ML2165 Series Medilec Plaster Mounted Recessed ... - Clipsal
ML2165 Series Medilec Plaster Mounted Recessed ... - Clipsal
ML2165 Series Medilec Plaster Mounted Recessed ... - Clipsal

Create successful ePaper yourself
Turn your PDF publications into a flip-book with our unique Google optimized e-Paper software.
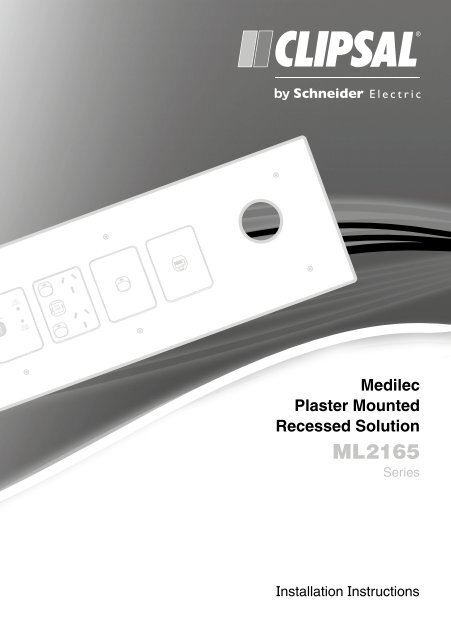
<strong>Medilec</strong><br />
<strong>Plaster</strong> <strong>Mounted</strong><br />
<strong>Recessed</strong> Solution<br />
<strong>ML2165</strong><br />
<strong>Series</strong><br />
Installation Instructions
<strong>ML2165</strong> <strong>Series</strong> <strong>Plaster</strong> <strong>Mounted</strong> Recess Solution Installation Instructions<br />
Product Range<br />
<strong>ML2165</strong> <strong>Plaster</strong> <strong>Mounted</strong> Recess solution<br />
Description<br />
The <strong>Clipsal</strong> <strong>Medilec</strong> <strong>ML2165</strong> <strong>Series</strong> is a modular, plaster mount, metal plate<br />
range of medical service panels, which have been specifically designed for patient<br />
treatment areas of hospitals, and medical and dental practices. The system consists<br />
of a recessed plaster mounted wall box, grid, 2000 <strong>Series</strong> accessories and a fascia<br />
powder-coated or stainless steel plate.<br />
Wall Box Installation<br />
The metal wall box is mounted within the wall cavity, through a cut-out in the plaster<br />
board to the equal size of the wall box. The wall must be framed to allow panel size.<br />
The box is then fixed to the plaster via mounting brackets that are attached to the<br />
back of the wall box. They are lifted up and pushed back to the underside of the<br />
plaster wall. Screws are then put through the front of the wall box and through to the<br />
bracket behind to achieve plaster fixing.<br />
If required, it is recommended that the <strong>Clipsal</strong> <strong>Medilec</strong> segregation barriers be<br />
installed prior to the wall box installation.<br />
© 2011 Schneider Electric. All Rights Reserved.
<strong>ML2165</strong> <strong>Series</strong> <strong>Plaster</strong> <strong>Mounted</strong> Recess Solution Installation Instructions<br />
Grid Installation<br />
The metal grid plate is mounted to the wall box via four screws, which are fixed to<br />
each corner of the grid. There are no adjustments required with this product.<br />
There are different grids required for 2000 <strong>Series</strong> accessories and gas outlets. The<br />
gas grid plates allow for installation of both ESCO and BOC outlets with or without a<br />
scavenge.<br />
2000 Accessories Installation<br />
Each 2000 <strong>Series</strong> accessory is installed onto the grid with two screws.<br />
When fixing a 2000 <strong>Series</strong> accessory to the grid, back the screws off slightly to<br />
allow the 2000 <strong>Series</strong> accessory to move from side to side.<br />
It is recommended that for easier installation, the 2000 <strong>Series</strong> accessories are<br />
mounted to the grid prior to the grid being mounted to the wall box.<br />
Facia Installation<br />
The fascia is fixed to the grid with two or four countersunk screws.<br />
A slight adjustment of the positioning of the accessories may be necessary to align<br />
them up with the cut-outs within the fascia.<br />
Customising<br />
On top of our standard range of one to four gang components, the <strong>ML2165</strong> can be<br />
customised to extend in length to suit the customer’s requirements.<br />
Segregation can also be added within the wall box to allow different services to be<br />
mounted within the one wall box.<br />
Customised medical service panels will be supplied fully assembled from <strong>Medilec</strong>.<br />
Segregation Installation<br />
The segregation is made of one metal plate. The segregation plate is riveted into the<br />
wall box at each end. Pre-punched 3.3mm holes are in the segregation plates and<br />
wall boxes, making it easy to locate and rivet the segregation and wall box together.<br />
If wall box is already mounted into plaster wall, there are raised guiding fins on the<br />
bottom of the segregation that line up with slots in the back of the wall box. Once<br />
put into place, the grid plate either side of the segregation then provides a fixing by<br />
sandwiching the segregation plate.<br />
Wall Box<br />
There are break lines at each module on the wall box that allow the wall box to be<br />
broken down into a custom length. All fixing points for grid plates are completely<br />
modular along the whole length of the wall box, allowing any combination of<br />
services to be mounted on wall box (maximum length 2.4m).<br />
© 2011 Schneider Electric. All Rights Reserved.
Mounting Bracket<br />
There are break lines at each module on the mounting bracket, which allow the<br />
mounting bracket to be broken down into a custom length. All fixing points for the<br />
mounting bracket are completely modular along the whole length of the bracket,<br />
allowing the mounting bracket to match the fixing points and length of the custom<br />
wall box (maximum length 2.4m).<br />
Fascia Mounting Installation<br />
All fascias are custom-made in one length to match the services layout required.<br />
Fixing points are provided along the fascia matching those on the grid plates behind.<br />
The fascia mounts over the top of all services.<br />
Warranty<br />
The benefits conferred herein are in addition to, and in no way shall be deemed to<br />
derogate, either expressly or by implication, any or all other rights and remedies in<br />
respect to the Schneider Electric product, which the consumer has in the location<br />
where the product is sold.<br />
The warrantor is Schneider Electric with offices worldwide. This Schneider Electric<br />
product is guaranteed against faulty workmanship and materials for a period of two<br />
(2) years from the date of installation.<br />
Schneider Electric reserves the right, at its discretion, to either repair free of parts<br />
and labour charges, replace or offer refund in respect to any article found to be<br />
faulty due to materials, parts or workmanship.<br />
This warranty is expressly subject to the Schneider Electric product being installed,<br />
wired, tested, operated and used in accordance with the manufacturer’s instructions.<br />
Any alterations or modifications made to the product without permission of<br />
Schneider Electric might void the warranty.<br />
Schneider Electric shall meet all costs of a claim. However, should the product that<br />
is the subject of the claim be found to be in good working order, all such costs shall<br />
be met by the claimant.<br />
When making a claim, the consumer shall forward the Schneider Electric product<br />
to the nearest Schneider Electric office and provide adequate particulars of the<br />
defect within 28 days of the fault occurring. The product should be returned securely<br />
packed, complete with details of the date and place of purchase, description of load,<br />
and circumstances of malfunction.<br />
Schneider Electric (Australia) Pty Ltd<br />
Contact us: clipsal.com/feedback<br />
National Customer Care Enquiries:<br />
Tel 1300 2025 25<br />
Fax 1300 2025 56<br />
Schneider Electric (Australia) Pty Ltd reserves the right to<br />
change specifications, modify designs and discontinue items<br />
without incurring obligation and whilst every effort is made to<br />
ensure that descriptions, specifications and other information<br />
in this catalogue are correct, no warranty is given in respect<br />
thereof and the company shall not be liable for any error therein.<br />
© 2012 Schneider Electric. All Rights Reserved.<br />
Trademarks are owned by Schneider Electric Industries SAS or<br />
its affiliated companies.<br />
F2367/01 CLIPCOM 23657 JAN 2012