Water Dispenser Use & Care Manual - Hamilton Beach
Water Dispenser Use & Care Manual - Hamilton Beach
Water Dispenser Use & Care Manual - Hamilton Beach

Create successful ePaper yourself
Turn your PDF publications into a flip-book with our unique Google optimized e-Paper software.
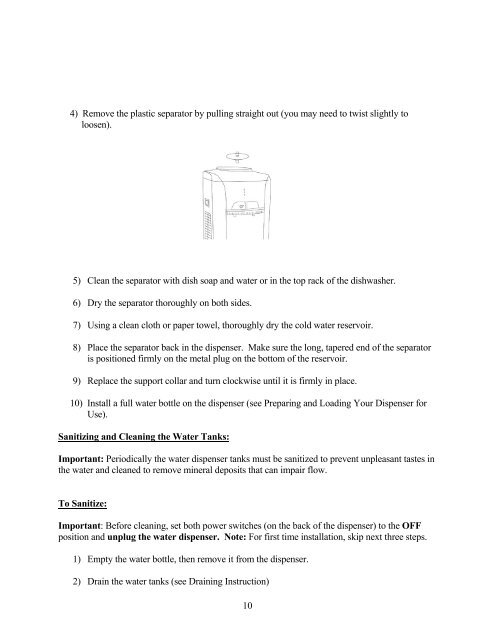
4) Remove the plastic separator by pulling straight out (you may need to twist slightly to<br />
loosen).<br />
5) Clean the separator with dish soap and water or in the top rack of the dishwasher.<br />
6) Dry the separator thoroughly on both sides.<br />
7) Using a clean cloth or paper towel, thoroughly dry the cold water reservoir.<br />
8) Place the separator back in the dispenser. Make sure the long, tapered end of the separator<br />
is positioned firmly on the metal plug on the bottom of the reservoir.<br />
9) Replace the support collar and turn clockwise until it is firmly in place.<br />
10) Install a full water bottle on the dispenser (see Preparing and Loading Your <strong>Dispenser</strong> for<br />
<strong>Use</strong>).<br />
Sanitizing and Cleaning the <strong>Water</strong> Tanks:<br />
Important: Periodically the water dispenser tanks must be sanitized to prevent unpleasant tastes in<br />
the water and cleaned to remove mineral deposits that can impair flow.<br />
To Sanitize:<br />
Important: Before cleaning, set both power switches (on the back of the dispenser) to the OFF<br />
position and unplug the water dispenser. Note: For first time installation, skip next three steps.<br />
1) Empty the water bottle, then remove it from the dispenser.<br />
2) Drain the water tanks (see Draining Instruction)<br />
10