EN BDA arcus incantare-Mediaserver version10 ... - arcus highend
EN BDA arcus incantare-Mediaserver version10 ... - arcus highend
EN BDA arcus incantare-Mediaserver version10 ... - arcus highend

You also want an ePaper? Increase the reach of your titles
YUMPU automatically turns print PDFs into web optimized ePapers that Google loves.
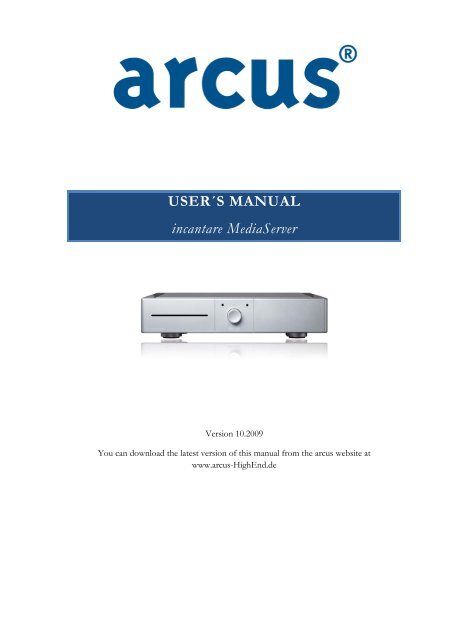
USER´S MANUAL<br />
<strong>incantare</strong> MediaServer<br />
Version 10.2009<br />
You can download the latest version of this manual from the <strong>arcus</strong> website at<br />
www.<strong>arcus</strong>-HighEnd.de
Dear <strong>arcus</strong> customer,<br />
The “<strong>arcus</strong>” brand is synonymous with technically well-devised and highly<br />
innovative products. <strong>arcus</strong> opens up new perspectives which need to be<br />
experienced at close hand. Thank you for purchasing our <strong>incantare</strong><br />
MediaServer. We are delighted by your trust in our products.<br />
Your <strong>arcus</strong> team<br />
CONT<strong>EN</strong>TS<br />
Section Page<br />
1. Safety Information 01<br />
2. Legal Notice on Copyright 02<br />
3. Scope of Delivery 03<br />
4. Environmental Protection 03<br />
Information<br />
5. Operating Elements on the 04<br />
Front<br />
6. Installation 04<br />
Section Page<br />
7. Remote Control 06<br />
8. Get Started 09<br />
9. Trouble Shooting 10<br />
10. Terms and Conditions of 11<br />
Guarantee<br />
11. Technical Data 12<br />
12. Important Note 13<br />
13. Imprint 13
�<br />
�<br />
�<br />
1. SAFETY INFORMATION<br />
Electrical devices are not toys<br />
Never let your children use electrical devices without supervision.<br />
Cells/rechargeble batteries can endanger life when swallowed.<br />
Therefore keep the device and batteries out of the reach of small children.<br />
If a battery has been swallowed, medical assistance must be sought immediately.<br />
Moisture and cleaning<br />
The device must be set up and operated in dry rooms only. Attention – this product is<br />
not waterproof. Do not immerse the device in water and do not allow it to make<br />
contact with water. Water seeping into the device can cause serious damage. Do not<br />
use any cleaning products that contain alcohol, ammonia, benzene or abrasive<br />
products, as these products may damage the device. The mains plug must be pulled out<br />
before the device is cleaned. To clean, only use a soft, dry cloth to wipe the surfaces of<br />
the device.<br />
Heat<br />
Do not expose the device to direct sunlight. Take care to ensure that the device is not<br />
exposed to any direct sources of heat, such as heating or an open fire. Ensure that the<br />
ventilation slits on the device are not obstructed.<br />
Additional safety instructions<br />
� Do not allow any objects to fall onto, or any liquids to seep into the device.<br />
� If this occurs, pull the mains plug out of the socket and have the device examined by a<br />
professional.<br />
� Place the device horizontally on a stable, even surface.<br />
� Take care to ensure that the device’s cooling system is not impaired.<br />
� Position the device so that the connections cannot be touched.<br />
� When the device is exposed to low temperatures (during transportation, for example), it<br />
must only be switched on once it has reached room temperature and any condensation<br />
that may have formed has evaporated.<br />
1
� The plug should be pulled out of the socket if the device is not in use for a while. Before<br />
operating the device again, ensure that there are no short-circuits at the connection points<br />
and that all connections are properly attached.<br />
� The user should carry out no works on this device other than the measures described in<br />
this user’s manual.<br />
� Apart from the manual interventions described in the user’s manual, no works of any kind<br />
must be performed on the device by the user. The device may only be opened by a<br />
qualified professional. Repairs and fuse changes must be carried out by a specialist repair<br />
shop.<br />
� In the event of damage or if an irregular function is suspected, it is mandatory to pull out<br />
the plug immediately and have the device examined by a specialist repair shop.<br />
� If you have sensitive furniture on which you wish to place the device, we recommend a<br />
neutral underlay in order to prevent potential colour staining by the device’s feet.<br />
� Always switch off the device using the standby switch on the front before cutting it off<br />
from the electrical supply by activating the mains switch (on the rear of the housing) or<br />
pulling out the plug.<br />
2. LEGAL NOTICE ON COPYRIGHT<br />
Intellectual property, including music, is subject to worldwide copyright protection.<br />
It is legal in most countries to create copies of legally acquired recording media (e.g. CDs) or<br />
music files (e.g. from the Internet) for personal use.<br />
It is prohibited to offer these copies commercially or to give them to a third party.<br />
Caution when downloading MP3 files from the Internet: Please make sure that the files are<br />
properly licensed, i.e. that the provider also has rights to the respective titles.<br />
If you are not the originator yourself or you have not been grated the appropriate rights of use<br />
by the originator or rights holder, you should note that if you infringe on this right, there is a<br />
risk that beneficial owners may take action against this possible criminal act and assert their<br />
rights.<br />
2
3. SCOPE OF DELIVERY<br />
When unpacking, check the system’s completeness in terms of:<br />
User’s manual<br />
Remote control (illustrated for<br />
demonstration purposes) and<br />
batteries<br />
4. <strong>EN</strong>VIRONM<strong>EN</strong>TAL PROTECTION INFORMATION<br />
Professional recycling<br />
Batteries and packaging materials have no place in domestic refuse.<br />
Batteries must be handed in at a collection point for used batteries.<br />
Conserve the environment by disposing of packaging material separately.<br />
This product must not be disposed of via the normal household waste at<br />
the end of its useful life, but must be handed in at a collection point for the<br />
recycling of electrical and electronic devices. The symbol on the product, in<br />
the user’s manual or on the packaging recalls this fact. The materials can be<br />
used again according to their description. By reusing, recycling materials or<br />
using spent devices in any other form you make an important contribution<br />
to protecting our environment. Please ask your local municipality for<br />
information on the relevant disposal point.<br />
3<br />
Mains cable
5. OPERATING ELEM<strong>EN</strong>TS ON THE FRONT<br />
1 2 3 4<br />
1. CD Slot Insert CD gently until it is pulled inside. Use Eject Key to eject.<br />
2. On/Off Starts the unit, or switch offs the Unit (Standby)<br />
3. Blue LED Indicates the unit is switched on<br />
4. Eject Key Eject CD<br />
6. INSTALLATION<br />
5 4 3 2 1<br />
When connecting the MediaServer it is mandatory that you observe the following indications:<br />
• Never open the housing of the power supply unit. Your life is at risk<br />
from electrocution when the housing is open. There are no components<br />
to be cleaned or repaired inside the device.<br />
• Operate the device using only an earthed socket with 100-240V~/ 50-60<br />
Hz alternating current. Information about your power supply ratings can be<br />
obtained from your local electricity provider.<br />
4<br />
1<br />
3
• Only use the supplied mains cable, or a derivative of identical<br />
construction.<br />
• The mains socket should be located in the vicinity of the device and<br />
within reach of the mains cable.<br />
AVOID a situation where you have to stretch the mains cable in<br />
order to reach the socket.<br />
• Arrange the cable of the MediaServer so that it cannot be tripped over<br />
or trodden on.<br />
• Place no objects or furniture on the cable, in order to avoid damage.<br />
It is essential that you switch off the MediaServer along with the rest of your system at all<br />
times when working on the cabling!<br />
1. Power Supply Input Cord<br />
The mains cable is inserted here<br />
2. LNB-INPUT<br />
Connection for DVB-S<br />
3. CI-MODULE<br />
Possibility for a CI module to watch Pay TV<br />
4. Audio Out<br />
Assymetric pre-amplifier output. Connect this to an amplifier.<br />
5. Panel Connectors<br />
5
7. REMOTE CONTROL<br />
6
Insert battery<br />
Open the back cover of the<br />
remote by sliding the tab up.<br />
Insert the lithium-ion battery as<br />
shown in the illustration. Replace<br />
the back cover<br />
Connect the Power<br />
Plug the AC cable into the power<br />
port on the side of the remote<br />
control. Plug the AC adapter into<br />
a wall socket to start charging the<br />
lithium-ion battery.<br />
Connect mini-receiver<br />
Plug the mini-receiver into a USB<br />
port on the rear side of the<br />
MediaServer<br />
Changing modes<br />
The remote control offers two<br />
operating modes, a media remote<br />
for navigating the Windows media<br />
center and a cursor mode for<br />
familiar keyboard and touch pad<br />
functions.<br />
Switch between modes by moving<br />
the mode slider at the top of the<br />
keypad. Move the slider to the left<br />
place the remote control in media<br />
remote mode. Move the slider to<br />
the right for cursor mode.<br />
7
8. GET STARTED<br />
First steps:<br />
Once all devices have been properly connected to the MediaServer, plug in the mains cable on<br />
the rear of the device and press the “On/Off” button on the front of the device.<br />
The first time the unit will need about one minute to start all operating systems.<br />
After you see the <strong>arcus</strong> logo on your screen you can start the setup.<br />
Follow the OSD Menue step by step and finish the installation.<br />
Now your system is ready to use.<br />
Press the “Launch Windows Media Center” button<br />
on the remote control<br />
CUSTOMIZE WINDOWS MEDIA C<strong>EN</strong>TER<br />
When you first start Windows Media Center, you can<br />
choose:<br />
* Express setup to get started right away.<br />
* Custom setup to learn more about all the possibilities<br />
with Windows Media Center.<br />
CUSTOM SETUP<br />
Select Custom setup.<br />
When you reach “Get the Most from Windows Media Center<br />
“, select Yes to be able to download album cover art, DVD<br />
cover art, current TV guide listings, information from online<br />
media services, and more.<br />
9
9. TROUBLESHOOTING<br />
Reset system<br />
In rare cases, the unit may not function as normal.<br />
Press the On/Off button for 5 seconds and the system will reset, or<br />
pull out the mains plug, wait at least three minutes and then re-insert it in the socket.<br />
Problem:<br />
The device is not working, even though the mains plug is pluged in.<br />
Problem:<br />
Cause:<br />
No mains supply.<br />
Solution:<br />
Make sure that the mains plug is correctly inserted in the socket.<br />
Check whether the socket is conducting electricity.<br />
Device does not react to commands from the remote control<br />
Cause:<br />
Batteries are too weak. Infrared sensor on the amplifier is obstructed<br />
Solution:<br />
Change batteries in the remote control.<br />
Remove object that is blocking the sensor.<br />
10
10. TERMS AND CONDITIONS OF GUARANTEE<br />
<strong>arcus</strong> GmbH guarantees to the purchaser of this product that, under normal operating<br />
conditions, the product is free from material and processing detects. When claiming under the<br />
guarantee it is mandatory that the customer present the following documents and provide the<br />
following information.<br />
Note:<br />
1. The original purchase receipt showing date of purchase, name, address, serial<br />
number and model number of the product.<br />
2. A detailed description of the defect.<br />
A malfunction in the device does not automatically mean a defect.<br />
Before sending in the device contact our service hotline on + 49 (0)700 60 77 77 77 or send us<br />
a brief fault description via e-mail: info@<strong>arcus</strong>-HighEnd.de .<br />
In order to be able to claim our optimal guarantee and service performance, you have the<br />
option of registering. You will then also receive automatic updates on developments in your<br />
product and other products.<br />
All <strong>arcus</strong> products are subject to a full quality inspection before leaving the factory. However,<br />
should manufacturing and/or material defects emerge during normal use, we provide a 2-year<br />
guarantee on our products.<br />
You can extend your guarantee for electronic components to 3 years, and for loudspeakers to 5<br />
years, by sending in the guarantee card and/or registering on our website<br />
www.<strong>arcus</strong>-HighEnd.de.<br />
The guarantee period commences from date of purchase. The guarantee extension applies only<br />
for registered first-time buyers, and purchase must have taken place at an authorized <strong>arcus</strong><br />
dealer.<br />
The guarantee will become invalid if a repair is carried out by a person or repair shop that is<br />
not authorized by <strong>arcus</strong>, or if the serial number is changed, removed or made illegible. Cases<br />
which do not fall under the guarantee: transport damage, and damage arising as a result of<br />
improper use or installation. There will be no extension of the guarantee period as a result of a<br />
performance under guarantee, and also not in the event of repaired or replaced parts. The<br />
provisions of the German product liability law and of comparable foreign regulations remain,<br />
insofar as they are indispensable, unaffected. We reserve the right to perform technical<br />
modifications for the purpose of advancement.<br />
11
<strong>arcus</strong> <strong>incantare</strong>: MediaServer – technical data sheet<br />
Frequency response 2 Hz - 20 kHz<br />
Distortion factor < 0.002 %<br />
Channel separation > 110 dB<br />
Signal-to-noise > 110 dB<br />
MediaServer<br />
Audio inputs analogue 1 x stereo cinch<br />
Analoge Audio-Ausgänge High definition 7.1 multichannel, 1 x stereo cinch<br />
Audio outputs analogue SPDIF toslink, 24 Bit, 196 kHz<br />
Video outputs HDMI 1.3, DVI-I<br />
Weight 20 kg<br />
Dimensions incl. feets 44 x 10 x 37 cm<br />
Power supply 110 / 230 Volt; 50 - 60 Hz<br />
Optional extras Extern memory up to 4 TB<br />
Disc drive Selectet high end slot in drive<br />
Used memory audio/video formatted memory with damped suspension<br />
Memory size 1 TB, 4 GB RAM<br />
Backup function Yes<br />
Cooling Heatpipe System without fan<br />
Networking wired Ethernet 10/100/1000 m/bits<br />
Networking wireless By USB-stick<br />
Encryption Folowing Rules<br />
Other ports 6 x USB 2.0<br />
Finishes Titan silver, black, white<br />
Mechanical construction Resonance optimized full metal housing, shielded board,<br />
vibration decoupled, stream optimized<br />
Technology platform Microsoft Windows Vista Ultimate Certified for Dolby Home Theater,<br />
Microsoft Windows Vista Premium WHQL<br />
Processor Intel Core 2 Duo E8500, 3,16 GHz<br />
Audio resolution 24 Bit - 196 kHz<br />
Video resolution 1080p Full HD, 2048 x 1536 mit 75 Hz frequence (QXGA) for digital<br />
and analog screens, HDCP Version 1.1 support<br />
Supported media BD-RE/R (SL), BD-RE/-R (DL), BD-ROM (SL/DL), DVD Multi Read/<br />
Write support, CD-R/-RW-ROM<br />
Audio support MP3 (32 kBit/s - 320 kBit/s), WAV, WMA, Audio CDs<br />
Video support MPEG-2, VOB, ASK, M1V, M2V, WMV, DAT, VOR, DVR-MS, H.264,<br />
MP2, MOV, DV AVI, VC1, TS, TRP, TP, M2TS, RM, DivX AVI<br />
Supportet formats TCP/IP, UPnP AV, DHCP, AutoIP<br />
Supported data systems FAT, FAT32, NTFS<br />
Country of production/manufacture Developed and engineered in Germany<br />
Errors excepted. <strong>arcus</strong> has the right to change technical details without any advance notice.<br />
as of 3/2009
12. IMPORTANT NOTE<br />
We receive many enquiries concerning loudspeakers or playback devices recommended by us<br />
for our products. We therefore think you will be interested in reading our views on this.<br />
<strong>arcus</strong> products are NOT developed in order to function / resonate only with specific<br />
loudspeakers or playback devices. <strong>arcus</strong> products are developed in order to play the music<br />
signal naturally. As long as your loudspeakers / playback devices follow the same principle, you<br />
will enjoy an outstanding sound experience at all times.<br />
13. IMPRINT<br />
Published by<br />
<strong>arcus</strong> GmbH<br />
Phone: +49 (0) 700 / 60 77 77 77 • Fax: +49 (0) 700 / 61 77 77 77<br />
E-mail: info@<strong>arcus</strong>-HighEnd.de • http:// www.<strong>arcus</strong>-HighEnd.de<br />
Errors and omissions reserved.<br />
<strong>arcus</strong> reserves the right to modify technical details without prior notice.<br />
<strong>arcus</strong> and the <strong>arcus</strong> logos are registered trademarks of <strong>arcus</strong> GmbH<br />
Reproduction, in whole or in part, only with the permission of <strong>arcus</strong> GmbH<br />
13