
Create successful ePaper yourself
Turn your PDF publications into a flip-book with our unique Google optimized e-Paper software.
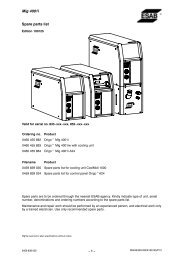
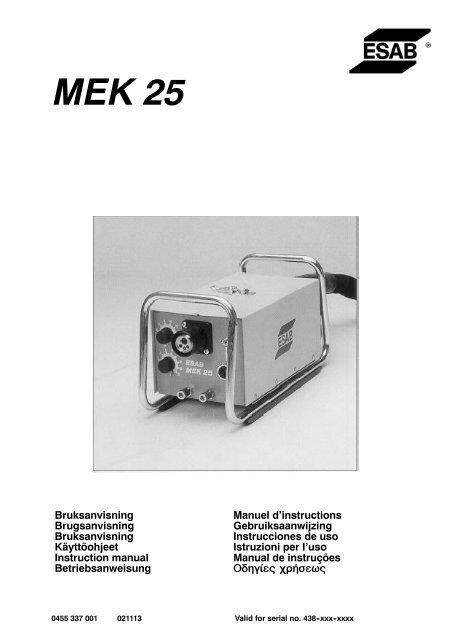
<strong>MEK</strong> <strong>25</strong><br />
1011031051071091111020211100<strong>25</strong>108024042106023061104022041100020040060001<br />
Bruksanvisning<br />
Brugsanvisning<br />
Bruksanvisning<br />
Käyttöohjeet<br />
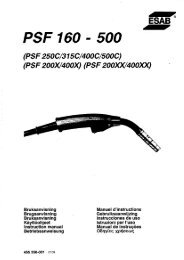
Instruction manual<br />
Betriebsanweisung<br />
0455 337 001 021113<br />
Manuel d’instructions<br />
Gebruiksaanwijzing<br />
Instrucciones de uso<br />
Istruzioni per l’uso<br />
Manual de instruções<br />
Ïäçãßåò ÷ñÞóåùò<br />
Valid for serial no. 438 -xxx -xxxx
SVENSKA .............................................. 3<br />
DANSK ................................................ 10<br />
NORSK ................................................ 17<br />
SUOMI ................................................ 24<br />
ENGLISH .............................................. 31<br />
DEUTSCH ............................................. 38<br />
FRANÇAIS ............................................. 45<br />
NEDERLANDS ......................................... 52<br />
ESPAÑOL .............................................. 59<br />
ITALIANO .............................................. 66<br />
PORTUGUÊS .......................................... 73<br />
ÅËËÇÍÉÊÁ .............................................<br />
80<br />
Rätt till ändring av specifikationer utan avisering förbehålles.<br />
Ret til ændring af specifikationer uden varsel forbeholdes.<br />
Rett til å endre spesifikasjoner uten varsel forbeholdes.<br />
Oikeudet muutoksiin pidätetään.<br />
Rights reserved to alter specifications without notice.<br />
Änderungen vorbehalten.<br />
Sous réserve de modifications sans avis préalable.<br />
Recht op wijzigingen zonder voorafgaande mededeling voorbehouden.<br />
Reservado el derecho de cambiar las especificaciones sin previo aviso.<br />
Ci riserviamo il diritto di variare le specifiche senza preavviso.<br />
Reservamo--nos o direito de alterar as especificações sem aviso prévio.<br />
Äéáôçñåßôáé ôï äéêáßùìá ôñïðïðïßçóçò ðñïäéáãñáöþí ×ùñßò ðñïåéäïðïßçóç.<br />
- 2 -
ENGLISH<br />
1 DIRECTIVE ........................................................ 32<br />
2SAFETY........................................................... 32<br />
3 INTRODUCTION ................................................... 33<br />
3.1 TECHNICAL DATA ........................................................ 33<br />
3.2 TECHNICAL DESCRIPTION ................................................ 34<br />
4 INSTALLATION .................................................... 35<br />
5 OPERATION ....................................................... 36<br />
6 ACCESSORIES .................................................... 37<br />
7 ORDERING OF SPARE PARTS ...................................... 37<br />
DIAGRAM ............................................................ 88<br />
SPARE PARTS LIST ...................................................<br />
89<br />
TOCe<br />
- 31 -
GB<br />
1 DIRECTIVE<br />
DECLARATION OF CONFORMITY<br />
Esab Welding Equipment AB, S--695 81 Laxå, Sweden, declares that Wire feed unit<br />
<strong>MEK</strong> <strong>25</strong> from serial number 438 onwards, conforms to standard EN 60974--1, in accordance<br />
with the requirements of directive (73/23/EEC) and appendix (93/68/EEC)<br />
and standard EN 50199 in accordance with the requirements of directive<br />
(89/336/EEC) and appendix (93/68/EEC).<br />
-- -- -- -- -- -- -- -- -- -- -- -- -- -- -- -- -- -- -- -- -- -- -- -- -- -- -- -- -- -- -- -- -- -- -- -- -- -- -- -- -- -- -- -- -- -- -- -- -- -- -- -- -- -- -- -- -- -- -- -- -- -- -- --------<br />
Laxå 95--04--20<br />
Paul Karlsson<br />
Managing Director<br />
Esab Welding Equipment AB<br />
695 81 LAXÅ<br />
SWEDEN Tel: + 46 584 81176 Fax: + 46 584 12336<br />
2 SAFETY<br />
bm16d12e<br />
WARNING<br />
ARC WELDING AND CUTTING CAN BE INJURIOUS TO YOURSELF AND OTHERS. TAKE PRECAU-<br />
TIONS WHEN WELDING. ASK FOR YOUR EMPLOYER’S SAFETY PRACTICES WHICH SHOULD BE<br />
BASED ON MANUFACTURERS’ HAZARD DATA.<br />
ELECTRIC SHOCK - Can kill<br />
S Install and earth the welding unit in accordance with applicable standards.<br />
S Do not touch live electrical parts or electrodes with bare skin, wet gloves or wet clothing.<br />
S Insulate yourself from earth and the workpiece.<br />
S Ensure your working stance is safe.<br />
FUMES AND GASES - Can be dangerous to health<br />
S Keep your head out of the fumes.<br />
S Use ventilation, extraction at the arc, or both, to take fumes and gases away from your breathing zone<br />
and the general area.<br />
ARC RAYS - Can injure eyes and burn skin.<br />
S Protect your eyes and body. Use the correct welding screen and filter lens and wear protective<br />
clothing.<br />
S Protect bystanders with suitable screens or curtains.<br />
FIRE HAZARD<br />
S Sparks (spatter) can cause fire. Make sure therefore that there are no inflammable materials nearby.<br />
NOISE - Excessive noise can damage hearing<br />
S Protect your ears. Use earmuffs or other hearing protection.<br />
S Warn bystanders of the risk.<br />
MALFUNCTION - Call for expert assistance in the event of malfunction.<br />
READ AND UNDERSTAND THE INSTRUCTION MANUAL BEFORE INSTALLING OR OPERATING.<br />
PROTECT YOURSELF AND OTHERS!<br />
- 32 -
GB<br />
3 INTRODUCTION<br />
A10 - <strong>MEK</strong> <strong>25</strong> is an intermediate wire feed unit for MIG/MAG--welding where the<br />
electrode is fed forward according to <strong>ESAB</strong>:’s A10--system<br />
By connecting an extension cable between the intermediate wire feed unit and the<br />
wire feed unit on the power source the working radius can be increased by up to<br />
<strong>25</strong> m.<br />
On <strong>MEK</strong> <strong>25</strong> the wire feed speed and the voltage can be controlled using<br />
potentiometers or a remote control unit can be connected.<br />
The drive motor is of a permanent--magnetic design and is integrated with a worm<br />
gear. The motor is fed with 24 V DC voltage.<br />
<strong>MEK</strong> <strong>25</strong> is equipped with a heavy--duty crash bar and runners to facilitate transport.<br />
The extensive range combined with the performance of the power source provides<br />
you with a flexible total solution.<br />
3.1 TECHNICAL DATA<br />
Control voltage 42V AC<br />
Voltage 0--24V DC<br />
Wire feed speed 1--18m/min<br />
Feed roller hollow wire 1,0--1,2 R / 1,4--1,6 R<br />
Feed roller solid wire 1,0--1,2<br />
Enclosure class IP 23<br />
Weight 7,5 kg<br />
Continuous A--weighted noise level 58 dB<br />
Enclosure class<br />
The IP code indicates the enclosure class, i. e. the degree of protection against penetration by solid<br />
objects or water. Equipment marked IP 23 is designed for indoor and outdoor use.<br />
bm16d12e<br />
- 33 -
GB<br />
3.2 TECHNICAL DESCRIPTION<br />
S (1) Potentiometer for stepless control of the welding voltage.<br />
S (2) Potentiometer for stepless control of the wire feed speed. Setting range<br />
1--18m/min.<br />
S (3) Remote switch for controlling the wire feed speed and voltage from a remote<br />
control unit.<br />
S (4) Socket for connecting the remote control unit, 23--pole.<br />
S (5) Connector for the welding gun with common connector for welding current,<br />
control voltage, shielding gas and wire.<br />
S (6) Connector for extension set with common connector for welding current,<br />
shielding gas and wire.<br />
S (7) 14--pole pin socket for connecting the extension set.<br />
bm16d12e<br />
- 34 -<br />
bm16d000
GB<br />
4 INSTALLATION<br />
WARNING!<br />
This product is intended for industrial use. In a domestic environment this product may cause radio<br />
interference. It is the user’s responsibility to take adequate precautions.<br />
Connecting the extension cable and the welding gun<br />
S The extension cable is connected to connector (6). Connect the 14--pole sleeve<br />
plug on the extension cable’s control cable to the pin socket (7) and tighten the<br />
nut.<br />
S Connect the other end of the extension cable to the corresponding socket on the<br />
power source’s wire feed unit.<br />
S The welding gun is connected to connector (5).<br />
Feed roller<br />
S Make sure the right feed roller and groove is used for the selected wire size.<br />
Each feed roller has grooves for two wire sizes. The feed roller should have the<br />
correct marking for respective wires facing outwards, towards you.<br />
S The feed roller can be turned or replaced using another suitable roller (see the<br />
spare parts list), by removing the screw that holds the feed rollers.<br />
Feeding the wire forward<br />
S Connect the power source to the mains supply.<br />
S Set the wire feed speed between 1--18m/min using the potentiometer (2) on the<br />
intermediate wire feed unit.<br />
S Straighten out the extension cable and the welding gun cable.<br />
S Swing out the control levers on the feed mechanism so that the feed rollers are<br />
released. Feed the wire forward to the intermediate wire feed unit by holding the<br />
welding gun trigger pressed in.<br />
S Guide the wire through the nozzles over the pressure rollers and into the welding<br />
gun’s wire--liner, swing back the pressure levers to their original positions.<br />
S Hold the welding gun trigger pressed in until the wire is fed out through the contact<br />
tip on the gun.<br />
S By setting the correct spring tension on the rollers a slip--free wire feed is obtained.<br />
If the rollers slip or in any other way do not function correctly perhaps the<br />
pre--tension needs to be adjusted. This is carried out using the adjuster screws<br />
on respective pressure arms. The pre--tension can be checked by using the<br />
graduated scale on respective adjuster screws.<br />
bm16d12e<br />
WARNING!<br />
Rotating parts can cause injury, take great care.<br />
- 35 -
GB<br />
5 OPERATION<br />
S Connect the return cable from the power source to the work piece.<br />
S Set a suitable wire feed speed and voltage by using the potentiometers<br />
(1) and (2).<br />
S You can now start to weld..<br />
bm16d12e<br />
- 36 -<br />
bm16d000
GB<br />
6 ACCESSORIES<br />
Remote control PAE 2<br />
Programming unit for remote control of the voltage and wire speed. Connect the<br />
Remote control to sleeve socket (4).<br />
Note while controlling via the remote unit set the remote switch (3) to the lower<br />
position.<br />
Order number:<br />
Remote control unit PAE 2 with Burndy socket,--23--pol. 466 515--880<br />
Hose bundle 12,5m Max 403 A 60% 469 961--880<br />
Hose bundle 19,0m Max 403 A 60% 469 961--881<br />
Hose bundle <strong>25</strong>,0m Max 403 A 60% 469 961--882<br />
Hose bundle for water cooling gun 12,5m/W Max 403 A 60% 469 961--883<br />
Hose bundle for water cooling gun 19,0m/W Max 403 A 60% 469 961--884<br />
Hose bundle for water cooling gun <strong>25</strong>,0m/W Max 403 A 60% 469 961--885<br />
Assembly Kits<br />
Gas flow meter 469 427--880<br />
7 ORDERING OF SPARE PARTS<br />
Spare parts are ordered through your nearest <strong>ESAB</strong> representative, see back cover.<br />
When ordering spare parts, please state machine type and number as well as designation<br />
and spare part number as shown in the spare parts list.<br />
This will simplify dispatch and ensure you get the right part.<br />
bm16d12e<br />
- 37 -