Rika Mexx Instructions - Euroheat
Rika Mexx Instructions - Euroheat
Rika Mexx Instructions - Euroheat

Create successful ePaper yourself
Turn your PDF publications into a flip-book with our unique Google optimized e-Paper software.
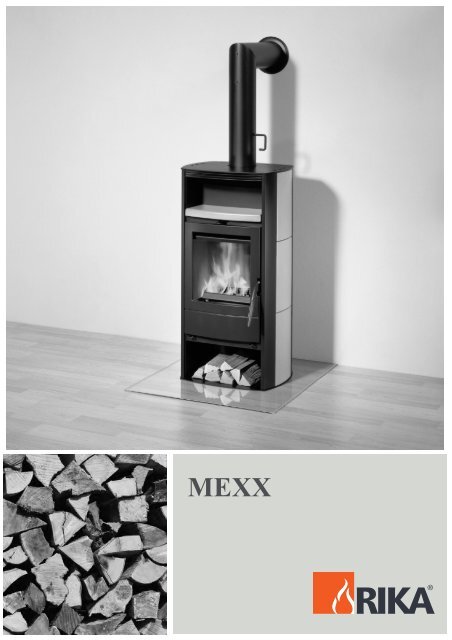
MEXX
ENGLISH<br />
Fig. 1<br />
2<br />
Fig. 2
3<br />
Fig. 3<br />
Fig. 4<br />
ENGLISH
ENGLISH<br />
Fig. 5<br />
Fig. 6<br />
4
5<br />
Fig. 7<br />
ENGLISH
ENGLISH<br />
C O N T E N T S<br />
Technical Specification and spare parts overview 7<br />
1. PACKAGING<br />
2. IMPORTANT INFORMATION<br />
General warning and safety instructions 8<br />
Before setting up 8<br />
3. BRIEF HEATING INFORMATION<br />
Fuel quantities 9<br />
Maximum fuel quantity 9/10<br />
Clean combustion 10<br />
Burning wood 10<br />
4. INSTALLING THE STOVE<br />
Changing the flue plate 11<br />
Making the stove connection 11<br />
5. OPERATION<br />
Lighting the fire 12<br />
Ash drawer 12<br />
Operating the shaker grate 12<br />
Slide setting at rated heating capacity 12<br />
6. FITTING OPTIONS<br />
Side panelling – heat retention chamber 13<br />
Changing flue pipe connection above to connection at rear 13<br />
7. MAINTENANCE AND CLEANING<br />
General maintenance 14<br />
Finish – condition and cleaning 14<br />
Convection air openings 14<br />
Cleaning the flue gas channels 15<br />
8. PROBLEM SOLVING<br />
9. GUARANTEE AND WARRANTY<br />
E X P L A N A T I O N O F S Y M B O L S<br />
Important information<br />
Practical advice<br />
Use the plan<br />
6
TECHNICAL DATA<br />
Dimensions (mm) and weights (kg)<br />
Height 1018<br />
Width 516<br />
Depth of the corpus 441<br />
Weigth with steel casing 115<br />
Weigth with ceramic casing 115<br />
Flue pipe outlet diameter 130<br />
Rated useful heat according to EN13240 6,0 kW<br />
Smallest thermal output 3,0 kW<br />
Room-heating capacity (m³) depending on<br />
70 – 160<br />
house insulation<br />
Fuel flow 1,7 kg/h<br />
Efficiency 79,6%<br />
CO2 content 9,5%<br />
CO emission rel. 13% O 964mg/Nm3<br />
Dust emissions 34 mg/Nm3<br />
Flue gas values for multiple connection to a chimney<br />
as per DIN 4705, Part 3 or for measuring the chimney<br />
as per DIN 4705, Part 2<br />
Flue gas mass flow [g/s] 5,8<br />
Flue gas temperature [°C] 251,2<br />
Minimum flow pressure at rated heating 12<br />
capacity [Pa]
ENGLISH<br />
2. IMPORTANT INFORMATION<br />
GENERAL WARNING AND SAFETY<br />
INSTRUCTIONS<br />
The general introductory warning information<br />
must be followed.<br />
➧ Read the whole of the manual thoroughly<br />
before commissioning the stove.<br />
➧ Only approved transport aids with<br />
adequate load bearing capacity must be<br />
used for transporting your stove.<br />
➧ Your stove is not suitable for use as a<br />
ladder or scaffold.<br />
➧ Thermal energy is produced by burning<br />
fuel; this leads to the surface of the stove,<br />
the doors, the door and operating handles,<br />
the door glasses, the flue pipes and possibly<br />
the front wall of the stove becoming very<br />
hot. Avoid touching these parts without<br />
wearing the relevant protective clothing or<br />
using the relevant means (cold hand).<br />
➧ Make children aware of the danger and<br />
keep them away from the stove when in<br />
use.<br />
BEFORE SETTING UP<br />
GROUND LOAD BEARING CAPACITY:<br />
Before setting up, ensure that the supporting<br />
construction has a load bearing capacity<br />
that will support the weight of the stove.<br />
SAFETY CLEARANCES (Minimum clearances)<br />
Fig 2<br />
1. From combustible items and supporting walls<br />
made from reinforced concrete construction<br />
a > 800 mm b > 200<br />
2. From non-combustible items<br />
a > 400 mm b > 100<br />
8<br />
➧ Only burn the approved fuel listed in the<br />
chapter “Clean Burning”.<br />
➧ Burning or inserting easily combustible<br />
or explosive materials, such as empty spray<br />
cans and suchlike in the stove, as well as<br />
storage of the same close to the stove is<br />
prohibited due to risk of explosion.<br />
➧ When reheating, no loose or easily<br />
combustible clothing should be worn.<br />
➧ Placing non heat resistant objects on the<br />
stove or nearby is prohibited.<br />
➧ Do not lay washing on the stove to dry.<br />
➧ Stands for drying items of clothing or<br />
suchlike must be set up at an adequate<br />
distance from the stove – fire hazard!<br />
➧ Working with easily combustible and<br />
explosive materials in the same or adjoining<br />
room to the stove is prohibited when the<br />
stove is on.<br />
FLUE PIPE CONNECTION<br />
Flue pipes are a particular hazard source in<br />
respect of escape of poisonous gas and fire<br />
hazard. Obtain the advice of an appointed<br />
specialist company in respect of laying and<br />
fitting the pipes.<br />
You must keep an eye on flue gas formation<br />
in the event of unfavourable weather<br />
(atmospheric inversion) and the draught<br />
conditions. If too little combustion air is<br />
added smoke can enter your house or flue<br />
gases can escape. Additionally harmful<br />
deposits can arise in the stove and in the<br />
chimney.
If flue gas escapes let the fire go out and<br />
check if all air inlet openings are free and<br />
the flue gas feeds and the stovepipe are<br />
clean. In cases of doubt you must inform<br />
the master chimney sweep, as a fault in the<br />
draught could be due to the chimney.<br />
Before adding new fuel, push the embers<br />
together to form a bed of embers.<br />
Only use a suitable tool from our accessory<br />
range for pushing the embers together, and<br />
ensure that no combustible material falls<br />
out of the stove.<br />
Place brown coal briquettes on the embers<br />
in a single layer, with finger width spacing.<br />
Use the devices supplied with your stove,<br />
such as the protective gloves or the cold<br />
hand to open the doors, as well as for operating<br />
the control elements.<br />
Stoves of Type 1 (BA 1)<br />
These stoves must only be operated with<br />
the grate door closed.<br />
The grate door must only be opened for<br />
adding fuel and must then be closed again,<br />
as this could otherwise lead to danger for<br />
other stoves that are also connected to the<br />
chimney.<br />
When the stove is not in operation, the<br />
grate door must be kept closed.<br />
When using wet fuel and if operation is<br />
restricted too much, the chimney can soot<br />
up, i.e. easily combustible materials such as<br />
soot and tar can be deposited and this can<br />
lead to a chimney fire.<br />
Should this happen, close all air inlet slides<br />
and flaps. Call the fire brigade and get yourself<br />
and all other occupants to safety.<br />
9<br />
CAUTION: The size of the grate door means<br />
that, particularly when reheating blazing flames,<br />
the door must not be opened abruptly,<br />
in order to prevent the flames from jumping<br />
out.<br />
3. BRIEF HEATING INFORMATION<br />
In principle your stove is suitable for burning dry<br />
billets. You can also burn fuels such as wood briquettes.<br />
Only use dry fuel. The burning of waste of any<br />
kind, in particular plastics, will damage your stove<br />
and the chimney, and is prohibited by the<br />
Emissions Protection Act.<br />
FUEL QUANTITIES<br />
The stove is equipped with flat firing due to<br />
the design. This means that only one layer<br />
of fuel may be placed on the existing basic<br />
embers. Please note that when a larger<br />
quantity of fuel is added, your stove will<br />
emit a larger quantity of heat or will heat<br />
up more fiercely than is intended for the<br />
design. This can lead to damage to your<br />
stove.<br />
MAXIMUM FUEL QUANTITIES<br />
Wood:<br />
2 billets approx. 0.9 kg<br />
Brown coal briquettes<br />
3 off approx 0.5 kg<br />
Wood briquettes (broken):<br />
2 off approx. 0.9 kg<br />
Your stove output is regulated via the air<br />
inlet slide. As your stove output is also<br />
dependent on the chimney draught, you<br />
must use this slide based on your own<br />
experience.<br />
The secondary air regulator, the primary air<br />
regulator and the shaker grate handle may only<br />
be used with the shaker hook provided.<br />
ENGLISH
ENGLISH<br />
The challenges of the present day and age<br />
mean that everyone must act responsibly.<br />
One of most important matters of concern<br />
is retaining our natural world. Our products<br />
are developments that comply with the<br />
most recent state of the art technology.<br />
This is an essential prerequisite for a clean,<br />
efficient and perfect functioning of our<br />
stoves.<br />
CLEAN BURNING<br />
The following is important for clean burning:<br />
THE FIREWOOD MUST BE DRY AND<br />
UNTREATED.<br />
Recommended value < 15% relative wood<br />
humidity. Dry and well ventilated wood that<br />
has been stored for 2-3 years.<br />
A stove is not a “waste incineration plant”.<br />
The warranty will become null and void if<br />
rubbish or non-approved material, such as<br />
plastic, treated wood etc. is burned.<br />
Further consequences are damage or soiling<br />
of the stove and chimney as well as the<br />
environment!<br />
CORRECT FIREWOOD QUANTITY AND<br />
FIREWOOD SIZE<br />
The correct quantity of firewood and size<br />
is important.<br />
➧ Too much firewood causes overheating.<br />
This causes the material to burn too fiercely<br />
and your stove will produce poor flue gas<br />
values.<br />
10<br />
➧ Too little firewood or billets that are too<br />
large means that the stove does not reach<br />
the optimum temperature. The flue gas<br />
values are poor in this respect too.<br />
➧ The correct firewood quantity means:<br />
for wood ? 1.6 kg (2 billets - 25 cm long) per<br />
layer (recommended value) at rated thermal<br />
output 8 kW.<br />
At the smallest thermal output (4 kW) ?<br />
0.8 kg (2 billets - 25 cm long)<br />
Note: Only wood briquettes and brown coal<br />
briquettes must be burned in your stove.<br />
Plastic, treated wood materials (e.g. chipboard),<br />
hard coal or textiles must not be burned.<br />
BURNING WOOD<br />
Clean burning of wood corresponds to the<br />
same chemical process as natural decay, i.e.<br />
the CO2 (carbon dioxide) released does<br />
not increase or contaminate the original<br />
CO2 content of the atmosphere.
4. INSTALLING THE STOVE<br />
CHANGING THE FLUE PLATE<br />
Fig. 5<br />
If the flue plate or flue direction in your<br />
stove needs to be changed, lift the flue<br />
plate carefully to the side and remove the<br />
side firebrick.<br />
Now you can turn the flue plate diagonally<br />
and rotate it through the grate opening.<br />
Before first commissioning or after changing<br />
the location of the stove, cleaning and service<br />
work, ensure that the flue plates (Fig. 5, 49),<br />
and the wood catcher (Fig.3, 9) are correctly<br />
positioned. When using a flue pipe with<br />
throttle valve, the throttle valve must be open.<br />
Care must be taken with this stove that the<br />
flue draught reaches at least the prescribed<br />
value (> 0.8 mbar). Should problems arise<br />
here, please contact your master chimney<br />
sweep.<br />
CONNECTING THE CHIMNEY<br />
Proceed as follows when fitting a connection<br />
to a bricked chimney:<br />
1. Measure and draw in the chimney<br />
connection (taking any floor plate thickness<br />
into account) as per the dimensions in situ<br />
2. Chisel out (drill) the holes in the wall<br />
3. Brick in wall lining<br />
First seal the wall lining using mineral wool<br />
insulation. Afterwards plaster using heat<br />
resistant cement mortar or equivalent.<br />
4. After the mortar has hardened, and after<br />
plastering and painting, position the floor<br />
plate including the floor protection (carton).<br />
5. The stove can now be lifted onto the<br />
floor plate carefully.<br />
The stove must not be pushed along an<br />
unprotected floor.<br />
11<br />
Strong corrugated cardboard, carton, or an old<br />
carpet are excellently suited as an installation<br />
aid and an underlay. The stove can also be<br />
pushed on this underlay.<br />
If you do not use our original flue pipes for<br />
the flue connection, then we recommend 2<br />
mm steel sheet pipes. The connecting piece<br />
must not project into the chimney shaft!<br />
Seal the gap between the flue pipe and wall<br />
lining using a ceramic seal.<br />
The installation must comply with the respective<br />
safety and construction regulations. Please<br />
contact your master chimney sweep in this<br />
respect – he will be happy to give you information.<br />
If you use a system chimney (e.g. glazed<br />
fireclay), please follow the manufacturer’s<br />
connection instructions precisely.<br />
ENGLISH
ENGLISH<br />
5. OPERATION<br />
LIGHTING THE FIRE<br />
In order to keep exhaust emissions as low as possible,<br />
we would ask you to keep to the following<br />
starting instructions.<br />
1. If the stove and chimney are still cold or if there<br />
is atmospheric low pressure, then burning<br />
some paper at the start is recommended, in<br />
order to “drive” the cold out of the stove and<br />
chimney.<br />
To start heating first lay uncoated paper on the<br />
floor of the grate, on top of that add 0.5 kg soft<br />
wood chips and 1 kg wood (3 small billets)<br />
Pull the shaker grate handle (Fig. 2, Part II) out<br />
completely and open the primary air slide (Fig.<br />
2, Part I) and secondary air slide (Fig. 2, Part III)<br />
Please do not use glossy paper or paper from<br />
magazines. It does not burn well and the print<br />
colours produce very poisonous substances in<br />
the flue gas.<br />
2. Now light the paper. Wait until the soft<br />
wood chips are burning well.<br />
Close the shaker grate handle and the<br />
primary air slide a few minutes later. Set the<br />
secondary air slide to the ideal setting a few<br />
minutes later.<br />
3. After this has burned, lay approx 1.6 kg<br />
wood (2 billets) on the fire. Open the<br />
shaker grate handle and the primary air<br />
slide until the wood is burning well (approx.<br />
2 mins). The secondary air slide remains in<br />
the ideal setting.<br />
Proceed in the same manner for each furt<br />
her layer.<br />
4. The mineral parts of the wood (approx. 1%)<br />
remain on the bottom of the grate as<br />
combustion residue.<br />
Because it is a natural product this ash is an<br />
excellent fertiliser for all plants in the<br />
garden. However the ash should be left to<br />
settle beforehand and doused with water.<br />
12<br />
ASH DRAWER<br />
The ash drawer must be emptied regularly to<br />
prevent excessive heating of the fire grid.<br />
Never heat the stove with the ash drawer open<br />
-> danger of overheating -> loss of warranty.<br />
Caution: Embers could remain in the ash.<br />
Empty the ash into non-flammable containers<br />
and do not place the ash drawer on flammable<br />
surfaces.<br />
OPERATING THE SHAKER GRATE<br />
The ash is transferred from the fire to the ash<br />
drawer by moving the shaker grate handle back<br />
and forth. This frees up room for the primary<br />
feed air that is required for the heating phase in<br />
the stove.<br />
It is not necessary to operate the shaker<br />
grate during heating.<br />
SLIDE SETTING AT RATED THERMAL<br />
OUTPUT<br />
Fuel Wood/ Brown coal .<br />
Wood briquettes briquettes<br />
Primary air closed open<br />
Secondary air 1/3 open open<br />
Shaker grate closed open<br />
The position “Primary air completely open”<br />
may only be used as a starting position.
6. FITTING OPTIONS<br />
SIDE PANELLING - HEAT RETENTION<br />
CHAMBER<br />
1. Remove the cover (Fig. 6, 60) from your<br />
stove.<br />
2. Now push the side panel sections (Fig. 6,<br />
62) from above into the guide slots.<br />
3. Position the cover on the stove.<br />
CHANGING FLUE PIPE CONNECTION<br />
ABOVE TO CONNECTION AT REAR<br />
(Fig. 8)<br />
1. Remove the cover insert (Fig.6, 60) from<br />
your stove.<br />
7. MAINTENANCE AND CLEANING<br />
GENERAL MAINTENANCE<br />
Your stove has been designed by our development<br />
team with minimal maintenance in<br />
mind and for a very long service life.<br />
Certain cleaning activities and checking the<br />
seals are however necessary from time to<br />
time. The time periods between the inspection<br />
intervals are above all dependent<br />
on the fire wood quality used and the frequency<br />
of use.<br />
Maintenance and cleaning work must only be<br />
carried out when the stove has completely<br />
cooled down.<br />
ONCE MORE<br />
Only use wood that has been stored<br />
properly and is dry and untreated. Feed the<br />
correct quantity of wood into the stove.<br />
Should the fuel be poor, the number of necessary<br />
maintenance activities can more than<br />
double.<br />
FINISH - CONDITION AND CLEANING<br />
The door glass can be cleaned using a glass<br />
cleaner designed for the purpose. The cleaner<br />
can be obtained from your specialist<br />
fire dealer. Should the glass become heavily<br />
sooted the possible cause could be damp<br />
wood.<br />
13<br />
2. Pull the rear panel (Fig.6, 63) upwards out<br />
of the side guides. Cut out the pre-cut<br />
circular section in the rear panel using a<br />
hacksaw<br />
3. Swap the flue gas connector (Fig.7, 71) (3x<br />
cross slot screws) and cooking cover<br />
(Fig. 7, 72) (3x cross slot screws) with each<br />
other.<br />
4. Attach the insert for connection to the<br />
rear (Fig. 7, 70) as shown in Fig. 7.<br />
5. Now refit the rear panel and position the<br />
cover on your stove.<br />
The stove finish is highly refractory and<br />
must only be cleaned using a cloth (damp if<br />
necessary). Only use original paint for<br />
touch up work, this is available from your<br />
specialist dealer as an accessory.<br />
CONVECTION AIR OPENINGS<br />
Regularly clean dust deposit from the convection<br />
air openings. The stove should be<br />
cleaned thoroughly before the start of the<br />
new heating season, in order to prevent<br />
strong odours.<br />
CLEANING THE FLUE GAS CHANNELS<br />
(1 x annually)<br />
Remove the flue pipes<br />
Brush off and vacuum any soot and dust<br />
deposits in the stove and in the flue pipes.<br />
Check the seals on the stove door and the<br />
ash drawer before the beginning and end of<br />
the heating period. Should they be damaged<br />
or excessively worn, then please order<br />
the relevant replacement.<br />
Only intact seals guarantee the perfect function<br />
of your stove. Loose seals can be secured with<br />
Thormohit sealant adhesive.<br />
ENGLISH
ENGLISH<br />
8. PROBLEM SOLVING<br />
What to do if ?<br />
Problem Reason Solution<br />
1. Ceramic glass pane<br />
soots up too quickly<br />
2. Fire not pulling<br />
correctly<br />
3. Fire does not start<br />
correctly<br />
4. Stove smells<br />
strongly and is<br />
smoking outside<br />
5. Paint not drying out<br />
6. Flue gas escapes<br />
when fuel is added<br />
and during the<br />
heating phase<br />
➧ Poor draught<br />
➧ Incorrect regulation<br />
➧ Too much fuel<br />
➧ Damp wood<br />
➧ Incorrect fuel<br />
➧ Chimney draught inadequate<br />
➧ Stove is sooted up on the inside<br />
➧ Weather influences<br />
➧ Incorrect starting<br />
➧ Burning in phase<br />
➧ Stove is dusty/sooted up<br />
➧ Burning in phase not<br />
completed properly<br />
➧ Chimney draught too low, flue<br />
gas connection leaking<br />
If you cannot find the correct solution to your problem, then please contact your specialist dealer or<br />
chimney sweep.<br />
14<br />
In principle: From time to time (dependent<br />
on use), each glass pane must be cleaned<br />
with specialised stove glass cleaner (e.g.<br />
Thermohit).<br />
Clarify this with the chimney sweep (if<br />
necessary increase height of chimney or<br />
fit a chimney cap)<br />
Regulation must be carried out as per<br />
the operating instructions using the air<br />
slide (if secondary air is closed, the glass<br />
pane will soot up very quickly, but this<br />
can be burnt off again by correct use)<br />
See item: “Max. Fuel quantities”<br />
See item: “Clean burning”, if necessary use<br />
wood briquettes (these are evenly dried)<br />
The pane will soot up quicker using coal<br />
briquettes than wood briquettes<br />
See: “Brief Heating Information”<br />
See: “Maintenance and Cleaning”<br />
See: “Lighting the fire“<br />
See: “Lighting the fire“<br />
See: “Operation” (hardening of the paint)<br />
See: “Convection air openings”<br />
See: “Operation“ (hardening of the paint)<br />
Check the connection points and reseal<br />
if necessary
E N G L I S H<br />
8 . W A R R A N T Y<br />
These warranty conditions apply to Austria,<br />
Germany and Switzerland.<br />
For the purpose of timely damage limitation, the<br />
warranty claim on the part of the claimant is to be<br />
enforced at the RIKA dealer in writing using the<br />
invoice and stating the purchase date, model name,<br />
serial number and reason for complaint.<br />
WARRANTY<br />
5 years on the welded stove body. The warranty<br />
only covers defects in materials and workmanship<br />
as well as delivery of spare parts free of charge.<br />
Labour and travel times are not included in the<br />
manufacturer’s warranty.<br />
Only use spare parts recommended or supplied by<br />
the manufacturer. Loss of warranty on nonobservance!<br />
The precondition for the warranty is that the stove<br />
has been installed and commissioned properly<br />
according to the <strong>Instructions</strong> for Use valid at the<br />
time of purchase. Connection must be performed by<br />
a specialist for such stoves.<br />
- 18 -<br />
The warranty excludes WEARING PARTS such as<br />
glass, coating, surface coatings (e.g. handles,<br />
panels), seals, fire trough, grates, draught plates,<br />
deflector plates, combustion chamber liners (e.g.<br />
fireclay), ceramics, natural stone, ignition elements,<br />
sensors, combustion chamber sensors and<br />
temperature controller. Damage arising from nonobservance<br />
of the manufacturer’s instructions for<br />
operation of the unit is also excluded (e.g.<br />
overheating, use of non-approved fuels, incorrect<br />
intervention in the stove, electrical excess voltage, a<br />
chimney draught set incorrectly for the stove, nonperformance<br />
or deficient maintenance and cleaning,<br />
incorrect operation by the user or third parties, etc.)<br />
or caused by such.<br />
Any costs incurred by the manufacturer due to<br />
unjustified warranty claims are to be charged to the<br />
claimant.<br />
THE WARRANTY DOES NOT AFFECT THE<br />
STATUTORY WARRANTY PROVISIONS.
- 19 -
Customer/Client:<br />
Customer/Client:<br />
To/A:<br />
To/A:<br />
G GAU RA AR NA TN ITE E E / G A R A N T I E<br />
- 20 -<br />
Stamp<br />
Stamp<br />
Marque<br />
Marque<br />
2010/12/09