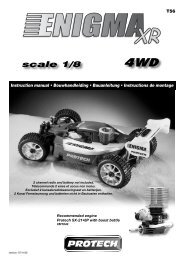
instruction manual • gebruiksaanwijzing • intructions de montage ...
instruction manual • gebruiksaanwijzing • intructions de montage ...
instruction manual • gebruiksaanwijzing • intructions de montage ...

Create successful ePaper yourself
Turn your PDF publications into a flip-book with our unique Google optimized e-Paper software.
Assembling the ailerons / Monteren van <strong>de</strong> rolroeren /<br />
Assemblage <strong>de</strong>s ailerons / Montieren von die Querru<strong>de</strong>rn<br />
Glue the steering rod of the aileron<br />
with epoxy, and at the same<br />
moment, glue the hinges of the<br />
ailerons on both si<strong>de</strong>s with slow<br />
instant glue. Fix the parts during<br />
the drying proces.<br />
(Fig. 1-2-3-4-5)<br />
6 - Skydancer<br />
Fig. 1 Fig. 2<br />
Fig. 4 Fig. 5<br />
Verlijm <strong>de</strong> scharnieren van <strong>de</strong><br />
rolroeren met langzame<br />
secon<strong>de</strong>nlijm aan bei<strong>de</strong> kanten.<br />
Verlijm op het zelf<strong>de</strong> moment <strong>de</strong><br />
stuurstang voor het rolroer met<br />
epoxy. Goed vastzetten tij<strong>de</strong>ns het<br />
uithar<strong>de</strong>n.<br />
(Fig. 1-2-3-4-5)<br />
Collez la comman<strong>de</strong> <strong>de</strong> l’aileron<br />
avec <strong>de</strong> la colle époxy et en<br />
même temps collez à la colle<br />
cyanoacrylate lente les charnières<br />
<strong>de</strong>s ailerons. Maintenir durant<br />
le sèchage.<br />
(Fig. 1-2-3-4-5)<br />
Joining the wing halves / Monteren van <strong>de</strong> 2 vleugel<strong>de</strong>len /<br />
Assemblage <strong>de</strong>s panneaux d’ailes / Montierung von die Flügelflächen<br />
Fig. 6 Fig. 7 Fig. 8<br />
Drw 1<br />
Glue<br />
W42<br />
Glue the wingjoiner in 1 wing<br />
part with epoxy and let the glue<br />
dry (Fig. 6-7).<br />
Check the aligment (Drw1).<br />
Glue the wing parts straight<br />
together with epoxy (Fig. 8-9).<br />
Fix the parts together during the<br />
drying proces (Fig. 9).<br />
Verlijm het verbindingsstuk aan<br />
1 zij<strong>de</strong> in het vleugel<strong>de</strong>el met<br />
epoxy (Fig. 6-7). Laat <strong>de</strong> lijm<br />
goed uithar<strong>de</strong>n.<br />
Controleer <strong>de</strong> uitlijning (Drw 1).<br />
Verlijm <strong>de</strong> twee vleugel<strong>de</strong>len<br />
met epoxy recht tegen elkaar<br />
(Fig. 8-9). Klem <strong>de</strong> stukken goed<br />
tegen elkaar tij<strong>de</strong>ns het<br />
uithar<strong>de</strong>n (Fig. 9).<br />
Fig. 3<br />
Fig. 9<br />
Collez à l’époxy la clé d’aile<br />
dans un panneau d’aile, laissez<br />
sécher (Fig. 6-7).<br />
Collez à l’époxy les 2 panneaux<br />
ensemble (Fig. 8).<br />
Vérifier l’alignement (Drw1).<br />
Maintenez les pièces durant le<br />
séchage (Fig. 9).<br />
Glue