
Create successful ePaper yourself
Turn your PDF publications into a flip-book with our unique Google optimized e-Paper software.
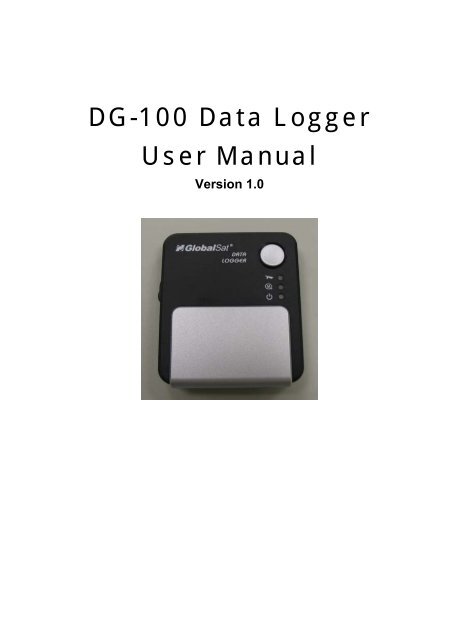
<strong>DG</strong>-<strong>100</strong> <strong>Data</strong> <strong>Logger</strong><br />
<strong>User</strong> <strong>Manual</strong><br />
Version 1.0
<strong>DG</strong>-<strong>100</strong> page 2<br />
Table of Content<br />
1 Introduction and Features................................................ 3<br />
Introduction ...................................................................3<br />
Features.........................................................................4<br />
2 Specifications ................................................................... 5<br />
System specification ........................................................5<br />
GPS specification.............................................................6<br />
3 Hardware overview .......................................................... 7<br />
Hardware introduction......................................................7<br />
Detailed Hardware Functions.............................................8<br />
Package contents ............................................................9<br />
4 Software Utility .............................................................. 10<br />
Software Utility features .................................................10<br />
Install the software Utility...............................................11<br />
<strong>DG</strong>-<strong>100</strong> Setup...............................................................12<br />
5 Getting Started............................................................... 15<br />
<strong>DG</strong>-<strong>100</strong> Usage ..............................................................16<br />
Transfer data to your PC .................................................16<br />
Save data.....................................................................17<br />
Displaying the data on map ............................................18<br />
Export data ..................................................................21<br />
Speed filter...................................................................22<br />
Delete the data from memory .........................................22<br />
Metric system or imperial system.....................................22<br />
Using the G-mouse function ............................................23<br />
6 Troubleshooting ............................................................. 24<br />
► Change the battery ....................................................24
<strong>DG</strong>-<strong>100</strong> page 3<br />
1 Introduction and Features<br />
Introduction<br />
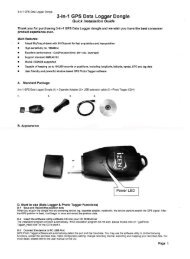
GlobalSat <strong>DG</strong>-<strong>100</strong> is a GPS data logger that records track data from the received GPS<br />
signal. With a GPS logger and antenna built in a miniature construction, <strong>DG</strong>-<strong>100</strong><br />
features an all-in-one, cost-effective GPS logger solution. The <strong>DG</strong>-<strong>100</strong> records time,<br />
date, speed, altitude and GPS location at preset intervals. Based on the SiRF star III<br />
chipset, <strong>DG</strong>-<strong>100</strong> offers accurate position tracking capabilities.<br />
All recorded GPS information can be downloaded to the computer. It is a convenient,<br />
economical way for later review of your recorded histories. Simply connect the<br />
<strong>DG</strong>-<strong>100</strong> to your PC or Notebook, and then download the track-log to your PC for use<br />
with Windows based software utility. <strong>User</strong> can easily export the recorded points to<br />
Google Earth and Google Maps.<br />
It is ideal application in fleet management, marine navigational aids, traveling and<br />
consumer personal use. You also can use the <strong>DG</strong>-<strong>100</strong> as an USB GPS mouse. It is<br />
another good feature for <strong>DG</strong>-<strong>100</strong>.
<strong>DG</strong>-<strong>100</strong> page 4<br />
Features<br />
The main features of <strong>DG</strong>-<strong>100</strong> GPS data logger<br />
1. SiRF StarIII chipset 20 channels.<br />
2. Allowing user to store up to 60000 points.<br />
3. Two NiMh batteries for more than 20 hours continuous operation.<br />
4. USB interface.<br />
5. Power On/Off button for easy use.<br />
6. Three preset saving intervals (Time/Distance) can be selected by slide switch.<br />
7. Three LEDs to show the status of GPS, battery and memory.<br />
8. MMCX port for external GPS antenna.<br />
9. USB G-mouse function.<br />
10. Configuration Wizard helps you to quickly make the configuration.<br />
11. <strong>User</strong> friendly Windows based software utility. <strong>User</strong> may use the software utility to<br />
do the following functions:<br />
• Upload recorded data<br />
• Change Recording Interval<br />
• Configuration setting<br />
• Delete recorded data<br />
• Exporting and mapping your recorded data:<br />
(1) Exploring to KML (Interface with Google Earth)<br />
(2) Show recorded data on Google Maps<br />
(3) Text format<br />
(4) Excel file format<br />
(5) NMEA183
<strong>DG</strong>-<strong>100</strong> page 5<br />
2 Specifications<br />
System specification<br />
Electrical Characteristics<br />
GPS standard SiRF StarⅢ<br />
GPS Antenna Built-in patch antenna<br />
Operation time Up to 24 hrs<br />
Charge time 7 hrs<br />
Battery Charging USB connector @ 350mah<br />
POWER BUTTON<br />
Power On/Off Press and hold for 3 second to On/Off the device.<br />
Instant Save Press button once to save a waypoint manually when<br />
device is active.<br />
STATUS LED’S<br />
GPS status Flashing Green – GPS position is fixed.<br />
Steady Green – GPS position is not fixed.<br />
Power status Solid Red – Device is power on.<br />
Flashing Red – Device is in low battery power.<br />
Solid Amber – Battery is being charged.<br />
Memory status Flashing Blue – Memory is 2/3 full.<br />
Solid Blue – Memory is full.<br />
TEMPERATURE<br />
Operating -20°C ~ 50°C (-4°F ~ 122°F)<br />
Storage -20°C ~ 35°C (-4°F ~ 95°F)<br />
Humidity Operational up to 95% non-condensing<br />
SLIDE SWITCH<br />
One Slide Switch There are three customized setting of intervals.<br />
A (interval 1 Time or Distance selectable)<br />
B (interval 2 Time or Distance selectable)<br />
C (interval 3 Time or Distance selectable)<br />
BATTERY<br />
Battery Type Two NiMh Rechargeable Battery<br />
MECHANICAL<br />
Dimension 3.15”X 2.75’’X 0.7’’
<strong>DG</strong>-<strong>100</strong> page 6<br />
GPS specification<br />
Electrical Characteristics<br />
GPS Chipset SiRF Star III<br />
Frequency L1, 1575.42 MHz<br />
C/A Code 1.023 MHz chip rate<br />
Channels 20 channel all-in-view tracking<br />
ACCURACY<br />
Position Horizontal 10 meters, 2D RMS<br />
1-5 meters 2D RMS, WAAS corrected<br />
Velocity 0.1m/sec<br />
Time 1 micro-second synchronized to GPS time<br />
DATUM<br />
Datum Default: WGS-84<br />
ACQUISITION RATE<br />
Hot start 1 sec., average<br />
Warm start 38 sec., average<br />
Cold start 42 sec., average<br />
Reacquisition 0.1 sec. average<br />
PROTOCOL<br />
GPS Protocol Default: NMEA 0183 (Secondary: SiRF binary)<br />
GPS Output<br />
format<br />
GGA(1sec), GSA(1sec), GSV(5sec), RMC(1sec), GLL,<br />
VTG is optional<br />
DYNAMIC CONDITION<br />
Acceleration Limit Less than 4g<br />
Altitude Limit 18,000 meters (60,000 feet) max.<br />
Velocity Limit 515 meters/sec. (1,000 knots) max.<br />
Jerk Limit 20 m/sec**3
<strong>DG</strong>-<strong>100</strong> page 7<br />
3 Hardware overview<br />
Hardware introduction<br />
Power button<br />
External<br />
antenna port<br />
GPS status LED<br />
Memory status LDE<br />
Battery status LDE<br />
Mode switch<br />
Battery cover<br />
USB connector
<strong>DG</strong>-<strong>100</strong> page 8<br />
Detailed Hardware Functions<br />
Power button<br />
Press and hold the power button for 3 seconds to turn<br />
on/off the device.<br />
Press power button once to save a waypoint manually<br />
when device is active.<br />
Mode Switch<br />
You can set up to 3 different interval modes for your<br />
requirement by the software utility.<br />
GPS status LED Flashing Green – GPS position is fixed.<br />
Memory status LED<br />
Steady Green – GPS position is not fixed.<br />
Flashing Blue – Memory is 2/3 full.<br />
Battery status LED<br />
Solid Blue – Memory is full.<br />
Solid Red – Device is power on.<br />
Flashing Red – Device is in low battery power.<br />
Solid Amber – Battery is being charged.<br />
External antenna Port For you to connect an external antenna.<br />
USB connector<br />
Connect with the USB cable for data transfer or battery<br />
charging purpose.<br />
Belt clip<br />
You can use the belt clip to clip <strong>DG</strong>-<strong>100</strong> on your belt or<br />
backpack.<br />
DC charger (optional) For you to charge the <strong>DG</strong>-<strong>100</strong> in car or use it in car.
<strong>DG</strong>-<strong>100</strong> page 9<br />
Package contents<br />
Check the contents of your <strong>DG</strong>-<strong>100</strong> package. If you find any accessories are missing or<br />
appear damaged, please contact your dealer immediately.<br />
<strong>DG</strong>-<strong>100</strong><br />
Two rechargeable NiMh batteries<br />
Belt clip<br />
CD (user manual, software utility)<br />
DC charger (optional)
<strong>DG</strong>-<strong>100</strong> page 10<br />
4 Software Utility<br />
Software Utility features<br />
Upload recorded data:<br />
Information Stored:<br />
Speed Filter:<br />
Speed Filter Threshold:<br />
Distance Filter<br />
Saving intervals:<br />
Converting Output<br />
format<br />
Configuration Wizard<br />
<strong>User</strong> can upload recorded data and save it to PC.<br />
1. Only Position<br />
2. Position, Time, Date, Speed.<br />
3. Position, Time, Date, Speed, Altitude.<br />
<strong>User</strong> programmable via software utility.<br />
Disables data save if speed falls below a threshold<br />
value.<br />
Disable data save if data logger hasn’t moved<br />
greater than the selected radius.<br />
Saving interval (Time or Distance) can be selectable.<br />
<strong>User</strong> programmable via utility.<br />
Mode Switch to select saving interval.<br />
(1) Exploring to KML ( Interface with Google Earth)<br />
(2) Show recorded data on Google Maps<br />
(3) Text format<br />
(4) Excel file format<br />
(5) NMEA183 file format<br />
Using Configuration Wizard to help you quick adjust<br />
the settings, including Mode A, B, C.
<strong>DG</strong>-<strong>100</strong> page 11<br />
Install the software Utility<br />
1. Insert the software utility CD into your CD-ROM drive, the installation program<br />
will start automatically.<br />
2. Click on “Install USB Driver” button to install the USB driver which is needed<br />
when you connect <strong>DG</strong>-<strong>100</strong> to your PC.<br />
3. Click on “<strong>DG</strong>-<strong>100</strong> PC Software” button and follow the instruction to install the<br />
<strong>DG</strong>-<strong>100</strong> software utility.<br />
4. You can click “<strong>User</strong> <strong>Manual</strong>” button to open the user manual folder. The user<br />
manual is in PDF format. You have to install the Acrobat PDF Reader to view the<br />
PDF file.
<strong>DG</strong>-<strong>100</strong> page 12<br />
<strong>DG</strong>-<strong>100</strong> Setup<br />
1. Turn on the power of <strong>DG</strong>-<strong>100</strong>, and<br />
then connect it to the USB port on<br />
PC.<br />
2. Check the COM port of <strong>DG</strong>-<strong>100</strong> first.<br />
Click [Start] > [Control Panel] ><br />
[Performance and Maintenance]<br />
> [System], you will see the<br />
System Properties dialog box; click<br />
on [Hardware] tab and then the<br />
[Device Manager] button. Expand<br />
the [Ports (COM & LPT)] item, and<br />
the “Prolific USB-to-Serial Comm<br />
Port” is the COM port of you <strong>DG</strong>-<strong>100</strong>.<br />
3. Click from [Start] > [All<br />
Programs] > [GlobalSat <strong>Data</strong><br />
<strong>Logger</strong>] > [<strong>DG</strong>-<strong>100</strong> Utility] to<br />
start the GlobalSat <strong>DG</strong>-<strong>100</strong> utility.<br />
The Configuration Wizard appears when the first<br />
time you start the program. It helps you to quickly<br />
setup the configuration with easy step by step.<br />
• Step 1: Select Device Type. Please select<br />
“<strong>Data</strong> <strong>Logger</strong>”.<br />
• Step 2: Select COM port.<br />
• Step 3: Select the Mode switch.<br />
There are 3 predefined modes,<br />
including “Hiker/Backpacker”,<br />
“Bicyclist”, and “Motorcyclist”.
<strong>DG</strong>-<strong>100</strong> page 13<br />
• Step 4: Select the Metric or Imperial unit.<br />
• Step 5:<br />
Select the<br />
directory for<br />
exporting<br />
files.<br />
• When you finished the setup, a<br />
successful message appears and<br />
all settings are saved in system.<br />
4. The <strong>DG</strong>-<strong>100</strong> utility will import the<br />
setting you just made from<br />
Configuration Wizard.<br />
If you did not use Configuration<br />
Wizard to do the settings, please<br />
manually select the correct COM<br />
port and set the Baud Rate to<br />
“115200”.<br />
If later on you want to enable<br />
Configuration Wizard again, please<br />
click from menu bar, [File] ><br />
[Quick Configuration].
<strong>DG</strong>-<strong>100</strong> page 14<br />
5. From menu bar, click on [Settings] > [Configuration] to open the Device<br />
Configuration dialog box.<br />
<strong>Data</strong> logging format:<br />
There are three options for you to choose those data items to be recorded.<br />
Disable data logging if speed falls below a threshold:<br />
If your speed is below this specified value, <strong>DG</strong>-<strong>100</strong> will not save the data of current<br />
position.<br />
Disable data logging if distance is less than the selected radius:<br />
If the distance between your last point and current point is less than this specified<br />
value, <strong>DG</strong>-<strong>100</strong> will not save the data of current position.<br />
<strong>Data</strong> logging interval Mode A, B, C<br />
Setup the Mode Switch for the interval (time or distance) for recording the data.<br />
System information<br />
It shows the current memory usage status.<br />
6. When you have done the configuration setup, press OK button to save the settings<br />
to <strong>DG</strong>-<strong>100</strong>.<br />
7. These setting will take effect when next time you restart the device.
<strong>DG</strong>-<strong>100</strong> page 15<br />
5 Getting Started<br />
Tool Bar<br />
Configuration<br />
GPS information<br />
Tree Bar<br />
Status Bar<br />
1 Open a training file. 8 The Configuration for GPS<br />
device.<br />
2 Save training information to<br />
a file.<br />
9 Metric system.<br />
3 Preference 10 Delete records.<br />
4 Select all files. 11 Load Track Points.<br />
5 Export training information<br />
to the KML format.<br />
12 Export to Google Earth.<br />
6 Export to CSV file. 13 Display program information,<br />
version number and copyright.<br />
7 Export to the text file.
<strong>DG</strong>-<strong>100</strong> page 16<br />
<strong>DG</strong>-<strong>100</strong> Usage<br />
1. When you press the power button to turn on the <strong>DG</strong>-<strong>100</strong>, it starts to search the<br />
GPS signal. After the GPS position is fixed, it will begin to record and save the<br />
position data.<br />
2. You can select the Mode Switch for the different recording interval as you need.<br />
3. If you want to stop recording, just press the power button to turn it off.<br />
4. When the battery power is exhausted, it will shut down automatically.<br />
Note: When you connect <strong>DG</strong>-<strong>100</strong> to your PC, <strong>DG</strong>-<strong>100</strong> will enter the “data transfer<br />
mode”, it can not record the data in this mode. After you disconnect it from<br />
PC, please remember to power off and restart <strong>DG</strong>-<strong>100</strong> to make it return to<br />
<strong>Data</strong> <strong>Logger</strong> mode.<br />
Transfer data to your PC<br />
1. Turn on the power of<br />
<strong>DG</strong>-<strong>100</strong>, and then connect it<br />
to the USB port on PC. Start<br />
the software utility. Select<br />
the correct COM port and set<br />
the Baud Rate to “115200”.<br />
From menu bar, click on<br />
[TrackRecord] > [Load<br />
Track Points]. Select the<br />
data item which you want to<br />
load and click on “Load”<br />
button.<br />
2. The data is loaded in the Tree Bar area, and the entire track points will be sorted<br />
by time order displaying on the right bottom window.
<strong>DG</strong>-<strong>100</strong> page 17<br />
3. Select the data you want from Tree Bar area. From menu bar click [Map] ><br />
[View Points]; the data you select will be combined and displayed in details in<br />
a new window or the right side.<br />
(You can click on [File] > [Select All Files] to automatically select all data<br />
record in Tree Bar, or click on [File] > [Select All Files] again to deselect all.)<br />
Save data<br />
From menu bar click on [File] > [Save] to save the data to a <strong>Data</strong><strong>Logger</strong> (*.gsd)<br />
format. This will save all data items in Tree Bar no matter they are selected or not. You<br />
can open the saved gsd file by [File] > [Open].
<strong>DG</strong>-<strong>100</strong> page 18<br />
Displaying the data on map<br />
1. Display the track points on Google Earth:<br />
You can display all the data from “active window” on Google Earth. Just click [Map]<br />
> [Google Earth] from the menu bar.<br />
Check the root record to<br />
display all information.<br />
Check “TrackPoints” to<br />
display the route by red line.<br />
Check any point which you want to display<br />
its position and information in map.<br />
1.1 By default, it only shows the track points on the map.<br />
1.2 You can select from [File] > [Preference],<br />
and check the “Show Speed/Time in Google<br />
Earth” to have the Speed and Time info of the<br />
points shown on the map.<br />
1.3 To display the route on Google Earth, you must install Google Earth and the<br />
internet connection is also needed. For more information, please visit<br />
http://earth.google.com/.
<strong>DG</strong>-<strong>100</strong> page 19<br />
2. Display the track points on Google Maps:<br />
You can display all the data from “active window” on Google Maps. Just click [Map]<br />
> [Show Track Points in Google Maps] from the menu bar. To display the<br />
track points on Google Maps, your PC must have the internet connection enabled.
<strong>DG</strong>-<strong>100</strong> page 20<br />
3. Display one track point on Google Maps:<br />
You can double click on any track point to display its position on Google Maps.<br />
Double click on any track<br />
point to display its position<br />
on Google Maps window.
<strong>DG</strong>-<strong>100</strong> page 21<br />
Export data<br />
Inactive window<br />
Active window<br />
1. With the export function, you can export the data in “active window” to the<br />
following three kinds of data format.<br />
2. Click [File] > [Export] > [KML File] to export the data to the Google Earth KML<br />
file format.<br />
3. Click [File] > [Export] > [CSV File] to export the data to the Excel file format.<br />
4. Click [File] > [Export] > [TXT File] to export the data to the TXT file format.<br />
5. Click [File] > [Export] > [NMEA183 Format] to export the data to the<br />
NMEA183 text file format.
<strong>DG</strong>-<strong>100</strong> page 22<br />
Speed filter<br />
The Speed filter function allows you to display the data which match the criteria. Select<br />
the range criteria and input speed value (integer), then click “Refresh” button.<br />
Delete the data from memory<br />
If you have already saved your data to PC, then you can click on [TrackRecord] ><br />
[Delete All] to delete all data from the <strong>DG</strong>-<strong>100</strong> memory.<br />
Metric system or imperial system<br />
You can click on [Settings] > [Metric System] to check this item for displaying the<br />
distance by “meters” and speed by “km/hour”, or uncheck it for displaying the<br />
distance by “feet” and speed by “mile/hour”.
<strong>DG</strong>-<strong>100</strong> page 23<br />
Using the G-mouse function<br />
You can connect the <strong>DG</strong>-<strong>100</strong> to your Notebook and use it as a GPS mouse.<br />
1. Connect <strong>DG</strong>-<strong>100</strong> to your Notebook.<br />
2. Turn on the <strong>DG</strong>-<strong>100</strong>.<br />
3. Start the <strong>DG</strong>-<strong>100</strong> software utility.<br />
4. Select the correct COM port and set Baud Rate to 115200.<br />
5. Click the “Start GMouse mode” button. This would start <strong>DG</strong>-<strong>100</strong> G-mouse<br />
function. Now you can close the <strong>DG</strong>-<strong>100</strong> software utility.<br />
6. Start your Navigation software and set the COM port and Baud Rate if necessary.<br />
The G-mouse is ready for your use.<br />
7. If you want to end the G-mouse mode, and return to the data logger mode, you<br />
must turn off the <strong>DG</strong>-<strong>100</strong> and turn on it again.
<strong>DG</strong>-<strong>100</strong> page 24<br />
6 Troubleshooting<br />
► Change the battery<br />
1. Press downward to open the battery cover.<br />
2. If there are rechargeable batteries in the <strong>DG</strong>-<strong>100</strong>, then you can connect the<br />
device to PC’s USB port for battery charging or for data downloading.<br />
3. The USB port of computer will provide power to <strong>DG</strong>-<strong>100</strong> via the USB cable when<br />
you make the connection. If you use the non-rechargeable battery, please<br />
remove it to avoid any hazard.
<strong>DG</strong>-<strong>100</strong> page 25<br />
FCC Notices<br />
This device complies with part 15 of the FCC rules. Operation is subject to the following two<br />
conditions:<br />
(1) This device may not cause harmful interference, and<br />
(2) This device must accept any interference received, including interference that may cause<br />
undesired operation.<br />
FCC RF Exposure requirements:<br />
This device and its antenna(s) must not be co-located or operation in conjunction with any other<br />
antenna or transmitter.<br />
NOTE: THE MANUFACTURER IS NOT RESPONSIBLE FOR ANY RADIO OR TV<br />
INTERFERENCE CAUSED BY UNAUTHORIZED MODIFICATIONS TO THIS EQUIPMENT.<br />
SUCH MODIFICATIONS COULD VOID THE USER’S AUTHORITY TO OPERATE THE<br />
EQUIPMENT.