ASTATplus - G E Power Controls
ASTATplus - G E Power Controls
ASTATplus - G E Power Controls

Create successful ePaper yourself
Turn your PDF publications into a flip-book with our unique Google optimized e-Paper software.
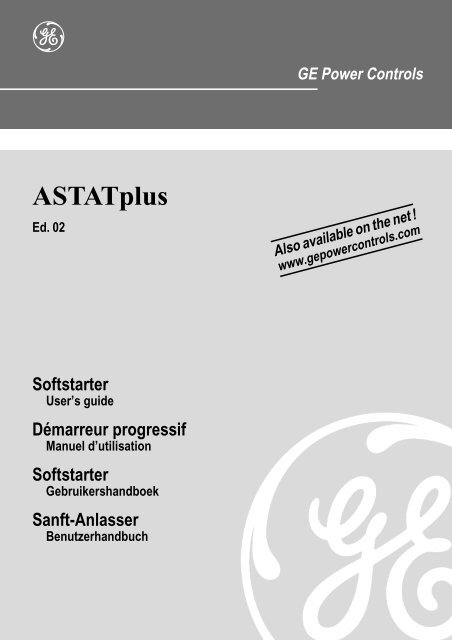
GE <strong>Power</strong> <strong>Controls</strong><br />
<strong>ASTATplus</strong><br />
Ed. 02<br />
Also available on the net !<br />
www.gepowercontrols.com<br />
Softstarter<br />
User’s guide<br />
Démarreur progressif<br />
Manuel d’utilisation<br />
Softstarter<br />
Gebruikershandboek<br />
Sanft-Anlasser<br />
Benutzerhandbuch
this is a blanc page
ASTAT Soft Starters<br />
USER’S GUIDE<br />
<strong>ASTATplus</strong><br />
A<br />
MANUEL D’UTILISATION<br />
GEBRUIKERSHANDBOEK<br />
<strong>ASTATplus</strong><br />
<strong>ASTATplus</strong><br />
B<br />
C<br />
BENUTZERHANDBUCH<br />
<strong>ASTATplus</strong><br />
D
Notes
GE <strong>Power</strong> <strong>ASTATplus</strong> <strong>Controls</strong><br />
A<br />
1<br />
SOLID STATE<br />
SOFT STARTER<br />
<strong>ASTATplus</strong><br />
USER’S MANUAL<br />
Remarks<br />
1. Read this manual throughly before using the soft starter <strong>ASTATplus</strong> and store it in a safe<br />
place for reference.<br />
2. Make sure that this manual is delivered to the end user<br />
3. CE marking<br />
When using <strong>ASTATplus</strong> in the EU, compliance with EMC is required.<br />
<strong>ASTATplus</strong> range comply with the generic EN 50081-2 and EN 50082-2<br />
4. The policy of GE <strong>Power</strong> <strong>Controls</strong> is one of continuous improvement.<br />
The right is reserved to alter the design or any structural details of the products at any<br />
time without giving notice.
<strong>ASTATplus</strong><br />
A<br />
2<br />
WARNINGS<br />
1. Disconnect power before installing or servicing.<br />
2. Hazardous voltages are present in the motor circuit even when the starter is OFF.<br />
An isolation contactor is recommended, configured to provide automatic<br />
isolation when the motor is turned OFF.<br />
3. Unit may contain more than one live circuit. Disconnect both control and main<br />
circuits before installing or servicing.<br />
4. Soft stop should not be used as an Emergency stop.<br />
5. Stopping mode must be set to meet applicable standards for operator safety.<br />
6. Separate motor overcurrent protection is required to be provided in accordance<br />
with the Canadian Electrical Code, Part 1, <strong>ASTATplus</strong> provides separate motor<br />
protection.<br />
CAUTIONS<br />
1. Semi-conductor fuses specified may not provide branch circuit protection. Refer<br />
to local applicable electrical codes.<br />
2. Overload relay setting should be properly coordinated with motor.<br />
3. Slow speed running will affect the motor thermal characteristic due to reduced<br />
cooling. Care must be taken when operating motor under these conditions.<br />
4. DC braking - braking current may cause motor overheating. Select the lowest<br />
braking current and time.<br />
5. DC braking must use additional (DC3) in the motor circuit. See wiring diagram<br />
page A.12.<br />
6. Abnormal starting times in excess of 30 seconds, or closely repeated operations<br />
of acceleration ramp/deceleration ramp, slow speed, or DC injection braking may<br />
cause motor damage. Contact motor manufacturer for proper motor selection.<br />
7. If control power is lost between starts, the overload relay protection is reset to<br />
cold start conditions.
<strong>ASTATplus</strong><br />
CONTENTS<br />
Section 1. Generalities ...................................................................................................................................... A.4<br />
A<br />
3<br />
1.1. Comparison of starting systems .......................................................................................................... A.4<br />
1.2. Advantages of the <strong>ASTATplus</strong> ............................................................................................................. A.5<br />
Section 2. Types and powers ........................................................................................................................... A.6<br />
2.1. IEC ratings ........................................................................................................................................... A.6<br />
2.2. UL ratings ............................................................................................................................................ A.7<br />
2.3. Thermal characteristics ....................................................................................................................... A.8<br />
Section 3. Technical specifications ................................................................................................................ A.9<br />
3.1. General specifications ......................................................................................................................... A.9<br />
3.2. I/O terminal board specifications ......................................................................................................... A.10<br />
3.3. I/O wiring ............................................................................................................................................. A.12<br />
3.4. Operating modes ................................................................................................................................. A.13<br />
Section 4. Programming. ................................................................................................................................. A.16<br />
4.1. Keypad and display description .......................................................................................................... A.16<br />
4.2. Parameter blocks configuration........................................................................................................... A.17<br />
4.3. Monitor block parameters ................................................................................................................... A.19<br />
4.4. Calibration block parameters -CAL- .................................................................................................... A.20<br />
4.5. Basic block parameters -BAS- ............................................................................................................ A.21<br />
4.6. Advanced block parameters -ADV- ..................................................................................................... A.23<br />
Section 5. Installation. ..................................................................................................................................... A.26<br />
5.1. Equipment installation ......................................................................................................................... A.26<br />
5.2. Fuses, contactors and supply wiring ................................................................................................... A.27<br />
5.3. Start-up................................................................................................................................................ A.28<br />
5.4. Troubleshooting ................................................................................................................................... A.29<br />
5.5. Thyristor check .................................................................................................................................... A.30<br />
Section 6. Appendix. ........................................................................................................................................ A.31<br />
6.1. Application diagrams ........................................................................................................................... A.31<br />
6.2. Serial communication .......................................................................................................................... A.34<br />
6.3. Dimensions .......................................................................................................................................... A.42<br />
6.4. PCB's layout ........................................................................................................................................ A.43
<strong>ASTATplus</strong><br />
A<br />
4<br />
1. Generalities<br />
1.1. Comparison of starting systems<br />
There are numerous applications where soft starting and<br />
limited current peak are needed and thereby making direct<br />
starting of squirrel-cage motors impossible.<br />
Traditionally in such cases other types of starting with<br />
reduced stator voltage have been resorted to. The bestknown<br />
are star-delta starters, autotransformer starters,<br />
stator resistance starters or using part winding motors.<br />
Any reduced starting voltage imposes a current limitation,<br />
and as a consequence the starting torque is also reduced,<br />
but there will always be peaks during the change from one<br />
point or state to another which can damage the machine<br />
being driven. In order to analyse the performances offered<br />
by each of these different types of starters, the following<br />
table shows the special characteristics of each of them,<br />
comparing with the ASTAT system.<br />
Note that in general reduced voltage starts produce a<br />
reduction in torque in squared proportion to the current in<br />
the phases of the motor (not the line) and the latter in turn is<br />
reduced in linear proportion to the voltage. From this it can<br />
be deduced that any start with reduced voltage reduces the<br />
torque in squared proportion to the voltage per motor<br />
phase. From this point of view soft starting produces, just<br />
like any other reduced voltage start, a reduction in starting<br />
torque, according to the adjusted parameters. The<br />
avantage, of course, is the ease with which this ramp can be<br />
controlled to produce a soft start in accordance with the<br />
actual requirement of the machine.<br />
From the comparison table it can be seen that the maximum<br />
starting torque attainable using the soft system is 90% of<br />
that which direct starting tends to.<br />
Bearing in mind that the direct starting torque varies between<br />
1.5 and 2.4 times rated torque, it can be deduced<br />
that with the soft starter, starting torques which are<br />
somewhat higher than rated are obtained.<br />
This area includes the starting of pumps, fans, conveyor<br />
belts, etc. where a torque in the region of 60% of rated is<br />
usually sufficient for correct starting.<br />
As a general rule it can be guaranteed that soft starter will<br />
allow starting of drives which are currently used in<br />
conventional starting systems, with the advantages outlined,<br />
and above al the facility to adjust the current peaks and<br />
torque at the machine, faced with the impossibility or<br />
difficulty of varying the steps in conventional systems.<br />
Conventional starters<br />
Soft starter<br />
Direct Autotransfo Stator Part Star-delta<br />
resistance winding<br />
motor<br />
% of direct start 100% 30, 40 or 64% 58 - 70% 65% 33% Depending on adjust,<br />
current (in the line) max. 90%<br />
% of direct start torque 100% 30, 40 or 64% 33 - 49% 48% 33% Depending on adjust,<br />
max. 90%<br />
Starting steps (1) 1 4, 3 or 2 3 or 2 2 2 Continuous, no steps<br />
Connections to motor 3 3 3 6 6 3<br />
Line overload 5 In 1.5 or 2.1 or 3.2 In 3 - 3.5 In 3.25 In 1.65 In Depending on adjust,<br />
(approx.)<br />
max. 4-7 In<br />
Change or no no no no yes no<br />
starting pause<br />
(1) “Steps” means sharp changes of speed during the time from rest until rated speed is reached.
<strong>ASTATplus</strong><br />
1.2. Advantages of the <strong>ASTATplus</strong><br />
Increase in productivity and reliability with the use<br />
á of static soft starters<br />
Starting and stopping the motor without steps or transitions<br />
lengthens the life of power-driven machine mechanical<br />
elements, greatly reducing stress on transmission and<br />
coupling parts.<br />
Consequently, overhauling times are reduced and machine<br />
and facility lifespans are lengthened.<br />
ì Pump control<br />
The <strong>ASTATplus</strong> includes a Pump Control function which is<br />
more effective than the standard soft stop, reducing fluid<br />
surges or hammering in a pipe line system.<br />
This method reduces the motor speed, by controlling<br />
internal parameters in the motor as well as the output<br />
voltage in a close-loop system.<br />
A<br />
5<br />
Improvement in acceleration / deceleration<br />
é characteristics<br />
U<br />
I<br />
Being able to start by using the voltage ramp or alternatively<br />
by limiting current lets acceleration fit the load<br />
characteristics. Application of a pulse start may also be<br />
selected in cases of high static friction load.<br />
Braking may be made by cutting-off power or by stop ramp,<br />
and it is also possible to brake more energetically by feeding<br />
a DC current to the motor stator, so there are many ways to<br />
obtain the best possible deceleration.<br />
I L<br />
current limit<br />
nominal motor<br />
current<br />
t<br />
í Protected motor<br />
The soft starter protects the motor from overloads as well as<br />
from incorrect operating conditions such as loss of an input<br />
or output phase, blocked rotor, thyristor short circuit, etc.<br />
ó Digital technology<br />
1a Initial tension<br />
1 Acceleration<br />
2 Constant tension when<br />
motor current reaches its limit<br />
value<br />
3 Acceleration<br />
4 Fast increase of tension<br />
when motor reaches its<br />
nominal speed<br />
5 Nominal tension<br />
6 Soft stop (non linear):<br />
prevents water hammering<br />
in pump control<br />
The control system is based on the use of a highly<br />
specialized microcontroller by which signals are treated<br />
digitally, thereby avoiding deratings and adjustments<br />
common to analogue circuits and obtaining excellent<br />
precision and speed of execution.<br />
The control board is made with the technology of surface<br />
mounting devices (SMD), which increases equipment<br />
reliability.<br />
ú High level of immunity<br />
Design of the unit was closely tied to the conditions of<br />
supply lines, which handle more disturbance every day. The<br />
control signals are optoelectronically isolated and various<br />
levels of protection have been set up in the circuits to<br />
immunize the equipment against external disturbance and<br />
its effects.<br />
ò Advanced functions<br />
The <strong>ASTATplus</strong> includes advanced functions, like linear acceleration<br />
ramp, forward and reverse jog, programmable I/O or<br />
connection to a computer by serial communication (RS 232), all<br />
included as standard.<br />
These performances allows the incorporation of the soft starter<br />
to a distributed control net, in automated plant processes,<br />
together with other soft starters, programmable controllers,<br />
variable speed drives, etc.<br />
à Easy to run and adjust<br />
This unit can be used for a wide range of applications.<br />
Adjustments are very easy to make and diverse options may<br />
be selected to have equipment capabilities suited to<br />
application needs every time.<br />
è Easy maintenance due to full monitoring<br />
The signalling code based on alphanumeric display, makes<br />
the equipment working conditions known at any time and<br />
gives a quick diagnosis when protection security is violated.
<strong>ASTATplus</strong><br />
A<br />
6<br />
2. Types and powers<br />
2.1. IEC ratings (1)<br />
HEAVY DUTY LIGHT DUTY Type Weight<br />
Current 220V/ 380V/ 440V 480V/ Current 220V/ 380V/ 440V 480V/<br />
rating(2) 240V 415V 500V rating(3) 240V 415V 500V<br />
A kW(4) kW(4) kW(4) kW(4) A kW(5) kW(5) kW(5) kW(5) Kg. Lbs.<br />
Cooling with natural convection - IP20<br />
14 3 5.5 7.5 - 17 4 7.5 7.5 - QC1FDP 4.3 9.48<br />
3 5.5 7.5 7.5 4 7.5 7.5 11 QC2FDP 4.3 9.48<br />
17 4 7.5 7.5 - 21 5.5 11 11 - QC1GDP 4.3 9.48<br />
4 7.5 7.5 11 5.5 11 11 13 QC2GDP 4.3 9.48<br />
22 5.5 11 11 - 27 7.5 13 15 - QC1HDP 4.6 10.14<br />
5.5 11 11 15 7.5 13 15 15 QC2HDP 4.6 10.14<br />
32 7.5 15 18.5 - 38 10 18.5 22 - QC1IDP 4.6 10.14<br />
7.5 15 18.5 22 10 18.5 22 25 QC2IDP 4.6 10.14<br />
Cooling with fan - IP00<br />
48 13 22 22 - 58 15 25 30 - QC1JDP 12.5 27.56<br />
13 22 22 30 15 25 30 37 QC2JDP 12.5 27.56<br />
63 15 30 37 - 75 22 37 45 - QC1KDP 12.5 27.56<br />
15 30 37 37 22 37 45 45 QC2KDP 12.5 27.56<br />
72 20 37 37 - 86 25 45 50 - QC1LDP 17.0 37.48<br />
20 37 37 45 25 45 50 50 QC2LDP 17.0 37.48<br />
105 30 55 55 - 126 37 63 75 - QC1MDP 17.0 37.48<br />
30 55 55 75 37 63 75 80 QC2MDP 17.0 37.48<br />
156 40 75 90 - 187 55 90 110 - QC1NDP 45.0 99.20<br />
40 75 90 110 55 90 110 132 QC2NDP 45.0 99.20<br />
240 63 110 132 - 288 80 150 165 - QC1QDP 45.0 99.20<br />
63 110 132 160 80 150 165 200 QC2QDP 45.0 99.20<br />
315 90 160 200 - 378 110 200 220 - QC1RDP 55.0 121.3<br />
90 160 200 220 110 200 220 250 QC2RDP 55.0 121.3<br />
370 110 200 220 - 444 132 220 250 - QC1SDP 55.0 121.3<br />
110 200 220 250 132 220 250 315 QC2SDP 55.0 121.3<br />
475 150 250 250 - 570 160 300 355 - QC1TDP 80.0 176.4<br />
150 250 250 335 160 300 355 400 QC2TDP 80.0 176.4<br />
610 200 315 400 - 732 220 400 450 - QC1UDP 105.0 231.5<br />
200 315 400 400 220 400 450 500 QC2UDP 105.0 231.5<br />
850 250 450 530 - 1020 300 560 600 - QC1VDP 120.0 264.5<br />
250 450 530 600 300 560 600 750 QC2VDP 120.0 264.5<br />
1075 355 600 670 - 1290 395 715 750 - QC1XDP 150.0 330.7<br />
355 600 670 750 395 715 750 850 QC2XDP 150.0 330.7<br />
(1) Ratings in Amps. given for ambient temperature up to 40ªC and 1000m altitude<br />
Derate output current by 1,5% / ºC above 40ºC.<br />
Derate output current by 1% / 100m above 1000m<br />
(2) Heavy duty ratings, IEC Class 10 and 20 protections allowed<br />
(3) Light duty ratings, only IEC Class 10 protection allowed.<br />
(4) Maximum recommended Motor <strong>Power</strong> for IEC Class 20 protection. Set ASTAT's parameters "N" and "o" accordingly<br />
(5) Maximum recommended Motor <strong>Power</strong> for IEC Class 10 protection. Set ASTAT's parameters "N" and "o" accordingly
<strong>ASTATplus</strong><br />
2.2. UL ratings<br />
Current Max. HEAVY DUTY STANDARD DUTY Type Weight<br />
rating starting 200V 230V 460V 200V 230V 460V<br />
current<br />
A A HP HP HP HP HP HP Kg. Lbs.<br />
Cooling with natural convection - IP00<br />
14 70 3 3 - 3 3 - QC1FDP 4.3 9.48<br />
- - 7.5 - - 7.5 QC2FDP 4.3 9.48<br />
17 85 3 3 - 3 3 - QC1GDP 4.3 9.48<br />
- - 10 - - 10 QC2GDP 4.3 9.48<br />
22 110 5 7.5 - 5 7.5 - QC1HDP 4.6 10.14<br />
- - 15 - - 15 QC2HDP 4.6 10.14<br />
34 170 7.5 7.5 - 10 10 - QC1IDP 4.6 10.14<br />
- - 20 - - 25 QC2IDP 4.6 10.14<br />
Cooling with fan - IP00<br />
48 240 10 15 - 15 15 - QC1JDP 12.5 27.56<br />
- - 30 - - 30 QC2JDP 12.5 27.56<br />
63 315 15 20 - 20 20 - QC1KDP 12.5 27.56<br />
- - 40 - - 40 QC2KDP 12.5 27.56<br />
72 360 20 20 - 20 25 - QC1LDP 17.0 37.48<br />
- - 40 - - 50 QC2LDP 17.0 37.48<br />
105 525 30 30 - 30 30 - QC1MDP 17.0 37.48<br />
- - 60 - - 75 QC2MDP 17.0 37.48<br />
156 780 40 50 - 50 60 - QC1NDP 45.0 99.20<br />
- - 100 - - 125 QC2NDP 45.0 99.20<br />
240 1200 60 75 - 75 75 - QC1QDP 45.0 99.20<br />
- - 150 - - 200 QC2QDP 45.0 99.20<br />
315 1575 75 100 - 100 125 - QC1RDP 55.0 121.25<br />
- - 200 - - 250 QC2RDP 55.0 121.25<br />
370 1850 100 125 - 125 150 - QC1SDP 55.0 121.25<br />
- - 250 - - 300 QC2SDP 55.0 121.25<br />
500 2500 150 150 - 150 200 - QC1TDP 80.0 176.36<br />
- - 350 - - 400 QC2TDP 80.0 176.36<br />
630 3150 200 200 - 200 250 - QC1UDP 105.0 231.47<br />
- - 400 - - 500 QC2UDP 105.0 231.47<br />
850 4250 250 300 - 300 350 - QC1VDP 120.0 264.54<br />
- - 600 - - 700 QC2VDP 120.0 264.54<br />
A<br />
7
<strong>ASTATplus</strong><br />
2.3. Thermal characteristics<br />
A<br />
8<br />
The <strong>ASTATplus</strong> allows motor protection according IEC Class 10 or Class 20 and Nema 10, 20 or 30, free selectable by<br />
parameter "o" -overload-<br />
IEC Class 10 IEC Class 20<br />
COLD<br />
COLD<br />
HOT<br />
HOT<br />
Nema 10 Nema 20<br />
COLD<br />
COLD<br />
HOT<br />
HOT<br />
Nema 30<br />
Thermal memory<br />
If the control voltage is not removed, the unit has a cool<br />
down characteristic, being the cool down time 300 sec. after<br />
the overload trip.<br />
If the control voltage is removed after tripping, you must<br />
wait, at least, 2 minutes before the unit can be restarted.<br />
COLD<br />
Operations per hour<br />
Supposing a cycle T, with starting time of t1, running time of<br />
T-2t1 at rated current and OFF time of t1 sec. at least, the<br />
<strong>ASTATplus</strong> allows the following operations per hour.<br />
Starting Operations / Hour. Operations / Hour<br />
current Starting time t1= 10sec. Starting time t1=20 sec.<br />
HOT<br />
2 x Ir 180 90<br />
3 x Ir 160 60<br />
4 x Ir 30 10
<strong>ASTATplus</strong><br />
3. Technical specifications<br />
3.1. General specifications<br />
Voltage ratings 3ph AC systems Up to 440V, +10%, -15% for QC1xDP <strong>ASTATplus</strong> series<br />
Up to 500V, +10%, -15% for QC2xDP <strong>ASTATplus</strong> series<br />
Freq. range 50/60 Hz Control range of 45-65 Hz<br />
Control Control system Digital system with microcontroller<br />
specifications<br />
Starting ramp with progressive increase in voltage and current limitation<br />
Initial voltage (pedestal) % 30 - 95 Un<br />
A<br />
9<br />
Starting torque % 10 - 90 Mdirect start<br />
Kick start % 95 Un (90% Mdirect start), adjustable 0 to 999 ms<br />
Motor current (Im)<br />
0,4 to 1,2 Ir (rated ASTAT current)<br />
Current limitation<br />
1 to 7 In<br />
Acceleration ramp time 1 to 99 s (types: standard or linear ramp up)<br />
Energy savings<br />
Output voltage reduction according to power factor<br />
Override<br />
Fixed output voltage permanently equal to supply voltage<br />
Bypass<br />
Direct control of a bypass contactor<br />
Brake time by ramp 1 to 120 s (1 to 99 in secondary ramp) adjustable independently of starting<br />
ramp time (types: standard, pump control or linear ramp down)<br />
DC braking<br />
0 to 99 s. ; 0,5 to 2,5In<br />
Slow speed Direct torque: 7% or 14% of nominal speed; reverse torque: 20%<br />
of nominal speed<br />
Retry<br />
0 to 4 attemps, and 1 to 99 sec. retry time<br />
Monitoring<br />
Motor current, line voltage, power, power factor and elapsed time<br />
Operation External control Start - Stop<br />
Acceleration phase Adjustable time<br />
Permanent phase<br />
Energy savings / Override choice<br />
Stop phase<br />
<strong>Power</strong> cut-off / Ramp / DC braking/Pump control<br />
Inputs / Outputs Inputs 4 digital optocoupled. Two fixed (Start , Stop) , and 2 programmable (I3, I4)<br />
1 Analog 0-5VDC for Tachogenerator input feedback<br />
Outputs 3 programmable relays, (1r, 2r, 3r)<br />
1 Analog 0-10VDC output for current metering<br />
Protections Current limit Adjustable from 1 In to 7 In<br />
Overload<br />
IEC class 10 and 20 ; NEMA class 10,20 and 30 all selectable<br />
Cool-down time after<br />
overload trip<br />
300 s<br />
Loss on input phase Trip at 3 s<br />
Thyristor short circuit Trip at 200 ms<br />
Radiator overheating Trip at 200 ms<br />
Motor thermistor<br />
Trip at 200 ms if thermistor impedance > response value<br />
Loss on output phase Trip at 3 s<br />
Stalled rotor<br />
Trip at 200 ms<br />
Supply frequency error (Hz) If f < 45 or f > 65, will not start<br />
Overcurrent<br />
100 to 150% In; trip time adjustable from 0 to 99 sec.<br />
Undercurrent<br />
0 to 99% In; trip time adjustable from 0 to 99 sec.<br />
Overvoltage<br />
100 to 130% Un; trip time adjustable from 0 to 99 sec.<br />
Undervoltage<br />
0 to 50% Un; trip time adjustable from 0 to 99 sec.<br />
Error (CPU)<br />
60 ms<br />
Memory<br />
4 former errors<br />
Long start time<br />
2 s x ta (ta = acceleration ramp time)<br />
Long slow speed time 120 s
<strong>ASTATplus</strong><br />
A<br />
10<br />
Environmental Temperature 0 to +55 ºC (derate output current by 1,5% / ºC above 40ºC)<br />
conditions Relative humidity 95% without condensation<br />
Maximum altitude 3000 m (derate output current by 1% / 100m above 1000m)<br />
Mounting position<br />
Vertical<br />
Protection Degree<br />
IP00, UL open<br />
Standards CE, cUL, UL CE Conforming IEC 947-4-2; UL, cUL conforming to UL508<br />
Conducted &<br />
Conforming IEC 947 -4-2, Class A<br />
Radiated emissions<br />
Electrostatic discharges Conforming to IEC 1000-4-2, level 3<br />
Radioelectric interference Conforming to IEC 1000-4-6, level 3 and to IEC 1000-4-3, level 3<br />
Immunity to fast trasients Conforming to IEC 1000-4-4, level 3<br />
Immunity to Surge Voltage Conforming to IEC 1000-4-5, level 3<br />
3.2. I/O terminal board specifications<br />
<strong>Power</strong> I/O terminals<br />
Terminal Function Description<br />
1L1, 3L2, 5L3 Mains Input 3ph input voltage according <strong>ASTATplus</strong> type.<br />
2T1, 4T2, 6T3 Motor output Output terminals to 3ph AC motor<br />
A1, A2, B1, B2 Input Control 110/120V AC, +10%, -15%: 220/240V AC, +10%, -15%:<br />
Voltage<br />
A1 A2 B1 B2 A1 A2 B1 B2<br />
Digital inputs<br />
Terminal Function Description<br />
57 Common for digital This is a common terminal for the digital input terminals specified below.<br />
inputs<br />
1 Run Run order. Command signal may be provided by one NO free voltage pushbutton<br />
to terminals 1 and 57.<br />
2 Stop Stop order. Command signal may be provided by one NC free voltage push-button<br />
to terminals 2 and 57.<br />
Note: Run/Stop permanent command is allowed linking 1-57 and using one dry<br />
NO contact to 2-57 terminals.<br />
3 Programmable These two inputs are programmable. Can be assigned to the following internal<br />
input I3<br />
functions<br />
4 Programmable -soft stop -DC brake -Linear Ramp<br />
input I4 -pump control -slow speed control -dual ramp selection<br />
-kick start -reverse slow speed -bypass function<br />
-override<br />
-local / remote control<br />
Command signal should be provided by one NC dry contact to terminals 57-3 or<br />
terminals 57-4. By switching<br />
ON / OFF this contact, is possible to enable or disable the assigned function.
<strong>ASTATplus</strong><br />
Digital outputs<br />
Terminal Function Description<br />
11, 12, 14 Programmable 11-12 = NC, 11-14 = N.O. dry contacts. This relay can be assigned to several<br />
relay1r<br />
internal output functions. (page A.12)<br />
As default assigned to function RUN<br />
23, 24 Programmable 23-24 = N.O. free voltage contact. This relay can be assigned to several internal<br />
relay 2r<br />
output functions. (page A.12)<br />
As default assigned to function EOR<br />
33, 34 Programmable 33-34 = N.O. free voltage contact. This relay can be assigned to several internal<br />
relay 3r<br />
output functions. (page A.12)<br />
As default assigned to function DC BRAKE<br />
Common for all relay output contacts<br />
Maximum usage voltage: 380VAC (B300 UL)<br />
Thermal current: 8A.<br />
AC-15 use:<br />
220V/3A, 380V/1A<br />
DC-15 use: 30V max/ 3.5A<br />
Analog I/O<br />
Terminal Function Description<br />
8 Analog input This is a common terminal for the analog input terminal number 7.<br />
common<br />
7 TG feedback input 0-5V analog input for speed feedback. It should be provided by a DC tacho-generator<br />
coupled to the motor.<br />
This speed feedback signal is required when the "linear ramp" function is used.<br />
9 Current Output 0-10V DC analog Output for current measurement purpose.<br />
Ir correspond to 2V DC<br />
Load Impedance 10K/ or higher<br />
Motor thermistor terminals<br />
Terminal Function Description<br />
5 , 6 Motor thermistor This input allows a motor thermistor with a response value from 2,8 to 3,2K/,<br />
input<br />
and a reset value from 0,75 to 1K/ to control motor temperature.<br />
When the motor thermistor is not used, a link must be used in terminals 5-6.<br />
Communications<br />
Terminal Function Description<br />
SG, TD, RD Gr, Tx, Rx data RS232C, 3 wires, half duplex. Maximum cable length 3mts (10 feet)<br />
Asynchronous data transmission, 9600 Bauds, 1 bit start, 8 bits data, 2 bits stop.<br />
No parity<br />
ASCII and ModBus RTU protocols selectable from keypad as standard<br />
(Check appendix 6.2). Profibus DP and DeviceNet by external optional accessory<br />
A<br />
11
<strong>ASTATplus</strong><br />
A<br />
12<br />
3.3. I/O wiring<br />
<strong>ASTATplus</strong>'s terminal layout and wiring configuration is shown in the diagram of bellow<br />
(1)<br />
(1)<br />
(3)<br />
(2)<br />
(4)<br />
~<br />
(4)<br />
(4)<br />
(1) Control and Mains wiring recommendations are given in chapter 5.<br />
(2) The programmable inputs I3, I4 are not assigned to any function as default. Check page A15 prior to using these inputs.<br />
(3) The programmable relay outputs are assigned to the following functions as default:<br />
Relay (1r): RUN, (RUN status)<br />
Relay (2r): EOR, (End of Ramp)<br />
Relay (3r): DCBR, (DC Braking control)<br />
(4) Important: Use dry contacts only
<strong>ASTATplus</strong><br />
3.4. Operating modes<br />
Starting and Stopping<br />
Initial ramp<br />
1<br />
5 main frequency cycles<br />
A<br />
13<br />
Initial voltage (pedestal)<br />
1a<br />
30 to 95% Un (adjustable)<br />
Kick start<br />
2<br />
95% Un. Enabled by parameter “Pxxx” to ON<br />
Acceleration ramp (tramp)<br />
3<br />
Voltage ramp up from1 to 99s (adjustable). Dual ramp possibility<br />
Linear speed ramp by tacho feedback also possible<br />
3a<br />
Fast increase of output voltage when motor gets rated speed<br />
Current limit<br />
4<br />
1 to 7 In<br />
Permanent state<br />
5<br />
Rated voltage (Override)<br />
5a<br />
Rated current<br />
6<br />
Energy savings. Enabled by “Fxxx” to OFF<br />
Stopping modes (All selectable)<br />
7<br />
Motor power cut-off. “Sxxx” to OFF, “Cxxx” to OFF<br />
8<br />
Deceleration ramp 1 to 120s (adjustable). Secondary ramp 1 to 99 s<br />
Ramp dowm modes available are:<br />
- Soft Stop -Voltage ramp down-. Enabled by “Sxxx” to ON<br />
- Pump control. Selectable by “Sxxx” to ON and “Cxxx” to ON<br />
- Linear ramp down (Tacho feedback needed)<br />
8a<br />
Evolution of current in deceleration ramp mode<br />
9<br />
DC brake (0 to 99s adjustable). Enabled by “Bxxx” to ON<br />
Starting by voltage ramp<br />
Starting by current limitation<br />
Override<br />
Override<br />
Energy savings<br />
Energy savings
<strong>ASTATplus</strong><br />
A<br />
14<br />
Jog and linear ramp<br />
Linear acceleration and<br />
deceleration ramp<br />
Low slow (7%) and<br />
High slow (14%) speeds<br />
Reverse slow speed (20%)<br />
Slow speed (7% or 14%)<br />
Ramp time adjustable (Selectable by parameter “Dxxx” to ON<br />
Enabled by parameter “Jxxx” to ON and “jxxx” to LO or HI<br />
Enabled by parameter “Jxxx” to ON and "rxxx" to ON<br />
Enabled by parameter “Jxxx” to ON<br />
Acceleration ramp 5<br />
Ramp time adjustable<br />
Soft stop (deceleration ramp)<br />
6<br />
Ramp time adjustable<br />
Slow speed (7% or 14%)<br />
7<br />
Enabled by parameter “Jxxx” to ON<br />
DC Brake<br />
1<br />
2<br />
3a<br />
4<br />
8<br />
1a<br />
3<br />
Current and time adjustables,<br />
Enabled by parameter Bxxx to ON, and bxx, Ixxx adjustments<br />
Linear ramp with T.G. feedback<br />
Slow speed. Basic diagram<br />
N/Nn<br />
1<br />
N/Nn<br />
1<br />
1<br />
1a<br />
t<br />
0,14<br />
0,07<br />
-0,20<br />
3<br />
2<br />
3a<br />
t<br />
Slow speed. Full diagram<br />
N/Nn<br />
1<br />
5 6<br />
4<br />
7<br />
8<br />
TERMINALS<br />
Closed<br />
4-57<br />
Open<br />
t<br />
Closed<br />
1-57<br />
Open<br />
Closed<br />
2-57<br />
Open<br />
t
○ ○ ○ ○ ○ ○ ○ ○<br />
○ ○ ○ ○ ○ ○ ○ ○ ○ ○ ○<br />
○ ○ ○ ○ ○ ○ ○ ○ ○ ○ ○<br />
○ ○ ○ ○ ○ ○ ○ ○ ○ ○ ○<br />
○ ○ ○ ○ ○ ○ ○ ○<br />
○ ○ ○ ○ ○ ○ ○ ○<br />
<strong>ASTATplus</strong><br />
Programmable inputs and functions<br />
The <strong>ASTATplus</strong> functions like Soft stop, kick start, and etc, can be enabled or disabled by setting ON or OFF in their<br />
dedicated parameters, using the facilities provided by the keypad. Most of these functions can be enabled or disabled<br />
remotely as well, through the programmable inputs I3 or I4 (terminals board 3-57 and 4-57).<br />
Function<br />
Soft Stop<br />
Pump Control<br />
Kick Start<br />
Override<br />
By-pass<br />
DC Brake<br />
Linear Ramp<br />
(Jog). Slow Speed<br />
Reverse Jog<br />
Dual motor<br />
Remote Control<br />
Parameter<br />
S x x x<br />
C x x x<br />
P x x x<br />
F x x x<br />
z x x x<br />
B x x x<br />
D x x x<br />
J x x x<br />
r x x x<br />
A x x x<br />
X x x x<br />
Set Value<br />
_<br />
_<br />
O F F<br />
O N<br />
_ I 3<br />
_ I 4<br />
<br />
The function is permanently disabled<br />
The function is permanently enabled<br />
The status of the function depends on ASTAT's I3 input<br />
The status of the function depends on ASTAT's I4 input<br />
Note: One programmable input may enable or<br />
disable more than one function<br />
A<br />
15<br />
More than one function can be enabled in the <strong>ASTATplus</strong>, either by the keypad or through the programmable inputs I3 and I4,<br />
but there are some functions which may not work as expected during stopping, when are simultaneously enabled. The<br />
priority when two or more of the below functions are simultaneously enabled is defined in the following table,<br />
Condition<br />
DC Brake (B=ON) a b c<br />
Linear Ramp (S, D=ON) a a a<br />
Soft Stop (S=ON) b a c<br />
Pump Control (S, C=ON) c a c <br />
Action<br />
a The Unit stops by Linear Ramp<br />
b The unit stops by DC brake after the Soft Stop is completed.<br />
c The unit stops by Pump Control<br />
DC Brake (B=ON)<br />
Linear Ramp (S, D=ON)<br />
Soft Stop (S=ON)<br />
Pump Control (S, C=ON)<br />
Programmable relay outputs<br />
The <strong>ASTATplus</strong> includes three programmable relays 1r, 2r and 3r, (dry contacts).<br />
ASTAT terminals are 11-12-14, 23-24 and 33-34<br />
These relays can be assigned to several functions, as shown bellow<br />
Set Value<br />
<br />
Relay N#<br />
Relay 1r<br />
Relay 2r<br />
Relay 3r<br />
Parameter<br />
1 r x x<br />
1 r x x<br />
3 r x x<br />
20<br />
21<br />
22<br />
23<br />
24<br />
25<br />
26<br />
27<br />
28<br />
29<br />
30<br />
EOR Detects end of voltage ramp. -Only can be asigned to relay 2r-<br />
DC Brake DC Brake command -Only can be assigned to relay 3r-<br />
Fault Detects ASTAT's fault status<br />
Undervoltage Detects limit set in parameter UVxx<br />
Overvoltage Detects limit set in parameter OVxx<br />
RUN Detects ASTAT's run status<br />
JOG Detects Jog (slow speed) status<br />
Undercurrent Detects limit set in parameter UCxx<br />
Overcurrent Detects limit set in parameter OCxx<br />
Disables the relay function<br />
Future use
<strong>ASTATplus</strong><br />
A<br />
16<br />
4. Programming<br />
4.1. Keypad and display description<br />
Display 1<br />
Displays Monitoring, Status indications, error messages and function set values<br />
Display Structure<br />
F V V V Status code<br />
F V V V Error code<br />
F F/V V V function code (*)<br />
Function code<br />
Data<br />
O N Equipment is connected<br />
to main supply<br />
(equipment is ON)<br />
S T O P Stop<br />
L O C K Remote stop<br />
P U L S Kick start<br />
R A M P Acceleration ramp<br />
F U L L Full conduction or<br />
Override<br />
S A V E Energy saving<br />
S O F T Soft stop<br />
P U M P Pump control<br />
D C B K DC braking<br />
I N C H Inching / slow speed<br />
T A C H Linear ramp (tacho)<br />
E 0 1 0 Frequency out of range<br />
E 0 1 1 Overload trip<br />
E 0 1 3 Loss of synchronism<br />
E 0 1 4 Phase U scr<br />
E 0 1 5 Phase V scr<br />
E 0 1 6 Phase W scr<br />
E 0 1 7 Heatsink overtemperature<br />
E 0 1 8 Motor thermistor<br />
E 0 1 9 Phase U lost<br />
E 0 2 0 Phase V lost<br />
E 0 2 1 Phase W lost<br />
E 0 2 2 Stalled rotor<br />
E 0 2 3 Internal error<br />
E 0 2 5 Long start time<br />
E 0 2 6 Long slow speed time<br />
E 0 2 7 Lock-out<br />
E 0 2 8 Undervoltage<br />
E 0 2 9 Overvoltage<br />
E 0 3 0 Undercurrent<br />
E 0 3 1 Overcurrent<br />
E 0 3 2 Retry, attempts exceeded<br />
M x x x Motor current<br />
v x x x Software Version<br />
. .<br />
. .<br />
P F x x <strong>Power</strong> Factor<br />
. .<br />
. .<br />
L x x x Limit current<br />
T x x x Starting Torque<br />
a x x x Ramp up time<br />
d x x x Ramp down time<br />
S x x x Soft Stop selection<br />
. .<br />
. .<br />
L K x x Lock out<br />
. .<br />
. .<br />
(*)These are examples. Full details in<br />
sections 4.2 on page A17, 4.3 on<br />
page A19, 4.4 on page A20, 4.5 on<br />
page A21 and 4.6 on page A23<br />
Keypad 2<br />
Allows setting of parameters and functions<br />
SELECTION<br />
Use with B or D to select the parameter or<br />
function code to be displayed and/or<br />
modified<br />
SEARCH / ADJUSTMENT<br />
Decreases the value of the selected parameter<br />
SEARCH / ADJUSTMENT<br />
Increases the value of the selected parameter<br />
ENTER / SAVE<br />
- Introduces the new parameter value into<br />
memory<br />
- Updates the selected parameter value with<br />
the displayed value
<strong>ASTATplus</strong><br />
4.2. Parameters blocks configuration<br />
Mode selection<br />
The <strong>ASTATplus</strong> includes a large number of parameters which are<br />
divided in four blocks: Monitor, Calibration, Basic and Advanced.<br />
The parameters of each group can be displayed or skipped<br />
according the selection done in parameter “G”.<br />
The monitor parameters are always displayed regardless of the<br />
mode selected<br />
Settings in parameter “G”<br />
Gxxx The Monitor parameters are always displayed,<br />
whichever are the settings in parameter “G”.<br />
GCAL The Calibration parameters are displayed<br />
GBAS The Basic parameters are displayed<br />
GADV The Advanced parameters are displayed<br />
GALL All parameters are displayed<br />
Monitoring<br />
parameters<br />
G ALL<br />
G CAL<br />
G BAS<br />
G ADV<br />
Calibration<br />
parameters<br />
Basic<br />
parameters<br />
Advanced<br />
parameters<br />
A<br />
17<br />
Searching and setting parameters<br />
The <strong>ASTATplus</strong> displays the parameters sequentially while depresing the key and pushing repeteadly or keys.<br />
Proceed in this way untill the parameter “G” is displayed.<br />
C / V<br />
There is a quick way to search automatically the parameter “G” by pressing and Keys. “Gxxx” will be shown on the<br />
display.<br />
C / V<br />
Once the parameter “G” is displayed, choose the value desired by pressing or Keys. The display will sequence<br />
“GBAS”, “GCAL”, “GADV” and<br />
“GALL” values repeatedly. The actual value displayed can be stored in a temporal memory buffer by pressing<br />
key.<br />
Values stored in the temporal memory are lost upon control power loss, unless these are saved in the permanent E2PROM<br />
memory through parameter “W”. Additional indications are given on page 4-4<br />
The above is an example given for parameter “G”, but all <strong>ASTATplus</strong> parameters can be modified from its default factory<br />
value proceeding in similar way.<br />
Parameter layout<br />
Monitor parameters<br />
Status Shown automatically ON, STOP, LOCK, PULS, ...<br />
(see page A.16)<br />
M Motor Current<br />
v<br />
Software Version<br />
C / V<br />
+<br />
V<br />
PF<br />
w<br />
E<br />
e<br />
K<br />
W<br />
G<br />
Line Voltage<br />
Line <strong>Power</strong> Factor<br />
Line <strong>Power</strong><br />
Elapsed time<br />
Fault history Buffer<br />
Password<br />
E2PROM writting<br />
Parameter Block Selector<br />
e0, e1, e2, e3<br />
Calibration parameters<br />
U Line Voltage<br />
t Voltage Calibration<br />
UF Unit frame<br />
m Current Calibration<br />
N Motor rated current<br />
o Overload Protection<br />
100-500<br />
F,G ,H , ... ,X<br />
m<br />
40-120<br />
0, N1, N2, N3,C1,C2<br />
GBAS<br />
GADV GALL GCAL<br />
f<br />
Service Factor<br />
100-130<br />
1 2
<strong>ASTATplus</strong><br />
A<br />
18<br />
1 2<br />
Basic parameters<br />
Advanced parameters<br />
L<br />
Current Limit<br />
Unit<br />
%<br />
Range<br />
100-700<br />
LK<br />
Lock-out<br />
Unit<br />
minutes<br />
Range<br />
00-45<br />
T<br />
Starting Torque<br />
%<br />
010-090<br />
R<br />
E2PROM Reading<br />
ON, OFF<br />
a<br />
Ramp up time<br />
sec.<br />
01-99<br />
Q<br />
Factory Settings<br />
ON, OFF<br />
d<br />
Ramp down time<br />
mS<br />
01-120<br />
Y<br />
Retry<br />
n. attempts<br />
000-004<br />
p<br />
Kick Start<br />
sec.<br />
000-999<br />
y<br />
Retry time<br />
sec.<br />
001-099<br />
b<br />
DC Brake time<br />
sec.<br />
000-099<br />
UV<br />
Undervoltage<br />
%<br />
00-50<br />
I<br />
DC Brake current<br />
%<br />
050-250<br />
uv<br />
Undervoltage trip time<br />
sec.<br />
00-99<br />
S<br />
Soft Stop switch<br />
OFF, ON, I3, I4<br />
OV<br />
Overvoltage<br />
%<br />
00-30<br />
C<br />
Pump Control switch<br />
OFF, ON, I3, I4<br />
ov<br />
Overvoltage trip time<br />
sec.<br />
00-99<br />
ST<br />
SP<br />
Pump curve selection<br />
starting<br />
Pump curve selection<br />
stopping<br />
00-03<br />
00-05<br />
UC<br />
uc<br />
OC<br />
Undercurrent<br />
Undercurrent trip time<br />
Overcurrent<br />
%<br />
sec.<br />
%<br />
00-99<br />
00-99<br />
00-50<br />
P<br />
Kick Start Switch<br />
OFF, ON, I3, I4<br />
oc<br />
Overcurrent trip time<br />
sec.<br />
00-99<br />
F<br />
z<br />
B<br />
Override Switch<br />
By-pass Switch<br />
DC Brake Switch<br />
OFF, ON, I3, I4<br />
OFF, ON, I3, I4<br />
OFF, ON, I3, I4<br />
PON, PI3, PI4<br />
2a<br />
2d<br />
2t<br />
D<br />
Secondary Ramp up<br />
Secondary Ramp down<br />
Secondary Starting Torque<br />
Tacho control switch<br />
sec.<br />
sec.<br />
%<br />
01-99<br />
01-99<br />
10-90<br />
ON, OFF, I3, I4<br />
J<br />
Slow Speed switch<br />
OFF, I3, I4<br />
j<br />
Low / High slow speeds<br />
LO, HI<br />
r<br />
Reverse slow speed<br />
OFF, ON, I3, I4<br />
A<br />
Dual motor switch<br />
OFF, ON, I3, I4<br />
X<br />
Remote control<br />
OFF, ON, I3, I4<br />
XP<br />
S<br />
Comm Protocol selection 00-02<br />
Station number 001-247<br />
1r<br />
2r<br />
3r<br />
Output relay 1r<br />
Output relay 2r<br />
Output relay 3r<br />
22-30<br />
20, 22-30<br />
21, 22-30
<strong>ASTATplus</strong><br />
4.3. Monitor block parameters<br />
Display<br />
ON<br />
Status<br />
Function<br />
Default Range Unit<br />
ON<br />
ON<br />
STOP<br />
LOCK<br />
PULS<br />
RAMP<br />
FULL<br />
SAVE<br />
SOFT<br />
PUMP<br />
DCBK<br />
INCH<br />
TACH<br />
-<br />
-<br />
-<br />
-<br />
-<br />
-<br />
-<br />
-<br />
-<br />
-<br />
-<br />
-<br />
Description<br />
Switch on time. Equipment is connected to<br />
main supply<br />
Stop<br />
Remote control through serial port.<br />
Kick start<br />
Acceleration ramp<br />
Full conduction / Override (full voltage)<br />
Energy saving<br />
Soft stop<br />
Pump control<br />
DC braking<br />
Inching / slow speed<br />
Linear ramp (tacho feedback needed)<br />
A<br />
19<br />
M x x x<br />
Motor current<br />
000-999<br />
1.0-9.9<br />
A<br />
kA<br />
%<br />
Displays motor current in Amps.<br />
Current higher than 999A is displayed in kA<br />
If parameter UFxx is not calibrated, the motor<br />
current is displayed in %N<br />
v x x x<br />
Software version<br />
-<br />
-<br />
xxx = Version number<br />
V x x x<br />
Main Source voltage<br />
-<br />
V<br />
Displays line voltage in volts.<br />
P F x x<br />
<strong>Power</strong> factor<br />
00-99<br />
%<br />
Displays line power factor<br />
w x x x<br />
Line power<br />
-<br />
kW<br />
Displays line power<br />
E x x x<br />
Elapsed time<br />
-<br />
Hrs<br />
Displays RUN time in hours (x 1000)<br />
e x x x<br />
Error trace buffer<br />
e0xx-e3xx<br />
-<br />
Saves the last four errors<br />
e0xx: Fault 1 -Latest fault- xx: Fault code error<br />
e1xx: Fault 2<br />
e2xx: Fault 3<br />
e3xx: Fault 4<br />
K x x x<br />
Password<br />
K 0 0 0<br />
000-999<br />
-<br />
= 69 allows E2PROM writing operation<br />
= 10 Key lock enabled<br />
= 20 Key lock disabled<br />
W x x x<br />
E2PROM writing<br />
W OF F<br />
ON, OFF<br />
-<br />
Saves the unit current parameters to the<br />
E2PROM<br />
This rewrites the last values saved<br />
G x x x<br />
Parameter display<br />
selection<br />
G B A S<br />
CAL, BAS,<br />
ADV, ALL<br />
-<br />
CAL:<br />
BAS:<br />
ADV:<br />
ALL:<br />
Displays calibration parameters<br />
Displays basic parameters<br />
Displays advanced parameters<br />
Displays all parameters<br />
Note: The monitor block parameters are<br />
always displayed
<strong>ASTATplus</strong><br />
A<br />
20<br />
4.4. Calibration block parameters -CAL-<br />
Display<br />
U x x x<br />
Function<br />
Line voltage<br />
setting<br />
Default Range Unit<br />
U 4 0 0<br />
100-500<br />
V<br />
Description<br />
Line Voltage from 100 to 500V. Set rated value<br />
t<br />
x x x<br />
Voltage<br />
calibration<br />
t 4 0 0<br />
000-600<br />
V<br />
Setting of this parameter allows better accuracy<br />
in monitoring or voltage protections. (Check the<br />
voltage calibration procedure) (1)<br />
U F<br />
x<br />
Unit frame<br />
U F 0<br />
F, G, H, I, J, K, L,<br />
M, N, Q, R, ...X<br />
-<br />
Unit frame rating (F,G,H,...X)<br />
Setting “0” disables calibration<br />
m x x x<br />
Current<br />
calibration<br />
m 0 0 0<br />
000-1000<br />
A<br />
Setting of this parameter allows better accuracy<br />
in monitoring or current protections. (Check the<br />
current calibration procedure) (2)<br />
N x x x<br />
Motor rated<br />
current<br />
N 1 0 0<br />
040-120<br />
%<br />
100 x I motor/ I unit ratio<br />
When this parameter is adjusted at a value<br />
higher than 105% the overload protection curve<br />
is automatically adjusted to Class 10. “C1”, or<br />
to Nema 20 “N2”<br />
o x x x<br />
Overload<br />
protection<br />
o C 1<br />
OFF<br />
N1, N2, N3,<br />
C1, C2<br />
-<br />
Selects either the following overload curves<br />
OFF: Overload protection disabled<br />
(external overload relay must be used)<br />
N1: Nema 10<br />
N2: Nema 20<br />
N3: Nema 30<br />
C1: Class 10<br />
C2: Class 20<br />
f<br />
x x x<br />
Service factor<br />
f 1 0 0<br />
100-130<br />
%<br />
Allows motor service factor. Applicable for<br />
Nema ratings<br />
(1) Voltage calibration procedure<br />
When the unit is installed on site or after PCB's replacement the voltage measurements may have accuracy of 10%. To<br />
improve the Voltage measurement accuracy up to 3% proceed as follow.<br />
1. Switch on the ASTAT and measure the RMS voltage on phases 1L1-3L2 using a calibrated voltmeter<br />
2. Search the parameter “txxx”, set the voltage measured and save this value by the key.<br />
It is not necessary to rewrite the E2PROM to make permanent the new setting, the <strong>ASTATplus</strong> does this automatically.<br />
3. Once the ASTAT has been calibrated, this operation does not need to be repeated. Note however that the parameter<br />
“txxx” will show the latest entry, which may differ from the actual voltage value.<br />
(2) Current calibration procedure<br />
When the unit is installed on site or after PCB's replacement the current measurements may have accuracy of 10%. To<br />
improve the Current measurement accuracy up to 3% proceed as follow.<br />
1. Search parameter “UF x” and enter the right ASTAT's frame type letter. (“F”, “G”, “H”, ..etc.)<br />
2. Start the motor, and measure the rms motor current using a calibrated Ammeter.<br />
This measurement must be done after complete the starting, once the motor current has been stabilized.<br />
3. Search the parameter “mxxx”, set the current measured and save this value by the enter's keypad key. It is not<br />
necessary to rewrite the E2PROM to make permanent the new setting, the <strong>ASTATplus</strong> do this automatically.<br />
Note: Set real current measured while motor is running. DO NOT enter motor nameplate current rating.<br />
4. Once the ASTAT has been calibrated, this operation does not need to be repeated. Note however that the parameter<br />
“mxxx” will show the latest entry, which may differ from the actual current value.
<strong>ASTATplus</strong><br />
4.5. Basic block parameters. -BAS-<br />
4.5.1. Basic functions<br />
Display Function Default Range Unit<br />
Description<br />
A<br />
21<br />
L x x x<br />
Current limit<br />
L 3 5 0<br />
100-700<br />
%<br />
Sets Device current limit. Sets motor current<br />
limit if parameter “N” is properly adjusted.<br />
The maximum range setting is automatically<br />
calculated by the unit according the following<br />
expression:<br />
Max Limit = 450 / N (max allowed is 700%)<br />
N is the motor capacity / unit capacity ratio<br />
adjusted in parameter “Nxxx”.<br />
T<br />
x x<br />
Starting torque<br />
t 2 0<br />
10-90<br />
%<br />
Sets the initial voltage applied to the motor<br />
a<br />
x x<br />
Ramp up time<br />
a 2 0<br />
01-99<br />
sec.<br />
Sets Voltage ramp up time. Motor acceleration<br />
time will depend of load conditions.<br />
d x x x<br />
Ramp down time<br />
d 0 2 0<br />
001-120<br />
sec.<br />
Sets Voltage ramp down time. Motor deceleration<br />
time will depend of load conditions.<br />
Enabled only if the parameter “Sxxx” is ON<br />
p x x x<br />
Kick start<br />
p 0 0 0<br />
000-999<br />
ms.<br />
During the time adjusted, provides 95% of full<br />
voltage to motor at starting time. Useful for<br />
high static-friction loads<br />
Enabled only if the parameter “Pxxx” is ON<br />
b<br />
I<br />
x x<br />
x x x<br />
DC brake time<br />
DC brake<br />
current<br />
b 0 0<br />
I 0 5 0<br />
00-99<br />
050-250<br />
sec.<br />
%<br />
Provides DC braking at stopping time.<br />
Enabled only if the parameter “Bxxx” is ON<br />
(1) CAUTION<br />
If Pump Control is<br />
enabled (C=ON), the<br />
“Kick Start” and “DC<br />
Brake” functions are<br />
automatically disabled,<br />
so the parameters “p”,<br />
“b” and “I” are now used<br />
to set PID Pump Control<br />
algorithm<br />
Function Display Description<br />
Load detection<br />
Proportional control<br />
Integral time control<br />
p x x x<br />
b x x x<br />
I<br />
x x x<br />
x x x = 0 - 25<br />
x x x = 0 - 20<br />
(default = 0 in 50Hz P. Source)<br />
(default = 15 in 60Hz P. Source)<br />
(default = 10)<br />
x x x = 50 - 75 (default = 50)
<strong>ASTATplus</strong><br />
4.5.2. Programmable basic functions<br />
A<br />
Display<br />
Function<br />
Default<br />
Range<br />
Description<br />
22<br />
S x x x<br />
Soft stop selector<br />
S O F F<br />
OFF, ON, I3, I4<br />
Enables or disables all modes of Soft stop<br />
C x x x<br />
Pump control<br />
selector<br />
C O F F<br />
OFF, ON, I3, I4<br />
Enables the Pump control function. Usefull to limit fluid<br />
hammering.<br />
The parameter "Sxxx" must also be enabled.<br />
NOTE: Parameters "p ", "b " and "I " are disabled while<br />
"C" is ON<br />
S T x x<br />
Pump curve<br />
selection at<br />
starting phase (*)<br />
S T 0 0<br />
00-03<br />
Choice of various pump control algorithms for starting<br />
phase.<br />
00: Voltage ramp up 01-03: Various pump algorithms<br />
S P x x<br />
Pump curve<br />
selection at<br />
stopping phase (*)<br />
S P 0 2<br />
00-05<br />
Choice of various pump control algorithms for stopping<br />
phase.<br />
00: Voltage ramp down 01-05: Various pump algorithms<br />
P x x x<br />
Kick start selector<br />
P O F F<br />
OFF, ON, I3, I4<br />
Enables or disables the KIck start function<br />
If Pump control function “P” is enabled, both Kick start<br />
and DC Brake functions are internally disabled<br />
F x x x<br />
Override selector<br />
F O F F<br />
OFF, ON, I3, I4<br />
When this function is enabled, the unit provides<br />
constant full voltage after starting, producing the lowest<br />
harmonic distortion. Note that the energy saving<br />
function is disabled when Override is enabled.<br />
z x x x<br />
By-pass selector<br />
z O F F<br />
OFF, ON, I3, I4<br />
This function provides control of an external by-pass<br />
contactor, significantly lowering heating losses and<br />
eliminating harmonics.<br />
When the By-Pass function “z” is enabled, the<br />
programmable relay output 2r is automatically assigned<br />
to this function, and must be used to control the<br />
external by-pass contactor<br />
B x x x<br />
DC Brake selector<br />
B O F F<br />
OFF, ON, I3, I4,<br />
PON, PI3, PI4<br />
Enables or disables the DC brake function<br />
When the DC Brake function “B” is enabled, the<br />
programmable relay output 3r is automatically assigned<br />
to this function.<br />
PON, PI3 or PI4 settings enable the DC Brake function<br />
just before starting the motor. This is usefull to stop a<br />
fan which is rotating in reverse at the starting time<br />
(*) – Curve 0 (both ST00, SP00): Standard voltage ramp up -starting- and ramp down -soft stop-<br />
– Curve 1 (both ST01, SP01): Pump Algorithm based on estimated average PF -power factor-, with large sampling period<br />
– Curve 2 (both ST02, SP02): Pump Algorithm based on instantaneous PF with short sampling period<br />
– Curve 3 (both ST03, SP03): Pump Algorithm based on estimated average PF with short sampling period<br />
– Curve 4 (SP04): As Curve 3, but with high accuracy on PF average estimation<br />
– Curve 5 (SP05): Pump Algorithm based on former ASTAT CD
<strong>ASTATplus</strong><br />
4.6. Advanced block parameters -ADV-<br />
4.6.1. Advanced functions<br />
Display Function Default Range Unit<br />
Description<br />
A<br />
23<br />
L K x x<br />
Lock-Out<br />
L K 0 0<br />
00-45<br />
min.<br />
Sets time between consecutive starts. Setting<br />
“0” disables this function.<br />
R x x x<br />
E2PROM reading<br />
R OF F<br />
ON, OFF<br />
-<br />
Loads the parameters from the E2PROM to the<br />
temporal buffer<br />
Q x x x<br />
Factory settings<br />
Q OF F<br />
ON, OFF<br />
-<br />
Loads default factory settings to the temporal<br />
buffer.<br />
Y<br />
y<br />
x<br />
x x<br />
Retry<br />
Retry time<br />
Y 0<br />
y 1 0<br />
0-4<br />
01-99<br />
-<br />
sec.<br />
Allows up to four tries of automatic restart<br />
after a fault.<br />
Setting “0” disables this function.<br />
Time between retries.<br />
U V x x<br />
u v x x<br />
Undervoltage<br />
Undervoltage trip<br />
time<br />
U V 0 0<br />
u v 2 0<br />
00-50<br />
00-99<br />
%<br />
sec.<br />
The unit trips if the line voltage decreases below<br />
the percentage set. Setting “0” disables<br />
this protection.<br />
Note: Calibrate parameter “U” before enabling<br />
this protection.<br />
Delay trip time<br />
OV x x<br />
o v x x<br />
Overvoltage<br />
Overvoltage trip<br />
time<br />
OV 0 0<br />
o v 2 0<br />
00-30<br />
00-99<br />
%<br />
sec.<br />
The unit trips if the line voltage increases above<br />
the percentage set. Setting “0” disables this<br />
protection.<br />
Note: Calibrate parameter “U” before enabling<br />
this protection.<br />
Delay trip time<br />
U C x x<br />
u c x x<br />
Undercurrent<br />
Undercurrent trip<br />
time<br />
U C 0 0<br />
u c 2 0<br />
00-99<br />
00-99<br />
%<br />
sec.<br />
The unit trips if the current decreases below<br />
the percentage set. Setting “0” disables this<br />
protection.<br />
Note: Calibrate parameter “U” before enabling<br />
this protection.<br />
Delay trip time<br />
OCx x<br />
o c x x<br />
Overcurrent<br />
Overcurrent trip<br />
time<br />
OC0 0<br />
o c 2 0<br />
00-50<br />
00-99<br />
%<br />
sec.<br />
The unit trips if the current increases above the<br />
percentage set. Setting “0” disables this protection.<br />
Note: Calibrate parameter “U” before enabling<br />
this protection.<br />
Delay trip time.<br />
2 a x x<br />
2 d x x<br />
2 T x x<br />
Dual ramp up<br />
Dual ramp down<br />
Dual starting<br />
torque<br />
2 a 2 0<br />
2 d 2 0<br />
2 T 2 0<br />
01-99<br />
01-99<br />
10-90<br />
%<br />
%<br />
%<br />
These are a secondary set of ramp up, ramp<br />
down and starting torque parameters, which<br />
take over the primary “a”, “d” and “T” when the<br />
programmable function “A” is enabled.
<strong>ASTATplus</strong><br />
4.6.2. Programmable advanced functions<br />
A<br />
Display<br />
Function<br />
Default<br />
Range<br />
Description<br />
24<br />
D x x x<br />
Linear Ramp<br />
D O F F<br />
OFF, ON, I3, I4<br />
This function provides linear acceleration and<br />
deceleration ramps in a wider range of load conditions<br />
using tachogenerator feedback.<br />
A DC Tacho-Generator coupled to motor must be used<br />
to provide an analog signal feedback of 0-5VDC to<br />
terminals 7 and 8<br />
J xx x<br />
Slow Speed<br />
J O F F<br />
OFF, I3, I4<br />
This function enables slow speed operation<br />
Maximum operation time 120sec.<br />
j<br />
x x<br />
Speed changeover<br />
j<br />
L O<br />
LO, HI<br />
LO: Low Speed, 7% of rated speed.<br />
HI: High Speed, 14% of rated speed.<br />
r<br />
x x x<br />
Reverse<br />
r<br />
O F F<br />
OFF, ON, I3, I4<br />
Reverse dirention is allowed in “High slow speed” mode<br />
only. It provides 20% of rated speed<br />
A x x x<br />
Dual motor selector<br />
A O F F<br />
OFF, ON, I3, I4<br />
This function allows dual motor control settings of<br />
acceleration, deceleration and starting torque, and is<br />
useful to start or stop a motor in diferent load<br />
conditions.<br />
When this function is enabled, the parameters 2a, 2d<br />
and 2T take over the parameters a, d and T. It allows<br />
dual motor control settings<br />
X x x x<br />
Remote control<br />
selector<br />
X O F F<br />
OFF, ON, I3, I4<br />
Allows serial communication control by SG, TD and RD<br />
terminals. Check Appendix section for more details<br />
X P x x<br />
Communication<br />
protocol<br />
X P 0 0<br />
00-02<br />
Sets serialcommunications protocol<br />
0: ASCII 1: Modbus RTU<br />
2; External modules (DeviceNet, ProfibusDP ...)<br />
s x x x<br />
Station number<br />
s 0 0 1<br />
001-247<br />
ASCII protocol allows a maximum of 90 stations only
<strong>ASTATplus</strong><br />
4.6.3. Programmable relay output functions<br />
Display<br />
Function<br />
Default<br />
Range<br />
Description<br />
A<br />
1 r x x<br />
Output relay 1r<br />
1 r 2 5<br />
(RUN)<br />
22-30<br />
This is a programmable relay with one NO / NC dry<br />
contacts to <strong>ASTATplus</strong>'s terminals 11-12-13<br />
25<br />
2 r x x<br />
Output relay 2r<br />
2 r 2 0<br />
(EOR)<br />
20, 22-30<br />
This is a programmable relay with one NO dry contact<br />
to <strong>ASTATplus</strong>'s terminals 23-24<br />
This relay is automatically assigned to BY-Pass control<br />
if the function “z” is ON. Any other assignment by the<br />
user is overwrited in this case<br />
3 r x x<br />
Output relay 3r<br />
3 r 2 1<br />
(DC Brake)<br />
21, 22-30<br />
This is a programmable relay with one NO dry contact<br />
to <strong>ASTATplus</strong>'s terminals 33-34<br />
This relay is automatically assigned to DC-Brake control<br />
if the function “B” is ON. Any other assignment by the<br />
user is overwrited in this case<br />
The programmable relays can be set to the functions shown in the following table<br />
Range Function Remarks<br />
20<br />
21<br />
22<br />
23<br />
24<br />
25<br />
26<br />
27<br />
28<br />
29<br />
30<br />
EOR<br />
DC Brake<br />
FAULT<br />
Undervoltage<br />
Overvoltage<br />
RUN<br />
Slow Speed<br />
Undercurrent<br />
Overcurrent<br />
Disabled<br />
Future use<br />
Detects end of voltage ramp -This function only can be assigned to relay 2r-<br />
DC Brake control command -This function only can be assigned to relay 3r-<br />
Detects unit Fault status<br />
Detects Undervoltage according limit adjusted in function “UV”<br />
Detects Overvoltage according limit adjusted in function “OV”<br />
Detects unit RUN status<br />
Detects slow speed status<br />
Detects Undercurrent according limit adjusted in function “UC”<br />
Detects Overcurrent limits as adjusted in function “OC”<br />
Disables the relay function
<strong>ASTATplus</strong><br />
A<br />
26<br />
5. Installation<br />
5.1. Equipment installation<br />
CAUTION! DISCONNECT POWER BEFORE INSTALLING OR SERVICING<br />
ONLY SPECIALIZED PERSONNEL SHOULD INSTALL THE EQUIPMENT AND ONLY AFTER<br />
HAVING READ THIS USER’S GUIDE.<br />
THE USER ITSELF IS RESPONSABLE FOR ANY PHYSICAL INJURY OR MATERIAL DAMAGE<br />
RESULTING FROM MISHANDLING THE EQUIPMENT.<br />
IF YOU HAVE ANY DOUBTS ABOUT ANY PROCEDURE, PLEASE CONTACT YOUR DEALER.<br />
Remarks<br />
Supply wire conductors should have the same<br />
section as direct starters. As an indication, Vd<br />
voltage drop in wires should not be more than 2%.<br />
Vd =<br />
3<br />
x R x L x In<br />
1000<br />
R = conductor resistance (m/ / m)<br />
L = conductor length (m)<br />
In = motor rated current(A)<br />
Conductor section (mm 2 ) 2.5 4 6 10 16 25 35 50 100 150<br />
R (Cu) 20ºC (m/ / m) 7.5 4.55 3.05 1.85 1.13 0.725 0.528 0.254 0.183 0.122<br />
R (Al) 20ºC (m/ / m) 1.86 1.188 0.868 0.416 0.3 0.2<br />
Signal wiring should be no longer than 3mts (up to 25mts.<br />
when using screened cable), and should be separate from<br />
power wires (line, motor, command relays, etc.) by at least<br />
10cm, and if they cross, they should do so at a 90º angle<br />
Relays and contactors located in the same housing as the<br />
equipment should have an RC suppressor parallel to the coil<br />
(or a reverse diode, if controled by DC).<br />
SIGNAL<br />
POWER<br />
CORRECT<br />
INCORRECT<br />
Do not install capacitors to correct the power factor<br />
between equipment output and motor<br />
If the equipment is fed by a line transformer, its rated power<br />
should be at least 1.5 times, but less than 10 times, higher<br />
than equipment supply.<br />
Environment<br />
When installing equipment, keep the following points in<br />
mind :<br />
- The equipment should be installed vertically and hang<br />
over a platform or bars. The vertical position is essential<br />
for proper cool air circulation<br />
- Environmental conditions are in accordance with the<br />
following ranges and maximum values :<br />
- Operating temperature : 0ºC to +55ºC<br />
- Relative humidity (without condensation) : 95%<br />
- Maximum altitude : 3000m<br />
Reduce rating by 1.5% / ºC from 40ºC and 1% / 100m<br />
from 1000m<br />
- Do not install equipment in environments containing<br />
explosive or flammable gases, or near important heat<br />
sources<br />
- Equipment should be well ventilated, with minimum<br />
keeping clearances as indicated in the illustration.<br />
- When equipment is to be mounted on a platform subject<br />
to strong vibrations, there should be an elastic base to<br />
protect the equipment.
<strong>ASTATplus</strong><br />
5.2. Fuses, contactors and supply wiring<br />
IEC Class 10 ratings<br />
Cat. No. In Total Fuses Fuses Fuses Control voltage Contactor Contactor Conductor<br />
losses aM Jean Müller BUSSMANN type DC 1 DC 3 section<br />
100% In (F1) type (Typower Sucu 660V~ Fuse Consumpt. (1)<br />
A W A Size In A VA mm 2<br />
QC _ F DP 17 67 25 S00C+/üf01/40A/690V 00 40 1 18 CL02 CL02 4<br />
QC _ G DP 21 78 32 S00C+/üf01/50A/690V 00 50 1 18 CL03 CL03 4<br />
QC _ H DP 27 88 40 S00C+/üf01/80A/690V 00 80 1 18 CL04 CL03 6<br />
QC _ I DP 38 116 63 S1üf01/110/100A/690V 00 100 1 18 CL45 CL04 10<br />
QC _ J DP 58 208 80 S1üf01/110/125A/690V 00 125 2 55 CL07 CL45 16<br />
QC _ K DP 75 277 100 S1üf01/110/160A/660V 00 160 2 55 CL08 CL06 25<br />
QC _ L DP 86 302 125 S1üf01/110/200A/690V 00 200 2 55 CL09 CL06 35<br />
QC _ M DP 126 389 200 S1üf01/110/250A/690V 00 250 2 55 CK75 CL07 50<br />
QC _ N DP 187 719 250 M2üf02/315A/690V 00 315 2 78 CK08 CL10 95<br />
QC _ Q DP 288 1097 400 M3üf02/500A/690V 2 550 2 78 CK95 CK85 185<br />
QC _ R DP 378 1286 500 S3üf02/110/630A/690V 2 630 4 118 CK10 CK85 240<br />
QC _ S DP 444 1374 630 S3üf02/110/800A/690V 2 800 4 118 CK11 CK95 Busbar (2)<br />
QC _ T DP 570 2086 800 S3üf02/110/1000A/690V 3 1000 4 118 CK12 CK10 Busbar (2)<br />
QC _ U DP 732 2352 1000 S3üf02/110/1250A/690V 3 1250 4 248 CK12 CK10 Busbar (2)<br />
QC _ V DP 1020 3000 1250 S3üf02/110/800A/690V – – 4 248 CK13 CK11 Busbar (2)<br />
QC _ X DP 1290 3839 2x800 S3üf02/110/1000A/690V – – 4 248 CK13 CK12 Busbar (2)<br />
IEC Class 20 ratings<br />
QC _ F DP 14 56 20 S00C+/üf01/40A/690V 00 40 1 18 CL01 CL01 4<br />
QC _ G DP 17 65 25 S00C+/üf01/50A/690V 00 50 1 18 CL02 CL02 4<br />
QC _ H DP 22 74 32 S00C+/üf01/80A/690V 00 80 1 18 CL03 CL03 4<br />
QC _ I DP 32 99 63 S1üf01/110/100A/690V 00 100 1 18 CL04 CL04 6<br />
QC _ J DP 48 178 80 S1üf01/110/125A/690V 00 125 2 55 CL06 CL04 10<br />
QC _ K DP 63 236 80 S1üf01/110/160A/660V 00 160 2 55 CL07 CL04 16<br />
QC _ L DP 72 257 100 S1üf01/110/200A/690V 00 200 2 55 CL08 CL06 25<br />
QC _ M DP 105 325 160 S1üf01/110/250A/690V 00 250 2 55 CL10 CL06 35<br />
QC _ N DP 156 591 200 M2üf02/315A/690V 00 315 2 78 CK75 CL07 70<br />
QC _ Q DP 240 901 315 M3üf02/500A/690V 2 550 2 78 CK85 CK75 120<br />
QC _ R DP 315 1063 400 S3üf02/110/630A/690V 2 630 4 118 CK95 CK85 185<br />
QC _ S DP 370 1136 500 S3üf02/110/800A/690V 2 800 4 118 CK10 CK85 240<br />
QC _ T DP 475 1721 630 S3üf02/110/1000A/690V 3 1000 4 118 CK11 CK95 Busbar (2)<br />
QC _ U DP 610 1950 800 S3üf02/110/1250A/690V 3 1250 4 248 CK12 CK10 Busbar (2)<br />
QC _ V DP 850 2491 1000 S3üf02/110/800A/690V – – 4 248 CK13 CK10 Busbar(2)<br />
QC _ X DP 1075 3168 1250 S3üf02/110/1000A/690V – – 4 248 CK13 CK12 Busbar(2)<br />
A<br />
27<br />
(1) The 3 contacts of DC3 must be connected in parallel (2) As per IEC 9471<br />
Branch circuit protection, UL<br />
Gould-Shawmut, semi-conductor fuses<br />
Short-circuit rating max @480V<br />
Cat Nr. Max. Fuse Max. circuit Non-<br />
Type Type rating class breaker combi- Combi-<br />
A50QS (3) A50P (4) RK5 & J size nation nation <br />
QC _ F DP 50A - 30A 35A 25KA 5KA<br />
QC _ G DP 60A - 35A 40A 25KA 5KA<br />
QC _ H DP 80A - 40A 50A 25KA 5KA<br />
QC _ I DP 100A - 70A 80A 25KA 5KA<br />
QC _ J DP 150A - 100A 125A 25KA 10KA<br />
QC _ K DP 200A - 125A 150A 25KA 10KA<br />
QC _ L DP 225A - 150A 150A 25KA 10KA<br />
QC _ M DP 350A - 200A 250A 25KA 10KA<br />
QC _ N DP 450A - 350A 350A 65KA 25KA<br />
QC _ Q DP 600A - 500A 600A 65KA 25KA<br />
QC _ R DP 2X500A in parallel - 600A 700A 65KA 25KA<br />
QC _ S DP 2x600A in parallel - 600A 800A 65KA 25KA(4)<br />
QC _ T DP - 2x1000A in parallel - 800A 65KA 30KA(4)<br />
QC _ U DP - 2x1200A in parallel - 1000A 65KA 30KA<br />
QC _ V DP - 2x1600A in parallel - 1200A 65KA 65KA<br />
(3) Suitable for use on a circuit capable of<br />
delivering not more than 100KA RMS<br />
symetrical amperes, for 208V, 240V and<br />
up to 480V maximum, when used with<br />
the semi-conductor fuse for shortcircuit<br />
protection. Listed with Gould<br />
Shawmut Form 101, Type A5QS or<br />
A50P<br />
(4) Suitable for use on a circuit capable of<br />
delivering not more than 65KA RMS<br />
symetrical amperes, for 208V, 240V and<br />
up to 480V maximum, when used with<br />
contactors (isolation or by-pass) that<br />
are also rated for 65KA withstand.<br />
Note: When <strong>ASTATplus</strong> reduced voltage starters are used in conjunction with semi-conductor fuses, type 2 co-ordination to<br />
IEC 947-4 is attained. These fuses are recommended for best overall short-circuit protection. The semiconductor fuse<br />
specified may provide branch circuit protection. Refer to local applicable electrical codes
<strong>ASTATplus</strong><br />
A<br />
28<br />
5.3. Start-up<br />
- Make sure equipment wiring<br />
corresponds to one of the recommended<br />
routing diagrams or equivalent<br />
- Make sure the control wire harness<br />
corresponds to the control voltage used.<br />
- If the motor has thermal protection sensor, remove the link<br />
between terminals 5 and 6 prior to wire the sensor<br />
110/120V ac 220/240V ac<br />
A1<br />
A2<br />
B1<br />
B2<br />
A1<br />
A2<br />
B1 B2<br />
- Adapt equipment rated current to motor,<br />
setting the motor current In<br />
N x x x ; x x x =<br />
In (motor)<br />
Ir (unit)<br />
x 100<br />
Factory setting<br />
N 1 0 0<br />
- Set overload trip curve as needed<br />
- Set starting parameters as needed :<br />
oxxx ; xx x OFF= disabled<br />
(external overload relay must be used)<br />
C1/C2= IEC Class 10 or Class 20<br />
N1/N2/N3= Nema 10, 20 or 30<br />
Factory setting<br />
o C1<br />
Factory setting<br />
L x x x =<br />
Im (start)<br />
In (motor)<br />
x 100<br />
Starting torque T _ x x T _ 20<br />
Acceleration ramp time a x x x a _ 2 0<br />
Kickstart P ON/OFF/I3/I4 P OFF<br />
Kickstart time p x x x (if P enabled) P 1 0 0<br />
Current limit L x x x L 3 0 0<br />
- Set braking parameters as needed :<br />
Factory setting<br />
Soft stop S ON/OFF/I3/I4 S OFF<br />
Deceleration ramp time d x x x d _ 2 0<br />
DC injection brake B ON/OFF/I3/I4 B OFF<br />
DC braking time b _ x x (if B enabled) b _ _ 5<br />
DC braking current I x x x (if B enabled) I 1 5 0<br />
If you change the default configuration and<br />
wish to keep it, remember to rewrite the<br />
parameters in E2PROM as follows :<br />
- Set parameter K to ON (ON = 69 + )<br />
- Set parameter W to ON<br />
- Press (parameter W is set to OFF automatically)<br />
- Send run command to equipment and make sure that operation is correct.
<strong>ASTATplus</strong><br />
5.4. Troubleshooting<br />
Symptom or Error Possible Cause Measures to be taken<br />
Display OFF<br />
No control voltage<br />
Check wire harness and control voltage<br />
A<br />
29<br />
F1 fuse blown on power supply PCB Check and change, page 6.8<br />
Bad connection of flat wire joining power<br />
supply PCB to control PCB<br />
Verify connectors<br />
Equipment does not respond to<br />
STOP / START controls<br />
F2 fuse blown on power supply PCB Check and change, page 6.8<br />
Frequency error<br />
(admits 45Hz H f main H 65Hz)<br />
Overload trip<br />
No 1L1 phase or frequency is out of<br />
range<br />
Excessive load or excessive current<br />
during starting<br />
Check 1L1 phase and/or mains<br />
frequence<br />
Verify overload conditions during starting<br />
time and steady state.<br />
Check settings in parameters “Nxxx”,<br />
“Lxxx”, and “oxxx”<br />
Synchronism loss<br />
(Ex13)<br />
Phase 1L1 lost<br />
Check 1L1 phase<br />
Phase U, V, W thyristor<br />
(Ex14)<br />
(Ex15)<br />
(Ex16)<br />
Shortcircuited thyristor<br />
No output phases<br />
Check thyristor module<br />
Check 2T1, 4T2 and 6T3 phases<br />
Heatsink thermostat<br />
(Ex17)<br />
Heatsink thermostat tripped by<br />
overheating or defective<br />
Check thermostat and wiring<br />
Motor thermistor<br />
(Ex18)<br />
Motor thermistor tripped by overheating<br />
or defective<br />
Check thermistor and wiring<br />
Phase U, V, W loss<br />
(Ex19)<br />
(Ex20)<br />
(Ex21)<br />
No input / output phases<br />
Defective thyristor or bad wire harness<br />
Check power wire harness for 1L1, 3L2,<br />
5L3, 2T1, 4T2 and 6T3<br />
Verify gate and cathode wire<br />
harness. Verify thyristors<br />
Stalled rotor<br />
(Ex22)<br />
Equipment detected stalled motor rotor<br />
Restart equipment and check for an<br />
appreciable loss in motor speed at any<br />
time (i.e. when the motor is loaded.<br />
In this case, try jumping the bypass<br />
terminals 3-57 at the end of acceleration<br />
ramp).<br />
Internal error<br />
(Ex23)<br />
Microcontroller malfunction<br />
Check IC1 and IC8 are correctly inserted<br />
in their sockets<br />
Long start time<br />
(Ex25)<br />
Current limit condition present more than<br />
2 x ta sec. or 240 sec.<br />
(ta = acceleration ramp time)<br />
Increase current limit and / or<br />
acceleration ramp time<br />
Long slow speed time (Ex26) Equipment has been in slow speed Avoid this condition<br />
mode more than 120 sec.<br />
Lock-out (Ex27) The time between startings is less that Check is settings are correct<br />
the adjusted in parameter “LKxx” This protection may be disabled<br />
Undervoltage<br />
overvoltage<br />
Undercurrent<br />
overcurrent<br />
(Ex28)<br />
(Ex29)<br />
(Ex30)<br />
(Ex31)<br />
The line voltage exceeds of limit set in<br />
parameters “UVxx” or “OVxx”<br />
The motor current exceeds of limit set in<br />
parameters “UCxx” or “OCxx”<br />
Check is settings are correct.<br />
This protection may be disabled<br />
Check is settings are correct.<br />
This protection may be disabled<br />
Retry (Ex32) The retry feature could not re-start the Check last message “e1xx” and correct.<br />
motor after a fault<br />
Be sure that retry settings are correct as<br />
well.
<strong>ASTATplus</strong><br />
5.5. Thyristor check<br />
A<br />
30<br />
Short-circuit<br />
Use a testing lamp to check the defective power module<br />
between input and output phases.<br />
If the lamp goes on, at least one of the thyristors has a<br />
short-circuit.<br />
Check with a tester the value or the R resistance between<br />
input and output of the same phase (connector B on main<br />
PCB must be previously removed)<br />
If R < 50K/, at least one of the thyristor is defective<br />
1L1 (3L2 or 5L3)<br />
Testing lamp<br />
3 to 6V<br />
2T1 (4T2 or 6T3)<br />
Open thyristor<br />
With the simple assembly shown, the lamp should light when<br />
the S switch is closed and remain lite when open.<br />
If not, the thyristor is defective.<br />
3 to 6V
<strong>ASTATplus</strong><br />
6. Appendix<br />
6.1. Application diagrams<br />
Basic diagram<br />
Control Voltage<br />
110 / 120V AC<br />
Control Voltage<br />
220 / 240V AC<br />
Programmable relay Outputs<br />
Programmable Inputs (3)<br />
Remarks<br />
(1) The isolation contactor DC1, is not required to<br />
perform operation to the motor.<br />
Be aware however that DC1 provides galvanic<br />
isolation from the incoming line increasing the<br />
safety.<br />
(2) In this example, Start and Stop command is<br />
enabled by push-buttons. Permanent command<br />
is allowed as well, wiring 1, 2 and 57 terminals<br />
as shown on page A12.<br />
(3) The output relays allow for direct action on<br />
contactors according ratings specified on<br />
page A11 of this manual.<br />
(4) The <strong>ASTATplus</strong> is provided with an electronic<br />
motor overload protection, which should be<br />
adequate protection for most of the<br />
applications.<br />
You should use an external overload protection<br />
if required by local codes or to protect the<br />
motor against current unbalance.<br />
A<br />
31<br />
Start Stop<br />
Push-button command (2)<br />
Motor<br />
thermistor<br />
Basic diagram with By-Pass control<br />
Start/Stop (2)<br />
(permanent<br />
Command)<br />
Control Voltage<br />
110 / 120V AC<br />
Control Voltage<br />
220 / 240V AC<br />
Programmable relay Outputs<br />
Programmable Inputs (3)<br />
By-Pass (5)<br />
Programmable<br />
Input<br />
Motor<br />
thermistor<br />
Remarks<br />
(1) The isolation contactor DC1, is not<br />
required to perform operation to the<br />
motor.<br />
Be aware however that DC1 provides<br />
galvanic isolation from the incoming<br />
line increasing the safety.<br />
(2) In this example, Start and Stop<br />
command is enabled by permanent<br />
command. Push-buttons control is<br />
allowed as well, wiring 1, 2 and 57<br />
terminals as shown on page A12.<br />
(3) The output relays allow for direct<br />
action on contactors according<br />
ratings specified on page A11 of this<br />
manual.<br />
(4) CAUTION:<br />
In by-pass mode an external<br />
overload relay protection must be<br />
used.<br />
(5) By-pass control using function<br />
“zxxx” and external contactor DC2.<br />
Details given bellow.<br />
By-pass control. Programming steps<br />
1. The by-pass function may be enabled by setting “zxxx” to ON. In this case the by-pass is automatically done after<br />
starting.<br />
An alternative, if “zxxx” is set to one of the programmable inputs “I3” or “I4”, the by-pass may be controlled by one<br />
remote signal (5). Check section 4.5.2 on page A22 for more details.<br />
2. Once this function is enabled, the relay 2r is automatically assigned to this function (check section 4.6.3 on page A24).<br />
This relay must be used to control the by-pass contactor.
<strong>ASTATplus</strong><br />
A<br />
32<br />
Basic diagram with jog (slow speed) function<br />
Cntrol Voltage<br />
110 / 120V AC<br />
Control Voltage<br />
220 / 240V AC<br />
Programmable relay Outputs<br />
Programmable Inputs (3)<br />
Start Stop Forward Reverse Motor<br />
Push-Button<br />
command (2)<br />
Jog<br />
(Slow Speed) (5)<br />
thermistor<br />
Remarks<br />
(1) The isolation contactor DC1, is not required to<br />
perform operation to the motor.<br />
Be aware however that DC1 provides galvanic<br />
isolation from the incoming line increasing the<br />
safety.<br />
(2) In this example, Start and Stop command is<br />
enabled by push-buttons. Permanent command<br />
is allowed as well, wiring 1, 2 and 57 terminals<br />
as shown on page A12.<br />
(3) The output relays allow for direct action on<br />
contactors according ratings specified on<br />
page A11 of this manual.<br />
(4) The <strong>ASTATplus</strong> is provided with an electronic<br />
motor overload protection, which should be<br />
adequate protection for most of the<br />
applications.<br />
You should use an external overload protection<br />
if required by local codes or to protect the<br />
motor against current unbalance.<br />
(5) Slow Speed for Jog forward or reverse using<br />
programmable inputs I3, I4. Details given<br />
bellow.<br />
Jog (Slow Speed) function. Programming steps<br />
1. The slow speed function may be enabled by setting “Jxxx” to I3. In this case Slow Speed is allowed by a push-button<br />
wired to <strong>ASTATplus</strong> terminals 3-57.<br />
Reverse jog is also possible by setting “rxxx” to ON. As alternative, if “rxxx” is set to programmable input I4, forward or<br />
reverse may be controlled by remote push-button signal (5). Check section 4.6.3 on page A24 for more details.<br />
2. Slow Speed can be effected with <strong>ASTATplus</strong> in stop status. Slow speed and normal run commands are internally interlocked.<br />
Basic diagram with DC brake injection<br />
Control Voltage<br />
110 / 120V AC<br />
Control Voltage<br />
220 / 240V AC<br />
Start/Stop<br />
(permanent<br />
Command)<br />
Programmable relay Outputs<br />
Programmable Inputs (3)<br />
Motor<br />
thermistor<br />
DC brake function. Programming steps<br />
(5)<br />
Remarks<br />
(1) The isolation contactor DC1, is not required to<br />
perform operation to the motor.<br />
Be aware however that DC1 provides galvanic<br />
isolation from the incoming line increasing the<br />
safety.<br />
(2) In this example, Start and Stop command is<br />
enabled by permanent command. Push-buttons<br />
control is allowed as well, wiring 1, 2 and 57<br />
terminals as shown on page A.12.<br />
(3) The output relays allow for direct action on<br />
contactors according ratings specified on<br />
page A11 of this manual.<br />
(4) The <strong>ASTATplus</strong> is provided with an electronic<br />
motor overload protection, which should be<br />
adequate protection for most of the<br />
applications.<br />
You should use an external overload protection<br />
if required by local codes or to protect the<br />
motor against current unbalance.<br />
(5) DC brake at stopping time is provided by the<br />
DC brake function and external contactor DC3.<br />
CAUTION:<br />
The 3 contacts of DC3 must be connected in<br />
parallel. Mandatory between 2T1 and 4T2<br />
phases, otherwise a short-circuit can occur<br />
1. The DC function may be enabled by setting “Bxxx” to ON.<br />
2. Once this function is enabled, the relay 3r is automatically assigned to this function. This relay must be used to control the<br />
DC brake contactor. Check section 4.5.1 and 4.5.2 on A.21 and A.22 for more details
<strong>ASTATplus</strong><br />
Basic diagram with linear ramp<br />
Control Voltage<br />
110 / 120V AC<br />
Control Voltage<br />
220 / 240V AC<br />
FT1<br />
Start Stop<br />
Push-button<br />
command (2)<br />
Programmable relay Outputs<br />
Programmable Inputs (3)<br />
Motor<br />
thermistor<br />
TAV-5<br />
T6<br />
Linear<br />
ramp (5)<br />
Remarks<br />
(1) The isolation contactor DC1, is not required to<br />
perform operation to the motor.<br />
Be aware however that DC1 provides galvanic<br />
isolation from the incoming line increasing the<br />
safety.<br />
(2) In this example, Start and Stop command is<br />
provided by push-buttons. Permanent command<br />
is allowed as well, wiring 1, 2 and 57 terminals as<br />
shown on page A12.<br />
(3) The output relays allow for direct action on contactors<br />
according ratings specified on page A11<br />
of this manual.<br />
(4) The <strong>ASTATplus</strong> is provided with an electronic<br />
motor overload protection, which should be adequate<br />
protection for most of the applications.<br />
You should use an external overload protection<br />
if required by local codes or to protect the<br />
motor against current unbalance.<br />
(5) Linear ramp provided by “Dxxx” function. A tacho<br />
generator must be used as feedback. Details<br />
given bellow.<br />
A<br />
33<br />
Linear ramp function. Programming steps<br />
The linear ramp function may be enabled by setting “Dxxx” to ON. In this case, linear ramp is independent of the load.<br />
This function needs the speed feedback provided by an external tacho generator.<br />
Check section 4.6.2 on page A.24 for more details.
<strong>ASTATplus</strong><br />
A<br />
34<br />
6.2. Serial communication<br />
<strong>ASTATplus</strong> is able to send and receive data trough a serial RS232 port. Within this port <strong>ASTATplus</strong> communicates with a host<br />
(which can be either with a PC / PCL or an industrial fieldbus system) to be started, stopped, programmed or checked.<br />
Three different communication possibilities are available:<br />
– Connection to a PC / PLC using ASCII protocol. (PC Windows communication software tool available)<br />
– Connection to a PC / PLC using Modbus RTU protocol.<br />
– Connection to industrial fieldbus systems (Profibus DP / DeviceNet). In this case it is necessary to use an external<br />
communications module. <strong>ASTATplus</strong> communicates with this module using Modbus RTU protocol, and the module acts<br />
as a gateway to the fieldbus system.<br />
In order to select the disired procedure the user must change the value of the parameter XP.<br />
Protocol<br />
XP setting<br />
ASCII 0<br />
Modbus RTU 1<br />
Profibus/DeviceNet 2<br />
6.2.1. RS232 port, wiring and communication settings<br />
RS232 is an operating standard of communication only in terms of electrical characteristics (voltage, timing, etc) while the<br />
communication procedure are defined by different protocols (Modbus, ASCII, Profibus, DeviceNet, etc.).<br />
The maximum allowed RS232 cable length is 3 meters. <strong>ASTATplus</strong> uses a connector with only 3 pins: TD, RD, SG.<br />
Astat Terminal<br />
TD<br />
RD<br />
SG<br />
Name<br />
Transmit data<br />
Receive data<br />
Signal common<br />
The following table indicates the communication settings used by <strong>ASTATplus</strong> to perform data communication via its serial port<br />
Name Setting Description<br />
Baud Rate 9600 bps Bits per second transmission rate<br />
Parity None Data error checking method<br />
Data Bits 8 Number of data bits in each transmission<br />
Start Bits 1 Number of bits to indicate beginning of transmission<br />
Stop Bits 2 Number of bits to indicate ending of transmission<br />
Data ASCII / RTU Communications protocol used<br />
Handshaking None No need to request to send or clear to send
<strong>ASTATplus</strong><br />
6.2.2. ASCII Protocol<br />
To select this communications protocol, XP must be set to 0.<br />
It is possible to operate the <strong>ASTATplus</strong> from a host using standard ASCII characters. Two functions are available to be able to<br />
READ and WRITE parameters.<br />
A<br />
35<br />
Write Parameters to ASTATPlus:<br />
To write data into a parameter, the command format is the following:<br />
Request from host:<br />
:ssWxxxyyyA<br />
Response from the ASTAT:<br />
:ssWxxxyyyA<br />
where ‘:’ is a char to indicate the command start, ‘ss’ is the station address, ‘xxx’ (3 bytes needed) is the parameter number,<br />
and ‘yyy’ (3 bytes needed) is the value to write into the parameter. The ‘A ’ is the return key to indicate the command stop.<br />
Note: the parameters modification is not allowed while the motor is operating.<br />
Read Parameters from <strong>ASTATplus</strong>:<br />
To read a parameter, the command format is the following:<br />
Request from host:<br />
:ssRxxxA<br />
Response from the ASTAT:<br />
:ssRxxxyyyyyA<br />
where ‘:’ is a char to indicate the command start, ‘ss’ is the station address, ‘xxx’ (3 bytes needed) is the parameter number,<br />
and ‘yyyyy’ ( chars response) is the value of the parameter. The ‘A ’ is the return key to indicate the command stop.<br />
Examples:<br />
If we are trying to communicate with station 2:<br />
- to start the unit, the command will be: :02W060000A<br />
- to stop the unit, the command will be: :02W060001A<br />
- to set the acceleration ramp time to 35sec., the command will be: :02W005035A<br />
- to know which overload curve is selected, the command will be: :02R016A;<br />
( if for instance the response is :02R01600004A, this means that the overload curve selected is IEC class 10).<br />
The table shown in 6.2.5 provides a complete reference for the parameters that can be controlled by the serial interface.<br />
6.2.3. MODBUS RTU Protocol<br />
Modbus RTU is an standard communication protocol. It is completely predefined, so any Modbus RTU master device will be<br />
able to send and receive data from <strong>ASTATplus</strong>. To select this communications protocol, XP must be set to 1.<br />
The communication begins with a master request which is answered by the slave (ASTATPlus).<br />
Each message from master to slave and viceversa is transmitted asynchronously as follows:<br />
Quiet time Slave address Function code Data field CRC Quiet time<br />
3.5 chars 0-247 1-24 N chars 2 chars 3.5 chars<br />
It is required to give different address to each slave. A Modbus master is able to handle up to 248 different addresses, but as<br />
address 0 is reserved for broadcast command, only 247 slaves are allowed. The CRC is an error detection code.<br />
Although Modbus protocol defines up to 24 different functions, only 3 of them will be useful to <strong>ASTATplus</strong>:<br />
- Read - Write - Read + Write
<strong>ASTATplus</strong><br />
A<br />
36<br />
Read parameters from <strong>ASTATplus</strong><br />
The function code assigned to ‘Read’ is ‘3’ (3h).<br />
The request message from master must contain the following information:<br />
– Slave address; the master must indicate which slave has been selected. The non-addressed slaves will receive the<br />
message but will not execute the command. Only the slave with the corresponding address will send a response message.<br />
– Function code: as related above, Read command is number 3.<br />
– Data field: as this is a read command, the data requested is the number of parameters to be read and the starting address<br />
to begin to read.<br />
Quiet time Slave address Function code Data field CRC Quiet time<br />
starting address<br />
3.5 chars slave # 3 # of parameters 2 chars 3.5 chars<br />
The response from the <strong>ASTATplus</strong> will contain the same slave address and function code, but the data field will include the<br />
total number of chars read, and the value of the requested parameters.<br />
Quiet time Slave address Function code Data field CRC Quiet time<br />
# of chars read<br />
3.5 chars slave # 3 parameters value 2 chars 3.5 chars<br />
Write Parameters to <strong>ASTATplus</strong><br />
The function code assigned to ‘Write’ is ‘16’ (10h)<br />
The request message from master must contain the following information:<br />
– Slave address: the master must indicate which slave has been selected. The non-addressed slaves will receive the message<br />
but will not execute the command. Only the slave with the corresponding address will send a response message.<br />
– Function code: as related above, Write command is number 10h.<br />
– Data field: as this is a write command, the data requested is the number of parameters to be written, number of chars,<br />
starting address and the value to write.<br />
Quiet time Slave address Function code Data field CRC Quiet time<br />
starting address<br />
3.5 chars slave # 10 # of parameters 2 chars 3.5 chars<br />
# of chars<br />
values to write<br />
The response from the <strong>ASTATplus</strong> will contain the same slave address and function code, but the data field will include the<br />
total number of chars read, and the value of the requested parameters.<br />
Quiet time Slave address Function code Data field CRC Quiet time<br />
starting address<br />
3.5 chars slave # 10 # of parameters 2 chars 3.5 chars<br />
Read + Write parameters to <strong>ASTATplus</strong><br />
The function code assigned to ‘Read and Write’ is ‘23’ (17h).<br />
The request message from master must contain information to perform both operations:<br />
– Slave address: the master must indicate which slave has been selected. The non-addressed slaves will receive the message<br />
but will not execute the command. Only the slave with the corresponding address will send a response message.<br />
– Function code: as related above, write command is number 17h.<br />
– Data field: as a read command, the data requested is the starting address, and the quantity to read. As this is also a write<br />
command, the data requested is the number of parameters to be written, number of chars, starting address and the value<br />
to write.<br />
Quiet time Slave address Function code Data field CRC Quiet time<br />
starting address to read<br />
# of parameters to read<br />
3.5 chars slave 17 # starting address to write 2 chars 3.5 chars<br />
# of parameters to write<br />
# of chars to write<br />
values to write
<strong>ASTATplus</strong><br />
The response from the <strong>ASTATplus</strong> will contain the same slave address and function code, but the data field will include the<br />
total number of chars read, and the value of the requested parameters.<br />
Quiet time Slave address Function code Data field CRC Quiet time<br />
# of chars<br />
3.5 chars slave # 17 parameters read 2 chars 3.5 chars<br />
A<br />
37<br />
Examples<br />
Supposing we are trying to communicate with slave 17 (note that 17 is 11h):<br />
– To read parameters 3, 4, 5 and 6<br />
Quiet time Slave address Function code Data field CRC Quiet time<br />
0003<br />
3.5 chars 11 03 0004 2 chars 3.5 chars<br />
– To read values 1, 2 and 3 in parameters 9, 10 and 11<br />
Quiet time Slave address Function code Data field CRC Quiet time<br />
0009<br />
3.5 chars 11 10 0003 2 chars 3.5 chars<br />
06<br />
0001<br />
0002<br />
0003<br />
– To execute the above 2 commands in one<br />
Quiet time Slave address Function code Data field CRC Quiet time<br />
0003<br />
3.5 chars 11 17 0004 2 chars 3.5 chars<br />
0009<br />
0003<br />
06<br />
0001<br />
0002<br />
0003
1 1<br />
1<br />
<strong>ASTATplus</strong><br />
6.2.4. Profibus / DeviceNet<br />
A<br />
38<br />
It is possible to connect <strong>ASTATplus</strong> to an industrial fieldbus. Only a communications adapter is required. It is also necessary<br />
to set XP to 2.<br />
2 different modules are available: Profibus DP and DeviceNet<br />
Profibus DP: Cat Nr.: QCPPDP Reference Nr.: 129769<br />
DeviceNet: Cat Nr.: QCPDNT Reference Nr.: 129768<br />
<strong>ASTATplus</strong> communicates with this module using Modbus RTU protocol.<br />
ASTAT<br />
plus<br />
Modbus RTU<br />
Communications<br />
adapter<br />
1<br />
Fieldbus<br />
system<br />
1<br />
Profibus DP / DeviceNet<br />
1<br />
max. length 3m.<br />
Note: Detailed information of communication modules QCPPDP and QCPDNT is described in their specific manuals.
<strong>ASTATplus</strong><br />
6.2.5. List of parameters that can be controlled by the serial interface<br />
Parameter Parameter Function Read/Write Range Comments<br />
number name (R / W)<br />
000 Status Soft starter status R/- 0 - 14 0: ON<br />
1: STOP<br />
2: LOCK<br />
3: Alarm (errors)<br />
4: PULS<br />
5: RAMP<br />
6: FULL<br />
7: SAVE<br />
8: SOFT<br />
9: DCBK<br />
10: FULL (override)<br />
11: Not used<br />
12: INCH<br />
13: TACH<br />
14: PUMP<br />
001 M Motor current (%N or Amps, depending on UF parameter) R/-<br />
002 N Nominal motor current (% Unit current) R/W 40-120<br />
003 L Limit current (% In) R/W 100-700<br />
004 T Starting torque (% DOL torque) R/W 10-90<br />
005 a Acceleration ramp time (sec) R/W 1-99<br />
006 d Deceleration ramp time (sec) R/W 1-120<br />
007 p Kick start time (msec) R/W 0-999<br />
008 b DC brake time (sec) R/W 0-99<br />
009 I DC brake current (% In) R/W 50-250<br />
010 S Soft stop control R/W 0-3 0: OFF<br />
1: ON<br />
2: I3<br />
3: I4<br />
011 C Pump control R/W 0-3 0: OFF<br />
1: ON<br />
2: I3<br />
3: I4<br />
012 P Kick start control R/W 0-3 0: OFF<br />
1: ON<br />
2: I3<br />
3: I4<br />
013 F Override R/W 0-3 0: OFF<br />
1: ON<br />
2: I3<br />
3: I4<br />
014 B DC brake control R/W 0-6 0: OFF<br />
1: ON<br />
2: I3<br />
3: I4<br />
4: PON<br />
5: PI3<br />
6: PI4<br />
015 LK Lockout (sec) R/W 0-45<br />
016 o Overload trip curve R/W 0-5 0: OFF<br />
1: N1<br />
2: N2<br />
3: N3<br />
4: C1<br />
5: C2<br />
017 Internal use<br />
018 W Write EEPROM -/W 1<br />
019 R Read EEPROM -/W 1<br />
A<br />
39
<strong>ASTATplus</strong><br />
A<br />
40<br />
Parameter Parameter Function Read/Write Range Comments<br />
number name (R / W)<br />
020 --- Internal use<br />
021 v Software version R/- xxx vxxx<br />
022 --- Internal use<br />
023 --- Internal use<br />
024 1r Programmable relay 11-12-14 R/W 22-30 See programmable relays<br />
functions on page xx<br />
025 2r Programmable relay 23-24 R/W 20,22-30<br />
026 3r Programmable relay 33-34 R/W 21-30<br />
027 OC Overcurrent (%N ) R/W 0-50 0: OFF<br />
028 oc Overcurrent time (sec) R/W 0-99<br />
029 r Reverse slow speed R/W 0-3 0: OFF<br />
1: ON<br />
2: I3<br />
3: I4<br />
030 Y Retry attemps R/W 0-4<br />
031 y Retry time (sec) R/W 1-99<br />
032 UV Undervoltage (%U) R/W 0-50 0: OFF<br />
033 uv Undervoltage time (sec) R/W 0-99<br />
034 OV Overvoltage (%U) R/W 0-30 0: OFF<br />
035 ov Overvoltage time (sec) R/W 0-99<br />
036 UC Undercurrent (%N) R/W 0-99 0: OFF<br />
037 uc Undercurrent time (sec) R/W 0-99<br />
038 PF <strong>Power</strong> factor (%) R/- 00-99<br />
039 U Nominal voltage (volt) R/W 100-500<br />
040 V Line voltage (volt) R/-<br />
041 w <strong>Power</strong> (KW*10) R/-<br />
042 X Local/remote control 0-3 0: OFF<br />
1: ON<br />
2: I3<br />
3: I4<br />
043 D Linear ramp control R/W 0-3 0: OFF<br />
1: ON<br />
2: I3<br />
3: I4<br />
044 J Slow speed control R/W 0-2 0: OFF<br />
1: I3<br />
2: I4<br />
045 j Slow speed type R/W 0-1 0: HI<br />
1: LO<br />
046 2a Secondary acceleration ramp time (sec) R/W 1-99<br />
047 2d Secondary deceleration ramp time (sec) R/W 1-99<br />
048 A Dual ramp selection R/W 0-3 0: OFF<br />
1: ON<br />
2: I3<br />
3: I4<br />
049 UF Unit frame R/W 0-16 0: not defined<br />
1 to 16: F to X frames<br />
050 E Elapsed time (hours) R/-<br />
052 Q Recall factory settings -/W 1<br />
053 2T Secondary starting torque (%DOL torque) R/W 10-90<br />
054 m Current calibration R/-<br />
055 --- Internal use<br />
056 z Bypass function R/W 0-3 0: OFF<br />
1: ON<br />
2: I3<br />
3: I4<br />
057 --- Internal use<br />
058 f Service factor (%N) R/W 100-130<br />
059 t Voltage calibration R/-
<strong>ASTATplus</strong><br />
Parameter Parameter Function Read/Write Range Comments<br />
number name (R / W)<br />
060 RUN/STOP RUN/STOP order -/W 0: RUN<br />
1: STOP<br />
061 --- Internal use<br />
062 --- Internal use<br />
063 --- Internal use<br />
064 --- Internal use<br />
065 --- Internal use<br />
066 --- Internal use<br />
067 --- Internal use<br />
068 --- Internal use<br />
069 --- Internal use<br />
070 ST Pump Control selection curve R/W 0-3 0: standard voltage ramp<br />
1-3: Pump algorithms<br />
071 --- Internal use<br />
072 --- Internal use<br />
073 SP Pump Control selection curve R/W 0-5 0: standard voltage ramp<br />
1-5: Pump algorithms<br />
074 --- Internal use<br />
075 --- Internal use<br />
076 --- Internal use<br />
077 --- Internal use<br />
078 --- Internal use<br />
079 --- Internal use<br />
080 --- Internal use<br />
081 --- Internal use<br />
082 --- Internal use<br />
083 XP Communication protocol R/W 0-2 0: ASCII<br />
1: Modbus RTU<br />
2: others (with external<br />
module)<br />
084 s Station number for communication R/W 1-247<br />
085 e0xx error e0 R/- xx: error code<br />
086 e1xx error e1 R/- xx: error code<br />
087 e2xx error e2 R/- xx: error code<br />
088 e3xx error e3 R/- xx: error code<br />
A<br />
41
<strong>ASTATplus</strong><br />
A<br />
42<br />
6.3. Dimensions<br />
Cat nr. A B C Weight (kg)<br />
QC _ FDP 200 160 6 4.3<br />
QC _ GDP 200 160 6 4.3<br />
QC _ HDP 200 160 6 4.6<br />
QC _ I DP 250 200 31 4.6<br />
Cat nr. Weight (kg)<br />
QC _ JDP 12.5<br />
QC _ KDP 12.5<br />
Cat nr. Weight (kg)<br />
QC _ LDP 17<br />
QC _ MDP 17
1 2 3 4<br />
1<br />
0<br />
<strong>ASTATplus</strong><br />
A<br />
43<br />
Terminal<br />
details<br />
Cat nr. A B C D E F G H I J K L Weight (kg)<br />
QC_NDP 510 490 305 460 465 9 53 106 54 259 70 168 45<br />
QC_QDP 510 490 305 460 465 9 53 106 54 259 70 168 45<br />
QC_RDP 550 540 317 480 495 9 59 118 54 275 78 168 45<br />
QC_SDP 550 540 317 480 495 9 59 118 54 275 78 168 45<br />
QC_TDP 590 685 317 520 640 9 59 118 64.5 270 100 168 80<br />
QC_UDP 790 850 402 700 805 11 60 120 120 352 120 175 80<br />
QC_VDP 790 850 402 700 805 11 60 120 120 352 120 175 80<br />
QC_XDP 810 1000 407 720 995 11 70 140 110 357 120 175 80<br />
Terminal<br />
details<br />
Cat. No. Cat. No. Cat. No. Cat. No. A<br />
Cat. No.<br />
QC _ NDP<br />
QC _ RDP<br />
QC _ TDP QS _ UDP 6<br />
QC _ XDP<br />
QC _ QDP<br />
QC _ SDP<br />
QS _ VDP 10<br />
6.4. P.C.B.’s layout<br />
Supply<br />
Control<br />
MAIN<br />
TRANS-<br />
FORMER<br />
C / V<br />
PULSE<br />
TRAFO<br />
PULSE<br />
TRAFO<br />
PULSE<br />
TRAFO
<strong>ASTATplus</strong> Notes<br />
A<br />
44
this is a blanc page
GE <strong>Power</strong> <strong>Controls</strong><br />
Ref. C/4343/EFDG 4.0 Ed. 01/2002<br />
© Copyright GE <strong>Power</strong> <strong>Controls</strong>, 2000<br />
GE <strong>Power</strong> <strong>Controls</strong><br />
Hornhouse Lane,<br />
Knowsley Business Park<br />
Liverpool L33 7YQ<br />
United Kingdom<br />
GE <strong>Power</strong> <strong>Controls</strong> Belgium<br />
Axxes Business Park<br />
Guldensporenpark 30<br />
B-9820 Merelbeke (Gent)<br />
GE <strong>Power</strong> <strong>Controls</strong> Germany<br />
Ernst-Weyden-Straße 7<br />
D-51105 Köln<br />
GE <strong>Power</strong> <strong>Controls</strong> France<br />
7, rue Nicolas Robert<br />
BP 32 - Z.I. La Garenne<br />
F-93601 Aulnay-sous-Bois<br />
GE <strong>Power</strong> <strong>Controls</strong> Nederland<br />
Maanlander 45<br />
NL-3824 MN Amersfoort<br />
Postbus 127<br />
NL-3800 AC Amersfoort<br />
GE <strong>Power</strong> <strong>Controls</strong><br />
Export Department<br />
Guldensporenpark 30<br />
B-9820 Merelbeke (Gent)<br />
Belgium