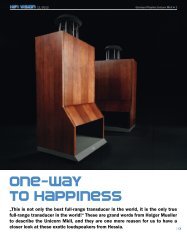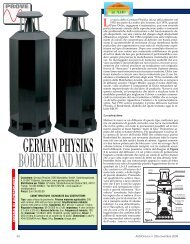
Carbon Mk IV User Manual - German Physiks
Carbon Mk IV User Manual - German Physiks
Carbon Mk IV User Manual - German Physiks

You also want an ePaper? Increase the reach of your titles
YUMPU automatically turns print PDFs into web optimized ePapers that Google loves.
There are two recommended methods of connecting the <strong>Carbon</strong> <strong>Mk</strong> <strong>IV</strong> to the amplifier.<br />
Single Wire Connection<br />
This uses one cable to connect each loudspeaker to the power amplifier. The two red terminals and<br />
the two black terminals on the crossover panel should be linked together as shown in figure 8. The<br />
loudspeakers will be shipped with high quality links in this position.<br />
Connect the loudspeaker cable to the woofer input terminals taking care to ensure that the woofer<br />
positive terminal is connected to the power amplifier positive output terminal and the woofer negative<br />
terminal is connected to the power amplifier negative output terminal.<br />
Bi-Wire Connection<br />
In this method of connection the DDD driver and woofer inputs are connected to the power amplifier<br />
with separate loudspeaker cables. Ensure that the links between the two red terminals and the two<br />
black terminals on the crossover panel have been removed.<br />
Connect one loudspeaker cable to the DDD driver input terminals taking care to ensure that the<br />
positive terminal is connected to the power amplifier positive output terminal and the negative terminal<br />
is connected to the power amplifier negative output terminal.<br />
Connect the other loudspeaker cable to the woofer input terminals taking care to ensure that the<br />
woofer positive terminal is connected to the power amplifier positive output terminal and the woofer<br />
negative terminal is connected to the power amplifier negative output terminal.<br />
Loudspeaker Cables<br />
We recommend that you use loudspeaker cables terminated with high quality spade lugs, as these<br />
provide the best electrical connection. The lugs should be either soldered or crimped to the<br />
loudspeaker cable – the latter is preferred. We do not recommend the use of bare wire to connect to<br />
the loudspeaker terminals. This produces an inferior connection that will further degrade as the bare<br />
conductors become tarnished.<br />
6. LOUDSPEAKER BREAK IN<br />
Like all audiophile equipment, <strong>German</strong> <strong>Physiks</strong> loudspeakers require a break in period from new<br />
before they reach their optimum level of performance. Initially the sound may seem harsh. Please do<br />
not be concerned. The sound will become more relaxed and smooth as the break in progresses. The<br />
music used for the break in should be dynamic in order to properly exercise all the components of the<br />
loudspeaker.<br />
For the first 10 hours play the loudspeaker at low level only. This is a level where you would easily be<br />
able to carry out a conversation without needing to raise your voice.<br />
After this, the speaker may be played at normal listening levels. The break in process will be complete<br />
after 200 to 300 hours.<br />
7. CARE OF YOUR LOUDSPEAKERS<br />
NOTE:<br />
NEVER attempt to open the cabinets. There are no user<br />
serviceable parts inside the loudspeakers.<br />
NEVER touch the diaphragm on the DDD driver, or allow<br />
any object to come into contact with the diaphragm.<br />
11