Owner's Manual - GXi Outdoor Power
Owner's Manual - GXi Outdoor Power
Owner's Manual - GXi Outdoor Power

You also want an ePaper? Increase the reach of your titles
YUMPU automatically turns print PDFs into web optimized ePapers that Google loves.
®<br />
Heavy Duty <strong>Power</strong> Equipment<br />
Owner’s <strong>Manual</strong><br />
This manual contains important safety instructions for gasoline<br />
generator models: 4550Pro, 5650, 6500, 6500EL, 7550EL Pro that should be followed during installation and<br />
maintenance of the generator and batteries<br />
READ SAFETY WARNINGS AND OPERATING INSTRUCTIONS CAREFULLY, SAVE THESE INSTRUCTIONS.<br />
Contents:<br />
1. Tools and Accessories<br />
2. DEK Product Lines<br />
3. Missing Parts Request Form<br />
4. Warnings<br />
5. Warnings and Specifications<br />
6. Component Identification<br />
7. Wheel Kit Assembly & Commissioning the Battery<br />
8. Commissioning the Battery<br />
9. Controls<br />
10. Operating the Generator<br />
11. Operating the Generator<br />
12. Maintenance<br />
13. Maintenance<br />
14. Transporting and Storage<br />
15. Troubleshooting<br />
16. Warranty and Service<br />
DO NOT RETURN THIS GENERATOR<br />
TO THE STORE!<br />
HAVE QUESTIONS OR NEED HELP?<br />
call 24 hrs / 7-days a week help-line: [1] 919-550-3221<br />
or go to www.DEK<strong>Power</strong>USA.com<br />
Have the following information ready when you call us:<br />
Date of Purchase:<br />
Location of Purchase:<br />
Serial #:<br />
_______________________<br />
_______________________<br />
_______________________<br />
Rev. 9/2011<br />
DEK® is registered trademark of <strong>GXi</strong> <strong>Outdoor</strong> <strong>Power</strong>, LLC Clayton, NC 27520 USA.<br />
No part of this publication can be printed or copied without written permission.<br />
1 of 16
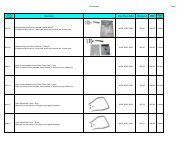
Heavy Duty <strong>Power</strong> Equipment<br />
DEK Product Lines<br />
4550 Pro, 5650, 6500(EL), 7550 Pro<br />
For your convenience, DEK offers a complete range of generator<br />
accessories. Please ask your local retailer for more details or call<br />
[1] 919-550-3221.<br />
Universal Generator Cover:<br />
Heavy duty nylon cover<br />
fits over most models of<br />
4000W to 7500W generators.<br />
A flexible handle<br />
bar flap accommodates<br />
most common<br />
handle bar designs. The<br />
cover keeps water, ice,<br />
snow, dust and dirt from<br />
damaging your generator<br />
when it is in storage.<br />
It can also be used as a<br />
rain cover to protect the<br />
generator when stored<br />
outdoors. The cover<br />
cannot be used while<br />
the generator is in operation.<br />
The generator<br />
should be allowed to cool down for approximately 15 minutes after<br />
being shut down, prior to placing the cover over the generator.<br />
SAE 10W30 Motor Oil:<br />
A premium high performance<br />
formulation designed for high<br />
RPM small gasoline engines<br />
such as those used on generators.<br />
This oil provides excellent<br />
protection against viscosity and<br />
thermal breakdown that often<br />
happens under the prolonged<br />
severe duty experienced by generator<br />
engines. Use of this oil<br />
formulation is highly encouraged<br />
by the manufacturer. Frequent<br />
oil changes with high quality motor<br />
oil will prolong the life of your<br />
DEK generator.<br />
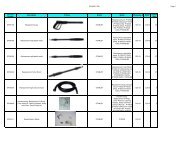
Fuel Stabilizer:<br />
Adapters:<br />
Converts 240V twist lock (L14-30)<br />
to six (6) 120V outlets. Lighted<br />
ends show when power is on.<br />
Ideal for use in combination with a<br />
240V extension cord. Can handle<br />
up to 30 Amps (7200 Watts).<br />
Extension Cords:<br />
240V, 10/4, heavy duty extension<br />
cords with L14-30 connectors at<br />
each end. Lighted end shows when<br />
power is on. Ideal for use in combination<br />
with the 240V to 120V<br />
adapter, eliminating up to six<br />
120V extension cords. This cord<br />
reduces harmful voltage drops<br />
experienced when using most<br />
120V extension cords. Available<br />
in 25‟ lengths and can be combined<br />
to reach the desired length.<br />
Use of DEK‟s fuel stabilizer<br />
keeps your gasoline fresh for up<br />
to 12 months. Gasoline breaks<br />
down in 60 days, potentially<br />
causing damage to your engine.<br />
DEK recommends storing your<br />
generator with the fuel tank full<br />
and with fuel stabilizer added.<br />
This protects the engine and fuel<br />
system from the effects of humidity<br />
and ensures your generator is<br />
ready for use at all times.<br />
Rev. 1/2010<br />
DEK® is registered trademark of <strong>GXi</strong> <strong>Outdoor</strong> <strong>Power</strong>, LLC Clayton, NC 27520 USA.<br />
No part of this publication can be printed or copied without written permission.<br />
2 of 16
Heavy Duty <strong>Power</strong> Equipment<br />
DEK Product Lines<br />
4550 Pro, 5650, 6500(EL), 7550 Pro<br />
Other fine products offered by<br />
Heavy Duty <strong>Power</strong> Equipment<br />
Commercial Lawn Mowers Heavy Duty Pressure Washers Rental Grade Chipper Shredders<br />
For more information or where to purchase DEK outdoor power<br />
equipment, visit us at: www.DEK<strong>Power</strong>USA.com<br />
Please indicate the part that you are missing:<br />
Missing Parts Request Form<br />
Hardware bag<br />
Wheel Kit<br />
Other<br />
Name<br />
Address<br />
Date of purchase<br />
Model #:<br />
4550Pro<br />
5650<br />
6500 or 6500EL<br />
755EL Pro<br />
Phone<br />
Email<br />
Serial #:<br />
Comments:<br />
IMPORTANT: Please include your receipt. Without a receipt, your<br />
order will be delayed. You may also email us at:<br />
customerservice@gxioutdoorpower.com or fax at 919-550-3277. If<br />
emailing, please scan in your proof of purchase.<br />
Rev. 1/2010<br />
DEK® is registered trademark of <strong>GXi</strong> <strong>Outdoor</strong> <strong>Power</strong>, LLC Clayton, NC 27520 USA.<br />
No part of this publication can be printed or copied without written permission.<br />
3 of 16
Heavy Duty <strong>Power</strong> Equipment<br />
WARNINGS<br />
4550 Pro, 5650, 6500(EL), 7550 Pro<br />
This owner‟s manual is considered a permanent part of the generator<br />
and should remain with the generator if resold. The information<br />
and specifications included in this publication were in<br />
effect at the time of approval for printing.<br />
<strong>GXi</strong> <strong>Outdoor</strong> <strong>Power</strong>, LLC, exclusive marketer of DEK Heavy<br />
Duty <strong>Power</strong> Equipment, reserves the right to discontinue or<br />
change specifications or design at any time without notice and<br />
without incurring any obligation whatever. No part of this publication<br />
may be reproduced without written permission.<br />
EMISSION CONTROL SYSTEM INFORMATION<br />
The U.S. and California Clean Air Acts<br />
EPA and California regulations require all manufacturers to furnish<br />
written instructions describing the operation and maintenance<br />
of emission control systems. The following instructions<br />
and procedures must be followed in order to keep the emissions<br />
from your DEK engine within the emission standards. Maintenance,<br />
replacement, or repair of the emission control devices<br />
and systems may be performed by any engine repair establishment<br />
or individual, using parts that are „„certified‟‟ to EPA standards.<br />
SAFETY LABEL LOCATIONS<br />
These labels warn you of potential hazards that can cause serious<br />
injury. Read them carefully. If a label comes off or becomes<br />
hard to read, contact your DEK generator dealer for a replacement.<br />
SAFETY INFORMATION<br />
DEK generators are designed to give safe and dependable service<br />
if operated according to instructions. Read and understand<br />
this owner‟s manual before operating your generator.<br />
OPERATOR RESPONSIBILITY<br />
Know how to stop the generator quickly in case of emergency.<br />
Understand the use of all generator controls, output receptacles,<br />
and connections. Be sure that anyone who operates the generator<br />
receives proper instruction. Do not let children operate the<br />
generator.<br />
CARBON MONOXIDE GAS<br />
Exhaust contains poisonous carbon monoxide, a colorless<br />
and odorless gas. Breathing exhaust can cause loss of consciousness<br />
and may lead to death. To keep exhaust gas<br />
from accumulating, use in an area with adequate ventilation.<br />
DO NOT use this generator in a garage, basement,<br />
crawlspace, enclosed shed, or any other area that does not<br />
have adequate ventilation. DO NOT use this generator near<br />
ventilation ducts or open windows that may allow exhaust<br />
gasses to enter your home or business. ONLY operate this<br />
generator outdoors.<br />
Electrocution Hazard<br />
<br />
<br />
<br />
DANGER<br />
DANGER<br />
Keep the generator dry.<br />
DO NOT use the generator in wet conditions, rain or<br />
snow, or near a pool or sprinkler system<br />
DO NOT use when your hands are wet<br />
NEVER START OR STOP THE ENGINE WITH DEVICES CON-<br />
NECTED TO THE GENERATOR.<br />
WARNING<br />
The engine exhaust from this product contains chemicals<br />
known to the State of California to cause cancer, birth defects<br />
or other reproductive harm.<br />
DANGER<br />
Fire and Burn Hazards<br />
The exhaust system gets hot enough to ignite some materials.<br />
Keep the generator at least 3 feet (1 meter) away from<br />
buildings and other equipment during operation.<br />
Do not enclose the generator in any structure.<br />
Do not smoke when refueling.<br />
Keep flammable materials away from the generator.<br />
The muffler becomes very hot during operation and remains<br />
hot for a while after stopping the engine. Be careful not to<br />
touch the muffler while it is hot.<br />
Let the engine cool before storing the generator indoors.<br />
Refuel in a well ventilated area with the engine stopped.<br />
Fuel vapors are extremely flammable and may ignite after<br />
the engine has started. Make sure that any spilled fuel has<br />
been wiped up before starting the generator.<br />
Connections to a Building Electrical System<br />
Connections for standby power to a building electrical system<br />
must be made by a qualified electrician. The connection must<br />
isolate the generator power from utility power, and must comply<br />
with all applicable laws and electrical codes. A transfer switch,<br />
which isolates generator power from utility power, is available<br />
through any of <strong>GXi</strong>‟s authorized dealers of DEK generators.<br />
WARNING<br />
Generator must be installed by a qualified electrician and<br />
connected to transfer equipment as a separately derived system<br />
in accordance with the National Electrical Code, NFPA<br />
70. The generator shall be connected through transfer equipment<br />
that switches all conductors other than the equipment<br />
grounding conductor. The frame of the generator shall be<br />
connected to an approved grounding electrode.<br />
Improper connections to a building electrical system can<br />
allow electrical current from the generator to backfeed into<br />
the utility lines. Such backfeed may electrocute utility company<br />
workers or others who contact the lines during a power<br />
outage, and the generator may explode, burn, or cause fires<br />
when utility power is restored.<br />
Ground System<br />
DEK portable generators have a system ground that connects<br />
generator frame components to the ground terminals in the AC<br />
output receptacles. The system ground is not connected to the<br />
AC neutral wire. If the generator is tested by a receptacle tester, it<br />
will not show the same ground circuit condition as for a home<br />
receptacle where the ground and neutral are connected.<br />
Special Requirements<br />
There may be Federal or State Occupational Safety and Health<br />
Administration (OSHA) regulations, local codes, or ordinances<br />
that apply to the intended use of the generator. Please consult a<br />
qualified electrician, electrical inspector, or the local agency having<br />
jurisdiction.<br />
Rev. 1/2010<br />
DEK® is registered trademark of <strong>GXi</strong> <strong>Outdoor</strong> <strong>Power</strong>, LLC Clayton, NC 27520 USA.<br />
No part of this publication can be printed or copied without written permission.<br />
4 of 16
Heavy Duty <strong>Power</strong> Equipment<br />
WARNINGS<br />
4550 Pro, 5650, 6500(EL), 7550 Pro<br />
AC Applications<br />
Before connecting an appliance or power cord to the generator:<br />
1. Make sure that appliances are in good working order.<br />
Faulty appliances or power cords can create a potential for<br />
electrical shock. If an appliance begins to operate abnormally,<br />
becomes sluggish or stops suddenly, turn it off immediately.<br />
2. Disconnect the appliance, and determine whether the problem<br />
is the appliance, or if the rated load capacity of the generator<br />
has been exceeded.<br />
3. Make sure that the electrical rating of the tool or appliance<br />
does not exceed that of the generator. Never exceed the<br />
maximum power rating of the generator. <strong>Power</strong> levels between<br />
rated and maximum may be used for no more than<br />
30 minutes.<br />
Substantial overloading will open the circuit breaker. Exceeding<br />
the time limit for maximum power operation or<br />
slightly overloading the generator may not switch the<br />
circuit breaker or circuit protector OFF, but will shorten the<br />
service life of the generator.<br />
Limit operation requiring maximum power to 30 minutes. For<br />
continuous operation (longer than 30 minutes), do not exceed<br />
80% of the rated power balanced equally on the A&B sides of<br />
the Alternator.<br />
The total power requirements (VA) of all appliances connected<br />
must be considered. Appliance and power tool manufacturers<br />
usually list rating information near the model number or serial<br />
number.<br />
WARNING<br />
Failure to properly follow maintenance instructions and<br />
precautions can cause serious injuries or death. Always<br />
follow the inspection and maintenance recommendations<br />
and schedules in this owner’s manual.<br />
Safety Precautions:<br />
Make sure the engine is off before you begin any maintenance<br />
or repairs. This will eliminate several potential hazards:<br />
Carbon monoxide poisoning from engine exhaust.<br />
Be sure there is adequate ventilation whenever you<br />
operate the engine.<br />
Burns from hot parts.<br />
Let the engine and exhaust system cool before touching.<br />
Injury from moving parts.<br />
Do not run the engine unless instructed to do so.<br />
In the State of California a spark arrestor is required by law.<br />
Other states may have similar laws. Federal laws apply on all<br />
federal lands. If you equip the muffler with a spark arrestor, it<br />
must be maintained in effective working order. See page 11.<br />
Rapid retraction of the recoil starter cord can pull the<br />
starter cord back faster than you can let go. When starting<br />
the engine, pull the cord slowly until resistance is felt then<br />
pull rapidly to avoid kickback.<br />
DANGER<br />
Changing the speed of the generator by adjusting the governor can cause damage to the generator,<br />
devices attached to the generator, and may result in bodily injury. Do not adjust or<br />
tamper with the engine speed setting.<br />
Product Specifications<br />
Rev. 1/2010<br />
DEK® is registered trademark of <strong>GXi</strong> <strong>Outdoor</strong> <strong>Power</strong>, LLC Clayton, NC 27520 USA.<br />
No part of this publication can be printed or copied without written permission.<br />
5 of 16
Heavy Duty <strong>Power</strong> Equipment<br />
Fuel Tank<br />
Component Identification<br />
Fuel Cap<br />
4550 Pro, 5650, 6500(EL), 7550 Pro<br />
Generator models may have<br />
different features and/or options<br />
than shown in these diagrams.<br />
DEK reserves the right to alter<br />
product features and<br />
specifications.<br />
Choke Lever<br />
Air Filter<br />
Recoil Starter (Assembly)<br />
Emissions Information<br />
Fuel Valve<br />
Battery (electric start option only)<br />
Oil Fill Cap—one one each side of the<br />
engine.<br />
Oil Drain (one on each side of the engine)<br />
Engine Serial Number stamped<br />
on the engine block<br />
ON/OFF Switch<br />
Main<br />
Breaker<br />
L14-30 240V/120V<br />
Digital Meter<br />
Ground<br />
Lug<br />
12 V Breaker<br />
Start Switch (electric start option)<br />
120V AC Outlets<br />
12V DC Outlet<br />
Pull Out Handle<br />
Bars<br />
(recessed)<br />
Choke Lever<br />
Valve Cover<br />
Alternator<br />
Carburetor<br />
Exhaust Pipe<br />
Muffler Guard<br />
Rev. 1/2010<br />
DEK® is registered trademark of <strong>GXi</strong> <strong>Outdoor</strong> <strong>Power</strong>, LLC Clayton, NC 27520 USA.<br />
No part of this publication can be printed or copied without written permission.<br />
6 of 16
Heavy Duty <strong>Power</strong> Equipment<br />
Wheel Kit Assembly<br />
4550 Pro, 5650, 6500(EL), 7550 Pro<br />
Required Tools (not supplied)<br />
1. Adjustable wrench or a socket<br />
wrench with a 8 mm socket.<br />
Approximate assembly time is 5<br />
minutes.<br />
Supplied with your generator:<br />
1. Two(2) foot assemblies with two<br />
(2) 8 mm nuts.<br />
2. Two (2) wheel axle assemblies.<br />
Pre-assembled wheel /<br />
axle assembly.<br />
Two pre-assembled, retractable, handle bars, one<br />
on each side of the generator frame. Twist to<br />
lock / unlock. Pull or push to extend / retract.<br />
Step<br />
1<br />
Insert each foot assembly through<br />
holes in the frame. Tighten nut with<br />
adjustable wrench or 8 mm socket.<br />
Step<br />
2<br />
Insert each axle and tighten the<br />
bolt to secure in place using an<br />
adjustable wrench or 8 mm<br />
socket.<br />
Additional equipment required to safely operate this generator:<br />
1. Gas can.<br />
2. Unleaded gasoline.<br />
3. SAE 10W30 & 14HP oil (a little more than 1 quart for DEK 11hp, 13hp and 14hp engines, a little less than 1 quart is required for DEK‟s<br />
smaller engines).<br />
4. An oil fill funnel.<br />
5. Gasoline fuel stabilizer (for storing your generator). 120V and/or 240V extension cords.<br />
6. An adjustable wrench or a 12mm socket for oil changes.<br />
Note: A spark arrestor was supplied with your generator and must be installed for use within the State of California. See supplemental instructions.<br />
Commissioning the Battery<br />
The battery is an optional feature. The battery is used to<br />
start a generator equipped with an electric starter. Not all<br />
generators are sold with batteries. Please verify with your<br />
retailer if you believe the battery is missing.<br />
WARNING<br />
Lead acid storage batteries contain sulfuric acid which can<br />
cause serious injuries. The battery also gives off explosive<br />
gases. Keep sparks, flames and cigarettes away. Provide<br />
adequate ventilation when charging or using batteries. Battery<br />
posts, terminals and related accessories contain lead<br />
and lead compounds. Avoid spills of electrolyte and wash<br />
hands thoroughly after handling.<br />
Use gloves and safety glasses when handling and installing<br />
lead acid batteries.<br />
If you get electrolyte in your eyes, flush your eyes with clean<br />
water for 15 minutes and seek medical attention. Keep out of<br />
reach of children.<br />
Battery Maintenance:<br />
Routine maintenance is essential to keep the battery in good<br />
condition and maximize its service life.<br />
1. Keep the terminals and connections free from corrosion<br />
and coat with petroleum jelly or grease to reduce corrosion<br />
from occurring.<br />
2. If the generator sits idle for more than two (2) months, it is<br />
best to recharge the battery to ensure it is fully charged<br />
when you need it and to increase battery life.<br />
FOR YOUR SAFETY AND CONVENIENCE, THE<br />
BATTERY WAS SHIPPED SEALED AND<br />
PRE-CHARGED.<br />
The battery is ready to be connected to the generator.<br />
To connect the battery, use an adjustable wrench or 8 mm<br />
socket to secure the black wire to the positive terminal and<br />
the negative terminal.<br />
Rev. 1/2010<br />
DEK® is registered trademark of <strong>GXi</strong> <strong>Outdoor</strong> <strong>Power</strong>, LLC Clayton, NC 27520 USA.<br />
No part of this publication can be printed or copied without written permission.<br />
7 of 16
Heavy Duty <strong>Power</strong> Equipment<br />
Controls<br />
4550 Pro, 5650, 6500(EL), 7550 Pro<br />
DC Terminals<br />
Some generators are shipped with optional DC battery charging<br />
cables, have a standard 12V DC receptacle, and have a 12V<br />
cigarette lighter style outlet.<br />
The battery must be connected to the generator DC terminals<br />
with the proper polarity (battery positive to generator red terminal<br />
and battery negative to the generator black terminal).<br />
Disconnecting the battery cables:<br />
1. Stop the engine.<br />
2. Disconnect the negative ( - ) battery cable from the generator<br />
negative ( - ) terminal.<br />
3. Disconnect the other end of the negative ( - ) battery cable<br />
from the battery negative ( - ) terminal.<br />
4. Disconnect the positive ( + ) battery cable from the generator<br />
positive (+ ) terminal.<br />
5. Disconnect the other end of the positive ( + ) battery cable<br />
from the battery positive ( + ) terminal.<br />
6. Reconnect the vehicle ground battery cable to the battery<br />
negative ( - )terminal.<br />
WARNING<br />
Do not use the 12V DC and the AC receptacles at the same<br />
time.<br />
Connecting the battery cables:<br />
1. Before connecting the battery charging cables to a battery<br />
that is installed in a vehicle, disconnect the vehicle ground<br />
battery cable from the battery negative ( - ) terminal.<br />
2. Connect the other end of the positive ( + ) battery cable to<br />
the generator positive ( + ) terminal.<br />
3. Connect the positive ( + ) battery cable to the battery positive<br />
( + ) terminal.<br />
4. Connect the negative ( - ) battery cable to the battery negative<br />
( - ) terminal.<br />
5. Connect the other end of the negative ( - ) battery cable to<br />
the generator negative ( - ) terminal.<br />
6. Start the generator.<br />
CAUTION: Do not start the vehicle while the battery charging<br />
cable is connected and the generator is running. The<br />
vehicle or the generator may be damaged.<br />
Rev. 1/2010<br />
DEK® is registered trademark of <strong>GXi</strong> <strong>Outdoor</strong> <strong>Power</strong>, LLC Clayton, NC 27520 USA.<br />
No part of this publication can be printed or copied without written permission.<br />
8 of 16
Heavy Duty <strong>Power</strong> Equipment<br />
Controls<br />
4550 Pro, 5650, 6500(EL), 7550 Pro<br />
Choke Rod<br />
WARNING<br />
The engine was shipped without engine oil. DO NOT START<br />
THE ENGINE WITHOUT FILLING THE ENGINE WITH OIL.<br />
Use SAE 10W-30 for normal conditions and SAE 5W-30<br />
when the ambient temperature is below 32° F.<br />
The choke is used to<br />
provide an enriched<br />
fuel mixture when<br />
starting a cold engine.<br />
It can be<br />
opened and closed<br />
by operating the<br />
choke rod manually.<br />
Pull the rod out toward<br />
CLOSED to<br />
enrich the mixture<br />
for cold starting.<br />
Open once the engine<br />
is running.<br />
Recoil Starter<br />
To start the engine, pull the starter grip lightly until resistance is<br />
felt, then pull briskly.<br />
NOTICE:<br />
Do not allow the starter grip to snap back against the engine.<br />
Return it gently to prevent damage to the starter.<br />
The recoil starter is used to start the engine if the generator is<br />
not equipped with a 12 volt battery to operate the starter motor,<br />
or if the battery does not contain adequate charge to operate the<br />
starter motor.<br />
RECOIL STARTER<br />
STARTER GRIP<br />
Turn clockwise<br />
to turn<br />
fuel valve on.<br />
Fuel Valve Lever<br />
Oil Alert System<br />
The fuel valve is<br />
located between the<br />
fuel tank and carburetor.<br />
When the<br />
valve lever is in the<br />
ON position, fuel is<br />
allowed to flow from<br />
the fuel tank to the<br />
carburetor. Be sure<br />
to return the fuel<br />
valve lever to the<br />
OFF position after<br />
stopping the engine.<br />
OFF<br />
ON<br />
The Oil Alert system is designed to prevent engine damage<br />
caused by an insufficient amount of oil in the crankcase. Before<br />
the oil level in the crankcase can fall below a safe limit, the Oil<br />
Alert system will automatically stop the engine (the engine<br />
switch will remain in the ON position). The Oil Alert system<br />
should not take the place of checking the oil level before each<br />
use. If the engine stops and will not restart, check the engine oil<br />
level (see page 14) before troubleshooting in other areas.<br />
Ground Terminal<br />
Engine Switch<br />
The generator ground terminal is connected<br />
to the frame of the generator, the<br />
metal non-current-carrying parts of the<br />
generator, and the ground terminals of<br />
each receptacle.<br />
To start and stop the engine.<br />
WARNING<br />
Before using the ground terminal, consult a qualified electrician,<br />
electrical inspector or local agency having jurisdiction<br />
for local codes or ordinances that apply to the intended<br />
use of the generator.<br />
Engine ON / OFF Switch<br />
Electric Starter Switch<br />
(optional feature)<br />
NOTE: SYSTEM GROUND IS NOT CONNECTED TO THE AC<br />
NEUTRAL ON THIS GENERATOR. CONSULT AN ELECTRI-<br />
CIAN WHEN CONNECTING THIS GENERATOR TO YOUR<br />
HOME OR BUSINESS ELECTRICAL PANEL TO ENSURE<br />
GROUNDING MEETS THE LOCAL ELECTRICAL CODE<br />
Rev. 1/2010<br />
DEK® is registered trademark of <strong>GXi</strong> <strong>Outdoor</strong> <strong>Power</strong>, LLC Clayton, NC 27520 USA.<br />
No part of this publication can be printed or copied without written permission.<br />
9 of 16
Heavy Duty <strong>Power</strong> Equipment<br />
Operating the Generator<br />
4550 Pro, 5650, 6500(EL), 7550 Pro<br />
DANGER<br />
CARBON MONOXIDE GAS<br />
CARBON MONOXIDE Using a generator indoors CAN KILL<br />
YOU IN MINUTES.<br />
Generator exhaust contains carbon monoxide (CO). This is<br />
a poison you cannot see or smell. If you can smell the generator<br />
exhaust, you are breathing CO. But even if you cannot<br />
smell the exhaust, you could be breathing CO.<br />
NEVER use a generator inside homes, garages, crawlspaces,<br />
or other partly enclosed areas. Deadly levels of<br />
carbon monoxide can build up in these areas. Using a fan<br />
or opening windows and doors does NOT supply enough<br />
fresh air.<br />
ONLY use a generator outside and far away from windows,<br />
doors, and vents. These openings can pull in generator<br />
exhaust.<br />
Even when you use a generator correctly, CO may leak into<br />
the home. ALWAYS use a battery-powered or batterybackup<br />
CO alarm in the home.<br />
If you start to feel sick, dizzy, or weak after the generator<br />
has been running, move to fresh air RIGHT AWAY. See a<br />
doctor. You could have carbon monoxide poison.”<br />
Step 1.<br />
Ensure all electrical loads are removed from the generator.<br />
Disconnect all the extension cords and ensure the main breaker<br />
is in the OFF position. Remove all flammable materials and<br />
debris from the area. Make sure the generator is level.<br />
Step 2.<br />
Check the oil level by removing the oil fill cap.<br />
Put the generator on a level surface with the engine<br />
stopped.<br />
Remove the oil filler cap.<br />
<br />
WARNING<br />
For power outages, permanently installed stationary generators<br />
are better suited for providing backup power to the home. Even a<br />
properly connected portable generator can become overloaded.<br />
This may result in overheating or stressing the generator components,<br />
possibly leading to a generator failure.<br />
Check the oil level. If the oil level is low, fill it until the oil is<br />
overflowing. It will take approximately 1.1 - 1.5 quarts of<br />
oil.<br />
Step 3.<br />
Make sure there is fuel in the gasoline<br />
tank. Look at the fuel level indicated<br />
by removing the fuel cap to inspect<br />
the contents of the fuel tank. The fuel<br />
filter can also be inspected once the<br />
fuel cap is removed. Ensure the fuel filter is clean of dirt and<br />
debris. Tightly secure the fuel cap after your inspection is complete.<br />
Fuel can damage paint and plastic. Be careful not to spill fuel<br />
when filling your fuel tank. Damage caused by spilling fuel is not<br />
covered under warranty. Use unleaded gasoline with a pump<br />
octane rating of 86 or higher. This engine is certified to operate<br />
on unleaded gasoline. Unleaded gasoline produces fewer engine<br />
and spark plug deposits and<br />
extends exhaust system life. Never<br />
use stale or contaminated gasoline<br />
or an oil/gasoline mixture. Avoid<br />
getting dirt or water in the fuel tank.<br />
DO NOT overfill the tank. Leave a 1 inch air gap in the tank.<br />
Gasoline is highly flammable and explosive. You can be<br />
burned or seriously injured when refueling.<br />
<br />
<br />
WARNING<br />
Ethanol warning<br />
This portable generator is not for use with<br />
gasoline/ethanol blends with over 15%<br />
ethanol.<br />
Stop engine and keep heat, sparks, and flame away.<br />
Refuel only outdoors.<br />
If additional oil is need, SAE 10W-30 engine oil is recommended<br />
for most general purpose applications. In cold weather climate,<br />
use SAE 5W-30.<br />
<br />
Wipe up spills immediately.<br />
Rev. 1/2010<br />
DEK® is registered trademark of <strong>GXi</strong> <strong>Outdoor</strong> <strong>Power</strong>, LLC Clayton, NC 27520 USA.<br />
No part of this publication can be printed or copied without written permission.<br />
10 of 16
Heavy Duty <strong>Power</strong> Equipment<br />
Operating the Generator<br />
4550 Pro, 5650, 6500(EL), 7550 Pro<br />
Step 4.<br />
Set the fuel valve lever to the ON position by rotating it clockwise.<br />
Step 5.<br />
Pull the choke lever to the CLOSED position. See page 7 for a<br />
diagram of the choke lever.<br />
Step 6.<br />
Turn the generator ON/OFF switch to the “ON” position.<br />
Step 7.<br />
Start the engine<br />
1. If you have an electric starter, press the electric starter<br />
switch to the START position, hold it there for 5 seconds and<br />
let it come to rest in the ON position once the engine has<br />
started.<br />
2. If you are using the recoil starter, pull slightly on the cord<br />
until you feel some pressure. Once you feel the backpressure<br />
building, rapidly pull the cord.<br />
Step 8.<br />
Once the generator is running, push the choke lever into the<br />
OPEN position.<br />
Step 9.<br />
Let the generator warm up for approximately 3 minutes before<br />
applying any electrical loads.<br />
Step 10.<br />
Apply loads to the generator one at a time, allowing the generator<br />
to stabilize after you add each incremental load. Add the<br />
loads with the largest surge power requirement first. This would<br />
include refrigerators, air-conditioners, large motors, and pumps.<br />
Add smaller loads once the generator has stabilized with the<br />
larger loads.<br />
ALWAYS UNPLUG APPLIANCES AND REMOVE ALL ELEC-<br />
TRICAL LOADS BEFORE REFUELING. THEN FOLLOW<br />
STEPS 2 - 10.<br />
WARNING<br />
Connecting a load larger than this generator‟s power rating may<br />
damage the circuit breakers, alternator and sensitive appliances.<br />
Continuously loading this generator above 80% of its maximum<br />
output power will shorten the life of the generator.<br />
Balance the load evenly between the A and B outlets to maximize<br />
the output power.<br />
Appliances with electric motors require an additional 150%<br />
power when they are starting up (indicated by an * and in bold<br />
in the chart below).<br />
To determine maximum load that you may safely connect<br />
to this generator:<br />
1. Calculate the maximum continuous power required by adding<br />
up the running power of each appliance. The total running<br />
power of your appliances cannot exceed the maximum<br />
output power of this generator.<br />
2. Calculate the surge power by:<br />
i) Adding up the running power of each appliance with an<br />
* and in bold below.<br />
ii) Multiplying the total by 1.5.<br />
iii) Adding this to the total running power calculated in<br />
step 1 above.<br />
The surge power requirements of your appliances cannot<br />
exceed the surge power rating of this generator.<br />
Appliance<br />
Typical Residential Loads<br />
Running <strong>Power</strong><br />
Light bulbs (each)<br />
75 Watts<br />
Stove element (each)<br />
1000 Watts<br />
Microwave<br />
1500 Watts<br />
Coffee maker<br />
700 Watts<br />
Television<br />
750 Watts<br />
VCR<br />
250 Watts<br />
Computer & monitor<br />
800 Watts<br />
Space heater<br />
1500 Watts<br />
Washing machine<br />
1000 Watts<br />
NG clothes dryer<br />
750 Watts<br />
Electric clothes dryer<br />
5500 Watts<br />
Dishwasher<br />
1850 Watts<br />
Water heater<br />
5000 Watts<br />
Electric furnace<br />
5000 Watts<br />
Toaster<br />
1200 Watts<br />
Box fan*<br />
750 Watts<br />
Window A/C - 8000 BTU*<br />
2400 Watts<br />
Central A/C (per ton)*<br />
2800 Watts<br />
Furnace blower*<br />
850 Watts<br />
2 hp well pump* 2000 Watts<br />
Refrigerator*<br />
1000 Watts<br />
Freezer*<br />
1000 Watts<br />
STOPPING THE GENERATOR<br />
In an emergency:<br />
To stop the engine in an emergency, move the engine switch<br />
to the OFF position and turn the fuel valve OFF.<br />
In normal use:<br />
1. Turn the AC circuit breaker to the OFF position (if applicable).<br />
2. Disconnect all loads and extension cords.<br />
3. Allow the engine to run with no load for 3 minutes.<br />
4. Turn the engine switch to the OFF position.<br />
5. Turn the fuel valve lever to the OFF position.<br />
6. Allow the generator to cool off before touching any engine or<br />
alternator components. It may take as long as 30 minutes<br />
before the generator is cool enough to touch safely.<br />
Rev. 1/2010<br />
DEK® is registered trademark of <strong>GXi</strong> <strong>Outdoor</strong> <strong>Power</strong>, LLC Clayton, NC 27520 USA.<br />
No part of this publication can be printed or copied without written permission.<br />
11 of 16
Heavy Duty <strong>Power</strong> Equipment<br />
Maintenance<br />
4550 Pro, 5650, 6500(EL), 7550 Pro<br />
MAINTENANCE<br />
The Importance of Maintenance<br />
Good maintenance is essential for safe, economical, and trouble-free<br />
operation. It will also help reduce air pollution.<br />
To help you properly care for your generator, the following<br />
pages include a maintenance schedule, routine inspection<br />
procedures, and simple maintenance procedures using basic<br />
hand tools. Other service tasks that are more difficult, or require<br />
special tools, are best handled by professionals and are<br />
normally performed by a DEK technician or other qualified<br />
mechanic.<br />
The maintenance schedule applies to normal operating conditions.<br />
If you operate your generator under severe conditions,<br />
such as sustained high-load or high-temperature operation, or<br />
use it in unusually wet or dusty conditions, consult your servicing<br />
dealer for recommendations applicable to your individual<br />
needs and use.<br />
Engine Oil Change<br />
Drain the oil while the engine is warm to assure rapid and complete<br />
draining.<br />
1. Remove the drain plug and sealing washer, remove the oil<br />
filler cap, and drain the oil.<br />
2. Reinstall the drain plug and sealing washer. Tighten the<br />
plug securely.<br />
3. Refill with the recommended oil (SAE 10W-30 ) and check<br />
the oil level.<br />
Dispose of used motor oil in a manner that is compatible with<br />
the environment. Do not throw it in the trash, pour it on the<br />
ground, or down a drain.<br />
Air Cleaner Service<br />
A dirty air cleaner will restrict air flow to the carburetor. To prevent<br />
carburetor malfunction, service the air cleaner regularly.<br />
Service more frequently when operating the generator in extremely<br />
dusty areas.<br />
Maintenance, replacement, or repair of the emission control<br />
devices and systems may be performed by any engine<br />
repair establishment or individual, using parts that are<br />
‘‘certified’’ to EPA standards.<br />
Maintenance Schedule<br />
Item<br />
Engine oil (Check)<br />
Engine Oil (Change)<br />
Air Cleaner (Check)<br />
Air Cleaner Wash<br />
Before<br />
each use<br />
X<br />
X<br />
20hrs or<br />
every 3<br />
month<br />
X<br />
50 hrs or<br />
every 3<br />
months<br />
X<br />
100 hrs or<br />
every 6<br />
months<br />
300 hrs<br />
or every<br />
1 year<br />
NOTICE:<br />
Never run the generator without the air filter. Rapid engine wear<br />
will result.<br />
1. Unsnap the air cleaner cover clips, remove the air<br />
cleaner cover, and remove the element.<br />
2. Wash the air cleaner element in a solution of household<br />
detergent and warm water, then rinse thoroughly, or<br />
wash in nonflammable or high flashpoint solvent. Allow<br />
the air cleaner element to dry thoroughly.<br />
3. Soak the air cleaner element in clean engine oil and<br />
squeeze out the excess oil. The engine will smoke during<br />
initial startup if too much oil is left in the air cleaner<br />
element.<br />
4. Reinstall the air cleaner element and the cover.<br />
Fuel Filter Cleaning<br />
Fuel filter Cup (Clean)<br />
Spark Plug (Clean)<br />
Spark Plug (Change)<br />
Optional Spark Arrestor (Clean)<br />
X<br />
X<br />
X<br />
X<br />
The fuel filter cup / screen prevents dirt which may be in the<br />
fuel from entering the carburetor. The fuel filter should be<br />
inspected and cleaned on a regular basis. For best results,<br />
clean the filter with gasoline and a toothbrush or blow the<br />
debris out of the filter with air pressure.<br />
Valve Clearance (Adjust) X*<br />
Fuel Tank and Filter (Clean) X*<br />
Fuel Tube (Check)<br />
Combustion Chamber (Clean)<br />
* Should be performed by an authorized DEK dealer.<br />
Every 2 yrs (replace if necessary)*<br />
After every 250 hrs*<br />
Replacement Parts<br />
The emission control systems on your DEK engine were designed,<br />
built, and certified to conform with EPA and California emission regulations.<br />
We recommend the use of genuine DEK parts whenever you<br />
have maintenance done. These original-design replacement parts<br />
are manufactured to the same standards as the original parts, so you<br />
can be confident of their performance. The use of replacement parts<br />
that are not of the original design and quality may impair the effectiveness<br />
of your emission control system.<br />
Spark Plug Service<br />
In order to service the spark plug, you will need a spark plug<br />
wrench. Recommended spark plugs: BPR5ES (NGK) and<br />
W16EPR-U (DENSO). To ensure proper engine operation,<br />
the spark plug must be properly gapped and free of deposits.<br />
If the engine has been running, the muffler will be very<br />
hot. Be careful not to touch the muffler.<br />
1. Remove the spark plug cap.<br />
2. Clean any dirt from around the spark plug base.<br />
3. Use a spark plug wrench to remove the spark plug.<br />
A manufacturer of an aftermarket part assumes the responsibility that<br />
the part will not adversely affect emission performance. The manufacturer<br />
or rebuilder of the part must certify that use of the part will<br />
not result in a failure of the engine to comply with emission regulations.<br />
Rev. 1/2010<br />
DEK® is registered trademark of <strong>GXi</strong> <strong>Outdoor</strong> <strong>Power</strong>, LLC Clayton, NC 27520 USA.<br />
No part of this publication can be printed or copied without written permission.<br />
12 of 16
Heavy Duty <strong>Power</strong> Equipment<br />
Maintenance<br />
4550 Pro, 5650, 6500(EL), 7550 Pro<br />
4. Visually inspect the spark plug. Discard<br />
it if the insulator is cracked,<br />
chipped or fouled.<br />
5. Measure the plug gap with a feeler<br />
gauge. Correct as necessary by<br />
carefully bending the side electrode.<br />
The gap should be: 0.028 0.031 in<br />
(0.70 0.80 mm)<br />
TRANSPORTING<br />
When transporting the generator, turn the engine switch and the<br />
fuel valve OFF. Keep the generator level to prevent fuel spillage.<br />
Fuel vapor or spilled fuel may ignite.<br />
Take care not to drop or strike the generator when transporting.<br />
Do not place heavy objects on the generator. When transporting<br />
the generator by loading it on to a vehicle, secure to the generator<br />
frame as shown.<br />
6. Check that the spark plug washer is in good condition, and<br />
thread the spark plug in by hand to prevent cross-threading.<br />
7. After the spark plug is seated, tighten with a spark plug<br />
wrench to compress the washer.<br />
If installing a new spark plug, tighten 1/2 turn after the spark<br />
plug seats to compress the washer. If reinstalling a used spark<br />
plug, tighten 1/8 1/4 turn after the spark plug seats to compress<br />
the washer.<br />
NOTICE:<br />
The spark plug must be securely tightened. An improperly tightened<br />
spark plug can become very hot and could damage the<br />
engine. Use only the recommended spark plugs or equivalent.<br />
Optional Spark Arrestor Maintenance<br />
If the generator has been running, the muffler will be very hot.<br />
Allow it to cool before proceeding. The spark arrester must be<br />
serviced every 50 hours to keep it functioning as designed.<br />
Clean the spark arrester as follows:<br />
1. Loosen the screw by the exhaust port of the muffler and<br />
remove the spark arrester.<br />
2. Use a brush to remove carbon deposits from the spark arrester<br />
screen. Inspect the screen for breaks or tears and<br />
replace it if necessary.<br />
3. Install the spark arrester in the reverse order of removal.<br />
SCREW<br />
DANGER<br />
Contact with a hot engine<br />
or exhaust system can<br />
cause serious burns or<br />
fires. Let the engine cool<br />
before transporting or storing<br />
the generator.<br />
STORING<br />
Before storing the unit for an extended period:<br />
1. Be sure the storage area is free of excessive humidity and dust.<br />
2. Service according to the table below:<br />
STORAGE TIME<br />
Recommended Service Procedure to prevent hard starting:<br />
1 to 2 months Fill with fresh gasoline and add gasoline conditioner*.<br />
2 months to 1 year Fill with fresh gasoline and add gasoline conditioner*.<br />
1 year or longer<br />
Drain the carburetor float bowl.<br />
Fill with fresh gasoline and add gasoline conditioner*.<br />
Drain the carburetor float bowl.<br />
Remove the spark plug. Put a tablespoon of engine oil into the cylinder.<br />
Turn the engine slowly with the recoil starter to distribute the oil. Reinstall<br />
the spark plug.<br />
Change the engine oil.<br />
After removal from storage, drain the stored gasoline into a suitable container,<br />
and fill with fresh gasoline before starting.<br />
* Use gasoline conditioners that are formulated to extend storage life. Contact your authorized<br />
DEK generator dealer for conditioner recommendations.<br />
Optional Starter Motor Fuse Replacement<br />
If the fuse is blown, the starter motor won‟t operate. Turn the engine<br />
switch to the OFF position. Remove the fuse holder cover<br />
and replace the fuse. The specified fuse is 10A.<br />
NOTICE:<br />
Never use a fuse with a<br />
different rating from that<br />
specified. Serious damage<br />
to the electrical system<br />
or fire may result.<br />
SPARK ARRESTOR<br />
Storage Preparation<br />
1. Drain the carburetor by loosening the drain screw. Drain the<br />
gasoline into a suitable container. Place 4 ounces of fuel<br />
stabilizer in the fuel tank.<br />
2. Change the engine oil (page 10 ).<br />
3. Remove the spark plug, and pour about a tablespoon of<br />
clean engine oil into the cylinder. Turn the engine several<br />
revolutions slowly with the recoil starter to distribute the oil,<br />
then reinstall the spark plug.<br />
4. Slowly pull the starter grip until resistance is felt. At this<br />
point, the piston is coming up on its compression stroke and<br />
both the intake and exhaust valves are closed. Storing the<br />
engine in this position will help to protect it from internal<br />
corrosion.<br />
WARNING<br />
Gasoline is extremely flammable and is explosive under<br />
certain conditions. Perform this task in a well-ventilated<br />
area with the engine stopped. Do not smoke or allow flames<br />
or sparks in the area during this procedure.<br />
Rev. 1/2010<br />
DEK® is registered trademark of <strong>GXi</strong> <strong>Outdoor</strong> <strong>Power</strong>, LLC Clayton, NC 27520 USA.<br />
No part of this publication can be printed or copied without written permission.<br />
13 of 16
Heavy Duty <strong>Power</strong> Equipment<br />
Troubleshooting<br />
4550 Pro, 5650, 6500(EL), 7550 Pro<br />
Symptom:<br />
No spark, engine not catching, engine won't start<br />
Potential Causes Check / solution Recommendation<br />
Fuel valve off/out of fuel Fill tank/turn fuel valve on<br />
Spark arrestor clogged<br />
Remove, clean and replace.<br />
Choke is open<br />
Close choke by pulling choke wire out. Open choke after starting<br />
Vacuum check valve has failed Replace check valve Call DEK for parts/service<br />
On/Off switch broken Use fuel shut-off as ON/OFF switch until switch is replaced. Call DEK for parts/service<br />
Oil level too low<br />
The engine shuts down when oil level low<br />
Oil switch<br />
Verify oil switch/sensor is functioning . The oil switch is the gold, brass colored box about 3 inches to the Call DEK for parts/service<br />
left of the oil fill cap. Dis-connect oil switch by disconnecting black lead out of finger connection. If the<br />
engine starts, then switch/sensor is faulty or the oil level is too low, if engine still does not start, then<br />
switch/sensor is probably ok to reassemble<br />
Recoil is broken If ratchets are broken they will not spin the engine. Call DEK for parts/service<br />
Fuel filter is dirty<br />
Contaminates will clog filter, not allowing fuel to get to engine. Clean or replace fuel filter.<br />
Fuel is contaminated<br />
Contaminates in fuel will not allow combustion at the specified pressure and temperate and blocks filters<br />
Spark plug boot off/loose Press spark plug boot firmly on spark plug. Call DEK for parts/service<br />
Ignition coil failure<br />
Call DEK for parts/service<br />
Spark plug fouled or failed Remove spark plug, clean or replace Call DEK for parts/service<br />
Carburator clogged Clean with fresh fuel Call DEK for parts/service<br />
Symptom:<br />
Recoil is hard to pull or not retracting<br />
Potential Causes Check / solution Recommendation<br />
Spark arrestor<br />
Remove, clean and replace.<br />
Recoil rubbing on dented housing<br />
Call DEK for parts/service<br />
Alternator bearing failed Alternator bearing needs to be replaced. Send to service. Call DEK for parts/service<br />
Camshaft detent has failed<br />
Call DEK for parts/service<br />
Head valve timing is off<br />
Call DEK for parts/service<br />
Symptom:<br />
Engine starts, but then shuts off before 10 seconds<br />
Potential Causes Check / solution Recommendation<br />
Remove/Clean spark arrestor Remove, clean and replace.<br />
Oil level too low<br />
The engine shuts down when the oil level is low. Check the owners manual for oil capacity<br />
Fuel valve off/out of fuel Fill tank/turn fuel valve on<br />
Spark plug fouled or failed Remove spark plug, clean or replace Call DEK for parts/service<br />
Vacuum check valve has failed Replace check valve, call DEK for replacement procedure. Call DEK for parts/service<br />
Symptom:<br />
Choke wire broke<br />
Potential Causes Check / solution Recommendation<br />
Choke broke Choke should be closed while starting. Pull black choke counter-clockwise and hold in place with wire. Call DEK for parts/service<br />
Symptom:<br />
Engine runs: rough/vibrating/oscillating<br />
Potential Causes Check / solution Recommendation<br />
Remove/Clean spark arrestor Remove, clean and replace.<br />
The choke is not open<br />
Push choke lever in.<br />
Over loading generator<br />
Disconnect some appliances<br />
Air filter is dirty<br />
Clean air filter<br />
Fuel filter is clogged<br />
Contaminates will clog filter, not allowing fuel to get to engine. Clean filter<br />
Fuel is contaminated<br />
Contaminates in fuel will not allow combustion at the specified pressure and temperate<br />
Vacuum check valve has failed Replace check valve. Call DEK for parts/service<br />
Head valve timing is off Send to service Call DEK for parts/service<br />
Symptom:<br />
Engine runs, but boggs down under load<br />
Potential Causes Check / solution Recommendation<br />
Remove/Clean spark arrestor Remove, clean and replace.<br />
Choke is open<br />
Push choke lever in<br />
Over loading generator<br />
Disconnect some appliances / devices<br />
Air filter is dirty<br />
Clean air filter<br />
Fuel filter is clogged<br />
Contaminates will clog filter, not allowing fuel to get to engine<br />
Symptom:<br />
Engine runs, Volt meter shows 120 VAC, but no power to outlets<br />
Potential Causes Check / solution Recommendation<br />
Bad extension cord/power strip Try different / shorter extension cord or a different power strip<br />
Push button breaker tripped Disconnect all loads and push reset button.<br />
GFCI tripped<br />
Disconnect all loads. Push the red reset button very deep/firmly<br />
GFCI failed Replace GFCI with any GFCI or household outlet Call DEK for parts/service<br />
Rev. 1/2010<br />
DEK® is registered trademark of <strong>GXi</strong> <strong>Outdoor</strong> <strong>Power</strong>, LLC Clayton, NC 27520 USA.<br />
No part of this publication can be printed or copied without written permission.<br />
14 of 16
Heavy Duty <strong>Power</strong> Equipment<br />
Troubleshooting<br />
4550 Pro, 5650, 6500(EL), 7550 Pro<br />
Symptom:<br />
Engine runs and volt meter shows 240VAC and 120VAC, but no power goes to connected devices<br />
Potential Causes Check / solution Recommendation<br />
Bad extension cord/power strip Try different / shorter extension cord or a different power strip<br />
Device failed<br />
Try a different light bulb or device<br />
Push button breaker tripped Push button breaker tripped<br />
GFCI tripped<br />
Push the red reset button very deep/firmly<br />
GFCI failed Replace GFCI with any GFCI or household outlet Call DEK for parts/service<br />
Broken wire<br />
Call DEK for parts/service<br />
Toggle switch failed<br />
Call DEK for parts/service<br />
Symptom:<br />
Engine runs, volt meter shows 120VAC in 120V mode, but 120VAC or 0VAC in 240V mode<br />
Potential Causes Check / solution Recommendation<br />
Circuit breaker failed<br />
Call DEK for parts/service<br />
Toggle switch failed<br />
Call DEK for parts/service<br />
Alternator phase has failed<br />
Call DEK for parts/service<br />
Broken wire<br />
Call DEK for parts/service<br />
Symptom:<br />
Voltage too high/low<br />
Potential Causes Check / solution Recommendation<br />
Spark arrestor<br />
Remove, clean and replace.<br />
Voltage not measured correctly Voltage must be measured between hot and neutral, not hot and ground, the ground is isolated<br />
Speed screw bent<br />
Call DEK for parts/service<br />
Symptom:<br />
Voltage is 120 VAC on 1 phase but too high/low on other phase<br />
Potential Causes Check / solution Recommendation<br />
Alternator phase has failed<br />
Call DEK for parts/service<br />
Symptom:<br />
Engine oil leaking<br />
Potential Causes Check / solution Recommendation<br />
Oil leaking from crankcase gas- Tighten crankcase bolts<br />
Oil leaking from shaft Oil seals failed Call DEK for parts/service<br />
Symptom:<br />
Oil leaking from Valve head cover<br />
Potential Causes Check / solution Recommendation<br />
Bolt not tight<br />
Tighten bolts<br />
Symptom:<br />
Fuel leak at tank shut-off<br />
Potential Causes Check / solution Recommendation<br />
Shut-off valve loose Tighten nut on shut-off valve/replace shut-off valve Call DEK for parts/service<br />
Symptom:<br />
Fuel leaking out of carburator<br />
Potential Causes Check / solution Recommendation<br />
Fuel drain screw loose<br />
Tighten fuel drain screw<br />
Carburator float seat not seating Flush with clean fuel<br />
Symptom:<br />
Cannot turn engine with recoil<br />
Potential Causes Check / solution Recommendation<br />
Recoil ratchets have broken<br />
Call DEK for parts/service<br />
Recoil is crushed in<br />
Call DEK for parts/service<br />
Alternator bearing has failed<br />
Call DEK for parts/service<br />
Head valve timing is off<br />
Call DEK for parts/service<br />
Symptom:<br />
Fuel gauge leaks<br />
Potential Causes Check / solution Recommendation<br />
Replace fuel gauge gasket<br />
Call DEK for parts/service<br />
Rev. 1/2010<br />
DEK® is registered trademark of <strong>GXi</strong> <strong>Outdoor</strong> <strong>Power</strong>, LLC Clayton, NC 27520 USA.<br />
No part of this publication can be printed or copied without written permission.<br />
15 of 16
Heavy Duty <strong>Power</strong> Equipment<br />
Limited Warranty & Service<br />
4550 Pro, 5650, 6500(EL), 7550 Pro<br />
PRODUCTS COVERED BY THIS WARRANTY:<br />
LENGTH OF WARRANTY:*<br />
(FROM THE DATE OF ORIGINAL RETAIL PURCHASE)<br />
NONCOMMERCIAL/ NON-<br />
COMMERCIAL<br />
RENTAL<br />
RENTAL<br />
Engine 36 months / 300 hours 12 months / 300 hours 3 months / 300 hours<br />
Battery 3 months 3 months 3 months<br />
Alternator 36 months / 300 hours 12 months / 300 hours 3 months / 300 hours<br />
Electrical and Frame Components 24 months / 300 hours 12 months /300 hours 3 months / 300 hours<br />
Emission Controls 36 months 36 months 36 months<br />
*LENGTH OF WARRANTY: All warranty coverage expires when the operating hours exceed 300 hours.<br />
TO QUALIFY FOR THIS WARRANTY:<br />
The product must be purchased in the United States from a dealer authorized by <strong>GXi</strong> <strong>Outdoor</strong> <strong>Power</strong>, LLC to sell those products. This warranty applies to first retail purchaser<br />
/ owner during the applicable warranty time period. SAVE YOUR PROOF OF PURCHASE RECEIPT.<br />
WHAT DEK POWER EQUIPMENT WILL REPAIR OR REPLACE UNDER WARRANTY:<br />
DEK will repair or replace, at its option, any part that is proven to be defective in material or workmanship under normal use during the applicable warranty time period<br />
subject to the exclusions stated herein. This warranty is void if the owner fails to follow the prescribed maintenance and operating procedures described in this manual.<br />
This specifically refers to ensuring routine oil changes are made, that fuel stabilizer is used for long-term storage, that the generator is not overloaded, and that the generator<br />
loads are distributed evenly between the A and B outlets. Dirty carburetors, spark plugs, air filters, fuel filters, and freight or handling damage are not covered<br />
under warranty.<br />
DEK has the right to recover warranty administration costs from the owner if the root cause of the malfunction was found to be other than defective material or workmanship.<br />
In particular, this warranty does not cover: contaminants in the fuel or oil; damage caused by not following the prescribed warnings and operating practices; failure<br />
to follow proper maintenance and storage procedures; and physical damage due to shipping or handling or storage. Damage to the generator that occurs as a result of<br />
connecting a DEK generator to household wiring without the use of a UL approved transfer switch device that is connected to the home or business and grounded as per<br />
applicable local electrical codes, is not covered by this warranty.<br />
Warranty repairs will be made without charge for parts and labor for the first year. After the first year, this limited warranty covers the costs of replacement parts only.<br />
Anything replaced under warranty becomes the property of DEK. Parts replaced under warranty will be considered as part of the original product and any warranty on<br />
those parts will expire coincident with the original product warranty.<br />
TO OBTAIN WARRANTY SERVICE:<br />
You must take the DEK <strong>Power</strong> Equipment product, accessory, replacement part, apparel or the power equipment on which the accessory or replacement part is installed,<br />
and proof of purchase, at your expense, to any DEK <strong>Power</strong> Equipment service location in the United States, who is authorized to service that product, during the service<br />
location‟s normal business hours. If you are unable to obtain warranty service, or are dissatisfied with the warranty service you receive, take the following steps: First,<br />
contact the manager of the service center involved; normally this will resolve the problem. However, if you should require further assistance, write or call the DEK Customer<br />
Service.<br />
EXCLUSIONS:<br />
THIS WARRANTY DOES NOT EXTEND TO PARTS AFFECTED OR DAMAGED BY ACCIDENT AND/OR COLLISION, NORMAL WEAR, FUEL CONTAMINATION, USE<br />
IN AN APPLICATION FOR WHICH THE PRODUCT WAS NOT DESIGNED OR ANY OTHER MISUSE, NEGLECT, INCORPORATION OR USE OF UNSUITABLE AT-<br />
TACHMENTS OR PARTS, UNAUTHORIZED ALTERATION, OR ANY CAUSES OTHER THAN DEFECTS IN MATERIAL OR WORKMANSHIP OF THE PRODUCT.<br />
Consumable parts such as oil, spark plugs, filters, carburetors, are not covered by this warranty.<br />
DISCLAIMER OF CONSEQUENTIAL DAMAGE AND LIMITATION OF IMPLIED WARRANTIES:<br />
DEK DISCLAIMS ANY RESPONSIBILITY FOR LOSS OF TIME OR USE OF THE PRODUCT, TRANSPORTATION, COMMERCIAL LOSS, OR ANY OTHER INCIDEN-<br />
TAL OR CONSEQUENTIAL DAMAGE. ANY IMPLIED WARRANTIES ARE LIMITED TO THE DURATION OF THIS WRITTEN LIMITED WARRANTY.<br />
This warranty is void if the manufacturing date and the serial number on the equipment has been removed or the equipment has been modified.<br />
EMISSION CONTROL SYSTEM INFORMATION<br />
The U.S. and California Clean Air Acts<br />
EPA and California regulations require all manufacturers to furnish written instructions describing the operation and maintenance of emission control systems. The following<br />
instructions and procedures must be followed in order to keep the emissions from your DEK engine within the emission standards. Maintenance, replacement, or<br />
repair of the emission control devices and systems may be performed by any engine repair establishment or individual, using parts that are „„certified‟‟ to EPA standards.<br />
The emission control systems on your DEK engine were designed, built, and certified to conform with EPA regulations. We recommend the use of genuine DEK parts<br />
whenever you have maintenance done. These original-design replacement parts are manufactured to the same standards as the original parts, so you can be confident of<br />
their performance. The use of replacement parts that are not of the original design and quality may impair the effectiveness of your emission control system. A manufacturer<br />
of an aftermarket part assumes the responsibility that the part will not adversely affect emission performance. The manufacturer or re-builder of the part must certify<br />
that use of the part will not result in a failure of the engine to comply with emission regulations.<br />
Emission controls are covered by this warranty for all uses for a period of 3 years from original retail purchase date, this coverage extends to subsequent owners of the<br />
product with proof of original purchase.<br />
Rev. 1/2010<br />
DEK® is registered trademark of <strong>GXi</strong> <strong>Outdoor</strong> <strong>Power</strong>, LLC Clayton, NC 27520 USA.<br />
No part of this publication can be printed or copied without written permission.<br />
16 of 16