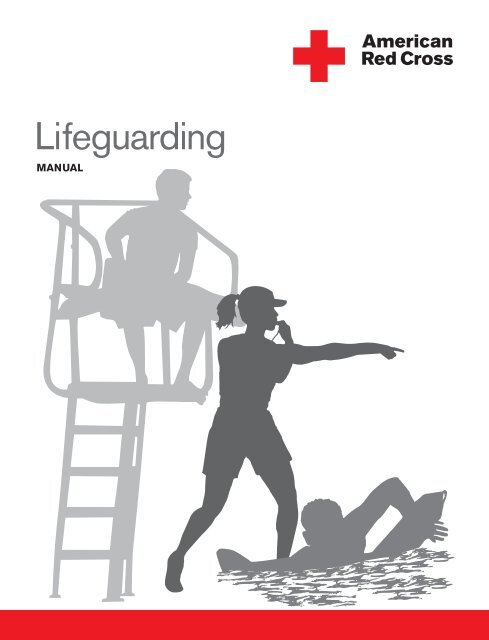
American Red Cross Lifeguarding Manual - Johns Hopkins University
American Red Cross Lifeguarding Manual - Johns Hopkins University
American Red Cross Lifeguarding Manual - Johns Hopkins University

You also want an ePaper? Increase the reach of your titles
YUMPU automatically turns print PDFs into web optimized ePapers that Google loves.
<strong>Lifeguarding</strong><br />
<strong>Manual</strong>
<strong>American</strong> <strong>Red</strong> <strong>Cross</strong><br />
<strong>Lifeguarding</strong><br />
<strong>Manual</strong><br />
The following organizations provided review of the materials and/or support <strong>American</strong> <strong>Red</strong> <strong>Cross</strong> <strong>Lifeguarding</strong>:
This manual is part of the <strong>American</strong> <strong>Red</strong> <strong>Cross</strong> <strong>Lifeguarding</strong> program. By itself, it does not constitute<br />
complete and comprehensive training. Visit redcross.org to learn more about this program.<br />
The emergency care procedures outlined in this book reflect the standard of knowledge and accepted<br />
emergency practices in the United States at the time this book was published. It is the reader’s responsibility<br />
to stay informed of changes in emergency care procedures.<br />
PLEASE READ THE FOLLOWING TERMS AND CONDITIONS BEFORE AGREEING TO ACCESS<br />
AND DOWNLOAD THE AMERICAN RED CROSS MATERIALS. BY DOWNLOADING THE<br />
MATERIALS, YOU HEREBY AGREE TO BE BOUND BY THE TERMS AND CONDITIONS.<br />
The downloadable electronic materials, including all content, graphics, images, and logos, are copyrighted<br />
by and the exclusive property of The <strong>American</strong> National <strong>Red</strong> <strong>Cross</strong> (“<strong>Red</strong> <strong>Cross</strong>”). Unless otherwise<br />
indicated in writing by the <strong>Red</strong> <strong>Cross</strong>, the <strong>Red</strong> <strong>Cross</strong> grants you (“recipient”) the limited right to download,<br />
print, photocopy and use the electronic materials, subject to the following restrictions:<br />
■■<br />
■■<br />
■■<br />
■■<br />
The recipient is prohibited from selling electronic versions of the materials.<br />
The recipient is prohibited from revising, altering, adapting, or modifying the materials.<br />
The recipient is prohibited from creating any derivative works incorporating, in part or in whole, the<br />
content of the materials.<br />
The recipient is prohibited from downloading the materials and putting them on their own website<br />
without <strong>Red</strong> <strong>Cross</strong> permission.<br />
Any rights not expressly granted herein are reserved by the <strong>Red</strong> <strong>Cross</strong>. The <strong>Red</strong> <strong>Cross</strong> does not permit<br />
its materials to be reproduced or published without advance written permission from the <strong>Red</strong> <strong>Cross</strong>.<br />
To request permission to reproduce or publish <strong>Red</strong> <strong>Cross</strong> materials, please submit your written request to<br />
The <strong>American</strong> National <strong>Red</strong> <strong>Cross</strong>.<br />
© 2012 <strong>American</strong> National <strong>Red</strong> <strong>Cross</strong>. All rights reserved.<br />
The <strong>Red</strong> <strong>Cross</strong> emblem, <strong>American</strong> <strong>Red</strong> <strong>Cross</strong>® and the <strong>American</strong> <strong>Red</strong> <strong>Cross</strong> logo are trademarks of<br />
The <strong>American</strong> National <strong>Red</strong> <strong>Cross</strong> and protected by various national statutes.<br />
The Boy Scouts of America Corporate Trademark and "PREPARED . FOR LIFE." are trademarks or registered trademarks<br />
of the Boy Scouts of America in the United States and/or other countries.<br />
All rights reserved. Used with Permission.<br />
Published by Krames StayWell Strategic Partnerships Division<br />
Printed in the United States of America<br />
ISBN: 978-1-58480-487-1<br />
Scan this code with your<br />
smartphone to access<br />
free skill refreshers, or visit<br />
redcross.org/LGrefresher.
acknowledgments<br />
iii<br />
Acknowledgments<br />
This manual is dedicated to the thousands of employees and volunteers of the <strong>American</strong><br />
<strong>Red</strong> <strong>Cross</strong> who contribute their time and talent to supporting and teaching lifesaving<br />
skills worldwide and to the thousands of course participants and other readers who have<br />
decided to be prepared to take action when an emergency strikes.<br />
This manual reflects the 2010 Consensus on Science for CPR and Emergency<br />
Cardiovascular Care and the Guidelines 2010 for First Aid. These treatment<br />
recommendations and related training guidelines have been reviewed by the <strong>American</strong><br />
<strong>Red</strong> <strong>Cross</strong> Scientific Advisory Council, a panel of nationally recognized experts in fields<br />
that include emergency medicine, occupational health, sports medicine, school and public<br />
health, emergency medical services (EMS), aquatics, emergency preparedness and<br />
disaster mobilization. This manual also reflects the United States <strong>Lifeguarding</strong> Standards:<br />
A Review and Report of the United States Lifeguard Standards Coalition, a collaborative<br />
effort of the <strong>American</strong> <strong>Red</strong> <strong>Cross</strong>, the United States Lifesaving Association and the<br />
YMCA of the USA.<br />
Many individuals shared in the development and revision process in various supportive,<br />
technical and creative ways. The <strong>American</strong> <strong>Red</strong> <strong>Cross</strong> <strong>Lifeguarding</strong> <strong>Manual</strong> was<br />
developed through the dedication of both employees and volunteers. Their commitment to<br />
excellence made this manual possible.<br />
The following members of the <strong>American</strong> <strong>Red</strong> <strong>Cross</strong><br />
Scientific Advisory Council also provided guidance<br />
and review:<br />
David Markenson, MD, FAAP, EMT-P<br />
Chair, <strong>American</strong> <strong>Red</strong> <strong>Cross</strong> Scientific Advisory Council<br />
Chief, Pediatric Emergency Medicine<br />
Maria Fareri Children’s Hospital<br />
Westchester Medical Center<br />
Valhalla, New York<br />
Peter Wernicki, MD<br />
Aquatics Chair, <strong>American</strong> <strong>Red</strong> <strong>Cross</strong> Scientific<br />
Advisory Council<br />
Sports Medicine Orthopedic Surgeon<br />
International Lifesaving Federation Medical Committee<br />
Past Chair<br />
U.S. Lifesaving Association<br />
Medical Advisor<br />
Vero Beach, Florida<br />
Roy R. Fielding<br />
Member, <strong>American</strong> <strong>Red</strong> <strong>Cross</strong> Scientific Advisory Council<br />
<strong>University</strong> of North Carolina—Charlotte, Department<br />
of Kinesiology<br />
Coordinator, Exercise Science/Director of Aquatics<br />
Charlotte, North Carolina<br />
Terri Lees<br />
Member, <strong>American</strong> <strong>Red</strong> <strong>Cross</strong> Scientific Advisory Council<br />
Aquatic Supervisor<br />
North Kansas City Community Center<br />
North Kansas City, Missouri<br />
Francesco A. Pia, PhD<br />
Member, <strong>American</strong> <strong>Red</strong> <strong>Cross</strong> Scientific Advisory Council<br />
Water Safety Films, Inc.<br />
President, Pia Consulting Services<br />
Larchmont, New York<br />
S. Robert Seitz, M.Ed., RN, NREMT-P<br />
Member, <strong>American</strong> <strong>Red</strong> <strong>Cross</strong> Scientific Advisory Council<br />
<strong>University</strong> of Pittsburgh<br />
Center for Emergency Medicine<br />
Pittsburgh, Pennsylvania<br />
The Sounding Board for this edition included:<br />
Joyce A. Bathke<br />
Chief Administrative Officer<br />
<strong>American</strong> <strong>Red</strong> <strong>Cross</strong> St. Louis Area Chapter<br />
St. Louis, Missouri<br />
David W. Bell, PhD<br />
National Aquatic Committee<br />
National Health and Safety Committee<br />
Boy Scouts of America<br />
Ponca City, Oklahoma<br />
Pete DeQuincy<br />
Aquatic Supervisor<br />
East Bay Regional Park District<br />
Oakland, California
iv<br />
<strong>Lifeguarding</strong> <strong>Manual</strong><br />
Shawn DeRosa, JD, EMT-B<br />
Manger of Aquatic Facilities and Safety Officer for<br />
Intercollegiate Athletics<br />
The Pennsylvania State <strong>University</strong><br />
<strong>University</strong> Park, Pennsylvania<br />
Scott E. Gerding<br />
Sales Manager<br />
Mid-East Division<br />
<strong>American</strong> <strong>Red</strong> <strong>Cross</strong><br />
Columbus, Ohio<br />
Juliene R. Hefter<br />
Deputy Director<br />
Wisconsin Park & Recreation Association<br />
Owner, Safety First Aquatics, LLC<br />
Greendale, Wisconsin<br />
Carolyn Hollingsworth–Pofok<br />
Director of Recreation and Events<br />
Millcreek MetroParks<br />
Canfield, Ohio<br />
William A.J. Kirkner, JD<br />
Aquatics Director<br />
JCC of Greater Baltimore<br />
Reisterstown, Maryland<br />
Joetta R. Jensen<br />
Assistant Professor and Director of Aquatics<br />
Hampton <strong>University</strong><br />
Hampton, Virginia<br />
Rhonda Mickelson<br />
Director of Standards<br />
<strong>American</strong> Camp Association<br />
Estes Park, Colorado<br />
Edwin Pounds<br />
Aquatics Manager<br />
City of Pearland<br />
Pearland, Texas<br />
Clayton D. Shuck<br />
Deputy Manager of Recreation<br />
South Suburban Parks and Recreation<br />
Centennial, Colorado<br />
Thomas C. Werts<br />
President<br />
Aquatics Safety Consulting<br />
Kissimmee, Florida<br />
The following individuals participated as Waterfront<br />
and Waterpark Working Group members:<br />
Darwin DeLappa<br />
Director of Water Safety<br />
New York State Parks and Recreation<br />
Queensbury, New York<br />
Luiz A. Morizot-Leite<br />
Captain, Ocean Rescue Lifeguard, Miami-Dade<br />
Fire Rescue Department<br />
Miami-Dade County, Florida<br />
Robert E. Ogoreuc<br />
Assistant Professor<br />
Slippery Rock <strong>University</strong><br />
Slippery Rock, Pennsylvania<br />
William J. Frazier<br />
Aquatic Operations Manager<br />
Massanutten Resort<br />
McGaheysville, Virginia<br />
Lee Hovis<br />
Director of Recreation Operations<br />
Nocatee Waterpark Recreation<br />
Ponte Vedra Beach, Florida<br />
Danial Llanas<br />
Director of Support Services<br />
Busch Entertainment Corporation<br />
San Antonio, Texas<br />
Scott Mersinger<br />
Aquatics Director<br />
Lost Rios Waterpark<br />
Wisconsin Dells, Wisconsin<br />
The following individuals provided external review:<br />
Alex Antoniou<br />
Director of Educational Programs<br />
National Swimming Pool Foundation<br />
Colorado Springs, Colorado<br />
Jerome H. Modell, MD., D Sc (Hon.)<br />
Emeritus Professor of Anesthesiology<br />
Courtesy Professor of Psychiatry<br />
Courtesy Professor of Large Animal Clinical Sciences<br />
Colleges of Medicine & Veterinary Medicine, <strong>University</strong><br />
of Florida<br />
Gainesville, Florida<br />
The <strong>American</strong> <strong>Red</strong> <strong>Cross</strong> thanks Jorge L. Olaves H., Ed S,<br />
Florida A&M <strong>University</strong>, for his contributions to this manual.<br />
Adam Abajian<br />
Recreation Program Manager/Lakefront Operations<br />
City of Evanston<br />
Evanston, Illinois
preface<br />
v<br />
Preface<br />
This manual is for lifeguards, whom the <strong>American</strong> <strong>Red</strong> <strong>Cross</strong> profoundly thanks for their<br />
commitment to safeguarding the lives of children and adults who enjoy aquatic facilities. As<br />
the number of community pools and waterparks grows nationwide, participation in aquatic<br />
activities is also growing. With this growth comes the need for even more lifeguards.<br />
To protect this growing number of participants, lifeguards must receive proper and<br />
effective training. Lifeguards also need to maintain their skills to ensure their ability to<br />
work effectively with others as a part of a lifeguard team. Participation in frequent and<br />
ongoing training is essential.<br />
Lifeguards must be able to recognize hazardous situations to prevent injury. They must<br />
be able to supervise swimmers, minimize dangers, educate facility users about safety,<br />
enforce rules and regulations, provide assistance and perform rescues.<br />
Being a lifeguard carries a significant professional responsibility, but lifeguarding also<br />
offers opportunities for personal growth. Experience as a lifeguard can help one develop<br />
professional and leadership skills that will last a lifetime—through college, career and family.<br />
There are a half million <strong>American</strong> <strong>Red</strong> <strong>Cross</strong>-trained lifeguards working at swimming<br />
pools, waterparks and waterfronts across our country. Every day on the job, these<br />
lifeguards are part of a critical force for good—ensuring the safety of patrons and<br />
protecting lives.
vi<br />
<strong>Lifeguarding</strong> <strong>Manual</strong><br />
Contents<br />
chapter 1<br />
The Professional Lifeguard<br />
Introduction_________________________________________ 2<br />
Responsibilities of a Professional Lifeguard_______________ 2<br />
Characteristics of a Professional Lifeguard_______________ 3<br />
Decision Making_____________________________________ 6<br />
Legal Considerations_________________________________ 6<br />
Continuing Your Training_______________________________ 8<br />
Being Part of the Team________________________________ 9<br />
Wrap-Up___________________________________________ 10<br />
chapter 3<br />
Surveillance and Recognition<br />
An Overview of the Process of Drowning________________ 34<br />
Effective Surveillance________________________________ 34<br />
Wrap-Up___________________________________________ 49<br />
Facility Safety<br />
Injury Prevention<br />
chapter 2<br />
Rescue Equipment__________________________________ 12<br />
Facility Safety Checks________________________________ 15<br />
Weather Conditions_________________________________ 25<br />
Rules and Regulations_______________________________ 27<br />
Management and Safety______________________________ 30<br />
Wrap-Up___________________________________________ 32<br />
chapter 4<br />
How Injuries Happen_________________________________ 53<br />
Injury-Prevention Strategies___________________________ 53<br />
Effective Guarding—Injury Prevention Challenges_________ 56<br />
Wrap-Up___________________________________________ 70<br />
chapter 5<br />
Emergency Action Plans<br />
Types of Emergency Action Plans______________________ 72<br />
Implementing an Emergency Action Plan________________ 76<br />
Emergencies Outside of Your Zone ____________________ 85<br />
Wrap-Up___________________________________________ 86<br />
Water Rescue Skills<br />
chapter 6<br />
General Procedures for a Water Emergency_____________ 88<br />
Train to the Standard, Meet the Objective_______________ 90<br />
Rescue Skills_______________________________________ 90<br />
Additional Rescue Skills for Waterfronts________________ 94<br />
Special Situations for Waterfronts______________________ 95<br />
When Things Do Not Go as Practiced_________________ 100<br />
Wrap-Up__________________________________________ 102<br />
chapter 7<br />
Before Providing Care<br />
and Victim Assessment<br />
Bloodborne Pathogens______________________________ 132<br />
How Pathogens Spread_____________________________ 133<br />
Preventing the Spread of Bloodborne Pathogens________ 135<br />
If You Are Exposed_________________________________ 140<br />
General Procedures for Injury or Sudden Illness on Land____140<br />
Wrap-Up__________________________________________ 147<br />
chapter 8<br />
Breathing Emergencies<br />
Recognizing and Caring for Breathing Emergencies______ 160<br />
Giving Ventilations__________________________________ 163<br />
Airway Obstruction_________________________________ 169<br />
Emergency Oxygen_________________________________ 172<br />
Oxygen Delivery Devices____________________________ 175<br />
Suctioning________________________________________ 180<br />
Wrap-Up__________________________________________ 180
Contents<br />
vii<br />
Cardiac Emergencies<br />
chapter 9<br />
Cardiac Chain of Survival____________________________ 194<br />
Heart Attack_______________________________________ 194<br />
Cardiac Arrest_____________________________________ 196<br />
CPR_____________________________________________ 196<br />
AEDs_____________________________________________ 198<br />
Multiple-Rescuer Response__________________________ 203<br />
Wrap-Up__________________________________________ 206<br />
First Aid<br />
chapter 10<br />
Responding to Injuries and Illnesses___________________ 215<br />
Secondary Assessment_____________________________ 216<br />
Sudden Illness_____________________________________ 217<br />
Skin and Soft Tissue Injuries_________________________ 220<br />
Bites and Stings___________________________________ 228<br />
Poisoning_________________________________________ 232<br />
Heat-Related Illnesses and Cold-Related Emergencies___ 233<br />
Injuries to Muscles, Bones and Joints__________________ 235<br />
Emergency Childbirth_______________________________ 237<br />
Wrap-Up _________________________________________ 238<br />
chapter 11<br />
Caring for Head, Neck and Spinal Injuries<br />
Causes of Head, Neck and Spinal Injuries______________ 247<br />
Caring for Head, Neck and Spinal Injuries______________ 248<br />
Wrap-Up _________________________________________ 257<br />
Glossary__________________________________________ 273<br />
References________________________________________ 280<br />
Index_____________________________________________ 285
viii<br />
<strong>Lifeguarding</strong> <strong>Manual</strong><br />
SKILL SHEETs<br />
• Rotations—Ground-Level Station_______________________ 50<br />
• Rotations—Elevated Station___________________________ 51<br />
• Entries<br />
cc<br />
Slide-In Entry___________________________________ 103<br />
cc<br />
Stride Jump____________________________________ 103<br />
cc<br />
Compact Jump_________________________________ 104<br />
cc<br />
Run-and-Swim Entry_____________________________ 105<br />
• Assists<br />
cc<br />
Simple Assist___________________________________ 106<br />
cc<br />
Reaching Assist from the Deck____________________ 106<br />
• Rescues at or Near the Surface of the Water<br />
cc<br />
Active Victim Front Rescue_______________________ 107<br />
cc<br />
Active Victim Rear Rescue________________________ 108<br />
cc<br />
Passive Victim Rear Rescue_______________________ 109<br />
• Multiple-Victim Rescue______________________________ 111<br />
• Rescuing a Submerged Victim<br />
cc<br />
Submerged Victim in Shallow Water_______________ 112<br />
cc<br />
Feet-First Surface Dive___________________________ 113<br />
cc<br />
Head-First Surface Dive__________________________ 114<br />
cc<br />
Submerged Victim in Deep Water__________________ 116<br />
• Removal from Water<br />
cc<br />
Two-Person Removal from the Water<br />
Using a Backboard______________________________ 118<br />
cc<br />
Walking Assist__________________________________ 120<br />
cc<br />
Beach Drag____________________________________ 120<br />
cc<br />
Front-and-Back Carry____________________________ 121<br />
• Using a Rescue Board<br />
cc<br />
Approaching a Victim on a Rescue Board___________ 122<br />
cc<br />
Rescuing an Active Victim with a Rescue Board______ 123<br />
cc<br />
Rescuing a Passive Victim with a Rescue Board_____ 124<br />
• Using Watercraft for Rescues<br />
cc<br />
Using a Square Stern Rowboat for Rescues_________ 126<br />
cc<br />
Using a Motorized Watercraft for Rescues__________ 127<br />
cc<br />
Using a Kayak for Rescues_______________________ 127<br />
• When Things Do Not Go as Practiced<br />
cc<br />
Front Head-Hold Escape_________________________ 128<br />
cc<br />
Rear Head-Hold Escape__________________________ 128<br />
cc<br />
In-Water Ventilations_____________________________ 129<br />
cc<br />
Quick Removal from Shallow Water for a Small Victim_130<br />
• Removing Disposable Gloves________________________ 148<br />
• Using a Resuscitation Mask<br />
cc<br />
Head-Tilt/Chin-Lift_______________________________ 149<br />
cc<br />
Jaw-Thrust (With Head Extension) Maneuver_________ 150<br />
cc<br />
Jaw-Thrust (Without Head Extension) Maneuver______ 150<br />
• Primary Assessment—Adult__________________________ 151<br />
• Primary Assessment—Child and Infant_________________ 152<br />
• Recovery Positions_________________________________ 154<br />
• Moving a Victim<br />
cc<br />
Non-Emergency Moves<br />
●●<br />
Walking Assist_______________________________ 156<br />
●●<br />
Two-Person Seat Carry________________________ 156<br />
cc<br />
Emergency Moves<br />
●●<br />
Pack-Strap Carry_____________________________ 157<br />
●●<br />
Clothes Drag________________________________ 158<br />
●●<br />
Ankle Drag__________________________________ 158<br />
• Giving Ventilations__________________________________ 181<br />
• Giving Ventilations Using a Bag-Valve-Mask Resuscitator—<br />
Two Rescuers_____________________________________ 182<br />
• Conscious Choking—Adult and Child__________________ 184<br />
• Conscious Choking—Infant___________________________ 186<br />
• Unconscious Choking_______________________________ 187<br />
• Assembling the Oxygen System______________________ 189<br />
• Administering Emergency Oxygen____________________ 190<br />
• Using a <strong>Manual</strong> Suctioning Device____________________ 191<br />
• One-Rescuer CPR_________________________________ 207<br />
• Two-Rescuer CPR—Adult and Child___________________ 208<br />
• Two-Rescuer CPR—Infant____________________________ 210<br />
• Using an AED_____________________________________ 212<br />
• Secondary Assessment—Using SAMPLE to Take a<br />
Brief History_______________________________________ 239<br />
• Checking a Conscious Person_______________________ 240<br />
• Controlling External Bleeding_________________________ 242<br />
• Splinting<br />
cc<br />
Arm Injuries____________________________________ 243<br />
cc<br />
Leg Injuries_____________________________________ 244<br />
cc<br />
Foot Injuries____________________________________ 244<br />
cc<br />
Rib and Breastbone Injuries_______________________ 245<br />
cc<br />
Hand and Finger Injuries_________________________ 245<br />
• Head Splint—Face-Up Victim at or Near the Surface_____ 258<br />
• Head Splint—Face-Down Victim at or Near the Surface____259<br />
• Head Splint—Submerged Victim______________________ 260<br />
• Head Splint—Face-Down in Extremely Shallow Water____ 261<br />
• Spinal Backboarding Procedure—Shallow Water________ 262<br />
• Spinal Backboarding Procedure—Deep Water__________ 265<br />
• Spinal Injury—Removal from the Water on a Backboard___ 267<br />
• Spinal Backboarding Procedure and Removal<br />
from Water—Speed Slide____________________________ 268<br />
• Caring for a Standing Victim Who Has a Suspected<br />
Head, Neck or Spinal Injury on Land__________________ 269<br />
• <strong>Manual</strong> Stabilization for a Head, Neck or Spinal Injury<br />
on Land__________________________________________ 272
The Professional<br />
Lifeguard<br />
■■<br />
■■<br />
L<br />
ifeguarding can be a rewarding job. Being a lifeguard is:<br />
Dynamic. Each day on the job presents you with<br />
new situations.<br />
Challenging. You need to make quick<br />
judgments to do the job well.<br />
Chapter1<br />
■■<br />
■■<br />
Important. You may need to<br />
respond to an emergency at<br />
any moment.<br />
Inspiring. With the<br />
knowledge, skills and<br />
attitude you acquire through<br />
your lifeguard training, you<br />
can save a life.<br />
This chapter describes the<br />
characteristics, responsibilities<br />
and rewards of being a<br />
professional lifeguard.<br />
It also discusses<br />
the importance of<br />
maintaining lifeguarding<br />
knowledge and skills. n
2<br />
<strong>Lifeguarding</strong> <strong>Manual</strong><br />
INTRODUCTION<br />
You are training to become a professional lifeguard, taking responsibility for<br />
the lives of people who are participating in a variety of aquatic activities. As a<br />
professional rescuer with a legal responsibility to act in an emergency, you must<br />
be self-disciplined and confident in your knowledge and skills. You need to have<br />
solid public-relations, customer-service and conflict-resolution skills. In addition,<br />
you must be willing to be a leader as well as a good team member. Being a<br />
lifeguard requires maturity, professionalism and competence in specialized<br />
rescue techniques.<br />
The purpose of the <strong>American</strong> <strong>Red</strong> <strong>Cross</strong> <strong>Lifeguarding</strong> course is to teach you the<br />
skills needed to help prevent and respond to aquatic emergencies. This includes<br />
land and water rescue skills plus first aid and CPR.<br />
RESPONSIBILITIES OF<br />
A PROFESSIONAL LIFEGUARD<br />
As a lifeguard, your primary responsibility is to prevent drowning and other injuries<br />
from occurring at your aquatic facility (Figure 1-1). Lifeguards do this in many ways,<br />
such as:<br />
Figure 1-1<br />
Patron surveillance is an important part of a lifeguard’s<br />
primary responsibility.<br />
■■<br />
■■<br />
■■<br />
■■<br />
■■<br />
■■<br />
Monitoring activities in and near the water<br />
through patron surveillance.<br />
Preventing injuries by minimizing or eliminating<br />
hazardous situations or behaviors.<br />
Enforcing facility rules and regulations and<br />
educating patrons about them.<br />
Recognizing and responding quickly and<br />
effectively to all emergencies.<br />
Administering first aid and CPR, including<br />
using an automated external defibrillator (AED)<br />
and, if trained, administering emergency oxygen<br />
when needed.<br />
Working as a team with other lifeguards, facility<br />
staff and management.<br />
A lifeguard also is responsible for other tasks, which are secondary responsibilities.<br />
Secondary responsibilities must never interfere with patron surveillance. Secondary<br />
responsibilities can include:<br />
■■<br />
■■<br />
■■<br />
■■<br />
■■<br />
Testing the pool water chemistry.<br />
Assisting patrons (conducting safety orientations, administering swim tests and<br />
fitting life jackets).<br />
Cleaning or performing maintenance.<br />
Completing records and reports.<br />
Performing opening duties, closing duties or facility safety checks<br />
and inspections.
Chapter 1 The Professional Lifeguard 3<br />
CHARACTERISTICS OF<br />
A PROFESSIONAL LIFEGUARD<br />
To fulfill the responsibilities of a professional lifeguard, you must be mentally,<br />
physically and emotionally prepared at all times to do your job (Figure 1-2).<br />
As a professional lifeguard you must be:<br />
Figure 1-2<br />
Lifeguards must be mentally, physically and emotionally prepared to carry out their duties.<br />
■■<br />
■■<br />
■■<br />
■■<br />
■■<br />
■■<br />
Knowledgeable and skilled. Have the appropriate knowledge and skills<br />
to help prevent and respond to emergencies. Successful completion of this<br />
<strong>Lifeguarding</strong> course is your initial training. You must maintain your knowledge<br />
and skills through annual or preseason orientation and training, and through<br />
regular, frequent in-service training.<br />
Reliable. Arrive at work on time, accept assignments willingly, be committed<br />
to your work and respond to all incidents quickly and effectively.<br />
Mature. Be a leader but also be a good team<br />
Figure 1-3<br />
member, act responsibly, take initiative<br />
and obey all facility rules, leading others<br />
by example.<br />
Courteous and consistent. Be polite<br />
and enforce the rules firmly and equally for<br />
everyone (Figure 1-3).<br />
Positive. Show a positive attitude in all<br />
job activities.<br />
Professional. Look professional and be<br />
prepared to respond appropriately to any<br />
situation by:<br />
cc<br />
Wearing the lifeguard uniform only when<br />
on duty.<br />
Lifeguards should be courteous and consistent with patrons<br />
when enforcing rules.
4<br />
<strong>Lifeguarding</strong> <strong>Manual</strong><br />
Figure 1-4<br />
■■<br />
cc<br />
cc<br />
cc<br />
cc<br />
cc<br />
cc<br />
cc<br />
cc<br />
Sitting or standing upright at the lifeguarding station.<br />
Being well groomed.<br />
Regular exercise helps lifeguards stay physcially fit.<br />
Keeping rescue equipment positioned for immediate use when on duty.<br />
Keeping your eyes focused on your assigned zone of responsibility at<br />
all times.<br />
Keeping interactions with others brief and not letting them interrupt patron<br />
surveillance.<br />
Transferring and handling equipment carefully.<br />
Observing all facility rules, regulations and policies.<br />
Eating only when on break or off surveillance duty.<br />
Healthy and fit. To stay in good physical condition, a professional lifeguard must:<br />
cc<br />
cc<br />
cc<br />
cc<br />
Exercise. An exercise program should include<br />
swimming and water exercises that focus on<br />
building endurance and developing strength<br />
(Figure 1-4). Regular exercise helps you to<br />
stay alert, cope with stress and fatigue and<br />
perform strenuous rescues.<br />
Eat and hydrate properly. Good nutrition<br />
and a balanced diet help to provide the energy<br />
needed to stay alert and active. Drink plenty of<br />
water to prevent dehydration.<br />
Rest adequately. Proper rest and sleep<br />
during off-duty hours are essential for staying<br />
alert while on duty.<br />
Protect yourself from sun exposure.<br />
Overexposure to the sun’s ultraviolet (UV) rays<br />
can cause many problems, such as fatigue, sunburn, skin cancer, dehydration, heat<br />
exhaustion and heat stroke. To prevent these problems:<br />
●●<br />
Use a sunscreen with a sun protection factor (SPF) of at least 15,<br />
re-applying at regular intervals.<br />
●●<br />
●●<br />
●●<br />
●●<br />
Use an umbrella or shade structure for sun protection and to help<br />
keep cool.<br />
Wear a shirt and hat with a brim that shades your face, ears and<br />
the back of your neck and use polarized sunglasses with UVA/UVB<br />
protection.<br />
Drink plenty of water.<br />
Take breaks in cool or shaded areas.<br />
As a professional lifeguard, there are also some things you must not do. Keep the<br />
following in mind:<br />
■■<br />
■■<br />
■■<br />
■■<br />
■■<br />
Do not leave your lifeguard station while on surveillance duty.<br />
Do not use mobile phones or other devices for personal calls, texting or other<br />
types of communication when on duty.<br />
Do not slouch in a lifeguard stand. Always be attentive and sit or stand upright<br />
when on surveillance duty.<br />
Do not participate in conversations at the lifeguard station.<br />
Do not eat at the lifeguard station.
Chapter 1 The Professional Lifeguard 5<br />
■■<br />
■■<br />
Do not leave the facility while on duty.<br />
Do not use alcohol or drugs. Alcohol or drugs can negatively affect job<br />
performance and can jeopardize the safety of patrons, co-workers and yourself.<br />
SWIMMING FOR FITNESS<br />
Getting to a victim, executing water-based<br />
rescues and moving the victim to safety,<br />
and performing life-sustaining resuscitation<br />
require you to have adequate strength and<br />
endurance at a moment’s notice. This means<br />
that you need to constantly maintain or improve<br />
your personal level of fitness. Luckily, most<br />
lifeguards have access to one of the most<br />
versatile pieces of fitness equipment available,<br />
the water.<br />
There are two main approaches to improving<br />
your level of fitness: improving endurance<br />
and increasing intensity. You can improve<br />
your endurance by practicing more, whether<br />
by swimming longer distances or for longer<br />
periods of time.<br />
When exercising to increase endurance, you<br />
must commit to a regular, consistent workout<br />
schedule. Count the number of pool lengths<br />
that you can swim without having to stop to<br />
take a break. Your goal should be to increase<br />
this amount slightly each time you practice. At<br />
the beginning, you should be able to swim at<br />
least 300 yards without stopping. Try to build<br />
up to a competitive mile, which is about 1650<br />
yards, or 66 lengths of a 25-yard pool. Once<br />
you build your endurance to this level, you will<br />
find it easy to practice even longer distances.<br />
If your practice time is limited, you may choose<br />
to focus on the intensity of your swim. Typically,<br />
when a person is doing an activity for a long<br />
period of time, he or she begins to slow down<br />
as muscles become fatigued. Strength is built<br />
by forcing muscles to work at or beyond their<br />
current peak level, which requires maintaining—<br />
or increasing—your level of effort over your<br />
period of exercise.<br />
In swimming, this can be done through<br />
interval training. Intervals are a series of<br />
repeat swims of the same distance and time<br />
interval, each done at the same high level of<br />
effort. There is a rest period between the time<br />
spent swimming that depends on the speed<br />
of the swim. The entire swim series is a set.<br />
As an example, an interval set is “5 x 100 on<br />
1:30.” This means that the 500-yard swim<br />
is broken up into five 100-yard swims, with<br />
1:30 being the total amount of time for the<br />
swim and rest. In this example, a swimmer<br />
who swims the 100 in 1:15, has 15 seconds<br />
available for rest. This short rest period keeps<br />
the heart rate within the target range without<br />
dropping back to a resting heart rate. Interval<br />
training is the best all-around method to<br />
develop both speed and endurance.<br />
As your level of fitness improves, you should<br />
combine the endurance and intensity<br />
approaches. Breaking down a larger endurance<br />
workout into smaller parts allows you to keep<br />
up your level of intensity, and it also helps to<br />
make the workout more interesting.
6<br />
<strong>Lifeguarding</strong> <strong>Manual</strong><br />
DECISION MAKING<br />
Decision making is an important—and sometimes difficult—component of<br />
lifeguarding. In an emergency, such as a situation requiring a possible rescue or<br />
CPR, you must make critical decisions quickly and act quickly. Your facility should<br />
have established emergency action plans (EAPs), which are the written procedures<br />
that guide the actions of lifeguards and other staff members in emergencies.<br />
In a non-emergency situation, such as how to work with your facility’s management<br />
or how to interact with patrons, you can take more time for deliberation. In these<br />
kinds of situations, when time is not a critical factor, a decision-making model can<br />
help guide you through the process. The FIND decision-making model can be<br />
applied to lifeguarding situations to help you clearly understand what is involved<br />
in a decision. FIND means:<br />
■■<br />
■■<br />
■■<br />
■■<br />
F = Figure out the problem.<br />
I = Identify possible solutions.<br />
N = Name the pros and cons for each solution.<br />
D = Decide which solution is best, then act on it.<br />
LEGAL CONSIDERATIONS<br />
To avoid liability, it is important to understand the following legal principles that apply<br />
to your role as a professional lifeguard.<br />
■■<br />
■■<br />
■■<br />
■■<br />
■■<br />
Duty to act. While on the job, you have a legal responsibility to act in an<br />
emergency. Failure to adhere to this duty could result in legal action.<br />
Standard of care. You are expected to meet a minimum standard of care,<br />
which may be established in part by your training program and in part by state<br />
or local authorities. This standard requires you to:<br />
cc<br />
cc<br />
cc<br />
cc<br />
Communicate proper information and warnings to help prevent injuries.<br />
Recognize someone in need of care.<br />
Attempt to rescue those needing assistance.<br />
Provide emergency care according to your level of training.<br />
Negligence. When a person is injured or suffers additional harm because<br />
lifeguards failed to follow the standard of care or failed to act at all, the<br />
lifeguards may be considered negligent. Negligence includes:<br />
cc<br />
cc<br />
cc<br />
cc<br />
Failing to control or stop any behaviors that could result in further harm<br />
or injury.<br />
Failing to provide care.<br />
Providing inappropriate care.<br />
Providing care beyond the scope of practice or level of training.<br />
Abandonment. Once care is initiated, it must be continued until emergency<br />
medical services (EMS) personnel or someone with equal or greater training<br />
arrives and takes over. You can be held legally responsible for abandoning a<br />
person who requires ongoing care if you leave the scene or stop providing care.<br />
Confidentiality. While making a rescue or providing care, you may learn<br />
something about the injured or ill person, such as information about medical
Chapter 1 The Professional Lifeguard 7<br />
■■<br />
■■<br />
■■<br />
conditions, physical problems and medications taken. This person’s right to<br />
privacy is protected by laws that require you to keep information learned about<br />
the person confidential. Reporters, insurance investigators or attorneys may<br />
ask questions following an incident. This information should not be shared with<br />
anyone except EMS personnel directly associated with the person’s care, facility<br />
management or the facility’s legal counsel. Sharing personal information with<br />
individuals not directly associated with an injured person’s medical care may<br />
constitute a breach of the victim’s privacy.<br />
Documentation. Properly documenting injuries and incidents is very<br />
important. If legal action occurs later, your records and reports can provide legal<br />
documentation of what was seen, heard and<br />
done at the scene. Complete the required<br />
Figure 1-5<br />
forms as soon as possible after the incident,<br />
preferably, immediately after the incident has<br />
wrapped up. As time passes, critical details<br />
may be forgotten. When completing a report,<br />
state the facts of the incident without including<br />
your opinion. Once the report is complete, sign<br />
and date it and have all responders read the<br />
report, then sign and date it as well. A copy of<br />
the report should be kept by the facility.<br />
Consent. An injured or ill person must give<br />
permission before responders can provide<br />
first aid and emergency care (Figure 1-5). To<br />
obtain consent:<br />
cc<br />
cc<br />
cc<br />
cc<br />
cc<br />
cc<br />
State your name.<br />
State your level of training.<br />
Ask if you may help.<br />
Explain that you would like to assess him or her to<br />
find out what you think may be wrong or what you<br />
can do to help.<br />
Explain what you plan to do.<br />
With this information, an ill or injured person can<br />
grant his or her informed consent for care. Someone<br />
who is unconscious, confused or seriously injured<br />
or ill (such as in a nonfatal drowning) may not be<br />
able to grant consent. In these cases, the law<br />
assumes the victim would give consent if he or she<br />
were able to do so. This is called implied consent.<br />
Implied consent also applies to a minor who needs<br />
emergency medical assistance and whose parent or<br />
guardian is not present.<br />
Refusal of care. Some injured or ill people may refuse<br />
care, even if they desperately need it. Parents also may<br />
refuse care for children. Even though someone may be<br />
seriously injured, his or her wishes must be honored.<br />
In these situations, you should explain why he or she<br />
needs care. For significant injuries, you should call<br />
EMS personnel to evaluate the situation. For non-lifethreatening<br />
emergencies, when care is refused and you<br />
You must ask for a victim’s consent before giving care.<br />
Good Samaritan Laws<br />
Most states and the District of<br />
Columbia have Good Samaritan laws<br />
that protect people against claims<br />
of negligence after having provided<br />
emergency care in good faith without<br />
having accepted anything in return.<br />
These laws differ somewhat from state<br />
to state but generally help to protect<br />
people who act in good faith, within<br />
the scope of their training, and who<br />
are not negligent.<br />
Some Good Samaritan laws,<br />
however, do not provide coverage<br />
for individuals who have a legal duty<br />
to act, which includes professional<br />
lifeguards. Therefore, it is important<br />
that lifeguards consult a lawyer or the<br />
facility’s legal counsel to determine the<br />
degree of protection provided by their<br />
state’s Good Samaritan laws.
8<br />
<strong>Lifeguarding</strong> <strong>Manual</strong><br />
Did You Know?<br />
You may be evaluated periodically<br />
while on the job by your employer<br />
or through a contracted agency,<br />
such as the <strong>Red</strong> <strong>Cross</strong> or a combination<br />
of both. These evaluations<br />
may be announced or unannounced<br />
and may include how you perform<br />
patron surveillance and lifeguarding<br />
skills.<br />
are asked not to call EMS personnel, make it clear that you<br />
are neither denying nor withholding care and that you are<br />
not abandoning the victim. You must document any refusal<br />
of care. Someone else, such as another lifeguard, should<br />
witness the person’s refusal of care and sign a report. Ask<br />
the person who refuses care to sign the report as well;<br />
if he or she refuses to sign, note that on the report.<br />
CONTINUING YOUR TRAINING<br />
Earning a lifeguarding certification means you have<br />
successfully completed a training course and passed<br />
written and skill evaluations on a given date. It does not<br />
mean that you have learned everything there is to know<br />
about lifeguarding. Once hired as a lifeguard, you should<br />
expect that you will be required to continue your training.<br />
It is the responsibility of facility management to provide<br />
direction and help lifeguards maintain and build on skills<br />
and to perform effectively as a team. Expect facility<br />
management to provide a pre-service evaluation, annual<br />
or preseason orientation and training, a policies and<br />
procedures manual and regular in-service training.<br />
Pre-Service Evaluation<br />
Facilities often require lifeguard applicants to hold a current training certificate from<br />
a nationally recognized agency, such as the <strong>American</strong> <strong>Red</strong> <strong>Cross</strong>. State codes,<br />
insurance company rules and standards of organizations to which your facility belongs<br />
may require your employer to evaluate your current skill level. Your employer may have<br />
you participate in rescue scenarios to ensure that you understand your responsibilities<br />
within your team and are familiar with your facility’s layout and equipment.<br />
Figure 1-6<br />
Annual or Preseason Orientation and Training<br />
Lifeguards should have annual training. This is especially important for seasonal<br />
lifeguards, who can forget knowledge and skills<br />
between seasons. Annual training can include<br />
review courses or a review of first aid, CPR/AED<br />
and lifeguarding knowledge and skills (Figure 1-6).<br />
Annual training helps lifeguards maintain their knowledge<br />
and skills.<br />
An orientation session about facility operations<br />
and lifeguards’ responsibilities helps both<br />
new and returning lifeguards understand the<br />
facility, their responsibilities and management’s<br />
expectations. The orientation is critical for<br />
learning what is unique about your workplace and<br />
how it differs from the environment in which you<br />
were trained. Ask your employer questions about<br />
your facility and become completely familiar with<br />
your facility’s operations.
Chapter 1 The Professional Lifeguard 9<br />
Policies and Procedures <strong>Manual</strong><br />
A policies and procedures manual should provide the<br />
information that you need to understand what is expected<br />
of you, to be able to work safely and to perform your duties<br />
effectively. This manual usually includes administrative<br />
policies and procedures, personnel policies and guidelines<br />
and standard operating procedures.<br />
Regular In-Service Training<br />
In-service training takes place while you are employed<br />
as a lifeguard and is designed to help you maintain your<br />
knowledge and skills at a professional level (Figure 1-7). It<br />
also gives you a chance to practice with other lifeguards<br />
at your facility. This will help you to efficiently respond as a<br />
team in an emergency.<br />
BEING PART OF THE TEAM<br />
There are two teams at most aquatic facilities: the<br />
lifeguard team and the safety team. The lifeguard team<br />
is formed whenever two or more lifeguards are<br />
on duty. The lifeguard team is part of a larger<br />
safety team, which is a network of people who<br />
prevent, prepare for, respond to and assist in an<br />
emergency at an aquatic facility. To be effective,<br />
members of both teams must know, understand<br />
and practice the roles that they are assigned in<br />
an emergency.<br />
Figure 1-7<br />
In-Service Training<br />
It is a best practice of many wellmanaged<br />
facilities that lifeguards<br />
participate in a minimum of 4 hours<br />
of in-service training each month. The<br />
facility manager, lifeguard supervisor,<br />
a head lifeguard or an individual who<br />
is an expert in a particular subject<br />
matter, such as a public health official,<br />
risk manager or human resources<br />
representative, may conduct in-service<br />
trainings. Training sessions will address<br />
issues, such as surveillance and<br />
recognition, water and land rescue skills,<br />
emergency response drills, decisionmaking<br />
protocols, facility rules and<br />
regulations, customer service, records<br />
and reports and physical conditioning.<br />
Lifeguard Team<br />
If you work at a facility where two or more<br />
lifeguards are on duty at a time, you are part of a<br />
lifeguard team. To learn what you should expect<br />
from other team members, it is critical that you<br />
communicate and practice together. Your ability to<br />
respond to an emergency depends in large part on<br />
how much you have practiced the facility’s EAPs<br />
together and how well you communicate.<br />
By practicing with your team, you will learn how<br />
staff members work together in a variety of<br />
circumstances (Figure 1-8). Team practice also<br />
gives teammates the chance to work on different<br />
responder roles together. This is particularly<br />
important because team rescues are an integral<br />
part of lifeguarding. Several of the rescues<br />
presented in this course require more than one<br />
rescuer to provide care.<br />
In-service training allows lifeguards to practice their skills.<br />
Figure 1-8<br />
Practicing together helps lifeguard teams be better prepared<br />
for an emergency.
10<br />
<strong>Lifeguarding</strong> <strong>Manual</strong><br />
In addition to practicing rescues and response, it is important that the team works<br />
to maintain a climate of teamwork. Effective communication, trust, mutual respect,<br />
commitment and cooperation are crucial elements for working effectively as a team.<br />
Some ways that you can have a positive effect on your team include:<br />
■■<br />
■■<br />
■■<br />
■■<br />
■■<br />
■■<br />
■■<br />
Arriving to work on time.<br />
Rotating stations on time.<br />
Attending in-service trainings.<br />
Enforcing safety rules in a consistent manner.<br />
Communicating clearly while treating others with respect.<br />
Being prepared by maintaining your knowledge, skills and physical fitness.<br />
Completing secondary responsibilities in a timely and acceptable fashion.<br />
The Emergency Action Plan<br />
The lifeguard team and other staff members must practice the facility’s EAPs<br />
together until everyone knows their responsibilities and can perform them effectively.<br />
Because conditions can change throughout the day, you may need to adapt the<br />
EAP to a particular situation. Some facilities have created more than one EAP to<br />
cover specific situations or conditions. Factors that may affect the steps of an EAP<br />
include the number of lifeguards on duty. the number and availability of other safety<br />
team members on duty and the types of patron activities occurring.<br />
Safety Team<br />
After your lifeguard team activates the facility’s EAP, the safety team needs to back<br />
you up and provide assistance. The main objective of the safety team is to assist you<br />
in maintaining a safe environment and providing emergency care.<br />
In addition to the lifeguard team and other facility staff members, the safety team is<br />
composed of local emergency service personnel. Other members of the safety team<br />
may work off-site and often include upper-level management personnel. Chapter 5<br />
discusses safety team members and their roles and responsibilities.<br />
WRAP-UP<br />
Being a professional lifeguard means being fully prepared for this challenging and<br />
important work. Looking and acting professional indicates readiness to do the job.<br />
Maintaining professional conduct requires practice and commitment. No one is a<br />
natural-born lifeguard; it takes hard work. A lifeguard can meet the challenges and<br />
gain the rewards of being a professional through practice, hard work and dedication.
O<br />
Facility Safety<br />
ne of your most important responsibilities as<br />
a lifeguard is to help ensure that your facility<br />
is safe. You do this, in part, by having rescue<br />
equipment immediately available, conducting routine safety<br />
checks, taking appropriate action during severe weather<br />
and being familiar with facility rules. Management also<br />
has a role to play, which includes keeping the facility<br />
in compliance with the law and making<br />
sure that lifeguards are doing their<br />
Chapter2<br />
jobs correctly. n
12<br />
<strong>Lifeguarding</strong> <strong>Manual</strong><br />
RESCUE EQUIPMENT<br />
Aquatic facilities must have the appropriate rescue equipment available for<br />
emergency response and in proper working order at all times. Using rescue<br />
equipment makes a rescue safer for both you and the victim. You also must have<br />
immediate access to communication devices used at your facility to activate an<br />
emergency action plan (EAP), which may include a whistle, megaphone, radio,<br />
flag or other signaling equipment.<br />
As a lifeguard, you must always wear or carry certain equipment so that it is<br />
instantly available in an emergency. The primary piece of rescue equipment used to<br />
perform a water rescue is the rescue tube. Another piece of equipment that must<br />
be immediately accessible is the backboard, which is used to remove victims from<br />
the water. Some facilities, like waterfronts, may use specific or specialty rescue<br />
equipment to meet the needs of their particular environments.<br />
Equipment That You Wear or Carry<br />
Figure 2-1<br />
To respond quickly and appropriately to an<br />
emergency, a rescue tube, resuscitation mask<br />
and gloves must be instantly available. The best<br />
way to ensure this is to always keep the strap<br />
of the rescue tube over your shoulder and neck<br />
and wear a hip pack containing the gloves and<br />
resuscitation mask (Figure 2-1). You should<br />
wear the hip pack at all times, even when not<br />
on surveillance duty.<br />
It is important to wear your lifeguard gear properly.<br />
Rescue Tubes<br />
The rescue tube is used at pools, waterparks and<br />
most non-surf waterfronts. It is a 45- to 54-inch<br />
vinyl, foam-filled tube with an attached tow line and<br />
shoulder strap. A rescue tube is capable of keeping multiple victims afloat.<br />
When performing patron surveillance, always keep the rescue tube ready<br />
to use immediately.<br />
■■<br />
■■<br />
■■<br />
Keep the strap of the rescue tube over the shoulder and neck.<br />
Hold the rescue tube across your thighs when sitting in a lifeguard chair or<br />
across your stomach when standing.<br />
Hold or gather the excess line to keep it from getting caught in the chair or other<br />
equipment when you move or start a rescue.
Chapter 2 Facility Safety 13<br />
Resuscitation Masks<br />
A resuscitation mask is a transparent, flexible device that creates a tight seal<br />
over the victim’s mouth and nose to allow you to breathe air into a victim without<br />
making mouth-to-mouth contact. All masks should have a one-way valve for<br />
releasing exhaled air. Some masks also have an inlet for administering emergency<br />
oxygen. Masks come in different sizes to ensure a proper fit and tight seal on<br />
adults, children and infants.<br />
Gloves<br />
Disposable (single-use) gloves are used to protect employees<br />
that may be exposed to blood or other body fluids. Gloves should<br />
be made of non-latex materials, such as nitrile. Gloves also<br />
should be powder free.<br />
Equipment You Can Easily Reach<br />
Other first aid and rescue equipment should be easily accessible<br />
for emergency use. This additional equipment may include<br />
backboards, rescue buoys, other personal protective equipment (PPE), other<br />
resuscitation equipment, an automated external defibrillator (AED),<br />
first aid supplies and rescue boards.<br />
Backboards<br />
A backboard is<br />
the standard piece<br />
of equipment<br />
used at aquatic<br />
facilities to remove<br />
victims from the<br />
water when they<br />
are unable to<br />
exit the water on<br />
their own or when they have a possible injury to the head, neck or spine. Some<br />
backboards have runners on the bottom that allow the board to slide easily onto a<br />
deck or pier. A backboard must have a minimum of three body straps to secure a<br />
victim in cases of head, neck or spinal injury, in addition to a device for immobilizing<br />
the head. Additional straps may be necessary for<br />
special removal situations, such as steep inclines Figure 2-2<br />
or vertical lifts.<br />
Rescue Buoys<br />
A rescue buoy (Figure 2-2), also known as a<br />
rescue can or torpedo buoy, often is the primary<br />
piece of rescue equipment used at waterfronts<br />
and surf beaches. Most rescue buoys are made of<br />
lightweight, hard, buoyant plastic and vary in length<br />
from 25 to 34 inches. Molded handgrips along the<br />
sides and rear of the buoy allow the victim to keep<br />
a firm hold on the buoy. Rescue buoys are buoyant<br />
enough to support multiple victims.<br />
Rescue buoy
14<br />
<strong>Lifeguarding</strong> <strong>Manual</strong><br />
Personal Protective Equipment<br />
Personal protective equipment (PPE) is the specialized clothing, equipment and<br />
supplies used to prevent you from coming into direct contact with a victim’s body<br />
fluids. In addition to gloves and resuscitation masks, other PPE may be available at<br />
your facility, including gowns, masks, shields and protective eyewear. A blood spill<br />
kit should also be available to safely clean up blood.<br />
Bag-Valve-Mask Resuscitator<br />
Figure 2-3<br />
A bag-valve-mask resuscitator (BVM) is a handheld<br />
device attached to a resuscitation mask<br />
that is used to ventilate a victim in respiratory<br />
arrest or when performing CPR. BVMs come in<br />
various sizes to fit adult, children and infants. The<br />
appropriately sized BVM should be used based on<br />
the size of the victim. Using a BVM requires two<br />
rescuers: one to maintain a tight seal for the mask,<br />
and one to squeeze the bag (Figure 2-3).<br />
Giving ventilations using a bag-valve-mask resuscitator.<br />
Other Resuscitation Equipment<br />
In addition to resuscitation masks, other<br />
resuscitation equipment is effective in responding to<br />
breathing and cardiac emergencies. Use of all of the<br />
following supplemental resuscitation equipment is<br />
not covered in the <strong>Lifeguarding</strong> course and requires additional training.<br />
This equipment may or may not be used at your facility.<br />
■■<br />
■■<br />
Oxygen cylinders and delivery devices. In a breathing or<br />
cardiac emergency, oxygen cylinders and delivery devices are<br />
used to administer emergency oxygen to the victim.<br />
Suctioning devices. <strong>Manual</strong> suction devices are used to remove<br />
fluids and foreign matter from the victim’s upper airway. They are<br />
lightweight, compact and operated by hand.<br />
■■<br />
Airways. Oropharyngeal and nasopharyngeal airways come in a<br />
variety of sizes and are used to help maintain an open airway in a<br />
nonbreathing victim. They do this by keeping the tongue away from<br />
the back of the throat during resuscitation.<br />
Automated External Defibrillators<br />
An AED is a portable electronic device that analyzes the heart’s<br />
rhythm and can deliver an electrical shock, which helps the heart to<br />
re-establish an effective rhythm. This is known as defibrillation.
Chapter 2 Facility Safety 15<br />
It is used in conjunction with CPR on unconscious victims with no obvious signs<br />
of life (movement and breathing). An AED should be available at your facility.<br />
First Aid Kit and Supplies<br />
An adequate inventory of first aid supplies must be available at all aquatic facilities.<br />
Common contents of a first aid kit include items used to treat bleeding and<br />
wounds and to help stabilize injuries to muscles, bones and joints. Ice packs and<br />
rescue blankets also may be included since they may help to treat heat- and coldrelated<br />
emergencies. Your state or local health department may establish specific<br />
requirements for the contents of your first aid kit.<br />
Rescue Board<br />
Some waterfronts use rescue boards as standard equipment. Rescue boards are<br />
made of plastic or fiberglass and may include a soft rubber deck. They are shaped<br />
similarly to a surf board but usually are larger to accommodate a lifeguard plus<br />
one or more victims. Rescue boards are fast, stable and easy to use. They may be<br />
used during rescues to quickly paddle out long distances. They also may be used<br />
by lifeguards as a patrolling device, with the lifeguard paddling along the outer<br />
boundary of the swimming area.<br />
Ring Buoys, Reaching Poles,<br />
and Shepherd’s Crooks<br />
A ring buoy, reaching pole and shepherd’s crook often are<br />
required by the health department for swimming pools and<br />
waterparks. This equipment is not typically used by lifeguards<br />
to perform the professional rescues taught in this course.<br />
This equipment usually is used by untrained bystanders. If<br />
your facility has any of these items, you should learn how to<br />
use them.<br />
FACILITY SAFETY CHECKS<br />
Facility safety checks are the primary tool used by aquatic facility staff to ensure<br />
overall safety for their facilities. These checks<br />
may be performed by lifeguards or by staff that<br />
are trained to handle facility operations and<br />
maintenance, or by a combination of both (Figure<br />
2-4). A lifeguard supervisor or facility manager<br />
will instruct you about the specific procedures<br />
for your facility. You should never perform safety<br />
checks while also performing patron surveillance.<br />
If you identify an equipment problem during<br />
your surveillance or if a problem is reported<br />
to you, notify a lifeguard supervisor or another<br />
lifeguard who is not performing surveillance. If<br />
the condition is hazardous, follow your facility<br />
protocols and stop patrons from using the<br />
equipment or prohibit them from entering a<br />
potentially hazardous area.<br />
Figure 2-4<br />
When performing facility safety checks, report any unsafe<br />
conditions found.
16<br />
<strong>Lifeguarding</strong> <strong>Manual</strong><br />
TYPICAL ITEMS FOUND ON<br />
A FACILITY CHECKLIST<br />
The facility safety checklist should include the<br />
status of the following items (if they are okay or<br />
not okay) and any action required.<br />
Equipment:<br />
Verify that all equipment is in good working order,<br />
there is a sufficient number and equipment is in<br />
the proper location.<br />
Rescue Equipment<br />
■■<br />
■■<br />
■■<br />
■■<br />
■■<br />
■■<br />
■■<br />
Rescue tubes and/or buoys<br />
Rescue board<br />
Non-motorized craft<br />
Motorized craft<br />
Masks and fins<br />
Reaching pole<br />
Ring buoy<br />
First Aid Equipment<br />
■■<br />
■■<br />
■■<br />
■■<br />
■■<br />
■■<br />
Hip packs<br />
cc<br />
Resuscitation masks<br />
cc<br />
Disposable gloves<br />
cc<br />
First aid supplies<br />
Backboard(s) with head immobilizer and<br />
straps<br />
First aid kit<br />
AED(s)<br />
Suctioning equipment<br />
Emergency oxygen delivery system<br />
Safety Equipment<br />
■■<br />
■■<br />
■■<br />
■■<br />
■■<br />
■■<br />
■■<br />
Lifeguard stands/stations<br />
Communication devices – whistles, radios,<br />
E-stop(s)<br />
Telephone – directions for emergency<br />
calls posted<br />
PPE – extra gloves, gowns, face shield,<br />
blood spill kit<br />
Life jackets<br />
Umbrellas or shade structures<br />
Sunscreen<br />
Operational Conditions:<br />
As applicable for the environment and<br />
facility type.<br />
■■<br />
■■<br />
■■<br />
■■<br />
■■<br />
■■<br />
■■<br />
■■<br />
■■<br />
■■<br />
■■<br />
Bottom free of hazards<br />
Water clarity (pools and waterparks should<br />
see the bottom)<br />
Water level<br />
Water temperature – within specified range<br />
Air temperature – within specified range<br />
Weather conditions – safe<br />
Lighting – underwater and above ground<br />
working properly<br />
Water chemical ranges – within<br />
specified range<br />
Drain covers undamaged and secured<br />
Suction fittings undamaged and secured<br />
Circulation system – within range and proper<br />
operational condition<br />
cc<br />
Flow rates<br />
cc<br />
Filter differential<br />
cc<br />
Hair/lint strainer<br />
cc<br />
Gutter/skimmer baskets
Chapter 2 Facility Safety 17<br />
Risk Management:<br />
In place, visible, secure, clean, ready for use.<br />
■■<br />
■■<br />
■■<br />
■■<br />
■■<br />
■■<br />
■■<br />
■■<br />
■■<br />
■■<br />
■■<br />
■■<br />
■■<br />
Depth markings clearly visible<br />
Swim area sections set up with ropes<br />
and/or buoys<br />
Signage in line of sight for patrons<br />
Fences and barriers, gates and doors secure<br />
Walkways/decks clear, accessible, non-slip<br />
and free of hazards<br />
Handrails or guardrails secure<br />
Ladder rungs or steps secure<br />
ADA accessibility equipment secure and<br />
ready for use<br />
Diving boards – secure and non-slip<br />
Starting blocks – secure and non-slip<br />
Floating features – tethered and secure,<br />
undamaged<br />
Fire extinguishers – charged and ready for use<br />
Emergency exits – clear, accessible with<br />
working lights and alarms<br />
Facility Sanitation:<br />
Clean, non-slip and ready to use<br />
■■<br />
■■<br />
■■<br />
■■<br />
■■<br />
■■<br />
Pool shell – free of algae, free of scum line<br />
Deck or shoreline – clean and free of<br />
environmental debris, such as animal droppings<br />
Restrooms/locker rooms<br />
cc<br />
Warm, running water<br />
cc<br />
Soap<br />
cc<br />
Paper products adequately stocked<br />
First aid station – adequately stocked<br />
Tables and seating<br />
Trash receptacles<br />
Administration:<br />
Posted or filed as applicable.<br />
■■<br />
■■<br />
■■<br />
■■<br />
■■<br />
■■<br />
■■<br />
■■<br />
■■<br />
Zones of surveillance diagrams posted<br />
Lifeguard rotation plans posted<br />
EAPs available<br />
MSDS sheets available<br />
Staff certifications – copies on file for all staff<br />
Training records – on file<br />
Water quality test results<br />
cc<br />
Daily results posted<br />
cc<br />
Records on file<br />
Rescue and/or incident reports on file<br />
AED inspection checklist – up-to-date<br />
■■<br />
Emergency oxygen system checklist –<br />
up-to-date<br />
Aquatic Attractions:<br />
■■<br />
■■<br />
■■<br />
■■<br />
Rides and slides – inspected and test run<br />
complete<br />
Rafts, tubes and/or sleds – properly inflated<br />
and handles secure<br />
Landing areas free of rough surfaces and debris<br />
Water level and flow appropriate for attraction<br />
Waterfronts:<br />
■■<br />
■■<br />
■■<br />
■■<br />
■■<br />
Shoreline is clean and free of sharp objects<br />
Bottom conditions are free from hazards<br />
Water conditions are safe for swimming<br />
Piers or docks are anchored, stable, and free<br />
from trip or injury hazards<br />
Lifeguard stands – surrounding area clear<br />
of objects
18<br />
<strong>Lifeguarding</strong> <strong>Manual</strong><br />
Figure 2-5<br />
Safety checks are conducted before the facility<br />
is opened, during daily operations and at<br />
closing. Checks conducted before the facility<br />
is opened may include a physical inspection of<br />
all features, such as a test ride of all attractions.<br />
If you find an unsafe condition, you should<br />
correct the condition before the facility opens,<br />
if possible. If you cannot correct the problem,<br />
you should inform a supervisor immediately. If<br />
the condition is serious, the supervisor or facility<br />
manager may close or delay the opening of the<br />
facility, attraction or area until the condition<br />
is corrected. Signs, ropes or cones can keep<br />
patrons away from an area of the facility not<br />
open to the public (Figure 2-5). Inform other<br />
lifeguards about the hazard so that they can<br />
direct patrons away from the area. You also should record incidents in the daily<br />
log or on the appropriate form or report.<br />
Use signs, ropes or cones to keep patrons away from unsafe<br />
conditions or areas not open to the public.<br />
Rip CURRENTS<br />
This course is not intended to prepare lifeguards<br />
to work at surf waterfront environments; however,<br />
it is important for all lifeguards to understand<br />
the dangers of rip currents and to help educate<br />
others about these dangers.<br />
A rip current is a strong channel of water that<br />
flows offshore beginning near the shore and<br />
often extending well beyond the breaking<br />
waves. Rips currents are often associated with<br />
underwater features, such as sandbars, that<br />
may cause a channel in the bottom of a body<br />
of water, allowing water to escape from the<br />
near shore through a narrow channel. They also<br />
commonly occur near physical structures, such<br />
as piers, groins and natural outcroppings. Rip<br />
currents can create fast moving currents that<br />
may exceed 8 feet per second—this makes it<br />
extremely difficult for even a strong swimmer to<br />
swim against.<br />
According to the National Weather Service,<br />
common indicators of a rip current include:<br />
■■<br />
■■<br />
■■<br />
■■<br />
A channel of churning, choppy water.<br />
An area having a noticeable difference in<br />
water color.<br />
A line of foam, seaweed or debris moving<br />
steadily away from shore.<br />
A break in the incoming wave pattern.<br />
Although these are good indicators, they are not<br />
always present. Consequently, it is not always<br />
possible even for an experienced lifeguard to spot<br />
a rip current. Rip currents can occur in any surf or<br />
weather condition.<br />
The United States Lifesaving Association (USLA)<br />
estimates that each year more than 100 people
Chapter 2 Facility Safety 19<br />
Specific Areas to Inspect for Safety<br />
The facility’s safety checklist is a guide for performing a safety check. The purpose<br />
is to verify that equipment has been tested, is working properly and is ready for<br />
use and that the facility is clean and safe for patrons. Your facility should have a<br />
checklist specific to your facility. General areas and equipment to inspect include:<br />
■■<br />
■■<br />
■■<br />
■■<br />
■■<br />
■■<br />
■■<br />
Rescue equipment (hip pack contents, rescue tubes, backboards and<br />
first aid supplies).<br />
Communication equipment.<br />
Pool decks or waterfront shorelines.<br />
Pools, waterfront swimming areas or waterpark attractions.<br />
Locker rooms (dressing areas, shower areas and restrooms).<br />
Equipment and structures (ladders, diving boards and starting blocks).<br />
Recreational equipment and play structures.<br />
drown in rip currents. Rip currents are believed<br />
to account for more than 80 percent of rescues<br />
performed by surf lifeguards. This makes rip<br />
currents one of nature’s most deadly natural forces.<br />
Many beaches and waterfront areas use colorcoded<br />
flags to indicate the presence of hazardous<br />
water conditions and rip currents. Any time a red or<br />
double red flag is visible, stay out of the water; use<br />
extreme caution when there is a yellow flag.<br />
If caught in a rip current, do not panic. Never<br />
attempt to swim against the current—fighting the<br />
current will cause you to become exhausted and<br />
possibly drown. Allow the current to take you<br />
away from shore. Once the current weakens,<br />
swim parallel to the beach then back to shore<br />
at an angle. Try to swim in the direction of<br />
least resistance to the current. If you are too<br />
exhausted to swim to shore, signal by calling and<br />
waving for help.<br />
If you are lifeguarding at a waterfront area where<br />
there is the possibility of rip currents, it is critical to<br />
receive specialized training in the specific conditions<br />
and hazards that exist in your area and to learn<br />
how to identify rip currents and to help someone<br />
who is caught in them. For more information on rip<br />
currents, visit ripcurrents.noaa.gov and usla.org.<br />
Photo courtesy John R. Fletemeyer
20<br />
<strong>Lifeguarding</strong> <strong>Manual</strong><br />
Inspecting Aquatic Attractions and Features<br />
Figure 2-6<br />
Safety checks are a primary method of facility surveillance<br />
and help prevent injuries to patrons.<br />
Facilities should follow the manufacturer’s<br />
guidelines for installation, safe inspection,<br />
maintenance and use of its various attractions and<br />
features (Figure 2-6). Your employer should provide<br />
you with a specific set of guidelines and training<br />
if you are responsible for these inspections. In<br />
some cases, maintenance personnel, rather than<br />
lifeguards, will be responsible for inspections. Even<br />
if the attraction or feature has been inspected<br />
already, stay alert for any problems that may<br />
develop, such as loose or rusted bolts; cracks;<br />
broken or missing pieces; frayed, loose or mildewed<br />
safety nets; unusual noises; and an area with<br />
increased frequency of injury to patrons.<br />
Hazards at Waterfront Facilities<br />
You should be aware of the specific potential hazards presented by some<br />
waterfront facilities. These include underwater hazards, physical structures and<br />
changing water conditions.<br />
Dangerous conditions may develop with changing winds, tides and weather. On<br />
some days, the water may be totally calm and flat. On other days, there may be large<br />
waves. Checking for potentially hazardous conditions specific to your facility should<br />
be covered during your orientation. If they are not, ask your facility management to<br />
discuss procedures for any situation for which you do not feel adequately prepared.<br />
Underwater Hazards<br />
Figure 2-7<br />
Common underwater hazards may change throughout the day<br />
and include:<br />
■■<br />
■■<br />
■■<br />
■■<br />
■■<br />
■■<br />
Holes in the swimming area and sudden drop-offs.<br />
Submerged objects, such as rocks, tree stumps and underwater<br />
plants (Figure 2-7).<br />
Bottom conditions (sand, rock, silt, weeds and mud).<br />
Slope of the bottom and water depth.<br />
Shells, barnacles and marine life.<br />
Broken glass or other sharp objects.<br />
You should check for and, if possible, remove underwater hazards. If<br />
hazards cannot be removed, swimming areas should be re-positioned<br />
away from them. Alternatively, the shape and size of swimming areas<br />
may need to be changed to avoid underwater hazards. Floating buoys<br />
can be used to mark underwater hazards to warn patrons of their danger.<br />
Physical Structures<br />
Remove any underwater hazards at<br />
waterfront facilities.<br />
Piers and docks in the water often are used for different activities<br />
(Figure 2-8, A–D). The following precautions should be taken with<br />
these structures:
Chapter 2 Facility Safety 21<br />
Figure 2-8 A<br />
Figure 2-8 B<br />
Figure 2-8 C<br />
Figure 2-8 D<br />
Dock formations: (A) “F” dock, (B) “H” dock, (C) “A” dock, (D) “T” dock.<br />
■■<br />
■■<br />
■■<br />
■■<br />
■■<br />
Ensure the floating piers, docks and rafts are anchored securely.<br />
Adjust attachment points between floating sections to minimize hazards.<br />
Be aware of and take steps to eliminate blind spots (obstructed views) caused<br />
by structures.<br />
Ensure that patrons dive only in designated areas. Check the water depth<br />
daily. Be aware of bottom and tidal changes before allowing head-first entries.<br />
Prohibit swimming in fishing areas around piers or docks or adjacent to boat activity.<br />
Changing Water Conditions<br />
Many factors can influence water conditions, which in turn can affect patron safety.<br />
These factors include:<br />
■■<br />
Water depth and currents. Changes in the water level may lead to increased<br />
currents that make standing difficult and could sweep swimmers beyond area<br />
boundaries. Examples include:<br />
cc<br />
cc<br />
cc<br />
A dam that releases water, causing the water depth above the dam to drop<br />
and the river depth below the dam to rise.<br />
Heavy rainfall that makes a lake or river rise, or a long, dry period that makes<br />
it too shallow for diving.<br />
Tidal changes.
22<br />
<strong>Lifeguarding</strong> <strong>Manual</strong><br />
WATER QUALITY<br />
The quality of water in spas and swimming pools<br />
constantly changes. It is affected by many factors,<br />
including the concentration of disinfectant in the<br />
water; the water’s pH level, chemical balance<br />
and saturation; air temperature; sunlight; and<br />
contaminants from bathers and the environment.<br />
All of these factors are important not only for a<br />
safe swimming environment but also to ensure<br />
crystal-clear water clarity.<br />
Additional training is needed, and a certification<br />
in pool operations often is required, to learn how<br />
and when to make chemical adjustments to the<br />
pool water. If you work at a swimming pool or<br />
waterpark, your responsibilities probably will<br />
include monitoring the water to make sure that it is<br />
safe, clean and clear. You may be asked to assist<br />
by periodically testing the water’s chlorine or<br />
bromine and pH levels. You should receive training<br />
on how to properly test the pool water chemistry if<br />
this is included in your job responsibilities.<br />
Disinfectant and pH Levels<br />
Chlorine is one of the most common chemicals<br />
used to disinfect pools and spas. When dissolved<br />
in pool or hot tub water, chlorine produces<br />
a chemical called hypochlorous acid, also<br />
known as free chlorine. Free chlorine disinfects<br />
and sanitizes the water by killing germs and<br />
contaminants. To work most effectively, the free<br />
chlorine-to-water ratio should be 2 to 4 parts per<br />
million (ppm). This concentration of free chlorine,<br />
called a residual, should be maintained at all times<br />
throughout the water.<br />
Free chlorine is colorless and odorless. However,<br />
it reacts with certain contaminants, such as<br />
human waste, to create combined chlorines,<br />
which are more commonly known as chloramines.<br />
Chloramines cause the chlorine-like smell found<br />
in indoor pools. Chloramines also can irritate the<br />
skin and mucous membranes.<br />
The pH of the pool and hot tub water must be<br />
maintained at the appropriate level for free chlorine<br />
to be effective and for bathers to be comfortable.<br />
As the pH level goes down, free chlorine works<br />
better as a disinfectant. However, when the pH<br />
drops below 7.2, the water may irritate eyes and<br />
skin and corrode pool surfaces and equipment.<br />
Human tears have a pH of about 7.5; therefore, the<br />
ideal pH in pool and hot tub water is 7.4 to 7.6.<br />
Bromine is another chemical commonly used<br />
to kill germs and contaminants in pool and hot<br />
tub water. It often is used in hot tubs instead<br />
of chlorine because it is more stable in hot<br />
■■<br />
■■<br />
cc<br />
cc<br />
Seiche, which is a standing wave of water that oscillates in large lakes<br />
usually created by strong winds and/or large barometric pressure gradients.<br />
Sandbars that can move and shift from season to season or from heavy rain<br />
that produces strong currents. These changes in the waterfront floor can<br />
create unexpected drops or new shallow-water features.<br />
Water quality. Insufficient flow may lead to stagnant water and compromise<br />
water quality.<br />
Debris or cloudiness in the water.
Chapter 2 Facility Safety 23<br />
temperatures and does not burn away as quickly.<br />
It also does not leave a chemical odor in the water.<br />
Testing and Adjusting<br />
A supervisor, or another staff member trained<br />
and certified in pool operations, typically<br />
monitors and adjusts chemical levels throughout<br />
the day. However, you may be trained to test<br />
the chlorine or bromine and pH levels of the<br />
water. The water quality will need to be tested<br />
and the results recorded at periodic intervals<br />
throughout the day. Your facility should have a<br />
test kit available that measures free chlorine or<br />
bromine and pH levels. Some measure other<br />
water-balance levels as well. N,N-diethyl-pphenylenediamine<br />
(DPD) is the most common<br />
test chemical used to test for free chlorine or<br />
bromine. DPD reacts with chlorine and turns the<br />
water test sample shades of light to dark pink.<br />
Phenol red is a dye used to test the water’s pH.<br />
Its color changes from yellow to orange to red<br />
based on the pH level. The water test result color<br />
is compared with the colors on the test kit.<br />
Your facility will have guidelines for the minimum,<br />
maximum and ideal ranges for chlorine or<br />
bromine and pH levels for safe swimming. Alert<br />
the appropriate staff member immediately if<br />
the water test results are not within the proper<br />
ranges for safe swimming at your facility.<br />
Adjustments may need to be made as soon as<br />
possible or the pool or hot tub may need to be<br />
temporarily closed until the chemical ranges are<br />
correct for safe swimming.<br />
Waterfront Considerations<br />
(Source: http://water.epa.gov/type/oceb/beaches<br />
Accessed September 6, 2011)<br />
Water quality is also important at natural bodies<br />
of water. Swimming in unsafe water may result in<br />
minor illnesses, such as sore throats or diarrhea<br />
or more serious illnesses, such as meningitis,<br />
encephalitis or severe gastroenteritis. Children,<br />
the elderly and people with weakened immune<br />
systems have a greater chance of getting sick<br />
when they come in contact with contaminated<br />
water. The quality of natural bodies of water<br />
can be impacted by pollutants, such as runoff<br />
from animal waste, fertilizer, pesticides, trash<br />
and boating wastes and especially storm water<br />
runoff during and after heavy periods of rain. The<br />
Environmental Protection Agency recommends<br />
that state and local officials monitor water quality<br />
and issue an advisory or closure when beaches<br />
are unsafe for swimming.<br />
■■<br />
Water temperature, which usually is colder early in the summer and after rain.<br />
Although surface water may be warm and comfortable, water at a depth of<br />
several feet can be much colder. This condition, called a thermocline, can cause<br />
hypothermia (low body temperature).<br />
When dealing with changing water conditions:<br />
■■<br />
■■<br />
■■<br />
Warn patrons of hazards by using signs, buoys and safety announcements.<br />
Check for objects that may have washed into the area.<br />
Check for changes in bottom conditions, water depth and water quality.
24<br />
<strong>Lifeguarding</strong> <strong>Manual</strong><br />
!<br />
RECREATIONAL<br />
WATER ILLNESSES<br />
Illnesses that are spread by<br />
swallowing, breathing or contacting<br />
contaminated water are called recreational<br />
water illnesses (RWIs). Typical RWIs include<br />
earaches, rashes and diarrhea. RWIs generally<br />
are not severe, but in rare cases they can result<br />
in serious outcomes, including pneumonia,<br />
neurological damage and even death.<br />
Gastroenteritis, a stomach ailment that causes<br />
diarrhea, nausea, vomiting and abdominal pain,<br />
is one of most commonly documented RWIs. It<br />
occurs when feces are released into the water<br />
and swallowed by other swimmers before having<br />
been killed by chlorine or another disinfectant.<br />
Cryptosporidium is the parasite that causes<br />
most gastroenteritis outbreaks. Crypto can<br />
remain infectious, even when exposed to<br />
disinfectant levels for several days; therefore,<br />
people suffering from diarrhea should not<br />
enter the water. Those diagnosed with<br />
cryptosporidiosis should not enter recreational<br />
water for 2 weeks after symptoms have ceased.<br />
Fecal Incident Response<br />
Recommendations<br />
During orientation or in-service training, your<br />
facility should provide training on how to<br />
respond to accidental fecal releases (AFRs).<br />
If an AFR occurs, you should direct all patrons<br />
to leave all of the pools that use the same<br />
filtration system. Remove as much of the<br />
fecal material as possible with a scoop or<br />
net, trying not to break formed stool apart.<br />
Dispose of the feces using the sanitary<br />
procedures. Do not vacuum the feces. Clean<br />
and disinfect the scoop and net and then<br />
place them in the pool during the following<br />
disinfection procedures.<br />
Formed stool<br />
Continue to operate the filtration system.<br />
■■<br />
■■<br />
Adjust the pH to below 7.5.<br />
Raise the free chlorine level to at least 2 ppm.<br />
Maintain those levels for 25 minutes before<br />
reopening the pool.<br />
Diarrheal discharge<br />
■■<br />
■■<br />
■■<br />
Continue to operate the circulation system.<br />
■■<br />
Adjust the pH to below 7.5.<br />
■■<br />
■■<br />
■■<br />
■■<br />
Raise the free chlorine level to at least<br />
20 ppm.<br />
Maintain those levels for 13 hours.<br />
Backwash the filter.<br />
Return the chlorine level to normal levels<br />
before re-opening the pool.<br />
Vomit in Pool Water<br />
Patrons are unlikely to contract RWIs by<br />
swallowing, breathing or contacting pool water<br />
contaminated by vomit or blood. The vomit that<br />
a person produces after swallowing too much<br />
water probably is not infectious; however, if a<br />
person vomits and it contains any solid matter<br />
or food particles, you should respond the same<br />
way as you would to a formed stool incident.<br />
To learn more about prevention practices,<br />
healthy swimming and recreational water topics,<br />
and to download free outbreak response toolkits<br />
and publications, visit CDCs website at<br />
cdc.gov/healthywater/swimming. You can<br />
learn even more by enrolling in a pool<br />
operator course.
Chapter 2 Facility Safety 25<br />
■■<br />
■■<br />
Alert patrons to cold water and watch for signs of hypothermia in patrons.<br />
Check and document scheduled high and low tides in the daily log each<br />
morning before opening, and plan for changes in water depth.<br />
WEATHER CONDITIONS<br />
Weather affects the safety of swimmers both outdoors and indoors. You should be<br />
aware of the weather conditions in your area and know how to act when severe<br />
weather occurs.<br />
The National Oceanic and Atmospheric Administration<br />
(NOAA) Weather Radio All Hazards is a good source<br />
of information about potentially hazardous weather. This<br />
nationwide radio network provides detailed weather<br />
information 24 hours a day to most areas. A special<br />
radio receiver is needed to receive the signal and can<br />
be set to sound an alarm when a warning is issued for a<br />
specific area. These radios have battery back-up in case<br />
of power failure. Local up-to-date forecasts and weather<br />
warnings also are available from Internet sites, such as the<br />
National Weather Service at www.nws.noaa.gov. Local<br />
radio stations, television channels and cable services also<br />
provide forecasts and emergency weather warnings.<br />
Always follow your facility’s EAP for severe weather<br />
conditions.<br />
Lightning and Thunderstorms<br />
In most parts of the United States, lightning and<br />
thunderstorms happen more often in the summer. Follow<br />
the facility’s procedures for clearing patrons from the water<br />
before an impending storm. Patron or employee safety<br />
never should be put at risk. If a storm or other bad weather<br />
is predicted, stay alert for signs of the coming storm, such<br />
as thunder and lightning or high winds.<br />
Lightning<br />
Lightning is the result of the build-up<br />
and discharge of electrical energy, and<br />
this rapid heating of the air produces<br />
the shock wave that results in thunder.<br />
25 million cloud-to-ground lightning<br />
strikes occur in the United States<br />
each year. Lightning often strikes as<br />
far as 10 to 15 miles away from any<br />
rainfall with each spark of lightning<br />
reaching over 5 miles in length<br />
and temperatures of approximately<br />
50,000° F. Even if the sky looks blue<br />
and clear, be cautious. One ground<br />
lightning strike can contain 100<br />
million volts of electricity. The National<br />
Lightning Safety Institute recommends<br />
waiting 30 minutes after the last<br />
lightning sighting or sound of thunder<br />
before resuming activities.<br />
Source: National Weather Service Web at<br />
www.lightningsafety.noaa.gov.<br />
If thunder or lightning occur:<br />
■■<br />
■■<br />
■■<br />
■■<br />
■■<br />
Clear everyone from the water at the first sound of thunder or first sight<br />
of lightning. If you are in an elevated station, get down immediately. Move<br />
everyone to a safe area free from contact with water, plumbing or electrical<br />
circuits. For outdoor facilities, move everyone inside, if possible. Large<br />
buildings are safer than smaller or open structures, such as picnic shelters or<br />
gazebos.<br />
Keep patrons and staff out of showers and locker rooms during a thunderstorm as<br />
water and metal can conduct electricity.<br />
Do not use a telephone connected to a landline except in an emergency.<br />
Keep everyone away from windows and metal objects (e.g., doorframes, lockers).<br />
Watch for more storms and monitor weather reports on a radio or TV broadcast,<br />
weather radio or website.
26<br />
<strong>Lifeguarding</strong> <strong>Manual</strong><br />
If caught outside in a thunderstorm and there is not enough time to reach<br />
a safe building:<br />
■■<br />
■■<br />
■■<br />
■■<br />
Keep away from tall trees standing alone and any tall structures.<br />
Keep away from water and metal objects, such as metal fences, tanks,<br />
rails and pipes.<br />
Keep as low to the ground as possible: squat or crouch with the knees drawn<br />
up, both feet together and hands off the ground.<br />
Avoid lying flat on the ground; minimize ground contact.<br />
Figure 2-9<br />
Heavy Rain and Hail<br />
Heavy rain and hail can be dangerous. Rain can<br />
make it difficult to see the bottom of the pool<br />
or beneath the surface. If you cannot see the<br />
bottom of the pool (Figure 2-9), clear the pool<br />
of all patrons. In addition, hail can cause serious<br />
physical injury. If it is hailing, clear patrons from<br />
the water and direct them to shelter.<br />
Rain can obscure the bottom of a pool.<br />
Tornadoes<br />
If the aquatic facility’s locale is prone to tornadoes,<br />
facility staff should monitor weather forecasts. A<br />
tornado watch means that tornadoes are possible. Some facilities may decide to<br />
close once a watch is issued and before the arrival of wind, rain and lightning, which<br />
also may occur when tornado formation is likely. A tornado warning means that a<br />
tornado has been sighted or indicated on radar and is occurring or imminent in the<br />
warning area. Some communities activate sirens during a tornado warning. Everyone<br />
should take shelter immediately.<br />
If a tornado warning is issued:<br />
■■<br />
Clear the water and surrounding area.<br />
■■<br />
■■<br />
■■<br />
Move everyone to the location specified in the facility’s EAP, such as a basement<br />
or an inside area on the lowest level of a building.<br />
Keep everyone away from windows, doors and outside walls.<br />
Have everyone lie flat in a ditch or on a low section of ground if adequate shelter<br />
is unavailable at or near the facility.<br />
If a tornado siren warning is heard, keep patrons in the safe location. Continue<br />
listening to local radio or television stations or a NOAA Weather Radio for updated<br />
instructions from the authorities.<br />
High Wind<br />
High wind may cause waves or turbulence that makes it hard to see patrons in the<br />
water. Wind also increases the risk of hypothermia, especially for small children and<br />
the elderly. Safety guidelines for high wind include:<br />
■■<br />
Clearing the pool or waterfront if visibility is impaired by waves or<br />
increased turbidity.
Chapter 2 Facility Safety 27<br />
■■<br />
■■<br />
Moving all patrons and staff indoors.<br />
Securing all facility equipment that could be blown around and become<br />
dangerous, but only if it is possible and safe to do so.<br />
Fog<br />
In some areas, fog can occur at any time of the day or night with changing weather<br />
conditions. If fog limits visibility, your facility may need to close.<br />
Weather Conditions and Indoor Facilities<br />
Indoor facilities are safe from most weather problems but still may be affected.<br />
Severe weather can cause a power failure; therefore, the facility should have<br />
some type of portable or emergency lighting. In the event of a power failure, you<br />
should clear the pool because circulation and filtration of pool water will not be<br />
possible. If weather conditions cause safety concerns, you also should clear<br />
the deck. Follow the facility’s EAP for severe weather conditions.<br />
RULES AND REGULATIONS<br />
Every aquatic facility establishes its own set of rules and<br />
regulations, some of which are required by the state or local<br />
health department, whereas others are determined by the facility<br />
management. This course concentrates on common rules aimed at<br />
keeping patrons safer and preventing injuries; however, you should be<br />
familiar with and enforce all rules at your facility.<br />
Common Rules<br />
Every facility should post its rules and regulations for patron behavior in plain view<br />
of all patrons and staff. Rules do not keep patrons from having fun. Rules exist<br />
for everyone’s health and safety. Posted rules help patrons to enjoy their<br />
experience without endangering themselves or others. Facilities that attract<br />
numerous international guests or those that are located in multicultural<br />
communities also may post rules in other languages or use international<br />
signs or symbols.<br />
Common rules posted at aquatic facilities may include:<br />
■■<br />
Swim only when a lifeguard is on duty.<br />
■■<br />
■■<br />
■■<br />
■■<br />
■■<br />
■■<br />
Swim diapers are required for small children or people<br />
with incontinence.<br />
No swimming with open or infected wounds.<br />
Obey lifeguard instructions at all times.<br />
No running, pushing or rough play.<br />
No hyperventilating before swimming underwater or<br />
breath-holding contests.<br />
No sitting or playing near or with drains or suction fittings.<br />
■■<br />
Dive only in designated areas (Figure 2-10).<br />
Figure 2-10<br />
To help prevent injuries, post<br />
signs, markings and warnings<br />
to inform patrons about<br />
dangers.
28<br />
<strong>Lifeguarding</strong> <strong>Manual</strong><br />
■■<br />
■■<br />
No glass containers in the pool area and locker rooms.<br />
No alcoholic beverages or drug use allowed.<br />
Waterfront Rules<br />
Waterfront facilities often adopt additional rules that are specific to the waterfront<br />
environment. These may include:<br />
■■<br />
■■<br />
■■<br />
■■<br />
■■<br />
■■<br />
No playing or swimming under piers, rafts, platforms or play structures.<br />
No boats, sailboards, surfboards or personal water craft in<br />
swimming areas.<br />
No running or diving head-first into shallow water.<br />
No fishing near swimming areas.<br />
No umbrellas at the waterline (umbrellas present a surveillance obstruction).<br />
No swimming in unauthorized areas.<br />
Waterpark Rules<br />
At waterparks, rules and regulations should be posted, but they also may be<br />
recorded and played over a public address system. Rules may vary based on the<br />
type of attractions available. For example, U.S. Coast Guard-approved life jackets<br />
may be required on certain attractions but not allowed on others.<br />
Waterparks should have signage at every attraction stating the depth of the<br />
water, height or age requirements and how to safely use the attraction. This is to<br />
prevent patrons from finding themselves in water that is deeper or shallower than<br />
they expected. For example, some pools at the end of a slide are shallow so that<br />
patrons can stand up, but others are very deep. Without signage to warn them,<br />
patrons may expect a shallow catch pool and be surprised to find themselves in<br />
deep water.<br />
Additional rules for each attraction typically cover:<br />
■■<br />
■■<br />
■■<br />
■■<br />
The minimum or maximum number of people allowed on an attraction or a tube<br />
at a time.<br />
The maximum height or age requirements in areas designated for small children.<br />
The minimum height or weight requirements for patrons using an attraction<br />
(Figure 2-11).<br />
Common rules for winding rivers, such as:<br />
cc<br />
cc<br />
cc<br />
cc<br />
cc<br />
cc<br />
cc<br />
cc<br />
cc<br />
Enter and exit the winding river only at designated places.<br />
No jumping or diving into the water.<br />
No people on shoulders.<br />
Stay in tubes at all times if tubes are used.<br />
No walking or swimming in the winding river if tubes are used.<br />
Only one properly fitted life jacket per patron.<br />
No stacking of tubes or life jackets.<br />
No forming chains of tubes or life jackets.<br />
Only one patron allowed per tube, except for an adult holding a small child.<br />
The child must be wearing a U.S. Coast Guard-approved life jacket in case<br />
the adult tips over.
Chapter 2 Facility Safety 29<br />
Figure 2-11<br />
Use a measuring pole or line to ensure patrons are the proper height to use a ride.<br />
■■<br />
Common rules for waterslides, such as:<br />
cc<br />
cc<br />
cc<br />
cc<br />
Enter, ride and exit the slide feet-first.<br />
No stopping in the slide, and no running, standing, kneeling, rotating or<br />
spinning on the slides. Keep hands and feet inside the slide.<br />
No metal objects, locker keys, jewelry, metal snaps/zippers, eyewear or<br />
watches, including metal rivets, buttons or fasteners on swimsuits or shorts.<br />
No aqua socks or aqua shoes, eyeglasses, sunglasses or goggles.<br />
Rules for Facility Equipment and Structures<br />
Other rules for specific equipment and structures depend on the facility and<br />
may include:<br />
■■<br />
■■<br />
■■<br />
■■<br />
One person at a time on a ladder or attraction.<br />
Do not sit or hang on lifelines or lane lines.<br />
Do not climb on lifeguard stands or towers.<br />
Starting blocks may be used only by swim team members in scheduled<br />
practices, competitions and instruction when supervised by a certified coach<br />
or instructor.<br />
Diving-Area Rules<br />
Rules for diving boards and dive towers should be posted in the diving area.<br />
The rules may include:<br />
■■<br />
■■<br />
■■<br />
Patrons must demonstrate their swimming ability before entering deep water.<br />
Only one person on the diving board at a time and only one person on the<br />
ladder at a time.<br />
Look before diving or jumping to make sure the diving area is clear.
30<br />
<strong>Lifeguarding</strong> <strong>Manual</strong><br />
■■<br />
■■<br />
■■<br />
Only one bounce allowed on the diving board.<br />
Dive or jump forward, straight out from the diving board.<br />
Swim immediately to the closest ladder or wall.<br />
Rules for Spas, Hot Tubs and Therapy Pools<br />
Spas, hot tubs and therapy pools are popular, but their hazards include drowning,<br />
hyperthermia (high body temperature) and disease transmission. Rules common to<br />
these areas include:<br />
■■<br />
■■<br />
■■<br />
■■<br />
■■<br />
■■<br />
■■<br />
■■<br />
■■<br />
■■<br />
■■<br />
Use only when a lifeguard is present.<br />
Shower with soap and water before entering the water.<br />
People with heart disease, diabetes, high or low blood pressure, seizures,<br />
epilepsy or other medical conditions are cautioned against using a spa or hot tub.<br />
Pregnant women and young children should seek their health care provider’s<br />
approval before using a spa or hot tub.<br />
No unsupervised use by children.<br />
Do not use the spa or hot tub while under the influence of alcohol or other drugs.<br />
No diving, jumping or rough play in the spa or hot tub.<br />
Do not allow anyone to sit or play near or with the drain or suction fittings.<br />
Secure or remove any loose or dangling items, including hair, swimwear and jewelry.<br />
Limit time in the spa to 10 minutes. Patrons then may shower, cool down and<br />
return again briefly. Prolonged use may result in nausea, dizziness, fainting<br />
or hyperthermia.<br />
Remove swim caps before entering the spa or hot tub.<br />
MANAGEMENT AND SAFETY<br />
As a lifeguard, your job is to follow and enforce your facility’s rules and regulations.<br />
The job of your facility’s management is to ensure that the facility is in compliance<br />
with local, state and federal regulations and to make sure that you are enforcing the<br />
rules correctly. Management is responsible for:<br />
■■<br />
■■<br />
■■<br />
■■<br />
■■<br />
Creating, reviewing and revising a facility’s policies and procedures, rules and<br />
regulations and EAPs as needed.<br />
Addressing unsafe conditions.<br />
Complying with federal, state and local laws and regulations for facility<br />
operations and employment.<br />
Maintaining records on the facility and its employees.<br />
Assisting after an emergency.<br />
Policies, Regulations and Emergency Action Plans<br />
Facility management is responsible for ensuring that policies, rules and procedures,<br />
and emergency action plans are in place. Management also is responsible for<br />
reviewing and revising these plans as necessary to address any changes that may<br />
have occurred, such as new programming, new features or attractions or emerging<br />
codes and industry standards.
Chapter 2 Facility Safety 31<br />
Addressing Unsafe Conditions<br />
Lifeguards work with management to address unsafe conditions at a facility.<br />
Management tells lifeguards what to check during safety checks and relies on<br />
them to find and report dangers. When an unsafe condition is found and reported,<br />
management is responsible for correcting the condition. You should always report<br />
unsafe conditions to your supervisor. In some instances you may be asked to take<br />
action to limit use of an unsafe area or to help correct the unsafe condition, such<br />
as by sweeping up broken glass or by removing a piece of equipment from use.<br />
Complying with Regulations<br />
Government regulations protect patrons and employees. The facility and staff must<br />
comply with all regulations. Federal, state and local regulations affect the operation<br />
of aquatic facilities in many ways, such as lifeguard certification requirements,<br />
facility design and safety features, pool capacities, staff training requirements and<br />
lifeguard competencies, ratio of lifeguards to patrons, water sanitation procedures,<br />
first aid equipment and supplies, lifeguarding equipment and diving depths.<br />
Regulations are specific to individual areas. You should be familiar with those that<br />
affect your facility. Facility management should provide this information during<br />
orientation or in-service training.<br />
The following sections describe some federal regulations that may affect you.<br />
Age Limitations for Employment<br />
Federal and state departments of labor set conditions on the number of hours and<br />
the types of tasks that employees younger than 18 years are allowed to perform.<br />
The requirements typically are more stringent for 15 year olds than for those 16 and<br />
17 years of age. A facility’s policy and procedures manual should cover how these<br />
regulations affect your duties.<br />
Hazard Communication Standard<br />
Federal regulations protect people from chemical hazards in and around a facility.<br />
For example, the Hazard Communication Standard is designed to prevent injury and<br />
illness caused by exposure to hazardous chemicals in the workplace.<br />
Employees must be trained about the<br />
chemicals stored and used in the workplace<br />
for jobs that involve handling such items.<br />
Each chemical has an information sheet<br />
called a Material Safety Data Sheet<br />
(MSDS), and the information for each<br />
hazardous chemical must be easy to find<br />
and use. Each MSDS includes procedures<br />
for handling each substance and provides<br />
information about the dangers of exposure<br />
as well as first aid and medical follow-up<br />
if exposure occurs. Be sure to learn about all<br />
hazardous materials are at your workplace and<br />
know where to find and access your facility’s<br />
MSDSs (Figure 2-12). Employees have a right<br />
to know:<br />
Figure 2-12<br />
Every chemical stored at a facility should have a Material<br />
Safety Data Sheet.
32<br />
<strong>Lifeguarding</strong> <strong>Manual</strong><br />
■■<br />
■■<br />
■■<br />
■■<br />
■■<br />
■■<br />
Which hazardous chemicals are in the facility.<br />
Where those chemicals are stored in the facility.<br />
The specific dangers of those chemicals.<br />
How to identify chemical hazards in the facility.<br />
How to protect themselves and others from being exposed to<br />
hazardous chemicals.<br />
What to do if they or others are exposed to such hazards.<br />
Hazardous chemicals must be handled properly and with care, and stored properly,<br />
as specified in the Hazard Communication Standard. Unauthorized personnel<br />
should be kept away from chemical storage areas.<br />
Bloodborne Pathogens Standard<br />
The federal Occupational Safety and Health Administration developed the<br />
Bloodborne Pathogens Standard to reduce the risk of disease transmission while<br />
on the job. This standard helps to protect employees from contact with body<br />
fluids that may contain disease-causing bacteria and viruses, called bloodborne<br />
pathogens. Your employer must provide an exposure control plan to help protect<br />
employees from being exposed to bloodborne pathogens and let employees know<br />
what to do if an exposure occurs. Additional information is provided in Chapter 7,<br />
Before Providing Care and Victim Assessment.<br />
WRAP-UP<br />
Your top priority as a lifeguard is helping keep patrons safe and free from injury<br />
so that they can safely enjoy aquatic activities. Lifeguards prevent injuries by<br />
enforcing the safety rules. Lifeguards also prevent injuries by conducting safety<br />
inspections of the facility, water, equipment and attractions. Lifeguards also<br />
need to recognize and respond to the changing water conditions and weather<br />
conditions that can occur. Together with management and your fellow lifeguards,<br />
your job is to set the stage for this safe experience by helping to create and<br />
maintain a safe aquatic facility.
Surveillance and<br />
Recognition<br />
Y<br />
our primary responsibility as a lifeguard is to help ensure<br />
patron safety and protect lives. The main tool used to<br />
accomplish this is patron surveillance—keeping a close<br />
watch over the people in the facility and intervening when necessary.<br />
You will spend most of your time on patron surveillance. To do this<br />
effectively, you must be alert and attentive—and ready to react—at all<br />
times as you continuously supervise patrons. n<br />
Chapter3
34<br />
<strong>Lifeguarding</strong> <strong>Manual</strong><br />
AN OVERVIEW OF THE PROCESS<br />
OF DROWNING<br />
Figure 3-1<br />
A conscious drowning victim struggles to breathe and cannot<br />
call out for help.<br />
Drowning is a continuum of events that begins<br />
when a victim’s airway becomes submerged under<br />
the surface of the water (Figure 3-1). The process<br />
can be stopped, but if it is not, it will end in death.<br />
The process of drowning begins when water enters<br />
the victim’s airway. This causes involuntary breath<br />
holding and then laryngospasm (a sudden closure<br />
of the larynx or windpipe). When this occurs,<br />
air cannot reach the lungs. During this time, the<br />
victim is unable to breathe but may swallow large<br />
quantities of water into the stomach. As oxygen<br />
levels are reduced, the laryngospasm begins to<br />
subside and the victim may gasp for air but instead<br />
inhales water into the lungs.<br />
Due to inadequate oxygen to body tissues, cardiac<br />
arrest may occur. This can happen in as little as 3 minutes after submerging. Brain<br />
damage or death can occur in as little as 4 to 6 minutes. The sooner the drowning<br />
process is stopped by getting the victim’s airway out of the water, opening the<br />
airway and providing resuscitation (ventilations or CPR), the better the chances are<br />
for survival without permanent brain damage.<br />
No two drownings are alike—there are many intervening variables that can affect the<br />
outcome, including any underlying medical conditions of the victim and the time until<br />
advanced medical care intervenes. However, in general, giving ventilations often will<br />
resuscitate the victim if they are given within 1½ to 2 minutes of submerging.<br />
When you are providing care, an unconscious victim may have isolated or infrequent<br />
gasping in the absence of other breathing, called agonal gasps. Agonal gasps<br />
can occur even after the heart has stopped beating. Normal, effective breathing is<br />
regular, quiet and effortless. Agonal gasps are not breathing. Care for the victim as<br />
though he or she is not breathing at all by giving ventilations or providing CPR.<br />
Lifeguards must understand that only a few minutes can make the difference between<br />
life and death. To give a victim the greatest the chance of survival and a normal<br />
outcome, you must recognize when a person needs help or is in danger of drowning<br />
and you must act immediately. If there is any question whether a person in the water<br />
is beginning to drown or merely playing games, it is essential that you intervene, and if<br />
necessary, remove the person from the water immediately and provide care.<br />
EFFECTIVE SURVEILLANCE<br />
With effective surveillance, you can recognize behaviors or situations that might lead<br />
to life-threatening emergencies, such as drownings or injuries to the head, neck or<br />
spine, and then act quickly to modify the behavior or control the situation. Effective<br />
surveillance has several elements:<br />
■■<br />
■■<br />
Recognition of dangerous behaviors<br />
Victim recognition
Chapter 3 SURVEILLANCE AND RECOGNITION 35<br />
■■<br />
■■<br />
■■<br />
Effective scanning<br />
Zone of surveillance responsibility<br />
Lifeguard stations<br />
Recognition of Dangerous Behaviors<br />
A focus of preventive lifeguarding is to intervene quickly to stop potentially<br />
dangerous behaviors that could result in an emergency. This may include<br />
redirecting a child to shallower water, stopping a group of teens from having breathholding<br />
contests or stopping swimmers from<br />
hyperventilating (breathing rapidly and deeply)<br />
Figure 3-2 A<br />
and swimming underwater for extended periods.<br />
Swimmers and nonswimmers, regardless of age,<br />
can become victims quickly because of dangerous<br />
behaviors or other situations (Figure 3-2, A–E).<br />
Examples include:<br />
■■<br />
A weak swimmer or nonswimmer who is:<br />
cc<br />
cc<br />
cc<br />
Bobbing in or near water over his or<br />
her head.<br />
Crawling hand-over-hand along a pool wall.<br />
Beyond arm’s reach of a supervising adult,<br />
even if wearing a floatation aid.<br />
A child bobbing in water over her head.<br />
Figure 3-2 B<br />
Figure 3-2 C<br />
A small child crawling hand-over-hand toward deep water.<br />
A toddler left unattended.<br />
Figure 3-2 D<br />
Figure 3-2 E<br />
A child wearing an improperly fitting life jacket.<br />
A victim experiencing a medical emergency.
36<br />
<strong>Lifeguarding</strong> <strong>Manual</strong><br />
■■<br />
cc<br />
cc<br />
Clinging to something or struggling to grab something to stay afloat.<br />
Wearing a life jacket improperly.<br />
A person who is:<br />
cc<br />
cc<br />
cc<br />
Breath-holding or swimming underwater for an extended period after<br />
hyperventilating.<br />
Participating in a high-risk/high-impact activity, such as diving.<br />
Experiencing a medical emergency, such as a sudden illness.<br />
Victim Recognition<br />
Another element of effective surveillance is being able to recognize when someone<br />
is in trouble in the water. It is important to understand the behaviors that a victim<br />
shows when in distress or drowning. Someone in trouble may struggle at the<br />
surface for just a short time or may quickly disappear beneath the surface without<br />
any signs of distress. Others may be submerged already when the process of<br />
drowning begins, such as the person who has jumped or slipped into water over his<br />
or her head and is struggling to reach the surface.<br />
Figure 3-3<br />
A swimmer may be in distress or actively struggling to survive. Others may be<br />
passive and therefore unable to help themselves, showing little or no movement.<br />
Understanding these behaviors enables lifeguards to recognize quickly when<br />
someone needs help. Lifeguards should be able to<br />
recognize and respond to a drowning victim within<br />
30 seconds.<br />
Swimmers in Distress<br />
A distressed swimmer may reach for a rescue device, such as<br />
a rescue tube or a rope line.<br />
Figure 3-4<br />
A distressed swimmer may wave for help, float on the back,<br />
scull or tread water.<br />
A swimmer can become distressed for several<br />
reasons, such as exhaustion, cramp or sudden<br />
illness. Quick recognition is key to preventing the<br />
distressed swimmer from becoming a drowning<br />
victim. A distressed swimmer makes little or no<br />
forward progress and may be unable to reach<br />
safety without assistance. Distressed swimmers<br />
may be:<br />
■■<br />
■■<br />
■■<br />
■■<br />
■■<br />
Able to keep their face out of the water.<br />
Able to call for help.<br />
Able to wave for help.<br />
Horizontal, vertical or diagonal, depending on<br />
what they use to support themselves.<br />
Floating, sculling or treading water.<br />
The distressed swimmer generally is able to reach<br />
for a rescue device, such as a rescue tube (Figure<br />
3-3). If a safety line or other floating object is<br />
nearby, a distressed swimmer may grab and cling<br />
to it for support. As conditions continue to affect<br />
the distressed swimmer, such as fatigue, cold or<br />
sudden illness, he or she becomes less able to<br />
support him or herself in the water (Figure 3-4).<br />
As this occurs, his or her mouth moves closer
Chapter 3 SURVEILLANCE AND RECOGNITION 37<br />
to the surface of the water, and anxiety increases. If a distressed swimmer is<br />
not rescued, he or she may become a drowning victim; therefore, you need to<br />
immediately initiate a rescue.<br />
Drowning Victim—Active<br />
A drowning victim who is struggling to remain at<br />
the surface of the water has distinctive arm and<br />
body positions. These are efforts to try to keep<br />
the mouth above the water’s surface in order to<br />
breathe (Figure 3-5). This universal behavior is<br />
called the instinctive drowning response. Once<br />
it is recognized that a victim is drowning, the<br />
lifeguard must perform a swift or immediate rescue.<br />
Some victims cycle through these behaviors<br />
quickly and might submerge within seconds,<br />
whereas others are able to remain near the surface<br />
of the water for a short time. A drowning victim<br />
who is struggling:<br />
■■<br />
■■<br />
■■<br />
■■<br />
■■<br />
■■<br />
Cannot call out for help because his or her<br />
efforts are focused on getting a breath.<br />
Works to keep the face above water in an effort to breathe. A young child may<br />
be in a horizontal face-down position during the struggle because he or she is<br />
unable to lift the face out of the water.<br />
Has extended the arms to the side or front, pressing down for support.<br />
Is positioned vertically in the water with no supporting kick. A young child may<br />
tip into a horizontal face-down position.<br />
Might continue to struggle underwater once submerged.<br />
Eventually will lose consciousness and stop moving.<br />
Drowning victims who are struggling to breathe<br />
may not always look the same. For some, the<br />
mouth sinks below the surface and reappears,<br />
sometimes repeatedly. While the mouth is below<br />
the surface, the drowning victim attempts to keep<br />
the mouth closed to avoid swallowing water. When<br />
above the surface, the drowning victim quickly<br />
exhales and then tries to inhale before the mouth<br />
goes below the surface again. While the victim is<br />
gasping for air, he or she also might take water into<br />
the mouth (Figure 3-6). For a young child who is<br />
in a horizontal face-down position, he or she is not<br />
able to keep the mouth above the surface of the<br />
water at all.<br />
Figure 3-5<br />
A drowning victim may become unable to support themselves<br />
and struggle at the surface of the water.<br />
Figure 3-6<br />
A drowning victim may struggle to breathe and cannot call out<br />
for help.<br />
Often, a drowning victim at or near the surface is<br />
unable to call out for help. He or she can take in<br />
only enough air to breathe, so no air is left to call out. A drowning in progress often<br />
is silent.<br />
A drowning victim does not make any forward progress in the water. A young child<br />
may appear to be doing a “doggy paddle” but has no forward progress; all efforts
38<br />
<strong>Lifeguarding</strong> <strong>Manual</strong><br />
are devoted to getting air. The victim might be able to stay at the surface for only<br />
20 to 60 seconds, if at all. He or she may continue to struggle underwater but<br />
eventually will lose consciousness and stop moving.<br />
A victim may slip into water over his or her head, incur an injury, or experience<br />
a sudden illness and struggle underwater to reach the surface. If unable to<br />
swim or make progress, he or she will be unable to reach the surface.<br />
This drowning victim may appear to be a person who is playing or floating<br />
underwater. It may be easier to recognize a swimmer in distress or a victim<br />
struggling on the surface than to recognize a victim who has submerged<br />
already or is submerging.<br />
Never assume that anyone exhibiting these behaviors is playing or faking; it is<br />
essential that you intervene, and if necessary, remove the person from the water<br />
immediately and provide care.<br />
Drowning Victim—Passive<br />
Some drowning victims do not struggle. They suddenly slip under water due to a<br />
medical condition or another cause, such as:<br />
Figure 3-7<br />
■■<br />
A heart attack or stroke.<br />
■■<br />
A seizure.<br />
■■<br />
A head injury.<br />
■■<br />
A heat-related illness.<br />
■■<br />
Hypothermia (below-normal body temperature).<br />
■■<br />
Hyperventilation and prolonged underwater<br />
breath-holding activities.<br />
■■<br />
Use of alcohol and other drugs.<br />
These drowning victims:<br />
A drowning victim may float face-down at or near the surface<br />
of the water.<br />
Figure 3-8<br />
■■<br />
■■<br />
■■<br />
■■<br />
■■<br />
Might float face-down at or near the surface or<br />
might sink to the bottom (Figure 3-7).<br />
May be limp or have slight convulsive-type<br />
movements.<br />
Have no defined arm or leg action, no<br />
locomotion and no breathing.<br />
May appear to be floating, if at the surface of<br />
the water.<br />
May be face-down, on one side or face-up, if at<br />
the bottom (Figure 3-8).<br />
Anyone who is exhibiting one or more of these<br />
signals for 30 seconds should be considered a<br />
drowning victim and responded to immediately.<br />
It can be difficult to clearly see a victim who is<br />
underwater or at the bottom of a pool because<br />
of glare, reflections, or water movement from the<br />
wind or other swimmers. The victim may appear<br />
to look like a smudge, an object like a towel,<br />
or a shadow. Do not expect to see a clear outline of a person on the bottom. At<br />
waterfronts, submerged victims may not be visible, depending on the water depth<br />
A drowning victim may be face-down at the bottom of a pool.
Chapter 3 SURVEILLANCE AND RECOGNITION 39<br />
!<br />
DANGEROUS<br />
BEHAVIORS<br />
Hyperventilation and<br />
Extended Breath-Holding<br />
Voluntary hyperventilation (rapid, deep<br />
breathing) is a dangerous technique used by<br />
some swimmers to try to swim long distances<br />
underwater or to hold their breath for an<br />
extended period while submerged in one<br />
place. They mistakenly think that by taking a<br />
series of deep breaths in rapid succession and<br />
forcefully exhaling that they can increase the<br />
amount of oxygen they breathe, allowing them<br />
to hold their breath longer underwater. This is<br />
not true. Hyperventilation does not increase the<br />
amount of oxygen or allow a swimmer to hold<br />
his or her breath longer; instead, it lowers the<br />
carbon dioxide level in the body. The practice<br />
is risky because the level of carbon dioxide in<br />
the blood is what signals a person to breathe.<br />
As the level of carbon dioxide increases, a<br />
person normally takes a breath. When a person<br />
hyperventilates and then swims underwater,<br />
the oxygen level in the blood can drop to a<br />
point where the swimmer passes out before<br />
the body knows it is time to breathe. Then,<br />
when the person finally does take a breath<br />
instinctively, water rushes in and the drowning<br />
process begins.<br />
Do not allow swimmers to participate in<br />
contests, games or repetitive activities to<br />
see who can swim underwater the farthest<br />
or hold their breath underwater the longest.<br />
Hyperventilation, prolonged underwater<br />
swimming for distance and breath-holding<br />
for time are extremely dangerous. If you see<br />
these dangerous activities, you must intervene.<br />
Explain to patrons that they should only take<br />
a single inhalation before submerging when<br />
swimming and playing underwater. In addition,<br />
instructors must prevent these activities during<br />
instructional periods, such as swim lessons,<br />
lifeguard classes, SCUBA classes and<br />
competitive swimming.<br />
Alcohol<br />
The following are some ways that alcohol<br />
can affect a person in the water and lead to<br />
drowning or head, neck or spine injuries:<br />
■■<br />
■■<br />
■■<br />
■■<br />
Alcohol affects balance. Some people<br />
with alcohol in their body have drowned in<br />
shallow water when they lost their balance<br />
and were unable to stand up. “Ordinary”<br />
actions on steps, ladders, diving boards or<br />
play structures become hazardous for an<br />
intoxicated person.<br />
Alcohol affects judgment. A person might<br />
take unusual, uncharacteristic risks, such<br />
as diving into shallow water.<br />
Alcohol slows body movements. It can<br />
greatly reduce swimming skills, even those<br />
of an excellent swimmer.<br />
Alcohol impairs ones ability to stay awake<br />
and respond appropriately to emergencies.<br />
One of the biggest myths about alcohol is that<br />
an intoxicated person can sober up by going<br />
swimming. Splashing water on a person’s face<br />
or immersing a person in water will not reduce<br />
the amount of alcohol in the bloodstream or<br />
reduce the effects of alcohol.
40<br />
<strong>Lifeguarding</strong> <strong>Manual</strong><br />
or because of poor water clarity. If you see something on the bottom that should<br />
not be there, do not delay, go right away.<br />
Specific Behaviors<br />
When conducting surveillance, look for behavior that indicates a patron in<br />
need of immediate assistance. It is important to recognize the behaviors of<br />
Table 3-1: Behaviors of Distressed Swimmers and Drowning Victims<br />
Distressed Swimmer<br />
Drowning Victim—<br />
Active<br />
Drowning Victim—<br />
Passive<br />
Head Position Above water Tilted back with face<br />
looking up<br />
■■<br />
■■<br />
Face-up or facedown<br />
in the water<br />
Submerged<br />
Appearance and,<br />
if visible, Facial<br />
Expressions<br />
■■<br />
■■<br />
Trying to support<br />
self by holding or<br />
clinging to a lane<br />
line or safety line<br />
Expression of<br />
concern for<br />
personal safety<br />
■■<br />
■■<br />
■■<br />
Struggling to keep or<br />
get the head above<br />
the surface of the<br />
water<br />
Struggling to reach<br />
the surface, if<br />
underwater<br />
Expression of panic/<br />
wide eyed<br />
■■<br />
■■<br />
■■<br />
■■<br />
Limp or convulsivelike<br />
movements<br />
Floating or<br />
submerged<br />
Eyes may be closed<br />
If submerged, may<br />
look like a shadow<br />
Breathing Is breathing Struggles to breathe Not breathing<br />
Arm and Leg<br />
Action<br />
■■<br />
■■<br />
Floating, sculling or<br />
treading water<br />
Might wave for help<br />
Arms to sides or in front,<br />
alternately moving up<br />
and pressing down<br />
None<br />
Body Position<br />
Horizontal, vertical or<br />
diagonal, depending on<br />
means of support<br />
Vertical, leaning slightly<br />
back<br />
Horizontal or vertical<br />
Locomotion<br />
■■<br />
Little or no forward<br />
progress<br />
None<br />
None<br />
■■<br />
Less and less able<br />
to support self<br />
Sounds<br />
Able to call for help but<br />
Cannot call out for help<br />
None<br />
may not do so<br />
Location At the surface At the surface,<br />
underwater or sinking<br />
Floating at the surface,<br />
sinking or submerged<br />
on the bottom
Chapter 3 SURVEILLANCE AND RECOGNITION 41<br />
a drowning victim (Table 3-1). Notice:<br />
■■<br />
■■<br />
■■<br />
■■<br />
■■<br />
Breathing.<br />
Appearance or facial expression (if the face is visible to you).<br />
Arm and leg action.<br />
Head and body position.<br />
Body propulsion or locomotion (movement) through the water.<br />
Understanding these behaviors helps you to quickly recognize when someone<br />
needs help. When you see some or all of these behaviors, react. Do not spend time<br />
second-guessing yourself, immediately initiate a rescue. Quick action can mean the<br />
difference between life and death for a distressed or drowning victim.<br />
Effective Scanning<br />
Knowing what to look for to determine if a victim<br />
is in trouble in the water is a first step, but you<br />
also need to know how to look. Scanning is a<br />
visual technique for watching patrons in the water<br />
(Figure 3-9). When scanning, you should not just<br />
passively watch patrons in the water. Effective<br />
scanning requires you to deliberately and actively<br />
observe swimmers’ behaviors and look for signals<br />
that someone in the water needs help. You must<br />
actively scan all patrons in the water, regardless of<br />
the type of activities taking place.<br />
Guidelines for Effective Scanning<br />
Figure 3-9<br />
Scanning is a surveillance technique for watching patrons.<br />
Drowning and injuries can happen in an instant,<br />
often silently. Scanning your entire area of responsibility quickly and thoroughly is<br />
important. You cannot prevent or save what you cannot see. When scanning:<br />
■■<br />
■■<br />
■■<br />
■■<br />
■■<br />
■■<br />
■■<br />
■■<br />
■■<br />
Scan all patrons in your assigned area of responsibility.<br />
Stay focused—do not let your attention drift.<br />
Scan the entire volume of water—the bottom, middle and surface.<br />
Move your head and eyes while scanning and look directly at each area rather<br />
than staring in a fixed direction. You may notice movement with your peripheral<br />
(side) vision, but to recognize that a person is in trouble, you must look directly<br />
at him or her.<br />
Scan from point to point thoroughly and repeatedly. Do not neglect any part of<br />
the assigned area, including any deck or beach areas and those areas under,<br />
around and directly in front of the lifeguard station.<br />
Focus on effective patron surveillance instead of the scanning pattern itself.<br />
Scan for signs of potential problems: arm and leg action, body position and<br />
movement through the water may indicate that a patron is a weak swimmer and<br />
is in trouble in the water.<br />
Scan crowded and high-risk areas carefully. Partially hidden arm movements<br />
might indicate that a victim is actively drowning.<br />
Pay close attention to nonswimmers or weak swimmers. Excitement or lack of<br />
knowledge may lead nonswimmers or weak swimmers to become unknowingly
42<br />
<strong>Lifeguarding</strong> <strong>Manual</strong><br />
■■<br />
■■<br />
■■<br />
■■<br />
■■<br />
careless. They might try things they would not otherwise do, or they might<br />
accidentally enter deep water.<br />
Maintain an active posture. Slouching, leaning back, sitting back with legs<br />
crossed, or resting your head in your hand may cause you to become too<br />
relaxed and lose focus.<br />
Adjust your body position or stand up to eliminate blind spots. Be aware of<br />
areas that are difficult to see. Areas might be blocked when patrons cluster<br />
together; or water movement, such as from fountains or bubbles, may distort the<br />
view underwater.<br />
Change your body position regularly to help stay alert. For example, switch<br />
between seated and standing positions while in an elevated station.<br />
While scanning, do not be distracted by people or activities outside of your area<br />
of responsibility. Keep focused on the assigned zone.<br />
Do not interrupt scanning an area if a patron asks a question or has a<br />
suggestion or concern. Acknowledge the patron and quickly explain that you<br />
cannot look at him or her while talking, but you are listening to the patron.<br />
Politely but briefly answer the patron’s question, suggestion or concern, or refer<br />
him or her to the head lifeguard, facility manager or another staff member.<br />
Scanning Challenges<br />
There are many challenges to scanning (Figure 3-10, A–D). You must be aware of<br />
the challenges and actively employ tactics to combat them. The lives of patrons<br />
Figure 3-10 A<br />
Figure 3-10 B<br />
Figure 3-10 C<br />
Figure 3-10 D<br />
Scanning challenges include: (A) glare on the water, (B) water movement obscuring the bottom of the pool, (C) cloudy water and<br />
(D) fatigue
Chapter 3 SURVEILLANCE AND RECOGNITION 43<br />
Table 3-2: Scanning Challenges<br />
Challenge<br />
Tactics<br />
Monotony<br />
Fatigue<br />
Distractions<br />
Blind spots<br />
■■<br />
■■<br />
■■<br />
■■<br />
■■<br />
■■<br />
■■<br />
■■<br />
■■<br />
■■<br />
■■<br />
■■<br />
Stay fully engaged in what you are seeing—do not let your attention drift.<br />
Change body position and posture periodically.<br />
Sit upright and slightly forward.<br />
Rotate stations.<br />
Request additional lifeguard coverage.<br />
Keep hydrated, cool off and get out of the sun when on break.<br />
Exercise during one of your breaks.<br />
Stay focused on patron surveillance.<br />
Do not daydream, have conversations with co-workers or patrons or watch<br />
events outside of your area.<br />
Keep patron activities safe and orderly. Signal for an additional lifeguard or<br />
supervisor if assistance is needed.<br />
Adjust your location or body position or stand up.<br />
Check all potential blind spots: under the stand, at play features or any part<br />
of the zone.<br />
Glare (from the<br />
sun or overhead<br />
lights)<br />
Water movement<br />
and surface<br />
distortion of the<br />
water<br />
Murky water<br />
Heavy patron<br />
loads<br />
Low patron loads<br />
High air<br />
temperature<br />
■■<br />
■■<br />
■■<br />
■■<br />
■■<br />
■■<br />
■■<br />
■■<br />
■■<br />
■■<br />
■■<br />
■■<br />
■■<br />
■■<br />
■■<br />
■■<br />
■■<br />
■■<br />
■■<br />
Use polarized sunglasses.<br />
Change body position—stand up and look around and through glare spots.<br />
Reposition your lifeguard station with permission of your supervisor.<br />
Adjust your body position.<br />
Be aware of the normal appearance of the bottom of the pool; know the<br />
appearance of drains, colored tiles or painted depth markings.<br />
Scan the bottom carefully.<br />
Adjust your location or body position.<br />
Stay alert for high-risk activities.<br />
Signal for additional assistance to get extra coverage for the area.<br />
Stand up frequently.<br />
Signal for additional assistance to get extra coverage for your area.<br />
Change body position and posture frequently.<br />
Change to a ground-level station, if appropriate.<br />
Use fans to cool the surrounding air in an indoor setting.<br />
Stay in the shade; use umbrellas.<br />
Cool off by getting wet during your break.<br />
Rotate more frequently.<br />
Stay in cooler areas during breaks.<br />
Stay hydrated by drinking plenty of water.
44<br />
<strong>Lifeguarding</strong> <strong>Manual</strong><br />
depend on it. Table 3-2 presents some scanning challenges that you may encounter<br />
and tactics to overcome them.<br />
Zones of Surveillance Responsibility<br />
Your lifeguard supervisor or facility manager will establish each lifeguard’s zone<br />
of surveillance responsibility—referred to as zones. These are the specific areas<br />
THE RID FACTOR<br />
If an active victim drowns while lifeguards are<br />
on duty, it is probably due to one or more of<br />
the following causes:<br />
■■<br />
■■<br />
■■<br />
Lifeguards fail to recognize the victim’s<br />
instinctive drowning response.<br />
Secondary duties intrude on lifeguards’<br />
primary responsibility of patron surveillance.<br />
Lifeguards are distracted from surveillance.<br />
This set of causes often is referred to as the<br />
“RID factor,” where the acronym, RID, stands<br />
for recognition, intrusion and distraction.<br />
Recognition<br />
Knowing how to recognize that a swimmer<br />
is in distress or a person is drowning is one<br />
of the most important lifeguarding skills. You<br />
must be able to distinguish such behavior<br />
from that of others who are swimming<br />
or playing safely in the water. You must<br />
recognize when someone needs to be<br />
rescued. You cannot expect the victim or<br />
others to call for help in an emergency.<br />
With good surveillance and scanning<br />
techniques, you can recognize even a passive<br />
victim who has slipped underwater without a<br />
struggle, if the victim is in clear water.<br />
Intrusion<br />
Intrusion occurs when secondary duties, such<br />
as maintenance tasks, intrude on your primary<br />
responsibility of patron surveillance. Lifeguards<br />
often have to sweep the deck, empty trash<br />
cans, pick up towels, check locker rooms and<br />
perform other maintenance duties. While these<br />
duties might be part of the job, you should<br />
not perform them while conducting patron<br />
surveillance. Before you begin these duties,<br />
you must be sure that another lifeguard has<br />
taken over surveillance for your assigned area<br />
of responsibility.<br />
Similarly, you cannot perform adequate<br />
surveillance duties while also coaching a swim<br />
team or teaching a swimming lesson. These<br />
additional responsibilities should be performed<br />
by a different lifeguard, coach or instructor,<br />
even if there are no other patrons in the water.<br />
Distraction<br />
Distractions also affect patron surveillance:<br />
for example, a lifeguard talking with other<br />
lifeguards or friends. A brief conversation might<br />
seem innocent, but during that time, you could<br />
miss the 20- to 60-second struggle of a young<br />
child at the water’s surface. The child could die<br />
because you were distracted. You should not<br />
engage in social conversation while are on duty.
Chapter 3 SURVEILLANCE AND RECOGNITION 45<br />
of the water, deck, pier or shoreline that are your<br />
responsibility to scan from your lifeguard station<br />
(Figure 3-11).<br />
Figure 3-11<br />
When establishing coverage, supervisors or<br />
managers must ensure that:<br />
■■<br />
■■<br />
■■<br />
■■<br />
All areas of the water—from the bottom through<br />
to the surface—are covered and can be seen by<br />
a lifeguard.<br />
There is overlapping coverage when more than<br />
one lifeguard is performing surveillance.<br />
Lifeguards have unobstructed views of their<br />
zones from each station.<br />
The size and shape of each zone allow<br />
lifeguards to respond quickly, within 30<br />
seconds, to victims in the water.<br />
The zone of surveillance responsibility refers to the specific<br />
area a lifeguard is responsible for scanning.<br />
Supervisors or managers should post diagrams or charts showing the size, shape<br />
and boundaries of each zone. These can change throughout the day, depending on<br />
the following:<br />
■■<br />
■■<br />
■■<br />
■■<br />
■■<br />
Number of patrons<br />
Types of activities<br />
Variety of activities<br />
Time of day<br />
Environmental conditions, such as glare from<br />
the sun<br />
To ensure that all areas of the pool are covered<br />
adequately, you might be assigned zone coverage,<br />
total coverage or emergency back-up coverage.<br />
Figure 3-12 A<br />
Zone Coverage<br />
In zone coverage, the swimming area is divided<br />
into separate zones, with one zone for each<br />
lifeguard station (Figure 3-12, A–B). Zones can<br />
be designated by markers, such as ladders, lane<br />
lines, lifelines, buoys, or the shape of the pool.<br />
Zone coverage is effective for high-risk areas or<br />
activities, avoiding blind spots and reducing the<br />
number of patrons watched by each lifeguard.<br />
When zone coverage is being provided, each<br />
lifeguard needs to know the zone for each<br />
guarding position.<br />
At a minimum, zones should overlap by several<br />
feet so that the boundaries between them have<br />
double coverage. This prevents any area from not<br />
being scanned. When zones overlap, it is important<br />
that each lifeguard react to an emergency; that<br />
is, you should not assume that the other lifeguard<br />
will notice a problem and react. However, if the<br />
Zone coverage at a pool<br />
Figure 3-12 B<br />
Zone coverage at a waterfront
46<br />
<strong>Lifeguarding</strong> <strong>Manual</strong><br />
position of the other lifeguard allows a significantly quicker rescue, your emergency<br />
action plan (EAP) should establish how lifeguards communicate as to who enters<br />
the water and who provides back-up coverage.<br />
Figure 3-13<br />
Total coverage at a pool<br />
Figure 3-14 A<br />
Zone coverage with three lifeguards<br />
Figure 3-14 B<br />
Back-up coverage during a rescue at a three-zone facility<br />
Total Coverage<br />
When you are assigned total coverage, you<br />
will be the only lifeguard conducting patron<br />
surveillance while you are on duty. Some<br />
facilities, such as a small pool, always assign<br />
their lifeguards total coverage. Other facilities<br />
use total coverage for specific situations, such<br />
as when there are a limited number of patrons<br />
present. When only one lifeguard is conducting<br />
patron surveillance, that lifeguard has to scan the<br />
entire area, control the activities of patrons in and<br />
out of the water and recognize and respond to<br />
emergencies (Figure 3-13). If adequate coverage<br />
cannot be provided for all patrons, inform a<br />
supervisor that help is needed.<br />
Emergency Back-Up Coverage<br />
In emergency situations when two or more<br />
lifeguards are on duty and one lifeguard must<br />
enter the water for a rescue, lifeguards who remain<br />
out of the water must now supervise a larger area.<br />
They might need to move to better vantage points<br />
or close part of the swimming area, depending on<br />
the facility’s design.<br />
Figure 3-14, A illustrates zone coverage when<br />
three lifeguards are on surveillance duty. Figure<br />
3-14, B shows an example of emergency back-up<br />
coverage for the same three-zone facility. Figure<br />
3-14, B depicts lifeguard Y as the primary rescuer.<br />
He or she signals and enters the water (indicated<br />
by a dotted line). The other two lifeguards<br />
(lifeguards X and Z) stand in each of the lifeguard<br />
chairs and divide the responsibility for scanning<br />
the pool. Meanwhile, additional lifeguards or<br />
safety team members monitor the rescue and<br />
prepare to assist with additional equipment<br />
and call emergency medical services (EMS)<br />
personnel, if appropriate.<br />
Lifeguard Stations<br />
Lifeguards perform patron surveillance from<br />
a variety of positions including elevated,<br />
ground-level, roving and floating stations.<br />
Additional coverage at waterfront areas sometimes<br />
is provided by foot patrols, boat patrols
Chapter 3 SURVEILLANCE AND RECOGNITION 47<br />
and four-wheel-drive vehicles. The goal is to provide optimum coverage for the<br />
whole facility by placing lifeguards in positions to quickly recognize and respond to<br />
emergencies. To ensure that lifeguards stay alert, periodic rotations and breaks from<br />
surveillance are built into their surveillance schedules.<br />
The location of any lifeguard station must allow you to see your entire zone. The<br />
lifeguard stand may need to be moved or the position adjusted during the day to<br />
adapt to the changing sun, glare, wind or water conditions. It is critical for you to<br />
have a clear view of your entire zone.<br />
Elevated Stations<br />
Elevated lifeguard stations generally provide the<br />
most effective position for a broad view of the<br />
zone and patron activities (Figure 3-15). This is<br />
especially important at a facility where a single<br />
lifeguard at a time performs patron surveillance.<br />
When you are scanning from an elevated station,<br />
be sure to include the area under, around and<br />
directly in front of the stand. Movable stands<br />
should be positioned close to the edge of the<br />
water with enough room to climb up and down<br />
from the stand.<br />
Figure 3-15<br />
The area surrounding an elevated stand must be<br />
An elevated lifeguard station<br />
kept clear of patrons or objects that might interfere<br />
with your ability to respond. You must know how<br />
to safely exit the stand, both in the course of a normal rotation as well as in an<br />
emergency. Be sure to practice with the rescue tube so that you are able to do so<br />
quickly and without getting injured. A safety zone should be established that allows<br />
access to the water in case of an emergency. At a waterfront, the safety zone should<br />
be thoroughly inspected with rakes and shovels before opening each day. This helps<br />
to prevent injuries to lifeguards during emergency exits from the lifeguard stand.<br />
Ground-Level Stations<br />
Lifeguards sometimes are assigned to a fixed<br />
location on a deck or in shallow water (Figure<br />
3-16). These stations allow for quick response<br />
and are common around winding rivers, in shallowwater<br />
areas with play structures, and at the end<br />
of slides. The primary purpose of ground-level<br />
stations is to be close to patrons so you can easily<br />
make assists and enforce safety rules for patrons<br />
in the water and on the deck. While maintaining<br />
surveillance, you also can educate patrons about<br />
the reasons behind the rules; however, you should<br />
never become distracted from surveillance duties<br />
by talking socially with patrons or other staff.<br />
Figure 3-16<br />
A ground-level lifeguard station<br />
Roving Stations<br />
When a facility becomes unusually crowded, such as during a special event or<br />
activity, supervisors or managers might assign a lifeguard to a roving station. The
48<br />
<strong>Lifeguarding</strong> <strong>Manual</strong><br />
Figure 3-17<br />
Rescue water craft, such as kayaks, may be used at<br />
waterfront areas.<br />
Figure 3-18<br />
roving lifeguard is assigned a specific zone, which also is covered by another<br />
lifeguard in an elevated station. These roving, or walking, lifeguards are mobile<br />
and able to position themselves where needed within the zone. Combining the<br />
views from elevated stations with the mobility of the roving lifeguard provides extra<br />
coverage to help ensure effective patron surveillance.<br />
Floating Stations (Rescue Watercraft)<br />
In many waterfront facilities, lifeguards are stationed to watch swimmers from<br />
a water craft, usually as extra coverage. Rescue watercraft typically are used to<br />
patrol the outer edge of a swimming area. Often,<br />
someone in trouble in the water can be reached<br />
more quickly from watercraft than from a lifeguard<br />
station on the shore.<br />
A rescue board may be used to help with patron surveillance<br />
at waterfront areas.<br />
Lifeguard Rotations<br />
In a small, calm area, a rescue board, kayak<br />
or flat-bottom rowboat might be used (Figure<br />
3-17). When patrolling on a rescue board, sit<br />
or kneel on the board for better visibility (Figure<br />
3-18). Some protocols may require you to keep<br />
the rescue tube or buoy strapped across your<br />
chest or attached to the board. In rough water,<br />
rowboats might be used. Powerboats, inflatable<br />
boats and personal watercraft also can be<br />
used as rescue watercraft. Facility management<br />
normally provides on-the-job training in the use of<br />
watercraft at a facility.<br />
If stationed on watercraft in water with a current,<br />
you might have to row or paddle to stay in position.<br />
Some watercraft have a special anchor line with<br />
a quick release for lifeguards to make a rescue.<br />
In some larger watercraft, one lifeguard maintains<br />
the craft’s position while a second watches the<br />
swimming area.<br />
Make sure that you are well trained in operating the<br />
facility’s watercraft before using it for surveillance<br />
or to make a rescue. Use caution with motorized<br />
watercraft to avoid injuring swimmers or damaging<br />
lifelines when crossing into the swimming area to<br />
make a rescue.<br />
All facilities should have a defined rotation procedure. Rotations include moving from<br />
one station to another as well as breaks from surveillance duty. Lifeguards should get<br />
regular breaks from surveillance duty to help stay alert and decrease fatigue. Typically,<br />
you might perform patron surveillance for 20 or 30 minutes at one station, rotate to<br />
another station for 20 or 30 minutes, and then rotate off of patron surveillance duty<br />
to perform other duties or take a break for 20 or 30 minutes, thereby getting a break<br />
from constant surveillance. Rest and meal breaks should be factored into the rotation.<br />
An emergency back-up coverage “station” often is included as a part of the rotation.<br />
The location may be a staff room or on the pool deck, pier or shoreline within sight
Chapter 3 SURVEILLANCE AND RECOGNITION 49<br />
of the swimming area(s). The lifeguard at this station is not responsible for patron<br />
surveillance but is expected to be able to immediately respond to the EAP signal in<br />
an emergency. (Chapter 5 covers information about emergency action plans.)<br />
Your supervisor will establish a plan for lifeguard rotations, usually based on:<br />
■■<br />
Locations of stations.<br />
■■<br />
Type of station (elevated, ground-level, roving or floating).<br />
■■<br />
The need to be in the water at some stations.<br />
■■<br />
The number of patrons using an attraction.<br />
■■<br />
The activity at the station, such as wave durations at a wave pool.<br />
■■<br />
EAPs.<br />
The rotation begins with the incoming lifeguard. While rotating, each lifeguard<br />
should carry his or her own rescue tube, and both lifeguards must ensure there is no<br />
lapse in patron surveillance, even for a brief moment. Each lifeguard must know who<br />
is responsible for scanning the zone—“owning the zone”—and at what time during<br />
the rotation. You will be transferring scanning responsibilities back and forth as the<br />
incoming lifeguard gets into position and the outgoing guard prepares to leave the<br />
station. Keep any necessary conversations brief and make sure that eye contact<br />
remains on the water.<br />
As the incoming lifeguard, you should be aware of the patrons and activity level of<br />
the zone you will be watching. Begin scanning your zone as you are walking toward<br />
your station, checking all areas of the water from the bottom to the surface.<br />
The outgoing lifeguard should inform you of any situations that need special<br />
attention. The exchange of information should be brief, and patron surveillance must<br />
be maintained throughout the entire rotation. Once in position, with the rescue<br />
tube strapped in place, make any adjustments needed, such as removing shoes<br />
or adjusting an umbrella before confirming to the outgoing lifeguard that you own<br />
the zone. The outgoing lifeguard should continue scanning as he or she is walking<br />
toward the next station. The skill sheet at the end of this chapter outlines the steps<br />
for rotations for ground-level and elevated stations.<br />
WRAP-UP<br />
A lapse in coverage—even for just a few seconds—could result in injury or death. A<br />
lifeguard must be alert for dangerous behaviors and able to recognize a distressed<br />
swimmer and a drowning victim who is active or passive. Effective scanning<br />
techniques and lifeguard stations are needed both to prevent incidents and locate<br />
people in trouble.
50<br />
<strong>Lifeguarding</strong> <strong>Manual</strong><br />
ROtatiONS—Ground-Level Station<br />
At a ground-level station, you (the incoming lifeguard) should:<br />
1<br />
Begin scanning your zone as you are<br />
walking toward your station. Note the<br />
swimmers, activities and the people on the<br />
deck. In a pool or waterpark setting where<br />
the water is clear, check the entire volume<br />
of water from the bottom of the pool to the<br />
surface of the water.<br />
2<br />
Walk to the side of the lifeguard being<br />
relieved and begin scanning the zone.<br />
3<br />
Exchange information. Ask the lifeguard<br />
being relieved whether any patrons in the<br />
zone need closer than normal supervision.<br />
4<br />
Once scanning has started, signal or tell the<br />
outgoing lifeguard that you have the zone<br />
covered and he or she can rotate.<br />
5<br />
The outgoing lifeguard continues scanning as he or she is walking toward the next station.
Skill Sheet 51<br />
ROtatiONS—Elevated Station<br />
At an elevated station, you (the incoming lifeguard) should:<br />
1<br />
2<br />
Begin scanning your zone as you are walking toward your station. Note the swimmers, activities<br />
and the people on the deck. In a pool or waterpark setting where the water is clear, check the<br />
entire volume of water from the bottom of the pool to the surface of the water.<br />
Take a position next to the stand and begin scanning<br />
the zone. After a few moments of scanning, signal the<br />
lifeguard in the stand to climb down.<br />
3<br />
Once on the deck, the outgoing lifeguard takes a<br />
position next to the stand and is responsible for<br />
surveillance of the zone. Climb up in the stand, make<br />
any adjustments to equipment or personal items and<br />
begin scanning.<br />
4<br />
5<br />
Exchange information. Ask the lifeguard being relieved whether any patrons in the zone need<br />
closer than normal supervision.<br />
Signal or tell the outgoing lifeguard that you have<br />
the zone covered and he or she can rotate.<br />
6<br />
The outgoing lifeguard continues scanning as he or she is walking toward the next station.
Injury Prevention<br />
L<br />
ifeguards are essential for keeping aquatic facilities safe.<br />
Unlike most other professional rescuers, lifeguards are<br />
present to help prevent emergencies from occurring. As a<br />
lifeguard, one of your goals is to prevent injuries;<br />
therefore, it is important for you to<br />
understand how injuries occur and<br />
know the best strategies<br />
for preventing them.<br />
In addition, you<br />
must be prepared<br />
to meet the<br />
safety challenges<br />
presented by<br />
visiting groups as<br />
well as the various<br />
activities and<br />
features at<br />
Chapter4<br />
your facility. n
Chapter 4 INJURY PREVENTION 53<br />
HOW INJURIES HAPPEN<br />
Aquatic injury prevention is part of your facility’s risk management program. Risk<br />
management involves identifying dangerous conditions or behaviors that can cause<br />
injuries and then taking steps to minimize or eliminate those conditions or behaviors.<br />
Even though lifeguarding requires performing emergency rescues, far more time is<br />
spent on preventive lifeguarding—trying to make sure emergencies do not happen in<br />
the first place.<br />
Although not all emergencies can be prevented, knowing what causes lifethreatening<br />
injuries can help you to prevent many of them. Injuries either are life<br />
threatening or non-life-threatening. Examples of life-threatening injuries include<br />
drowning and injuries to the head, neck or spine. Life-threatening conditions that can<br />
result from an injury include unconsciousness, breathing and cardiac emergencies,<br />
severe bleeding and drowning.<br />
Drowning begins when a person’s mouth and nose are submerged and water enters<br />
the airway, regardless of the water depth. Drowning can occur in shallow or deep<br />
water. In shallow water a toddler may fall over and be unable to stand or unable to<br />
raise the head up. Drowning also may result when a nonswimmer enters or falls<br />
into water over his or her head, when a poor swimmer becomes exhausted and<br />
cannot stay afloat or when a patron is incapacitated in the water due to a medical<br />
emergency, such as a seizure or cardiac emergency.<br />
Most head, neck or spinal injuries at aquatic facilities result from a high-risk/high-impact<br />
activity, such as head-first entries into shallow water. If a victim’s head strikes the bottom<br />
or the side of the pool, the spinal cord can be damaged, causing paralysis or death.<br />
Non-life-threatening injuries also occur in aquatic facilities. Examples of non-lifethreatening<br />
injuries include fractures or dislocations, abrasions (scrapes), superficial<br />
burns (sunburns), muscle cramps (caused by overexertion), heat exhaustion,<br />
dehydration and sprains and strains.<br />
Non-life-threatening injuries can occur by slipping, tripping, falling when running or<br />
getting cut on sharp objects. They also can occur when patrons do not follow rules<br />
when using play equipment or slides. If you understand how most injuries occur, you can<br />
help prevent them by increasing your awareness of risks and hazards, helping patrons to<br />
avoid risky behavior and developing a safety-conscious attitude at your facility.<br />
INJURY-PREVENTION STRATEGIES<br />
As you learned earlier in this course, your injury-prevention responsibilities include<br />
taking steps to ensure that the facility is safe and providing effective patron surveillance.<br />
Another important injury-prevention responsibility is communicating with patrons, which<br />
involves educating and informing patrons as well as enforcing your facility’s rules.<br />
Communicating with Patrons<br />
Communicating with patrons is an important injury-prevention strategy. It requires<br />
you to inform and educate patrons about inappropriate behaviors and the potential<br />
for injury. Communication also includes consistently enforcing rules and regulations<br />
in a positive, customer-friendly manner.
54<br />
<strong>Lifeguarding</strong> <strong>Manual</strong><br />
Figure 4-1<br />
Signs provide instructions to patrons on how to use<br />
equipment and list rules and regulations of the facility.<br />
Did You Know?<br />
The precise way that you will<br />
use your whistle in an emergency<br />
should be spelled out in your facility’s<br />
plan. Typically, an emergency<br />
action plan (EAP) will<br />
specify that a certain number<br />
and type of whistle blasts should<br />
correspond to a certain emergency<br />
situation. You should practice your<br />
whistle-blowing technique during<br />
orientations and in-service trainings<br />
to cover all of the variations<br />
and numbers of whistle blasts.<br />
Figure 4-2<br />
Informing and Educating Patrons<br />
Patrons need to know about risks that could<br />
cause injury. Signs communicate warning, provide<br />
instructions on how to use equipment and list rules<br />
and regulations to prevent behaviors that can lead to<br />
injury (Figure 4-1). Part of your role, too, is to inform<br />
patrons about the potential for injury; therefore, you<br />
need to understand the rules and regulations of your<br />
facility and the rationale behind them.<br />
Patrons may be unfamiliar with a facility’s features<br />
or get so excited that they do not read signs or pay<br />
attention to the rules. If patrons are not following the<br />
rules, it is your job to inform them of the possible<br />
consequences. Explaining rules in a positive way<br />
encourages patrons to behave safely. The following steps can<br />
prevent a patron from engaging in risky behavior:<br />
■■<br />
■■<br />
■■<br />
Get the patron’s attention, for example by blowing a<br />
whistle, and saying, “Excuse me.” (Figure 4-2)<br />
Explain the hazard or danger, for example, “If you dive into<br />
shallow water, you might hit your head on the bottom and<br />
get injured.” Or say, “You may slip and hurt yourself if you<br />
run.” Simply telling someone not to do something often<br />
does not work. People usually understand and cooperate<br />
when they know why something is dangerous.<br />
Explain a safe option. For example, say, “If you want to dive,<br />
please go to the deep end of the pool where it is safe.” Or<br />
say, “Excuse me, diving into shallow water is dangerous<br />
and can cause a head injury. Please use the deep end.”<br />
Or say, “Walk, please.” This type of explanation gets<br />
the patron’s attention, clarifies the danger, emphasizes<br />
the consequences of the risky behavior and offers safe<br />
options, if available and appropriate.<br />
Enforcing Rules<br />
By enforcing the rules, you help to prevent injuries and<br />
encourage safe patron behavior. When conducting patron<br />
surveillance, keep rule enforcement brief by using<br />
only a few words or short phrases, such as, “Slow<br />
down,” or by giving a hand signal. When enforcing<br />
rules, be consistent, fair and respectful. In some<br />
cases the patron may not know the facility’s<br />
rules or may not understand them. Always use<br />
age-appropriate enforcement methods that are<br />
approved by the facility’s policies.<br />
When enforcing rules, use your whistle to get patron’s attention.<br />
If certain patrons repeatedly break the rules even<br />
after you have attempted to correct their behavior,<br />
you could direct them to leave the water for a set<br />
time. Signal for someone who is not engaged in<br />
patron surveillance, such as another lifeguard or
Chapter 4 INJURY PREVENTION 55<br />
INTERACTING<br />
PROFESSIONALLY<br />
WITH THE PUBLIC<br />
When you are on duty, your actions should<br />
promote an atmosphere of professionalism,<br />
safety, trust and goodwill. The following<br />
general guidelines will help you display a<br />
professional image and maintain a positive<br />
relationship with patrons:<br />
■■<br />
■■<br />
When conducting patron surveillance, any<br />
verbal interaction should be brief and your<br />
eyes should remain on the water. Politely<br />
refer the patron to a staff member who is not<br />
conducting surveillance if necessary.<br />
When not conducting patron surveillance:<br />
cc<br />
cc<br />
cc<br />
cc<br />
Treat people as you would like to be<br />
treated. Make every patron feel welcome,<br />
important and respected.<br />
Be professional at all times. Be<br />
courteous, mature and responsible.<br />
Never insult or argue with a patron.<br />
Speak clearly and calmly, at a reasonable<br />
pace and volume.<br />
Use appropriate language, but do not<br />
patronize or speak down to anyone,<br />
including children.<br />
Lifeguards should interact with the public in a<br />
professional manner.<br />
cc<br />
cc<br />
cc<br />
cc<br />
cc<br />
cc<br />
When interacting with patrons, make<br />
frequent and direct eye contact. Remove<br />
your sunglasses, if necessary. When<br />
speaking to small children, kneel down<br />
to be at eye level with them.<br />
Take all suggestions and complaints<br />
seriously, and follow up as necessary.<br />
Avoid blaming anyone. If you cannot<br />
resolve a complaint, take it to your<br />
facility’s management. Always follow<br />
the facility’s procedures.<br />
Repeat the concern expressed by the<br />
patron back to him or her to ensure that<br />
you understand the concern correctly.<br />
Do not make promises that cannot be kept.<br />
Enforce rules fairly and consistently. Be<br />
positive and nonjudgemental. Reinforce<br />
correct behavior.<br />
Take a sincere interest in all patrons.<br />
Nonverbal Communication<br />
Spoken words make up a surprisingly small part<br />
of overall communication. A listener automatically<br />
tends to make judgments about a speaker’s<br />
attitude based on the volume, pace, tone and<br />
pitch of the speaker’s voice. A listener also<br />
reacts positively or negatively to visual cues<br />
or body language. You can gauge a person’s<br />
attitude as cooperative or confrontational by<br />
evaluating these cues; know that the listener<br />
will be doing the same.<br />
Nonverbal communication also is expressed<br />
while you are on duty, whether you are<br />
conducting patron surveillance or performing<br />
secondary responsibilities. Patrons may make<br />
judgments about your professionalism by<br />
observing your appearance, demeanor, posture<br />
and behavior. Lifeguards are “on stage” and<br />
set the tone while on duty.
56<br />
<strong>Lifeguarding</strong> <strong>Manual</strong><br />
!<br />
DEALING WITH<br />
UNCOOPERATIVE<br />
PATRONS AND<br />
VIOLENCE<br />
No matter how fairly you enforce the rules,<br />
you may encounter an uncooperative patron.<br />
Before assuming that a patron is being<br />
uncooperative, you should make sure that he or<br />
she hears and understands you.<br />
If a patron breaks the rules and is<br />
uncooperative, you should take action right<br />
away because breaking the rules can be a<br />
danger to the uncooperative patron and to<br />
others. Most facilities have procedures for<br />
handling uncooperative patrons; however, if<br />
your facility does not have a procedure, you<br />
should call the lifeguard supervisor or facility<br />
manager for help as soon as possible.<br />
A patron may threaten to or commit a violent<br />
act. You must be realistic about what can be<br />
done in a violent situation. If violence is likely<br />
to erupt, call the supervisor or facility manager<br />
immediately. If violence does erupt, do not<br />
try to stop it. Never confront a violent patron<br />
physically or verbally and do not approach a<br />
patron who has a weapon. In such a situation,<br />
the best approach is to retreat and follow the<br />
facility’s EAP for violence. Safety for patrons<br />
and facility staff should be your main goal.<br />
a supervisor, to explain the rules and their rationale. If the patron is a child and a<br />
parent or guardian is available, the rules should be clearly explained to the adult<br />
as well. Since most people want to be treated with respect, simply explaining and<br />
enforcing the rules usually is sufficient. If a parent or guardian is uncooperative, do<br />
not argue, but instead ask a supervisor or facility manager to assist you.<br />
A patron may become uncooperative and defiant, compromising his or her safety<br />
and the safety of others. If this happens, you should summon a supervisor or<br />
facility manager, who may ask the patron to leave the facility. Use this approach<br />
only when other methods have failed.<br />
If a patron refuses to leave after being told to leave for repeatedly breaking the rules,<br />
the supervisor or manager may choose to call the police or security personnel. Every<br />
facility needs a procedure for removing someone from the facility. This procedure<br />
should have specific steps and guidelines to follow. Any such action should be<br />
recorded in the facility’s daily log and on the appropriate form or report.<br />
EFFECTIVE GUARDING—INJURY<br />
PREVENTION CHALLENGES<br />
Lifeguards should be conducting patron surveillance anytime the facility is being<br />
used by patrons or staff. A major goal of patron surveillance is looking for behaviors
Chapter 4 INJURY PREVENTION 57<br />
that indicate someone may need assistance. As part of your patron surveillance,<br />
you also may have specific responsibilities based on the facility’s activities or<br />
features, such as enforcing age or height requirements, helping patrons with<br />
equipment or ensuring that riders are in the proper position. These responsibilities<br />
will vary and may include guarding:<br />
■■<br />
■ ■<br />
■■<br />
A variety of activities occurring simultaneously.<br />
“Kiddie” areas, play structures, special attractions, water slides, winding rivers<br />
and wave pools.<br />
Organized recreational swim groups and youth camps.<br />
Guarding Activities<br />
Facilities often have a variety of activities taking place simultaneously, all of which<br />
require your surveillance. Examples include:<br />
■■<br />
■■<br />
■■<br />
■■<br />
■■<br />
■■<br />
Open or recreational swim.<br />
Water exercises, such as water walking and lap swimming.<br />
Instructional classes, such as swim lessons, water therapy, water exercise and<br />
SCUBA lessons.<br />
Swimming, water polo, synchronized swimming and other team practice.<br />
Competitive events, such as swim meets and triathlons.<br />
Special events, such as movie nights and pool parties and after-hour rentals.<br />
To help you identify patrons who may need assistance, be aware of the age and<br />
ability levels of those participating in the activity. For example, you may notice a<br />
young child in beginner-level swim lessons moving toward water over his or her<br />
head or an elderly man stopping frequently as he swims laps.<br />
Each activity has its own unique characteristics and risks. Some activities, such as<br />
SCUBA classes, may require that you receive special training on what to look for<br />
specifically or be aware of while you are on surveillance duty. Considerations and<br />
questions that need to be answered for effective guarding include:<br />
■■<br />
■■<br />
■■<br />
■■<br />
What things could go wrong that are unique about this activity?<br />
What is the swimming ability or comfort level in the water of patrons involved in<br />
this activity?<br />
Are there any unique challenges or obstacles to recognizing an emergency,<br />
approaching a victim or performing a rescue?<br />
Do participants have any medical conditions that increase the chances for<br />
sudden illness or injury due to the nature of the activity?<br />
Instructional Classes<br />
Instructional classes are a type of general activity but have the benefit of supervision<br />
by trained personnel. Although the instructor is responsible for the safety of the<br />
class, that does not relieve you of your responsibilities. You must still scan every<br />
person in the water and enforce rules, perform rescues and provide first aid as<br />
appropriate. However, with proper preparation, instructors may become valuable<br />
members of your safety team. Facility management should share and practice<br />
emergency action plans (EAPs) with instructors, clarify their roles during an<br />
emergency and share those roles with you. Some instructors will have lifeguard<br />
training and specialized rescue skills; others will not.
58<br />
<strong>Lifeguarding</strong> <strong>Manual</strong><br />
Having an instructor present may help you to ensure patron safety because he or<br />
she may be:<br />
■■<br />
■■<br />
■■<br />
Familiar with special equipment. Therapy classes may use wheelchairs, lifts<br />
and special flotation devices. Instructors for those classes should be able to<br />
recognize and deal with potential problems with such devices.<br />
Familiar with the behavior of specific types of patrons. Instructors may be able to<br />
recognize subtle signs of potential problems that may not be obvious to you. For<br />
example, a water exercise instructor may detect the early signs of overexertion of<br />
a patron in that class.<br />
Able to help in an emergency related to the specialized class. For example,<br />
a SCUBA instructor should know how to deal with and respond to a victim<br />
wearing a SCUBA tank and buoyancy control device.<br />
Guarding Areas for Young Children<br />
Figure 4-3<br />
Many facilities have shallow pools for young children. It is common for these<br />
areas to have play equipment, including slides, fountains, inflatable play<br />
equipment and climbing structures (Figure 4-3).<br />
Effective patron surveillance at these areas<br />
is essential, even though the water may be<br />
shallow. Enforce rules, such as height and age<br />
requirements, fairly and consistently. Note that:<br />
Many facilities have play equipment for young children.<br />
Figure 4-4<br />
■ ■<br />
■■<br />
■■<br />
■■<br />
Older children might be too large for some<br />
structures, or their play might be too rough for<br />
young children.<br />
Toddlers who are still learning to walk may fall<br />
easily. If they fall down in water, they usually<br />
cannot lift themselves to an upright position,<br />
even if the water is ankle or knee deep.<br />
Children often get lost. Remind adults to<br />
supervise their children at all times.<br />
You must watch out for young children using the pool as a toilet. The facility<br />
should have procedures for preventing and addressing the situation, including<br />
handling fecal incidents, which follow local health department guidelines.<br />
■■<br />
Children usually do not think about overexposure<br />
to the sun or hypothermia. If a child is becoming<br />
sunburned or overly cold, immediately inform the<br />
child’s parent or guardian.<br />
Guarding Zones<br />
with Play Structures<br />
Sprays and fountains are a common feature at many facilities.<br />
Facilities may have play structures that are<br />
either permanent or removable (Figure 4-4).<br />
Permanent structures include sprays and<br />
fountains, interactive water-play structures and<br />
dumping buckets. Removable structures include<br />
large floating toys, inflatable play structures and<br />
water basketball and volleyball nets. Some play
Chapter 4 INJURY PREVENTION 59<br />
structures require their own lifeguards, whereas others are watched by lifeguards<br />
surveying a larger area.<br />
While guarding at play structures:<br />
■■<br />
■■<br />
■■<br />
■■<br />
■■<br />
■■<br />
■■<br />
Do not let a play structure become overcrowded. Be prepared to restrict the<br />
number of patrons using it at one time.<br />
Do not allow patrons to swim underneath structures.<br />
Watch that patrons return to the surface after dropping into the water<br />
from a floating feature. Swimmers can be surprised by the fall or become<br />
disoriented, especially if they do not realize they will be dropping into<br />
deep water.<br />
Pay close attention to children playing in and around sprays, fountains and<br />
interactive water-play structures. These attractions usually are in shallow water.<br />
Excited children may run and fall. A very young child who falls might not be able<br />
to get back up or may strike his or her head.<br />
Pay close attention to patrons in moving water. Moving water can surprise<br />
people. They might lose their balance and be<br />
unable to stand up again.<br />
Figure 4-5<br />
Watch for overcrowding and horseplay on<br />
floating structures. These structures are<br />
tethered to the bottom of the pool; some allow<br />
patrons to walk from one floating structure to<br />
another while holding onto an overhead rope<br />
(Figure 4-5).<br />
Keep play safe and orderly.<br />
cc<br />
cc<br />
Patrons may climb onto floating toys and<br />
jump back into the water. They may not<br />
notice what is around them and jump onto<br />
other swimmers or into water that is over<br />
their heads.<br />
Patrons may throw balls and other toys and<br />
hit unsuspecting swimmers, resulting in injury.<br />
Floating structures are a special attraction at waterparks.<br />
Guarding Special Rides and Attractions<br />
Special attractions create a lot of excitement and can include rides, such as bowl<br />
slides, multi-person raft rides, uphill water coasters and high-speed water slides.<br />
Some attractions found at deep-water pools also include diving platforms, cable<br />
swings and hand-over-hand structures like ropes, nets and rings. In a waterpark<br />
setting, there are multiple attractions designed for a variety of age groups and<br />
abilities. Regardless of the patron’s swimming ability, patrons may become fearful,<br />
disoriented or off-balance, thus requiring assistance.<br />
Follow these general principles when guarding attractions:<br />
■■<br />
■■<br />
■■<br />
Watch patrons as they enter and exit an attraction. Dispatch patrons safely on<br />
a ride at set intervals. Dispatching is the method of informing patrons when it is<br />
safe for them to proceed on a ride.<br />
Carefully watch both the water below and the activities overhead.<br />
Keep patrons in view as long as possible. Keeping patrons in view can be
60<br />
<strong>Lifeguarding</strong> <strong>Manual</strong><br />
■■<br />
■■<br />
a problem on some attractions: structures, such as caves, enclosed tubes,<br />
bridges and buildings, might prevent you from seeing patrons at all times.<br />
When a patron goes out of sight, watch to make sure that he or she emerges<br />
safely on the other side.<br />
Ensure that patrons who submerge return to the surface. The excitement<br />
may cause weak swimmers or nonswimmers to overestimate their abilities or<br />
underestimate the water’s depth.<br />
Be aware of special risks. Structures designed to have patrons sit or climb on<br />
them, or swim over or under them, pose hazards. Supervise patrons carefully.<br />
Someone who falls off of a mat, raft or tube might be injured or pose a hazard<br />
to another patron.<br />
Figure 4-6<br />
When guarding at a water slide, be<br />
sure patrons meet the minimum height<br />
requirements.<br />
Guarding at Water Slides<br />
On some water slides, patrons ride on an inner tube, raft, mat or sled. On<br />
others, riding equipment is not allowed. On some slides, only one person<br />
is allowed on an inner tube or a raft. On others, two or more people can go<br />
together on a special tube or raft. On an inner tube or raft, patrons ride in a<br />
sitting position. If no equipment is used, the proper riding position typically is<br />
face-up and feet-first. Lifeguard stations may be positioned at the top, middle<br />
and/or bottom of a slide.<br />
Follow these guidelines when lifeguarding at a water slide:<br />
■■<br />
When dispatching at the top of a slide:<br />
■■<br />
cc<br />
cc<br />
cc<br />
cc<br />
cc<br />
cc<br />
cc<br />
cc<br />
cc<br />
Check that patrons are tall enough to use the slide by using<br />
a measuring pole or line on a wall (Figure 4-6).<br />
Instruct riders how to ride down the slide according to<br />
manufacturer’s instructions and facility protocols and make<br />
sure they are in the correct riding position.<br />
Instruct riders not to stop on the slide.<br />
Help riders with the equipment.<br />
Confirm that the riders are ready to go and signal them<br />
to start.<br />
If assisting riders to take off, use tube handles when<br />
available. Avoid pushing or pulling riders by their shoulders,<br />
arms or legs.<br />
Dispatch the next rider(s) at the proper intervals. For dropoff<br />
slides, speed slides and free-fall slides, ensure that the<br />
previous rider has left the runout end of the slide or the<br />
catch pool and the lifeguard at the bottom has signaled for<br />
the next rider.<br />
If you can see the lifeguard at the bottom, he or she can use<br />
a hand signal or whistle.<br />
If you cannot see the lifeguard at the bottom, a mechanical<br />
system, such as light signals, can be used.<br />
When stationed at the middle of a slide:<br />
cc<br />
Watch for riders who:<br />
●●<br />
Stop, slow down, stand up or form a chain.<br />
●●<br />
Lose their mat, tube or raft or have trouble getting down the slide.
Chapter 4 INJURY PREVENTION 61<br />
■■<br />
cc<br />
●●<br />
Hit their heads on the side<br />
of the slide.<br />
Alert the dispatcher and lifeguard<br />
at the end of the slide of the situation<br />
and assist patrons as necessary.<br />
When stationed at the bottom of<br />
a slide:<br />
cc<br />
cc<br />
cc<br />
cc<br />
cc<br />
Figure 4-7<br />
Observe all riders exiting the slide<br />
into the catch pool (Figure 4-7).<br />
Patrons might not realize the depth<br />
of the catch pool and may need<br />
assistance.<br />
Assist riders who appear to be off<br />
balance or get caught underwater<br />
in the strong downward flow of water in the catch pool.<br />
This strong force can knock a person off balance or hold<br />
a small person or nonswimmer under water.<br />
Help riders, if needed, from the runout or catch pool.<br />
Some patrons might be disoriented or frightened from<br />
the ride (Figure 4-8).<br />
Ensure that riders do not cross in front of any slide when<br />
getting out of the runout or catch pool.<br />
Signal the lifeguard at the top when each rider has moved<br />
out of the catch pool or runout and it is clear to send the<br />
next rider.<br />
Watch for riders to exit the slide into the catch pool.<br />
Figure 4-8<br />
Guarding Winding Rivers<br />
In a winding river, water flows in a long circular or twisting path<br />
through a facility. Depending on the winding river, patrons may<br />
be floating on tubes, walking or swimming. Some wear life<br />
jackets, some do not. Water speeds may vary. Lifeguards may be<br />
positioned at the entrance and exit. They also may be positioned<br />
at several elevated or ground-level stations or at a combination of<br />
both with overlapping zones around the river (Figure 4-9).<br />
When guarding a winding river:<br />
■■<br />
Ensure that patrons enter and exit at designated locations.<br />
■■<br />
■■<br />
■■<br />
Watch for inexperienced swimmers falling off their inner<br />
tubes or inflatable rafts. It will be difficult for you to see all<br />
patrons or the bottom of the winding river if there are a lot<br />
of tubes and rafts in the water. Similarly, it can be difficult<br />
for someone who falls off a raft or tube to come up for air<br />
if the surface is blocked. In addition, someone who is hit<br />
by an inflatable raft might be knocked down, hit the bottom<br />
and get into trouble.<br />
Watch for patrons around features in winding rivers, such as<br />
fountains and waterfalls, which can catch patrons off-guard<br />
or cause patrons to gather.<br />
Watch carefully for, and correct, risky behavior.<br />
Assist riders to exit the speed slide,<br />
if needed.<br />
Figure 4-9<br />
Lifeguards may be stationed in multiple<br />
zones around a winding river when<br />
performing patron surveillance.
62<br />
<strong>Lifeguarding</strong> <strong>Manual</strong><br />
LIFE JACKETS<br />
The U.S. Coast Guard has categorized personal<br />
flotation devices (PFDs) into five categories. They<br />
are rated for their buoyancy and purpose. Types I,<br />
II, III and V are referred to as life jackets, whereas<br />
Type IV is a throwable device.<br />
Swimming ability, activity and water conditions<br />
help determine which type of life jacket to use.<br />
For any type, it should be U.S. Coast Guard<br />
approved and in good condition. The U.S. Coast<br />
Guard label is stamped directly on any approved<br />
device (see image below).<br />
Facilities may have policies addressing the use<br />
of life jackets in a pool, waterfront or attraction.<br />
Type II and III life jackets are most commonly used<br />
in these settings. In general, anyone who cannot<br />
swim well should wear a life jacket if they are going<br />
to be in or around the water at an aquatic facility;<br />
however, in some cases, such as on certain slides,<br />
life jackets are not permitted. In other cases, such<br />
as fast-moving winding rivers, life jackets are<br />
recommended or may be required. Life jackets may<br />
be available at a facility for rent or free of charge.<br />
As a lifeguard, you may be tasked with:<br />
■■<br />
■■<br />
■■<br />
■■<br />
■■<br />
Ensuring that life jackets are U.S. Coast<br />
Guard approved. Inflatable toys and swim<br />
aids, such as water wings, swim rings and<br />
other flotation devices, are not designed to<br />
be used as substitutes for U.S. Coast Guardapproved<br />
life jackets or adult supervision.<br />
Ensuring that life jackets are in good condition.<br />
Buckles and straps should be in good working<br />
condition. There should be no rips, tears, holes<br />
or shrinkage of the buoyant materials.<br />
Helping patrons to select a properly sized life<br />
jacket. Life jackets are sized by weight. Check<br />
the U.S. Coast Guard label and be sure that it<br />
is matched to the weight range of the patron.<br />
Ensuring that life jackets are properly worn<br />
by patrons. A properly fitted life jacket should<br />
feel snug, keep the person’s chin above the<br />
water and allow the person to breathe easily.<br />
The life jacket should not ride up on the<br />
patron’s body in the water. Completely secure<br />
any straps, buckles or ties associated with<br />
the life jacket.<br />
Ensuring that patrons properly use life jackets.<br />
Correct any improper wearing or use of life<br />
jackets. Do not allow patrons to wear multiple<br />
life jackets or stack multiple life jackets on top<br />
of each other to be used as floats.<br />
You should remove any extra empty life jackets from<br />
the water. An empty life jacket in the water should<br />
be a signal that something is wrong. Consistent<br />
enforcement of rules related to life jacket use can<br />
lead to appropriate behavior by all patrons.
Chapter 4 INJURY PREVENTION 63<br />
Type Style Typical Use Features<br />
I Life jacket Boating on offshore waters<br />
or rough water where<br />
rescue may be delayed<br />
May help to turn an unconscious<br />
person from a face-down position to<br />
a vertical, face-up position, or to a<br />
face-up, slightly tipped-back position<br />
II Buoyant vest Recreational boating on<br />
inland waters where a<br />
rescue is likely to occur<br />
quickly. Good for calm or<br />
inland water. Suitable for<br />
supervised use in pools<br />
and waterparks.<br />
III Flotation vest Fishing or sailing on inland<br />
waters where a rescue is<br />
likely to occur quickly. Good<br />
for calm or inland water.<br />
Suitable for supervised use<br />
in pools and waterparks.<br />
May help to turn an unconscious<br />
person from a face-down position<br />
to a vertical, face-up position, or<br />
to a face-up, slightly tipped-back<br />
position. Is less buoyant than a<br />
Type I life jacket<br />
May help to keep a conscious<br />
person in a vertical, face-up position,<br />
or in a face-up, slightly tipped-back<br />
position; wearer may have to tilt the<br />
head back to avoid going face-down<br />
IV<br />
Throwable<br />
device, such as a<br />
buoyant cushion<br />
or ring buoy<br />
Boating on inland waters<br />
with heavy boat traffic where<br />
help always is present<br />
May be thrown to a victim in an<br />
emergency; does not take the place<br />
of wearing a life jacket or vest<br />
V Special use Intended for specific<br />
activities, such as<br />
whitewater rafting and<br />
special offshore work<br />
environments<br />
Acceptable only when used<br />
according to directions on its label
64<br />
<strong>Lifeguarding</strong> <strong>Manual</strong><br />
Guarding Wave Pools<br />
Wave pools are popular attractions that produce waves of various heights,<br />
intervals and patterns. Wave pools vary in size, shape and depth (Figure 4-10).<br />
At one end is the head wall, where a mechanical system creates the waves.<br />
Lifeguards are stationed at various places around or in the pool and also may<br />
be stationed on the head wall for a better view of the pool (Figure 4-11). Wave<br />
pools operate on a cycle, such as 10 minutes with the waves on and 10 minutes<br />
with them off.<br />
Figure 4-10<br />
Wave pools are popular attractions at waterpark facilities.<br />
Figure 4-11<br />
When guarding a wave pool:<br />
Lifeguards may be stationed along the head wall at a<br />
wave pool while performing patron surveillance.<br />
■■<br />
■■<br />
■■<br />
■■<br />
■■<br />
■■<br />
■■<br />
■■<br />
Ensure that patrons enter only in the shallow end.<br />
When the waves are on, stand up to get a better<br />
view of patrons.<br />
Watch for swimmers who get knocked over by the<br />
waves or carried<br />
into deeper water by the undercurrent.<br />
Inexperienced swimmers may go to where the waves<br />
break because of the excitement.<br />
Do not let patrons dive into the waves or dive<br />
through inner tubes.<br />
Keep the areas around ladders and railings clear so<br />
that patrons can exit from the pool quickly.<br />
Keep other swimmers out of the pool during special activities,<br />
like surfing. The surfboards or boogie boards in the wave pool can<br />
present a hazard to others.<br />
Before performing an emergency rescue, turn the waves off<br />
using the emergency stop (E-stop) button at the lifeguard chair<br />
(Figure 4-12).<br />
Rotate positions only when the waves are off.
Chapter 4 INJURY PREVENTION 65<br />
Guarding Organized Recreational Swim Groups<br />
Groups of all sizes visit aquatic facilities for recreation. This includes groups<br />
from day-care centers, day camps and youth organizations as well as school<br />
groups, sports groups and groups visiting facilities for birthday parties. These<br />
groups may be based out of your facility and swim regularly or may visit one or<br />
more times as a field trip. Groups often are supervised by leaders, chaperones<br />
or camp counselors. These supervisors may assist with discipline but do not<br />
take the place of lifeguards. Group leaders may be in the water with the group,<br />
on the deck or shore, or a combination of both. Group leaders should know<br />
how to alert lifeguards in an emergency.<br />
In some cases, most group members will have similar swimming abilities,<br />
such as a day-care center group composed of preschool-age nonswimmers.<br />
The swimming ability of other groups may vary widely, such as in a youthcamp<br />
group with a wider age range of children.<br />
Sometimes, a group will reserve all or part of a facility for its own instructor<br />
to teach a class, lead a practice or conduct skill checks (Figure 4-13). These<br />
activities may include kayaking, SCUBA diving or swim team tryouts.<br />
In general, when guarding groups, you should:<br />
■■<br />
■■<br />
■■<br />
■■<br />
■■<br />
■■<br />
Ensure that swimming areas are divided according to<br />
swimmers’ abilities and are clearly marked.<br />
Ensure that patrons stay in the sections<br />
appropriate for their swimming abilities. Be aware<br />
that weak or nonswimmers, excited<br />
to be together enjoying a recreational activity,<br />
may attempt to venture into areas that are beyond<br />
their swimming ability.<br />
Provide U.S. Coast Guard-approved life jackets for<br />
weak or nonswimmers.<br />
Know how to identify group leaders or chaperones.<br />
Ensure that chaperones are actively supervising<br />
the members of their group and that the<br />
appropriate swimmer-to-chaperone ratio is met. If it appears that they are not<br />
doing so, alert your facility’s manager.<br />
Signal for additional lifeguard coverage, such as a roving lifeguard, if you feel<br />
you cannot effectively guard your zone. You may need to do this at the beginning<br />
of the swim time while the group gets adjusted to the facility’s rules or if large<br />
groups are concentrated in one area.<br />
For groups using buddy checks (see Guarding at Youth Camps, page 68), you may<br />
need to signal the buddy check, confirm that everyone is accounted for and count<br />
the individuals or buddy pairs, depending on the system being followed.<br />
Regardless of a group’s makeup or activities, as a lifeguard, you still are responsible<br />
for helping to ensure the safety of its members. To help groups remain safe and<br />
injury free, your facility’s manager may develop plans and strategies in advance.<br />
Strategies for Safe Group Visits<br />
Figure 4-13<br />
Facilities often implement additional strategies for injury prevention and swimmer<br />
management during group visits. Group leaders should meet in advance with<br />
Figure 4-12<br />
An emergency stop (E-stop)<br />
button can be pressed to turn<br />
off the waves in a wave pool<br />
when a rescue is required.<br />
Groups sometimes reserve all or part of a facility for its<br />
own use.
66<br />
<strong>Lifeguarding</strong> <strong>Manual</strong><br />
Figure 4-14<br />
managers at the facility to discuss appropriate plans and procedures. A copy of the<br />
facility rules as well as written expectations of group leaders should be provided in<br />
advance of the group visit, when possible. Strategies for ensuring safe group visits<br />
typically involve one or more of the following:<br />
■■<br />
■■<br />
Color-coded wristbands are used to classify patrons by<br />
swimming ability.<br />
■■<br />
■■<br />
■■<br />
Booking procedure. Before the visit, group leaders should provide the<br />
aquatic facility with information about how many group members and<br />
supervisors will be visiting. This is especially important with large camp<br />
groups, which require additional time to process through safety orientation,<br />
swimmer classification and identification procedures. Confirming the<br />
supervisor-to-swimmer ratios helps facility managers to plan appropriate<br />
staffing levels. Group leaders also should inform the facility about any<br />
special characteristics of the group, such as the percentage of swimmers<br />
and nonswimmers. Any staff who will be accompanying the group should be<br />
informed about how to help supervise group members around and in the water<br />
and how to help the lifeguards in an aquatic emergency.<br />
Safety orientation. Safety orientations are conducted when groups first<br />
arrive at the facility. The purpose is to educate all members of the visiting<br />
group on your facility’s policies and rules and to point out key safety issues.<br />
You may be tasked with conducting these<br />
orientations.<br />
■■<br />
Classification of swimming abilities.<br />
Swim tests are administered to determine if<br />
a visitor has the minimum level of swimming<br />
ability required to participate safely in activities,<br />
such as swimming in water over his or her<br />
head or riding on certain slides. If your facility<br />
administers these tests, management may have<br />
developed a system for lifeguards to easily<br />
identify patrons’ swim levels. For example, levels<br />
can be identified by color-coded wristbands or<br />
swim caps (Figure 4-14). A red armband might<br />
identify someone is a beginner who needs to<br />
stay in the shallow end; a green armband might<br />
identify someone who can go in deep water.<br />
Designation of swimming areas. Swimming areas should be clearly<br />
marked and defined according to swimmers’ abilities and intended use.<br />
Buoyed ropes should divide shallow and deep water. Multi-use facilities often<br />
divide the water into sections for general recreation swim or lap swim, or<br />
divide areas for floatable features or play structures. In waterfront areas, the<br />
swimming area should be restricted from the nonswimming areas, and there<br />
should be some type of continuous barrier, such as buoyed lifelines, piers or<br />
decks, around the perimeter of areas set aside for weak or nonswimmers to<br />
prevent them from straying into deep water. All swimming areas should be<br />
explained to the group and its leaders during the safety orientation.<br />
Identification of group leaders or adult chaperones. Your facility should<br />
use an identification system so that lifeguards and other facility staff can easily<br />
locate group leaders or adult chaperones. For example, group leaders could<br />
wear a laminated lanyard or a brightly colored baseball cap or T-shirt to identify<br />
them as being responsible for that group.<br />
Supplemental group strategies. Other strategies, such as the buddy system<br />
and buddy checks, sometimes are used to provide an additional layer
Chapter 4 INJURY PREVENTION 67<br />
of protection. These are particularly helpful with camp groups, which can be<br />
large. For more details on the buddy system, see page 68.<br />
How to Conduct a Safety Orientation<br />
If you are tasked with providing a safety<br />
orientation to a visiting group, you will need to<br />
cover general water safety as well as information<br />
specific to your facility (Figure 4-15). When<br />
conducting a safety orientation:<br />
Figure 4-15<br />
■■<br />
■■<br />
■■<br />
■■<br />
■■<br />
■■<br />
Ensure that group leaders or adult chaperones<br />
are present and that they can be clearly<br />
identified by all members of the facility staff.<br />
Make it fun and build rapport with the group.<br />
Ask questions rather than reading a list of<br />
rules. This allows you to become more familiar<br />
with what group members already know as well<br />
as gauge their level of understanding. Explain<br />
the reasons for any rules that group members<br />
do not understand.<br />
Welcome visiting groups to your facility by conducting a<br />
safety orientation.<br />
Identify areas where they can and cannot swim, if applicable.<br />
Point out where the lifeguards are stationed and inform the group how to get<br />
additional help if needed.<br />
Confirm the swimmer-to-supervisor ratio expected for group leaders and divide<br />
the group so that group leaders have a designated set of people to oversee.<br />
Issue any identification and/or swim classification items to group members and<br />
leaders, such as colored wristbands.<br />
Safety topics typically covered during an orientation include general aquatic safety<br />
rules, swimming area sections, water depths, features or play structures, equipment,<br />
how to use approved floatation devices, rule signage locations and operational<br />
information, such as buddy checks or breaks.<br />
How to Administer a Swim Test<br />
Swim tests can be used to determine if a person has the minimum level of swimming<br />
ability required to participate safely in activities, such as swimming in deep water,<br />
riding a slide that empties into deep water or jumping off a diving board into deep<br />
water. There is no single set of swim-test criteria that best meets the needs of all<br />
facilities or organizations, nor is the following information intended to set a standard.<br />
If administering swim tests, each facility or organization should establish its own<br />
requirements based on the facility’s design and features, the activities offered and<br />
common practices.<br />
During your facility-specific training, you should be provided with standard<br />
procedures and criteria for conducting swim tests. Never administer a swim test<br />
while performing patron surveillance duty. When administering a swim test:<br />
■■<br />
■■<br />
Have the swimmer take the test in a safe area, such as near a wall, safety line<br />
or lap lane.<br />
Have the swimmer take the test in shallow water first. If successful, have the<br />
swimmer move to the deep water and take the test.
68<br />
<strong>Lifeguarding</strong> <strong>Manual</strong><br />
Figure 4-16<br />
■■<br />
■■<br />
■■<br />
Be prepared to assist a person who may<br />
struggle in the water while attempting the swim<br />
test. Swimmers may overestimate their abilities<br />
(Figure 4-16).<br />
Ensure that chaperone(s) are present during<br />
the test, if applicable.<br />
Ensure that the person has safely exited the<br />
water after the test is complete.<br />
When the test is competed, tell the swimmer<br />
where he or she is permitted to swim.<br />
Have a lifeguard stationed near a patron during a swim test in<br />
case he or she needs assistance.<br />
■■<br />
■■<br />
■■<br />
■■<br />
To be eligible to swim in deep water, swimmers<br />
should be able to at least:<br />
■■<br />
Jump into the water, level off at the surface<br />
of the water and begin to swim.<br />
Swim at the surface of the water without using anything for support, such as<br />
touching the bottom, the wall or the safety line.<br />
Be able to swim a distance equal to the maximum width of the deep-water<br />
swimming area section of the facility.<br />
Demonstrate breath control—the ability to pick up or turn the head to get<br />
a breath while swimming.<br />
Exit the water independently.<br />
After the initial test, additional swim tests should be conducted at intervals<br />
throughout a season to determine if swimming abilities have improved.<br />
Guarding at Youth Camps<br />
Some youth camps operate their own waterfront and pool facilities. If you are<br />
working at one of these camps, your area of responsibility and patron load may be<br />
smaller than those at a public facility because typically campers will be your only<br />
patrons. Some camps will supplement trained lifeguards with other staff who, after<br />
proper orientation, will serve as spotters or lookouts; however, these staff members<br />
never should take the place of lifeguards.<br />
At the beginning of a camp session, all participants and staff who will be involved in<br />
aquatic activities should be given a swim test. After the initial test, additional swim<br />
tests should be conducted at intervals throughout the camp session to determine<br />
if participants’ swimming abilities have improved. Participants who arrive after the<br />
initial test has been given also should be tested.<br />
Youth camps with their own aquatic facilities often implement additional<br />
prevention strategies, including the buddy system, buddy boards and<br />
buddy checks.<br />
Buddy Systems<br />
The buddy system is used by camps to enhance safety for swimming groups.<br />
Under the buddy system, one participant is paired with another participant of similar<br />
swimming skills. The pair then is assigned to a specific swimming area. If buddies<br />
do not have similar swimming skills, the pair should remain in the swimming area<br />
suitable to the weakest swimmer’s abilities.
Chapter 4 INJURY PREVENTION 69<br />
Buddies must be instructed to stay together and be responsible for one another.<br />
They need to tell a lifeguard immediately if their buddy is in trouble or missing,<br />
at which time you should take immediate action.<br />
The buddy system provides useful safeguards to help account for swimmers<br />
by having each buddy look out for the other; however, it does not replace<br />
lifeguard surveillance.<br />
Buddy Boards<br />
A buddy board helps to keep track of everyone in the swimming<br />
area (Figure 4-17). Typically it is a large, permanent structure<br />
mounted within the confines of the swimming area near<br />
the entrance.<br />
Figure 4-17<br />
Generally, a buddy board works as follows:<br />
■■<br />
■■<br />
■■<br />
■■<br />
■■<br />
Based on the initial swim test, each person gets a colored tag<br />
with his or her full name and group designation, such<br />
as a cabin or campsite number. Tags should be color-coded<br />
or labeled by swimming ability, such as “swimmer”<br />
or “nonswimmer.”<br />
A lifeguard or other staff member is stationed at the buddy<br />
board to make sure that tags are placed correctly and that<br />
everyone who enters or leaves the swimming area moves his or<br />
her tag appropriately.<br />
Before buddies enter the water, they hang their tags on hooks<br />
on the section of the board that indicates the swimming area in<br />
which they will be swimming. The buddies’ tags should be next<br />
to each other to indicate that they are a pair. Tags should be<br />
placed on separate hooks to facilitate a reliable count.<br />
If buddies decide to move from one section to another, such as<br />
from the deep to the shallow area, they must first notify the person at the board<br />
and move their tags.<br />
When buddies leave the water, they move their tags to the “Out” section.<br />
Buddy boards are used to track patrons<br />
who enter a swimming area.<br />
Buddy Checks<br />
The primary purpose of buddy checks is to<br />
account for all swimmers and to teach buddies to<br />
continuously monitor their partners. Buddy checks<br />
often are set for specific<br />
timed intervals.<br />
To initiate a buddy check, a lifeguard, lookout or<br />
supervisor gives a prearranged signal, such as<br />
a whistle blast. The buddies grasp each other’s<br />
hands, raise their arms over their heads and<br />
hold still while the staff accounts for everyone<br />
(Figure 4-18). Buddies do not have to leave<br />
the water: those in shallow water may stand in<br />
place, those in deep water may move with their<br />
buddy to the side and those already on deck<br />
should remain there.<br />
Figure 4-18<br />
Buddy checks are used to account for each swimmer in a<br />
swim area.
70<br />
<strong>Lifeguarding</strong> <strong>Manual</strong><br />
Two methods commonly are used to confirm that the staff has accounted for<br />
everyone. Both use a buddy board or other tracking system.<br />
■■<br />
■■<br />
Method 1: Lifeguards count the swimmers in each area and relay those numbers<br />
to a monitor. The monitor checks the numbers against the total on the buddy<br />
board or other tracking device.<br />
Method 2: Each pair of buddies is given a number. The monitor calls off the<br />
numbers in order, and buddies respond when their number is called.<br />
If everything matches, the buddy check is over. If a buddy check reveals a missing<br />
person, you should immediately suspect that the buddy is submerged and activate<br />
your facility’s EAP.<br />
Although the buddy system provides useful safeguards, buddy checks are not<br />
conducted frequently enough to substitute for normal surveillance. You should never<br />
depend on the buddy system as the only method of supervision. You must constantly<br />
scan your zone of responsibility, looking for the behaviors of swimmers in trouble.<br />
WRAP-UP<br />
As a lifeguard, one of your goals includes helping to ensure that serious injuries<br />
never happen. The more you know about how injuries occur, the better you will<br />
be able to prevent them. Good communication with patrons is vital in preventing<br />
injuries. You should inform patrons about the potential for injury and educate them<br />
about the consequences of risky behavior. It also is important to develop strategies<br />
for dealing with injury-prevention challenges at your facility.
Emergency Action Plans<br />
W<br />
hile on duty, you may need to respond to a variety of<br />
situations ranging from aquatic emergencies and facility<br />
problems to missing persons, sudden<br />
illness and severe weather. Your role will be<br />
spelled out in your facility’s emergency action<br />
plan(s) (EAPs). EAPs are detailed plans<br />
describing the safety team’s responsibilities<br />
in an emergency.<br />
Chapter5<br />
During orientation, in-service training<br />
and in simulation drills, you should<br />
learn and practice your assigned<br />
roles in EAPs. You should know the<br />
roles assigned to lifeguards based<br />
on where they are positioned or<br />
who is the primary rescuer and<br />
also become familiar with the roles<br />
assigned to other members of the<br />
safety team—all outlined in the EAP.<br />
To be effective, lifeguard and<br />
safety teams should practice the<br />
EAPs regularly, using a variety<br />
of simulated emergency<br />
situations. Remember that<br />
in some emergencies, only<br />
a few minutes can make<br />
the difference between<br />
life and death. To give a<br />
drowning victim the greatest<br />
chance for survival and a normal<br />
outcome, you must be able to<br />
efficiently implement the EAP and<br />
provide resuscitative care. n
72<br />
<strong>Lifeguarding</strong> <strong>Manual</strong><br />
TYPES OF EMERGENCY ACTION PLANS<br />
Every aquatic facility has its own specific set of EAPs based on the unique<br />
characteristics at each facility. Factors such as the facility’s layout, number of staff<br />
on duty at a time, location of back-up lifeguards and other safety team members,<br />
equipment used and typical response times of the local emergency medical services<br />
(EMS) system are included in the plan. EAPs should be practiced regularly and<br />
included in your facility’s policies and procedures manual.<br />
Aquatic facilities often have a general plan for water and land rescues, as well as<br />
additional plans designed to address specific situations. Examples of situationbased<br />
EAPs include:<br />
■■<br />
Water emergency—Drowning victim—active (Flowchart 5-1).<br />
■■<br />
Water emergency—Drowning victim—passive (Flowchart 5-2).<br />
■■<br />
■■<br />
■■<br />
Water emergency—Spinal injury victim.<br />
Water emergency—Missing person.<br />
Land emergency—Injury or illness.<br />
Other situations requiring an EAP include evacuations, sheltering in place, severe<br />
weather, chemical spills or leaks, power failures and violence.<br />
Along with detailing the role that you and your lifeguard team will play in an<br />
emergency, EAPs also identify the very important roles played by other members<br />
of the safety team.<br />
Role of the Safety Team<br />
As discussed in Chapter 1, the lifeguard team is part of a larger safety team—a<br />
network of people who prevent, prepare for, respond to and assist in an emergency<br />
at an aquatic facility (Figure 5-1).<br />
Figure 5-1<br />
Safety teams consist of lifeguards; aquatics instructors;<br />
admissions personnel; retail, concession and administrative<br />
staff; maintenance, custodial and security personnel;<br />
supervisors and administrators.<br />
Safety team members working on-site may include<br />
aquatics instructors; admissions personnel; retail,<br />
concession and administrative staff; maintenance,<br />
custodial and security personnel; supervisors and<br />
administrators. At parks, waterfronts and youth<br />
camps, other team members may include park<br />
rangers, game wardens, marine safety officers and<br />
EMS personnel stationed at on-site advanced first<br />
aid stations.<br />
Additional members of the safety team may work<br />
off-site and often include upper-level management<br />
personnel. Members from a variety of departments<br />
within an organization, such as communications,<br />
public relations, risk management, legal counsel<br />
and executive leadership, may play a role. These<br />
team members often become involved as soon as<br />
possible after a serious injury or death.<br />
Even if only one lifeguard is performing patron surveillance, other safety team<br />
members on-site should be in a position to see and/or hear your emergency<br />
signal(s) and immediately respond to help in an emergency.
Chapter 5 emergency action plans 73<br />
Sample Emergency Action Plan Flow: Water Emergency<br />
The following two flowcharts illustrate how an EAP could be implemented. The first example depicts a situation<br />
where no additional resuscitative care is needed after the victim has been removed from the water; the second<br />
illustrates a situation where additional resuscitative care is required. Your facility’s EAPs will include decision<br />
points based on conditions found at the scene along with assigned roles and detailed instructions about how<br />
to proceed, which are based on specific circumstances and needs of the facility, such as staffing positions and<br />
levels and emergency response times.<br />
Flowchart 5-1: No Additional Resuscitative Care Is Needed<br />
Flowchart 5-2: Additional Resuscitative Care Is Needed<br />
Rescuer Action<br />
Other<br />
Lifeguard(s)<br />
Assist With…<br />
Additional Staff<br />
Assist With…<br />
Rescuer Action<br />
Other<br />
Lifeguard(s)<br />
Assist With…<br />
Additional Staff<br />
Assist With…<br />
Signal<br />
Rescue<br />
Back-up<br />
surveillance<br />
coverage<br />
Clearing the<br />
zone or area if<br />
no additional<br />
certified<br />
lifeguards<br />
available<br />
for patron<br />
surveillance<br />
Signal<br />
Rescue<br />
Back-up<br />
surveillance<br />
coverage<br />
Clearing the<br />
zone or area if<br />
no additional<br />
certified<br />
lifeguards<br />
available<br />
for patron<br />
surveillance<br />
Victim Okay—No Additional Care Needed<br />
Victim Needs Emergency Care<br />
Report, advise,<br />
release<br />
Equipment<br />
check<br />
Corrective<br />
action<br />
Return to duty<br />
Provide<br />
emergency<br />
care<br />
Report, advise,<br />
release<br />
Equipment and<br />
facility check<br />
Corrective<br />
action<br />
The water or<br />
land rescue<br />
and providing<br />
emergency<br />
care<br />
Back-up zone<br />
coverage or<br />
clearing the<br />
area<br />
Summoning<br />
ems<br />
personnel<br />
Bringing<br />
additional<br />
equipment, if<br />
necessary<br />
Clearing the<br />
area or facility<br />
Controlling<br />
the crowd<br />
Meeting EMS<br />
personnel<br />
Return to duty<br />
If the victim was treated for serious injuries or illness, follow the facility EAP protocols for:<br />
■■<br />
Closing the facility.<br />
■■<br />
Handling patrons and answering questions.<br />
■■<br />
Contacting family members.<br />
■■<br />
Discussing the incident details.<br />
■■<br />
Contacting the chain of command,<br />
such as supervisors or public relations personnel.<br />
■■<br />
Operational debriefings.
74<br />
<strong>Lifeguarding</strong> <strong>Manual</strong><br />
Everyone needs to know his or her roles in an EAP. In a small facility, team members<br />
may be assigned several different roles, whereas in a large facility each person may<br />
have only one role.<br />
Depending on the emergency, the number of staff available and procedures laid out<br />
in the EAP, other members of the safety team may support lifeguards by:<br />
■■<br />
■■<br />
■■<br />
■■<br />
Assisting with emergency rescues, if trained to do so.<br />
Summoning EMS personnel by calling 9-1-1 or the local emergency number.<br />
Bringing rescue equipment, such as a backboard or an automated external<br />
defibrillator (AED), to the scene.<br />
Clearing the swimming area and controlling bystanders.<br />
!<br />
MISSING PERSON<br />
PROCEDURE<br />
Every aquatic facility should<br />
include missing-person procedures in<br />
its EAP. All staff should be trained in these<br />
procedures during orientation.<br />
Time is critical when a person is missing. For<br />
example, the missing person could be someone<br />
struggling in the water or a child who wandered<br />
off and cannot be found by his or her parent.<br />
Every missing-person report is serious.<br />
During all missing-person search procedures, one<br />
person should be in charge to avoid confusion<br />
and wasting time. This may be the lifeguard<br />
supervisor or facility manager.<br />
Lifeguards will begin the search, but if the<br />
missing person is not found immediately, they<br />
may ask other facility staff for help and call<br />
EMS personnel for back-up. You and other staff<br />
should continue the search until EMS personnel<br />
arrive on the scene to assist with the search.<br />
You can cancel the EMS response if you find<br />
the missing person and he or she does not need<br />
medical assistance.<br />
The facility’s EAP may include some or all of the<br />
following steps for a missing-person search:<br />
■■<br />
■■<br />
■■<br />
■■<br />
■■<br />
The lifeguard who takes the initial report<br />
should quickly alert other lifeguards about the<br />
situation. He or she then should find out the<br />
following from the patron who reported the<br />
person missing:<br />
cc<br />
cc<br />
cc<br />
cc<br />
Where the person was last seen<br />
How long the person has been missing<br />
The person’s age<br />
The person’s swimming ability<br />
The lifeguard should keep the reporting party<br />
with him or her until a positive identification of<br />
the missing person is made.<br />
A public address request for the missing<br />
person to report to a specific area may<br />
be made.<br />
All other lifeguards should clear the swimming<br />
areas and assist in the search, starting at<br />
the place where the missing person was last<br />
seen and expanding from there.<br />
If it is determined that the missing person is<br />
not in the water, lifeguards and other staff<br />
should meet in a designated location to begin<br />
an organized land search. The search should
Chapter 5 emergency action plans 75<br />
■■<br />
■■<br />
■■<br />
■■<br />
■■<br />
■■<br />
Alerting additional safety team members.<br />
Securing and protecting the area or evacuating the facility.<br />
Notifying the chain of command, beginning with the lifeguard supervisor or<br />
facility manager, who then informs the appropriate individuals.<br />
Meeting and directing EMS responders to the scene.<br />
Collecting information for reports.<br />
Dealing with questions from patrons or the media.<br />
All safety team members working on-site must know where equipment is<br />
stored, including the first aid kit, AED, backboard, resuscitation equipment and<br />
disposable gloves. Certification in CPR/AED and first aid is beneficial and often<br />
■■<br />
■■<br />
include lawns, bathrooms, locker rooms,<br />
picnic areas and other play structures within<br />
the facility. Swimming areas should remain<br />
closed until it is determined that the missing<br />
person is not in the aquatic facility.<br />
A designated lifeguard or staff member<br />
should make an announcement over the<br />
public address system describing the missing<br />
person, if appropriate. (Follow the facility’s<br />
policy as to whether or not you should<br />
describe a missing child.) Use a megaphone<br />
if necessary. Direct everyone to please<br />
stay calm and ask for volunteers, if they are<br />
needed. Ask the missing person to report to<br />
the main lifeguard area. In many cases, the<br />
person will not be aware that someone has<br />
reported him or her missing.<br />
If the missing person is not found in the<br />
aquatic facility, facility staff or EMS personnel<br />
should call the local police department, which<br />
will take over and expand the search.<br />
EAPs for waterfront facilities also may include the<br />
following steps:<br />
■■<br />
One lifeguard should act as the lookout above<br />
the water level on a pier, raft or watercraft<br />
with rescue equipment.<br />
■■<br />
■■<br />
Lifeguards should look under piers, rafts,<br />
floating play structures and in other<br />
dangerous locations.<br />
Adult volunteers can help search shallow areas,<br />
but only lifeguards should search beyond<br />
chest-deep water. See Chapter 6, Water<br />
Rescue Skills, for information on sightings and<br />
cross bearings and line searches.<br />
EAPs for camps also may include the<br />
following steps:<br />
■■<br />
■■<br />
■■<br />
Staff should quickly check the missing<br />
person’s cabin or tent and other areas.<br />
All campers should be moved to a central<br />
location where a head count should be taken.<br />
Lifeguards should continue to search the<br />
entire waterfront until every person has been<br />
accounted for or until proper authorities<br />
take over.<br />
EAPs for parks also may include the<br />
followings steps:<br />
■■<br />
■■<br />
Staff should search playgrounds, campsites<br />
and wooded areas.<br />
Park rangers, maintenance staff and<br />
volunteers can search land areas while<br />
lifeguards search the water.
76<br />
<strong>Lifeguarding</strong> <strong>Manual</strong><br />
Figure 5-2<br />
Safety team members should participate in emergency<br />
simulation drills.<br />
is required for team members who may need to<br />
assist the lifeguard team. Safety team members<br />
also should practice with the lifeguard team<br />
by participating in emergency simulation drills<br />
(Figure 5-2).<br />
In some situations, it may be necessary to<br />
solicit the assistance of bystanders. Although<br />
bystanders may not have the training required to<br />
handle emergencies, with direct communication<br />
and guidance they can help by controlling<br />
a crowd, relaying a message to other team<br />
members, getting equipment or summoning<br />
EMS personnel.<br />
Figure 5-3<br />
IMPLEMENTING AN EMERGENCY<br />
ACTION PLAN<br />
The following section describes a typical EAP designed for a general water or land<br />
emergency. In an actual emergency, the safety team member responsible for each<br />
task would be designated in the facility’s specific EAP.<br />
At the Onset of an Emergency<br />
Recognize the Emergency<br />
The first step in any EAP is recognition that an emergency is taking place in the<br />
water or on land and determine that someone needs immediate help.<br />
Activate the EAP<br />
Next, before leaving your station, activate the EAP by giving the prearranged signal,<br />
such as a long whistle blast, to alert other lifeguards and staff.<br />
This step is critical. If your signal is not recognized, other lifeguards and safety<br />
team members will not realize that there is an emergency. Without their backup,<br />
your safety and the safety of patrons may<br />
be compromised.<br />
Pushing the emergency stop (E-stop) button stops waves at<br />
a wave pool.<br />
The signals used to activate an EAP must be<br />
simple and clear. They will be predetermined<br />
based on the nature of the facility and the number<br />
of staff. One or more of the following signals are<br />
commonly used: whistles, your hands (for hand<br />
signals), public address systems, telephones,<br />
two-way radios, flags, horns, megaphones and<br />
electronic devices (buttons or switches) that<br />
must be triggered.<br />
At a slide, the signal must alert the lifeguard<br />
stationed at the top to stop dispatching more<br />
riders. At a wave pool, pushing the emergency
Chapter 5 emergency action plans 77<br />
stop (E-stop) button is required to stop the waves before attempting a rescue<br />
(Figure 5-3).<br />
Perform a Water Rescue or Provide Emergency Care<br />
Once you have given the signal, choose the appropriate rescue for the situation<br />
and provide care to the victim as necessary. Some rescues may require additional<br />
lifeguards to enter the water and assist with the water rescue.<br />
CHOOSING WHERE<br />
TO WORK<br />
It is very important that you choose your<br />
place of employment wisely. Before you<br />
accept a lifeguarding job, you should evaluate<br />
the potential working conditions. Are you<br />
going to be set up for success? Will you<br />
have the tools you need to perform your job?<br />
The best way to answer these questions is to<br />
“interview” potential employers. Just as they<br />
will ask you questions when they interview<br />
you, you should ask them questions about<br />
their facilities.<br />
These questions should include:<br />
■■<br />
■■<br />
■■<br />
■■<br />
■■<br />
■■<br />
■■<br />
How many lifeguards will be on duty<br />
at one time?<br />
What is the length of lifeguard rotations?<br />
How many lifeguard stands are there?<br />
Are there scheduled meal breaks?<br />
Does the facility provide rescue<br />
equipment, such as rescue tubes, first aid<br />
kits and backboards?<br />
Does the facility provide uniforms, or are<br />
you required to purchase your own?<br />
Does the facility provide whistles, or are<br />
you required to provide your own?<br />
■■<br />
■■<br />
■■<br />
Has the facility established an emergency<br />
action plan (EAP)?<br />
Does the facility conduct new-employee<br />
orientations?<br />
Is there a staff manual outlining policies<br />
and procedures, and if so, is it available<br />
to you?<br />
Single-Guard Facilities<br />
Before accepting a job at a single-guard<br />
facility, take the time to evaluate how<br />
emergencies are handled at that site. Be sure<br />
to ask:<br />
■■<br />
■■<br />
Who will call EMS personnel in<br />
an emergency?<br />
Will another trained rescuer be available<br />
to assist you, such as to remove a passive<br />
victim from the water?<br />
Lifeguards generally work together as a team<br />
to respond to emergency situations, so it is<br />
important for you to know how this would be<br />
accomplished with only one lifeguard on duty<br />
at a time.<br />
You also should find out how the single-guard<br />
facility manages day-to-day activities, such<br />
as lifeguard rotations, meal breaks and<br />
general maintenance.
78<br />
<strong>Lifeguarding</strong> <strong>Manual</strong><br />
During the Emergency<br />
Ensure Back-Up Zone Coverage<br />
The lifeguard rotation should include back-up zone coverage plans that ensure<br />
back-up coverage is immediately available upon activating the EAP. For water<br />
rescues, the EAP may direct all lifeguards to stand in their chairs and adjust their<br />
zone coverage to include that of the lifeguard making the rescue. Alternatively, the<br />
plan may require lifeguards who are not on patron surveillance duty to take the<br />
rescuing lifeguard’s place at the vacant lifeguard station.<br />
Clear the Swimming Area<br />
Sometimes an incident is serious enough to require clearing the swimming area. The<br />
lifeguard who is providing back-up coverage—or another member of the safety team<br />
identified in the EAP—makes this judgment and signals to patrons to leave the water.<br />
With the area cleared, other staff members are able to either assist with the rescue<br />
or provide additional care.<br />
Summon EMS Personnel<br />
If the incident involves a life-threatening emergency, someone must summon EMS<br />
personnel by immediately calling 9-1-1 or the local emergency number. A safety<br />
team member usually makes this call, but it might be made by a patron or other<br />
bystander; so, emergency numbers and other instructions, such as the facility’s<br />
address, should be clearly displayed in the facility and at each phone (Table 5-1). In<br />
some facilities, a number, such as an 8 or 9, must be dialed first to place an outside<br />
call. This information also should be included in any instructions.<br />
Some facilities and remote youth camps have on-site medical staff on their safety teams,<br />
such as emergency medical technicians (EMTs) or nurses. If this is the case, the facility’s<br />
EAP may direct you to contact one of these members before or instead of calling 9-1-1.<br />
When EMS personnel arrive, a member of the safety team meets them and directs<br />
them to the scene.<br />
Table 5-1: Sample Emergency Call Procedure: Ambulance, Fire, Police<br />
■■<br />
■■<br />
■■<br />
■■<br />
Call 9-1-1 or the local emergency number.<br />
Identify yourself.<br />
Explain the situation briefly (e.g., unconscious child pulled from the water).<br />
Explain the purpose of the call (e.g., need an ambulance, need police).<br />
Give the location.<br />
Facility Name _____________________________________<br />
Physical Address __________________________________<br />
_________________________________________________<br />
Phone #__________________________________________<br />
■■<br />
■■<br />
Answer questions addressed to you.<br />
Do not hang up until the EMS call-taker tells you to do so.
Chapter 5 emergency action plans 79<br />
Control Bystanders<br />
You may need to control bystanders to prevent them from interfering with a rescue<br />
or emergency care. This may involve:<br />
■■<br />
■■<br />
■■<br />
■■<br />
■■<br />
■■<br />
Using a firm but calm voice to ask bystanders to move back so that care can be<br />
provided. Do not yell at patrons.<br />
Roping off areas or positioning chairs around the emergency site.<br />
Using the public address system to communicate with patrons.<br />
Repeating commands and requests as often as is necessary.<br />
Ensuring that EMS personnel have a clear path.<br />
Keeping bystanders and any children away from the rescue scene.<br />
Any safety team member should be empowered to solicit aid from bystanders as<br />
appropriate, such as to summon EMS personnel or to help with crowd control.<br />
Always follow your facility’s policies and procedures when seeking assistance<br />
from patrons. However, emergency plans should not rely on bystander aid in lieu of<br />
adequate staffing. Bystanders are not primary response personnel.<br />
Evacuate the Facility<br />
In certain circumstances, such as a fire or violent situation, you may need to<br />
evacuate the facility. To evacuate everyone safely:<br />
■■<br />
■■<br />
■■<br />
■■<br />
Give the predetermined signal and instruct patrons to clear the pool or<br />
waterfront area.<br />
Follow the facility’s evacuation procedures to clear all areas of the facility,<br />
including locker rooms, lobby areas and staff rooms.<br />
Direct patrons to a position of safety.<br />
Ensure that patrons do not re-enter the facility until the facility is declared safe<br />
for re-entry. In emergency situations, EMS, fire or law enforcement personnel<br />
will inform facility staff when it is safe to re-enter.<br />
After the Emergency<br />
Report, Advise, Release<br />
After the emergency has been resolved, you and other members of the safety team<br />
still have three important tasks to complete: report, advise and release.<br />
Report the Incident<br />
Staff members involved in the incident need to complete the appropriate incident<br />
report form as quickly as possible after providing care. Collect the required<br />
information about the victim, such as name, address and contact information,<br />
before you release the victim. After releasing the victim, you can continue filling<br />
out the information regarding the rescue. The person who made the rescue<br />
should fill out the form, recording only factual information of what was heard<br />
and seen and any action taken. Do not record personal opinions or information<br />
given to you by someone else. Depending on the circumstances, other lifeguards<br />
involved in the incident may sign your form as witnesses or fill out their own,<br />
separate forms.
80<br />
<strong>Lifeguarding</strong> <strong>Manual</strong><br />
TRAINING WITH<br />
EMERGENCY PERSONNEL<br />
As a professional lifeguard, you may have<br />
the opportunity to train with local emergency<br />
medical services (EMS) personnel, including<br />
emergency medical technicians, paramedics,<br />
firefighters and law enforcement officers.<br />
These training sessions can be beneficial<br />
to both lifeguards and EMS personnel. In<br />
addition to<br />
fostering good<br />
relationships,<br />
training<br />
together gives<br />
lifeguards<br />
a better<br />
understanding<br />
of their role on<br />
the EMS team<br />
and familiarizes<br />
EMS personnel<br />
with the<br />
aquatic<br />
facility’s<br />
emergency<br />
procedures.<br />
Your facility might offer a variety of joint inservice<br />
trainings including but not limited to:<br />
■■<br />
■■<br />
■■<br />
■■<br />
Medical emergency action plans<br />
and procedures.<br />
Emergency action plans for severe<br />
weather, and chemical and natural<br />
disasters.<br />
Threats to public safety and facility security.<br />
Types of equipment to be used during<br />
an emergency.<br />
■■<br />
■■<br />
■■<br />
■■<br />
■■<br />
■■<br />
■■<br />
■■<br />
Missing-person protocols for land and water.<br />
Public-indecency awareness.<br />
Demonstration of CPR/AED and<br />
lifeguarding skills.<br />
Practice and coordination of medical<br />
emergency action plans.<br />
Practice and coordination of missing<br />
person procedures.<br />
Practice and coordination of evacuation<br />
procedures for fire or other emergencies.<br />
Proper radio communications.<br />
Procedures for recognizing and handling<br />
suspicious behavior.<br />
One of the benefits of these trainings is<br />
that you and your fellow lifeguards get a<br />
chance to see EMS responders in action<br />
and to practice interacting with them before<br />
an actual emergency occurs. For example,<br />
if your training session involves practicing<br />
how to transfer care to EMS personnel, you<br />
might discover that you may be expected<br />
to continue giving CPR even after EMS<br />
personnel arrive.<br />
Likewise, EMS personnel may benefit from<br />
these training sessions by getting to see<br />
lifeguards carry out water rescues and provide<br />
emergency care. This gives EMS personnel the<br />
chance to become familiar with your skills and<br />
your facility’s equipment.<br />
Both EMS personnel and lifeguards benefit<br />
from trainings that cover emergency action<br />
plans. By practicing EAPs in advance, both have<br />
an opportunity to address potential problems.<br />
For example, while practicing an evacuation plan<br />
you may discover that the EMS stretcher does<br />
not fit in your facility’s elevator.
Chapter 5 emergency action plans 81<br />
Sometimes you will be responsible for requesting witness statements from<br />
bystanders, although this usually is done by a lifeguard supervisor or manager.<br />
Witnesses should write their names, addresses phone numbers and statements<br />
on separate, dated forms, describing the incident in their own words. Do not tell<br />
witnesses what to put in their statements and separate witnesses when they are<br />
completing their statements; if they are allowed to be together, they may talk to<br />
each other, which may distort their perception of the emergency.<br />
Remember that documentation is important for legal reasons as well as for tracking<br />
when, where and how often incidents occur. Reports provide valuable information<br />
for facilities to use when they assess safety protocols, such as staffing levels or<br />
placement of lifeguard stations.<br />
Advise the Victim<br />
Depending on the nature of the incident, your next step may be to advise the victim.<br />
For example, you might give the victim safety instructions to prevent a similar incident<br />
from recurring or recommend that the person follow up with a health care provider.<br />
In certain cases, you might advise the person not to return to the water for a period<br />
of time. In a serious or life-threatening emergency, it may be more appropriate to have<br />
EMS or medical personnel provide the advice. Always be certain to document your<br />
actions and any advice given to the victim on the incident report.<br />
Release the Victim<br />
A victim may be released only when the rescue and emergency care provided by<br />
you and your safety team is complete. In some cases, you will release the person<br />
under his or her own care or to a parent, guardian, camp counselor, group leader,<br />
instructor or other staff member. In other situations, you will release the victim to the<br />
care of advanced emergency care providers, such as EMS personnel. Always be<br />
sure to document that the victim was released.<br />
Notify the Chain of Command<br />
The facility’s lifeguard supervisor or facility manager needs to be notified when<br />
emergencies occur. With a serious injury or death, the lifeguard supervisor or<br />
facility manager notifies the appropriate administrator(s) as soon as possible.<br />
The administrator works with responding agencies to determine who should contact<br />
the victim’s family. Your chain of command also may offer advice and guidance on<br />
what needs to be done before reopening the facility.<br />
Check the Equipment and the Facility<br />
All equipment and supplies used in the rescue must be inspected. You or other<br />
safety team members must report and/or replace all damaged or missing items<br />
before returning to duty. Properly clean and disinfect any equipment or areas of<br />
the facility exposed to blood or other potentially infectious materials. Use biohazard<br />
bags to dispose of contaminated materials, such as used gloves and bandages.<br />
Place all soiled clothing in marked plastic bags for disposal or cleaning. If the facility<br />
was cleared or closed during the incident, put all required equipment back in place<br />
before reopening the facility.<br />
Remove any equipment involved in the emergency, such as a tube, sled or mat,<br />
from rotation until it is cleared by the lifeguard supervisor or facility manager.
82<br />
<strong>Lifeguarding</strong> <strong>Manual</strong><br />
SAMPLE INCIDENT REPORT FORM<br />
Date: ___________ Time: ________ AM PM Day: Mon Tue Wed Thur Fri Sat Sun<br />
Facility Data:<br />
Facility: ______________________________<br />
Phone Number: _____________________________<br />
Address: ___________________________________________________________________________<br />
City: ________________________________ State: _______________ Zip: _________________<br />
Patron Data: (complete a separate form for incidents involving more than one person)<br />
Name: ____________________________<br />
Phone Number: (H): ________________ (Cell): ________________<br />
Address: ___________________________________________________________________________<br />
City: ________________________________ State: _______________ Zip: _________________<br />
Family Contact: Name: : ______________________________________<br />
Phone: ________________<br />
Date of birth: ______________ Age: ___________ Gender: Male Female<br />
Incident Data:<br />
Location of Incident: (describe the location below and mark an X on the facility diagram)<br />
Location: ____________________________________________________________________<br />
Water Depth, if a water rescue: _____________<br />
Water Conditions: ________________________<br />
Facility Condition:_________________________<br />
Description of Incident: (describe what happened and include any contributing factors such<br />
as unaware of depth, medical reasons, etc.): _____________________________________________<br />
___________________________________________________________________________________<br />
___________________________________________________________________________________<br />
Did an injury occur? Yes No<br />
If yes, describe the type of injury: _______________________________________________________<br />
___________________________________________________________________________________<br />
Care Provided:<br />
Did facility staff provide care? Yes No<br />
Describe care provided in detail: _______________________________________________________<br />
___________________________________________________________________________________<br />
___________________________________________________________________________________
Chapter 5 emergency action plans 83<br />
___________________________________________________________________________________<br />
___________________________________________________________________________________<br />
Patron Advised:<br />
Describe any instructions provided to the patron: (cautioned to obey the rules, issued a<br />
life jacket, etc.) ______________________________________________________________________<br />
___________________________________________________________________________________<br />
Patron returned to activity? Yes No<br />
Patron Released To:<br />
Self<br />
Parent/Guardian<br />
EMS Transported off-site Medical Facility: ___________________________________________<br />
Staff Information:<br />
Name and position title of staff that provided care: ________________________________________<br />
Name(s) of assisting lifeguard(s) or staff involved in incident:<br />
___________________________________________________________________________________<br />
___________________________________________________________________________________<br />
Report Prepared By:<br />
Name: _______________________________<br />
Signature: ____________________________<br />
Position: ___________________________________<br />
Date: ________________<br />
Witnesses (attach witness descriptions of incident)<br />
Name: ______________________________<br />
Phone: ______________________________________<br />
Address: ___________________________________________________________________________<br />
City: ________________________________ State: _______________ Zip: _________________<br />
Witnesses (attach witness descriptions of incident)<br />
Name: _______________________________________<br />
Phone: _____________________________<br />
Address: ___________________________________________________________________________<br />
City: ________________________________ State: _______________ Zip: _________________<br />
Refusal of Care:<br />
Did victim refuse medical attention by staff? Yes No<br />
If yes, victim (parent or guardian for a minor) signature: ____________________________________<br />
Attachments:<br />
Note any attachments such as EMS personnel report or follow-up conversations with the victim<br />
and/or parents or guardian.
84<br />
<strong>Lifeguarding</strong> <strong>Manual</strong><br />
If an injured victim was put on a backboard, EMS personnel usually will use that same<br />
backboard to transport the victim to a hospital. If this occurs, ask EMS personnel to<br />
temporarily exchange backboards with the facility; otherwise, immediately replace<br />
the backboard or close the facility until a backboard is available on site. Report any<br />
missing or damaged items to the lifeguard supervisor or facility manager.<br />
Take Corrective Action<br />
Before reopening the facility, you or another member of the safety team should<br />
correct any problems that contributed to the incident, such as tightening a loose<br />
step on a ladder. If a problem cannot be resolved, you may need to restrict access<br />
to the unsafe area.<br />
Return to Duty<br />
After completing your responsibilities for the rescue, return to surveillance duty<br />
at the appropriate lifeguard station. Follow the procedures for lifeguard rotations.<br />
Inform your supervisor if you need time to regroup or are too shaken by the incident<br />
to effectively focus on surveillance.<br />
Reopen the Facility<br />
During or after a significant incident, the lifeguard supervisor, facility manager or<br />
another individual as identified in the EAP decides whether to close the facility<br />
temporarily and then, when to reopen. The decision may depend on safety issues,<br />
such as whether enough lifeguards are ready to return to surveillance duty, all of the<br />
required equipment is in place or spills involving blood or other potentially infectious<br />
materials have been cleaned up.<br />
Deal with Questions<br />
Television or newspaper reporters, insurance company representatives and attorneys<br />
may ask questions about the emergency, as may people who are just curious. Do<br />
not give out any information about the incident or injured person. Only management<br />
or a designated spokesperson should talk to the media or others about an incident;<br />
your doing so may lead to legal action. The procedure for dealing with the media and<br />
others should be laid out in the policies and procedures manual and the EAP.<br />
If people ask questions, let them know that you are not the appropriate person to speak<br />
to regarding the incident and refer them to the manager or spokesperson. Do not<br />
discuss the emergency with anyone who is not on the facility staff, except for safety<br />
team members who are there to assist staff. If the area where the incident happened is<br />
visible from public property, you cannot prevent people from taking pictures or filming<br />
from a public area. However, facility policy may state that permission from management<br />
is necessary before anyone is allowed to take photos or film inside the facility.<br />
Attend the Operational Debriefing<br />
The entire safety team may attend a meeting to talk about what happened before,<br />
during and after the emergency. Avoid assigning blame or criticizing anyone’s<br />
actions or reactions. Goals of the debriefing are to:<br />
■■<br />
■■<br />
Examine what happened.<br />
Assess the effectiveness of the EAP.
Chapter 5 emergency action plans 85<br />
!<br />
CRITICAL<br />
INCIDENT<br />
STRESS<br />
In an emergency, a person may react both<br />
physically mentally. Physical reactions<br />
include muscles becoming more tense and<br />
the heart rate and breathing increasing.<br />
Mental and emotional stress may manifest as<br />
sleeplessness, anxiety, depression, exhaustion,<br />
restlessness, nausea or nightmares. Some<br />
effects may occur immediately, but others may<br />
appear days, weeks or even months after the<br />
incident. People react to stress in different<br />
ways, even with the same incident. Someone<br />
may not even recognize that he or she is<br />
suffering from stress or know its cause.<br />
A critical incident may cause a strong<br />
emotional reaction and interfere with a<br />
lifeguard’s ability to cope and function during<br />
and after the incident. For lifeguards, critical<br />
incidents include:<br />
■■<br />
■■<br />
■■<br />
■■<br />
A patron’s death, especially the death of<br />
a child or a death following a prolonged<br />
rescue attempt.<br />
An event that endangers the rescuer’s<br />
life or threatens someone important to<br />
the rescuer.<br />
The death of a co-worker on the job.<br />
Any powerful emotional event, especially<br />
one that receives media coverage.<br />
These catastrophic events are especially<br />
stressful if the lifeguard believes that he or<br />
she did something incorrectly or failed to do<br />
something—even after doing exactly what he<br />
or she was trained to do. This stress is called<br />
critical incident stress. It is a normal reaction.<br />
Someone experiencing this usually needs help<br />
to recognize, understand and cope with the<br />
stress. If this type of stress is not identified and<br />
managed, it can disrupt a lifeguard’s personal<br />
life and his or her effectiveness on the job.<br />
Facility management should help by contacting<br />
a licensed mental health professional.<br />
■■<br />
■■<br />
Consider new ways to prevent similar incidents.<br />
Be alert for stress reactions after a critical incident. If the incident involved a<br />
serious injury or death and you need assistance in coping with the experience,<br />
a licensed mental health professional may help.<br />
EMERGENCIES OUTSIDE OF YOUR ZONE<br />
Emergencies sometimes occur away from the water in places such as locker rooms,<br />
concession areas, entrance and lobby areas, mechanical rooms, playgrounds and<br />
play areas and parking lots.<br />
You must be prepared to respond to these emergencies even though they are outside<br />
of the immediate aquatic environment and not part of your zone of responsibility.<br />
If you witness or are told about an emergency when you are not on surveillance duty,<br />
you should activate the predetermined EAP signal. If the signal cannot be heard
86<br />
<strong>Lifeguarding</strong> <strong>Manual</strong><br />
THE NEED FOR<br />
RESCUE DATA<br />
Training agencies, such as the <strong>American</strong><br />
<strong>Red</strong> <strong>Cross</strong>, can gain a great deal of useful<br />
information from reviewing aquatic facilities’<br />
rescue reports. Knowing the details about the<br />
emergencies to which lifeguards respond and<br />
the rescue methods that they use while on the<br />
job can help these agencies to determine what<br />
lifeguards and management need to know to<br />
be prepared and effective in an emergency.<br />
As one example, the Department of Kinesiology<br />
at the <strong>University</strong> of North Carolina at Charlotte<br />
has developed a rescue reporting system to<br />
gather information for this purpose. The ultimate<br />
goal is to help the <strong>Red</strong> <strong>Cross</strong> and others learn<br />
more about what actually takes place when<br />
lifeguards are called upon to respond to an<br />
emergency. This includes details, such as:<br />
■■<br />
■■<br />
■■<br />
Environmental conditions at the time of<br />
the rescue.<br />
How lifeguards identified the emergency.<br />
Type of equipment used.<br />
The information is gathered in a multiple-choice<br />
format and is completely anonymous. All<br />
emergencies, from a complex rescue to a simple<br />
reaching assist, can be reported. To access the<br />
survey, go to water-rescue.uncc.edu.<br />
from your location, and you cannot or should not move the victim, you should send<br />
a patron to alert another staff member to initiate the facility’s EAP. In the meantime,<br />
size up the scene, assess the victim’s condition and give appropriate care.<br />
You also could be summoned by other safety team members to respond to or assist with<br />
emergencies in other parts of your facility, such as a gymnasium, childcare area, cardio<br />
or weight room, sauna or park area. Whereas some of these areas might be supervised<br />
by facility staff trained in basic first aid, lifeguards might be called upon to respond in an<br />
emergency because they are trained at the professional level. Follow your facility EAPs<br />
for leaving your zone of responsibility to assist in these types of emergency situations.<br />
WRAP-UP<br />
EAPs are blueprints for handling emergencies. You need to know your EAP<br />
responsibilities and the roles given to all members of the safety team. Working as a<br />
team and practicing EAPs helps everyone know how to respond in an emergency<br />
and how to manage the stress it may cause.
Water Rescue Skills<br />
Y<br />
ou must always be prepared to enter the water to make<br />
rescues when on duty. This means that you have the<br />
proper equipment immediately available and are properly<br />
stationed to see your entire zone of responsibility. You should be<br />
scanning your zone, looking for signs indicating that someone may<br />
need help. If someone does need help, you must assess the victim’s<br />
condition, perform an appropriate rescue, move the victim to safety<br />
and provide additional care as needed.<br />
CHAPTER6<br />
The skills discussed in this chapter will give you the tools needed to<br />
safely perform a rescue in most aquatic environments, although the<br />
steps may need to be modified, depending on the actual situation in<br />
the water. When performing a rescue, you should keep in mind the skill<br />
steps that you have learned, but focus on the ultimate objective—to<br />
safely rescue the victim and provide appropriate care. n
88<br />
LIFEGUARDING MANUAL<br />
GENERAL PROCEDURES<br />
FOR A WATER EMERGENCY<br />
In all situations involving a water rescue, follow these general procedures:<br />
Activate the emergency action plan (EAP).<br />
■■<br />
■■<br />
■■<br />
■■<br />
■■<br />
■■<br />
Enter the water, if necessary.<br />
Perform an appropriate rescue.<br />
Move the victim to a safe exit point.<br />
Remove the victim from the water.<br />
Provide emergency care as needed.<br />
Report, advise and release.<br />
Activate the Emergency Action Plan<br />
As soon as you recognize an emergency situation, always immediately activate<br />
the EAP (Figure 6-1).<br />
Figure 6-1<br />
Enter the Water, if Necessary<br />
In some cases you will be able to use a reaching<br />
assist to pull a victim to safety from a deck or pier,<br />
such as a distressed swimmer at the surface.<br />
However, in most situations you will need to enter<br />
the water to perform a successful rescue.<br />
You must quickly evaluate and consider many<br />
factors when choosing how to safely enter the<br />
water. Each time you rotate to a new station, keep<br />
in mind the following factors as you consider how<br />
to enter the water to perform a rescue: water depth,<br />
location and condition of the victim, location of<br />
other swimmers, design of the lifeguard station,<br />
your location, facility set-up and type of equipment used (rescue board, rescue buoy<br />
or rescue tube).<br />
Immediately activate your facility’s EAP when an emergency<br />
situation occurs.<br />
Perform an Appropriate Rescue<br />
The type of water rescue you use will depend on the victim’s condition. This includes<br />
whether the victim is active or passive, at or near the surface, submerged, or possibly<br />
has sustained an injury to the head, neck or spine. You should ensure that the victim’s<br />
airway is above the surface of the water as you move the him or her to a safe exit point.<br />
Begin your rescue by approaching the victim. Always keep the victim or the location<br />
where you last spotted the victim within your line of sight. When swimming, always<br />
travel with the rescue tube strapped on during your approach to the victim. An<br />
exception may be a waterfront setting where additional specialty rescue equipment<br />
may be used, such as a rescue board or watercraft. You may approach the victim by:<br />
■■<br />
■■<br />
Walking with a rescue tube to the victim in shallow water.<br />
Swimming with a rescue tube to the victim.
CHAPTER 6 WATER RESCUE SKILLS 89<br />
■■<br />
■■<br />
■■<br />
Traveling on the deck or beach for a distance, then swimming with a rescue tube<br />
to the victim.<br />
Paddling on a rescue board.<br />
Navigating in a watercraft.<br />
As you near a victim you need to maintain control and may need to reposition your<br />
rescue tube, rescue board or watercraft before making contact. For all assists and<br />
rescues when the victim is in distress or struggling, communicate directly with<br />
the person. Let the victim know that you are there to help and give any necessary<br />
instructions using short phrases. For example, say “I’m here to help. Grab the tube.”<br />
Be aware that the victim’s condition and location can change between the time<br />
you notice the problem and when you complete your approach. For example, a<br />
victim who was struggling at the surface may begin to submerge as you approach,<br />
requiring you to use a different type of rescue than originally planned.<br />
Move the Victim to a Safe Exit Point<br />
After performing a water rescue, move the victim to a safe exit point. For some, this<br />
can be as simple as helping him or her to walk out of the water, such as in a simple<br />
assist. For others, it requires supporting the victim on the rescue tube while keeping<br />
his or her mouth and nose out of the water as you move to the safe exit point, such<br />
as in an active victim rear rescue.<br />
Do not automatically return to the point where you entered; you may be able to<br />
reach another point faster. However, realize that the closest place on land may not<br />
be feasible for removing the victim: there may be limited deck space or lane ropes,<br />
or equipment or other features may block the way. Move quickly to the nearest point<br />
with appropriate access. Be sure that the chosen exit site has enough room to<br />
safely remove the victim from the water. You also will need enough space to provide<br />
any additional care needed, such as giving ventilations or CPR.<br />
Remove the Victim from the Water<br />
Safely remove the victim from the water. For conscious victims, this may involve<br />
simply assisting the victim out of the water. For victims who are unresponsive or<br />
victims suspected of having a head, neck or spinal injury, you will need to use a<br />
backboard or a rescue board.<br />
Provide Emergency Care as Needed<br />
The victim may need additional emergency care after the water rescue. This<br />
can range from helping the person regain composure to giving ventilations or<br />
performing CPR.<br />
Report, Advise and Release<br />
After an emergency, you and other members of the safety team must complete<br />
incident report forms, advise the victim on the next steps and release the victim<br />
to the appropriate parties. Every water rescue should have a written report.<br />
Documentation is important for legal reasons as well as for tracking when, where<br />
and how often incidents occur. After the victim is out of the water and care has<br />
been given, advise the person, as appropriate, by providing any safety instructions
90<br />
LIFEGUARDING MANUAL<br />
necessary to prevent the likelihood of the incident recurring. You then may release<br />
the victim to his or her own care or to a parent or guardian.<br />
TRAIN TO THE STANDARD,<br />
MEET THE OBJECTIVE<br />
In this course and throughout your ongoing training, you will be taught how to<br />
perform water rescues based on <strong>American</strong> <strong>Red</strong> <strong>Cross</strong> standards. You will learn<br />
these techniques in a specific manner. However, in the real world, no two aquatic<br />
emergencies are exactly alike. Actual rescue situations often are fast-moving and<br />
rapidly changing. You may not be able to follow each step exactly as you have learned<br />
and practiced. So, in an actual rescue, keep in mind the skill steps you have learned,<br />
but your primary focus should be on the overall objective—saving the victim’s life.<br />
During this course and on the job, you must make decisions and handle situations<br />
as they occur. Keep in mind these four core objectives in any rescue situation:<br />
■■<br />
■■<br />
■■<br />
■■<br />
Ensure the safety of the victim, yourself and others in the vicinity. This includes<br />
the entry, approach, rescue, removal and care provided.<br />
Use a rescue technique that is appropriate and effective for the situation.<br />
Provide an appropriate assessment, always treating life-threatening conditions first.<br />
Handle the rescue with a sense of urgency.<br />
RESCUE SKILLS<br />
This section contains summaries of water rescue skills that will be taught in<br />
this course, along with the objectives specific to each type of skill. Skill sheets<br />
describing the skill steps are located at the end of the chapter.<br />
Figure 6-2<br />
Entries<br />
The objective of entries is to get in the water quickly and safely, with<br />
rescue equipment, and begin approaching the victim (Figure 6-2). It<br />
may not be safe to enter the water from an elevated lifeguard stand<br />
if your zone is crowded or due to the design or position of the stand.<br />
You may need to climb down and travel along the deck or shore<br />
before entering the water. The type of entry used depends on:<br />
The compact jump can be used to<br />
enter water at least 5 feet deep from an<br />
elevated station.<br />
■■<br />
■■<br />
■■<br />
■■<br />
■■<br />
■■<br />
The depth of the water.<br />
The height and position of the lifeguard station (elevated or<br />
at ground level).<br />
Obstacles in the water, such as people, lane lines and<br />
safety lines.<br />
The location and condition of the victim.<br />
The type of rescue equipment.<br />
The design of the facility.<br />
There are several ways to enter the water for a rescue:<br />
■■<br />
Slide-in entry. The slide-in entry is slower than other entries,
CHAPTER 6 WATER RESCUE SKILLS 91<br />
but it is the safest in most conditions. This technique is useful in shallow water,<br />
crowded pools or when a victim with a head, neck or spinal injury is close to the<br />
side of the pool or pier.<br />
■■<br />
■■<br />
■■<br />
Stride jump. Use the stride jump only if the water is at least 5 feet deep and<br />
you are no more than 3 feet above the water.<br />
Compact jump. You can use the compact jump to enter water from the deck<br />
or from a height, depending on the depth of the water. If jumping from a height<br />
(when you are more than 3 feet above the water, such as on a lifeguard stand or<br />
pier), the water must be at least 5 feet deep.<br />
Run-and-swim entry. To enter the water from a gradual slope—zero-depth<br />
area, such as a shoreline or wave pool—use the run-and-swim entry.<br />
Rescue Approaches<br />
The objective of a rescue approach is to safely, quickly and effectively move toward<br />
the victim in the water while maintaining control of the rescue tube, keeping the victim<br />
in your line of sight. The best way to swim to the victim using a rescue tube is with a<br />
modified front crawl or breaststroke (Figure 6-3, A–B). With the rescue tube under<br />
your armpits or torso, swim toward the victim with your head up, keeping the rescue<br />
tube in control at all times. For long distances or if the rescue tube slips out from<br />
under your arms or torso while you are swimming, let the tube trail behind (Figure 6-4).<br />
Figure 6-3 A<br />
Figure 6-3 B<br />
Modified front crawl approach<br />
Modified breastroke approach<br />
If necessary, reposition the rescue tube in front of<br />
you before contacting the victim.<br />
Figure 6-4<br />
In shallow water, it may be quicker or easier to walk<br />
to the victim. Hold the rescue tube at your side and<br />
walk quickly toward the victim. If necessary, position<br />
the tube in front of you before contacting the victim.<br />
Assists<br />
The objective of an assist is to safely and<br />
effectively help a victim who is struggling in the<br />
water and move him or her to safety. Assists are<br />
the most common way that lifeguards help patrons<br />
who are in trouble in shallow water.<br />
Allow the rescue tube to trail behind you when swimming<br />
long distances.
92<br />
LIFEGUARDING MANUAL<br />
Figure 6-5<br />
Simple assist<br />
An assist may be required to help a patron:<br />
■■<br />
■■<br />
■■<br />
■■<br />
■■<br />
Stand up because he or she is small or has<br />
been thrown off balance, such as by landing<br />
at the bottom of a slide (Figure 6-5).<br />
Get to the surface when he or she is<br />
submerged in shallow water.<br />
Enter and exit an attraction.<br />
Get in or out of inner tubes or rafts.<br />
Reach shallow water or a ladder when he or<br />
she is tired.<br />
You also may use an assist for a patron who is<br />
stuck on a slide or becomes frightened. In this<br />
instance, you should climb up the slide to reach<br />
the patron and talk to the patron to help calm him or her and provide direction.<br />
If you are stationed in the water, such as when standing in a catch pool, assists can<br />
be performed quickly without interrupting patron surveillance. However, if a rescue<br />
is needed instead of an assist, activate the EAP.<br />
The most common assists include the:<br />
■■<br />
■■<br />
Simple assist. A simple assist can be used in shallow water and may be<br />
merely helping a person to stand. The simple assist also may be used to rescue<br />
a victim who is submerged in shallow water and is within reach.<br />
Reaching assist from the deck. To assist a distressed swimmer who is<br />
close to the side of the pool or a pier, use a reaching assist from the deck by<br />
extending a rescue tube within the victim’s grasp. A swimmer in distress usually<br />
is able to reach for a rescue device. However, a victim who is struggling to keep<br />
his or her mouth above the water’s surface in order to breathe may not be able<br />
to grab a rescue tube. In this case, you may need to enter the water to rescue<br />
the victim using a front or rear victim rescue.<br />
Rescuing a Victim at or Near the Surface<br />
Figure 6-6<br />
The objective of rescuing a victim at or near the surface of the water is to safely<br />
and confidently support the victim using the rescue tube before the victim<br />
submerges (Figure 6-6). The victim’s airway should remain above the water while<br />
you move to a safe removal point, assess the victim’s condition and then provide<br />
the appropriate care.<br />
Use the following rescues for victims at or near the<br />
surface of the water:<br />
Active victim rear rescue<br />
■■<br />
■■<br />
■■<br />
Active victim front rescue: for a drowning<br />
victim who is facing toward you<br />
Active victim rear rescue: for a drowning<br />
victim who is facing away from you<br />
Passive victim rear rescue: for a drowning<br />
victim is who is face-down at or near the<br />
surface in a vertical-to-horizontal position,<br />
seems unconscious and is not suspected of<br />
having a head, neck or spinal injury
CHAPTER 6 WATER RESCUE SKILLS 93<br />
Rescuing a Submerged Victim<br />
Figure 6-7 A<br />
Sometimes a drowning victim is below the surface. This could<br />
be in shallow water or in deep water beyond your reach. The<br />
objective in rescuing a submerged victim is to effectively and<br />
quickly go under water, make contact with the victim, bring him<br />
or her to the surface and support the victim on the rescue tube<br />
while maintaining an open airway (Figure 6-7, A−B). Continue<br />
to maintain an open airway while moving the victim to a safe exit<br />
point, remove the victim, assess the victim’s condition and provide<br />
appropriate care.<br />
Use the following rescues, based on the victim’s position in the water:<br />
■■<br />
■■<br />
Submerged victim in shallow water: for a victim who is<br />
passive, submerged in shallow water and beyond your reach<br />
Submerged victim in deep water: for a victim who is<br />
submerged in deep water<br />
An additional lifeguard may be necessary to provide assistance,<br />
especially for a deep water rescue. For example, the additional<br />
lifeguard may need to retrieve and position the rescue tube if you<br />
had to remove the strap to reach the victim.<br />
Rescuing a submerged victim.<br />
In deep water, surface dives enable you to<br />
submerge to moderate depths to rescue or search<br />
for a submerged victim. When a victim is below the<br />
surface, you must be able to get under water or to<br />
the bottom using one of the following:<br />
Figure 6-7 B<br />
■■<br />
■■<br />
Feet-first surface dive.<br />
Head-first surface dive.<br />
Multiple-Victim Rescue<br />
Sometimes two or more victims need to be<br />
rescued simultaneously. This may happen, for<br />
example, when a victim grabs a nearby swimmer to<br />
try to stay above the water (Figure 6-8) or when a<br />
parent attempts to rescue a child but is overcome<br />
by the child’s strength. The objective for this<br />
rescue is the same as for any other active victim.<br />
Bring the victim to the surface while supporting the victim on<br />
the rescue tube.<br />
Figure 6-8<br />
Several lifeguards should assist in a multiplevictim<br />
rescue, if possible. At least one lifeguard<br />
should check the bottom for possible submerged<br />
victims while other lifeguards rescue the victims<br />
at the surface.<br />
Removal from Water<br />
At this stage in the rescue, the objective is to<br />
safely and effectively remove the victim from the<br />
water, taking the victim’s condition into account,<br />
and to provide the appropriate care. You must<br />
Multi-victim rescue
94<br />
LIFEGUARDING MANUAL<br />
Figure 6-9<br />
keep the victim’s airway above the water<br />
throughout the removal process (Figure 6-9).<br />
Sometimes a victim is unconscious or too exhausted<br />
to climb out of the water, even on a ladder. The<br />
decision when and how to remove the victim should<br />
be made based on the victim’s condition and size,<br />
how soon help is expected to arrive and whether<br />
a bystander can help. If a victim needs immediate<br />
first aid, such as ventilations or CPR, remove him or<br />
her from the water immediately and make sure that<br />
emergency medical services (EMS) personnel have<br />
been summoned. If you suspect that the victim has<br />
an injury to the head, neck or spine and the victim is<br />
breathing, special removal techniques are used to<br />
remove the victim (see Chapter 11, Caring for Head, Neck and Spinal Injuries).<br />
Two-person removal from the water using a backboard<br />
Use one of the following techniques to remove a victim from the water:<br />
■■<br />
■■<br />
■■<br />
■■<br />
Two-person removal from the water. To perform the two-person removal<br />
from the water, use a backboard at the side of a pool or pier.<br />
Walking assist. Use the walking assist to help a conscious victim walk out of<br />
shallow water.<br />
Beach drag. On a gradual slope from a waterfront beach or zero-depth entry,<br />
the beach drag is a safe, easy way to remove someone who is unconscious or<br />
who cannot walk from the water. Do not use this technique if you suspect an<br />
injury to the head, neck or spine.<br />
Front-and-back carry. In a waterfront beach or zero-depth entry, two rescuers<br />
can use the front-and-back carry in shallow water if the person is unconscious<br />
or cannot get out of the water without help. Do not use this technique if you<br />
suspect an injury to the victim’s head, neck or spine.<br />
Figure 6-10<br />
ADDITIONAL RESCUE SKILLS<br />
FOR WATERFRONTS<br />
Using a Rescue Board<br />
At some waterfronts, a rescue board is used to patrol the outer<br />
boundaries of a swimming area. A rescue board also may be<br />
kept by the lifeguard stand, ready for emergency use (Figure<br />
6-10). If the facility uses a rescue board, learn how to carry the<br />
board effectively, paddle quickly and maneuver the board in all<br />
conditions. Wind, water currents and waves affect how the you<br />
will be able to handle the board. Practice using a rescue board<br />
often to maintain your skills. Keep the board clean of suntan lotion<br />
and body oils, which can make it slippery.<br />
Have a rescue board ready for emergency<br />
use by the lifeguard stand.<br />
The objective when using a rescue board is to reach the victim<br />
quickly, safely make contact, place the victim on the board and<br />
return to shore (Figure 6-11). If the victim is unconscious, loading<br />
the victim on the rescue board can be challenging. Depending<br />
on variables, including distance from shore, the rescue board
CHAPTER 6 WATER RESCUE SKILLS 95<br />
may not be the most efficient method of rescue.<br />
Follow facility protocols for the use of the rescue<br />
board. When possible, multiple rescuers should<br />
assist in getting the victim to shore. Depending<br />
on variables, including distance from shore, the<br />
rescue board may not be the most efficient method<br />
of rescue. Follow facility protocols for the use of<br />
the rescue board.<br />
Figure 6-11<br />
Several skills are involved when using a rescue board:<br />
■■<br />
■■<br />
■■<br />
Approaching a victim on a rescue board<br />
Rescuing an active victim with a<br />
rescue board<br />
Rescuing a passive victim with a<br />
rescue board<br />
Using Watercraft for Rescues<br />
A rescue board can be used to rescue victims at a waterfront<br />
facility.<br />
Figure 6-12<br />
If your facility uses watercraft for rescues, you<br />
should practice to become skilled in managing<br />
them in all rescue situations and all weather<br />
conditions. The facility must train lifeguards in the<br />
use of the watercraft (Figure 6-12). Refer to the<br />
skill sheets at the end of this chapter for general<br />
guidelines on the use of various watercraft.<br />
SPECIAL SITUATIONS<br />
AT WATERFRONTS<br />
A rescue craft, such as a kayak, can be used to rescue victims<br />
at a waterfront facility.<br />
Sightings and <strong>Cross</strong> Bearings<br />
When a drowning victim submerges at a waterfront, you must swim or paddle to his<br />
or her last-seen position. Take a sighting or a cross bearing to keep track of where the<br />
victim went underwater.<br />
To take a sighting:<br />
1. Note where the victim went underwater.<br />
2. Line up this place with an object on the far shore,<br />
such as a piling, marker buoy, tree, building or<br />
anything that is identifiable. Ideally, the first object<br />
should be lined up with a second object on the<br />
shore (Figure 6-13). This will help you to maintain<br />
a consistent direction when swimming, especially<br />
if there is a current.<br />
3. Note the victim’s distance from the shore along<br />
that line.<br />
With two lifeguards, a cross bearing can be used.<br />
To take a cross bearing:<br />
1. Have each lifeguard take a sighting on the spot<br />
Figure 6-13<br />
Taking a sighting
96<br />
LIFEGUARDING MANUAL<br />
THROW BAGS<br />
The throw bag, or rescue bag, is a throwing<br />
device often carried by paddlers, kayakers and<br />
swift-water rescue teams. It also may be used<br />
at swimming facilities, particularly in rescue<br />
watercraft. The throw bag is a nylon bag that<br />
holds a foam disk and coiled line inside. The<br />
disk gives the bag its shape and keeps it from<br />
sinking, but it does not provide floatation<br />
for someone in the water. Some<br />
bags have cord locks that<br />
are attached to hold the line<br />
in the bag. Those<br />
should be loosened<br />
before use.<br />
To use a throw bag,<br />
you should hold the loop at the end of the line<br />
in one hand and throw the bag underhand<br />
with the other. Try to get the attention of the<br />
swimmer before you toss and throw the bag so<br />
that the line lands across the victim’s shoulder<br />
or slightly in front. The line plays out of the<br />
bag as it travels through the air. Tell the victim<br />
to grab onto the line and hold onto it. Pull the<br />
victim to safety. You may use an overhand toss<br />
for more distance or to throw over bushes<br />
along the shore. As with a ring buoy, always<br />
consider wind conditions and water current<br />
when using a throw bag.<br />
A throw bag probably is the<br />
easiest way to throw a line.<br />
It has the advantage<br />
of being ready for use<br />
at all times. The line is<br />
unlikely to tangle during<br />
storage or transport. If the first<br />
toss misses, then the rope is used as a regular<br />
heaving line with weight provided by the bag<br />
partially filled with water. It is not easy to quickly<br />
re-stuff a wet line for a second throw. With all<br />
rescue equipment at a facility, you participate in<br />
the in-service training and practice to become<br />
proficient in the use of throw bags.<br />
Figure 6-14<br />
Taking a cross bearing<br />
where the victim was last seen from a different<br />
angle (Figure 6-14).<br />
2. Ask other people to help out as spotters<br />
from shore.<br />
3. Have both lifeguards swim toward the victim<br />
along their sight lines.<br />
4. Have both lifeguards check spotters on shore<br />
for directions. Spotters communicate with<br />
megaphones, whistles or hand signals.<br />
5. Identify the point where the two sight lines<br />
cross. This is the approximate location where<br />
the victim went underwater.<br />
If a person is reported as missing in or near the<br />
water, or you have attempted and are unable<br />
to locate a victim after submersion, a search<br />
is necessary.
CHAPTER 6 WATER RESCUE SKILLS 97<br />
Searching Shallow-Water Areas<br />
To search shallow-water areas where the bottom cannot be seen:<br />
1. Have a lifeguard oversee the search.<br />
2. Ask adult volunteers and staff to link their arms<br />
and hold hands to form a line in the water. The<br />
shortest person should be in the shallowest<br />
water, and the tallest person should be in<br />
water no more than chest deep (Figure 6-15).<br />
3. Have the whole line slowly move together<br />
across the area, starting where the missing<br />
person was last seen.<br />
4. As the line moves forward, have searchers sweep<br />
their feet across the bottom with each step. If there<br />
is a current, walk downstream with the current. A<br />
typical search pattern is shown in Figure 6-16.<br />
5. Have only trained lifeguards search deeper areas.<br />
Searching Deep-Water Areas<br />
Surface Dives<br />
Feet-first and head-first surface dives enable<br />
lifeguards to submerge to moderate depths to<br />
search for a submerged victim.<br />
Deep-Water Line Searches<br />
The deep-water line search is used in water greater<br />
than chest deep when the bottom cannot be seen<br />
from the surface. The search should start at the<br />
point where the victim was last seen in the water.<br />
This point should be marked on the shoreline.<br />
Figure 6-15<br />
Lifeguards performing a shallow-water line search.<br />
Figure 6-16<br />
Search pattern<br />
1. Wearing masks and fins, several lifeguards form a straight line an arm’s length<br />
from each other (Figure 6-17).<br />
2. One lifeguard should serve as the safety lookout above the water level on a pier,<br />
raft or watercraft with rescue equipment in case<br />
a searcher gets in trouble or the missing person Figure 6-17<br />
is found.<br />
3. On command from the lead lifeguard, all<br />
lifeguards perform the same type of surface dive<br />
(feet-first or head-first) to the bottom and swim<br />
forward a predetermined number of strokes—<br />
usually three. If the water is murky, searchers<br />
check the bottom by sweeping their hands back<br />
and forth in front of them, making sure to cover<br />
the entire area. To keep the water from becoming<br />
cloudier, try to avoid disturbing silt and dirt on<br />
the bottom. Be sure not to miss any areas on the<br />
bottom when diving and resurfacing.<br />
Lifeguards performing a deep-water line search.
98<br />
LIFEGUARDING MANUAL<br />
Figure 6-18<br />
Deep-water search pattern<br />
4. Lifeguards should return to the surface as<br />
straight up as possible.<br />
5. The lead lifeguard accounts for all searchers,<br />
re-forms the line at the position of the person<br />
farthest back and backs up the line one body<br />
length. On command, the team dives again.<br />
6. Lifeguards repeat this procedure until the<br />
victim is found or the entire area has been<br />
searched. Figure 6-18 shows one example<br />
of a search pattern: lifeguards move the line in<br />
one direction to the boundary of the search<br />
area, then turn at a 90-degree angle to the first line and repeat the sequence<br />
as necessary.<br />
7. If the missing person is not found, lifeguards expand the search to nearby areas.<br />
Consider whether currents may have moved the victim.<br />
8. Lifeguards continue to search until the person is found, emergency personnel<br />
take over or the search has been called off by officials.<br />
9. If a lifeguard finds the victim, the lifeguard should bring the victim up by grasping<br />
the victim under the armpit and returning to the surface. Swim the victim to<br />
safety, keeping the victim on his or her back, with his or her face out of the<br />
water. A lifeguard with equipment should take over to maintain an open airway<br />
while moving the victim to safety. Remove the victim from the water, assess the<br />
victim’s condition and provide appropriate care.<br />
Figure 6-19<br />
Mask and Fins<br />
A mask and fins should be used in an underwater<br />
search for a missing person at a waterfront (Figure<br />
6-19). Use well-maintained equipment that is sized<br />
properly and fits you well.<br />
Mask<br />
Mask and fins<br />
A mask is made of soft, flexible material, with nontinted,<br />
tempered safety glass and a head strap that is<br />
easily adjusted. Choose a mask that allows blocking<br />
or squeezing of the nose to equalize pressure. Some<br />
masks have additional features, such as molded<br />
nosepieces or purge valves. Regardless of the<br />
design, a proper fit is essential: a good fit prevents water from leaking into the mask.<br />
Each lifeguard at a waterfront facility should have a mask that fits his or her face.<br />
To check that a mask fits properly:<br />
1. Place the mask against your face without using the strap. Keep hair out of the way.<br />
2. Inhale slightly through your nose to create a slight suction inside the mask. This<br />
suction should keep the mask in place without being held.<br />
3. Adjust the strap so that the mask is comfortable. The strap should be placed on<br />
the crown of the head for a proper fit. If it is too tight or too loose, the mask may<br />
not seal properly.<br />
4. Try the mask in the water. If it leaks a little, adjust how the strap sits on the back<br />
of your head and tighten the strap if needed. If the mask continues to leak, check<br />
it again with suction. A different size may be needed if the leaking persists.
CHAPTER 6 WATER RESCUE SKILLS 99<br />
To prevent the mask from fogging, rub saliva on the inside of the face plate and rinse<br />
the mask before putting it on. Commercial defoggers also can be used.<br />
If your mask starts to fill with water while you are submerged, you can remove the<br />
water by pressing the palm of one hand against the top of your mask, which loosens<br />
the bottom seal. At the same time, blow air out of your nose and tilt your head slightly<br />
to push the water out. Alternatively, you can pull the bottom of the mask away from<br />
your face to break the seal, ensuring that the top part still is firm against your face, and<br />
blow air out of your nose. If your mask has a purge valve, blow air out of your nose and<br />
excess water exits via the purge valve.<br />
Fins<br />
Fins provide more speed and allow users to cover greater distances with less effort.<br />
A good fit is important for efficient movement. Fins come in different sizes to fit the<br />
foot; the blades also differ in size. Fins with larger blades enable the person to swim<br />
faster but require more leg strength. Fins should match your strength and swimming<br />
ability. Each lifeguard at a waterfront facility should have fins that fit his or her feet.<br />
EQUALIZING PRESSURE<br />
UNDERWATER<br />
As you descend into deep water, water<br />
pressure increases and presses against<br />
the empty spaces in your skull, especially<br />
those inside your ears. This can cause pain<br />
or even injury. To relieve this pressure, you<br />
need to force more air into the empty spaces<br />
so that the air pressure matches the water<br />
pressure. This is called “equalizing.” Be sure<br />
that you equalize early and often by taking the<br />
following steps:<br />
to go deeper until successfully equalizing<br />
the pressure.<br />
4. If you are using a mask when descending,<br />
the increased water pressure will cause<br />
the mask to squeeze your face. To relieve<br />
the squeezing, exhale a small amount of air<br />
through your nose into the mask.<br />
If you are unable to equalize the pressure because<br />
of a head cold or sinus problem, you should return<br />
to the surface rather than risk an injury.<br />
1. Place your thumb and finger on your nose<br />
or on the nosepiece of your mask if you are<br />
wearing one.<br />
2. Pinch your nose and keep your mouth shut.<br />
Try to exhale gently through your nose until<br />
the pressure is relieved.<br />
3. Repeat this as needed to relieve ear<br />
pressure. If your ears hurt, do not attempt
100<br />
LIFEGUARDING MANUAL<br />
Wetting your feet and the fins first makes it easier to put them on. Do not pull the<br />
fins on by the heels or straps of the fins. This can cause a break or tear. Push your<br />
foot into the fin, and then slide the fin’s back or strap up over your heel.<br />
Figure 6-20<br />
Use a modified flutter kick when swimming with fins. The kicking action is deeper and<br />
slower, with a little more knee bend, than the usual flutter kick. Swimming underwater<br />
is easier if you use your legs only, not your arms; keep your arms relaxed at your side.<br />
In murky water, hold your arms out in front to protect your head<br />
and feel for the victim.<br />
Entering the Water with Mask and Fins<br />
It is important to learn how to enter the water safely while<br />
wearing equipment. You should enter using a slide-in entry or<br />
with a stride jump when entering from a height of less than 3<br />
feet. Never enter head-first wearing a mask and fins. If entering<br />
the water from a sloping beach, carry the fins until you are thighdeep<br />
in the water and then put them on.<br />
To do a stride jump with mask and fins:<br />
Stepping out with a long stride to enter the<br />
water when using a mask and fins.<br />
1. Put one hand over the mask to hold it in place, keeping your<br />
elbow close to your chest. Keep your other hand at your side.<br />
2. Make sure no swimmers or other objects are below.<br />
3. Step out with a long stride over the water but do not lean<br />
forward (Figure 6-20). The fins will slow your downward<br />
motion as you enter the water.<br />
4. Swim keeping your arms at the side and face in the water<br />
or hold your arms out in front to protect your head if visibility<br />
underwater is poor.<br />
WHEN THINGS DO NOT GO AS PRACTICED<br />
Figure 6-21<br />
Even with the best preparations and practice, circumstances sometimes may require<br />
you to deviate from your facility’s EAP during an emergency. The skills in this section<br />
are designed to help you deal with some of those situations that may affect your<br />
safety or could significantly delay life saving care. Your facility must determine under<br />
what circumstances these additional emergency skills can be used. Skill sheets are<br />
located at the end of the chapter.<br />
Escapes<br />
A drowning victim may grab you if your technique is<br />
faulty or if the rescue tube slips out of position (Figure<br />
6-21). You should always hold onto the rescue tube<br />
because it helps both you and the victim stay afloat.<br />
However, if you lose control of the tube and a victim<br />
grabs you, use one of the following skills to escape:<br />
Front head-hold escape<br />
■■<br />
■■<br />
Front head-hold escape: when the victim<br />
grabs you from the front.<br />
Rear head-hold escape: when the victim<br />
grabs you from behind.
CHAPTER 6 WATER RESCUE SKILLS 101<br />
COLD WATER<br />
A serious concern at many waterfront facilities<br />
is someone suddenly entering into cold water—<br />
water that is 70 [or 77]° F (21 [or 25]° C)<br />
or lower. This usually happens in one of two<br />
ways: a person falls in accidentally, or a person<br />
enters intentionally without proper protection.<br />
In some cases, a swimmer may be underwater<br />
in warmer water and suddenly enter a<br />
thermocline, a sharp change in temperature<br />
from one layer of water to another.<br />
As a general rule, if the water feels cold,<br />
consider it to be cold. Cold water can have a<br />
serious effect on a victim and on the lifeguard<br />
making the rescue.<br />
Sudden entry into cold water may cause the<br />
following negative reactions:<br />
■■<br />
■■<br />
■■<br />
■■<br />
A gasp reflex, a sudden involuntary attempt<br />
to “catch one’s breath,” may cause the<br />
victim to inhale water into the lungs if the<br />
face is underwater.<br />
If the person’s face is not underwater, he<br />
or she may begin to hyperventilate. This<br />
can cause unconsciousness and lead to<br />
breathing water into the lungs.<br />
An increased heart rate and blood pressure<br />
can cause cardiac arrest.<br />
A victim who remains in the cold water<br />
may develop hypothermia, (below-normal<br />
body temperature), which can cause<br />
unconsciousness.<br />
However, the body has several natural<br />
mechanisms that may help to increase the<br />
person’s chances of survival. In cold water, body<br />
temperature begins to drop almost as soon as<br />
the person enters the water. If cold water is<br />
swallowed, the cooling is accelerated. When<br />
a person remains in cold water, the body’s<br />
core temperature drops and body functions<br />
slow almost to a standstill, sharply decreasing<br />
the need for oxygen. Any oxygen in the blood<br />
is diverted to the brain and heart to maintain<br />
minimal functioning of these vital organs.<br />
Because of this response, some victims have<br />
been successfully resuscitated after being<br />
submerged in cold water for an extended period.<br />
Rescues in Cold Water<br />
It is important to locate and remove a victim<br />
from cold water as quickly as possible.<br />
Because you also will be affected by cold<br />
water, you should attempt the rescue without<br />
entering the water, if possible.<br />
You can extend a rescue tube to reach the<br />
victim, but the victim might not be able to<br />
maintain a hold on the equipment because his<br />
or her hands and arms are numb from the cold.<br />
If you must enter the water, take a rescue tube<br />
attached to a towline. A line-and-reel, which is a<br />
buoyant piece of rope or cord attached to rescue<br />
equipment, may be used to tow the lifeguard and<br />
the victim to safety. Wear body protection, such<br />
as a wetsuit, gloves, booties and hood, if possible.<br />
When the victim is out of the water, assess his or<br />
her condition. Victims who have been submerged<br />
in cold water still may be alive even with:<br />
■■<br />
■■<br />
■■<br />
■■<br />
A decreased or undetectable pulse rate.<br />
No detectable breathing.<br />
Bluish skin that is cold to the touch.<br />
Muscle rigidity.<br />
Begin giving ventilations or CPR, as needed,<br />
and provide first aid for hypothermia as soon<br />
as possible. The sooner the victim receives<br />
advanced medical care, the better the chances<br />
are for survival.
102<br />
LIFEGUARDING MANUAL<br />
Figure 6-22<br />
In-Water Ventilations<br />
Always remove a victim who is not breathing from the water as soon as possible<br />
to provide care. However, if you cannot immediately remove the victim or if<br />
doing so will delay care, then perform in-water ventilations (Figure 6-22). Once<br />
conditions allow you to remove the victim from<br />
the water, stop ventilations, remove the victim<br />
and then resume care immediately.<br />
Perform in-water ventilations if the victim cannot be removed<br />
immediately or if doing so will delay care.<br />
Quick Removal from Shallow<br />
Water for a Small Victim<br />
If you have rescued a passive or unconscious<br />
person who is smaller than you and a backboard<br />
is not immediately available, you may be able to lift<br />
the victim out of the water. Simply place the victim<br />
on the side, get yourself out of the water and begin<br />
providing care. Do not use this technique if you<br />
suspect a spinal injury but the victim is breathing<br />
and a backboard is on the way.<br />
WRAP-UP<br />
You must learn and practice water rescue skills so you will be able to effectively<br />
respond to aquatic emergencies. However, it is just as important that you to know<br />
how to adapt these skills to the actual circumstances encountered during a realworld<br />
situation. Emergencies can happen quickly, and conditions can change in an<br />
instant. In an emergency, you should perform the rescue, bring the victim to a safe<br />
exit point, remove the victim from the water and provide the appropriate care. Never<br />
jeopardize your own safety, always use rescue equipment (such as a rescue tube)<br />
and keep your eye on the ultimate objective—saving the victim’s life.
SKILL SHEET 103<br />
ENTRIES<br />
Slide-In Entry<br />
1<br />
Sit down on the edge facing the water.<br />
Place the rescue tube next to you or in<br />
the water.<br />
2<br />
3<br />
4<br />
Lower your body into the water feet-first.<br />
Retrieve the rescue tube.<br />
Place the rescue tube across your chest with the tube under your armpits, focus on the victim<br />
and begin the approach.<br />
Stride Jump<br />
1<br />
Squeeze the rescue tube high against your chest with the tube under your armpits.<br />
2<br />
3<br />
Hold the excess line to keep the line from getting caught on something when jumping into the water.<br />
Leap into the water with one leg forward<br />
and the other leg back.<br />
4<br />
Lean slightly forward, with your chest ahead of your hips, and focus on the victim when you enter<br />
the water.<br />
Continued on Next Page
104<br />
LIFEGUARDING MANUAL<br />
ENTRIES continued<br />
Stride Jump continued<br />
5<br />
Squeeze or scissor your legs together right<br />
after they make contact with the water for<br />
upward thrust.<br />
6<br />
Focus on the victim and begin the approach.<br />
Note: Use the stride jump only if the water is more than 5 feet deep and you are no more than 3<br />
feet above the water. You may need to climb down from an elevated lifeguard station and travel<br />
on land before entering the water.<br />
Compact Jump<br />
1<br />
Squeeze the rescue tube high against your chest with the tube under your armpits.<br />
2<br />
Hold the excess line to keep it from getting<br />
caught in the lifeguard chair or other<br />
equipment when jumping into the water.<br />
3<br />
Jump out and away from the lifeguard chair,<br />
pool deck or pier. In a wave pool, time the<br />
jump to land on the crest (top) of a wave.
SKILL SHEET 105<br />
4<br />
5<br />
6<br />
Bend your knees and keep your feet together and flat to absorb the shock if you hit the bottom.<br />
Do not point your toes or keep your legs straight or stiff.<br />
Let the buoyancy of the rescue tube bring you back to the surface.<br />
Focus on the victim when surfacing and begin the approach.<br />
Note: If you are more than 3 feet above the water, the water must be at least 5 feet deep. It<br />
may not be safe to enter the water from an elevated lifeguard stand if your zone is crowded or<br />
as a result of the design or position of the stand. You may need to climb down before entering<br />
the water.<br />
Run-and-Swim Entry<br />
1<br />
Hold the rescue tube and the excess line<br />
and run into the water, lifting your knees<br />
high to avoid falling.<br />
2<br />
When you can no longer run, either put the<br />
rescue tube across your chest and lean<br />
forward or drop the tube to the side and<br />
start swimming, letting the rescue tube trail<br />
behind. Do not dive or plunge head-first into<br />
the water; this could cause a serious head,<br />
neck or spinal injury.
106<br />
LIFEGUARDING MANUAL<br />
ASSISTS<br />
Simple Assist<br />
1<br />
2<br />
Approach the person who needs help while keeping the rescue tube between you and<br />
that person.<br />
Reach across the tube and grasp the<br />
person at the armpit to help the person<br />
maintain his or her balance.<br />
■■<br />
If the person is underwater, grasp the<br />
person under the armpits with both<br />
hands and help him or her stand up.<br />
3<br />
Assist the person to the exit point, if necessary.<br />
Reaching Assist from the Deck<br />
1<br />
Extend the tube to the victim, keeping<br />
your body weight on your back foot and<br />
crouching to avoid being pulled into<br />
the water.<br />
■■<br />
Remove the rescue tube strap from<br />
your shoulder if necessary to reach the<br />
victim and hold the shoulder strap in<br />
one hand and extend the tube to the<br />
victim with the other hand.<br />
2<br />
3<br />
Tell the victim to grab the rescue tube.<br />
Slowly pull the victim to safety.<br />
Note: A swimmer in distress generally is able to reach for a rescue device. However, a victim<br />
who is struggling to keep his or her mouth above the water’s surface to breathe may not be<br />
able to grab a rescue tube. In those cases, you may need to enter the water to rescue the victim<br />
using a front or rear victim rescue.
SKILL SHEET 107<br />
RESCUES AT OR NEAR THE SURFACE<br />
OF THE WATER<br />
Active Victim Front Rescue<br />
1<br />
Approach the victim from the front.<br />
2<br />
As you near the victim, grab the rescue tube<br />
from under your arms with both hands and<br />
begin to push the tube out in front of you.<br />
Continue kicking to maintain momentum.<br />
3<br />
Thrust the rescue tube slightly under<br />
water and into the victim’s chest, keeping<br />
the tube between you and the victim.<br />
Encourage the victim to grab the rescue<br />
tube and hold onto it.<br />
4<br />
Keep kicking, fully extend your arms and<br />
move the victim to a safe exit point. Change<br />
direction, if needed.
108<br />
LIFEGUARDING MANUAL<br />
RESCUES AT OR NEAR THE SURFACE<br />
OF THE WATER continued<br />
Active Victim Rear Rescue<br />
1<br />
Approach the victim from behind with the<br />
rescue tube across your chest.<br />
2<br />
With both arms, reach under the victim’s<br />
armpits and grasp the shoulders firmly. Tell<br />
the victim that you are there to help and<br />
continue to reassure the victim throughout<br />
the rescue.<br />
3<br />
Using your chest, squeeze the rescue tube<br />
between your chest and the victim’s back.<br />
4<br />
5<br />
Keep your head to one side to avoid being hit by the victim’s head if it moves backwards.<br />
Lean back and pull the victim onto the<br />
rescue tub.
SKILL SHEET 109<br />
6<br />
7<br />
Use the rescue tube to support the victim so that the victim’s mouth and nose are out of<br />
the water.<br />
Tow the victim to a safe exit point.<br />
Passive Victim Rear Rescue<br />
1<br />
Approach a face-down victim from behind<br />
with the rescue tube across your chest.<br />
2<br />
With both arms, reach under the victim’s<br />
armpits and grasp the shoulders firmly. You<br />
may be high on the victim’s back when<br />
doing this.<br />
3<br />
4<br />
5<br />
Using your chest, squeeze the rescue tube between your chest and the victim’s back.<br />
Keep your head to one side to avoid being hit by the victim’s head if it moves backwards.<br />
Roll the victim over by dipping your<br />
shoulder and rolling onto your back so that<br />
the victim is face-up on top of the rescue<br />
tube. Keep the victim’s mouth and nose<br />
out of the water. Place the tube under<br />
the victim below the shoulders so that<br />
the victim’s head naturally falls back to an<br />
open-airway position.<br />
Continued on Next Page
110<br />
LIFEGUARDING MANUAL<br />
RESCUES AT OR NEAR THE SURFACE<br />
OF THE WATER continued<br />
Passive Victim Rear Rescue continued<br />
6<br />
Tow the victim to a safe exit point. For<br />
greater distances, use one hand to stroke.<br />
For example, reach the right arm over the<br />
victim’s right shoulder and grasp the rescue<br />
tube. Then use the left hand to stroke.<br />
7<br />
Remove the victim from the water, assess the victim’s condition and provide appropriate care.
SKILL SHEET 111<br />
MULTIPLE-VICTIM RESCUE<br />
If you are the only lifeguard rescuing two victims who are clutching each other:<br />
1<br />
Approach one victim from behind.<br />
2<br />
With both arms, reach under the victim’s<br />
armpits and grasp the shoulders. Squeeze<br />
the rescue tube between your chest and the<br />
victim’s back, keeping your head to one side<br />
of the victim’s head.<br />
3<br />
Use the rescue tube to support both<br />
victims with their mouths and noses out<br />
of the water. Talk to the victims to help<br />
reassure them.<br />
4<br />
Support both victims until other lifeguards arrive or the victims become calm enough to assist<br />
with moving to a safe exit point.<br />
Note: Whenever possible, more than one rescuer should assist with a multiple-victim rescue.
112<br />
LIFEGUARDING MANUAL<br />
RESCUING A SUBMERGED VICTIM<br />
Submerged Victim in Shallow Water<br />
1<br />
2<br />
Swim or quickly walk to the victim’s side. Let go of the rescue tube but keep the strap around<br />
your shoulders.<br />
Submerge and reach down to grab the<br />
victim under the armpits.<br />
3<br />
Simultaneously pick up the victim,<br />
move forward and roll the victim face-up<br />
once surfaced.<br />
4<br />
Grab the rescue tube and position it<br />
under the victim’s shoulders. The victim’s<br />
head should fall back naturally into an<br />
open-airway position. If an assisting<br />
lifeguard is there with the backboard,<br />
skip this step and proceed to remove the<br />
victim from the water.<br />
5<br />
Move the victim to a safe exit point, remove the victim from the water, assess the victim’s<br />
condition and provide appropriate care.<br />
Tip: If the water depth is shallow enough, you can use the simple assist to lift the victim to the<br />
surface, then position him or her on the rescue tube, if needed, to complete the rescue.
SKILL SHEET 113<br />
Feet-First Surface Dive<br />
1<br />
2<br />
Swim to a point near the victim. Release the rescue tube but keep the strap around<br />
your shoulders.<br />
Position your body vertically, then at the same time press both<br />
hands down to your sides and kick strongly to raise your body<br />
out of the water.<br />
3<br />
Take a breath, then let your body sink underwater as you begin to<br />
extend your arms outward with palms upward, pushing against<br />
the water to help you move downward. Keep your legs straight<br />
and together with toes pointed. Tuck your chin and turn your face<br />
to look down toward the bottom.<br />
4<br />
5<br />
As downward momentum slows, repeat the motion of extending your arms outward and<br />
sweeping your hands and arms upward and overhead to go deeper.<br />
Repeat this arm movement until you are deep enough to reach the victim.<br />
Tips:<br />
■■<br />
■■<br />
Do not release all of the air in your lungs while you are submerging; instead, exhale gently.<br />
Save some air for your return to the surface.<br />
As you descend into deep water, be sure to equalize pressure early and often.
114<br />
LIFEGUARDING MANUAL<br />
RESCUING A SUBMERGED VICTIM continued<br />
Feet-First Surface Dive continued<br />
If you must swim underwater, such as for a deep-water line search, also perform the following steps:<br />
1<br />
When deep enough to reach the victim, tuck<br />
your body and roll to a horizontal position.<br />
2<br />
Extend your arms and legs and swim underwater.<br />
Head-First Surface Dive<br />
1<br />
2<br />
Swim to a point near the victim and release the rescue tube.<br />
Gain momentum using a swimming stroke.
SKILL SHEET 115<br />
3<br />
Take a breath, sweep your arms backwards<br />
to your thighs and turn them palms-down.<br />
4<br />
Tuck your chin to your chest and flex at<br />
the hip sharply while your arms reach<br />
downward toward the bottom.<br />
5<br />
Lift your legs upward, straight and<br />
together so that their weight above the<br />
water helps the descent. Get in a fully<br />
extended, streamlined body position that is<br />
almost vertical.<br />
6<br />
If you need to go deeper, such as for a<br />
deep-water line search, do a simultaneous<br />
arm pull with both arms to go deeper, then<br />
level out and swim forward underwater.<br />
Tips:<br />
■■<br />
■■<br />
If the depth of the water is unknown or the water is murky, hold one or both arms extended<br />
over the head toward the bottom or use a feet-first surface dive.<br />
As you descend into deep water, be sure to equalize pressure early and often.
116<br />
LIFEGUARDING MANUAL<br />
RESCUING A SUBMERGED VICTIM continued<br />
Submerged Victim in Deep Water<br />
1<br />
Perform a feet-first surface dive, and position yourself behind the victim.<br />
2<br />
Reach one arm under the victim’s arm (right<br />
arm to right side or left arm to left side) and<br />
across the victim’s chest. Hold firmly onto<br />
the victim’s opposite side.<br />
3<br />
Once you have hold of the victim, reach up<br />
with your free hand and grasp the towline.<br />
Pull it down and place it in the same hand<br />
that is holding the victim. Keep pulling the<br />
towline this way until nearing the surface.<br />
4<br />
As you surface, tilt the victim back so that<br />
he or she is face-up. Grasp and position the<br />
rescue tube so that it is squeezed between<br />
your chest and the victim’s back. If a victim<br />
is passive, place the tube below the victim’s<br />
shoulders so the victim’s head naturally falls<br />
back into an open-airway position. However,<br />
if the victim is active and begins to struggle,<br />
you will need to grasp tighter.
SKILL SHEET 117<br />
5<br />
6<br />
Reach your free arm over the tube and under the victim’s armpit. Grasp his or her shoulder firmly<br />
(right arm to right shoulder or left arm to left shoulder).<br />
Move your other arm from across the<br />
victim’s chest and grasp the victim’s<br />
shoulder firmly.<br />
7<br />
Tow the victim to a safe exit point. Remove the victim from the water, assess the victim’s<br />
condition and provide appropriate care.<br />
Tip: Depending on the depth of the water, use one of the following techniques:<br />
■■<br />
■■<br />
■■<br />
If you must remove the strap from your shoulder to descend and reach the victim,<br />
continue to hold onto the strap so that the rescue tube can be used to help bring the<br />
victim to the surface.<br />
If the victim is deeper than the length of the strap and towline, release the strap and towline,<br />
grasp the victim, push off the bottom (if possible) and kick to the surface. Once at the<br />
surface, place the rescue tube in position behind the victim and continue the rescue.<br />
If you have released the strap of the rescue tube, it might not be within reach when you<br />
return to the surface. An additional lifeguard responding to your EAP signal should assist<br />
by placing the rescue tube in position so that you can continue the rescue. If this is not<br />
possible, you may need to move to safety without the rescue tube.
118<br />
LIFEGUARDING MANUAL<br />
REMOVAL FROM THE WATER<br />
Two-Person Removal from the Water<br />
Using a Backboard<br />
1<br />
The primary lifeguard brings the victim to<br />
the side and turns him or her to face the<br />
wall. Another lifeguard brings a backboard<br />
with the head immobilizer and the straps<br />
removed, if possible.<br />
2<br />
The lifeguard on land crosses his or her<br />
hands to grab the victim’s wrists and pulls<br />
the victim up slightly to keep the head<br />
above the water and away from the wall.<br />
Support the victim’s head so that the head<br />
does not fall forward.<br />
3<br />
The primary lifeguard ensures that the victim’s face is out of the water and climbs out of the<br />
water, removes the rescue tube and gets the backboard.
SKILL SHEET 119<br />
4<br />
The primary lifeguard guides the backboard,<br />
foot-end first, down into the water along the<br />
wall next to the victim. The second lifeguard<br />
then turns the victim onto the backboard.<br />
Each lifeguard then quickly grasps one of<br />
the victim’s wrists and one of the handholds<br />
of the backboard.<br />
5<br />
When the primary lifeguard gives the signal, both lifeguards pull the backboard and victim<br />
onto land, resting the underside of the board against the edge. (Remember to lift with the<br />
legs and not with the back.) The lifeguards step backward and then carefully lower the<br />
backboard onto the ground. If other lifeguards or additional help is available, they can provide<br />
assistance by pulling or pushing the backboard.<br />
6<br />
Lifeguards provide immediate and appropriate care based on the victim’s condition. Continue<br />
care until EMS personnel arrive and assume control over the victim’s care.<br />
Tips:<br />
■■<br />
■■<br />
■■<br />
It may be easier to submerge the board initially if the board is angled, foot-end first, toward<br />
the wall.<br />
As soon as the board is submerged, turn the victim onto the board then allow the board to<br />
float up beneath the victim.<br />
Once the board is submerged, the second lifeguard can help to stabilize the board against<br />
the wall, placing his or her foot against the backboard, if necessary.
120<br />
LIFEGUARDING MANUAL<br />
REMOVAL FROM THE WATER continued<br />
Walking Assist<br />
1<br />
2<br />
Place one of the victim’s arms around your neck and across your shoulder.<br />
Grasp the wrist of the arm that is across your shoulder. Wrap your<br />
free arm around the victim’s back or waist to provide support.<br />
3<br />
4<br />
Hold the victim firmly and assist him or her in walking out of the water.<br />
Have the victim sit or lie down while you monitor his or her condition.<br />
Beach Drag<br />
1<br />
Stand behind the victim and grasp him or her under the armpits,<br />
supporting the victim’s head as much as possible with your<br />
forearms. Let the rescue tube trail behind, being careful not<br />
to trip on the tube or line. If another lifeguard is available to<br />
assist, each of you should grasp the victim under an armpit and<br />
support the head.<br />
2<br />
3<br />
Walk backward and drag the victim to the shore. Use your legs, not your back.<br />
Remove the victim completely from the water, then assess the victim’s condition and provide<br />
appropriate care.
SKILL SHEET 121<br />
Front-and-Back Carry<br />
1<br />
2<br />
From behind the victim, one lifeguard reaches under the victim’s armpits. This lifeguard grasps<br />
the victim’s right wrist with his or her right hand, and the victim’s left wrist with his or her left<br />
hand. The lifeguard then crosses the victim’s arms across the his or her chest.<br />
The second lifeguard stands between the<br />
victim’s legs, facing the victim’s feet. This<br />
lifeguard bends down and grasps the victim<br />
under the knees. On signal, both lifeguards<br />
lift the victim and carry him or her out of the<br />
water while walking forward.
122<br />
LIFEGUARDING MANUAL<br />
USING A RESCUE BOARD<br />
Approaching a Victim on a Rescue Board<br />
1<br />
Hold onto the sides of the board, about<br />
mid-board when entering the water.<br />
2<br />
When the water is knee-deep, lay the rescue<br />
board on the water and push it forward.<br />
Climb on just behind the middle and lie<br />
down in the prone position. If needed, place<br />
your foot into the water to help steer. For<br />
better balance, place a foot on either side of<br />
the rescue board in the water.<br />
3<br />
Paddle with the front of the board toward the victim using either a front-crawl or a butterfly arm<br />
stroke. If you need to change to a kneeling position to better see the victim, paddle a few strokes<br />
before moving on the board.<br />
4<br />
Continue paddling with your head up and the victim in your sight until you reach the victim.
SKILL SHEET 123<br />
Rescuing an Active Victim with a Rescue Board<br />
1<br />
Approach the victim from the side so that the<br />
side of the rescue board is next to the victim.<br />
2<br />
Grasp the victim’s wrist and slide off of the<br />
rescue board on the opposite side.<br />
3<br />
Help the victim to reach his or her arms<br />
across the rescue board. Encourage the<br />
victim to relax while you kick to turn the<br />
board toward shore.<br />
4<br />
Stabilize the rescue board and help the<br />
victim onto the board.<br />
5<br />
Tell the victim to lie on his or her stomach, facing the front of the board.<br />
Continued on Next Page
124<br />
LIFEGUARDING MANUAL<br />
USING A RESCUE BOARD continued<br />
Rescuing an Active Victim<br />
with a Rescue Board continued<br />
6<br />
7<br />
Carefully climb onto the board from the back with your chest between the victim’s legs. Take<br />
care to avoid tipping the rescue board and keep your legs in the water for stability.<br />
Paddle the rescue board to shore.<br />
8<br />
Slide off of the board and help the victim off of the board onto shore with a walking assist.<br />
Rescuing a Passive Victim with a Rescue Board<br />
To rescue someone who is unconscious or cannot hold onto or climb onto the rescue board:<br />
1<br />
Approach the victim from the side. Position the rescue board so that the victim is slightly forward<br />
of the middle of the rescue board.
SKILL SHEET 125<br />
2<br />
Grasp the victim’s hand or wrist and slide off of the board on the opposite side, flipping the<br />
rescue board over toward you. Hold the victim’s arm across the board with the victim’s chest<br />
and armpits against the far edge of the board.<br />
3<br />
4<br />
Grasp the far edge of the rescue board with the other hand.<br />
Kneel on the edge of the rescue board<br />
using your own body weight to flip the<br />
board toward you again. Catch the victim’s<br />
head as the rescue board comes down.<br />
5<br />
Position the victim lying down lengthwise<br />
in the middle of the rescue board with<br />
the victim’s head toward the front of the<br />
rescue board.<br />
6<br />
7<br />
Kick to turn the board toward shore. Carefully climb onto the board from the back with your<br />
chest between the victim’s legs. Be careful not to tip the rescue board and keep your legs in<br />
the water for stability.<br />
Paddle the rescue board to shore.<br />
Continued on Next Page
126<br />
LIFEGUARDING MANUAL<br />
USING A RESCUE BOARD continued<br />
Rescuing a Passive Victim<br />
with a Rescue Board continued<br />
8<br />
Help the victim to safety with the beach drag or other removal technique.<br />
Tips:<br />
■■<br />
■■<br />
Make sure that the victim’s armpits are along the edges of the board before flipping the board.<br />
Use caution when flipping the board to ensure that the victim’s armpits, and not the upper<br />
arms, remain along the edge of the board during the flip.<br />
USING WATERCRAFT FOR RESCUES<br />
Using a Square Stern Rowboat for Rescues<br />
1<br />
Extend an oar or rescue tube to the victim<br />
and pull him or her to the center of the stern<br />
(rear) of the craft. This is the most stable<br />
area on which to hold.<br />
2<br />
If the victim cannot hold the oar or rescue<br />
tube, move the stern close to the victim and<br />
grasp the victim’s wrist or hand and pull him<br />
or her to the stern.
SKILL SHEET 127<br />
3<br />
4<br />
Have the victim hold onto the stern while you move the watercraft to safety. Be sure that his or<br />
her mouth and nose remains above water.<br />
If the victim needs to be brought onto the<br />
craft, help the victim over the stern and<br />
move the watercraft to safety.<br />
Using a Motorized Watercraft for Rescues<br />
1<br />
2<br />
3<br />
Always approach the victim from downwind and downstream.<br />
Shut off the engine about three boat-lengths from the victim and coast or paddle to the victim.<br />
Bring the victim on board before restarting the engine.<br />
Using a Kayak for Rescues<br />
1<br />
Extend the rescue tube to a distressed swimmer or active victim.<br />
2<br />
Instruct the victim to hold onto the rescue<br />
tube while you paddle to shore.<br />
3<br />
Ensure that the victim continues to hold the tube and that his or her mouth and nose remain<br />
above water as you paddle.
128<br />
LIFEGUARDING MANUAL<br />
WHEN THINGS DO NOT GO AS PRACTICED<br />
Front Head-Hold Escape<br />
1<br />
As soon as the victim grabs hold, take a<br />
quick breath, tuck your chin down, turn your<br />
head to either side, raise your shoulders and<br />
submerge with the victim.<br />
2<br />
Once underwater, grasp the victim’s elbows<br />
or the undersides of the victim’s arms just<br />
above the elbows. Forcefully push up and<br />
away. Keep your chin tucked, your arms fully<br />
extended and your shoulders raised until<br />
you are free.<br />
3<br />
Quickly swim underwater, out of the victim’s reach. Surface and reposition the rescue tube and<br />
try the rescue again.<br />
Rear Head-Hold Escape<br />
1<br />
Take a quick breath, tuck your chin down,<br />
turn your head to either side, raise your<br />
shoulders and submerge with the victim.
SKILL SHEET 129<br />
2<br />
Once underwater, grasp the victim’s elbows<br />
or the undersides of the victim’s arms<br />
just above the elbows. Forcefully push up<br />
and away while twisting your head and<br />
shoulders. Keep your chin tucked, your arms<br />
fully extended and your shoulders raised<br />
until you are free.<br />
3<br />
Quickly swim underwater, out of the victim’s reach. Surface and reposition the rescue tube and<br />
try the rescue again.<br />
In-Water Ventilations<br />
1<br />
Ensure that the rescue tube is placed under<br />
the victim so that his or her airway falls into<br />
an open position.<br />
2<br />
From behind the victim’s head, position the assembled resuscitation mask.<br />
■■<br />
If you are in deep water, perform the skill with support from the rescue tube.<br />
3<br />
4<br />
Give ventilations.<br />
Remove the victim from the water as soon as conditions allow, then immediately resume<br />
providing care.
130<br />
LIFEGUARDING MANUAL<br />
WHEN THINGS DO NOT GO AS PRACTICED<br />
continued<br />
Quick Removal from Shallow Water<br />
for a Small Victim<br />
To remove a small passive victim from shallow water if a backboard is not immediately available:<br />
1<br />
2<br />
Bring the victim to the side of the pool or pier into shallow water.<br />
Maintain contact with the victim by rotating<br />
the victim on his or her back into the crook<br />
of your arm. Be sure to support the head<br />
above the surface of the water. Place your<br />
other arm under the victim’s knees.<br />
3<br />
Lift the victim carefully and place him or her<br />
on the pool deck, pier or dock.<br />
4<br />
Exit the water, assess the victim’s condition and provide the appropriate care.<br />
Notes:<br />
■■<br />
■■<br />
If the victim must be moved to provide<br />
further care, place the victim on a<br />
backboard with the assistance of<br />
another rescuer.<br />
Do not use this technique if you suspect a<br />
spinal injury, the victim is breathing and a<br />
backboard is on the way.
Before Providing Care<br />
and Victim Assessment<br />
A<br />
fter you rescue a victim from the water, your next<br />
steps are to identify any life-threatening conditions by<br />
performing a primary assessment<br />
and providing care. You also will need to<br />
perform a primary assessment if a victim<br />
is injured or becomes ill on land. While<br />
caring for a victim, it is crucial that you<br />
protect yourself and others from the<br />
transmission of infectious disease.<br />
Chapter7<br />
In this chapter, you will learn how<br />
infectious diseases occur and<br />
how you can prevent them from<br />
spreading. This chapter also<br />
covers the general procedures<br />
for responding to sudden illness<br />
and injury on land. n
132<br />
<strong>Lifeguarding</strong> <strong>Manual</strong><br />
BLOODBORNE PATHOGENS<br />
Bloodborne pathogens, such as bacteria and viruses, are present in blood and body<br />
fluids and can cause disease in humans. Pathogens are found almost everywhere<br />
in our environment. Bacteria can live outside of the body and commonly do not<br />
depend on other organisms for life. If a person is infected by bacteria, antibiotics<br />
and other medications often are used to treat the infection. Viruses depend on other<br />
organisms to live. Once viruses are in the body, they are difficult to kill. This is why<br />
prevention is critical. The bloodborne pathogens of primary concern to lifeguards are<br />
the hepatitis B virus, hepatitis C virus and HIV (Table 7-1).<br />
Hepatitis B<br />
Hepatitis B is a liver infection caused by the hepatitis B virus. Hepatitis B may be<br />
severe or even fatal; the hepatitis B virus can live in the body for up to 6 months<br />
before symptoms appear. These may include flu-like symptoms such as fatigue,<br />
abdominal pain, loss of appetite, nausea, vomiting and joint pain. Jaundice (yellowing<br />
of the skin and eyes) is a symptom that occurs in the later stage of the disease.<br />
Medications are available to treat chronic hepatitis B infection, but they do not<br />
work for everyone. The most effective means of prevention is the hepatitis B<br />
vaccine. This vaccine, which is given in a series of three doses, provides immunity<br />
to the disease. Scientific data show that hepatitis B vaccines are safe for adults,<br />
children and infants. Currently, no evidence exists indicating that hepatitis B<br />
vaccine causes chronic illnesses.<br />
Your employer must make the hepatitis B vaccination series available to you<br />
because you could be exposed to the virus at work. The vaccination must be made<br />
available within 10 working days of initial assignment, after appropriate training has<br />
been completed. However, you can choose to decline the vaccination series. If you<br />
decide not to be vaccinated, you must sign a form affirming your decision.<br />
Hepatitis C<br />
Hepatitis C is a liver disease caused by the hepatitis C virus. Hepatitis C is the<br />
most common chronic bloodborne infection in the United States. The symptoms<br />
are similar to those for hepatitis B infection and include fatigue, abdominal pain,<br />
loss of appetite, nausea, vomiting and jaundice. Currently, no vaccine exists against<br />
hepatitis C and no treatment is available to prevent infection after exposure.<br />
Hepatitis C is the leading cause of liver transplants. For these reasons, hepatitis C<br />
is considered to be more serious than hepatitis B.<br />
HIV<br />
HIV is the virus that causes AIDS. HIV attacks white blood cells and destroys<br />
the body’s ability to fight infection. This weakens the body’s immune system.<br />
The infections that strike people whose immune systems are weakened by HIV<br />
are called opportunistic infections. Some opportunistic infections include severe<br />
pneumonia, tuberculosis, Kaposi’s sarcoma and other unusual cancers.<br />
People infected with HIV may not feel or look sick initially. A blood test, however,<br />
can detect the HIV antibody. When an infected person has a significant drop in<br />
a certain type of white blood cells or shows signs of having certain infections or
Chapter 7 Before Providing Care And Victim Assessment 133<br />
cancers, he or she may be diagnosed as having AIDS. These infections can cause<br />
fever, fatigue, diarrhea, skin rashes, night sweats, loss of appetite, swollen lymph<br />
glands and significant weight loss. In the advanced stages, AIDS is a very serious<br />
condition. People with AIDS eventually develop life-threatening infections and can<br />
die from these infections. Currently, there is no vaccine against HIV.<br />
There are many other illnesses, viruses and infections to which you may be exposed.<br />
Keep immunizations current, have regular physical check-ups and be knowledgeable<br />
about other pathogens. For more information on the illnesses listed above and other<br />
diseases and illnesses of concern, contact the Centers for Disease Control and<br />
Prevention (CDC) at 800-342-2437 or go to cdc.gov.<br />
Table 7-1: How Bloodborne Pathogens Are Transmitted<br />
Disease Signs and Symptoms Mode of<br />
Transmission<br />
Infectious<br />
Material<br />
Hepatitis B<br />
Fatigue, abdominal pain, loss of<br />
appetite, nausea, vomiting, joint pain,<br />
jaundice<br />
Direct and indirect<br />
contact<br />
Blood, saliva,<br />
vomitus, semen<br />
Hepatitis C<br />
Fatigue, dark urine, abdominal pain,<br />
loss of appetite, nausea, jaundice<br />
Direct and indirect<br />
contact<br />
Blood, saliva,<br />
vomitus, semen<br />
HIV<br />
Symptoms may or may not appear<br />
in the early stage; late-contactstage<br />
symptoms may include fever,<br />
fatigue, diarrhea, skin rashes, night<br />
sweats, loss of appetite, swollen<br />
lymph glands, significant weight loss,<br />
white spots in the mouth or vaginal<br />
discharge (signs of yeast infection)<br />
and memory or movement problems<br />
Direct and possibly<br />
indirect contact<br />
Blood, saliva,<br />
vomitus, semen,<br />
vaginal fluid,<br />
breast milk<br />
HOW PATHOGENS SPREAD<br />
Exposures to blood and other body fluids occur across a wide variety of<br />
occupations. Lifeguards, health care providers, emergency medical services (EMS)<br />
personnel, public safety personnel and other workers can be exposed to blood<br />
through injuries from needles and other sharps devices, as well as by direct and<br />
indirect contact with skin and mucous membranes. For any disease to be spread,<br />
including bloodborne diseases, all four of the following conditions must be met:<br />
■■<br />
■■<br />
■■<br />
■■<br />
A pathogen is present.<br />
A sufficient quantity of the pathogen is present to cause disease.<br />
A person is susceptible to the pathogen.<br />
The pathogen passes through the correct entry site (e.g., eyes, mouth and other<br />
mucous membranes, non-intact skin, or skin pierced by needlesticks, animal and<br />
human bites, cuts, abrasions and other means).
134<br />
<strong>Lifeguarding</strong> <strong>Manual</strong><br />
Figure 7-1<br />
How pathogens spread<br />
To understand how infections occur, think of these<br />
four conditions as pieces of a puzzle (Figure 7-1).<br />
All of the pieces must be in place for the picture<br />
to be complete. If any one of these conditions is<br />
missing, an infection cannot occur.<br />
At the workplace, bloodborne pathogens, such as<br />
hepatitis B virus, hepatitis C virus and HIV, are spread<br />
primarily through direct or indirect contact with<br />
infected blood or other body fluids. These viruses are<br />
not spread by food or water or by casual contact,<br />
such as hugging or shaking hands. The highest risk<br />
of transmission while at work is unprotected direct or<br />
indirect contact with infected blood.<br />
Direct Contact<br />
Direct contact transmission occurs when infected blood or body fluids from one<br />
person enters another person’s body. For example, direct contact transmission can<br />
occur through infected blood splashing in the eye or from directly touching the body<br />
fluids of an infected person with a hand that has an open sore (Figure 7-2).<br />
Figure 7-2<br />
Direct contact<br />
Figure 7-3<br />
Indirect contact<br />
Indirect Contact<br />
Some bloodborne pathogens also can be transmitted<br />
by indirect contact (Figure 7-3). Indirect contact<br />
transmission can occur when a person touches an<br />
object that contains the blood or other body fluid<br />
of an infected person and that infected blood or<br />
other body fluid enters the body through a correct<br />
entry site. These objects include soiled dressings,<br />
equipment and work surfaces that have been<br />
contaminated with an infected person’s blood or<br />
other body fluids. For example, indirect contact<br />
can occur when a person picks up blood-soaked<br />
bandages with a bare hand, and the pathogens<br />
enter through a break in the skin on the hand.<br />
Droplet and Vector-Borne<br />
Transmission<br />
Other pathogens, such as the flu virus, can enter<br />
the body through droplet transmission. This occurs<br />
when a person inhales droplets from an infected<br />
person’s cough or sneeze (Figure 7-4). Vector-borne<br />
transmission of diseases occurs when the body’s<br />
skin is penetrated by an infectious source, such<br />
as an animal or insect bite or sting (Figure 7-5).<br />
Examples of diseases spread through vector-borne<br />
transmission include malaria and West Nile virus.
Chapter 7 Before Providing Care And Victim Assessment 135<br />
Risk of Transmission<br />
Hepatitis B, hepatitis C and HIV share a common<br />
mode of transmission—direct or indirect contact<br />
with infected blood or other body fluids—but they<br />
differ in the risk of transmission. Individuals who<br />
have received the hepatitis B vaccine and have<br />
developed immunity to the virus have virtually no<br />
risk for infection by the hepatitis B virus. For an<br />
unvaccinated person, the risk for infection from<br />
hepatitis B-infected blood from a needlestick or cut<br />
exposure can be as high as 30 percent, depending<br />
on several factors. In contrast, the risk for infection<br />
from hepatitis C-infected blood after a needlestick<br />
or cut exposure is about 2 percent, and the<br />
risk of infection from HIV-infected blood after a<br />
needlestick or cut exposure is less than 1 percent.<br />
Figure 7-4<br />
Droplet transmission<br />
Figure 7-5<br />
PREVENTING THE SPREAD<br />
OF BLOODBORNE<br />
PATHOGENS<br />
OSHA Regulations<br />
The federal Occupational Safety and Health<br />
Vector-borne transmission<br />
Administration (OSHA) issued regulations about<br />
on-the-job exposure to bloodborne pathogens.<br />
OSHA determined that employees are at risk when they are exposed to blood<br />
or other body fluids. Employers should follow OSHA requirements regarding<br />
job-related exposure to bloodborne pathogens, which are designed to protect<br />
you from disease transmission. This includes reducing or removing hazards from<br />
the workplace that may place employees in contact with infectious materials,<br />
including how to safely dispose of needles.<br />
OSHA regulations and guidelines apply to employees who may come into contact<br />
with blood or other body substances that could cause an infection. These<br />
regulations apply to lifeguards because, as professional rescuers, lifeguards are<br />
expected to provide emergency care as part of their job. These guidelines can help<br />
lifeguards and their employers meet the OSHA bloodborne pathogens standard to<br />
prevent transmission of serious diseases. For more information about the OSHA<br />
Bloodborne Pathogens Standard 29 CFR 1910.1030 and the Needlestick Safety<br />
and Prevention Act, go to osha.gov.<br />
Exposure Control Plan<br />
OSHA regulations require employers to have an exposure control plan. This is a<br />
written program outlining the protective measures that employers will take to eliminate<br />
or minimize employee exposure incidents. The plan also should detail how the<br />
employer will meet other OSHA requirements, such as recordkeeping. The exposure
136<br />
<strong>Lifeguarding</strong> <strong>Manual</strong><br />
control plan guidelines should be made available to lifeguards and should specifically<br />
explain what they need to do to prevent the spread of infectious diseases.<br />
Standard Precautions<br />
Standard precautions are safety measures that combine universal precautions and<br />
body substance isolation (BSI) precautions and are based on the assumption that all<br />
body fluids may be infectious. Standard precautions can be applied though the use of:<br />
■■<br />
■■<br />
■■<br />
■■<br />
■■<br />
■■<br />
Personal protective equipment (PPE).<br />
Good hand hygiene.<br />
Engineering controls.<br />
Work practice controls.<br />
Proper equipment cleaning.<br />
Spill clean-up procedures.<br />
EMPLOYERS’<br />
RESPONSIBILITIES<br />
OSHA’s regulations on bloodborne pathogens<br />
require employers to protect employees in<br />
specific ways including:<br />
■■<br />
■■<br />
■■<br />
■■<br />
■■<br />
■■<br />
Identifying positions or tasks covered by<br />
the standard.<br />
Creating an exposure control plan to<br />
minimize the possibility of exposure and<br />
making the plan easily accessible to<br />
employees.<br />
Developing and putting into action<br />
a written schedule for cleaning and<br />
decontaminating the workplace.<br />
Creating a system for easy identification of<br />
soiled material and its proper disposal.<br />
Developing a system of annual training for<br />
all covered employees.<br />
Offering the opportunity for employees to<br />
get the hepatitis B vaccination at no cost<br />
to them.<br />
■■<br />
■■<br />
■■<br />
■■<br />
■■<br />
■■<br />
Establishing clear procedures to follow for<br />
reporting an exposure.<br />
Creating a system of recordkeeping.<br />
In workplaces where there is potential<br />
exposure to injuries from contaminated<br />
sharps, soliciting input from nonmanagerial<br />
employees with potential exposure<br />
regarding the identification, evaluation and<br />
selection of effective engineering and work<br />
practice controls.<br />
If a needlestick injury occurs, recording the<br />
appropriate information in the sharps injury<br />
log, including:<br />
cc<br />
cc<br />
cc<br />
Type and brand of device involved in<br />
the incident.<br />
Location of the incident.<br />
Description of the incident.<br />
Maintaining a sharps injury log in a way<br />
that protects the privacy of employees.<br />
Ensuring confidentiality of employees’<br />
medical records and exposure incidents.
Chapter 7 Before Providing Care And Victim Assessment 137<br />
Personal Protective Equipment<br />
PPE appropriate for your job duties should be available at your workplace and should<br />
be identified in the exposure control plan. PPE includes all specialized clothing,<br />
equipment and supplies that prevent direct contact with infected materials (Figure<br />
7-6). These include, but are not limited to, breathing barriers, non-latex disposable<br />
(single-use) gloves, gowns, masks, shields and protective eyewear (Table 7-2).<br />
Table 7-2: Recommended Personal Protective Equipment Against Hepatitis B,<br />
Hepatitis C and HIV Transmission in Prehospital Settings<br />
Task or Activity<br />
Disposable<br />
Gloves<br />
Gown Mask Protective<br />
Eyewear<br />
Bleeding control with spurting blood Yes Yes Yes Yes<br />
Bleeding control with minimal bleeding Yes No No No<br />
Emergency childbirth Yes Yes Yes Yes<br />
Oral/nasal suctioning; manually<br />
clearing airway<br />
Yes No No, unless<br />
splashing<br />
is likely<br />
No, unless<br />
splashing<br />
is likely<br />
Handling and cleaning contaminated<br />
equipment and clothing<br />
Yes<br />
No, unless<br />
soiling<br />
is likely<br />
No<br />
No<br />
U.S. Department of Health and Human Services, Public Health Services, 1989. A curriculum guide for public safety and<br />
emergency response workers: Prevention of transmission of acquired immunodeficiency virus and hepatitis B virus. Atlanta:<br />
U.S. Department of Health and Human Services, Centers for Disease Control and Prevention. With modifications from<br />
Nixon, Robert G., 1999. Communicable diseases and infection control for EMS, Prentice Hall.<br />
Guidelines for using PPE to prevent infection include the following:<br />
■■<br />
■■<br />
■■<br />
Avoid contact with blood and other body fluids.<br />
Use CPR breathing barriers when giving<br />
ventilations to a victim.<br />
Wear disposable gloves when providing care,<br />
particularly if there is a risk of coming into<br />
contact with blood or other body fluids.<br />
cc<br />
cc<br />
cc<br />
cc<br />
Do not use gloves that are discolored,<br />
torn or punctured. Do not clean or reuse<br />
disposable gloves.<br />
Cover any cuts, scrapes or sores and<br />
remove jewelry, including rings, before<br />
wearing disposable gloves.<br />
Avoid handling items such as pens, combs<br />
or radios when wearing soiled gloves.<br />
Change gloves before providing care to a<br />
different victim.<br />
Figure 7-6<br />
Personal protectice equipment includes breathing barriers<br />
and gloves.
138<br />
<strong>Lifeguarding</strong> <strong>Manual</strong><br />
■■<br />
■■<br />
In addition to gloves, wear protective coverings, such as a mask, eyewear and a<br />
gown, when there is a likelihood of coming in contact with blood or other body<br />
fluids that may splash.<br />
Remove disposable gloves without contacting the soiled part of the gloves and<br />
dispose of them in a proper container. See the skill sheet located at the end of<br />
the chapter for steps to removing gloves properly.<br />
Tip: To put gloves on with wet hands if near the pool, fill the gloves with water<br />
and place your hand inside the glove.<br />
Hand Hygiene<br />
Hand washing is the most effective measure to prevent the spread of infection.<br />
Wash your hands before providing care, if possible, so that they do not pass<br />
pathogens to the victim. Wash your hands frequently, such as before and after<br />
eating, after using the restroom and every time you have provided care. By washing<br />
hands often, you can wash away disease-causing germs that have been picked up<br />
from other people, animals or contaminated surfaces.<br />
To wash your hands correctly, follow these steps:<br />
Figure 7-7<br />
1. Wet your hands with warm water.<br />
2. Apply liquid soap to your hands.<br />
cc<br />
Rub your hands vigorously for at least 15 seconds, covering all surfaces of<br />
your hands and fingers, giving added attention to fingernails and jewelry.<br />
3. Rinse your hands with warm, running water.<br />
4. Dry your hands thoroughly with a disposable towel.<br />
5. Turn off the faucet using the disposable towel.<br />
Alcohol-based hand sanitizers and lotions allow you to cleanse your hands when<br />
soap and water are not readily available and your hands are not visibly soiled. If your<br />
hands contain visible matter, use soap and water instead. When using an alcoholbased<br />
hand sanitizer:<br />
■■<br />
■■<br />
■■<br />
■■<br />
Apply the product to the palm of one hand.<br />
Rub your hands together.<br />
Rub the product over all surfaces of your hands, including nail areas and<br />
between fingers, until the product dries.<br />
Wash your hands with antibacterial hand soap and water as soon as they<br />
are available.<br />
In addition to washing your hands frequently, it is a good idea to keep your<br />
fingernails shorter than ¼ inch and avoid wearing artificial nails.<br />
Engineering Controls and Work Practice Controls<br />
Engineering controls are objects used in the workplace that isolate or remove<br />
a hazard, thereby reducing the risk of exposure. Examples of engineering<br />
controls include:<br />
Sharps disposal container<br />
■■<br />
Biohazard bags and labels.<br />
■■<br />
PPE.<br />
■■<br />
Sharps disposal containers (Figure 7-7).<br />
■■<br />
Self-sheathing needles.
Chapter 7 Before Providing Care And Victim Assessment 139<br />
■■<br />
Safer medical devices, such as sharps<br />
with engineered injury protections or needleless systems.<br />
Work practice controls are methods of working that reduce the likelihood of an<br />
exposure incident by changing the way a task is carried out. Examples of work<br />
practice controls include:<br />
■■<br />
■■<br />
■■<br />
■■<br />
■■<br />
■■<br />
■■<br />
Disposing of sharp items (e.g., broken glass) in puncture-resistant,<br />
leak-proof, labeled containers.<br />
Avoiding splashing, spraying and splattering droplets of blood or other<br />
potentially infectious materials when performing all procedures.<br />
Removing and disposing of soiled protective clothing as soon<br />
as possible.<br />
Cleaning and disinfecting all equipment and work surfaces soiled by blood<br />
or other body fluids.<br />
Using good hand hygiene.<br />
Not eating, drinking, smoking, applying cosmetics or lip balm, handling contact<br />
lenses, or touching the eyes, mouth or nose when in an area where exposure to<br />
infectious materials is possible.<br />
Isolating contaminated areas so other employees or people do not walk<br />
through and become exposed.<br />
Be aware of any areas, equipment or containers that may be contaminated.<br />
Biohazard warning labels are required on any container holding contaminated<br />
materials, such as used gloves, bandages or<br />
trauma dressings. Signs should be posted<br />
Figure 7-8<br />
at entrances to work areas where infectious<br />
materials may be present.<br />
Equipment Cleaning and<br />
Spill Clean-Up<br />
After providing care, you should clean and<br />
disinfect the equipment and surfaces. In some<br />
cases, you will need to properly dispose of<br />
certain equipment. Handle all soiled equipment,<br />
supplies and other materials with care until they<br />
are properly cleaned and disinfected (Figure<br />
7-8). Place all used disposable items in labeled<br />
containers. Place all soiled clothing in marked<br />
plastic bags for disposal or washing (Figure 7-9).<br />
Commercial blood spill kits are available.<br />
Take the following steps to clean up spills:<br />
■■<br />
Wear disposable gloves and other PPE.<br />
■■<br />
■■<br />
■■<br />
Clean up spills immediately or as soon as<br />
possible after the spill occurs.<br />
Rope off or place cones around the area so<br />
others do not accidentally get exposed by<br />
walking through the spill.<br />
If the spill is mixed with sharp objects, such as<br />
broken glass and needles, do not pick these<br />
Clean and disinfect all equipment after use.<br />
Figure 7-9<br />
Use a biozhazard bag to dispose of soiled materials.
140<br />
<strong>Lifeguarding</strong> <strong>Manual</strong><br />
■■<br />
■■<br />
■■<br />
up with your hands. Use tongs, a broom and dustpan or two pieces<br />
of cardboard.<br />
Flood the area with a fresh disinfectant solution of approximately 1½ cups of<br />
liquid chlorine bleach to 1 gallon of water (1 part bleach per 9 parts water, or<br />
about a 10 percent solution), and allow it to stand for at least 10 minutes.<br />
Use appropriate material to absorb the solution and dispose of it in a labeled<br />
biohazard container.<br />
Scrub soiled boots, leather shoes and other leather goods, such as belts, with<br />
soap, a brush and hot water. If you wear a uniform to work, wash and dry it<br />
according to the manufacturer’s instructions.<br />
IF YOU ARE EXPOSED<br />
If you are exposed to a bloodborne pathogen, take the following steps immediately:<br />
■■<br />
■■<br />
■■<br />
Clean the contaminated area thoroughly with soap and water. Wash needlestick<br />
injuries, cuts and exposed skin.<br />
If you are splashed with blood or other potentially infectious material around your<br />
mouth or nose, flush the area with water.<br />
If your eyes are involved, irrigate them with clean water, saline or sterile irrigants<br />
for 20 minutes.<br />
Following any exposure incident:<br />
■■<br />
■■<br />
■■<br />
Report the exposure incident to the appropriate supervisor immediately and to<br />
the EMS personnel when they take over the care of the victim. This step can be<br />
critical to receive appropriate post-exposure treatment.<br />
Document what happened. Include the time and date of the exposure as well as<br />
the circumstances of the exposure, any actions taken after the exposure and any<br />
other information required by your employer.<br />
Seek immediate follow-up care as identified in your facility exposure<br />
control plan.<br />
GENERAL PROCEDURES FOR INJURY OR<br />
SUDDEN ILLNESS ON LAND<br />
If someone is suddenly injured or becomes ill, activate the facility’s emergency<br />
action plan (EAP). Use appropriate first aid equipment and supplies and follow<br />
these general procedures:<br />
1. Size up the scene.<br />
cc<br />
Move the victim only if necessary for his or her safety.<br />
2. Perform a primary assessment.<br />
cc<br />
Obtain consent if the victim is conscious.<br />
3. Summon EMS, if needed.<br />
4. Perform a secondary assessment, if no life-threatening conditions<br />
are found.<br />
5. Provide care for the conditions found.<br />
6. Report, advise and release.
Chapter 7 Before Providing Care And Victim Assessment 141<br />
Size-Up the Scene<br />
When you size-up the scene, your goal is to determine if the scene is safe for you,<br />
other lifeguards, EMS personnel, the victim(s) and any bystanders. You should:<br />
■■<br />
■■<br />
■■<br />
■■<br />
■■<br />
Use your senses to check for hazards that could present a danger to you<br />
or the victim, such as unusual odors that would indicate a gas leak or fire,<br />
sights that would indicate anything out of the ordinary or sounds, such as<br />
an explosion.<br />
Determine what caused the injury or the nature of the illness.<br />
Determine the number of injured or ill victims.<br />
Determine what additional help may be needed.<br />
Put on the appropriate PPE.<br />
If the scene appears to be unsafe, move to a safe distance, notify additional<br />
members of the safety team and wait for their arrival.<br />
Moving a Victim<br />
When an emergency occurs in the water, you must remove the victim from the water<br />
so that you can provide care. However, for emergencies on land, you should care for<br />
the victim where he or she is found.<br />
Ideally, when a victim is on land, you should move him or her only after you have<br />
conducted an assessment and provided care. Moving a victim needlessly can lead<br />
to further pain and injury. Move an injured victim on land only if:<br />
■■<br />
■■<br />
■■<br />
You are faced with immediate danger.<br />
You need to get to other victims who have more serious injuries or illnesses.<br />
It is necessary to provide appropriate care (e.g., moving a victim to the top or<br />
bottom of a flight of stairs to perform CPR).<br />
If you must leave a scene to ensure your personal safety, you must make all attempts<br />
to move the victim to safety as well.<br />
Your safety is of the utmost importance. Lifting and moving a victim requires<br />
physical strength and a high level of fitness. If you improperly lift a victim, you can<br />
permanently injure yourself.<br />
When moving a victim, consider the victim’s height and weight; your physical<br />
strength; obstacles, such as stairs and narrow passages; distance to be moved;<br />
availability of others to assist; victim’s condition; and the availability of transport aids.<br />
To improve your chances of successfully moving a victim without injuring yourself<br />
or the victim:<br />
■■<br />
■■<br />
■■<br />
■■<br />
Lift with your legs, not your back. Keep your legs shoulder-width apart, head up,<br />
back straight and shoulders square.<br />
Avoid twisting or bending anyone who has a possible head, neck or spinal injury.<br />
Do not move a victim who is too large for you to move comfortably.<br />
Walk forward when possible, taking small steps and looking where you are going.<br />
There are several ways to move a victim. Non-emergency moves include:<br />
■■<br />
Walking assist. Either one or two responders can use the walking assist for a<br />
conscious person who simply needs assistance to walk to safety.
142<br />
<strong>Lifeguarding</strong> <strong>Manual</strong><br />
■■<br />
Two-person seat carry. The two-person seat carry requires a second<br />
responder. This carry can be used for any person who is conscious and not<br />
seriously injured.<br />
Emergency moves include:<br />
■■<br />
■■<br />
■■<br />
Clothes drag. The clothes drag can be used to move a conscious or<br />
unconscious person suspected of having a head, neck or spinal injury. This<br />
move helps to keep the person’s head, neck and back stabilized.<br />
Pack-strap carry. The pack-strap carry can be used with conscious and<br />
unconscious people. Using this carry with an unconscious person requires a<br />
second responder to help position the injured or ill person on your back.<br />
Ankle drag. Use the ankle drag (also known as the foot drag) to move a person<br />
who is too large to carry or move in any other way.<br />
Perform a Primary Assessment<br />
Conduct a primary assessment to determine if the victim has any life-threatening<br />
conditions and, if so, summon EMS personnel. The primary assessment includes<br />
checking the victim for responsiveness, breathing and a pulse, and scanning for<br />
severe bleeding.<br />
Check the Victim for Responsiveness<br />
A person who can speak is conscious. Remember, if a person is conscious, you<br />
must obtain consent before providing care. Document any refusal of care by the<br />
victim on an incident or rescue report. If a witness is available, have him or her listen,<br />
and document in writing, any refusal of care.<br />
If an adult or child appears to be unresponsive, tap the victim on the shoulder and<br />
shout, “Are you okay?” If an infant appears to be unresponsive, tap the infant’s<br />
shoulder and shout or flick the bottom of the infant’s foot to see if he or she responds.<br />
Summon EMS Personnel<br />
If you are unsure of the victim’s condition or notice that the condition is worsening,<br />
summon EMS personnel. As a general rule, summon EMS personnel for any of the<br />
following conditions:<br />
■■<br />
■■<br />
■■<br />
■■<br />
■■<br />
■■<br />
■■<br />
■■<br />
■■<br />
■■<br />
Unconsciousness or altered level of consciousness (LOC), such as drowsiness<br />
or confusion<br />
Breathing problems (difficulty breathing or no breathing)<br />
Any victim recovered from underwater who may have inhaled water<br />
Chest pain, discomfort or pressure lasting more than a few minutes or that<br />
goes away and comes back or that radiates to the shoulder, arm, neck, jaw,<br />
stomach or back<br />
Persistent abdominal pain or pressure<br />
No pulse<br />
Severe external bleeding (bleeding that spurts or gushes steadily from a wound)<br />
Vomiting blood or passing blood<br />
Severe (critical) burns<br />
Suspected poisoning
Chapter 7 Before Providing Care And Victim Assessment 143<br />
■■<br />
■■<br />
■■<br />
■■<br />
■■<br />
■■<br />
Seizures in the water<br />
Seizures on land, unless the person is known to have periodic seizures. If not,<br />
summon EMS personnel for a seizure on land if:<br />
cc<br />
The seizure lasts more than 5 minutes.<br />
cc<br />
The person has repeated seizures with no sign of slowing down.<br />
cc<br />
The person appears to be injured.<br />
cc<br />
The cause of the seizure is unknown.<br />
cc<br />
The person is pregnant.<br />
cc<br />
The person is known to have diabetes.<br />
cc<br />
The person fails to regain consciousness after the seizure.<br />
cc<br />
The person is elderly and may have had a stroke.<br />
cc<br />
This is the person’s first seizure.<br />
Suspected or obvious injuries to the head, neck or spine<br />
Stroke<br />
Painful, swollen, deformed areas (suspected broken bone) or an open fracture<br />
Victim’s physical condition is unclear or is worsening<br />
Open the Airway and Check for Breathing and Pulse<br />
You must open the victim’s airway and quickly check for breathing and a pulse for<br />
no more than 10 seconds (Figure 7-10). Perform<br />
these tasks concurrently. If a victim is able to speak,<br />
Figure 7-10<br />
the airway is functional and he or she is breathing.<br />
However, even if a victim can speak, you must<br />
continue to assess breathing because breathing<br />
status, rate and quality can change suddenly.<br />
Opening the Airway<br />
When a victim is unconscious, the tongue relaxes<br />
and can block the flow of air through the airway,<br />
especially if the victim is lying on his or her back.<br />
To check for breathing and give ventilations, you<br />
must manually tilt the head or thrust the jaw to<br />
move the tongue away from the back of the throat.<br />
The method used to open the airway depends on<br />
the number of rescuers responding, the position<br />
of the rescuer to the victim, and whether you<br />
suspect the victim has an injury to the head, neck or spine. The three methods for<br />
opening the airway are the:<br />
■■<br />
■■<br />
■■<br />
When conducting a primary assessment, first open the<br />
victim’s airway and check for breathing and a pulse for no<br />
more than 10 seconds.<br />
Head-tilt/chin-lift: used when the rescuer is positioned at the victim’s side<br />
Jaw-thrust maneuver (with head extension): used when the rescuer is<br />
positioned above the victim’s head<br />
Jaw-thrust maneuver (without head extension): used when the victim is<br />
suspected of having an injury to the head, neck or spine<br />
For a child, tilt the head slightly past the neutral position, but not as far as you would<br />
for an adult. For an infant, tilt the head to the neutral position (Table 7-3).
144<br />
<strong>Lifeguarding</strong> <strong>Manual</strong><br />
Table 7-3: Head Positions for Giving Ventilations to an Adult, a Child and an Infant<br />
A B C<br />
Correct head position using the head-tilt/chin-lift technique for (A) an adult, (B) a child and (C) an infant<br />
Checking for Breathing<br />
To check for breathing, position your ear over the mouth and nose so that you can<br />
hear and feel air as it escapes while you look for the chest to rise and fall. Normal,<br />
effective breathing is regular, quiet and effortless. Isolated or infrequent gasping<br />
in the absence of other breathing in an unconscious person may be agonal gasps,<br />
which can occur even after the heart has stopped beating. Be aware that this is not<br />
breathing. In this situation, care for the victim as though he or she is not breathing<br />
at all. If there is foam (white or pinkish in color) in the airways and exuding from the<br />
mouth and nostrils, wipe it away.<br />
Checking for a Pulse<br />
With every heartbeat, a wave of blood moves through the blood vessels. This<br />
creates a beat called the pulse. You can feel it with your fingertips in the arteries<br />
near the skin. Sometimes the pulse may be difficult to find, since it may be slow<br />
or weak. If you do not find a pulse within 10 seconds, do not waste any more time<br />
attempting to find one. Assume that there is no pulse and begin care immediately.<br />
To check for a pulse:<br />
■■<br />
■■<br />
For an adult or child, feel for a carotid pulse by placing two fingers in the<br />
middle of the victim’s throat and then sliding them into the groove at the side<br />
of the victim’s neck closest to you. Press in lightly; pressing too hard can<br />
compress the artery.<br />
For an infant, feel for the brachial pulse on the inside of the upper arm between<br />
the infant’s elbow and shoulder. Press in lightly; pressing too hard can compress<br />
the artery.<br />
Give 2 Ventilations if Appropriate<br />
For victims of cardiac arrest (witnessed sudden collapse), it is necessary to<br />
immediately begin CPR chest compressions. However, in certain situations, such as<br />
drowning or another respiratory event, giving ventilations before beginning CPR is<br />
important because children and infants, as well as adult victims of hypoxia, are more<br />
likely to experience respiratory emergencies.<br />
For adults:<br />
■■<br />
If you find an adult who is unconscious and not breathing as a result of<br />
drowning, hypoxia or another respiratory problem, you should give the victim
Chapter 7 Before Providing Care And Victim Assessment 145<br />
■■<br />
2 ventilations before starting compressions (see Chapter 8, Breathing<br />
Emergencies, for further information on breathing emergencies).<br />
However, if an adult is not breathing and does not have a pulse, you should<br />
assume that the problem is a cardiac emergency. In this case, skip the 2<br />
ventilations and begin CPR chest compressions (see Chapter 9, Cardiac<br />
Emergencies, for more on cardiac emergencies).<br />
For a child or infant:<br />
■■<br />
If you find that a child or an infant is unconscious and not breathing, you should<br />
give the victim 2 ventilations. The only exception to this rule is if you witness a<br />
child or an infant suddenly collapse. In this case, it is assumed that it is a cardiac<br />
emergency, in which case you should skip the 2 ventilations and begin CPR<br />
chest compressions.<br />
Using a Resuscitation Mask to Give Ventilations<br />
You should always use a resuscitation mask when<br />
giving ventilations (Figure 7-11). To ensure that<br />
you are giving adequate ventilations, the mask<br />
must be properly placed and sealed over the<br />
victim’s mouth and nose. Each ventilation should<br />
last about 1 second and make the victim’s chest<br />
clearly rise and fall.<br />
Figure 7-11<br />
To use a resuscitation mask to give ventilations:<br />
■■<br />
■■<br />
■■<br />
■■<br />
Position yourself at the victim’s head, either on<br />
the victim’s side or above the head.<br />
Position the mask over the victim’s mouth and<br />
nose. Use both hands to hold the mask in<br />
place to create an airtight seal.<br />
If you are on the victim’s side, tilt the victim’s head back while lifting the<br />
chin. If you are behind the victim’s head, lift the jaw. For a victim with a<br />
suspected head, neck or spinal injury, use the jaw-thrust (without head<br />
extension) maneuver.<br />
Blow into the one-way valve, ensuring that you can see the chest clearly rise<br />
and fall. Each ventilation should last about 1 second, with a brief pause between<br />
breaths to let the exhaled breath escape.<br />
Use a resuscitation mask when giving ventilations.<br />
Scan for Severe Bleeding<br />
As you move into place to begin providing care based on the conditions that<br />
you find, you should do a quick visual scan of the victim for severe bleeding.<br />
Be sure to scan the victim’s entire body from head to toe. Breathing and cardiac<br />
emergencies are the most critical conditions and should be handled first. If the<br />
victim is bleeding severely, additional lifeguards should assist by controlling<br />
the bleeding.<br />
Recovery Positions<br />
In most cases, you should leave the victim in a face-up position and maintain an<br />
open airway if he or she is unconscious but breathing. This is particularly important<br />
if you suspect the victim has a spinal injury. However, there are a few situations
146<br />
<strong>Lifeguarding</strong> <strong>Manual</strong><br />
in which you should move a victim into a modified high arm in endangered spine<br />
(H.A.IN.E.S) recovery position to keep the airway open and clear even if a spinal<br />
injury is suspected. Examples of these situations include if you are alone and have<br />
to leave the victim (e.g., to call for help), or you cannot maintain an open and clear<br />
airway because of fluids or vomit. Placing a victim in this position will help keep the<br />
airway open and clear.<br />
Perform a Secondary Assessment<br />
If you are certain that the victim does not have any life-threatening conditions, you<br />
should perform a secondary assessment to identify any additional problems. The<br />
secondary assessment provides additional information about injuries or conditions<br />
that may require care and could become life-threatening if not addressed. See<br />
Chapter 10, First Aid, for more information on injuries, illnesses and performing a<br />
secondary assessment.<br />
Provide Care for the Conditions Found<br />
Provide care for the conditions found during the primary and/or secondary<br />
assessments. Always treat life-threatening situations first. Other lifeguards and/or<br />
safety team members should assist as outlined in the EAP, by getting equipment<br />
and summoning EMS personnel or in the actual delivery of care, such as giving twoperson<br />
CPR or using an AED. Care should be continued until EMS personnel take<br />
over, if needed.<br />
Report, Advise and Release<br />
Once appropriate care is given, be sure to complete incident report forms, advise<br />
the victim on next steps and release the victim to the appropriate parties.<br />
ONE AGE<br />
DOES NOT FIT ALL<br />
For the purpose of the skills in this manual:<br />
■■<br />
■■<br />
■■<br />
Anyone approximately 12 years of age or<br />
older is an adult.<br />
Anyone age 1 year to about 12 years<br />
is a child.<br />
An infant is anyone younger than 1 year.<br />
However, for the purpose of operating an AED:<br />
■■<br />
Anyone 1 to 8 years of age or weighing<br />
less than 55 pounds is a child.<br />
If precise age or weight is not known, use your<br />
best judgment and do not delay care while<br />
determining age.
Chapter 7 Before Providing Care And Victim Assessment 147<br />
CALL FIRST<br />
OR CARE FIRST?<br />
If you are alone when responding to someone<br />
who is ill, you must decide whether to Call First<br />
or Care First.<br />
If you are ALONE:<br />
■■<br />
Call First (call 9-1-1 or the local emergency<br />
number before providing care) for:<br />
cc<br />
cc<br />
cc<br />
Any adult or child about 12 years of<br />
age or older who is unconscious.<br />
A child or an infant who you witnessed<br />
suddenly collapse.<br />
An unconscious child or infant known<br />
to have heart problems.<br />
■■<br />
Care First (provide 2 minutes of care,<br />
then call 9-1-1 or the local emergency<br />
number) for:<br />
cc<br />
cc<br />
An unconscious child (younger than<br />
about age 12) who you did not<br />
see collapse.<br />
Any victim of a nonfatal drowning.<br />
Call First situations are likely to be cardiac<br />
emergencies in which time is a critical factor.<br />
In Care First situations, the conditions often are<br />
related to breathing emergencies.<br />
WRAP-UP<br />
As a professional lifeguard, you are an important link in the EMS system and have<br />
a duty to act and to meet professional standards. One of these standards is taking<br />
appropriate precautions to protect yourself and others against the transmission of<br />
infectious diseases. You also should be familiar with and always follow the general<br />
procedures for responding to injury or sudden illness on land. These include the<br />
following: activating the EAP, sizing up the scene, performing an initial assessment,<br />
summoning EMS personnel by calling 9-1-1 or the local emergency number, and<br />
after caring for any life-threatening injuries, performing a secondary assessment.
148<br />
<strong>Lifeguarding</strong> <strong>Manual</strong><br />
REMOVIng DIsposaBLE GLoves<br />
Note: To remove gloves without spreading germs, never touch your bare skin with the outside of<br />
either glove.<br />
1<br />
Pinch the glove.<br />
■■<br />
■■<br />
Pinch the palm side of one glove near<br />
your wrist.<br />
Carefully pull the glove off so that it is<br />
inside out.<br />
2<br />
Slip two fingers under the glove.<br />
■■<br />
■■<br />
Hold the glove in the palm of your<br />
gloved hand.<br />
Slip two fingers under the glove at the<br />
wrist of the remaining gloved hand.<br />
3<br />
Pull the glove off.<br />
■■<br />
■■<br />
Pull the glove until it comes off,<br />
inside out.<br />
The first glove should end up inside the<br />
glove you just removed.<br />
4<br />
Dispose of gloves and wash hands.<br />
■■<br />
■■<br />
Dispose of gloves and other PPE in a<br />
proper biohazard container.<br />
Wash your hands thoroughly with<br />
soap and running water, if available.<br />
Otherwise, rub hands thoroughly with<br />
an alcohol-based sanitizer if hands are<br />
not visibly soiled.
Skill Sheet 149<br />
USIng A RESUSCITATIon MASK<br />
Note: Activate the EAP, size-up the scene for safety and then perform a primary assessment.<br />
Always select the properly sized mask for the victim.<br />
Head-Tilt/Chin-Lift<br />
1<br />
2<br />
3<br />
4<br />
Kneel to the side of the victim’s head.<br />
Position the mask.<br />
■■<br />
■■<br />
Place the rim of the mask between the victim’s lower lip and chin.<br />
Lower the mask until it covers the victim’s mouth and nose.<br />
Seal the mask.<br />
■■<br />
■■<br />
■■<br />
Place the thumb and fingers of one hand around the top of the mask.<br />
Place the thumb of your other hand on the bottom of the mask and slide your first two<br />
fingers onto the bony part of the victim’s chin.<br />
Press downward on the mask with your top hand and the thumb of your lower hand to seal<br />
the top and bottom of the mask.<br />
Tilt the victim’s head back and lift the chin to<br />
open the airway.<br />
5<br />
Blow into the mask.<br />
■■<br />
Each ventilation should last about 1<br />
second and make the chest clearly rise.<br />
The chest should fall before the next<br />
ventilation is given.
150<br />
<strong>Lifeguarding</strong> <strong>Manual</strong><br />
USIng A RESUSCITATIon MASK continued<br />
Jaw-Thrust (With Head Extension) Maneuver<br />
1<br />
2<br />
3<br />
Position the mask.<br />
■■<br />
■■<br />
■■<br />
Kneel above the victim’s head.<br />
Place the rim of the mask between the lower lip and chin.<br />
Lower the resuscitation mask until it covers the victim’s mouth and nose.<br />
To seal the mask and open the airway:<br />
■■<br />
■■<br />
■■<br />
Using the elbows for support, place<br />
your thumbs and index fingers along<br />
each side of the resuscitation mask to<br />
create a “C.”<br />
Slide your 3rd, 4th and 5th fingers into<br />
position to create an “E” on both sides<br />
of the victim’s jawbone.<br />
Hold the mask in place while you tilt the<br />
head back and lift the jaw into the mask.<br />
Blow into the mask.<br />
■■<br />
Each ventilation should last about 1 second and make the chest clearly rise. The chest<br />
should fall before the next ventilation is given.<br />
Jaw-Thrust (Without Head Extension) Maneuver<br />
Position the mask.<br />
1<br />
■■<br />
■■<br />
■■<br />
Kneel above the victim’s head.<br />
Place the rim of the mask between the lower lip and chin.<br />
Lower the resuscitation mask until it covers the victim’s mouth and nose.<br />
To seal the mask and open the airway:<br />
2<br />
■■<br />
■■<br />
■■<br />
Place your thumbs and index fingers<br />
along each side of the resuscitation<br />
mask to create a “C.”<br />
Slide your 3rd, 4th and 5th fingers into<br />
position to create an “E” on both sides<br />
of the victim’s jawbone.<br />
Without moving or tilting the head back,<br />
lift the lower jaw up with your fingers<br />
along the jawbone to seal the mask to<br />
the face.
Skill Sheet 151<br />
3<br />
Blow into the mask.<br />
■■<br />
Each ventilation should last about 1 second and make the chest clearly rise. The chest<br />
should fall before the next ventilation is given.<br />
PRIMARY ASSESSMENT—ADULT<br />
Note: Always follow standard precautions when providing care. Activate the EAP and get an<br />
AED on the scene as soon as possible.<br />
Size-up the scene for safety and then:<br />
1<br />
2<br />
3<br />
Check for responsiveness .<br />
■■<br />
Tap the shoulder and ask, “Are you okay?”<br />
If no response, summon EMS personnel.<br />
■■<br />
If the victim is face-down, roll the victim onto his or her back while supporting the head,<br />
neck and back.<br />
Open the airway and quickly check for breathing and a pulse for no more than 10 seconds.<br />
■■<br />
■■<br />
■■<br />
To open the airway:<br />
cc<br />
cc<br />
cc<br />
From the side, use the head-tilt/<br />
chin-lift technique.<br />
From above the victim’s head, use<br />
the jaw-thrust (with head extension)<br />
maneuver.<br />
If a head, neck or spinal injury is<br />
suspected, use the jaw-thrust<br />
(without head extension) maneuver.<br />
Look, listen and feel for breathing.<br />
Feel for a carotid pulse by placing two fingers in the middle of the victim’s throat and then<br />
sliding them into the groove at the side of the neck closest to you. Press lightly.<br />
Note: For a breathing emergency (e.g., drowning, hypoxia), give 2 ventilations before scanning<br />
for severe bleeding. If at any time the chest does not rise, the airway might be blocked. Provide<br />
care for an unconscious choking victim.<br />
Continued on Next Page
152<br />
<strong>Lifeguarding</strong> <strong>Manual</strong><br />
PRIMARY ASSESSMENT—ADULT continued<br />
4<br />
Quickly scan for severe bleeding.<br />
5<br />
Provide care as needed.<br />
■■<br />
■■<br />
■■<br />
■■<br />
If no breathing or pulse, perform CPR.<br />
If no breathing but there is a pulse, give 1 ventilation about every 5 seconds.<br />
If there is severe bleeding and the victim is breathing, provide first aid care for the bleeding.<br />
If unconscious but breathing, leave the victim in a face-up position. Place in a modified<br />
H.A.IN.E.S. recovery position only if you:<br />
cc<br />
cc<br />
Are alone and must leave the victim (e.g., to call for help).<br />
Cannot maintain an open and clear airway because of fluids or vomit.<br />
PRIMARY ASSESSMENT—CHILD AND INFANT<br />
Note: Always follow standard precautions when providing care. Activate the EAP and get an<br />
AED on the scene as soon as possible.<br />
Size-up the scene for safety and then:<br />
1<br />
2<br />
Check for responsiveness.<br />
■■<br />
■■<br />
For a child, tap the shoulder and shout, “Are you okay?”<br />
For an infant, tap the shoulder or flick the underside of the foot and shout.<br />
If no response, summon EMS personnel.<br />
■■<br />
If the victim is face-down, roll the victim onto his or her back while supporting the head,<br />
neck and back.
Skill Sheet 153<br />
3<br />
Open the airway and check for breathing<br />
and a pulse for no more than 10 seconds.<br />
■■<br />
■■<br />
■■<br />
To open the airway:<br />
cc<br />
cc<br />
cc<br />
From the side, use the head-tilt/<br />
chin-lift technique.<br />
From above the victim’s head, use<br />
the jaw-thrust (with head extension)<br />
maneuver.<br />
If you suspect a head, neck or<br />
spinal injury, use the jaw-thrust<br />
(without head extension) maneuver.<br />
Look, listen and feel for breathing.<br />
Check for a pulse.<br />
cc<br />
cc<br />
For a child, feel for a carotid pulse by placing two fingers in the middle of the victim’s<br />
throat and then sliding them into the groove at the side of the neck closest to you.<br />
Press in lightly; pressing too hard can compress the artery.<br />
For an infant, feel for the brachial pulse on the inside of the upper arm between the<br />
infant’s elbow and shoulder. Press lightly.<br />
Note: If you witnessed a child or an infant suddenly collapse, skip step 4.<br />
4<br />
If no breathing, give 2 ventilations. Each<br />
ventilation should last about 1 second and<br />
make the chest clearly rise.<br />
■■<br />
The chest should fall before the next<br />
ventilation is given.<br />
Note: If at any time the chest does not rise during Step 4, the airway might be blocked. Provide<br />
care for an unconscious choking victim.<br />
5<br />
Quickly scan for severe bleeding.<br />
Continued on Next Page
154<br />
<strong>Lifeguarding</strong> <strong>Manual</strong><br />
PRIMARY ASSESSMENT—CHILD AND INFANT continued<br />
6<br />
Provide care as needed.<br />
■■<br />
■■<br />
■■<br />
■■<br />
If no breathing or pulse, perform CPR.<br />
If no breathing but there is a pulse, give 1 ventilation about every 3 seconds.<br />
If there is severe bleeding and the victim is breathing, provide first aid care for the bleeding.<br />
If unconscious but breathing, leave the victim in a face-up position. Place in a modified<br />
H.A.IN.E.S recovery position only if you:<br />
cc<br />
cc<br />
Are alone and have to leave the victim (e.g., to call for help).<br />
Cannot maintain an open and clear airway because of fluids or vomit.<br />
RECoverY POSITIons<br />
Note: If the victim is unconscious but breathing, leave him or her in a face-up position. Place in<br />
a modified H.A.IN.E.S. recovery position only if you:<br />
■■<br />
■■<br />
Are alone and must leave the victim (e.g., to call for help).<br />
Cannot maintain an open and clear airway because of fluids or vomit.<br />
To place a victim in the modified H.A.IN.E.S. recovery position:<br />
1<br />
2<br />
Kneel at the victim’s side.<br />
Roll the victim away from you.<br />
■■<br />
■■<br />
■■<br />
■■<br />
■■<br />
■■<br />
■■<br />
Reach across the victim’s body, lift up the arm farthest from you and place it next to the<br />
head with the palm facing up.<br />
Take the person’s arm closest to you and place it next to his or her side.<br />
Grasp the leg farthest from you and bend it up.<br />
Using your hand that is closest to the victim’s head, cup the base of the victim’s skull in the<br />
palm of your hand and carefully slide your forearm under the victim’s shoulder closest to<br />
you. Do not lift or push the head or neck.<br />
Place your other hand under the arm and hip closest to you.<br />
Using a smooth motion, roll the victim away from you by lifting with your hand and forearm.<br />
Keep the victim’s head in contact with his or her extended arm and be sure to support the<br />
head and neck with your hand.<br />
Stop all movement when the victim is on his or her side.
Skill Sheet 155<br />
3<br />
4<br />
Place the top leg on the other leg so that both knees are in a bent position.<br />
Make sure the arm on top is in line with the<br />
upper body.<br />
■■<br />
If you must leave the person to get help,<br />
place the hand of the upper arm palm<br />
side down with the fingers under the<br />
armpit of the extended lower arm.<br />
Another option for a recovery position for an infant is to:<br />
1<br />
2<br />
Carefully position the infant face-down along your forearm.<br />
Support the infant’s head and neck with<br />
your other hand while keeping the infant’s<br />
mouth and nose clear.
156<br />
<strong>Lifeguarding</strong> <strong>Manual</strong><br />
MOVIng A VICTIM—Non-EMERGENCy Moves<br />
Note: Do not use these non-emergency moves for a victim suspected of having a head, neck or<br />
spinal injury.<br />
Walking Assist<br />
Note: Either one or two lifeguards can use this method with a conscious victim.<br />
To help a victim who needs assistance walking to safety:<br />
1<br />
2<br />
Stand at one side of the victim, place the victim’s arm across your shoulders and hold it in place<br />
with one hand.<br />
Support the victim with your other hand around the<br />
victim’s waist.<br />
3<br />
Walk the victim to safety.<br />
Two-Person Seat Carry<br />
The two-person seat carry requires a second rescuer. To perform the carry:<br />
1<br />
2<br />
Put one arm under the victim’s thighs and the other across the victim’s back.<br />
Interlock your arms with those of a second<br />
rescuer under the victim’s legs and across<br />
the victim’s back.
Skill Sheet 157<br />
3<br />
4<br />
Have the victim place his or her arms over both rescuers’ shoulders.<br />
Lift the victim in the “seat” formed by the rescuers’ arms and carry the victim to safety.<br />
MOVIng A VICTIM—Emergency MOVES<br />
Pack-Strap Carry<br />
Note: This move is not safe for a victim suspected of having a head, neck or spinal injury.<br />
To move either a conscious or an unconscious victim with no suspected head, neck or spinal injury:<br />
1<br />
2<br />
3<br />
4<br />
5<br />
Have the victim stand or have a second rescuer support the victim in a standing position.<br />
Position yourself with your back to the victim. Keep your back straight and knees bent so that<br />
your shoulders fit into the victim’s armpits.<br />
<strong>Cross</strong> the victim’s arms in front of you and grasp the victim’s wrists.<br />
Lean forward slightly and pull the victim up and onto your back.<br />
Stand up and walk to safety.
158<br />
<strong>Lifeguarding</strong> <strong>Manual</strong><br />
MOVIng A VICTIM—EMERGENCy Moves continued<br />
Clothes Drag<br />
Note: The clothes drag is an appropriate emergency move for a victim suspected of having<br />
a head, neck or spinal injury.<br />
1<br />
2<br />
Position the victim on his or her back.<br />
Kneel behind the victim’s head and gather<br />
the victim’s clothing behind his or her neck.<br />
3<br />
Pull the victim to safety, cradling the victim’s head with his or her clothes and your hands.<br />
Ankle Drag<br />
Note: This move is not safe for a victim suspected of having a head, neck or spinal injury.<br />
To move a victim too large to carry or otherwise move:<br />
1<br />
Stand at the victim’s feet, firmly grasp<br />
the victim’s ankles and carefully move<br />
backward. Keep your back as straight as<br />
possible; do not twist.<br />
2<br />
Pull the victim in a straight line being careful not to bump the victim’s head.
Breathing Emergencies<br />
I<br />
n a breathing emergency,<br />
a person’s breathing can<br />
become so impaired that life<br />
is threatened. Air cannot travel freely<br />
and easily into the lungs, which greatly<br />
reduces the body’s oxygen supply or<br />
may cut off the oxygen supply entirely.<br />
This can stop the heart and prevent<br />
blood from reaching the brain and<br />
other vital organs. Due to inadequate<br />
oxygen to body tissues, the victim<br />
may suffer cardiac arrest. This can<br />
occur in as little as 3 minutes after<br />
submerging. Permanent brain<br />
damage or death can occur<br />
within 4 to 6 minutes.<br />
Chapter8<br />
As a lifeguard, you may be<br />
called upon at any time to<br />
respond to a breathing<br />
emergency; therefore, it is<br />
important for you to know<br />
how to recognize and care<br />
for these emergencies. n
160<br />
<strong>Lifeguarding</strong> <strong>Manual</strong><br />
RECOGNIZING AND CARING FOR<br />
BREATHING EMERGENCIES<br />
If a victim suffers a breathing emergency and is deprived of adequate oxygen,<br />
hypoxia will result. Hypoxia is a condition in which insufficient oxygen reaches the<br />
cells. Hypoxia may result from an obstructed airway, shock, inadequate breathing,<br />
drowning, strangulation, choking, suffocation, cardiac arrest, head trauma, carbon<br />
monoxide poisoning or anaphylactic shock.<br />
Signs and symptoms of hypoxia include increased breathing and heart rates,<br />
cyanosis (a condition that develops when tissues do not get enough oxygen and<br />
turn blue, particularly in the lips and nail beds), changes in level of consciousness<br />
(LOC), restlessness and chest pain.<br />
Figure 8-1<br />
There are two types of breathing (also referred to as respiratory) emergencies:<br />
respiratory distress, a condition in which<br />
breathing becomes difficult, and respiratory<br />
arrest, a condition in which breathing stops.<br />
Respiratory distress can lead to respiratory<br />
failure, which occurs when the respiratory system<br />
is beginning to shut down, which in turn can lead<br />
to respiratory arrest.<br />
Watch and listen for breathing problems in a conscious victim.<br />
Ask the victim how he or she feels.<br />
Breathing problems can be identified by watching<br />
and listening to a conscious victim’s breathing and<br />
by asking the victim how he or she feels (Figure<br />
8-1). Because oxygen is vital to life, always ensure<br />
that the victim has an open airway and is breathing.<br />
Without an open airway, a victim cannot breathe and<br />
will die. A victim who can speak or cry is conscious,<br />
has an open airway, is breathing and has a pulse.<br />
Respiratory Distress<br />
A victim who is having difficulty breathing is experiencing respiratory distress.<br />
Causes of Respiratory Distress<br />
Respiratory distress can be caused by a partially obstructed airway; illness; chronic<br />
conditions, such as asthma and emphysema; electrocution, including lightning<br />
strikes; heart attack; injury to the head, chest, lungs or abdomen; allergic reactions;<br />
drugs; poisoning; emotional distress; or anaphylactic shock.<br />
Signs and Symptoms of Respiratory Distress<br />
Signs and symptoms of respiratory distress include:<br />
■■<br />
■■<br />
■■<br />
■■<br />
■■<br />
Slow or rapid breathing.<br />
Unusually deep or shallow breathing.<br />
Shortness of breath or noisy breathing.<br />
Dizziness, drowsiness or light-headedness.<br />
Changes in LOC.
Chapter 8 Breathing Emergencies 161<br />
ASTHMA<br />
Asthma is an ongoing illness in which the<br />
airways swell. An asthma attack happens when<br />
an asthma trigger, such as dust or exercise,<br />
affects the airways, causing them to suddenly<br />
swell and narrow. This makes breathing<br />
difficult, which can be frightening.<br />
Recognizing<br />
an Asthma Attack<br />
You can often tell when a person is having<br />
an asthma attack by the hoarse whistling<br />
sound made when inhaling and/or exhaling.<br />
This sound, known as wheezing, occurs<br />
because airways have narrowed or<br />
become obstructed.<br />
Signs and symptoms of an asthma attack<br />
include coughing or wheezing; coughing<br />
that occurs after exercise, crying or laughing;<br />
difficulty breathing; shortness of breath;<br />
rapid, shallow breathing; sweating; tightness<br />
in the chest; inability to talk without stopping<br />
frequently for a breath; bent posture with<br />
shoulders elevated and lips pursed to<br />
make breathing easier; and feelings of<br />
fear or confusion.<br />
2. If the person has prescribed asthma<br />
medication, help him or her take it.<br />
3. Shake the inhaler and then remove the<br />
cover from the mouthpiece. Position<br />
the spacer if you are using one.<br />
4. Have the person breathe out fully through<br />
the mouth and then place the lips tightly<br />
around the inhaler mouthpiece.<br />
5. Have the person inhale deeply and<br />
slowly as you or the person depresses<br />
the inhaler canister to release the<br />
medication, which he or she then inhales<br />
into the lungs.<br />
6. Have the person hold his or her breath<br />
for a count of 10. If using a spacer, have<br />
the person take 5 to 6 deep breaths<br />
with the spacer still in the mouth, without<br />
holding his or her breath.<br />
7. Once the inhalation is complete, have the<br />
person rinse his or her mouth with water<br />
to reduce side effects.<br />
8. Monitor the person’s condition.<br />
Caring for an Asthma Attack<br />
You may need to assist a person with asthma<br />
in using an inhaler. Before doing so, obtain<br />
consent and then follow these general<br />
guidelines, if local protocols allow:<br />
1. Help the person sit up and rest in a<br />
position comfortable for breathing.<br />
Assist a victim with using an asthma inhaler if local<br />
protocols allow.
162<br />
<strong>Lifeguarding</strong> <strong>Manual</strong><br />
■■<br />
■■<br />
■■<br />
■■<br />
■■<br />
■■<br />
■■<br />
■■<br />
■■<br />
Increased heart rate.<br />
Chest pain or discomfort.<br />
Skin that is flushed, pale, ashen or bluish.<br />
Unusually moist or cool skin.<br />
Gasping for breath.<br />
Wheezing, gurgling or high-pitched noises.<br />
Inability to speak in full sentences.<br />
Tingling in the hands, feet or lips.<br />
Feelings of apprehension or fear.<br />
Caring for Respiratory Distress<br />
You do not need to know the cause of respiratory distress to provide care. When<br />
you find a victim experiencing difficulty breathing, activate the emergency action<br />
plan (EAP) and:<br />
■■<br />
■■<br />
■■<br />
■■<br />
■■<br />
■■<br />
■■<br />
Maintain an open airway.<br />
Summon emergency medical services (EMS) personnel.<br />
Help the victim to rest in a comfortable position that makes breathing easier.<br />
Reassure and comfort the victim.<br />
Assist the victim with any of his or her prescribed medication.<br />
Keep the victim from getting chilled or overheated.<br />
Administer emergency oxygen, if available and you are trained to do so.<br />
Someone with asthma or emphysema who is in respiratory distress may try to do<br />
pursed-lip breathing. To assist with this, have the person assume a position of<br />
comfort. After he or she inhales, have the person slowly exhale through the lips,<br />
pursed as though blowing out candles. This creates back pressure, which can help<br />
to open airways slightly until EMS personnel arrive and take over.<br />
Respiratory Arrest<br />
A victim who has stopped breathing is in respiratory arrest.<br />
Causes of Respiratory Arrest<br />
Respiratory arrest may develop from respiratory distress, respiratory failure or<br />
other causes including drowning; obstructed airway (choking); injury to the head,<br />
chest, lungs or abdomen; illness, such as pneumonia; respiratory conditions, such<br />
as emphysema or asthma; heart attack; coronary heart disease (such as angina);<br />
allergic reactions (food or insect stings); electrocution, including lightning strikes;<br />
shock; poisoning; drugs; and emotional distress.<br />
Caring for Respiratory Arrest<br />
Although respiratory arrest may have many causes, you do not need to know the<br />
exact cause to provide care. Begin by following the general procedures for injury or<br />
sudden illness on land.<br />
To check to see if someone is breathing, look to see if the victim’s chest clearly<br />
rises and falls (Figure 8-2). Listen for escaping air and feel for air against the side
Chapter 8 Breathing Emergencies 163<br />
of your face when checking for breathing and a<br />
pulse during the primary assessment. The normal<br />
breathing rate for an adult is between 12 and<br />
20 breaths per minute; however, some people<br />
breathe slightly slower or faster. You usually can<br />
observe the chest rising and falling.<br />
Normal, effective breathing is regular, quiet and<br />
effortless. In an unconscious person, you may<br />
detect isolated or infrequent gasping in the absence<br />
of other breathing. These are called agonal gasps,<br />
which can occur even after the heart has stopped<br />
beating. Agonal gasps are not breathing—care for<br />
the victim as though he or she is not breathing at all.<br />
Figure 8-2<br />
Check breathing by watching if the victim’s chest clearly rises<br />
and falls.<br />
Drowning Victims<br />
Anyone who experiences respiratory impairment from submersion in water is a<br />
drowning victim. Drowning may or may not result in death. Victims who have been<br />
pulled from the water and are not breathing are in immediate need of ventilations.<br />
In general, if the victim is rescued quickly enough, giving ventilations may resuscitate<br />
the victim. Without oxygen, a victim’s heart will stop and death will result. Your<br />
objective is to get the victim’s mouth and nose out of the water, open the airway and<br />
give ventilations as quickly as possible.<br />
Always ensure that victims who have been involved in a drowning incident are taken<br />
to the hospital, even if you think the danger has passed. Complications can develop<br />
as long as 72 hours after the incident and may be fatal.<br />
GIVING VENTILATIONS<br />
Giving ventilations is a technique for breathing air into a victim to provide the<br />
oxygen necessary to survive. The air you exhale contains enough oxygen to keep<br />
a person alive.<br />
Each ventilation should last about 1 second and make the chest clearly rise.<br />
The chest should fall before you give the next ventilation. Give 1 ventilation every<br />
5 seconds for an adult. Give 1 ventilation about every 3 seconds for a child or<br />
an infant.<br />
When giving ventilations to a victim:<br />
■■<br />
Maintain an open airway by keeping the head tilted back in the proper position.<br />
■■<br />
Seal the mask over the victim’s mouth and nose.<br />
■■<br />
Give ventilations for about 2 minutes, then reassess for breathing and a pulse.<br />
■■<br />
If the victim has a pulse but is not breathing, continue giving ventilations.<br />
Continue giving ventilations until:<br />
■■<br />
■■<br />
■■<br />
■■<br />
The victim begins to breathe on his or her own.<br />
Another trained rescuer takes over.<br />
More advanced medical personnel, such as EMS personnel, take over.<br />
You are too exhausted to continue.
164<br />
<strong>Lifeguarding</strong> <strong>Manual</strong><br />
■■<br />
■■<br />
The victim has no pulse, in which case you should begin CPR or use an AED<br />
if one is available and ready to use.<br />
The scene becomes unsafe.<br />
CPR Breathing Barriers<br />
Figure 8-3<br />
CPR breathing barriers help to protect you against disease transmission when giving<br />
ventilations or performing CPR. CPR breathing barriers include resuscitation masks and<br />
bag-valve-mask resuscitators (BVMs). A resuscitation mask should be in your hip pack.<br />
Resuscitation Masks<br />
A resuscitation mask allows you to breathe air (with or without<br />
emergency oxygen) into a victim without making mouth-tomouth<br />
contact.<br />
Resuscitation masks have several benefits. They help to get air<br />
quickly to the victim through both the mouth and nose; create<br />
a seal over the victim’s mouth and nose; can be connected to<br />
emergency oxygen, if equipped with an oxygen inlet; and protect<br />
against disease transmission.<br />
Resuscitation mask<br />
Figure 8-4<br />
Pediatric resuscitation masks<br />
Figure 8-5<br />
A resuscitation mask should have the following characteristics<br />
(Figure 8-3):<br />
■■<br />
■■<br />
■■<br />
■■<br />
■■<br />
■■<br />
Be easy to assemble and use<br />
Be made of transparent, pliable material<br />
that allows you to make a tight seal over the<br />
victim’s mouth and nose<br />
Have a one-way valve for releasing exhaled air<br />
Have a standard 15- or 22-mm coupling<br />
assembly (the size of the opening for the<br />
one-way valve)<br />
Have an inlet for delivering emergency oxygen<br />
(if facility protocols include administering<br />
emergency oxygen)<br />
Work well under different environmental<br />
conditions, such as extreme heat or cold or<br />
in the water<br />
Pediatric resuscitation masks are available and<br />
should be used to care for children and infants<br />
(Figure 8-4). You should not use adult resuscitation<br />
masks on children or infants in an emergency<br />
situation unless a pediatric resuscitation mask is<br />
not available and EMS personnel advise you to do<br />
so. Always use the appropriate equipment matched<br />
to the size of the victim.<br />
Bag-Valve-Mask Resuscitators<br />
BVMs come in a variety of sizes for use with adults, children<br />
and infants.<br />
A BVM has three parts: a bag, a valve and a mask<br />
(Figure 8-5). By placing the mask on the victim’s
Chapter 8 Breathing Emergencies 165<br />
face and squeezing the bag, you open the one-way valve, forcing air into the victim’s<br />
lungs. When you release the bag, the valve closes and air from the surrounding<br />
environment refills the bag. Because it is necessary to maintain a tight seal on the<br />
mask, two rescuers should operate a BVM. (One rescuer positions and seals the<br />
mask, while the second rescuer squeezes the bag.)<br />
BVMs have several advantages in that they:<br />
■■<br />
■■<br />
■■<br />
■■<br />
■■<br />
Increase oxygen levels in the blood by using the air in the surrounding<br />
environment instead of the air exhaled by a rescuer.<br />
Can be connected to emergency oxygen.<br />
Are more effective for giving ventilations than a resuscitation mask when used<br />
correctly by two rescuers.<br />
Protect against disease transmission and inhalation hazards if the victim has<br />
been exposed to a hazardous gas.<br />
May be used with advanced airway adjuncts.<br />
BVMs come in various sizes to fit adults, children and infants; you should use<br />
the appropriately sized BVM for the size of the victim. Using an adult BVM on<br />
an infant has the potential to cause harm, and they should not be used unless a<br />
pediatric BVM is not available and more advanced medical personnel advise you<br />
to do so.<br />
Giving Ventilations—Special Considerations<br />
Frothing<br />
A white or pinkish froth or foam may be coming out of the mouth and/or nose of<br />
victims of fatal and nonfatal drownings. This froth results from a mix of mucous, air<br />
and water during respiration. If you see froth, clear the victim’s mouth with a finger<br />
sweep before giving ventilations. If an unconscious victim’s chest does not clearly<br />
rise after you give a ventilation, retilt the head and then reattempt ventilations. If the<br />
ventilations still do not make the chest clearly rise, assume that the airway is blocked<br />
and begin care for an unconscious choking victim.<br />
Vomiting<br />
When you give ventilations, the victim may vomit.<br />
Many victims who have been submerged vomit<br />
because water has entered the stomach or air has<br />
been forced into the stomach during ventilations. If<br />
this occurs, quickly turn the victim onto his or her<br />
side to keep the vomit from blocking the airway<br />
and entering the lungs (Figure 8-6). Support the<br />
head and neck, and turn the body as a unit. After<br />
vomiting stops, clear the victim’s airway by wiping<br />
the victim’s mouth out using a finger sweep and<br />
suction if necessary, turn the victim onto his or her<br />
back and continue with ventilations.<br />
You can use a finger sweep to clear the airway<br />
of an unconscious victim when the blockage<br />
is visible, but when available, you should use a<br />
Figure 8-6<br />
If a victim vomits, turn him on his side to keep the vomit from<br />
entering the victim’s airway and entering the lungs.
166<br />
<strong>Lifeguarding</strong> <strong>Manual</strong><br />
ANAPHYLAXIS<br />
Anaphylactic shock, also known as anaphylaxis,<br />
is a severe allergic reaction that can cause air<br />
passages to swell and restrict breathing. In<br />
susceptible people, triggers can include insect<br />
bites or stings, certain food and food additives,<br />
medication and chemicals.<br />
Anaphylactic shock is a life-threatening condition<br />
and requires immediate care.<br />
Anyone at risk should wear a medical<br />
identification tag, bracelet or necklace.<br />
Recognizing Anaphylaxis<br />
Some possible signs and symptoms of<br />
anaphylaxis include swelling of the face, neck,<br />
hands, throat, tongue or other body part;<br />
itching of the tongue, armpits, groin or any<br />
body part; rash or hives; weakness, dizziness<br />
or confusion; redness or welts on the skin;<br />
red watery eyes; nausea, abdominal pain or<br />
vomiting; rapid heart rate; wheezing, difficulty<br />
breathing or shortness of breath; difficulty<br />
swallowing; tight feeling in the chest and<br />
throat; low blood pressure; and shock.<br />
■■<br />
epinephrine auto-injector, if local protocols<br />
allow. (Epinephrine is a form of adrenaline<br />
medication prescribed to treat the symptoms<br />
of severe allergic reactions.)<br />
Administer emergency oxygen, if it is available<br />
and you are trained to do so.<br />
Before assisting with an epinephrine auto-injector:<br />
■■<br />
■■<br />
■■<br />
■■<br />
■■<br />
Determine whether the person already has<br />
taken epinephrine or antihistamine. If so,<br />
DO NOT administer another dose, unless<br />
directed to do so by more advanced medical<br />
personnel.<br />
Check the label to confirm that the<br />
prescription of the auto-injector is for<br />
the person.<br />
Check the expiration date of the auto-injector.<br />
If it has expired, DO NOT use it.<br />
Confirm that the liquid is clear and not cloudy,<br />
if the medication is visible. If it is cloudy, DO<br />
NOT use it.<br />
Leave the safety cap on until the auto-injector<br />
is ready to use. Carefully avoid accidental<br />
injection when assisting a person by never<br />
touching the needle end of the device.<br />
Caring for Anaphylaxis<br />
If you suspect that someone is experiencing<br />
anaphylaxis, you should immediately:<br />
■■<br />
■■<br />
■■<br />
■■<br />
Summon EMS personnel.<br />
Provide emergency care.<br />
Remove the victim from the source<br />
of the allergy.<br />
Assist with the person’s prescribed<br />
Locate the injection site.
Chapter 8 Breathing Emergencies 167<br />
Two injectable epinephrine systems are<br />
available commercially, by prescription only,<br />
in spring-loaded syringes that function when<br />
pressed into the thigh. They are the EpiPen ®<br />
(which includes one dose) and Twinject ® (which<br />
includes two doses).<br />
To assist with administering epinephrine:<br />
1. Locate the outside middle of one thigh to<br />
use as the injection site, ensuring that there<br />
are no obstructions to the skin, such as keys,<br />
coins or seams.<br />
2. Grasp the auto-injector firmly in your fist and<br />
pull off the safety cap with your other hand.<br />
3. Hold the (black) tip (needle end) near the<br />
person’s outer thigh so that the auto-injector<br />
is at a 90-degree angle to the thigh.<br />
4. Quickly and firmly push the tip straight into<br />
the outer thigh. You will hear a click.<br />
5. Hold the auto-injector firmly in place for<br />
10 seconds, then remove it from the thigh<br />
and massage the injection site with a gloved<br />
hand for several seconds.<br />
If using Twinject:<br />
1. Remove the device from the hard case.<br />
2. Remove the green cap, labeled “1.” You will<br />
see a red tip. Do not put your thumb, finger or<br />
hand over the red tip.<br />
3. Remove the green cap, labeled “2.”<br />
4. Place the red tip against the middle of the<br />
outer thigh, press down hard until the needle<br />
enters the thigh (it will go through light<br />
clothing), and hold for a count of 10.<br />
5. Remove the Twinject from the thigh. Check<br />
the rounded, red tip. If the needle is exposed,<br />
the dose was given.<br />
6. Continue to monitor the person’s condition<br />
and observe the person’s response to<br />
the epinephrine.<br />
7. Place the used auto-injector in a proper<br />
sharps container and give it to more<br />
advanced medical personnel when they arrive.<br />
Only the victim should self-administer the second<br />
dose included with the Twinject injector.<br />
Check state and local regulations regarding use<br />
of prescription and over-the-counter medications.<br />
Press the tip straight into the outer thigh.<br />
Massage the injection site with a gloved hand.
168<br />
<strong>Lifeguarding</strong> <strong>Manual</strong><br />
manual suction device to suction the airway clear. Suctioning is the process of<br />
removing foreign matter from the upper airway by means of a manual device.<br />
When using a manual suction device:<br />
■■<br />
■■<br />
■■<br />
Remove the protective cap from the tip of the suction catheter.<br />
Measure and check the suction tip to prevent inserting the suction tip<br />
too deeply.<br />
Suction for no more than 15 seconds at a time for an adult, 10 seconds for a<br />
child and 5 seconds for an infant.<br />
Air in the Stomach<br />
When giving ventilations, blow slowly, with just enough air to make the victim’s chest<br />
clearly rise. The chest should fall before you give the next ventilation. If you blow<br />
too much air into the victim, air may enter the stomach, causing gastric distention.<br />
The victim then will likely vomit, which can obstruct the airway and complicate<br />
resuscitation efforts.<br />
Suspected Head, Neck or Spinal Injury<br />
Figure 8-7<br />
If you suspect that an unconscious victim has a head, neck or spinal injury, always take<br />
care of the airway and breathing first. Open the airway by using the jaw-thrust (without<br />
head extension) maneuver to check for breathing or to give ventilations (Figure 8-7). If<br />
the jaw-thrust (without head extension) maneuver<br />
does not open the airway, use the head-tilt/chin-lift<br />
technique. See Chapter 11, Caring for Head, Neck<br />
and Spinal Injuries, for more information on injuries<br />
to the head, neck or spine.<br />
Jaw-thrust (without head extension) maneuver<br />
If the victim vomits, quickly roll the victim onto his<br />
or her side to prevent aspiration or choking. You<br />
can do this even if the victim is immobilized on<br />
a backboard. Simply turn the board and victim,<br />
ensuring that the head is securely fastened to the<br />
board. After vomiting stops, remove vomit from<br />
the victim’s mouth using a finger sweep or suction<br />
device if necessary, turn the victim onto the back<br />
and continue with ventilations.<br />
Dentures<br />
If the victim is wearing dentures, leave them in place unless they become loose and<br />
block the airway. Dentures help to support the victim’s mouth and cheeks, making it<br />
easier to seal the mask when giving ventilations.<br />
Mask-to-Nose Ventilations<br />
If the victim’s mouth is injured, you may need to give ventilations through the nose.<br />
To give mask-to-nose ventilations using a resuscitation mask:<br />
■■<br />
■■<br />
■■<br />
Open the airway using a head-tilt/chin-lift technique.<br />
Place the resuscitation mask over the victim’s mouth and nose.<br />
Use both of your hands to keep the victim’s mouth closed.
Chapter 8 Breathing Emergencies 169<br />
■■<br />
■■<br />
Seal the resuscitation mask with both of your hands.<br />
Give ventilations.<br />
Mask-to-Stoma Ventilations<br />
Some victims may breath through a stoma—an opening in the neck as a result of surgery.<br />
If so, keep the airway in a neutral position as you look, listen and feel for breathing with<br />
your ear over the stoma. To give ventilations, make an airtight seal with a round pediatric<br />
resuscitation mask around the stoma or tracheostomy tube and blow into the mask.<br />
Table 8-1: Giving Ventilations—Adult, Child and Infant<br />
Giving Ventilations<br />
Adult<br />
Child and Infant<br />
When giving ventilations:<br />
■■<br />
■■<br />
■■<br />
■■<br />
■■<br />
■■<br />
1 ventilation every 5 seconds<br />
Each ventilation should last about 1 second and make the chest<br />
clearly rise.<br />
The chest should fall before you give the next ventilation.<br />
1 ventilation every 3 seconds<br />
Each ventilation should last about 1 second and make the chest<br />
clearly rise.<br />
The chest should fall before you give the next ventilation.<br />
■■<br />
■■<br />
■■<br />
■■<br />
■■<br />
■■<br />
Maintain an open airway by keeping the head tilted back in the proper position.<br />
Seal the mask over the victim’s mouth and nose.<br />
Give ventilations for about 2 minutes, then reassess for breathing and a pulse.<br />
If the chest does not clearly rise, the airway could be blocked. Retilt the head and attempt another<br />
ventilation. If the chest still does not clearly rise, provide care for an unconscious victim.<br />
If the victim vomits, roll the victim onto the side and clear the victims’ mouth using a finger sweep<br />
and suction, if necessary. Turn the victim onto the back and continue giving ventilations.<br />
If the victim has a pulse but is not breathing, continue giving ventilations.<br />
Continue ventilation cycles until:<br />
■■<br />
■■<br />
The victim begins to breathe on his or her own.<br />
The victim has no pulse, in which case you should begin CPR or use an AED if one is available<br />
and ready to use.<br />
AIRWAY OBSTRUCTION<br />
An airway obstruction is the most common cause of breathing emergencies. A<br />
victim whose airway is blocked can quickly stop breathing, lose consciousness and<br />
die. A partial airway obstruction can move some air to and from the lungs, often<br />
while wheezing.
170<br />
<strong>Lifeguarding</strong> <strong>Manual</strong><br />
There are two types of airway obstruction: mechanical and anatomical. Any<br />
foreign body lodged in the airway is a mechanical obstruction and requires<br />
immediate attention. An anatomical airway obstruction is caused by the body<br />
itself, most commonly the tongue. An unconscious victim loses muscle tone,<br />
which may cause the tongue to fall back and block the airway.<br />
Causes of Airway Obstructions<br />
Common causes of choking include:<br />
■■<br />
■■<br />
■■<br />
■■<br />
■■<br />
Swallowing poorly chewed food.<br />
Drinking alcohol before or during meals. (Alcohol dulls the nerves that aid<br />
swallowing, making choking on food more likely.)<br />
Eating too fast or talking or laughing while eating.<br />
Walking, playing or running with food or small objects, such as toy parts or<br />
balloons, in the mouth.<br />
Wearing dentures. (Dentures make it difficult to sense whether food is fully<br />
chewed before it is swallowed.)<br />
Caring for Airway Obstructions<br />
A conscious person who is clutching the throat is showing what is commonly<br />
called the universal sign of choking. This person’s airway may be partially or<br />
completely obstructed.<br />
Complete airway obstruction occurs when the person cannot cough, speak, cry<br />
or breathe and requires immediate action. The objective in this case is to clear the<br />
obstruction before the person becomes unconscious.<br />
Protocols for caring for a conscious choking victim may vary, but abdominal<br />
thrusts, back blows and chest thrusts each have been proven to effectively clear an<br />
obstructed airway in conscious victims. Frequently, a combination of more than one<br />
technique may be needed to expel an object and clear the airway.<br />
Conscious Choking<br />
Figure 8-8<br />
You must get consent before helping a conscious choking person (Figure 8-8).<br />
If the person is a child or infant, get consent from a parent or guardian, if present.<br />
If no parent or guardian is present, consent is<br />
implied. If you suspect a person is choking, ask<br />
the victim, “Are you choking?” Then, identify<br />
yourself and ask if you can help. If the victim is<br />
coughing, encourage continued coughing. If the<br />
victim cannot cough, speak or breathe, activate<br />
the EAP and have another person summon<br />
EMS personnel.<br />
Obtain consent before providing care.<br />
When caring for a conscious choking adult,<br />
perform a combination of 5 back blows followed<br />
by 5 abdominal thrusts. Each back blow and<br />
abdominal thrust should be a separate and<br />
distinct attempt to dislodge the object. For a<br />
conscious child, use a combination of 5 back
Chapter 8 Breathing Emergencies 171<br />
Table 8-2: Providing Care for Obstructed Airway—Adult, Child and Infant<br />
Conscious Choking<br />
Unconscious Choking<br />
Adult and Child<br />
■■<br />
■■<br />
5 back blows<br />
5 abdominal thrusts (Use<br />
chest thrusts if you cannot<br />
reach around the victim or the<br />
victim is pregnant.)<br />
■■<br />
■■<br />
■■<br />
Retilt the head and attempt<br />
a ventilation.<br />
Give 30 chest compressions.<br />
Look inside the mouth and<br />
remove the object if seen.<br />
■■<br />
Attempt ventilations.<br />
Infant<br />
■■<br />
5 back blows<br />
(Same steps as adult.)<br />
■■<br />
5 chest trusts<br />
Continue the cycle of<br />
care until:<br />
■■<br />
■■<br />
The object is forced out.<br />
The victim begins to cough<br />
forcefully or breathe.<br />
■■<br />
■■<br />
The object is forced out.<br />
The victim begins to cough<br />
forcefully or breathe.<br />
■■<br />
The victim becomes<br />
unconscious.<br />
■■<br />
Ventilation attempts are<br />
successful and effective.<br />
When providing care:<br />
■■<br />
■■<br />
■■<br />
Use less force on a child than you would on an adult when giving abdominal thrusts.<br />
Use two or three fingers on the center of the chest just below the nipple line when giving chest<br />
trusts to an infant.<br />
Keep one hand on the infant’s forehead to maintain an open airway when giving chest thrusts<br />
to an infant.<br />
blows and 5 abdominal thrusts, but with less force. Using too<br />
much force could cause internal injuries. For a conscious choking<br />
infant, perform a combination of 5 back blows and 5 chest<br />
thrusts. Use even less force when giving back blows and chest<br />
thrusts to an infant.<br />
Figure 8-9<br />
If you cannot reach far enough around the victim to give<br />
effective abdominal thrusts or if the victim is obviously pregnant<br />
or known to be pregnant, give back blows followed by chest<br />
thrusts (Figure 8-9).<br />
For all victims, continue 5 back blows and 5 abdominal or chest<br />
thrusts until the object is dislodged and the victim can cough or<br />
breathe, or until the victim becomes unconscious.<br />
Conscious Choking Victim<br />
Who Becomes Unconscious<br />
If a conscious victim becomes unconscious, carefully lower<br />
the victim to the ground and provide care for an unconscious<br />
choking victim.<br />
If a victim is obviously pregnant, use chest<br />
thrusts instead of abdominal thrusts to<br />
dislodge the object.
172<br />
<strong>Lifeguarding</strong> <strong>Manual</strong><br />
Unconscious Choking<br />
Unlike the conscious victim suffering foreign body airway obstruction, consent is<br />
implied when a victim is unconscious. However, you must get consent from a parent<br />
or guardian, if present, before helping an unconscious choking child.<br />
You should provide care to an unconscious adult, child or infant who is choking on<br />
a firm, flat surface. The objective is to clear the airway of the obstruction, allowing<br />
adequate ventilations. If an unconscious victim’s chest does not clearly rise after<br />
giving a ventilation, assume the airway is blocked by a foreign object and position<br />
yourself to give chest compressions as you would when performing CPR chest<br />
compressions. (See Chapter 9, Cardiac Emergencies, for information on how to<br />
give chest compressions.) After compressions, look in the mouth for an object and,<br />
if you see one, remove it with a gloved finger. For an infant, use your little finger to<br />
remove the object. Reattempt 2 ventilations.<br />
Repeat cycles of 30 chest compressions, foreign object check/removal and 2<br />
ventilations until the chest clearly rises. If the chest clearly rises, quickly check for<br />
breathing and a pulse for no more than 10 seconds. Provide care based on the<br />
conditions found.<br />
EMERGENCY OXYGEN<br />
Figure 8-10<br />
When someone has a breathing or cardiac<br />
emergency, the supply of oxygen to the brain and<br />
heart, as well as the rest of the body, is reduced,<br />
resulting in hypoxia, in which an insufficient amount<br />
of oxygen reaches the cells. If breathing stops<br />
(respiratory arrest), the brain and heart will soon<br />
be starved of oxygen, resulting in cardiac arrest<br />
and ultimately death if not managed quickly and<br />
appropriately.<br />
Administering emergency oxygen<br />
The air a person normally breathes is about 21<br />
percent oxygen. When giving ventilations or<br />
performing CPR, the air exhaled into the victim is<br />
about 16 percent oxygen. This may not be enough<br />
oxygen to save the victim’s life. By administering<br />
emergency oxygen, you can deliver a higher percentage of oxygen, thus increasing<br />
the victim’s chance of survival (Figure 8-10).<br />
Emergency oxygen can be given for many breathing and cardiac emergencies.<br />
Consider administering emergency oxygen for:<br />
■■<br />
■■<br />
■■<br />
An adult breathing fewer than 12 or more than 20 breaths per minute.<br />
A child breathing fewer than 15 or more than 30 breaths per minute.<br />
An infant breathing fewer than 25 or more than 50 breaths per minute.<br />
Oxygen should be delivered using equipment that is properly sized for the victim and<br />
flow rates that are appropriate for the delivery device.<br />
Emergency oxygen units are available without prescription for first aid use,<br />
provided that they contain at least a 15-minute supply of oxygen and are designed<br />
to deliver a pre-set flow rate of at least 6 liters per minute (LPM). Oxygen cylinders
Chapter 8 Breathing Emergencies 173<br />
are labeled “U.S.P.” and marked with a yellow<br />
diamond containing the word “Oxygen” (Figure<br />
8-11). The U.S.P. stands for United States<br />
Pharmacopeia and indicates that the oxygen is<br />
medical grade.<br />
Oxygen cylinders come in different sizes and<br />
various pressure capacities. In the United States,<br />
oxygen cylinders typically have green markings.<br />
However, the color scheme is not regulated, so<br />
different manufacturers and countries other than<br />
the United States may use differently colored<br />
markings. Oxygen cylinders are under high<br />
pressure and should be handled carefully.<br />
Variable-Flow-Rate Oxygen<br />
Many EMS systems use variable-flow-rate oxygen,<br />
which allows the rescuer to vary the flow of<br />
oxygen. These systems are practical because they<br />
are able to deliver a large amount of oxygen.<br />
To administer emergency oxygen using a<br />
variable-flow-rate system, assemble the following<br />
pieces of equipment: an oxygen cylinder, a<br />
regulator with pressure gauge and flowmeter,<br />
and a delivery device.<br />
The regulator lowers the pressure of the oxygen as<br />
it comes out of the cylinder so that the oxygen can<br />
be used safely. The regulator also has a pressure<br />
gauge that shows the pressure in the cylinder<br />
(Figure 8-12). The pressure gauge shows if the<br />
cylinder is full (2000 pounds per square inch [psi]),<br />
nearly empty or in between). The regulator must<br />
be carefully attached to the oxygen cylinder. An<br />
“O-ring” gasket makes the seal tight (Figure 8-13).<br />
The flowmeter controls how rapidly the oxygen<br />
flows from the cylinder to the victim. The flow can<br />
be set from 1 to 25 LPM.<br />
Figure 8-11<br />
Oxygen cylinders are marked with a yellow diamond that<br />
says “Oxygen” and, in the United States, typically have green<br />
markings.<br />
Figure 8-12<br />
A pressure regulator is attached to an oxygen cylinder to<br />
reduce the pressure of oxygen to a safe level.<br />
Figure 8-13<br />
Fixed-Flow-Rate Oxygen<br />
Some emergency oxygen systems have the<br />
An O-ring gasket<br />
regulator set at a fixed-flow rate. Most fixed-flow<br />
rate tanks are set at 15 LPM; however, you may<br />
come across tanks set at 6 LPM, 12 LPM or another rate. Some fixed-flow-rate<br />
systems have a dual (high/low) flow setting. Fixed-flow-rate oxygen systems typically<br />
come with the delivery device, regulator and cylinder already assembled (Figure<br />
8-14), which makes it quick and simple to administer emergency oxygen.<br />
A drawback to fixed-flow-rate oxygen systems is that the flow rate cannot be<br />
adjusted, which limits how it can be used as well as the concentration of oxygen
174<br />
<strong>Lifeguarding</strong> <strong>Manual</strong><br />
Figure 8-14<br />
that can be delivered. For example, a fixed-flow-rate unit with a<br />
preset flow of 6 LPM can be used only with a nasal cannula or<br />
resuscitation mask, whereas a preset flow rate of 12 LPM allows<br />
the use of only a resuscitation mask or non-rebreather mask.<br />
To operate this type of device, simply turn it on according to the<br />
manufacturer’s instructions, check that oxygen is flowing and place<br />
the delivery device on the victim.<br />
A fixed-flow-rate oxygen system<br />
■■<br />
■■<br />
■■<br />
■■<br />
■■<br />
■■<br />
■■<br />
■■<br />
Oxygen Safety Precautions<br />
When preparing and administering emergency oxygen, safety is<br />
a major concern. Use emergency oxygen equipment according to<br />
the manufacturer’s instructions and in a manner consistent with<br />
federal and local regulations.<br />
Also, follow these recommended guidelines:<br />
■■<br />
■■<br />
Be sure that oxygen is flowing before putting the delivery<br />
device over the victim’s face.<br />
Do not use oxygen around flames or sparks, including smoking<br />
materials, such as cigarettes, cigars and pipes. Oxygen causes<br />
fire to burn more rapidly and intensely.<br />
Do not use grease, oil or petroleum products to lubricate or clean the regulator.<br />
This could cause an explosion.<br />
Do not stand oxygen cylinders upright unless they are well secured. If the<br />
cylinder falls, the regulator or valve could become damaged or cause injury due<br />
to the intense pressure in the tank.<br />
Do not drag or roll cylinders.<br />
Do not carry a cylinder by the valve or regulator.<br />
Do not hold onto protective valve caps or guards when moving or<br />
lifting cylinders.<br />
Do not deface, alter or remove any labeling or markings on the oxygen cylinder.<br />
Do not attempt to mix gases in an oxygen cylinder or transfer oxygen from one<br />
cylinder to another.<br />
Do not use a defibrillator when around flammable materials, such as free-flowing<br />
oxygen or gasoline.<br />
Never attempt to refill an oxygen cylinder; only an appropriately licensed professional<br />
should do this. When high-pressure oxygen cylinders have been emptied, close the<br />
cylinder valve, replace the valve protection cap or outlet plug if provided, and mark<br />
or tag the cylinder as empty. Promptly return the cylinder to be refilled according to<br />
state and local regulations.<br />
Pay specific attention to the following areas concerning oxygen cylinders:<br />
■■<br />
■■<br />
Check for cylinder leaks, abnormal bulging, defective or inoperative valves or<br />
safety devices.<br />
Check for the physical presence of rust or corrosion on a cylinder or cylinder<br />
neck, and any foreign substances or residues, such as adhesive tape, around the<br />
cylinder neck, oxygen valve or regulator assembly. These substances can hamper<br />
oxygen delivery and in some cases have the potential to cause a fire or explosion.
Chapter 8 Breathing Emergencies 175<br />
OXYGEN DELIVERY DEVICES<br />
An oxygen delivery device is the equipment used<br />
by a victim for breathing emergency oxygen. Tubing<br />
carries the oxygen from the regulator to the delivery<br />
device, which is placed on the victim’s face. When<br />
administering emergency oxygen, make sure that the<br />
tubing does not get tangled or kinked, which could<br />
stop the flow of oxygen to the mask. Oxygen delivery<br />
devices include nasal cannulas, resuscitation masks,<br />
non-rebreather masks and BVMs (Table 8-3). Various<br />
sizes of these devices are available for adults,<br />
children and infants. Appropriate sizing is important<br />
to ensure adequate airway management.<br />
Figure 8-15<br />
Use the blow-by technique for children and infants who are<br />
If young children or infants are frightened by a<br />
frightened by having oxygen masks on their faces.<br />
mask being placed on their face, use the “blow-by”<br />
technique. To perform this technique, you or a<br />
parent or guardian holds the mask about 2 inches from the child’s or infant’s face,<br />
waving it slowly from side to side, allowing the oxygen to pass over the face and<br />
be inhaled (Figure 8-15).<br />
Table 8-3: Oxygen Delivery Devices<br />
Delivery Device Common Flow Rate Oxygen<br />
Concentration<br />
Suitable Victims<br />
Nasal Cannula 1–6 LPM 24–44% ■■<br />
■■<br />
Victims with<br />
breathing difficulty<br />
Victims unable to<br />
tolerate mask<br />
Resuscitation Mask 6–15 LPM 35–55% ■■<br />
■■<br />
Victims with<br />
breathing difficulty<br />
Victims who are<br />
nonbreathing<br />
Non-Rebreather Mask 10–15 LPM Up to 90% Breathing victims only<br />
BVM 15 LPM or higher 90% or higher Breathing and<br />
nonbreathing victims
176<br />
<strong>Lifeguarding</strong> <strong>Manual</strong><br />
Nasal Cannulas<br />
Nasal cannulas are used only on victims who are able to breathe, most commonly<br />
on those with minor breathing difficulty or a history of respiratory medical conditions.<br />
They are useful for a victim who can breathe but cannot tolerate a mask over the<br />
face. Nasal cannulas are held in place over a victim’s ears, and oxygen is delivered<br />
through two small prongs inserted into the nostrils.<br />
These devices are not used often in an emergency because they do not give as much<br />
oxygen as a resuscitation mask, non-rebreather mask or BVM. Victims experiencing<br />
a serious breathing emergency generally breathe through the mouth and need a<br />
device that can supply a greater concentration of oxygen. Nasal cannulas may not be<br />
effective for victims with a nasal airway obstruction, nasal injury or severe cold.<br />
With a nasal cannula, you should set the flow rate at 1 to 6 LPM. Avoid using<br />
rates above 6 LPM with this device since they tend to quickly dry out mucous<br />
membranes, which causes nose bleeds and headaches.<br />
MONITORING OXYGEN<br />
SATURATION<br />
Pulse oximetry is used to measure the<br />
percentage of oxygen saturation in the blood.<br />
The reading is taken by a pulse oximeter<br />
and appears as a percentage of hemoglobin<br />
saturated with oxygen. Pulse oximetry readings<br />
are recorded using the percentage and then<br />
Sp02 (e.g., 95 to 99% Sp02).<br />
Pulse oximetry should be used as an added tool<br />
for victim care, as it is possible for victims to show<br />
a normal reading but have trouble breathing, or<br />
have a low reading but appear to be breathing<br />
normally. When treating the victim, all symptoms<br />
should be assessed, along with the data provided<br />
by the device. The pulse oximeter reading never<br />
should be used to withhold oxygen from a victim<br />
who appears to be in respiratory distress or when<br />
it is the standard of care to apply oxygen despite<br />
good pulse oximetry readings, such as in a victim<br />
with chest pain.<br />
To use a pulse oximeter, apply the probe to the<br />
victim’s finger or any other measuring site, such as<br />
the ear lobe or foot, according to manufacturer’s<br />
recommendation. If the victim is wearing nail<br />
polish, remove it using an acetone wipe. Let the<br />
machine register the oxygen saturation level and<br />
verify the victim’s pulse rate on the oximeter with<br />
the actual pulse of the victim. Monitor the victim’s<br />
saturation levels while administering emergency<br />
oxygen. If the oxygen level reaches 100 percent<br />
and local protocols allow, you may decrease the<br />
flow rate of oxygen and change to a lower flowing<br />
delivery device.
Chapter 8 Breathing Emergencies 177<br />
Resuscitation Masks<br />
A resuscitation mask with oxygen inlet can be used to deliver emergency oxygen<br />
to a nonbreathing victim. It also can be used to deliver oxygen to someone who is<br />
breathing but still requires emergency oxygen. Some resuscitation masks come<br />
with elastic straps to place over the victim’s head to keep the mask in place. If the<br />
mask does not have straps, you or the victim can hold the mask in place. With a<br />
resuscitation mask, set the oxygen flow rate at 6 to 15 LPM.<br />
Non-Rebreather Masks<br />
A non-rebreather mask is used to deliver high concentrations of oxygen to a victim<br />
who is breathing. It consists of a face mask with an attached oxygen reservoir bag<br />
and a one-way valve between the mask and bag, which prevents the victim’s exhaled<br />
air from mixing with the oxygen in the reservoir bag.<br />
Limitations<br />
Some factors may reduce the reliability of the<br />
pulse oximetry reading, including:<br />
■■<br />
■■<br />
■■<br />
■■<br />
Hypoperfusion, poor perfusion (shock).<br />
Cardiac arrest (absent perfusion to fingers).<br />
Excessive motion of the patient during<br />
the reading.<br />
Carbon monoxide poisoning (carbon<br />
monoxide saturates hemoglobin).<br />
■■<br />
■■<br />
■■<br />
■■<br />
■■<br />
■■<br />
Fingernail polish.<br />
Hypothermia or other cold-related emergency.<br />
Sickle cell disease or anemia.<br />
Cigarette smokers (due to carbon monoxide).<br />
Edema (swelling).<br />
Time lag in detection of respiratory<br />
insufficiency. (The pulse oximeter could<br />
warn too late of a decrease in respiratory<br />
function based on the amount of oxygen<br />
in circulation.)<br />
Range Percent Value Delivery Device<br />
Normal 95 to 100 None<br />
Mild hypoxia 91 to 94 Nasal cannula or resuscitation mask<br />
Moderate hypoxia 86 to 90 Non-rebreather mask or BVM<br />
Severe hypoxia < 85 Non-rebreather mask or BVM
178<br />
<strong>Lifeguarding</strong> <strong>Manual</strong><br />
AIRWAY ADJUNCTS<br />
The tongue is the most common cause of airway<br />
obstruction in an unconscious person. You<br />
can use a mechanical device, called an airway<br />
adjunct, to keep a victim’s airway clear.<br />
There are two types of airway adjuncts. One<br />
type, called an oropharyngeal airway (OPA),<br />
is inserted in the victim’s mouth.<br />
placed airway device can compress the tongue<br />
into the back of the throat, further blocking<br />
the airway.<br />
When preparing to insert an OPA, first be sure<br />
that the victim is unconscious. OPAs are used<br />
only on unconscious, unresponsive victims with<br />
The other type, called a nasopharyngeal airway<br />
(NPA), is inserted in the victim’s nose.<br />
OPAs and NPAs come in a variety of sizes.<br />
The curved design fits the natural contour of the<br />
mouth and throat. Once you have positioned<br />
the device, use a resuscitation mask or BVM to<br />
ventilate a nonbreathing victim.<br />
Oropharyngeal Airways<br />
When properly positioned, an OPA keeps the<br />
tongue away from the back of the throat,helping<br />
to maintain an open airway. An improperly<br />
Insert an OPA with the curved tip along the roof of the mouth.<br />
Oropharyngeal airways<br />
Rotate it to drop into the back of the throat.
Chapter 8 Breathing Emergencies 179<br />
no gag reflex. If a victim begins to gag, remove<br />
the airway immediately. OPAs should not be<br />
used if the victim has suffered oral trauma, such<br />
as broken teeth, or has recently undergone oral<br />
surgery. To insert an OPA on an adult, select the<br />
appropriately sized OPA, point the tip upward<br />
toward the roof of the mouth and then rotate it<br />
180 degrees into position. Follow local protocols<br />
for when, how and who can use OPAs.<br />
Airways of children and infants are smaller than<br />
those of adults. The size of the airway also can<br />
vary according to the age of the child or infant,<br />
so it is important to use an appropriately sized<br />
OPA for pediatric victims. Also, the palate for<br />
children and infants is softer than for an adult.<br />
For a child or infant, insert the OPA sideways<br />
and then rotate it 90 degrees. Or, use a tongue<br />
depressor and insert with the tip of the device<br />
pointing toward the back of the tongue and<br />
throat in the position in which the device will rest<br />
after insertion. If an OPA is inserted with the tip<br />
pointing upward toward the roof of the mouth<br />
and rotated 180 degrees in a child or infant, it<br />
can cause injury to the child’s or infant’s palate.<br />
Nasopharyngeal airways<br />
Nasopharyngeal Airways<br />
When properly positioned, an NPA keeps the<br />
tongue out of the back of the throat, keeping<br />
the airway open. An NPA may be used on a<br />
conscious, responsive victim or an unconscious<br />
victim. Unlike an OPA, the NPA does not cause<br />
the victim to gag. NPAs should not be used on<br />
victims with suspected head trauma or skull<br />
fracture. Follow local protocols for when, how<br />
and who can use NPAs.<br />
A properly positioned NPA keeps the tongue out of the<br />
back of the throat.
180<br />
<strong>Lifeguarding</strong> <strong>Manual</strong><br />
The victim inhales oxygen from the bag, and exhaled air escapes through flutter<br />
valves on the side of the mask. The flow rate should be set at 10 to 15 LPM. When<br />
using a non-rebreather mask with a high-flow rate of oxygen, you can deliver up to<br />
90 percent oxygen concentration to the victim.<br />
Bag-Valve-Mask Resuscitators<br />
A BVM can be used on a breathing or nonbreathing victim. A conscious, breathing<br />
victim can hold the BVM to inhale the oxygen, or you can squeeze the bag as the<br />
victim inhales to deliver more oxygen. Set the oxygen flow rate at 15 LPM or higher<br />
when using a BVM. The BVM with an oxygen reservoir bag is capable of supplying<br />
90 percent or more oxygen concentration when used at 15 LPM or higher.<br />
SUCTIONING<br />
Sometimes injury or sudden illness can cause mucus, fluids or blood to collect in a<br />
victim’s airway. A finger sweep can be used to clear the airway on an unconscious victim<br />
when the blockage is visible, but a more effective method is to suction the airway clear.<br />
Suctioning is the process of removing foreign matter from the upper airway using a<br />
manual or mechanical device.<br />
Figure 8-16<br />
Suctioning devices are used to clear a victim’s airway.<br />
It is important to suction when fluids or foreign<br />
matter are present or suspected, because<br />
the airway must be open and clear in order<br />
for the victim to breathe. <strong>Manual</strong> suction units<br />
are operated by hand (Figure 8-16). They are<br />
lightweight, compact and relatively inexpensive.<br />
Because they do not require an energy source,<br />
they avoid some of the problems associated<br />
with mechanical units and are more suited to the<br />
aquatic environment.<br />
If suctioning is part of facility protocols, there<br />
should be several sizes of sterile suction catheters<br />
on hand to use on victims of various sizes.<br />
WRAP-UP<br />
Breathing emergencies are extremely serious. As a lifeguard, you must know how to<br />
recognize the signs and symptoms of respiratory distress, hypoxia and respiratory<br />
arrest, and react immediately to provide care for victims. This includes knowing how<br />
to give ventilations and care for choking victims. If facility protocols allow, it also<br />
includes knowing how to administer emergency oxygen.
Skill Sheet 181<br />
GIVIng VENTILATIOns<br />
Note: Always follow standard precautions when providing care. Activate the EAP, size-up the<br />
scene for safety and then perform a primary assessment. Always select the right sized mask for<br />
the victim.<br />
If the victim is not breathing but has a pulse:<br />
1<br />
2<br />
Position and seal the resuscitation mask.<br />
Open the airway and blow into the mask.<br />
■■<br />
■■<br />
For an adult, give 1 ventilation about<br />
every 5 seconds.<br />
For a child or infant, give 1 ventilation<br />
about every 3 seconds.<br />
■■<br />
Each ventilation should last about 1<br />
second and make the chest clearly rise.<br />
■■<br />
■■<br />
The chest should fall before you give<br />
the next breath.<br />
Give ventilations for about 2 minutes.<br />
Note: For a child, tilt the head slightly past a neutral position. Do not tilt the head as far back<br />
as for an adult. For a victim with a suspected head, neck or spinal injury, use the jaw-thrust<br />
(without head extension) maneuver to open the airway to give ventilations.<br />
3<br />
Recheck for breathing and pulse about<br />
every 2 minutes.<br />
■■<br />
Remove the mask and look, listen and<br />
feel for breathing and a pulse for no<br />
more than 10 seconds.<br />
What to Do Next<br />
If unconscious but breathing:<br />
■■<br />
Place in a recovery position.<br />
If unconscious and no breathing but there is a pulse:<br />
■■<br />
Continue giving ventilations.<br />
Continued on Next Page
182<br />
<strong>Lifeguarding</strong> <strong>Manual</strong><br />
GIVIng VENTILATIOns continued<br />
If unconscious and no breathing or pulse:<br />
■■<br />
Begin CPR.<br />
If at any time the chest does not rise:<br />
■■<br />
The airway could be blocked—provide care for an unconscious choking victim:<br />
cc<br />
cc<br />
cc<br />
cc<br />
cc<br />
Retilt the head and try to give another ventilation.<br />
If the chest still does not clearly rise, give 30 chest compressions.<br />
Open the mouth to look for and remove a foreign object with a finger if seen.<br />
Give 2 ventilations.<br />
As long as the chest does not clearly rise, continue cycles of giving 30 chest compressions,<br />
looking for a foreign object and giving ventilations.<br />
GIVIng VENTILATIOns USIng A BAG-VALVEmasK<br />
RESUSCITATOR—TWO RESCUERS<br />
Note: Always follow standard precautions when providing care. Activate the EAP, size-up the<br />
scene for safety and then perform a primary assessment. Always select the right sized mask for<br />
the victim. Prepare the BVM for use during the primary assessment.<br />
If the victim is not breathing but has a pulse:<br />
1<br />
2<br />
Rescuer 1 kneels behind the victim’s head and positions the mask over the victim’s mouth<br />
and nose.<br />
To seal the mask and open the airway using the jaw-thrust (with head extension) maneuver:<br />
■■<br />
■■<br />
■■<br />
Using the elbows for support, place<br />
your thumbs and index fingers along<br />
each side of the resuscitation mask to<br />
create a “C.”<br />
Slide your 3rd, 4th and 5th fingers into<br />
position to create an “E” on both sides<br />
of the victim’s jawbone.<br />
Hold the mask in place while you tilt<br />
the head back and lift the jaw into the<br />
mask.
Skill Sheet 183<br />
Note: For a child, tilt the head back slightly past a neutral position. Do not tilt the head as far<br />
back as for an adult. For an infant, position the head in a neutral position.<br />
3<br />
4<br />
Rescuer 2 gives ventilations.<br />
■■<br />
■■<br />
■■<br />
Squeeze the bag slowly with both<br />
hands.<br />
For an adult, give 1 ventilation about<br />
every 5 seconds.<br />
For a child or infant, give 1 ventilation<br />
about every 3 seconds.<br />
■■<br />
Each ventilation should last about 1<br />
second and make the chest clearly rise.<br />
The chest should fall before the next<br />
breath is given.<br />
Rescuer 2 rechecks for breathing and a pulse about every 2 minutes.<br />
■■<br />
Remove the mask and look, listen and feel for breathing and a pulse for no more than<br />
10 seconds.<br />
What to Do Next<br />
If unconscious but breathing:<br />
■■<br />
Place in a recovery position.<br />
If unconscious and not breathing but there is a pulse:<br />
■■<br />
Continue giving ventilations.<br />
If unconscious and no breathing or pulse:<br />
■■<br />
Begin CPR.<br />
If at any time the chest does not rise:<br />
■■<br />
The airway could be blocked—provide care for an unconscious choking victim:<br />
cc<br />
Retilt the head and try to give another ventilation.<br />
cc<br />
If the chest still does not clearly rise, give 30 chest compressions.<br />
cc<br />
Open the mouth to look for a foreign object and remove with a finger if seen.<br />
cc<br />
Give 2 ventilations.<br />
cc<br />
As long as the chest does not clearly rise, continue cycles of giving 30 chest compressions,<br />
looking for a foreign object and giving ventilations.
184<br />
<strong>Lifeguarding</strong> <strong>Manual</strong><br />
CONSCIOUS CHOKING—ADULT AND CHILD<br />
Notes:<br />
■■<br />
■■<br />
Activate the EAP; size-up the scene for safety, which includes using appropriate PPE;<br />
and obtain consent.<br />
For a child, stand or kneel behind the child, depending on the child’s size. Use less force<br />
on a child than you would on an adult.<br />
If the victim cannot cough, speak or breathe:<br />
1<br />
2<br />
Give 5 back blows.<br />
■■<br />
■■<br />
■■<br />
■■<br />
Position yourself slightly behind<br />
the victim.<br />
Place one arm diagonally across the<br />
victim’s chest and bend the victim<br />
forward at the waist. The victim’s upper<br />
airway should be at least parallel to<br />
the ground.<br />
Firmly strike the victim between<br />
the shoulder blades with the heel<br />
of your hand.<br />
Each thrust should be a distinct attempt to dislodge the object.<br />
Give 5 abdominal thrusts.<br />
■■<br />
■■<br />
■■<br />
■■<br />
■■<br />
Stand behind the victim.<br />
For a child, stand or kneel behind the<br />
child, depending on the child’s size.<br />
Use less force on a child than you<br />
would on an adult.<br />
Place the thumb side of your fist<br />
against the middle of the abdomen,<br />
just above the navel.<br />
Grab your fist and give quick,<br />
upward thrusts.<br />
Each thrust should be a distinct attempt<br />
to dislodge the object.
Skill Sheet 185<br />
What to Do Next<br />
Continue giving 5 back blows and 5 abdominal thrusts until:<br />
■■<br />
■■<br />
■■<br />
The object is forced out.<br />
The victim begins to cough forcefully or breathe.<br />
The victim becomes unconscious.<br />
If the victim becomes unconscious:<br />
■■<br />
■■<br />
Carefully lower the victim to the ground, open the mouth and look for an object.<br />
Continue to provide care for an unconscious choking victim.<br />
Use chest thrusts if:<br />
■■<br />
■■<br />
You cannot reach far enough around the victim to give abdominal thrusts.<br />
The victim is obviously pregnant or known to be pregnant.<br />
To perform chest thrusts:<br />
1<br />
2<br />
Stand behind the victim and place the thumb side of your fist against the center of the victim’s<br />
chest, or slightly higher on the victim’s chest if she is pregnant.<br />
Grab your fist and give quick, inward<br />
thrusts. Look over the victim’s shoulder so<br />
that his or her head does not hit your face<br />
when you perform the chest thrusts.<br />
3<br />
Repeat until the object is forced out, the victim begins to cough forcefully or breathe, or until<br />
the victim becomes unconscious.
186<br />
<strong>Lifeguarding</strong> <strong>Manual</strong><br />
CONSCIOUS CHOKING—INFANT<br />
Note: Activate the EAP; size-up the scene for safety, which includes using appropriate PPE;<br />
and obtain consent.<br />
If the infant cannot cough, cry or breathe:<br />
1<br />
2<br />
Carefully position the infant face-down along your forearm.<br />
■■<br />
Support the infant’s head and neck with your hand.<br />
■■<br />
Lower the infant onto your thigh, keeping the infant’s head lower than his or her chest.<br />
Give 5 back blows.<br />
■■<br />
■■<br />
Give back blows with the heel of<br />
your hand between the infant’s<br />
shoulder blades.<br />
Each back blow should be a distinct<br />
attempt to dislodge the object.<br />
3<br />
4<br />
Position the infant face-up along your forearm.<br />
■■<br />
■■<br />
■■<br />
Position the infant between both of your forearms, supporting the infant’s head and neck.<br />
Turn the infant face-up.<br />
Lower the infant onto your thigh with the infant’s head lower than his or her chest.<br />
Give 5 chest thrusts.<br />
■■<br />
■■<br />
Put two or three fingers on the center<br />
of the chest just below the nipple<br />
line and compress the chest about<br />
1½ inches.<br />
Each chest thrust should be a distinct<br />
attempt to dislodge the object.<br />
What to Do Next<br />
Continue giving 5 back blows and 5 chest thrusts until:<br />
■■<br />
■■<br />
■■<br />
The object is forced out.<br />
The infant begins to cough forcefully or breathe.<br />
The infant becomes unconscious.<br />
If the infant becomes unconscious:<br />
■■<br />
■■<br />
Carefully lower the infant to the ground, open the mouth and look for an object.<br />
Continue to provide care for an unconscious choking infant.
Skill Sheet 187<br />
UNCONSCIOUS CHOKING<br />
Notes:<br />
■■<br />
■■<br />
Activate the EAP, size-up the scene for safety then perform a primary assessment.<br />
Ensure that the victim is on a firm, flat surface, such as the floor or a table.<br />
If at any time the chest does not clearly rise:<br />
1<br />
Retilt the head and give another ventilation.<br />
2<br />
If the chest still does not clearly rise,<br />
give 30 chest compressions.<br />
■■<br />
■■<br />
■■<br />
■■<br />
■■<br />
Place the heel of one hand on the<br />
center of the chest.<br />
Place the other hand on top of the first<br />
hand and compress the chest 30 times.<br />
For an adult, compress the chest at<br />
least 2 inches.<br />
For a child, compress the chest about<br />
2 inches.<br />
Compress at a rate of about 100 compressions per minute.<br />
3<br />
Look for an object inside the mouth.<br />
■■<br />
Grasp the tongue and lower jaw<br />
between your thumb and fingers,<br />
and lift the jaw.<br />
Continued on Next Page
188<br />
<strong>Lifeguarding</strong> <strong>Manual</strong><br />
UNCONSCIOUS CHOKING continued<br />
4<br />
If you see an object, remove it.<br />
■■<br />
Slide your finger along the inside of the<br />
victim’s cheek, using a hooking motion<br />
to sweep out the object.<br />
5<br />
Give 2 ventilations.<br />
■■<br />
Replace the resuscitation mask and<br />
give 2 ventilations.<br />
What to Do Next<br />
If at any time the chest does not rise:<br />
■■<br />
Repeat Steps 2–5.<br />
If the ventilations make the chest clearly rise:<br />
■■<br />
Remove the mask, check for breathing and a pulse for no more than 10 seconds.<br />
If unconscious but breathing, place in a recovery position:<br />
■■<br />
Leave the victim face-up and continue to monitor the victim’s condition.<br />
If unconscious and no breathing but there is a pulse:<br />
■■<br />
Give ventilations.<br />
If unconscious and no breathing or pulse:<br />
■■<br />
Begin CPR.<br />
Notes:<br />
■■<br />
■■<br />
■■<br />
Keep your fingers off the chest when giving chest compressions.<br />
Use your body weight, not your arms, to compress the chest.<br />
Position your shoulders over your hands with your arms as straight as possible.
Skill Sheet 189<br />
ASSEMBLING THE OXYGEN SYstem<br />
Note: Always follow standard precautions when providing care.<br />
1<br />
2<br />
3<br />
Check the cylinder.<br />
■■<br />
Make sure that the oxygen cylinder is labeled “U.S.P.” (United States Pharmacopeia) and is<br />
marked with a yellow diamond containing the word “Oxygen.”<br />
Clear the valve.<br />
■■<br />
■■<br />
■■<br />
Remove the protective covering.<br />
Remove and save the O-ring gasket, if necessary.<br />
Turn the cylinder away from you and others before opening for 1 second to clear the valve<br />
of any debris.<br />
Attach the regulator.<br />
■■<br />
■■<br />
■■<br />
■■<br />
■■<br />
Put the O-ring gasket into the valve on top of the cylinder, if necessary.<br />
Make sure that it is marked “Oxygen Regulator” and that the O-ring gasket is in place.<br />
Check to see that the pin index corresponds to an oxygen cylinder.<br />
Secure the regulator on the cylinder by placing the two metal prongs into the valve.<br />
Hand-tighten the screw until the regulator is snug.<br />
4<br />
Open the cylinder counterclockwise<br />
one full turn.<br />
■■<br />
■■<br />
Check the pressure gauge.<br />
Determine that the cylinder has enough<br />
pressure (more than 200 psi). If the<br />
pressure is lower than 200 psi,<br />
DO NOT use.<br />
Continued on Next Page
190<br />
<strong>Lifeguarding</strong> <strong>Manual</strong><br />
ASSEMBLING THE OXYGEN SYstem continued<br />
5<br />
Attach the delivery device.<br />
■■<br />
Attach the plastic tubing between the<br />
flowmeter and the delivery device.<br />
Note: When breaking down the oxygen equipment, be sure to bleed the pressure regulator by<br />
turning on the flowmeter after the cylinder has been turned off.<br />
ADMINIsterING EMERGENCY OXYGEN<br />
Notes:<br />
■■<br />
■■<br />
■■<br />
Always follow standard precautions when providing care. Follow local protocols for using<br />
emergency oxygen.<br />
Check the cylinder to make sure the oxygen cylinder is labeled “U.S.P.” and is marked with a<br />
yellow diamond containing the word “Oxygen.”<br />
Determine that the cylinder has enough pressure (more than 200 psi). If the pressure is<br />
lower than 200 psi, DO NOT use. Assemble the cylinder, regulator and delivery device prior<br />
to delivery.<br />
1<br />
Turn the unit on and adjust the flow as<br />
necessary.<br />
■■<br />
For a variable-flow-rate oxygen system,<br />
turn the flowmeter to the desired<br />
flow rate.<br />
cc<br />
cc<br />
cc<br />
cc<br />
Nasal cannula: 1–6 LPM<br />
Resuscitation mask: 6–15 LPM<br />
Non-rebreather mask: 10–15 LPM<br />
●●<br />
Inflate the oxygen reservoir bag to<br />
two-thirds full by placing your thumb over the one-way valve until the bag is<br />
sufficiently inflated.<br />
BVM: 15 LPM or higher
Skill Sheet 191<br />
2<br />
Verify the oxygen flow.<br />
■■<br />
Listen for a hissing sound and feel for<br />
oxygen flow through the delivery device.<br />
3<br />
Place the delivery device on the victim and<br />
continue care until EMS personnel take over.<br />
Note: When monitoring a conscious victim’s oxygen saturation levels using a pulse oximeter,<br />
you may reduce the flow of oxygen and change to a lower flowing delivery device if the blood<br />
oxygen level of the victim reaches 100 percent.<br />
USIng A MANUAL SUCTIONIng DEVICE<br />
Note: Follow standard precautions and then perform a primary assessment. If needed,<br />
assemble the device according to manufacturer’s instructions.<br />
1<br />
2<br />
Position the victim.<br />
■■<br />
■■<br />
Roll the body as a unit onto one side.<br />
Open the mouth.<br />
Remove any visible large debris from the<br />
mouth with a gloved finger.<br />
Continued on Next Page
192<br />
<strong>Lifeguarding</strong> <strong>Manual</strong><br />
USIng A MANUAL SUCTIONIng DEVICE continued<br />
3<br />
4<br />
Measure and check the suction tip.<br />
■■<br />
■■<br />
■■<br />
Measure from the victim’s earlobe to<br />
the corner of the mouth.<br />
Note the distance to prevent inserting<br />
the suction tip too deeply.<br />
Check that the suction is working by<br />
placing your finger over the end of the<br />
suction tip as you squeeze the handle<br />
of the device.<br />
Suction the mouth.<br />
■■<br />
■■<br />
■■<br />
■■<br />
Insert the suction tip into the back of<br />
the mouth.<br />
Squeeze the handle of the suction<br />
device repeatedly to provide suction.<br />
Apply suction as you withdraw the tip<br />
using a sweeping motion, if possible.<br />
Suction for no more than 15 seconds<br />
at a time for an adult, 10 seconds for a<br />
child or 5 seconds for an infant.
Cardiac Emergencies<br />
A<br />
cardiac emergency is life threatening. It can happen at<br />
any time to a victim of any age, on land or in the water.<br />
You may be called on to care for a victim of a cardiac<br />
emergency. This care includes performing Cpr and using an<br />
automated external defibrillator (AED)—two of the links in the Cardiac<br />
Chain of Survival. By following the Cardiac Chain of Survival, you can<br />
greatly increase a victim’s chance of survival.<br />
Chapter 7 describes how to identify and give initial care for lifethreatening<br />
conditions by performing a primary assessment.<br />
Chapter 8 covers how to recognize and<br />
care for breathing emergencies.<br />
This chapter covers how to provide<br />
care for cardiac emergencies,<br />
such as heart attack and<br />
Chapter9<br />
cardiac arrest. n
194<br />
<strong>Lifeguarding</strong> <strong>Manual</strong><br />
CARDIAC CHAIN OF SURVIVAL<br />
To effectively respond to cardiac emergencies, it is important to understand the<br />
Cardiac Chain of Survival. The four links in the Cardiac Chain of Survival are:<br />
■■<br />
■■<br />
■■<br />
■■<br />
Early recognition and early access to the emergency medical services<br />
(EMS) system. The sooner someone calls 9-1-1 or the local emergency<br />
number, the sooner EMS personnel will arrive and take over.<br />
Early CPR. CPR helps supply oxygen to the brain and other vital organs. This<br />
helps keep the victim alive until an AED is used or more advanced medical care<br />
is provided.<br />
Early defibrillation. An electrical shock, called defibrillation, may help restore<br />
an effective heart rhythm. Defibrillation is delivered using an AED.<br />
Early advanced medical care. EMS personnel provide more advanced<br />
medical care and transport the victim to a hospital.<br />
For each minute CPR and defibrillation are delayed, the victim’s chance for survival<br />
is reduced by about 10 percent.<br />
HEART ATTACK<br />
When the muscle of the heart suffers a loss of oxygenated blood, the result is a<br />
myocardial infarction (MI), or heart attack.<br />
Causes of a Heart Attack<br />
Heart attacks usually result from cardiovascular disease. Other common causes<br />
of heart attack include respiratory distress, electrocution and traumatic injury. The<br />
most common conditions caused by cardiovascular disease include coronary heart<br />
disease (also known as coronary artery disease) and stroke.<br />
Recognizing a Heart Attack<br />
The sooner you recognize the signs and symptoms of a heart attack and act, the<br />
better the victim’s chance of survival. Heart attack pain can be confused with the<br />
pain of indigestion, muscle spasms or other conditions, often causing people to<br />
delay getting medical care. Brief, stabbing pain or pain that gets worse when<br />
bending or breathing deeply usually is not caused by a heart problem.<br />
Summon EMS personnel and provide prompt care if the victim shows or reports any<br />
of the signs and symptoms listed below. Ask open-ended questions, such as “How<br />
are you feeling?” to hear the symptoms described in the victim’s own words.<br />
■■<br />
■■<br />
■■<br />
Chest discomfort or pain that is severe, lasts longer than 3 to 5 minutes, goes<br />
away and comes back, or persists even during rest<br />
Discomfort, pressure or pain that is persistent and ranges from discomfort to<br />
an unbearable crushing sensation in the center of the chest, possibly spreading<br />
to the shoulder, arm, neck, jaw, stomach or back, and usually not relieved by<br />
resting, changing position or taking medication<br />
Pain that comes and goes (such as angina pectoris)
Chapter 9 Cardiac Emergencies 195<br />
■■<br />
■■<br />
■■<br />
■■<br />
■■<br />
■■<br />
Difficulty breathing, such as at a faster rate than normal or noisy breathing<br />
Pale or ashen skin, especially around the face<br />
Sweating, especially on the face<br />
Dizziness or light-headedness<br />
Nausea or vomiting<br />
Fatigue, lightheadedness or loss of consciousness<br />
Some individuals may show no signs at all. Women may experience different signs.<br />
The chest pain or discomfort experienced by women may be sudden, sharp, but<br />
short-lived pain and outside the breastbone. Women are somewhat more likely to<br />
experience some of the other warning signs, such as shortness of breath, nausea<br />
or vomiting, back or jaw pain and unexplained fatigue or malaise.<br />
Caring for a Heart Attack<br />
If you think someone is having a heart attack:<br />
■■<br />
■■<br />
■■<br />
■■<br />
■■<br />
■■<br />
■■<br />
Take immediate action and summon EMS personnel.<br />
Have the victim stop any activity and rest in a comfortable position.<br />
Loosen tight or uncomfortable clothing.<br />
Closely monitor the victim until EMS personnel take over. Note any changes<br />
in the victim’s appearance or behavior.<br />
Comfort the victim.<br />
Assist the victim with prescribed medication, such as nitroglycerin or aspirin,<br />
and administer emergency oxygen, if is available and you are trained to do so.<br />
Be prepared to perform CPR and use an AED.<br />
You should also ask questions to get information that relates to the victim’s<br />
condition, such as what happened, whether the victim has any medical conditions<br />
or is taking any medications, or when was the last time the victim had anything to<br />
eat or drink.<br />
Administering Aspirin for a Heart Attack<br />
You may be able to help a conscious victim who is showing early signs of a heart<br />
attack by offering an appropriate dose of aspirin when the signs first begin, if local<br />
protocols allow or medical direction permits. Aspirin never should replace advanced<br />
medical care.<br />
If the victim is conscious and able to take medicine by mouth, ask:<br />
■■<br />
Are you allergic to aspirin?<br />
■■<br />
Do you have a stomach ulcer or stomach disease?<br />
■■<br />
Are you taking any blood thinners, such as Coumadin® (warfarin)?<br />
■■<br />
Have you been told by a doctor not to take aspirin?<br />
If the victim answers “no” to all of these questions and if local protocols allow,<br />
consider administering two chewable (162-mg) baby aspirins or up to one 5-grain<br />
(325-mg) adult aspirin tablet with a small amount of water. You also may offer<br />
these doses of aspirin if you have cared for the victim and he or she has regained<br />
consciousness and is able to take the aspirin by mouth.
196<br />
<strong>Lifeguarding</strong> <strong>Manual</strong><br />
Be sure that you give only aspirin and not acetaminophen (e.g., Tylenol ® ) or other<br />
nonsteroidal anti-inflammatory drugs (NSAIDs), such as ibuprofen (e.g., Motrin ®<br />
or Advil ® ) or naproxen (e.g., Aleve ® ). Likewise, do not offer coated aspirin products<br />
since they take too long to dissolve, or products meant for multiple symptoms,<br />
such as cold, fever and headache.<br />
CARDIAC ARREST<br />
Cardiac arrest is a life-threatening emergency that may be caused by a heart<br />
attack, drowning, electrocution, respiratory arrest or other conditions. Cardiac<br />
arrest occurs when the heart stops beating, or beats too irregularly or weakly<br />
to circulate blood effectively. Cardiac arrest can occur suddenly and without<br />
warning. In many cases, the victim already may be experiencing the signs and<br />
symptoms of a heart attack.<br />
The signs of a cardiac arrest include sudden collapse, unconsciousness,<br />
no breathing and no pulse.<br />
CPR<br />
Figure 9-1<br />
A victim who is unconscious, not breathing and has no pulse is in cardiac arrest<br />
and needs CPR (Figure 9-1). The objective of CPR is to perform a combination<br />
of effective chest compressions and ventilations to circulate blood that contains<br />
oxygen to the victim’s brain and other vital organs. In most cases, CPR is performed<br />
in cycles of 30 chest compressions followed by<br />
2 ventilations.<br />
CPR is delivered in cycles of chest compressions<br />
and ventilations.<br />
Summoning EMS personnel immediately is critical<br />
for the victim’s survival. If an AED is available, it<br />
should be used in combination with CPR and<br />
according to local protocols until EMS personnel<br />
take over.<br />
To most effectively perform compressions, place<br />
your hands in the center of the chest. Avoid<br />
pressing directly on the xiphoid process, the<br />
lowest point of the breastbone. Compressing<br />
the chest straight down provides the best blood<br />
flow and is also less tiring for you. Kneel at<br />
the victim’s side, opposite the chest, with your<br />
hands in the correct position. Keep your arms as<br />
straight as possible, with your shoulders directly over your hands.<br />
The effectiveness of compressions can be increased if:<br />
■■<br />
■■<br />
■■<br />
■■<br />
■■<br />
The victim is on a firm, flat surface<br />
Compressions are the proper depth.<br />
Compression rate is appropriate.<br />
The chest fully recoils after each compression (letting the chest come all the way<br />
back up).<br />
CPR is performed without interruption.
Chapter 9 Cardiac Emergencies 197<br />
Remember that when giving ventilations to a victim, you should:<br />
■■<br />
■■<br />
■■<br />
Maintain an open airway by keeping the head tilted back in the proper position.<br />
Seal the mask over the victim’s mouth and nose.<br />
Blow into the one-way valve, ensuring that you can see the chest clearly rise<br />
and fall. Each ventilation should last about 1 second, with a brief pause between<br />
breaths to let the chest fall.<br />
After ventilations, quickly reposition your hands on the center of the chest and start<br />
another cycle of compressions and ventilations.<br />
Table 9-1: Summary of Techniques for CPR—Adult, Child and Infant<br />
Adult Child Infant<br />
Hand position<br />
Heel of one hand in center of chest<br />
(on lower half of sternum) with the other<br />
hand on top<br />
Two or three fingers on the<br />
center of the chest (just<br />
below the nipple line)<br />
Compression depth At least 2 inches About 2 inches About 1½ inches<br />
Ventilations<br />
Cycles (one rescuer)<br />
Until chest clearly rises (about 1 second per ventilation)<br />
30 chest compressions and 2 ventilations<br />
Cycles (two rescuers)<br />
30 chest compressions<br />
and 2 ventilations<br />
15 chest compressions and 2 ventilations<br />
Rate<br />
At least 100 compressions per minute<br />
Once you begin CPR, do not stop. Continue CPR until:<br />
■■<br />
You see an obvious sign of life, such as breathing.<br />
■■<br />
An AED is available and ready to use.<br />
■■<br />
Another trained rescuer takes over, such as a member of your safety team.<br />
■■<br />
EMS personnel take over.<br />
■■<br />
You are too exhausted to continue.<br />
■■<br />
The scene becomes unsafe.<br />
When performing CPR, it is not unusual for the victim’s ribs to break or cartilage to<br />
separate. The victim may vomit, there may be frothing at the nose and mouth, and<br />
the scene may be chaotic. The victim also may produce agonal gasps. Remember<br />
that agonal gasps are not breathing—this victim needs CPR.<br />
Understand that, despite your best efforts, not all victims of cardiac arrest survive.
198<br />
<strong>Lifeguarding</strong> <strong>Manual</strong><br />
Figure 9-2<br />
Two-Rescuer CPR<br />
When an additional rescuer is available, you should provide two-rescuer CPR. One<br />
rescuer gives ventilations and the other gives chest compressions. Rescuers should<br />
change positions (alternate giving compressions and ventilations) about every 2<br />
minutes to reduce the possibility of rescuer fatigue. Changing positions should take<br />
less than 5 seconds.<br />
The two-thumb-encircling-hands chest compression<br />
technique with thoracic squeeze is used on an infant in<br />
two-person CPR.<br />
When CPR is in progress by one rescuer and<br />
a second rescuer arrives, the second rescuer<br />
should confirm whether EMS personnel have<br />
been summoned. If EMS personnel have not been<br />
summoned, the second rescuer should do so<br />
before getting the AED or assisting with care. If<br />
EMS personnel have been summoned, the second<br />
rescuer should get the AED, or if an AED is not<br />
available, help perform two-rescuer CPR.<br />
When performing two-rescuer CPR on a child or<br />
infant, rescuers should change the compressionto-ventilation<br />
ratio from 30:2 to 15:2. This provides<br />
more frequent respirations for children and infants.<br />
When providing two-rescuer CPR to an infant,<br />
rescuers should perform a different technique, called<br />
the two-thumb-encircling-hands chest compression<br />
technique with thoracic squeeze (Figure 9-2).<br />
AEDS<br />
Figure 9-3<br />
AEDs<br />
AEDs are portable electronic devices that analyze the heart’s rhythm and provide an<br />
electrical shock (Figure 9-3). Defibrillation is the delivery of an electrical shock that<br />
may help re-establish an effective rhythm. CPR can help by supplying blood that<br />
contains oxygen to the brain and other vital organs.<br />
However, the sooner an AED is used, the greater<br />
the likelihood of survival. You must assess victims<br />
quickly and be prepared to use an AED in cases of<br />
cardiac arrest.<br />
When the Heart Stops<br />
Any damage to the heart from disease or injury<br />
can disrupt the heart’s electrical system, which<br />
normally triggers the contraction—or pumping<br />
action—of the heart muscle. This disruption can<br />
result in an abnormal heart rhythm, possibly<br />
stopping circulation. The two most common<br />
treatable abnormal rhythms that cause sudden<br />
cardiac arrest are ventricular fibrillation (V-fib) and ventricular tachycardia<br />
(V-tach). In V-fib, the ventricles quiver, or fibrillate, without any organized rhythm,<br />
and the electrical impulses fire at random, creating chaos and preventing the heart<br />
from pumping and circulating blood. There is no pulse. In V-tach, an abnormal
Chapter 9 Cardiac Emergencies 199<br />
electrical impulse controls the heart. This abnormal impulse<br />
fires so fast that the heart’s chambers do not have time to<br />
fill, and the heart is unable to pump blood effectively. With<br />
little or no blood circulating, there may be either a pulse or<br />
no pulse.<br />
In many cases, V-fib and V-tach can be corrected by early<br />
defibrillation. If V-fib or V-tach is not corrected, all electrical<br />
activity will eventually cease, a condition called asystole.<br />
Asystole cannot be corrected by defibrillation. You cannot tell<br />
what, if any, rhythm the heart has by feeling for a pulse. An<br />
AED will analyze the heart’s rhythm and determine if there is a<br />
treatable rhythm.<br />
Did You Know?<br />
Each year, more than<br />
300,000 <strong>American</strong>s die<br />
suddenly of cardiac arrest.<br />
Using an AED on Adults<br />
When cardiac arrest occurs, use an AED as soon as it is ready<br />
to use. First, apply the AED pads and allow the AED to analyze<br />
the heart rhythm. Then, follow the prompts of the AED. If CPR is<br />
in progress, do not interrupt chest compressions until the AED<br />
is turned on, the AED pads are applied and the AED is ready to<br />
analyze the heart rhythm.<br />
After a shock is delivered, or if no shock is advised, perform about 2 minutes<br />
of CPR before the AED analyzes the heart rhythm again. If at any time you<br />
notice an obvious sign of life, such as breathing, stop CPR and monitor the victim’s<br />
condition. Administer emergency oxygen if available and you are trained to do so.<br />
Using an AED on Children and Infants<br />
While the incidence of cardiac arrest in children and infants is relatively low<br />
compared with that of adults, cardiac arrest does happen to young children.<br />
Causes of cardiac arrests in children include:<br />
■■<br />
■■<br />
■■<br />
■■<br />
■■<br />
Airway and breathing problems.<br />
Traumatic injuries or accidents (e.g., drowning, motor-vehicle collision,<br />
electrocution and poisoning).<br />
A hard blow to the chest.<br />
Congenital heart disease.<br />
Sudden infant death syndrome (SIDS).<br />
AEDs equipped with pediatric AED pads are capable of delivering the lower levels<br />
of energy considered appropriate for infants and children up to 8 years old or<br />
weighing less than 55 pounds. Use pediatric AED pads and/or equipment for a<br />
pediatric victim, if available. If pediatric-specific equipment is not available, an AED<br />
designed for adults can be used on children and infants.<br />
Always follow local protocols, medical direction and the manufacturer’s instructions.<br />
For a child or infant in cardiac arrest, follow the same general steps and precautions<br />
as when using an AED on an adult. If the pads risk touching each other because of<br />
the victim’s smaller chest size, place one pad on the child or infant’s chest and the<br />
other on the back.
200<br />
<strong>Lifeguarding</strong> <strong>Manual</strong><br />
AED Precautions<br />
When operating an AED, follow these general precautions:<br />
■■<br />
■■<br />
■■<br />
■■<br />
■■<br />
■■<br />
■■<br />
■■<br />
Do not use alcohol to wipe the victim’s chest dry; alcohol is flammable.<br />
Do not touch the victim while the AED is analyzing. Touching or moving the<br />
victim could affect the analysis.<br />
Before shocking a victim with an AED, make sure that no one is touching or<br />
is in contact with the victim or the resuscitation equipment.<br />
Do not touch the victim while the device is defibrillating. You or someone else<br />
could be shocked.<br />
Do not defibrillate a victim when around flammable or combustible materials,<br />
such as gasoline or free-flowing oxygen.<br />
Do not use an AED in a moving vehicle. Movement could affect the analysis.<br />
Do not use an AED on a victim wearing a nitroglycerin patch or other patch<br />
on the chest. With a gloved hand, remove any patches from the chest before<br />
attaching the device.<br />
Do not use a mobile phone or radio within 6 feet of the AED. Electromagnetic<br />
and infrared interference generated by radio signals can disrupt analysis.<br />
Special AED Situations<br />
Some situations require special precautions when using an AED. These<br />
include using AEDs around water, on victims with implantable devices or<br />
transdermal patches, on victims of trauma or hypothermia, or when confronted<br />
with AED protocols that differ from those discussed here. Be familiar with<br />
these situations and know how to respond appropriately. Always follow<br />
manufacturer’s recommendations.<br />
AEDs Around Water<br />
A shock delivered in water could harm rescuers or bystanders; however, AEDs<br />
are safe to use on victims who have been removed from the water. If the victim is<br />
in water:<br />
Figure 9-4<br />
■■<br />
Remove the victim from the water before defibrillation. A shock delivered in<br />
water could harm rescuers or bystanders.<br />
■■<br />
■■<br />
■■<br />
Be sure that there are no puddles of water<br />
around you, the victim or the AED (Figure 9-4).<br />
Remove the victim’s wet clothing to place the<br />
AED pads properly, if necessary.<br />
Dry the victim’s chest and attach the AED pads.<br />
Before using an AED, be sure the victim is not lying in any<br />
puddles of water. Dry the victim’s chest, then attach the<br />
AED pads.<br />
If it is raining, take steps to make sure that the<br />
victim is as dry as possible and sheltered from the<br />
rain. Ensure that the victim’s chest is wiped dry. Do<br />
not delay defibrillation when taking steps to create<br />
a dry environment. AEDs are safe, even in rain and<br />
snow, when all precautions and manufacturer’s<br />
operating instructions are followed. Avoid getting<br />
the AED or AED pads wet.
Chapter 9 Cardiac Emergencies 201<br />
Pacemakers and Implantable<br />
Cardioverter-Defibrillators<br />
Figure 9-5<br />
Pacemakers are small implantable devices<br />
sometimes located in the area below the right<br />
collarbone. There may be a small lump that can be<br />
felt under the skin (Figure 9-5). An implantable<br />
cardioverter-defibrillator (ICD) is a miniature<br />
version of an AED that automatically recognizes<br />
and restores abnormal heart rhythms. Sometimes,<br />
a victim’s heart beats irregularly, even if the victim<br />
has a pacemaker or an ICD.<br />
■■<br />
■■<br />
■■<br />
If the implanted device is visible, or you know<br />
that the victim has one, do not place the AED<br />
pad directly over the device. This may interfere<br />
with the delivery of the shock. Adjust AED pad placement if necessary and<br />
continue to follow the AED instructions.<br />
If you are not sure whether the victim has an implanted device, use the AED<br />
as needed. It will not harm the victim or rescuer.<br />
Follow any special precautions associated with ICDs, but do not delay CPR<br />
or defibrillation.<br />
Scars or a small lump may indicate that the patient has had<br />
some sort of device implanted.<br />
It is possible to receive a mild shock if an<br />
implantable ICD delivers a shock to the victim<br />
while CPR is performed. This risk of injury to<br />
rescuers is minimal and the amount of electrical<br />
energy involved is low.<br />
Figure 9-6<br />
Transdermal Medication Patches<br />
A transdermal medication patch automatically<br />
delivers medication through the skin. The most<br />
common of these patches is the nitroglycerin patch,<br />
used by those with a history of cardiac problems.<br />
Since you might absorb nitroglycerin or other<br />
medications, remove the patch from the victim’s<br />
chest with a gloved hand before defibrillation.<br />
Nicotine patches used to stop smoking look similar<br />
to nitroglycerin patches. To avoid wasting time trying to identify patches, remove<br />
any patch on the victim’s chest with a gloved hand (Figure 9-6). Never place AED<br />
electrode pads directly on top of medication patches.<br />
Hypothermia<br />
Hypothermia is a life-threatening condition in which the entire body cools because<br />
its ability to keep warm fails. Some people who have experienced hypothermia have<br />
been resuscitated successfully even after prolonged exposure to the cold. During<br />
your primary assessment, you may have to check for breathing and a pulse for up to<br />
30 to 45 seconds.<br />
If the victim is not breathing and does not have a pulse begin CPR until an AED<br />
becomes available. Follow local protocols regarding whether you should use an<br />
AED in this situation.<br />
Remove any type of transdermal medication patch from the<br />
victim’s chest with a gloved hand before defibrillation.
202<br />
<strong>Lifeguarding</strong> <strong>Manual</strong><br />
If the victim is wet:<br />
■■<br />
■■<br />
■■<br />
■■<br />
■■<br />
■■<br />
Remove wet clothing, dry the victim’s chest and protect the victim from further<br />
heat loss.<br />
Attach the AED pads.<br />
If a shock is indicated, deliver it, following the instructions of the AED.<br />
Follow local protocols regarding whether additional shocks should be delivered.<br />
Do not withhold CPR or defibrillation to re-warm the victim.<br />
Be careful not to unnecessarily shake a victim who has experienced hypothermia<br />
as this could result in an irregular heart rhythm.<br />
Chest Hair<br />
Some men have excessive chest hair that may cause difficulty with pad-to-skin<br />
contact. Since the time it takes to deliver the first shock is critical, and chest hair<br />
rarely interferes with pad adhesion, attach the pads and analyze the heart’s rhythm<br />
as soon as possible.<br />
■■<br />
■■<br />
Press firmly on the pads to attach them to the victim’s chest. If you get a<br />
“Check pads” or similar message from the AED, remove the pads and replace<br />
with new ones. The pad adhesive may pull out some of the chest hair, which<br />
may solve the problem.<br />
If you continue to get the “Check pads” message, remove the pads, carefully<br />
shave the victim’s chest and attach new pads to the victim’s chest.<br />
Trauma<br />
If a victim is in cardiac arrest resulting from traumatic injuries, you may still use an<br />
AED. Administer defibrillation according to local protocols.<br />
Metal Surfaces<br />
It is safe to deliver a shock to a victim in cardiac arrest on a metal surface, such<br />
as bleachers, as long as appropriate safety precautions are taken. Care should be<br />
taken that AED pads do not contact the conductive (metal) surface and that no one<br />
is touching the victim when the shock button is pressed.<br />
Jewelry and Body Piercings<br />
You do not need to remove jewelry and body piercings when using an AED. Leaving<br />
them on the victim will do no harm. However, do not place the AED pad directly over<br />
metallic jewelry or body piercings. Adjust pad placement if necessary and continue<br />
to follow established protocols.<br />
Pregnancy<br />
Defibrillation shocks transfer no significant electrical current to the fetus. Follow<br />
local protocols and medical direction.<br />
AED Maintenance<br />
For defibrillators to perform optimally, they must be maintained. AEDs require<br />
minimal maintenance. These devices have various self-testing features. Familiarize<br />
yourself with any visual or audible prompts the AED may have to warn of malfunction
Chapter 9 Cardiac Emergencies 203<br />
or a low battery. Read the operator’s manual thoroughly and check with the<br />
manufacturer to obtain all necessary information regarding maintenance.<br />
In most instances, if the machine detects any malfunction, you should inform<br />
management, who will contact the manufacturer. The device may need to be<br />
returned to the manufacturer for service. While AEDs require minimal maintenance,<br />
it is important to remember the following:<br />
■■<br />
■■<br />
■■<br />
■■<br />
■■<br />
■■<br />
Follow the manufacturer’s specific recommendations for periodic<br />
equipment checks.<br />
Make sure that the batteries have enough energy for one complete rescue.<br />
(A fully charged backup battery should be readily available.)<br />
Make sure that the correct defibrillator pads are in the package and are<br />
properly sealed.<br />
Check any expiration dates on AED pads and batteries, and replace as necessary.<br />
After use, make sure that all accessories are replaced and that the machine is in<br />
proper working order before placing the unit back in service.<br />
If at any time the machine fails to work properly, or you recognize any warning<br />
indicators, discontinue use, place the unit out of service and contact the<br />
manufacturer immediately.<br />
MULTIPLE-RESCUER RESPONSE<br />
In the aquatic environment, more than two rescuers often respond to an emergency.<br />
In many cases, three or more rescuers provide care for an unconscious victim.<br />
When an unconscious victim has been removed from the water and needs CPR,<br />
care might begin with one rescuer until other rescuers arrive on the scene with<br />
additional equipment and begin assisting in providing care.<br />
Roles for multiple-rescuer response for an<br />
unconscious victim may include (Figure 9-7):<br />
Figure 9-7<br />
■■<br />
■■<br />
■■<br />
Airway. The rescuer is positioned behind the<br />
victim’s head to maintain an open airway and<br />
ensure the mask is positioned and sealed to<br />
provide effective ventilations.<br />
Breathing. The rescuer provides ventilations<br />
by using a bag-valve-mask resuscitator (BVM).<br />
Emergency oxygen may be attached to the BVM<br />
if rescuers are trained to administer emergency<br />
oxygen. If there is froth or the victim vomits<br />
during CPR, the rescuer clears the obstructed<br />
airway from the victim’s mouth by using a finger<br />
sweep or a manual suction device.<br />
Circulation. The rescuer provides<br />
compressions and also may operate the AED. If an additional rescuer is<br />
available, he or she should place the pads and operate the AED.<br />
In a multi-rescuer response for an unconscious victim,<br />
lifeguards and other staff work together to provide care.<br />
Practice multiple-rescuer response drills regularly with your team. Each member of<br />
the team should be able to arrive on the scene and be able to perform any of the<br />
roles necessary in providing the appropriate care. See the flowchart on the next<br />
page for an example of how multiple-rescuer response operates.
Example of a Multiple-Rescuer Response<br />
This is an example of how multiple rescuers come on to the scene and help care for the victim. Follow the<br />
protocols for the EAP for your facility. A victim may not exhibit all of the symptoms or exhibit the symptoms<br />
in this order (e.g., obstructed airway). Always provide the appropriate care for the conditions found.<br />
You should use an AED as soon as it is available and ready to use. Using an AED has priority over using a<br />
BVM or administering emergency oxygen. If a rescuer is needed to get or prepare the AED, stop using the<br />
BVM and perform two-person CPR until the AED is ready to analyze.<br />
This example assumes that the EAP has been activated, EMS personnel have been called and a primary<br />
assessment has been done. The victim is not breathing and has no pulse. Additional rescuers are coming<br />
in to support the efforts of the initial rescuers and are bringing equipment.<br />
The initial rescuers begin two-rescuer CPR.<br />
■■<br />
■■<br />
Rescuers 1 and 2 perform two-rescuer CPR.<br />
Rescuer 1 gives ventilations while Rescuer 2 gives chest compressions.<br />
An additional rescuer arrives with the AED. CPR continues until the AED pads are placed on the victim<br />
and it is ready to begin analyzing.<br />
Rescuer 3:<br />
■■<br />
Turns on the AED and follows the prompts.<br />
cc<br />
cc<br />
cc<br />
cc<br />
cc<br />
Attaches the pads to the victim’s bare chest.<br />
Plugs in the connector, if necessary.<br />
Says “Everyone, stand clear!”<br />
Pushes the “Analyze” button, if necessary.<br />
If a shock is advised, delivers the shock by pressing the “Shock” button, if necessary.<br />
After the shock or if no shock is advised:<br />
■■<br />
Rescuers 1, 2 and 3 perform about 2 minutes of CPR.
Chapter 9 Cardiac Emergencies 205<br />
An additional rescuer arrives with the BVM and assists with care.<br />
■■<br />
■■<br />
■■<br />
■■<br />
Rescuer 4 assembles the BVM, if necessary.<br />
Administer emergency oxygen if trained to do so.<br />
Rescuer 1 places and seals the mask of the<br />
BVM and maintains an open airway.<br />
Rescuer 4 provides ventilations by squeezing<br />
the bag.<br />
Rescuer 2 performs compressions.<br />
cc<br />
cc<br />
cc<br />
Notes:<br />
If the victim vomits:<br />
●●<br />
●●<br />
●●<br />
Rescuers quickly roll the victim onto<br />
the side.<br />
After vomiting stops, a rescuer on the side of the victim clears the victim’s mouth out<br />
using a finger sweep and suction if necessary.<br />
Turn the victim onto the back and continue providing care.<br />
If ventilations do not make the chest clearly rise:<br />
●●<br />
Rescuer 1 retilts the head.<br />
●●<br />
Rescuer 3 attempts 1 ventilation.<br />
If ventilation attempt still does not make the chest clearly rise:<br />
●●<br />
Rescuer 2 gives 30 chest compressions.<br />
●●<br />
●●<br />
●●<br />
●●<br />
●●<br />
Rescuer 3 looks inside the mouth and removes any visible large debris from the mouth<br />
using a finger sweep and suction if necessary.<br />
Rescuer 4 replaces the mask.<br />
Rescuer 1 opens the airway and seals the mask.<br />
Rescuer 4 provides ventilations.<br />
Rescuer 2 performs compressions.<br />
■■<br />
■■<br />
If at any time you notice breathing or a pulse, stop CPR and monitor the victim’s condition.<br />
Rescuers should change positions (alternate performing compressions and giving ventilations)<br />
about every 2 minutes to reduce the possibility of rescuer fatigue. Changing positions should take<br />
less than 5 seconds.
206<br />
<strong>Lifeguarding</strong> <strong>Manual</strong><br />
WRAP-UP<br />
As a professional lifeguard, you should be able to recognize and respond to<br />
cardiac emergencies, including heart attacks and cardiac arrest. To do this, you<br />
must understand the importance of the four links of the Cardiac Chain of Survival:<br />
early recognition of the emergency and early access to EMS, early CPR, early<br />
defibrillation and early advanced medical care.<br />
When using an AED, always follow local protocols. AEDs are relatively easy to<br />
operate, and generally require minimal training and retraining. Remember that AEDs<br />
are safe to use on victims who have been removed from the water, but you must first<br />
make sure you, the victim and the AED are not in or near puddles.
Skill Sheet 207<br />
ONE-reSCUER CPR<br />
Notes:<br />
■■<br />
■■<br />
■■<br />
Activate the EAP, size-up the scene for safety and then perform a primary assessment.<br />
Always follow standard precautions when providing care.<br />
Ensure the victim is on a firm, flat surface, such as the floor or a table.<br />
If the victim is not breathing and has no pulse:<br />
1<br />
2<br />
3<br />
Give 30 chest compressions.<br />
■■<br />
■■<br />
■■<br />
Push hard, push fast.<br />
cc<br />
Compress the chest at least 2<br />
inches for an adult, about 2 inches<br />
for a child and about 1½ inches for<br />
an infant at a rate of at least 100<br />
per minute.<br />
cc<br />
Let the chest rise completely before<br />
pushing down again.<br />
For an adult or a child:<br />
cc<br />
cc<br />
Place the heel of one hand on the<br />
center of the chest with the other<br />
hand on top.<br />
Keep your arms as straight as<br />
possible and shoulders directly over<br />
your hands.<br />
For an infant:<br />
Place one hand on the infant’s forehead.<br />
cc<br />
cc<br />
Place two or three fingers on the center of the chest just below the nipple line (toward<br />
the infant’s feet).<br />
Give 2 ventilations.<br />
Perform cycles of 30 compressions and<br />
2 ventilations.<br />
Continued on Next Page
208<br />
<strong>Lifeguarding</strong> <strong>Manual</strong><br />
One-RESCuer Cpr continued<br />
Do not stop CPR except in one of the following situations:<br />
■■<br />
■■<br />
■■<br />
■■<br />
■■<br />
■■<br />
You see an obvious sign of life, such as breathing.<br />
An AED is ready to use.<br />
Another trained responder takes over.<br />
More advanced medical personnel take over.<br />
You are too exhausted to continue.<br />
The scene becomes unsafe.<br />
Notes:<br />
■■<br />
■■<br />
■■<br />
Keep your fingers off the chest when performing compressions on an adult or child.<br />
Use your body weight, not your arms, to compress the chest.<br />
Count out loud or to yourself to help keep an even pace.<br />
TWO-RESCuer Cpr—ADULT AND CHILD<br />
Notes:<br />
■■<br />
■■<br />
■■<br />
Activate the EAP, size-up the scene for safety and then perform a primary assessment.<br />
Always follow standard precautions when providing care.<br />
Ensure the victim is on a firm, flat surface, such as the floor or a table.<br />
If the victim is not breathing and has no pulse:<br />
1<br />
Rescuer 2 finds the correct hand position to<br />
give chest compressions.<br />
■■<br />
Place two hands on the center of<br />
the chest.<br />
2<br />
Rescuer 2 gives chest compressions.<br />
■■<br />
Push hard, push fast.<br />
cc<br />
Compress the chest at least 2 inches for an adult and about 2 inches for a child at a<br />
rate of at least 100 per minute.
Skill Sheet 209<br />
3<br />
Rescuer 1 gives 2 ventilations.<br />
4<br />
5<br />
Perform about 2 minutes of compressions and ventilations.<br />
■■<br />
■■<br />
Adult: Perform cycles of 30 compressions and 2 ventilations.<br />
Child: Perform cycles of 15 compressions and 2 ventilations.<br />
Rescuers change positions about every<br />
2 minutes.<br />
■■<br />
■■<br />
■■<br />
■■<br />
■■<br />
Rescuer 2 calls for a position change<br />
by using the word “change” at the end<br />
of the last compression cycle:<br />
cc<br />
cc<br />
For an adult, use the word “change”<br />
in place of the word “30.”<br />
For a child, use the word “change”<br />
in place of the word “15.”<br />
Rescuer 1 gives 2 ventilations.<br />
Rescuer 2 quickly moves to the victim’s head with his or her own mask.<br />
Rescuer 1 quickly moves into position at the victim’s chest and locates correct hand<br />
position on the chest.<br />
Changing positions should take less than 5 seconds.<br />
6<br />
Rescuer 1 begins chest compressions.<br />
■■<br />
Continue cycles of compressions and ventilations.<br />
Continue CPR until:<br />
■■<br />
■■<br />
■■<br />
■■<br />
■■<br />
■■<br />
You see an obvious sign of life, such as breathing.<br />
An AED is ready to use.<br />
Another trained responder takes over.<br />
EMS personnel take over.<br />
You are too exhausted to continue.<br />
The scene becomes unsafe.<br />
Notes:<br />
■■<br />
■■<br />
■■<br />
Keep your fingers off the chest when performing compressions for an adult or child.<br />
Use your body weight, not your arms, to compress the chest.<br />
Count out loud or to yourself to help keep an even pace.
210<br />
<strong>Lifeguarding</strong> <strong>Manual</strong><br />
TWO-RESCuer Cpr—INFANT<br />
Notes:<br />
■■<br />
■■<br />
■■<br />
Activate the EAP, size-up the scene for safety and then perform a primary assessment.<br />
Always follow standard precautions when providing care.<br />
Ensure the victim is on a firm, flat surface, such as the floor or a table.<br />
If the victim is not breathing and has no pulse:<br />
1<br />
Rescuer 2 finds the correct hand position to<br />
give chest compressions.<br />
■■<br />
■■<br />
Use the two-thumbs-encircling<br />
technique on the infant’s chest.<br />
cc<br />
cc<br />
cc<br />
Place thumbs next to each other on<br />
the center of the chest just below<br />
the nipple line.<br />
Place both hands underneath<br />
the infant’s back and support the<br />
infant’s back with your fingers.<br />
Ensure that your hands do not compress or squeeze the side of the ribs.<br />
If available, a towel or padding can be placed underneath the infant’s shoulders to help<br />
maintain the head in the neutral position.<br />
2<br />
3<br />
Rescuer 2 gives chest compressions.<br />
■■<br />
Push hard, push fast.<br />
Compress the chest about 1½ inches for an infant at a rate of at least 100 per minute.<br />
cc<br />
Rescuer 1 gives 2 ventilations.<br />
4<br />
Perform about 2 minutes of compressions and ventilations.<br />
■■<br />
Perform cycles of 15 compressions and 2 ventilations.
Skill Sheet 211<br />
5<br />
Rescuers change positions about every<br />
2 minutes.<br />
■■<br />
■■<br />
■■<br />
■■<br />
■■<br />
Rescuer 2 calls for a position change<br />
by using the word “change” in place<br />
of saying “15” at the end of the last<br />
compression cycle.<br />
Rescuer 1 gives 2 ventilations.<br />
Rescuer 2 quickly moves to the victim’s<br />
head with his or her own mask.<br />
Rescuer 1 quickly moves into position at the victim’s chest and locates correct hand<br />
position on the chest.<br />
Changing positions should take less than 5 seconds.<br />
6<br />
Rescuer 1 begins chest compressions.<br />
■■<br />
Continue cycles of compressions and ventilations.<br />
Continue CPR until:<br />
■■<br />
■■<br />
■■<br />
■■<br />
■■<br />
■■<br />
You see an obvious sign of life, such as breathing.<br />
An AED is ready to use.<br />
Another trained responder takes over.<br />
EMS personnel take over.<br />
You are too exhausted to continue.<br />
The scene becomes unsafe.<br />
Note:<br />
■■<br />
Count out loud or to yourself to help keep an even pace.
212<br />
<strong>Lifeguarding</strong> <strong>Manual</strong><br />
USIng AN AED<br />
Note: Activate the EAP, size-up the scene for safety and then perform a primary assessment.<br />
Always follow standard precautions when providing care.<br />
If the victim is not breathing and has no pulse:<br />
1<br />
2<br />
Turn on the AED and follow the voice and/or visual prompts.<br />
Wipe the victim’s bare chest dry.<br />
Tip: Remove any medication patches with a gloved hand.<br />
3<br />
Attach the AED pads to the victim’s bare,<br />
dry chest.<br />
■■<br />
Place one pad on the victim’s upper<br />
right chest and the other pad on the left<br />
side of the chest.<br />
cc<br />
For a child or an infant: Use<br />
pediatric AED pads, if available. If<br />
the pads risk touching each other,<br />
place one pad in the middle of the<br />
child’s chest and the other pad<br />
on the child’s back, between the<br />
shoulder blades.
Skill Sheet 213<br />
4<br />
5<br />
Plug in the connector, if necessary.<br />
Stand clear.<br />
■■<br />
■■<br />
Make sure that no one, including you, is<br />
touching the victim.<br />
Say, “Everyone, stand clear!”<br />
6<br />
7<br />
Analyze the heart rhythm.<br />
■■<br />
Push the “Analyze” button, if necessary. Let the AED analyze the heart rhythm.<br />
Deliver a shock or perform CPR based on<br />
the AED recommendation.<br />
■■<br />
■■<br />
If a shock is advised:<br />
cc<br />
cc<br />
cc<br />
cc<br />
cc<br />
Make sure no one, including you, is<br />
touching the victim.<br />
Say, “Everyone, stand clear.”<br />
Deliver the shock by pushing the<br />
“Shock” button, if necessary.<br />
After delivering the shock, perform<br />
about 2 minutes of CPR.<br />
Continue to follow the prompts of<br />
the AED.<br />
If no shock is advised:<br />
Perform about 2 minutes of CPR.<br />
cc<br />
cc<br />
Continue to follow the prompts of<br />
the AED.<br />
Notes:<br />
■■<br />
■■<br />
■■<br />
If at any time you notice an obvious sign of life, such as breathing, stop CPR and monitor<br />
the victim’s condition.<br />
The AED will not advise a shock for normal or absent heart rhythms.<br />
If two trained rescuers are present, one should perform CPR while the second rescuer<br />
operates the AED.
First Aid<br />
A<br />
s covered in Chapter 7, when you encounter an ill or injured<br />
victim, you must follow a series of general procedures<br />
designed to ensure a proper assessment and response.<br />
These include activating the emergency action plan (EAP), sizing<br />
up the scene, performing a primary assessment and summoning<br />
emergency medical services (EMS) personnel for any life-threatening<br />
emergencies. If you do not find a life-threatening situation, you should<br />
perform a secondary assessment and provide first aid as needed.<br />
Chapter10<br />
This chapter covers how to perform a<br />
secondary assessment, including<br />
how to check a conscious victim<br />
and how to take a brief history.<br />
It also describes how to<br />
recognize and provide<br />
first aid for some of the<br />
injuries, illnesses and<br />
medical conditions that<br />
you might encounter<br />
while on the job. n
Chapter 10 first aid 215<br />
RESPONDING TO INJURIES AND ILLNESSES<br />
Even when everyone works to prevent emergencies, injuries and<br />
illnesses do occur at aquatic facilities. With some injuries, such<br />
as a nosebleed, the problem will be obvious and easy to treat<br />
by following the first aid care steps described in this chapter. In<br />
other situations, such as a sudden illness, it may be harder to<br />
determine what is wrong.<br />
Figure 10-1<br />
In all cases, remember to follow the general procedures for<br />
injury or sudden illness on land and to use appropriate personal<br />
protective equipment, such as disposable gloves and CPR<br />
breathing barriers. It is a common practice to carry a few first aid<br />
supplies in your hip pack (Figure 10-1).<br />
Also, be aware that every facility should have a first aid area<br />
where an injured or ill person can receive first aid and rest,<br />
and where first aid supplies are available (Figure 10-2). Some<br />
facilities staff the first aid area with highly trained personnel,<br />
such as emergency medical technicians (EMTs). You should<br />
know where your facility’s first aid area is located, the type<br />
of equipment and supplies available, how to provide first<br />
aid correctly and whether staff with more advanced training<br />
are present.<br />
A few first aid supplies can be carried in<br />
your hip pack<br />
Considerations for<br />
Responding to Injuries<br />
and Illnesses<br />
Your job as a lifeguard requires you to juggle<br />
many responsibilities. Injuries happen suddenly,<br />
and in a first aid emergency you must decide<br />
how best to respond to the situation, including<br />
when to activate the EAP. The ability to<br />
recognize that an emergency has occurred is<br />
the first step toward taking appropriate action.<br />
Once you recognize that an emergency has<br />
occurred, you must decide to act. To help make<br />
decisions in an emergency situation, consider<br />
the following:<br />
Figure 10-2<br />
Every facility should have first aid supplies that are available<br />
from a first aid area.<br />
■■<br />
■■<br />
■■<br />
■■<br />
■■<br />
■■<br />
Should I provide care where the victim was found, or move him or her to the<br />
first aid room?<br />
Is the safety of the victim or others compromised?<br />
Is there a risk of further injury to the victim?<br />
Is there a risk of exposing the victim or others to pathogens (e.g., by leaving<br />
a trail of blood or body fluids)?<br />
Should I summon EMS personnel?<br />
When should I recommend that the victim see a health care provider to seek<br />
further medical treatment?
216<br />
<strong>Lifeguarding</strong> <strong>Manual</strong><br />
Figure 10-3<br />
SECONDARY<br />
ASSESSMENT<br />
During the secondary assessment, you should take<br />
a brief history and perform a quick head-to-toe<br />
physical exam (Figure 10-3). If any life-threatening<br />
conditions develop during your secondary<br />
assessment, stop the assessment and provide<br />
appropriate care immediately.<br />
When conducting a secondary assessment on a conscious<br />
victim, perform a head-to-toe physical exam.<br />
Using SAMPLE to Take<br />
a Brief History<br />
Use the SAMPLE mnemonic as an easy way to remember what you should ask<br />
about when you are taking the brief history:<br />
S = Signs and symptoms<br />
cc<br />
A = Allergies<br />
cc<br />
These include bleeding, skin that is cool and moist, pain, nausea, headache<br />
and difficulty breathing.<br />
Determine if the victim is allergic to any medications, food, or environmental<br />
elements, such as pollen or bees.<br />
M = Medications<br />
cc<br />
Find out if the victim is using any prescription or nonprescription<br />
medications.<br />
P = Pertinent past medical history<br />
cc<br />
Determine if the victim is under the care of a health care provider for any<br />
medical condition, has had medical problems in the past or recently has<br />
been hospitalized.<br />
L = Last oral intake<br />
cc<br />
Find out what the victim most recently took in by mouth as well as the<br />
volume or dose consumed. This includes food, drinks and medication.<br />
E = Events leading up to the incident<br />
cc<br />
Determine what the victim was doing before and at the time of the incident.<br />
When talking to a child, get down at eye level with the child, speak slowly and in a<br />
friendly manner, use simple words and ask questions that the child can easily understand.<br />
Checking a Conscious Person<br />
Check the victim by performing a head-to-toe exam. Before beginning the exam, tell the<br />
person what you are going to do. Visually inspect the person’s body, looking carefully<br />
for any bleeding, cuts, bruises and obvious deformities. Look for a medical identification<br />
(ID) tag, necklace or bracelet on the person’s wrist, neck or ankle (Figure 10-4). These<br />
will provide medical information about the person, explain how to care for the conditions<br />
identified and list whom to call for help. Do not ask the person to move any areas in
Chapter 10 first aid 217<br />
which he or she has discomfort or pain or if a head, neck or<br />
spinal injury is suspected.<br />
Figure 10-4<br />
When checking a child or infant for non-life-threatening<br />
conditions, observe the child or infant before touching him or her.<br />
Look for signs and symptoms that indicate changes in the level<br />
of consciousness (LOC), trouble breathing and any apparent<br />
injuries or conditions. If a child or an infant becomes extremely<br />
upset, conduct the check from toe to head. This will allow the<br />
child or infant to become familiar with the process and see what<br />
is happening. Check for the same things on a child or an infant<br />
that you would look for with an adult.<br />
See the Checking a Conscious Person skill sheet at the end of this<br />
chapter for steps to follow when performing a head-to-toe exam.<br />
If the person is unable to move a body part or is experiencing<br />
dizziness or pain on movement:<br />
■■<br />
■■<br />
■■<br />
■■<br />
■■<br />
Help the person rest in a comfortable position.<br />
Keep the person from getting chilled or overheated.<br />
Reassure the person.<br />
Determine whether to summon EMS personnel.<br />
Continue to watch for changes in LOC and breathing.<br />
Medical ID tags, necklaces and bracelets can<br />
provide important information about an injured<br />
or ill person.<br />
SUDDEN ILLNESS<br />
Sudden illness can happen to anyone, anywhere. You may not be able to identify the<br />
illness, but you still can provide care. Victims of sudden illness usually look and feel<br />
ill. If you suspect something is wrong, check the victim and look for a medical ID tag,<br />
necklace or bracelet on the person’s wrist, neck or ankle. The victim may try to say<br />
nothing is seriously wrong, but the victim’s condition can worsen rapidly. Do not be<br />
afraid to ask the victim questions.<br />
There are many types of sudden illness, including diabetic emergencies, fainting,<br />
seizures and stroke.<br />
Signs and Symptoms of Sudden Illness<br />
Many sudden illnesses have similar signs and symptoms. These include:<br />
■■<br />
■■<br />
■■<br />
■■<br />
■■<br />
■■<br />
Changes in LOC, such as feeling<br />
light-headed, dizzy or becoming<br />
unconscious.<br />
Nausea or vomiting.<br />
Difficulty speaking or slurred speech.<br />
Numbness or weakness.<br />
Loss of vision or blurred vision.<br />
Changes in breathing; the person<br />
may have trouble breathing or may<br />
not be breathing normally.<br />
■■<br />
■■<br />
■■<br />
■■<br />
■■<br />
■■<br />
■■<br />
Changes in skin color<br />
(pale, ashen or flushed skin).<br />
Sweating.<br />
Persistent pressure or pain.<br />
Diarrhea.<br />
Seizures.<br />
Paralysis or an inability to move.<br />
Severe headache.
218<br />
<strong>Lifeguarding</strong> <strong>Manual</strong><br />
General Care Steps for Sudden Illness<br />
When providing care for sudden illness, follow the general procedures for injury<br />
or sudden illness on land:<br />
■■<br />
■■<br />
■■<br />
■■<br />
■■<br />
Care for any life-threatening conditions first.<br />
Monitor the victim’s condition and watch for changes in LOC.<br />
Keep the victim comfortable, reassure him or her and keep the victim from<br />
getting chilled or overheated.<br />
Do not give the victim anything to eat or drink unless the victim is fully conscious<br />
and is not in shock.<br />
Care for any other problems that develop, such as vomiting.<br />
Diabetic Emergencies<br />
People who are diabetic sometimes become ill because there is too much or<br />
too little sugar in their blood. Many people who are diabetic use diet, exercise or<br />
medication to control their diabetes. The person may disclose that he or she is<br />
diabetic or you may learn this from the information on a medical ID tag or from<br />
a bystander. Often, people who have diabetes know what is wrong and will ask<br />
for something with sugar if they are experiencing symptoms of low blood sugar<br />
(hypoglycemia). They may carry some form of sugar with them.<br />
If the person is conscious and can safely swallow fluids or food, give him or her<br />
sugar. If it is available, give glucose paste or tablets to the victim. If not available,<br />
sugar in liquid form is preferred. Most fruit juices (e.g., about 12 ounces of orange<br />
juice), milk and non-diet soft drinks have enough sugar to be effective (Figure<br />
10-5). You also can give table sugar dissolved in a glass of water. If the person<br />
has hypoglycemia, sugar will help quickly. If the problem is high blood sugar<br />
(hyperglycemia), giving the sugar will not cause any further harm. Give something<br />
by mouth only if the victim is fully conscious.<br />
Always summon EMS personnel for any of the following circumstances:<br />
■■<br />
■■<br />
■■<br />
■■<br />
The person is unconscious or about to lose consciousness.<br />
The person is conscious and unable to swallow.<br />
The person does not feel better within about 5 minutes after taking sugar.<br />
A form of sugar cannot be found immediately. Do not spend time looking for it.<br />
Figure 10-5<br />
Give a victim experiencing a diabetic emergency fruit juice,<br />
milk or a non-diet soft drink.<br />
Fainting<br />
When a person suddenly loses consciousness<br />
and then reawakens, he or she may simply<br />
have fainted. Fainting is not usually harmful,<br />
and the person will usually quickly recover.<br />
Lower the person to the ground or other flat<br />
surface and position the person on his or her<br />
back. Loosen any tight clothing, such as a tie<br />
or collar. Make sure the victim is breathing.<br />
Do not give the victim anything to eat or drink.<br />
If the victim vomits, position the victim on his<br />
or her side.
Chapter 10 first aid 219<br />
Seizures<br />
There are many different types of seizures. Generalized seizures usually last 1 to<br />
3 minutes and can produce a wide range of signs and symptoms. When this type<br />
of seizure occurs, the person loses consciousness and can fall, causing injury. The<br />
person may become rigid and then experience sudden, uncontrollable muscular<br />
convulsions, lasting several minutes. Breathing may become irregular and even<br />
stop temporarily.<br />
Seeing someone have a seizure may be intimidating, but you can provide<br />
care for the person. The person cannot control any muscular convulsions that<br />
may occur, and it is important to allow the seizure to run its course because<br />
attempting to restrain the person can cause further injury. To provide care to a<br />
person having a seizure:<br />
■■<br />
■■<br />
Protect the person from injury by moving nearby objects away from the person.<br />
Position the person on his or her side, if possible, after the seizure passes so<br />
that fluids (saliva, blood, vomit) can drain from the mouth.<br />
When the seizure is over, the person usually begins to breathe normally. He or she<br />
may be drowsy and disoriented or unresponsive for a period of time. Check to see if<br />
the person was injured during the seizure. Be reassuring and comforting. If the seizure<br />
occurred in public, the person may be embarrassed and self-conscious. Ask bystanders<br />
not to crowd around the person. He or she will be tired and want to rest. Stay with the<br />
person until he or she is fully conscious and aware of his or her surroundings.<br />
If the person is known to have periodic seizures,<br />
there is no need to summon EMS personnel. He<br />
or she usually will recover from a seizure in a few<br />
minutes. However, summon EMS personnel if:<br />
Figure 10-6<br />
■■<br />
■■<br />
■■<br />
■■<br />
■■<br />
■■<br />
■■<br />
■■<br />
■■<br />
■■<br />
The seizure occurs in the water.<br />
The seizure lasts more than 5 minutes.<br />
The person has repeated seizures with no sign<br />
of slowing down.<br />
The person appears to be injured.<br />
The cause of the seizure is unknown.<br />
The person is pregnant.<br />
The person is known to have diabetes.<br />
The person fails to regain consciousness after<br />
the seizure.<br />
The person is elderly and may have suffered<br />
a stroke.<br />
This is the person’s first seizure.<br />
Figure 10-7<br />
Seizures in the Water<br />
If a person has a seizure in the water:<br />
1. Summon EMS personnel.<br />
2. Support the person with his or her<br />
head above water until the seizure ends<br />
(Figures 10-6 and 10-7).<br />
If someone experiences a seizure while in the water, support<br />
the victim’s head above the water until the seizure ends.
220<br />
<strong>Lifeguarding</strong> <strong>Manual</strong><br />
3. Remove the person from the water as soon as possible after the seizure (since<br />
he or she may have inhaled or swallowed water).<br />
4. Once on land, position the person on his or her back and perform a primary<br />
assessment. Give ventilations or CPR if needed. If the person vomits, turn the<br />
victim on his or her side to drain fluids from the mouth. Sweep out the mouth (or<br />
suction out the mouth if you are trained to do so).<br />
Stroke<br />
Figure 10-8<br />
As with other sudden illnesses, the signs and symptoms of a stroke or mini-stroke<br />
are a sudden change in how the body is working or feeling. This may include sudden<br />
weakness or numbness of the face, an arm or a leg. Usually, weakness or numbness<br />
occurs only on one side of the body. Other signs<br />
and symptoms include difficulty with speech<br />
(trouble speaking and being understood, and<br />
difficulty understanding others); blurred or dimmed<br />
vision; sudden, severe headache; dizziness or<br />
confusion; loss of balance or coordination; trouble<br />
walking; and ringing in the ears.<br />
Signals of a stroke include facial drooping.<br />
Figure 10-9<br />
Weakness on one side of the body is another signal of a stroke.<br />
■■<br />
If the person shows any signs or symptoms of<br />
stroke, time is critical. The objective is to recognize<br />
a possible stroke and summon EMS personnel<br />
immediately. To identify and care for a victim of<br />
stroke, think FAST:<br />
■■<br />
■■<br />
■■<br />
Face—Weakness on one side of the face<br />
(Figure 10-8)<br />
cc<br />
Ask the person to smile. This will show<br />
if there is drooping or weakness in the<br />
muscles on one side of the face. Does one<br />
side of the face droop?<br />
Arm—Weakness or numbness in one arm<br />
(Figure 10-9)<br />
cc<br />
Ask the person to raise both arms to find<br />
out if there is weakness in the limbs. Does<br />
one arm drift downward?<br />
Speech—Slurred speech or trouble speaking<br />
cc<br />
Ask the person to speak a simple sentence<br />
to listen for slurred or distorted speech.<br />
Example: “The sky is blue.” Can the victim<br />
repeat the sentence correctly?<br />
Time—Time to summon EMS personnel if any of these signs or symptoms are seen<br />
cc<br />
Note the time of onset of signs and symptoms, and summon EMS<br />
personnel immediately.<br />
SKIN AND SOFT TISSUE INJURIES<br />
Soft tissues are the layers of skin and the fat and muscle beneath the skin’s outer<br />
layer. A physical injury to the body’s soft tissue is called a wound. Any time the soft<br />
tissues are damaged or torn, the body is threatened. Injuries may damage the soft
Chapter 10 first aid 221<br />
tissues at or near the skin’s surface or deep in the body. Germs can enter the body<br />
through a scrape, cut, puncture or burn and cause infection. Severe bleeding can<br />
occur at or under the skin’s surface, where it is harder to detect.<br />
Burns are a special kind of soft tissue injury. Like other types of soft tissue injury,<br />
burns can damage the top layer of skin or the skin and the layers of fat, muscle and<br />
bone beneath.<br />
Soft tissue injuries typically are classified as either closed or open wounds.<br />
Closed Wounds<br />
Closed wounds occur beneath the surface of the skin. The simplest closed wound<br />
is a bruise or contusion. Bruises result when the body is subjected to blunt force,<br />
such as when you bump your leg on a table or chair. Such a blow usually results in<br />
damage to soft tissue layers and blood vessels beneath the skin, causing internal<br />
bleeding. Most closed wounds do not require special medical care. However, a<br />
significant violent force can cause injuries involving larger blood vessels and the<br />
deeper layers of muscle tissue. These injuries can result in severe bleeding beneath<br />
the skin. In these cases, medical care is needed quickly.<br />
Caring for Internal Bleeding<br />
Summon EMS personnel immediately if:<br />
The victim complains of severe pain or cannot move a body part without pain.<br />
The force that caused the injury was great enough to cause serious damage.<br />
An injured arm or leg is blue or extremely pale.<br />
The victim has excessive thirst, becomes confused, faint, drowsy or<br />
unconscious.<br />
The victim is vomiting blood or coughing up blood.<br />
The victim has skin that feels cool or moist, or looks pale or bluish.<br />
The victim has a rapid, weak pulse.<br />
The victim has tender, swollen, bruised or hard areas of the body, such as the<br />
abdomen.<br />
While waiting for EMS personnel to arrive, the objectives are to:<br />
■■<br />
■■<br />
■■<br />
■■<br />
■■<br />
■■<br />
■■<br />
■■<br />
Care for any life-threatening conditions first.<br />
Help the victim rest in a comfortable position and reassure him or her.<br />
Monitor the victim’s condition and watch for any changes in LOC.<br />
Keep the victim from getting chilled or overheated (care for shock).<br />
Care for other problems that develop, such as vomiting.<br />
If the closed wound is not serious:<br />
1. Apply direct pressure on the area to decrease bleeding under the skin.<br />
■■<br />
■■<br />
■■<br />
■■<br />
■■<br />
2. Elevate the injured part to reduce swelling if you do not suspect a muscle, bone<br />
or joint injury and if doing so does not cause more pain.<br />
3. Apply ice or a cold pack on the area to help control swelling and pain.<br />
cc<br />
When applying ice or a chemical cold pack, place a gauze pad, towel or<br />
other cloth between the source of cold and the victim’s skin.
222<br />
<strong>Lifeguarding</strong> <strong>Manual</strong><br />
cc<br />
cc<br />
If an ice pack is not available, fill a plastic bag with ice and water or wrap ice<br />
with a damp cloth.<br />
Apply the ice or cold pack for no more than 20 minutes. If continued icing is<br />
needed, remove the pack for 20 minutes and re-chill it, then replace it.<br />
Open Wounds<br />
Figure 10-10<br />
In an open wound, the break in the skin can be as minor as a scrape of the surface layers<br />
(abrasion) or as severe as a deep penetration. The amount of external bleeding depends<br />
on the location and severity of the injury. Most external<br />
bleeding injuries that you encounter will be minor,<br />
such as a small cut that can be cared for by cleaning<br />
the wound and applying an adhesive bandage. Minor<br />
bleeding, such as results from a small cut, usually<br />
stops by itself within 10 minutes when the blood clots.<br />
However, some cuts are too large or the blood is<br />
under too much pressure for effective clotting to<br />
occur. In these cases, you need to recognize the<br />
situation and provide care quickly. Remember to<br />
always wear non-latex disposable gloves and follow<br />
all other standard precautions when giving care.<br />
Abrasion<br />
Figure 10-11<br />
Laceration<br />
Figure 10-12<br />
Avulsion<br />
The following are the four main types of open wounds:<br />
■■<br />
Abrasion (Figure 10-10)<br />
cc<br />
cc<br />
Skin has been rubbed or scraped away<br />
(e.g., scrape, road rash, rug burn). The area<br />
usually is painful.<br />
Dirt and other matter may have entered the<br />
wound. Cleaning the wound is important to<br />
prevent infection.<br />
■■<br />
Laceration (Figure 10-11)<br />
cc<br />
cc<br />
Cuts bleed freely, and deep cuts can<br />
bleed severely.<br />
Deep cuts can damage nerves, large blood<br />
vessels and other soft tissues.<br />
■■<br />
Avulsion (Figure 10-12)<br />
cc<br />
cc<br />
An avulsion is a cut in which a piece of soft<br />
tissue or even part of the body, such as a<br />
finger, is torn loose or is torn off entirely<br />
(e.g., amputation).<br />
Often, deeper tissues are damaged,<br />
causing significant bleeding.<br />
■■<br />
Puncture (Figure 10-13)<br />
cc<br />
cc<br />
cc<br />
Puncture wounds often do not bleed<br />
profusely and can easily become infected.<br />
Bleeding can be severe, with damage to<br />
major blood vessels or internal organs.<br />
An object embedded in the wound should<br />
be removed only by EMS personnel.
Chapter 10 first aid 223<br />
Caring for External Bleeding<br />
To care for a minor wound, such as an abrasion,<br />
follow these general guidelines:<br />
Figure 10-13<br />
■■<br />
■■<br />
■■<br />
■■<br />
■■<br />
■■<br />
Control any bleeding.<br />
cc<br />
Place a sterile dressing over the wound.<br />
cc<br />
Apply direct pressure until bleeding stops<br />
(Figure 10-14, A).<br />
Clean the wound thoroughly with soap (if<br />
available) and water. If possible, irrigate an<br />
abrasion with clean, warm running tap water for<br />
about 5 minutes to remove any dirt and debris.<br />
Puncture<br />
If bleeding continues, use a new sterile<br />
dressing and apply more pressure.<br />
After bleeding stops, remove the dressing and apply antibiotic ointment, if one<br />
is available, the victim has no known allergies or sensitivities to the medication<br />
and local protocols allow you to do so.<br />
Cover the wound with a sterile dressing and<br />
Figure 10-14, A<br />
bandage (or with an adhesive bandage) to<br />
keep the wound moist and prevent drying.<br />
(Figure 10-14, B).<br />
Wash your hands immediately after<br />
providing care.<br />
To care for a major wound:<br />
■■<br />
■■<br />
■■<br />
■■<br />
■■<br />
■■<br />
Activate the EAP, summon EMS personnel<br />
and follow the general procedures for injury or<br />
sudden illness on land.<br />
Cover the wound with a sterile gauze dressing<br />
and apply direct pressure using the flat part of<br />
your fingers. A large wound may require more<br />
pressure; use pressure from your full hand with<br />
gauze dressings to try to stop the bleeding. For<br />
an open fracture, do not apply direct pressure<br />
over the broken bones, but instead pack sterile<br />
gauze around the area to control bleeding and<br />
prevent infection.<br />
If the dressing becomes saturated with blood<br />
while you are applying pressure, do not remove<br />
it. Instead, place additional dressings over the<br />
soaked bandage and reapply direct pressure.<br />
Then cover the dressings with a bandage to<br />
hold them in place.<br />
Keep the victim warm and position the victim<br />
on his or her back.<br />
Care for other conditions, including shock.<br />
Wash your hands immediately after providing care.<br />
Apply direct pressure firmly against a wound for a few<br />
minutes to control any bleeding.<br />
Figure 10-14, B<br />
Use a sterile dressing and bandage to cover the wound.<br />
If conscious and able, the victim may use his or her hand to apply pressure while<br />
you put your gloves on and prepare the necessary supplies.
224<br />
<strong>Lifeguarding</strong> <strong>Manual</strong><br />
Figure 10-15<br />
Shock<br />
Any serious injury or illness can result in a condition known as shock. Shock is a<br />
natural reaction by the body. It usually means the victim’s condition is serious. Signs<br />
and symptoms of shock include restlessness or irritability; altered LOC; pale or ashen,<br />
cool, moist skin; nausea or vomiting; rapid breathing and pulse; and excessive thirst.<br />
To minimize the effects of shock:<br />
■■<br />
Make sure that EMS personnel have been summoned.<br />
■■<br />
Monitor the victim’s condition and watch for changes in LOC.<br />
■■<br />
Control any external bleeding.<br />
■■<br />
Keep the victim from getting chilled or overheated.<br />
■■<br />
Have the victim lie flat on his or her back.<br />
■■<br />
■■<br />
■■<br />
Cover the victim with a blanket to prevent loss of body heat. Do not overheat the<br />
victim—your goal is to maintain a normal body temperature.<br />
Comfort and reassure the victim until EMS personnel take over.<br />
Administer emergency oxygen, if available and trained to do so.<br />
Note: Do not give food or drink to a victim of shock, even if the victim asks for them.<br />
Care for Wounds—Specific Situations<br />
Patrons at aquatic facilities can suffer a variety of wounds, from a minor nosebleed to<br />
a severed body part. No matter how seriously the victim is wounded, you must remain<br />
calm and follow the general procedures for injury or sudden illness on land. This section<br />
covers how to care for some of the specific wounds that you might encounter on the job.<br />
Nosebleeds<br />
To care for a nosebleed:<br />
■■<br />
Control a nosebleed by having the victim sit with the head<br />
slightly forward, pinching the nostrils together.<br />
Have the victim sit leaning slightly forward to prevent swallowing or choking on<br />
the blood (Figure 10-15).<br />
■■<br />
■■<br />
■■<br />
Pinch the nostrils together for about 5 to<br />
10 minutes or until the bleeding stops.<br />
cc<br />
cc<br />
Other methods of controlling bleeding<br />
include applying an ice pack to the bridge<br />
of the nose or putting pressure on the<br />
upper lip just beneath the nose.<br />
Do not pack the victim’s nose to stop<br />
the bleeding.<br />
After the bleeding stops, have the victim avoid<br />
rubbing, blowing or picking the nose, which<br />
could restart the bleeding.<br />
Medical attention is needed if the bleeding<br />
persists or recurs, or if the victim says the<br />
nosebleed was a result of high blood pressure.<br />
■■<br />
If the victim loses consciousness, place the<br />
victim on his or her side to allow blood to drain from the nose. Summon EMS<br />
personnel immediately.
Chapter 10 first aid 225<br />
Eye Injuries<br />
Care for open or closed wounds around the eyeball as you would for any soft tissue<br />
injury. Never put direct pressure on the eyeball. For embedded objects in the eye:<br />
■■<br />
■■<br />
■■<br />
■■<br />
■■<br />
Summon EMS personnel.<br />
Help the victim into a comfortable position.<br />
Do not try to remove any object from the eye.<br />
Bandage loosely and do not put pressure on the injured eyeball.<br />
Stabilize the object as best as possible.<br />
Depending on the size of the object, you may<br />
be able to stabilize it by encircling the eye<br />
with a gauze dressing or soft sterile cloth,<br />
being careful not to apply any pressure to<br />
the area. Position bulky dressings, such<br />
as roller gauze, around the impaled object<br />
and then cover it with a shield such as a<br />
paper cup (Figure 10-16). The shield should<br />
not touch the object. Bandage the shield<br />
and dressing in place with a self-adhering<br />
bandage and roller bandage covering the<br />
patient’s injured eye, to keep the object<br />
stable and minimize movement.<br />
For small foreign bodies in the eye, such as sand:<br />
■■<br />
■■<br />
■■<br />
Figure 10-16<br />
Tell the victim to blink several times to try to remove the object.<br />
Gently flush the eye with water.<br />
Seek medical attention if the object remains.<br />
For chemicals in the eye, flush the eye continuously with water for 10 minutes or<br />
until EMS personnel take over. Always flush away from the uninjured eye.<br />
To care for an impaled object in the eye, stabilize the object with<br />
a shield, such as a paper cup, and bandage the cup in place.<br />
Injuries to the Mouth and Teeth<br />
If a head, neck or spinal injury is not suspected:<br />
■■<br />
■■<br />
■■<br />
■■<br />
Rinse out the victim’s mouth with cold tap water, if available.<br />
Have the victim lean slightly forward or place<br />
the victim on his or her side.<br />
Try to prevent the victim from swallowing the<br />
blood, which could cause nausea or vomiting.<br />
Apply a dressing.<br />
cc<br />
cc<br />
cc<br />
For injuries inside the cheek, place folded<br />
sterile dressings inside the mouth against<br />
the wound.<br />
For injuries outside the cheek, apply<br />
direct pressure using a sterile dressing<br />
(Figure 10-17).<br />
For injuries to the tongue or lips, apply direct<br />
pressure using a sterile dressing. Apply cold<br />
to reduce swelling and ease pain.<br />
Figure 10-17<br />
Apply direct pressure using a sterile dressing to injuries<br />
outside the cheek.
226<br />
<strong>Lifeguarding</strong> <strong>Manual</strong><br />
■■<br />
If a tooth is knocked out:<br />
cc<br />
Rinse out the victim’s mouth with cold tap water, if available.<br />
cc<br />
Have the victim bite down on a rolled sterile dressing in the space left by the<br />
tooth (or teeth).<br />
cc<br />
Save any displaced teeth.<br />
●●<br />
Carefully pick up the tooth by the crown (white part), not the root.<br />
●●<br />
Rinse off the root of the tooth in water if it is dirty. Do not scrub it or<br />
remove any attached tissue fragments.<br />
●●<br />
Place the tooth in milk. If milk is not available, place the tooth in clean<br />
water and keep the tooth with the victim.<br />
cc<br />
Advise the victim to get to a dentist with the tooth as soon as possible.<br />
Scalp Injuries<br />
Scalp injuries often bleed heavily. Putting pressure on the area around the wound<br />
can control the bleeding.<br />
Figure 10-18<br />
Control bleeding from a scalp injury by applying pressure<br />
around the wound. Avoid direct pressure.<br />
■■<br />
■■<br />
■■<br />
Apply gentle pressure at first because there<br />
may be a skull fracture (Figure 10-18). If you<br />
feel a depression, spongy areas or bone<br />
fragments, do not put direct pressure on<br />
the wound.<br />
Summon EMS personnel if you cannot<br />
determine the seriousness of the scalp injury.<br />
For an open wound with no sign of a fracture,<br />
control the bleeding with several dressings<br />
secured with a bandage.<br />
If you suspect a head, neck or spinal injury,<br />
minimize movement of the head, neck and spine.<br />
See Chapter 11, Caring for Head, Neck and<br />
Spinal Injuries, on how to care for a head, neck or<br />
spinal injury.<br />
Embedded Objects<br />
An object that remains in an open wound is called an embedded object. Take the<br />
following steps to care for an embedded object:<br />
Figure 10-19<br />
■■<br />
■■<br />
■■<br />
Summon EMS personnel.<br />
Place several dressings around the object to<br />
keep it from moving. Avoid placing pressure on<br />
or moving the object.<br />
Bandage the dressings in place around the<br />
object (Figure 10-19). Do not remove the object.<br />
Injuries to the Abdomen<br />
Place several dressing around an embedded objective to keep it<br />
from moving. Bandage the dressings in place around the object.<br />
Be aware that wounds through the abdomen can<br />
cause internal organs to push outside of the body.<br />
To care for an abdominal injury:<br />
■■<br />
Summon EMS personnel.
Chapter 10 first aid 227<br />
■■<br />
■■<br />
■■<br />
Carefully remove clothing from around the wound.<br />
If organs are protruding:<br />
cc<br />
cc<br />
cc<br />
Do not attempt to put them back into the abdomen.<br />
Cover the organs with a moist, sterile dressing and cover the dressing with<br />
plastic wrap.<br />
Place a folded towel or cloth over the dressing to keep the organs warm.<br />
Care for shock.<br />
Animal and Human Bites<br />
An animal or human bite may be serious because of the nature of the wound and<br />
risk of infection. A person who is bitten by an animal should be removed from the<br />
situation if possible, but only without endangering yourself or others. Do not try to<br />
restrain or capture the animal. Tetanus and rabies immunizations may be necessary,<br />
so it is vital to report bites from any wild or unknown domestic animal to the local<br />
health department or other agency according to local protocols. For animal or<br />
human bites:<br />
■■<br />
■■<br />
■■<br />
Summon EMS personnel if the wound bleeds severely or if the animal is<br />
suspected to have rabies.<br />
For severe bleeding, control the bleeding first. Do not clean the wound; it will be<br />
properly cleaned at the hospital.<br />
If the bleeding is minor, wash the wound with large amounts of clean water. Saline<br />
may be used, if available. Control the bleeding and cover with a sterile bandage.<br />
Severed Body Parts<br />
Caring for a victim with a severed body part can be disturbing. Remain calm and<br />
take the following steps:<br />
■■<br />
■■<br />
■■<br />
■■<br />
■■<br />
■■<br />
Summon EMS personnel.<br />
Control the bleeding, and wrap and bandage<br />
the wound to prevent infection.<br />
Wrap the severed body part(s) in sterile gauze<br />
(or clean material) (Figure 10-20).<br />
Place the severed body part(s) in a plastic<br />
bag and seal the bag. Put the plastic bag in<br />
a container of an ice and water slurry (not on<br />
ice alone).<br />
Care for shock.<br />
Be sure that the body part is taken to the<br />
hospital with the victim immediately.<br />
Burns<br />
Figure 10-20<br />
Wrap a severed body part in sterile gauze, put in a plastic<br />
bag and put the bag on ice.<br />
Burns are a special kind of soft tissue injury. Like other types of soft tissue injury,<br />
burns can damage the top layer of skin or the skin and the layers of fat, muscle<br />
and bone beneath. There are four sources of burns: heat, radiation, chemicals<br />
and electricity.<br />
Burns are classified by their depth. The deeper the burn, the more severe. Burns<br />
can be superficial (first degree), partial thickness (second degree) or full thickness
228<br />
<strong>Lifeguarding</strong> <strong>Manual</strong><br />
Figure 10-21, A<br />
(third degree) (Figure 10-21, A–C). The severity of<br />
the burn depends on the temperature or strength<br />
of the heat or other source, length of exposure<br />
to the burn source, location of the burn, area and<br />
size of the burn and the victim’s age and general<br />
medical condition.<br />
Certain burns can lead to shock and need<br />
immediate medical attention. These include burns:<br />
Figure 10-21, B<br />
■■<br />
■■<br />
■■<br />
■■<br />
■■<br />
■■<br />
That cause a victim to have difficulty breathing.<br />
That cover more than one body part or a large<br />
body surface area.<br />
To the head, neck, hands, feet or genitals.<br />
To the airway (burns to the mouth and nose<br />
may be a signal of this).<br />
To a child or an elderly person (other than very<br />
minor burns).<br />
From chemicals, explosions or electricity.<br />
Caring for Burns<br />
Figure 10-21, C<br />
The three classifications of burns are: (A) superficial (first<br />
degree), (B) partial thickness (second degree) and (C) full<br />
thickness (third degree)<br />
To care for burns, follow the general procedures<br />
for a land emergency. If the scene is safe, check<br />
the victim for life-threatening conditions. Summon<br />
EMS personnel if the condition is life threatening.<br />
The following general guidelines apply for all types<br />
of burns:<br />
■■<br />
■■<br />
■■<br />
■■<br />
■■<br />
Stop the burning by removing the victim from<br />
the source of the burn.<br />
Cool the burned area with large amounts of<br />
cold tap water at least until pain is relieved.<br />
Cover the burned area loosely with a<br />
sterile dressing.<br />
Take steps to minimize shock, such as by keeping<br />
the victim from getting chilled or overheated.<br />
Comfort and reassure the victim.<br />
Table 10-1 outlines specific considerations and<br />
care steps for the different sources of burns.<br />
BITES AND STINGS<br />
Spider Bites and Scorpion Stings<br />
Only two spiders in the United States are poisonous: the black widow and the<br />
brown recluse. A bite from one of these spiders can cause serious illness or fatality.<br />
Some scorpion stings also can be fatal. When patrons are bitten by spiders at<br />
aquatic facilities, it is usually when they are reaching or rummaging in dark places,<br />
such as lockers or storage areas. They are typically bitten on their hands or arms.
Chapter 10 first aid 229<br />
Table 10-1: Care Steps Based on Source of Burn<br />
Electrical Chemical Radiation (Sun)<br />
■■<br />
■■<br />
■■<br />
■■<br />
■■<br />
Summon EMS personnel.<br />
Check the scene for<br />
safety and check for lifethreatening<br />
injuries. If a<br />
power line is down, wait<br />
for the fire department<br />
or the power company<br />
to disconnect the<br />
power source.<br />
Cool the burn with cold tap<br />
water until pain is relieved.<br />
Cover the burn with a dry,<br />
sterile dressing.<br />
Be aware that<br />
electrocutions can cause<br />
cardiac and breathing<br />
emergencies. Be prepared<br />
to perform CPR or<br />
defibrillation. Take steps to<br />
minimize shock.<br />
■■<br />
■■<br />
■■<br />
■■<br />
Summon EMS personnel.<br />
Brush off dry chemicals<br />
with a gloved hand, being<br />
careful not to get the<br />
chemical on yourself or<br />
to brush it into the victim’s<br />
eyes. Flush the affected<br />
area continuously with<br />
large amounts of<br />
cool water.<br />
Keep flushing the area for<br />
at least 20 minutes or until<br />
EMS personnel arrive.<br />
If a chemical gets into an<br />
eye, flush the eye with<br />
cool, clean running water<br />
until EMS personnel arrive.<br />
Always flush the affected<br />
eye from the nose outward<br />
and downward to prevent<br />
washing the chemical into<br />
the other eye.<br />
■■<br />
Cool the burned area and<br />
protect the area from further<br />
damage by keeping it out of<br />
the sun.<br />
■■<br />
If possible, have the victim<br />
remove contaminated<br />
clothes to prevent further<br />
contamination while<br />
continuing to flush the area.<br />
If someone has been bitten by a black widow or brown recluse spider or stung by<br />
a scorpion:<br />
■■<br />
■■<br />
■■<br />
■■<br />
■■<br />
■■<br />
■■<br />
■■<br />
Summon EMS personnel.<br />
Wash the wound thoroughly.<br />
Bandage the wound. Apply a topical antibiotic ointment to the bite to prevent<br />
infection if the person has no known allergies or sensitivities to the medication.<br />
Apply a cold pack to the site to reduce swelling and pain.<br />
If it is available and local protocols allow, give the victim antivenin—a medication<br />
that blocks the effects of the black widow spider’s poisonous venom.<br />
Care for life-threatening conditions.<br />
Monitor the victim’s condition and watch for changes in LOC.<br />
Keep the victim comfortable.
230<br />
<strong>Lifeguarding</strong> <strong>Manual</strong><br />
Figure 10-22<br />
Snakebites<br />
Snakebites kill few people in the United States. Whereas 7000 to 8000 venomous<br />
snakebites are reported each year in the United States, fewer than five victims die<br />
from the snakebite.<br />
To provide care for a bite from a venomous snake:<br />
■■<br />
Summon EMS personnel.<br />
■■<br />
■■<br />
■■<br />
Apply an elastic roller bandage using overlapping turns to<br />
slow the spread of venom.<br />
Keep the injured area still and lower than the heart. The victim should walk only<br />
if absolutely necessary.<br />
Wash the wound.<br />
Apply an elastic roller bandage. Use a narrow bandage to wrap a hand or wrist, a<br />
medium-width bandage to wrap an arm or ankle and a wide bandage to wrap a leg.<br />
cc<br />
cc<br />
Check for feeling, warmth and color of the limb beyond where the bandage<br />
will be placed, and note changes in skin color and temperature.<br />
Place the end of the bandage against the skin and use overlapping turns<br />
(Figure 10-22).<br />
cc<br />
cc<br />
cc<br />
Gently stretch the bandage while wrapping.<br />
The wrap should cover a long body section,<br />
such as an arm or a calf, beginning at the<br />
point farthest from the heart. For a joint like a<br />
knee or ankle, use figure-eight turns to support<br />
the joint.<br />
Always check the area above and below the<br />
injury site for warmth and color, especially<br />
fingers and toes, after applying an elastic<br />
roller bandage. By checking before and after<br />
bandaging, you will be able to determine if<br />
any tingling or numbness is a result of the<br />
bandaging or of the injury itself.<br />
Check the snugness of the bandage—a finger<br />
should easily, but not loosely, pass under the<br />
bandage.<br />
For any snakebite do not apply ice, cut the wound, apply suction or apply a tourniquet.<br />
Insect Stings<br />
Insect stings can be painful. They also can be fatal for people who have severe<br />
allergic reactions. Allergic reactions can result in a breathing emergency. If someone<br />
is having a breathing emergency, summon EMS personnel.<br />
To care for an insect sting:<br />
■■<br />
■■<br />
■■<br />
Examine the sting site to see if the stinger is in the skin (if there is one). Remove<br />
the stinger if it is still present. Scrape it away with the edge of a plastic card,<br />
such as a credit card.<br />
Wash the wound with soap and water, cover the site with a dressing and keep<br />
the wound clean.<br />
Apply a cold pack to the site to reduce pain and swelling.
Chapter 10 first aid 231<br />
■■<br />
■■<br />
■■<br />
Watch the victim for signals of an allergic reaction—shortness of breath; swelling<br />
of the face, neck or tongue; rash or hives; or a tight feeling in the chest and throat.<br />
Care for life-threatening conditions.<br />
Monitor the victim’s condition, look for changes in LOC and keep the<br />
victim comfortable.<br />
Marine Life<br />
The stings of some forms of marine life not only are painful, but they can make the<br />
victim feel sick, and in some parts of the world, can be fatal (Figure 10-23, A–D).<br />
The side effects of a sting from an aquatic creature can include allergic reactions<br />
that can cause breathing and heart problems, as well as paralysis and death.<br />
If the sting occurs in water, the victim should be moved to dry land as soon as<br />
possible. Emergency care is necessary if the victim has been stung by a lethal<br />
jellyfish, does not know what caused the sting, has a history of allergic reactions<br />
to stings from aquatic life, has been stung on the face or neck, or starts to have<br />
difficulty breathing.<br />
Basic care steps for jellyfish stings are to remove the victim from the water,<br />
prevent further injection of poisonous material by deactivating or removing<br />
nematocysts (stingers) and control pain.<br />
Figure 10-23, A<br />
Figure 10-23, B<br />
Figure 10-23, C<br />
Figure 10-23, D<br />
(A) Stingray, iStockphoto.com/Dia Karanouh; (B) Bluebottle jellyfish/Portuguese man-of-war, iStockphoto/Mark Kostich; (C) Sea<br />
anemone, iStockphoto/Omers; (D) Jellyfish, Shutterstock/Johan1900
232<br />
<strong>Lifeguarding</strong> <strong>Manual</strong><br />
There are some differences in specific care based on the region and the species<br />
of jellyfish. The supervisor of the aquatic facility should inform you of the types of<br />
jellyfish in the region, specific treatment recommendations and photographs of the<br />
jellyfish to aid in identification.<br />
To deactivate the stingers/tentacles for most types of jellyfish in most waters in<br />
the United States, flush the injured part in vinegar as soon as possible for at least<br />
30 seconds to offset the toxin. A baking soda slurry also may be used if vinegar<br />
is not available. For “bluebottle” jellyfish, also known as Portuguese man-of-war,<br />
which are found in tropical waters, flush with ocean water instead of vinegar.<br />
Vinegar triggers further injection of poisonous material. Do not rub the wound or<br />
apply fresh water, ammonia or rubbing alcohol, because these substances may<br />
increase pain.<br />
Carefully remove any stingers/tentacles with gloved hands or a towel. When<br />
stingers are removed or deactivated, use hot-water immersion (as hot as can be<br />
tolerated) for at least 20 minutes or until pain is relieved. If hot water is not available,<br />
dry hot packs or, as a second choice, dry cold packs also may be helpful in<br />
decreasing pain. Do not apply a pressure immobilization bandage.<br />
POISONING<br />
A poison is any substance that can cause injury, illness or death when introduced<br />
into the body. Poisons can be in the form of solids, liquids, sprays or fumes (gases<br />
and vapors). If a person is showing signals of poisoning, call the Poison Control<br />
Center at 1-800-222-1222. If the person is unconscious or experiences a change in<br />
LOC, or if another life-threatening condition is present, summon EMS personnel.<br />
In an aquatic facility, the Material Safety Data Sheet (MSDS) is required on site for<br />
every product/chemical in use. In the case of a known poisoning by a product or<br />
chemical, the MSDS should accompany the victim to the doctor or hospital.<br />
Ingested Poison<br />
Ingested poisons are poisons that are swallowed and include the following:<br />
■■<br />
■■<br />
■■<br />
■■<br />
Certain foods, such as specific types of mushrooms and shellfish<br />
Drugs, such as excessive amounts of alcohol<br />
Medications, such as too much aspirin<br />
Household items, such as cleaning products, pesticides and certain<br />
household plants<br />
A person who has ingested poison generally looks ill and displays symptoms<br />
common to other sudden illnesses. If you have even a slight suspicion that a person<br />
has been poisoned, call the Poison Control Center.<br />
Inhaled Poison<br />
Poisoning by inhalation occurs when a person breathes in poisonous gases or<br />
fumes. Poisonous fumes can come from a variety of sources. They may or may not<br />
have an odor. Common inhaled poisons include:<br />
■■<br />
Carbon monoxide, which can come from car exhaust, fires or charcoal grills.
Chapter 10 first aid 233<br />
■■<br />
■■<br />
Chlorine gas, which is highly toxic. You will need special training to recognize<br />
and treat this type of poisoning.<br />
Fire extinguisher gases.<br />
If someone has inhaled poisonous fumes:<br />
■■<br />
■■<br />
■■<br />
■■<br />
■■<br />
■■<br />
Size-up the scene to be sure that it is safe to help the victim.<br />
Summon EMS personnel.<br />
Move the victim to fresh air.<br />
Care for life-threatening conditions.<br />
Monitor the victim’s condition and watch for changes in the LOC.<br />
If conscious, keep the victim comfortable.<br />
Absorbed Poison<br />
An absorbed poison enters through the skin or mucous membranes in the eyes,<br />
nose and mouth. Absorbed poisons come from plants, as well as from chemicals<br />
and medications. Poison ivy, poison oak and poison sumac are the most common<br />
poisonous plants in the United States. Some people are allergic to these poisons and<br />
have life-threatening reactions after contact, whereas others may not even get a rash.<br />
If someone has been exposed to a poisonous substance, remove exposed clothing<br />
and jewelry and immediately rinse the exposed area thoroughly with water for 20<br />
minutes, using a shower or garden hose if possible. If a rash or wet blisters develop,<br />
advise the victim to see his or her health care provider. If the condition spreads to<br />
large areas of the body or face, have the victim seek medical attention.<br />
HEAT-RELATED ILLNESSES AND<br />
COLD-RELATED EMERGENCIES<br />
Exposure to extreme heat or cold can make a person ill. A person can develop a<br />
heat-related illness or a cold-related emergency even when temperatures are not<br />
extreme. Factors that may contribute to these emergencies include environmental<br />
conditions, such as wind speed, humidity level and general working or living<br />
conditions, as well as the victim’s personal physical attributes, such as age and<br />
state of health and recent physical exertion.<br />
Once the signs and symptoms of a cold-related emergency or heat-related illness<br />
appear, the victim’s condition can quickly get worse and lead to death.<br />
Heat-Related Illnesses<br />
Heat-related illnesses are progressive conditions caused by overexposure to heat.<br />
If recognized in the early stages, heat-related emergencies usually can be reversed.<br />
If not recognized early, they may progress to heat stroke, a life-threatening condition.<br />
There are three types of heat-related illnesses:<br />
■■<br />
■■<br />
Heat cramps are painful muscle spasms that usually occur in the legs and<br />
abdomen. Heat cramps are the least severe of the heat-related illnesses.<br />
Heat exhaustion is an early indicator that the body’s cooling system is becoming<br />
overwhelmed. Signs and symptoms of heat exhaustion include cool, moist,
234<br />
<strong>Lifeguarding</strong> <strong>Manual</strong><br />
■■<br />
pale, ashen or flushed skin; headache, nausea and dizziness; weakness and<br />
exhaustion; and heavy sweating.<br />
Heat stroke occurs when the body’s systems are overwhelmed by heat and stop<br />
functioning. Heat stroke is a life-threatening condition. Signs and symptoms of<br />
heat stroke include red, hot, dry skin; changes in LOC; and vomiting.<br />
Caring for Heat-Related Illnesses<br />
Take the following steps to care for someone suffering from a heat-related illness:<br />
Move the victim to a cool place.<br />
Loosen tight clothing and remove perspiration-soaked clothing.<br />
Cool the victim by spraying with cool water or applying cool, wet towels to<br />
the skin.<br />
Fan the victim.<br />
Encourage the victim to drink small amounts of a commercial sports drink, milk<br />
or water if the victim is conscious and able to swallow.<br />
If the victim refuses water, vomits or starts to lose consciousness:<br />
■■<br />
■■<br />
■■<br />
■■<br />
■■<br />
■■<br />
■■<br />
■■<br />
■■<br />
Send someone to summon EMS personnel.<br />
Place the victim on his or her side.<br />
Continue to cool the victim by using ice or cold packs on his or her wrists,<br />
ankles, groin and neck, and in the armpits. If possible, wrap the victim’s entire<br />
body in ice-water-soaked towels.<br />
Continue to check for breathing and a pulse.<br />
Cold-Related Emergencies<br />
Temperatures do not have to be extremely cold for someone to suffer a cold-related<br />
emergency, especially if the victim is wet or if it is windy.<br />
Hypothermia<br />
Hypothermia occurs when a victim’s entire body cools because its ability to keep<br />
warm fails. A victim with hypothermia will die if care is not provided. The signs<br />
and symptoms of hypothermia include shivering; numbness; glassy stare; apathy,<br />
weakness or impaired judgment; and loss of consciousness.<br />
To care for hypothermia:<br />
■■<br />
■■<br />
■■<br />
■■<br />
■■<br />
Perform a primary assessment, including a pulse check for up to 30 to 45 seconds.<br />
Summon EMS personnel.<br />
Gently move the victim to a warm place. Sudden movements may cause a heart<br />
arrhythmia and possibly cardiac arrest.<br />
Remove any wet clothing.<br />
Warm the victim by wrapping all exposed body surfaces in blankets or by putting<br />
dry clothing on the victim. Be sure to cover the head since a significant amount<br />
of body heat is lost through the head.<br />
cc<br />
Do not warm the victim too quickly, such as by immersing him or her in<br />
warm water.
Chapter 10 first aid 235<br />
■■<br />
■■<br />
■■<br />
If the victim is alert, have him or her drink liquids that are warm, but not hot,<br />
and do not contain alcohol or caffeine.<br />
If you are using hot water bottles or chemical hot packs, first wrap them in a<br />
towel or blanket before applying.<br />
Monitor the victim’s condition and watch for changes in LOC.<br />
Frostbite<br />
Frostbite occurs when body parts freeze from having been exposed to the cold. Severity<br />
depends on the air temperature, length of exposure and the wind speed. Frostbite can<br />
cause the loss of the nose, fingers, hands, arms, toes, feet and legs. The signs and<br />
symptoms of frostbite include a lack of feeling in an affected area, swelling and skin that<br />
appears waxy, is cold to the touch or dis colored (flushed, white, yellow or blue).<br />
To care for frostbite:<br />
■■<br />
■■<br />
■■<br />
■■<br />
■■<br />
■■<br />
■■<br />
■■<br />
■■<br />
■■<br />
Get the victim out of the cold.<br />
Do not attempt to warm the frostbitten area if there is a chance that it might<br />
refreeze or if you are close to a medical facility.<br />
Handle the area gently; never rub the affected area.<br />
Warm the affected area by soaking it in water not warmer than about 105° F until<br />
normal color returns and the area feels warm (for 20 to 30 minutes). If you do<br />
not have a thermometer, test the water temperature yourself. If the temperature is<br />
uncomfortable to your touch, it is too warm.<br />
Loosely bandage the area with dry, sterile dressings.<br />
If the victim’s fingers or toes are frostbitten, separate them with dry, sterile gauze.<br />
Avoid breaking any blisters.<br />
Take precautions to prevent hypothermia.<br />
Monitor the person and care for shock.<br />
Summon EMS personnel to seek emergency medical care as soon as possible.<br />
INJURIES TO MUSCLES, BONES AND JOINTS<br />
Accidents, such as falls, are a common cause of injuries to muscles, bones and<br />
joints. There are four types of muscle, bone and joint injuries:<br />
■■<br />
■■<br />
■■<br />
■■<br />
Fracture—A complete break, a chip or a crack in a bone. Factures can be open<br />
or closed.<br />
cc<br />
cc<br />
Closed fractures: The skin over the broken bone is intact.<br />
Open fractures: There is an open wound in the skin over the fracture.<br />
Dislocation—Displacement of a bone away from its normal position at a joint.<br />
These usually are more obvious than fractures.<br />
Sprain—Tearing ligaments at a joint.<br />
Strain—Stretching and tearing muscles or tendons.<br />
It is difficult to know whether a muscle, bone or joint injury is a closed fracture,<br />
dislocation, sprain or strain. However, you do not need to be able to identify the type<br />
of injury because the type of care provided is universal. The objective is to keep the<br />
injured area stable in the position found until EMS personnel take over.
236<br />
<strong>Lifeguarding</strong> <strong>Manual</strong><br />
Caring for Muscle, Bone and Joint Injuries<br />
When caring for muscle, bone and joint injuries, except for an open fracture, use the<br />
general procedures for a land emergency and:<br />
■■<br />
■■<br />
■■<br />
■■<br />
Summon EMS personnel if the victim cannot move or use the injured area.<br />
Support the injured area above and below the site of the injury.<br />
Check for circulation and sensation below the injured area.<br />
Immobilize and secure the injured area only if the victim must be moved and<br />
it does not cause further pain or injury. In many cases, it may be best to allow<br />
EMS personnel to immobilize the injury prior to transport.<br />
RICE<br />
The general care for all musculoskeletal<br />
injuries is similar: rest, immobilize, cold and<br />
elevate or “RICE.”<br />
Rest<br />
Avoid any movements or activities that<br />
cause pain. Help the victim to find the most<br />
comfortable position. If you suspect head, neck<br />
or spinal injuries, leave the victim lying flat.<br />
Immobilize<br />
Stabilize the injured area in the position in<br />
which it was found. In most cases, applying<br />
a splint will not be necessary. For example,<br />
the ground can provide support to an injured<br />
leg, ankle or foot, or the victim may cradle an<br />
injured elbow or arm in a position of comfort.<br />
Cold<br />
Apply ice or a cold pack for periods of 20<br />
minutes. If 20 minutes cannot be tolerated,<br />
apply ice for periods of 10 minutes. If<br />
continued icing is needed, remove the pack for<br />
20 minutes, refreeze and then replace it.<br />
Cold helps to reduce swelling, and eases pain<br />
and discomfort. Commercial cold packs can<br />
be stored in a kit until ready to use, or you can<br />
make an ice pack by placing ice (crushed or<br />
cubed) with water in a plastic bag and wrapping<br />
it with a towel or cloth. Place a thin layer of<br />
gauze or cloth between the source of cold and<br />
the skin to prevent injury to the skin. Do not<br />
apply an ice or cold pack directly over an open<br />
fracture because doing so would require you to<br />
put pressure on the open fracture site and could<br />
cause discomfort to the victim. Instead, place<br />
cold packs around the site. Do not apply heat<br />
as there is no evidence that applying heat helps.<br />
Elevate<br />
Elevating the injured area above the level of<br />
the heart helps slow the flow of blood, helping<br />
to reduce swelling. Elevation is particularly<br />
effective in controlling swelling in extremity<br />
injuries. However, never attempt to elevate a<br />
seriously injured area of a limb unless it has<br />
been adequately immobilized.
Chapter 10 first aid 237<br />
■■<br />
Recheck for circulation and sensation below the injured area.<br />
Caring for an open fracture is described in a later section.<br />
Immobilizing Muscle, Bone and Joint Injuries<br />
Immobilizing a muscle, bone or joint injury helps keep the injured body part from<br />
moving. This also may help to reduce any pain. Splinting is a method of immobilizing<br />
an injured extremity and should be used only if moving or transporting a person to<br />
seek medical attention and if splinting does not cause more pain.<br />
If splinting is necessary, splint the injury in the position in which the injured area was<br />
found. Splint the injured area and the joints or bones above and below the injury<br />
site. Check for circulation and sensation before and after splinting.<br />
A tool or device used to immobilize an injury is called a splint. Commercially<br />
manufactured splints are widely available, but if necessary you can improvise one<br />
from items available at the scene. The following can be used to immobilize common<br />
muscle, bone and joint injuries:<br />
■■<br />
■■<br />
■■<br />
Anatomic splints. The person’s body is the splint. For example, an arm can be<br />
splinted to the chest, or an injured leg to the uninjured leg.<br />
Soft splints. Soft materials, such as a folded blanket, towel, pillow or folded<br />
triangular bandage, can be used to form a splint. A sling is a specific kind of soft<br />
splint that uses a triangular bandage tied to support an injured arm, wrist or hand.<br />
Rigid splints. Boards, folded magazines or newspapers, or metal strips that do<br />
not have sharp edges can serve as splints.<br />
See the splinting skill sheets at the end of this chapter for specific steps to follow<br />
when caring for arm, leg and foot injuries.<br />
Caring for Open Fractures<br />
An open fracture occurs when a broken bone tears through the skin and<br />
surrounding soft tissue. To care for a victim with an open fracture, summon EMS<br />
personnel, place sterile dressings around the open fracture, bandage the dressings<br />
in place around the fracture, and do not move the exposed bone and limb. This may<br />
cause further harm and great pain.<br />
EMERGENCY CHILDBIRTH<br />
If a pregnant woman is about to give birth, summon EMS personnel. Important<br />
information to give to the dispatcher includes the pregnant woman’s name, age and<br />
expected due date; the length of time that she has been having labor pains; and<br />
whether this is her first child.<br />
You should also speak with the woman to help her remain calm; place layers of<br />
clean sheets, towels or blankets under the woman and over her abdomen; control<br />
the scene so that the woman will have privacy; and position the woman on her back<br />
with her knees bent, feet flat and legs spread apart.
238<br />
<strong>Lifeguarding</strong> <strong>Manual</strong><br />
Remember, the woman delivers the baby, so be patient and let it happen naturally.<br />
The baby will be slippery, so take care to avoid dropping the newborn. After delivery,<br />
ensure that you clear the newborn’s nasal passages and mouth thoroughly, wrap the<br />
newborn in a clean, warm blanket or towel and place him or her next to the mother.<br />
Notes:<br />
■■<br />
■■<br />
■■<br />
■■<br />
Do not let the woman get up or leave to find a restroom (most women at this<br />
moment feel a desire to use the restroom).<br />
Be sure to allow the woman’s knees to be spread apart to avoid causing<br />
complications or harm to the baby.<br />
Do not place your fingers in the woman’s vagina for any reason.<br />
Do not pull on the baby.<br />
Continue to meet the needs of the newborn while caring for the mother. Help the<br />
mother to begin nursing the newborn, if possible. This will stimulate the uterus<br />
to contract and help to slow the bleeding. The placenta still will be in the uterus,<br />
attached to the newborn by the umbilical cord. Contractions of the uterus usually<br />
will expel the placenta within 30 minutes. Do not pull on the umbilical cord.<br />
Catch the placenta in a clean towel or container. It is not necessary to separate<br />
the placenta from the newborn. Follow local protocols and medical direction for<br />
guidance on cutting the cord.<br />
WRAP-UP<br />
As a professional lifeguard, you may need to care for patrons with a variety of<br />
injuries and illnesses. An important part of your job is to provide these victims with<br />
effective care. Remember to follow the general procedures for injury or sudden<br />
illness on land until EMS personnel arrive and take over. This includes performing a<br />
primary assessment and, if you do not find a life-threatening emergency, performing<br />
a secondary assessment. You must know how to check a conscious person from<br />
head to toe, take a brief SAMPLE history and provide the victim with whatever first<br />
aid is needed.
Skill Sheet 239<br />
SECONDARY ASSESSMent—USING SAMPLE<br />
TO TAKE A BRIEF HISTORY<br />
Notes:<br />
■■<br />
■■<br />
When talking to children, get to eye level with the child, talk slowly and in a friendly manner,<br />
use simple words and ask questions a child can easily answer.<br />
If the child’s parents are nearby, ask for consent. If a parent or guardian is not available,<br />
consent is implied.<br />
Take a brief history using SAMPLE:<br />
1<br />
2<br />
3<br />
4<br />
5<br />
6<br />
Signs and symptoms:<br />
■■<br />
■■<br />
■■<br />
What happened?<br />
Where do you feel any pain or discomfort?<br />
Do you have any numbness or loss of sensation? If so, where?<br />
Allergies:<br />
■■<br />
Do you have any allergies to medications or food? If so, what type of reactions have you<br />
experienced when you were exposed?<br />
Medications:<br />
■■<br />
■■<br />
Do you have any medical conditions or are you taking any medications? If so, what<br />
conditions do you have or what medications are you taking?<br />
Have you taken any medications in the past 12 hours?<br />
Pertinent past medical history:<br />
■■<br />
■■<br />
■■<br />
■■<br />
Have you recently been ill?<br />
Do you have any medical conditions?<br />
Have you experienced any recent falls, accidents or blows to the head?<br />
Have you had surgery, been in a traumatic accident or had a medical emergency?<br />
Last oral intake:<br />
■■<br />
■■<br />
When did you last eat or drink?<br />
What did you last eat or drink?<br />
Events leading up to the incident:<br />
■■<br />
■■<br />
What were you doing before the incident occurred?<br />
What were you doing when the incident occurred?
240<br />
<strong>Lifeguarding</strong> <strong>Manual</strong><br />
CHECKING A CONSCIOUS PERSON<br />
Notes:<br />
■■<br />
■■<br />
■■<br />
■■<br />
1<br />
2<br />
3<br />
When checking an adult or child, explain what you are about to do.<br />
If a child or an infant becomes extremely upset, conduct the check from toe to head.<br />
Look for a medical ID tag, necklace or bracelet on the victim’s wrist, neck or ankle.<br />
Do not ask the victim to move any area of the body that causes discomfort or pain, or if you<br />
suspect a head, neck or spinal injury.<br />
Check the head.<br />
■■<br />
■■<br />
Look at the scalp, face, ears, eyes, nose and mouth for cuts, bumps, bruises<br />
and depressions.<br />
Note if the victim has any changes in LOC, such as dizziness, or feels light-headed.<br />
Check skin appearance and temperature.<br />
■■<br />
■■<br />
■■<br />
Feel the victim’s forehead with the back<br />
of your hand and note if the skin is cold<br />
or hot.<br />
Look at the color of the victim’s face<br />
and lips.<br />
Look at the victim’s skin and note if it is<br />
moist or dry; or if it is red, pale, flushed<br />
or ashen.<br />
Check the neck.<br />
■■<br />
■■<br />
Ask the victim to move his or her<br />
head from side to side if there is no<br />
discomfort and if an injury to the neck is<br />
not suspected.<br />
Note pain, discomfort or inability<br />
to move.<br />
4<br />
Check the shoulders.<br />
■■<br />
Ask the victim to shrug his or her shoulders.<br />
5<br />
Check the chest and abdomen.<br />
■■<br />
■■<br />
■■<br />
Ask the victim to take a deep breath and blow air out.<br />
Listen for difficulty or changes in breathing.<br />
Ask the victim if he or she is experiencing pain during breathing.
Skill Sheet 241<br />
6<br />
Check the arms.<br />
■■<br />
■■<br />
Check one arm at a time.<br />
Ask the victim to move his or her hand<br />
and fingers and to bend the arm.<br />
7<br />
Check the legs.<br />
■■<br />
■■<br />
Check one leg at a time.<br />
Ask the victim to move his or her foot<br />
and toes and to bend the leg.<br />
8<br />
9<br />
Provide care for any conditions found.<br />
Have the victim rest in a comfortable position if he or she can move all body parts without pain<br />
or discomfort and has no other apparent signs or symptoms of injury or illness. Continue to<br />
watch for changes in consciousness and breathing.
242<br />
<strong>Lifeguarding</strong> <strong>Manual</strong><br />
CONTROLLING EXternaL BLeedING<br />
Note: Always follow standard precautions when providing care. Activate the EAP and summon<br />
EMS personnel, if necessary. You can ask the victim to apply direct pressure with the dressing<br />
while you put on your gloves, if necessary.<br />
To control external bleeding:<br />
1<br />
2<br />
Cover the wound with a dressing, such as a sterile gauze pad.<br />
Apply direct pressure firmly against the<br />
wound until bleeding stops.<br />
3<br />
Cover the dressing with a roller bandage<br />
and secure it directly over the wound.<br />
4<br />
Check for circulation beyond the injury (check for pulse, skin temperature and feeling).<br />
If the bleeding does not stop:<br />
■■<br />
■■<br />
■■<br />
■■<br />
Apply additional dressings and bandages on top of the first ones and continue to apply<br />
direct pressure.<br />
Take steps to minimize shock.<br />
Summon EMS personnel.<br />
Follow local protocols when considering other methods of bleeding control, such as<br />
applying a tourniquet.
Skill Sheet 243<br />
SPLIntING<br />
Note: Splint only if necessary to move the victim before EMS personnel arrive.<br />
Arm Injuries<br />
1<br />
2<br />
Leave the arm in the position in which it was found or in the position in which the victim is<br />
holding it.<br />
Place a triangular bandage under the injured<br />
arm and over the uninjured shoulder to form<br />
a sling.<br />
3<br />
Tie the ends of the sling at the side of the<br />
neck. Place gauze pads under the knots to<br />
make it more comfortable for the victim.<br />
4<br />
Secure the arm to the chest with a folded<br />
triangular bandage.
244<br />
<strong>Lifeguarding</strong> <strong>Manual</strong><br />
SPLINTIng continued<br />
Leg Injuries<br />
1<br />
Place several folded triangular bandages<br />
above and below the injured body area.<br />
2<br />
3<br />
Place the uninjured leg next to the injured leg.<br />
Tie triangular bandages securely with knots.<br />
Foot Injuries<br />
Note: Do not remove the victim’s shoes.<br />
1<br />
Place several folded triangular bandages<br />
above and below the injured area.<br />
2<br />
Gently wrap a soft object (pillow or folded blanket) around the injured area.
Skill Sheet 245<br />
3<br />
Tie bandages securely with knots.<br />
Rib and Breastbone Injuries<br />
1<br />
2<br />
Place a pillow or folded towel between the victim’s injured ribs and arm.<br />
Bind the arm to the body to help support the injured area.<br />
Hand and Finger Injuries<br />
1<br />
2<br />
For a hand injury, place a bulky dressing in the palm of the victim’s hand and wrap with a<br />
roller bandage.<br />
For a possible fractured or dislocated finger,<br />
tape the injured finger to the finger next to it.
Caring for Head, Neck<br />
and Spinal Injuries<br />
E<br />
very year, approximately 12,000<br />
spinal cord injuries are reported in<br />
the United States. Nearly 8 percent<br />
of these injuries occur during sports and<br />
recreation, some from head-first entries<br />
into shallow water.<br />
11<br />
Chapter<br />
Although most head, neck and spinal<br />
injuries occur during unsupervised<br />
activities, they do sometimes happen<br />
while a lifeguard is on duty. These injuries<br />
are rare, but when they do occur, they can<br />
result in lifelong disability or even death.<br />
Prompt and effective care is required.<br />
As a professional lifeguard, you must be<br />
aware of the causes of head, neck and<br />
spinal injuries. You also must know<br />
how to recognize them and provide<br />
appropriate care. n
Chapter 11 Caring For Head, Neck And Spinal Injuries 247<br />
CAUSES OF HEAD, NECK<br />
AND SPINAL INJURIES<br />
Head, neck and spinal injuries rarely happen during supervised diving into deep<br />
water. In pools, head, neck and spinal injuries most often occur at the shallow end,<br />
in a corner or where the bottom slopes from shallow to deep water. They also occur<br />
when someone strikes a floating object, like an inner tube or person, while diving.<br />
Head, neck or spinal injuries also happen out of the water, for example, when a<br />
person trips or falls on a pool deck or in a locker room.<br />
At lakes, rivers and oceans, head, neck and spinal injuries usually occur in areas where<br />
depths change with the tide or current. At beaches, these injuries happen mainly when<br />
someone plunges head-first into shallow water or a breaking wave. These injuries also<br />
result from collisions with an underwater hazard, such as a rock, tree stump or sandbar.<br />
Head, neck or spinal injuries often are caused by high-impact/high-risk activities.<br />
In aquatic environments, examples of these activities include:<br />
■■<br />
■■<br />
■■<br />
■■<br />
■■<br />
■■<br />
■■<br />
Entering head-first into shallow water.<br />
Falling from greater than a standing height.<br />
Entering the water from a height, such as a diving board, water slide, an<br />
embankment, cliff or tower.<br />
Striking a submerged or floating object.<br />
Receiving a blow to the head.<br />
Colliding with another swimmer.<br />
Striking the water with high impact, such as falling while water skiing or surfing.<br />
Signs and Symptoms<br />
You should suspect a possible head, neck or spinal injury only if the activity was<br />
high-impact or high-risk and signs or symptoms of injury are present.<br />
The signs and symptoms of possible head, neck or spinal injury include:<br />
■■<br />
■■<br />
■■<br />
■■<br />
■■<br />
■■<br />
■■<br />
■■<br />
■■<br />
■■<br />
■■<br />
■■<br />
■■<br />
■■<br />
■■<br />
Unusual bumps, bruises or depressions on the head, neck or back.<br />
Heavy external bleeding of the head, neck or back.<br />
Bruising of the head, especially around the eyes and behind the ears.<br />
Blood or other fluids in the ears or nose.<br />
Seizures.<br />
Changes in level of consciousness.<br />
Impaired breathing or vision.<br />
Nausea or vomiting.<br />
Partial or complete loss of movement of any body area.<br />
Loss of balance.<br />
Victim holds his or her head, neck or back.<br />
Behavior resembling intoxication.<br />
Severe pain or pressure in the head, neck or back.<br />
Back pain, weakness, tingling or loss of sensation in the hands, fingers, feet or toes.<br />
Persistent headache.
248<br />
<strong>Lifeguarding</strong> <strong>Manual</strong><br />
CARING FOR HEAD, NECK<br />
AND SPINAL INJURIES<br />
For a victim of a suspected head, neck or spinal injury, your objective is to minimize<br />
movement of the head, neck and spine. You must use specific rescue techniques<br />
to stabilize and restrict motion of the victim’s head, neck and spine, regardless of<br />
whether the victim is on land or water. You must also be familiar with and train using<br />
your facility’s equipment. Skill sheets that describe the steps to care for head, neck<br />
and spinal injuries are located at the end of the chapter.<br />
If the victim is in the water and is breathing, you, along with at least one assisting<br />
lifeguard, will immobilize him or her using a backboard equipped with straps and a<br />
head-immobilizer device. If the victim is not breathing, immediately remove the victim<br />
from the water using a technique, such as the two-person-removal-from-the-water, and<br />
provide resuscitative care. Whether on land or in the water, higher priority is given to<br />
airway management, giving ventilations or performing CPR than to spinal immobilization.<br />
The care that you provide to a victim with an injury to the head, neck or spine depends on:<br />
■■<br />
■■<br />
■■<br />
■■<br />
■■<br />
The victim’s condition, including whether he or she is conscious and breathing.<br />
The location of the victim (shallow or deep water, at the surface of the water,<br />
submerged or not in the water).<br />
The availability of additional help, such as other lifeguards, bystanders,<br />
fire fighters, police or emergency medical services (EMS) personnel.<br />
The facility’s specific procedures.<br />
The air and water temperature.<br />
Figure 11-1<br />
Caring for Head, Neck and Spinal Injuries in the Water<br />
If you suspect a head, neck or spinal injury and the victim is in the water, follow<br />
these general rescue procedures:<br />
1. Activate the facility’s emergency action plan (EAP). Facilities may have a distinct<br />
signal to begin a suspected head, neck or spine injury rescue.<br />
2. Safely enter the water. If the victim is near a pool wall or pier, minimize water<br />
movement by using a slide-in entry rather than a compact or stride jump. If you use<br />
a running entry, slow down before reaching the victim.<br />
3. Perform a rescue providing in-line stabilization<br />
appropriate for the victim’s location and whether<br />
the victim is face-up or face-down.<br />
4. Move the victim to safety. If in deep water, move<br />
to shallow water if possible.<br />
5. Check for consciousness and breathing<br />
(Figure 11-1).<br />
Check for consciousness and breathing while maintaining<br />
in-line stabilization.<br />
cc<br />
cc<br />
If the victim is breathing, proceed with the spinal<br />
backboarding procedure (See page 250).<br />
If the victim is not breathing, immediately<br />
remove the victim from the water using a<br />
technique, such as the two-person-removalfrom-the-water,<br />
and provide resuscitative care.
Chapter 11 Caring For Head, Neck And Spinal Injuries 249<br />
cc<br />
Do not delay removal from the water by strapping<br />
the victim onto the board or using the head<br />
immobilizer device.<br />
6. Backboard the victim using the spinal backboarding<br />
procedure.<br />
7. Remove the victim from the water.<br />
8. Re-assess the victim’s condition and provide appropriate<br />
care. Additionally:<br />
cc<br />
cc<br />
Minimize shock by keeping the victim from getting<br />
chilled or overheated.<br />
If the victim vomits, tilt the backboard on one side to<br />
help clear the vomit from the victim’s mouth.<br />
<strong>Manual</strong> In-line Stabilization<br />
The head splint technique is used for performing manual inline<br />
stabilization for victims in the water (Figure 11-2). You can<br />
use this technique when the victim is face-up or face-down; in<br />
shallow or deep water; and at, near or below the surface. The<br />
technique is performed in subtly different ways, depending on the victim’s location and<br />
position in the water. However, regardless of the variation used, your objective should<br />
remain the same—to get the victim into a face-up position while minimizing movement<br />
of the head, neck and spine.<br />
Vary the technique in the following ways, based on<br />
the victim’s position in the water:<br />
■■<br />
■■<br />
■■<br />
■■<br />
■■<br />
If the victim is face-up, approach from behind<br />
the victim’s head.<br />
If the victim is face-down, approach from the<br />
victim’s side.<br />
If the victim is in shallow water, you do not need<br />
to use the rescue tube to support yourself.<br />
If the victim is at the surface in deep water, you<br />
may need the rescue tube to support yourself<br />
and the victim.<br />
Figure 11-2<br />
Head Injuries<br />
If the victim is submerged, do not use the<br />
rescue tube when you are submerging and<br />
bringing the victim to the surface. Once at the<br />
surface, another lifeguard can place a rescue tube under your armpits to help<br />
support you and the victim.<br />
The head splint technique uses the victim’s arms to help hold the victim’s head in line<br />
with the body. Avoid lifting or twisting the victim when performing this skill. Do not move<br />
the victim any more than necessary. Minimize water movement by moving the victim<br />
away from crowded areas and toward the calmest water possible. Keep the victim’s<br />
mouth and nose out of the water and minimize water splashing onto the victim’s face.<br />
As soon as the victim is stabilized in the head splint and is face-up in the water,<br />
immediately check the victim for consciousness and breathing.<br />
Use the head splint technique for performing manual in-line<br />
stabilization for victims in the water.<br />
Fortunately, injuries to the head, neck or spine rarely occur in deep water. Should<br />
this occur, the victim often can be moved to shallow water. Lane lines or safety lines<br />
Any significant force to the head can<br />
cause an injury, ranging from bleeding<br />
to a concussion. A concussion is a<br />
temporary impairment of brain function.<br />
In most cases, the victim may lose<br />
consciousness for only an instant. Be<br />
aware that a person in the water who<br />
receives a severe blow to the head<br />
could lose consciousness temporarily<br />
and submerge. Anyone suspected of<br />
having any head injury in or out of the<br />
water should be examined immediately<br />
by a health care provider.
250<br />
<strong>Lifeguarding</strong> <strong>Manual</strong><br />
IMMOBILIZATION<br />
EQUIPMENT FOR VICTIMS<br />
OF HEAD, NECK OR<br />
SPINAL INJURIES<br />
The backboard is the standard piece of<br />
rescue equipment used at aquatic facilities for<br />
immobilizing and removing a victim from the<br />
water. Backboards work best when they are<br />
equipped with:<br />
■■<br />
■■<br />
A minimum of three straps to secure the<br />
victim to the board.<br />
A head immobilizer device that can be<br />
attached to the top, or head-end, of the board.<br />
Backboards vary in shape, size, buoyancy,<br />
number or style of body straps and style<br />
of head immobilizer device. Every aquatic<br />
facility develops its own backboarding<br />
procedures based on the facility type,<br />
equipment, number of rescuers available and<br />
local EMS protocols. Your facility should<br />
train you on using a backboard according to<br />
the facility’s procedures.<br />
may need to be moved to clear a path to shallow water. If you cannot move the<br />
victim to shallow water, such as in a separate diving well, use the rescue tube under<br />
both armpits to help support yourself and the victim until the backboard arrives.<br />
Spinal Backboarding Procedure<br />
Figure 11-3<br />
After stabilizing the victim’s head, neck and spine, you and at least one other<br />
lifeguard should place and secure the victim on a backboard. Using a backboard<br />
helps to immobilize the victim during the process<br />
of removing him or her from the water. A minimum<br />
of two lifeguards is needed to place and secure a<br />
victim on a backboard, but additional lifeguards or<br />
bystanders should also help, if available.<br />
Place rescue tubes under the backboard to help floatation of<br />
the board.<br />
To place a victim on a backboard, submerge the<br />
board, position it under the victim and carefully raise<br />
it up to the victim’s body. You then secure the victim<br />
to the backboard with straps and a head immobilizer<br />
device. Throughout the spinal backboarding process,<br />
you or another lifeguard must maintain manual inline<br />
stabilization of the victim’s head and neck. To<br />
aid in floatation of the backboard, rescue tubes can<br />
be placed under the board (Figure 11-3). Additional<br />
lifeguards also can assist in keeping the board afloat.
Chapter 11 Caring For Head, Neck And Spinal Injuries 251<br />
Communication between lifeguards is critical during the spinal backboarding<br />
procedure. Communication with the victim also is important. Let the victim know<br />
what you are doing and reassure him or her along the way. Tell the victim not<br />
to nod or shake his or her head, but instead to say “yes” or “no” in answer to<br />
your questions<br />
Team Spinal Backboarding<br />
Spinal backboarding and removal from the water can be a challenge in deep<br />
or shallow water. Having other lifeguards work with you is helpful and may be<br />
necessary to ensure your safety as well as that of the victim. Working together<br />
as a team, other lifeguards can help by:<br />
■■<br />
■■<br />
■■<br />
■■<br />
■■<br />
■■<br />
■■<br />
Submerging and positioning the backboard under<br />
the victim.<br />
Supporting the rescuer at the head of the<br />
backboard in deep water (Figure 11-4, A).<br />
Supporting the backboard while the straps and<br />
head immobilizer are secured.<br />
Securing the straps or the head immobilizer<br />
device (Figure 11-4, B–C).<br />
Communicating with and reassuring the victim.<br />
Guiding the backboard as it is being removed<br />
from the water (Figure 11-4, D).<br />
Removing the backboard from the water<br />
(Figure 11-4, E).<br />
Figure 11-4, A<br />
Figure 11-4, B<br />
Figure 11-4, C<br />
Figure 11-4, D<br />
Figure 11-4, E
252<br />
<strong>Lifeguarding</strong> <strong>Manual</strong><br />
ALTERNATE METHOD<br />
FOR MANUAL IN-LINE<br />
STABILIZATION TECHNIQUE—<br />
HEAD AND CHIN SUPPORT<br />
When caring for victims with head, neck or<br />
spinal injuries in the water, special situations may<br />
require a modification to the in-line stabilization<br />
technique used, such as when a victim has one<br />
arm or little flexibility in the shoulders. The head<br />
and chin support can be used for face-down or<br />
face-up victims who are at or near the surface in<br />
shallow water at least 3 feet deep or for a face-up<br />
victim. Be aware of the following situations:<br />
■■<br />
■■<br />
Do not use the head and chin support for a<br />
face-down victim in water that is less than<br />
3 feet deep. This technique requires you to<br />
submerge and roll under the victim while<br />
maintaining in-line stabilization. It is difficult to<br />
do this in water less than 3 feet deep without<br />
risking injury to yourself or the victim.<br />
Do not use the rescue tube for support when<br />
performing the head and chin support on a<br />
face-down victim in deep water. This impedes<br />
your ability to turn the victim over. However,<br />
once the victim is turned face-up, another<br />
lifeguard can place a rescue tube under your<br />
armpits to help support you and the victim.<br />
To perform the head and chin support for<br />
a face-up or face-down victim at or near<br />
the surface:<br />
1. Approach the victim from the side<br />
2. With your body about shoulder depth in the<br />
water, place one forearm along the length of<br />
the victim’s breastbone and the other forearm<br />
along the victim’s spine.<br />
3. Use your hands to gently hold the victim’s<br />
head and neck in line with the body. Place<br />
one hand on the victim’s lower jaw and the<br />
Place one hand on the victim’s lower jaw and the<br />
other hand on the back of the lower head.<br />
other hand on the back of the lower head.<br />
Be careful not to place pressure on the neck<br />
or touch the front or back of the neck.<br />
Be careful not to place pressure on the neck or<br />
touch the front or back of the neck.<br />
4. Squeeze your forearms together, clamping<br />
the victim’s chest and back. Continue to<br />
support the victim’s head and neck.<br />
cc<br />
cc<br />
cc<br />
If the victim is face-down, you must turn<br />
him or her face-up. Slowly move the victim<br />
forward to help lift the victim’s legs. Turn<br />
the victim toward you while submerging.<br />
Roll under the victim while turning the<br />
victim over. Avoid twisting the victim’s<br />
body. The victim should be face-up as you<br />
surface on the other side.<br />
Check for consciousness and breathing.
Chapter 11 Caring For Head, Neck And Spinal Injuries 253<br />
cc<br />
If the victim is breathing, hold the victim<br />
face-up in the water and move toward<br />
safety until the backboard arrives. In<br />
deep water, move the victim to shallow<br />
water if possible.<br />
Spinal Backboarding Procedure<br />
Using the Head and Chin Support<br />
Turn the victim toward you while submerging.<br />
Roll under the victim while turning the victim over.<br />
When using the head and chin support as the<br />
stabilization technique, modify the backboarding<br />
procedure in the following ways:<br />
1. While an additional rescuer raises the<br />
backboard into place, the primary rescuer<br />
carefully removes his or her arm from beneath<br />
the victim and places it under the backboard<br />
while the other hand and arm remain on the<br />
victim’s chin and chest.<br />
2. The additional rescuer moves to the victim’s<br />
head and places the rescue tube under the<br />
head of the backboard to aid in floatation of<br />
the board.<br />
3. The additional rescuer then supports the<br />
backboard with his or her forearms and<br />
stabilizes the victim’s head by placing his or<br />
her hands along side of the victim’s head.<br />
The primary rescuer can now release.<br />
The victim should be face-up as you surface on the<br />
other side.<br />
cc<br />
If the victim is not breathing, immediately<br />
remove the victim from the water using<br />
a technique, such as the two-personremoval-from-the-water.<br />
Do not delay<br />
removal from the water by strapping the<br />
victim onto the backboard or using the<br />
head immobilizer device.<br />
Use the head and chin support as a stabilization<br />
technique when performing spinal backboarding in<br />
deep water, but modify the backboarding procedure.
254<br />
<strong>Lifeguarding</strong> <strong>Manual</strong><br />
■■<br />
Providing care after the victim has been removed from the water.<br />
Additional lifeguards should be able to arrive at the scene, identify what assistance<br />
is needed and begin helping.<br />
Removal from the Water<br />
Once the victim is secured onto the backboard, you should remove the victim from<br />
the water. Your technique will vary depending on the characteristics of your exit point<br />
(e.g., shallow or deep water, speed slide or sloping waterfront entry).<br />
After the victim is out of the water, assess his or her condition and provide the appropriate<br />
care. Place a towel or blanket on the victim to keep him or her warm, if needed.<br />
Use the following skills to secure a victim suspected of having a spinal injury to a<br />
backboard and remove him or her from the water:<br />
■■<br />
■■<br />
■■<br />
Spinal backboarding procedures—shallow water<br />
Spinal backboarding procedures—deep water<br />
Spinal injury removal from the water on a backboard<br />
Special Situations<br />
In-line stabilization and backboarding can be more difficult to perform in facilities<br />
that have extremely shallow water, moving water or confined spaces. Caring for a<br />
victim of a head, neck or spinal injury in these situations requires modification of the<br />
techniques for in-line stabilization and removal from the water.<br />
During orientation and in-service trainings, your facility’s management should provide<br />
information and skills practice for in-line stabilization and backboarding procedures<br />
used at the facility for its specific attractions and environments. These trainings should<br />
include emergency shut-off procedures to stop water flow and movement.<br />
Removal from Extremely Shallow Water<br />
Many facilities have extremely shallow water, such as zero-depth pools, wave pools<br />
and sloping beaches. To remove a victim from a zero-depth or sloping entry, have<br />
sufficient lifeguards on each side of the backboard to support the victim’s weight.<br />
After the victim is secured to the backboard:<br />
■■<br />
■■<br />
■■<br />
Carefully lift up the backboard and victim using proper lifting techniques to<br />
prevent injuring yourself.<br />
Remove the backboard and victim from the water by slowly walking out. Keep<br />
the board as level as possible during the removal.<br />
Gently lower the backboard and the victim to the ground once out of the water<br />
using proper lifting techniques to prevent injuring yourself.<br />
Moving Water<br />
You may need to modify the way you care for a person with a head, neck or spinal<br />
injury if waves or currents are moving the water. In water with waves, move the<br />
victim to calmer water, if possible. At a waterfront, a pier or raft may break or block<br />
the waves. If there is no barrier from the waves, have other rescuers form a “wall”<br />
with their bodies to block the waves. At a wave pool, stop the waves by pushing<br />
the emergency stop button. Remember, even though the button has been pushed,<br />
residual wave action will continue for a short time.
Chapter 11 Caring For Head, Neck And Spinal Injuries 255<br />
Rivers, Streams and Winding River Attractions<br />
A special problem in rivers, streams and winding rivers at waterparks is that the<br />
current can pull or move the victim. At waterparks, the facility’s EAP may include<br />
signaling another lifeguard to stop the flow of water in a winding river by pushing<br />
the emergency stop button. In all cases:<br />
■■<br />
■■<br />
■■<br />
■■<br />
Ask other lifeguards or patrons for help in keeping<br />
objects and people from floating into the rescuer<br />
while he or she is supporting the victim.<br />
Do not let the current press sideways on the<br />
victim or force the victim into a wall. This would<br />
twist the victim’s body. Keep the victim’s head<br />
pointed upstream into the current (Figure 11-5).<br />
This position also reduces the splashing of water<br />
on the victim’s face.<br />
Once the in-line stabilization technique is<br />
performed and the victim is turned face-up, slowly<br />
turn the victim so that the current pulls his or her<br />
legs around to point downstream.<br />
Place the victim on a backboard by following the<br />
facility’s spinal backboarding procedures.<br />
Figure 11-5<br />
Position the victim’s head so it is pointed upstream into<br />
the current.<br />
Catch Pools<br />
The water in a catch pool moves with more force than in a winding river and can make<br />
it difficult to hold a victim still.<br />
■■<br />
■■<br />
■■<br />
If a person is suspected of having a head, neck or spinal injury in a catch pool,<br />
immediately signal other lifeguards to stop sending riders.<br />
If possible, someone should stop the flow of water by pushing the emergency<br />
stop button.<br />
Once in-line stabilization is achieved and the victim is turned face-up, move the<br />
victim to the calmest water in the catch pool if water is still flowing (Figure 11-6).<br />
If there is only one slide, the calmest water is usually at the<br />
Figure 11-6<br />
Move the victim to the calmest water in the catch pool once manual in-line stabilization is achieved.
256<br />
<strong>Lifeguarding</strong> <strong>Manual</strong><br />
Figure 11-7, A<br />
Slide<br />
center of the catch pool. If several slides empty into the<br />
same catch pool, calmer water usually is between two slides<br />
(Figure 11-7, A—B).<br />
■■<br />
Place the victim on a backboard following the facility’s spinal<br />
backboarding procedures.<br />
Speed Slides<br />
Figure 11-7, B<br />
Calm<br />
Catch pool with only one slide<br />
A head, neck or spinal injury may happen on a speed slide<br />
if the patron twists or turns his or her body the wrong way,<br />
strikes his or her head on the side of the slide or sits up and<br />
tumbles down off the slide. The narrow space of a speed slide<br />
is problematic for rescuing a victim with a head, neck or spinal<br />
injury. Backboarding can be a challenge because the water<br />
in the slide is only 2 or 3 inches deep and does not help to<br />
support the victim.<br />
Caring for Head, Neck<br />
and Spinal Injuries on Land<br />
Slide<br />
Calm<br />
Slide<br />
If you suspect that a victim on land has a head, neck or spinal<br />
injury, your goal is the same as for a victim in the water:<br />
minimize movement of the head, neck and spine. Activate the<br />
facility’s EAP and follow the general procedures for injury or<br />
sudden illness on land:<br />
■■<br />
Size-up the scene.<br />
Perform a primary assessment.<br />
Summon EMS personnel.<br />
Perform a secondary assessment.<br />
Provide the appropriate care.<br />
■■<br />
■■<br />
■■<br />
■■<br />
Use appropriate personal protective equipment, such as<br />
disposable gloves and breathing barriers.<br />
Catch pool with two slides<br />
Approach the victim from the front so that he or she can see<br />
you without turning the head. Tell the victim not to nod or shake<br />
his or her head, but instead respond verbally to your questions,<br />
such as by saying “yes” or “no.”<br />
Caring for a Non-Standing Victim<br />
If you suspect a victim on land has a head, neck or spinal injury, have the victim<br />
remain in the position in which he or she was found until EMS personnel assume<br />
control (Figure 11-8). Gently support the head in the position in which it was found.<br />
Do not attempt to align the head and neck, unless you cannot maintain an open<br />
airway. Gently position the victim’s head in line with the body only if you cannot<br />
maintain an open airway.<br />
Caring for a Standing Victim<br />
If you encounter a patron who is standing but has a suspected head, neck or<br />
spinal injury, secure the victim to the backboard while he or she remains standing
Chapter 11 Caring For Head, Neck And Spinal Injuries 257<br />
and slowly lower him or her to the ground (Figure<br />
11-9). Follow the steps on the skill sheet, Caring<br />
for a Standing Victim Who Has a Suspected<br />
Head, Neck or Spinal Injury on Land.<br />
Figure 11-8<br />
If EMS personnel are available within a<br />
few minutes and the victim’s safety is not<br />
compromised, you may maintain manual<br />
stabilization with the victim standing. Do not have<br />
the person sit or lie down. Minimize movement of<br />
the victim’s head by placing your hands on both<br />
sides of the victim’s head (Figure 11-10).<br />
If the victim’s condition becomes unstable (e.g.,<br />
the victim complains of dizziness, has a potential<br />
life-threatening condition or begins to lose<br />
consciousness), slowly lower the victim to the<br />
ground with the assistance of other lifeguards. Try<br />
to maintain manual stabilization while the victim is<br />
being lowered.<br />
If a non-standing victim has a suspected head, neck or spinal<br />
injury, keep him in the position in which he was found until<br />
EMS personnel assume control.<br />
Figure 11-9<br />
WRAP-UP<br />
Although they are rare, head, neck and spinal<br />
injuries do occur at aquatic facilities. They can<br />
cause life-long disability or even death. Prompt,<br />
effective care is needed. As a professional<br />
lifeguard, you must be able to recognize and care<br />
for victims with head, neck or spinal injuries. To<br />
decide whether an injury could be serious, consider<br />
both its cause and the signs and symptoms. If<br />
you suspect that a victim in the water has a head,<br />
neck or spinal injury, make sure to summon EMS<br />
personnel immediately. Minimize movement by<br />
using in-line stabilization. Secure the victim to a<br />
backboard to restrict motion of the head, neck and<br />
spine. When the victim is out of the water, provide<br />
the appropriate care until EMS personnel arrive and<br />
assume control of the victim’s care.<br />
Secure a standing victim with a suspected head, neck or<br />
spinal injury to the backboard while he remains standing.<br />
Slowly lower him to the ground.<br />
Figure 11-10<br />
Maintain manual stabilization for a standing victim with a<br />
suspected head, neck or spinal injury by placing your hands<br />
on both sides of the person’s head.
258<br />
<strong>Lifeguarding</strong> <strong>Manual</strong><br />
HEAD SPliNT—FACE-UP VICTIM AT OR NEAR<br />
THE SURFACE<br />
1<br />
2<br />
Approach the victim’s head from behind, or stand behind the victim’s head.<br />
■■<br />
■■<br />
In shallow water, lower your body so that the water level is at your neck.<br />
In deep water, use the rescue tube under both of your arms for support.<br />
Grasp the victim’s arms midway between his or her shoulder and elbow. Grasp the victim’s right<br />
arm with your right hand and the victim’s left arm with your left hand. Gently move the victim’s<br />
arms up alongside the head. Position yourself to the victim’s side while trapping the victim’s<br />
head with his or her arms.<br />
3<br />
4<br />
Slowly and carefully squeeze the victim’s arms against his or her head to help hold the head in<br />
line with the body. Do not move the victim any more than necessary.<br />
Position the victim’s head close to the<br />
crook of your arm, with the head in line<br />
with the body.<br />
5<br />
6<br />
Check for consciousness and breathing.<br />
■■<br />
■■<br />
If the victim is not breathing, immediately remove the victim from the water using a technique,<br />
such as the two-person-removal-from-the-water, and provide resuscitative care. Do not delay<br />
removal from the water by strapping the victim in or using the head immobilizer device.<br />
If the victim is breathing, hold the victim with the head in line with the body and move toward<br />
safety until the backboard arrives. In deep water, move the victim to shallow water, if possible.<br />
Continuously monitor for consciousness and breathing. If at any time the victim stops breathing,<br />
immediately remove the victim from the water then provide appropriate care.
Skill Sheet 259<br />
HEAD SPliNT—FACE-DOWN VICTIM AT OR<br />
NEAR THE SURFACE<br />
1<br />
2<br />
3<br />
Approach the victim from the side.<br />
■ ■ In deep water, use the rescue tube under both of your arms for support.<br />
Grasp the victim’s arms midway between the shoulder and elbow. Grasp the victim’s right arm<br />
with your right hand and the victim’s left arm with your left hand. Gently move the victim’s arms<br />
up alongside the head.<br />
Squeeze the victim’s arms against his or<br />
her head to help hold the head in line with<br />
the body.<br />
4<br />
5<br />
Glide the victim slowly forward.<br />
■■<br />
■■<br />
In shallow water, lower your body to<br />
shoulder depth before gliding the<br />
victim forward.<br />
Continue moving slowly and turn the<br />
victim until he or she is face-up. To<br />
do this, push the victim’s arm that is<br />
closest to you under the water while<br />
pulling the victim’s other arm across the<br />
surface toward you.<br />
Position the victim’s head in the crook of<br />
your arm, with the head in line with the body.<br />
Continued on Next Page
260<br />
<strong>Lifeguarding</strong> <strong>Manual</strong><br />
HEAD SPliNT—FACE-DOWN VICTIM AT OR<br />
NEAR THE SURFACE continued<br />
6<br />
7<br />
Check for consciousness and breathing.<br />
■■<br />
■■<br />
If the victim is not breathing, immediately remove the victim from the water using a technique,<br />
such as the two-person-removal-from-the-water, and provide resuscitative care. Do not delay<br />
removal from the water by strapping the victim in or using the head immobilizer device.<br />
If the victim is breathing, hold the victim with the head in line with the body and move<br />
toward safety until the backboard arrives. In deep water, move the victim to shallow water,<br />
if possible.<br />
Continuously monitor for consciousness and breathing. If at any time the victim stops breathing,<br />
immediately remove the victim from the water then provide appropriate care.<br />
HEAD SPliNT—SUBMERGED VICTIM<br />
1<br />
2<br />
3<br />
Approach the victim from the side. In deep water, release the rescue tube if the victim is more<br />
than an arm’s reach beneath the surface.<br />
Grasp the victim’s arms midway between the shoulder and elbow. Grasp the victim’s right arm<br />
with your right hand and the victim’s left arm with your left hand. Gently move the victim’s arms<br />
up alongside the head.<br />
Squeeze the victim’s arms against his or<br />
her head to help hold the head in line with<br />
the body.<br />
4<br />
Turn the victim face-up while bringing the<br />
victim to the surface at an angle. To turn<br />
the victim face-up, push the victim’s arm<br />
that is closest to you down and away from<br />
you while pulling the victim’s other arm<br />
across the surface toward you. The victim<br />
should be face-up just before reaching the<br />
surface or at the surface.
Skill Sheet 261<br />
5<br />
6<br />
7<br />
Position the victim’s head close to the crook of your arm with the head in line with the body.<br />
Another lifeguard can place a rescue tube under your armpits to help support you and the victim.<br />
Check for consciousness and breathing.<br />
■■<br />
■■<br />
If the victim is not breathing, immediately remove the victim from the water using a<br />
technique, such as the two-person-removal-from-the-water, and provide resuscitative<br />
care. Do not delay removal from the water by strapping the victim in or using the head<br />
immobilizer device.<br />
If the victim is breathing, hold the victim with the head in line with the body and move<br />
toward safety until the backboard arrives. In deep water, move the victim to shallow water,<br />
if possible.<br />
Continuously monitor for consciousness and breathing. If at any time the victim stops breathing,<br />
immediately remove the victim from the water then provide appropriate care.<br />
Note: If the victim is submerged but face-up, approach the victim from behind and follow the<br />
same steps in the skill sheet, Head Splint—Face-Up Victim at or Near the Surface while you<br />
bring the victim to the surface.<br />
HEAD SPliNT—FACE-DOWN IN EXTREMELY<br />
SHALLOW WATER<br />
1<br />
Approach the victim from the side. Grasp<br />
the victim’s right arm with your right hand<br />
and the victim’s left arm with your left hand,<br />
trapping the victim’s head between his or<br />
her arms.<br />
2<br />
3<br />
After the victim’s head is trapped between his or her arms, begin to roll the victim toward you.<br />
While rolling the victim, step from the<br />
victim’s side toward the victim’s head and<br />
begin to turn the victim face-up.<br />
Continued on Next Page
262<br />
<strong>Lifeguarding</strong> <strong>Manual</strong><br />
HEAD SPliNT—FACE-DOWN IN EXTREMELY<br />
SHALLOW WATER continued<br />
4<br />
Lower your arm on the victim’s side that<br />
is closest to you so that the victim’s arms<br />
go over the top of your arm as you step<br />
toward the victim’s head. Maintain arm<br />
pressure against the victim’s head, since<br />
your hand rotates during this maneuver.<br />
You are now positioned above and behind<br />
the victim’s head.<br />
5<br />
6<br />
Check for consciousness and breathing.<br />
■■<br />
■■<br />
If the victim is not breathing, immediately remove the victim from the water and give the<br />
appropriate care.<br />
If the victim is breathing, hold the victim in this position. Place a towel or blanket on the<br />
victim to keep him or her from getting chilled.<br />
Continuously monitor for consciousness and breathing. If at any time the victim stops breathing,<br />
immediately remove the victim from the water then provide appropriate care.<br />
Note: If you are unable to keep the victim from getting chilled and there are enough assisting<br />
lifeguards, follow the care steps for skill sheet, Spinal Backboarding Procedure and Removal<br />
from Water—Speed Slide.<br />
SPINAL BACKBOArdiNG PROCEDURE—<br />
SHALLOW WATER<br />
Note: If the victim is not breathing, immediately remove the victim from the water using the twoperson-removal-from-the-water<br />
technique and provide resuscitative care. Do not delay removal<br />
from the water by strapping the victim in or using the head immobilizer device.<br />
1<br />
The first lifeguard (primary rescuer) provides<br />
in-line stabilization until another lifeguard<br />
arrives with the backboard.
Skill Sheet 263<br />
2<br />
The assisting lifeguard removes the headimmobilizer<br />
device, enters the water,<br />
submerges the backboard and positions<br />
the board under the victim so that it extends<br />
slightly beyond the victim’s head. The<br />
victim’s head should be centered on the<br />
backboard’s head space.<br />
3<br />
4<br />
While an assisting lifeguard raises the backboard into place, the primary rescuer moves the<br />
elbow that is under the victim toward the top of the backboard while continuing to apply<br />
pressure on both of the victim’s arms, using the victim’s arms as a splint.<br />
Once the backboard is in place, an<br />
assisting lifeguard then stabilizes the<br />
victim by placing one hand and arm on<br />
the victim’s chin and chest, the other hand<br />
and arm under the backboard. The primary<br />
rescuer then releases his or her grip on the<br />
victim’s arms.<br />
5<br />
The primary rescuer lowers the victim’s<br />
arms, moves behind the victim’s head and<br />
places the rescue tube under the head of the<br />
backboard to aid in floatation of the board.<br />
6<br />
The primary rescuer balances the<br />
backboard on the rescue tube with his or<br />
her forearms and stabilizes the victim’s head<br />
by placing his or her hands along each side<br />
of the victim’s head.<br />
Continued on Next Page
264<br />
<strong>Lifeguarding</strong> <strong>Manual</strong><br />
SPINAL BACKBOArdiNG PROCEDURE—<br />
SHALLOW WATER continued<br />
7<br />
An assisting lifeguard secures the victim<br />
on the backboard with a minimum of three<br />
straps: one each across the victim’s chest,<br />
hips and thighs. Secure the straps in the<br />
following order:<br />
■■<br />
■■<br />
■■<br />
■■<br />
Strap high across the chest and under<br />
the victim’s armpits. This helps prevent<br />
the victim from sliding on the backboard<br />
during the removal.<br />
Strap across the hips with the<br />
victim’s arms and hands secured<br />
under the straps.<br />
Strap across the thighs.<br />
Recheck straps to be sure that they<br />
are secure.<br />
8<br />
The rescuers secure the victim’s head to the<br />
backboard using a head immobilizer and a<br />
strap across the victim’s forehead.<br />
9<br />
If not done already, bring the victim to the side.
Skill Sheet 265<br />
SPINAL BACKBOArdiNG PROCEDURE—<br />
DEEP WATER<br />
Note: If the victim is not breathing, immediately remove the victim from the water using the twoperson<br />
removal-from-the-water technique and provide resuscitative care. Do not delay removal<br />
from the water by strapping the victim in or using the head immobilizer device.<br />
1<br />
The first lifeguard (primary rescuer) provides<br />
in-line stabilization. If the victim is facedown,<br />
the primary rescuer turns the victim<br />
into a face-up position. If necessary, an<br />
assisting lifeguard retrieves the primary<br />
rescuer’s rescue tube and inserts it under<br />
the primary rescuer’s armpits.<br />
2<br />
The primary rescuer moves the victim to<br />
the side, if possible, toward a corner. An<br />
assisting lifeguard places a rescue tube<br />
under the victim’s knees to raise the legs.<br />
This makes placing the backboard under the<br />
victim easier.<br />
3<br />
An assisting lifeguard places the backboard<br />
under the victim while the primary rescuer<br />
maintains stabilization.<br />
4<br />
As an assisting lifeguard raises the<br />
backboard into place, the primary rescuer<br />
moves the elbow that is under the victim<br />
toward the top of the backboard while<br />
continuing to apply pressure on both of<br />
the victim’s arms. An assisting lifeguard<br />
stabilizes the victim with one hand and arm<br />
on the victim’s chin and chest, and the other<br />
hand and arm under the backboard.<br />
Continued on Next Page
266<br />
<strong>Lifeguarding</strong> <strong>Manual</strong><br />
SPINAL BACKBOArdiNG PROCEDURE—<br />
DEEP WATER continued<br />
5<br />
Once the backboard is in place, the primary<br />
rescuer then lowers the victim’s arms, moves<br />
behind the victim’s head and places a rescue<br />
tube under the head of the backboard. The<br />
primary rescuer balances the board on the<br />
rescue tube with his or her forearms and<br />
stabilizes the victim’s head by placing his<br />
or her hands along each side of the victim’s<br />
head. The assisting rescuer moves to the<br />
foot of the board and removes the rescue<br />
tube under the victim’s knees by sliding the<br />
rescue tube toward him or herself.<br />
6<br />
An assisting lifeguard secures the victim<br />
on the backboard by placing straps at least<br />
across the victim’s chest, hips and thighs.<br />
After all the straps have been checked and<br />
properly secured, the rescuers secure the<br />
victim’s head using a head immobilizer and<br />
a strap across the victim’s forehead.
Skill Sheet 267<br />
SPINAL INJURY—REMOVAL FROM THE<br />
WATER ON A BACKBOARD<br />
1<br />
2<br />
Once the victim is properly secured to the backboard, position the backboard with the head-end<br />
by the side of the pool and the foot-end straight out into the water.<br />
With one lifeguard at each side, lift the head of the backboard slightly and place it on the edge.<br />
Use one or two rescue tubes if needed to support the foot end of the board.<br />
3<br />
One lifeguard gets out of the pool while the<br />
other maintains control of the backboard.<br />
Once out of the water, the lifeguard on land<br />
grasps the head of the backboard while the<br />
other gets out of the water.<br />
4<br />
Together the lifeguards stand and step<br />
backward, pulling the backboard and sliding<br />
it up over the edge and out of and away<br />
from the water. If available, an assisting<br />
lifeguard remains in the water to help push<br />
the board.<br />
5<br />
If available, additional lifeguards help guide and remove the backboard out of the water and onto<br />
land, then begin to assess the victim’s condition and providing the appropriate care.<br />
Continued on Next Page
268<br />
<strong>Lifeguarding</strong> <strong>Manual</strong><br />
SPINAL INJURY—REMOVAL FROM THE WATER<br />
ON A BACKBOARD continued<br />
Notes:<br />
■■<br />
■■<br />
Use proper lifting techniques to prevent injury to yourself:<br />
cc<br />
cc<br />
cc<br />
cc<br />
Keep the back straight.<br />
Bend at the knee.<br />
Move in a controlled way without jerking or tugging.<br />
Keep the board as level and low to the deck or pier as possible, consistent with proper<br />
lifting techniques.<br />
Additional lifeguards can assist by:<br />
cc<br />
Supporting the primary rescuer at the head of the backboard.<br />
cc<br />
Placing and securing the straps along the chest, hips and thighs.<br />
cc<br />
Placing the head immobilizer and securing the strap across the forehead.<br />
cc<br />
Removing the backboard from the water.<br />
cc<br />
Begin assessing the victim’s condition and providing the appropriate care.<br />
SPINAL BACKBOArdiNG PROCEDURE AND<br />
REMOVAL FroM WATER—SPEED SLIDE<br />
1<br />
The primary rescuer performs in-line<br />
stabilization by placing his or her hands on<br />
both sides of the victim’s head while the<br />
victim is on the slide.<br />
2<br />
Other lifeguards carefully lift the victim and slide the backboard into place from the feet to<br />
the head.
Skill Sheet 269<br />
3<br />
Lifeguards lower the victim onto the backboard.<br />
4<br />
5<br />
Lifeguards secure the victim to the backboard and immobilize the head.<br />
Lifeguards lift the backboard and victim out<br />
of the slide.<br />
CARING FOR A STANdiNG VICTIM WHO HAS<br />
A SUSPECTED HEAD, NECK OR SPINAL<br />
INJURY ON LAND<br />
Note: Have another person call EMS personnel for a head, neck or spinal injury while you<br />
maintain in-line stabilization of the head, neck and spine.<br />
1<br />
2<br />
Lifeguard 1 approaches the victim from the front and performs manual stabilization of the<br />
victim’s head and neck by placing one hand on each side of the head.<br />
Lifeguard 2 retrieves a backboard and<br />
places it against the victim’s back, being<br />
careful not to disturb stabilization of the<br />
victim’s head. Lifeguard 3 helps to position<br />
the backboard so that it is centered behind<br />
the victim.<br />
Continued on Next Page
270<br />
<strong>Lifeguarding</strong> <strong>Manual</strong><br />
CARING FOR A STANdiNG VICTIM WHO HAS A<br />
SUSPECTED HEAD, NECK OR SPINAL INJURY<br />
ON LAND continued<br />
3<br />
While Lifeguard 3 holds the backboard,<br />
Lifeguard 2 secures the victim to the<br />
backboard by placing and securing straps<br />
across the victim’s chest, under the armpits,<br />
and across the hips and thighs. Lifeguard 2<br />
rechecks the straps to be sure that they are<br />
secure, then secures the victim’s head to<br />
the backboard using a head immobilizer and<br />
strap across the victim’s forehead.<br />
4<br />
The lifeguards at the victim’s side each<br />
place their inside hands underneath the<br />
victim’s armpit, in between the victim’s<br />
arm and torso, and grasp the backboard<br />
at a handhold at the victim’s armpit level<br />
or higher.<br />
5<br />
When the victim is secured to the board,<br />
the other lifeguard grasps the top. Lifeguard<br />
1 informs the victim that they will lower him<br />
or her to the ground. When ready, signal<br />
to the other two lifeguards to begin. While<br />
lowering the victim, the lifeguards at the<br />
victim’s sides should walk forward and bend<br />
at the knees to avoid back injury.
Skill Sheet 271<br />
If the position of the head immobilizer<br />
cannot be adjusted to the height of a victim,<br />
consider one of the following options:<br />
■■<br />
■■<br />
Place the blocks on either side of the victim’s head<br />
flush against the backboard. Place an additional strap<br />
across the victim’s forehead.<br />
cc<br />
If this not possible, have another lifeguard provide<br />
manual stabilization from the head of the board.<br />
At the beginning, this lifeguard stands behind the<br />
board and reaches around to provide stabilization.<br />
As the board is lowered, this lifeguard steps back,<br />
while maintaining stabilization, until the board is on<br />
the ground.<br />
If the victim is taller than the backboard, place an object<br />
such as a folded blanket or towel under the foot of the<br />
backboard so that the victim’s head does not extend<br />
beyond the end of the board.
272<br />
<strong>Lifeguarding</strong> <strong>Manual</strong><br />
MANUAL STABiliZATION FOR A HEAD,<br />
NECK OR SPINAL INJURY ON LAND<br />
Note: Have someone call EMS personnel for a head, neck or spinal injury while you minimize<br />
movement of the head, neck and spine.<br />
1<br />
Minimize movement by placing your hands<br />
on both sides of the victim’s head.<br />
2<br />
3<br />
4<br />
Support the head in the position found.<br />
■■<br />
Do not align the head and neck with the spine if the head is sharply turned to one side,<br />
there is pain on movement or if you feel any resistance when attempting to align the head<br />
and neck with the spine.<br />
Maintain an open airway.<br />
Keep the victim from getting chilled or overheated.<br />
Note: Gently position the victim’s head in line with the body if you cannot maintain an open airway.
Glossary 273<br />
Glossary<br />
Abandonment – Ending care of an ill or injured<br />
person without that person’s consent or without<br />
ensuring that someone with equal or greater training<br />
will continue that care.<br />
Abdomen – The middle part of the trunk (torso)<br />
containing the stomach, liver and other organs.<br />
Abrasion – A wound in which skin is rubbed or<br />
scraped away.<br />
Active drowning victim – A person exhibiting universal<br />
behavior that includes struggling at the surface in a<br />
vertical position and being unable to move forward or<br />
tread water.<br />
Agonal gasps – Isolated or infrequent gasping in the<br />
absence of other breathing in an unconscious person.<br />
AIDS – When an infected person has a significant<br />
drop in a certain type of white blood cells or shows<br />
signs of having certain infections or cancers caused by<br />
an HIV infection.<br />
Airway adjunct – A mechanical device to keep a<br />
victim’s airway clear.<br />
Anaphylactic shock – A severe allergic reaction in<br />
which air passages may swell and restrict breathing; a<br />
form of shock. See also anaphylaxis.<br />
Anaphylaxis – A severe allergic reaction; a form of<br />
shock. See also anaphylactic shock.<br />
Anatomic splint – A part of the body used to<br />
immobilize an injured body part.<br />
Anatomical airway obstruction – Complete or partial<br />
blockage of the airway by the tongue or swollen tissues<br />
of the mouth or throat.<br />
Antihistamine – Drug used to treat the signals of<br />
allergic reactions.<br />
Aquatic environment – An environment in which<br />
recreational water activities are played or performed.<br />
Aquatic safety team – A network of people in the<br />
facility and emergency medical services system who can<br />
plan for, respond to and assist in an emergency at an<br />
aquatic facility.<br />
Area of responsibility – The zone or area in which a<br />
lifeguard conducts surveillance.<br />
Ashen – A grayish color; darker skin often looks ashen<br />
instead of pale.<br />
Assess – To examine and evaluate a situation carefully.<br />
Asthma – A condition that narrows the air passages<br />
and makes breathing difficult.<br />
Asystole – A condition in which the heart has stopped<br />
generating electrical activity.<br />
Atrioventricular node (AV) – The point along the<br />
heart’s electrical pathway midway between the atria and<br />
ventricles that sends electrical impulses to the ventricles.<br />
Automated external defibrillator (AED) – An<br />
automatic device used to recognize a heart rhythm that<br />
requires an electric shock and either delivers the shock<br />
or prompts the rescuer to deliver it.<br />
Avulsion – A wound in which soft tissue is partially or<br />
completely torn away.<br />
Backboard – A standard piece of rescue equipment at<br />
all aquatic facilities used to maintain in-line stabilization<br />
while securing and transporting a victim with a<br />
suspected head, neck or back injury.<br />
Bag-valve-mask (BVM) resuscitator – A handheld<br />
breathing device used on a victim in respiratory distress<br />
or respiratory arrest. It consists of a self-inflating bag, a<br />
one-way valve and a mask; can be used with or without<br />
supplemental oxygen.<br />
Bandage – Material used to wrap or cover an injured<br />
body part; often used to hold a dressing in place.<br />
Blind spots – Areas within a lifeguard’s area of<br />
responsibility that cannot be seen or are difficult to see.<br />
Bloodborne pathogens – Bacteria and viruses<br />
present in blood and body fluids that can cause disease<br />
in humans.<br />
Bloodborne pathogens standard – A federal<br />
regulation designed to protect employees from exposure<br />
to bodily fluids that might contain a disease-causing agent.<br />
Body substance isolation (BSI) precautions – An<br />
approach to infection control that considers all body<br />
fluids and substances to be infectious.<br />
Bone – A dense, hard tissue that forms the skeleton.<br />
Buddy board – A board with identification tags used to<br />
keep track of swimmers and reinforce the importance of<br />
the buddy system.<br />
Bulkhead – A moveable wall placed in a swimming<br />
pool to separate activities or water of different depths.<br />
Buoy – A float in the water anchored to the bottom.<br />
Buoyancy – The tendency of a body to float or to rise<br />
when submerged in a fluid.<br />
Buoyant – Tending to float, capable of keeping an<br />
object afloat.
274<br />
<strong>Lifeguarding</strong> <strong>Manual</strong><br />
Bystanders – People at the scene of an emergency<br />
who do not have a duty to provide care.<br />
Carbon dioxide – A colorless, odorless gas; a waste<br />
product of respiration.<br />
Carbon monoxide – A clear, odorless, poisonous gas<br />
produced when carbon or other fuel is burned, as in<br />
gasoline engines.<br />
Cardiac arrest – A condition in which the heart has<br />
stopped or beats too ineffectively to generate a pulse.<br />
Cartilage – An elastic tissue in the body; in the joints,<br />
it acts as a shock absorber when a person is walking,<br />
running or jumping.<br />
Catch pool – A small pool at the bottom of a slide<br />
where patrons enter water deep enough to cushion<br />
their landing.<br />
Chain of command – The structure of employee and<br />
management positions in a facility or organization.<br />
Chemical hazard – A harmful or potentially harmful<br />
substance in or around a facility.<br />
Chest – The upper part of the trunk (torso), containing<br />
the heart, major blood vessels and lungs.<br />
Chronic – Persistent over a long period of time.<br />
Closed wound – An injury that does not break the skin<br />
and in which soft tissue damage occurs beneath the skin.<br />
Cold-related emergencies – Emegencies, including<br />
hypothermia and frostbite, caused by overexposure<br />
to cold.<br />
Concussion – A temporary impairment of brain function.<br />
Confidentiality – Protecting a victim’s privacy by not<br />
revealing any personal information learned about a victim<br />
except to law enforcement personnel or emergency<br />
medical services personnel caring for the victim.<br />
Consent – Permission to provide care given by an ill or<br />
injured person to a rescuer.<br />
Convulsions – Sudden, uncontrolled muscular<br />
contractions.<br />
CPR – A technique that combines chest compressions<br />
and rescue breaths for a victim whose heart and<br />
breathing have stopped.<br />
Critical incident – Any situation that causes a person<br />
to experience unusually strong emotional reactions that<br />
interfere with his or her ability to function during and<br />
after a highly stressful incident.<br />
Critical incident stress – The stress a person<br />
experiences during or after a highly stressful emergency.<br />
<strong>Cross</strong> bearing – A technique for determining the place<br />
where a submerged victim was last seen, performed by<br />
two persons some distance apart, each pointing to the<br />
place such that the position is where the lines of their<br />
pointing cross.<br />
Current – Fast-moving water.<br />
Cyanosis – A blue discoloration of the skin around the<br />
mouth and fingertips resulting from a lack of oxygen in<br />
the blood.<br />
Daily log – A written journal kept by lifeguards,<br />
the head lifeguard and management containing a<br />
daily account of safety precautions taken and<br />
significant events.<br />
Deep-water line search – An effective pattern for<br />
searching in water that is greater than chest deep.<br />
Defibrillation – An electrical shock that disrupts the<br />
electrical activity of the heart long enough to allow the<br />
heart to spontaneously develop an effective rhythm on<br />
its own.<br />
Diabetes – A condition in which the body does<br />
not produce enough insulin or does not use insulin<br />
effectively enough to regulate the amount of sugar<br />
(glucose) in the bloodstream.<br />
Diabetic – A person with the condition called diabetes<br />
mellitus, which causes a body to produce insufficient<br />
amounts of the hormone insulin.<br />
Diabetic emergency – A situation in which a person<br />
becomes ill because of an imbalance of sugar (glucose)<br />
and insulin in the bloodstream.<br />
Direct contact transmission – Occurs when infected<br />
blood or body fluids from one person enter another<br />
person’s body at a correct entry site.<br />
Disability – The loss, absence or impairment of<br />
sensory, motor or mental function.<br />
Dislocation – The movement of a bone away from its<br />
normal position at a joint.<br />
Disoriented – Being in a state of confusion; not<br />
knowing place, identity or what happened.<br />
Dispatch – The method for informing patrons when it is<br />
safe to proceed on a ride.<br />
Distressed swimmer – A person capable of staying<br />
afloat, but likely to need assistance to get to safety. If not<br />
rescued, the person becomes an active drowning victim.<br />
Dressing – A pad placed on a wound to control<br />
bleeding and prevent infection.<br />
Drop-off slide – A slide that ends with a drop of<br />
several feet into a catch pool.
Glossary 275<br />
Droplet transmission – Transmission of disease<br />
through the inhalation of droplets from an infected<br />
person’s cough or sneeze.<br />
Drowning – Death by suffocation in water.<br />
Drug – Any substance other than food intended to<br />
affect the functions of the body.<br />
Duty to act – A legal responsibility of certain people to<br />
provide a reasonable standard of emergency care; may<br />
be required by case law, statute or job description.<br />
Electrocardiogram (ECG) – A graphic record<br />
produced by a device that records the electrical activity<br />
of the heart from the chest.<br />
Embedded object – An object that remains embedded<br />
in an open wound.<br />
Emergency – A sudden, unexpected incident<br />
demanding immediate action.<br />
Emergency action plan (EAP) – A written plan<br />
detailing how facility staff are to respond in a specific<br />
type of emergency.<br />
Emergency back-up coverage – Coverage by<br />
lifeguards who remain out of the water during an<br />
emergency situation and supervise a larger area when<br />
another lifeguard must enter the water for a rescue.<br />
Emergency medical services (EMS)<br />
personnel – Trained and equipped community-based<br />
personnel dispatched through a local emergency number<br />
to provide emergency care for injured or ill people.<br />
Emergency medical technician (EMT) – A person<br />
who has successfully completed a state-approved<br />
emergency medical technician training program;<br />
paramedics are the highest level of EMTs.<br />
Emergency stop button – A button or switch used to<br />
immediately turn off the waves or water flow in a wave<br />
pool, water slide or other water attraction in the event of<br />
an emergency.<br />
Emphysema – A disease in which the lungs lose their<br />
ability to exchange carbon dioxide and oxygen effectively.<br />
Engineering controls – Safeguards intended to isolate<br />
or remove a hazard from the workplace.<br />
Epilepsy – A chronic condition characterized by<br />
seizures that vary in type and duration; can usually be<br />
controlled by medication.<br />
Epinephrine – A form of adrenaline medication<br />
prescribed to treat the symptoms of severe allergic<br />
reactions.<br />
Exhaustion – The state of being extremely tired<br />
or weak.<br />
Facility surveillance – Checking the facility to help<br />
prevent injuries caused by avoidable hazards in the<br />
facility’s environment.<br />
Fainting – A temporary loss of consciousness.<br />
Fibrillation – A quivering of the heart’s ventricles.<br />
Forearm – The upper extremity from the elbow<br />
to the wrist.<br />
Fracture – A chip, crack or complete break in<br />
bone tissue.<br />
Free-fall slide – A type of speed slide with a nearly<br />
vertical drop, giving riders the sensation of falling.<br />
Frostbite – The freezing of body parts exposed to<br />
the cold.<br />
Gasp reflex – A sudden involuntary attempt to “catch<br />
one’s breath,” which may cause the victim to inhale water<br />
into the lungs if the face is underwater.<br />
Heat cramps – Painful spasms of skeletal muscles after<br />
exercise or work in warm or moderate temperatures;<br />
usually involve the calf and abdominal muscles.<br />
Heat exhaustion – The early stage and most common<br />
form of heat-related illness; often results from strenuous<br />
work or exercise in a hot environment.<br />
Heat stroke – A life-threatening condition that develops<br />
when the body’s cooling mechanisms are overwhelmed<br />
and body systems begin to fail.<br />
Heat-related illnesses – Illnesses, including heat<br />
exhaustion, heat cramps and heat stroke, caused by<br />
overexposure to heat.<br />
Hemostatic agents – A substance that stops<br />
bleeding by shortening the amount of time it takes<br />
for blood to clot. They usually contain chemicals that<br />
remove moisture from the blood.<br />
Hepatitis B – A liver infection caused by the hepatitis B<br />
virus; may be severe or even fatal and can be in the body<br />
up to 6 months before symptoms appear.<br />
Hepatitis C – A liver disease caused by the hepatitis<br />
C virus; it is the most common chronic bloodborne<br />
infection in the United States.<br />
HIV – A virus that destroys the body’s ability to fight<br />
infection. A result of HIV infection is referred to as AIDS.<br />
Hull – The main body of a boat.<br />
Hydraulic – Strong force created by water flowing<br />
downward over an obstruction and then reversing its flow.<br />
Hyperglycemia – Someone experiencing symptoms of<br />
high blood sugar.
276<br />
<strong>Lifeguarding</strong> <strong>Manual</strong><br />
Hyperventilation – A dangerous technique some<br />
swimmers use to stay under water longer by taking<br />
several deep breaths followed by forceful exhalations,<br />
then inhaling deeply before swimming under water.<br />
Hypoglycemia – Someone experiencing symptoms of<br />
low blood sugar.<br />
Hypothermia – A life-threatening condition in which<br />
cold or cool temperatures cause the body to lose heat<br />
faster than it can produce it.<br />
Hypoxia – A condition in which insufficient oxygen<br />
reaches the cells, resulting in cyanosis and changes in<br />
consciousness and in breathing and heart rates.<br />
Immobilize – To use a splint or other method to keep<br />
an injured body part from moving.<br />
Implied consent – Legal concept that assumes a<br />
person would consent to receive emergency care if he<br />
or she were physically able to do so.<br />
Incident – An occurrence or event that interrupts<br />
normal procedure or brings about a crisis.<br />
Incident report – A report filed by a lifeguard or<br />
other facility staff who responded to an emergency<br />
or other incident.<br />
Indirect contact transmission – Occurs when a<br />
person touches objects that have the blood or body fluid<br />
of an infected person, and that infected blood or body<br />
fluid enters the body through a correct entry site.<br />
Inflatables – Plastic toys or equipment that are filled<br />
with air to function as recommended.<br />
Inhaled poison – A poison that a person breathes into<br />
the lungs.<br />
Injury – The physical harm from an external force<br />
on the body.<br />
In-line stabilization – A technique used to minimize<br />
movement of a victim’s head and neck while<br />
providing care.<br />
In-service training – Regularly scheduled staff<br />
meetings and practice sessions that cover lifeguarding<br />
information and skills.<br />
Instinctive drowning response – A universal set<br />
of behaviors exhibited by an active drowning victim<br />
that include struggling to keep the face above water,<br />
extending arms to the side and pressing down for<br />
support, not making any forward progress in the water<br />
and staying at the surface for only 20 to 60 seconds.<br />
Intervals – A series of repeat swims of the same<br />
distance and time interval, each done at the same high<br />
level of effort.<br />
Jaundice – Yellowing of the skin and eyes.<br />
Joint – A structure where two or more bones are joined.<br />
Laceration – A cut.<br />
Laryngospasm – A spasm of the vocal cords that<br />
closes the airway.<br />
Life jacket – A type of personal floatation device (PFD)<br />
approved by the United States Coast Guard for use<br />
during activities in, on or around water.<br />
Lifeguard – A person trained in lifeguarding, CPR<br />
and first aid skills who ensures the safety of people<br />
at an aquatic facility by preventing and responding to<br />
emergencies.<br />
Lifeguard competitions – Events and contests<br />
designed to evaluate the skills and knowledge of<br />
individual lifeguards and lifeguard teams.<br />
Lifeguard team – A group of two or more lifeguards on<br />
duty at a facility at the same time.<br />
Ligaments – A tough, fibrous connective tissue that<br />
holds bones together at a joint.<br />
Line-and-reel – A heavy piece of rope or cord attached<br />
to rescue equipment that may be used to tow the<br />
lifeguard and the victim to safety.<br />
Material Safety Data Sheet (MSDS) – A form that<br />
provides information about a hazardous substance.<br />
Mechanical obstruction – Complete or partial blockage<br />
of the airway by a foreign object, such as a piece of food<br />
or a small toy, or by fluids, such as vomit or blood.<br />
Muscle – Tissue in the body that lengthens and<br />
shortens to create movement.<br />
Myocardial infarction – A heart attack.<br />
Nasal cannula – A device used to deliver oxygen to<br />
a breathing person; used mostly for victims with minor<br />
breathing problems.<br />
Negligence – The failure to follow the standard of care<br />
or to act, thereby causing injury or further harm to another.<br />
Nonfatal drowning – To survive, at least temporarily,<br />
following submersion in water (drowning).<br />
Non-rebreather mask – A mask used to deliver high<br />
concentrations of oxygen to breathing victims.<br />
Occupational Safety and Health Administration<br />
(OSHA) – A government agency that helps protect the<br />
health and safety of employees in the workplace.<br />
Open wound – An injury to soft tissue resulting in a<br />
break in the skin, such as a cut.
Glossary 277<br />
Opportunistic infections – Infections that strike<br />
people whose immune systems are weakened by HIV or<br />
other infections.<br />
Oxygen – A tasteless, colorless, odorless gas<br />
necessary to sustain life.<br />
Oxygen delivery device – Equipment used to supply<br />
oxygen to a victim of a breathing emergency.<br />
Paralysis – A loss of muscle control; a permanent loss<br />
of feeling and movement.<br />
Partial thickness burn – A burn that involves both<br />
layers of skin. Also called a second-degree burn.<br />
Passive drowning victim – An unconscious victim<br />
face-down, submerged or near the surface.<br />
Pathogen – A disease-causing agent. Also called a<br />
microorganism or germ.<br />
Patron surveillance – Maintaining a close watch over<br />
the people using an aquatic facility.<br />
Peripheral vision – What one sees at the edges of<br />
one’s field of vision.<br />
Personal floatation device (PFD) – Coast Guardapproved<br />
life jacket, buoyancy vest, wearable floatation aid,<br />
throwable device or other special-use floatation device.<br />
Personal water craft – A motorized vehicle designed for<br />
one or two riders that skims over the surface of the water.<br />
Pier – A wooden walkway or platform built over the<br />
water supported by pillars that is used for boats to dock,<br />
fishing or other water activities.<br />
Poison – Any substance that causes injury, illness or<br />
death when introduced into the body.<br />
Poison Control Center (PCC) – A specialized kind<br />
of health center that provides information in cases of<br />
poisoning or suspected poisoning emergencies.<br />
Policies and procedures manual – A manual that<br />
provides detailed information about the daily and<br />
emergency operations of a facility.<br />
Preventive lifeguarding – The methods that lifeguards<br />
use to prevent drowning and other injuries by identifying<br />
dangerous conditions or behaviors and then taking steps<br />
to minimize or eliminate them.<br />
Primary responsibility – A lifeguard’s main<br />
responsibility, which is to prevent drowning and other<br />
injuries from occurring at an aquatic facility.<br />
Professional rescuers – Paid or volunteer<br />
personnel, including lifeguards, who have a legal<br />
duty to act in an emergency.<br />
Public address system – An electronic<br />
amplification system, used at an aquatic facility so that<br />
announcements can be easily heard by patrons.<br />
Puncture – An open wound created when the skin is<br />
pierced by a pointed object.<br />
Rapids ride – A rough-water attraction that simulates<br />
white-water rafting.<br />
Reaching assist – A method of helping someone out<br />
of the water by reaching to that person with your hand,<br />
leg or an object.<br />
Reaching pole – An aluminum or fiberglass pole,<br />
usually 10- to 15-feet long, used for rescues.<br />
Refusal of care – The declining of care by a victim;<br />
the victim has the right to refuse the care of anyone who<br />
responds to an emergency.<br />
Rescue board – A plastic or fiberglass board shaped<br />
like a surf board that is used by lifeguards to paddle out<br />
and make a rescue.<br />
Rescue tube – A 45- to 54-inch vinyl, foam-filled<br />
tube with an attached tow line and shoulder strap that<br />
lifeguards use to make rescues.<br />
Respiratory arrest – A condition in which breathing<br />
has stopped.<br />
Respiratory distress – A condition in which breathing<br />
is difficult.<br />
Respiratory failure – When the respiratory system<br />
is beginning to shut down, which in turn can lead to<br />
respiratory arrest.<br />
Resuscitation mask – A pliable, dome-shaped device<br />
that fits over a person’s mouth and nose; used to assist<br />
with rescue breathing.<br />
RID factor – Three elements—recognition, intrusion and<br />
distraction—related to drownings at guarded facilities.<br />
Ring buoy – A buoyant ring, usually 20 to 30 inches in<br />
diameter; with an attached line, allows a rescuer to pull a<br />
victim to safety without entering the water.<br />
Risk management – Identifying and eliminating or<br />
minimizing dangerous conditions that can cause injuries<br />
and financial loss.<br />
Roving station – When a roving lifeguard is assigned a<br />
specific zone, which also is covered by another lifeguard<br />
in an elevated station.<br />
Rules – Guidelines for conduct or action that help keep<br />
patrons safe at pools and other swimming areas.<br />
Runout – The area at the end of a slide where water<br />
slows the speed of the riders.
278<br />
<strong>Lifeguarding</strong> <strong>Manual</strong><br />
Safety check – An inspection of the facility to find and<br />
eliminate or minimize hazards.<br />
Scanning – A visual technique used by lifeguards to<br />
properly observe and monitor patrons participating in<br />
water activities.<br />
Secondary responsibilities – Other duties a lifeguard<br />
must perform, such as testing the pool water chemistry,<br />
assisting patrons, performing maintenance, completing<br />
records and reports, or performing opening duties,<br />
closing duties or facility safety checks. Secondary<br />
responsibilities should never interfere with a lifeguard’s<br />
primary responsibility.<br />
Seiche – A French word meaning to sway back and<br />
forth. It is a standing wave that oscillates in a lake<br />
because of seismic or atmospheric disturbances<br />
creating huge fluctuations of water levels in just<br />
moments. Water sloshes between opposing shores<br />
within the lake basin, decreasing in height with each<br />
rocking back and forth until it reaches equilibrium.<br />
Seizure – A disorder in the brain’s electrical<br />
activity, marked by loss of consciousness and<br />
often by convulsions.<br />
Shepherd’s crook – A reaching pole with a large hook<br />
on the end. See also reaching pole.<br />
Shock – A life-threatening condition in which the<br />
circulatory system fails to deliver blood to all parts of the<br />
body, causing body organs to fail.<br />
Sighting – A technique for noting where a submerged<br />
victim was last seen, performed by imagining a line to<br />
the opposite shore and estimating the victim’s position<br />
along that line. See also cross bearing.<br />
Sink – To fall, drop or descend gradually to a<br />
lower level.<br />
Soft tissue – Body structures that include the layers of<br />
skin, fat and muscles.<br />
Spa – A small pool or tub in which people sit in rapidly<br />
circulating hot water.<br />
Spasm – An involuntary and abnormal muscle contraction.<br />
Speed slide – A steep water slide on which patrons<br />
may reach speeds in excess of 35 mph.<br />
Spinal cord – A bundle of nerves extending from the<br />
base of the skull to the lower back and protected by the<br />
spinal column.<br />
Splint – A device used to immobilize body parts;<br />
applying such a device.<br />
Spokesperson – The person at the facility designated<br />
to speak on behalf of others.<br />
Sprain – The stretching and tearing of ligaments and<br />
other tissue structures at a joint.<br />
Standard of care – The minimal standard and quality of<br />
care expected of an emergency care provider.<br />
Standard precautions – Safety measures, such<br />
as body substance isolation, taken to prevent<br />
occupational-risk exposure to blood or other potentially<br />
infectious materials, such as body fluids containing<br />
visible blood.<br />
Starting blocks – Platforms from which competitive<br />
swimmers dive to start a race.<br />
Sterile – Free from germs.<br />
Stern – The back of a boat.<br />
Stoma – An opening in the front of the neck through<br />
which a person whose larynx has been removed<br />
breathes.<br />
Strain – The stretching and tearing of muscles<br />
or tendons.<br />
Stress – A physiological or psychological response to<br />
real or imagined influences that alter an existing state of<br />
physical, mental or emotional balance.<br />
Stroke – A disruption of blood flow to a part of the<br />
brain, causing permanent damage.<br />
Submerged – Underwater, covered with water.<br />
Suctioning – The process of removing foreign matter<br />
from the upper airway by means of manual device.<br />
Sun protection factor (SPF) – The ability of a<br />
substance to prevent the sun’s harmful rays from being<br />
absorbed into the skin; a concentration of sunscreen.<br />
Sunscreen – A cream, lotion or spray used to protect<br />
the skin from harmful rays of the sun.<br />
Superficial burn – A burn involving only the outer layer<br />
of skin, the epidermis, characterized by dry, red or tender<br />
skin. Also referred to as a first-degree burn.<br />
Surveillance – A close watch kept over someone or<br />
something, such as patrons or a facility.<br />
Thermocline – A layer of water between the warmer,<br />
surface zone and the colder, deep-water zone in a body<br />
of water in which the temperature decreases rapidly<br />
with depth.<br />
Throwable device – Any object that can be thrown to<br />
a drowning victim to aid him or her in floating.<br />
Throwing assist – A method of helping someone<br />
out of the water by throwing a floating object with a<br />
line attached.
Glossary 279<br />
Tornado warning – A warning issued by the National<br />
Weather Service notifying that a tornado has been sighted.<br />
Tornado watch – A warning issued by the National<br />
Weather Service notifying that tornadoes are possible.<br />
Total coverage – When only one lifeguard is conducting<br />
patron surveillance for an entire pool while on duty.<br />
Universal precautions – Practices required by the<br />
federal Occupational Safety and Health Administration<br />
to control and protect employees from exposure to<br />
blood and other potentially infectious materials.<br />
Universal sign of choking – When a conscious<br />
person is clutching the throat due to an airway blockage.<br />
Vector-borne transmission – Transmission of a<br />
disease by an animal or insect bite through exposure to<br />
blood or other body fluids.<br />
Ventricles – The two lower chambers of the heart.<br />
Ventricular fibrillation (V-fib) – An abnormal heart<br />
rhythm characterized by disorganized electrical activity,<br />
which results in the quivering of the ventricles.<br />
Waterfront – Open water areas, such as lakes, rivers,<br />
ponds and oceans.<br />
Waterpark – An aquatic theme park with attractions<br />
such as wave pools, speed slides or winding rivers.<br />
Wheezing – The hoarse whistling sound made when<br />
inhaling and/or exhaling.<br />
Work practice controls – Employee and employer<br />
behaviors that reduce the likelihood of exposure to a<br />
hazard at the job site.<br />
Wound – An injury to the soft tissues.<br />
Xiphoid process – The lowest point of the breastbone.<br />
Zone coverage – Coverage in which the swimming<br />
area is divided into separate zones, with one zone for<br />
each lifeguard station.<br />
Zone of surveillance responsibility – Also referred<br />
to as zones, these are the specific areas of the water,<br />
deck, pier or shoreline that are a lifeguard’s responsibility<br />
to scan from a lifeguard station.<br />
Ventricular tachycardia (V-tach) – An abnormal heart<br />
rhythm characterized by rapid contractions of the ventricles.
280<br />
<strong>Lifeguarding</strong> <strong>Manual</strong><br />
References<br />
2010 International Consensus on Cardiopulmonary Resuscitation and Emergency<br />
Cardiovascular Care Science With Treatment Recommendations, Circulation.<br />
http://circ.ahajournals.org/content/122/16_suppl_2/S250.short. Accessed August 2011.<br />
<strong>American</strong> Alliance for Health, Physical Education, Recreation and Dance. Safety Aquatics.<br />
Sports Safety Series, Monograph #5. <strong>American</strong> Alliance for Health, Physical Education,<br />
Recreation and Dance, 1977.<br />
<strong>American</strong> Heart Association and the <strong>American</strong> National <strong>Red</strong> <strong>Cross</strong>, 2010 Guidelines for<br />
First Aid, Circulation, http://circ.ahajournals.org/content/122/18_suppl_3/S934.full.pdf.<br />
Accessed August 2011.<br />
The <strong>American</strong> National <strong>Red</strong> <strong>Cross</strong>. Adapted Aquatics: Swimming for Persons With Physical<br />
or Mental Impairments. Washington, D.C.: The <strong>American</strong> National <strong>Red</strong> <strong>Cross</strong>, 1977.<br />
———. Basic Water Rescue. Yardley, Pennsylvania: StayWell Health & Safety Solutions, 2009.<br />
———. CPR/AED for the Professional Rescuer and Health Care Providers. Yardley,<br />
Pennsylvania: StayWell Health & Safety Solutions, 2011.<br />
———. Emergency Medical Response. Yardley, Pennsylvania: StayWell Health & Safety<br />
Solutions, 2011.<br />
———. First Aid/CPR/AED. Yardley, Pennsylvania: StayWell Health & Safety Solutions, 2011<br />
———. First Aid—Responding to Emergencies. Yardley, Pennsylvania: StayWell Health & Safety<br />
Solutions, 2006.<br />
———. <strong>Lifeguarding</strong> <strong>Manual</strong>. Yardley, Pennsylvania: StayWell Health & Safety Solutions, 2006.<br />
———. <strong>Lifeguarding</strong> Today. Boston: StayWell, 1994.<br />
———. Safety Training for Swim Coaches. Yardley, Pennsylvania: StayWell Health & Safety<br />
Solutions, 2009.<br />
———. Swimming and Water Safety. Yardley, Pennsylvania: StayWell Health & Safety<br />
Solutions, 2009.<br />
<strong>American</strong> <strong>Red</strong> <strong>Cross</strong> Scientific Advisory Council (SAC). Advisory Statement on Aspirin<br />
Administration, 2001.<br />
———. Advisory Statement on Asthma Assistance, 2003.<br />
———. Advisory Statement on Epinephrine Administration, 2001.<br />
———. Advisory Statement on Cervical Collar Application in Water Rescue, 2000.<br />
———. Advisory Statement on Hand Hygiene for First Aid, 2006<br />
———. Advisory Statement on Hyperthermia, 2009.<br />
———. Advisory Statement on Lightning Safety for Pools, 2009.<br />
———. Advisory Statement on Subdiaphragmatic Thrusts and Drowning Victims, 2006.<br />
———. Advisory Statement on Voluntary Hyperventilation Preceding Underwater Swimming,<br />
2009.<br />
Armbruster, D.A.; Allen, R.H.; and Billingsley, H.S. Swimming and Diving. 6th ed. St. Louis:<br />
The C.V. Mosby Company, 1973.
eferences<br />
281<br />
Association for the Advancement of Health Education. “Counting the Victims.” HE-XTRA 18<br />
(1993):8.<br />
Baker, S.P.; O’Neill, B.; and Ginsburg, M.J. The Injury Fact Book. 2nd ed. Lexington,<br />
Massachusetts: Lexington Books, D.C. Heath and Co., 1991.<br />
Beringer, G.B., et al. “Submersion Accidents and Epilepsy.” <strong>American</strong> Journal of Diseases of<br />
Children 137 (1983):604–605.<br />
Bierens, Joost J.L.M.; Handbook on Drowning. Berlin/Heidelberg: Springer-Verlag, 2006.<br />
Brewster, C.B. Open Water Lifesaving: The United States Lifesaving Association <strong>Manual</strong>.<br />
2nd ed. Boston: Pearson Custom Publishing, 2003.<br />
Brown, V.R. “Spa Associated Hazards—An Update and Summary.” Washington, D.C.: U.S.<br />
Consumer Product Safety Commission, 1981.<br />
Bruess, C.E.; Richardson, G.E.; and Laing, S.J. Decisions for Health. 4th ed. Dubuque, Iowa:<br />
William C. Brown Publishers, 1995.<br />
The Canadian <strong>Red</strong> <strong>Cross</strong> Society. <strong>Lifeguarding</strong> <strong>Manual</strong>. Yardley, Pennsylvania: StayWell<br />
Health & Safety Solutions, 2009.<br />
Centers for Disease Control and Prevention. “Drownings at U.S. Army Corps of Engineers<br />
Recreation Facilities, 1986–1990.” Morbidity and Mortality Weekly Report 41<br />
(1992):331–333.<br />
———. “Drownings in a Private Lake—North Carolina, 1981–1990.” Morbidity and Mortality<br />
Weekly Report 41 (1992):329–331.<br />
———. “Suction-Drain Injury in a Public Wading Pool—North Carolina, 1991.” Morbidity and<br />
Mortality Weekly Report 41 (1992):333–335.<br />
———. Suggested Health and Safety Guidelines for Recreational Water Slide Flumes. Atlanta,<br />
Georgia: U.S. Department of Health and Human Services, 1981.<br />
———. Swimming Pools—Safety and Disease Control Through Proper Design and Operation.<br />
Atlanta, Georgia: United States Department of Health, Education, and Welfare, 1976.<br />
Chow, J.M. “Make a Splash: Children’s Pools Attract All Ages.” Aquatics International<br />
(1993):27–32.<br />
Clayton, R.D., and Thomas, D.G. Professional Aquatic Management. 2nd ed. Champaign,<br />
Illinois: Human Kinetics, 1989.<br />
Committee on Trauma Research; Commission on Life Sciences; National Research Council;<br />
and the Institute of Medicine. Injury in America. Washington, D.C.: National Academy<br />
Press, 1985.<br />
Consumer Guide with Chasnoff, I.J.; Ellis, J.W.; and Fainman, Z.S. The New Illustrated<br />
Family Medical & Health Guide. Lincolnwood, Illinois: Publications International, Ltd.,<br />
1994.<br />
Council for National Cooperation in Aquatics. Lifeguard Training: Principles and<br />
Administration. New York: Association Press, 1973.<br />
Craig, A.B., Jr. “Underwater Swimming and Loss of Consciousness.” The Journal of the<br />
<strong>American</strong> Medical Association 176 (1961):255–258.<br />
DeMers, G.E., and <strong>Johns</strong>on, R.L. YMCA Pool Operations <strong>Manual</strong>. 3rd ed. Champaign,<br />
Illinois: Human Kinetics, 2006.
282<br />
<strong>Lifeguarding</strong> <strong>Manual</strong><br />
Ellis, J., et al. National Pool and Waterpark Lifeguard Training <strong>Manual</strong>. Alexandria, Virginia:<br />
National Recreation and Park Association, 1993 and 1991.<br />
Ellis & Associates. International Lifeguard Training Program. Burlington, Massachusetts:<br />
Jones & Bartlett Learning. 2006<br />
Fife, D.; Scipio, S.; and Crane, G. “Fatal and Nonfatal Immersion Injuries Among New Jersey<br />
Residents.” <strong>American</strong> Journal of Preventive Medicine 7 (1991):189–193.<br />
Forrest, C., and Fraleigh, M.M. “Planning Aquatic Playgrounds With Children In Mind: Design<br />
A Spray Park Kids Love.” California Parks & Recreation (Summer 2004):12.<br />
Gabriel, J.L., editor. U.S. Diving Safety <strong>Manual</strong>. Indianapolis: U.S. Diving Publications, 1990.<br />
Gabrielsen, M.A. “Diving Injuries: Research Findings and Recommendations for <strong>Red</strong>ucing<br />
Catastrophic Sport Related Injuries.” Presented to the Council for National Cooperation in<br />
Aquatics. Indianapolis, 2000.<br />
———. Swimming Pools: A Guide to Their Planning, Design, and Operation. 4th ed.<br />
Champaign, Illinois: Human Kinetics, 1987.<br />
Getchell, B.; Pippin, R.; and Varnes, J. Health. Boston: Houghton Mifflin Co., 1989.<br />
Hedberg, K., et al. “Drownings in Minnesota, 1980–85: A Population-Based Study.”<br />
<strong>American</strong> Journal of Public Health 80 (1990):1071–1074.<br />
Huint, R. <strong>Lifeguarding</strong> in the Waterparks. Montreal: AquaLude, Inc., 1990.<br />
Idris A.H.; Berg, R.; Bierens, J.; Bossaert, L, Branche, C.; Gabrielli, A.; Graves, S.A.;<br />
Handley, J.; Hoelle, R.; Morley, P.; Pappa, L.; Pepe, P.; Quan, L.; Szpilman, D.; Wigginton,<br />
J.; and Modell, J.H. Recommended Guidelines For Uniform Reporting of Data From<br />
Drowning: the “Utstein Style”. Circulation, 108 (2003):2565–2574.<br />
Kowalsky, L., editor. Pool-Spa Operators Handbook. San Antonio, Texas: National Swimming<br />
Pool Foundation, 1990.<br />
Lierman, T.L., editor. Building a Healthy America: Conquering Disease and Disability. New<br />
York: Mary Ann Liebert, Inc., Publishers, 1987.<br />
Lifesaving Society. Alert: <strong>Lifeguarding</strong> in Action. 2nd ed. Ottawa, Ontario: Lifesaving<br />
Society, 2004.<br />
Litovitz, T.L.; Schmitz, B.S.; and Holm, K.C. “1988 Annual Report of the <strong>American</strong><br />
Association of Poison Control Centers National Data Collection System.” <strong>American</strong><br />
Journal of Emergency Medicine 7 (1989):496.<br />
Livingston, S.; Pauli, L.L.; and Pruce, I. “Epilepsy and Drowning in Childhood.” British<br />
Medical Journal 2 (1977):515–516.<br />
Marion Laboratories. Osteoporosis: Is It in Your Future? Kansas City: Marion Laboratories,<br />
1984.<br />
MayoClinic.com. Dehydration Overview. http://www.mayoclinic.com/health/dehydration/<br />
ds00561. Accessed August 2011.<br />
Mitchell, J.T. “Stress: The History, Status and Future of Critical Incident Stress Debriefings.”<br />
JEMS: Journal of Emergency Medical Services 13 (1988):47–52.<br />
———. “Stress and the Emergency Responder.” JEMS: Journal of Emergency Medical<br />
Services 15 (1987):55–57.<br />
Modell, J.H. “Drowning.” New England Journal of Medicine 328 (1993):253–256.<br />
National Committee for Injury Prevention and Control. Injury Prevention: Meeting the
eferences<br />
283<br />
Challenge. New York: Oxford <strong>University</strong> Press as a supplement to the <strong>American</strong> Journal<br />
of Preventive Medicine, Volume 5, Number 3, 1989.<br />
National Safety Council. Injury Facts, 1999 Edition. Itasca, Illinois: National Safety Council,<br />
1999.<br />
National Spa and Pool Institute. <strong>American</strong> National Standard for Public Swimming Pools.<br />
Alexandria, Virginia: National Spa and Pool Institute, 1991.<br />
New York State Department of Public Health. Drownings at Regulated Bathing Facilities in<br />
New York State, 1987–1990. Albany, New York: New York State Department of Health,<br />
1990.<br />
O’Connor, J. “A U.S. Accidental Drowning Study, 1980–1984.” Thesis, <strong>University</strong> of Oregon,<br />
1986.<br />
O’Donohoe, N.V. “What Should the Child With Epilepsy Be Allowed to Do?” Archives of<br />
Disease in Childhood 58 (1983):934–937.<br />
Orlowski, J.P.; Rothner, A.D.; and Lueders, H. “Submersion Accidents in Children With<br />
Epilepsy.” <strong>American</strong> Journal of Diseases of Children 136 (1982):777–780.<br />
Payne, W.A., and Hahn, D.B. Understanding Your Health. 7th ed. St. Louis: McGraw Hill<br />
Companies, 2002.<br />
Pearn, J. “Epilepsy and Drowning in Childhood.” British Medical Journal 1 (1977):1510–<br />
1511.<br />
Pearn, J.; Bart, R.; and Yamaoka, R. “Drowning Risks to Epileptic Children: A Study From<br />
Hawaii.” British Medical Journal 2 (1978):1284–1285.<br />
Pia, F. “Observations on the Drowning of Nonswimmers.” Journal of Physical Education (July<br />
1974):164–167.<br />
———. On Drowning, Water Safety Films, Inc. (1970).<br />
———. “<strong>Red</strong>ucing Swimming Related Drowning Fatalities.” Pennsylvania Recreation and Parks<br />
(Spring 1991):13–16.<br />
———. “The RID Factor as a Cause of Drowning.” Parks and Recreation (June 1984):52–67.<br />
Quan, L., and Gomez, A. “Swimming Pool Safety—An Effective Submersion Prevention<br />
Program.” Journal of Environmental Health 52 (1990):344–346.<br />
Rice, D.P.; MacKenzie, E.J.; et al. Cost of Injury in the United States: a Report to Congress<br />
1989. San Francisco, California: Institute for Health and Aging, <strong>University</strong> of California,<br />
and Injury Prevention Center, The <strong>Johns</strong> <strong>Hopkins</strong> <strong>University</strong>, 1989.<br />
Robertson, L.S. Injury Epidemiology. 2nd ed. New York: Oxford <strong>University</strong> Press, 1998.<br />
The Royal Life Saving Society Australia. <strong>Lifeguarding</strong>. 3rd ed. Marrickville, NSW: Elsevier<br />
Australia, 2001.<br />
The Royal Life Saving Society UK. The Lifeguard. 2nd ed. RLSS Warwickshire, UK, 2003.<br />
Spinal Cord Injury Information Network. Facts and Figures at a Glance—Feburary 2011.<br />
http://www.spinalcord.uab.edu. Accessed August 2011.<br />
Spray Parks, Splash Pads, Kids-Cool! http://www.azcentral.com/families/articles/0514grmombeat14Z12.html.<br />
Accessed August 2011.<br />
Strauss, R.H., editor. Sports Medicine. Philadelphia: W.B. Saunders Co., 1984.<br />
Torney, J.A., and Clayton, R.D. Aquatic Instruction, Coaching and Management. Minneapolis,<br />
Minnesota: Burgess Publishing Co., 1970.
284<br />
<strong>Lifeguarding</strong> <strong>Manual</strong><br />
———. Aquatic Organization and Management. Minneapolis, Minnesota: Burgess Publishing<br />
Co., 1981.<br />
United States Lifeguard Standards Coalition. United States Lifeguard Standards. January<br />
2011. http://www.lifeguardstandards.org/pdf/USLSC_FINAL_APPROVAL_1-31-11.pdf.<br />
Accessed August 2011.<br />
White, J.E. Starguard: Best Practices for Lifeguards. Champaign, Illinois: Human Kinetics,<br />
2006.<br />
Williams, K.G. The Aquatic Facility Operator <strong>Manual</strong>. 3rd ed. The National Recreation and<br />
Park Association, National Aquatic Section, 1999.<br />
Wintemute, G.J., et al. “The Epidemiology of Drowning in Adulthood: Implications for<br />
Prevention.” <strong>American</strong> Journal of Preventive Medicine 4 (1988):343–348.<br />
World Waterpark Association. Considerations for Operating Safety. Lenexa, Kansas: World<br />
Waterpark Association, 1991.<br />
YMCA of the USA. On the Guard II. 4th ed. Champaign, Illinois: Human Kinetics, 2001.<br />
Special Thanks<br />
Special thanks to Lead Technical Reviewers for video and photography: David Bell, Boy<br />
Scouts of America National Aquatic Committee and Shawn DeRosa, The Pennsylvania State<br />
<strong>University</strong> Manger of Aquatic Facilities and Safety Officer for Intercollegiate Athletics; Dan<br />
Jones and City of Norfolk lifeguards; Lauren Scott, Ginny Savage and the lifeguarding staff<br />
of Water Country U.S.A; Bill Kirkner, Mark Bonitabus, Sue Szembroth and the lifeguarding<br />
staff of the JCC of Greater Baltimore; Mike McGoun and the lifeguarding staff of the Coral<br />
Springs Aquatic Center; and Angela Lorenzo-Clavell and the City of Chandler lifeguarding<br />
staff for opening their facilities to us and providing their expertise with our photography<br />
and video shoots. We would also like to express our appreciation to Barbara Proud, Simon<br />
Bruty, Bernardo Nogueria, Primary Pictures crew, the Canadian <strong>Red</strong> <strong>Cross</strong> and the many<br />
volunteers who made the photos and videos a reality.
Index<br />
285<br />
Index<br />
A<br />
Abandonment, 6, 273<br />
Abdominal injuries, 226–27<br />
Abdominal thrusts in airway<br />
obstruction, 170–71, 184–85<br />
Abrasions, 222, 273<br />
Absorbed poisons, 233<br />
Accidental fecal release (AFR),<br />
24<br />
Action plan in emergency. See<br />
Emergency action plan<br />
Active drowning victim, 37–38,<br />
40, 273<br />
emergency action plan on,<br />
72, 73<br />
front rescue approach to, 92,<br />
107<br />
rear rescue approach to, 92,<br />
108–9<br />
rescue board skills for, 95,<br />
123–24<br />
Administration of facility, safety<br />
checklist on, 17<br />
Adults, 146<br />
AED use on, 199<br />
airway obstruction in, 170,<br />
171, 172, 184–85<br />
call first or care first in<br />
emergencies of, 147<br />
chest compressions in, 197,<br />
208–9<br />
primary assessment of, 144,<br />
145, 151–52<br />
pulse check in, 144, 151<br />
ventilations in, 145, 152, 169,<br />
181, 183, 197, 209<br />
Advice provided to victim after<br />
emergency, 81<br />
in land emergencies, 146<br />
in water rescue, 89–90<br />
AED. See Automated external<br />
defibrillator<br />
Age<br />
care appropriate for, 146<br />
and employment limitations,<br />
31<br />
Agonal gasps, 34, 163, 273<br />
AIDS, 132–33, 135, 137, 273,<br />
275<br />
Air in stomach, 168<br />
Airway adjuncts, 14, 178–79, 273<br />
Airway obstruction, 169–72,<br />
184–88<br />
airway adjuncts in, 14, 178–<br />
79, 273<br />
anatomical, 170, 273<br />
in conscious victim, 170–71,<br />
184–86<br />
maneuvers opening, 143–44,<br />
149–51, 153<br />
mechanical, 170, 276<br />
suctioning in, 180<br />
in unconscious victim, 171–<br />
72, 187–88<br />
universal sign of choking in,<br />
170, 279<br />
Alcohol use, 39<br />
Allergic reactions<br />
anaphylaxis in, 166–67, 273<br />
to insect stings, 230, 231<br />
SAMPLE mnemonic for<br />
history-taking on, 216, 239<br />
Amputation injuries, 227<br />
Anaphylaxis, 166–67, 273<br />
shock in, 166, 273<br />
Angina pectoris, 194<br />
Animal bites, 227<br />
Ankle drag, 142, 158<br />
Approach to victim in water<br />
rescue, 91, 92, 107–10<br />
with rescue board, 95, 122<br />
Area of responsibility, 273<br />
blind spots in, 42, 43, 273<br />
Arm splints, 243<br />
Arm weakness in stroke, 220<br />
Aspirin in heart attack, 195–96<br />
Assessment, 273<br />
primary, 142–46, 151–54<br />
of scene, 141<br />
secondary, 146, 216–17,<br />
240–41<br />
Assists, 91–92, 106<br />
reaching, 92, 106, 277<br />
simple, 92, 106<br />
walking, 94, 120, 142, 156<br />
Asthma, 161, 162, 273<br />
Asystole, 199, 273<br />
Automated external defibrillator<br />
(AED), 14–15, 198–203,<br />
212–13, 273<br />
for children and infants, 146,<br />
199<br />
in CPR sequence, 199, 213<br />
maintenance of, 202–3<br />
in multiple rescuers, 203,<br />
205<br />
precautions in use of, 200<br />
in special situations, 200–<br />
202<br />
steps in use of, 212–13<br />
and transdermal medication<br />
patches, 200, 201, 212<br />
in wet conditions, 200, 202<br />
Avulsion injuries, 222, 273<br />
B<br />
Back blows in airway obstruction,<br />
170–71, 184–85, 186<br />
Backboards, 13, 249, 262–71,<br />
273<br />
in deep water areas, 265–66<br />
head and chin support in, 253<br />
in land emergencies, 256–57,<br />
269–71<br />
removal of victim from water<br />
using, 94, 118–19, 251,<br />
254, 267–69<br />
returned to duty after<br />
emergency, 81<br />
in shallow water areas, 254,<br />
262–64<br />
in special situations, 254–56<br />
in speed slide areas, 256,<br />
268–69<br />
Back-up coverage in emergency,<br />
45, 46, 78, 275<br />
Bag-valve-mask resuscitators, 14,<br />
164–65, 206, 273<br />
oxygen delivery with, 180,<br />
190<br />
ventilation technique with,<br />
182–83<br />
Bandages, 273<br />
in eye injuries, 225<br />
in open wounds with<br />
bleeding, 223, 242<br />
in snakebites, 230<br />
Beach drag, 94, 120<br />
Behavior<br />
of active drowning victim,<br />
37–38, 40<br />
dangerous, 35–36, 39<br />
of distressed swimmer,<br />
36–37, 40<br />
of lifeguard, professional<br />
manner in, 55<br />
of passive drowning victim,<br />
38–40<br />
violent, 56<br />
Biohazardous material disposal<br />
after emergency, 81, 139, 148<br />
Bites and stings, 227, 228–32<br />
disease transmission in, 134,<br />
279<br />
Bleeding, 223, 242<br />
contamination of pool water<br />
in, 24<br />
exposure to bloodborne<br />
pathogens in, 132–40<br />
internal, 221–22<br />
from nose, 224<br />
in scalp injuries, 226<br />
scanning victim for, 145, 152,<br />
153<br />
Blind spots, 42, 43, 273<br />
Blood in pool water, 24<br />
Bloodborne pathogens, 32,<br />
132–40, 273<br />
exposure control plan,<br />
135–36<br />
exposure incident, 140<br />
federal standards for<br />
protection from, 32, 135–<br />
36, 273<br />
personal protective equipment<br />
for protection from, 14,<br />
137–38<br />
standard precautions in<br />
exposure to, 136, 278<br />
Body piercings, and AED use,<br />
202<br />
Body substance isolation<br />
precautions, 136, 273<br />
Bone, 273<br />
fractures of. See Fractures<br />
Booking procedure for group<br />
visits to facility, 66<br />
Breastbone injuries, splints in,<br />
245<br />
Breath-holding, extended, as<br />
dangerous behavior, 35, 39<br />
Breathing, checking for, 144,<br />
151, 153<br />
in cardiac emergencies, 203<br />
in respiratory arrest, 162–63<br />
Breathing barriers for personal<br />
protection, 137, 164–65<br />
Breathing emergencies, 159–92<br />
airway adjuncts in, 14, 178–<br />
79, 273<br />
in airway obstruction, 169–<br />
72, 184–88<br />
in anaphylaxis, 166–67<br />
in asthma, 161<br />
oxygen provided in, 172–80,<br />
189–91<br />
in respiratory arrest, 160,<br />
162–64<br />
in respiratory distress,<br />
160–62<br />
in respiratory failure, 160<br />
suctioning in, 180, 191–92<br />
ventilations given in, 163–69,<br />
181–83<br />
Breathing techniques. See<br />
Ventilations<br />
Bromine, 23<br />
Bruises, 221<br />
Buddy boards, 69, 70<br />
Buddy checks, 65, 66, 69–70<br />
Buddy systems, 68–70<br />
Buoyant vest, 63<br />
Buoys, 273<br />
rescue, 13<br />
ring, 15, 277<br />
Burns, 221, 227–28, 229<br />
partial thickness, 227, 228,<br />
277<br />
superficial, 227, 228, 278<br />
Bystanders, 79, 274<br />
C<br />
Call first or care first, 147<br />
Camps, 68–70, 75<br />
Carbon monoxide, 232, 274<br />
Cardiac arrest, 196, 274<br />
in children, 199<br />
Cardiac chain of survival, 194<br />
Cardiac emergencies, 193–213<br />
AED use in, 198–203,<br />
212–13<br />
in cardiac arrest, 196<br />
cardiopulmonary resuscitation<br />
in, 144, 145, 194, 196–213<br />
chain of survival in, 194<br />
in heart attack, 194–96<br />
multiple rescuers in, 203–6<br />
oxygen in, 172<br />
Cardiopulmonary resuscitation<br />
(CPR), 144–45, 194, 196–<br />
213, 274<br />
in adults, 151–52<br />
and AED use, 199, 213<br />
airway opening in, 143–44,<br />
149–51, 153<br />
barriers for personal<br />
protection in, 137, 164–65<br />
in call first or care first
286<br />
<strong>Lifeguarding</strong> <strong>Manual</strong><br />
Cardiopulmonary resuscitation<br />
continued<br />
situations, 147<br />
chest compressions in. See<br />
Chest compressions<br />
in children and infants, 152–<br />
54, 197, 198<br />
equipment used in, 13, 14<br />
in multiple rescuers, 203–6<br />
in one rescuer, 207–8<br />
recovery position in, 145–46,<br />
154–55<br />
in two rescuers, 198, 208–11<br />
ventilations in. See<br />
Ventilations<br />
Cardioverter-defibrillator,<br />
implantable, AED use in, 201<br />
Care<br />
consent to, 7, 170, 172, 274,<br />
276<br />
refusal of, 7–8, 277<br />
standard of, 6, 278<br />
Care first or call first, 147<br />
Carrying methods<br />
front-and-back carry, 94, 121<br />
pack-strap carry, 142, 157<br />
two-person seat carry, 142,<br />
156–57<br />
Catch pools, 61, 274<br />
assists in, 92<br />
head, neck, and spinal injuries<br />
in, 255–56<br />
Chain of command, 80, 274<br />
Chaperones in group visits to<br />
facility, 65, 66<br />
Chemicals, 31–32, 274<br />
burns from, 229<br />
disinfectant, 22–23<br />
eye injuries from, 225<br />
Material Safety Data Sheets<br />
on, 31, 232, 276<br />
poisonous, 232–33<br />
Chest compressions<br />
in airway obstruction, 172, 187<br />
in cycle with ventilations,<br />
144–45, 182, 183,<br />
196–98<br />
effectiveness of, 196<br />
in multiple rescuers, 203,<br />
205, 206<br />
in one rescuer, 207–8<br />
in two rescuers, 183, 208–11<br />
Chest hair affecting AED use,<br />
202<br />
Chest injuries, splints in, 245<br />
Chest thrusts in airway<br />
obstruction, 171, 185, 186<br />
Childbirth, emergency, 237–38<br />
Children<br />
AED use on, 146, 199, 212<br />
age range of, 146<br />
airway adjuncts for, 178–79<br />
airway obstruction in, 170,<br />
171, 172, 178–79, 184–85<br />
bag-valve-mask resuscitators<br />
for, 165<br />
call first or care first in<br />
emergencies of, 147<br />
chest compressions in, 197,<br />
198, 208–9<br />
dangerous behaviors of, 35<br />
fecal incidents, 24, 58<br />
oxygen therapy in, 172, 175<br />
play structures for, 58–59<br />
primary assessment of,<br />
152–54<br />
pulse check in, 144<br />
resuscitation masks for, 164<br />
surveillance of, 58<br />
two-rescuer CPR in, 198,<br />
208–9<br />
ventilations in, 145, 153, 154,<br />
169, 181, 183, 197, 198,<br />
209<br />
at youth camps, 68–70, 75<br />
Chloramines, 22<br />
Chlorine, 22, 23<br />
in spill clean-up, 140<br />
Choking, 170–72, 184–88. See<br />
also Airway obstruction<br />
Circulation<br />
in cardiac emergencies, 203<br />
in musculoskeletal injuries,<br />
236, 237<br />
pulse checks of, 144, 151,<br />
153<br />
Clearing swimming area in<br />
emergency, 78<br />
Closed wounds, 221–22, 274<br />
Clothes drag, 142, 158<br />
Cold application in RICE<br />
treatment, 236<br />
Cold-related emergencies, 234–<br />
35, 274<br />
frostbite in, 235, 275<br />
hypothermia in, 22, 101,<br />
201–2, 234–35, 276<br />
Cold water rescues, 101<br />
Color-coded wrist bands or swim<br />
caps, 66<br />
Communication<br />
on chemical hazards, 31–32<br />
in injury prevention strategies,<br />
53–56<br />
nonverbal, 55<br />
professional manner in, 55<br />
with victim in water<br />
emergency, 89<br />
whistle use in, 54<br />
Compact jump entry for water<br />
rescue, 91, 104–5<br />
Concussion, 249, 274<br />
Confidentiality, 6–7, 274<br />
Consent to care, 7, 274<br />
implied, 170, 172, 276<br />
Contusions, 221<br />
Convulsions, 219, 274<br />
Cooling techniques in heatrelated<br />
illnesses, 234<br />
CPR. See Cardiopulmonary<br />
resuscitation<br />
Cramps, in heat-related illness,<br />
233, 275<br />
Critical incident, 274<br />
stress in, 84–85, 274<br />
<strong>Cross</strong> bearings, 95–96, 274<br />
Cryptosporidium, 24<br />
Current, 274<br />
changes in, 21–22<br />
head, neck, and spinal injuries<br />
in, 254–55<br />
rip currents, 18–19<br />
Cyanosis, 160, 274<br />
D<br />
Dangerous behaviors, 39<br />
communication with patrons<br />
about, 54<br />
surveillance for, 35–36<br />
Debriefing meeting after<br />
emergency, 84<br />
Decision making, 6<br />
Deep water areas<br />
backboarding in, 265–66<br />
equalizing pressure in, 99<br />
head, neck and spinal injuries<br />
in, 249, 252, 254, 265–66<br />
line search in, 97–98, 274<br />
submerged victim in, 93,<br />
97–98, 116–17<br />
surface dives in, 97<br />
swimming ability required for,<br />
67–68<br />
Defibrillation, 194, 274<br />
with automated external<br />
defibrillator, 198–203<br />
Dentures, 168, 170<br />
Diabetes mellitus, 218, 274<br />
Direct contact transmission of<br />
disease, 134, 274<br />
Disinfectants, 22–23<br />
in spill clean-up, 140<br />
Dislocation of joint, 53, 235, 274<br />
Dispatching, 274<br />
at water slides, 60<br />
Distractions, 43, 44, 277<br />
Distressed swimmers, 36–37,<br />
40, 274<br />
assists for, 91–92, 106<br />
Dives, 93, 97, 113–15<br />
feet-first, 93, 97, 113–14<br />
head-first, 93, 97, 114–15<br />
Diving area rules and regulations,<br />
29<br />
Documentation. See Reports and<br />
documentation<br />
Drag methods<br />
ankle drag, 142, 158<br />
beach drag, 94, 120<br />
clothes drag, 142, 158<br />
Dressings, 274<br />
in burns, 228<br />
in eye injuries, 225<br />
in open wounds with<br />
bleeding, 223, 242<br />
Droplet transmission of disease,<br />
134, 275<br />
Drop-off slides, 60, 274<br />
Drowning, 275<br />
active victim in. See Active<br />
drowning victim<br />
breathing emergencies in,<br />
163<br />
emergency action plan on,<br />
72, 73<br />
frothing in, 165<br />
instinctive response in, 37,<br />
276<br />
nonfatal, 276<br />
passive victim in. See Passive<br />
drowning victim<br />
process of, 34, 53<br />
recognition of, 36–41<br />
Drugs, 275<br />
in anaphylaxis, 166–67<br />
aspirin in heart attack,<br />
195–96<br />
in asthma, 161<br />
epinephrine, 166–67, 275<br />
history-taking on, with<br />
SAMPLE mnemonic, 216,<br />
239<br />
in transdermal medication<br />
patches, 200, 201, 212<br />
Duty to act, 6, 275<br />
E<br />
EAP. See Emergency action plan<br />
Electrical burns, 229<br />
Elevated stations, 47, 51<br />
Elevation of injured area in RICE<br />
treatment, 236<br />
Embedded objects, 226, 275<br />
Emergencies, 275<br />
back-up coverage in, 45, 46,<br />
78, 275<br />
breathing, 159–92<br />
cardiac, 193–213<br />
first aid in, 214–45<br />
in head, neck, and spinal<br />
injuries, 246–72<br />
on land, 85–86, 140–46<br />
outside of zone, 85–86<br />
stop button used in, 64,<br />
76–77, 275<br />
water rescue in, 87–130<br />
whistle use in, 54<br />
Emergency action plan, 10,<br />
71–86, 275<br />
activation of, 76, 88<br />
back-up coverage in, 46, 49<br />
decision making in, 6<br />
example of, 73<br />
implementation of, 76–85<br />
in injuries and illnesses, 215<br />
for instructional classes, 57<br />
in land emergencies, 85–86,<br />
140–46<br />
management responsibilities<br />
for, 30<br />
in missing person, 74–75<br />
rescue equipment in, 12<br />
in respiratory distress, 162<br />
safety team role in, 72–76<br />
in severe weather conditions,<br />
25, 26, 27<br />
Emergency medical services<br />
(EMS), 275<br />
back-up coverage in calling<br />
for, 46<br />
in cardiac chain of survival,<br />
194<br />
emergency action plan on, 78<br />
exposure to bloodborne<br />
pathogens, 133<br />
in heart attack, 194, 195<br />
indications for calling,<br />
142–43<br />
in internal bleeding, 221<br />
lifeguard training with, 80<br />
in missing person, 74, 75<br />
refusal of care from, 7–8<br />
in respiratory distress, 162<br />
and safety team role, 73–76<br />
in seizures, 219<br />
in stroke, 220
Index<br />
287<br />
Emphysema, 162, 275<br />
Employers<br />
age limitation policies of, 31<br />
evaluation of lifeguards by, 8<br />
exposure control plan of,<br />
135–36<br />
in-service training provided by,<br />
9, 71, 276<br />
policies and procedures<br />
manual of, 9, 277<br />
potential, interview with, 77<br />
Enforcement of rules, 54–56<br />
Engineering controls, 138–39,<br />
275<br />
Entry for water rescue, 90–91,<br />
103–5<br />
compact jump, 91, 104–5<br />
with mask and fins, 100<br />
run-and-swim, 91, 105<br />
slide-in, 90–91, 100, 103<br />
stride jump, 91, 100, 103–4<br />
Epinephrine, 166–67, 275<br />
Equalizing pressure underwater,<br />
99<br />
Equipment, 12–15<br />
cleaning and disinfection of,<br />
139<br />
disposal of, 139<br />
inspection after emergency,<br />
81<br />
safety checklist on, 16<br />
for young children, 58<br />
Escapes, 100, 128–29<br />
front head-hold, 100, 128<br />
rear head-hold, 100, 128–29<br />
Evacuation of facility, 79<br />
Evaluation of lifeguards, preservice<br />
and on-the-job, 8<br />
Examination of conscious person,<br />
216–17, 240–41<br />
Exhaustion, 275<br />
in heat-related illness, 233–<br />
34, 275<br />
Exit point in water rescue, moving<br />
victim to, 89<br />
Eye injuries, 225<br />
Eyewear, protective, 137, 138<br />
F<br />
Facial weakness in stroke, 220<br />
Facility<br />
evacuation of, 79<br />
in-service training provided by,<br />
9, 71, 276<br />
policies and procedures<br />
manual of, 9, 277<br />
reopening of, 81, 84<br />
safety of, 11–32<br />
selection of, as place of<br />
employment, 77<br />
single-guard, 77<br />
spokesperson of, 84, 278<br />
surveillance of, 275<br />
Fainting, 218, 275<br />
FAST approach to stroke, 220<br />
Fecal incidents, 24, 58<br />
Feet-first surface dive, 93, 97,<br />
113–14<br />
Fibrillation, 275<br />
ventricular, 198–99, 279<br />
FIND decision-making model, 6<br />
Finger splints, 245<br />
Fins, 97, 98, 99–100<br />
First aid, 214–45<br />
in cold-related emergencies,<br />
234–35<br />
in heat-related illness,<br />
233–34<br />
in injuries, 215, 220–32,<br />
235–37, 242–45<br />
in poisonings, 232–33<br />
in sudden medical illness,<br />
215, 217–20<br />
First aid kit and supplies, 15, 16,<br />
215<br />
Fitness, swimming for, 5<br />
Flag warning of rip current, 19<br />
Floating play structures, 59<br />
Floating stations, 48<br />
Flotation vest, 63<br />
Fog, 26<br />
Food intake, SAMPLE mnemonic<br />
for history-taking on, 216, 239<br />
Foot drag, 142, 158<br />
Foot splints, 244–45<br />
Foreign bodies<br />
airway obstruction from,<br />
170–72, 184–88<br />
in eye, 225<br />
in open wounds, 226<br />
Fractures, 53, 235, 275<br />
with bleeding, 223<br />
open, 223, 237<br />
of skull, 226<br />
Free-fall slides, 60, 275<br />
Front-and-back carry method,<br />
94, 121<br />
Front head-hold escape, 100,<br />
128<br />
Front rescue of active victim, 92,<br />
107<br />
Frostbite, 235, 275<br />
Frothing, 165<br />
G<br />
Gasp reflex, 101, 275<br />
Gastroenteritis, 24<br />
Gloves, 13, 137–38<br />
removal of, 148<br />
Good Samaritan laws, 7–8<br />
Gowns, as personal protective<br />
equipment, 137, 138<br />
Ground-level stations, 47, 50<br />
Group visits to facilities, 65–68<br />
H<br />
Hail storms, 26<br />
H.A.IN.E.S. (high arm in<br />
endangered spine) recovery<br />
position, 146, 152, 154<br />
Hand hygiene for infection<br />
control, 138<br />
Hand splints, 245<br />
Hazards<br />
biohazardous material<br />
disposal after emergency,<br />
81, 139, 148<br />
chemical, 31–32, 274<br />
underwater, 20<br />
in water condition changes,<br />
21–23<br />
in weather conditions, 23–27<br />
Head, neck and spinal injuries,<br />
53, 246–72<br />
backboards in. See<br />
Backboards<br />
in catch pools, 255–56<br />
causes of, 247<br />
in deep-water areas, 249,<br />
252, 254, 265–66<br />
head and chin support in,<br />
252–53<br />
head splint technique in, 249,<br />
258–62<br />
in-line stabilization in, 248,<br />
249, 252–53, 272<br />
on land, 256–57, 269–72<br />
in moving water, 254–55<br />
recovery position in, 146<br />
removal of victim from water<br />
in, 251, 253, 254, 267–69<br />
in shallow water areas, 249,<br />
252, 254, 261–64<br />
signs and symptoms in, 247<br />
in speed slides, 256,<br />
268–69<br />
in standing victim, 256–57,<br />
269–71<br />
in submerged victim, 249,<br />
260–61<br />
ventilations in, 168<br />
Head-first surface dive, 93, 97,<br />
114–15<br />
Head splint technique, 249,<br />
258–62<br />
with face-down victim, 249,<br />
259–60, 261–62<br />
with face-up victim, 249, 258<br />
with submerged victim, 249,<br />
260–61<br />
Head-tilt/chin-lift maneuver, 143,<br />
149, 151, 153<br />
in head, neck, or spinal<br />
injuries, 168<br />
Heart attack, 194–96, 276<br />
Heat-related illnesses, 233–34,<br />
275<br />
cramps in, 233, 275<br />
exhaustion in, 233–34, 275<br />
heat stroke in, 234, 275<br />
Height requirements at water<br />
slides, 60<br />
Hepatitis B, 132, 133, 275<br />
personal protective equipment<br />
in exposure to, 137<br />
risk of transmission, 135<br />
vaccination against, 135, 136<br />
Hepatitis C, 132, 133, 275<br />
personal protective equipment<br />
in exposure to, 137<br />
risk of transmission, 135<br />
High arm in endangered spine<br />
(H.A.IN.E.S.) recovery position,<br />
146, 152, 154<br />
History-taking, SAMPLE<br />
mnemonic for, 216, 239<br />
HIV infection and AIDS, 132–33,<br />
135, 137, 273, 275<br />
Hot tubs and spas, 278<br />
rules and regulations on,<br />
29–30<br />
water quality in, 22–23<br />
Human bites, 227<br />
Hyperglycemia, 218, 275<br />
Hyperthermia, in spa or hot tub<br />
use, 29, 30<br />
Hyperventilation, 276<br />
in cold water, 101<br />
as dangerous behavior, 35,<br />
39<br />
Hypochlorous acid, 22<br />
Hypoglycemia, 218, 276<br />
Hypothermia, 22, 234–35, 276<br />
AED use in, 201–2<br />
in cold water, 101<br />
Hypoxia, 160, 172, 177, 276<br />
I<br />
Illness<br />
from bloodborne pathogens,<br />
132–40<br />
recognition of, 36, 38<br />
from recreational water, 24<br />
sudden, 215, 217–20<br />
Immobilization, 236, 237, 276<br />
backboards in. See<br />
Backboards<br />
in RICE treatment, 236<br />
splints in, 237, 243–45<br />
Implied consent, 170, 172, 276<br />
Incidents, 276<br />
critical, 84–85, 274<br />
exposure to bloodborne<br />
pathogens in, 140<br />
fecal, 24, 58<br />
report filed on, 7, 79–81,<br />
276. See also Reports and<br />
documentation<br />
Indirect contact transmission of<br />
disease, 134, 276<br />
Infants<br />
AED use on, 199, 212<br />
age range of, 146<br />
airway adjuncts for, 178–79<br />
airway obstruction in, 170,<br />
171, 172, 178–79, 186<br />
bag-valve-mask resuscitators<br />
for, 165<br />
call first or care first in<br />
emergencies of, 147<br />
chest compressions in, 197,<br />
198, 210–11<br />
oxygen therapy in, 172, 175<br />
primary assessment of,<br />
152–54<br />
pulse check in, 144<br />
resuscitation masks for, 164<br />
two-rescuer CPR in, 198,<br />
210–11<br />
ventilations in, 145, 153, 154,<br />
169, 181, 183, 197, 198,<br />
210–11<br />
Infections<br />
from bloodborne pathogens,<br />
132–40<br />
from water contamination,<br />
24<br />
Ingested poisons, 232<br />
Inhalation<br />
of pathogens, 134<br />
of poisons, 232–33, 276<br />
Injuries, 215, 276<br />
AED use in, 202<br />
in bites and stings, 227,<br />
228–32
288<br />
<strong>Lifeguarding</strong> <strong>Manual</strong><br />
Injuries continued<br />
bleeding in, 223, 242. See<br />
also Bleeding<br />
of head, neck and spinal cord,<br />
246–72<br />
life-threatening, 53<br />
musculoskeletal, 235–37,<br />
243–45<br />
non-life-threatening, 53<br />
prevention of, 52–70<br />
severed body parts in, 227<br />
shock in, 224<br />
of skin and soft tissues,<br />
220–28<br />
In-line stabilization of head and<br />
neck, 248, 249, 252–53, 276<br />
on land, 272<br />
modified, with head and chin<br />
support, 252–53<br />
in special situations, 254–56<br />
Insect stings, 230–31<br />
In-service training, 9, 71, 276<br />
Instinctive drowning response,<br />
37, 276<br />
Instructional classes, patron<br />
surveillance and safety in,<br />
57–58<br />
Intervals in swim training, 5, 276<br />
Interview with potential<br />
employers, 77<br />
Intrusions on surveillance, and<br />
RID factor, 44, 277<br />
J<br />
Jaw-thrust maneuver, 143,<br />
150–51<br />
with head extension, 143,<br />
150, 151, 153<br />
without head extension, 143,<br />
150–51, 153, 168<br />
Jellyfish stings, 231–32<br />
Jewelry, and AED use, 202<br />
Joints, 276<br />
dislocation of, 53, 235, 274<br />
K<br />
Kayaks, 48, 95, 127<br />
L<br />
Lacerations, 222, 276<br />
Land emergencies, 85–86,<br />
140–46<br />
backboarding procedure in,<br />
256–57, 269–71<br />
head, neck and spinal injuries<br />
in, 256–57, 269–72<br />
moving victim in, 141–42<br />
outside of surveillance zone,<br />
85–86<br />
primary assessment in,<br />
142–46<br />
scene assessment in, 141<br />
secondary assessment in,<br />
146<br />
Laryngospasm, 34, 276<br />
Legal considerations, 6–8<br />
Leg splints, 244<br />
Lifeguards, 1–10, 276<br />
characteristics of, 3–4<br />
decision making by, 6<br />
evaluation of, 8<br />
fitness of, 5<br />
legal considerations, 6–8<br />
primary responsibility of, 2,<br />
33, 277<br />
professionalism of, 55<br />
rotation of, 48–49, 50–51<br />
roving, 47–48, 65, 277<br />
secondary responsibilities of,<br />
2, 44, 278<br />
as team, 9–10, 276<br />
training of, 8–9. See also<br />
Training<br />
Life jackets, 62–63, 276<br />
in group visits to facility, 65<br />
improper fit of, 35, 36<br />
Life-threatening injuries, 53<br />
Ligaments, 276<br />
sprain of, 235, 278<br />
Lightning, 25<br />
Line-and-reel attached to rescue<br />
equipment, 276<br />
in cold water rescues, 101<br />
Line search in deep water,<br />
97–98, 274<br />
M<br />
Management personnel of facility,<br />
safety responsibilities of, 30–32<br />
Marine life stings, 231–32<br />
Masks<br />
non-rebreather, 175, 177,<br />
180, 190, 276<br />
as personal protective<br />
equipment, 137, 138<br />
resuscitation. See<br />
Resuscitation masks<br />
swimming, for underwater<br />
searches, 97, 98–99, 100<br />
Mask-to-nose ventilations,<br />
168–69<br />
Mask-to-stoma ventilations, 169<br />
Material Safety Data Sheet, 31,<br />
232, 276<br />
Medical emergencies, 53<br />
passive drowning in, 38<br />
recognition of, 36, 38<br />
in sudden illness, 215,<br />
217–20<br />
Medications. See Drugs<br />
Metal surfaces, and AED use,<br />
202<br />
Missing person procedures,<br />
74–75, 96–98<br />
deep water search in, 97–98<br />
shallow-water search in,<br />
96–97<br />
Motorized watercraft for rescues,<br />
127<br />
Mouth injuries, 225–26<br />
Moving victim, 156–58<br />
in land emergencies,<br />
141–42<br />
for removal from water. See<br />
Removal of victim from<br />
water<br />
Multiple rescuers<br />
backboarding with, 250–51,<br />
263–71<br />
in cardiac emergencies,<br />
203–5<br />
Multiple-victim rescue, 93, 111<br />
Muscle, 276<br />
injuries of, 235–37<br />
Myocardial infarction, 194–96,<br />
276<br />
N<br />
Nasal cannulas, 276<br />
oxygen delivery with, 175,<br />
176, 190<br />
Nasopharyngeal airways, 179<br />
National Weather Service, 25<br />
Neck injuries. See Head, neck,<br />
and spinal injuries<br />
Needlestick injuries, 135, 136<br />
Negligence, 6, 276<br />
and Good Samaritan laws, 7<br />
9-1-1 calls, in call first or care first<br />
situations, 147<br />
Nitroglycerin transdermal patch,<br />
AED use in, 200, 201<br />
Non-rebreather mask, 276<br />
oxygen delivery with, 175,<br />
177, 180, 190<br />
Nonverbal communication, 55<br />
Nosebleeds, 224<br />
O<br />
Occupational Safety and Health<br />
Administration (OSHA), 32,<br />
135–36, 276<br />
Open wounds, 222–23, 276<br />
Operational conditions of facility,<br />
safety checklist on, 16<br />
Opportunistic infections, 132,<br />
277<br />
Orientation<br />
annual or preseason, 8<br />
on emergency action plan,<br />
71<br />
of group visiting facility, 66,<br />
67<br />
Oropharyngeal airways, 178–79<br />
Oximetry, pulse, 176–77<br />
Oxygen, 172–80, 189–91, 277<br />
cylinders of, 172–73, 174,<br />
189<br />
delivery devices, 14, 175–80,<br />
189–90, 277<br />
fixed-flow-rate, 173–74<br />
safety precautions with, 174<br />
saturation monitoring, 176–77<br />
variable-flow-rate, 173<br />
P<br />
Pacemakers, AED use in, 201<br />
Pack-strap carry, 142, 157<br />
Paralysis, 53, 277<br />
Passive drowning victim, 38–40,<br />
277<br />
emergency action plan on,<br />
72, 73<br />
rear rescue approach to, 92,<br />
109–10<br />
rescue board skills for, 95,<br />
124–26<br />
Pathogens, 277<br />
bloodborne. See Bloodborne<br />
pathogens<br />
Patron surveillance, 33–51, 277<br />
blind spots in, 42, 43, 273<br />
for dangerous behaviors,<br />
35–36<br />
in group visits to facility,<br />
65–68<br />
in instructional classes,<br />
57–58<br />
lifeguard stations in, 46–49,<br />
50–51<br />
at play structures, 58–59<br />
professionalism in, 55<br />
rotation procedure for breaks<br />
in, 48–49, 50–51<br />
rule enforcement in, 54–56<br />
scanning method in, 41–44<br />
in special rides and<br />
attractions, 59–64<br />
in uncooperative or violent<br />
patrons, 56<br />
victim recognition in, 36–41<br />
of young children, 58<br />
at youth camps, 68–70<br />
zone of responsibility in,<br />
44–46<br />
Personal flotation devices,<br />
62–63, 277<br />
Personal protective equipment,<br />
14, 137–38<br />
pH of water, 22–23<br />
Phoning for help, in call first or<br />
care first situations, 147<br />
Physical examination of conscious<br />
person, 216–17, 240–41<br />
Piercings, body, and AED use,<br />
202<br />
Piers, 277<br />
safety checks of, 20–21<br />
Plants, poisonous, 233<br />
Play structures, guarding zones<br />
with, 58–59<br />
Poison Control Center, 232, 277<br />
Poisons, 232–33, 276, 277<br />
Policies and procedures manual,<br />
9, 277<br />
on age limitations for<br />
employment, 31<br />
Pregnancy<br />
AED use in, 202<br />
airway obstruction in, 171,<br />
185<br />
emergency childbirth in,<br />
237–38<br />
Pre-service evaluation, 8<br />
Preventive lifeguarding, 52–70,<br />
277<br />
communication with patrons<br />
in, 53–56<br />
in instructional classes,<br />
57–58<br />
life jacket use in, 62–63<br />
at play structures, 58–59<br />
in recreational swim groups,<br />
65–68<br />
at rides and attractions,<br />
59–64<br />
of young children, 58<br />
at youth camps, 68–70<br />
Primary assessment, 142–46,<br />
151–54<br />
in adults, 144, 145, 151–52<br />
in children and infants,<br />
152–54
Index<br />
289<br />
Primary responsibility of<br />
lifeguards, 2, 33, 277<br />
Professionalism, 55<br />
Public relations, professionalism<br />
in, 55<br />
Pulse checks, 144, 151, 153<br />
Pulse oximetry, 176–77<br />
Puncture wounds, 222, 277<br />
Q<br />
Quality of water, 22–23<br />
and recreational water<br />
illnesses, 24<br />
R<br />
Rainfall, heavy, 21, 26<br />
Reaching assist, 92, 106, 277<br />
Reaching poles, 15, 277<br />
with shepherd’s crook, 15, 278<br />
Rear head-hold escape, 100,<br />
128–29<br />
Rear rescue<br />
of active victim, 92, 108–9<br />
of passive victim, 92, 109–10<br />
Recognition of drowning<br />
in active victim, 37–38, 40<br />
and distress in swimmer,<br />
36–37, 40<br />
in passive victim, 38–40<br />
and RID factor, 44, 277<br />
Recovery position, 145–46, 152,<br />
154–55<br />
H.A.IN.E.S. (high arm in<br />
endangered spine), 146,<br />
152, 154<br />
Recreational water illnesses, 24<br />
Refusal of care, 7–8, 277<br />
Regulations. See Rules and<br />
regulations<br />
Release of victim after emergency,<br />
81<br />
in land emergencies, 146<br />
in water rescue, 90<br />
Removal of victim from water, 89,<br />
93–94, 118–21<br />
with backboard, 94, 118–19,<br />
251, 254, 267–69<br />
with beach drag, 94, 120<br />
with front-and-back carry<br />
method, 94, 121<br />
in head, neck and spinal<br />
injuries, 251, 253, 254,<br />
267–69<br />
of small victim from shallow<br />
water, 102, 130<br />
from speed slides, 256,<br />
268–69<br />
with walking assist, 94, 120<br />
Reopening facility after<br />
emergency, 81, 84<br />
Reports and documentation, 7,<br />
79–81, 276<br />
on land emergencies, 146<br />
legal considerations in, 7<br />
on refusal of care, 8<br />
sample form for, 82–83<br />
on uncooperative patrons, 56<br />
and <strong>University</strong> of North<br />
Carolina data gathering<br />
system, 86<br />
on water rescue, 89<br />
Rescue bags, 96<br />
Rescue boards, 15, 89, 277<br />
in active victim rescue, 95,<br />
123–24<br />
as floating station, 48<br />
in passive victim rescue, 95,<br />
124–26<br />
in waterfront areas, 94–95,<br />
122–26<br />
Rescue breathing. See<br />
Ventilations<br />
Rescue buoys, 13<br />
Rescue equipment, 12–15<br />
inspection after emergency,<br />
81<br />
safety checklist on, 16<br />
Rescue skills in water, 87–130.<br />
See also Water rescue<br />
Rescue tubes, 12, 88–89, 91,<br />
277<br />
Respiratory arrest, 160, 162–64,<br />
172, 277<br />
Respiratory distress, 160–62,<br />
277<br />
Respiratory failure, 160, 277<br />
Responsibilities of lifeguards, 2<br />
primary, 2, 33, 277<br />
secondary, 2, 44, 278<br />
for zone of surveillance,<br />
44–46, 279<br />
Responsiveness of victim, primary<br />
assessment of, 142, 151, 152<br />
Rest in RICE treatment, 236<br />
Resuscitation masks, 13, 145,<br />
149–51, 164, 181, 277<br />
and mask-to-nose ventilations,<br />
168–69<br />
and mask-to-stoma<br />
ventilations, 169<br />
oxygen delivery with, 175,<br />
177, 190<br />
Rib injuries, splints in, 245<br />
RICE (rest, immobilization, cold,<br />
elevation) treatment, 236<br />
RID (recognition, intrusion,<br />
distraction) factor, 44, 277<br />
Rides<br />
emergency stop button of, 64,<br />
76–77, 275<br />
patron surveillance on, 59–61<br />
safety checklist on, 17<br />
Ring buoys, 15, 277<br />
Rip currents, 18–19<br />
Risk management, 17, 53, 277<br />
Rivers and streams, head, neck,<br />
and spinal injuries in, 255<br />
Rotation of lifeguards, 48–49,<br />
50–51<br />
Roving stations, 47–48, 65, 277<br />
Rowboat use for rescues,<br />
126–27<br />
Rules and regulations, 27–30, 277<br />
enforcement of, 54–56<br />
government regulations, 31,<br />
32, 135–36<br />
informing patrons about, 54<br />
management responsibilities<br />
for, 30–32<br />
patrons uncooperative with,<br />
56<br />
Run-and-swim entry for water<br />
rescue, 91, 105<br />
S<br />
Safety, 11–32<br />
access to rescue equipment<br />
for, 12–14<br />
facility safety checks for,<br />
15–23, 81, 278<br />
management responsibilities<br />
for, 30–32<br />
rules and regulations for,<br />
27–30<br />
water conditions affecting,<br />
21–23<br />
weather conditions affecting,<br />
23–27<br />
Safety checks, 15–23, 278<br />
after emergency, 81<br />
sample checklist for, 16–17<br />
Safety team, 9, 10, 273<br />
emergency action plan on,<br />
73–76<br />
SAMPLE mnemonic for historytaking,<br />
216, 239<br />
Sanitation of facility, safety<br />
checklist on, 17<br />
Scalp injuries, 226<br />
Scanning, 41–44, 278<br />
blind spots in, 42, 43, 273<br />
challenges to, 42–44<br />
guidelines on, 41–42<br />
rotation procedure for breaks<br />
in, 48–49, 50–51<br />
Scene assessment, 141<br />
Scorpion stings, 228–29<br />
SCUBA classes, 57, 58, 65<br />
Searching techniques, 96–98<br />
in deep water, 97–98, 274<br />
in shallow water, 96–97<br />
Seat carry, two-person, 142,<br />
156–57<br />
Secondary assessment, 146<br />
of conscious person, 216–17,<br />
240–41<br />
SAMPLE mnemonic for<br />
history-taking in, 216, 239<br />
Secondary responsibilities of<br />
lifeguards, 2, 278<br />
as intrusion on surveillance,<br />
44<br />
Seiche, 22, 278<br />
Seizures, 143, 219–20, 278<br />
Severed body parts, 227<br />
Shallow water areas<br />
head, neck and spinal injuries<br />
in, 249, 252, 254, 261–64<br />
head splint technique in, 249,<br />
261–62<br />
quick removal of small victim<br />
from, 102, 130<br />
searching in, 97<br />
spinal backboarding in, 254,<br />
262–64<br />
submerged victim in, 93,<br />
96–97, 112<br />
Shepherd’s crook, reaching poles<br />
with, 15, 278<br />
Shock, 224, 278<br />
anaphylactic, 166, 273<br />
in burns, 228<br />
Sighting technique, 95, 278<br />
cross bearings in, 95–96, 274<br />
Signs and symptoms<br />
in head, neck and spinal<br />
injuries, 247<br />
SAMPLE mnemonic for<br />
history-taking on, 216, 239<br />
Simple assist, 92, 106<br />
Single-guard facilities, 77<br />
Skin injuries, 220–28<br />
Skull fractures, 226<br />
Slide-in entry for water rescue,<br />
90–91, 103<br />
with mask and fins, 100<br />
Slides<br />
assists in, 92<br />
backboarding procedure in,<br />
256, 268–69<br />
catch pool of, 61, 274<br />
with drop-off, 60, 274<br />
emergency action plan for, 76<br />
free-fall, 60, 275<br />
head, neck and spinal injuries<br />
on, 256, 268–69<br />
patron surveillance at, 60–61<br />
rules and regulations on, 28<br />
safety checklist on, 17<br />
Snakebites, 230<br />
Soft tissues, 278<br />
injuries of, 220–28<br />
Spas and hot tubs, 278<br />
rules and regulations on,<br />
30<br />
water quality in, 22–23<br />
Spasm, 278<br />
of larynx, 34, 276<br />
Speech changes in stroke, 220<br />
Speed slides, 60, 61, 278<br />
backboarding procedure in,<br />
256, 268–69<br />
Spider bites, 228–29<br />
Spill clean-up, 139–40<br />
Spinal backboards. See<br />
Backboards<br />
Spinal cord, 278<br />
injuries of. See Head, neck<br />
and spinal injuries<br />
Splints, 237, 243–45, 278<br />
Spokesperson of facility, 84, 278<br />
Sprains, 235, 278<br />
Standard of care, 6, 278<br />
Standard precautions, 136, 278<br />
Standing victim with head, neck<br />
and spinal injuries, 256–57,<br />
269–71<br />
Starting blocks, 29, 278<br />
Stations, 46–49<br />
elevated, 47, 51<br />
ground-level, 47, 50<br />
return to, after emergency,<br />
84<br />
and rotation of lifeguard<br />
duties, 48–49, 50–51<br />
roving, 47–48, 65, 277<br />
at water slides, 60–61<br />
at wave pools, 64<br />
Stings and bites, 227, 228–32<br />
disease transmission in, 134,<br />
279<br />
Stoma, 278<br />
and mask-to-stoma<br />
ventilations, 169<br />
Stomach, air entering, during<br />
ventilations, 168<br />
Stool in pool water, 24, 58
290<br />
<strong>Lifeguarding</strong> <strong>Manual</strong><br />
Stop button, emergency, 64,<br />
76–77, 275<br />
Strain, 235, 278<br />
Streams and rivers, head neck,<br />
and spinal injuries in, 255<br />
Stress, 278<br />
in critical incident, 84–85,<br />
274<br />
Stride jump entry for water<br />
rescue, 91, 103–4<br />
with mask and fins, 100<br />
Stroke, 220, 278<br />
Submerged victim, 93, 112–17,<br />
278<br />
in cold water, 101<br />
in deep water, 93, 97–98,<br />
116–17<br />
head splint technique for,<br />
249, 260–61<br />
in shallow water, 93, 96–97,<br />
112<br />
sightings and cross bearings<br />
for, 95–96<br />
Suctioning, 14, 180, 191–92,<br />
278<br />
in vomiting, 168<br />
Sunburn, 229<br />
Surface dives, 93, 97, 113–15<br />
feet-first, 93, 97, 113–14<br />
head-first, 93, 97, 114–15<br />
Surveillance, 278<br />
of facility, 275<br />
of patrons, 33–51, 277<br />
zone of responsibility in,<br />
44–46, 279<br />
Swimming ability<br />
color-coded wrist bands or<br />
swim caps on, 66<br />
testing of, 66, 67–68<br />
Swim tests, 66, 67–68<br />
Swim training, 5<br />
endurance in, 5<br />
intervals in, 5, 276<br />
T<br />
Tachycardia, ventricular, 198–99,<br />
279<br />
Teams, 9–10<br />
lifeguard team, 9–10, 276<br />
safety team, 9, 10, 73–76,<br />
273<br />
Therapy pool rules and<br />
regulations, 29–30<br />
Thermocline, 22, 101, 278<br />
Throwable devices, 278<br />
personal flotation devices,<br />
62, 63<br />
rescue bags, 96<br />
Throw bags, 96<br />
Thunderstorms, 25<br />
Tongue<br />
airway obstruction from,<br />
178–79<br />
injuries of, 225<br />
Tooth injuries, 225–26<br />
Tornadoes, 26, 279<br />
Total coverage, 45, 46, 279<br />
Training, 8–9<br />
annual or preseason, 8<br />
on emergency action plan, 71<br />
with emergency medical<br />
services personnel, 80<br />
on fecal release incidents, 24<br />
in-service, 9, 71, 276<br />
on recreational water<br />
illnesses, 24<br />
on safety checks, 20<br />
on water quality, 22, 23<br />
on water rescue, 90<br />
Transdermal medication patches,<br />
AED use in, 200, 201, 212<br />
Transmission of disease, 133–40<br />
bloodborne pathogens<br />
standard in prevention of,<br />
32, 273<br />
body substance isolation<br />
precautions in prevention<br />
of, 136, 273<br />
in direct contact, 134, 274<br />
in droplet inhalation, 134, 275<br />
in indirect contact, 134, 276<br />
personal protective equipment<br />
in prevention of, 14,<br />
137–38<br />
risk of, 135<br />
standard precautions in, 136,<br />
278<br />
vector-borne, 134, 279<br />
in water contamination, 24<br />
Trauma. See Injuries<br />
Two rescuers<br />
backboard method, 94,<br />
118–19<br />
bag-valve-mask resuscitation,<br />
165, 182–83<br />
CPR, 198, 208–11<br />
front-and-back carry method,<br />
94, 121<br />
seat carry method, 142,<br />
156–57<br />
U<br />
Uncooperative patrons, 56<br />
Underwater hazards, 20<br />
Universal sign of choking, 170,<br />
279<br />
<strong>University</strong> of North Carolina<br />
rescue reporting system, 86<br />
V<br />
Vaccine for hepatitis B, 135, 136<br />
Vector-borne transmission of<br />
disease, 134, 279<br />
Ventilations, 144–45, 163–69,<br />
181–83<br />
air entering stomach in, 168<br />
with bag-valve-mask<br />
resuscitators, 14, 164–65,<br />
180, 182–83, 190<br />
breathing barriers for personal<br />
protection in, 137, 164–65<br />
in cycle with chest<br />
compressions, 144–45,<br />
182, 183, 196–98<br />
in head, neck and spinal<br />
injuries, 168<br />
mask-to-nose, 168–69<br />
mask-to-stoma, 169<br />
in multiple rescuers, 203,<br />
205, 206<br />
in one rescuer, 207<br />
with resuscitation mask. See<br />
Resuscitation masks<br />
in two rescuers, 182–83,<br />
209–11<br />
in water, 102, 129<br />
Ventricular fibrillation, 198–99,<br />
279<br />
Ventricular tachycardia, 198–99,<br />
279<br />
Violent behavior, 56<br />
Viruses, 132–33<br />
HIV, 132–33, 135, 137, 273,<br />
275<br />
personal protective equipment<br />
in exposure to, 137<br />
risk of transmission, 135<br />
vaccination against, 135, 136<br />
Vomiting, 24, 165, 168<br />
W<br />
Walking assist, 94, 120, 156<br />
in land emergencies, 141<br />
Warming methods in cold-related<br />
emergencies, 234–35<br />
Water conditions, 21–23<br />
quality of water in, 22–23, 24<br />
scanning challenges in, 43<br />
Watercraft, 48, 95, 126–27<br />
Waterfront areas, 279<br />
missing person procedure<br />
in, 75<br />
rescue skills for, 94–102<br />
rules and regulations in,<br />
28<br />
safety checks of, 17, 20–23<br />
Waterparks, 59–64, 279<br />
head, neck and spinal injuries<br />
in, 255<br />
missing person procedure<br />
in, 75<br />
rules and regulations in, 28<br />
Water quality, 22–23<br />
and recreational water<br />
illnesses, 24<br />
Water rescue, 87–130<br />
approach toward victim in, 91,<br />
92, 107–10<br />
assists in, 91–92, 106<br />
in cold water, 101<br />
core objectives in, 90<br />
in deep water. See Deep<br />
water areas<br />
entry methods in, 90–91,<br />
100, 103–5<br />
escapes in, 100, 128–29<br />
exit point in, 89<br />
general procedures in, 88–90<br />
in head, neck and spinal<br />
injuries, 248–56<br />
with mask and fins, 98–100<br />
of multiple victims, 93, 111<br />
removal victim from water in,<br />
89, 93–94, 102, 118–21.<br />
See also Removal of victim<br />
from water<br />
with rescue board, 94–95,<br />
122–26. See also Rescue<br />
boards<br />
in shallow water. See Shallow<br />
water areas<br />
sightings and cross bearings<br />
in, 95–96, 274, 278<br />
standards on, 90<br />
of submerged victim,<br />
93, 112–17. See also<br />
Submerged victim<br />
ventilations in water during,<br />
102, 129<br />
of victim at or near surface,<br />
92, 107–10<br />
with watercraft, 95, 126–27<br />
in waterfront areas, 94–102<br />
Water slides. See Slides<br />
Wave pools, 64, 76–77<br />
Weather conditions, 25–27<br />
affecting indoor facilities,<br />
26–27<br />
and changing water<br />
conditions, 21, 22<br />
and cold-related emergencies,<br />
234–35<br />
and cold water rescues, 101<br />
and heat-related illnesses,<br />
233–34<br />
scanning challenges in, 43<br />
young children in, 58<br />
Wet conditions, AED use in, 200<br />
Wheezing, 161, 279<br />
Whistle use, 54<br />
Winding river attractions, 61, 255<br />
Windy conditions, 26<br />
Work practice controls, 139, 279<br />
Wounds, 220–28, 279<br />
bleeding from, 221–22, 223.<br />
See also Bleeding<br />
closed, 221–22, 274<br />
embedded objects in, 226,<br />
275<br />
open, 222–23, 276<br />
puncture, 222, 277<br />
X<br />
Xiphoid process, 196, 279<br />
Y<br />
Youth camps, 68–70, 75<br />
Z<br />
Zone coverage, 45–46, 279<br />
in emergency, 78<br />
Zone of surveillance responsibility,<br />
44–46, 279<br />
and emergencies outside of<br />
zone, 85–86
<strong>Lifeguarding</strong><br />
Thank You for Participating in the <strong>American</strong> <strong>Red</strong> <strong>Cross</strong><br />
<strong>Lifeguarding</strong> Program<br />
Your path to becoming a great lifeguard starts with <strong>Red</strong> <strong>Cross</strong> training. The important<br />
skills you learn in this course will help you act with speed and confidence in<br />
emergency situations both in and out of the water. Your manual covers:<br />
Water Rescue Skills • Surveillance and Recognition • First Aid • Breathing<br />
Emergencies • Cardiac Emergencies and CPR • AED • and More.<br />
<strong>Red</strong> <strong>Cross</strong> <strong>Lifeguarding</strong> emphasizes teamwork and prevention to help patrons stay<br />
safe. Plus, convenient online refreshers supplement your in-service training to help<br />
keep your knowledge and skills sharp. Visit redcross.org to learn about this and other<br />
training programs.<br />
The <strong>Red</strong> <strong>Cross</strong> <strong>Lifeguarding</strong> program is approved by the <strong>American</strong> <strong>Red</strong> <strong>Cross</strong><br />
Scientific Advisory Council, and reflects the latest evidence-based science from:<br />
• 2010 Consensus on Science for CPR and Emergency<br />
Cardiovascular Care (ECC).<br />
• 2010 Guidelines for First Aid.<br />
• 2011 United States Lifeguard Standards Coalition Report.<br />
The <strong>American</strong> <strong>Red</strong> <strong>Cross</strong> Scientific Advisory Council is a panel of nationally<br />
recognized experts in emergency medicine, sports medicine, emergency medical<br />
services (EMS), emergency preparedness, disaster mobilization and other public<br />
health and safety fields. The Council helps assure that courses, training materials<br />
and products incorporate the latest scientific and technical information.<br />
Each year the <strong>American</strong> <strong>Red</strong> <strong>Cross</strong> shelters, feeds and provides emotional support<br />
to victims of disasters and teaches lifesaving skills to more than 15 million people.<br />
The <strong>Red</strong> <strong>Cross</strong> supplies nearly half of the nation’s blood, provides international<br />
humanitarian aid, supports military members and their families, teaches swimming<br />
and water safety to more than 2 million people and trains nearly 300,000 lifeguards.<br />
Stock No. 655735<br />
redcross.org<br />
Scan this code with your<br />
smartphone to access free<br />
skill refreshers, or visit<br />
redcross.org/LGrefresher.