SECTION 09 30 00 - TILING PART 1 - GENERAL 1.1 RELATED ...
SECTION 09 30 00 - TILING PART 1 - GENERAL 1.1 RELATED ...
SECTION 09 30 00 - TILING PART 1 - GENERAL 1.1 RELATED ...

You also want an ePaper? Increase the reach of your titles
YUMPU automatically turns print PDFs into web optimized ePapers that Google loves.
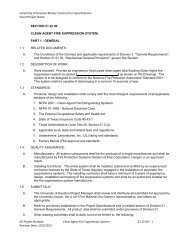
University of Houston Master Construction Specifications<br />
Insert Project Name<br />
3.6 CRACK ISOLATION MEMBRANE INSTALLATION<br />
A. Install crack isolation membrane to comply with ANSI A108.17 and manufacturer's written<br />
instructions to produce membrane of uniform thickness and bonded securely to substrate.<br />
B. Do not install tile or setting materials over crack isolation membrane until membrane has<br />
cured.<br />
3.7 CLEANING AND PROTECTING<br />
A. Cleaning: On completion of placement and grouting, clean all ceramic tile surfaces so they are<br />
free of foreign matter.<br />
1. Remove epoxy and latex‐portland cement grout residue from tile as soon as possible.<br />
2. Clean grout smears and haze from tile according to tile and grout manufacturer's<br />
written instructions but no sooner than 10 days after installation. Use only cleaners<br />
recommended by tile and grout manufacturers and only after determining that cleaners<br />
are safe to use by testing on samples of tile and other surfaces to be cleaned. Protect<br />
metal surfaces and plumbing fixtures from effects of cleaning. Flush surfaces with clean<br />
water before and after cleaning.<br />
3. Remove temporary protective coating by method recommended by coating<br />
manufacturer and that is acceptable to tile and grout manufacturer. Trap and remove<br />
coating to prevent drain clogging.<br />
B. Protect installed tile work with kraft paper or other heavy covering during construction period<br />
to prevent staining, damage, and wear. If recommended by tile manufacturer, apply coat of<br />
neutral protective cleaner to completed tile walls and floors.<br />
C. Prohibit foot and wheel traffic from tiled floors for at least seven days after grouting is<br />
completed.<br />
D. Before final inspection, remove protective coverings and rinse neutral protective cleaner from<br />
tile surfaces.<br />
3.8 EXTERIOR TILE INSTALLATION SCHEDULE<br />
A. Exterior Floor Installations:<br />
1. Tile Installation: Cement mortar bed (thickset) over waterproof membrane on concrete<br />
; TCA F101 and ANSI A108.1A .<br />
a. Thin‐Set Mortar for Cured‐Bed Method: Dry‐set portland cement mortar.<br />
b. Grout: Standard sanded cement grout.<br />
3.9 INTERIOR TILE INSTALLATION SCHEDULE<br />
A. Interior Floor Installations, Concrete Subfloor:<br />
AE Project #: Tiling <strong>09</strong> <strong>30</strong> <strong>00</strong> ‐ 17<br />
Revision Date: 07/29/2013