eWON Getting Started - eWON wiki
eWON Getting Started - eWON wiki
eWON Getting Started - eWON wiki

Create successful ePaper yourself
Turn your PDF publications into a flip-book with our unique Google optimized e-Paper software.
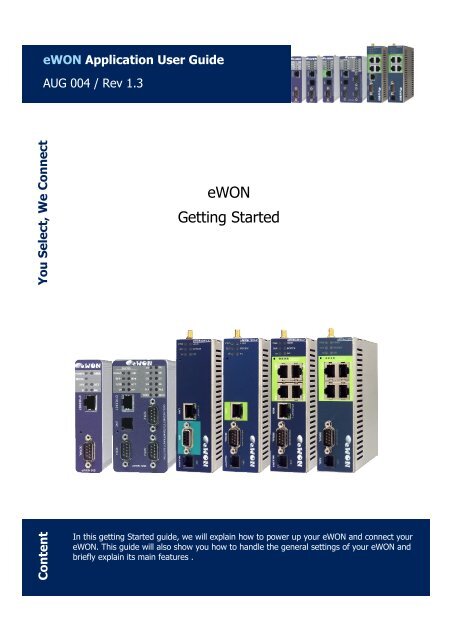
<strong>eWON</strong> Application User Guide<br />
AUG 004 / Rev 1.3<br />
You Select, We Connect<br />
<strong>eWON</strong><br />
<strong>Getting</strong> <strong>Started</strong><br />
Content<br />
In this getting <strong>Started</strong> guide, we will explain how to power up your <strong>eWON</strong> and connect your<br />
<strong>eWON</strong>. This guide will also show you how to handle the general settings of your <strong>eWON</strong> and<br />
briefly explain its main features .
Table of Contents<br />
1. Hardware and software requirements..................................................................................................4<br />
Hardware requirements....................................................................................................................4<br />
Software requirements.....................................................................................................................4<br />
<strong>eWON</strong> Firmware Version.................................................................................................................4<br />
2. Hardware installation ..........................................................................................................................5<br />
Power supply:..................................................................................................................................5<br />
Ethernet connection:........................................................................................................................5<br />
3. Get in touch with your <strong>eWON</strong>..............................................................................................................6<br />
Assigning an IP address to the <strong>eWON</strong>.............................................................................................6<br />
Navigate through the <strong>eWON</strong> internal Web pages.............................................................................8<br />
4. Generic <strong>eWON</strong> configuration.............................................................................................................10<br />
<strong>eWON</strong> identification.......................................................................................................................10<br />
User configuration..........................................................................................................................11<br />
IP Address configuration................................................................................................................13<br />
Time settings..................................................................................................................................14<br />
5. Create Tags and monitor values........................................................................................................15<br />
Available IO servers.......................................................................................................................15<br />
Tag Creation..................................................................................................................................17<br />
Monitor your tags...........................................................................................................................18<br />
Tag display..............................................................................................................................18<br />
Change the value of a tag........................................................................................................18<br />
6. Alarm Management...........................................................................................................................19<br />
Configure the alarm settings on your Tag......................................................................................19<br />
Alarm Display in the View I/O Page................................................................................................19<br />
Alarm summary..............................................................................................................................20<br />
Alarm history..................................................................................................................................20<br />
Alarm notification............................................................................................................................20<br />
Configure <strong>eWON</strong> for Internet connection.......................................................................................22<br />
Email notification layout...........................................................................................................22<br />
7. Real Time Logging.............................................................................................................................24<br />
Configuration..................................................................................................................................24<br />
Real Time graph.............................................................................................................................24<br />
8. Historical logging...............................................................................................................................26<br />
Configuration..................................................................................................................................26<br />
Historical Logging graph.................................................................................................................27<br />
Historical Logging Table.................................................................................................................28<br />
9. Transparent Gateway........................................................................................................................29<br />
Ethernet to serial protocol gateway................................................................................................29<br />
VCOM solution...............................................................................................................................29<br />
10. Tag publishing (Modbus TCP/ SNMP).............................................................................................30<br />
11. IP Router.........................................................................................................................................31<br />
NAT and Transparent forwarding...................................................................................................31<br />
VPN...............................................................................................................................................31<br />
Proxy features................................................................................................................................31<br />
12. Remote maintenance.......................................................................................................................32<br />
13. User defined Web pages.................................................................................................................33<br />
14. Backup and Restore........................................................................................................................36<br />
15. Configuration using FTP transfers...................................................................................................40<br />
16. Export Block Descriptors..................................................................................................................41
Table of Contents<br />
17. <strong>eWON</strong> Scripting...............................................................................................................................42<br />
18. <strong>eWON</strong> limitations.............................................................................................................................43<br />
Revisions...............................................................................................................................................44
Hardware and software requirements Chapter 1.<br />
1. Hardware and software requirements<br />
Hardware requirements<br />
In order to follow this guide you'll need:<br />
<br />
1 <strong>eWON</strong><br />
Depending on the <strong>eWON</strong> type some features will be available or not.<br />
Software requirements<br />
<strong>eWON</strong> configuration software:<br />
The <strong>eWON</strong> is configured through its web server. So all you need is a standard Web<br />
Browser software like Internet Exploreri or Firefoxii.<br />
Additionally we suggest you to download the eBuddy utility on our website :<br />
http://support.ewon.biz/<br />
This utility allows to list all the <strong>eWON</strong>s on your network and to change the default IP<br />
address of an <strong>eWON</strong> to match your LAN IP address range. With eBuddy you can also<br />
easily upgrade the firmware of your <strong>eWON</strong> (if required).<br />
<strong>eWON</strong> Firmware Version<br />
To be able to follow this guide your <strong>eWON</strong> needs a firmware version 5.0 or higher.<br />
A simple way to realize the <strong>eWON</strong> firmware upgrade is to use eBuddy, the <strong>eWON</strong><br />
software companion.<br />
<strong>eWON</strong> (<strong>Getting</strong> <strong>Started</strong>) Page 4/44
Hardware installation Chapter 2.<br />
2. Hardware installation<br />
Power supply:<br />
The <strong>eWON</strong> has to be supplied by an external voltage source ranging from 12 to 24<br />
VDC. The power supply must be SELV-compliant (security voltage).<br />
When switched on, the power indicator must go solid green.<br />
Information about the installation for every <strong>eWON</strong> type are available on our website<br />
under http://support.ewon.biz/doc.html<br />
Ethernet connection:<br />
Every <strong>eWON</strong> is shipped with the pre-configured IP address 10.0.0.53 (Mask<br />
255.255.255.0)<br />
Before connecting the Ethernet port of the <strong>eWON</strong> to your local Ethernet network, ask<br />
first your network administrator if the above IP address can be used on your network<br />
or not.<br />
Otherwise you can also use a crossed Ethernet cable to connect the <strong>eWON</strong> directly to<br />
your PC.<br />
The <strong>eWON</strong> Ethernet interface is 10/100 BASE TX using an RJ45 connector<br />
The Ethernet interface of the <strong>eWON</strong> is the topmost connector.<br />
As soon as the Ethernet network is properly connected, the "Link" Led will<br />
go solid green, indicating that the <strong>eWON</strong> has sensed the network speed (10 or<br />
100MBits).<br />
<strong>eWON</strong> (<strong>Getting</strong> <strong>Started</strong>) Page 5/44
Get in touch with your <strong>eWON</strong> Chapter 3.<br />
3. Get in touch with your <strong>eWON</strong><br />
Assigning an IP address to the <strong>eWON</strong><br />
Every <strong>eWON</strong> is shipped with the pre-configured IP address 10.0.0.53 and adm/adm<br />
as User Name/ Password.<br />
The network settings of your PC do probably not allow you to connect directly to this<br />
pre-configured IP address.<br />
On our website, you will find an utility called «eBuddy» that will allow you to change<br />
the IP address of the <strong>eWON</strong> even if your PC is not on the same IP address range.<br />
http://support.ewon.biz<br />
To change the IP address of your <strong>eWON</strong> follow the steps below:<br />
- Launch the eBuddy application (eBuddy.exe)<br />
- Click on the «Set IP address» link<br />
<strong>eWON</strong> (<strong>Getting</strong> <strong>Started</strong>) Page 6/44
3. Get in touch with your <strong>eWON</strong><br />
- Enter the <strong>eWON</strong> serial number in the Serial Number field, or click on the Browse<br />
button. In this case, the dialog box «Select an <strong>eWON</strong>» will appear showing you all the<br />
<strong>eWON</strong> connected to your Network.<br />
- Once the Serial Number has been entered, click Next.<br />
- Set the new IP Address and the Subnet Mask.<br />
- Click on Next to launch the update and wait for the <strong>eWON</strong> to reboot:<br />
- When done, click on Finish to exit the IP Address Wizard.<br />
<strong>eWON</strong> (<strong>Getting</strong> <strong>Started</strong>) Page 7/44
3. Get in touch with your <strong>eWON</strong><br />
Navigate through the <strong>eWON</strong> internal Web pages<br />
Every configuration of the <strong>eWON</strong> can be done using the internal web pages of the<br />
<strong>eWON</strong>.<br />
Accessing the internal web pages of your <strong>eWON</strong> is very simple:<br />
- Enter the IP address of your <strong>eWON</strong> in the address bar of your Web Browser<br />
(Internet Exploreri or Firefoxii): http://10.0.0.53 or http://192.168.0.2 in our example.<br />
- On the «Connect to» pop-up page enter adm (User Name) /adm (Password) then<br />
click on OK.<br />
You are now navigating on your <strong>eWON</strong>.<br />
The menu bar on the top of the main page allows you to navigate through the different<br />
displays and configuration pages of your <strong>eWON</strong>.<br />
A click on the «Configuration» menu will replace this menu with the configuration<br />
menu bar.<br />
A click on a menu in the Configuration menu bar will open a second menu bar (green<br />
color).<br />
Most of the menus of this second bar will open a third level menu bar. This menu bar<br />
is presented in a tree format on the left side of the configuration page.<br />
<strong>eWON</strong> (<strong>Getting</strong> <strong>Started</strong>) Page 8/44
3. Get in touch with your <strong>eWON</strong><br />
In this document we will use the following syntax to represent the path to use to<br />
access the desired configuration page.<br />
Configuration → System Setup → General → General → Identification<br />
<strong>eWON</strong> (<strong>Getting</strong> <strong>Started</strong>) Page 9/44
Generic <strong>eWON</strong> configuration Chapter 4.<br />
4. Generic <strong>eWON</strong> configuration<br />
<strong>eWON</strong> identification<br />
To identify your <strong>eWON</strong>, use the following menu<br />
Configuration → System Setup → General → General → Identification<br />
In the «<strong>eWON</strong> Identification» and the «General Information» fields, enter the<br />
information concerning your <strong>eWON</strong> or your project.<br />
The new <strong>eWON</strong> identification will be displayed just under the <strong>eWON</strong> icon on the top<br />
left corner of the window.<br />
If after modification the new «<strong>eWON</strong> Identification» is not displayed, use the Refresh<br />
button of your Browser.<br />
Setting the <strong>eWON</strong> Identification fields is useful because the information will also be<br />
included in the mail or SMS notification when an alarm is been raised.<br />
<strong>eWON</strong> (<strong>Getting</strong> <strong>Started</strong>) Page 10/44
4. Generic <strong>eWON</strong> configuration<br />
User configuration<br />
For obvious security reasons it would be better to change the default password of the<br />
Adm user account.<br />
The different user accounts of the <strong>eWON</strong> can be managed using the following<br />
configuration page:<br />
Configuration → Users Setup<br />
Click on the «Adm» account to open the user account window.<br />
On this configuration page you can now change the user account settings of the<br />
selected user as for example change the password or define the access rights.<br />
If you want to add a new user to the <strong>eWON</strong>, use the «Create New User» link in the<br />
green menu just under the configuration menu bar.<br />
<strong>eWON</strong> (<strong>Getting</strong> <strong>Started</strong>) Page 11/44
4. Generic <strong>eWON</strong> configuration<br />
Hereunder a list of the most common used access rights:<br />
Access right<br />
View IO<br />
Force outputs<br />
Acknowledge alarms<br />
Change configuration<br />
FTP server access<br />
Allows (to)<br />
access the SCADA real time IO screen<br />
change the <strong>eWON</strong> outputs<br />
Acknowledge alarm<br />
access the configuration part of the <strong>eWON</strong><br />
the user to access the <strong>eWON</strong> FTP Server<br />
<strong>eWON</strong> (<strong>Getting</strong> <strong>Started</strong>) Page 12/44
4. Generic <strong>eWON</strong> configuration<br />
IP Address configuration<br />
Use the following link to open the Ethernet LAN configuration window:<br />
Configuration → System Setup → Communication → Network<br />
connections → Ethernet → Eth1 - LAN<br />
Here you can change the <strong>eWON</strong> IP address and encode for example the default<br />
gateway or the DNS information for your <strong>eWON</strong>.<br />
Instead of using a fixed IP address you can also decide to use Bootp or DHCP for the<br />
IP address specification.<br />
IMPORTANT<br />
If you change the <strong>eWON</strong> IP address settings, <strong>eWON</strong> must be<br />
restarted to take the modification into account. To restart the<br />
<strong>eWON</strong>, use the Reboot button under following menu<br />
Configuration → System Setup → General → General →<br />
Reboot (or Reset for older firmware versions)<br />
or just power off and on the <strong>eWON</strong>.<br />
<strong>eWON</strong> (<strong>Getting</strong> <strong>Started</strong>) Page 13/44
4. Generic <strong>eWON</strong> configuration<br />
Time settings<br />
You can set the <strong>eWON</strong> date and time settings by using the following menu<br />
Configuration → System Setup → General → General → Date & Time<br />
Correct date and time settings are very important for the alarm management and the<br />
data logging features of the <strong>eWON</strong>. When VPN connections are used, correct time<br />
settings are necessary for the certification check, etc.<br />
You can ask the <strong>eWON</strong> to synchronize automatically its date and time according to a<br />
Network Time Server (NTP server). The NTP server settings can be configured using<br />
the following window<br />
Configuration → System Setup → General → Net Services → NTP (time)<br />
In the «GMT offset parameter» enter the time-lag (in hours) between your local time<br />
zone and the GMT time zone. Pay attention, the value to enter here is just the<br />
opposite value of the time zone you usually specify in the date and time properties<br />
settings of your PC. For example: If the time-lag is +2, you will have to insert -2 into<br />
your <strong>eWON</strong>.<br />
NOTE<br />
<strong>eWON</strong> does not handle daylight saving time changes. So you<br />
will need to adapt the GMT offset parameter for winter and<br />
summer time.<br />
<strong>eWON</strong> (<strong>Getting</strong> <strong>Started</strong>) Page 14/44
Create Tags and monitor values Chapter 5.<br />
5. Create Tags and monitor values<br />
In the <strong>eWON</strong> you can create Tags. A Tag will allow you to retrieve and modify the<br />
data on an external device like a PLC or a Modbus device.<br />
The <strong>eWON</strong> integrates several IO Servers which allow to link a tag to a register of the<br />
external device.<br />
Available IO servers<br />
List of possible IO Servers:<br />
IO Server<br />
MEM<br />
EWON<br />
MODBUS<br />
UNITE<br />
NETMPI<br />
DF1<br />
FINS<br />
ABLOGIX<br />
S73&400<br />
S7200<br />
HITACHI<br />
Used for<br />
Internal memory tags<br />
<strong>eWON</strong> integrated DI and DO<br />
Modbus devices (TCP / RTU)<br />
Schneider PLC (Unitelway)<br />
Siemens devices using eLink (obsolete)<br />
Allen Bradley PLC of the SLC family<br />
OMRON PLC<br />
Allen Bradley PLC of the Controllogix family<br />
Siemens S7-300 and S7-400 (MPI / Profibus / ISOTCP)<br />
Siemens S7-200 (PPI / ISOTCP)<br />
HITACHI PLC<br />
Most of the IO Servers need a communication configuration.<br />
To access the IO Server configuration page use the following path:<br />
Configuration → IO Server Config<br />
<strong>eWON</strong> (<strong>Getting</strong> <strong>Started</strong>) Page 15/44
5. Create Tags and monitor values<br />
To configure the IO Server select the desired IO server in the list box and click on the<br />
Edit button just next the IO Server.<br />
For detailed information about each IO Server, please refer to the <strong>eWON</strong> General<br />
Reference Guide (chapter 5: IO servers) that you can find at http://support.ewon.biz<br />
IMPORTANT<br />
The serial port can only be used by one IO Server at the same<br />
time. So, if the MODBUS IO Server uses already the serial<br />
port, then the UNITE IO Server cannot be used to poll data on<br />
the serial link as well.<br />
On the Ethernet Link this limitation does not exist. So you can<br />
use the MODBUS IO Server to poll data on a device using the<br />
Ethernet link and on the same time use the DF1 IO Server to<br />
poll also data over Ethernet on a AB PLC device.<br />
<strong>eWON</strong> (<strong>Getting</strong> <strong>Started</strong>) Page 16/44
5. Create Tags and monitor values<br />
Tag Creation<br />
Let us create some tags. Go back to the configuration menu and select Tag Setup.<br />
We will create 2 tags:<br />
• 1 tag connected to the digital output of the <strong>eWON</strong><br />
• 1 memory tag that we will use later to compute for an alarm management purpose.<br />
The Tag list is currently empty. Select the Create New Tag, to show the tag<br />
configuration window:<br />
Configuration → Tag Setup → Create new tag<br />
In below window, enter the parameters of the tag connected to the <strong>eWON</strong>'s digital<br />
output:<br />
Tag Name: MyOutput<br />
Tag Description: <strong>eWON</strong> Digital Output<br />
Server Name: EWON<br />
Address: DO1<br />
Type: Boolean<br />
Click "Add/Update Only" (at the bottom of the screen) to validate your changes.<br />
Let us create another tag which will be used later for the alarm configuration:<br />
Tage Name: Level<br />
Tag Description: Check the tank's level<br />
Server Name: MEM<br />
Address: empty<br />
Type: Analog<br />
Click "Add/Update Only" (at the bottom of the screen) to validate<br />
<strong>eWON</strong> (<strong>Getting</strong> <strong>Started</strong>) Page 17/44
5. Create Tags and monitor values<br />
Monitor your tags<br />
Tag display<br />
Use the following link to display the View I/O page which allows you to monitor the<br />
Tags you have already created:<br />
Main Menu → View I/O<br />
On this screen you will see the current value of every configured Tag.<br />
To refresh the value of the tags; use the «Update» button in the green sub menu. To<br />
classify tags or to give special access rights to Tag groups a Tag is linked to a Tag<br />
page. The list box next to the Update button allows you to select the Tag page to<br />
display.<br />
Change the value of a tag<br />
To change the value of a tag enter the value into the «New value» column of the<br />
View I/O page and click the «Update» button situated just after the «New value» field<br />
column.<br />
Do not forget to refresh the View I/O page using the «Update» button in the green<br />
sub menu in order to reflect the applied value changes.<br />
<strong>eWON</strong> (<strong>Getting</strong> <strong>Started</strong>) Page 18/44
Alarm Management Chapter 6.<br />
6. Alarm Management<br />
Configure the alarm settings on your Tag<br />
Configuration → Tag Setup<br />
If you want to edit the alarm configuration of your tag, click on the tag name (Level, in<br />
our example). Fill the fields with all the information needed.<br />
For instance, if the Alarm Level High is 100, the alarm is raised if the level goes<br />
above 100.<br />
Once the Alarm has been enabled, click on Add/Update Only<br />
To see if the alarm has actually been activated, click on Tag Setup.<br />
Configuration → Tag Setup<br />
The X sign under the bell icon proves that the alarm has been activated for this tag.<br />
Alarm Display in the View I/O Page<br />
Main Menu → View I/O<br />
On the View I/O page a yellow bell icon next a Tag indicates that an alarm has been<br />
raised for this Tag.<br />
<strong>eWON</strong> (<strong>Getting</strong> <strong>Started</strong>) Page 19/44
6. Alarm Management<br />
Alarm summary<br />
The Alarm summary will give you an overview of alarms that are currently present in<br />
the <strong>eWON</strong> and their situation. If an alarm is raised, it will be displayed on this page<br />
(ALM). The same occurs if the alarm returns to normal (RTN). Bear in mind that when<br />
the alarm is acknowledged, it is not displayed anymore.<br />
Alarm history<br />
This page will give you an overview of the various steps the alarm has gone through.<br />
So, you can easily see if and when an alarm has been raised or acknowledged, for<br />
instance.<br />
Alarm notification<br />
When configuring the alarm, you can ask the <strong>eWON</strong> to send out a notification when<br />
the alarm is raised. The notification can be done by email, SMS (only for GSM and<br />
PSTN modems), FTP or SNMP traps.<br />
Configuration → Tag Setup<br />
Let us configure an alarm notification by email.<br />
Click on the bell link to open the Alarm notification window linked to the tag.<br />
<strong>eWON</strong> (<strong>Getting</strong> <strong>Started</strong>) Page 20/44
6. Alarm Management<br />
Select for which alarm status the email will have to be sent out:<br />
ALM: when an alarm is raised<br />
ACK: when an alarm is acknowledged<br />
RTN: when an alarm has returned to a normal state<br />
END: When the alarm cycle is finished (ACK and RTN)<br />
Fill the different email fields in: «email to», «email subject» and «email attachment».<br />
To send out an email, the <strong>eWON</strong> needs information about the SMTP server which<br />
has to be used to send the mail.<br />
These settings must be specified under the following path:<br />
Configuration → System Setup → General → Net services → SMTP (mails)<br />
IMPORTANT<br />
If a domain name is used for the SMTP server, then you will<br />
probably have to specify the DNS servers in the <strong>eWON</strong> Ethernet<br />
section. To do so, follow the following path: Configuration – System<br />
Setup – Communication – Ethernet – Eth1-LAN.<br />
<strong>eWON</strong> (<strong>Getting</strong> <strong>Started</strong>) Page 21/44
6. Alarm Management<br />
Configure <strong>eWON</strong> for Internet connection<br />
When a new alarm is triggered, the <strong>eWON</strong> will check the SMTP server address. If the<br />
address is not compatible with its local network, then the <strong>eWON</strong> will establish the<br />
Internet connection (if configured) to be able to send out emails. Once an email has<br />
been sent, the <strong>eWON</strong> will disconnect from the Internet after configurable timeouts.<br />
Let us assume that we want to use a SMTP server on the Internet. So, we will need to<br />
configure the <strong>eWON</strong> for the Internet connection. To do so, a wizard is at your<br />
disposal. This wizard will guide you through the different steps required for the<br />
Internet connection. You will find the wizard on the upper right corner, next to the Main<br />
Menu.<br />
Once you have clicked on the<br />
opens.<br />
Icon, the <strong>eWON</strong> configuration wizards page<br />
On this window, click on Configure INTERNET Connection and follow the steps to<br />
configure the Internet connection.<br />
Email notification layout<br />
When an alarm has been raised and you configured your <strong>eWON</strong> to send an email<br />
notification, it will contain the following information: the name of the Tag created, the<br />
level, the status and the alarm action (the text that you have written when configuring<br />
the alarm)<br />
<strong>eWON</strong> (<strong>Getting</strong> <strong>Started</strong>) Page 22/44
6. Alarm Management<br />
Hereunder an example:<br />
<strong>eWON</strong> (<strong>Getting</strong> <strong>Started</strong>) Page 23/44
Real Time Logging Chapter 7.<br />
7. Real Time Logging<br />
Please be aware that there is an important difference between the Real Time and the<br />
Historical Logging.<br />
The Historical Logging is used to save value changes of a variable in the <strong>eWON</strong> flash<br />
file system (non volatile flash memory). On the other hand, the Real Time saves any<br />
changes into a volatile memory (RAM memory). It only displays changes that occurred<br />
in a defined period of time (30 sec, 1 min, you can specify this period)<br />
Configuration<br />
Configuration → Tag Setup<br />
To configure the Real time logging, click on the Tag Name and scroll down. Here you<br />
can choose the Time span and the Logging Interval (for example, you can ask the<br />
<strong>eWON</strong> to show you the variations of a tag every 10 seconds during 600 seconds).<br />
The data you will get from the graph are not saved in the <strong>eWON</strong>. The Real Time<br />
Logging is aimed at obtaining a kind of diagnostic, a look back in recent time.<br />
Real Time graph<br />
Main menu→ View I/O<br />
To see the Real Time Graph, all you have to do is click on the small icon representing<br />
a graph next to the Tag. See above.<br />
<strong>eWON</strong> (<strong>Getting</strong> <strong>Started</strong>) Page 24/44
7. Real Time Logging<br />
Hereunder, an example of a Real Time Graph.<br />
<strong>eWON</strong> (<strong>Getting</strong> <strong>Started</strong>) Page 25/44
Historical logging Chapter 8.<br />
8. Historical logging<br />
The Historical Logging is used to save value changes of a variable in the <strong>eWON</strong> flash<br />
file system (non volatile flash memory).<br />
Configuration<br />
Configuration → Tag Setup<br />
To configure the Historical Logging, click on the Tag Name and scroll down and check<br />
the Historical Logging Enabled field.<br />
For example, a logging deadband of 2 means that a point will be logged when the<br />
value changes by 2 or more. If you put a negative value in the deadband, the logging<br />
on value changes will be disabled.<br />
A logging interval time of 0 means that the time based logging is disabled. On the<br />
other hand, a logging interval of 60 means that the value will be logged every 60<br />
seconds.<br />
<strong>eWON</strong> (<strong>Getting</strong> <strong>Started</strong>) Page 26/44
8. Historical logging<br />
Historical Logging graph<br />
Main menu → View I/O<br />
To display the Historical Logging Graph, select the Tag with the left checkbox, click on<br />
Show Graph For Selection, select your time range for the selected variables and<br />
finally click on Update Graph link.<br />
Hereunder a example of a Historical Logging Graph.<br />
<strong>eWON</strong> (<strong>Getting</strong> <strong>Started</strong>) Page 27/44
8. Historical logging<br />
Historical Logging Table<br />
Main menu → View I/O<br />
If you want to see the Historical Logging of tags in a table format, you have select<br />
your Tag to click on the Historical Logging Table.<br />
Then, choose a “from” date and a “to” date. Before clicking on Update, select “any”<br />
the Group field. Hereunder, an example of a Historical Logging Table where you can<br />
see the variations of the selected tag.<br />
<strong>eWON</strong> (<strong>Getting</strong> <strong>Started</strong>) Page 28/44
Transparent Gateway Chapter 9.<br />
9. Transparent Gateway<br />
The <strong>eWON</strong> can act as a transparent Gateway between its Ethernet interface and the<br />
serial interface.<br />
This will allow the connection to a serial device through the <strong>eWON</strong> using the Ethernet<br />
protocol for the device. So your PC does not need to be connected directly to the<br />
device (like a PLC) over the serial link. But it can be connected anywhere as long as<br />
the PC has still access to the network on which the <strong>eWON</strong> is installed with the serial<br />
device.<br />
Ethernet to serial protocol gateway<br />
<strong>eWON</strong> can act as transparent Ethernet to serial gateway for the following protocols:<br />
To use the Transparent Gateway in the <strong>eWON</strong>, all you have to do is configure the<br />
serial port settings of the IO Server for the desired protocol. For example, you will<br />
need to configure the serial settings of the DF1 IO Server if you want to use the<br />
transparent gateway between EIP and DF1 (AllenBradley protocols).<br />
VCOM solution<br />
If the serial device to which you want to connect does not use one of the protocols<br />
previously listed, then perhaps the VCOM feature of the <strong>eWON</strong> could be a solution to<br />
connect over Ethernet to your device. A Virtual COM (VCOM) solution will actually<br />
simulate a COM port on your PC. This virtual COM port is then connected to the serial<br />
port of the <strong>eWON</strong> using the Ethernet Link between your PC and the <strong>eWON</strong>. For the<br />
programming or communication software running on your PC, it is then as if the serial<br />
device was directly connected to your PC.<br />
However, the main difference between a real direct serial connection to the device<br />
and the VCOM solution is that the communication over Ethernet will need longer<br />
communication timeouts. If the software you are using has long enough timeouts or if<br />
these timeouts are configurable, then the VCOM solution could be applied to your<br />
device.<br />
<strong>eWON</strong> (<strong>Getting</strong> <strong>Started</strong>) Page 29/44
Tag publishing (Modbus TCP/ SNMP) Chapter 10.<br />
10. Tag publishing (Modbus TCP/ SNMP)<br />
As already seen before, the <strong>eWON</strong> allows you to create Tags to poll for example data<br />
on serial or Ethernet devices using the different integrated IO Servers.<br />
The <strong>eWON</strong> allows you also to publish the Tags you have created. Using this feature,<br />
an external software could then read the Tags value out of the <strong>eWON</strong>.<br />
For example, a supervision software running on a PC which is connected to the<br />
<strong>eWON</strong> using the Ethernet Link (local network or over a remote connection) could then<br />
read the values which are polled on the PLC even if the supervision software does not<br />
support the PLC protocol.<br />
The <strong>eWON</strong> can publish Tags using the following protocols:<br />
– Modbus TCP<br />
– SNMP<br />
– Instant value files (This are csv formated files containing the actual value of each<br />
Tag)<br />
The Tag publishing has to be activated in the configuration page of each Tag which<br />
need to be published.<br />
The Tag configuration shown in the picture here above, will publish the Tag value as<br />
an Analog Output on register 1.<br />
An external software can then read back this value using Modbus TCP, by specifying<br />
the <strong>eWON</strong> IP address, the Unit ID 100 (default setting of the <strong>eWON</strong>) and the Analog<br />
Output register 1.<br />
<strong>eWON</strong> (<strong>Getting</strong> <strong>Started</strong>) Page 30/44
IP Router Chapter 11.<br />
11. IP Router<br />
Most of the <strong>eWON</strong> series can be used as IP router. Only the <strong>eWON</strong> 500 and 4001 or<br />
4002 devices without modem do not allow the routing, because they only integrate<br />
one Ethernet interface.<br />
The different possible features that the <strong>eWON</strong> can fulfill as IP router are listed<br />
hereunder.<br />
NAT and Transparent forwarding<br />
This features are needed if you want that the Ethernet devices behind the <strong>eWON</strong> can<br />
connect to the Internet or can be reached from the Internet.<br />
The NAT feature (Network Address Translation) must be used to allow the Ethernet<br />
devices behind the <strong>eWON</strong> to go out to the Internet.<br />
The Transparent Forwarding feature, if activated, will forward all incoming traffic to the<br />
designed IP device which is connected to the <strong>eWON</strong>.<br />
VPN<br />
The VPN (Virtual Private Network) feature of the <strong>eWON</strong> will allow you to establish a<br />
secured connection to your <strong>eWON</strong> over the Internet.<br />
The VPN connection can be:<br />
– a point to point connection between your PC and the <strong>eWON</strong> (using eCatcher with<br />
or without the use of Talk2M)<br />
– a point to point connection between two <strong>eWON</strong>'s<br />
– a real VPN network, connecting several <strong>eWON</strong>'s and PC's together to a virtual<br />
network.<br />
The VPN solutions of the <strong>eWON</strong> have been designed to simplify considerably the<br />
integration effort for the user.<br />
Not every <strong>eWON</strong> has VPN capabilities. Refer to the feature matrix for the different<br />
<strong>eWON</strong> types to check if your device allows VPN or not.<br />
Link to the feature matrix: http://www.ewon.biz/FeatureMatrix.htm<br />
Proxy features<br />
The <strong>eWON</strong> also integrates a Proxy feature.<br />
The Proxy feature of the <strong>eWON</strong> can be used to connect from remote to a local<br />
Ethernet device which is connected to the <strong>eWON</strong>. For the local Ethernet device, it<br />
looks then as if the <strong>eWON</strong> was communicating directly to the device and not an<br />
external device of the network.<br />
<strong>eWON</strong> (<strong>Getting</strong> <strong>Started</strong>) Page 31/44
Remote maintenance Chapter 12.<br />
12. Remote maintenance<br />
The <strong>eWON</strong> can be used to allow remote maintenance on your PLC devices using the<br />
Ethernet or the serial connection of the PLC.<br />
In fact, to achieve the remote maintenance, a combination of the IP router feature and<br />
the serial gateway feature of the <strong>eWON</strong> is used.<br />
To be able to do the remote maintenance, some configurations have to be done in the<br />
<strong>eWON</strong> and most of the time, in the programming software as well.<br />
On our website, you will find documentations dedicated to the remote maintenance for<br />
every supported PLC device. (http://support.ewon.biz , in the Connectivity section)<br />
<strong>eWON</strong> (<strong>Getting</strong> <strong>Started</strong>) Page 32/44
User defined Web pages Chapter 13.<br />
13. User defined Web pages<br />
Your <strong>eWON</strong> has an built-in Web server. Actually, you have already used it by<br />
browsing through the internal <strong>eWON</strong> web pages (View I/O, Configuration pages, etc).<br />
You can also create your own Web pages on the <strong>eWON</strong>. This will allow you to<br />
customize the <strong>eWON</strong> more precisely in accordance to the project you realize.<br />
A special syntax has to be used to include <strong>eWON</strong> data into your web pages. By using<br />
this syntax you will be able for example to include the value of an acquired Tag,<br />
acknowledge an alarm, etc.<br />
The custom web pages have to be placed in the /usr directory of the <strong>eWON</strong>.<br />
To display the web page following link has then to be used in your Internet Browser:<br />
http://<strong>eWON</strong>_IP_Address/usr/NAME_OF_THE_PAGE_WEB<br />
for example: http://10.0.0.53/usr/Mypage.shtm<br />
The example hereunder shows how to create a custom web page.<br />
– Create a file called MyPage.shtm with following content:<br />
<br />
<br />
My custom <strong>eWON</strong> web page<br />
<br />
<br />
<br />
Currently looged user: <br />
<br />
<br />
Actual value of Tag 'Level' is: <br />
<br />
<br />
<br />
– Put by FTP the MyPage.shtm file on the /usr directory of your <strong>eWON</strong>.<br />
– Display the web page using following link in your Web Browser:<br />
http://<strong>eWON</strong>_IP-Address/usr/Mypage.shtm<br />
The following page will then be displayed:<br />
<strong>eWON</strong> (<strong>Getting</strong> <strong>Started</strong>) Page 33/44
13. User defined Web pages<br />
IMPORTANT<br />
When your <strong>eWON</strong> is configured with a user defined Web page as<br />
default page, then use following link to display back again the<br />
standard <strong>eWON</strong> configuration pages:<br />
http://<strong>eWON</strong>_IP_Address/index.htm<br />
NOTE<br />
You can configure the <strong>eWON</strong> to display directly a user defined Web page<br />
instead of the standard <strong>eWON</strong> configuration pages.<br />
This can be done under following menu:<br />
Configuration → System Setup → General → General →<br />
Identification<br />
Just enter the full name of the custom web page in the «user defined Home<br />
page» field.<br />
When you then enter the IP address of your <strong>eWON</strong> in your Web Browser,<br />
the user defined web page will be directly displayed.<br />
Detailed information about the build-up of user define web pages can be found in the<br />
following PDF document: RG-003-0-EN (Web Reference Guide).pdf<br />
(support.ewon.biz)<br />
When your <strong>eWON</strong> has viewON capabilities then you can also create your own web<br />
pages using the viewON application. The viewON application will allow you to create a<br />
Web Scada application and put this application on the <strong>eWON</strong> web server. Clients will<br />
then be able to connect to the <strong>eWON</strong> (locally or from remote locations) and run the<br />
Scada application.<br />
<strong>eWON</strong> (<strong>Getting</strong> <strong>Started</strong>) Page 34/44
13. User defined Web pages<br />
An example of a Web page designed with the viewON application is shown<br />
hereunder:<br />
<strong>eWON</strong> (<strong>Getting</strong> <strong>Started</strong>) Page 35/44
Backup and Restore Chapter 14.<br />
14. Backup and Restore<br />
eBuddy allows you to backup and restore your <strong>eWON</strong>.<br />
To do so, just open eBuddy and click on the Backup and Restore link.<br />
Once this has been done, a window will open asking if you want to backup or restore<br />
your <strong>eWON</strong>.<br />
<strong>eWON</strong> (<strong>Getting</strong> <strong>Started</strong>) Page 36/44
14. Backup and Restore<br />
After having chosen, click on the «Next »button and specify the IP address of the<br />
<strong>eWON</strong>.<br />
You can also click on the «Browse» button. In this case, the dialog box «Select an<br />
<strong>eWON</strong>» will appear showing you all the <strong>eWON</strong> connected to your Network.<br />
<strong>eWON</strong> (<strong>Getting</strong> <strong>Started</strong>) Page 37/44
14. Backup and Restore<br />
When you have selected your <strong>eWON</strong> in the list and clicked on the «Next » button, a<br />
Select the Backup File window appears. In the Filename field, specify where you<br />
want to save the backup copy, click on the «Next » button and save.<br />
The backup copy will be saved as a .tar file. When you open it, you will find 3 different<br />
files: comcfg.txt, config.txt, program.bas and the /usr directory. These are the only<br />
files you need to backup your <strong>eWON</strong>.<br />
<strong>eWON</strong> (<strong>Getting</strong> <strong>Started</strong>) Page 38/44
14. Backup and Restore<br />
When you open it, you will find 3 different files: comcfg.txt, config.txt, program.bas and<br />
the /usr directory. These are the only files you need to backup your <strong>eWON</strong>.<br />
<strong>eWON</strong> (<strong>Getting</strong> <strong>Started</strong>) Page 39/44
Configuration using FTP transfers Chapter 15.<br />
15. Configuration using FTP transfers<br />
Every <strong>eWON</strong> can be used as FTP server or FTP client. This will allow you to get or<br />
put your own data files on the <strong>eWON</strong>.<br />
The FTP Server feature of the <strong>eWON</strong> can also be used to change the <strong>eWON</strong> settings<br />
or to make a backup of your <strong>eWON</strong>.<br />
All you have to do is put on the <strong>eWON</strong> a file that contains the different configuration<br />
parameters. When the <strong>eWON</strong> receives the file, it will analyze it and, if the syntax is<br />
correct, performs the changes.<br />
In fact, we saw in the previous chapter that the following files are needed to make a<br />
full backup of your <strong>eWON</strong>:<br />
– the comcfg.txt file<br />
– the config.txt file<br />
– the program.bas file<br />
– the /usr directory.<br />
The config.txt file contains the general information of your <strong>eWON</strong>, the configuration<br />
settings of the different IO Servers and also the Tag and user list of your <strong>eWON</strong>.<br />
The comcfg.txt file contains the information about the communication settings of the<br />
<strong>eWON</strong>. This file contains for example the IP address of your <strong>eWON</strong> and the Internet<br />
connection settings.<br />
The program.bas file contains the entire BASIC program you realized in your <strong>eWON</strong>.<br />
The /usr directory will contain the custom web pages you created, the customized files<br />
you stored on the <strong>eWON</strong> and the viewON project.<br />
If you adapt some settings in the config.txt file or in the comcfg.txt file, and you put this<br />
file (or a part of this file) back to the <strong>eWON</strong> using FTP, then <strong>eWON</strong> will perform the<br />
modification.<br />
If, for example, you create the following config.txt file and you put it on the <strong>eWON</strong> root<br />
using a FTP transfer, then the <strong>eWON</strong> identification will be changed and 3 new Tags<br />
will be added (or modified, if the Tag was already existing).<br />
:System<br />
Identification:<strong>eWON</strong> connected to Tank1<br />
:TagList<br />
"Id";"Name";"Description";"ServerName";"TopicName"<br />
1;"Level";"Level of Tank1";"MEM";""<br />
2;"Temperature";"Temperature of Tank1";"MEM";""<br />
7;"Pressure";"Pressure of Tank1";"MEM";""<br />
<strong>eWON</strong> (<strong>Getting</strong> <strong>Started</strong>) Page 40/44
Export Block Descriptors Chapter 16.<br />
16. Export Block Descriptors<br />
The Export Block Descriptors have to be used to export data out of the <strong>eWON</strong>.<br />
For example, we saw earlier in this document that you can send out emails for alarm<br />
notifications. With the use of Export Block Descriptors you can integrate additional<br />
information into the email as the alarm history or a historical graph covering the last<br />
20 minutes.<br />
An Export Block Descriptor is a string of characters describing what kind of <strong>eWON</strong><br />
data to export using a predefined syntax.<br />
Typically, the Export Block Descriptor will answer the following questions:<br />
• Which <strong>eWON</strong> data to export (Event log, Historical logging, etc.)?<br />
• How to format the exported data (Binary, Text, Html table, Graphic)?<br />
• The start time ?<br />
• The end time?<br />
• Which Tag is concerned?<br />
For example, the following Export Block Descriptor will extract the historical logging of<br />
the last 4 hours of Tag A1 and represent the result in text format:<br />
$dtHL $ftT $st_h4 $et_m0 $tnA1.<br />
If you add now this Export Block Descriptor to the email for the alarm notification, then<br />
the user will receive an alarm notification containing the Historical Graph of the last 4<br />
hours. This will allow the user to make a more precise analyze of the alarm situation.<br />
Other advanced use of the Export Block Descriptor are for example:<br />
• Include data in an <strong>eWON</strong> HTML custom page.<br />
• Access data in Basic Scripting using the OPEN “exp:.....” function<br />
For a detailed explanation about the use of the Export Block Descriptor please refer to<br />
the General Reference Guide (http://support.ewon.biz).<br />
<strong>eWON</strong> (<strong>Getting</strong> <strong>Started</strong>) Page 41/44
<strong>eWON</strong> Scripting Chapter 17.<br />
17. <strong>eWON</strong> Scripting<br />
You can create your own program on the <strong>eWON</strong>.<br />
Classic use of the program features of the <strong>eWON</strong> are:<br />
– Handling of an incoming SMS to change the value of a register in the PLC<br />
– Changing dynamically some <strong>eWON</strong> configuration parameters, such as Internet<br />
connection settings, etc.<br />
– Create and periodically send out a report (alarms, historical data, etc) by email or<br />
FTP<br />
The program of the <strong>eWON</strong> is based on a syntax close to the BASIC, with many<br />
specific extensions.<br />
The Basic program syntax and the extended functions are described in the<br />
“Programming Reference Guide”. (http://support.ewon.biz)<br />
If you want to create your own program in the <strong>eWON</strong>, then we suggest you to read the<br />
«Programming <strong>eWON</strong> Learning by example» guide. The first part of this document<br />
explains how to create your own program in the <strong>eWON</strong>.<br />
(http://support.ewon.biz/kb.html)<br />
<strong>eWON</strong> (<strong>Getting</strong> <strong>Started</strong>) Page 42/44
<strong>eWON</strong> limitations Chapter 18.<br />
18. <strong>eWON</strong> limitations<br />
As any device, the <strong>eWON</strong> has its limits. For example the number of points that can be<br />
stored in the historical logging is not infinite, same thing for the number of Tags that<br />
can be created in the <strong>eWON</strong>, etc.<br />
For a normal use of the <strong>eWON</strong> you will not be confronted to these limitations.<br />
But for an advanced use of the <strong>eWON</strong>, it is probably better to know those limits before<br />
starting up the <strong>eWON</strong> programming.<br />
<strong>eWON</strong> (<strong>Getting</strong> <strong>Started</strong>) Page 43/44
Revisions<br />
Revision Level Date Description<br />
1.0 2008-05-05 First release.<br />
1.1 2008-06-13 Symbol Tag editor added (chapter 3)<br />
1.2 2008-08-26 Complete version<br />
1.3 2009-12-14 MB_CD pictures<br />
i<br />
ii<br />
i<br />
ii<br />
Microsoft, Internet Explorer, Windows and Windows XP are either registered trademarks or trademarks of<br />
Microsoft Corporation<br />
Firefox is a trademark of the Mozilla Foundation<br />
Microsoft, Internet Explorer, Windows and Windows XP are either registered trademarks or trademarks of<br />
Microsoft Corporation<br />
Firefox is a trademark of the Mozilla Foundation<br />
Document build number: 118<br />
Note concerning the warranty and the rights of ownership:<br />
The information contained in this document is subject to modification without notice.<br />
The vendor and the authors of this manual are not liable for the errors it may contain, nor for their<br />
eventual consequences.<br />
No liability or warranty, explicit or implicit, is made concerning quality, the accuracy<br />
and the correctness of the information contained in this document. In no case the manufacturer's<br />
responsibility could be called for direct, indirect, accidental or other damage occurring from any<br />
defect of the product or errors coming from this document.<br />
The product names are mentioned in this manual for information purposes only. The<br />
trade marks and the product names or marks contained in this document are the property of their<br />
respective owners.<br />
This document contains materials protected by the International Copyright Laws. All<br />
reproduction rights are reserved. No part of this handbook can be reproduced, transmitted or copied<br />
in any way without written consent from the manufacturer and/or the authors of this handbook<br />
<strong>eWON</strong> sa, Member of ACT'L Group. Subject to change without notice.<br />
<strong>eWON</strong> (<strong>Getting</strong> <strong>Started</strong>) Page 44/44