Download manual - Gryphon Audio Designs
Download manual - Gryphon Audio Designs
Download manual - Gryphon Audio Designs

You also want an ePaper? Increase the reach of your titles
YUMPU automatically turns print PDFs into web optimized ePapers that Google loves.
Prelude<br />
Owner´s Manual
Table of Contents:<br />
Introduction....................... 3<br />
The <strong>Gryphon</strong>....................... 3<br />
Prelude................................ 4<br />
The Man.............................. 4<br />
Made in Denmark............... 4<br />
Musical Objectives............... 5<br />
The <strong>Gryphon</strong> Master Tape<br />
Collection............................ 5<br />
Design Principles................ 5<br />
Exterior Design................... 7<br />
Manufacture and Assembly. 8<br />
Using Your <strong>Gryphon</strong>......... 8<br />
AC Voltage.......................... 8<br />
Burn-in and Warm-up.......... 9<br />
Placement........................... 9<br />
Menu Activated<br />
functions.............................. 9<br />
Balanced Connections......... 14<br />
Choice of Cables................ 14<br />
Care and Maintenance....... 14<br />
Warranty.............................. 15<br />
Safety Instructions.............. 16
Introduction<br />
Welcome to the global family of<br />
proud owners of fine audio components<br />
from <strong>Gryphon</strong> <strong>Audio</strong><br />
<strong>Designs</strong> of Denmark. Your new<br />
<strong>Gryphon</strong> unit has been painstakingly<br />
designed to re-create the<br />
sound of live music taking place<br />
in its original recorded space.<br />
Every <strong>Gryphon</strong> product is<br />
designed to cater to the needs of<br />
the most discerning music<br />
enthusiast with sumptuous<br />
styling and superb user-friendliness<br />
which elevate it above the<br />
mundane world of conventional<br />
audio components.<br />
As audiophiles, the<br />
members of the<br />
<strong>Gryphon</strong> design team are constantly<br />
reminded to keep their<br />
priorities straight. We are not<br />
involved in “hi-fi” for its own<br />
sake, but strictly as a means to<br />
an end, in the service of our lifelong<br />
love of the live music experience<br />
in all its sonic and emotional<br />
glory.<br />
Our higher goal is to bring to the<br />
listener a “You-Are-There” sensation.<br />
In taking up this challenge,<br />
the <strong>Gryphon</strong> designers go<br />
back to basics to analyze the<br />
essential nature of the live music<br />
experience. For us, an awareness<br />
of soundstaging, ambience<br />
3<br />
and concert hall dimensions are<br />
necessary components.<br />
Dynamics and an unambiguous<br />
sense of instrument location<br />
even in the loudest passages<br />
are also high priorities. To<br />
achieve these objectives,<br />
<strong>Gryphon</strong> products offer exceptional<br />
speed and agility along<br />
with seamless coherence in the<br />
time domain.<br />
Since 1985, <strong>Gryphon</strong> <strong>Audio</strong><br />
<strong>Designs</strong> has quietly gone about<br />
the business of creating fine<br />
home audio components. We<br />
know that you will appreciate<br />
and enjoy the benefits<br />
of our accumulated experience<br />
and share our abiding<br />
passion for music.<br />
The <strong>Gryphon</strong><br />
In Greek mythology: A fabled<br />
creature, half-lion and halfeagle,<br />
combining the power of<br />
the “King of Beasts” with the<br />
grace of the “King of Birds”. The<br />
guardian of the source of gold<br />
and protector of the Dionysian<br />
cup of infinite wealth.<br />
In the real world: An acclaimed<br />
Danish audio engineering company<br />
employing cutting edge<br />
technology and common sense<br />
in the pursuit of the purest musical<br />
experience. We feel that the<br />
gryphon is an appropriate symbol<br />
for our high sonic goals.
Flemming E. Rasmussen painting 1967<br />
The <strong>Gryphon</strong> Head Amp 1985<br />
Prelude<br />
A piece or movement that serves<br />
as an introduction to another<br />
section or composition and<br />
establishes the key, such as one<br />
that precedes a fugue, opens a<br />
suite, or precedes a church service<br />
( Websters )<br />
The Man<br />
<strong>Gryphon</strong> <strong>Audio</strong> <strong>Designs</strong> is the<br />
brainchild of Flemming E.<br />
Rasmussen and the fulfillment of<br />
a lifelong dream to allow the<br />
purest essence of the live music<br />
experience to be recreated in the<br />
home environment.<br />
Rasmussen holds a degree in<br />
painting and graphic arts from<br />
the Aarhus Art Academy,<br />
Denmark. During his studies,<br />
Rasmussen developed close<br />
relationships with the local music<br />
community and designed many<br />
LP covers and concert posters.<br />
After graduation, he taught photography<br />
and painting and<br />
designed textiles, before founding<br />
2R Marketing, which quickly<br />
became Denmark’s leading High<br />
End audio import company.<br />
<strong>Gryphon</strong> <strong>Audio</strong> <strong>Designs</strong> was<br />
founded in 1985 as an offshoot<br />
of 2R Marketing, The first product,<br />
the now legendary <strong>Gryphon</strong><br />
Head Amp, grew from a one-off<br />
4<br />
spare time project developed<br />
only for the designers’ own home<br />
systems. Although the <strong>Gryphon</strong><br />
project was initially strictly a<br />
hobby, not an actively pursued<br />
commercial venture, demand<br />
generated by reviews and wordof-mouth<br />
led to the formal establishment<br />
of <strong>Gryphon</strong> <strong>Audio</strong><br />
<strong>Designs</strong> as a separate corporate<br />
entity.<br />
Following the immediate success<br />
of the <strong>Gryphon</strong> brand, all<br />
import business was phased out<br />
in 1993, so that Rasmussen<br />
could dedicate his efforts entirely<br />
to <strong>Gryphon</strong>.<br />
Made In Denmark<br />
Every product from <strong>Gryphon</strong><br />
<strong>Audio</strong> <strong>Designs</strong> is designed and<br />
built in Denmark. This is much<br />
more than just a geographical<br />
fact. It is also a seal of approval,<br />
a stamp of quality. Living in a<br />
region with no natural resources<br />
(no oil, coal, precious metals,<br />
etc.), the Danes have learned to<br />
rely on their quick wits and<br />
skilled hands. Innovative technology,<br />
beautiful craftsmanship,<br />
pride in one’s craft and a keen<br />
eye for attractive design are<br />
some of the long-standing<br />
Danish traditions which are distilled<br />
to their finest essence in<br />
every unit that bears the<br />
<strong>Gryphon</strong> name.
<strong>Gryphon</strong> is located in beautiful tranquil surroundings.<br />
Musical<br />
Objectives<br />
While scientific method and<br />
sophisticated technology play an<br />
important role in our electronics<br />
design work, at <strong>Gryphon</strong> we<br />
never lose sight of the fact that<br />
the keen ears of an experienced<br />
listener are the most crucial “calibration<br />
tools.” Therefore, every<br />
<strong>Gryphon</strong> product exists for one<br />
simple purpose: to bring the user<br />
closer in the never-ending quest<br />
for a more natural and convincing<br />
musical illusion.<br />
Every <strong>Gryphon</strong> design has been<br />
built to cruise effortlessly through<br />
even the most demanding musical<br />
passages, regardless of volume<br />
level, with a musical presentation<br />
defined by supreme<br />
articulation and immediacy, subtle<br />
dynamic shading and razorsharp<br />
focus. Refinement and<br />
delicacy are combined with<br />
power and authority for a natural,<br />
involving listening experience.<br />
The <strong>Gryphon</strong><br />
Master Tape<br />
Collection<br />
In the <strong>Gryphon</strong> listening rooms,<br />
we are fortunate to possess a<br />
5<br />
unique library of more than<br />
1,000 original master tapes of<br />
recordings made during the<br />
Golden Age of studio engineering<br />
from 1956-1976.<br />
Unlike conventional commercial<br />
releases, our master tapes capture<br />
the dynamic contrasts and<br />
subtle inner harmonic structure<br />
of the musical event, forcing us<br />
to work to a higher standard in<br />
our efforts to maintain the integrity<br />
of the original musical performance.<br />
Design Principles<br />
With state of the art technical<br />
equipment and some of the<br />
finest minds in the audio engineering<br />
field at our disposal, the<br />
<strong>Gryphon</strong> brand name continues<br />
to define the highest audiophile<br />
standards of subjective and<br />
technical performance.<br />
The dual mono configuration<br />
radically eliminates any possibility<br />
of crosstalk or other interference<br />
between channels and provides<br />
infinite channel separation<br />
which contributes to the ability to<br />
create space, focus, depth and<br />
transparency.<br />
Because the electrical power<br />
coming out of your wall fluctuates<br />
wildly in terms of voltage<br />
and distortion, <strong>Gryphon</strong> incorporates<br />
heavily regulated multi-
Typical <strong>Gryphon</strong> module<br />
stage power supplies that act as<br />
effective mains conditioning filters.<br />
Displays and control circuits<br />
are fed by a separate power supply<br />
to isolate any digital noise<br />
artifacts and effectively prevent<br />
them from contaminating the signal<br />
path.<br />
While the printed circuit boards<br />
in more conventional audio products<br />
utilize conductor tracks a<br />
mere 35 um thick, <strong>Gryphon</strong><br />
employs at least 70 um traces of<br />
the highest purity.<br />
Beginning with our very first<br />
product, “The Head Amp” all<br />
<strong>Gryphon</strong> products have featured<br />
extremely wide frequency bandwidth,<br />
because the ability to<br />
reproduce ultra-sonic frequencies<br />
with no difficulty ensures linear<br />
phase across the audible frequency<br />
range.<br />
The implementation of circuits<br />
with wideband frequency<br />
response is a painstaking<br />
endeavor in which the actual layout<br />
and ground pattern of the PC<br />
boards are crucial to the<br />
achievement of superior sonic<br />
performance with no loss of<br />
inherent stability.<br />
Wideband frequency response<br />
ensures the high slew rate<br />
essential to the realistic handling<br />
of the ultra-fast transients which<br />
6<br />
routinely occur in live music and<br />
is crucial in recreating the natural<br />
decay of musical instruments.<br />
Wide bandwidth also improves<br />
phase characteristics, for more<br />
correct soundstaging and imaging.<br />
All <strong>Gryphon</strong> designs are realized<br />
with an absolute minimum of<br />
negative feedback, which when<br />
present in large amounts can<br />
actually increase TIM distortion.<br />
All <strong>Gryphon</strong> preamplifiers are<br />
designed with zero negative<br />
feedback. <strong>Gryphon</strong> power amplifiers<br />
apply negative feedback<br />
judiciously for improved linearity<br />
and bandwidth.<br />
<strong>Gryphon</strong> research into the detrimental<br />
effects of magnetically<br />
induced distorted (MID) has led<br />
to the elimination of magnetizable<br />
materials wherever possible.<br />
To eliminate the effects of<br />
stray magnetic fields, non-magnetic<br />
materials are employed<br />
throughout, with the unavoidable<br />
exception of the transformer<br />
shield box.<br />
The mechanical design of the<br />
cabinet and assembly methods<br />
are all carefully calculated to<br />
ensure minimal resonance,<br />
either through the use of<br />
mechanically grounded high<br />
mass or decoupling. Vibrationsensitive<br />
components, capaci-
<strong>Gryphon</strong> <strong>Audio</strong> <strong>Designs</strong> in the<br />
outskirts of the small town of Ry<br />
tors in particular, are thus guaranteed<br />
a non-resonant environment.<br />
The heavy, thick chassis offers a<br />
vibration-proof environment for<br />
the sensitive electronics inside<br />
and provides crucial shielding<br />
from a polluted world of low and<br />
high-frequency radio waves,<br />
power-line radiation and other<br />
electrical interference.<br />
Meticulous attention to such<br />
issues makes a significant contribution<br />
to the relaxing, open<br />
and transparent <strong>Gryphon</strong> sound.<br />
Unique, non-invasive protection<br />
circuitry offers reliable, fuss-free<br />
protection without compromising<br />
signal purity and signal path simplicity,<br />
with no conventional<br />
relays in the signal path to<br />
degrade or compress sound.<br />
The ground path has been carefully<br />
laid out in order to achieve<br />
superior sonic performance with<br />
no loss of stability. Component<br />
layout has been designed to<br />
ensure the shortest conceivable<br />
signal path.<br />
Exhaustive investigation underlies<br />
the selection of every component<br />
part and many original,<br />
proprietary components are custom-built<br />
exclusively for<br />
<strong>Gryphon</strong>. Because what is left<br />
out is just as important as what<br />
7<br />
goes in, an absolute minimum of<br />
internal wiring is included.<br />
By lavishing attention on each<br />
aspect of the circuit and fully<br />
understanding the purpose and<br />
behavior of every single part of<br />
the whole, our designers can<br />
optimize performance in each<br />
section, before moving on to the<br />
next step. This ensures simplicity,<br />
a short signal path and a unity<br />
of purpose with a single, welldefined<br />
objective: musical purity.<br />
In the interest of ultimate fidelity,<br />
tone controls, balance controls<br />
and other unnecessary components<br />
have been banished from<br />
the signal path.<br />
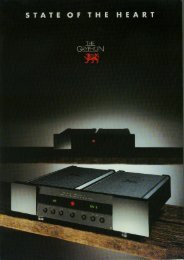
Exterior Design<br />
From the very beginning, every<br />
<strong>Gryphon</strong> product has offered<br />
stunning audio performance,<br />
sumptuous styling and superb<br />
user-friendliness, catering to the<br />
needs of the discerning audiophile<br />
who demands musicality,<br />
convenience and aesthetics, all<br />
without compromise.<br />
In every <strong>Gryphon</strong> product, form<br />
follows function in a unique synthesis<br />
of aesthetics and practicality.<br />
<strong>Gryphon</strong> stands for<br />
sophisticated technology with a<br />
high standard of industrial finish<br />
that also incorporates the best of<br />
handcraftsmanship.
The peerless finish, build quality,<br />
ergonomics and pride of ownership<br />
that contribute to the totality<br />
of the <strong>Gryphon</strong> concept can only<br />
be fully understood and appreciated<br />
up close and in person.<br />
Rasmussen’s background in fine<br />
arts and industrial design gives<br />
every <strong>Gryphon</strong> product a distinctive,<br />
luxuriant finish which arises<br />
organically out of the audio circuit<br />
design and the user interface<br />
for a truly unique integration<br />
of form and function.<br />
Manufacture and<br />
Assembly<br />
At our laboratories and manufacturing<br />
facilities in Denmark, we<br />
maintain full control over every<br />
aspect of development and production,<br />
and the members of our<br />
conscientious staff diligently follow<br />
each <strong>Gryphon</strong> model from<br />
initial concept to early prototype,<br />
through to final quality control.<br />
Printed circuit boards are<br />
assembled by a supplier of precision<br />
military and medical<br />
equipment with strict standards<br />
of quality control and pre-inspection<br />
of components. Chassis<br />
parts are manufactured by a<br />
specialist chosen solely for the<br />
outstanding quality of workmanship.<br />
In every aspect of every<br />
<strong>Gryphon</strong> product, the same<br />
stringent standards of excellence<br />
apply.<br />
Following a 48-hour burn-in,<br />
each product is tested again,<br />
before being subjected to<br />
<strong>Gryphon</strong>’s custom-developed<br />
transport simulator which simulates<br />
the inevitable shaking that<br />
a product will encounter in transit.<br />
The product is placed on top<br />
of a very large loudspeaker<br />
which plays a special CD with<br />
low frequencies which simulate<br />
the vibrations of an airplane.<br />
Each unit “travels” the equivalent<br />
of 40 round trips from Denmark<br />
to Australia before leaving the<br />
factory.<br />
AC Voltage<br />
Your <strong>Gryphon</strong> unit is especially<br />
made for the AC voltage of the<br />
country to which it has been<br />
shipped. If the voltage has been<br />
changed, the warranty is void<br />
and the product may be unsafe<br />
or malfunction.<br />
Correct AC polarity contributes<br />
greatly to optimum performance.<br />
If you are not using a three-pin,<br />
non-reversible power plug,<br />
please experiment with the orientation<br />
of the plug for optimum<br />
performance.<br />
8
The master On/Off switch on<br />
the Prelude is placed on the<br />
underside of the unit near the<br />
front.<br />
Burn-In and<br />
Warm-Up<br />
Your <strong>Gryphon</strong> unit has been<br />
thoroughly tested and burned in<br />
before shipping. Performance<br />
will continue to improve during<br />
the first 40 – 50 hours of normal<br />
use. After this period optimum<br />
performance will be reached<br />
approximately 45 minutes after<br />
turn-on. With the exception of<br />
Class A power amplifiers, we<br />
recommend leaving your<br />
<strong>Gryphon</strong> components powered<br />
up at all times.<br />
Placement<br />
Care must be taken to position<br />
the Prelude only on a stable surface<br />
which can reliably support<br />
the weight of the unit. Keep the<br />
Prelude away from large poweramplifers<br />
or high current carrying<br />
AC cords. Do never place the<br />
unit on top of an power amplifier.<br />
9<br />
Menu-activated<br />
functions<br />
The <strong>Gryphon</strong> Prelude incorporates<br />
several functions which are<br />
accessed via a Menu system.<br />
To access the Menu, press<br />
Menu. MENU will appear in the<br />
display and the Prelude will mute<br />
its output. CONTINUE will blink<br />
in the display. To enter the Menu,<br />
press Monitor. If you do not wish<br />
to access the menu-controlled<br />
functions, press an Input button<br />
so that EXIT blinks in the display,<br />
then press Monitor to return to<br />
normal playback and to the normal<br />
display.<br />
When you enter the Menu,<br />
NAME INPUT will appear in the<br />
display. Press Menu again to<br />
move through the menu-controlled<br />
functions in the following<br />
order:<br />
Name Input - Change Max Level<br />
- Change Start Level -<br />
Brightness Control - Restore<br />
Settings - Dedicate input 3 to AV<br />
- Continue/Exit<br />
At the end, you can either continue<br />
from the beginning of the<br />
list or exit the Menu. To return to<br />
the top of the list, press Monitor<br />
and NAME INPUT will appear in<br />
the display. To exit the Menu,
press an Input button so that<br />
EXIT blinks in the display, then<br />
press Monitor to return to normal<br />
playback and to the normal display.<br />
Any settings which you<br />
have changed are automatically<br />
stored in memory.<br />
Naming Inputs<br />
You can assign a specific name<br />
to each input, either a pre-programmed<br />
standard name or a<br />
custom name of your choice of<br />
up to 8 characters. When NAME<br />
INPUT appears in the display,<br />
press Monitor. SELECT INPUT:<br />
1 will appear in the display. To<br />
choose a different input for naming,<br />
press an Input button to<br />
move up or down through the<br />
five inputs. When the number of<br />
the input which you wish to<br />
name is displayed, press<br />
Monitor. CUSTOM will blink in<br />
the display. If you wish to create<br />
a custom name for the input,<br />
press Monitor and skip to section<br />
1.a. below. If you wish to select a<br />
name from the standard list,<br />
press an Input button so that<br />
STANDARD blinks, then press<br />
Monitor and skip to section 1.b.<br />
below. Please note: If a name<br />
has previously been assigned to<br />
the input, that name will be deleted<br />
if you press Monitor while<br />
STANDARD is blinking.<br />
1.a. If you have chosen custom<br />
naming, CUSTOM will appear in<br />
10<br />
the first line of the display. The<br />
selected input number will<br />
appear in the second line, followed<br />
by a colon (:) and a cursor<br />
marking the first position in the<br />
8-character name which you can<br />
create. If a custom name has<br />
already been assigned to this<br />
input, it will be displayed. To<br />
select a character (letter, number,<br />
symbol, empty space or<br />
punctuation mark) for the first<br />
position, continuously press one<br />
of the Volume buttons until the<br />
desired character is displayed.<br />
Press Input Up to move to the<br />
next position, then use the<br />
Volume buttons to select the<br />
desired character. Repeat for<br />
each character in the name. If<br />
you make a mistake or change<br />
your mind, use the Input Down<br />
button to move back and change<br />
a previously selected character.<br />
When the name is complete,<br />
press Monitor. The name is now<br />
stored in memory and will be displayed<br />
each time you select that<br />
input. NAME INPUT will appear<br />
in the display. You can go back<br />
to step 1 above to name another<br />
input or press Menu to select the<br />
next menu-controlled function.<br />
1.b. If you have chosen standard<br />
naming, SELECT STANDARD<br />
NAME will appear in the first line<br />
of the display. The selected input<br />
number and the first name in the<br />
standard list (CD) will appear in
the second line. To select the<br />
name which you wish to assign<br />
to the input, press the volume<br />
buttons to move up or down<br />
through the standard name list in<br />
the following order:<br />
CD – DVD – DSD – TUNER –<br />
TAPE – PHONO – DAT – MINI-<br />
DISC – AUX<br />
When the name which you wish<br />
to assign to the input is displayed,<br />
press Monitor. The name<br />
is now stored in memory and will<br />
be displayed each time you<br />
select that input. NAME INPUT<br />
will appear in the display. You<br />
can go back to step 1 above to<br />
name another input or press<br />
Menu to select another menucontrolled<br />
function.<br />
Setting Maximum Level<br />
You can select and store in<br />
memory a maximum volume<br />
level (between 01 and 50) which<br />
cannot be exceeded, <strong>manual</strong>ly<br />
or by remote, until you re-set this<br />
function. This effectively protects<br />
your audio system from expensive<br />
accidents. When CHANGE<br />
MAX LEVEL appears in the display,<br />
press Monitor. MAX<br />
LEVEL: and the currently<br />
assigned maximum volume setting<br />
will appear in the display. To<br />
change this setting, press<br />
Volume Up or Down until the<br />
desired maximum volume level<br />
is displayed. Press Monitor. The<br />
selected maximum volume setting<br />
is now stored in memory.<br />
CHANGE MAX LEVEL will<br />
appear in the display. Press<br />
Menu to select the next menucontrolled<br />
function.<br />
Setting Start-Up Level<br />
You can select and store in<br />
memory a default volume level<br />
(between 00 and 20) which will<br />
automatically be set by the<br />
amplifier each time you turn it<br />
on. When CHANGE START<br />
LEVEL appears in the display,<br />
press Monitor. START LEVEL:<br />
and the current default start level<br />
will appear in the display. To<br />
change this setting, press<br />
Volume Up or Down until the<br />
desired start level is displayed.<br />
Press Monitor. The selected start<br />
level is now stored in memory<br />
and will be set each time you<br />
turn on the amplifier. CHANGE<br />
START LEVEL will appear in the<br />
display. Press Menu to select the<br />
next menu-controlled function.<br />
Setting Display Brightness<br />
You can select and store in<br />
memory the desired level of<br />
brightness in the front-panel display.<br />
When BRIGHTNESS CON-<br />
TROL appears in the display,<br />
press Monitor. BRIGHTNESS<br />
will appear in the first line of the<br />
display. 100% 75% 50% 25%<br />
OFF will appear in the second<br />
11
line. The 100% indicator will<br />
blink. Press an Input button<br />
repeatedly until the desired level<br />
of brightness blinks. The display<br />
will immediately change to the<br />
selected brightness, unless you<br />
have selected OFF. If OFF is<br />
selected, the display will turn off<br />
after you exit the Menu. Press<br />
Monitor. The selected brightness<br />
level is now stored in memory.<br />
BRIGHTNESS CONTROL will<br />
appear in the display. Press<br />
Menu to select the next menucontrolled<br />
function.<br />
NOTE: When the display is<br />
turned completely off, pressing<br />
any button on the front panel or<br />
on the remote will cause the display<br />
to turn on briefly so that you<br />
can see the current volume level<br />
and selected input. Press a second<br />
time to activate the desired<br />
function.<br />
Restoring Default Settings<br />
You can delete all of your custom<br />
Menu settings and return to the<br />
factory pre-set default settings.<br />
Doing so deletes all input<br />
names, sets Maximum Level at<br />
50, sets Start Level at 00, sets<br />
Brightness at 100% and sets<br />
Input 3 as a normal audio input.<br />
When RESTORE SETTINGS<br />
appears in the display, press<br />
Monitor. RESTORE? appears in<br />
the first line of the display. NO<br />
and YES appear in the second<br />
line. NO will blink. If you do NOT<br />
wish to delete your custom settings,<br />
press Monitor, while NO is<br />
blinking, then press Menu to<br />
select the next menu-controlled<br />
function. If you do wish to delete<br />
all your custom settings, press<br />
Input Up until YES blinks, then<br />
press Monitor. You have now<br />
deleted all your custom settings.<br />
The factory pre-set default settings<br />
are now in effect.<br />
RESTORE SETTINGS will<br />
appear in the display. Press<br />
Menu to select the next menucontrolled<br />
function.<br />
Assigning Input 3 as a<br />
Dedicated AV Connection<br />
You can use the Prelude and<br />
your power amplifier with a separate<br />
surround processor by<br />
connecting the left and right front<br />
channels from your surround<br />
processor to Input 3 of the<br />
Prelude and using the Menu to<br />
configure this input so that the<br />
signal bypasses all preamplifier<br />
stages in the Prelude. This<br />
allows you to enjoy the full performance<br />
of the Prelude for<br />
stereo and surround listening<br />
without placing any surround<br />
components in the stereo signal<br />
path.<br />
12
CAUTION: When Input 3 is set<br />
up as a dedicated AV connection,<br />
the Prelude’s volume control<br />
is automatically set at a fixed<br />
level. The signal from the surround<br />
processor goes direct to<br />
the power amplifier and MUST<br />
be calibrated and attenuated by<br />
the surround processor.<br />
When DEDICATE INP.3 TO AV<br />
appears in the display, press<br />
Menu to select the next menucontrolled<br />
function, if you do<br />
NOT wish to connect the left and<br />
right front channels from a surround<br />
processor to Input 3 of the<br />
Prelude. If you do wish to make<br />
a dedicated AV connection,<br />
press Monitor. WARNING! NO<br />
ATTENUATION will blink in the<br />
display for 5 seconds, after<br />
which you will be asked to confirm<br />
that you wish to configure<br />
Input 3 as a dedicated AV connection<br />
which bypasses the<br />
Calisto volume control. ARE<br />
YOU SURE? will appear in the<br />
first line of the display. NO and<br />
YES will appear in the second<br />
line. NO will blink.<br />
If you do NOT wish to make a<br />
dedicated AV connection, press<br />
Monitor while NO is blinking,<br />
then press Menu to select the<br />
next menu-controlled function. If<br />
you do wish to make this connection,<br />
press Input Up so that<br />
YES blinks in the display. Press<br />
Monitor. Input 3 is now configured<br />
as a dedicated connection<br />
which bypasses the Prelude volume<br />
control and should ONLY<br />
be used with a source which has<br />
its own volume control, such as<br />
a surround processor. NEVER<br />
connect a normal line-level<br />
source such as a tuner, CD player,<br />
etc. directly to this input, while<br />
it is configured in this manner.<br />
You can always restore Input 3<br />
to normal operation via the<br />
Menu.<br />
When you have configured Input<br />
3, DEDICATE INP.3 TO AV will<br />
appear in the display. Press<br />
Menu to select the next menucontrolled<br />
function.<br />
Exiting the Menu<br />
When CONTINUE and EXIT<br />
appear in the display, you can<br />
either exit the Menu or return to<br />
the beginning of the list of menucontrolled<br />
functions.<br />
To go to the top of the list, press<br />
Monitor while CONTINUE is<br />
blinking.<br />
To exit the Menu, press an Input<br />
button so that EXIT blinks, then<br />
press Monitor to return to normal<br />
playback and to the normal display.<br />
13
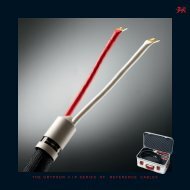
Balanced<br />
Connections<br />
All <strong>Gryphon</strong> products uses the<br />
AES standard for balanced connections.<br />
1. Ground<br />
2. Positive<br />
3. Negative<br />
We recommend the use of dedicated<br />
balanced cables. Avoid the<br />
use of adaptors as they degrade<br />
performanc<br />
Choice of Cables<br />
Because your Prelude pre amplifier<br />
is a high-resolution <strong>Gryphon</strong><br />
audio device, it will immediately<br />
reveal the characteristics and<br />
possible limitations of the other<br />
components in your system, as<br />
well as those of the interconnects<br />
and loudspeaker cables<br />
used to connect your system.<br />
Wiring should never be utilized<br />
as "equalizers" to correct errors<br />
elsewhere in the system.<br />
Instead, any error should be corrected<br />
at the source, so that<br />
interconnects and loudspeaker<br />
cables can be selected solely on<br />
the basis of sonic neutrality. For<br />
this reason, we employ<br />
<strong>Gryphon</strong>'s own range of interconnects<br />
and cables in every<br />
stage of the design of every<br />
<strong>Gryphon</strong> product.<br />
Care and<br />
Maintenance<br />
<strong>Gryphon</strong> products are handcrafted<br />
by individuals who take great<br />
pride in the high level of fit and<br />
finish which we achieve. To<br />
maintain your <strong>Gryphon</strong> components<br />
in pristine condition,<br />
please follow these simple<br />
instructions.<br />
Metal surfaces may be cleaned<br />
with a damp cloth. Some product<br />
made for treatment of vinyl interiors<br />
in cars may be useful. Test<br />
the product on a non-visible surface,<br />
before using any fluids.<br />
Acrylic surfaces should only be<br />
wiped with a very soft, dry cloth.<br />
Small scratches may be<br />
removed with fiberglass polish.<br />
Fingerprints may be removed<br />
with a damp cloth. Do NOT use<br />
spirits or paper tissue.<br />
14
Warranty<br />
The <strong>Gryphon</strong> Prelude is warranted<br />
against failures arising<br />
through faulty workmanship and<br />
materials for a period of 5 year<br />
from date of purchase. The warranty<br />
is not transferable. This<br />
warranty is only valid in the<br />
country where the product was<br />
purchased. All claims under this<br />
warranty must be made to the<br />
distributor in the buyer`s country<br />
by returning the unit securely<br />
packed in the original box with all<br />
accessories, postage/freight prepaid<br />
and insured. The unit will be<br />
repaired or replaced at no<br />
charge for parts and labor.<br />
This warranty remains valid only<br />
if the serial number of the unit<br />
has not been defaced or<br />
removed and if repairs are performed<br />
only by authorized<br />
<strong>Gryphon</strong> dealers or distributors.<br />
It does not cover damage due to<br />
misuse, accident or neglect. This<br />
warranty is not valid if the operation<br />
voltage of the product has<br />
been changed. The distributor or<br />
manufacturer, <strong>Gryphon</strong> <strong>Audio</strong><br />
<strong>Designs</strong>, Denmark, retains the<br />
exclusive right to make such<br />
judgement on the basis of<br />
inspection.<br />
The retailer, distributor or manufacturer<br />
of the <strong>Gryphon</strong> shall not<br />
be liable for consequential damage<br />
arising from the use, misuse<br />
or failure of this product, includ-<br />
ing injuries to persons or property.<br />
To qualify, the enclosed warranty<br />
registration card must be filled<br />
out and returned to the manufacturer<br />
within 10 days of purchase.<br />
15
SAFETY<br />
INSTRUCTIONS<br />
Hazardous live<br />
Do not expose the unit to<br />
dripping water or moist.<br />
Mains Switch:<br />
To place your Prelude into<br />
standby mode use the main<br />
switch. The switch is located in<br />
the bottom on the right side just<br />
beneath the acrylic front panel.<br />
16
USING THE<br />
OPTIONAL<br />
Prelude<br />
PHONO MODULE.<br />
Gain:<br />
Moving coil (MC) : 64dB<br />
Moving magnet (MM) : 42dB<br />
Impedance:<br />
Moving Coil ( MC )<br />
20 or 100 Ohm<br />
Moving Magnet ( MM ) 47 kOhm/200pf.<br />
S/N ratio:<br />
MC Input 250mV 1kHz : >72dB<br />
MM Input 2.5mV 1kHz : >84dB<br />
Input impedance in MC mode<br />
With the (red) jumper placed to the right side of the jumper sockets<br />
(JP101) and (JP301) the input impedance will be 100 Ohm in MC<br />
mode.<br />
With the jumper placed to the left sider of the jumper socket the input<br />
impedance will be 20 Ohm in MC mode.<br />
Input impedance in MM mode<br />
The input impedance in MM mode is 47kOhm/200pF.<br />
Switching between MM and MC ( yellow illustration )<br />
The selection of MC or MM is made with jumpers JP100, JP102,<br />
JP104, JP300, JP302, and JP304.<br />
17