Dune HD Center - Hantz + Partner Mailing Aktionen, Links und ...
Dune HD Center - Hantz + Partner Mailing Aktionen, Links und ...
Dune HD Center - Hantz + Partner Mailing Aktionen, Links und ...

You also want an ePaper? Increase the reach of your titles
YUMPU automatically turns print PDFs into web optimized ePapers that Google loves.
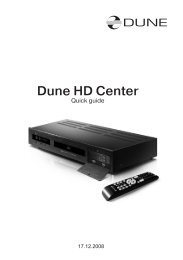
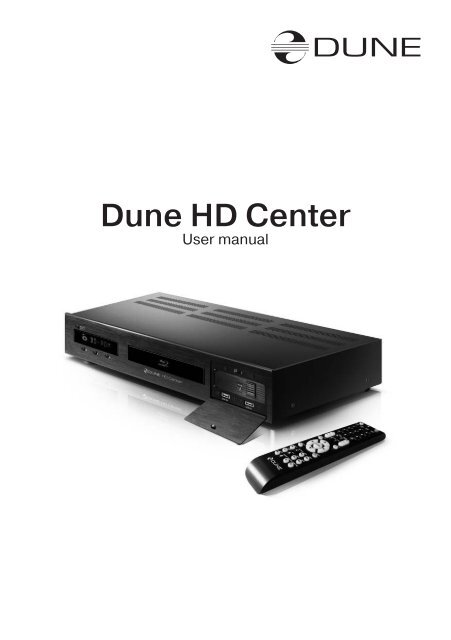
<strong>Dune</strong> <strong>HD</strong> <strong>Center</strong><br />
User manual
1.<br />
2.<br />
3.<br />
4.<br />
5.<br />
6.<br />
7.<br />
8.<br />
9.<br />
10.<br />
11.<br />
12.<br />
Table of contents<br />
Key features of DUNE <strong>HD</strong> <strong>Center</strong><br />
Package contents<br />
Notes on discs<br />
Safety measures<br />
Before getting started<br />
Remote control<br />
Connections<br />
System setup<br />
Playback<br />
Using of player. Playback of media content.<br />
Troubleshooting<br />
Specifications<br />
4<br />
7<br />
7<br />
9<br />
11<br />
12<br />
15<br />
21<br />
29<br />
32<br />
43<br />
48<br />
3
1<br />
Key features of DUNE <strong>HD</strong> <strong>Center</strong><br />
media player<br />
Player features:<br />
Blu-Ray discs playback<br />
● BD-ROM (Profile 1.1/2.0), as well as DVD and CD.<br />
Media content playback<br />
● Video, Music and Pictures.<br />
Network drive operation<br />
● NFS, SMB and some other HTTP clients.<br />
Mobile rack with SATA Direct Link for fast and easy <strong>HD</strong>D exchange<br />
● Supports any audio and video collection on any number of hard discs w/o need to create<br />
expensive multi-disc NAS solutions. Any 3.5" SATA <strong>HD</strong>Ds can be used.<br />
<strong>HD</strong>MI v1.3<br />
● Up-to-date <strong>HD</strong>MI v1.3 interface ensures peerless quality of digital video and audio<br />
signal.<br />
Three USB 2.0 ports<br />
● Three high-speed USB 2.0 ports ensure an easy-to-use playback of media content from<br />
such external data storage devices, as USB-<strong>HD</strong>D, flash drives, cardreaders, etc.<br />
Upgradeability<br />
● availability of connection of optional modules: Wi-Fi 802.11n, Ethernet 1000 Mb/s and<br />
2 x eSATA<br />
General features of Blu-ray discs<br />
Blu-ray optical media can store up to 25 GB on a single-layer disc, or 50 GB on dual-layer<br />
disc. Blu-ray discs support video signals of high-definition TV (<strong>HD</strong>TV) with definition up to<br />
1920x1080p. Data stream read from the disc may reach 40 Mbit/s.<br />
4
Function description and Blu-ray disc partition contained in this manual are common<br />
and describe potential features of Blu-ray format. The menu configuration,<br />
functions set, as well as menu navigation are disc-dependent and may vary.<br />
Graphics in the menu of BD-ROM disc:<br />
Interactive<br />
elements<br />
Video<br />
Video material recorded on the majority of BD-ROM discs, contains two additional full <strong>HD</strong><br />
video layers. The first layer is used for graphics, such as subtitles and OSD. The second<br />
layer is used for output of such interactive elements, as control buttons or disc menu.<br />
Compared to the DVD standard, the menu may be displayed directly during the playback<br />
of BD-ROM. No need to stop the playback, the menu elements and so<strong>und</strong> effects overlay<br />
the main video picture and allow promptly correcting of the device operation.<br />
Subtitles:<br />
Depending on possibility to select different subtitles displaying contained on the Blu-ray<br />
disc, you may be able to change the style, size and color of fonts used. In addition, some<br />
animation effects, such as fade-in and scrolling are also available.<br />
Video formats played back with the media player<br />
Blu-ray player:<br />
Use of BD-ROM media and AVC, VC-1 and MPEG-2 codecs<br />
● For best picture quality when viewing Blu-Ray discs, your other attached equipment<br />
shall support 1920x1080 or 1280x720 High-Definition TV (<strong>HD</strong>TV) format signals.<br />
Media file player:<br />
Use of optical BD-ROM (provided that the content is not protected), BD-R (RE), DVD-<br />
ROM, DVD-R (RW), CD-ROM, CD-R (RW) media, or embedded <strong>HD</strong>D, or external media,<br />
such as USB <strong>HD</strong>D and USB Flash drive. The media content may also be played via <strong>HD</strong>Dequipped<br />
LAN of your personal PC or NAS. And from the Internet.<br />
Codecs used for playback of MPEG2, MPEG4, DivX, XVID, WMV9, VC1, H.264 media files.<br />
File formats supported: MKV, MPEG-TS, MPEG-PS, M2TS, VOB, AVI, MOV, MP4, QT, ASF,<br />
WMV, DVD-ISO, VIDEO_TS.<br />
● For best picture quality when viewing media files, your other attached equipment shall<br />
support 1920x1080 or 1280x720 High-Definition TV (<strong>HD</strong>TV) format signals.<br />
5
Operations with <strong>HD</strong>D<br />
How to tаke out the <strong>HD</strong>D.<br />
How to insert the <strong>HD</strong>D<br />
1. Shift the clamp upwards.<br />
1. Having convinced that the container<br />
handle is slightly opened, insert the<br />
internal container and push it inside<br />
all the way.<br />
2. Keeping the<br />
clamp, turn the handle<br />
outside<br />
3. Pull out the internal container from<br />
a player<br />
2. Turn the handle inside till the<br />
clamp clicks.<br />
How to change the <strong>HD</strong>D in the internal container<br />
1. Shift the top cover of the internal<br />
container in an arrows direction.<br />
3. Be convinced that the <strong>HD</strong>D is densely<br />
pressed to a rear side of the container<br />
and fixed to an emphasis.<br />
Only such placing provides correct<br />
functioning of the device.<br />
2. Insert the <strong>HD</strong>D into the internal<br />
container.<br />
4. Close the top cover<br />
of the internal container.<br />
6
2<br />
Package contents:<br />
1 2<br />
3<br />
4<br />
5<br />
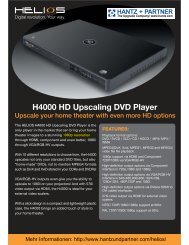
1. <strong>Dune</strong> <strong>HD</strong> <strong>Center</strong> media player<br />
2. Remote control (batteries not included)<br />
3. Power supply cord<br />
4. AV cable<br />
5. Quick start guide<br />
3<br />
Notes on Discs<br />
The regional code of BD-DVD discs is shown on the rear panel<br />
of your player. Please refer to the end of this manual for<br />
description of regional codes of BD-DVD discs.<br />
Notes on Copyright:<br />
The law prohibits copying, transmitting, displaying, broadcasting via cable network, public<br />
playback and letting on lease of copyright-protected materials without the rightholder’s<br />
authorization. The video discs are encoded with copy protection, and any picture recorded<br />
from this disc will be distorted. This product incorporates a copyright protection technology<br />
which is protected by requirements of certain U.S. patents and other intellectual property rights<br />
owned by Macrovision Corporation and other rights owners. Use of this copyright protection<br />
technology must be authorized by Macrovision Corporation and is intended for home viewing<br />
uses. Reverse engineering or disassembly is prohibited.<br />
Information on regional content protection:<br />
This media player has been developed and manufactured <strong>und</strong>er Region Management<br />
Information conditions available on the disc. If the regional code shown on BD-DVD disc does<br />
not match the regional code of this player, this device will not play back this disc. You will not be<br />
able to play back some BD-DVD disc with this media player, if they were bought outside your<br />
home region or intended not for in-home use.<br />
7
Blu-Ray Regions<br />
А1<br />
C3<br />
B2<br />
А1<br />
Code Region<br />
1 or A Eastern and South-Eastern Asia, USA<br />
2 or B Europe, Oceania, Africa, Meadle East,, Greenlandia<br />
3 or С Russia, PRC, Central and South Asia, Mongolia<br />
DVD Regions<br />
1<br />
2<br />
2<br />
5<br />
6<br />
5<br />
3<br />
4<br />
2<br />
4<br />
Code<br />
Region<br />
1 Canada, United States; U.S. territories; Bermuda<br />
2 Western and Central Europe; Western Asia; Egypt, Japan, South Africa, Swaziland; United Kingdom,<br />
French overseas territories<br />
3 Southeast Asia; South Korea; Taiwan; Hong Kong<br />
4 Australia; Oceania; Central and South America; Caribbean; Mexico<br />
5 Ukraine, Belarus, Russia, Africa, Central and South Asia, Mongolia, North Korea.<br />
6 China<br />
7 Reserved for future use<br />
8 International venues such as aircraft, cruise ships, etc.<br />
All<br />
Region ALL discs have all 8 flags set, allowing the disc to be played in any locale on any player.<br />
8
Types of optical discs supported<br />
Type ROM R RE (RW)<br />
BD + + +<br />
DVD + + +<br />
CD* + + +<br />
*playback of CD function will be added in one of following firmwares.<br />
4<br />
Safety measures<br />
To avoid troubles, before to start using this device, please read this manual<br />
carefully and keep it for future reference.<br />
Warning: This Blu-ray player uses a laser beam sightless with human<br />
eye. If directed to human eye retina, it may cause hazardous radiation<br />
exposure and loss of sight. Please make sure that you use the player in<br />
conformity with the user’s manual. Please make sure that the device is<br />
out of reach of small children as far as possible.<br />
Caution: This product employs a laser system. Performing adjustments,<br />
or carrying out procedures other than those specified herein may result<br />
in hazardous radiation exposure. Do not open the safety enclosure: this<br />
product does not contain any parts that can be repaired by the user.<br />
1) Do not try to repair the device. Only authorized after-sales centers are entitled to carry<br />
out repair and preventive maintenance.<br />
2) To avoid electric shock, do not touch the plugged in device with wet hands and do<br />
not allow moisture within the case. If it happened, immediately unplug the device and<br />
contact an authorized <strong>Dune</strong> service center.<br />
3) Clean the device only with a dry soft cotton, or alike, cloth preventing accumulation<br />
of static discharges. Do not use any liquid detergent or scouring powder. In case of<br />
hard dirt, use special wipes suitable for PC care. Make sure that the wipe is dry enough<br />
(otherwise fluid drops may get inside).<br />
4) The device is for indoor use only. Do not expose it to direct sunlight, do not leave it near<br />
a heater or radiator.<br />
5) DO NOT use the device in rooms with high humidity.<br />
6) DO NOT plug in the player immediately after moving it from a cold into a warm place.<br />
If you move the device from an extremely cold place, unpack it and leave for 1.5 to 2<br />
hours in order to allow evaporation of condensate on internal parts, afterwards you may<br />
start using it.<br />
7) Please make sure to switch off all relevant AV equipment before connection to the Bluray<br />
media player.<br />
8) Use EU-standard screened cables and sockets.<br />
9) Do not move the media player during the disc playback, since there is probability of<br />
9
damage of optical drive and internal parts.<br />
10) Do not place any items on the player. The device needs some space for releasing<br />
of heat produced during its operation. DO NOT place any liquid-containing vessels,<br />
metallic items and any other materials upon its top enclosure that may disturb the<br />
normal operation of the device.<br />
11) Do not hinder the opening of the tray of the media player. If something hinders the tray<br />
opening, remove it and try again.<br />
12) Please remove the disc out of the player after viewing and turn off the player.<br />
13) Do not press the disc tray. Do not place any items on the tray.<br />
14) Voltage fluctuations in AC mains may result in improper operation of the device. In this<br />
case, please turn off the player with the POWER button on the front panel of the device<br />
or unplug, and after 10 to 15 seconds plug in back. The media player will restart, and its<br />
functionality will be restored.<br />
15) If you intend not to use the Blu-ray media player for a long period of time, for safety<br />
reasons and to spare power, please make sure to unplug from the AC mains. Please be<br />
aware that even in standby mode the device consumes the power.<br />
Restrictions in respect of content playback<br />
When playing some BD-DVD-CD disks, some operations, commands and functions may<br />
not be available. It is connected with the software features recorded on the media. This<br />
feature is not a trouble.<br />
Although the player supports the majority of the most common file formats (containers<br />
and codecs), it does not mean that it will play any files. It is not guaranteed that this media<br />
player will play without fail absolutely all Blu-ray, DVD and CD labeled discs either. It is<br />
due to possible faults during recording of these discs: software errors or poor quality of<br />
the optical drive. Frequently media files are recorded with violation of certain rules, and<br />
although they may be properly played with some built-in PC players, this media player may<br />
not be able to do this (play back these ‘exotic’ files). These restrictions and errors may<br />
be potentially eliminated in new updates of firmware. Please refer to the ‘Specifications’<br />
section for the full list of optical media and supported audio and video codecs.<br />
10
5<br />
When you start using the media player for the first time, please make sure that the shipping<br />
packing is not broken, has no compression or opening marks.<br />
● If the packing was broken, the manufacturer shall not be held liable in respect of the<br />
integrity of the package contents.<br />
When you connect the media player to your AV appliances for the first time, please make<br />
sure that all seals and retainer screws on the top enclosure are in place and contain no<br />
unsealing mark.<br />
● If for some reason, the seals were broken, the manufacturer shall be entitled to refuse<br />
the free of charge after-sales servicing of the device.<br />
After switching on the player performs automatic booting procedure, including boot-up<br />
of embedded operating system. It may take 30 to 60 sec. After that you will get to splash<br />
screen (Main root folder) of the file browser.<br />
Please do connect to relevant AV appliances only if all devices are switched<br />
off. Please refer to the ‘Connections’ section below for description of the<br />
majority of connections.<br />
Exterior<br />
Before getting started<br />
Front view<br />
1 2 3 4 5 6 7 8<br />
1. Standby Indicator<br />
2. Display<br />
3. STOP Button<br />
Rear view<br />
4. PLAY Button<br />
5. OPEN/CLOSE<br />
6. Blu-Ray tray<br />
7. Mobile rack<br />
8. USB 2.0<br />
DTS is a registered trademark & the DTS<br />
logos and Symbol are trademarks of DTS,<br />
lnc. 1996-2008 DTS, lnc. All Rights Reserved.<br />
BLU-RAY DISC PLAYER<br />
MODEL: <strong>HD</strong> <strong>Center</strong><br />
Manufactured <strong>und</strong>er license from Dolby Laboratories. Dolby<br />
and the double-D symbol are trademarks of Dolby Laboratories.<br />
USB<br />
AC~100-240V<br />
50/60Hz, 27W min.<br />
Do not remove covers hazard - life parts<br />
5 C<br />
Made in Israel<br />
ETHERNET<br />
<strong>HD</strong>MI<br />
1 2 3 4 5 6 7 8 9 10 11 12<br />
1. AC Power Jack<br />
2. On/Off Button<br />
3. 7.1 Channel Audio Output Jacks<br />
4. LAN<br />
5. <strong>HD</strong>MI 1.3 Jack<br />
6. Video Output (CVBS) Jack<br />
7. S-Video Output Jack<br />
8. Component Video (Y, PB, PR) Output Jacks<br />
9. COAXIAL Output Jack<br />
10. OPTICAL Output Jack<br />
11. Stereo Audio Left/Right Output Jacks<br />
12. USB 2.0<br />
11
6<br />
Remote Control (RC)<br />
1) Command indicator (i.e. indicator of remote control response to button pressing)<br />
2) EJECT, MUTE, POWER – opening/closing of disk tray, so<strong>und</strong> on/off and standby<br />
mode on/off, respectively<br />
3) A(Red) - INFO, B(Green) - ZOOM, C(Yelow) - MODE, D(Blue) - SETUP – control<br />
menu buttons for setting of internal functions, as well as some playback modes.<br />
4) 0 - 9 – numeric buttons. Allow controlling of player in playback mode, as well as text<br />
entry.<br />
5) INFO, ZOOM, MODE, SETUP – control menu buttons, allow setting of internal<br />
functions, as well as some playback modes.<br />
6) Vol+ / Vol- – volume adjusting<br />
1<br />
7) Page Up / Page Down – for scrolling up and down<br />
2<br />
to see and change settings.<br />
A B C D<br />
8) SUBTITLE, AUDIO, RETURN, POP UP/MENU,<br />
3<br />
ENTER and control menu buttons UP, DOWN,<br />
RIGHT, LEFT – to control main player modes and<br />
cursor motions through file browser.<br />
4<br />
9) PLAY, PAUSE, STOP, REW, FWD, PREV, NEXT,<br />
SLOW REW, SLOW FWD – media file playback<br />
control buttons.<br />
5<br />
10) TOP MENU/URL, ANGLE/ROTATE, SEARCH<br />
i<br />
– control menu buttons, allow setting of internal<br />
functions, as well as some playback modes.<br />
6<br />
...<br />
*Some buttons may have several functions, depending 7<br />
on mode. For more details, please refer to Text<br />
entry with Remote control, System adjustments and 8<br />
Playback sections.<br />
.. .<br />
Note:<br />
● Use alkaline AA batteries.<br />
● Observe polarity when inserting batteries.<br />
● Direct the remote control to the player. There must<br />
be no obstacles between the RC and the player. If<br />
the player is installed inside a desk with tinted glass,<br />
the manufacturer may not guarantee an <strong>und</strong>isturbed<br />
functioning of RC.<br />
● If RC functions only at short distances or stopped<br />
functioning, make sure to replace batteries to new<br />
ones.<br />
10<br />
9<br />
TOP<br />
POP<br />
UP/<br />
12
Text entry with RC<br />
0, 1, 2, 3, 4, 5, 6, 7, 8, 9: Entry of characters to a position pointed<br />
by the cursor.<br />
First pressing: entry of first character from a set of characters connected<br />
with the remote control. Each subsequent pressing: you<br />
may change the entered character to the sequent one from the<br />
list.<br />
● 0: entering of space character.<br />
● 1: entering of special characters (punctuation marks, etc.).<br />
● during character selection mode connected with button 1: Right/<br />
Left/Up/Down: select required character.<br />
ENTER – validate selection, exit selection mode.<br />
SUBTITLE (...) – enter full stop mark or other special characters.<br />
Functions like button 1 in character entering mode.<br />
CLEAR (
Contextual menu<br />
MENU – show contextual menu with a list of available additional commands. Through contextual<br />
menu you can copy the edited text line to clipboard and paste the text line from the<br />
clipboard (into cursor position)<br />
STANDBY Mode<br />
14<br />
Pressing of POWER button switches over the player<br />
to STANDBY mode. In this mode the built-in <strong>HD</strong>D is<br />
disabled, as well as the video output, but the device<br />
does not switch off completely.<br />
To activate the player from standby mode, press POWER<br />
button once again. It allows immediate switching on of the<br />
player (within several seconds). When switching on after<br />
standby mode, as well as at getting started for the first time,<br />
you will get to the Main root folder of file browser.<br />
A B C D<br />
i
7<br />
Connections<br />
This section describes different connection possibilities of media player to AV<br />
equipment.<br />
Depending on model and design of TV or projection set, after connecting in one of the ways<br />
described below and plugging the power supply, the player initialization may take up to 10<br />
sec. If after this time there is no picture (DUNE logo) on screen, it shall mean that there are<br />
connection errors. Please check Troubleshooting section in such a case.<br />
If after the initial screen (DUNE logo) disappears there is no other picture on screen in 10 sec.<br />
and more, this problem is usually caused by the currenly preset incorrect video mode on the<br />
player. Please address the “Quick setting of video output” section below in such a case.<br />
Connection to a TV set with <strong>HD</strong>MI/DVI output:<br />
<strong>HD</strong>MI IN<br />
Since <strong>Dune</strong> <strong>HD</strong> <strong>Center</strong> is designed first of all for playback of high definition (<strong>HD</strong>) video (up<br />
to 1080p), the best way of signal transmission from player to a TV set or projector is the<br />
<strong>HD</strong>MI interface. In this case, video and audio streams are transmitted in digital form, without<br />
losses, allowing enjoying excellent picture and so<strong>und</strong>. It is recommended to connect the<br />
player to any compatible equipment using original DUNE <strong>HD</strong>MI cable (option).<br />
If your TV set has no <strong>HD</strong>MI socket, but it is equipped with DVI one, you can use an original<br />
DUNE <strong>HD</strong>MI-DVI adapter (to be connected to <strong>HD</strong>MI-<strong>HD</strong>MI cable) or <strong>Dune</strong> <strong>HD</strong>MI-DVI<br />
cable (no adapter needed). In this case, transmission of audio stream is only available<br />
separately, from an analog audio or digital optical output.<br />
1) Make sure that the player and the TV set are switched off. Do not switch on until the end<br />
of connection procedure.<br />
2) Connect the <strong>HD</strong>MI output of the player with appropriate <strong>HD</strong>MI/DVI input of the TV set<br />
using a <strong>HD</strong>MI-<strong>HD</strong>MI cable for <strong>HD</strong>MI input of your TV set, or <strong>HD</strong>MI-DVI cable or <strong>HD</strong>MI-<br />
<strong>HD</strong>MI cable with <strong>HD</strong>MI-DVI adapter, for DVI input of your TV set.<br />
3) Using RC of TV or projector (depending on what you use), select required input and display<br />
mode. For more instructions please refer to the manual of your displaying equipment.<br />
4) Wait until you see a picture on screen of your TV (or projection) set received from the<br />
player.<br />
15
Connection to a TV set with component video signal input<br />
(Component Video, Y, Cb, Cr)<br />
For this connection you should use a 3RCA-3RCA video cable and (optionally) a<br />
2RCA-2RCA audio cable for so<strong>und</strong> transmission to your TV set. Please note that<br />
video cable shall have an impedance of 75 Ohm, i.e. specially fitted for transmission<br />
of analog video signal.<br />
COMPONENT<br />
VIDEO IN<br />
AUDIO IN<br />
R L<br />
1) Make sure that the player and TV set are switched off. Do not switch on until the end of<br />
connection procedure.<br />
2) Connect the component video output of media player with relevant TV input using a<br />
3RCA-3RCA cable.<br />
3) Optionally connect audio output AUDIO L R of the player with relevant input of TV set<br />
using a 2RCA-2 RCA cable (note: you can use optical cable to transmit digital audio to<br />
your A/V receiver; this way better audio quality result may be expected).<br />
4) Using RC of TV or projector (depending on what you use), select required input and<br />
display mode. For more instructions please refer to the manual of your displaying<br />
equipment.<br />
Connection to a TV set with composite video or S-Video signal<br />
Since both these kinds of connection do not allow a high-quality picture, we<br />
recommend to use them only in case that your TV or projection set does not have<br />
modern video interfaces, such as <strong>HD</strong>MI or Component Y, Cb, Cr.<br />
1) Make sure that the player and TV set are switched off. Do not switch on until the end of<br />
connection procedure.<br />
2) Connect the media player with relevant TV input using a RCA-RCA or S-Video cable,<br />
depending on equipment.<br />
3) Optionally connect audio output AUDIO L R of the player with relevant input of TV set using<br />
a 2RCA-2 RCA cable (note: you can use optical cable to transmit digital audio to your A/V<br />
receiver; this way better audio quality result may be expected).<br />
16
AUDIO IN<br />
R L<br />
S VIDEO IN<br />
4) Using RC of TV or projector (depending on what you use), select required input and display<br />
mode. For more instructions please refer to the manual of your displaying equipment.<br />
Transmission of digital audio signal to an AV receiver with<br />
<strong>HD</strong>MI input<br />
This media player is equipped with an up-to-date <strong>HD</strong>MI v 1.3 interface allowing<br />
transmission of digital video and audio streams using a single cable. If your AV receiver<br />
has a <strong>HD</strong>MI v1.3 input and decoders of up-to-date audio formats, you may<br />
enjoy a <strong>HD</strong> multi-channel so<strong>und</strong> in full. For this connection it is suggested to use an<br />
original DUNE <strong>HD</strong>MI-<strong>HD</strong>MI cable (not included, can be ordered separately).<br />
1) Make sure that the player and the AV receiver are switched off. Do not switch on until the<br />
end of connection procedure.<br />
2) Connect <strong>HD</strong>MI output of the media player with relevant <strong>HD</strong>MI input of your AV receiver<br />
using a <strong>HD</strong>MI-<strong>HD</strong>MI cable.<br />
3) Using RC of the AV receiver select relevant<br />
mode (ref. to your AV receiver manual).<br />
<strong>HD</strong>MI IN<br />
● We recommend you to turn down the volume of your audio equipment before connection,<br />
in order to avoid lesion of your hearing ability and eliminate risk of damage<br />
of your audio systems.<br />
17
Transmission of digital audio signal to an AV receiver using<br />
an optical cable<br />
An optical Toslink–Toslink audio cable shall be used (not included).<br />
1) Connect digital audio output of the player with digital audio input of the AV receiver<br />
2) Select relevant input and so<strong>und</strong> mode on the AV receiver.<br />
Optical<br />
● We recommend you to turn down the volume of your audio equipment before connection,<br />
in order to avoid lesion of your hearing ability and eliminate risk of damage of your<br />
audio systems.<br />
Transmission of analog audio signal to an external stereo<br />
amplifier (or TV set)<br />
An analog 2RCA-2RCA cable shall be used (not included).<br />
1) Connect audio output AUDIO L R of your player with audio input of your stereo amplifier<br />
2) Select relevant input using INPUT SELECTOR switch.<br />
AUDIO IN<br />
R L<br />
● We recommend you to turn down the volume of your audio equipment before connection,<br />
in order to avoid lesion of your hearing ability and eliminate risk of damage of your<br />
audio systems.<br />
18
● You may send an analog audio signal from your player to the TV set, if you use DVI,<br />
Component Video, S-Video or CVBS for video signal transmission and don’t use AV received<br />
for digital audio decoding. In case of connection using <strong>HD</strong>MI, video and audio<br />
signals will be transmitted using a single <strong>HD</strong>MI cable, that’s why there is no need of additional<br />
analog audio connections in this case.<br />
● We recommend you to turn down the volume of your audio equipment before connection,<br />
in order to avoid lesion of your hearing ability and eliminate risk of damage of your<br />
audio systems.<br />
Transmission of analog 7.1 audio signal to an external<br />
amplifier(reciever)<br />
An analog 2RCA-2RCA cable shall be used (not included). It is better to use four<br />
identikal pairs.<br />
● We recommend you to turn down the volume of your audio equipment before connection,<br />
in order to avoid lesion of your hearing ability and eliminate risk of damage of<br />
your audio systems..<br />
19
Connection to LAN and Internet<br />
A standard Cat5 or Cat6 Ethernet cable with RJ45 connectors should be used (not<br />
included).<br />
Connection of external USB drives<br />
Your media player is equipped with a socket for connection of external data storage<br />
devices with USB interface. There are two standard A-type USB ports for this<br />
purpose.<br />
1) Connect a USB cable of external device to your media player.<br />
2) Wait until popup of an icon in Main root folder showing start of initialization of equipment<br />
connected to your player.<br />
● Playback and other operations with USB drives are described in the section below. Ref.<br />
Playback section.<br />
20
8<br />
System setup<br />
This chapter describes a list of settings of different functions of your media<br />
player.<br />
Setup menu<br />
● Access to the setup menu only in file browser mode<br />
WARNING During playback of media files and DVDs any access to the<br />
setup menu is disabled. In order to enter the menu you need to stop<br />
playback first<br />
● To enter the setup menu press SETUP on your RC or use Setup folder of the main<br />
menu of the player.<br />
● To exit the setup menu, press SETUP once again or<br />
RETURN button.<br />
● To browse the setup menu use RC buttons Up, Down, RETURN/Left, ENTER/Right.<br />
Quick setting of video output<br />
MODE button on the RC allows quick setting of video output without use of<br />
setup menu. This type of video output configuration may be required in case<br />
that after connection of your player to a TV or projector, you see no picture on<br />
screen (and no setup menu displayed accordingly).<br />
After pressing MODE button you will enter quick setting mode of video output.<br />
Pressing one of the digit buttons 1, 2, 3, 4, 5 right after that on your RC, you<br />
may switch to one of the following settings of video output respectively:<br />
1 ) Composite/S-Video/Component, PAL<br />
2 ) Composite/S-Video/Component, NTSC<br />
3 ) <strong>HD</strong>MI, 480i 60Hz<br />
4 ) <strong>HD</strong>MI, 720p 60Hz<br />
5 ) <strong>HD</strong>MI, 1080i 60Hz<br />
To exit quick setting mode of video output after successful settings, press<br />
ENTER on your RC.<br />
● After pressing the MODE and a digit buttons please wait for up to 15 sec.<br />
before the new video mode is settled.<br />
● The pointed five video settings are only to ensure that you can quickly set up<br />
some usable video mode for any type of video connection you are using,<br />
regardless the previous settings of your player.<br />
After getting picture on screen with one of these modes, please go into Setup<br />
menu and choose the most appropriate video output and resolution.<br />
● During any video playback the MODE button is deactivated. To change<br />
parameters of video output, stop playing back by pressing STOP button.<br />
● In case of any problems, to make sure that the playback is stopped and you<br />
are in file browser mode, switch off and then switch on the player and wait<br />
until player booting during up to 60 sec. Ref. STANDBY mode.<br />
A B C D<br />
TOP<br />
i<br />
...<br />
.. .<br />
POP<br />
UP/<br />
21
Menu: Settings<br />
General. In this menu section you may adjust general interface language and time of screensaver<br />
activation.<br />
22<br />
Video. In this section you will find settings of video output type (digital <strong>HD</strong>MI or analog) and<br />
adjusting of video resolution on selected output.<br />
• Resolution value adjusted will be used by default for any file played with the media<br />
player.<br />
• Read carefully your TV or projection set instructions. Some video modes may not be<br />
supported by your equipment.<br />
• In case of using of <strong>HD</strong>MI connection, depending on <strong>HD</strong>MI support in your TV/projection<br />
set, intermediate <strong>HD</strong>MI equipment (if any) and the player, some video modes may not<br />
be available or may function improperly. In this case, use other video modes or other<br />
connection type.<br />
• To have the best picture quality it is advisable to use an <strong>HD</strong>MI connection. Ref.<br />
Connection to a TV set with <strong>HD</strong>MI input.
Audio. This section of settings allows setting of connection type of relevant audio equipment<br />
Analog audio output mode: Stereo mode is designed for connection to a stereo amplifier<br />
or similar device. Ref. Transmission of analog audio signal to an external stereo amplifier<br />
(or TV set)<br />
23
Digital audio output mode: you may switch the mode of digital optical output.<br />
PCM (Pulse Code Modulation, forced conversion): a mode in which original track,<br />
i.e. Dolby Digital or DTS, is converted in Pulse Code form. It is supported by decoders of<br />
virtually any up-to-date audio equipment. But this mode is only recommended in case that<br />
your AV receiver does not support full decoding of multi-channel so<strong>und</strong> of formats above,<br />
or a TV set (no home theater system) is connected through a digital cable to your player<br />
• if specific so<strong>und</strong> track and specific playback mode are supported<br />
● Original (Bitstream): a mode, in which original so<strong>und</strong> tracks, i.e. Dolby Digital or DTS,<br />
are transmitted to an external decoder in original form. Ref. Transmission of digital audio<br />
signal to AV receiver<br />
• if specific so<strong>und</strong> track and specific playback mode are supported<br />
24
Network.<br />
This section describes main parameters of functioning of media player in LAN or Internet.<br />
Connection. You may select a type of connection which will be used by default. It may be Wire<br />
(twisted-pair cable connection) or Wireless (Wi-Fi connection; optional). Or you may select a<br />
LAN-free use by selecting No.<br />
Selection of networking mode: Auto (DHCP): selection of networking mode allowing the<br />
media player to receive automatically an IP address and other parameters required for TCP/IP<br />
networks.<br />
Manually: selection of networking mode when all TCP/IP parameters are set by the user.<br />
25
Information: includes all system information on your device.<br />
Others. This section describes additional settings of your media player.<br />
26
Display view: you may select shape and type of the player menu which will be displayed by<br />
default.<br />
• You may use the menu type that is most suitable for you. It may be icons, or text messages for<br />
displaying all functions of your media player.<br />
IPTV. This section describes media player setting for reception of IPTV channels.<br />
● You only need to choose the name of your IPTV provider from the list in Setup. All other steps<br />
will be made by the player automatically.<br />
• List of IPTV providers may vary depending on programming time.<br />
● IPTV protocols: Multicast UDP (raw), RTP. Formats: MPEG-TS container, MPEG2, H.264 video<br />
codec (SD and <strong>HD</strong>), MPEG and AC3 audio codecs.<br />
27
Internet radio.<br />
• List of Internet radio stations may vary depending on programming time.<br />
Coding. Display of text information in the menu and submenus of media player.<br />
28
9<br />
Playback<br />
Blu-ray operations<br />
Playing of a standard Blu-ray or normal DVD disc.<br />
Before playing any optical discs, we suggest you to refer to the ‘Settings.<br />
Other. Optical drive’. In this section you will need to select an operation that<br />
will be performed by the media player by default, after inserting of a BD-ROM<br />
or DVD-ROM disc, respectively.<br />
Playback of BD-ROM<br />
After inserting of a BD-ROM in your media player, please wait until<br />
the disc menu is displayed. Depending on the record conditions and<br />
materials content available on the BD-ROM disc, its initialization may<br />
take up to two minutes. All features of BD-ROM discs are described<br />
on the start pages of this manual, cf. ‘Notes on discs’ section. If after<br />
this time the disc is not initialized, try to refer to the ‘Troubleshooting’<br />
section.<br />
The following Remote Control operated commands are available in<br />
BD-ROM playback mode.<br />
EJECT - opening/closing of disc tray<br />
MUTE - so<strong>und</strong> off/on<br />
POWER – Standby on/off.<br />
A (red)– INFO<br />
B (green) – ZOOM<br />
C (yelow) – MODE<br />
D (blue) – SETUP<br />
Vol+ / Vol- – volume control<br />
INFO – information on current status of media player.<br />
• current operation: PLAY, PAUSE, etc.<br />
• type of optical media used currently: BD-ROM, BD-R, etc.<br />
• type of so<strong>und</strong> track: Stream type DD, DD+, DTS, etc.<br />
• type of content and current playback time: <strong>HD</strong>MV 00:25:53<br />
A B C D<br />
TOP<br />
i<br />
...<br />
.. .<br />
POP<br />
UP/<br />
29
• current disc chapter: Title 1/11<br />
• current disc episode: Chapter 8/27<br />
• current bit rate: Bit rate 34.43 Mbp<br />
ZOOM – first pressing: switch to picture zoom mode, display information on current zoom<br />
settings.<br />
Subsequent pressings: switch to subsequent zoom setting: 2X, 4X, 8X, 16X, ZOOM OFF.<br />
• Left/Right/Up/Down – navigation through the frame enlarged in ZOOM mode.<br />
SETUP – picture parameters setting mode (Contrast, Brightness, Hue, saturation)<br />
• Left/Right – adjusting of selected parameter.<br />
0 - 9 – digit buttons. Disabled when playing a BD-ROM disc.<br />
SUBTITLE: first pressing: display information on current subtitles.<br />
• Subsequent pressings: switch to subsequent subtitles.<br />
AUDIO: first pressing: display information on current so<strong>und</strong> track.<br />
• Subsequent pressings: switch to the next so<strong>und</strong> track.<br />
RETURN – return to preceding disc/menu status.<br />
POP UP/MENU – displays an interactive menu of BD-ROM disc (selection of scenes, switching<br />
between episodes, additional materials, etc.)<br />
PLAY, ENTER: start the playback.<br />
PAUSE/STEP: first pressing: switch to the pause mode.<br />
• Subsequent pressings: frame-by-frame playback (switching to the next frame). To exit the<br />
pause mode, press PLAY.<br />
STOP: end the playback, return to the Main page of the file browser.<br />
FWD (>>) REW (
DVD-Video playback<br />
After starting playback of a DVD disk from external optical drive or a material in a<br />
DVD-Video format from a folder on <strong>HD</strong>D, you will get to the DVD player.<br />
● This interface is only intended for operation of DVD-Video.<br />
● f you play a DVD-Video disk already inserted in the device, its playback<br />
starts from the point where it stopped playing previously. Your<br />
media player stores such data for 200 last played DVD disks, earlier A B C D<br />
stored items will be deleted as they are replaced by more recent<br />
ones.<br />
Item storage runs as with regular DVD-Video disks played from optical<br />
drive, as well as DVD-Video material stored on hard drive of media<br />
player or external drive. To playback the DVD-Video from the very beginning,<br />
press twice CLEAR button on your RC.<br />
Following RC buttons are enabled for DVD player:<br />
i<br />
Left/Right/Up/Down<br />
...<br />
Page-Up/Page-Down: first pressing: switch to played item change<br />
mode.<br />
Subsequent pressings: change of desired playback item backward/<br />
forward by 10 min)<br />
Left/Right: backward/forward by 10 sec.<br />
Up/Down: backward/forward by 1 min.<br />
● To exit item selection mode and switch over to item selected, press<br />
ENTER (or wait until automatic switch to selected item after short<br />
idle time).<br />
0, 1, 2, 3, 4, 5, 6, 7, 8, 9: switch to a DVD-Video chapter with specified<br />
number. You may select a two-digit chapter number by entering<br />
both digits consecutively. If it’s a one-digit number, please wait shortly<br />
after its input. All these operations shall be made during the playback.<br />
Also with digital buttons you may select DVD-Video menu item.<br />
INFO: display/hide the information on played DVD: media (name of<br />
folder name; optical drive), type of media container, format (code<br />
type), resolution of video stream in file, maximal bitrate (statistics for the current file playback<br />
session), average bitrate (statistics for the current file playback session), current<br />
bitrate (playback statistics), duration.<br />
AUDIO: first pressing: display information on current so<strong>und</strong> track, subsequent pressings:<br />
switch to the next so<strong>und</strong> track.<br />
SUBTITLE: first pressing: display information on the current subtitles, subsequent pressings:<br />
switch between available subtitle versions.<br />
Volume-Up/Volume-Down: first pressing: display information on the current volume<br />
level. Subsequent pressings: volume level increase/decrease.<br />
MUTE: switch off/on the so<strong>und</strong>.<br />
ZOOM: first pressing: switch to picture zoom setting mode with display of the current status.<br />
Subsequent pressings: change zooming modes.<br />
TOP<br />
.. .<br />
POP<br />
UP/<br />
31
10<br />
Using of player. Playback of media content.<br />
File browser<br />
File browser allows browsing of all files and folders available. Browsing starts from the<br />
Main page, which includes sub-divisions corresponding to connected drives, including<br />
network resources<br />
Up: select previous file/folder from the list. Move the cursor to the area of indication of the current<br />
path (in case of selection of the first element from the list).<br />
Down: select next file/folder from the list.<br />
Page-Up: select a file from the top of the page displayed / move one page up.<br />
Page-Down: select a file from the end of the page displayed / move one page down.<br />
RETURN/Left: return to the main folder<br />
ENTER/Right: enter the folder (when selected).<br />
…or start playing of selected media file / showing of digital picture.<br />
…or start playback of DVD-Video (i.e. a local copy thereof). It is possible in case of prior selection of<br />
external optical drive with inserted DVD-video disk.<br />
…or start firmware update (in case of selection of firmware file).<br />
PLAY: start playing of all media files in the current folder (except for files in attached folders) starting<br />
from the current file.<br />
Before this you need to select a start file using cursor buttons.<br />
…or start DVD-Video playback (i.e. a local copy thereof). It is possible in case of prior selection of<br />
external optical drive with inserted DVD-video disk. You may also start playback of your own contents<br />
prepared in the DVD-Video format by this way from a folder, (it must contain a subfolder named<br />
VIDEO_TS).<br />
32
… or start playback of all files in selected folder, including files in subfolders, in alphabetical order.<br />
… or start playback of all files selected (one time, in the same order as displayed).<br />
MENU: show contextual menu with a list of available additional commands<br />
for the file/folder selected and the current folder. Using the contextual menu<br />
you may execute the following commands:<br />
● Display information on the file/folder selected (also allows testing of file<br />
reading speed rate).<br />
● Open a DVD-Video structure (browse disk content instead of playback<br />
start).<br />
● Select or deselect the file/folder selected.<br />
● Select or deselect all files/folders in the current folder.<br />
● Delete file(s)/folder(s) selected.<br />
A B<br />
i<br />
C D<br />
● Copy file(s)/folder(s) selected (files/folders are put to clipboard).<br />
...<br />
● Cut file(s)/folder(s) selected (files/folders are put to clipboard).<br />
● Paste previously copied/cut files/folders from the clipboard to the current<br />
folder (i.e. execute copy/moving of files/folders).<br />
● Update current folder content.<br />
● Create a folder.<br />
● Create a network folder (only on Main page).<br />
TOP<br />
● Change network folder definition.<br />
● Delete network folder.<br />
SELECT: select or deselect file/folder selected, afterwards select next file/<br />
folder from the list.<br />
CLEAR (
Selection of files and folders.<br />
To execute operations with several files/folders at the same time, you may select these<br />
files/folders. Use SELECT button on your RC or commands of contextual menu.<br />
You may select files/folders only within the current folder. In case of switch to another folder,<br />
the information on selections will be reset.<br />
A B C D<br />
i<br />
...<br />
.. .<br />
POP<br />
UP/<br />
Copy and relocation of files/folders<br />
TOP<br />
Copying and relocating of files/folders is executed using so-called clipboard<br />
functioning on the same principle as Windows clipboard:<br />
To copy files/folders you need first to copy them to the clipboard, afterwards go to the target folder<br />
and click paste.<br />
To move files/folders, you should first cut them to the clipboard, then go to the target folder and<br />
click paste.<br />
● Copy, Cut, Paste commands may be executed using the contextual menu.<br />
● In case of copying or relocation of a folder, its content will be copied/moved entirely, including<br />
all attached folders and their contents.<br />
34
● To copy or relocate several files/folders at once, you should select these files/folders.<br />
In case of moving of files/folders within one section of a drive, there is no physical copying<br />
thereof (only the drive catalog is refreshed), files/folders are moved to the new location<br />
instantly. In case of moving files/folders between different sections or different drives, files/<br />
folders will be first copied to the new location, and then deleted from the old location. During<br />
copying you should not unplug the player or disable the drive currently enabled. Otherwise the<br />
information may be damaged and become unrestorable.<br />
File player<br />
In case of playback of one or several files, you switch over to the file player.<br />
This section describes only playback of a single media file.<br />
After connection of an external DVD drive for playback of DVD<br />
disks, an icon is automatically added in the Main folder.<br />
Following RC buttons are enabled for the file player:<br />
35
36<br />
Left/Right/Up/Down<br />
Page-Up/Page-Down. First pressing: switch to playback item change<br />
mode.<br />
● Subsequent pressings: change desired playback item:<br />
Left/Right: backward/forward by 10 sec.<br />
Up/Down: backward/forward by 1 min.<br />
Page-Up/Page-Down: backward/forward by 10 min.<br />
● To exit the item selection mode and switch over to selected item, press<br />
ENTER button (or wait until automatic switch to selected item after a short<br />
idle time).<br />
0, 1, 2, 3, 4, 5, 6, 7, 8, 9: switch to playback item:<br />
0%, 10%, 20%, 30%, 40%, 50%, 60%, 70%, 80%, 90% (from playback<br />
start).<br />
INFO: display/hide information on the current file:<br />
File name. Container type. Format (codec type). Rethsolution of<br />
A B<br />
i<br />
C<br />
...<br />
D<br />
POP<br />
UP/<br />
TOP<br />
video stream in the file. Maximum bitrate (statistics of the current session<br />
of file playback). Average bitrate (statistics of the current session of file<br />
playback). Current bitrate (playback statistics). Duration.<br />
AUDIO: First pressing: display information on current so<strong>und</strong> track.<br />
● Subsequent pressings: switch to the next so<strong>und</strong> track.<br />
SUBTITLE: First pressing – display information on current subtitles.<br />
● Subsequent pressings: switch to the next subtitles.<br />
Volume-Up/Volume-Down: First pressing: display information on current<br />
volume level.<br />
● Subsequent pressings: increase/decrease volume level.<br />
MUTE: turn the so<strong>und</strong> off/on.<br />
ZOOM: First pressing: switch to picture zoom mode, display information on current zoom setting.<br />
● Subsequent pressings: switch to subsequent picture zoom.<br />
● In case of Special setting selection, following RC buttons are enabled:<br />
Left/Right: zoom in/out (proportionate picture stretching).<br />
Up/Down: increase/decrease vertical stretching (proportions adjusting).<br />
Page-Up/Page-Down: increase/decrease overscan area (to equalize picture cropping by TV<br />
set).<br />
● To exit ZOOM setting mode, press ENTER and wait until automatic exit from the mode after<br />
short idle time.<br />
SETUP: display picture parameters setup menu (brightness, contrast, saturation, chromatic<br />
level).<br />
.. .
Following RC buttons are enabled in the mode of picture<br />
parameters setting:<br />
Up/Down: select previous/subsequent proportion parameter.<br />
Left/Right: decrease/increase parameter value (proportionate).<br />
CLEAR: reset to default value.<br />
● To exit from picture parameter setting mode, press ENTER (or wait until automatic exit from<br />
the mode after short idle time).<br />
MODE: switch of deinterlacer function mode. Modes available: motion adaptive (default),<br />
bob, constant blend, disabled.<br />
Deinterlace: adaptive<br />
SHUFFLE: first pressing: switch to adjustment mode of so<strong>und</strong> synchronization, display information<br />
on current adjustment.<br />
● Following RC buttons are enabled in adjustment mode: Left: decrease adjustment value<br />
(“move” so<strong>und</strong> backward, relatively to video). Right: decrease adjustment value (“move”<br />
so<strong>und</strong> forward, relatively to video). To exit from adjustment mode, press ENTER or wait until<br />
automatic exit from the mode after short idle time.<br />
A-B: first pressing: display information on current adjustment status of video frame rate.<br />
● Subsequent pressings: turn on/off video frame rate adjustment. In case of activated adjustment,<br />
video frame rate increases with a factor of 25/23.768.<br />
PAUSE/STEP: first pressing: switch over to pause mode.<br />
Subsequent pressings: frame-by-frame display (switch to next frame).<br />
To exit the pause mode, press PLAY.<br />
FWD (>>)<br />
REW (
When the playlist browser is displayed, following RC<br />
buttons are enabled:<br />
MENU, RETURN: hide playlist browser.<br />
UP, DOWN, PageUp, PageDown: cursor moving.<br />
PLAY, ENTER: start playback of selected item.<br />
CLEAR: delete selected item from the playlist.<br />
REPEAT: switch on/off the loop playback mode of the current playlist.<br />
PREV, NEXT: start playback of previous/next item.<br />
● Other RC buttons are disabled.<br />
ROTATE (ANGLE): rotate picture (only for static picture display).<br />
EJECT: open/close tray of built-in optical drive.<br />
● If a file is played from a DVD disk in external optical drive, optical drive tray opening commanwill<br />
stop the playback.<br />
DVD-Video playback<br />
After starting playback of a DVD disk from external optical drive or a material in a<br />
DVD-Video format from a folder on <strong>HD</strong>D, you will get to the DVD player.<br />
● This interface is only intended for operation of DVD-Video.<br />
● If you play a DVD-Video disk already inserted in the device, its playback<br />
starts from the point where it stopped playing previously. Your media<br />
player stores such data for 200 last played DVD disks, earlier stored<br />
items will be deleted as they are replaced by more recent ones.<br />
Item storage runs as with regular DVD-Video disks played from optical<br />
drive, as well as DVD-Video material stored on hard drive of media player<br />
or external drive. To playback the DVD-Video from the very beginning,<br />
press twice CLEAR button on your RC.<br />
Following RC buttons are enabled for DVD player:<br />
Left/Right/Up/Down<br />
Page-Up/Page-Down: first pressing: switch to played item change<br />
mode.<br />
Subsequent pressings: change of desired playback item backward/forward<br />
by 10 min)<br />
Left/Right: backward/forward by 10 sec.<br />
Up/Down: backward/forward by 1 min.<br />
● To exit item selection mode and switch over to item selected, press<br />
ENTER (or wait until automatic switch to selected item after short idle<br />
time).<br />
0, 1, 2, 3, 4, 5, 6, 7, 8, 9: switch to a DVD-Video chapter with specified<br />
number. You may select a two-digit chapter number by entering both<br />
digits consecutively. If it’s a one-digit number, please wait shortly after<br />
its input. All these operations shall be made during the playback. Also<br />
with digital buttons you may select DVD-Video menu item.<br />
INFO: display/hide the information on played DVD: media (name of<br />
folder name; optical drive), type of media container, format (code type),<br />
resolution of video stream in file, maxi<br />
38<br />
A B C D<br />
TOP<br />
i<br />
...<br />
.. .<br />
POP<br />
UP/
mal bitrate (statistics for the current file playback session), average bitrate (statistics for<br />
the current file playback session), current bitrate (playback statistics), duration.<br />
AUDIO: first pressing: display information on current so<strong>und</strong> track, subsequent pressings:<br />
switch to the next so<strong>und</strong> track.<br />
SUBTITLE: first pressing: display information on the current subtitles, subsequent pressings:<br />
switch between available subtitle versions.<br />
Volume-Up/Volume-Down: first pressing: display information on the current volume<br />
level. Subsequent pressings: volume level increase/decrease.<br />
MUTE: switch off/on the so<strong>und</strong>.<br />
ZOOM: first pressing: switch to picture zoom setting mode with display of the current status.<br />
Subsequent pressings: change zooming modes.<br />
In case of Special setting selection, following RC buttons<br />
are enabled:<br />
Left/Right: decrease/increase picture size (proportionate change of<br />
frame size).<br />
Up/Down: increase/decrease vertical stretching (proportion adjustment).<br />
Page-Up/Page-Down: increase/decrease overscan area (equalizing<br />
of picture cropping by TV set).<br />
To exit ZOOM mode, press ENTER (or wait until automatic exit from<br />
the mode after short idle time).<br />
SETUP: display picture parameters setup menu, such as brightness,<br />
contrast, color-saturation. For more information please refer Picture<br />
parameters setting<br />
PAUSE/STEP: first pressing: switch to pause mode. Subsequent<br />
pressings: frame-by-frame playback (switch to the next frame).<br />
● To resume normal playback, press PLAY.<br />
FWD (>>)/REW (
Network disks operation<br />
You may connect to your player network disks with SMB and NFS<br />
protocols.<br />
ВIt is possible to connect any number of network disks. Each network disk connected is<br />
displayed in root directory of the file browser (Main page) as a special folder or an icon.<br />
Warning: current firmware version does not support network disks, if they are only accessible<br />
with UPnP/DLNA or HTTP/ HTML protocols, and if using of SMB or NFS is impossible.<br />
To create new network folder (i.e. to initialize the network disk):<br />
1) Enter the root directory of the file browser on the Main page.<br />
2) Execute the Create a network folder command using the contextual menu (MENU button<br />
of the RC).<br />
3) In pop-up dialog box adjust network folder parameters.<br />
40
4) In Name area enter any name which you like. This name will be displayed in the file<br />
browser for this external resource.<br />
5) In Type area select SMB or NFS, depending on protocol supported by your network<br />
disk.<br />
If you wish to connect to a Windows-operated PC and do not know what is NFS server,<br />
the easiest way is to use SMB protocol: in this case, you do not need installation of additional<br />
software, standard Windows tools will be sufficient (2000, XP or Vista).<br />
If you wish to connect to NAS (Network Attached Storage), and your NAS supports NFS,<br />
use NFS protocol.<br />
● By default, there is no standard Windows software supporting NFS protocol. If you<br />
wish to use NFS to access files on a Windows-operated PC, you need to install and<br />
adjust NFS server software, e.g. HaneWin NFS Server (User Manual available in English<br />
on developer’s web site).<br />
Connection through SMB protocol:<br />
1) In Server area enter IP address of your server. E.g.: 10.0.0.2.<br />
In case of connection to Windows PC, you may find the required IP address in network<br />
connection features on Windows PC (for example, in Windows XP you can see the symbol<br />
of network connection in the right bottom corner of the display; double click on it and<br />
you have a window with the connection status; choose “Support” folder here and you<br />
see the needed “IP Address”).<br />
● Indication of Windows name of the server is currently not supported.<br />
● If your LAN is adjusted for DNS resolution of names and the player network settings<br />
contain correct DNS parameters, you may use the DNS name of your server in the<br />
place of IP address.<br />
2) In the Folder area enter name of common access folder at SMB server. E.g.: VIDEO.<br />
After connection to a Windows PC, the name of common access folder may be fo<strong>und</strong> in<br />
folder properties (for example, in Windows XP file browser: right-click with mouse on the<br />
shared folder name, choose “Sharing and Security…” and you have the needed name in<br />
the “Share name” field of the appeared window. The same window can be used to add<br />
new shared folder on your Windows computer for any folder you need to share).<br />
● Name of common access folder displayed in the network may not be the same as its<br />
name on hard disk. You should use a network name. If SMB server requires user name/<br />
password, enter these data in the relevant fields (usually not required).<br />
Connection with NFS protocol:<br />
1) In the Server area specify IP address of your NFS server. E.g.: 10.0.0.2.<br />
After connection to a Windows PC, you may find your IP address in network properties of<br />
Windows PC (in the way as described for SMB protocol above).<br />
● Indication of Windows-name of server is not supported.<br />
● If your LAN supports DNS resolution of names and network settings of your player contain<br />
correct DNS parameters, you may use DNS name of server instead of IP-adress.<br />
41
2) In the Folder area, specify the full path to the folder on NFS server. E.g.: /data/video.<br />
● path to folder should begin with “/” mark. Folder path is specified by specific NFSserver<br />
and its settings.<br />
3) Press OK. New network folder will be displayed in the root directory of file browser. Enter<br />
network folder displayed for browsing contents of connected network disk.<br />
● If at an attempt to enter a network folder you see ‘No access to network folder’ message,<br />
refer to Troubleshooting section.<br />
Access to hard disk of the player from the network:<br />
You may use your player as network file storage (NAS), and have a local network<br />
access to storage drives contents connected to the player.<br />
For FTP access it is enough to establish a FTP connection with the player. No need to<br />
enter user name and password (i.e. so-called anonymous FTP access). If a FTP client<br />
asks to enter user name and password, enter ‘ftp’ as user name, and leave password<br />
line blank.<br />
If you wish to connect to the player by FTP from a Windows PC:<br />
1) Find out IP-address of your player (you can find it through the player Setup menu, ref.<br />
System information section).<br />
2) Start Windows Explorer and enter in address line ftp://IP-address-of the player (e.g.:<br />
ftp://10.0.0.3).<br />
● for FTP access it is recommended to use special FTP-clients instead of Windows Explorer,<br />
such as FileZilla; specialized FTP-clients frequently operate better.<br />
For SMB access, the player provides a common (open) access folder titled ‘internal_<br />
hard_disk’, corresponding to internal hard disk of your player. No need to enter user<br />
name and password.<br />
If you wish to connect to your player through SMB from<br />
a Windows PC:<br />
1) Find out IP-address of your player (you can find it through the player Setup menu, System<br />
information section).<br />
2) Start Windows Explorer and enter in address line \\IP-address-of-the-player\internal_<br />
hard_disk (e.g.: \\10.0.0.3\internal_hard_disk).<br />
● You can also address to your player as follows: \\IP-address-of-the player\\dune\internal_hard_disk<br />
and \\dune.<br />
If you fail to get access to the player from the network, please refer to Troubleshooting<br />
section.<br />
42
11<br />
Troubleshooting<br />
General:<br />
TROUBLE: the device does not switch on.<br />
SOLUTION: check, if the media player is connected to AC mains.<br />
TROUBLE: the device is properly connected to the mains, but works improperly.<br />
SOLUTION:<br />
a) it is possible that the temperature requirements were not observed, and there is condensate<br />
on internal parts. Immediately switch the device into Standby mode, and unplug<br />
it of the AC mains. Wait until the condensate evaporates, cf. ‘Safety measures’, and<br />
afterwards restart using of the media player in normal mode.<br />
b) it is possible that the device needs to be rebooted. Switch to Standby mode, and unplug<br />
of the AC mains. Wait ca. 1 minute, afterwards turn on.<br />
c) some functions can work improperly or not be enabled, it is due to the software recorded<br />
on the media. Make sure that functions required are enabled/disabled in the specific<br />
media fragment. If after all the remedies above you still think that the media player works<br />
improperly, please refer to the service center.<br />
TROUBLE: the remote control does not work or works improperly.<br />
SOLUTION: Please refer to the ‘Remote control’ section for proper operation of the remote<br />
control.<br />
TROUBLE: The player turns on, but there is no picture.<br />
SOLUTION: If during 60 sec after switching on, there is no picture on the screen of your TV, and<br />
the player operation indicator is lighted, most probably video output parameters of your player<br />
or video input of your TV/projection set are incorrect. If you are sure that the equipment is duly<br />
connected, but (using appropriate cable connected to appropriate sockets), try to adjust video<br />
input settings using MODE button of your RC. Ref. ‘Quick adjusting of video output’.<br />
TROUBLE: Player switched on, but no picture on the screen<br />
SOLUTION: If during 60 sec after switching on there is no picture on the screen of your TV<br />
set, and the player operation indicator is lighted, most probably video output parameters<br />
of your player or video input of your TV set/projector are incorrect. If you are not sure that<br />
the equipment is duly connected (using appropriate cable connected to appropriate sockets),<br />
try to change video input settings using MODE button of your RC. Ref. Quick setting<br />
of video output<br />
TROUBLE: <strong>HD</strong>MI connection does not function or function improperly (picture disappears/jumps,<br />
etc.)<br />
This kind of troubles results from bad compatibility of the player with some models of <strong>HD</strong>MI<br />
equipment. Symptoms may be the following:<br />
1. <strong>HD</strong>MI-connection is not available at all, although everything is duly connected and adjusted.<br />
2. Recurrent failure or jumping of picture during video playback or operation of file browser.<br />
3. Recurrent warning on TV screen about change of video mode during video playback or<br />
operation of file browser.<br />
4. So<strong>und</strong> troubles of TV set (during so<strong>und</strong> transmission through <strong>HD</strong>MI).<br />
43
5. Color bars on screen.<br />
6. Other artefacts<br />
Note: reinitializing of <strong>HD</strong>MI-video output of the player at switching between file browser<br />
and video playback (in the form of several second delay before playback start and return to<br />
the file browser) is an expected and normal player behavior with current firmware versions<br />
installed in any <strong>HD</strong>MI-equipment which does not prevent from using the player. This feature<br />
does not relate to above troubles.<br />
If you encounter the problems above:<br />
First of all, make sure that the problem relates to <strong>HD</strong>MI connection: try to use an<br />
analog connection to TV set (e.g., component). If problem persists after using of<br />
analog connection, it shall mean that it relates not to <strong>HD</strong>MI, but to your TV set.<br />
● Try to switch on/off the so<strong>und</strong> transmission through <strong>HD</strong>MI (setup menu, So<strong>und</strong> setting<br />
section), sometimes it has a considerable effect on the situation.<br />
● Try different settings of video output: 480i/720p/1080i/1080p, 23.976/24/<br />
30/50/59.94/60Hz. Your TV set may not support some video modes, or does it improperly.<br />
Change of video mode to another compatible with your TV set may help<br />
solving the problem. You should test by consecutive examination of video modes. It<br />
is suggested to start with the lowest picture resolutions.<br />
● If possible, try to use another <strong>HD</strong>MI cable.<br />
● If possible, try to change the mode of connection of the player to your <strong>HD</strong>MI-equipment:<br />
e.g., instead of connection through a receiver, connect directly to a TV set.<br />
● If possible, try to connect the player to another TV set or AV-receiver. Since the problem<br />
may be caused by another equipment, and not the player or <strong>HD</strong>MI cable.<br />
If the problem persists, it is quite probable that the player is not compatible or hardly<br />
compatible with <strong>HD</strong>MI-equipment. It is probable that the future firmware will have modifications/updates<br />
eliminating problems with your <strong>HD</strong>MI-equipment.<br />
You may post a written description of your problem on the manufacturer’s forum or e-<br />
mail it (you may find its address at www.hdi.co.il). In such cases, please describe your<br />
problem in details as much as possible, including conditions and situations in which it<br />
manifests.<br />
BD-ROM player:<br />
TROUBLE: none of optical media is played back or is played with noise or hang-up.<br />
SOLUTION: make sure that there is a disc in the tray duly inserted (printed labels upward).<br />
Check for deep scratches and dirt on the optical data carrier. Check the media content, it is<br />
possible that the media player does not play back this type of media or materials. Please refer<br />
to ‘Key features of DUNE <strong>HD</strong> <strong>Center</strong>’ and ‘Notes on discs’ sections for full list of discs and AV<br />
codec types.<br />
TROUBLE: BD-ROM and DVD-ROM are not played back.<br />
SOLUTION: check the regional code on your disc. The disc coding shall match the coding<br />
on the rear panel of your media player. Please refer to information on regional protection<br />
of content, cf. ‘Notes on discs’ section.<br />
TROUBLE: Some functions of BD-ROM differ from their description.<br />
44
SOLUTION: set of functions, as well as internal menu of BD-ROM disc may vary. Try playing<br />
back of another disc. Cf. ‘Main features of Blu-ray discs’.<br />
TROUBLE: the default language of the media player menu is not displayed in the subtitles<br />
or not so<strong>und</strong>ed.<br />
SOLUTION: it is possible that this media simply does not contain a so<strong>und</strong> track and subtitles<br />
with support of a specific language. Check these parameters on the disc cover or try<br />
another disc.<br />
TROUBLE: no subtitles displayed.<br />
SOLUTION: it is possible that this media simply does not contain subtitles or they are disabled.<br />
Press Subtitle button several times and select one of subtitles versions, if they are<br />
available on the disc. Check the availability of subtitles on the disc cover or try another disc.<br />
TROUBLE: when playing a program from a BD-ROM the current camera angle does not<br />
change (Angle).<br />
SOLUTION: it is possible that this disc does not support the angle selection. Not all movie<br />
scenes may change the angle. Check the availability of such scenes on the disc cover or<br />
try another disc.<br />
Mediaplayer<br />
TROUBLE: Jerking playback of high bitrate video files, with recurrent hang-up of video<br />
image<br />
SOLUTION: Make sure during playback of high bitrate video files that the player has sufficient<br />
media data reading rate (even with some reserve) of used data storage drive. If<br />
reading rate is insufficient, there will be playback failures. To avoid this kind of failures, it is<br />
advisable to store the file on a drive ensuring best reading rate and playback the file from<br />
this device. Tip: the quickest drive is the internal hard drive of your media player.<br />
● You may find a table of approximate reading rates for different kinds of drives on the<br />
manufacturer’s site<br />
You may evaluate the speed potential of a specific drive<br />
as follows:<br />
Select the file from the file browser, press INFO button on RC and select “Reading check”.<br />
The player will check the file reading and display the information on maximum possible<br />
rate of media data reading from this file. For smooth playback of the file, this rate shall exceed<br />
the maximum file bitrate. In some cases, the reserve may not be sufficient compared<br />
to an average file bitrate.<br />
File bitrate may be evaluated during file playback by the player by pressing the INFO button.<br />
Note: the information on bitrate delivered by the player is very rough and may be erroneous,<br />
that’s why it is advisable to use this function only during a file playback from the drive which<br />
reading rate is a priori sufficient (e.g.: from internal EXT2/EXT3-formatted hard disk).<br />
During file playback by the player, the information box activated with INFO button may display<br />
“Clipboard <strong>und</strong>erflowing: ...”, displaying the duration of time span in seconds during<br />
which <strong>und</strong>errun of input buffer of the decoder took place. If you see this warning, it shall<br />
mean the insufficient reading rate from the drive.<br />
During playback of a file from the built-in EXT2/EXT3-formatted hard drive, the maximum<br />
45
46<br />
possible data transmission rate is reached. It is suggested to copy a problematic file to the<br />
internal hard disk of the player. If during playback from the internal hard disk the the problem<br />
disappers, it’s most probably caused by the insufficient reading rate from the external<br />
resource used earlier.<br />
In the same time, jumps and other playback failures may result from properties of the media<br />
file. For instance, it may be coded so that the player’s decoder does not simply ‘<strong>und</strong>erstand’<br />
it. You may check it easily: if file playback failures happen even when playing<br />
it from the internal hard disk, then the problem is caused by the file itself. It is probable<br />
that with future firmware versions it may be played correctly, but the manufacturer cannot<br />
guarantee it.<br />
TROUBLE: Selected file is not played back, although its format seems to be supported<br />
by the player<br />
SOLUTION: The problem may be due to several causes:<br />
1. File error. To eliminate this factor you may try to play back the file with different software<br />
player installed on your PC. If all of these players warn about the failure, then this file<br />
may not be used.<br />
2. File coding specifics. Although the DUNE player supports the majority of most popular<br />
file formats (containers and codecs), it shall not mean that it will normally play back any<br />
file of these formats encoded by any way. Frequently, these files are made with violation<br />
of certain rules, and although they may be correctly played back with different embedded<br />
PC players, the DUNE player may not do this (since the HW decoder of the player<br />
and/or player software are not designed for playback of such ‘exotic’ files).<br />
3. Player software or hardware limitations or errors. These limitations or errors may be<br />
potentially eliminated in future firmware updates. Please watch for updates.<br />
* If you think that a file is not played back by the player by mistake (or is played back improperly)<br />
and wish to draw attention of program developers, you may inform <strong>HD</strong>I about<br />
it by e-mail. Give as much details as possible about the essence and way of problem<br />
occurrence, as well as about the file: size in bytes, type of container (e.g.: MKV, TS,<br />
AVI), type of video codec (e.g.: MPEG2, H.264, VC1, MPEG4), type of audio codec for<br />
all so<strong>und</strong> tracks (e.g.: AC3, DTS), frame rate (e.g.: 23.976, 24.0, 25.0, 29.97, 30.0),<br />
bitrate (e.g.: 20 Mbit/sec). If possible, give the link for downloading of this file. In case of<br />
availability of such link, the probability of finding the solution rises significantly. In case<br />
of so<strong>und</strong> problems please do not forget to specify the way of connection to the relevant<br />
audio equipment, specific model of your receiving audio equipment and setting values<br />
of the player from the So<strong>und</strong> adjusting section.<br />
TROUBLE: after an attempt to enter the network folder there is a popup: “No access to<br />
network folder”<br />
SOLUTION: several reasons and solutions of this problem are possible<br />
1. Incorrect type of network folder. Rectify by specifying the correct path to the folder.<br />
If you connect to a Windows-operated PC (2000, XP or Vista) and do not know what is a<br />
NFS-server, then specify SMB.<br />
2. Incorrect IP-address (or DNS-name) of the server.<br />
If you use a DNS-name, try to use the IP-address of the server. Make sure that the IPaddress<br />
of the server is correct.<br />
You may find this information on a Windows PC, in network connection properties.<br />
3. Incorrectly adjusted or disabled network connection between the player and the server.
Make sure that the player and the server are duly connected to the network (check connection<br />
of network cables).<br />
Make sure that the player’s network parameters are set correctly (Setup menu, please<br />
check the “Network setting” section).<br />
Enter the player setup menu, System information section, and make sure that the IPaddress<br />
line displays correct check the IP-address and that to the right of the IP-address<br />
it is displayed: “On”.<br />
If you connect to a Windows PC, do the following: firstly, find the IP-address of the player<br />
(cf. setup menu, System information section). Afterwards, on the PC: press Start, Run<br />
and enter in the command line ‘ping IP-address-of-the-player’ (e.g.: ping 10.0.0.3). If<br />
successful transmission of packages is displayed, it shall mean that the network connection<br />
between the player and the Windows PC is correct.<br />
4. Incorrect name of network folder. Make sure that the correct name is entered.<br />
After connection to a Windows PC: name of common access folder may be fo<strong>und</strong> in<br />
folder properties on the PC. Make sure that the server is correctly setup (required folder<br />
is open for common access). Make sure that you may have an access to the common<br />
folder from another PC or other network device.<br />
5. Incorrect user name/password (in case of SMB connection). Make sure that you<br />
enter correct user name and password.<br />
Make sure that you may get access to common folder with specified user name and password<br />
from another PC of network device.<br />
● To change network folder settings: select the network folder in the file browser. Execute the<br />
“Change the network folder” command using the contextual menu. In pop-up dialogbox modify<br />
network folder parameters. Press OK.<br />
● To delete the network folder: select the network folder in file browser. Execute the “Delete the<br />
network folder” command using the contextual menu.<br />
TROUBLE: no access to internal hard disk of the player through the network<br />
SOLUTION: several reasons and solutions of this problem are possible<br />
1. Incorrectly adjusted or disabled network connection between the player and the client<br />
PC.<br />
● Make sure that the player and the client PC are correctly connected to the network<br />
(check the network cable connection).<br />
● Make sure that the network parameters of the player are correct (Cf.: Setup menu, “Network<br />
setting” section).<br />
● Enter the player setup menu, System information section, and make sure that the IPaddress<br />
in the IP-address line is correct, and to the right of the IP-address “On” is indicated.<br />
● If you connect to a Windows PC, do the following: firstly, find the IP-address of the player<br />
(cf. setup menu, “System information” section). Afterwards, on the PC: press Start, Run<br />
and enter in the command line ‘ping IP-address-of-the-player’ (e.g.: ping 10.0.0.3). If<br />
successful transmission of packages is displayed, it shall mean that the network connection<br />
between the player and the Windows PC is correct.<br />
2. Incorrect IP-address of the player.<br />
● Make sure that you enter the IP-address currently assigned to the player. You may find the<br />
IP-address currently assigned in the player Setup menu, “System information” section.<br />
47
12<br />
Optical discs<br />
Processor<br />
DUNE <strong>HD</strong> <strong>Center</strong> specifications<br />
Video file formats<br />
Video compression<br />
algorithms<br />
Audio formats<br />
Digital images<br />
Subtitle formats<br />
System memory<br />
Available picture<br />
modes through <strong>HD</strong>MI<br />
v1.3<br />
Analog video output<br />
Audio output<br />
USB 2.0 ports<br />
LAN connection<br />
Size, mm<br />
Sigma Designs 8634 SoC<br />
RAM: 384 Mb<br />
ROM: 64 Mb (for control microprogramm)<br />
1GB NAND flash<br />
DUNE <strong>HD</strong> <strong>Center</strong> dimensions<br />
BD-ROM, BD-R (RE), DVD-ROM, DVD-R (RW), CD, CD-R (RW)<br />
MKV, MPEG-TS, MPEG-PS, M2TS, VOB, AVI, MOV, MP4, QT, ASF, WMV,<br />
DVD-ISO, VIDEO_TS<br />
MPEG2, MPEG4, DivX, XVID, WMV9, VC1, H.264<br />
DD: AC3 (DD), EAC3 (DD+), Dolby True <strong>HD</strong> [lossless]; DTS: DTS <strong>HD</strong><br />
High Resolution Audio (HRA), DTS <strong>HD</strong> Master Audio (MA) [lossless],<br />
decoding in PCM/analog, Bitstream on <strong>HD</strong>MI1.3.<br />
JPG, PNG, BMP<br />
Plain text, SSA/AAS (MKV containers), SRT (with any supported video<br />
file format), VOB<br />
● 480i, 480p (60 Гц) ● 576i, 576p (50 Гц) ● 720p (50 Гц, 60 Гц)<br />
●1080i (50 Гц, 60 Гц) ●1080p (24 Гц, 25 Гц, 30 Гц, 50 Гц, 60 Гц)<br />
●1024х768, 1280х1024, 1280х768, 1280х960, 1360х768, 1366х768,<br />
1400х1050, 1440х900, 1600х1200, 1680х1050, 1920х1200 (60 Гц)<br />
Component (Y, Pb, Pr), S-Video, composite (CVBS)<br />
D igital: optical Toslink and Сoaxial, analog: 7.1 output and stereo 2RCA<br />
3 x USB Host<br />
LAN Ethernet 100 Mbit/sec Wi-Fi<br />
430mm (width) x 270mm (depth) x 50mm (height)<br />
301,5mm<br />
81,1mm<br />
435,5mm<br />
* Note: Files with specific coding features or specific combinations of containers/codecs may not be<br />
played, or played with limitations or improperly. Follow release of firmware updates (control microprograms).<br />
Firmware update may resolve problems of playback of some files. This procedure may be<br />
made by the user or by a technician of post-sales service center.<br />
** Note: basic modes of music files playback are currently supported (single file playback, M3U and PLS<br />
play lists are supported). More advanced mechanisms will be available in future firmware releases.<br />
*** Note: only very basic mode of picture viewing is currently supported (single picture view only).<br />
More advanced mechanisms, including slide shows, will be available in future firmware releases.<br />
48
http://www.hdi-dune.de<br />
HANTZ + PARTNER<br />
The Upgrade Company! www.hantz.com<br />
Deutschland:<br />
Tel.: 0761 / 59 21 00<br />
Fax: 0761 / 58 52 28<br />
Schweiz:<br />
Tel.: 061 / 27 311 - 31<br />
Fax: 061 / 27 311 - 39<br />
Österreich:<br />
Tel.: 01 / 58 55 430<br />
Fax: 01 / 58 55 460