Installing the HELIX DSP PC-Tool Software
Installing the HELIX DSP PC-Tool Software
Installing the HELIX DSP PC-Tool Software

You also want an ePaper? Increase the reach of your titles
YUMPU automatically turns print PDFs into web optimized ePapers that Google loves.
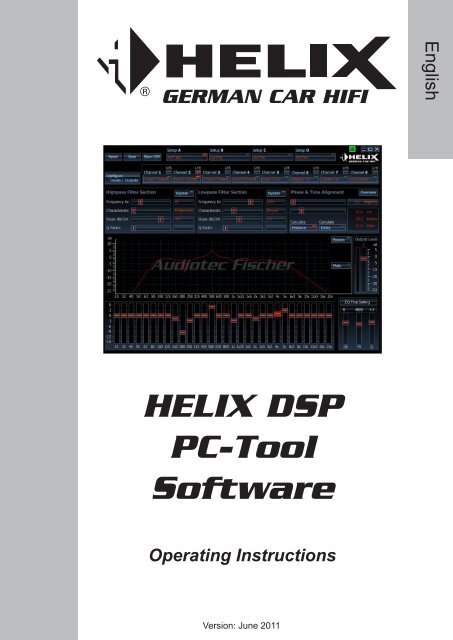
English<br />
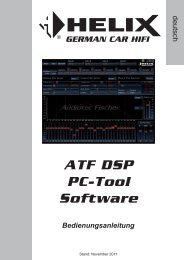
<strong>HELIX</strong> <strong>DSP</strong><br />
<strong>PC</strong>-<strong>Tool</strong><br />
<strong>Software</strong><br />
Operating Instructions<br />
Version: June 2011
Contents<br />
System requirements......................................................................................3<br />
<strong>Installing</strong> <strong>the</strong> <strong>HELIX</strong> <strong>DSP</strong> <strong>PC</strong>-<strong>Tool</strong> <strong>Software</strong>.................................................. 4<br />
Connecting <strong>the</strong> PP50 <strong>DSP</strong> to <strong>the</strong> <strong>PC</strong>.............................................................. 6<br />
Connecting <strong>the</strong> C-<strong>DSP</strong>/P-<strong>DSP</strong> to <strong>the</strong> <strong>PC</strong>........................................................ 7<br />
Starting <strong>the</strong> software.......................................................................................8<br />
Operating controls.........................................................................................10<br />
Description of <strong>the</strong> main navigation menu..........................................................10<br />
Channel selection..........................................................................................12<br />
Linking channels:...............................................................................................12<br />
Channel routing - configuring inputs and outputs..................................... 13<br />
Naming inputs:..................................................................................................13<br />
Naming outputs:................................................................................................14<br />
Default settings of <strong>the</strong> individual channel types:...............................................14<br />
Allocating inputs to outputs:..............................................................................15<br />
High and low-pass filter settings.................................................................. 17<br />
Crossover frequency.........................................................................................17<br />
Filter characteristics..........................................................................................17<br />
Butterworth<br />
Bessel<br />
Linkwitz<br />
Chebyshev<br />
Self-define<br />
Slope.................................................................................................................19<br />
Q-factor.............................................................................................................21<br />
High-pass and low-pass filter bypass function..................................................22<br />
Adjusting <strong>the</strong> output levels...........................................................................23<br />
Adjusting <strong>the</strong> phasing and time alignment.................................................. 24<br />
Adjusting <strong>the</strong> phase...........................................................................................24<br />
Adjusting <strong>the</strong> time alignment.............................................................................25<br />
Adjusting <strong>the</strong> equalizer..................................................................................27<br />
Graphic 1/3 octave equalizer.............................................................................27<br />
PP50 <strong>DSP</strong>: Parametric filter..............................................................................28<br />
P-<strong>DSP</strong>: Graphic equalizer fine adjustment function..........................................29<br />
C-<strong>DSP</strong>: Graphic equalizer fine adjustment function..........................................30<br />
Measuring frequency responses.................................................................. 31<br />
Measuring equipment........................................................................................31<br />
Measuring microphone<br />
Suitable preamplifiers<br />
Suitable measurement signals<br />
Measurement software......................................................................................32<br />
Appropriate car radio settings for taking readings<br />
Frequency response readings...........................................................................34<br />
Important information about <strong>the</strong> PP50 <strong>DSP</strong>......................................................36
System requirements<br />
<strong>PC</strong> system requirements:<br />
• At least 1 GHz processor<br />
• At least 1 GB RAM main memory<br />
• At least 25 MB free hard disk space<br />
• 1 free USB port for connecting <strong>the</strong> <strong>HELIX</strong> Optical & USB Interface<br />
• Screen resolution of at least 1024 x 768 pixels or greater<br />
The software has been tested on <strong>the</strong> following operating systems: Windows XP, Windows Vista<br />
(32 bit) and Windows 7.<br />
PP50 <strong>DSP</strong> system requirements:<br />
• You require <strong>the</strong> <strong>HELIX</strong> Optical & USB Interface (Part No. H424493)<br />
• The relevant SETUP FILE must be installed in <strong>the</strong> PP50 <strong>DSP</strong>File name: “PP50 <strong>DSP</strong> <strong>PC</strong>-<strong>Tool</strong><br />
<strong>Software</strong> Rev X.X.af1”Detailed instructions are provided in <strong>the</strong> PP50 <strong>DSP</strong> user manual.<br />
P-<strong>DSP</strong> system requirements:<br />
• You require <strong>the</strong> supplied USB cable<br />
• The most recent version of <strong>the</strong> SETUP FILE must be installed in <strong>the</strong> P-<strong>DSP</strong>File name: P-<strong>DSP</strong><br />
<strong>PC</strong>-<strong>Tool</strong> <strong>Software</strong> Rev X.X.af1Detailed instructions are provided in <strong>the</strong> P-<strong>DSP</strong> user manual.<br />
Recommended equipment for correct in-vehicle sound measurement:<br />
A device is required to measure frequency responses in order to optimize <strong>the</strong> PP50 <strong>DSP</strong> to your<br />
vehicle. There are now very reasonably priced systems which operate on a <strong>PC</strong>/Notebook/Netbook<br />
and make it affordable for everyone to achieve reliable readings. The following list of components<br />
and software have been tested by us and judged to meet <strong>the</strong> operational requirements.<br />
• Behringer ECM8000 measuring microphone<br />
• T-BONE Micplug USB microphone-USB interface with phantom power<br />
• Praxis measurement software from Liberty Instruments (freeware)<br />
• A music CD containing a pink noise test signal<br />
Fur<strong>the</strong>r information can be found under “Recommended measuring equipment”, “Measuring frequency<br />
responses” and “Operating <strong>the</strong> measurement software”.<br />
3
<strong>Installing</strong> <strong>the</strong> <strong>HELIX</strong> <strong>DSP</strong> <strong>PC</strong>-<strong>Tool</strong> software<br />
In order to use <strong>the</strong> <strong>HELIX</strong> <strong>DSP</strong> <strong>PC</strong>-<strong>Tool</strong> software you must first install it on your <strong>PC</strong> according to<br />
<strong>the</strong> following instructions:<br />
• Important: Ensure that <strong>the</strong> processor and/or USB interface are not yet connected to your<br />
computer. Only connect <strong>the</strong> processor and/or USB interface once <strong>the</strong> software has been successfully<br />
installed on <strong>the</strong> computer!<br />
• Download <strong>the</strong> compressed zip-file “<strong>HELIX</strong> <strong>DSP</strong> <strong>PC</strong>-<strong>Tool</strong>.zip” from <strong>the</strong> Audiotec Fischer website<br />
(www.audiotec-fischer.de) The file can be found under <strong>the</strong> “<strong>PC</strong>-<strong>Tool</strong>” tab.<br />
• This zip-file contains a folder called “<strong>HELIX</strong> <strong>DSP</strong> <strong>PC</strong>-<strong>Tool</strong>”<br />
• Unpack <strong>the</strong> entire folder and save it on your hard driveImportant: This folder must not be saved<br />
to any portable data storage media (e.g. USB stick), but stored on <strong>the</strong> hard drive.<br />
• If <strong>the</strong> folder has been successfully unpacked and saved, you will find it contains <strong>the</strong> following<br />
files, among o<strong>the</strong>rs:<br />
4
• Now double-click on <strong>the</strong> “USB driver.exe” file to install <strong>the</strong> USB communication driver. This<br />
driver must be installed before you start <strong>the</strong> “<strong>HELIX</strong> <strong>DSP</strong> <strong>PC</strong>-<strong>Tool</strong> Rev X.xx.exe” program!The<br />
following window will appear on your <strong>PC</strong> when you install <strong>the</strong> USB driver:<br />
Important information:<br />
If this window does not open, please execute <strong>the</strong> “USB driver.exe” file again.<br />
<strong>Installing</strong> <strong>the</strong> driver itself can take up to 1 minute, depending on <strong>the</strong> <strong>PC</strong>.<br />
• Once <strong>the</strong> driver has been installed, your <strong>PC</strong> is ready to use <strong>the</strong> software.<br />
• You may now connect <strong>the</strong> processor and/or USB interface to a free USB port on your <strong>PC</strong>.<br />
Information on <strong>the</strong> PP50 <strong>DSP</strong>:<br />
The PP50 <strong>DSP</strong> is supplied as standard with operating software (.af1-file) for adjusting <strong>the</strong> <strong>DSP</strong> via<br />
<strong>the</strong> <strong>PC</strong>-<strong>Tool</strong>. This file is located in <strong>the</strong> amplifier’s first memory bank (af1). If communication problems<br />
occur between <strong>the</strong> PP50 <strong>DSP</strong> and <strong>the</strong> interface/<strong>PC</strong>-<strong>Tool</strong>, please install <strong>the</strong> most recent version<br />
of this file. The file can be found under “Download” under <strong>the</strong> <strong>PC</strong>-<strong>Tool</strong> tab on our homepage.<br />
Download <strong>the</strong> latest version of this file and install <strong>the</strong> file via a micro SD card. Detailed instructions<br />
can be found under “<strong>Installing</strong> vehicle-specific setups” in <strong>the</strong> PP50 <strong>DSP</strong> user manual.<br />
Information on <strong>the</strong> P-<strong>DSP</strong>:<br />
The P-<strong>DSP</strong> is supplied as standard with operating software for configuring <strong>the</strong> <strong>DSP</strong> via <strong>the</strong> <strong>PC</strong>-<br />
<strong>Tool</strong>. If communication problems occur between <strong>the</strong> <strong>DSP</strong> and <strong>the</strong> computer, please install <strong>the</strong> most<br />
recent version of this file. The most recent file can be found under Download under <strong>the</strong> <strong>PC</strong>-<strong>Tool</strong><br />
tab on our homepage. Detailed instructions on updating <strong>the</strong> operating software can be found in <strong>the</strong><br />
P-<strong>DSP</strong> user manual under “Updating <strong>the</strong> operating software”.<br />
5
Connecting <strong>the</strong> PP50 <strong>DSP</strong> to <strong>the</strong> <strong>PC</strong><br />
• Connect <strong>the</strong> red connector of <strong>the</strong> <strong>HELIX</strong> Optical & USB Interface to <strong>the</strong> red “CONTROL IN-<br />
PUT” on <strong>the</strong> PP50 <strong>DSP</strong>:<br />
Please note: The interface connector may only be inserted one way<br />
up. Do not attempt to force <strong>the</strong> connector into <strong>the</strong> “CONTROL IN-<br />
PUT” <strong>the</strong> wrong way up.<br />
Connector to<br />
CONTROL INPUT<br />
• Connect <strong>the</strong> <strong>HELIX</strong> Optical & USB Interface USB connector to a free USB port on your <strong>PC</strong>.<br />
• Switch on <strong>the</strong> PP50 <strong>DSP</strong> via your car radio.<br />
6
Connecting <strong>the</strong> C-<strong>DSP</strong>/P-<strong>DSP</strong> to <strong>the</strong> <strong>PC</strong><br />
• Connect <strong>the</strong> P-<strong>DSP</strong> directly to <strong>the</strong> computer using <strong>the</strong> supplied USB cable.Use <strong>the</strong> USB port<br />
on <strong>the</strong> P-<strong>DSP</strong>.<br />
Please note: It is not possible to use <strong>the</strong> <strong>HELIX</strong> USB Interface with this<br />
processor. Only use <strong>the</strong> P-<strong>DSP</strong> USB port to connect to <strong>the</strong> computer.<br />
• Then insert <strong>the</strong> USB cable into a free port on <strong>the</strong> computer.<br />
• Now switch on <strong>the</strong> P-<strong>DSP</strong> via <strong>the</strong> radio or <strong>the</strong> remote input, or via <strong>the</strong> high level input.<br />
7
Starting <strong>the</strong> software<br />
Requirements:<br />
• The software and <strong>the</strong> USB driver have been installed correctly<br />
• The PP50 <strong>DSP</strong> or <strong>the</strong> C-<strong>DSP</strong>/P-<strong>DSP</strong> have been connected correctly to <strong>the</strong> computer<br />
• The most recent version of <strong>the</strong> operating software has been installed on <strong>the</strong> PP50 <strong>DSP</strong> and/or<br />
<strong>the</strong> C-<strong>DSP</strong>/P-<strong>DSP</strong>: instructions can be found in <strong>the</strong> user manual of <strong>the</strong> respective device<br />
In order to start <strong>the</strong> software, please execute <strong>the</strong> <strong>HELIX</strong> <strong>DSP</strong> <strong>PC</strong>-<strong>Tool</strong> Rev 1-XX.exe file.<br />
The following window will <strong>the</strong>n appear on your screen:<br />
Now press <strong>the</strong> “Connect” button. If <strong>the</strong> PP50 <strong>DSP</strong> or <strong>the</strong> C-<strong>DSP</strong>/P-<strong>DSP</strong> has been connected correctly,<br />
<strong>the</strong> program user interface will appear within 5-15 seconds:<br />
8
The following window will appear if <strong>the</strong> PP50 <strong>DSP</strong> or P-<strong>DSP</strong> is not connected correctly or <strong>the</strong> USB<br />
drive is not installed correctly.<br />
You can still start <strong>the</strong> software in demo mode. However, it is not possible to make any adjustments<br />
in demo mode as <strong>the</strong> device is not connected.<br />
If you start in demo mode, you <strong>the</strong>n have <strong>the</strong> option of selecting <strong>the</strong> user interface for <strong>the</strong> specific<br />
device. The user interface will open automatically on selection.<br />
Important information about <strong>the</strong> PP50 <strong>DSP</strong>:<br />
• If you start <strong>the</strong> software in demo mode, it will not recognize any optical and USB interface subsequently<br />
connected. It is <strong>the</strong>n necessary to close <strong>the</strong> program completely and restart it.<br />
• Once <strong>the</strong> PP50 <strong>DSP</strong> has been connected to <strong>the</strong> <strong>PC</strong> via <strong>the</strong> <strong>HELIX</strong> USB Interface, <strong>the</strong> amplifier<br />
will be in <strong>PC</strong> mode, which deactivates various functions such as <strong>the</strong> under voltage detector or<br />
<strong>the</strong> automatic switching on/off using High Level or Remote, for example. This status remains<br />
active until you close <strong>the</strong> software again correctly using <strong>the</strong> “Close” button. It is not enough to<br />
simply break <strong>the</strong> connection between <strong>the</strong> <strong>PC</strong> and <strong>the</strong> PP50 <strong>DSP</strong>. If you do this, <strong>the</strong> amplifier<br />
remains in <strong>DSP</strong> mode for up to an hour and does not switch off, even if you switch off your car<br />
radio!<br />
Important information on <strong>the</strong> P-<strong>DSP</strong><br />
• Once <strong>the</strong> P-<strong>DSP</strong> has been connected to <strong>the</strong> computer and <strong>the</strong> <strong>PC</strong>-<strong>Tool</strong> started, <strong>the</strong> P-<strong>DSP</strong> will<br />
be in <strong>PC</strong> mode. However, it does not remain switched on if <strong>the</strong> remote input signal or high level<br />
signal is switched off. Please ensure that <strong>the</strong>se signals remain switched on during <strong>the</strong> configuration<br />
process.<br />
9
Operating controls<br />
Main navigation menu<br />
Reset button:<br />
The Reset button is used to reset all <strong>the</strong> adjustments made in <strong>the</strong> software. Pressing this button<br />
also resynchronizes <strong>the</strong> connection between <strong>the</strong> device and <strong>the</strong> software.<br />
Important information:<br />
If you accidentally press <strong>the</strong> Reset button while adjusting <strong>the</strong> <strong>DSP</strong> without having saved your setup,<br />
you will loose all your data.<br />
Save button:<br />
Use <strong>the</strong> Save button to save an adjusted setup to a specified location on your <strong>PC</strong>. Clicking on<br />
<strong>the</strong> Save button opens a window which allows you to select <strong>the</strong> location and give <strong>the</strong> setup a file<br />
name. All setups are automatically given <strong>the</strong> file extension .afp. The .afp files contain all <strong>the</strong> <strong>PC</strong>-<br />
<strong>Tool</strong> software settings and may only be opened using this software.<br />
The Save button is also used to save <strong>the</strong> <strong>DSP</strong> settings as a micro SD card file. To use this function,<br />
<strong>the</strong> amplifier/processor must be connected to <strong>the</strong> computer and all <strong>the</strong> specific settings already<br />
adjusted (<strong>the</strong> settings must be saved using <strong>the</strong> “Store <strong>DSP</strong>” button). Then right-click on <strong>the</strong><br />
Save button. A window will now open which allows you to select <strong>the</strong> location. On confirmation, <strong>the</strong><br />
program generates a micro SD card file with <strong>the</strong> file extension .ac1. This process can take up to a<br />
minute!<br />
This file can <strong>the</strong>n be simply installed via <strong>the</strong> micro SD card slot on any of <strong>the</strong> devices of <strong>the</strong> same<br />
type without <strong>the</strong> need for <strong>the</strong> device to be connected to <strong>the</strong> computer.<br />
Please note: It is <strong>the</strong>n no longer possible to open, and <strong>the</strong>refore amend, <strong>the</strong> .ac1 file. We <strong>the</strong>refore<br />
strongly recommend saving <strong>the</strong> settings as .afp files.<br />
Important information:<br />
Saving <strong>the</strong> settings as an .afp file does not save <strong>the</strong>m in <strong>the</strong> actual amplifier. Please use <strong>the</strong> “Store<br />
<strong>DSP</strong>” button for this.<br />
It is not possible to install <strong>the</strong> .afp files directly in <strong>the</strong> amplifier/processor via <strong>the</strong> micro SD card<br />
slot, <strong>the</strong> <strong>PC</strong>-<strong>Tool</strong> must be used instead.<br />
Store <strong>DSP</strong> button:<br />
10<br />
The Store <strong>DSP</strong> button is used to permanently transfer <strong>the</strong> settings you made in <strong>the</strong> <strong>PC</strong> software to<br />
<strong>the</strong> amplifier’s/processor’s internal memory. The amplifier <strong>the</strong>n accesses this setup in its memory<br />
each time it is switched on. The .afp file is also always saved in <strong>the</strong> amplifier/processor and loaded<br />
from <strong>the</strong> device when <strong>the</strong> software opens. Never<strong>the</strong>less, we still recommend that you also always<br />
manually save <strong>the</strong> .afp file on your computer.
Please note: The PP50 <strong>DSP</strong> memory is only able to manage a single setup generated using this<br />
software.<br />
The C-<strong>DSP</strong>/P-<strong>DSP</strong> memory is able to manage two different setups. These can be<br />
selected via <strong>the</strong> software.<br />
Selecting <strong>the</strong> setups A–D:<br />
The <strong>PC</strong>-<strong>Tool</strong> software allows <strong>the</strong> direct comparison of a maximum of four different setups using <strong>the</strong><br />
“Setup A” to “Setup D” buttons. First, load a previously adjusted setup into <strong>the</strong> selected memory by<br />
clicking with <strong>the</strong> right hand mouse button on <strong>the</strong> respective box under “Setup A, ..., D”. This opens<br />
a window in which you can retrieve <strong>the</strong> corresponding .afp file from a chosen location. A setup is<br />
automatically active and audible as soon as it is loaded.<br />
Important information:<br />
The volume is temporarily reduced when switching between <strong>the</strong> various setups<br />
in order to avoid any potential temporary static noise when modifying <strong>the</strong> parameters.<br />
Channel routing - <strong>the</strong> “Configure Inputs/Outputs” button<br />
This button is used to switch to <strong>the</strong> channel routing overview in which you can configure any of <strong>the</strong><br />
inputs and outputs. This allows you to assign names to each of <strong>the</strong> individual channels, to add up<br />
input signals and allocate a specific input signal to each output. To protect <strong>the</strong> connected loudspeaker,<br />
you are also able to load suitable automatic default settings for each of your settings for<br />
each channel, which may, of course, be amended as required.<br />
Please note: The channel routing overview may only be found in <strong>the</strong> <strong>PC</strong>-<strong>Tool</strong> user interface of our<br />
standalone processors. The PP50 <strong>DSP</strong> does not have this function.<br />
Configure <strong>DSP</strong> button:<br />
This button is used to return to <strong>the</strong> main <strong>PC</strong>-<strong>Tool</strong> page from <strong>the</strong> channel routing user interface.<br />
11
Channel selection<br />
Selecting channels for adjustment:<br />
Select <strong>the</strong> channel you want to adjust. To do so, simply click on <strong>the</strong> respective box with <strong>the</strong> left<br />
mouse button. The active channel is indicated by <strong>the</strong> red LED (top front left in <strong>the</strong> example).<br />
The software allows each channel to be adjusted separately. In spite of this, it often makes sense<br />
Linking channels:<br />
to link <strong>the</strong> two front channels, or <strong>the</strong> two rear channels, for example, and <strong>the</strong>refore adjust <strong>the</strong>m<br />
simultaneously. This is particularly recommended for <strong>the</strong> high- and low-pass filters since having<br />
different values for <strong>the</strong> right and left channels should be avoided. Even with <strong>the</strong> equalizer, a separate<br />
adjustment of channels only makes sense if sound optimization is only required for a single<br />
listening position. Simply insert a tick by <strong>the</strong> channels you want to adjust simultaneously (in <strong>the</strong><br />
example above, <strong>the</strong> two front channels)<br />
Important information:<br />
When linking two channels, <strong>the</strong> adjustments made previously to one channel are not automatically<br />
transferred to <strong>the</strong> o<strong>the</strong>r channel. Only those adjustments made after <strong>the</strong> link has been created are<br />
<strong>the</strong>n applied in an identical manner to <strong>the</strong> linked channels. Therefore, please consider whe<strong>the</strong>r two<br />
or more channels should be adjusted simultaneously before making any adjustments.<br />
12
Channel routing - configuring inputs and outputs<br />
The C-<strong>DSP</strong>/P-<strong>DSP</strong> allows input channels to be freely allocated to <strong>the</strong> output channels. To perform<br />
this allocation, click on <strong>the</strong> “Configure Inputs/Outputs” box in <strong>the</strong> <strong>DSP</strong> <strong>PC</strong>-<strong>Tool</strong> main menu once<br />
<strong>the</strong> software starts.<br />
This will <strong>the</strong>n present you with <strong>the</strong> following input mask:<br />
Naming inputs:<br />
On <strong>the</strong> left hand side of this mask you can allocate a name to each of <strong>the</strong> input channels (C-<strong>DSP</strong>:<br />
“A-H” and P-<strong>DSP</strong>: “A-F) to give you <strong>the</strong> best possible overview. Make <strong>the</strong> transfer using <strong>the</strong> right<br />
and left mouse buttons.<br />
The following names may be allocated to <strong>the</strong> input channels:<br />
• Not used (input is muted)<br />
• Front L Fullrange<br />
• Front L Tweeter<br />
• Front L Midrange<br />
• Front L Woofer<br />
• Front R Fullrange<br />
• Front R Tweeter<br />
• Front R Midrange<br />
• Front R Midwoofer<br />
• Rear L Fullrange<br />
• Rear L Tweeter<br />
• Rear L Midwoofer<br />
• Rear R Fullrange<br />
• Rear R Tweeter<br />
• Rear R Midwoofer<br />
• Center Full<br />
• Center Tweeter<br />
• Center Midwoofer<br />
• Subwoofer<br />
Please note:<br />
This setting does not affect <strong>the</strong> functionality. It is merely used as an overview<br />
and helps you to better differentiate between <strong>the</strong> channels.<br />
13
Naming outputs:<br />
Just as with <strong>the</strong> inputs, you are also able to allocate names to <strong>the</strong> outputs “A-H”<br />
on <strong>the</strong> right hand side of <strong>the</strong> input mask. They are selected using <strong>the</strong> right or left<br />
mouse button.<br />
In this case, however, <strong>the</strong> selected configuration does immediately affect <strong>the</strong><br />
default settings of <strong>the</strong> high-pass and low-pass filters in <strong>the</strong> <strong>DSP</strong> main menu. This<br />
<strong>the</strong>refore prevents, for example, a tweeter connected to output A accidentally<br />
being assigned a broad band signal which may damage it. Any unused output<br />
channels should ideally be muted (“Not_used”):<br />
Default settings of individual channel types:<br />
Output channels Default high-pass Default low-pass<br />
Not used<br />
Channel output muted<br />
Front L Fullrange - -<br />
Front L Tweeter 3000 Hz, 12 dB, Butterworth -<br />
Front L Midrange 500 Hz, 12 dB, Butterworth 3000 Hz, 12 dB, Butterworth<br />
Front L Woofer - 3000 Hz, 12 dB, Butterworth<br />
Front R Fullrange - -<br />
Front R Tweeter 3000 Hz, 12 dB, Butterworth -<br />
Front R Midrange 500 Hz, 12 dB, Butterworth 3000 Hz, 12 dB, Butterworth<br />
Front R Woofer - 3000 Hz, 12 dB, Butterworth<br />
Center Fullrange 200 Hz, 12 dB, Butterworth -<br />
Center Tweeter 3000 Hz, 12 dB, Butterworth -<br />
Center Woofer - 3000 Hz, 12 dB, Butterworth<br />
Rear L Fullrange - -<br />
Rear L Tweeter 3000 Hz, 12 dB, Butterworth -<br />
Rear L Midrange 500 Hz, 12 dB, Butterworth 3000 Hz, 12 dB, Butterworth<br />
Rear L Woofer - 3000 Hz, 12 dB, Butterworth<br />
Rear R Fullrange - -<br />
Rear R Tweeter 3000 Hz, 12 dB, Butterworth -<br />
Rear R Midrange 500 Hz, 12 dB, Butterworth 3000 Hz, 12 dB, Butterworth<br />
Rear R Woofer - 3000 Hz, 12 dB, Butterworth<br />
Rear Fill 200 Hz, 12 dB, Butterworth -<br />
Subwoofer 1 - 80 Hz. 24 dB, Butterworth<br />
Subwoofer 2 - 80 Hz. 24 dB, Butterworth<br />
14
Please note:<br />
These default settings may, of course, be modified in <strong>the</strong> <strong>DSP</strong> main menu. They are only used to<br />
protect <strong>the</strong> connected loudspeaker and are not recommendations for correct settings!<br />
Allocating inputs to outputs:<br />
In <strong>the</strong> center of <strong>the</strong> input mask, you can allocate any of <strong>the</strong> input signals to each of <strong>the</strong> eight outputs<br />
A-H. You can also use ei<strong>the</strong>r <strong>the</strong> right or left mouse button to make this selection:<br />
Important information:<br />
In order to reach <strong>the</strong> maximum level on each output, it is important that each of <strong>the</strong> output<br />
channels always (!) equals <strong>the</strong> sum of four input signals. If you only select one input signal<br />
per output, <strong>the</strong> maximum possible output level is reduced by about 12 dB.<br />
General information about <strong>the</strong> input/output configuration:<br />
• You do not have to use all <strong>the</strong> P-<strong>DSP</strong> inputs. It is entirely possible to generate all eight output<br />
channels from only two input channels.<br />
• We recommend setting all unused inputs and outputs to “Not_used”.<br />
• Each output channel should always equal <strong>the</strong> sum of four input signals. This means that all<br />
fields required for <strong>the</strong> sum signal must be completed, even if <strong>the</strong>y are always filled with <strong>the</strong><br />
same signal. If this is not <strong>the</strong> case, <strong>the</strong>re will be a significant drop in output.<br />
15
The following examples are provided as way of clarification:<br />
a) If, for example, Output A “Front L Full” is allocated to Input A “Front L Full”,<br />
<strong>the</strong>n please select “Front Full L” in all four entry fields.<br />
CORRECT:<br />
INCORRECT:<br />
b) If, for example, a sum signal is generated for <strong>the</strong> subwoofer from four channels front and<br />
rear, <strong>the</strong> following setting is useful:<br />
c) If, for example, a front-center signal is generated from <strong>the</strong> two front channels,<br />
<strong>the</strong> following setting is useful:<br />
d) If you are only using <strong>the</strong> optical digital inputs, for example, <strong>the</strong> following setting would be<br />
suitable for a multiple channel configuration with a central loudspeaker and subwoofer:<br />
16
High- and low-pass filter settings<br />
This section makes it possible to configure almost any type of high-pass and low-pass filter for <strong>the</strong><br />
selected channel. When doing so, <strong>the</strong> following parameters are adjusted separately: crossover<br />
frequency, filter characteristics, slope and <strong>the</strong> Q-factor.<br />
The functions of <strong>the</strong> individual parameters are described below.<br />
Crossover frequency (Frequency)<br />
Use <strong>the</strong> slide control to select <strong>the</strong> required crossover frequency for <strong>the</strong> high-pass or<br />
low-pass filter.<br />
PP50 <strong>DSP</strong>: It is possible to adjust <strong>the</strong> front and rear channels in 1/6-octave increments from 20<br />
Hz to 20,480 Hz. The subwoofer channel high-pass may be adjusted between 20 Hz<br />
and 100 Hz and <strong>the</strong> low-pass from 20 Hz to 150 Hz in increments of 1 Hz.<br />
P-<strong>DSP</strong>: It is possible to adjust <strong>the</strong> full-range channels in 1/12-octave increments between 20<br />
Hz and 20,480 Hz. The high-pass may be adjusted between 20 Hz and100 Hz and<br />
<strong>the</strong> low-pass between 20 Hz and 150 Hz in increments of 1Hz.<br />
C-<strong>DSP</strong>: It is possible to adjust <strong>the</strong> full-range channels in 1/24-octave increments between 20<br />
Hz and 20,480 Hz. The high-pass may be adjusted between 20 Hz and100 Hz and<br />
<strong>the</strong> low-pass between 20 Hz and 150 Hz in increments of 1Hz.<br />
Filter characteristics (characteristics)<br />
There are four different filter characteristics available for selection and <strong>the</strong> option setting your own<br />
high-pass and low-pass filter using “Self-Define”. The table presents an overview of <strong>the</strong> typical properties<br />
of <strong>the</strong> different filter characteristics:<br />
Butterworth<br />
• Regular impulse behavior<br />
• Sharp transition from <strong>the</strong> passband to <strong>the</strong> stopband<br />
• 3 dB gain in <strong>the</strong> crossover frequency band<br />
• The most popular characteristics, suitable for almost all applications<br />
Bessel<br />
• Very good impulse behavior<br />
• Very gradual transition from <strong>the</strong> passband to <strong>the</strong> stopband<br />
• Requires loudspeakers that also have a smooth frequency response outside <strong>the</strong> functional<br />
range<br />
• Less than 1 dB gain in <strong>the</strong> crossover frequency<br />
17
• Only practical in combination with very high quality loudspeaker systems; not recommended for<br />
subwoofers<br />
Linkwitz<br />
• Very good impulse behavior<br />
• No steep transition from <strong>the</strong> passband to <strong>the</strong> stopband<br />
• No gain at <strong>the</strong> crossover frequency<br />
• Only useful in combination with very high quality loudspeaker systems; not particularly recommended<br />
for subwoofers<br />
Chebyshev<br />
• Very sharp transition from <strong>the</strong> passband to <strong>the</strong> stopband<br />
• Poor impulse behavior<br />
• Frequency response exhibits waviness (1 dB “ripple”)<br />
• Only recommended as a low-pass for subwoofer or as a high-pass as required for tweeters<br />
which are operated near to <strong>the</strong>ir resonance frequency<br />
Self-Define<br />
• Only available as a 12 dB filter, with adjustable filter values<br />
• Useful as a high-pass filter in so-called “filtered bass reflex systems”, whereby <strong>the</strong> crossover<br />
frequency usually corresponds to <strong>the</strong> tuning frequency of <strong>the</strong> bass reflex tunnel<br />
Examples of <strong>the</strong> different filter characteristics are presented for a 1000 Hz high- and low-pass filter<br />
with a slope of 24 dB.<br />
Fig. 1:<br />
Filter characteristics of <strong>the</strong> high-pass<br />
18
Fig. 2:<br />
Low-pass filter characteristics<br />
Slope<br />
Use this slide control to adjust <strong>the</strong> slope of <strong>the</strong> filter in 6 dB increments from “0 dB” per octave<br />
(filter not active) to a maximum of “-42 dB” per octave on <strong>the</strong> C-<strong>DSP</strong> and a maximum of 30 dB per<br />
octave on <strong>the</strong> P-<strong>DSP</strong> (= filter with very steep slope). The effect of <strong>the</strong> slope on <strong>the</strong> frequency characteristics<br />
of a filter is illustrated below using <strong>the</strong> example of a 1000 Hz high- and low-pass (with<br />
Butterworth characteristic):<br />
Fig. 3:<br />
Effect of slope on <strong>the</strong> high-pass<br />
19
Fig. 4:<br />
Effect of slope on <strong>the</strong> low-pass<br />
The value you select for <strong>the</strong> slope depends heavily on <strong>the</strong> type of application.<br />
The following points may aid your decision:<br />
• The steeper <strong>the</strong> slope, <strong>the</strong> worse <strong>the</strong> filter impulse behavior.<br />
• The preferred level for <strong>the</strong> subwoofer channel low-pass filter is “-24 dB”.<br />
• Standard values for <strong>the</strong> crossover between <strong>the</strong> woofer and <strong>the</strong> tweeter in fully active systems<br />
lie around “-12 dB”.<br />
• If <strong>the</strong> woofer exhibits considerable lack of clarity in <strong>the</strong> frequency response slightly above <strong>the</strong><br />
set crossover frequency, it may be useful to select a steep slope (e.g. -24 dB per octave) for<br />
<strong>the</strong> low-pass filter.<br />
• A small 19 mm tweeter operated in a fully active system at up to 3000 Hz also requires a steeper<br />
slope (-18 dB to -24 dB) to avoid overloading <strong>the</strong> woofer and causing a considerable distortion<br />
factor.<br />
• In most instances, a high-pass filter for a woofer or subwoofer is sufficiently dimensioned with<br />
“-12 dB” and is only necessary when small loudspeaker systems are used.<br />
• A lower slope steepness of just “-6 dB” in fully active systems is to be used with caution, particularly<br />
with tweeters, and are only useful in combination with a suitably selected crossover<br />
frequency.<br />
Important information:<br />
• If you have selected <strong>the</strong> “Linkwitz” filter characteristics, you are only able to set <strong>the</strong> values to<br />
“-12 dB” and “-24 dB”.<br />
• The “Self-Define” characteristics always has a slope of -12 dB per octave.<br />
20
Q-factor (Q-Factor)<br />
This slide control is only active if you select <strong>the</strong> “Self-Define” characteristics. The slope for this<br />
characteristics setting is fixed at -12 dB and <strong>the</strong>re is <strong>the</strong> option of adjusting <strong>the</strong> Q-factor of <strong>the</strong><br />
high- or low-pass between 0.5 and 2.0 in increments of 0.1. The Q-factor effect is illustrated below<br />
using <strong>the</strong> example of a high- and low-pass filter with a crossover frequency of 1000 Hz.<br />
Fig. 5:<br />
Q-factor effect for <strong>the</strong> high-pass<br />
Fig. 6:<br />
Q-factor effect for <strong>the</strong> low-pass<br />
21
Important information about <strong>the</strong> PP50 <strong>DSP</strong>:<br />
If you are using <strong>the</strong> PP50 <strong>DSP</strong> with <strong>the</strong> PP 7E or PP 7S subwoofers,<br />
please adjust <strong>the</strong> subwoofer channel high-pass filter settings as follows:<br />
• Crossover frequency: 49 Hz<br />
• Characteristics: Self-Define<br />
• Q-Factor: 1.5<br />
High- and low-pass filter bypass function<br />
Use <strong>the</strong> bypass button to completely bridge <strong>the</strong> effect of a high- or low-pass filter with a single<br />
push of a button to obtain a simple acoustic comparison “with and without filter”.<br />
Important information:<br />
In fully active systems, do not simply bypass <strong>the</strong> tweeter high-pass filter. Without any frequency<br />
crossover, irreparable damage may be caused even at low volumes! Bridging a low-pass filter, on<br />
<strong>the</strong> o<strong>the</strong>r hand, is generally uncritical and will not result in any damage to <strong>the</strong> loudspeaker.<br />
22
Adjusting <strong>the</strong> output level<br />
The output level of each of <strong>the</strong> channels may be adjusted using <strong>the</strong> “Output level” slide control.<br />
This increments depend on <strong>the</strong> governor setting. The “–10” to “+5 dB” band has increments of<br />
1 dB, <strong>the</strong> “–30 dB” to “-10 dB” band increments of 2 dB and that below “–30 dB” has increments<br />
of 6 dB. The exact value is also indicated on <strong>the</strong> scale next to <strong>the</strong> slide control and as an absolute<br />
value above <strong>the</strong> slide control.<br />
When adjusting <strong>the</strong> slide control, values greater than “0 dB” must be avoided, o<strong>the</strong>rwise <strong>the</strong>re is<br />
a risk of overloading <strong>the</strong> amplifier signal processor. Ensure that <strong>the</strong> red area of <strong>the</strong> level indicator<br />
is never visible at any volume. This may possibly occur if you have used <strong>the</strong> full boost of “+6 dB”<br />
in an equalizer frequency band, for example. The red bar in <strong>the</strong> level indicator is a clear sign that<br />
<strong>the</strong> signal processor is overloaded, which may cause a dramatic and sudden rise in <strong>the</strong> distortion<br />
factor. In contrast to an analog amplifier, which overloads slowly, <strong>the</strong> digital amplifier stages are<br />
comparably very “intolerant”. Digital overmodulation sounds extremely uncomfortable and may<br />
quickly damage <strong>the</strong> connected loudspeaker (tweeter). It is <strong>the</strong>refore preferable to set <strong>the</strong> quietest<br />
channel to “0 dB” and adjust all o<strong>the</strong>r channels downwards accordingly until <strong>the</strong> volume balance<br />
meets your requirements.<br />
Muting an output channel (“Mute”)<br />
The mute button is used to mute <strong>the</strong> output of a channel. Clicking on<br />
this function again takes <strong>the</strong> channel off mute.<br />
Bypassing <strong>the</strong> equalizer and <strong>the</strong> time alignment (“Bypass”)<br />
Activating <strong>the</strong> “Bypass” button on <strong>the</strong> left next to <strong>the</strong> Output Level slide control bypasses<br />
<strong>the</strong> graphic 1/3 octave equalizer, <strong>the</strong> parametric filter, <strong>the</strong> fine-EQ functions and <strong>the</strong> time alignment<br />
settings. The “Bypass” may be removed by clicking on <strong>the</strong> function for a second time.<br />
23
Adjusting <strong>the</strong> phasing and time alignment<br />
Time alignment overview page (“Overview”)<br />
So that you don’t have to constantly switch backwards and forwards between <strong>the</strong> individual channels<br />
when adjusting <strong>the</strong> time alignment and phase, you can use <strong>the</strong> Overview button<br />
to display all <strong>the</strong> channel values simultaneously. This presents you with <strong>the</strong> following display:<br />
24<br />
Use <strong>the</strong> “Back to <strong>DSP</strong> Menu” button located in <strong>the</strong> top left hand corner to return to <strong>the</strong> previous<br />
display.<br />
Adjusting <strong>the</strong> phase<br />
The phase position of each of <strong>the</strong> front and rear channels can be switched between 0 and 180<br />
degrees.<br />
Regulation of <strong>the</strong> subwoofer channel phase is particularly sensitive and may be adjusted between<br />
0 and 360 degrees in increments of 22.5 degrees. This makes it possible to acoustically adjust <strong>the</strong><br />
subwoofer precisely to <strong>the</strong> front and rear channels.
Adjusting <strong>the</strong> time alignment (“Time Alignment”)<br />
It is only possible to achieve a clean natural response of <strong>the</strong> music if <strong>the</strong> time alignment is adjusted<br />
correctly. The program <strong>the</strong>refore allows sensitive adjustments in increments of 7 mm.<br />
The software provides two different ways of adjusting <strong>the</strong> time alignment:<br />
• “Calculate Distance”: This mode requires <strong>the</strong> input of <strong>the</strong> distance between <strong>the</strong> loudspeaker<br />
and<br />
<strong>the</strong> ear of <strong>the</strong> listener. The program uses this to calculate <strong>the</strong> necessa<br />
ry time delay for each channel.<br />
• “Calculate Delay”: This mode requires <strong>the</strong> direct input of <strong>the</strong> preferred time delay value<br />
if available.<br />
The optimum setting is most easily calculated using <strong>the</strong> “Calculate Distance” mode as follows:<br />
• Use a tape measure to measure in centimeters <strong>the</strong> distance between <strong>the</strong> front left loudspeaker<br />
and your head in your sitting/listening position.<br />
• Adjust this value using <strong>the</strong> slide control.<br />
• Repeat <strong>the</strong>se steps for each of <strong>the</strong> o<strong>the</strong>r channels.<br />
• The program uses <strong>the</strong>se distances to calculate <strong>the</strong> required time delay for each of <strong>the</strong> channels<br />
and displays <strong>the</strong>se values accordingly in “msec”. This prevents a delay on <strong>the</strong> loudspeaker<br />
fur<strong>the</strong>st from <strong>the</strong> listening position (usually <strong>the</strong> subwoofer channel), whereas <strong>the</strong> loudspeaker<br />
closest to <strong>the</strong> listener usually experiences a delay.<br />
• It is not necessary to measure/adjust <strong>the</strong> values as accurately as possible as <strong>the</strong>y merely serve<br />
as initial values for <strong>the</strong> fine adjustment.<br />
• Now mute <strong>the</strong> rear channels and <strong>the</strong> subwoofer using <strong>the</strong> “Mute” function.<br />
• Select a piece of music which preferably consists of only a voice and no accompanying instruments.<br />
• In small increments, adjust <strong>the</strong> time alignment of one of <strong>the</strong> front loudspeakers until you can<br />
hear <strong>the</strong> voice ei<strong>the</strong>r directly from <strong>the</strong> front, or slightly from <strong>the</strong> right (1 o’clock position). It is<br />
usually only necessary to regulate <strong>the</strong> time alignment by only a few centimeters to reach <strong>the</strong><br />
desired result.<br />
• Now mute <strong>the</strong> front channels using <strong>the</strong> “Mute” function and reactivate <strong>the</strong> rear channels.<br />
• Listen to <strong>the</strong> same piece of music again and adjust <strong>the</strong> time alignment of <strong>the</strong> rear channels so<br />
that <strong>the</strong> voice can be heard from directly behind you, or slightly from <strong>the</strong> right (5 o’clock position).<br />
• Reactivate <strong>the</strong> front channels (keeping <strong>the</strong> subwoofer channel muted as before).<br />
• PP50 <strong>DSP</strong>: The PP50 <strong>DSP</strong> also has <strong>the</strong> option of using <strong>the</strong> “Additional Delta Delay Front/Rear”<br />
slide control to shift <strong>the</strong> rear channels backwards until it is almost impossible to hear <strong>the</strong>m or<br />
<strong>the</strong>y no longer have any negative effect on <strong>the</strong> natural response of <strong>the</strong> front loudspeaker.<br />
• It is not usually necessary to adjust <strong>the</strong> time alignment of <strong>the</strong> subwoofer following <strong>the</strong> “tape<br />
measure method”. Setting <strong>the</strong> phase control is particularly effective in this respect.<br />
• This completes <strong>the</strong> adjustment of <strong>the</strong> time alignment.<br />
25
26<br />
Important information:<br />
• The time alignment function may only be used to achieve optimum stereo reproduction for one<br />
listening position in <strong>the</strong> vehicle. However, spatial reproduction in <strong>the</strong> o<strong>the</strong>r positions is usually<br />
worse with time alignment!<br />
• Always switch on <strong>the</strong> time alignment before you adjust <strong>the</strong> frequency response with <strong>the</strong> equalizer.
Adjusting <strong>the</strong> equalizer<br />
Graphic 1/3 octave equalizer<br />
Each of <strong>the</strong> <strong>DSP</strong> channels has its own equalizer which affects <strong>the</strong> frequency response in high<br />
resolution 1/3-octave increments. The front and rear channels <strong>the</strong>refore have 30 slide controls<br />
for <strong>the</strong> bands between 25 Hz and 20 kHz. The subwoofer channel has 10 bands from 25 Hz to<br />
200 Hz. The curve displayed above <strong>the</strong> slide control indicates <strong>the</strong> function of <strong>the</strong> equalizer.<br />
The frequency bands have been subdivided into 1/3 octave internals because this is particularly<br />
suited to human hearing and makes it easy to adjust <strong>the</strong> equalizer if <strong>the</strong> frequency response is<br />
also measured in <strong>the</strong> same 1/3 octave resolution (please also refer to <strong>the</strong> chapter “Measuring frequency<br />
responses”).<br />
Each band of <strong>the</strong> equalizer allows a maximum boost of “+6 dB” and a maximum cut of “-18 dB”.<br />
This asymmetrical design was chosen because<br />
boost levels of more than “+6 dB” are rarely required. Any stronger, narrow band frequency dips<br />
measured in <strong>the</strong> frequency response are usually due to signal cancellations caused by <strong>the</strong><br />
phase shifts which may not be eliminated by <strong>the</strong> equalizer, even with greater boost levels. Experience<br />
shows that attention should be paid to <strong>the</strong> elimination of excess gain in <strong>the</strong> frequency response<br />
when adjusting it. Hearing is considerably more sensitive to narrow band excess gain than<br />
to narrow band frequency dips. You can read more about adjusting <strong>the</strong> equalizer in <strong>the</strong> chapter<br />
entitled “Measuring frequency responses”.<br />
27
PP50 <strong>DSP</strong>: Parametric filter<br />
In addition <strong>the</strong> graphic 1/3 octave equalizer, <strong>the</strong> PP50 <strong>DSP</strong> also has one parametric filter for each<br />
channel which may be used to make even finer acoustic adjustments. This filter is intended exclusively<br />
for compensating excess gain in <strong>the</strong> frequency response (range: 0 to -30 dB). This prevents<br />
any boosts and <strong>the</strong>refore eliminates any dips in <strong>the</strong> frequency response.<br />
A parametric filter is typically used for <strong>the</strong> narrow band resonance of a door panel, for example,<br />
which cannot be eliminated with <strong>the</strong> 1/3 octave equalizer. The center frequency of <strong>the</strong> parametric<br />
filter may be precisely adjusted using <strong>the</strong> “Hz” slide control in 1/6-octave increments, and for <strong>the</strong><br />
subwoofer channel in 1/12-octave increments; <strong>the</strong> corresponding value is displayed above <strong>the</strong><br />
slide control.<br />
The following diagram illustrates <strong>the</strong>ir function:<br />
28
The “Q” slide control is used to adjust <strong>the</strong> bandwidth of <strong>the</strong> frequency cut. A low Q-factor equates<br />
to a broad band reduction, while a high Q-value equates to a particularly narrow band cuts. The<br />
effect of <strong>the</strong> “Q” control is illustrated in <strong>the</strong> following diagram:<br />
P-<strong>DSP</strong>: Graphic equalizer fine adjustment function<br />
The FineEQ function is used to precisely adjust <strong>the</strong> 1/3 octave equalizer and provides a similar<br />
function to <strong>the</strong> parametric filter of <strong>the</strong> PP50 <strong>DSP</strong>. The FineEQ function makes it possible to adjust<br />
each of <strong>the</strong> 30 bands of each channel even more accurately. Therefore, both <strong>the</strong> center frequency<br />
and <strong>the</strong> Q-factor of each band may be adjusted with great precision. To finely adjust <strong>the</strong> selected<br />
band, click with <strong>the</strong> mouse on <strong>the</strong> level control of <strong>the</strong> specific band. This should turn red. On <strong>the</strong><br />
right hand side in <strong>the</strong> “EQ Fine Setting” area, you can now adjust <strong>the</strong> center frequency of <strong>the</strong> band<br />
up and down. This adjustment is made in 1/12-octave increments. The quality (Q-factor) of each<br />
band may also be adjusted. The default value for each band is 4.3. In this respect, <strong>the</strong> P-<strong>DSP</strong><br />
provides <strong>the</strong> option of adjusting a frequency cut or boost with a narrower band width. This function<br />
mainly serves to eliminate specific individual problems in <strong>the</strong> frequency response.<br />
29
C-<strong>DSP</strong>: Graphic equalizer fine adjustment function<br />
The C-<strong>DSP</strong> also has a fine adjustment function for each individual band in <strong>the</strong> 1/3 octave equalizer.<br />
Its functionality is identical to that of <strong>the</strong> P-<strong>DSP</strong>, although <strong>the</strong> setting options are significantly<br />
more comprehensive. This makes it possible to adjust <strong>the</strong> central frequencies of each of <strong>the</strong> bands<br />
of <strong>the</strong> C-<strong>DSP</strong> by increments of 1/24 octaves which allows almost any frequency to be selected as<br />
required. The Q-factor setting also has an extended range of possible values. The adjustment range<br />
lies between 0.5 and 15, whereby <strong>the</strong> individual bands may be adjusted more broadly in comparison<br />
to <strong>the</strong> P-<strong>DSP</strong>. This function <strong>the</strong>refore offers almost <strong>the</strong> same setting options as a purely<br />
parametric equalizer.<br />
30
Measuring frequency responses<br />
To optimally adjust setting of <strong>the</strong> equalizer using <strong>the</strong> “<strong>HELIX</strong> <strong>DSP</strong> <strong>PC</strong>-<strong>Tool</strong>” it is absolutely necessary<br />
to be able to measure <strong>the</strong> frequency responses of <strong>the</strong> loudspeakers in your vehicle. Even<br />
absolute professionals are unable to make perfect adjustments using <strong>the</strong>ir hearing alone.<br />
Thankfully, good measuring equipment is now affordable and is definitely worth <strong>the</strong> investment.<br />
Measuring equipment<br />
The following list of necessary components and software have been tested by us and judged to<br />
meet <strong>the</strong> operational requirements.<br />
• Behringer ECM8000 measuring microphone<br />
• T-BONE Micplug USB microphone USB interface with phantom power<br />
• Praxis measurement software from Liberty Instruments - free to download from www.libinst.<br />
com/praxis_downloads.htm<br />
• A music CD containing a pink noise test signal<br />
Measuring microphone<br />
The Behringer ECM8000 is a very robust and linear measuring microphone with omnidirectional<br />
characteristics. In comparison to considerably more expensive microphones, it also provides perfectly<br />
sufficient results for this application. The supplied wind deflector should not be used when<br />
taking measurements. It always requires a preamplifier which supplies <strong>the</strong> microphone with <strong>the</strong><br />
necessary voltage (“phantom power”). There is <strong>the</strong>refore no need for a direct connection to a <strong>PC</strong><br />
sound card.<br />
Suitable preamplifiers<br />
A microphone preamplifier with phantom power is required for <strong>the</strong> measuring microphone to<br />
function with <strong>the</strong> <strong>PC</strong>. This function can be performed by <strong>the</strong> T-Bone MICPLUG USB, for example.<br />
It is simply attached to <strong>the</strong> measuring microphone and connected directly to <strong>the</strong> <strong>PC</strong> using <strong>the</strong><br />
(unfortunately very short) USB cable supplied. There is no need for a specific driver. If <strong>the</strong> USB<br />
connecting cable is too short, we recommend using an additional XLR microphone cable to connect<br />
<strong>the</strong> microphone and <strong>the</strong> preamplifier. When using <strong>the</strong> MICPLUG USB, ensure that <strong>the</strong> phantom<br />
power has been activated using <strong>the</strong> small button on <strong>the</strong> underside. This is easy to spot as <strong>the</strong><br />
transparent ring on <strong>the</strong> preamplifier changes color from blue to red (this requires that it is already<br />
connected to <strong>the</strong> <strong>PC</strong>).<br />
Suitable measurement signals<br />
So-called “pink noise” is used as a measurement test signal and must be reproduced by <strong>the</strong> car<br />
radio. This is <strong>the</strong> only means of ensuring that <strong>the</strong> equalization in many factory-installed radios (in<br />
this instance, <strong>the</strong> sound control which is not accessible to <strong>the</strong> user) is taken into consideration<br />
during <strong>the</strong> reading.<br />
If you don’t have <strong>the</strong> CD with a “pink noise” test signal, you can download it from <strong>the</strong> Audiotec<br />
Fischer website under “Downloads”, “<strong>Tool</strong>s”.<br />
If you want to burn <strong>the</strong> track onto a CD, please use <strong>the</strong> “Rosa Rauschen.cda” file („Rosa Rauschen“<br />
is <strong>the</strong> German term for pink noise). If your car radio can also play music directly from a<br />
USB stick, select ei<strong>the</strong>r <strong>the</strong> uncompressed WAV format “Rosa Rauschen.wav” or <strong>the</strong> MP3 format<br />
31
“Rosa Rauschen.mp3” and copy <strong>the</strong>m to <strong>the</strong> USB memory.<br />
We recommend creating a CD of <strong>the</strong> test signal if possible.<br />
Appropriate car radio settings for taking readings<br />
To take readings it is important that your car radio is set up correctly. All sound controls should be<br />
set to ei<strong>the</strong>r “linear” or <strong>the</strong> central position. Deactivate any existing loudness functions. The balance<br />
and fade controllers must also be adjusted to <strong>the</strong> “central position”.<br />
Measurement software<br />
For measuring <strong>the</strong> frequency responses, we recommend <strong>the</strong> Praxis measurement software from<br />
Liberty Instruments. This is free to download from www.libinst.com/praxis_downloads.htm<br />
The software offers a considerably greater range of functions than is necessary for measuring frequency<br />
responses. To simplify it, we have <strong>the</strong>refore created a configuration file which performs all<br />
<strong>the</strong> necessary software settings so that you can get on with <strong>the</strong> measurements. This configuration<br />
file is available on <strong>the</strong> Audiotec Fischer website under “<strong>PC</strong>-<strong>Tool</strong>”, “Downloads”. Download <strong>the</strong> “Praxis<br />
Setup ATF.ini” file and save it preferably in <strong>the</strong> same directory where you previously installed<br />
<strong>the</strong> “Praxis” software (usually under C:\Programs\Praxis\).<br />
Also download <strong>the</strong> reference curve which you will use later to help you adjust <strong>the</strong> equalizer.<br />
This is also available on <strong>the</strong> Audiotec Fischer website under “<strong>PC</strong>-<strong>Tool</strong>”, “Downloads” (“Reference<br />
frequency response curve Europe.px2”). This file must be saved in <strong>the</strong> same directory as <strong>the</strong> configuration<br />
file.<br />
Now install <strong>the</strong> configuration file by starting <strong>the</strong> “Praxis” measurement software as follows:<br />
“Config” -> “Load Config File” -> “<strong>Software</strong> specific”<br />
1.<br />
32
2.<br />
This opens a window in which you can select <strong>the</strong> directory where you previously saved <strong>the</strong> “Praxis<br />
Setup ATF.ini” configuration file.<br />
Click with <strong>the</strong> mouse on “Open” to automatically load <strong>the</strong> configuration file, and “LOAD CONFIG”<br />
will be temporarily displayed.<br />
3.<br />
Now you need to adjust <strong>the</strong> microphone you are going to use to take <strong>the</strong> measurements:<br />
“Setup” -> “D/A&A/D” -> “Dev”.<br />
This naturally requires that you have already connected your measuring microphone to a USB port<br />
on your <strong>PC</strong> via <strong>the</strong> preamplifier.<br />
“Praxis” is now ready for <strong>the</strong> frequency response reading.<br />
4.<br />
33
Frequency response readings<br />
• Ensure that you have correctly adjusted <strong>the</strong> time alignment using <strong>the</strong> <strong>HELIX</strong> <strong>DSP</strong> <strong>PC</strong>-<strong>Tool</strong> before<br />
you start <strong>the</strong> measurement.<br />
• Sit in <strong>the</strong> driver’s seat with <strong>the</strong> measuring microphone.<br />
• It is best to place your <strong>PC</strong> (Notebook/Netbook) on <strong>the</strong> passenger seat so that you can use it<br />
easily. Ensure that <strong>the</strong> screen is not positioned directly in front of <strong>the</strong> loudspeaker on <strong>the</strong> passenger<br />
side as this can distort <strong>the</strong> readings.<br />
• Start <strong>the</strong> “pink noise” reproduction on your car radio. Set <strong>the</strong> volume to fully cover any ambient<br />
noise. Ideally, <strong>the</strong> vehicle will be in an enclosed garage while you are taking <strong>the</strong> measurements<br />
so that traffic noise does not affect <strong>the</strong> readings, for example.<br />
• Begin by measuring <strong>the</strong> front loudspeaker system, i.e. initially mute <strong>the</strong> rear loudspeaker and<br />
any connected subwoofer (e.g. using <strong>the</strong> <strong>HELIX</strong> <strong>DSP</strong> <strong>PC</strong>-<strong>Tool</strong> Mute function).<br />
• Hold <strong>the</strong> measuring microphone upright and gradually turn it to a horizontal position in a semicircle<br />
between your left and right ears.<br />
• To start taking readings on your <strong>PC</strong>, press <strong>the</strong> F12 function key. “Praxis” will now start measuring<br />
for approximately 18 seconds.<br />
• You can <strong>the</strong>n identify <strong>the</strong> determined frequency response toge<strong>the</strong>r with <strong>the</strong> red reference curve<br />
on your <strong>PC</strong>.<br />
• Now use <strong>the</strong> <strong>HELIX</strong> <strong>DSP</strong>-<strong>Tool</strong> equalizer to adjust <strong>the</strong> frequency response so that it matches<br />
34
<strong>the</strong> reference curve as closely as possible. This is an iterative process, whereby <strong>the</strong> equalizer<br />
is first adjusted before fur<strong>the</strong>r measurements are taken. However, you will see that <strong>the</strong> desired<br />
result is usually achieved after just a few attempts. Bear in mind that <strong>the</strong> “Praxis” measurement<br />
software is set up so that <strong>the</strong> frequency response is measured in <strong>the</strong> same 1/3 octave intervals<br />
with <strong>the</strong> same center frequencies you set in <strong>the</strong> <strong>HELIX</strong> <strong>DSP</strong> <strong>PC</strong>-<strong>Tool</strong> equalizer.<br />
• We recommend you “link” <strong>the</strong> two front channels so <strong>the</strong> right and left hand front channels can<br />
be adjusted simultaneously. Individually optimizing each channel is only recommended in rare<br />
circumstances. Audiotec Fischer always adjusts <strong>the</strong> vehicle-specific setups of <strong>the</strong> left and right<br />
hand channels in <strong>the</strong> PP50 <strong>DSP</strong> in an identical manner, <strong>the</strong>reby avoiding adjusting <strong>the</strong> channels<br />
separately.<br />
• When adjusting <strong>the</strong> frequency response, avoid large boosts; large cuts pose no problems,<br />
however.<br />
• Do not attempt to balance out deep narrow band dips in <strong>the</strong> frequency response. Such dips are<br />
nearly always caused by out-of-phase signal cancellations and it is not possible to sufficiently<br />
compensate for <strong>the</strong>m. The human ear does not usually perceive <strong>the</strong>se signal cancellations as<br />
disturbances.<br />
• Strong narrow band gain in measured frequency responses should, on <strong>the</strong> o<strong>the</strong>r hand, be<br />
completely eliminated as <strong>the</strong> ear is very sensitive to this. If <strong>the</strong> graphic equalizer is insufficient<br />
for this function, please use <strong>the</strong> additional parametric filter (PP50 <strong>DSP</strong>) or <strong>the</strong> fine adjustment<br />
function (C-<strong>DSP</strong>/P-<strong>DSP</strong>).<br />
• Once you have corrected <strong>the</strong> front channels, mute <strong>the</strong>m and activate <strong>the</strong> rear channels (keep<br />
<strong>the</strong> subwoofer muted as before).<br />
• Now perform <strong>the</strong> measurement process as described in <strong>the</strong> same way for <strong>the</strong> rear loudspeakers.<br />
There are different approaches, however:<br />
• You also measure <strong>the</strong> rear loudspeakers from <strong>the</strong> driver’s seat. This method is only recommended<br />
if <strong>the</strong> vehicle has just two seats, or if you usually only travel alone. The rear loudspeakers<br />
usually sound very unpleasant in <strong>the</strong> rear seats if <strong>the</strong>y have been optimized for <strong>the</strong> driver’s<br />
seat.<br />
• Alternatively, in vehicles with four or more seats, sit in <strong>the</strong> middle in <strong>the</strong> rear to take <strong>the</strong> readings<br />
for <strong>the</strong> rear loudspeakers and adjust <strong>the</strong> settings to achieve a pleasant sound in <strong>the</strong> rear<br />
seats. Audiotec Fischer use this procedure to create <strong>the</strong> vehicle-specific setups for <strong>the</strong> PP50<br />
<strong>DSP</strong>.<br />
• Now reactivate all <strong>the</strong> loudspeakers including <strong>the</strong> subwoofer and take ano<strong>the</strong>r frequency response<br />
reading. The next step is to optimally adjust <strong>the</strong> subwoofer to <strong>the</strong> front/rear loudspeakers.<br />
The equalizer should only be used as <strong>the</strong> last means of adjustment.<br />
Following this adjustment, <strong>the</strong> PP50 <strong>DSP</strong> should have <strong>the</strong> optimum setup for your loudspeaker<br />
system. Do not forget to save this configuration to your <strong>PC</strong> using <strong>the</strong> “Save” button and transfer it<br />
to <strong>the</strong> memory of <strong>the</strong> amplifier using <strong>the</strong> “Store <strong>DSP</strong>” button.<br />
35
Important information about <strong>the</strong> PP50 <strong>DSP</strong><br />
• If you are using <strong>the</strong> PP50 <strong>DSP</strong> with <strong>the</strong> PP 7E or PP 7S subwoofers, please use <strong>the</strong> following<br />
settings for <strong>the</strong> subwoofer channel high-pass filter crossover frequency: 49 Hz characteristics:<br />
Self-Define Q-factor: 1.5<br />
• Begin with a suitable setting for <strong>the</strong> subwoofer channel low-pass filter. A good initial value in<br />
this respect is a crossover frequency of 80 Hz with a slope of -24 dB and a Butterworth characteristics.<br />
• In many cases it is useful to relieve <strong>the</strong> front and rear loudspeakers from low frequencies using<br />
a high-pass filter. The following settings have proven to meet <strong>the</strong> operational requirements for<br />
<strong>the</strong> various loudspeaker sizes (LS): 6x9” or 20 cm LS: high-pass filter –12 dB, Butterworth,<br />
crossover frequency 40 Hz16.5 cm LS:<br />
high-pass filter –12 dB, Butterworth, crossover<br />
frequency 50 Hz13 cm LS:<br />
high-pass filter –12 dB to –18 dB, Butterworth,<br />
crossover frequency 70 Hz 10 cm LS:<br />
high-pass filter -18 dB to –24 dB,<br />
Butterworth, crossover frequency 80-100 Hz<br />
• Now set <strong>the</strong> phase control and <strong>the</strong> output level of <strong>the</strong> subwoofer channel so <strong>the</strong>re is a harmonious<br />
balance between <strong>the</strong> front/rear channels and <strong>the</strong> subwoofer even without <strong>the</strong> help of <strong>the</strong><br />
equalizer.<br />
• If it is not possible to achieve an even frequency response in <strong>the</strong> bass range using <strong>the</strong> settings<br />
given above, you can use <strong>the</strong> equalizer for fur<strong>the</strong>r adjustments in <strong>the</strong> subwoofer channel.<br />
36
Audiotec Fischer GmbH<br />
Gewerbegebiet Lake II · Hünegräben 26 · 57392 Schmallenberg · Germany<br />
Tel.: +49 (0) 2972 9788 0 · Fax: +49 (0) 2972 9788 88<br />
E-mail: helix@audiotec-fischer.com · Internet: www.audiotec-fischer.com<br />
37