Get the most from your monitors with this Genelec Monitor setu - HHb
Get the most from your monitors with this Genelec Monitor setu - HHb
Get the most from your monitors with this Genelec Monitor setu - HHb

You also want an ePaper? Increase the reach of your titles
YUMPU automatically turns print PDFs into web optimized ePapers that Google loves.
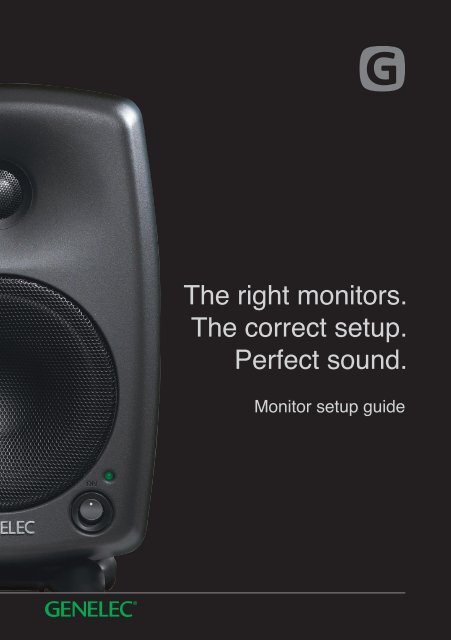
The right <strong>monitors</strong>.<br />
The correct <strong>setu</strong>p.<br />
Perfect sound.<br />
<strong>Monitor</strong> <strong>setu</strong>p guide
Table of contents<br />
<strong>Genelec</strong> key technologies ..................... 3<br />
What is a monitor? ............................. 4<br />
<strong>Monitor</strong>ing ............................................. 5<br />
Basics of system <strong>setu</strong>p ...................... 6<br />
<strong>Monitor</strong> placement ................................ 7<br />
<strong>Monitor</strong> settings ..................................... 11<br />
Subwoofer placement ........................... 12<br />
Room improvements .......................... 14<br />
Room treatments .................................. 15<br />
Acoustic improvements ........................ 18<br />
Fundamentals ..................................... 20<br />
<strong>Genelec</strong> key technologies<br />
Active electronic crossover operating at low signal<br />
levels.<br />
Optimized amplifiers. Each transducer is driven by<br />
its own optimized amplifier.<br />
Protection circuitry. Sophisticated drive unit<br />
protection circuitry for safe operation.<br />
Room response controls. Precise room response<br />
controls for optimizing in-room performance.<br />
Directivity Control Waveguide DCW for flat on- and<br />
off- axis response.<br />
<strong>Monitor</strong> listening distance<br />
recommendations ................................. 25<br />
2<br />
<strong>Monitor</strong> <strong>setu</strong>p guide<br />
3
<strong>Monitor</strong>ing<br />
What is a<br />
monitor?<br />
A person or a device that observes, checks, controls,<br />
warns or keeps continous record of something.<br />
An audio monitor is much more than just a<br />
loudspeaker that sounds good. It is a surveillance<br />
device of <strong>the</strong> process of ei<strong>the</strong>r recording or mixing<br />
or transmitting, or any situation where critical audio<br />
work is performed.<br />
What is a monitor?<br />
What is a<br />
reference<br />
monitor?<br />
Add <strong>the</strong> word reference to <strong>the</strong> word monitor and we<br />
get <strong>the</strong> reference monitor. What does it take for a<br />
monitor to become a reference monitor? It needs to<br />
be reliable and well known but also we need to know<br />
<strong>the</strong> frequency response at <strong>the</strong> listening position<br />
so that we are able to calibrate <strong>the</strong> monitor as flat<br />
as possible. Only <strong>the</strong>n we can call it a reference<br />
monitor.<br />
Select <strong>the</strong> right <strong>Genelec</strong> monitor to serve as a<br />
perfect tool for <strong>your</strong> situation at<br />
www.genelec.com/learning-center/speaker-selection<br />
4 What is a monitor?<br />
<strong>Monitor</strong> <strong>setu</strong>p guide<br />
5
<strong>Monitor</strong> placement<br />
Step 1<br />
Identify <strong>your</strong> listening<br />
L<br />
R<br />
area. Try to have<br />
60°<br />
<strong>the</strong> listening position<br />
<strong>with</strong>in <strong>the</strong> front 1/3<br />
of <strong>the</strong> room. Place<br />
<strong>the</strong> <strong>monitors</strong> in 60°<br />
angle and point <strong>the</strong>m<br />
towards <strong>the</strong> listening<br />
position.<br />
Step 1<br />
Step 2<br />
Avoid listening position<br />
L<br />
R<br />
Basics of system <strong>setu</strong>p.<br />
closer than 1 m <strong>from</strong><br />
any wall.<br />
60°<br />
Step 3<br />
Find <strong>the</strong> left-right<br />
symmetry axis of <strong>your</strong><br />
room. Establish <strong>the</strong><br />
symmetrical listening<br />
›1 m<br />
position.<br />
Step 2<br />
Step 4<br />
Every monitor has a listening distance<br />
recommendation. Place <strong>the</strong> monitor accordingly.<br />
(see page 25 et seq.).<br />
6 Basics of system <strong>setu</strong>p.<br />
<strong>Monitor</strong> <strong>setu</strong>p guide<br />
7
Step 5<br />
Avoid placing <strong>the</strong> <strong>monitors</strong> between 1-2.2 m <strong>from</strong> <strong>the</strong><br />
Step 6<br />
A monitor should not be placed closer than 1.2 m<br />
wall due to wall cancellation.<br />
<strong>from</strong> <strong>the</strong> fl oor.<br />
Speaker distance<br />
to <strong>the</strong> front wall<br />
5 cm<br />
OK<br />
1 m<br />
Avoid<br />
OK<br />
2,2 m<br />
1.2 m<br />
When you move <strong>the</strong> speaker closer to <strong>the</strong> wall, <strong>the</strong><br />
cancellation moves higher in frequency range.<br />
Step 7<br />
Point <strong>the</strong> <strong>monitors</strong> towards <strong>your</strong> listening position, do<br />
not tilt more than 15 degrees.<br />
Cancellation<br />
frequency and<br />
wall behind <strong>the</strong><br />
speaker<br />
SPL<br />
Normal listening position height is between 1.2 and<br />
1.4 m.<br />
40 200<br />
f<br />
<strong>Monitor</strong> heights<br />
(ITU-R BS.775-1<br />
standard)<br />
SPL<br />
‹15° ‹15°<br />
1.2-1.4 m<br />
40 200<br />
f<br />
You can easily fi nd <strong>the</strong> cancellation<br />
frequencies <strong>with</strong> <strong>the</strong> <strong>Genelec</strong> AcoustiTape.<br />
Ordercode MAI-0079.<br />
8 Basics of system <strong>setu</strong>p.<br />
<strong>Monitor</strong> <strong>setu</strong>p guide<br />
9
<strong>Monitor</strong> settings<br />
Correct monitor<br />
placement<br />
An ideal 5.1 <strong>setu</strong>p.<br />
L<br />
C<br />
R<br />
Step 1<br />
Set <strong>the</strong> sensitivity control on all speakers clockwise<br />
to full (-6 dBu) to begin <strong>with</strong>.<br />
More information can be found in <strong>the</strong> operating<br />
manual of <strong>your</strong> product.<br />
60°<br />
1110°<br />
Input sensitivity<br />
control<br />
SENSITIVITY FOR<br />
100 dB SPL @ 1 m<br />
+3<br />
+6<br />
0<br />
+12 -6<br />
dBu<br />
-3<br />
-4<br />
LS<br />
-10°<br />
RS<br />
+10°<br />
Step 2<br />
If you use an acoustic measurement device like<br />
RoomEQ Wizard, measure ear height at <strong>the</strong> listening<br />
position. Analyse <strong>the</strong> results and adjust DIP-switches<br />
to achieve as fl at and similar frequency response as<br />
possible in each monitor.<br />
ON<br />
OFF<br />
1 2 3 4<br />
Step 3<br />
If you have a large horizontal surface in front of <strong>the</strong><br />
<strong>monitors</strong>, a boost around 160 Hz boost typically<br />
occurs. Some <strong>Genelec</strong> <strong>monitors</strong> have a desktop<br />
control DIP switch, which compensates <strong>the</strong> 160 Hz<br />
boost by -4 dB.<br />
dB<br />
Desktop control<br />
DIP switch<br />
ON<br />
OFF<br />
1 2 3 4<br />
4 dB @ 160 Hz frequency<br />
10 Basics of system <strong>setu</strong>p.<br />
<strong>Monitor</strong> <strong>setu</strong>p guide<br />
11
Subwoofer placement<br />
Step 1<br />
Subwoofer<br />
placement<br />
Finding a subwoofer position can be diffi cult. Try to<br />
fi nd a location between left-center or center-right<br />
area at <strong>the</strong> front wall. Avoid exact center position,<br />
where <strong>the</strong> room modes may cause problems.<br />
possible<br />
subwoofer<br />
placement<br />
L<br />
C<br />
R<br />
possible<br />
subwoofer<br />
placement<br />
Recommended<br />
distance <strong>from</strong><br />
front wall<br />
(<strong>with</strong>out<br />
subwoofer)<br />
5 cm<br />
OK<br />
1 m<br />
Avoid<br />
2.2 m<br />
OK<br />
Speaker and<br />
subwoofer<br />
distance <strong>from</strong> <strong>the</strong><br />
front wall<br />
LS<br />
RS<br />
5 cm 1.1 m 2 m<br />
60 cm<br />
Step 2<br />
Placing <strong>the</strong> subwoofer to a corner or near <strong>the</strong> front<br />
Step 3<br />
Adjust <strong>the</strong> subwoofer phase and level according to<br />
wall boosts <strong>the</strong> bass. Use sensitivity control to<br />
<strong>the</strong> procedure described in <strong>the</strong> operating manual.<br />
compensate <strong>the</strong> bass boost.<br />
A <strong>Genelec</strong> subwoofer reproduces <strong>the</strong> frequencies up<br />
SPL<br />
subwoofer<br />
main speakers<br />
to 85 Hz and <strong>the</strong> <strong>monitors</strong> reproduce <strong>the</strong> frequencies<br />
above 85 Hz. The LFE channel in <strong>the</strong> subwoofer<br />
reproduces frequencies up to 120 Hz.<br />
85 Hz<br />
frequency<br />
12 Basics of system <strong>setu</strong>p.<br />
<strong>Monitor</strong> <strong>setu</strong>p guide<br />
13
Room treatments<br />
Calibration doesn’t necessarily give best results if<br />
<strong>the</strong> room is not acoustically properly treated. Some<br />
improvements can be made quite easily. There<br />
is plenty of information in <strong>the</strong> Internet and many<br />
acoustic professionals to help you out <strong>with</strong> room<br />
issues.<br />
Wall surfaces, ceilings and fl oors can be refl ective,<br />
diffusive or absorptive. Combinations of <strong>the</strong>se are<br />
often used.<br />
Room improvements.<br />
Adjusting <strong>the</strong> listening space<br />
Hard surfaces such as<br />
glass, concrete, dry wall or<br />
MDF refl ect <strong>the</strong> sound.<br />
Soft materials such as rock/<br />
mineral wool, carpets and<br />
curtains absorb <strong>the</strong> sound.<br />
The thicker <strong>the</strong> layer is,<br />
better is <strong>the</strong> absorption.<br />
Diffusion and<br />
absorption<br />
Irregular surfaces such as<br />
diffusers or bookshelves<br />
diffuse and spread <strong>the</strong><br />
sound around.<br />
Combination of diffusive<br />
and absorptive surface.<br />
14 Room improvements.<br />
<strong>Monitor</strong> <strong>setu</strong>p guide<br />
15
Two opposite, parallel surfaces in a room sustain<br />
<strong>the</strong> sound energy bouncing back and forth causing<br />
fl utter echo, standing waves or cancellation dips.<br />
Refl ections can also occur between three or more<br />
surfaces. Optimal acoustic situation is when you<br />
receive a natural direct sound <strong>from</strong> <strong>the</strong> speakers to<br />
<strong>your</strong> listening position (a.k.a. sweet spot) <strong>with</strong>out <strong>the</strong><br />
room refl ections coloring <strong>the</strong> sound and <strong>the</strong> stereo<br />
imaging.<br />
Flutter echo<br />
Multiple<br />
refl ections<br />
L R<br />
16 Room improvements. <strong>Monitor</strong> <strong>setu</strong>p guide<br />
17
Acoustic improvements<br />
Improve <strong>the</strong> acoustics in <strong>your</strong> room by following<br />
<strong>the</strong>se steps:<br />
Step 1<br />
Step 1<br />
Cut <strong>the</strong> corners, use MDF or drywall and fi ll <strong>the</strong><br />
empty space <strong>with</strong> mineral wool.<br />
Step 2<br />
Step 2<br />
Use damping material on <strong>the</strong> front wall surfaces.<br />
Step 3<br />
Step 3<br />
Use damping material on <strong>the</strong> side walls.<br />
Step 4<br />
Step 4<br />
Use diffusive element(s) on <strong>the</strong> back wall. This can<br />
be e.g. a simple bookself.<br />
Step 5<br />
Step 5<br />
Massive layer of damping material at <strong>the</strong> back of <strong>the</strong><br />
room, up to 40-50 cm or more is okay.<br />
Step 6<br />
Step 6<br />
Use damping and diffusive material above <strong>the</strong><br />
listening position.<br />
The picture shows a 5.1 system. The same rules<br />
apply to a stereo <strong>setu</strong>p.<br />
18 Room improvements.<br />
<strong>Monitor</strong> <strong>setu</strong>p guide<br />
19
Sound travels approximately 340 m/s. It takes 3 ms<br />
to travel 1 meter.<br />
Ideally <strong>the</strong> sound volume drops by<br />
6 dB when <strong>the</strong> distance doubles.<br />
1 m 100 dB 0 dB<br />
2 m 94 dB -6 dB<br />
4 m 88 dB -12 dB<br />
Sound volume increases 3 dB<br />
when <strong>the</strong> power doubles.<br />
100 W 85 dB 0 dB<br />
200 W 88 dB +3 dB<br />
400 W 91 dB +6 dB<br />
Industry standard SPL for cinema mixing work is<br />
85 dB at <strong>the</strong> listening position.<br />
Common definitions of Frequency spectra:<br />
Fundamentals.<br />
Basics of sound<br />
Subsonic frequencies 1 Hz - 20 Hz Not audible to<br />
humans.<br />
Very low frequencies 20 Hz - 40 Hz Lowest audible<br />
octave to humans.<br />
Low frequencies 40 Hz - 160 Hz Music low<br />
frequencies, here are<br />
<strong>the</strong> kick drum, bass<br />
and low register of<br />
grand piano.<br />
Middle low<br />
frequencies<br />
160 Hz – 400 Hz Middle C of piano is<br />
here.<br />
Middle frequencies 400 Hz - 2.5 kHz Low-order harmonics<br />
of <strong>most</strong> instruments.<br />
Middle high<br />
frequencies<br />
2.5 kHz - 5 kHz Ear <strong>most</strong> sensitive to<br />
<strong>this</strong> range. Presence,<br />
voice frequencies are<br />
here.<br />
High frequencies 5 kHz - 10 kHz Brightness and<br />
harmonics are here.<br />
Very high frequencies 10 kHz - 20 kHz Highest harmonics<br />
are here.<br />
Large Pipe Organ 16 Hz<br />
20<br />
30<br />
Concert grand piano 29 Hz<br />
5 strings Electric bass 31 Hz<br />
Double bass 40 Hz<br />
Tuba (horn) 45 Hz<br />
40<br />
50<br />
60<br />
70<br />
Guitar 80 Hz<br />
80 90 100<br />
Male fundamental<br />
frequency 120 Hz<br />
200<br />
Female fundamental<br />
frequency 230 Hz<br />
300<br />
400<br />
500<br />
Useful low frequency spectrum extension<br />
20 Fundamentals<br />
<strong>Monitor</strong> <strong>setu</strong>p guide<br />
21
Sound radiation<br />
The monitor radiates omnidirectionally at low<br />
frequencies. At higher frequencies, <strong>the</strong> energy<br />
Wall proximity<br />
gives low<br />
frequency boost<br />
Free fi eld or anechoic chamber<br />
On or in <strong>the</strong> wall<br />
radiated becomes increasingly directional: midrange<br />
frequencies radiate in a hemispherical pattern and<br />
high frequencies in a beam- or ray-like pattern. All<br />
<strong>this</strong> sound energy reflects <strong>from</strong> <strong>the</strong> walls around and<br />
should be controlled.<br />
SPL<br />
SPL<br />
SPL<br />
+6 dB<br />
low frequencies midrange high frequencies<br />
frequency<br />
frequency<br />
frequency<br />
In a corner<br />
frequency<br />
Corner and fl oor<br />
Radiation load<br />
Ideally, free standing monitor has a fl at frequency<br />
response. Placing <strong>the</strong> monitor near <strong>the</strong> wall boosts<br />
<strong>the</strong> low frequencies; one wall up to +6 dB, a two-wall<br />
corner (or wall and desk) up to +12 dB and a twowall<br />
corner <strong>with</strong> fl oor, desk (or even ceiling) boosts<br />
up to +18 dB. <strong>Genelec</strong> speakers come <strong>with</strong> DIP<br />
SPL<br />
+12 dB<br />
SPL<br />
+18 dB<br />
switches which are designed to compensate <strong>this</strong><br />
boundary load effect. (AutoCal in DSP systems.)<br />
frequency<br />
frequency<br />
22 Fundamentals<br />
<strong>Monitor</strong> <strong>setu</strong>p guide<br />
23
Low frequency<br />
boost correction<br />
<strong>Monitor</strong> listening distance<br />
recommendations<br />
SPL<br />
ON<br />
OFF<br />
1 2 3 4<br />
6010A/8020B<br />
8030A/8130A<br />
8040A/8240A<br />
0.5 1 1.5 2 2.5 3 3.5 4 4.5 5 in meter<br />
8050A/8250A<br />
frequency<br />
1032A<br />
8260A<br />
1037C<br />
The ideal situation is to have <strong>the</strong> room, <strong>the</strong> speaker and<br />
<strong>the</strong> listener in a good harmony.<br />
Each room is different and behaves differently when<br />
<strong>the</strong> speaker is placed in <strong>the</strong> room. Speaker calibration<br />
minimizes <strong>the</strong> coloration caused by <strong>the</strong> room. Ideal<br />
calibration results in a fl at frequency response, <strong>with</strong><br />
minimum boosts/bumps, dips/notches or ripples across<br />
entire frequency response.<br />
1038CF/1238CF<br />
1038B/1038BC<br />
1034B/1034BC<br />
1039A<br />
1035B<br />
1036A<br />
0.5 1 1.5 2 2.5 3 3.5 4 4.5 5 in meter<br />
Not recommended<br />
Recommended<br />
Typical listening distance in studio control rooms<br />
Decreasing recommendation<br />
24 Fundamentals<br />
<strong>Monitor</strong> <strong>setu</strong>p guide<br />
25
<strong>Monitor</strong>s<br />
-3 dB LF<br />
extension<br />
SPL short term RMS<br />
@ 1 m *)<br />
Room<br />
volume<br />
up to<br />
Subwoofers<br />
for 2-channel<br />
(Stereo)<br />
Subwoofers<br />
for 5-channel<br />
(Surround)<br />
6010A 73 Hz 93 dB<br />
8020B 66 Hz 95 dB<br />
8030A / 8130A 55 Hz 100 dB<br />
8040A / 8240A 45 Hz 105 dB<br />
8050A / 8250A 35 Hz 110 dB<br />
1032A 40 Hz 113 dB<br />
8260A 26 Hz 113 dB<br />
1037C 35 Hz 116 dB<br />
1038CF / 1238CF 55 Hz 118 dB<br />
1038B 33 Hz 120 dB<br />
1034B 32 Hz 123 dB<br />
1039A 29 Hz 126 dB<br />
1035B 29 Hz 131 dB<br />
1036A 19 Hz 131 dB<br />
55 m 3 5040A 5040A<br />
65 m 3 7050B 7050B<br />
75 m 3 7050B 7060B / 7260A<br />
85 m 3 7060B / 7260A 7070A / 7270A<br />
95 m 3 7070A / 7270A 7071A / 7271A<br />
100 m 3 7070A / 7270A 7071A / 7271A<br />
115 m 3 7071A / 7271A 7071A / 7271A<br />
125 m 3 7071A / 7271A 7073A<br />
125 m 3 7071A / 7271A 7073A<br />
170 m 3 7071A / 7271A 7073A<br />
200 m 3 7073A 2 x 7073A<br />
240 m 3 7073A 2 x 7073A<br />
400 m 3 2 x 7073A 3 x 7073A<br />
400 m 3 2 x 7073A 3 x 7073A<br />
*) Maximum short term sine wave acoustic output on axis in half space, averaged <strong>from</strong><br />
100 Hz to 3 kHz @ 1m<br />
Subwoofers<br />
Frequency<br />
+/-3 dB<br />
SPL short term RMS<br />
@ 1 m<br />
5040A 35 - 85 Hz 96 dB<br />
7050B 25 - 85 Hz 100 dB<br />
7060B / 7260A 19 - 85 / 120 Hz 108 dB<br />
7070A / 7270A 19 - 85 / 120 Hz 112 dB<br />
7071A / 7271A 19 - 85 / 120 Hz 118 dB<br />
7073A 19 - 85 / 120 Hz 124 dB<br />
26 Fundamentals <strong>Monitor</strong> <strong>setu</strong>p guide<br />
27
Notes<br />
Notes
Notes<br />
sound passion
<strong>Genelec</strong> Oy<br />
Olvitie 5 · 74100 Iisalmi · Finland<br />
T +358 17 83 881<br />
F +358 17 81 2267<br />
e-mail: genelec@genelec.com<br />
<strong>Genelec</strong> Document BBAGE084. Copyright <strong>Genelec</strong> Oy 2011.<br />
All data subject to change <strong>with</strong>out prior notice.<br />
www.genelec.com<br />
2011-1