


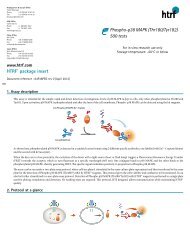
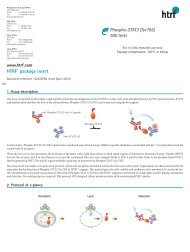
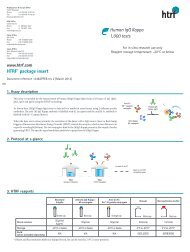
HTRF® package insert Human Interleukin 2 ... - Cisbio Bioassays
HTRF® package insert Human Interleukin 2 ... - Cisbio Bioassays
HTRF® package insert Human Interleukin 2 ... - Cisbio Bioassays

You also want an ePaper? Increase the reach of your titles
YUMPU automatically turns print PDFs into web optimized ePapers that Google loves.
4. Reagent preparation<br />
HTRF® reagent concentrations have been set for optimal assay performances. Note that any dilution or improper use of the d2 and Cryptate-conjugates will impair the assay’s<br />
quality.<br />
For an accurate quantitative determination of sample, dilution must be carried out with the medium used for preparing the samples (i.e. diluent, culture medium or any other<br />
compatible medium).<br />
Standard and conjugates may be frozen and thawed once: to avoid freeze/thaw cycles it is recommended to dispense remaining stock solutions of standard and conjugates into<br />
disposable plastic vials for storage at –60°C or below.<br />
Be careful, working solution preparation may differ between the 1,000 and the 20,000 data point kits.<br />
• Thaw all reagents at room temperature, allow them to warm up (caution: take buffers’ thawing time into account).<br />
• Prepare the working solutions from stock solutions (§3) by following the instructions below.<br />
4.1. Preparation of working solutions of conjugates<br />
Determine the amounts of conjugates needed for the experiment. Each well requires 5µL of each conjugate. In practice:<br />
Anti-(h) IL2-d2 conjugate<br />
Anti-(h) IL2-Eu 3+ -Cryptate- conjugate<br />
1 volume<br />
99 volumes 1 volume<br />
99 volumes<br />
Purple cap<br />
Red cap<br />
Red cap<br />
Red cap<br />
Prepare a 100X diluted solution using the reconstitution buffer: e.g. take 1mL of conjugate stock<br />
solution and add it to 99mL of reconstitution buffer.<br />
Prepare a 100X diluted solution using the reconstitution buffer: e.g. take 1mL of conjugate stock<br />
solution and add it to 99mL of reconstitution buffer.<br />
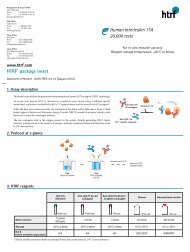
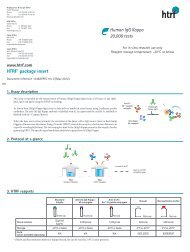
4.2. Standard curve preparation<br />
Determine how many standard levels and replicates will be tested. Each well requires 10µl of standard.<br />
A recommended standard dilution procedure is listed and illustrated below.<br />
Standards Working concentration (pg/mL) Preparation<br />
Std 8 5000 100µl Calibrator stock solution + 200µl diluent<br />
Std 7 2500 100µl Std 8 + 100µl diluent<br />
Std 6 1250 100µl Std 7 + 100µl diluent<br />
Std 5 625 100µl Std 6 + 100µl diluent<br />
Std 4 312.5 100µl Std 5 + 100µl diluent<br />
Std 3 156.2 100µl Std 4 + 100µl diluent<br />
Std 2 78.1 100µl Std 3 + 100µl diluent<br />
Std 1 39 100µl Std 2 + 100µl diluent<br />
Std 0 0 100µl diluent<br />
→ Dilute the standard stock solution 3-fold with diluent; this yields the high standard (Std 8: 5000 pg/mL) for the top of the curve.<br />
In practice:<br />
• e.g. take 100µL of standard stock solution and add it to 200µL of diluent. Mix gently.<br />
→ Use the high standard (Std 8) to prepare the standard curve using 1/2 serial dilutions as follows:<br />
• Dispense 100µL of diluent in each vial from Std 7 to Std 1.<br />
• Add 100µL of standard 8 to 100µL of diluent, mix gently and repeat the 1/2 serial dilution to make standard solutions: 2500, 1250, 625, 312.5, 156.2, 78.1, 39 pg/mL.<br />
This will create 8 standards for the analyte. Std 0 (Positive control) is diluent alone.<br />
Step 1: Dispense diluent into each vial<br />
200µL 100µL 100µL 100µL 100µL 100µL<br />
100µL<br />
100µL 100µL<br />
Step 2: standards dilution<br />
100µL 100µL 100µL 100µL 100µL 100µL 100µL 100µL<br />
Diluent<br />
(white cap)<br />
Std 8 Std 7 Std 6 Std 5 Std 4 Std 3 Std 2 Std 1 Std 0<br />
Standard stock solution<br />
(green cap)<br />
Std 8 Std 7<br />
Std 6 Std 5 Std 4 Std 3 Std 2 Std 1


![HTRF meeting_130426_villa_pour pdf [Mode de compatibilité]](https://img.yumpu.com/22345646/1/190x135/htrf-meeting-130426-villa-pour-pdf-mode-de-compatibilitac.jpg?quality=85)