Sire Active Review
Sire Active Review
Sire Active Review

You also want an ePaper? Increase the reach of your titles
YUMPU automatically turns print PDFs into web optimized ePapers that Google loves.
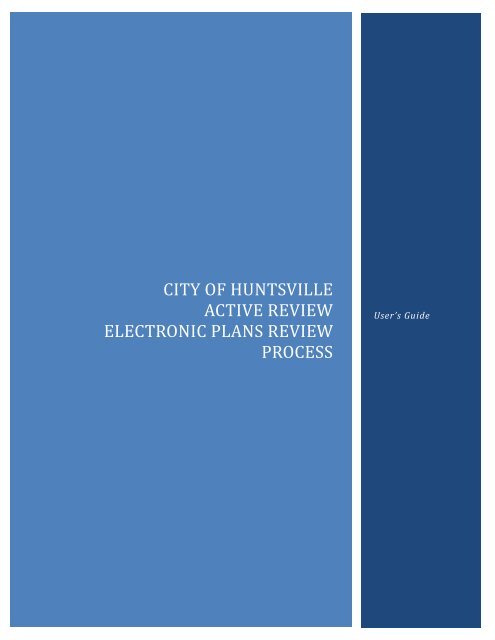
CITY OF HUNTSVILLE<br />
ACTIVE REVIEW<br />
ELECTRONIC PLANS REVIEW<br />
PROCESS<br />
User’s Guide
1<br />
City of Huntsville SIRE ACTIVE REVIEW<br />
Plans <strong>Review</strong> Submittal Process<br />
The <strong>Active</strong> <strong>Review</strong> Web Portal allows applicants to submit documents to The City of Huntsville<br />
for review. Documents can be marked up by Plans <strong>Review</strong>ers and then sent back to the applicant<br />
for more information.<br />
To submit documents, using Internet Explorer, applicants access<br />
http://eplansubmit.huntsvilleal.gov/<strong>Active</strong><strong>Review</strong> a web portal provided by the City of<br />
Huntsville. From the web portal, applicants can create an account; complete forms created by the<br />
City of Huntsville and upload plans for review in the following digital document types<br />
PDF,DWG,DGN,DXF,DOC,DOCX,XLS,XLSX to the City of Huntsville.<br />
Once an applicant has submitted an item for review, they can login to the portal at any time to<br />
check the status of the item. If more information is needed from the applicant, an email is sent to<br />
them requesting their attention to the item.<br />
Within the City of Huntsville, SIRE workflow tools are used by Plans <strong>Review</strong>ers in order to<br />
automate the process. The plans review process is configured based on the guidelines of the City<br />
of Huntsville. Plans <strong>Review</strong>ers have the ability to view submitted documents, markup the<br />
documents should any corrections need to be made; Plans <strong>Review</strong>ers also have the ability to<br />
view document versions side-by-side or as an overlay to validate changes.
2<br />
Using the <strong>Active</strong> <strong>Review</strong> Applicant Portal<br />
Applicants use the <strong>Active</strong> <strong>Review</strong> Web Portal to enter information into forms to which they have<br />
access. Before information can be entered into a form, Applicants must log in to <strong>Active</strong> <strong>Review</strong>:<br />
• <strong>Sire</strong> <strong>Active</strong> <strong>Review</strong> is designed to work with Internet Explorer<br />
• If the Applicant has already established an account, they can enter their email and password in<br />
the appropriate fields in the login window shown below.<br />
• If the Applicant does not have an existing account, they must create one in order to log in, see<br />
below<br />
New Users Start
3<br />
Creating an <strong>Active</strong> <strong>Review</strong> Account<br />
Before an Applicant can log in to <strong>Active</strong> <strong>Review</strong>, they must create an account.<br />
To create an <strong>Active</strong> <strong>Review</strong> account:<br />
1. Click the Click Here to Create an Account link from the <strong>Active</strong> <strong>Review</strong> log in screen. The<br />
Account tab appears.<br />
2. Enter the appropriate information in the required fields (shaded in yellow).
4<br />
3. A passcode must be entered upon completion. This code must be in all capital letters. Note: If the<br />
passcode is not entered correctly, the Applicant will need to enter it AND their password again.<br />
4. Click Save Changes.<br />
• A screen appears indicating that the account was successfully created.<br />
Select the Click Here to Login and Create <strong>Review</strong>s link. The Login screen reappears allowing the<br />
Submitter to login using the user name and password they created.<br />
5. <strong>Active</strong> <strong>Review</strong> opens to the <strong>Review</strong>s tab.<br />
Editing an <strong>Active</strong> <strong>Review</strong> Account<br />
The information contained within an Applicants account can be modified at any time by following the<br />
Steps outlined below.<br />
1. Log into <strong>Active</strong> <strong>Review</strong>.<br />
2. Click on the Account tab next to the <strong>Review</strong>s tab at the top of the page. The Account<br />
page will open displaying all the information for the logged in user.
5<br />
3. Edit any of the fields necessary and press the Save Changes button at the bottom of the page.<br />
You may have to scroll down to see the Save Changes button.<br />
Understanding the <strong>Review</strong>s Tab<br />
The <strong>Review</strong>s tab allows the Applicant to enter information into the Application and/or view<br />
previously submitted Applications or take necessary action on any Application that has been<br />
returned to them.<br />
Filling out an <strong>Active</strong> <strong>Review</strong> Form<br />
1. From the Submit section, Applicant can choose to submit either Commercial or<br />
Residential Building Application.<br />
2. Upon selection, the Application opens. Applicants complete the form as needed,<br />
ensuring that all required fields (shaded in yellow) are populated.<br />
3. At the bottom of the form are some options as shown below. Applicants can<br />
select these options either while they are filling out the form or upon completion.<br />
These options include:<br />
• Finish Later: Applicants can choose this option if they are unable to complete the<br />
form in one sitting. The form is saved and placed in the Saved section on the<br />
<strong>Review</strong>s tab. The Applicant can go back to the form and complete it at any time.<br />
• Spell Check: Applicants can choose this option to perform a spell check on the Application.<br />
• Preview: Applicants can choose this option to preview the Application as it will<br />
be submitted to the site.<br />
• Continue: Applicants can choose this option to submit the Application to the<br />
site. Upon selecting this option, Applicants are provided with the opportunity to<br />
upload documents related to this Application. When the Application has been<br />
submitted, it will appear in the <strong>Active</strong> <strong>Review</strong>s section on the <strong>Review</strong>s Tab.
6<br />
4. After pressing the Continue button the option is available to upload files. To<br />
upload files an Applicant must follow the steps below:<br />
• Click the Select Files link. Navigate to and select all necessary files, on your Computer.<br />
• Press the Start Upload button. A message will appear indicating that either<br />
the upload was successful or unsuccessful.<br />
• Press the Click Here to Finish button to submit the form and all of the attached files.<br />
5. When Applications are fully submitted, they appear in the <strong>Active</strong> <strong>Review</strong>s section of the<br />
<strong>Review</strong>s tab.<br />
Applicants should also receive and Email notification from the City of Huntsville.<br />
<strong>Review</strong>s Tab<br />
A Plans <strong>Review</strong> form that has been submitted for review to the City of Huntsville can be<br />
sent back to the Applicant requesting more information. When a form has been sent<br />
back to the Applicant, a yellow notification bar appears across the top of the <strong>Review</strong>s<br />
tab in <strong>Active</strong> <strong>Review</strong> indicating that you have reviews that need attention.<br />
The Applicant can click the link in the notification bar to open the item(s) they<br />
have for review. From here you have the following options:<br />
• Notes: View any notes entered for this item. If the Applicant has permission,<br />
they can also add notes informing the Plans <strong>Review</strong>er of any action taken on<br />
this item. See the Notes table entry in the “Working with an Item in the<br />
Queue” section.<br />
• Tasks: View any tasks entered for this item. If a file was marked up, that file<br />
also appears in the tasks list. Applicants can either click to mark this task<br />
as in progress or click to mark this task as complete. When Applicants click<br />
the complete icon a dialog box appears asking for a reason. Applicants must<br />
enter a reason and click OK.
7<br />
• Files: Lists any files that were attached to the Application. If a file is new, a<br />
green N icon appears ( ). If a file has been modified, a red C icon ( ) appears.<br />
If a new version has been added, a version number appears in the V column.<br />
• History: Shows a history of the form, from here you can view the date of an<br />
event, who created the event and what the actual event was.<br />
• Application: Displays the filled out form that was previously submitted.<br />
Other Actions in the <strong>Review</strong>s tab include:<br />
Viewing Modified Files<br />
Any modifications made to files appear in the Files or the Tasks list in PDF format.<br />
To view modifications made to files:<br />
1. Select the link for the modified file from the Files or Tasks list (the yellow bar).<br />
The file opens as a PDF, any markups made by the Plans <strong>Review</strong>er are shown<br />
on the file.
8<br />
To upload a modified file:<br />
1. From the <strong>Review</strong>s tab, click the Files option.<br />
2. Select the Revise File link. The Add Files dialog box appears.<br />
3. Click Select Files and select the file you want to upload.<br />
4. Click Start Upload. The file is uploaded and appears in your file list.<br />
5. Click Continue ( ) to send the form with the revised file back to the<br />
City of Huntsville for further review.<br />
6. Click OK to confirm the submission.<br />
Sorting <strong>Active</strong> <strong>Review</strong>s<br />
On the <strong>Review</strong>s tab there are Filters located in the upper right-hand corner that can be used to<br />
find specific reviews by sorting them into categories.
9<br />
1. On the <strong>Review</strong>s tab locate the Filter and press the appropriate icon to sort the<br />
<strong>Active</strong> <strong>Review</strong>s.<br />
The different icons and their functionality are listed in the table below.<br />
Icon<br />
Function<br />
Displays non-cancelled and non-complete reviews.<br />
Displays partially reviewed reviews.<br />
Displays reviews that need information.<br />
Displays reviews that need payment. (Payments are only accepted in the<br />
Inspection Department, 308 Fountain Circle)<br />
Displays cancelled reviews.<br />
Displays completed reviews.<br />
Viewing Recently Added or Accessed <strong>Active</strong> <strong>Review</strong>s<br />
An Applicant can easily locate and view a recently submitted plan by looking in the Recent Panel<br />
located in the upper left-hand corner of the page.<br />
1. Click on the name of the review that is to be viewed in the Recent Panel. The<br />
review will open.
10<br />
Contact Numbers for Help or Information about the <strong>Active</strong> <strong>Review</strong> Electronic Plans<br />
<strong>Review</strong> Process should be directed to the following:<br />
Engineering Related:<br />
David Scroggins Engineering Department david.scroggins@huntsvilleal.gov<br />
256-427-5300<br />
Robbie Stewart Engineering Department Robbie.stewart@huntsvilleal.gov<br />
256-427-5320<br />
Building Related:<br />
Eric Weber Inspection Department eric.weber@huntsvilleal.gov<br />
256-427-5341<br />
Jeff Jenkins Inspection Department jeff.jenkins@huntsvilleal.gov<br />
256-427-5353