OM, HUSQVARNA, HU700L, 2011-06, 532438157, AAaa ...
OM, HUSQVARNA, HU700L, 2011-06, 532438157, AAaa ...
OM, HUSQVARNA, HU700L, 2011-06, 532438157, AAaa ...

You also want an ePaper? Increase the reach of your titles
YUMPU automatically turns print PDFs into web optimized ePapers that Google loves.
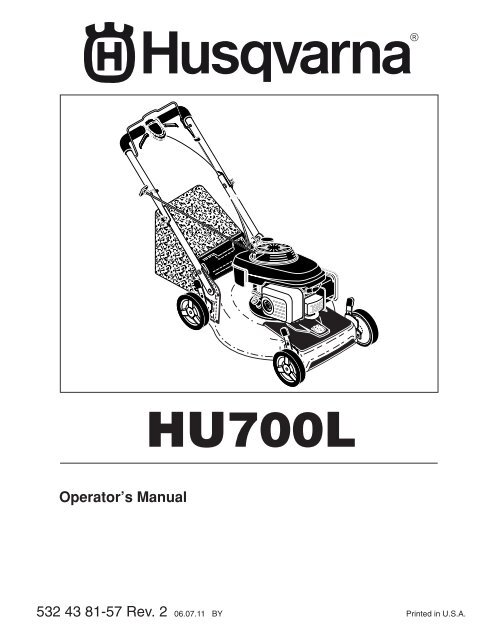
<strong>HU700L</strong><br />
Operator’s Manual<br />
532 43 81-57 Rev. 2 <strong>06</strong>.07.11 BY Printed in U.S.A.
SAFETY RULES<br />
Safe Operation Practices for Walk-Behind Mowers<br />
IMPORTANT: THIS CUTTING MACHINE IS CAPABLE OF AMPUTATING HANDS AND FEET AND THROW ING OBJECTS. FAILURE<br />
TO OBSERVE THE FOLLOWING SAFETY INSTRUCTIONS COULD RESULT IN SERIOUS INJURY OR DEATH.<br />
Look for this symbol to point out impor<br />
tant safety precautions. It means<br />
CAUTION!!! BE C<strong>OM</strong>E ALERT!!! YOUR<br />
SAFE TY IS IN VOLVED.<br />
CAUTION: Always disconnect spark plug<br />
wire and place wire where it cannot contact<br />
spark plug in order to prevent ac ci den tal<br />
starting when setting up, trans port ing,<br />
adjusting or making re pairs.<br />
WARNING: Engine exhaust, some of its<br />
con stit u ents, and certain vehicle com po -<br />
nents contain or emit chem i cals known to<br />
the State of Cal i for nia to cause can cer and<br />
birth defects or oth er re pro duc tive harm.<br />
WARNING: Battery posts, terminals and<br />
related ac ces so ries contain lead and lead<br />
compounds, chemicals known to the State<br />
of Cal i for nia to cause can cer and birth<br />
defects or oth er re pro duc tive harm. Wash<br />
hands after handling.<br />
CAUTION: Muffler and other engine parts<br />
become extremely hot during operation<br />
and remain hot after engine has stopped.<br />
To avoid severe burns on contact, stay away<br />
from these areas.<br />
I. GENERAL OPERATION<br />
• Read, understand, and follow all instructions on the<br />
machine and in the manual(s) before starting. Be thorough<br />
ly familiar with the controls and the proper use of<br />
the machine before starting.<br />
• Do not put hands or feet near or under rotating parts.<br />
Keep clear of the discharge opening at all times.<br />
• Only allow responsible individuals, who are familiar<br />
with the instructions, to operate the machine.<br />
• Clear the area of objects such as rocks, toys, wire,<br />
bones, sticks, etc., which could be picked up and thrown<br />
by the blade.<br />
• Be sure the area is clear of other people before mowing.<br />
Stop machine if anyone enters the area.<br />
• Do not operate the mower when barefoot or wearing<br />
open sandals. Always wear substantial foot wear.<br />
• Do not pull mower backwards unless absolutely neces<br />
sary. Always look down and behind before and while<br />
moving backwards.<br />
• Never direct discharged material toward anyone.<br />
Avoid discharging material against a wall or obstruction.<br />
Material may richochet back toward the operator.<br />
Stop the blade when crossing gravel surfaces.<br />
• Do not operate the mower without proper guards,<br />
plates, grass catcher or other safety protective devices<br />
in place.<br />
• See manufacturer’s instructions for proper operation<br />
and installation of accessories. Only use accessories<br />
approved by the manufacturer.<br />
2<br />
• Stop the blade(s) when crossing gravel drives, walks,<br />
or roads.<br />
• Stop the engine (motor) whenever you leave the equipment,<br />
before cleaning the mower or unclogging the<br />
chute.<br />
• Shut the engine (motor) off and wait until the blade comes<br />
to complete stop before removing grass catch er.<br />
• Mow only in daylight or good artifi cial light.<br />
• Do not operate the machine while under the infl uence<br />
of alcohol or drugs.<br />
• Never operate machine in wet grass. Always be sure of<br />
your footing: keep a fi rm hold on the handle and walk;<br />
never run.<br />
• Disengage the self-propelled mechanism or drive clutch<br />
on mowers so equipped before starting the engine (motor).<br />
• If the equipment should start to vibrate abnormally,<br />
stop the engine (motor) and check immediately for the<br />
cause. Vibration is generally a warning of trouble.<br />
• Always wear safety goggles or safety glasses with side<br />
shields when operating mower.<br />
II. SLOPE OPERATION<br />
Slopes are a major factor related to slip and fall accidents<br />
which can result in severe injury. All slopes require extra<br />
caution. If you feel uneasy on a slope, do not mow it.<br />
DO:<br />
• Mow across the face of slopes: never up and down. Exercise<br />
extreme caution when changing direction on slopes.<br />
• Remove obstacles such as rocks, tree limbs, etc.<br />
• Watch for holes, ruts, or bumps. Tall grass can hide<br />
obstacles.<br />
DO NOT:<br />
• Do not trim near drop-offs, ditches or embankments.<br />
The operator could lose footing or balance.<br />
• Do not trim excessively steep slopes.<br />
• Do not mow on wet grass. Reduced footing could cause<br />
slipping.<br />
III. CHILDREN<br />
Tragic accidents can occur if the operator is not alert to<br />
the presence of children. Children are often attracted to<br />
the machine and the mowing activity. Never assume that<br />
children will remain where you last saw them.<br />
• Keep children out of the trimming area and under the<br />
watchful care of another re spon si ble adult.<br />
• Be alert and turn machine off if children enter the<br />
area.<br />
• Before and while walking backwards, look behind and<br />
down for small children.<br />
• Never allow children to operate the machine.<br />
• Use extra care when approaching blind corners, shrubs,<br />
trees, or other objects that may obscure vision.<br />
IV. SAFE HANDLING OF GASOLINE<br />
Use extreme care in handling gasoline. Gasoline is extremely<br />
fl ammable and the vapors are explosive.<br />
• Extinguish all cigarettes, cigars, pipes and other sources<br />
of ignition.<br />
• Use only an approved container.<br />
• Never remove gas cap or add fuel with the engine running.<br />
Allow engine to cool before refueling.
• Never refuel the machine indoors.<br />
• Never store the machine or fuel container where there<br />
is an open fl ame, spark or pilot light such as a water<br />
heater or on other appliances.<br />
• Never fi ll containers inside a vehicle, on a truck or trailer<br />
bed with a plastic liner. Always place containers on<br />
the ground away from your vehicle before fi lling.<br />
• Remove gas-powered equipment from the truck or trailer<br />
and refuel it on the ground. If this is not possible, then<br />
refuel such equipment with a portable container, rather<br />
than from a gasoline dispenser nozzle.<br />
• Keep the nozzle in contact with the rim of the fuel tank<br />
or container opening at all times until fueling is complete.<br />
Do not use a nozzle lock-open device.<br />
• If fuel is spilled on clothing, change clothing immediately.<br />
• Never overfi ll fuel tank. Replace gas cap and tighten<br />
securely.<br />
V. GENERAL SERVICE<br />
• Never run a machine inside a closed area.<br />
• Never make adjustments or repairs with the engine<br />
(motor) running. Disconnect spark plug wire, and keep<br />
wire away from plug to prevent accidental starting.<br />
• Keep nuts and bolts, especially blade attachement<br />
bolts, tight and keep equipment in good condition.<br />
• Never tamper with safety devices. Check their proper<br />
operation regularly.<br />
• Keep machine free of grass, leaves, or other debris<br />
build-up. Clean oil or fuel spillage. Allow machine to<br />
cool before storing.<br />
• Stop and inspect the equipment if you strike an object.<br />
Repair, if necessary, before restarting.<br />
• Never attempt to make wheel height adjustments while<br />
the engine (motor) is running.<br />
• Grass catcher components are subject to wear, damage,<br />
and deterioration, which could expose moving<br />
parts or allow objects to be thrown. Frequently check<br />
com po nents and replace with manufacturer’s rec om -<br />
mend ed parts, when necessary.<br />
• Mower blade is sharp and can cut. Wrap the blade or<br />
wear gloves, and use extra caution when servicing it.<br />
• Do not change the engine governor setting or overspeed<br />
the engine.<br />
• Maintain or replace safety and instruction labels, as<br />
necessary.<br />
WARNING: This lawn mower is equipped with an internal com bus tion engine and should not be used on or near any<br />
un im proved forest-covered, brush-covered or grass-cov ered land unless the engine’s exhaust system is equipped with<br />
a spark arrester meeting applicable local or state laws (if any). If a spark arrester is used, it should be maintained in<br />
effective working order by the operator.<br />
A spark arrester for the muffler is available through your nearest authorized service center.<br />
CONGRATULATIONS on your purchase of a new lawn<br />
mower. It has been designed, engineered and man u fac tured<br />
to give you the best possible dependability and performance.<br />
Should you experience any problem you cannot easily<br />
remedy, please contact your nearest authorized service<br />
center/department. We have competent, well-trained<br />
tech ni cians and the proper tools to service or repair this<br />
lawn mower.<br />
Please read and retain this manual. The instructions will<br />
enable you to assemble and maintain your lawn mower<br />
properly. Always observe the “SAFETY RULES”.<br />
SERIAL<br />
NUMBER: _________________________________<br />
DATE OF PURCHASE: _______________________<br />
THE MODEL AND SERIAL NUMBERS WILL BE FOUND<br />
ON A DECAL ATTACHED TO THE REAR OF THE LAWN<br />
MOWER HOUSING.<br />
YOU SHOULD RECORD BOTH SERIAL NUMBER AND<br />
DATE OF PURCHASE AND KEEP IN A SAFE PLACE<br />
FOR FUTURE REFERENCE.<br />
PRODUCT SPECIFICATIONS<br />
Gasoline Capacity<br />
and Type:<br />
1.0 Quarts<br />
(Unleaded Regular Only)<br />
Oil Type (API SG–SL): SAE 30 (above 0°C / 32°F)<br />
SAE 10W-30 (below 0°C / 32°F)<br />
Oil Capacity:<br />
0,57 Litres<br />
Spark Plug: NGK BPR6ES (Gap: .030")<br />
Valve Clearance:<br />
Intake: 0.015 mm<br />
(± 0.04 mm) Exhaust: 0.020 mm<br />
Blade Bolt Torque: 35–40 ft. lbs.<br />
CUST<strong>OM</strong>ER RESPONSIBILITIES<br />
• Read and observe the safety rules.<br />
• Follow a regular schedule in maintaining, caring for<br />
and using your lawn mower.<br />
• Follow the instructions under “Maintenance” and “Storage”<br />
sec tions of this own er’s manual.<br />
TABLE OF CONTENTS<br />
SAFETY RULES .........................................................2-3<br />
PRODUCT SPECIFICATIONS....................................... 3<br />
CUST<strong>OM</strong>ER RESPONSIBILITIES................................. 3<br />
ASSEMBLY.................................................................... 4<br />
OPERATION ...............................................................5-8<br />
MAINTENANCE SCHEDULE ........................................ 9<br />
3<br />
MAINTENANCE........................................................9-12<br />
SERVICE AND AD JUST MENTS ............................13-14<br />
STORAGE...............................................................14-15<br />
TROU BLE SHOOT ING................................................. 16<br />
WARRANTY............................................................17-20
ASSEMBLY<br />
Read these instructions and this man u al in its entirety before you attempt to assemble or operate your new lawn mow er.<br />
IMPORTANT: THIS LAWN MOWER IS SHIPPED WITH OUT OIL OR GASOLINE IN THE ENGINE.<br />
Your new lawn mower has been as sem bled at the factory with the ex cep tion of those parts left unassembled for shipping<br />
purposes. All parts such as nuts, washers, bolts, etc., necessary to com plete the as sem bly have been placed in the parts<br />
bag. To ensure safe and proper operation of your lawn mow er, all parts and hard ware you assemble must be tightened<br />
se cure ly. Use the correct tools as nec es sary to ensure proper tightness.<br />
TO RE MOVE LAWN MOW ER FR<strong>OM</strong> CAR TON<br />
1. Remove loose parts included with mower.<br />
2. Cut down two end corners of car ton and lay end panel<br />
down fl at.<br />
3. Remove all packing materials ex cept padding be tween<br />
upper and lower handle and padding holding operator<br />
presence control bar to up per handle.<br />
4. Roll lawn mower out of carton and check carton thorougly<br />
for ad di tion al loose parts.<br />
HOW TO SET UP YOUR LAWN MOW ER<br />
TO UNFOLD HANDLE (See Figs. 1 and 2)<br />
IMPORTANT: UNFOLD HANDLE CAREFULLY SO AS<br />
NOT TO PINCH OR DAMAGE CON TROL CABLES.<br />
1. Raise lower handle section to operating position and<br />
align hole in handle with one of three height positioning<br />
holes.<br />
2. Insert handle bolt through handle and bracket and<br />
secure with knob.<br />
3. Repeat for opposite side of handle.<br />
4. Remove protective padding, raise upper handle section<br />
into place on lower handle and tighten both handle<br />
knobs.<br />
5. Remove any packing material from around control<br />
bar.<br />
OPERATOR<br />
PRESENCE<br />
CONTROL<br />
BAR<br />
LIFT<br />
UP<br />
MOWING<br />
PO SI TION<br />
Your handles may be adjusted for your mowing comfort.<br />
Refer to “ADJUST HANDLE” in the Service and Ad just ments<br />
sec tion of this man u al.<br />
KNOB<br />
BOLT<br />
FIG. 2<br />
HANDLE<br />
BRACKET<br />
TO ASSEMBLE GRASS CATCHER<br />
(See Fig. 3)<br />
1. Put grass catcher frame into grass bag with rigid part<br />
of bag on the bottom. Make sure the frame handle is<br />
outside of the bag top.<br />
2. Slip vinyl bindings over frame.<br />
NOTE: If vinyl bindings are too stiff, hold them in warm water<br />
for a few minutes. If bag gets wet, let it dry before using.<br />
FRAME<br />
HANDLE<br />
LIFT<br />
UP<br />
UPPER<br />
HANDLE<br />
HANDLE<br />
KNOB<br />
VINYL<br />
BINDINGS<br />
FRAME<br />
OPENING<br />
FIG. 3<br />
FIG. 1<br />
LOWER<br />
HANDLE<br />
4<br />
TO INSTALL ATTACHMENTS<br />
Your lawn mower was shipped ready to be used as a<br />
mulcher. To convert mower to bagging or discharging,<br />
see “TO CON VERT MOWER” in the Operation section of<br />
this man u al.
KNOW YOUR LAWN MOWER<br />
OPERATION<br />
READ THIS OWNER'S MANUAL AND SAFETY RULES BEFORE OPERATING YOUR LAWN MOWER.<br />
Compare the illustrations with your lawn mower to familiarize yourself with the location of various controls and adjustments.<br />
Save this manual for future reference.<br />
These symbols may appear on your lawn mower or in literature supplied with the product. Learn and understand<br />
their meaning.<br />
DRIVE CONTROL<br />
LEVERS<br />
OPERATOR PRESENCE CON TROL BAR<br />
HANDLE KNOB<br />
GAS O LINE FILL ER CAP<br />
STARTER<br />
HANDLE<br />
FUEL SHUTOFF VALVE<br />
GRASS<br />
CATCHER<br />
AIR FILTER<br />
WHEEL HEIGHT ADJUSTER<br />
(ON EACH WHEEL)<br />
EN GINE OIL CAP WITH DIPSTICK<br />
HOUSING<br />
MUFFLER<br />
SPARK PLUG<br />
IMPORTANT: This lawn mower is shipped WITHOUT OIL OR GASOLINE in the engine.<br />
NOTE: Gasoline containing up to 10% ethanol (E10) is acceptable for use in this machine. The use of any gasoline exceeding<br />
10% ethanol (E10) will void the product warranty.<br />
MEETS CPSC SAFETY REQUIREMENTS<br />
Husqvarna rotary walk-behind power lawn mowers conform to the safety standards of the American National Standards Institute<br />
and the U.S. Consumer Product Safety Commission. WARNING: The blade turns when the engine is running.<br />
OPERATOR PRESENCE CONTROL BAR – must be held<br />
down to the handle to start the engine. Release to stop<br />
the engine.<br />
5<br />
DRIVE CONTROL LEVERS – used to engage power-propelled<br />
forward motion lawn mower.<br />
STARTER HANDLE – used for starting the engine.
OPERATION<br />
The operation of any lawn mower can result in foreign objects thrown into the eyes, which can result in<br />
severe eye damage. Always wear safety glasses or eye shields while operating your lawn mower or performing<br />
any adjustments or repairs. We recommend standard safety glasses or a wide vision safety mask<br />
over spectacles.<br />
HOW TO USE YOUR LAWN MOWER<br />
ENGINE SPEED<br />
The engine speed was set at the factory for optimum performance.<br />
Speed is not adjustable.<br />
3. Operate mower to test drive speed. Readjust as required.<br />
4. If condition fails to improve after the above steps (forward<br />
speed remains the same), your drive belt is worn<br />
and should be re placed.<br />
ENGINE ZONE CONTROL<br />
CAUTION: Federal regulations require<br />
an engine control to be installed on this<br />
lawn mower in order to minimize the risk<br />
of blade contact injury. Do not un der<br />
any cir cum stanc es attempt to defeat<br />
the function of the operator control. The<br />
blade turns when the engine is running.<br />
• Your lawn mower is equipped with an operator presence<br />
control bar which requires the operator to be positioned<br />
behind the mower handle to start and operate the mower.<br />
DRIVE CONTROL (See Fig. 4)<br />
• Self-propelling is controlled by hold ing the operator<br />
presence control bar down to the handle and pulling<br />
either drive control lever rearward to the handle. The<br />
further toward the handle a lever is pulled, the faster<br />
the unit will travel.<br />
• Forward motion will stop when either the operator presence<br />
control bar or a drive control lever are released. To<br />
stop forward motion without stop ping engine, re lease a<br />
drive control lever only. Hold op er a tor presence control<br />
bar down against handle to con tin ue mowing without<br />
self-propelling.<br />
NOTE: If after releasing the drive control the mower will<br />
not roll backwards, push the mower forward slightly to<br />
disengage drive wheels.<br />
OPERATOR PRESENCE CONTROL BAR<br />
ADJUSTMENT TURNBUCKLE<br />
FIG. 5<br />
TO ADJUST CUTTING HEIGHT (See Fig. 6)<br />
Raise wheels for low cut and lower wheels for high cut,<br />
adjust cutting height to suit your requirements. Me di um<br />
position is best for most lawns.<br />
• To change cutting height, squeeze adjuster lever to ward<br />
wheel. Move wheel up or down to suit your re quire ments.<br />
Be sure all wheels are in the same setting.<br />
NOTE: Adjuster is properly positioned when plate tab inserts<br />
into hole in lever. Also, 9-position adjusters (if so equipped)<br />
allow lever to be positioned between the plate tabs.<br />
ROTATE LEVER TOWARD ENGINE<br />
TO LOWER MOWER<br />
PLATE<br />
TAB<br />
TO ENGAGE<br />
DRIVE CONTROL<br />
DRIVE<br />
CONTROL<br />
LEVERS<br />
DRIVE CONTROL<br />
DISENGAGED<br />
FIG. 4<br />
DRIVE CONTROL ADJUSTMENT (See Fig. 5)<br />
Over time, the drive control system may become “loose”,<br />
resulting in decreased speed. There is a turnbuckle on<br />
the drive control housing to increase tension on the drive<br />
cable. Pro ceed as follows:<br />
1. Turn unit off, disconnect spark plug wire from plug.<br />
2. Rotate turnbuckle on drive control to increase drive<br />
speed.<br />
6<br />
FIG. 6<br />
LEVER<br />
ROTATE LEVER AWAY FR<strong>OM</strong> ENGINE TO RAISE MOWER<br />
TO CONVERT MOWER<br />
Your lawn mower was shipped ready to be used as a<br />
mulcher. To convert to bagging:<br />
REAR BAGGING (See Fig. 7)<br />
• Lift rear door of the lawn mower and place the grass<br />
catcher frame hooks onto the grass bag brackets.<br />
• To convert to mulching operation, remove grass catch er<br />
and close rear door.
OPERATION<br />
REAR DOOR<br />
GRASS BAG<br />
BRACKET<br />
GRASS<br />
CATCHER<br />
HANDLE<br />
3. Empty clippings from bag using both frame handle and<br />
bag handle.<br />
NOTE: Do not drag the bag when emptying; it will cause<br />
unnecessary wear.<br />
GRASS<br />
CATCHER<br />
FRAME<br />
HANDLE<br />
GRASS<br />
CATCHER<br />
FRAME HOOK<br />
FIG. 7<br />
REAR DISCHARGING (See Fig. 8)<br />
• Lift the rear door and install the clipping defl ector (available<br />
accessory) legs into holes of handle brackets as<br />
shown.<br />
• When the rear door is lowered it will rest on the top<br />
of the clipping defl ector and secure it to the mower<br />
housing.<br />
• Mower is now ready for rear discharging operation.<br />
• To convert to mulching or bagging operation, clipping<br />
defl ector must be removed and mulcher door must be<br />
closed and locked.<br />
BAG<br />
HANDLE<br />
FIG. 9<br />
BEFORE STARTING ENGINE<br />
ADD OIL (See Fig. 10)<br />
Your lawnmower is shipped without oil in the engine. For<br />
type and grade of oil to use, see “EN GINE” in the Maintenance<br />
section of this manual.<br />
CAUTION: DO NOT overfill engine with<br />
oil, or it will smoke heavily from the<br />
muffler on startup.<br />
REAR<br />
DOOR<br />
DEFLECTOR<br />
BAR “LEG”<br />
HANDLE<br />
BRACKET<br />
HOLES<br />
1. Be sure lawnmower is level.<br />
2. Remove oil fi ll cap/dipstick from oil fi ll spout.<br />
3. You recieve a container of oil with the unit. Slowly<br />
pour the entire container down the oil fi ll spout into the<br />
engine.<br />
4. Insert and tighten oil fi ll cap/dipstick.<br />
IMPORTANT:<br />
• Check oil level before each use. Add oil if needed. Fill<br />
to full line on dipstick.<br />
• Change the oil after every 25 hours of operation or each<br />
season. You may need to change the oil more often under<br />
dusty, dirty conditions. See “TO CHANGE ENGINE<br />
OIL” in the Maintenance section of this manual.<br />
CLIPPING DEFLECTOR<br />
GASOLINE<br />
FILLER CAP<br />
FIG. 8<br />
CAUTION: Do not run your lawn mower<br />
without rear door closed or ap proved<br />
grass catch er or clipping deflector in<br />
place. Nev er at tempt to op er ate the lawn<br />
mow er with the rear door re moved or<br />
propped open.<br />
TO EMPTY GRASS CATCHER (See Fig. 9)<br />
1. Lift up on grass catcher using the frame han dle.<br />
2. Remove grass catcher with clippings from under lawn<br />
mower han dle.<br />
7<br />
ENGINE<br />
OIL CAP<br />
FIG. 10
ADD GASOLINE (See Fig. 10)<br />
• Fill fuel tank to bottom of tank fi ller neck. Do not overfi<br />
ll. Use fresh, clean, regular unleaded gasoline with<br />
a minimum of 87 octane. Do not mix oil with gasoline.<br />
Purchase fuel in quan ti ties that can be used within 30<br />
days to assure fuel freshness.<br />
CAUTION: Alcohol blended fuels<br />
(called gasohol or using ethanol or<br />
methanol) can attract moisture which<br />
leads to separation and for ma tion of<br />
acids during storage.<br />
Acidic gas can damage the fuel system of an<br />
engine while in storage. To avoid engine problems,<br />
the fuel system should be emptied before<br />
stor age of 30 days or longer. Empty the gas tank,<br />
start the engine and let it run until the fuel lines<br />
and carburetor are empty. Use fresh fuel next<br />
season. See Storage In struc tions for additional<br />
information. Never use engine or carburetor<br />
cleaner products in the fuel tank or permanent<br />
damage may occur.<br />
TO STOP ENGINE (See Fig. 11)<br />
• To stop engine, release operator presence control bar.<br />
Wait until blade and all moving parts have stopped and<br />
turn fuel valve to OFF position if you do not intend to<br />
re start the engine soon.<br />
TO START ENGINE<br />
NOTE: Due to protective coatings on the engine, a small<br />
amount of smoke may be present during the initial use of<br />
the product and should be considered normal.<br />
1. Be sure fuel valve is in the ON po si tion.<br />
2. Move choke lever to ON ( ) position.<br />
3. Hold operator presence control bar down to the han dle<br />
and pull starter handle quickly. Do not allow starter rope<br />
to snap back.<br />
NOTE: The choke lever automatically begins moving to<br />
the OFF position when operator presence control bar is<br />
held down to handle.<br />
OFF<br />
ON<br />
( )<br />
OPERATION<br />
• Under certain conditions, such as very tall grass, it<br />
may be nec es sary to raise the height of cut to reduce<br />
pushing effort and to keep from overloading the engine<br />
and leaving clumps of grass clippings. It may also be<br />
necessary to re duce ground speed and/or run the lawn<br />
mower over the area a sec ond time.<br />
• For extremely heavy cutting, re duce the width of cut<br />
by over lap ping previously cut path and mow slowly.<br />
• For better grass bagging and most cutting conditions,<br />
the engine speed should be set in the FAST po si tion.<br />
• When using a rear discharge lawn mower in moist,<br />
heavy grass, clumps of cut grass may not enter the<br />
grass catcher. Reduce ground speed (pushing speed)<br />
and/or run the lawn mower over the area a second time.<br />
• If a trail of clippings is left on the right side of a rear<br />
discharge mow er, mow in a clockwise direction with a<br />
small overlap to collect the clippings on the next pass.<br />
• Pores in cloth grass catchers can become fi lled with<br />
dirt and dust with use and catchers will collect less<br />
grass. To prevent this, reg u lar ly hose catcher off with<br />
water and let dry before using.<br />
• Keep top of engine around starter clear and clean of<br />
grass clippings and chaff. This will help engine air fl ow<br />
and extend engine life.<br />
MULCHING MOWING TIPS<br />
IMPORTANT: FOR BEST PERFORMANCE, KEEP MOWER<br />
HOUSING FREE OF BUILT-UP GRASS AND TRASH. SEE<br />
“CLEANING” IN THE MAINTENANCE SECTION OF THIS MANUAL.<br />
• The special mulching blade will recut the grass clippings<br />
many times and reduce them in size so that as<br />
they fall onto the lawn they will disperse into the grass<br />
and not be noticed. Also, the mulched grass will biodegrade<br />
quickly to provide nutrients for the lawn. Always<br />
mulch with your highest engine (blade) speed as this<br />
will provide the best recutting action of the blades.<br />
• Avoid cutting your lawn when it is wet. Wet grass tends<br />
to form clumps and interferes with the mulching action.<br />
The best time to mow your lawn is the early afternoon.<br />
At this time the grass has dried, yet the newly cut area<br />
will not be exposed to direct sunlight.<br />
• For best results, adjust the lawn mower cutting height<br />
so that the lawn mower cuts off only the top one-third<br />
of the grass blades (See Fig. 12). If the lawn is overgrown<br />
it will be necessary to raise the height of cut to<br />
reduce pushing effort and to keep from overloading<br />
the engine and leaving clumps of mulched grass. For<br />
extremely heavy mulching, reduce your width of cut by<br />
overlapping previously cut path and mow slowly.<br />
CHOKE<br />
LEVER<br />
ON<br />
OFF<br />
MAX 1/3<br />
FUEL VALVE LEVER<br />
MOWING TIPS<br />
FIG. 11<br />
CAUTION: Do not use de-thatcher<br />
blade attachments on your mower.<br />
Such attachments are hazardous, will<br />
damage your mower and could void<br />
your warranty.<br />
8<br />
FIG. 12<br />
• Certain types of grass and grass conditions may require<br />
that an area be mulched a second time to completely<br />
hide the clippings. When doing a second cut, mow<br />
across (perpendicular) to the fi rst cut path.<br />
• Change your cutting pattern from week to week. Mow<br />
north to south one week then east to west the next week.<br />
This will help prevent matting and graining of the lawn.
*<br />
**<br />
***<br />
****<br />
Check for Loose Fasteners<br />
Clean / Inspect Grass Catcher *<br />
Check Tires<br />
Check Drive Wheels ***<br />
Clean Lawn Mower ****<br />
Clean under Drive Cover ***<br />
Check Drive Belt / Pulleys ***<br />
Check / Sharpen / Replace Blade<br />
Lubrication<br />
Clean and Recharge Battery **<br />
Check Engine Oil level<br />
Change Engine Oil<br />
Clean Air Filter<br />
Inspect Muffler<br />
Replace Spark Plug<br />
Replace Air Filter Paper Cartridge<br />
Empty fuel system or add Stabilizer<br />
(if so equipped)<br />
Electric-Start mowers<br />
Power-Propelled mowers<br />
Use a scraper<br />
to clean under deck<br />
MAINTENANCE<br />
BEFORE<br />
EACH<br />
USE<br />
AFTER<br />
EACH<br />
USE<br />
EVERY<br />
10<br />
HOURS<br />
EVERY<br />
25 HOURS<br />
OR SEASON<br />
EVERY<br />
100<br />
HOURS<br />
BEFORE<br />
STORAGE<br />
1 - Change more often if operating under a heavy load or in high outdoor temperatures.<br />
2 - Service more often if operating in dirty or dusty conditions.<br />
3 - Replace blades more often when mowing in sandy soil.<br />
4 - Charge 48 hours at end of season.<br />
5 - And after each 5 hours of use.<br />
GENERAL REC<strong>OM</strong>MENDATIONS<br />
The warranty on this lawn mower does not cover items that<br />
have been subjected to operator abuse or negligence. To<br />
receive full value from the warranty, operator must maintain<br />
mower as instructed in this manual. Some adjustments<br />
will need to be made periodically to properly maintain your<br />
unit. At least once a season, check to see if you should<br />
make any of the adjustments described in the Service and<br />
Ad just ments section of this manual.<br />
• At least once a year, replace the spark plug, clean or<br />
replace air fi lter element and check blade for wear. A<br />
new spark plug and clean/new air fi lter element assure<br />
proper air-fuel mixture and help your engine run better<br />
and last longer.<br />
• Follow the maintenance schedule in this manual.<br />
LUBRICATION CHART<br />
ENGINE OIL<br />
BEFORE EACH USE<br />
1. Check engine oil level.<br />
2. Check for loose fasteners.<br />
LUBRICATION<br />
Keep unit well lubricated (See “LUBRICATION CHART”).<br />
IMPORTANT: DO NOT OIL OR GREASE PLASTIC WHEEL<br />
BEARINGS. VISCOUS LU BRI CANTS WILL ATTRACT DUST<br />
AND DIRT THAT WILL SHORT EN THE LIFE OF THE SELF-<br />
LU BRI CAT ING BEARINGS. IF YOU FEEL THEY MUST BE<br />
LU BRI CATED, USE ONLY A DRY, POW DERED GRAPHITE<br />
TYPE LUBRICANT SPAR INGLY.<br />
9<br />
REAR DOOR HINGE<br />
HANDLE BRACK ET MOUNT ING PINS<br />
SPRAY LUBRICANT<br />
SEE “ENGINE” IN MAINTENANCE SECTION
MAINTENANCE<br />
LAWN MOWER<br />
Always observe safety rules when performing any mainte<br />
nance.<br />
TIRES<br />
• Keep tires free of gasoline, oil, or insect control chemi<br />
cals which can harm rubber.<br />
• Avoid stumps, stones, deep ruts, sharp objects and<br />
other hazards that may cause tire damage.<br />
DRIVE WHEELS<br />
Check rear drive wheels each time you mow to be sure they<br />
move freely. The wheels not turning freely means trash,<br />
grass cuttings, etc., may be inside the drive wheel and dust<br />
cover area and must be cleaned out to free drive wheels.<br />
If necessary to clean drive wheels, check both rear wheels.<br />
6. Use block of wood between blade and lawn mower housing<br />
and tighten the blade bolt, turning clockwise.<br />
• The recommended tightening torque is 35–40 ft. lbs.<br />
IMPORTANT: BLADE BOLT IS HEAT TREATED. IF BOLT NEEDS<br />
REPLACING, REPLACE ONLY WITH APPROVED BOLT SHOWN<br />
IN THE REPAIR PARTS SECTION OF THIS MANUAL.<br />
CRANK-<br />
SHAFT<br />
KEY WAY<br />
KEY<br />
BELT<br />
RETAINER<br />
BLADE CARE<br />
For best results, mower blade must be kept sharp. Re place<br />
bent or dam aged blades.<br />
CAUTION: Use only a replacement blade<br />
approved by the manufacturer of your<br />
mower. Using a blade not approved<br />
by the manufacturer of your mower is<br />
hazardous, could damage your mower<br />
and void your warranty.<br />
BLADE ADAPTER<br />
DEBRIS SHIELD<br />
BLADE<br />
TRAILING EDGE<br />
HARDENED<br />
WASHER<br />
LOCK WASHER<br />
BLADE BOLT<br />
TO REMOVE BLADE (See Fig. 12)<br />
1. Disconnect spark plug wire from spark plug and place<br />
wire where it cannot come in contact with plug.<br />
2. Turn lawn mower on its side. Make sure air fi lter and<br />
carburetor are up.<br />
3. Use a wood block between blade and mower hous ing<br />
to prevent blade from turning when re mov ing blade<br />
bolt.<br />
NOTE: Protect your hands with gloves and/or wrap blade<br />
with heavy cloth.<br />
4. Remove blade bolt by turning counter-clockwise.<br />
5. Remove blade and attaching hardware (bolt, lock<br />
wash er and hardened wash er).<br />
6. Remove debris shield.<br />
NOTE: Remove the blade adapter and check the key inside<br />
hub of blade adapter. The key must be in good condition<br />
to work properly. Replace adapter if damaged.<br />
TO REPLACE BLADE (See Fig. 12)<br />
1. Position the blade adapter on the engine crank shaft.<br />
Be sure key in adapter and crankshaft keyway are<br />
aligned; and that the drive belt is inside the tabs of the<br />
belt retainer.<br />
2. Install debris shield.<br />
3. Position blade on the blade adapter.<br />
IMPORTANT: TO ENSURE PROPER AS SEM BLY, CENTER<br />
HOLE IN BLADE MUST ALIGN WITH STAR ON BLADE<br />
ADAPTER.<br />
4. Be sure the trailing edge of blade (opposite sharp edge)<br />
is up toward the engine.<br />
5. Install the blade bolt with the lock washer and hardened<br />
washer into blade adapter and crankshaft.<br />
10<br />
FIG. 12<br />
TO SHARPEN BLADE (See Fig. 13)<br />
NOTE: We do not recommend sharp en ing blade - but if you<br />
do, be sure the blade is balanced. An un bal anced blade<br />
will cause eventual damage to lawn mower or engine.<br />
• The blade can be sharp ened with a fi le or on a grinding<br />
wheel. Do not attempt to sharpen while on the<br />
mower.<br />
• To check blade balance, you will need a 5/8" diameter<br />
steel bolt, pin, or a cone balancer. (When using a<br />
cone bal anc er, follow the in struc tions supplied with<br />
bal anc er.)<br />
NOTE: Do not use a nail for balancing blade. The lobes of<br />
the center hole may appear to be centered, but are not.<br />
• Slide blade on to an unthreaded portion of the steel bolt<br />
or pin and hold the bolt or pin parallel with the ground.<br />
If blade is bal anced, it should remain in a horizontal<br />
po si tion. If either end of the blade moves downward,<br />
sharpen the heavy end until the blade is balanced.<br />
CENTER HOLE<br />
5/8" BOLT OR PIN<br />
BLADE<br />
FIG. 13
GRASS CATCHER<br />
• The grass catcher may be hosed with water, but must<br />
be dry when used.<br />
• Check your grass catcher often for damage or de te -<br />
ri o ra tion. Through normal use it will wear. If catcher<br />
needs replacing, replace only with ap proved replacement<br />
catcher shown in the Repair Parts section of this<br />
manual. Give the lawn mower model number when<br />
ordering.<br />
MAINTENANCE<br />
GEAR CASE<br />
• To keep your drive system working properly, the gear<br />
case and area around the drive should be kept clean<br />
and free of trash build-up. Clean under the drive cover<br />
twice a season.<br />
• The gear case is fi lled with lubricant to the proper level<br />
at the factory. The only time the lubricant needs attention<br />
is if service has been performed on the gear case.<br />
ENGINE<br />
LUBRICATION<br />
Maintenance, repair, or replacement of the emission control<br />
devices and systems, which are being done at the customers<br />
expense, may be performed by any non-road engine<br />
repair establishment or individual. Warranty repairs must<br />
be performed by an authorized engine manufacturer’s<br />
service outlet.<br />
LUBRICATION<br />
Use only high quality detergent oil rated with API service<br />
classifi cation SG–SL. Select the oil's SAE viscosity grade<br />
according to your expected operating temperature.<br />
CONTAINER<br />
FIG. 14<br />
4. Wipe off any spilled oil from lawn mower or side of<br />
engine.<br />
5. Fill engine with oil. Slowly pour oil down the oil fi ll spout<br />
into the engine.<br />
6. Wait one minute to allow oil to settle. Use guage on oil<br />
fi ll cap/dipstick for checking level. Insert dipstick into<br />
the tube and rest the oil fi ll cap on the tube. DO NOT<br />
thread the cap into the tube when taking reading.<br />
OIL FILL CAP /<br />
DIPSTICK<br />
UPPER<br />
MARK<br />
LOWER MARK<br />
NOTE: Multi-viscosity oils (5W30, 10W30 etc.) improve<br />
starting in cold weather, and you should check your engine<br />
oil level frequently to avoid possible engine damage from<br />
running low on oil.<br />
Change the oil after every 25 hours of operation or at least<br />
once a year if the lawn mower is not used for 25 hours in<br />
one year.<br />
Check the crankcase oil level before starting the engine<br />
and after each fi ve (5) hours of continuous use. Tighten oil<br />
plug securely each time you check the oil level.<br />
TO CHANGE ENGINE OIL (See Figs. 14 & 15)<br />
NOTE: Before tipping lawn mower to drain oil, empty fuel<br />
tank by running engine until fuel tank is empty.<br />
1. Disconnect spark plug wire from spark plug and place<br />
wire where it cannot come in contact with plug.<br />
2. Remove oil fi ll cap/dipstick; lay aside on a clean surface.<br />
3. Tip lawn mower on its side as shown and drain oil into<br />
a suitable container. Rock lawn mower back and forth<br />
to remove any oil trapped inside of engine.<br />
11<br />
FIG. 15<br />
7. Continue adding small amounts of oil and rechecking<br />
the dipstick until it reads full. DO NOT overfi ll, or engine<br />
will smoke on startup.<br />
8. Always be sure to retighten oil fi ll cap/dipstick before<br />
starting engine.<br />
9. Reconnect spark plug wire to spark plug.<br />
AIR FILTER (See Fig. 16)<br />
Your engine will not run properly and may be damaged by<br />
using a dirty air filter. Replace the air filter every 100 hours of<br />
operation or every season, whichever occurs fi rst. Service<br />
air cleaner more often under dusty conditions.<br />
TO CLEAN AIR FILTER<br />
1. Remove cover.<br />
2. Carefully remove cartridge.<br />
3. Clean by gently tapping on a fl at surface. If very dirty,<br />
replace cartridge.
MAINTENANCE<br />
CAUTION: Petroleum solvents, such as<br />
ker o sene, are not to be used to clean<br />
car tridge. They may cause de te ri o ra tion<br />
of the cartridge. Do not oil car tridge.<br />
Do not use pres sur ized air to clean or<br />
dry car tridge.<br />
4. Install cartridge, then replace cover.<br />
CARTRIDGE<br />
FILTER COVER<br />
SLOT<br />
TAB<br />
FIG. 16<br />
MUFFLER<br />
Inspect and replace corroded muffl er as it could create a<br />
fi re hazard and/or damage.<br />
SPARK PLUG<br />
Replace spark plug at the beginning of each mowing season<br />
or after every 100 hours of operation, whichever occurs<br />
fi rst. Spark plug type and gap setting are shown in the<br />
“PROD UCT SPEC I FI CA TIONS” section of this manual.<br />
WATER WASHOUT FEATURE (See Fig. 17)<br />
Your lawn mower is equipped with a fi tting that allows quick<br />
and easy cleaning of the underside of the housing. To use<br />
this feature, proceed as follows:<br />
1. Move lawn mower to an area of cut grass or another<br />
hard surface.<br />
NOTE: Water, grass and other debris will drain from beneath<br />
the mower housing during the washout process.<br />
2. Remove grass catcher and discharge chute assembly<br />
from lawn mower.<br />
3. Close mulcher door (if equipped).<br />
4. Connect a garden hose to the fi tting where shown.<br />
IMPORTANT: BE SURE THE GARDEN HOSE IS NOT ROUTED<br />
UNDER THE LAWN MOWER HOUSING OR ENTANGLED IN<br />
THE WHEELS.<br />
5. Turn on water supply and check for leaks at the fi t-<br />
ting.<br />
If no leaks are present, start engine (as described in the<br />
Operation section of this manual) and let engine run until<br />
the underside of the lawn mower is clean.<br />
WARNING: Do not engage the drive<br />
system during the washout process.<br />
6. Shut off the engine.<br />
7. Shut off water supply and remove hose from fi tting.<br />
CAUTION: Do not remove hose from<br />
fitting while engine is running. Water<br />
in engine can result in shortened engine<br />
life.<br />
8. Start engine (as described in the Operation section<br />
of this manual) and let engine run for a full minute to<br />
remove excess water from mower.<br />
HOSE<br />
CLEANING<br />
IMPORTANT: FOR BEST PERFORMANCE, KEEP MOWER<br />
HOUSING FREE OF BUILT-UP GRASS AND TRASH. CLEAN<br />
THE UNDERSIDE OF YOUR MOWER AFTER EACH USE.<br />
CAUTION: Disconnect spark plug wire<br />
from spark plug and place wire where it<br />
cannot come in contact with plug.<br />
• Clean the underside of your lawn mower by scraping<br />
to remove build-up of grass and trash.<br />
• Clean engine often to keep trash from accumulating. A<br />
clogged engine runs hotter and shortens engine life.<br />
• Keep finished surfaces / wheels free of gasoline, oil, etc.<br />
• We do not recommend using a garden hose to clean<br />
lawn mower unless the electrical system, muffl er, air<br />
fi lter and carburetor are covered to keep water out.<br />
Water in engine can result in shortened engine life.<br />
FIG. 17<br />
FITTING<br />
12
SERVICE AND ADJUSTMENTS<br />
CAUTION: TO AVOID SERIOUS INJURY, BEFORE PERFORMING ANY SERVICE OR ADJUSTMENTS:<br />
1. Release control bar and stop engine.<br />
2. Make sure the blade and all moving parts have completely stopped.<br />
3. Disconnect spark plug wire from spark plug and place where it cannot come in contact with plug.<br />
LAWN MOWER<br />
TO ADJUST CUTTING HEIGHT<br />
See “TO ADJUST CUTTING HEIGHT” in the Operation<br />
section of this manual.<br />
REAR DEFLECTOR<br />
The rear defl ector, attached between the rear wheels of<br />
your mower, is provided to minimize the possibility that<br />
objects will be thrown out of the rear of the mower into<br />
the operator's mowing position. If the defl ector becomes<br />
damaged, it should be replaced.<br />
TO REMOVE DRIVE BELT (See Fig. 17)<br />
1. Remove screws securing rear baffle.<br />
2. Turn lawn mower on its side with air fi lter and car bu -<br />
re tor up.<br />
3. Remove rear baffl e from mower.<br />
4. Remove blade bolt, lockwasher, hardened washer and<br />
blade.<br />
5. Remove debris shield.<br />
6. Remove gearcase belt keeper.<br />
7. Remove drive belt.<br />
TO REPLACE DRIVE BELT<br />
1. Place new drive belt on gearcase pulley.<br />
NOTE: Always use factory approved belt to assure proper<br />
fi t and long life.<br />
2. Reinstall gearcase belt keeper. Be sure the new drive<br />
belt is inside the tabs of the gearcase belt keeper.<br />
3. Position the blade adapter on the engine crank shaft.<br />
Be sure key in adapter and crankshaft keyway are<br />
aligned; and that the drive belt is inside the tabs of the<br />
belt retainer.<br />
4. Place rear baffl e in mower housing.<br />
5. Reinstall debris shield.<br />
6. Reinstall blade.<br />
7. Return mower to upright po si tion.<br />
8. Reinstall rear baffl e screws.<br />
REAR<br />
BAFFLE<br />
GEARCASE<br />
PULEY<br />
BLADE<br />
ADAPTER<br />
DEBRIS SHIELD<br />
HARDENED WASHER<br />
BLADE<br />
LOCKWASHER<br />
FIG. 17<br />
GEARCASE<br />
BELT KEEPER<br />
BELT<br />
RETAINER<br />
BLADE<br />
BOLT<br />
13
SERVICE AND ADJUSTMENTS<br />
TO ADJUST HANDLE (See Fig. 18)<br />
The handle on your lawn mower has three (3) height positions<br />
- adjust to height that suits you.<br />
1. Remove knob and carriage bolt on one side of the<br />
lower handle.<br />
2. While holding handle assembly, remove knob and<br />
car riage bolt from opposite side, align hole in handle<br />
with desired hole in handle bracket and reassemble<br />
bolt and knob and tighten securely.<br />
3. Align opposite side of handle with same positioning<br />
hole and secure with bolt and knob.<br />
KNOB<br />
BOLT<br />
HANDLE<br />
BRACKET<br />
ENGINE<br />
Maintenance, re pair, or re place ment of the emission control<br />
de vic es and sys tems, which are be ing done at the<br />
cus tom ers expense, may be performed by any non-road<br />
engine repair es tab lish ment or individual. Warranty repairs<br />
must be performed by an authorized engine man u fac tur er's<br />
service outlet.<br />
ENGINE SPEED<br />
Your engine speed has been factory set. Do not attempt to<br />
increase engine speed or it may result in personal injury. If<br />
you believe that the engine is running too fast or too slow,<br />
take your lawn mower to an authorized service center for<br />
repair and adjustment.<br />
CARBURETOR<br />
Your carburetor is not adjustable. If your engine does not<br />
operate properly due to suspected carburetor problems,<br />
take your lawn mower to an authorized service center for<br />
repair and/or adjustment.<br />
IMPORTANT: NEVER TAMPER WITH THE ENGINE GOVERNOR,<br />
WHICH IS FACTORY SET FOR PROPER ENGINE SPEED.<br />
OVER SPEED ING THE ENGINE ABOVE THE FACTORY HIGH<br />
SPEED SETTING CAN BE DANGEROUS. IF YOU THINK THE<br />
ENGINE-GOVERNED HIGH SPEED NEEDS ADJUSTING,<br />
CONTACT YOUR NEAREST AUTHORIZED SER VICE CEN TER,<br />
WHICH HAS PROPER EQUIP MENT AND EXPERIENCE TO<br />
MAKE ANY NEC ES SARY ADJUSTMENTS.<br />
FIG. 18<br />
STORAGE<br />
Immediately prepare your mower for storage at the end of the season or if the unit will not be used for 30 days or more.<br />
LAWN MOWER<br />
When lawn mower is to be stored for a period of time, clean<br />
it thoroughly, remove all dirt, grease, leaves, etc. Store in<br />
a clean, dry area.<br />
1. Clean entire lawn mower (See “CLEANING” in the<br />
Maintenance section of this manual).<br />
2. Lubricate as shown in the Maintenance section of this<br />
manual.<br />
3. Be sure that all nuts, bolts, screws, and pins are securely<br />
fastened. Inspect moving parts for damage, breakage<br />
and wear. Replace if necessary.<br />
4. Touch up all rusted or chipped paint surfaces; sand<br />
lightly before painting.<br />
HANDLE (See Figs. 19 and 20)<br />
You can fold your lawn mower han dle for storage.<br />
1. Loosen the two (2) handle knobs on sides of the upper<br />
handle and allow handle to fold down to the rear.<br />
2. Remove the two (2) handle knobs and carriage bolts<br />
on sides of the lower handle and pivot entire handle<br />
as sem bly forward and allow it to rest on mower.<br />
3. Reinstall knobs and carriage bolts to lower handle or<br />
handle brackets for safe keeping.<br />
• When setting up your handle from the storage position,<br />
the lower han dle will require manually locking into the<br />
mowing position.<br />
IMPORTANT: WHEN FOLDING THE HANDLE FOR STORAGE<br />
OR TRANSPORTATION, BE SURE TO FOLD THE HANDLE AS<br />
SHOWN OR YOU MAY DAMAGE THE CONTROL CABLES.<br />
14
STORAGE<br />
OPERATOR<br />
PRES ENCE<br />
CONTROL<br />
BAR<br />
FOLD<br />
FORWARD<br />
FOR<br />
STORAGE<br />
MOWING<br />
POSITION<br />
ENGINE<br />
FUEL SYSTEM<br />
IMPORTANT: IT IS IMPORTANT TO PREVENT GUM DEPOSITS<br />
FR<strong>OM</strong> FORMING IN ESSENTIAL FUEL SYSTEM PARTS<br />
SUCH AS CARBURETOR, FUEL FILTER, FUEL HOSE, OR<br />
TANK DURING STORAGE. ALCOHOL BLENDED FUELS<br />
(CALLED GASOHOL OR USING ETHANOL OR METHANOL)<br />
CAN ATTRACT MOISTURE WHICH LEADS TO SEPARATION<br />
AND FORMATION OF ACIDS DURING STORAGE. ACIDIC GAS<br />
CAN DAMAGE THE FUEL SYSTEM OF AN ENGINE WHILE IN<br />
STORAGE.<br />
• Empty the fuel tank by starting the engine and letting<br />
it run until the fuel lines and carburetor are empty.<br />
• Never use engine or carburetor cleaner products in the<br />
fuel tank or permanent damage may occur.<br />
• Use fresh fuel next season.<br />
NOTE: Fuel stabilizer is an acceptable alternative in minimizing<br />
the formation of fuel gum deposits during stor age.<br />
Add stabilizer to gasoline in fuel tank or storage container.<br />
Always follow the mix ratio found on stabilizer container.<br />
Run engine at least 10 minutes after adding stabilizer to<br />
allow the stabilizer to reach the carburetor. Do not empty<br />
the gas tank and carburetor if using fuel stabilizer.<br />
UPPER<br />
HANDLE<br />
HANDLE<br />
KNOB<br />
LOWER<br />
HANDLE<br />
FIG. 19<br />
ENGINE OIL<br />
Drain oil (with engine warm) and replace with clean engine<br />
oil. (See “ENGINE” in the Maintenance section of<br />
this manual).<br />
KNOB<br />
BOLT<br />
HANDLE<br />
BRACKET<br />
CYLINDER<br />
1. Remove spark plug.<br />
2. Pour one ounce (29 ml) of oil through spark plug hole<br />
into cylinder.<br />
3. Pull starter handle slowly a few times to distribute oil.<br />
4. Replace with new spark plug.<br />
FIG. 20<br />
OTHER<br />
• Do not store gasoline from one season to another.<br />
• Replace your gasoline can if your can starts to rust.<br />
Rust and/or dirt in your gasoline will cause problems.<br />
• If possible, store your unit indoors and cover it to give<br />
protection from dust and dirt.<br />
• Cover your unit with a suitable protective cover that<br />
does not retain moisture. Do not use plastic. Plastic<br />
cannot breathe, which allows condensation to form and<br />
will cause your unit to rust.<br />
IMPORTANT: NEVER COVER MOWER WHILE ENGINE AND<br />
EXHAUST AREAS ARE STILL WARM.<br />
CAUTION: Never store the lawn mower<br />
with gasoline in the tank inside a building<br />
where fumes may reach an open<br />
flame or spark. Allow the engine to cool<br />
before storing in any enclosure.<br />
15
TROUBLESHOOTING POINTS<br />
PROBLEM CAUSE CORRECTION<br />
Does not start 1. Dirty air fi lter. 1. Clean/replace air fi lter.<br />
2. Out of fuel. 2. Fill fuel tank.<br />
3. Stale fuel. 3. Empty fuel tank and refi ll tank with fresh,<br />
clean gasoline.<br />
4. Water in fuel. 4. Empty fuel tank and refi ll tank with fresh,<br />
clean gasoline.<br />
5. Spark plug wire is disconnected. 5. Connect wire to plug.<br />
6. Bad spark plug. 6. Replace spark plug.<br />
7. Loose blade or broken blade adapter. 7. Tight en blade bolt or replace blade adapter.<br />
8. Control bar in released position. 8. Depress control bar to handle.<br />
9. Control bar defective. 9. Replace control bar.<br />
10. Fuel valve lever (if equipped) in OFF position. 10. Turn fuel valve lever to the ON position.<br />
11. Weak battery (if equipped). 11. Charge battery.<br />
12. Disconnected battery connector (if equipped). 12. Connect battery to engine.<br />
Loss of power 1. Rear of lawn mower housing or cutting 1. Raise cutting height.<br />
blade dragging in heavy grass.<br />
2. Cutting too much grass. 2. Raise cutting height.<br />
3. Dirty air fi lter. 3. Clean/replace air fi lter.<br />
4. Buildup of grass, leaves and trash under 4. Clean underside of mower housing.<br />
mower.<br />
5. Too much oil in engine. 5. Check oil level.<br />
6. Walking speed too fast. 6. Cut at slower walking speed.<br />
Poor cut – 1. Worn, bent or loose blade. 1. Replace blade. Tighten blade bolt.<br />
uneven 2. Wheel heights uneven. 2. Set all wheels at same height.<br />
3. Buildup of grass, leaves and trash under 3. Clean underside of mower housing.<br />
mower.<br />
Excessive 1. Worn, bent or loose blade. 1. Replace blade. Tighten blade bolt.<br />
vibration 2. Bent engine crankshaft. 2. Contact a qualifi ed service center.<br />
Starter rope 1. Engine fl ywheel brake is on when control 1. Depress control bar to upper handle before<br />
hard to pull bar is released. pulling starter rope.<br />
2. Bent engine crankshaft. 2. Contact a qualifi ed service center.<br />
3. Blade adapter broken. 3. Replace blade adapter.<br />
4. Blade dragging in grass. 4. Move lawn mower to cut grass or other<br />
hard surface before starting.<br />
Grass catcher 1. Cutting height too low. 1. Raise cutting height.<br />
not filling 2. Lift on blade worn off. 2. Replace blade.<br />
(if so equipped) 3. Catcher not venting air.<br />
3. Clean grass catcher.<br />
Hard to push 1. Grass is too high or wheel height is too low. 1. Raise cutting height.<br />
2. Rear of lawn mower housing or cutting 2. Raise rear of lawn mower housing one (1)<br />
blade dragging in heavy grass.<br />
setting higher.<br />
3. Grass catcher too full. 3. Empty grass catcher.<br />
4. Handle height position not right for you. 4. Adjust handle height to suit.<br />
Loss of drive 1. Belt wear. 1. Check/replace drive belt.<br />
(or slowing of 2. Belt off of pulley. 2. Check/reinstall drive belt.<br />
drive speed) 3. Drive cable worn or broken. 3. Put belt on pulleys / replace belts if broken.<br />
4. “Loose” drive control system. 4. Adjust drive control.<br />
16
17
18
19
20