Resource Manual - International Embryo Transfer Society
Resource Manual - International Embryo Transfer Society
Resource Manual - International Embryo Transfer Society

Create successful ePaper yourself
Turn your PDF publications into a flip-book with our unique Google optimized e-Paper software.
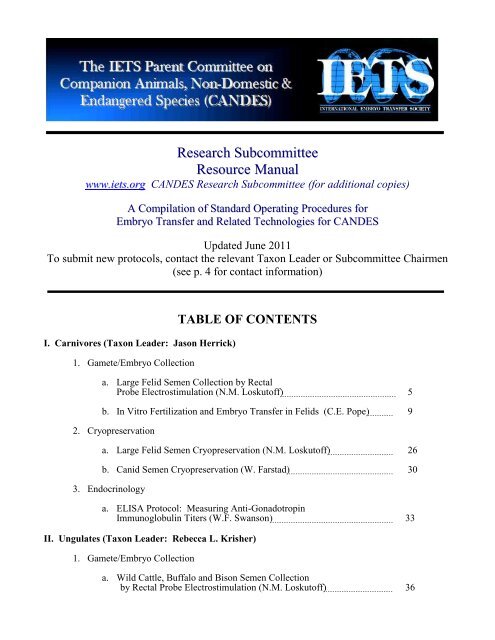
Research Subcommittee<br />
<strong>Resource</strong> <strong>Manual</strong><br />
www.iets.org CANDES Research Subcommittee (for additional copies)<br />
A Compilation of Standard Operating Procedures for<br />
<strong>Embryo</strong> <strong>Transfer</strong> and Related Technologies for CANDES<br />
Updated June 2011<br />
To submit new protocols, contact the relevant Taxon Leader or Subcommittee Chairmen<br />
(see p. 4 for contact information)<br />
I. Carnivores (Taxon Leader: Jason Herrick)<br />
1. Gamete/<strong>Embryo</strong> Collection<br />
TABLE OF CONTENTS<br />
a. Large Felid Semen Collection by Rectal<br />
Probe Electrostimulation (N.M. Loskutoff) 5<br />
b. In Vitro Fertilization and <strong>Embryo</strong> <strong>Transfer</strong> in Felids (C.E. Pope) 9<br />
2. Cryopreservation<br />
a. Large Felid Semen Cryopreservation (N.M. Loskutoff) 26<br />
b. Canid Semen Cryopreservation (W. Farstad) 30<br />
3. Endocrinology<br />
a. ELISA Protocol: Measuring Anti-Gonadotropin<br />
Immunoglobulin Titers (W.F. Swanson) 33<br />
II. Ungulates (Taxon Leader: Rebecca L. Krisher)<br />
1. Gamete/<strong>Embryo</strong> Collection<br />
a. Wild Cattle, Buffalo and Bison Semen Collection<br />
by Rectal Probe Electrostimulation (N.M. Loskutoff) 36
2. <strong>Embryo</strong> <strong>Transfer</strong><br />
a. Superovulation and <strong>Embryo</strong> <strong>Transfer</strong> in the<br />
Dromedary Camel (J.A. Skidmore) 40<br />
3. In Vitro Fertilization/Culture<br />
a. Bovine IVM/IVF/IVC Protocol (R.L. Krisher) 47<br />
4. Cryopreservation<br />
a. Wild Cattle, Buffalo and Bison Semen<br />
Cryopreservation (N.M. Loskutoff) 55<br />
b. Generalized Procedures for Harvesting Epididymal Sperm from<br />
Ruminants Post-Mortem for Cryobanking (N.M. Loskutoff) 58<br />
III. Birds (Taxon Leader: Juan M. Blanco)<br />
1. Artificial Insemination<br />
a. Semen Collection and Artificial Insemination in Cranes<br />
(R. Lastovica & N.M. Loskutoff) 66<br />
IV. Amphibians and Reptiles (Taxon Leader: Andrew J. Kouba)<br />
1. Gamete/<strong>Embryo</strong> Collection<br />
a. Semen Collection in Snakes (E. Viera & E.G. Crichton) 71<br />
b. Artificial Insemination in Snakes (K. Mattson & N.M. Loskutoff) 73<br />
V. Non-Human Primates (Taxon Leader: Justine K. O’Brien)<br />
1. In Vitro Fertilization/Culture<br />
a. Human sperm – Oocyte Interaction Tests<br />
(D.Y. Liu & H.W.G. Baker) 74<br />
2. Cryopreservation<br />
a. Gorilla Sperm Cryopreservation Protocol:<br />
Non-Egg Yolk Diluent (J.K. O‘Brien) 77<br />
b. Gorilla Sperm Cryopreservation Protocol:<br />
Test Yolk Buffer Diluent (J.K. O‘Brien) 79<br />
c. Great Ape Semen Cryopreservation Protocols:<br />
Egg Yolk-Based Cryodiluents (T.R. Bowsher & N.M. Loskutoff) 81<br />
3. Endocrinology<br />
a. Fecal Extraction Protocol for Hormone Analysis<br />
(A.C. Bellem and N. Wielebnowski) 86<br />
2
VI. Marsupials (Taxon Leader: Monique C.J. Paris)<br />
1. Gamete/<strong>Embryo</strong> Collection<br />
a. Collection and Evaluation of Brushtail Possum Semen/Sperm<br />
(F. Molinia) 87<br />
b. Superovulation of Female Brushtail Possums (F. Molinia) 93<br />
c. Superovulation of Womat Species (M.C.J. Paris & G. Druery ) 95<br />
d. Superovulation, Oocyte Collection, In Vitro Maturation, Semen<br />
Collection and Intracytoplasmic Sperm Injection in the Tammar<br />
Wallaby (G. Magarey) 98<br />
2. Endocrinology<br />
a. Estrous Cycle Monitoring n Wombat Species<br />
(M.C.J. Paris & G. Finlayson) 106<br />
b. Wombat Faecal Progesterone Metabolite Analysis<br />
(M.C.J. Paris & F. Schwarzenberger) 109<br />
c. Luteinizing hormone radioimmunoassay (M.C.J. Paris) 114<br />
3. Cryopreservation<br />
a. Ovarian Tissue Cryopreservation (J. Shaw) 117<br />
VII.<br />
Fish (Taxon Leader: Boris Dzyuba)<br />
1. Cryopreservation<br />
a. Fish Semen Cryopreservation. Patterns for Common Carp,<br />
Cyprinus carpio, Barbel Sturgeon, Acipenser nudiventris, and<br />
Haarder, Mugil soiuy (B. Dzyuba) 126<br />
2. Other<br />
a. Measurement Techniques for Fish Larvae Morphometric<br />
Parameters on Early Stages of Postnatal Growth (B. Dzyuba,<br />
K.J.W. Van Look, N. Satake & W.V. Holt) 132<br />
VIII. Rodents (Taxon Leader: Marina F. Ponzio)<br />
1. Semen Collection and Cryopreservation<br />
VIII. General<br />
a. Semen Collection, Evaluation and Cryopreservation in the<br />
Chinchilla, Chinchilla lanigera (M. Ponzio) …………………………... 133<br />
1. Endocrinology<br />
a. Cortisol Enzyme Immunoassay Protocol (A.C. Bellem, C. Munro<br />
and N. Wielebnowski) 137<br />
3
IETS CANDES Research Subcommittee<br />
E-Mail Addresses of <strong>Resource</strong> <strong>Manual</strong> Taxon Leaders<br />
Taxon Taxon Leader E-Mail Address<br />
Carnivores Jason Herrick jherrick@illinois.edu<br />
Ungulates Rebecca L. Krisher rkrisher@fertilityresearch.org<br />
Birds Juan <strong>Manual</strong> Blanco uhofleh@wanadoo.es<br />
Amphibians/Reptiles Andrew Kouba akouba@memphiszoo.org<br />
Non-Human Primates Justine K. O‘Brien justineo@vetsci.usyd.edu.au<br />
Invertebrates Anita Collins collinsa@ba.ars.usda.gov<br />
Marsupials Monique C.J. Paris m.paris@uu.nl<br />
Fish Boris Dzyuba bdzuba@yahoo.com<br />
Marine Mammals Todd Robeck todd.robeck@seaworld.com<br />
Rodents Marina F. Ponzio mponzio@mater.fcm.unc.edu.ar<br />
Other Taxa<br />
Suggestions Requested<br />
The IETS CANDES Research Subcommittee <strong>Resource</strong> <strong>Manual</strong> includes standard operating<br />
procedures (defined here as protocols) referring to all embryo transfer and related technologies<br />
applicable to companion animals, non-domestic and endangered species.<br />
New information and updates will be posted in March and September annually. Authors may<br />
send copies of their protocols for posting on the IETS CANDES web page to the relevant Taxon Leader<br />
above. Each new submission must contain contact details (preferably an e-mail address) for queries<br />
concerning the protocols and they must include citations of supporting manuscripts and/or data<br />
demonstrating application of the procedures. Protocols are specifically requested for the following<br />
topics:<br />
1. Gamete/<strong>Embryo</strong> Collection<br />
2. <strong>Embryo</strong> <strong>Transfer</strong><br />
3. Artificial Insemination<br />
4. In Vitro Fertilization/Culture<br />
5. Cryopreservation<br />
6. Endocrinology<br />
Taxon Leaders are needed at this time for ―Birds‖ and ―Marine Mammals‖ and requests are<br />
being accepted for other taxa to be included in the <strong>Resource</strong> <strong>Manual</strong>. Queries and requests should be<br />
sent to the IETS CANDES Research Subcommittee Co-Chairmen: Rebecca L. Krisher (E-Mail:<br />
rkrisher@purdue.edu) or Monique C. J. Paris (E-Mail: m_wolvekamp@hotmail.com). Taxon Leaders<br />
should have some background knowledge or experience in embryo transfer and related technologies for<br />
their specific taxon, and are responsible for recruiting participation from colleagues to submit relevant<br />
protocols.<br />
4
Large Felid Semen Collection by Rectal Probe<br />
Electrostimulation (Electroejaculation)<br />
N.M. Loskutoff<br />
Center for Conservation & Research, Omaha‘s Henry Doorly Zoo<br />
September 2003<br />
Contact information for further details:<br />
Naida Loskutoff at: NaidaL@omahazoo.com<br />
Publications using this protocol:<br />
1) Crichton, E.G., E. Bedows, A.K. Miller-Lindhom, D.M. Baldwin, D.L. Armstrong, L.H.<br />
Graham, J. Ford, J.O. Gjorret, P. Hyttel, C.E. Pope, G. Vajta and N.M. Loskutoff (2003) The<br />
efficacy of porcine gonadotropins for repeated stimulation of ovarian activity for oocyte retrieval<br />
and in vitro embryo production and cryopreservation in Siberian tigers (Panthera tigris altaica).<br />
Biology of Reproduction 68: 105-113.<br />
2) Gjorret, J.O., Crichton, E.G., Loskutoff, N.M., Armstrong, D.L. and Hyttel, P. Oocyte<br />
maturation, fertilization and early embryonic development in vitro in the Siberian tiger<br />
(Panthera tigris altaica). Molecular Reproduction and Development 63:79-88, 2002.<br />
3) Nelson, K.L., E.G. Crichton, L. Doty, D. Volenec, J.M. Finnegan, R.G. Morato, C.E. Pope, B.L.<br />
Dresser, D.L. Armstrong and N.M. Loskutoff (1999) Heterologous and homologous fertilizing<br />
capacity of cryopreserved felid sperm: a model for endangered species. Theriogenology 51:290,<br />
abst.<br />
4) Donoghue, A., A. Byers, L. Johnston, D. Armstrong, and D. Wildt. Timing of ovulation after<br />
gonadotrophin induction and its importance to successful intrauterine insemination in the tiger<br />
(Panthera tigris). Journal of Reproduction and Fertility, 107: pp 53-58. 1996<br />
Materials Needed:<br />
Rectal probe (see Fig. 1), sand paper<br />
Electrostimulator (e.g., Platz or Beltz models – for contact details,<br />
see Technology Subcommittee <strong>Resource</strong>s section)<br />
Electrical extension cord<br />
Lubricant (non-spermicidal)<br />
Latex gloves<br />
Paper towels<br />
15 ml conical tubes (sterile)<br />
Insulated container<br />
Medium (e.g., TL Hepes, Bio Whittaker)<br />
Permanent ink pen<br />
Warming packs (if necessary)<br />
Disinfectant<br />
5
Procedure<br />
1. Gently sand down the electrodes to ensure proper contact. ALWAYS turn the electrostimulator<br />
―ON‖ BEFORE inserting the rectal probe to prevent shock due to electrical surges. At that time,<br />
check the gauges to be sure the electrostimulator is functioning properly.<br />
~ 9.5 in (24 cm) total length<br />
~ 1 in<br />
(2.5 cm)<br />
3 x ~ 3.5 in (9 cm) electrodes;<br />
width: ~ 0.25 in (0.6 cm)<br />
Figure 1. Diagram of rectal probe suitable for semen collection by electroejaculation from large<br />
felids (e.g., tigers and lions).<br />
2. After the animal is chemically immobilized* and the keeper and veterinary personnel allow<br />
entrance into the animal‘s holding area, place lubricant on the tip of the rectal probe and gently<br />
insert it into the animal‘s rectum using a twisting motion. Do not force the probe if there is<br />
resistance. If the rectum need to be cleaned out, it is best to do so by inserting a water hose and<br />
flushing out the fecal material. Excess fecal material will interfere with the electrical<br />
stimulations.<br />
*Note that there are certain types of chemical immobilizing agents that detrimentally affect the<br />
quality of semen collected by electroejaculation, e.g., Azaperone, Medetomidine, etc.<br />
3. The penis should be exteriorized by carefully pushing in the skin just above (dorsally) in a<br />
forward (Cranial) manner. As soon as the penis is exteriorized, a collection tube should be<br />
placed over it. At this point the penis should constantly be kept inside a collection tube in case<br />
there are unexpected volumes of semen ejaculated. Only when the electroejaculation procedure<br />
is terminated and rectal probe removed, should the last collection tube be removed.<br />
4. The rectal probe should be positioned so that the three electrodes are facing ventrally – the<br />
middle electrode facing the midline of the animal. The probe should not be inserted into the<br />
rectum any farther than just to the end where it can be clearly seen.<br />
5. Before beginning electrical stimulations, be sure to ask all personnel if the procedure can begin.<br />
If it is safe, proceed with the minimum voltage limit stimulations. The stimulations are<br />
administered by increasing the voltage using the rheostat slowly to the voltage limit (e.g., count<br />
two seconds to go from 0 to 2 Volts). Hold at the voltage limit for one second, then quickly<br />
6
eturn to 0. Once initiated, this process should continue until the operator of the<br />
electrostimulator is told to stop so that the collection tube can be exchanged for a fresh tube.<br />
Tubes should be exchanged often to avoid the possibility of urine contamination.<br />
6. For tigers and lions, begin with a voltage limit of 2 V (5 repetitions), then increase the voltage<br />
limit by 0.5 V to a maximum of 5 V. Therefore, there should be 5 repetitions each of<br />
stimulations at 2, 2.5, 3 V – then a break of a few minutes – continued with 5 repetitions each of<br />
stimulations at 3, 3.5, 4 V – then a break of a few minutes – with the last series of stimulations of<br />
5 repetitions each at 4, 4.5 and 5 V. Again, change tubes often to avoid urine contamination<br />
(typically, if the animal is stimulated to urinate, this will contaminate all subsequent semen<br />
samples).<br />
7. Tiger and lion semen is clear to slightly cloudy – unlike ruminant semen which is whitish. Any<br />
yellowish tinge indicates urine contamination – pre-warmed medium (e.g., Hepes-buffered<br />
Tyrodes-lactate medium or TL-Hepes, BioWhittaker, Walkersville, MD, USA; Cat # 04-616F)<br />
should be immediately added to such tubes in an effort to recover viable sperm.<br />
8. The electroejaculation procedure should be terminated after a maximum of 50 stimulations (to<br />
avoid creating stiffening and cramping of leg musculature) or when 5 – 7 ml of seminal fluid is<br />
obtained (average maximum volume for tigers and lions).<br />
9. Semen fractions should be kept warm in a container or by holding the tubes against the body.<br />
10. Each individual collection tube should be examined separately. Only those tubes that contain<br />
motile sperm should then be pooled. It is helpful to use the attached worksheet for every<br />
electroejaculation procedure performed.<br />
11. Seminal plasma collected by electroejaculation can be harmful to large felid sperm after<br />
prolonged exposure. Therefore, prior to extension with a cryodiluent, the semen should be<br />
diluted with medium (e.g., TL-Hepes), centrifuged for 10 min at 300 x g, then the supernatant<br />
removed and discarded. The sperm rich pellet can then be reconstituted with the first<br />
cryodiluent.<br />
12. Transport the dirty rectal probe inside a palpation sleeve or plastic bag back to the lab – wash it<br />
immediately with warm soapy water and rinse with a disinfectant.<br />
7
Worksheet: Semen Collection by Rectal Probe Electrostimulation (Electroejaculation)<br />
Date: Species: ID#: Name: Location:<br />
Immobilization Protocol:<br />
Duration Fasted: (feed) (water) Weight: Pre-treatment:<br />
Drug Regimen:<br />
Supplementation:<br />
Time Begin: Time End: Clinician: Tech:<br />
Blood Collection for: Serum or Plasma (Anti-Coag?): Vol:<br />
Tissue/Excretus Collection:<br />
Scrotal Measurements:<br />
Length (Right): Length (Left): Texture:<br />
Width (Right): Width (Left): Circumf:<br />
Ambient Temp: Rectal Temp: Probe Size:<br />
Electrostimulator:<br />
Semen Collection Protocol:<br />
Total Voltage Range: Total Series: Total Stimulations/Series:<br />
Series: 1 2 3 4 5 6 Pool [ ]<br />
Time Begin:<br />
Time End:<br />
Volts (range):<br />
mAmps (range):<br />
Erection (+/-):<br />
Volume (ml):<br />
Color:<br />
pH:<br />
Urine (+/-):<br />
Est. Motility (%):<br />
Linear Prog (0-5):<br />
Debris (type):<br />
Total Conc. (x10 6 ):<br />
Comments:<br />
8
In Vitro Fertilization and <strong>Embryo</strong> <strong>Transfer</strong> in Felids<br />
Charles Earle Pope<br />
Audubon Nature Institute Center for Research of Endangered Species<br />
September 2006<br />
Contact information for further details:<br />
epope@auduboninstitute.org<br />
Pubications using this protocol:<br />
1) From: Pope. C.E. Methods in Molecular Biology, vol. 254: Germ Cell Protocols, Volume 2:<br />
Molecular <strong>Embryo</strong> Analysis, Live Imaging, Transgenesis, and Cloning. Edited by: H. Schatten<br />
© Humana Press Inc., Totowa, NJ<br />
Table 1. Pregnancies produced and kittens born after transfer of domestic cat embryos<br />
produced in vitro by our laboratory.<br />
<strong>Embryo</strong> Specific Recipient Kittens<br />
Derivation Treatment Pregnant/Total (%) Born (n) Ref<br />
In vivo matured/IVF ET D4-5<br />
>12 embryos/ET 11/26 (42) 21 10<br />
In vivo matured/IVF ET D4-5<br />
>12 embryos/ET 6/23 (26) 11 10<br />
In vivo matured/IVF Frozen D2 2/4 (50) 3 11<br />
In vivo matured/ICSI ET D5 2/4 (50) 3 12<br />
In vivo matured/SUZI ET D5 1/4 (25) 1 14<br />
In vitro matured/ICSI ET D5 3/9 (33) 3 13<br />
In vitro matured/IVF ET D5-6 0/4 (0) 0 15<br />
In vitro matured/IVF ET D5-6 3/3 (100) 4 15<br />
In vitro matured/IVF Frozen D4-5;<br />
ET D5-6 4/10 (40) 3 20<br />
In vitro matured/IVF Ovaries cooled;<br />
ET D6-7 3/3 (100) 3 24<br />
Introduction<br />
The genome of the cat is highly conserved. In fact, of the non-primate mammalian species in<br />
which gene maps are developing, the cat genome exhibits the most similarities to that of the human (1).<br />
Biomedical studies in the domestic cat have contributed significantly to our knowledge in the areas of<br />
immunology, infectious diseases, genetics, neurophysiology, and cancer (2). Many of the heritable<br />
disorders of cats are analogous to those of humans, including hemophilia A and B, polycystic kidney<br />
disease, and several lysosomal storage diseases such as mucopolysaccharidosis, α-mannosidosis, and<br />
spingomyelinosis C. The close phylogenetic relationship, and the fact that many analogous genetic<br />
disorders have been identified and characterized, are important factors that demonstrate the advantages<br />
of domestic cats as biomedical research models for human disease when compared to other laboratory<br />
animals.<br />
9
Although initial efforts to enhance reproductive rates of laboratory cats were reported more than<br />
30 yr ago, most of the progress in development of assisted reproductive techniques (ART) has occurred<br />
during the past 10–15 yr and has been the subject of several reviews (3–6). A major focus of most recent<br />
work, including that of our laboratory, has been directed toward developing techniques that can be<br />
applied to the conservation of endangered felid species. Initially, embryos were produced from in vivo–<br />
matured oocytes after retrieval by follicular aspiration from gonadotropin treated females. Although the<br />
first in vitro–derived kittens were produced from such oocytes (7), much of the recent work on in vitro<br />
embryo production has been done using in vitro–matured (IVM) oocytes. There are several reasons for<br />
this, not the least important of which is the greater accessibility of such material. Cat ovaries are easily<br />
obtainable from local veterinary clinics, making it possible to recover several hundred oocytes per week,<br />
particularly if the laboratory is located near a large metropolitan area. Furthermore, the ability to<br />
maximize in vitro embryo production using IVM oocytes becomes of utmost importance if the<br />
technology is to be of relevance for conserving endangered felids.<br />
Tangible evidence of progress in the development of felid ART made during the last decade is<br />
found by listing the different types of domestic kittens that have been produced in our laboratory after<br />
transfer of in vitro–derived embryos to recipient females, as shown in Table 1. Most of our embryo<br />
transfers (ET) have been done on d 5 when the embryos are mid- to late-morulae, the age and stage at<br />
which uterine entry naturally occurs. Others prefer to do oviductal ET of early cleavage stage embryos,<br />
thereby minimizing the in vitro culture interval (7,8). Oviductal ET may be advantageous in certain<br />
circumstances and possibly results in slightly higher pregnancy rates. Our decision to concentrate on<br />
uterine ET stems from it being less technically difficult and, therefore, more likely to have practical<br />
applicability, particularly if additional kittens can be produced by trans-cervical ET into the uterus, as<br />
one report has shown (9). Such an approach requires that considerable attention be devoted to continual<br />
evolution and improvement of the in vitro culture environment. For example, even though the base of<br />
our culture media for in vitro fertilization (IVF) and in vitro culture (IVC) is still Tyrode‘s balanced salt<br />
solution (14), a comparison of the culture media we used during the early 1990s (10,11) with that used<br />
more recently (12,13) reveals several differences. Among the most notable changes are the addition of<br />
amino acids, delayed supplementation with fetal bovine serum (FBS) and a gas atmosphere of reduced<br />
oxygen (5%). Resulting from greater interest and effort in developing ART in felids, in vitro<br />
development has shown gradual, but steady, improvement, as shown by rates of blastocyst development<br />
at d 7 increasing from 15%–30% in our earlier studies up to approx 50% in recent reports.<br />
This chapter describes the materials and methods used for the in vitro production of cat embryos,<br />
including IVM, IVF, IVC, embryo cryopreservation, and transfer of embryos to recipient females.<br />
Components of Culture Media<br />
Nondisposable Plastics or Glassware<br />
Materials and Methods<br />
1. All reusable plastic or glassware used for media preparation or holding/processing of<br />
gametes/embryos are washed in 1% 7X detergent (ICN, Aurora, OH) as described by the manufacturer.<br />
2. The water used for soaking/rinsing (and media preparation) is fresh sterile filtered (0.22 µm) 18 M<br />
water (Nanopure, Barnstead <strong>International</strong>, Dubuque, IA).<br />
10
3. After overnight soaking in the detergent, each item is scrubbed with a brush, rinsed, and allowed to<br />
soak overnight in water before additional multiple rinses.<br />
4. After oven drying, each item is wrapped or bagged and sterilized using a tabletop autoclave filled<br />
with reverse osmosis water and dedicated to culture labware only.<br />
Base Media<br />
The base salt solutions and media to which additional supplements are added to make the media<br />
used for gamete/embryo holding, culture, and storage are as follows:<br />
1. Tyrode‘s balanced salt solution (Ty, Irving Scientific, cat. no. 9282, Santa Ana, CA) is the base for<br />
IVF/IVC media and a HEPES-buffered medium for diluting/maintaining spermatozoa for IVF and<br />
embryos cryopreservation .<br />
2. TCM 199, (Irving Scientific, cat. no. 9102, with NaHCO3, without glutamine): base for IVM<br />
medium.<br />
3. TCM 199, (Sigma, cat. no. 3769, without glutamine and NaHCO3): base for HEPES buffered holding<br />
medium for oocytes/embryos outside of the CO2 incubator.<br />
4. TL Hepes solution, (Biowittaker, cat. no. 04-616F, Walkersville, MD): oocyte aspiration medium. 1–<br />
2 mL TL HEPES, with 10 µ/mL heparin and 50 µg/mL gentamicin added is preloaded into each 15-mL<br />
centrifuge tube to be used for collection of aspirated oocytes.<br />
Additional Components<br />
1. Gonadotropins. Equine chorionic gonadotropin (eCG; Calbiochem, cat. no. 367222, San Diego, CA)<br />
and human chorionic gonadotropin (hCG, Pregnyl, Organon Inc., West Orange, NJ) used in IVM<br />
medium. In a laminar flow hood, each vial of gonadotropin powder is reconstituted with sterile Ty so<br />
that each mL contains 100X final concentration used for culture (100X: eCG = 50 IU/mL; hCG =100<br />
IU/mL). Aliquot into 1.5 mL microcentrifuge tubes, label, and store at –80°C until needed. Do not<br />
refreeze after thawing.<br />
2. Supplement stocks. The energy sources and antibiotics in the IVF and IVC media are prepared as a<br />
100X solution in Ty (Table 2). To prepare 10 mL 100X stock, weigh out 0.146 g glutamine, 0.040 g<br />
sodium pyruvate, 0.242 g calcium lactate, and 0.050 g gentamicin and solubilize in Ty. Sterilize by<br />
filtering into 1.5-mL tubes, label, and store at –80ºC until the day of use. Similarly, 10 mL of 100X<br />
supplement for IVM medium is prepared as described for IVF/IVC, except that glutamine is increased to<br />
0.292 g and 0.200 g cysteine is added.<br />
3. Bovine serum albumin (BSA; fraction V, Serological Proteins, Inc., cat. no. 82047, Kankakee, Il).<br />
BSA is added at a 6 mg/mL final concentration for IVF and 3 mg/mL for the first step of IVC (see Note<br />
1).<br />
4. FBS, Hyclone, Inc., cat. no. 30070, Logan, UT). BSA is replaced with 10% FBS as development<br />
approaches the early morula stage on IVC d 2 or 3. Each serum bottle is thawed upon arrival, aliquoted<br />
at 10 mL/sterile 15-mL centrifuge tube (polypropylene, Corning, Inc.,cat. no. 430052) and stored at –<br />
80°C. As needed, FBS is thawed and heat-treated at 56°C for 30 min before use.<br />
11
5. Amino acids. Minimal essential medium (MEM) nonessential amino acids (NEAA) and MEM<br />
essential amino acids (EAA) are purchased as 100X and 50X solutions, respectively. Upon arrival, each<br />
100-mL bottle is aliquoted into 1.0 mL/1.5 mL sterile microcentrifuge tubes and stored at –80°C until<br />
needed.<br />
6. Epidermal growth factor (EGF, Sigma, cat. no. 9644). EGF powder is reconstituted with Ty to a 1000<br />
ng/mL concentration (100X final concentration), filter sterilized into 1.5-mL microcentrifuge tubes, and<br />
stored at –80°C until needed.<br />
Preparation of Media: Osmolality and pH<br />
1. All culture/holding media are freshly prepared every week. Table 2 outlines the quantities of each<br />
supplement to add to bicarbonate-based media for preparing a total of 100 mL of each medium used to<br />
culture oocytes/embryos from IVM through development to the blastocyst stage.<br />
Table 2. Quantities of base media and supplements used to prepare 100 mL of each<br />
type of culture medium used for in vitro production of cat embryos.<br />
Item IVM IVF IVC-I IVC-II<br />
Ty balanced salt solution – 89.5 mL 88.5 mL 76.5 mL<br />
Water, type I, fresh – 8.0 mL 8.0 mL 8.0 mL<br />
IVF/IVC 100X supplement – 1.0 mL 1.0 mL 1.0 mL<br />
NaHCO3, 7.5% solution – 1.5 mL 1.5 mL 1.5 mL<br />
100X MEM NEAAs – – 1.0 mL 1.0 mL<br />
50X MEM EAAs – – – 2.0 mL<br />
FBS – – – 10.0 mL<br />
BSA Fr V 0.3 g 0.6 g 0.3 g –<br />
TCM 199 96.75 mL – – –<br />
IVM 100X supplement 1.00 mL – – –<br />
hCG (1 IU/mL; 100 IU/mL stock) 1.00 mL – – –<br />
eCG (0.5 IU/mL; 200 IU/mL stock) 0.25 mL – – –<br />
EGF (10 ng/mL; 100X stock) 1.00 mL – – –<br />
2. Mixing and filtering are done using a horizontal laminar flow hood. After all components have been<br />
combined and thoroughly mixed for each medium, osmolality and pH values are checked.<br />
3. Desired osmolality is between 285 and 295 mOsm. If the medium is higher than 295 mOsm, it is<br />
adjusted by adding fresh water.<br />
4. Before gassing with 5% CO2 in air, the pH of bicarbonate buffered media should be approx 7.7–7.8.<br />
Media not in that pH range are adjusted with 1.0 N NaOH or 1.0 N HCl, as necessary.<br />
5. HEPES-buffered media are used for handling and processing of gametes when not maintained in a gas<br />
atmosphere of 5% CO2. After recovery of cumulus oocyte complexes, either from excised ovaries or<br />
after laparoscopic follicular aspiration, they are maintained in a HEPES buffered TCM 199 medium<br />
made in the laboratory.<br />
12
6. To prepare, 15 mM NaHCO3, 15 mM HEPES, 3 mg/mL BSA, and 1% of 100X IVC supplement is<br />
added to the TCM 199 base medium described above.<br />
7. HEPES buffered Ty (HeTy) is used for preparing embryo cryoprotectant medium and for extension<br />
and holding of sperm samples before IVF.<br />
8. HeTy is prepared as described for He 199, except that NaHCO3 is not added because it is contained in<br />
Ty as purchased.<br />
Filtration<br />
1. Each type of medium, after checking/adjusting osmolality and pH, is sterilized by yringe filtration<br />
into 15-mL conical centrifuge tubes (Corning Inc., cat. no. 430052, Acton, MA) in a laminar flow hood.<br />
2. No more than 5 mL bicarbonate-buffered culture medium is added per tube.<br />
3. For a description of the filtration process for larger media volumes, as is done when the base medium<br />
is purchased in dry form and mixed in the laboratory (see Note 3).<br />
Gas Equilibration<br />
1. Immediately after filtration, while still working in a laminar flow hood, each tube of medium is<br />
gassed with a mixture of 5% CO2 in air (or 5% CO2, 5% O2, 90% N2).<br />
2. Insert an 18 g × 3.8 cm needle, attached to the gas mixture by tubing, into the tube while it is being<br />
held at a 15° angle.<br />
3. Allow gas to blow over the media, but not into it, which prevents bubble formation.<br />
4. After 45–60 s, the needle is quickly withdrawn, and the tube is capped tightly.<br />
Media Storage<br />
After gassing, the tubes of freshly prepared media are stored in a tilt rack at 4°C until use within 7 d.<br />
Cryopreservation Solutions<br />
1. The cryoprotectant solution consists of 1.4 M propylene glycol (PG), 0.125 M sucrose (S), 10%<br />
Dextran 70, and 10% FBS in HeTy (CPS).<br />
2. Previously prepared HeTy medium can be used as the ‗base‘ for the cryoprotectant solution.<br />
3. However, preparation is easier if sucrose, then dextran, are added to and mixed withTy without BSA<br />
or FBS in it.<br />
4. After sucrose and dextran are in solution, then 1% 100X IVC supplement, 15 mM HEPES and 1.4 M<br />
PG are added.<br />
5. Next, add BSA (3 mg/mL) powder and swirl gently, avoiding bubbles, if possible.<br />
13
6. After BSA is completely in solution, add 10% FBS to complete the CPA solution.<br />
7. Sterilize by syringe filtration into sterile 5-mL cryotubes, label, and store at –80ºC until needed.<br />
Artificial Vagina for Semen Collection<br />
1. The artificial vagina (AV) consists of a sleeve and collection container prepared from a 2 mL latex<br />
bulb and a 1.5-mL microcentrifuge tube, respectively.<br />
2. After washing, the closed-end portion of the bulb is cut off, leaving an approx 3-cm length of open<br />
tube.<br />
3. The conical base of a microcentrifuge tube is cut away from the remaining portion and fitted into the<br />
end of the latex bulb that had been cut open.<br />
4. The AV is bagged and autoclaved along with a 50-mL glass serum bottle.<br />
5. To use, the bottle is filled with water warmed to approx 40°C, the AV is placed into the bottle, and the<br />
open end is folded over the lip of the bottle to hold it in place.<br />
6. A small amount of nonoil-based sterile lubricant is smeared around the AV opening.<br />
IVC of Oocytes and <strong>Embryo</strong>s<br />
1. Oocytes and embryos are placed in 500 µL preequilibrated IVM or IVC medium in four-well culture<br />
dishes (Nunclon, cat. no., 176740 Nunc, Denmark) and cultured in a closed system.<br />
2. The platform of the closed system is the inverted lid of a micro titer plate (Corning, Inc., cat. no.<br />
3513) onto which are placed the four-well dishes containing the oocytes or embryos next to a 60 × 15-<br />
mm Petri dish filled with approx 7 mL sterile water.<br />
3. Several holes are drilled in the lid of the 60-mm Petri dish to provide humidity in the sealed bag.<br />
4. The assembled system is placed inside of a 16.5 × 20.3 cm plastic bag (Kapak SealPAK pouch, cat.<br />
no. 402, Kapak Corp, Minneapolis, MN).<br />
5. Then, a 16-gauge × 10-cm blunt-tipped needle, connected by tubing to a premixed tank of 5% O2, 5%<br />
CO2 and 90% N2, is inserted into the open side of the bag, which, in turn, is placed in between the jaws<br />
of an impulse sealer (Model AIE-200, American <strong>International</strong> Electric, Whittier, CA).<br />
6. The premixed gas is humidified during inflow by bubbling it through a flask containing 700 mL<br />
sterile water.<br />
7. After the bag is inflated with the humidified gas mixture, the needle is quickly withdrawn, and the bag<br />
is heat-sealed.<br />
8. During the sealing process, the bag and its contents sit on a heated block maintained at 38°C.<br />
14
9. After checking for patency the bag containing the oocytes or embryos is placed into a water-jacketed<br />
incubator at 38°C (Forma Scientific, model 3130, Marietta, OH).<br />
Gonadotropic Stimulation of Ovarian Follicle Development in Oocyte Donors<br />
1. Porcine follicle stimulating hormone (FSH) (cat. no. 915, 50 IU/vial) and porcine leutinizing hormone<br />
(LH) (cat. no. 925, 25 IU/vial) are purchased from Sioux Biochemicals, Sioux Center, IA, and stored at<br />
4°C until needed.<br />
2. Immediately before use, lyophilized FSH is reconstituted by adding a sterile solution of 2%<br />
carboxymethylcellulose (CMC) and 1% Tween 20 (Tw20).<br />
3. Initially, 10 mL CMC/Tw20 is added to the vial of powder.<br />
4. To minimize bubble formation, direct flow down the inside wall, set the vial aside for a few minutes,<br />
then gently swirl for 30–60 s to ensure that all powder is completely dissolved.<br />
5. Then, remove the 10 mL FSH solution and put into a sterile 50-mL centrifuge tube.<br />
6. Add another 10 mL CMC/Tw20 to the original FSH vial and gently swirl before removing and adding<br />
to the 50-mL centrifuge tube.<br />
7. Lastly, add a final 5 mL CMC/Tw20 to the FSH vial, aspirate it back into the syringe, and add it to the<br />
50-mL tube. The final 25 mL vol of reconstituted FSH will have 2.0 IU/mL.<br />
8. The FSH solution is then aliquoted into 3-mL glass tubes (Vacutainer, cat. no. 366381, sterile, no<br />
additive, Becton Dickinson, Franklin Lakes, NJ) and held at 4°C, if it is to be used within 2 d, or stored<br />
at –80°C for later use.<br />
9. LH is similarly prepared, except that only 5 mL of CMC/Tw20 is added per vial to give a final 5<br />
IU/mL concentration.<br />
Methods<br />
Animals<br />
1. The cats in our facility are antibody-defined animals purchased from a US Department of Agriculture<br />
(USDA) approved, AAALAC accredited vendor (Liberty Research, Waverly, NY).<br />
2. Potential oocyte donors are chosen from sexually mature females with most of them ranging from<br />
approx 1 to 6 yr of age.<br />
3. They are group housed in rooms maintained at a temperature of 72–76°C, a relative humidity of 66–<br />
67%, and 14/10 h of light/dark cycle.<br />
4. The rooms are cleaned, and fresh food and water are provided daily.<br />
5. In addition to the animal care personnel, a veterinary staff consisting of one veterinarian and two<br />
technicians provide full-time health care.<br />
15
6. Semen for laboratory use is collected from two or three sexually mature tom cats that are individually<br />
housed in stainless-steel cages.<br />
Hormonal Stimulation of Ovarian Follicular Development<br />
Oocyte Donors<br />
1. Potential oocyte donors are selected from females that are interestrus as determined by vaginal<br />
cytology and lack of behavioral signs of estrus.<br />
2. Vaginal cells are recovered from nonsedated females with a moistened vaginal swab, then rolled onto<br />
a clean microscope slide.<br />
3. After staining, each slide is microscopically evaluated, and those with a predominance of parabasal<br />
and intermediate cells are candidates for gonadotropin treatment.<br />
Gonadotropin Treatment of Oocyte Donors<br />
1. The standard total amount of FSH administered to potential oocyte donors previously untreated with<br />
exogenous gonadotropins is 3.0 IU given in decreasing doses 1 time/d for 4 d.<br />
2. At 2.0 IU/mL, the total FSH volume of 1.5 mL is typically administered subcutaneously (sc) at the<br />
rate of 0.5, 0.4, 0.3, and 0.3 mL/d.<br />
3. FSH is given during mid to late afternoon, and injections should be done at approx. 24-h intervals. In<br />
the morning of the fifth day of hormone treatment, 3.0 IU LH is administered intramuscularly (im).<br />
4. The LH injection is given 24 h before the scheduled oocyte retrieval.<br />
5. For information about gonadotropin treatment for females that have previously undergone ovarian<br />
stimulation and oocyte recovery.<br />
Oocyte Retrieval from Gonadotropin-Treated Donors<br />
Pre-operative Procedure<br />
1. Food and water are withdrawn on the day before laparoscopy.<br />
2. Oocyte donors are sedated with injectable anesthetics, and the lower abdomen is closely clipped.<br />
3. After intubation, anesthesia is maintained by inhalation of isoflurane and oxygen. The abdominal area<br />
is scrubbed with chlorohexidene and sprayed with 70% alcohol before sterile disposable drapes are<br />
placed over the animal, leaving only the surgical area exposed.<br />
Laparoscopic Procedure<br />
1. Oocyte retrievals are done 24 h after LH administration.<br />
16
2. Three abdominal entry sites are required for insertion of the Verres‘ needle and two ports, one for the<br />
telescope and the other for forceps.<br />
3. To insufflate the abdominal cavity, a small skin incision is made on the right side 2.5–3.0-cm caudal<br />
to the umbilicus and 2.0-cm lateral to the midline.<br />
4. Skin folds on both the cranial and caudal sides of the incision are raised, and Allis tissue forceps are<br />
attached for elevating the abdominal wall.<br />
5. A 150-mm stainless-steel Verres needle (Olympus America, Inc., cat. no. A5150.1, Melville, NY) is<br />
positioned vertically at the incision site, and with manual pressure, is carefully inserted into the<br />
abdominal cavity.<br />
6. Usually, a ‗snapping‘ sound is heard as the blunt stylet tip returns to its full extension beyond the<br />
needle tip after entry into the abdominal cavity.<br />
7. When the needle tip is confirmed to be properly located, both by feel and free inflow of saline, tubing<br />
attached to an automatic insufflator (Insufflator-15 L, Olympus America, Inc.) is connected, and the<br />
abdominal cavity is insufflated to a pressure of 10 mm Hg with 5% O2, 5% CO2, 90% N2.<br />
8. Then, a 5-mm safety trocar/cannula (Ethicon Endosurgery, cat. no. 355 SD, Cincinnati, OH) is<br />
inserted into the abdominal cavity through a skin incision approx 1-cm anterior to the umbilicus as a<br />
port for insertion of the rigid 5 mm telescope (O° angle, Olympus America, Inc., cat. no. A5290A).<br />
9. A camera (Olympus America, Inc., cat. no. MH-972N) is connected to the telescope for visualizing<br />
the operative field on a 19"-color monitor mounted at eye-level and located at the tail-end of the<br />
operating table.<br />
10. While visualizing the bladder and surrounding area, a second 5-mm safety trocar/cannula is inserted<br />
into the abdominal cavity through the skin incision in the midline between two most-posterior teats.<br />
11. Even after insufflation, there is considerably less open area between the body wall and intestines at<br />
the lower puncture site.<br />
12. Accordingly, it is important to be able to see the tip of the lower trocar as it enters the abdominal<br />
cavity to ensure that no organs or tissues are damaged during entry.<br />
13. After the second-port entry, the surgery table is tilted (approx 15 to 20°) cranially downward so that<br />
intestines shift forward to improve access to the ovaries.<br />
14. A 5-mm Babcock forceps (Olympus America, cat. no. A63040A) for lifting and stabilizing each<br />
ovary is inserted through the lower port.<br />
15. If the ovaries are not immediately visible, the overlaying mesentery and/or intestinal loops are<br />
relocated using the Verres‘ needle.<br />
16. Then, the forceps are placed around the base of the ovary, being careful to exclude fimbrial tissue<br />
before clamping and elevating into the correct position for visualizing and accessing follicles.<br />
17
Follicle Aspiration<br />
1. A 18-gauge, 6-cm stainless steel trocar/cannula is placed percutaneously above each ovary<br />
sequentially, not simultaneously, as a port for inserting the aspiration needle.<br />
2. The sterile follicle aspiration units are custom -made in-house and consist of a 20 gauge (thin wall),<br />
10 cm needle connected to a approx 0.8 m-length of 1.02 mm (id) × 1.16 mm (od) silicone tubing, the<br />
other end of which passes through a 17-mm silicone stopper with 2–3 cm of tubing extending through<br />
the exit side. The tubing is stabilized and sealed in the stopper with silicone adhesive.<br />
3. The stopper also has a 16-gauge blunt tipped stainless-steel needle mounted in it for connecting via<br />
tubing to the vacuum pump.<br />
4. For follicle aspiration, the stopper is seated into a 15-mL conical tube containing 1–2 mL TL HEPES<br />
solution with heparin.<br />
5. Each visible follicle is punctured at 75 mmHg suction provided by a regulated vacuum pump<br />
specifically designed for follicle aspiration (Cook Veterinary Products, V-MAR-5115, Eight Mile<br />
Plains, Australia).<br />
6. Most gonadotropin-stimulated follicles are from 2 to 4 mm in diameter when aspirated at 24-h post-<br />
LH injection.<br />
7. The aspiration tubing is monitored carefully during the process to ensure that clotting has not ccurred<br />
and that the fluid is flowing into the collection tube. Periodically (after 5–15 follicle punctures), the<br />
aspiration needle is removed, placed in a tube of TL HEPES + heparin to flush the contents down into<br />
the collection tube.<br />
8. After all visible follicles have been aspirated, each ovary is rinsed with over 50 mL of sterile saline<br />
solution infused through either the aspiration cannula or the Verres‘ needle. The infused saline is<br />
removed by manual aspiration back into a 30-mL syringe connected to the Verres‘ needle.<br />
Post-laparoscopic Procedure<br />
1. When both ovaries have been aspirated, the surgery table top is returned to the level position, and any<br />
remaining infused saline is removed by aspiration.<br />
2. The insufflation tube is disconnected, and the ports on each cannula are opened so that residual gas is<br />
exhausted out of the abdominal cavity.<br />
3. At the puncture sites for the Verres‘ needle and trocars, the abdominal musculature is closed with an<br />
appropriately sized absorbable suture material in a simple interrupted pattern.<br />
4. If the animal has a thick sc fat layer, it is closed with an absorbable suture material in a simple<br />
continuous pattern.<br />
5. The skin is closed with an absorbable suture material in a buried subcuticular pattern. In cases where<br />
there is no closure of the sc fat layer (i.e., thin animals), the subcuticular suture is intermittently tacked<br />
to the abdominal musculature to decrease the likelihood of seroma formation.<br />
18
6 Poliglecaprone 25 is the preferred suture material, owing to its low reactivity and long duration of<br />
strength.<br />
7. A small amount of tissue adhesive (cyanoacrylate) is used at the completion of the skin suture to<br />
facilitate good-knot burial.<br />
In vitro Oocyte Maturation<br />
Ovary Collection and Transport<br />
Domestic cat ovaries obtained from local veterinary clinics after ovariohysterectomy are<br />
transported to the laboratory at ambient temperature in HEPES-buffered saline solution (UltraSaline A<br />
Solution, Bio-Whittaker, Walkersville, MD) supplemented with 50 µg/mL gentamicin.<br />
Oocyte Collection and Sorting<br />
1. Within 2–6 h, ovaries are minced and cumulus-oocyte complexes (COC) collected into HEPESbuffered<br />
TCM 199 (He-199) at 35–38°C.<br />
2. COC recovery and handling is done within laminar flow hoods using stereomicroscopes equipped<br />
with temperature-controlled stages set at 38°C.<br />
3. After rinsing three times in He 199, COC are sorted into three groups according to ooplasm<br />
appearance and cumulus cell presence (15):<br />
a. Type A oocytes have uniformly dark, finely granulated ooplasm enclosed in a smooth, spherical<br />
oolemma.<br />
b. Ooplasm of type B oocytes have slightly lighter pigmentation and the ooplasm is less uniformly<br />
and evenly granulated.<br />
c. Oocytes of type C have pale ooplasm that is more coarsely granulated and more irregular in<br />
overall appearance.<br />
IVC of IVM Oocytes<br />
From 10 to 30 oocytes of each type/well are cultured using the closed system for 24 h in<br />
modified TCM 199 containing eCG/hCG and BSA and the supplements described previously.<br />
Spermatozoa for IVF<br />
Semen Collection<br />
1. Semen is collected from adult domestic cats using an artificial vagina (AV; 16).<br />
2. The collection is done in a quiet area with minimal chance of disruption. As soon as the male mounts<br />
the ‗teaser‘ female, the penis is gently directed into the AV unit so that natural mating does not occur.<br />
3. Ejaculation usually occurs rather quickly, although, on occasion, males may require more time and<br />
patience to obtain a semen sample.<br />
19
4. The volume of semen samples collected using an AV usually ranges from 30 to 60 µL, although<br />
samples of 80–100 µL are obtained from some males.<br />
Semen Extension and Cooling for Temporary Storage<br />
1. The semen sample is held at room temperature during processing.<br />
2. A 3–6 µL aliquot of the fresh semen sample extended in 35 µL HeTy provides more than enough<br />
spermatozoa for IVF.<br />
3. The remainder of the semen sample is combined with 500 µL TEST yolk buffer (Refrigeration<br />
Medium, Irving Scientific, Santa Ana, CA) in a 1.5-mL microcentrifuge tube and gradually cooled to<br />
4°C by putting the tube in a 100-mL screw-top bottle containing room temperature (22–23°C) water,<br />
then placing the sample in a 4°C refrigerator.<br />
4. To stabilize the tube within the water bath, a hole slightly larger than the diameter of the<br />
microcentrifuge tube is drilled in the middle of the lid.<br />
5. The bottle is completely filled with water so that the contents of the tube will be submerged during<br />
cooling.<br />
6. Cooled semen is used for IVF for up to 3 d after collection/storage, whereas fertilizing ability is<br />
maintained for at least 7 d at 4°C (17).<br />
7. To use spermatozoa held at 4°C, a 3–6 µLaliquot is pipetted directly from the visible sperm pellet<br />
formed by sedimentation after cooling when motility is temporarily suspended.<br />
Estimation of Sperm Motility and Concentration<br />
1. The percentage of motile spermatozoa in the diluted sample is estimated subjectively using brightfield<br />
microscopy, and sperm concentration is measured photometrically (SpermaCue, MiniTube of<br />
America, Veronica, WI).<br />
2. To measure sperm concentration, an aliquot of semen sample extended in HeTy is further diluted 1:1<br />
in a formal citrate solution consisting of 2.9% (w/v) trisodium citrate dihydrate and 0.1% (v/v)<br />
formaldehyde in deionized water (18) to inhibit motility.<br />
3. A 25-µL aliquot of the sperm sample diluted in formal citrate is loaded into the photometer cuvette,<br />
the cuvet is placed in the chamber of the photometer, and the concentration is measured as n × 10 6<br />
sperm/mL.<br />
4. Then, 10 µL of the extended sample is further diluted with HeTy to 10 × 10 6 motile sperm/mL<br />
immediately before IVF.<br />
20
IVF<br />
1. The IVF dishes are prepared by pipetting 4–40 µL drops of modified Ty containing 6 mg/mL BSA<br />
(Table 2) into a 35 × 10 Petri dish (Falcon, cat. no. 1008) and overlaying with approx 3 mL of mineral<br />
oil (Sage BioPharma, cat. no. 4008, Bedminster, NJ).<br />
2. From 5 to 15 oocytes are pipetted into each drop in approx 5 µL medium.<br />
3. For IVF, 5 ± 1 µLof the aliquot previously diluted to 10 × 106 motile sperm/mL is added to each<br />
droplet of IVF medium to give a final motile sperm concentration of 1 × 10 6 /mL.<br />
4. Oocytes and spermatozoa are coincubated in 5% CO2 + air at 38°C.<br />
IVC<br />
1. At 5–7 h or 15–18 h post-insemination, in vivo matured and IVM oocytes, respectively (see Note 7<br />
for explanation of insemination durations), are rinsed four times in He 199 and cultured in 500 µL of<br />
modified Ty containing NEAA and BSA (IVC-1 medium) at 38°C in sealed bags filled with 5% CO2,<br />
5% O2, and 90% N2.<br />
2. Then, on d 2 or 3, uncleaved oocytes are removed and embryos are placed into fresh modified Ty<br />
containing NEAA, EAA, and 10% FBS, instead of BSA (IVC-2, Table 2).<br />
3. Those embryos that are not transferred to recipients on d 5, 6, or 7 are evaluated on d 7 by visually<br />
determining blastocyst development using a stereomicroscope.<br />
4. Additional information, such as number of cells per embryo, can be obtained after fixation using any<br />
of the standard staining methods, such as aceto-orceinstained wet mounts, Giemsa/air-dryed<br />
preparations, or fluorescence.<br />
5. A simple chemically defined differential staining technique can be used to determine inner cell mass<br />
and trophectoderm cell numbers in cat blastocysts (19).<br />
<strong>Embryo</strong> Cryopreservation<br />
Initially, embryos were frozen on IVC d 2 at the two to four-cell stage (11), but the protocol is<br />
equally effective for embryos frozen on d 3, 4, or 5 (15,20). In fact, we are currently freezing embryos<br />
on d 5.<br />
Equilibration and Freezing<br />
1. The cryoprotectant solution consists of 1.4 M PG, 0.125 M S, 10% dextran 70, and 10% FBS in HeTy<br />
(CPS).<br />
2. On d 2 (4–8 cells), d 4 (early morulae) and d 5 (morulae) of IVC, embryos are exposed to CPS at<br />
22°C after a two-step equilibration in two parts of HeTy: 1 part CPS (1/3 CPS) and one part HeTy: two<br />
parts CPS (2/3 CPS) with 3 min/step.<br />
21
3. During the 10–15 min equilibration in CPS, embryos are loaded into 0.25- mL nonirradiated straws<br />
(Ag Tech, cat. no. B4-2400, Manhattan, KS) and after heat-sealing the tip, each straw is placed into the<br />
chamber of a controlled rate-freezing unit (CryoLogic, model CL-863, Victoria, Australia) at 20°C.<br />
4. <strong>Embryo</strong>s are cooled at 2.0°C/min to –6.0°C.<br />
5. During a 10 min hold at –6.0°C each straw is manually seeded with a cotton swab.<br />
6. Cooling is then resumed at 0.3°C/min to –30°C, and after a 10-min hold, embryos are plunged into<br />
liquid nitrogen for storage.<br />
Thawing and Culture<br />
1. Straws containing the embryos are thawed for 2 min in air at 22°C, the heat-sealed tip is cut off, and<br />
the contents are expelled into a 35-mm Petri dish.<br />
2. Cryoprotective agents are removed at room temperature using a five-step rinse consisting of 3 min<br />
each in HeTy plus: 0.95 M PG/0.25 M S; 0.95 M PG/0.125 M S; 0.45 M PG/0.125 M S; 0 PG/0.125 M<br />
S; 0 PG/0.0625 M S.<br />
3. After a brief rinse in He 199 at 38°C, thawed embryos are cultured in IVC-2 medium until transfer to<br />
a recipient female on d 5, 6, or 7, or until evaluation/staining on d 7 or 8.<br />
4. Such embryos are usually starting to form blastocysts by d 6 and up to half should reach the blastocyst<br />
stage by d 7, providing a convenient visual estimate of the developmental potential of the embryos being<br />
transferred.<br />
ET<br />
1. The recipient female is anesthetized as described earlier for laparoscopy.<br />
2. D 5–7 in vitro-derived embryos are transferred by mid-ventral laparotomy into the uterus of<br />
gonadotropin-treated females from which follicular oocytes had been aspirated 5–7 d previously.<br />
3. Using the aseptic technique, a section of one uterine horn is exteriorized through a 1.5-cm incision.<br />
4. An entry site for the catheter is made by puncturing the exposed uterine horn near the anterior tip with<br />
a sterile 16-gauge stainless steel trocar with the tip ground to a round short-beveled point.<br />
5. <strong>Embryo</strong>s are loaded in approx 80 µL culture medium into a sterile 14-cm, 3.5 fr, open-ended tom-cat<br />
catheter (The Kendall Co., cat. no. 703021, Mansfield, MA) attached to a 1-mL all-plastic syringe.<br />
6. The tip of the catheter is carefully threaded through the puncture site into the uterine lumen approx 4<br />
cm toward the uterine body before expelling the embryos by a quick push of the syringe plunger.<br />
7. The catheter is removed, flushed with culture medium, and the medium is checked with a<br />
stereomicroscope to ensure that no embryos are present.<br />
8. Closure of the incision and postoperative care is the same as described for laparoscopy.<br />
22
Notes<br />
1. Each new BSA lot is tested for its ability to support in vitro cleavage of cat oocytes and development<br />
to the blastocyst stage. If in vitro embryonic development is similar to that usually obtained in our<br />
laboratory, then we request that the company set aside several bottles for us to purchase as needed.<br />
2. Low protein binding syringe filters (Acrodisc, Pall Corp., cat. no. 1492, 0.22 µm, Ann Arbor, MI) are<br />
used for sterile filtration of all culture media prepared weekly. As a precautionary measure, for each<br />
new filter, dispose of the first 500 µL medium before collecting into sterile tubes. If using a single filter<br />
for more than one type of medium, discard the first 0.5–1.0 mL new medium.<br />
3. If the base medium is purchased in dry form, after mixing with water, the medium (usually prepared<br />
in 1-L batches) is filtered using positive pressure. For these larger volumes (>1 L) of media, a peristaltic<br />
pump (Cole Parmer, cat. no. 77000-30, Chicago, IL) having a flow rate of 100 mL/min. with 3.9-mm id<br />
silicone tubing is used. The medium is pumped through a filter unit (AcroCap, Pall Corp. cat. no. 4480,<br />
0.2 µm) attached to the sterile tubing and collected into 100-mL sterile glass screw-top bottles prepared<br />
as described previously. Each bottle is labeled and stored at 4°C until use.<br />
4. The total FSH amount to be given to previously treated donors is based on their earlier follicular<br />
response to hormone treatment. As a general rule, if 20 or more oocytes were recovered during the last<br />
laparoscopic retrieval, then the total dose is not increased. However, if fewer than 20 oocytes were<br />
recovered from the potential oocyte donor at one or more previous retrievals, then the total FSH dose is<br />
increased to 3.6–4.0 IU or even 5.0 IU if only 5–15 oocytes were recovered. Another selection criterion<br />
is based on a minimum interval of 6 mo since the previous stimulation with exogenous gonadotropins.<br />
Swanson et al. (21) reported that repeated treatment (two or three times) of domestic cats with 150 IU<br />
eCG followed 84 h later with 100 IU hCG at intervals of 49–57 d resulted in development of ovarian<br />
refractoriness to follicular development and recovery of fewer oocytes at each attempt. The decrease in<br />
follicle development did not occur if the interval between eCG/hCG treatments was increased to 130–<br />
135 d. Accordingly, a minimum of 6 mo is allowed between FSH/LH treatments. Our recent data on<br />
number of oocytes recovered after repeated oocyte retrievals following follicular stimulation with<br />
FSH/LH agrees with the earlier report in which eCG/hCG was used.<br />
5. Before each laparoscopy, the reusable equipment, such as the telescope, fiber optic cable, camera, and<br />
connecting cable, are disinfected by soaking for 60–90 min in a solution of 0.05% chlorohexidene (2%<br />
chlorohexidene diacetate, Nolvasan Solution, Fort Dodge Animal Health, Fort Dodge, IA). The<br />
instruments are then rinsed thoroughly in deionized water sterilized by autoclaving. The other<br />
instrumentation, such as Babcock forceps, 5-mm trocar/cannula, tubing/needle sets for follicle<br />
aspiration, and insufflation needles are sterilized by autoclaving or ethylene oxide. After each use, the<br />
telescope, camera, and cables are rinsed and dried. The other instruments are rinsed, cleaned by<br />
sonication in 7X detergent (1%), and rinsed thoroughly again before drying and repackaging for<br />
sterilization.<br />
6. Ideally, training for AV semen collection should begin before sexual maturity, although sexually<br />
experienced mature males are quite trainable. An estrous female, who is compatible and cooperative<br />
with the male is used as a teaser. Also, semen can be collected from some males using a stuffed<br />
‗dummy‘ cat. Using an artificial ‗teaser‘ cat eliminates the necessity of finding a cooperative female in<br />
estrus, which can occasionally be problematic.<br />
23
7. IVM oocytes are coincubated with spermatozoa for 15–18 h mostly for practical reasons. Because the<br />
ovaries do not arrive in the laboratory until mid-afternoon after pick-up from the veterinary clinics, the<br />
oocytes are not placed into culture until late afternoon. Most developmentally competent cat oocytes<br />
complete IVM in approx 24 h and they are inseminated during late afternoon the following day. So,<br />
rather than returning to the laboratory later that night, spermatozoa are coincubated overnight with<br />
oocytes. Then, the next morning, approx 15 to 18 h postinsemination, oocytes are rinsed and placed in<br />
culture. On the other hand, in vivo–matured oocytes are aspirated from gonadotropin-treated donor<br />
females during the morning, and IVF is done by around mid-day. Over 90% of metaphase II cat oocytes<br />
examined between 0.5 and 3.0 h postinsemination (IVF) had undergone sperm penetration into the<br />
ooplasm (10,22). Furthermore, cleavage frequencies of oocytes following 6 vs 15 h coincubation with<br />
spermatozoa were not different (23).<br />
Acknowledgments<br />
I would like to express my great appreciation to Dr. Betsy L. Dresser, Senior Vice President<br />
Research/Director, Audubon Nature Institute Center for Research of Endangered Species (AICRES) for<br />
her long-term support and encouragement. I am also indebted to numerous colleagues and coworkers,<br />
both formerly at the Cincinnati Zoo Center for Research of Endangered Wildlife (CREW) and currently<br />
at AICRES, without whom this work would not have been possible. Lastly, the cooperation and<br />
assistance of local veterinary clinics in providing gonads for gamete retrieval has been invaluable.<br />
References<br />
1. O‘Brien, S. J., Menotti-Raymond, M., Murphy, W. J., and Nash, N. G. 1999. The promise of<br />
comparative genomics in mammals. Science 286, 458–462.<br />
2. Migaki, G. Section VIII, Compendium of inherited metabolic diseases in animals, in Animal<br />
Models of Inherited Metabolic Disease (Desnick, R., Patterson, D., and Thompson D. G., eds.),<br />
A.R. Liss, New York, 1982, pp. 473–501.<br />
3. Goodrowe, K. L., Walker, S. L., Ryckman, D. P., Mastromonaco ,G. F., Hay, M. A., Bateman, H.<br />
L., and Waddell, W. T. (2000) Piecing together the puzzle of carnivore reproduction. Anim.<br />
Reprod. Sci. 60–61, 389–403.<br />
4. Farstad, W. (2000) Current state in biotechnology in canine and feline reproduction. Anim.<br />
Reprod. Sci. 60–61, 375–387.<br />
5. Luvoni G. C. (2000) Current progress on assisted reproduction in dogs and cats: in vitro embryo<br />
production. Reprod. Nutr. Dev. 40, 505–512.<br />
6. Pope, C. E. (2000) <strong>Embryo</strong> technology in conservation efforts for endangered felids.<br />
Theriogenology 53, 163–174.<br />
7. Goodrowe, K. L., Wall, R. J., O‘Brien, S. J., Schmidt, P. M., and Wildt, D. E. (1988)<br />
Developmental competence of domestic cat follicular oocytes. Biol. Reprod. 39, 355–372.<br />
8. Swanson, W. F., McRae, M. A., Wildt, D. E., and Rall W. F. (1999) Cryoprotectant toxicity and<br />
cryopreservation success in IVF-derived cat embryos after embryo transfer. Theriogenology<br />
(abstr.) 51, 174.<br />
9. Swanson, W. F. and Godke, R. A. (1994) Transcervical embryo transfer in the cat. Lab. Anim. Sci.<br />
44, 288–291.<br />
10. Pope, C. E., Keller, G. L., and Dresser, B. L. (1993) In vitro fertilization in domestic and nondomestic<br />
cats including sequences of early nuclear events, development in vitro, cryopreservation<br />
and successful intra-and interspecies embryo transfer. J. Reprod. Fertil. (Suppl. 47), 189–201.<br />
24
11. Pope C. E., McRae, M. A., Plair, B. L., Keller, G. L., and Dresser, B. L. (1994) Successful in vitro<br />
and in vivo development of in vitro fertilized two- to four-cell cat embryos following<br />
cryopreservation, culture and transfer. Theriogenology 42, 513–525.<br />
12. Pope, C. E., Johnson, C. A., McRae, M. A., Keller, G. L., and Dresser, B. L. (1998) Development<br />
of embryos produced by intracytoplasmic sperm injection of cat oocytes. Anim. Reprod. Scs. 53,<br />
221–236.<br />
13. Gómez, M. C., Pope, C. E., Harris, R. F., Davis, A., Mikota, S., and Dresser, B. L. (2000) Births of<br />
kittens produced by intracytoplasmic sperm injection of domestic cat oocytes matured in vitro.<br />
Reprod. Fertil. Dev. 12, 423–433.<br />
14. Pope C. E., Johnson, C. A., McRae, M. A., Keller, G. L., and Dresser, B. L. (1995) In vitro and in<br />
vivo development of domestic cat oocytes following intracytoplasmic sperm injection or subzonal<br />
insemination. Theriogenology (abstr.) 43, 302.<br />
15. Pope, C. E., McRae, M. A., Plair, B. L., Keller, G. L., and Dresser B. L. (1997) In vitro and in vivo<br />
development of embryos produced by in vitro maturation and in vitro fertilization of cat oocytes. J.<br />
Reprod. Fertil. Suppl. 51, 69–82.<br />
16. Sojka, N. J., Jennings, L. L., and Hamner C. E. (1970) Artificial insemination in the cat (Felis<br />
catus, l). Lab. Anim. Sci. 20, 198–204.<br />
17. Harris, R. F., Gomez, M. C., Leibo, S. P., and Pope C. E. (2002) In vitro development of domestic<br />
cat embryos after in vitro fertilization of oocytes with spermatozoa stored for various intervals at 4<br />
C. Theriogenology (abstr.) 57, 365.<br />
18. Dott, H. M. and Foster, G. C. (1975) Preservation of differential staining of spermatozoa by formal<br />
citrate. J. Reprod. Fertil. 45, 57–60.<br />
19. Harris, R. F., Gomez, M. C., Pope, C. E., Giraldo, A. M. King, A. L., and Dresser, B. L. (2003)<br />
Differential staining of trophectoderm and inner cell mass cells of cat in vitro derived blastocysts.<br />
Theriogenology (abstr.) 59, 448.<br />
20. Pope, C. E., Gómez, M. C., Harris, R. F., and Dresser, B. L. (2002) Development of in vitro<br />
matured, in vitro fertilized cat embryos following cryopreservation, culture and transfer.<br />
Theriogenology (abstr.) 57, 464.<br />
21. Swanson, W. F., Roth, T. L., Graham, K., Horohov, D. W., and Godke, R. A. (1996) Kinetics of<br />
the humoral immune response to multiple treatments with exogenous gonadotropins and relation to<br />
ovarian responsiveness in domestic cats. A m. J. Vet. Res. 57, 302–307.<br />
22. Niwa, K., Ohara, K., Hosoi, Y., and Iritani, A. (1985) Early events of in vitro fertilization of cat<br />
eggs by epididymal spermatozoa. J. Reprod. Fertil. 74, 657–660.<br />
23. Pope, C. E., Gelwicks, E. J., Wachs, K. B., Keller, G. L., and Dresser B. L. (1989) In vitro<br />
fertilization in the domestic cat (Felis catus): A comparison between freshly collected and cooled<br />
semen. Theriogenology (abstr.)32, 241.<br />
24. Pope, C. E., Gómez, M. C., King, A. L., Harris, R. F., and Dresser, B. L. (2003) <strong>Embryo</strong>s<br />
produced in vitro after recovery of oocytes from cat ovaries stored at 4°C for 24 to 28 h retain the<br />
competence to develop into live kittens after transfer to recipients. Theriogenology (abstr.) 59, 308.<br />
25
Large Felid Semen Cryopreservation<br />
N.M. Loskutoff<br />
Center for Conservation & Research, Omaha‘s Henry Doorly Zoo<br />
September 2003<br />
Contact information for further details:<br />
Naida Loskutoff at: NaidaL@omahazoo.com<br />
Publications using this protocol:<br />
1) Crichton, E.G., E. Bedows, A.K. Miller-Lindhom, D.M. Baldwin, D.L. Armstrong, L.H.<br />
Graham, J. Ford, J.O. Gjorret, P. Hyttel, C.E. Pope, G. Vajta and N.M. Loskutoff (2003) The<br />
efficacy of porcine gonadotropins for repeated stimulation of ovarian activity for oocyte retrieval<br />
and in vitro embryo production and cryopreservation in Siberian tigers (Panthera tigris altaica).<br />
Biology of Reproduction 68: 105-113.<br />
2) Gjorret, J.O., Crichton, E.G., Loskutoff, N.M., Armstrong, D.L. and Hyttel, P. Oocyte<br />
maturation, fertilization and early embryonic development in vitro in the Siberian tiger<br />
(Panthera tigris altaica). Molecular Reproduction and Development 63:79-88, 2002.<br />
3) Stander-Breedt, H., Schwalbach, L.M., Greylig, J. and Loskutoff, N.M. (2002). Effect of<br />
different cryodiluents and thawing methods on the motility and heterologous fertilizing capacity<br />
of African lion (Pathera leo) spermatozoa. Proceedings of the 9 th <strong>International</strong> Symposium on<br />
Spermatology, Cape Town, South Africa (6-12 October 2002).<br />
4) Motlomelo, K.C., Schwalbach, L.M., Greylig, J. and Loskutoff, N.M. (2002). A novel sperm<br />
cryopreservation method for the South African cheetah (Acinonyx jubatus). Proceedings of the<br />
9 th <strong>International</strong> Symposium on Spermatology, Cape Town, South Africa (6-12 October 2002).<br />
5) Nelson, K.L., E.G. Crichton, L. Doty, D. Volenec, J.M. Finnegan, R.G. Morato, C.E. Pope, B.L.<br />
Dresser, D.L. Armstrong and N.M. Loskutoff. (1999) Heterologous and homologous fertilizing<br />
capacity of cryopreserved felid sperm: a model for endangered species. Theriogenology 51:290,<br />
abst.<br />
Materials Needed:<br />
Sterile test tubes<br />
Medium (e.g., Hepes-TL Solution, BioWhittaker, Walkersville, MD,<br />
USA; Cat # 04-616F)<br />
Fetal calf serum (cell culture tested; e.g., Sigma, Gibco or HyClone)<br />
Sterile pipettes<br />
Glass slides and cover glasses<br />
Compound microscope<br />
Vital stain (e.g., eosin nigrosin or eosin B – fast green)<br />
Hemacytometer<br />
Glutaraldehyde (2.5%)<br />
Slide warmer<br />
Cryodiluents: Non-glycerated and glycerated (see below)<br />
Straws (0.25 ml)<br />
Sealing powder<br />
Refrigerator (walk-in, preferably)<br />
Dry ice block (10 lb) or styrofoam ―boat‖<br />
Goblets and canes<br />
Liquid nitrogen storage tank<br />
26
Cryodiluents: generally, a TES-Tris (TEST Yolk Buffer, Refrigeration Medium; Irvine Scientific,<br />
Santa Ana, CA, Tel: 800-437-5706; Cat #9972) or Tris-citrate-buffered, egg yolk-based diluent (e.g.,<br />
Biladyl A, Minitube of America, Madison, WI, Tel: 608-845-1502). The Irvine cryodiluent already<br />
contains egg yolk, whereas fresh egg yolk must be added to Biladyl A just before use (one-half liter is<br />
prepared from a concentrate using distilled/deionized water that can be frozen as aliquots and stored<br />
long term).<br />
Ideally, semen is frozen using two steps: the initial dilution in the egg yolk-based extender, then after<br />
refrigeration, the second fraction containing 8% glycerol (cell culture quality) is slowly added (for a<br />
final glycerol concentration of 4% v/v). For very poor quality samples, glycerol should be substituted<br />
with cell culture quality grade dimethyl sulfoxide (DMSO) as the cryoprotective agent.<br />
Processing and Evaluation<br />
1. Before leaving the lab to collect the semen by electroejaculation, organize all of the materials<br />
necessary. In addition, place a 15 ml tube of Biladyl A (Minitube) as well as one 15 ml tube<br />
each of Biladyl A containing 8% glycerol or 8% DMSO in the water bath (and place a tube<br />
containing 0.1 ml fetal calf serum on the counter) to thaw, and one 15 ml tube of Hepes-TL<br />
solution (BioWhittaker) to warm.<br />
2. Collect the tiger or lion semen according to the instructions detailed on the large felid<br />
electroejaculation protocol, and be sure to change tubes often (to avoid the possibility of<br />
contaminating a semen sample with urine). A total of 10-15 separate tubes may be used for a<br />
final total volume of semen of 3-7 ml from an adult tiger. Use pre-warmed Hepes-TL solution to<br />
rinse down any droplets of semen found on the sides of the tubes. Label the individual tubes in<br />
numerical order of collection, then keep them in a pocket against your body, or in an insulated<br />
container next to warm packs until they are transported back to the lab.<br />
3. Once back in the lab, examine each tube separately for overall motility and rate of forward<br />
progression (0= no movement to 5=fast, linear progression). Pool all of the tubes containing<br />
greater than 40% overall motility and centrifuge at 300 x g for 10 min to concentrate the sperm.<br />
4. Discard the supernatant down to the pellet. Measure the volume of the pellet and dilute with prewarmed<br />
Hepes-TL solution containing 10% sterile fetal calf serum (typically, the pellet is<br />
reconstituted in 500 μl (0.5 ml) of medium). A thorough examination should then be made and<br />
recorded of this pooled sample: overall motility and rate of forward progression (after 1:100<br />
dilution in Hepes-TL and incubation on the slide warmer for 3-5 min), percentage of live and<br />
acrosome-intact sperm using eosin B-fast green vital staining, and an evaluation of structural<br />
morphology after fixation (1:100) in 2.5% glutaraldehyde). For accuracy in these assessments,<br />
be sure to gently yet thoroughly mix the sample before aliquoting (since the dead sperm will fall<br />
to the bottom of the tube).<br />
Cryopreservation<br />
1. At room temperature, add Biladyl A at a 2:1 dilution ratio (Biladyl A : sperm+Hepes-TL) then<br />
place this tube either in a beaker of room temperature water, or in a styrofoam holder, before<br />
placing in refrigeration (this will ensure slower cooling and avoid the possibility of cold-shock).<br />
At this time also place the cryoprotectants (Biladyl A containing 8% glycerol, or 8% DMSO if<br />
27
the sample is very poor quality), pre-labeled 0.25 ml straws, transfer pipettes and PVP straw<br />
sealing powder in the refrigerator to cool. Straws should be labeled with the species, animal ID<br />
number (ISIS) and the date of collection.<br />
2. After one hour of refrigeration (4 o C), add the pre-cooled cryoprotectants very slowly (drop by<br />
drop) using a pre-cooled transfer pipette at a 1:1 ratio to the extended semen for a final<br />
cryoprotectant concentration (glycerol or DMSO) of 4% v/v. Be sure to gently mix the sample<br />
slowly throughout the process.<br />
3. After the cryoprotectant is added, fill the pre-labeled 0.25 ml straws and seal them with the PVP<br />
powder (5 mm column plug minimum) . Be sure to wipe off any liquid on the outer surfaces of<br />
the straws to prevent them from sticking to each other. Refrigerate the straws (in a horizontal<br />
position) an additional two hours before freezing.<br />
4. To freeze the straws, place them directly on top of a block of dry ice contained in an insulated<br />
(e.g., styrofoam) container in the refrigerator. Be sure to hold the straws only at the cotton plug<br />
end to avoid warming the sperm by contact with your fingers. After placing all of the straws on<br />
the dry ice, wait a minimum of 10 min (maximum of 30 min) before plunging them directly and<br />
quickly into liquid nitrogen. As an alternative to dry ice, the straws can be frozen by placing<br />
them on a styrofoam ―boat‖ (see Fig 1) that is exactly one inch above the surface of liquid<br />
nitrogen; hold for 10 min before plunging.<br />
5. For long-term storage, goblets should be submerged and the straws inserted without removing<br />
from the liquid nitrogen. At no time should the straws be removed from the liquid nitrogen until<br />
they are thawed. Carefully and quickly place the filled goblets onto a cane and place the cane<br />
into a large liquid nitrogen storage container (flask or dewar). Record the total number of straws<br />
frozen on the semen evaluation form, along with the identification information recorded on the<br />
cane, and the number of the canister and dewar they are stored in.<br />
Thawing<br />
1. Have a water bath set at 50 o C and place this right next to the dewar containing the frozen straws<br />
you wish to thaw.<br />
2. To remove straws from a cane – be sure not to pull the entire canister up beyond the neck of the<br />
dewar (the higher the canister is pulled away from the liquid nitrogen, the more chance there is to<br />
cause damage to the other sperm samples stored there – for instance, one-half an inch out of the<br />
liquid nitrogen warms the sample +100 o C and this repeated warming and re-cooling back into the<br />
liquid nitrogen damages the sperm irreparably). Select the appropriate cane, then quickly bring it<br />
up to the neck of the dewar and remove a straw using forceps (not fingers).<br />
3. Place the straw(s) directly into the water bath and swirl for EXACTLY 8 sec. Hold the straw(s)<br />
by the PVP plug end to ensure that it does not pop out during thawing (and thereby potentially<br />
exposing the sperm directly to water).<br />
4. Wipe the straw well to remove any water, then decant into a sterile conical tube. Place a small<br />
aliquot (e.g., 25 μl) on a glass slide and incubate on a slide warmer for 3-5 min before assessing<br />
the sample for overall motility and rate of forward progression.<br />
28
5. To isolate the live and motile sperm from the cryopreserved semen sample, carefully layer the<br />
thawed sample on top of a Percoll gradient (1 ml of 90% under 1 ml of 45%) in a 15 ml conical<br />
tube and centrifuge at 700 x g for 30 min. Carefully remove the top layers down to the pellet and<br />
examine for quality before utilization.<br />
Styrofoam blocks (2)<br />
Wooden sticks (2)<br />
Semen straw<br />
1 in (2.5 cm)<br />
above LN 2<br />
Figure 1.<br />
Styrofoam ―boat‖ constructed from two blocks of styrofoam attached<br />
by two wooden sticks (far enough apart to securely hold the straws).<br />
Straws are laid on top of the sticks before the boat is carefully placed into<br />
an insulated container of liquid nitrogen (LN 2 ). The sticks are positioned so<br />
that the straws will be 1 in (2.5 cm) above the LN 2 surface. The container<br />
lid is replaced and after 10 min, the boat is lifted at an angle to plunge the<br />
straws directly into the LN 2 .<br />
29
Contact information for further details:<br />
Wenche Farstad: wenche.farstad@veths.no<br />
Publications using this protocol:<br />
Canid Semen Cryopreservation<br />
W. Farstad<br />
Norwegian School of Veterinary Science<br />
September 2006<br />
1) Andersen K (1975) Insemination with frozen dog semen based on a new insemination<br />
technique. Zuchthygiene 10,1.<br />
2) Farstad W (1984) Bitch fertility after natural mating and after artificial insemination with<br />
fresh or frozen semen. J Small Anim Pract 25, 561-65.<br />
3) Farstad W and Andersen Berg K (1989) Factors influencing the success rate of artificial<br />
insemination in the dog. J Reprod Fert 39 (Suppl), 289-92.<br />
4) Farstad W (1996) Semen cryopreservation in dogs and foxes. Review. Proceed, XIII Int.<br />
Congr. Anim. Reprod. and Artific. Insem. Sydney. Anim Reprod Sci 42 1-4, 251-60.<br />
5) Hofmo PO (1988) Studies on Cryopreservation of Fox Spermatozoa and Evaluation of<br />
the Fertilizing Capacity of Frozen-thawed Silver Fox Spermatozoa. PhD thesis,<br />
Norwegian College of Veterinary Medicine, Oslo, 70p.<br />
6) Linde-Forsberg C (1995) Artificial insemination with fresh, chilled extended and frozenthawed<br />
semen in the dog. Seminars in Veterinary Medicine and Surgery (Small animal),<br />
1, 48-58.<br />
7) Oettlé E (1986) Using a new acrosome stain to evaluate sperm morphology. Vet Med 3,<br />
263-66.<br />
8) Thomassen, R, Farstad W, Krogenæs A, Fougner JA, K Andersen Berg. 2001. Artificial<br />
insemination in dogs.a retrospective study. J Reprod Fertil, 57 (suppl) 341-46.<br />
9) Thomassen, R, Sanson G, Krogenæs A, Fougner JA, Andersen Berg,K, W.Farstad. 2006.<br />
Artificial insemination with frozen semen in dogs. A review of ten years of using the<br />
nonsurgical approach. Theriogenology ( suppl) in press( available at<br />
www.sciencedirect.com)<br />
Semen Quality Criteria<br />
Canine semen intended for routine cryopreservation should be collected before a bitch in oestrus,<br />
and the semen should be well-fractioned, saving only the sperm dense fraction for cryopreservation.<br />
Morphology should exceed 75% progressively motile sperm prior to freezing and with less than 10%<br />
protoplasmic droplets or other major sperm defects, such as damage to the acrosome, micro-, macro- or<br />
deformed sperm heads, coiled tails and swollen mid-piece. Progressive motility should be rapid and<br />
steady and be at least 4-5 on a scale of 1-5, with 5 being the most rapid movement. Post-thaw survival<br />
should exceed 40% motility and a progressive speed of at least 3 to expect normal conception rates<br />
using the following procedures and intrauterine artificial insemination.<br />
A variety of freezing regimes, extenders and thawing protocols have been published in the<br />
literature (for review, see Farstad, 1996). The author has worked mainly with the TRIS extender which<br />
has given good results for dog and fox semen over a number of years<br />
30
( Andersen, 1975, Farstad, 1984, Farstad and Andersen Berg, 1989; Linde- Forsberg, 1995; Farstad,<br />
1996, Thomassen et al, 2001, Thomassen et al, 2006), currently yielding conception results of 75-80% in<br />
dogs and foxes following intrauterine deposition, 50-150 million spermatozoa per insemination on two<br />
occasions 24h apart. In the author‘s laboratory the following procedure for processing and freezing of<br />
dog and fox semen is used.<br />
Preparation and Addition of Extender<br />
The TRIS base solution with antibiotics given earlier with the addition of the cryoprotector<br />
glycerol is used as freezing solution (Table 7.1). The volume of glycerol added to the recipe in Table.7.1<br />
is either 12ml ( 6v/v% ) or 16ml ( 8v/v%) depending on the freezing regime, 6% for automatic freezing<br />
and 8% for manual freezing (see below). The distilled water content in the recipe is adjusted accordingly<br />
to, either 188ml or 184 ml, respectively, instead of the original 200 ml.<br />
The TRIS base solution with glycerol is mixed just prior to use with 20% egg yolk. The egg<br />
yolk is obtained from specific pathogen free hens for export, and from consumer‘s eggs for domestic<br />
use. The yolk is separated from the egg white. Then the yolk is rolled over a clean piece of paper tissue,<br />
gently broken and allowed to run into a funnel. Then the yolk is broken down by vigorous beating with a<br />
glass rod to minimise the size of the egg yolk particles. This reduces the frequency of attachment of<br />
sperm heads to the egg particles, which makes semen motility evaluation more difficult. The egg yolk is<br />
then mixed with the TRIS buffer which is pre-warmed to 30 C. The mixture is stirred well, and warmed<br />
to 35 C. A premixed ready- for- use- TRIS-egg yolk extender can be frozen and kept frozen for twothree<br />
months prior to use. Gentle thawing in a water bath at 35 C with subsequent gentle shaking is<br />
recommended.<br />
After the microscopic evaluation of the semen according to the criteria mentioned initially, the<br />
sperm rich fraction of the ejaculate is diluted by drop-wise addition of 35 C extender at room<br />
temperature until the desired concentration is reached. In the author‘s laboratory a concentration of a<br />
total of 100 million spermatozoa ml -1 is used routinely for freezing. However, when semen is of high<br />
quality half the concentration, i.e. 50 million ml -1 , may be used.<br />
Cooling and Equilibration<br />
After dilution, a sample is examined microscopically, and the extended semen is then poured into<br />
the previously mentioned plastic Nunc centrifugation tubes which are placed into a beaker holding<br />
35C water. The water beaker is then placed into a walk-in- refrigerator at 4 C and left for 2h. During<br />
this time the semen is cooled to 4-5 C, and the penetrating cryoprotectant glycerol diffuses into the<br />
sperm cell cytoplasm (equilibration).<br />
Semen Packaging<br />
The semen is stirred gently to remix the semen after the 2h of equilibration and cooling, and is<br />
immediately placed into 0.5ml plastic straws (IMV, L‘aigle, France or Minitüb, Tiefenbach,<br />
Germany). This can be done by using commercially available filling devices, or by suction through a<br />
latex tube with a mouthpiece. The semen must be filled in such a way that the powder between the two<br />
filter tips at the filter end of the straw is filled with liquid and solidifies. The straws are first filled halfway,<br />
and a small air bubble is allowed into the straw before the rest of the straw is filled to<br />
approximately 1cm from the top. The air bubble prevents semen from being expelled due to change of<br />
31
pressure within the straw during thawing. Then the straw is sealed either by ultrasound, or by using<br />
commercially available sealing balls or sealing powders.<br />
Freezing Regimens<br />
There are principally two alternatives for freezing, either a manual, static protocol or an<br />
automatic, dynamic protocol, and the glycerol content added to the extender varies between the two<br />
freezing methods (see earlier for adjustment of water content in buffer base). The manual protocol<br />
involves the use of a Styrofoam box (30cm x 40cm x 30cm) with a removable metal rack placed 10cm<br />
below the edge of the box which is filled with liquid nitrogen up to a level 4cm below the rack.<br />
The pre-filled straws, maximum 8-10 at a time, are placed horizontally on top of the rack, using a<br />
forceps, and are then left on the rack in the nitrogen vapour for 8 min. The forceps are then cooled in<br />
liquid nitrogen and applied onto the straws one by one to ensure complete crystallization (seeding). The<br />
straws are subsequently plunged into the liquid nitrogen. This freezing protocol is called static because<br />
there is a constant non-regulated flow of vaporized nitrogen during cooling and freezing.<br />
Automatic freezing involves the use of freezing machines. It is called dynamic because<br />
vaporized nitrogen is let into the freezing chamber at variable speed by the pre-set freezing program,<br />
allowing the cooling and freezing rates to be regulated. One such freezing program using a Planer 10<br />
freezing machine was developed for fox semen by Hofmo (1988) and is used for dog semen in our<br />
laboratory when large quantities of semen are frozen. Straws are frozen horizontally on a rack with a<br />
removable lid, and several racks can be put into the freezing chamber. The freezing program follows the<br />
regime:<br />
-2 C/min from +4 C to -7C<br />
-50 C/ minute from -7 C to -100 C<br />
-25 C/minute from -100 C to -180C<br />
After the program is completed the whole rack is removed and placed directly into liquid nitrogen.<br />
Thawing<br />
The straws are thawed in a water bath (thermos) at 70C for 8 sec. After thawing the straw<br />
should be held vertically, filter tip down and sealed end up, and shaken to allow the air bubble in the<br />
middle of the straw to escape to the top of the straw. The straw is cut at the sealed end and a small<br />
drop of semen is placed on a slide on the warming plate for microscopic examination of post thaw<br />
quality. Often the spermatozoa need some time to start moving after thawing, but two minutes on the<br />
warming plate should ensure restoration of motility. Since other laboratories may use other freezing<br />
regimes, it is important to follow the instructions for thawing from the laboratory or company which has<br />
provided the frozen semen, since freezing and thawing regimes are closely connected.<br />
32
ELISA Protocol: Measuring Anti-Gonadotropin Immunoglobulin Titers<br />
W.F. Swanson<br />
Center for Conservation & Research, Cincinnati Zoo<br />
September 2002<br />
Contact Information for further details:<br />
Bill Swanson at william.swanson@cincinnatizoo.org<br />
Publications using this protocol:<br />
1) Swanson WF, TL Roth, K Graham, DW Horohov and RA Godke. 1996. Kinetics of the humoral<br />
immune response to multiple treatments with exogenous gonadotropins and relation to ovarian<br />
responsiveness in domestic cats. American Journal of Veterinary Research 57:302-307.<br />
2) Swanson WF, DW Horohov and RA Godke. 1995. Production of exogenous gonadotrophinneutralizing<br />
immunoglobulins in cats following repeated eCG/hCG treatment and relevance for<br />
assisted reproduction in felids. Journal of Reproduction and Fertility 105:35-41.<br />
ELISA Protocol<br />
1. Exogenous gonadotropins (eCG, hCG) are diluted in 0.06M sodium bicarbonate buffer (pH<br />
9.6) to a concentration of 10 ng protein per l and pipetted in 50 l aliquots (containing 500<br />
ng protein) into each well of a 96-well flat-bottom microtiter plate (Immulon 4, Dynatech<br />
Labs).<br />
2. Plates are sealed and maintained overnight at 4°C.<br />
3. Plates are washed five times with an automated plate washer (Dynatech MRW) using 0.01 M<br />
PBS (containing 0.1% Tween-20; EPBS-Tween) and blotted dry.<br />
4. Thawed serum samples are diluted in EPBS-Tween to concentrations of 1:100, 1:200 and<br />
1:400 (or greater, depending on optical density values) and pipetted (100 l/well) into test<br />
wells in triplicate. For appropriate control wells (see below), add 100 l of EPBS-Tween to<br />
each well.<br />
5. Plates are sealed and incubated at RT (22°C) for one hour.<br />
6. Plates are washed 5X with EPBS-Tween and blotted dry.<br />
7. Peroxidase-conjugated, rabbit anti-cat IgG (affinity purified to whole IgG; Rockland<br />
Laboratories, Gilbertsville, PA) is diluted 1:2000 in EPBS-Tween and pipetted (100 l/well)<br />
into test wells.<br />
8. Sealed plates are incubated for 30 minutes at 37°C.<br />
9. Plates are washed 5X with EPBS-Tween and blotted dry.<br />
33
10. OPD solution [o-phenylenediamine, Sigma; 1 mg/ml dissolved in 0.05M citrate buffer (pH<br />
4.5) and 0.05% hydrogen peroxide) is added to each well (100 l/well) and plates are<br />
maintained in the dark (since light sensitive) for 30 minutes at RT (22°C).<br />
11. The color reaction is stopped with 2.5M sulfuric acid (50 l/well) and optical density is<br />
measured at 492 nm with an automated plate reader (Dynex MRX).<br />
Controls (for each plate - in triplicate)<br />
Reagents<br />
1. Blank - only buffers added to wells<br />
2. Conjugate control - no cat serum - all else the same as test samples<br />
3. Serum control - add cat serum but no conjugate (anti-cat IgG) - all else the same<br />
4. Substrate control - like blanks except citrate buffer contains OPD<br />
5. Negative standard - serum from known naive cat(s) -usually domestic<br />
6. Positive standard - serum from known positive cat(s) - usually domestic<br />
1. eCG or hCG (Sigma) or LH (Sioux Biochemical) - dissolve in 0.06 M sodium bicarbonate<br />
buffer (pH 9.6) to a concentration of 10 ng/ l<br />
2. 0.06 M sodium bicarbonate - dissolve 0.5041 g sodium bicarbonate in 100 ml of milipore<br />
water -<br />
3. EPBS-Tween - for 2 liters, combine 16 g NaCl, 0.4 g KCl, 2.173 g Na 2 HPO 4 , 0.521 g<br />
KH 2 PO 4 and qs with distilled water to 1998 ml. Bring to 2 liters by adding 2 ml of Tween-<br />
20 (0.1% solution)<br />
4. Serum samples - dilute in EPBS-Tween (diluted from 1:100 to 1:1600, depending on optical<br />
density range)<br />
5. Conjugate (indicator or 2° antibody) - rabbit anti-cat IgG, conjugated to horseradish<br />
peroxidase (HRP) - diluted 1:2000 with EPBS-Tween<br />
6. OPD - 10 mg OPD dissolved in 10 ml citrate buffer with 5 l hydrogen peroxide stock<br />
(30%) added<br />
7. Citrate buffer - 0.05 M citrate buffer (pH 4.0 - 4.5) - mix equal molar concentrations of<br />
sodium citrate and citric acid solutions (i.e., add 1.676 g sodium citrate to 100 ml water and<br />
0.961 g citric acid to 100 ml water - mix 1:1 and pH to 4.5 with 5 N HCl)<br />
8. Stopping solution - 2.5 M sulfuric acid - qs stock sulfuric acid with distilled water to<br />
appropriate molarity (dilute 14 ml of stock sulfuric acid to 100 ml with milipore water)<br />
34
Assay Notes:<br />
Blocking - If desired, plates may be blocked after the antigen (eCG or hCG) incubation and initial plate<br />
wash using a 0.1% BSA solution (in EPBS). Add 100 l of BSA solution to all wells and maintain at<br />
RT for 3 hours before washing and then proceeding with the regular assay. However, in previous<br />
studies, blocking plates did not decrease optical density values for any tested domestic cat or nondomestic<br />
cat samples and was omitted from the routine assay. For most species, the relatively high<br />
Tween concentration, multiple plate washes and use of an affinity-purified conjugate minimize nonspecific<br />
binding.<br />
Standards - A domestic cat positive and negative standard may be included on each plate to ensure that<br />
the assay is working properly and to determine the appropriate serum sample dilution (to obtain values<br />
within the linear portion of the optical density curve). For most domestic cat samples, a dilution of<br />
1:100 to 1:400 is suitable.<br />
Determining Positivity - For each non-domestic species, the best approach is to compare gonadotropinbinding<br />
levels (mean optical density values) from each female before gonadotropin treatment and then<br />
after each treatment and then use the mean OD value (+ 3 SD) for all naive samples as your cut-off<br />
value between negative and positive titers. In reality, true naive samples are rarely available from each<br />
no-ndomestic female so samples from the female following the first gonadotropin treatment are used<br />
instead. We assume that IgG levels don't increase much between the initial gonadotropin injection and<br />
blood sampling (usually ~5-6 days) and that IgM is not bound significantly by the conjugate. To verify<br />
this, we usually evaluate serum samples from 2-3 males per species and compare mean OD values to<br />
females treated once with gonadotropins. If significantly different, the mean OD values for males (+ 3<br />
SD) can be used as the -/+ cut-off. If not different, the mean OD values (+ 3 SD) of 1X-stimulated<br />
females may be used instead.<br />
35
Wild Cattle, Buffalo and Bison Semen Collection by Rectal Probe<br />
Electrostimulation (Electroejaculation)<br />
N.M. Loskutoff<br />
Center for Conservation & Research, Omaha‘s Henry Doorly Zoo<br />
September 2003<br />
Contact information for further details:<br />
Naida Loskutoff at: NaidaL@omahazoo.com<br />
Publications using this protocol:<br />
1) Janesch, L., Rohr, J., Volenec, D., Grobler, D., Puffer, A., Prokupek, A.K., Armstrong, D.L.,<br />
Dankoff, S., Curro, T., Simmons, H., Crichton, E.G., Hamilton, J., Rasmussen, L., Zimmermann,<br />
D., Lomneth, R., Wood, R., Wood, D. and Loskutoff, N.M. (2001) Post-thaw viability of wild<br />
cattle (Bos gaurus) and buffalo (Syncerus caffer) sperm cryopreserved using a novel, non-animal<br />
protein cryodiluent. Theriogenology 55:387, abst.<br />
2) Puffer, A., de la Rey, R., de la Rey, M., Hansen, H., Grobler, D., Hofmeyr, M., Malan, J.H.,<br />
Armstrong, D.L., Dankoff, S., Rasmussen, L., York, D., Zimmermann, D. and Loskutoff, N.M.<br />
(2001) Choice of chemicals used in immobilization protocols can significantly affect semen<br />
quality in ejaculates collected from free-ranging African buffalo (Syncerus caffer).<br />
Theriogenology 55:398, abst.<br />
3) MacLean, R.A., Swanson, H., Hancock, J., O‘Brien, E., Williams, K.R. and Loskutoff, N.M.<br />
(1998) Comparison of three techniques for separating motile sperm in cryopreserved Bos<br />
gaurus semen. Theriogenology 49:263, abst.<br />
Materials Needed:<br />
Rectal probe (see Fig. 1), sand paper<br />
Electrostimulator (e.g., Platz or Beltz models – for contact details,<br />
see Technology Subcommittee <strong>Resource</strong>s section)<br />
Extension cord<br />
Lubricant (non-spermicidal)<br />
Palpation sleeves, latex gloves<br />
Gauze, paper towels<br />
50 ml sterile collection tubes with rack<br />
Insulated container<br />
Medium (e.g., TL Hepes Bio Whittaker)<br />
Permanent ink pen<br />
Warming packs (if necessary)<br />
Disinfectant<br />
Procedure<br />
1. After the bull is chemically immobilized* and his legs are safely secured with ropes, carefully<br />
clean out the rectum as far cranially as possible.<br />
*Note that there are certain types of chemical immobilizing agents that detrimentally affect the<br />
quality of semen collected by electroejaculation, e.g., Azaperone, Medetomidine, etc.<br />
36
~ 40 cm length<br />
~ 5 cm<br />
~ 6 cm<br />
~ 4 cm<br />
~ 15 cm<br />
3 electrodes: ~ 24 cm length; ~1 cm wide<br />
Figure 1.<br />
Diagram of rectal probe suitable for semen collection by electroejaculation from cattle<br />
(domestic and wild), buffalo and bison.<br />
2. Gently sand down electrodes before each use to ensure proper contact.<br />
3. After turning on the electrostimulator and checking to see if the gauges work properly, gently<br />
insert the rectal probe with the three longitudinal electrodes facing ventrally (always be sure to<br />
turn on the electrostimulator BEFORE placing the probe to avoid shock from electrical surges).<br />
4. After checking with the veterinary personnel, the person collecting the semen can approach the<br />
sheath area. If the penis can be easily manipulated out of the sheath, it should be held gently<br />
using one piece of gauze [be sure not to apply too much pressure since this can prevent the<br />
emission of semen]. If the penis cannot be easily manipulated out of the sheath, then carefully<br />
place the 50 ml collection tube inside the prepuce [try to avoid the dirty outer areas] and clamp<br />
down on the neck of the tube using the thumb and forefinger. When the stimulations begin, be<br />
sure that the sheath is extended as far forward and straight as possible to permit unobstructed<br />
flow of semen. Commonly, the bull will extend the penis out of the sheath after the stimulations<br />
begin; if this happens, stop for a moment to secure the penis with a piece of gauze.<br />
5. When the rectal probe is in place, the person doing the collection is ready and, most importantly,<br />
the veterinary and keeper personnel are certain that the animal is secure, begin the stimulation<br />
protocol. The stimulations are administered by taking about 2 sec to reach the voltage limit, hold<br />
for 2 sec, then quickly turning the rheostat back to 0. The voltage limit will begin at 2 V, then<br />
increase by 0.5 V increments to a maximum of 10 V. This will complete one series of<br />
stimulations. The person holding the probe should be sure that both legs are extending with<br />
equal force in response to the stimulations.<br />
6. After about a minute of rest to change tubes, a second series can be administered. Usually only<br />
three complete series of stimulations are necessary to collect an average total volume of semen<br />
(e.g., about 20-40 ml on a first collection, about 10-20 ml on a second collection performed<br />
within 3 weeks) Semen is very commonly produced between 6 - 8 V; therefore, it is sometimes<br />
advantageous to administer 2-5 sets of stimulations at 6, 6.5, 7, 7.5, 8 & 8.5 V. If this is done,<br />
then only two complete series of stimulations are necessary.<br />
37
7. Change tubes often. The color of the semen will vary from slightly opaque to milky white. If<br />
there appears to be urine contamination in the semen (yellowish appearance), then immediately<br />
dilute the sample 1:1 with medium (e.g., Hepes-buffered Tyrodes-lactate medium or TL-Hepes,<br />
BioWhittaker, Walkersville, MD, USA; Cat # 04-616F) and change to a new tube for collection.<br />
8. It is helpful for future semen collections on specific bulls to record the responses at each voltage<br />
level and series and the time taken to achieve erection and ejaculation. A sample worksheet for<br />
recording this information is attached.<br />
9. If the ambient temperature falls below 70 o F/20 o C, it will be important to wrap the collection tube<br />
with a warm pack to prevent cold-shock. The tubes should be maintained with warm packs in an<br />
insulated container until taken to the lab for processing.<br />
38
Worksheet: Semen Collection by Rectal Probe Electrostimulation (Electroejaculation)<br />
Date: Species: ID#: Name: Location:<br />
Immobilization Protocol:<br />
Duration Fasted: (feed) (water) Weight: Pre-treatment:<br />
Drug Regimen:<br />
Supplementation:<br />
Time Begin: Time End: Clinician: Tech:<br />
Blood Collection for: Serum or Plasma (Anti-Coag?): Vol:<br />
Tissue/Excretus Collection:<br />
Scrotal Measurements:<br />
Length (Right): Length (Left): Texture:<br />
Width (Right): Width (Left): Circumf:<br />
Ambient Temp: Rectal Temp: Probe Size:<br />
Electrostimulator:<br />
Semen Collection Protocol:<br />
Total Voltage Range: Total Series: Total Stimulations/Series:<br />
Series: 1 2 3 4 5 6 Pool [ ]<br />
Time Begin:<br />
Time End:<br />
Volts (range):<br />
mAmps (range):<br />
Erection (+/-):<br />
Volume (ml):<br />
Color:<br />
pH:<br />
Urine (+/-):<br />
Est. Motility (%):<br />
Linear Prog (0-5):<br />
Debris (type):<br />
Total Conc. (x10 6 ):<br />
Comments:<br />
39
Superovulation and <strong>Embryo</strong> <strong>Transfer</strong> in the Dromedary Camel<br />
J.A Skidmore<br />
Camel Reproduction Centre, Dubai, U.A.E.<br />
March 2003<br />
Contact information for further details:<br />
Lulu Skidmore at: luluskid@emirates.net.ae<br />
Publications using this protocol:<br />
1) Skidmore, J.A., Billah, M., Short, R.V. and Allen, W.R. (2002) Assisted reproductive<br />
techniques for hybridization of camelids. Reproduction, Fertility and Development 13 (8): 647-<br />
652.<br />
2) Skidmore, J. A., Billah, M. and Allen, W.R. (2002). Factor affecting pregnancy rate after<br />
embryo transfer in dromedary camels. Reproduction, Fertility and Development 14 (2): 109-<br />
118.<br />
3) Skidmore, J.A., Billah, M. and Allen, W.R. (1996). The ovarian follicular wave pattern and<br />
induction of ovulation in the mated and non-mated one-humped camel (Camelus dromedarius).<br />
Journal of Reproduction and Fertility 106, 185 – 192.<br />
4) Skidmore, J.A., Billah, M. and Allen, W.R., (1992). Ultrasonographic and videoendoscopic<br />
monitoring of early fetal development in the dromedary camel. Proc. 1 st Int. Camel Conf. pp.<br />
193-201. Eds. W.R. Allen, A.J. Higgins, I.G. Mayhew, D.H. Snow and J.F. Wade. R & W<br />
Publications (Newmarket) Ltd. UK.<br />
Superovulation<br />
Superovulation treatments, to stimulate the growth of multiple follicles, include the use of exogenous<br />
gonadotrophins such as equine chorionic gonadotrophin (eCG) or FSH which may, or may not, be given<br />
after a period of progesterone priming. This progesterone priming can be given either in PRID form<br />
(progesterone releasing intravaginal device) inserted into the vagina for a period of seven days, or as<br />
daily injections of 150mg progesterone - in - oil for up to 15 days. However the best results, i.e. the<br />
best stimulation of the ovaries, occur if the camel is treated with exogenous gonadotrophins when there<br />
is minimum follicular activity in the ovaries. If follicles are present at the time of treatment these tend<br />
to develop into overlarge follicles before the new stimulated wave of follicles have had a chance to<br />
develop.<br />
Follicle stimulating hormone (FSH)<br />
FSH of porcine or ovine origin has been used for superovulation in camels. In the dromedary a total<br />
dose of 20 iu of ovine FSH (oFSH) or porcine FSH (pFSH) in 20ml is given over 4 days. Generally<br />
speaking two injections are given daily in gradually decreasing doses for example: Day 1: 2 x 4ml,<br />
Day 2: 2 x 3ml, Day 3: 2 x 2ml, and Day 4: 2 x 1ml.<br />
Equine Chorionic Gonadotrophin (eCG)<br />
Equine Chorionic Gonadotrophin is well known for its FSH activity and has been used to promote<br />
follicular development and superovulation in camels. The dosage of eCG used varies from 1500 -<br />
40
6000iu. It is generally injected in a single dose one day before, or on the day of, completion of a 5 - 15<br />
day progesterone regime.<br />
Combined eCG and FSH<br />
In my experience the best response is seen when a combination of both FSH and eCG are given. The<br />
eCG (2500iu) is given as a single injection on day 1 of treatment together with the first of the twice<br />
daily injections of FSH, followed by three more days of twice daily injections in decreasing doses of<br />
FSH as described above.<br />
Problems with superovulation in camelidae<br />
Superovulation treatments in the camelidae female are far from perfect as the ovulation response and<br />
embryo yield remain highly variable. The main problems are;<br />
1. The high incidence of non-responsive females. Approximately 20-30% of superovulated females<br />
do not develop follicles. This is probably due to immunization against eCG in some females .<br />
2. The high incidence of follicle luteinization before breeding. This is particularly prevalent in eCG<br />
-treated females and could be due to the LH activity of this hormone.<br />
3. The high incidence of over stimulated ovaries. In some eCG or FSH super-ovulated females, the<br />
ovaries become very large and contain many generations of follicles with different sizes. This is<br />
probably due to an individual difference in response to the hormones.<br />
4. Dromedary camels can become refractory to superovulation with FSH and eCG. This is<br />
probably caused by immunization against these hormones. We have observed a complete arrest<br />
of ovarian activity in some females that have been superovulated with these hormones repeatedly<br />
during several years.<br />
Mating and induction of ovulation<br />
In order to achieve a good ovulation rate, donors should be monitored by ultrasonography and palpation<br />
throughout the superovulation treatment and bred when the follicles reach a suitable size.<br />
Follicles generally start to develop about 4 - 6 days after the start of treatment and reach 13 - 16mm in<br />
diameter approximately 8 - 12 days after the start of treatment.<br />
The number of matings per donor can vary, but in our programmes we generally mate the donor twice at<br />
a 24h interval and although ovulation occurs in response to mating, we usually give donors a single<br />
intravenous injection of GnRH analo<br />
maximize ovulation response.<br />
41
<strong>Embryo</strong> collection and evaluation<br />
The methods of embryo collection from camelidae are similar to those described in other species.<br />
Surgical embryo collection<br />
After exteriorization of the uterus via laparotomy surgical embryo collection is possible, however the<br />
use of this technique is only justified when collection of embryos at the tubal stage, ie. at the morula<br />
stage of development, is desired.<br />
The most widely used technique for the collection of embryos from camelidae remains the non-surgical<br />
technique.<br />
Non-Surgical collection of embryos<br />
The donor can either be placed in stocks or restrained sitting on the ground after being sedated (Fig 1.).<br />
The rectum needs to be cleared of all faeces and the tail wrapped in a tail bandage before cleaning the<br />
perineal region thoroughly.<br />
Some people like to use epidural anaesthesia which can be advantageous in llamas, alpacas and young<br />
dromedaries because of the smallness of the pelvis. However, in larger females it is not usually<br />
necessary, especially if they are already sedated.<br />
Collection is made using a Gibbon Balloon (20 Gauge) or Foley catheter (18 - 20 Gauge for camels).<br />
Using a sterile gloved hand the catheter can be guided through the vagina; the cervix is then dilated<br />
manually and the catheter inserted. Once the catheter is through the cervix the cuff is inflated with 30-<br />
40 ml of air or PBS medium and pulled back against the internal os of the cervix to seal it. The uterus is<br />
then flushed repeatedly with 60 - 120ml of flushing medium, you can use commercially available bovine<br />
embryo flushing media or Dulbecco's phosphate buffered saline (DPBS) + 0.2% Bovine Serum Albumin<br />
(BSA), + kanamycin sulphate) using a total volume of approximately 500ml.<br />
After each flush the medium is collected, by gravity flow, into sterile beakers and filtered through an<br />
embryo filter until only 20 - 30ml of medium remains. This is poured into a sterile petri dish and<br />
examined under a microscope for the presence of embryos. As many as 20 or more embryos have been<br />
recovered in a single flush but because not all the follicles will ovulate at the same time these embryos<br />
can vary in size.<br />
Effect of timing on embryo recovery rate<br />
It is now well established that in camelidae the embryo does not reach the uterus until day 6 or 6.5 after<br />
ovulation. Therefore any attempt to collect embryos before day 6 post-ovulation, results in low recovery<br />
rates.<br />
In practice the best recovery rates from dromedaries are achieved when the uterus is flushed on day 7 or<br />
8 after ovulation.<br />
42
Figure 1. Transcervical embryo collection from a superovulated dromedary camel<br />
(J.A. Skidmore and M. Billah, Camel Reproduction Centre, Dubai, UAE).<br />
Evaluation of camel embryos<br />
<strong>Embryo</strong>s recovered from the uterus in camelidae are generally at the hatched blastocyst stage. The size<br />
of the embryo is highly variable at different stages post-ovulation. However, the majority of the<br />
embryos collected at day 6.5 or 7 are already hatched blastocysts. The embryos recovered from the<br />
dromedary camel 7 days after mating are very variable in size and have a diameter ranging from 0.18 -<br />
0.50 mm. This variability of the stage of development is probably due to the wide spread of ovulations<br />
in superovulated animals. Hatched embryos continue to grow rapidly and become easily visible to the<br />
naked eye as they expand.<br />
The evaluation system used by most authors classifies the embryo into 5 grades according to their<br />
morphological characteristics and stage of development (Table 1; Figure 2). The clinician should look<br />
for abnormalities such as<br />
<br />
<br />
<br />
extruded blastomeres (i.e. individual cells which have been extruded<br />
from the cell mass).<br />
signs of degeneration (dark areas), and<br />
obvious morphological anomalies such as folding or wrinkling.<br />
43
Table 1. Classification of camel embryos.<br />
Grade<br />
Grade I<br />
Grade II<br />
Grade III<br />
Grade IV<br />
Grade V<br />
Characteristics<br />
Excellent quality embryo. Size corresponds to the stage of collection<br />
in relation to ovulation. Before day 8 it should be perfectly spherical<br />
with a smooth surface.<br />
Good embryo, same as above with some irregularities of the contour<br />
and very few protruded cells.<br />
Medium quality , small embryo with dark patches, irregular contour and some<br />
protruded cells.<br />
Collapsed embryos showing dark areas of degeneration and many<br />
extruded cells.<br />
Non-transferable. Collapsed very dark embryos or embryos that are<br />
retarded, dark morulae, and all stages that are younger than morula or<br />
unfertilized ova.<br />
Figure 2.<br />
Hatched, Day 7 blastocysts recovered transcervically from a superovulated<br />
dromedary camel (sizes range from 175 to 500 μm in diameter).<br />
Management of recipients<br />
The quality of the recipient is the most important factor in the success of any embryo transfer program.<br />
The two main aspects of selection of recipients for embryo transfer are:<br />
<br />
<br />
the screening of reproductive and health problems and<br />
the preparation and synchronization with the donor.<br />
44
Criteria for selection of recipients<br />
The screening programme can be summarized as follows:<br />
History: The potential recipient should be young (less than 12 years of age), have had at least one<br />
normal pregnancy with a normal delivery, and be either currently pregnant or recently weaned.<br />
General examination of the recipient should focus on conformation and a good body condition and on<br />
symptoms of debilitating or contagious diseases. All potential recipients should be tested for brucellosis<br />
and trypanosomiasis.<br />
A complete breeding-soundness examination should be done on the potential recipient including<br />
palpation and ultrasonography of the reproductive tract, uterine culture, vaginal examination and<br />
examination of the udder.<br />
Synchronization with donors<br />
Synchronization of the reproductive cycle between the donor and the recipient is very critical and<br />
embryo transfer results in the dromedary suggest that the best recipient should have ovulated 24 - 48<br />
hours after the donor. <strong>Transfer</strong> of embryos into recipients that have ovulated one day before the donor,<br />
or three of more days afterwards, result in very low pregnancy rates.<br />
Synchronization of follicular development and ovulation<br />
Synchronization of ovulation between the donor and recipient can be approached using two methods:<br />
<br />
<br />
selection of recipients from a random group or<br />
preparation of recipients in such a manner that follicular development<br />
is synchronized with that of the donor.<br />
In using the first technique a group of cycling recipients are examined 24 hours after the donor is bred<br />
and all females that have a mature follicle (1.3 - 1.7cm in diameter) are treated with GnRH or hCG.<br />
This method of selection is time consuming and can only be used if the number of donors are limited.<br />
Synchronization of follicular development in donors and recipients has been attempted using<br />
progestagen with variable degrees of success.<br />
Synchronization of recipients with Progesterone Releasing Intravaginal Devices (PRID's) has been<br />
attempted in the dromedary but was not successful.<br />
Better results can be obtained when recipients are induced to ovulate with hCG or GnRH following a<br />
treatment combining progesterone and eCG. The recipients are treated daily with progesterone<br />
(100mg/day) for 10 to 15 days, to try and dampen the development of more follicles, and on the last day<br />
of progesterone treatment, 1500 - 2500 iu eCG is injected to induce follicular development.<br />
Progesterone treatment is scheduled to end on the day of injection of gonadotrophin in the donor in an<br />
attempt to synchronize the recipient and donor. The eCG treatment guarantees the presence of mature<br />
follicles in the recipient at the same time or 24 - 48 hours after the donor.<br />
45
Preparation of recipients with progesterone<br />
Synchronization between the embryo and the uterus can be obtained by progesterone therapy, without<br />
induction of ovulation. Progesterone (100mg) is given daily starting 2 days after mating of the donor.<br />
However, because there is no CL, progesterone treatment has to be continued throughout pregnancy.<br />
Screening of recipients<br />
All recipients should be screened on the day of transfer to ascertain that ovulation has occurred and that<br />
a mature CL is present. This can be done either by determination of progesterone concentration in the<br />
blood or by ultrasonographic visualization of the CL.<br />
<strong>Transfer</strong> of embryos<br />
<strong>Embryo</strong>s can be transferred surgically or non-surgically.<br />
Surgical embryo transfer<br />
Surgical embryo transfer in the dromedary and Bactrian camels is done via the left flank laparotomy.<br />
The embryo is transferred into the uterine cavity through a puncture made in the exteriorized horn by a<br />
Pasteur pippette. However, this technique cannot be used in young and primiparous animals because<br />
the uterine horn is too short and difficult to exteriorize.<br />
Non-surgical technique<br />
The non-surgical technique for embryo transfer consists of placing the embryo directly into the uterine<br />
lumen through the cervix using a regular bovine insemination gun. The embryo is loaded into a 0.25ml<br />
or 0.5ml sterile plastic straw and placed in the gun for transfer. The inseminating gun is first covered by<br />
a sterile sheath with a side opening, so that the embryos can escape even if the pipette is up against the<br />
wall of the uterus, then a second plastic sanitary sheath.<br />
The recipient is prepared in the same manner described for embryo collection. Then the embryo is<br />
transferred as follows:<br />
1. The inseminating gun is introduced into the vagina and guided towards the cervix using a sterile<br />
gloved hand.<br />
2. The sanitary sheath is perforated after passage of the first cervical ring, by pulling the plastic<br />
sheath backwards towards the technician, and the gun is further guided into one of the uterine<br />
horns with a hand in the rectum.<br />
3. The plunger of the transfer pipette is pushed home and the embryo deposited into the uterus.<br />
46
Contact Information for further details:<br />
Rebecca Krisher at: rkrisher@purdue.edu<br />
Publications using this protocol:<br />
Bovine IVM/IVF/IVC Protocol<br />
R.L. Krisher<br />
Purdue University<br />
September 2000<br />
1) Krisher, R.L., Lane, M., Bavister, B.D. (1999) Developmental competence and metabolism of<br />
bovine embryos cultured in semi-defined and defined culture media. Biology of Reproduction 60:<br />
1345-1352.<br />
2) Krisher R.L., Bavister, B.D. (1999) Enhanced glycolysis after maturation of bovine oocytes in vitro<br />
is associated with increased developmental competence. Molecular Reproduction and Development<br />
53:19-26.<br />
3) Gandhi, A.P., Lane, M., Gardner, D.K., Krisher, R.L. (2000) A single medium supports development<br />
of bovine embryos throughout maturation, fertilization and culture. Human Reproduction 15:395-<br />
401.<br />
In Vitro Maturation<br />
1. On average, each ovary should yield approximately 3 oocytes. On the morning ovaries are expected,<br />
prepare the working medium for the day. First, make 3 L of 0.9% saline in a large flask. The<br />
measurements do not have to be exact; this is for washing ovaries. The water should be drawn from<br />
the RO system. The flask should be placed in the dry oven to warm. Make HEPES, 100 ml for<br />
aspiration. If HEPES is pre-made, aliquot into a bottle and add PSA. Place it in the dry oven to<br />
warm. Make the appropriate maturation medium. Make maturation drops—25 ul in a 1007 dish,<br />
add 10 ml mineral oil, add another 25 ul to give 50 ul drops. Sigma embryo tested mineral oil<br />
should be used throughout this protocol. Place the dishes in the incubator to equilibrate for at least 2<br />
hours, preferably 4. Maturation and fertilization are done at 39C with 5% CO2 in air. Each person<br />
should have his or her own shelf or shelves in the incubator. Names can be labeled with tape on the<br />
outside of the glass door.<br />
2. Set up for aspiration. The aspiration station should be in a room separate to the culture room. Place<br />
white absorbent paper beneath the work area. Turn on the slide warmer in the morning if it is not<br />
already on. Place the glass beakers in the warm oven, along with the styrofoam tray and several 50<br />
ml tubes. Get out the aspiration stoppers and 18 g, 1 1/2‖ needles. When the ovaries arrive, remove<br />
the beakers, tray and tubes from the oven, place the stoppers on the tubes, attach the needle and<br />
filter. If it is a hand held unit, make sure the vacuum hose is attached to the upper syringe and the<br />
filter to the lower one. For the best suction, set up only as many aspiration stations as you need, so<br />
there are no suction tubes left without connections to a stopper. The number of suction tubes can be<br />
modified at the Y joint by the pump. Place several paper towels, gloves, and a plastic bag at each<br />
station.<br />
3. When the ovaries arrive, put on a lab coat. Take the temperature of the ovaries and the saline wash.<br />
Pour the ovaries into a large beaker. Wash out the ovary container. Pour the excess blood off the<br />
ovaries. Wash them twice with the warmed saline in the large beaker, then dump them into the<br />
47
smaller glass beakers and fill the beaker with saline so the ovaries are covered. Place the beakers on<br />
the slide warmer by the aspiration setup. If there are more beakers than can be aspirated at once,<br />
place them in the warm oven until use.<br />
4. Aspirate follicles from 2-10 mm on the ovary, placing the ovaries in the plastic bag after you are<br />
through. Pierce the surface of the ovary just outside the visible boundary of the follicle. Go into the<br />
follicle under the surface of the ovary, and collect the fluid. While aspirating the fluid, use the<br />
needle to scrape the follicle walls to insure the oocyte is recovered. Collect the fluid in the 50 ml<br />
tubes. Collect about 35 ml per tube. Be careful not to aspirate any fluid into the vacuum tubing.<br />
When the tubes get full, hold them in the styrofoam tray on the slide warmer. Change the needle if it<br />
gets dull. When done aspirating, count the ovaries if necessary and place them in the plastic bag,<br />
tie/tape it closed and leave it for disposal after the oocytes are collected. Remove your lab coat,<br />
wash your hands and bring the tubes into the culture room. Also bring the HEPES medium from the<br />
dry oven. Do not wear the lab coat or gloves used for aspiration into the culture room.<br />
5. All work with oocytes and embryos in this protocol should be done as quickly as possible. All<br />
dishes containing oocytes or embryos should be worked with on the slide warmers if possible, and<br />
time out of the incubator for all oocytes, embryos and/or dishes should be minimized. Opening of<br />
the incubator door should always be minimized in regard to number of times opened, length of time<br />
open and width of opening.<br />
6. Set up for searching the aspiration tubes. Get out 1 1007 dish, 3 1008 dishes, several grid dishes (#<br />
of tubes of follicular fluid + 1), a drummond pipet with tips, a small bulb, and a long sterile pipette.<br />
Draw lines on the bottom of the 1007 dish. Fill the 1007 and 1008 dishes with HEPES medium—<br />
you can either pour or pipette. Sweep the bottom of one aspiration tube, using the bulb and Pasteur<br />
pipette. Pull sediment off of the bottom of the 50 ml tube into the pipette to approximately one inch<br />
past the beginning of the widened part. Place the sediment in a grid dish and add HEPES. Swirl to<br />
mix. Wipe off the drummond plunger wire with alcohol, dry with kim wipe. With a new tip, search<br />
the grid dish for oocytes. The magnification should be such that one square of the grid dish fits with<br />
corners touching the field of view. Do some selection at this time. Ultimately, only oocytes with 3<br />
or more layers of cumulus cells which are tightly compacted, and an even cytoplasm (not pycnotic)<br />
will be selected. Do not select oocytes with expanded cumulus masses or with no or few cumulus<br />
layers. At this time only a brief look should be given each oocyte. Most oocytes will be removed<br />
from the grid dish at this time unless they are obviously poor (denuded or expanded). Use the<br />
drummond to pick the oocytes out of the grid dish and move them into the 1007 dish. Search the<br />
entire grid dish for oocytes. After the first search, swirl the dish again and re-search. When you get<br />
to the point that you are picking up 5 or less oocytes on the re-search of your dishes, you can drop<br />
the re-search and just search each grid dish one time. Repeat this procedure for each tube. Do a<br />
second sweep on all the tubes combined (all second sweeps in one grid dish) when finished with all<br />
the first sweeps. When all the oocytes have been collected in the 1007 dish, change the drummond<br />
tip. Increase the magnification and examine each oocyte for a compact cumulus mass of at least<br />
three layers, not expanded, with even cytoplasm. Pick up the selected oocytes that meet these<br />
criteria and place them into the first 1008 dish. When all oocytes are selected, wash them through<br />
the remaining two 1008 dishes. If oocytes that should not be selected become apparent during the<br />
washes, they should be discarded at this time. Remove the maturation drops from the incubator.<br />
From the last wash dish, place the oocytes with as little medium as possible into the maturation<br />
drops, 10 per drop. Be sure to open the incubator doors as little as possible, and work quickly while<br />
in the incubator. Place the maturation drops back in the incubator.<br />
48
7. Clean up the microscope and aspiration areas; wipe countertop surfaces, scope bases and slide<br />
warmers with alcohol. Put all dishes into a ziplock bag, close and either place in the trash or back<br />
into the bucket if needed later in the day. Make sure all scopes and slide warmers are turned off<br />
before leaving the lab. Put the trashcan outside the culture room and lock the door if done for the<br />
day. Then go back and clean up the ovary aspiration area. Wash out the large beakers and flask<br />
with deionized water several times. Wash the aspiration stoppers with deionized water, then with<br />
alcohol, then with milliQ water. Set them in the warm air incubator to dry. Package them for<br />
autoclaving the next morning. Clean up the aspiration area by throwing away the white paper, paper<br />
towels, and used gloves into the biohazard trash can to be autoclaved. Anything not bloody should<br />
be placed into the regular trash. Wipe down the area with alcohol. Turn off the slidewarmer if it is<br />
not going to be used the next day. Take the ovaries down to the tissue cooler for incineration.<br />
On this day be sure to record in your notebook:<br />
--when the ovaries arrived<br />
--temperature of ovaries on arrival<br />
--temperature of saline<br />
--when aspiration began<br />
--when aspiration ended<br />
--number of ovaries you aspirated<br />
--when the oocytes went into maturation medium<br />
--how many oocytes were recovered<br />
--maturation treatments/medium used<br />
In Vitro Fertilization<br />
1. In the morning of the day of fertilization, make all necessary media and turn on the slide<br />
warmers and water bath. You will need fertilization, sperm, and HEPES medium. Make 10 ml<br />
of sperm, 5 ml of fertilization, and 50 ml of HEPES medium WITHOUT glucose. HEPES<br />
medium may be pre-made, in which case aliquot and add pen-strep. Put the sperm and HEPES<br />
into the warm air incubator to warm up. Make fertilization drops—22 ul medium in a 1007 dish,<br />
then add 10 ml paraffin oil, then add another 22 ul, for a total of 44 ul. You will later add 6 ul to<br />
this drop, for a total volume of 50 ul. Place the fertilization medium and the drops into the<br />
maturation/fertilization incubator to equilibrate for at least 2 hours, preferably 4.<br />
2. The oocytes should be fertilized 22-24 hours after they were placed into maturation medium.<br />
Start the swim up 1 1/2 hours before you want to fertilize. Get the warmed sperm medium, place<br />
1 ml into 5 small snap cap tubes. Thaw out the appropriate number of semen straws. To do so,<br />
remove the cap from the semen tank, draw out the appropriate canister, and use the forceps to<br />
pull up a cane while leaving the remaining canes low in the tank to avoid thawing. Quickly pull<br />
two straws out and place them immediately into a small cooler jug containing 37 degree water.<br />
Let them thaw for 1 minute. Remove them from the water bath, dry them off with a kimwipe,<br />
and cut the sealed end off. Hold the cut end over an empty small snap cap tube, and cut off the<br />
plugged end. Blow through the straw to remove all the contents. Empty all straws into one tube.<br />
Using a pipetman, SLOWLY layer 200 ul of the semen under the one ml sperm medium in each<br />
tube. Repeat until all the semen has been used. Cap the tubes tightly; place them in a 37 degree<br />
water bath for one hour. Set a timer.<br />
3. During this time, move the oocytes from maturation to fertilization drops. Take the maturation<br />
dishes out of the incubator. Using a cleaned drummond, remove the oocytes from the maturation<br />
49
drops and place them into a 1008 dish filled with warmed HEPES medium. Swirl the dish gently<br />
to wash the oocytes. Repeat the wash two times. The third wash should be in fertilization<br />
medium (500 ul under 300 ul oil in a nunc well or 3037 dish per treatment). When the oocytes<br />
are in the third wash, get the fertilization plate out of the incubator. From the third wash dish,<br />
move the oocytes into the fertilization drops with as little medium as possible (10 per drop).<br />
Place the fertilization drops back into the incubator until the sperm is ready for fertilization.<br />
4. After one hour, remove the swim up tubes from the water bath. Get out a 15 ml centrifuge tube.<br />
Using a pipetman, carefully remove the upper 800 ul from each swim up tube, and combine into<br />
one centrifuge tube. Label the tube. Spin the tube (after balancing) at 700 g for 5 minutes.<br />
During this 5 minutes get the heparin from the -20 freezer and the PHE from the -80 freezer and<br />
place it on the slide warmer in the culture room to thaw.<br />
5. Remove the tube from the centrifuge when done, and pull off the supernatant down to the pellet.<br />
Do not disturb the pellet. Add approximately 3 ml warm sperm medium back to the tube and<br />
spin for an additional 5 minutes at the same speed. During this time, prepare the hemocytometer<br />
for use, and place 95 ul of milliQ water into a small microcentrifuge tube. After the spin, again<br />
pull off the supernatant down to the pellet. Mix the pellet well. Do not add more medium.<br />
6. Remove 5 ul from the pellet, and mix it with the 95 ul in the microcentrifuge tube to make a 1:20<br />
dilution. Change tips on the pipetman. Load 10 ul of the 1:20 mix into each chamber of the<br />
hemocytometer. Count the sperm in 5 of the small center boxes on each side of the<br />
hemocytometer. Count 5 diagonally or 4 corners and the center. Get a 5 square count for each<br />
side, and average them. Divide 7500 by the average count, this is the ul of sperm needed.<br />
Subtract the ul of sperm needed from 300 to get the ul fertilization medium needed for the sperm<br />
dilution for IVF (total volume 300 ul). These calculations are based on a 1:20 dilution<br />
counted on 5 squares of a hemocytometer, and when 2 ul of the sperm/fert medium dilution is<br />
added to a 50 ul drop, the final sperm concentration is 1 M/ml. For example;<br />
count side 1 = 138<br />
count side 2 = 152<br />
average = 145<br />
7500 divided by 145 = 51.7 ul sperm pellet<br />
300 - 51.7 = 248.3 ul fertilization medium<br />
If there is not enough sperm pellet for the whole 300 ul, simply divide the amounts by one half.<br />
Usually 300 ul is much more than enough.<br />
7. Add the appropriate amount of fertilization medium to a sterile small microcentrifuge tube. Add<br />
the appropriate amount of sperm pellet to the tube. Mix well. Place on the slide warmer with the<br />
heparin and PHE.<br />
8. Remove the fertilization drops from the incubator. Place them on the slide warmer. Using the<br />
drummond, add 2 ul each of the sperm dilution, heparin and PHE. The order in which they are<br />
added is not critical. The tip of the drummond should be wiped with a kimwipe between each<br />
addition to remove oil. As soon as everything has been added to the drops, check to be sure you<br />
have added sperm to all drops containing oocytes and put the dishes back into the incubator.<br />
Clean up the area. Record in your notebook the time the oocytes were moved to fertilization<br />
drops, the counts, the dilution made, and the time the sperm was added to the oocytes.<br />
50
In Vitro Culture<br />
1. The presumptive zygotes should be placed into culture approximately 18 hours post<br />
insemination. <strong>Embryo</strong> culture is done at 39C in 5% CO2 and 10% O2, balance N2. First thing<br />
in the morning the day after fertilization, you should make the appropriate culture medium.<br />
Make drops (25 ul + oil + 25 ul) in 1007 dishes and place in the incubator to equilibrate. For<br />
every 1 or 2 culture drops one drop of the same medium should be present in the dish for<br />
washing. The drops should equilibrate at least 2 hours before adding the zygotes. Also make 50<br />
ml of HEPES and warm quickly.<br />
2. Place 0.5 ml HEPES into a 15 ml centrifuge tube for each treatment. Add 5 ul hyaluronidase<br />
solution. Remove the fertilization plates from the incubator. Work keeping the dishes and<br />
zygotes on the slide warmer as much as possible. Add the zygotes to the tube using a clean<br />
drummond. Keep treatments separate. Vortex for 3 minutes. Add 4 ml HEPES to the tube<br />
(pouring is OK), cap the tube and swirl the tube briefly.<br />
3. Pour out the contents of the tube into a 1008 dish. Search for the zygotes and place them in a<br />
group in the middle of the dish. Move the zygotes to a fresh 1008 dish containing 3 ml HEPES<br />
medium and swirl to wash away any cellular debris. Remove the culture drops from the<br />
incubator. Load the zygotes into the wash drops of culture medium, 10 for each culture drop so<br />
10 or 20 per wash drop. Use the drummond to mix the medium in the drop by drawing the<br />
embryos up and down several times. Pick up 10 embryos per drop in as little medium as<br />
possible and place into the final culture drop. Place the culture dish back into the incubator.<br />
4. Record the culture medium used, and the time the zygotes were placed into the culture drops.<br />
5. On day 4 post insemination (72 hours of culture), make step 2 culture medium and HEPES wash.<br />
Make culture drops in the morning (25ul + oil + 25ul) and let equilibrate for at least 2 hours.<br />
Again, make wash drops as above. Move the embryos quickly from the original culture drops to<br />
1008 dishes with HEPES. Swirl to wash. Remove culture drops from the incubator, place<br />
embryos into wash drops, mix and distribute as above. Move them in as little of the original<br />
medium as possible at each step. Place the new culture drops back into the incubator. Record<br />
the date and time when the embryos were moved.<br />
6. On day 8 post insemination, remove the embryos from the incubator and score each embryo for<br />
cleavage and development. Scores are as follows:<br />
1 cell, 2 cell, 4 cell, 8 cell, 12-16 cell, compact morula, early blastocyst, blastocyst, expanded<br />
blastocyst, hatching/hatched blastocyst. <strong>Embryo</strong>s from compacted morula on should be given a<br />
quality grade from 1 to 4. One is the best quality, 4 is dead.<br />
7. Stain for cell counting if required.<br />
51
Media Recipes<br />
SOF Bovine IVM/F/C Medium<br />
Based upon:<br />
Liu and Foote, 1995; BOR 53:786-790<br />
Tervit et al., 1972; JRF 30:493-497<br />
Gardner et al., 1994; BOR 50:390-400<br />
Gardner et al., 1997; Therio 47:278<br />
STOCK SOLUTION COMPOSITION<br />
STOCK A (Base) 10X 3 months expiration<br />
Reagent mM g/100 ml g/200 ml g/500 ml g/1000 ml<br />
NaCl 99.7 5.827 11.654 29.135 58.270<br />
KCl 7.16 0.534 1.068 2.670 5.340<br />
KH 2 PO 4 1.19 0.162 0.324 0.810 1.62<br />
MgCl 2 .6H 2 O 0.49 0.0996 0.1992 0.498 0.996<br />
Na Lactate<br />
(60% syrup)<br />
3.30 0.616<br />
(280.25 l)<br />
1.232<br />
(560.25 l)<br />
3.08<br />
(1401.25 l)<br />
6.16<br />
(2802.5 l)<br />
STOCK B (bicarb) 10X 1 week expiration<br />
Reagent mM g/10 ml g/50 ml g/100 ml<br />
NaHCO 3 25.07 .2100 1.050 2.100<br />
STOCK C (pyruvate) 100X 1 week expiration<br />
Reagent mM g/10 ml g/20 ml g/50 ml<br />
Na pyruvate 0.33 0.036 0.072 0.180<br />
STOCK D (calcium) 100X 1 month expiration<br />
Reagent mM g/10 ml g/20 ml g/50 ml<br />
CaCl 2 .2H 2 O 1.71 0.252 0.504 1.260<br />
STOCK X (glutamine) 100X 1 week expiration<br />
Reagent mM g/10 ml g/20 ml g/50 ml<br />
Glutamine 1.0 0.146 0.292 0.73<br />
STOCK G (glucose) 10X 3 months expiration<br />
Reagent mM g/10 ml g/50 ml g/100 ml<br />
Glucose 1.50 0.0270 0.135 0.270<br />
52
STOCK EDTA (edta) 100X 1 month expiration<br />
Reagent mM g/10 ml g/20 ml<br />
EDTA** 0.1 0.029 0.058<br />
**dissolve EDTA in 220 ul 1M NaOH, then QS to 10 ml with water.<br />
STOCK HEPES (HEPES) 10X 3 months expiration<br />
Reagent mM g/50 ml g/100 ml g/200 ml<br />
HEPES, acid<br />
Phenol red<br />
(0.5% soln)<br />
21 2.9795<br />
(0.69 ml)<br />
5.958<br />
0.0069g<br />
(1.38 ml)<br />
11.916<br />
(2.76 ml)<br />
STOCK T (taurine) 100X 2 months expiration<br />
Reagent mM g/10 ml g/20 ml<br />
Taurine 0.1 0.0125 0.025<br />
SOF working solutions<br />
STOCK MAT<br />
5 ml<br />
FERT<br />
5 ml<br />
SPERM<br />
10 ml<br />
Step 1 culture<br />
5 ml<br />
Step 2 culture<br />
5 ml<br />
A (base) 500 l 500 l 1 ml 500 l 500 l<br />
B (bicarb) 500 l 500 l 1 ml 500 l 500 l<br />
C (pyruvate) 50 l 50 l 306 l 50 l 50 l<br />
D (calcium) 50 l 50 l 100 l 50 l 50 l<br />
X<br />
50 l -- 50 l 50 l<br />
(glutamine)<br />
G (glucose) 500 l -- 500 l 1000 l<br />
T (taurine) -- -- 50 l --<br />
E (EDTA) -- -- 50 l --<br />
NEAA 50 l 100 l 50 l 50 l<br />
EAA -- -- 50 l 100 l<br />
Vitamins 50 ul -- -- 50 l<br />
Water 3250 l 3800 l 6960 l 3150 l 2650 l<br />
BSA See below 0.03 g<br />
FAF-BSA<br />
0.03 g<br />
fraction V<br />
0.04 g<br />
Pentex BSA<br />
0.04 g<br />
Pentex BSA<br />
Adjust pH of all working solutions to 8 before filtering, except sperm which is adjusted to 7.4<br />
Note: Vitamins, NEAA and EAA are purchased from ICN.<br />
53
Maturation medium with serum<br />
Maturation medium with BSA<br />
4.4 ml above mat SOF solution 4.9 ml above mat SOF solution<br />
25 ul FSH 25 ul FSH<br />
25 ul LH 25 ul LH<br />
25 ul EGF 25 ul EGF<br />
50 ul PSA 50 ul PSA<br />
500 ul BCS 0.04 g Pentex BSA<br />
Sperm TL<br />
To the above listed ingredients, add:<br />
100 l pen-strep<br />
34 l lactic acid<br />
500 l HEPES stock solution<br />
SOF/HEPES Working Solutions<br />
With glucose<br />
Without glucose<br />
STOCK 50 ml 100 ml 50 ml 100 ml<br />
A 5 ml 10 ml 5 ml 10 ml<br />
B 800 l 1.6 ml 800 l 1.6 ml<br />
C 500 l 1 ml 500 l 1 ml<br />
D 500 l 1 ml 500 l 1 ml<br />
X 500 l 1 ml 500 l 1 ml<br />
G 5 ml 10 ml -- --<br />
NEAA 500 l 1 ml 500 l 1 ml<br />
EAA 1 ml 2 ml 1 ml 2 ml<br />
HEPES 4.2 ml 8.4 ml 4.2 ml 8.4 ml<br />
PSA 500 ul 1000 ul 500 ul 1000 ul<br />
WATER 32 ml 63 ml 37 ml 73 ml<br />
BSA<br />
0.150 G<br />
fraction V<br />
0.300 G<br />
fraction V<br />
0.150 G<br />
fraction V<br />
0.300 G<br />
fraction V<br />
Use HEPES with glucose except to wash eggs from maturation to fertilization medium in the bovine<br />
system. HEPES with glucose can be used for this step if a fertilization wash is included. PH to 7.4<br />
before use<br />
54
Wild & Domestic Cattle, Buffalo and Bison Semen* Cryopreservation<br />
N.M. Loskutoff<br />
Center for Conservation & Research, Omaha‘s Henry Doorly Zoo<br />
September 2003<br />
Contact information for further details:<br />
Naida Loskutoff at: NaidaL@omahazoo.com<br />
Publications using this protocol:<br />
1) Shiewe, M., N. Loskutoff, B. Durrant, L. Johnston, D. Armstrong, and L. Simmons (1994). Gaur<br />
sperm cryopreservation trial: analysis of packaging type and rapid freezing method for potential<br />
field application. Theriogenology . 41: 291, abst.<br />
2) Gross, T., T. Tharnish, M. Patton, D. Armstrong and L. Simmons (1991) Gaur semen<br />
cryopreservation: comparison of cryodiluents and freezing procedures. In Proceedings of the<br />
Wild Cattle Symposium, Omaha, Nebraska, June 13-16, 1991. pp 17-32.<br />
3) Simmons, L., S. Junior, D. Armstrong, S. Hopkins and S. Hummel (1989) Techniques for<br />
collection and cryopreservation of gaur (Bos gaurus) semen. Proceedings of the American<br />
Association of Zoological Parks and Aquariums Central Regional Conference.<br />
*The procedure for semen collection from wild cattle, buffalo and bison by rectal probe<br />
electrostimulation (electroejaculation) can be found in a separate document.<br />
Semen Cryopreservation<br />
Materials Needed:<br />
Biladyl A & B fractions (Minitube of America, Madison, WI, Tel:<br />
608-845-1502)<br />
Microscope slides & coverslips<br />
Micropipettor & sterile tips<br />
Vital stain (e.g., nigrosin-eosin or eosin B-fast green)<br />
Glutaraldehyde (2.5%)<br />
Hemacytometer<br />
Microcentrifuge tubes<br />
100 ml sterile specimen cup<br />
Sealing powder<br />
Labeled 0.5 ml french straws, goblets & canes<br />
Slide warmer<br />
Refrigerator (preferably, walk-in)<br />
Liquid nitrogen<br />
Styrofoam ―boat‖ or Dry ice<br />
Procedure:<br />
Note: detailed instructions for determining seminal characteristics (e.g., total concentration,<br />
motility, rate of forward progression, viability and acrosomal integrity) are provided in the protocol for<br />
harvesting epididymal sperm.<br />
55
1. Once the overall motility and progressive forward status determinations are made, a 10 μl<br />
aliquot should be taken of the well mixed sample for the total sperm concentration. In addition,<br />
a 10 μl sample should be mixed with an equal volume of vital stain (e.g., nigrosin-eosin or eosin<br />
B-fast green) spread on a microscope slide and quickly dried (hair dryer works best) for<br />
estimations of live/dead and acrosomal status. A final 10 μl aliquot is placed into 1 ml of 2.5%<br />
glutaraldehyde for evaluation of structural morphology. When these have been determined, then<br />
the total volume after the first extension (i.e., semen plus non-glycerated Biladyl A) can be<br />
determined using the following equation:<br />
(Semen Volume; ml) x (Conc. x 10 6 ) x (Motility; 0.00) x (Morphology; 0.00)<br />
120 x 10 6<br />
Again, this equation will give you the volume of the semen plus Biladyl A; therefore, subtract the<br />
volume of raw semen to give you the amount of Biladyl A to add.<br />
2. Add the appropriate amount of Biladyl A directly to the raw semen or epididymal sperm at room<br />
temperature. [This total volume of the semen plus Biladyl A is the amount of the glycerated<br />
Biladyl B that will be slowly added, i.e., Biladyl B contains 14% glycerol and the final glycerol<br />
concentration desired in the extended semen is 7%].<br />
3. Carefully pipette the semen plus Biladyl A into a 100 ml specimen cup then place this into a cold<br />
room (e.g., 4-7 o C) along with the Biladyl B fraction. Be sure to place the cup on top of a<br />
styrofoam lid to prevent cold shock from a chilled surface. After 1-2 hours, very slowly add the<br />
appropriate volume of Biladyl B, drop by drop while gently mixing the diluted, cooled semen<br />
(the high osmolarity of the glycerated diluent can cause osmotic shock in the sperm if added too<br />
quickly). Note: it is always better to add the Biladyl B after cooling to prevent the sperm from<br />
metabolizing the glycerol; however, if a cold room is not available, then the Biladyl B should be<br />
added at room temperature, straws loaded then cooled (once cooled they should NOT be warmed<br />
above 4-7 o C before freezing).<br />
4. Immediately after the final extension of the semen has been completed, load the prelabeled<br />
straws and seal the ends with the sealing powder (columns of at least 5 mm).<br />
5. After all of the straws are filled and sealed, then wrap them in several paper towels and place<br />
them directly into a refrigerator for slow cooling down to about 4 o C.<br />
6. After at least 2 hours in an undisturbed refrigerator (maximum of about 8 hours), freeze the<br />
straws by placing them either directly onto a block of dry ice, contained in an insulated box, or in<br />
liquid nitrogen vapor by placing them on a styrofoam boat (Fig 1) so that the straws are 1 inch<br />
(2.5 cm) above the level of liquid nitrogen. The straws should remain on the dry ice or liquid<br />
nitrogen vapor for 10 min before plunging directly into the liquid nitrogen for long term storage.<br />
7. The frozen straws should then be carefully placed into straw goblets and canes (be sure not to<br />
take them out of liquid nitrogen during this procedure) then stored in a large storage tank. The<br />
total number of straws, results of the semen evaluation and animal identification information<br />
should be recorded in the cryostorage log book.<br />
56
8. To thaw, individual straws should be carefully removed from liquid nitrogen storage, and<br />
quickly placed directly into a 32 o C water bath. The straw should be gently swirled in the water<br />
bath for approximately 2 min, or until completely thawed. At that time, the straw should be<br />
gently wiped and dried with a paper towel, then the two ends cut with scissors and the contents<br />
decanted into a sterile test tube. Overall motility estimations and progressive forward movement<br />
determinations should be performed at zero and two hour post-thawing to determine sperm<br />
survival after freezing.<br />
Styrofoam blocks (2)<br />
Wooden sticks (2)<br />
Semen straw<br />
1 in (2.5 cm)<br />
above LN 2<br />
Figure 1.<br />
Styrofoam ―boat‖ constructed from two blocks of styrofoam attached<br />
by two wooden sticks (far enough apart to securely hold the straws).<br />
Straws are laid on top of the sticks before the boat is carefully placed into<br />
an insulated container of liquid nitrogen (LN 2 ). The sticks are positioned so<br />
that the straws will be 1 in (2.5 cm) above the LN 2 surface. The container<br />
lid is replaced and after 10 min, the boat is lifted at an angle to plunge the<br />
straws directly into the LN 2 .<br />
57
Generalized Procedures for Harvesting Epididymal Sperm from Ruminants<br />
Post-Mortem for Cryobanking<br />
N.M. Loskutoff<br />
Center for Conservation & Research, Omaha‘s Henry Doorly Zoo<br />
September 2003<br />
Contact information for further details:<br />
Naida Loskutoff at: NaidaL@omahazoo.com<br />
Publications using this protocol:<br />
1) Watson R., Lanterna J., Garcia A., Cooper C., Tomsett G. and Loskutoff N.M. (1997) Freezing<br />
resistances of epididymal sperm from waterbuck, greater kudu and warthog using glycerol,<br />
ethanediol or DMSO. Theriogenology 47:411 abst.<br />
2) Rush E.M., Jewell M., Cooper C., Garcia A., Tomsett G. and Loskutoff N.M. (1997) Effect of<br />
cryoprotectant and thawing method for cryopreserving epididymal sperm from impala<br />
(Aepyceros melampus) for IVF. Theriogenology 47:406 abst.<br />
3) Winger Q., Damiani P. and Loskutoff N.M. (1997) The application of standard bovine protocols<br />
for the maturation and fertilization of blesbok (Damaliscus dorcas phillipsi) oocytes using<br />
epididymal sperm cryopreserved in DMSO or glycerol. Theriogenology 47:412 abst.<br />
4) Loskutoff, N.M., Simmons, H.A., Goulding, M., Thompson, G., De Jong, T. and Simmons, L.G.<br />
(1996) Species and individual variations in cryoprotectant toxicities and freezing resistances of<br />
epididymal sperm from African antelope. Animal Reproduction Science 42:527-535.<br />
5) Loskutoff, N.M., Bartels, P., Meintjes, M., Godke, R.A. and Schiewe, M.C. (1995) Assisted<br />
reproductive technologies in nondomestic ungulates: a model approach to preserving and<br />
managing genetic diversity. Theriogenology 43:3-12.<br />
Summary<br />
Procedures are described for collecting and cryopreserving epididymal sperm from relatively<br />
healthy and fertile ruminants that die accidently or after acute trauma. Although these methods have<br />
been generally effective for a variety of species, they may not be optimal for all artiodactylids.<br />
Materials Needed:<br />
1. Sterile tissue culture dishes (e.g., 100-150 mm)<br />
2. Sterile test tubes (e.g., 50 ml polystyrene, conical tubes)<br />
3. Scalpel blade and holder or small scissors<br />
4. Medium for rinsing (e.g., Hepes-TL Solution, BioWhittaker, Walkersville,<br />
MD, USA; Cat # 04-616F)<br />
5. Sterile pipettes<br />
6. Glass slides and cover glasses<br />
7. Compound microscope<br />
8. Slide warmer<br />
9. Cell strainer (0.4-0.75 micron) or sterile gauze<br />
10. Cryodiluents (see below)<br />
11. Straws (0.25 ml)<br />
12. Sealing powder<br />
13. Refrigerator<br />
14. Dry ice block (10 lb)<br />
15. Liquid nitrogen storage tank<br />
16. Goblets and canes<br />
58
Cryodiluents: generally, a Tris-citrate-buffered, egg yolk-based diluent, commonly used for<br />
cryopreserving domestic bull semen, which can be purchased (e.g., Biladyl A and B, Minitube of<br />
America, Madison, WI, Tel: 608-845-1502). Fresh egg yolk must be added to each of the Biladyl<br />
fractions (A and B) at the time of preparation (QS each fraction to 400 ml with sterile,<br />
distilled/deionized water). Aliquots can then be frozen and stored for 6 mo.<br />
Harvesting Technique<br />
Using sterile instruments and aseptic technique, dissect the tails (caudae) of the epididymides<br />
from both testes (see Fig 1). Next, carefully remove any connective tissue layers covering the tail using<br />
forceps to first pull the tissue up and away before cutting. It is important to remove as many of the small<br />
overlying blood vessels as possible because blood can have a detrimental affect on sperm motility.<br />
Figure 1.<br />
Illustration of the anatomy of ruminant testes and epididymides within the<br />
scrotal sac.<br />
Note: this will expose the tiny underlying tubules of the epididymides where the sperm are stored – be<br />
careful not to cut these tubules until most of the blood vessels are removed.<br />
This should be done as quickly as possible – exposing the epididymides to air will result in the tubules<br />
drying out and losing the sperm. After most of the connective tissue and blood vessels have been<br />
removed, begin to cut small sections of the tubules (by lifting up with forceps and cutting with a small<br />
59
pair of scissors) and place these sections in a petri dish containing 5-10 ml of pre-warmed Hepes-TL<br />
Solution. A white-milky colored fluid should be expressed. Continue cutting until the entire tail had<br />
been processed. Allow the sections to remain in the medium (preferably on a slide warmer set at 36-<br />
38 o C) for at least 10 min, then use the forceps to gently squeeze then remove each section from the petri<br />
dish. Using a sterile pipette, gently pass the slurry through a cell strainer (or sterile gauze) into a 50 ml<br />
tube.<br />
At this point, a small aliquot of the sperm suspension (i.e., 25 μl) should be placed on a prewarmed<br />
microscope slide and evaluated for overall sperm motility and rate of forward<br />
progression. In addition, total sperm concentration, viability (percent live) and acrosomal integrity may<br />
be evaluated as described below.<br />
Cryopreservation Procedure<br />
Thaw aliquots of the non-glycerated (Biladyl A) and glycerated (Biladyl B) cryodiluents. At<br />
room temperature, add a volume of Biladyl A equal to that of the sperm suspension (1:1). Place this<br />
extended sample in a styrofoam box, or in a beaker containing room temperature water, and place this in<br />
a refrigerator, along with the thawed aliquot of Biladyl B (it is important for this initial cooling period to<br />
be gradual). Allow 2 hours of undisturbed refrigeration for the extended sperm sample to slowly cool to<br />
refrigeration temperature. At that time, very slowly add (e.g., drop by drop) a volume of Biladyl B<br />
equal to the total volume of the sperm suspension plus the added Biladyl A. This should be done in the<br />
refrigerator – do not allow the samples to warm during this final dilution (the cryoprotectant glycerol in<br />
Biladyl B can have toxic effects to the sperm). After adding the Biladyl B, mix the sperm sample<br />
thoroughly, but gently, and load the 0.25 ml straws. Seal the ends of the straws by dipping the end<br />
opposite to the cotton plug in PVP sealing powder. Allow the straws to remain undisturbed in the<br />
refrigerator for an additional hour before freezing. Freeze the straws by quickly placing them directly<br />
onto a block of dry ice, contained in a styrofoam box, and allow them to remain in the sealed box for a<br />
minimum of 10 min. At that time the straws should be quickly transferred directly into liquid nitrogen<br />
for long-term storage.<br />
Note: although dry ice is preferred, if not available the straws can be frozen in liquid nitrogen vapor<br />
using the technique described in the protocol for semen cryopreservation in wild cattle, buffalo and<br />
bison.<br />
Post-Thaw Evaluations<br />
To determine the viability of the frozen epididymal sperm after thawing, remove a straw from<br />
liquid nitrogen storage and place in directly into a 50 o C water bath for 8 sec (higher survival rates of<br />
ruminant sperm are observed with fast thawing methods; alternatively, thaw in a 36 o C water bath for 2<br />
min). Thoroughly wipe the water from the straw, then empty the contents into a sterile test tube.<br />
Examine small aliquots (i.e., 25 ul) immediately post-thawing and (if possible) at 2 and 6 hours postthawing<br />
after warming at 36-38 o C for 5-10 min.<br />
A. Total Concentration<br />
Standardization of Procedures for Examining Sperm Samples<br />
Raw semen (either individual fractions, or pooled fractions selected by overall motility<br />
estimation) should be mixed thoroughly, but gently, just before sampling. A 1:100 dilution<br />
60
(semen:water) is made by adding 10 microliters (or 0.010 milliliter) of semen to 990 microliters (or<br />
0.990 milliliter) of water [Note: calibrated pipettes should be used to ensure accuracy]. Dilution in<br />
water will kill the sperm making it easier to count individual cells.<br />
Exactly 10 microliters should then be placed on a hemacytometer grid, as shown below. The<br />
sperm contained in the five diagonal squares (each comprising 25 smaller squares) in the middle large<br />
square of the grid are counted (for those sperm lying over the lines of the adjacent squares, only count<br />
those on the top and left to avoid duplication). For more accuracy, it is best to count the five inner<br />
diagonal squares on each side of the hemacytometer chamber then divide by two for an average (see<br />
next page for illustration). This average multiplied by 5 equals the total number of sperm (x one<br />
million) per milliliter. For the total concentration of sperm in the ejaculate, multiply this number by the<br />
total volume (in milliliters) of semen obtained.<br />
B. Overall Motility Estimation<br />
To ensure an accurate estimation of overall motility, the raw semen must be diluted sufficiently<br />
in a biological medium to view individual sperm. Normally, a 1:100 (semen:medium) dilution is<br />
adequate. Hepes-buffered TALP (Tyrode‘s medium containing albumin, lactate and pyruvate) is an<br />
excellent quality medium for maintaining the survival of sperm from a wide variety of taxa. A total of<br />
200 sperm should be counted as moving or non-moving in several different fields on the microscope<br />
slide. For overall motility, all movement is recorded (even those sperm that may only show head<br />
movement, but no forward progression). The overall motility estimation is then recorded as the total<br />
number moving per 100 cells (expressed as % motile).<br />
61
C. Rate of Forward Progression (or Kinetic Rating)<br />
This is a very important indicator of sperm viability which should be included in the motility<br />
assessment. Since the fastest ratings are subjective, it is important that only one person performs the<br />
evaluation. As for overall motility, a total of 200 sperm are ranked as 0 to 5, using the following<br />
criteria:<br />
0 = no movement<br />
1 = head movement only (no forward progression)<br />
2 = slow forward progression (usually with labored head movements)<br />
3 = faster forward progression<br />
4 = faster forward progression<br />
5 = fastest, linear forward progression<br />
The average is determined for 100 sperm, and recorded as the average rate of forward progression (also<br />
referred to as status, or kinetic rating). This information is important<br />
because ratings of less than 3 often mean that the sperm will not be effective for use in artificial<br />
insemination.<br />
D. Viability<br />
The total numbers of live versus dead sperm is an important evaluation, especially for<br />
epididymal sperm recovered after death (which are live, but not motile until exposed to appropriate<br />
conditions). There are also situations where certain treatments (e.g., exposure to certain chemicals, or<br />
temperatures) can immobilize sperm temporarily. Normally, vital stains or dyes are used for this<br />
purpose – the damaged membranes of non-viable cells allow the uptake of the dye, whereas the intact<br />
membranes of viable cells do not. We have found the eosin B-fast green vital staining technique, first<br />
described for domestic bull sperm by Aalseth and Saacke (Gamete Research 15:38-81, 1986), to be very<br />
effective for a wide variety of mammalian species.<br />
Technique: approximately 10 microliters of the sperm suspension is combined with<br />
approximately 5 microliters of eosin B-fast green dye. A smear is made and dried immediately using a<br />
hand-held hair dryer (it is important to dry the smear quickly, as the live sperm will also take up stain if<br />
they die slowly during drying). The eosin B-fast green vital stain can not only expose live versus dead<br />
sperm, but can also indicate those sperm that have intact acrosomes versus those missing acrosomes<br />
(acrosome-reacted). Acrosomal integrity must be maintained in sperm to be effective for use in artificial<br />
insemination, as acrosome-reacted sperm have very limited longevity and ability to move in a forward<br />
progression. Four categories of stained sperm can be identified using eosin B/fast green vital staining<br />
(on blue background, white = live, intact acrosome; red = dead, acrosome-reacted) e.g.,<br />
Dead/Acrosome-Intact<br />
Bull Sperm<br />
Dead/Acrosome-Reacted<br />
Bull Sperm<br />
Live/Arosome-Reacted<br />
Bull Sperm<br />
Live/Acrosome-Intact<br />
Bull Sperm<br />
62
A total of 200 sperm should be counted, assigning sperm to the four categories above, then the total<br />
number of live sperm, and the number of acrosome intact sperm, both per 100 cells total (%) should be<br />
recorded.<br />
E. Acrosomal Integrity<br />
In addition to the above method for determining acrosomal integrity, there are several<br />
fluorescence based stains available that are specifically targeted to the sperm acrosome region (e.g.,<br />
Hoechst, PNA). Although these staining techniques are more specific for assessing acrosomal integrity,<br />
they require the use of specialized equipment for analysis (fluorescence microscopy). Nevertheless,<br />
samples of raw or treated semen can be air dried as smears on microscope slides, then shipped to<br />
appropriate facilities for analysis.<br />
F. Structural Morphology<br />
Ideally, normal structural morphology of sperm should be examined using the wet mount<br />
technique after fixation in glutaraldehyde (e.g., 2.5%). This is due to the fact that drying can distort<br />
sperm morphology and result in abnormalities that may be a direct result of handling. An alternative<br />
method is to air dry smears of the raw or treated semen on microscope slides, then to stain the smears<br />
using general use cytological staining kits (e.g., Diff Quick, DADE Diagnostics, Aguada, PR).<br />
A total of 200 sperm should be characterized according to the following categories of gross<br />
abnormal morphological features suspected as primary abnormalities (those resulting during<br />
spermatogenesis in the testicle, which may be heritable), secondary abnormalities (those resulting during<br />
sperm transport, which are probably not heritable) or tertiary abnormalities (those that may have<br />
occurred as a direct result of improper handling).<br />
Examples of gross structural abnormalities in mammalian sperm include:<br />
Primary abnormalities<br />
Head:<br />
Microcephalic (small head)<br />
Macrocephalic (large/swollen head)<br />
Double<br />
Abnormal acrosome<br />
Other<br />
Midpiece:<br />
Swollen<br />
Elongated<br />
Abaxial<br />
Other<br />
Tail:<br />
Double<br />
Short<br />
Other<br />
Secondary abnormalities<br />
Head:<br />
Detached<br />
Loose/damaged acrosome<br />
Other<br />
Midpiece:<br />
Bent<br />
Protoplasmic droplet<br />
Other<br />
Tail:<br />
Bent<br />
Shoehook<br />
Protoplasmic droplet<br />
Other<br />
Tertiary Abnormalities<br />
Reacted acrosomes<br />
Coiled tails<br />
Other<br />
63
Collection and Processing of Testicles or Ovaries Post-Mortem for Shipment<br />
Testicles: As soon as possible after death, remove testicles enclosed within the scrotal sac and place<br />
them into a clean plastic bag and seal tightly. Place ice packs or ice sealed in a plastic bag (not dry ice) on<br />
the bottom of a small styrofoam box or other insulated container. Cover the ice with several layers of<br />
newspaper or paper towels, then place the testicles on top and seal the box. Note: it is very important that<br />
the testicles cool very slowly to zero degrees (or ice bath temperature); therefore, be sure to not place them<br />
in direct contact with the ice (or the sperm will die of, or be damaged by, cold shock). Testicles may be<br />
sent by overnight priority delivery service, if recovered from a relatively young and healthy animal.<br />
However, a significant reduction in sperm survival would be expected from aged or chronically ill animals.<br />
Ideally – and for very valuable animals – same day courier services (e.g., counter-to-counter air freight) is<br />
preferable for optimal recovery. Nevertheless, current technology has demonstrated the potential of<br />
producing live offspring from embryos derived from in vitro fertilization as well as sperm injection of either<br />
motile or non-motile sperm collected from testicles. Therefore, sperm samples should be salvaged and<br />
cryobanked as part of a conservation program for any valuable animal.<br />
Ovaries: To avoid any loss in egg survival, ovaries must be received within 8 hours of death;<br />
therefore, they must be shipped by same day courier service (e.g., counter-to-counter air freight). Before<br />
removing ovaries, pre-warm physiological saline and several warm packs (to physiological temperature).<br />
Using sterile technique, cut the end of the oviducts at the utero-tubal junction, and remove the ovaries.<br />
Place them directly into a sterile specimen container or sealable, leak-proof plastic bag containing the<br />
physiological saline pre-warmed to body temperature. Pack the specimen cup in a thick styrofoam box<br />
containing several warm packs. Use cloth towels to ensure that the ovaries are properly insulated.<br />
64
Epididymal Sperm Collection and Processing Worksheet<br />
Date: Species: Animal ID: Location:<br />
Time of testes collection: Transport temp: Time of sperm recovery:<br />
Sperm diluent/medium used:<br />
Viability:<br />
Motility (%): Progression (0-5): Total % Live: Total % acrosome intact:<br />
[%Live/Acr Int: %Live/Acr Rx: %Dead/Acr Int: %Dead/Acr Rx: ]<br />
Vital stain used:<br />
Morphology:<br />
Fixation/staining method used:<br />
Total % structurally normal sperm: Total % abnormal:<br />
(excl. protoplasmic droplets)<br />
Summary of primary abnormalities (%): Secondary: Tertiary (handling):<br />
Primary abnormalities: Secondary abnormalities: Tertiary bnormalities:<br />
Head: Head: Type:<br />
Microcephalic:<br />
Detached:<br />
Macrocephalic:<br />
Loose acrosome:<br />
Round:<br />
Damaged acrosome:<br />
Pyriform:<br />
Other:<br />
Elongated:<br />
Midpiece:<br />
Double:<br />
Protoplasmic droplet:<br />
Abnormal acrosome:<br />
Bent:<br />
Other:<br />
Other:<br />
Midpiece:<br />
Tail:<br />
Elongated:<br />
Protoplasmic droplet:<br />
Abaxial:<br />
Bent:<br />
Thickened:<br />
Shoehook:<br />
Double:<br />
Other:<br />
Other:<br />
Tail:<br />
Coiled:<br />
Double:<br />
Short:<br />
Other:<br />
Cryopreservation Protocol:<br />
Storage Location:<br />
Comments:<br />
65
Semen Collection and Artificial Insemination of Cranes<br />
Submitted by R. Lastovica & N.M. Loskutoff<br />
Center for Conservation & Research, Omaha‘s Henry Doorly Zoo<br />
September 2003<br />
Contact information for further details:<br />
Bob Lastovica at: Birds@omahazoo.com<br />
Publications using this protocol:<br />
1) Gee, G.F. and Temple, S.A. (1978) Artificial insemination for breeding non-domestic birds. In<br />
P.F. Watson (Ed), Artificial Breeding of Non-Domestic Animals, Zool. Soc. London 43:51-72.<br />
2) Archibald, G.S. (1974) Methods for breeding and rearing cranes in captivity. <strong>International</strong> Zoo<br />
Yearbook 14:147.<br />
3) Gee, G.F. (1969) Reproductive Physiology of the Greater Sandhill Crane. A Progr. Rep.<br />
Admin. Rep., Patuxent Wildlife Research Center.<br />
From: La Rue, C. (1980) Increasing Fertility of Crane Eggs. Avicultural Magazine 86: 10-15.<br />
Introduction<br />
Many zoos and private aviculturists keep cranes which are rendered flightless through pinioning,<br />
tenectomy, or wing clipping. The high incidence of infertile eggs in many captive cranes suggest that<br />
these procedures may have a detrimental effect on fertility. Other reasons for infertile eggs may be the<br />
absence of copulation due to incompatible pairs, interruption of precopulatory behavior by people or<br />
other animals, and improper sexing of the ―pair.‖<br />
In an effort to increase fertility some crane breeding centers, notably the Patuxent Wildlife<br />
Research Center and the <strong>International</strong> Crane Foundation, have implemented artificial insemination (AI)<br />
as a propagation tool. Many of the problems which produce infertile eggs can be overcome by using AI.<br />
Artificial insemination is practiced at <strong>International</strong> Crane Foundation (ICF) at Baraboo, Wisconsin, USA<br />
(http://www.savingcranes.org/) for a variety of reasons, prominent among these are when:<br />
1. Individuals of a pair are incompatible because of behavioral problems and must be kept<br />
separated;<br />
2. There is a shortage of unrelated sexually mature males;<br />
3. Breeding age males are unable to copulate due to pinioning or other anatomical<br />
disabilities;<br />
4. Birds are sexually imprinted on humans and will not pair bond with other<br />
cranes;<br />
5. A pair is physically capable of breeding but do not copulate due to one or more<br />
of a variety of inhibiting factors; or<br />
6. New bloodlines are desired to improve the genetic variability in the captive<br />
flock.<br />
The technique of AI through the massage method has been described in other publications (Gee,<br />
1969; Archibald, 1974; Gee and Temple, 1978) but will be repeated here in the hope of encouraging<br />
66
more aviculturists to attempt AI when applicable. AI is as much an art as a science, but it is not difficult<br />
to learn. The methods used vary somewhat between individual people and individual birds.<br />
Handling<br />
The capturing and handling of the bird requires a concentrated effort to prevent injuries to both<br />
the bird and the aviculturist. In several years of AI at the Foundation there has never been a fatality or<br />
serious injury during this process. Normally, the bird is herded by two or three people into a corner<br />
which has been lined with Christmas trees to act as padding. The bird is then grabbed gently by the<br />
neck just below the head and by one wing. It is important to protect both yourself and the bird‘s neck<br />
from being struck by their flailing feet and sharp nails. The bird is immediately placed head first<br />
between the holder‘s legs. The bird‘s head can be released and the bird held firmly pressed against the<br />
holder‘s thighs. Normally the bird will relax some at this point but if it continues to struggle a good may<br />
be placed over the bird‘s head.<br />
Semen Collection<br />
Three people are usually involved in semen collection although two people can do the job<br />
satisfactorily. The person holding the bird is the ―stroker‖ whose job it is to restrain the bird while<br />
stroking the bird‘s thighs. The wings are allowed to remain free and should not be held between the<br />
stroker‘s legs. The arms are placed behind the wings with the forearms pressing the bird forward against<br />
the stroker‘s legs. The massage usually begins as an up and down motion on the bird‘s sides moving<br />
down to the inside of the thighs where the up and down strokes are continued. Normally the bird<br />
responds by raising its tail, contracting the cloaca repeatedly, and often times purring or clucking.<br />
The second person involved is the ―teaser‖ who squeezes the cloaca in a milking action which<br />
results in the ejaculation of a small quantity of semen. This usually occurs within a few seconds but<br />
some birds may take longer. Various methods can be employed but our preferred method is for the<br />
teaser to stand on the right side facing the opposite direction of the bird. Placing the right hand around<br />
and above the cloaca, the thumb is at the right side of the cloaca and the fingers are at the left side. The<br />
heel of the right hand helps to hold up the bird‘s tail pushing it over the bird‘s back. The left hand is<br />
placed under the cloaca, first stroking the abdomen a few times. The thumb of the left hand is then<br />
placed above the cloaca while the fingers are below the cloaca and pressure is applied in unison with the<br />
thumb and fingers of the right hand. This method results in a milking action from all four directions<br />
around the cloaca. In some techniques the left hand would be used to manipulate the cloaca while the<br />
right hand would hold the shot glass or eye cup for collecting. We use a third person to hold the small<br />
shot glass at the base of the cloaca to catch the ejaculate. Very small samples may have to be scraped<br />
off the cloaca onto the rim of the glass.<br />
It is important to avoid contamination of the semen with urates during the collection. It helps to<br />
walk the bird and hesitate before capture to encourage the bird to defecate before handling. If the glass<br />
becomes contaminated during the collection, a second shot glass may often be substituted quickly<br />
enough to catch a clean semen sample. Uncontaminated semen is translucent with a slight frosty<br />
appearance. Normally only a few drops will be ejaculated measuring from about 0.01 to 0.3 milliliters.<br />
If the ejaculate is milky and of large volume, it is probably contaminated with urates. Because urates<br />
will kill sperm in a very short time, a contaminated sample will greatly reduce the fertilizing capability<br />
of the insemination.<br />
67
Once collected in the glass, the semen is drawn into a 1 cc tuberculin syringe for measuring and<br />
subsequent insemination. If the semen is to be extended, a known amount of extender is deposited into<br />
the glass and drawn into the same syringe containing the semen. The sample is generally diluted enough<br />
to give an insemination volume of about 0.2 milliliters. Samples larger than 1.5 milliliters are not<br />
diluted unless they are to be split.<br />
Extender<br />
Several semen extenders are available that can be used with cranes successfully (see Table 1 for<br />
formulations). Patuxent uses Beltsville Poultry Semen Extender while ICF uses Minnesota Turkey<br />
Semen Extender sold by the Minnesota Turkey Growers Association. The use of a semen extender is<br />
advantageous when very small samples of semen are collected and when a sample is to be split for<br />
inseminating more than one bird or to be frozen for future use. In the absence of a commercial extender,<br />
a physiological saline solution can be used for fresh inseminations.<br />
Insemination of the Female<br />
The actual insemination of semen can be the most difficult part of AI in cranes. While cloacal<br />
inseminations can give satisfactory results, placing the semen directly into the oviduct is preferred. At<br />
ICF, an effort is made to accomplish intra-vaginal inseminations at all times. A female in breeding<br />
condition that has laid eggs in the past or is currently laying is the easiest to inseminate. A female not in<br />
breeding condition and that has not laid before is very difficult to inseminate properly.<br />
A reddening and enlargement of the opening into the oviduct is normally a reliable indication of<br />
breeding condition in the female crane. A relaxation of the cloaca and widening of the pubic bones<br />
often accompanies the onset of breeding condition.<br />
The insemination of cranes at ICF follows the same pattern as semen collection with only a few<br />
differences. The bird is caught and held in the same manner as that described for the male. The female<br />
is usually stroked on the back and sides just posterior to the wings instead of the thighs. The same<br />
responses of tail raising, cloacal contractions and purring or clucking are normally elicited during the<br />
massage. In many birds, the oviduct is everted briefly and appears as a small bright pink opening,<br />
surrounded by spongy tissue, located at the lower left quadrant of the cloaca. In most birds it is<br />
necessary to gently pull the cloacal lips apart wider in an effort to expose the oviduct. This<br />
manipulation is usually done by the teaser while the third person inserts the syringe once the oviduct is<br />
located.<br />
After locating the oviduct, the syringe is gently pushed in one to five centimeters and the semen<br />
is deposited slowly. This allows the oviduct time to accept and draw in deeper the contents of the<br />
syringe. Injecting the semen too quickly will result in some loss of semen. When the insemination is<br />
completed, the syringe is withdrawn slowly to prevent pulling semen out with the syringe. The bird is<br />
released quickly and gently to reduce the possibility of expelling semen.<br />
**Note: More recently, one change to this protocol has been made: once the syringe is inserted<br />
into the oviduct, the stroker stops stroking the back of the female. The semen is then deposited once the<br />
female stops everting the cloaca and begins to draw inward; thereby taking up the semen.<br />
With the 1 cc tuberculin syringe there is generally about 0.04 ml semen left in the hub of the<br />
syringe after the insemination. This is another reason for using extender with small samples. The<br />
68
emaining semen is sufficient for microscopic examination for sperm cell concentration and motility.<br />
These samples can be taken to the laboratory and examined an hour or two after collection if the samples<br />
are stored at about 5 o C and are not heavily contaminated by urates. Best results are obtained by<br />
examining samples immediately after collection with a microscope in the field at 430X magnification.<br />
Frequency of Inseminations<br />
Generally it is accepted that the higher frequency of inseminations, the higher the fertility rate.<br />
However, it is also true that the timing of each insemination is extremely important. Inseminations done<br />
three times a week and on days an egg is laid, a few hours after laying, should give good fertility.<br />
Currently at ICF we do AI every other day early in the morning and on days eggs are laid.<br />
Summary<br />
Artificial insemination can help improve fertility in many situations. The procedures are not<br />
overly complicated and can be learned in a short time through practice. A basic knowledge of AI<br />
techniques can be acquired at many University Poultry Science Departments and at commercial turkey<br />
breeding farms. These institutions provide an opportunity to develop AI skills before the cranes‘<br />
breeding season begins.<br />
69
Table 1. Semen extender formulations for birds (use for AI)<br />
Diluent composition (grams/liter):<br />
BPSE<br />
Acetate<br />
Fructose 5.00 8.00<br />
Magnesium chloride x 6 H 2 O 0.34 ---<br />
Tri-potassium citrate (anhydrous) 0.65 ---<br />
Sodium acetate x 3 H 2 O 4.30 ---<br />
Magnesium acetate x 4 H 2 O --- 0.80<br />
Potassium acetate (anhydrous) --- 5.00<br />
Sodium glutamate x H 2 O (glutamic acid) 8.67 19.20<br />
Potassium dihydrogen phosphate 0.65 ---<br />
Dipotassium hydrogen phosphate x 3 H 2 O 12.70 ---<br />
TES 1.95 ---<br />
pH 7.50 (not specified)<br />
Osmolality 333 333-375<br />
70
Semen Collection in Snakes<br />
Submitted by E. Viera and E.G. Crichton<br />
Center for Conservation & Research, Omaha‘s Henry Doorly Zoo;<br />
Updated September 2006<br />
Update prepared by Kelli Mattson<br />
Contact information for further details:<br />
Kelli Mattson at: Repro@omahazoo.com<br />
Publication describing this protocol:<br />
1) Mengden, G.A., Platz, C.G., Hubbard, R. and Quinn, H. (1980) Semen collection, freezing and<br />
artificial insemination in snakes. SSAR Contributions to Herpetology No. 1, Reproductive<br />
Biology and Diseases of Captive Reptiles; Murphy, J.B and Collins, J.T. (Eds.), <strong>Society</strong> for the<br />
Study of Amphibians and Reptiles.<br />
Procedure<br />
1. Expel uric acid and fecal material by holding the snake in a vertical position and gently<br />
applying pressure with the thumb along the ventral side of the animal while make a long<br />
ventral-caudal stroking motion along the lower abdomen.<br />
2. Flush away any fecal material from the vent opening by using saline or Ringer‘s solution<br />
(distilled water and chlorinated water will kill sperm).<br />
3. With the thumb, pressure is applied to the front of the anal plate and behind the<br />
hemipenes (see Figure 1 for diagram of snake anatomy). The tail is bent slightly<br />
backwards.<br />
4. Continue stroking and rinsing if necessary.<br />
5. Pull the cloaca open with thumb and push the tissues posteriorly. The cloacal papilla will<br />
be exposed.<br />
6. If a dried seminal plug appears, gently remove it.<br />
7. Repeat ―stroking‖ procedure, semen will be expelled from the papilla.<br />
8. Place a disposable transfer pipette between the papilla and the base of the hemipenes to<br />
extract a clean sample.<br />
9. Add semen collected to a microcentrifuge tube containing a select volume (over 50l and<br />
less than 500l) TL Hepes Solution (Cambrex 04-616F). Be sure to use a new tube os<br />
Hepes with each collection to prevent contamination.<br />
10. Males can be collected once per week during their breeding season.<br />
11. The males should ejaculate within 5 to 10 minutes of manipulation.<br />
12. A ―trained‖ snake, or one that becomes accustomed to the procedure will typically<br />
ejaculate within seconds after defecating.<br />
13. Males just starting with collections may get a little sore so be cautious and respectful,<br />
they may need some extra time between collections.<br />
71
Figure 2. Diagram of anatomical features in snakes.<br />
72
Artificial Insemination of Snakes<br />
Submitted by K.J. Mattson and N.M. Loskutoff<br />
Center for Conservation & Research, Omaha‘s Henry Doorly Zoo<br />
September 2006<br />
Contact information for further details:<br />
Kelli Mattson at: Repro@omahazoo.com<br />
Publications using this protocol:<br />
1) Quinn, H., Blasedel, T., and Platz, C.C. (1989). Successful artificial insemination in the<br />
checkered garter snake. Int Zoo Yb. 28: 177-183.<br />
2) K.J. Mattson, A.T. DeVries, S.M. McGuire, J. Krebs, E.E. Louis, N.M. Loskutoff. (2006)<br />
Successful Artificial Insemination in the Corn Snake, Elaphe gutatta, Using Fresh and Cooled<br />
Semen. Reprod Fertil Dev (in press).<br />
Semen collection: See “Semen Collection in Snakes” protocol<br />
It is recommended that artificial inseminations are performed one week after the species-specific<br />
hibernation period.<br />
Procedure<br />
1. Immediately prior to insemination, express the feces and urates from the female following the<br />
same technique as is used with the males when collecting semen (see the ―Semen Collection in<br />
Snakes‖ protocol).<br />
2. The artificial insemination (AI) team should consist of three people: one person to support the<br />
head, one person to position the tail in an arc with the cloaca at the top of the arc, and the third<br />
person to perform the inseminations.<br />
3. Draw up 100 l of air into a 1 ml latex and silicone-free tuberculin syringe (Norm-Ject, VWR<br />
53548-000) connected to a stainless steel feeding and dosing needle (EJAY <strong>International</strong>, FNS-<br />
20-1 ½) with a ball tip to prevent damaging any tissue during the insemination.<br />
4. The insemination dose per oviduct (50 l) is then drawn into the needle, and the ball tip is<br />
inserted into the cloaca.<br />
5. The tip of the needle is slowly moved around the inside of the vent to relax the muscles and open<br />
the cloaca to allow the gentle insertion of the needle. It is best to slowly increase the speed in<br />
which the tip of the needles is moved around the cloaca as the female relaxes, however, each<br />
snake reacts slightly different so one must always be sensitive to how the female is responding to<br />
the stimulus. The opening of each oviduct is situated to either side of and dorsal to the cloaca of<br />
the snake.<br />
6. The needle should be inserted into the oviduct and guided anteriorly until resistance is felt.<br />
7. The insemination dose (50 l) is then released into both oviducts and the needle slowly<br />
withdrawn. As the needle is withdrawn, release some of the air from the syringe to ensure the<br />
deposition of the entire insemination dose.<br />
73
Human Sperm-Oocyte Interaction Tests<br />
De Yi Liu and H.W. Gordon Baker<br />
University of Melbourne Department of Obstetrics and Gynecology and Reproductive<br />
Services Royal Women's Hospital and Melbourne IVF, Melbourne, Australia<br />
September 2002<br />
Contact information for further details:<br />
Dr. D Y Liu: Email: d.liu@unimelb.edu.au<br />
Publications using this protocol:<br />
1) Liu, D.Y., Lopata, A., Johnston, W.I.H. and Baker, H.W.G. A human sperm-zona pellucida binding<br />
test using oocytes that failed to fertilize in vitro. Fertil. Steril. 50: 782-788, 1988.<br />
2) Liu, D.Y. and Baker, H.W.G. Inducing the human acrosome reaction with a calcium ionophore<br />
A23187 decreases sperm-zona pellucida binding with oocytes that failed to fertilize in vitro. J.<br />
Reprod. Fert. 89: 127-134, 1990.<br />
3) Liu DY and Baker HWG. (1994) A new test for the assessment of sperm-zona pellucida<br />
penetration: relationship with results of other sperm tests and fertilization in vitro. Hum. Reprod.,<br />
9: 489-496.<br />
4) Pantke, P., Hyland, J., Galloway, D.B., Liu, D.Y. and Baker H.W.G. Development of a zona<br />
pellucida sperm binding assay for the assessment of stallion fertility. Equine Reproduction VI Biol.<br />
Reprod. Mono. 1: 681-687, 1995<br />
5) Liu DY and Baker HWG. (1996) A simple method for assessment of the human acrosome<br />
reaction of spermatozoa bound to the zona pellucida: lack of relationship with ionophore<br />
A23187-induced acrosome reaction. Hum. Reprod., 11: 551-557.<br />
Introduction<br />
These tests assess the capacity of populations of sperm to interact with the oocyte particularly spermzona<br />
pellucida (ZP) binding, the ZP induced acrosome reaction, sperm ZP penetration and, after<br />
removing the ZP, sperm-oolemma binding (Liu and Baker, 1990). The tests can be used to investigate<br />
factors which interfere with sperm function or sperm binding to the ZP and can be used clinically to<br />
provide important diagnostic information about sperm fertilising ability. Although these tests were<br />
developed with human sperm and oocytes they can be adapted for other animals such as the horse<br />
(Pantke et al., 1995).<br />
Source of human oocytes:<br />
Oocytes which showed no evidence of two pronuclei or cleavage at 48 to 60 h after insemination in a<br />
clinical IVF program were used for the ZP-induced AR tests. If the oocyte had sperm bound to the ZP<br />
from the IVF insemination, these were removed by aspiration using a fine glass pipette with an inner<br />
diameter (120µm) slightly smaller than the oocyte diameter. (Liu and Baker, 1994a; 1996). Most of the<br />
oocytes were obtained from patients with partial failure of fertilization in standard IVF and more than<br />
50% of these unfertilised oocytes had one or a few sperm penetrating the ZP from the IVF insemination.<br />
We have shown previously that oocytes with
1996). Oocytes with >10 sperm penetrating the ZP were not used. Also degenerate, activated or<br />
morphologically abnormal oocytes were not used for the sperm-ZP interaction test. Oocytes were<br />
pooled from several patients and used for the test on the same day or kept in the incubator and used<br />
within next 2-3 days. Four oocytes are used for each sperm preparation because of variability between<br />
the oocytes. The oocytes can also be stored in 1M ammonium sulphate at 4C for up to 6 months without<br />
loss of activity of the ZP for binding sperm and stimulating the acrosome reaction.<br />
These oocytes which have failed to fertilise are incapable of normal fertilisation during the test<br />
procedures. All patients signed consent forms permitting use of their unfertilised oocytes or sperm<br />
samples for research. The Royal Women‘s Hospital Research and Ethics Committees approved the<br />
project.<br />
Sperm preparation<br />
Motile sperm were selected by a swim-up technique as follows: 0.3 ml of semen was carefully added to<br />
the bottom of a test tube (12 x 75mm) containing 0.7 ml human tubal fluid (HTF, Irvine Scientific,<br />
Irvine, CA, USA) supplemented with 10% heat inactivated human serum (ICN Biomedicals, Irvine, CA,<br />
USA). Care was taken to avoid disturbing the interface between the semen and the medium. After<br />
incubation for 1 h, 0.5 ml of the top layer of the medium containing motile sperm was aspirated. The<br />
motile sperm suspension was then centrifuged at 1000g for 5 minutes, the supernatant removed and the<br />
sperm pellet washed again with 1 ml fresh HTF by centrifugation at 1000g for 5 minutes. The washed<br />
sperm pellet was resuspended with serum supplemented HTF to a sperm concentration of 2 x 10 6 /ml for<br />
the ZP-interaction test.<br />
Sperm-ZP binding<br />
For the sperm-ZP interaction tests, motile sperm (2 x 10 6 ) in 1 ml of medium were incubated with four<br />
oocytes for 2 h at 37 o C in 5% CO 2 in air. After incubation, the oocytes were transferred to phosphate<br />
buffered saline (PBS), pH 7.4, containing 2 mg/ml bovine serum albumin (BSA) and washed by<br />
repeated aspiration with a glass pipette (inside diameter approximately 250 m) to dislodge sperm<br />
loosely adhering to the surface of the ZP. Sperm binding to all 4 oocytes was assessed. Under these<br />
experimental conditions, with the high concentration of sperm in the insemination medium (20 times<br />
more than standard IVF insemination), the number of sperm bound tightly to the ZP is greater than<br />
100/ZP with sperm from fertile or normospermic men and sperm samples with an average of < 40<br />
sperm/ZP were considered to have poor sperm-ZP binding and no further testing was done (Liu et al.,<br />
2001, Liu and Baker 2003). Lower concentrations of sperm can be used to get countable numbers of<br />
sperm on the ZP if the main interest is sperm-ZP binding (Liu et al., 1988).<br />
ZP-induced AR<br />
For sperm samples with normal ZP-binding, all sperm bound to surface of the 4 ZPs were removed by<br />
repeated vigorous aspiration with a narrow gauge pipette with an inner diameter (approximately 120<br />
m) slightly smaller than the oocyte (Liu and Baker 1994a, 1996). This was performed on a glass slide<br />
with about 5 l PBS containing 0.2% BSA and the removed ZP-bound sperm were smeared in a limited<br />
area (about 16 mm 2 ), which was marked on the back of the slides with a glass pen to help find the sperm<br />
under the microscope. This pipetting procedure for removing sperm from the surface of ZP does not<br />
affect sperm motility, morphology and acrosome status (Liu and Baker, 1996).<br />
75
The acrosome status of sperm removed from the ZP was determined with fluorescein labelled Pisum<br />
Sativum agglutinin (PSA, Sigma Co., St. Louis, MO) with a modification of the method of Cross et al<br />
(1986). Sperm smears were fixed in 95% ethanol for 30 minutes after drying in air and then stained in<br />
25 g/ml PSA in PBS for at least 2 h at 4 o C. The slide was washed and mounted with distilled water<br />
and the percentage of AR was determined by scoring 200 of sperm removed from all 4 ZPs per test<br />
using a fluorescence microscope with oil immersion at a magnification of 400x. When more than half<br />
the head of a sperm was brightly and uniformly fluorescing, the acrosome was considered to be intact.<br />
Sperm with a fluorescing band at the equatorial segment or no staining of the head (a rare pattern) were<br />
considered to be acrosome reacted. As only motile sperm are capable of binding to the ZP, sperm<br />
removed from the ZP were alive and motile at the time of ZP-binding and thus no test of sperm viability<br />
was done.<br />
Sperm-ZP Penetration Test<br />
The procedures of this test is the same as the sperm-ZP binding test: motile sperm (2 x 10 6 ) in 1 ml of<br />
medium were incubated with four oocytes for 2 h at 37 o C in 5% CO 2 in air. After incubation, the<br />
oocytes were transferred to phosphate buffered saline (PBS), pH 7.4, containing 2 mg/ml bovine serum<br />
albumin (BSA) and washed by repeated aspiration with a glass pipette (inside diameter approximately<br />
250 m) to dislodge sperm loosely adhering to the surface of the ZP. Sperm binding to all 4 oocytes<br />
was assessed. Then oocytes are repeatedly aspirated in and out of a pipette of inner diameter 120 µm,<br />
which is slightly smaller than the size of the oocyte. Sperm on the surface of the ZP are sheared off and<br />
only sperm with their heads embedded in the ZP, or in the PVS remain. These sperm can not be removed<br />
by further repeated pipetting. The penetrating sperm are easily counted under the microscope.<br />
Histological examination of serial cross sections of some oocytes confirmed the accuracy of this method<br />
(Liu and Baker 1994b, 2000). This test is useful for prediction of defective sperm-ZP penetration, in<br />
particular, in men with normal semen analysis and normal sperm-ZP binding.<br />
76
Gorilla Sperm Cryopreservation Protocol – Non-Egg Yolk Diluent<br />
J. K. O‘Brien<br />
University Sydney<br />
September 2002<br />
Contact Information for further details:<br />
Justine O‘Brien at justineo@vetsci.usyd.edu.au<br />
Publications using this protocol:<br />
O‘Brien JK, Crichton EG, Evans KM, Schenk JL, Stojanov T, Evans G, Maxwell WMC, and Loskutoff<br />
NM. (2002) Sex ratio modification using sperm sorting and assisted reproductive technology - a<br />
population management strategy. Proceedings of the Second <strong>International</strong> Symposium on Assisted<br />
Reproductive Technology for the Conservation and Genetic Management of Wildlife, Omaha‘s Henry<br />
Doorly Zoo, pp. 224-231.<br />
Semen processing for samples collected by manual stimulation<br />
1. Collect semen onto a washed (purified water) non-toxic nitrile glove (powder-free).<br />
2. <strong>Transfer</strong> semen to either a cryovial (Nunc) or a microcentrifuge tube (ThermoTrace; Cat no. 1721-2:<br />
2.0 ml) using a 100 ul pipette (record volume).<br />
3. To collect semen remaining on the glove, rinse with small measured aliquots of HEPES-buffered<br />
HTF medium (Sage Biopharma, Cat. no. ART-1003) + 5%HSA (Irvine Scientific, Cat. no. 9988).<br />
This medium is termed “mHTF” (Part A).<br />
4. Record standard ejaculate characteristics:<br />
Volume of raw semen (ml):<br />
Volume of mHTF added during collection<br />
(ml; should be no greater than 1:1; semen::mHTF):<br />
Total volume (ml):<br />
Sperm/ml:<br />
Total sperm count:<br />
Motility (%):<br />
Forward progressive motility<br />
(0-5; 0 = no forward progressive motion, 5 = rapid progressive motion):<br />
Morphology: transfer 5 ul of semen to 100 ul of 1% glutaraldehyde<br />
(40 ul 25% glut + 0.96ml PBS):<br />
Acrosome integrity (FITC-PNA) and/or live dead stain:<br />
Freezing procedure<br />
1. Prior to semen collection, remove an aliquot from refrigerated Human Sperm Freezing Medium<br />
(Medicult #1067 0005; “SFM” Part B) and transfer to a cryovial or microcentrifuge tube. Leave<br />
tube at room temperature (so SFM will be at same temperature as semen).<br />
77
2. Place in refrigerator a pipette, pipette tips, forceps, labelled straws (estimate 4 straws for every<br />
0.25 ml of raw semen; label with Date, Male house name, studbook no., species; use a xylenefree<br />
Artline 725 permanent marker) and sealing apparatus (BD‘s ―Seal-ease‖ or ―ball bearings).<br />
3. Dilute semen (which was cooled to room temperature by placing it in rack) 1:1 with Part B.<br />
Dilute semen dropwise, very slowly with Part B – add only several drops of Part B to semen<br />
per minute so that dilution is performed over at least 5 minutes (preferably 10 min).<br />
Vol: Part A (+semen); Part B (1:1, diluted semen: PartB); Total Vol.<br />
4. Place tube of diluted semen in a 250 ml beaker containing approximately 100ml of room temp<br />
water. Before freezing check that this apparatus will cool a tube containing 0.5-1.0ml of semen at<br />
a rate of –0.5°C/minute; ie requires 30 min to cool from 21°C to 5°C).<br />
5. After cooling to 5°C for 30-40 min, equilibrate for a further 30 min (for human sperm, this<br />
equilibration time can be reduced to 10 min) – at the same time fill the labelled 0.25 ml straws<br />
with semen and seal using the ―Seal-ease‖ sealant or ball bearings. Leave 5 ul in tube for prefreeze<br />
assessments eg motility and FPM, acrosome status<br />
6. Record: Time start cool:______ _ Time post-cool 5°C (1-1.1h):<br />
Time post-equilibration:<br />
7. Place straws on a block of dry ice contained in an insulated container with a lid (eg plastic or<br />
styrofoam eski). Use forceps to handle straws at the cotton plug end. After all straws are placed<br />
on the dry ice, place lid on container and leave for 10 min.<br />
8. After 10 min, quickly transfer straws into liquid nitrogen using pre-cooled forceps (grasping<br />
straws at the cotton-plug end).<br />
9. Record: Time frozen on dry ice:<br />
10. Calculate no. sperm per straw:<br />
11. The straws are placed in a goblet (continually submerged in liquid nitrogen) which is held on a<br />
cane that can be stored in one of several canisters in a liquid nitrogen storage dewar.<br />
12. Record storage information:<br />
No. straws: Dewar #: Canister: Cane ID: Straw ID:<br />
Thawing procedure<br />
1. Remove straw from liquid nitrogen storage and transfer quickly to a 37°C waterbath, shaking<br />
vigorously for 1 minute.<br />
2. Remove and wipe the outside of the straw with a clean tissue. Using clean scissors, cut the ends of<br />
the straw and let contents flow into a tube. Any semen remaining in the straw can be retrieved using<br />
a pipette and sterile 200ul tip (attach to straw end and de-aspirate).<br />
78
Gorilla Sperm Cryopreservation Protocol – Test Yolk Buffer Diluent<br />
J. K. O‘Brien<br />
University Sydney<br />
September 2002<br />
Contact Information for further details:<br />
Justine O‘Brien at justineo@vetsci.usyd.edu.au<br />
Publications using this protocol*:<br />
1) Lambert HL, Citino S, Collazo I. Penetration of zona-free hamster oocytes by ejaculated<br />
cryopreserved gorilla spermatozoa. Fertil and Steril 1991;56:1201-1203.<br />
2) Pope CE, Dresser BL, Chin NW, Liu JH, Loskutoff NM, Behnke EJ, Brown C, McRae Ma,<br />
Sinoway CE, Campbell MK, Cameron KN, Owens OM, Johnson CA, Evans RR, Cedars MI.<br />
Birth of a western lowland gorilla (Gorilla gorilla gorilla) following in vitro fertilization and<br />
embryo transfer. Am J Prim 1997;41:247-260.<br />
3) Brown CS, Loskutoff NM. A training program for noninvasive semen collection in captive<br />
western lowland gorillas (Gorilla gorilla gorilla). Zoo Biol 1998;17:143-151.<br />
*Slight differences between the protocol outlined in this document and the published protocols exist.<br />
Semen processing for samples collected by manual stimulation<br />
1. Collect semen onto a washed (purified water) non-toxic nitrile glove (powder-free).<br />
2. <strong>Transfer</strong> semen to either a cryovial (Nunc) or a microcentrifuge tube (ThermoTrace; Cat no. 1721-2:<br />
2.0 ml) using a 100 ul pipette (record volume). To collect semen remaining on the glove, rinse with<br />
small measured aliquots of HEPES-buffered HTF medium (Sage Biopharma, Cat. no. ART-1003) +<br />
5%HSA (Irvine Scientific, Cat no. 9988). This medium is termed “mHTF” (Part A1).<br />
3. Record standard ejaculate characteristics:<br />
Volume of raw semen (ml):<br />
Volume of mHTF added during collection<br />
(ml; should be no greater than 1:1; semen::mHTF):<br />
Total volume (ml):<br />
Sperm/ml:<br />
Total sperm count:<br />
Motility (%):<br />
Forward progressive motility<br />
(0-5; 0 = no forward progressive motion, 5 = rapid progressive motion):<br />
Morphology: transfer 5 ul of semen to 100 ul of 1% glutaraldehyde<br />
(40 ul 25% glut + 0.96ml PBS):<br />
Acrosome integrity (FITC-PNA) and/or live dead stain:<br />
79
Freezing procedure<br />
Prior to semen collection thaw an aliquot of the non-glycerolated (Irvine Scientific, cat #9972; Part<br />
A2) and glycerolated (Irvine Scientific, Cat. no. 9971; Part B) TEST-yolk buffered media.<br />
Place in refrigerator/cool room a pipette, pipette tips, forceps, labelled straws (estimate 4 straws for<br />
every 0.25 ml of raw semen; label with Date, Male house name, studbook no., species; use a xylenefree<br />
Artline 725 permanent marker) and sealing apparatus (Becton Dickinson‘s ―Seal-ease‖ or ―ball<br />
bearings).<br />
At room temperature, dilute semen (which was cooled to room temperature by placing it in rack on<br />
the benchtop) 1:1 with Part A2 (also at room temperature).<br />
Place the tube of diluted semen in a 250 ml beaker containing approximately 200ml of room temp<br />
water. Before freezing check that this apparatus will cool a tube containing 0.5-1.0ml of semen at a<br />
rate no greater than –0.5°C/minute.<br />
Cool semen to 5°C for 2 h. Then dilute semen dropwise, very slowly with Part B (using the precooled<br />
pipette) - add only several drops of Part B to semen per minute so that dilution is<br />
performed over at least 5 minutes (preferably 10 min).<br />
Fill the labelled 0.25 ml straws with semen and seal using the ―Seal-ease‖ sealant or ball bearings.<br />
Leave 5 ul in tube for pre-freeze assessments eg motility and FPM, acrosome status<br />
Equilibrate semen for another 30 minutes ensuring that straws are held in a horizontal position.<br />
Record: Time start cool:___ Time post-cool 5°C (2h): Time post-equilibration:<br />
Place straws on a block of dry ice contained in an insulated container with a lid (eg plastic or<br />
styrofoam eski). Use forceps to handle straws at the cotton plug end. After all straws are placed on<br />
the dry ice, place lid on container and leave for 10 min. Alternatively, straws can be placed on a rack<br />
at exactly one inch (2.54cm) above the surface of liquid nitrogen.<br />
After 10 min, quickly transfer straws into liquid nitrogen using pre-cooled forceps (grasping straws<br />
at the cotton-plug end).<br />
Record: Time frozen on dry ice:<br />
Calculate no. sperm per straw:<br />
The straws are placed in a goblet (continually submerged in luqid nitrogen) which is held on a cane<br />
that can be stored in one of several canisters in a liquid nitrogen storage dewar.<br />
Record storage information:<br />
No. straws: Dewar #: Canister: Cane ID: Straw ID:<br />
Thawing procedure<br />
3. Remove straw from liquid nitrogen storage and transfer quickly to a 50°C waterbath, shaking<br />
vigorously for 8 sec only.<br />
4. Remove and wipe the outside of the straw with a clean tissue. Using clean scissors, cut the ends of<br />
the straw and let contents flow into a tube. Any semen remaining in the straw can be retrieved using<br />
a pipette and sterile 200ul tip (attach to straw end and de-aspirate).<br />
80
Great Ape Semen Cryopreservation: Egg Yolk-Based Cryodiluents<br />
T.R. Bowsher 1 and N.M. Loskutoff 2<br />
1 Dallas Zoo, Dallas, Texas;<br />
2 Center for Conservation & Research, Omaha‘s Henry Doorly Zoo<br />
March 2003<br />
Contact information for further details:<br />
Todd Bowsher at: tbowsher@msn.com<br />
Publications using this protocol:<br />
1) Bowsher, T.R. and Loskutoff, N.M. (2001) Assisted reproductive technologies in the great<br />
apes. Proceedings of the 1 st <strong>International</strong> Symposium on Assisted Reproductive Technology for<br />
the Conservation and Genetic Management of Wildlife. Henry Doorly Zoo, Omaha, NE, USA,<br />
pp. 152-156.<br />
2) Finnegan, J.M., Loskutoff, N.M. and Brown, C.S. (1999) Cost effective method to transport<br />
manually collected gorilla semen for long term storage. Proceedings of the American<br />
Association of Zoo Veterinarians, Columbus, Ohio, pp. 362-363.<br />
3) Kurz, S.G., Healy, M.R., Loskutoff, N.M., Brown, C.S., Crichton, E.G., Barnes, A.M., Finnegan,<br />
J.M., Volenec, D. and DeJonge, C.J. (1999) In-vitro maturation and intracytoplasmic sperm<br />
injection of western lowland gorilla oocytes. Theriogenology 51:361, abst.<br />
4) Pope, C.E., Dresser B.L., Chin N.W., Liu J.H, Loskutoff N.M., Behnke E.J., Brown C., McRae<br />
M.A., Sinoway C.E., Campbell M.K., Cameron K.N., Owens O.M., Johnson C.A., Evans R.R.<br />
and Cedars M.I. (1997). Birth of a western lowland gorilla (Gorilla gorilla gorilla) following in<br />
vitro fertilization and embryo transfer. American Journal of Primatology 41:247-260.<br />
5) Bowsher, T.R., Loskutoff, N.M., & Kraemer, D.C. (1990) Short-term storage of great ape semen.<br />
Proceedings of the Zoological <strong>Society</strong> of London, Symposium on Biotechnology and the<br />
Conservation of Genetic Diversity.<br />
Preparation of Cryodiluents<br />
Ingredients:<br />
Preparation*:<br />
TES buffer<br />
Tris buffer<br />
Sodium citrate<br />
Fructose<br />
Deionized/distilled water<br />
Fresh egg yolks<br />
Glycerol<br />
1. Prepare 325 mOsm solutions of each of the four ingredients in deionized/distilled water, e.g.,<br />
TES: ~ 10 g in 140 ml<br />
Tris: ~ 10 g in 310 ml<br />
Na-citrate: ~ 10 g in 180 ml<br />
Fructose: ~ 10 g in 120 ml<br />
2. Titrate the TES and Tris solutions together to a pH of 7.0 (pour the Tris into the TES solution<br />
while stirring continuously and monitoring the pH meter).<br />
81
3. Combine the following proportions into a sterile container:<br />
60% TES-Tris solution<br />
12.5% Na-citrate solution<br />
10% Fructose solution<br />
17.5% fresh egg yolk<br />
4. Mix and freeze aliquots (e.g., 5-10 ml) of half the amount containing no glycerol (Primate<br />
Extender A).<br />
5. To the remaining half, add 8% glycerol (cell culture quality grade), mix thoroughly, then<br />
freeze in 5-10 ml aliquots (Primate Extender B).<br />
*Alternatively, you can purchase commercially prepared semen cryodiluents such as TES-Tris<br />
(TEST Yolk Buffer, Refrigeration Medium; Irvine Scientific, Santa Ana, CA, Tel: 800-437-5706;<br />
Cat #9972) or Tris-citrate-buffered, egg yolk-based diluent (e.g., Biladyl A, Minitube of<br />
America, Madison, WI, Tel: 608-845-1502). The Irvine cryodiluent already contains egg yolk,<br />
whereas fresh egg yolk must be added to Biladyl A just before use (one-half liter is prepared<br />
from a concentrate using distilled/deionized water that can be frozen as aliquots and stored long<br />
term). Use half of the volume of these non-glycerated cryodiluents as Primate Extender A, then<br />
to the remaining half, add 8% glycerol (cell culture quality) for Primate Extender B.<br />
Materials Needed:<br />
Semen Freezing Protocol (Straw Method)<br />
Refrigerator or cold room (4-5 o C)<br />
Dry ice (5-10 lb block)<br />
Liquid nitrogen<br />
Sterile Pasteur or transfer pipettes<br />
French straws (0.25 ml)<br />
Fine permanent marker<br />
PVP straw sealing powder<br />
Goblets<br />
Canes<br />
Freezing Procedure for Straws<br />
1. Thaw one aliquot each of the non-glycerated (Primate Extender A) and glycerated (Primate<br />
Extender B) cryodiluents. Place Primate Extender B into the refrigerator, along with a Pasteur or<br />
transfer pipette, labeled straws (estimate four straws for every 0.25 ml of raw semen) and sealing<br />
powder. Label straws with a minimum of species, animal ID number and date of collection.<br />
2. At room temperature, add a volume of Primate Extender A equal to the semen volume (1:1<br />
dilution ratio) directly to the raw ejaculate in a sterile test tube (large enough to contain at least<br />
four times the volume of the raw ejaculate.<br />
3. Place the tube containing this first extension into a beaker of room temperature water, then place<br />
the beaker into a refrigerator (the water slows the cooling of the sperm to refrigeration<br />
temperature). Be sure that the refrigerator is left undisturbed during this equilibration period.<br />
82
4. After a minimum of two hours in refrigeration, slowly (drop by drop) add the cold glycerated<br />
cryodiluent (Primate Extender B) using the cold pipette at a volume equal to that of the semen<br />
plus the first extension with Primate Extender A. During the second dilution, continuously and<br />
gently mix the suspension with the pipette or by a gentle swirling motion.<br />
5. Fill the labeled straws with the extended semen and seal using the cold polyvinylpyrrolidone<br />
(PVP) powder (at least a 5 mm column).<br />
6. Refrigerate the filled straws for another 30 min. Be sure the straws lie in a horizontal position.<br />
7. Freeze the samples by placing they directly and quickly on to a block of dry ice contained in an<br />
insulated (e.g., styrofoam) container with a lid. Hold the straws only at the cotton plug end to<br />
avoid warming by contact with fingers. After all the straws are placed on the dry ice, place the<br />
lid on the container and leave undisturbed for a minimum of 10 min. Alternatively, straws can<br />
be placed on a styrofoam boat (Fig 1) at exactly one inch (2.5 cm) above the surface of liquid<br />
nitrogen.<br />
8. After 10 min, plunge the straws directly into liquid nitrogen. While submerged in liquid<br />
nitrogen, load goblets and insert them onto canes. Straws must not be lifted out of the liquid<br />
nitrogen at any time. Carefully place the canes into a liquid nitrogen storage container and<br />
record the entry into the cryobank log book including the total numbers of straws, canes,<br />
identification information and location of canister and dewar.<br />
Thawing Procedure for Straws<br />
1. Remove one or more straws from liquid nitrogen storage and place them immediately into a<br />
50 o C water bath. Swirl the straw(s) in the water bath for exactly 8 seconds then remove.<br />
2. Wipe away surface moisture, then cut the ends of the straws and decant the contents into a sterile<br />
container (e.g., microcentrifuge tube).<br />
Thawed semen should be examined immediately and two hours post-thawing for overall progressive<br />
motility and acrosomal integrity.<br />
Styrofoam blocks (2)<br />
Wooden sticks (2)<br />
Semen straw<br />
1 in (2.5 cm)<br />
above LN 2<br />
Figure 1.<br />
Styrofoam ―boat‖ constructed from two blocks of styrofoam attached by two<br />
wooden sticks (far enough apart to securely hold the straws). Straws are laid<br />
on top of the sticks before the boat is carefully placed into an insulated container<br />
of liquid nitrogen (LN 2 ). The sticks are positioned so that the straws will be one<br />
inch (2.5 cm) above the LN 2 surface. The container lid is replaced and after 10<br />
min, the boat is lifted at an angle to plunge the straws directly into the LN 2 .<br />
83
Semen Freezing Protocol (Pellet Method)<br />
Materials Needed:<br />
Refrigerator or cold room (4-5 o C)<br />
Dry ice (5-10 lb block)<br />
Cryogenic gloves<br />
Nail board (for making ~ 5 mm depression in the dry ice block)<br />
Sterile Pasteur or transfer pipettes<br />
Long handled plastic spoon<br />
Insulated container or bucket<br />
Long forceps<br />
Cryovials<br />
Fine permanent marker<br />
Canes for cryovials<br />
Sleeves for canes<br />
Liquid nitrogen<br />
Freezing Procedure for Pellets<br />
1. Thaw one aliquot each of the non-glycerated (Primate Extender A) and glycerated (Primate<br />
Extender B) cryodiluents. Place Primate Extender B into the refrigerator, along with a Pasteur or<br />
transfer pipette, labeled straws (estimate four straws for every 0.25 ml of raw semen) and sealing<br />
powder.<br />
2. At room temperature, add a volume of Primate Extender A equal to the semen volume (1:1<br />
dilution ratio) directly to the raw ejaculate in a sterile test tube (large enough to contain at least<br />
four times the volume of the raw ejaculate.<br />
3. Place the tube containing this first extension into a beaker of room temperature water, then place<br />
the beaker into a refrigerator (the water slows the cooling of the sperm to refrigeration<br />
temperature). Be sure that the refrigerator is left undisturbed during this equilibration period.<br />
4. After a minimum of two hours in refrigeration, slowly (drop by drop) add the cold glycerated<br />
cryodiluent (Primate Extender B) using the cold pipette at a volume equal to that of the semen<br />
plus the first extension with Primate Extender A. During the second dilution, continuously and<br />
gently mix the suspension with the pipette or by a gentle swirling motion.<br />
5. At this time, prepare for freezing by using the nail board to make ~ 5 mm depressions on a flat<br />
surface of a dry ice block and filling the insulated container with a small volume of liquid<br />
nitrogen.<br />
6. Use a cold Pasteur or transfer pipette to first gently mix the second extension, then drop the<br />
extended semen directly into the dry ice depressions (one drop per depression). Count the total<br />
number of pellets.<br />
7. Allow the pellets to remain on the dry ice for 10 min.<br />
84
8. Plunge the pellets directly into liquid nitrogen by using cryogenic gloves to lift the dry ice block<br />
and tapping on the opposite side to dislodge the pellets.<br />
9. Secure labeled cryovials using long forceps and lower it into the liquid nitrogen. Using the<br />
plastic spoon, scoop up the pellets and place them into the cryovial.<br />
10. The cryovials containing pellets should be carefully capped and placed onto canes. The canes<br />
should be covered by protective sleeves then placed into a liquid nitrogen storage container.<br />
Thawing Procedure for Pellets<br />
1. Transport one or more cryovials containing the frozen pellets in an insulated container<br />
(preferably not white) containing a small volume of liquid nitrogen.<br />
2. Fill several 10 ml round bottom sterile tubes with 0.5 ml of medium (e.g., Hepes-TL Solution,<br />
BioWhittaker, Walkersville, MD, USA; Cat # 04-616F). Place the rack containing these tubes<br />
into a 37 o C water bath. Use one tube to thaw two to three pellets.<br />
3. Using a flamed, 25 gauge needle, poke three holes into the body of a long handled plastic spoon.<br />
4. Carefully uncap the cryovial and release the pellets. Using the modified plastic spoon, scoop 2-3<br />
pellets at a time and lift them out of the liquid nitrogen. As soon as the liquid nitrogen is drained<br />
through the holes in the spoon, drop the pellets into a tube containing the pre-warmed medium<br />
and swirl the tube gently in the water bath until the pellets are thawed.<br />
5. Thawed semen should be examined immediately and two hours post-thawing for overall<br />
progressive motility and acrosomal integrity.<br />
85
Protocol prepared by: Astrid Bellem<br />
Contact information for further details:<br />
asbellem@brookfieldzoo.org<br />
nawieleb@brookfieldzoo.org<br />
Publications using this protocol:<br />
Fecal Extraction Protocol for Hormone Analysis<br />
A.C. Bellem and N. Wielebnowski<br />
Brookfield Zoo, Chicago, IL<br />
March 2004<br />
1) Atsalis S, Margulis SW, Bellem A, Wielebnowski N. (submitted) Behavioral and hormonal<br />
cycles in captive geriatric lowland gorillas (Gorilla gorilla). American Journal of Primatology<br />
Extraction Protocol<br />
1. Measure 0.5g (+/- 0.05) of mixed, defrosted wet fecal sample into a 16x125 mm polypropylene test<br />
tube, being careful to remove any hair, bone, litter or debris.<br />
2. Record exact weight on fecal extraction sheet, and record any comments (unusually wet or dry,<br />
hairball).<br />
3. Fill a labeled 12x75mm polypropylene tube with sample and freeze for future use, if required.<br />
4. Continue until all samples in the set are weighed out.<br />
5. Add 5 ml of 80%EtOH in dH20 to all of the weighed fecal samples and cap tubes quickly.<br />
6. Vortex all tubes well, making sure samples are broken up.<br />
7. Place racked tubes in baggies (to hold tubes in rack), place in a horizontal position on a rotator and<br />
mix well for 14-18 hours (overnight).<br />
8. Centrifuge tubes for 15 minutes at room temperature at 1500 rpm.<br />
9. Pipette 1.0 mL assay buffer into labeled 12x75mm polypropylene test tubes, add 1 mL, of<br />
supernatant from each corresponding tube, cap tightly, mix and store frozen. Dilution tube labels<br />
should include animal ID (name), sample #, date and 1:10.<br />
This represents a 10-fold dilution, 5-fold in EtOH, since the original volume is 5 mL, and a further 2-<br />
fold into buffer, so that the sample will freeze. Samples not diluted into buffer will evaporate, even in<br />
capped tubes stored in the freezer.<br />
86
Semen/Spermatozoa Collection and Evaluation in Brushtail Possums<br />
F. Molinia<br />
Landcare Research, PO Box 69, Lincoln 8152, New Zealand<br />
September 2003<br />
Contact information for further details:<br />
Frank Molinia at: moliniaf@landcare.cri.nz<br />
Publications using this protocol:<br />
1) Molinia FC and Rodger JC (1996). Pellet-freezing spermatozoa of two marsupials: the tammar<br />
wallaby, Macropus eugenii and the brushtail possum, Trichosurus vulpecula. In: Marsupial<br />
Gametes and <strong>Embryo</strong>s. Reprod. Fertil. Dev. 8, 681-684.<br />
2) Garner DL, Johnson LA, Yue ST, Roth BL and Haugland RP (1994). Dual DNA staining<br />
assessment of bovine sperm viability using SYBR-14 and propidium iodide. J. Androl. 15, 620-<br />
629.<br />
3) Sistina Y, Lin M, Mate KE, Robinson ES and Rodger JC (1993). The unique stability of the<br />
marsupial sperm acrosomal membranes examined by unprotected freeze-thawing and treatment<br />
with the detergent Triton X-100. Reprod. Fertil Dev. 5, 1-14.<br />
4) Mate KE and Rodger JC (1991). Stability of the acrosome of the brush-tailed possum<br />
(Trichosurus vulpecula) and tammar wallaby (Macropus eugenii) in vitro and after exposure to<br />
conditions and agents known to cause capacitation or acrosome reaction of eutherian<br />
spermatozoa. J. Reprod. Fertil. 91, 41-48.<br />
5) Rodger JC, Cousins SJ and Mate KE (1991). A simple glycerol-based freezing protocol for the<br />
semen of a marsupial, Trichosurus vulpecula, the common brushtail possum. Reprod. Fertil.<br />
Dev. 3, 119-125.<br />
6) Rodger JC and Pollitt CC (1981). Radiographic examination of electroejaculation in marsupials.<br />
Biol. Reprod. 24, 1125-1134.<br />
7) Rodger JC and White IG (1978). The collection, handling and some properties of marsupial<br />
semen. In: Artificial Breeding of Non-domestic Animals, pp 289-301. Ed. PF Watson. Symp.<br />
Zool. Soc. Lond. No. 43, Academic Press, London.<br />
Background<br />
Semen/Spermatozoa Collection<br />
The following procedure for collecting possum semen/spermatozoa is adapted from techniques<br />
described by Rodger and White (1978), Rodger and Pollitt (1981), Rodger et al. (1991) and Molinia and<br />
Rodger (1996).<br />
Safety<br />
To avoid unnecessary exposure to biological hazards, operators should be suitably dressed in overalls<br />
and gumboots, and should wear gloves during sample collection. Avoid accidental inhalation of<br />
fluothane anaesthetic.<br />
87
Procedures<br />
Electroejaculation<br />
a. Anaesthetise possum (using method approved by Institutional Ethics Committee).<br />
b. Clean genital area with savlon solution. Extract penis and clean.<br />
c. Lubricate probe with obstetrical gel and gently position probe in rectum (~ 8 cm) so that<br />
electrodes lie at the anterior end of the male reproductive tract.<br />
d. Remove all traces of obstetrical gel from genital area and position penis in 15 ml collection<br />
vial containing 1 ml phosphate buffered saline (PBS), or EMEM media (Sistina et al., 1993),<br />
optional.<br />
e. Activate pulse generator. This automatically applies electrical stimuli (30 pulses/sec, 6.5 V)<br />
for a period of 5 sec duration followed by 5 sec rest interval. Repeat cycle approximately 10<br />
times until ejaculation. Resist posterior movement of probe as rectum contracts. The<br />
electrodes should lie against the posterior prostate gland that is readily palpable anterior to<br />
the pelvic bones during the breeding season.<br />
f. Semen volumes will vary greatly (0.5 - 12 ml). Dilute semen samples, 1:1 with PBS or<br />
EMEM media, immediately after collection.<br />
g. Between collections the probe should be thoroughly washed and soaked in savlon solution.<br />
Epididymal flushing<br />
Notes<br />
a. Euthanase male possum (using method approved by Institutional Ethics Committee), and<br />
remove both testes at the base of the scrotal sac, close to the body wall.<br />
b. Carefully dissect scrotum removing skin and outer membrane (tunica dartos). Separate<br />
epididymides from testes including a 5 cm portion of the vas deferens. Rinse tissue in PBS or<br />
EMEM media and blot with gauze sponges.<br />
c. At the base of the tail-region of each epididymis, remove remaining outer membrane (tunica<br />
vaginalis). Tease out a single epididymal duct tubule and cut.<br />
d. Insert a 21 G blunt needle attached to a syringe containing approximately 1-2 ml of PBS or<br />
EMEM media into the fee-end of the vas.<br />
e. Put the tail end of the epididymis into the top-end of a 15 ml centrifugation tube, and holding<br />
the needle into the vas, flush the tissue.<br />
f. Creamy-white epididymal spermatozoa will filter from the cut-end of the duct tubule. Stop<br />
flushing when the secretion runs clear with media. Repeat for the other side.<br />
Electroejaculation<br />
<br />
<br />
<br />
Semen samples are occasionally contaminated with urine. If this occurs use a fresh sampling<br />
vial and continue collection.<br />
If electrical stimulation does not elicit ejaculation after 10 cycles remove, clean, re-lubricate<br />
and reposition the probe. Faecal matter may accumulate around the strip electrodes<br />
preventing good electrical contact.<br />
After a number of collections some possums may give only sperm-free ejaculates.<br />
Positioning the probe adjacent to the anterior prostate (by palpation and lateral movement of<br />
the prostate) and applying electrical stimulus for several 5 sec cycles may yield spermcontaining<br />
ejaculates.<br />
88
Epididymal flushing<br />
<br />
<br />
If flush is contaminated with blood then discard the sample.<br />
Do not flush epididymides that appear infected.<br />
Equipment and reagents<br />
Probe: Perspex multipolar rectal probe (12 mm diameter) with 2 pairs of strip electrodes.<br />
Stimulator: Portable pulse generator powered by 9 V battery producing 30 square wave DC pulses per<br />
second with an amplitude of 6-8 volts and a current of 30-60 mAmps. The pulse generator is preset to<br />
repeatedly produce pulses for 5 seconds followed by 5 seconds off.<br />
Obstetrical gel: Veterinary lambing lubricant.<br />
Savlon solution: Consists of 10% savlon solution.<br />
Phosphate Buffered Saline: Containing 8 g NaCl, 0.2 g KCl, 1.44 g Na 2 PO 4 and 0.24 g KH 2 PO 4 in<br />
1000 ml distilled water, pH 7.2.<br />
EMEM media: Eagle=s minimum essential medium with Earle=s salts, L-glutamine and non-essential<br />
amino acids (M 0643 Sigma) supplemented with 20 mM HEPES buffer, 2.2 g/L sodium bicarbonate (26<br />
mM), 0.23 mM pyruvate, 100 mg/L streptomycin, 100,000 iu/L penicillin, pH 7.4.<br />
Semen/Spermatozoa Evaluation<br />
Background<br />
Integral to procedures that utilise sources of brushtail possum spermatozoa (eg: sperm cryopreservation,<br />
artificial insemination, capacitation/acrosome reaction studies) is the initial assessment of sperm quality.<br />
Sperm quality is assessed by a variety of parameters including the following: concentration, percentage<br />
and progressive motility (Rodger et al., 1991; Molinia and Rodger, 1996), percentage viability (Garner<br />
et al., 1994), and acrosome integrity (Mate and Rodger, 1991; Sistina et al., 1993).<br />
Procedures<br />
Initial assessment of spermatozoa<br />
A normal ejaculate of possum semen following electroejaculation or epididymal sperm after flushing<br />
(see SOP - No. 1) is opaque and creamy white in colour. It may appear yellow or occasionally<br />
grey/green if contaminated with urine, or pink/red if contaminated with blood, in which case the sample<br />
should be discarded.<br />
<br />
<br />
Aspirate sample into a clean syringe or graduated vial and record sample volume.<br />
Record the general appearance of the sample.<br />
Determining sperm concentration<br />
An improved Neubauer counting chamber is used to estimate the concentration of sperm in the semen<br />
sample. The whole grid of chamber is 1 mm square and 0.1 mm deep. Therefore the grid contains a<br />
volume of 0.1 mm 3 (= 1/10,000 ml).<br />
89
a. Mix sample thoroughly and aliquot 10 μl portion into a 1 ml eppendorf tube.<br />
b. Dilute aliquot 1:10 or up to 1:100 with counting diluent to immobilise sperm.<br />
c. Position clean cover slip on counting chamber.<br />
d. Thoroughly mix diluted aliquot and load the 10 μl fixed volume pipette.<br />
e. Touch tip of pipette to edge of cover slip and slowly expel sample allowing area under cover slip<br />
to fill, but do not overfill.<br />
f. Leave to settle for about 1 minute.<br />
g. Using a phase contrast microscope (300 x magnification) count sperm in 5 (out of 25) large<br />
diagonal squares (equivalent to 1/50,000 ml). Include sperm lying on the lines on the bottom and<br />
right hand sides of the square.<br />
h. Calculate concentration as:<br />
Sperm concentration (spermatozoa/ml) = n x df x 50,000<br />
n = number of sperm in 5 squares<br />
df = dilution factor of sample counted<br />
Total sperm in sample = sperm concentration x sample volume<br />
Eg: If 5 ml sample is diluted 1:2 with PBS at collection, 1:10 with counting diluent and the total number<br />
of sperm counted in 5 large squares of the counting chamber is 56, then:<br />
Sperm concentration = 56 x 20 x 50,000<br />
= 5.6 x 10 7 sperm/ml<br />
Total sperm in sample = 5.6 x 10 7 sperm/ml x 5 ml<br />
= 2.8 x 10 8 sperm/sample<br />
Assessing sperm motility<br />
a. Dilute sperm sample (if required) with phosphate buffered saline (PBS) or EMEM media<br />
until sperm can swim freely under coverslip.<br />
b. Place drop (15-20 μl) of diluted sample on a glass slide.<br />
c. Gently apply a coverslip (22 mm x 22 mm) and leave to stabilise for about 1 minute on a<br />
d. Observe 9-10 fields under a phase-contrast microscope, with a minimum of approximately<br />
50-100 sperm/field and estimate percentage motility (0-100%) as the proportion of cells<br />
moving.<br />
e. The progressive motility of the sample is graded using the following scale:<br />
Assessing sperm viability<br />
0 No movement.<br />
1 Weak tail beat, little or no forward movement.<br />
2 Slow forward movement usually along a circular path.<br />
3 Moderate forward movement mainly along a curved path.<br />
4 Moderate to rapid forward movement along a straight path.<br />
5 Very rapid forward movement along a straight path.<br />
The Fertilight live/dead sperm viability kit is used to assess the viability of a sperm sample using<br />
fluorescence microscopy. The kit has two components, stored in the freezer:<br />
Component A = 100 µl of 1 mM SYBR-14 in 100% DMSO.<br />
90
Component B = 5 ml of 2.4 mM propidium iodide in water.<br />
To make working solutions:<br />
Component A - a further 1:10 dilution of this is made into DMSO and can be stored in the<br />
freezer. Note: stock solutions prepared in aqueous media may result in unacceptable dye loss. On<br />
the day of use take 5 µl of this dilution and add it to 495 µl of BSA-saline media in an eppendorf<br />
tube. Note: phosphate-containing buffers may interfere with Component A staining.<br />
Component B - on day of use take 10 µl and add to 190 µl of BSA-saline media in an eppendorf<br />
tube. Put both eppendorf tubes in the incubator at 36 o C.<br />
To stain samples:<br />
a. Dilute sperm sample to 25-50 million sperm/ml.<br />
b. Aliquot 40 µl of the sperm sample in an eppendorf tube, add 5 µl of Component A working<br />
solution (final concentration of 100 nM SYBR), and 5 µl of Component B working solution<br />
(final concentration of 12 µM propidium iodide).<br />
c. Incubate at 36 o C for 10-15 min.<br />
d. Fix sample by adding 10 µl of 0.2% paraformaldehyde fixative.<br />
To assess samples:<br />
a. Turn on fluorescence lamp and once warmed up, set the (blue light) filter block commonly<br />
used for FITC.<br />
b. Mount 10-20 µL stained fixed samples on slides under coverslip. Live sperm stain green,<br />
dead sperm stain red. Note: some sperm stain 50:50 and are classed as moribund.<br />
c. Count several fields from 3 replicates of the sample until approximately 600 sperm are<br />
assessed, and calculate the proportion viable.<br />
Assessing acrosome integrity<br />
The acrosome integrity of a sample can be assessed at the light microscopy level using Bryan=s stain or<br />
at the ultrastructural level (as for any other sperm structure) using electron microscopy.<br />
Bryan‘s stain<br />
a. Dilute sperm sample in PBS or EMEM media to a concentration of around 5 million/ml.<br />
b. Make a further 1:10 dilution of this sample with 2% paraformaldehyde fixative and<br />
incubate at room temperature for 10-15 min.<br />
c. Load a 50 µl sample into the Cytospin chamber and centrifuge at 210 g for 3-4 min so<br />
that sperm attach to slides in discrete Adot@ regions. Note: If there are too many sperm<br />
attached for counting, then dilute the original sperm sample further and repeat the above<br />
steps.<br />
d. Stain slides for 3-4 min in Bryan‘s stain.<br />
e. Mount coverslips on slides and visualize acrosomes under light microscopy.<br />
f. Assess a total of 600 sperm (3 replicates: 200 sperm per replicate) for the proportion of<br />
absent, present and altered acrosomes.<br />
Electron microscopy<br />
a. Dilute sperm sample 1:10 with Superfix for 10-15 min at room temperature.<br />
b. Centrifuge sample for 10 min at 700 g.<br />
91
Reagents<br />
c. Resuspend pellet in fresh Superfix and refrigerate.<br />
d. Trained EM technician to continue processing.<br />
e. Assess acrosomal status (or status of any other sperm structure) from a minimum of 100<br />
spermatozoa per treatment by electron microscopy.<br />
Sperm counting diluent: Containing 50 g NaHCO 3 , 10 ml 35% (v/v) formalin in 1L distilled water.<br />
Phosphate Buffered Saline: Containing 8 g NaCl, 0.2 g KCl, 1.44 g Na 2 PO 4 and 0.24 g KH 2 PO 4 in<br />
1000 ml distilled water, pH 7.2.<br />
EMEM media: Eagle=s minimum essential medium with Earle=s salts, L-glutamine and non-essential<br />
amino acids (M 0643 Sigma) supplemented with 20 mM HEPES buffer, 2.2 g/L sodium bicarbonate (26<br />
mM), 0.23 mM pyruvate, 100 mg/L streptomycin, 100,000 iu/L penicillin, pH 7.4.<br />
Fertilight live/dead sperm viability kit: Available from Molecular Probes Inc., Eugene, Oregon. Item<br />
key: L-7011.<br />
BSA-saline media: Contains final concentrations of 130 mM NaCl, 4 mM KCl, 1 mM CaCl, 0.5 mM<br />
MgCl, 10 mM HEPES buffer, 14 mM fructose, 1 mg/ml Bovine Serum Albumin (V), pH 7.4.<br />
Bryan=s stain: 1% Eosin Y (E 4382 Sigma), 1% Fast Green FCF (F 7258 Sigma), 1% flavianic acid (F<br />
6500 Sigma) in 1% acetic acid.<br />
Paraformaldehyde fixative: Paraformaldehyde powder dissolved in PBS (ie: w/v dilution). Note: Use a<br />
magnetic stirrer to dissolve powder in PBS on hotplate (70<br />
clear. Buffer to pH 7.4.<br />
Superfix: Generally contains 4% paraformaldehyde and 2.5% gluteraldehyde in 0.1 M phosphate<br />
buffer.<br />
92
Superovulation of Female Brushtail Possums<br />
F. Molinia<br />
Landcare Research, PO Box 69, Lincoln 8152, New Zealand<br />
September 2003<br />
Contact information for further details:<br />
Frank Molinia at: moliniaf@landcare.cri.nz<br />
Publications using this protocol:<br />
1) Glazier AM, Mate KE and Rodger JC (2002). In vitro and in vivo maturation of oocytes from<br />
gonadotrophin-treated brushtail possums. Molec. Reprod. Dev. 62, 504-512.<br />
2) Glazier AM (1999). Time of ovulation in the brushtail possum (Trichosurus vulpecula)<br />
following PMSG/LH induced ovulation. J. Exp. Zool. 283, 608-611.<br />
3) Glazier AM and Molinia FC (1998). Improved method of superovulation in monovulatory<br />
brushtail possums (Trichosurus vulpecula) using pregnant mares= serum<br />
gonadotrophin-luteinizing hormone. J. Reprod. Fertil. 113, 191-195.<br />
4) Molinia FC, Gibson RJ, Brown AM, Glazier AM and Rodger JC (1998a). Successful fertilization<br />
after superovulation and laparoscopic intrauterine insemination of the brushtail possum,<br />
Trichosurus vulpecula and tammar wallaby, Macropus eugenii. J. Reprod. Fertil. 113, 9-17.<br />
5) Molinia FC, Gibson RJ, Smedley MA and Rodger JC (1998b). Further observations of the<br />
ovarian response of the tammar wallaby (Macropus eugenii) to exogenous gonadotrophins: an<br />
improved method for superovulation using FSH/LH. In: Brown JL and Wildt DE (Eds.),<br />
Reproductive Research in Wildlife Species. Anim. Reprod. Sci. 53, 253-263.<br />
6) Rodger JC and Mate KE (1988). A PMSG/GnRH method for the superovulation of the<br />
monovulatory brush-tailed possum (Trichosurus vulpecula). J. Reprod. Fertil. 83, 885-891.<br />
Background<br />
Superovulation procedures are developed as a means of increasing productivity of the female and<br />
synchronising reproduction. The following procedures for superovulation of female brushtail possums<br />
are based on several published reports using exogenous gonadotrophin treatments: a) induction of<br />
growth and development of multiple ovarian follicles using pregnant mare serum gonadotrophin<br />
(PMSG) described by Rodger and Mate (1988), and Glazier et al. (2002); b) ovulation induction of<br />
PMSG-primed females with porcine luteinizing hormone (LH) described by Molinia et al. (1998a),<br />
Glazier and Molinia (1998) and Glazier (1999); and c) superovulation during seasonal anoestrus using<br />
porcine follicle stimulating hormone (FSH)/LH, based on that described for the tammar wallaby by<br />
Molinia et al. (1998b), and developed for the possum by Glazier and Molinia (2002).<br />
Safety<br />
Superovulation procedures require handling of the animals, and hormones are normally administered as<br />
intra-muscular (i.m.) injections after restraint in a hessian bag. Extreme care and experience is required<br />
to undertake these procedures. Rubber gloves are ALWAYS worn when handling animals. All<br />
hormones should be stored in a solvents cabinet, their use routinely recorded and their disposal is as for<br />
any sharps/contaminated waste.<br />
93
Procedures<br />
PMSG/LH<br />
Possums in NZ normally breed in Autumn and to a lesser extent in Spring. The following superovulation<br />
procedure utilizes PMSG/LH and is most reliable from the months of April till the end of July.<br />
i. Treat females with a single i.m. injection of 15 international units (i.u.) PMSG.<br />
FSH/LH<br />
ii.<br />
iii.<br />
78 h later, treat females with a single i.m. injection of 4 mg LH.<br />
Onset of ovulation occurs 30-36 h post-LH treatment, and around 9-10 eggs per female<br />
can be recovered (from 48 h post-LH) using this method.<br />
During seasonal anoestrus, the PMSG/LH protocol is unreliable or fails. The following superovulation<br />
procedure (which is still in development) utilizes FSH/LH and so far is reliable from the months of<br />
November till the end of February.<br />
i. Treat females with an i.m. injection of 3 mg FSH, twice daily (ideally 12 h apart) for four<br />
consecutive days (eight injections of FSH total).<br />
Reagents<br />
ii.<br />
iii.<br />
12 h after the last FSH injection, treat females with a single i.m. injection of 4 mg LH.<br />
Onset of ovulation occurs from 27 h post-LH treatment, and around 11-12 eggs per<br />
female can be recovered (from 48 h post-LH) using this method.<br />
PMSG: Pregnant mare serum gonadotrophin. Intervet distribute this product under the name Folligon.<br />
Dilute sample powder using the diluent provided by the manufacturer and sterile PBS or 0.9% saline to a<br />
concentration of 50 i.u./ml and load 0.3 ml (ie: 15 i.u. dose) into 1 ml syringes attached to a 25 G x 5/8"<br />
needle. Use diluted samples immediately or they can be stored in a freezer (-20 o C) prior to use. If<br />
freezing, ensure there is an air-gap behind the 0.3 ml volume, and that the sample is properly thawed on<br />
the day of use.<br />
LH: Luteinizing hormone. Vetrepharm (now called Bioniche) distribute this product as a lyophilised<br />
powder extracted from porcine pituitary glands under the name Lutropin-V. Dilute sample powder using<br />
the diluent provided by the manufacturer to a concentration of 5 mg/ml and load 0.8 ml (ie: 4 mg dose)<br />
into 1 ml syringes attached to a 25 G x 5/8" needle. Ideally, use diluted samples the same day or store<br />
briefly at room temperature.<br />
FSH: Follicle stimulating hormone. Vetrepharm (now called Bioniche) distribute this product as a<br />
lyophilised powder extracted from porcine pituitary glands under the name Folltropin-V. Dilute sample<br />
powder using the diluent provided by the manufacturer and either sterile saline or PBS to a<br />
concentration of 10 mg/ml and load 0.3 ml (ie: 3 mg dose) into 1 ml syringes attached to a 25 G x 5/8"<br />
needle. Ideally, use diluted samples the same day or store for up to 5 days in the fridge (4 o C).<br />
94
Superovulation in Wombat Species<br />
(established for both common and southern hairy-nosed wombats)<br />
M.C.J. Paris 1 & G. Druery 2<br />
1 University of Glasgow, Glasgow, UK;<br />
2 Rockhampton, Australia<br />
January 2006<br />
Contact information for further details:<br />
Monique Paris at: m_wolvekamp@hotmail.com<br />
Publications using this protocol:<br />
1) West M, Lacham-Kaplan O, Bickell C, Cleary ML, Galloway D, Edwards G, and Paris MCJ. (2002)<br />
Successful superovulation of the Common Wombat and cleavage following ICSI of resulting<br />
oocytes. Theriogenology: 594.<br />
2) Druery GV, Shimmin GA, Taggart DA, Temple-Smith PD, MacDonald C, Finlayson GR and Paris<br />
MCJ.(2003). Ovarian follicular superstimulation in the Southern Hairy-nosed wombat, Lasiorhinus<br />
latifrons. Theriogenology 59(1): 391.<br />
3) West M, Paris MCJ, Cleary M, Shaw J, Galloway D, Trounson AO. (2003). In vitro<br />
maturation (IVM) of oocytes collected following hormonal ovarian stimulation of<br />
common wombat (Vombatus Ursinus). Theriogenology 59(1): 405.<br />
4) Druery GV, Shimmin GV, Taggart D, Temple-Smith PD, MacDonals CH, Finlayson GR,<br />
Breed WG, Paris MCJ.(2003). Collection of mature oocytes from southern hairy-nosed<br />
wombats following ovarian follicular stimulation with porcine gonadotrophins. Australian<br />
Mammal <strong>Society</strong>, 49 th Scientific Meeting, Sydney, New South Wales: 8.<br />
5) McDonald CH, Taggart DA, Breed WG, Druery GV, Finlayson GR, Shimmin GA, Paris<br />
MCJ. (2003). The effect of gonadotrophins on ovarian follicular development and oocyte<br />
maturation in the southern hairy-nosed wombat. Proceedings of the 34 nd Annual<br />
Conference, Australian <strong>Society</strong> for Reproductive Biology: 26, Reprod Fert Dev :15: 92<br />
Melbourne, Victoria, Australia.<br />
6). Druery GV, Rival MD, Taggart DA, Shimmin GA, Horsup AB, Temple-Smith PD, Paris<br />
DBBP, Paris MCJ.(2005). Timing of ovulation in the gonadotrophin-stimulated southern<br />
hairy-nosed wombat, Lasiorhinus latifrons. Reprod Fert & Dev 17: 246.<br />
7) Druery GV, Taggart DA, Shimmin GA, Horsup AB, Temple-Smith PD, Paris DBBP, Paris<br />
MCJ. (2004). Time of ovulation and artificial insemination following superovulation in the<br />
southern hairy-nosed wombat (Lasiorhinus latifrons). Advances in Ethology 38<br />
(supplements to Ethology) : 100. Contributions to the 5th <strong>International</strong> Symposium on<br />
Physiology, Behaviour and Conservation of Wildlife. Berlin, Germany, 26-29 September<br />
2004.<br />
Materials Needed for Superovulation:<br />
For Gonadotrophin Administration<br />
Needles (25G)<br />
Syringes (1 ml)<br />
Fridge<br />
Hormones tested by our group:<br />
95
porcine follicle stimulating hormone (pFSH; Folltropin-V; Bioniche, Canada)<br />
Pregnant Mare Serum Gonadotrophin (PMSG; Folligon; Intervet, Australia or Bioniche, Canada)<br />
Porcine luteinising hormone (pLH; Lutropin-V; Bioniche, Canada)<br />
For Blood Collection:<br />
Zoletil (Virbac Pty Ltd., Australia)<br />
Syringes (5 ml)<br />
Needles (21 G)<br />
Ethanol<br />
Gauze<br />
Elastic band (Garrot) to visualize the vein<br />
Heparinized blood tubes to collect plasma<br />
Eppendorftubes<br />
Centrifuge<br />
Freezer for storage, minimum required temperature: –20 degrees.<br />
Days 1 2 3 4 5 6 7 8 Ref<br />
Short<br />
FSH/LH<br />
Short<br />
FSH/LH<br />
Long<br />
FSH/LH<br />
Long<br />
FSH/LH<br />
PMSG/<br />
LH<br />
2 X<br />
6 mg<br />
FSH (im)<br />
2 x 25<br />
mg FSH<br />
(im)<br />
2x4mg<br />
FSH<br />
(im)<br />
2 X 13.4<br />
mg FSH<br />
(im)<br />
15IU<br />
PMSG<br />
(im)<br />
2 X<br />
6 mg<br />
FSH<br />
(im)<br />
2 x 25<br />
mg FSH<br />
(im)<br />
2x4mg<br />
FSH<br />
(im)<br />
2 X 13.4<br />
mg FSH<br />
(im)<br />
2 X<br />
6 mg<br />
FSH<br />
(im)<br />
2 x 25<br />
mg FSH<br />
(im)<br />
2x4mg<br />
FSH<br />
(im)<br />
2 X 13.4<br />
mg FSH<br />
(im)<br />
2X<br />
6 mg<br />
FSH<br />
(im)<br />
2 x 25 mg<br />
FSH<br />
(im)<br />
2x4mg<br />
FSH<br />
(im)<br />
2 X 13.4<br />
mg FSH<br />
(im)<br />
4mg<br />
pLH<br />
(im)<br />
4 mg<br />
pLH<br />
(im)<br />
25 mg<br />
pLH<br />
(sc)<br />
2x4mg<br />
FSH<br />
(im)<br />
2 X 13.4<br />
mg FSH<br />
(im)<br />
2x4mg<br />
FSH<br />
(im)<br />
2 X 13.4<br />
mg FSH<br />
(im)<br />
2x4mg<br />
FSH<br />
(im)<br />
2 X 13.4<br />
mg FSH<br />
(im)<br />
4mg<br />
pLH<br />
(im)<br />
25<br />
mg<br />
pLH<br />
(sc)<br />
1<br />
2<br />
Unpubl.<br />
Data<br />
2<br />
Unpubl.<br />
Data<br />
PMSG<br />
150 IU<br />
(im)<br />
25 mg<br />
pLH (sc) 2<br />
The efficiency of protocols above is discussed in the listed Literature. In general, it was found in the<br />
Southern Hairy nosed Wombat (so far most extensively been studied) that using the 7 day FSH/LH<br />
protocol gives oocytes the opportunity to reach metaphase 2 stage, and currently this protocol is thus<br />
recommended, also based on the fact that more precise information on the actual timing of ovulation<br />
relative to superovulation, is now available ( Advances in Ethology 2004; 38 (supplements to Ethology)<br />
: 100, Reprod Fert & Dev 2005; 17: 246). Initial AI attempts have been undertaken using this<br />
information.<br />
General comments<br />
The injections (FSH and PMSG) are advised to be given intramuscularly, FSH injections are given 12<br />
hourly apart, followed by either an intramuscularly or subcutaneous injection of pLH (see exact tested<br />
protocols above), 12 hours after the last FSH injection, or 72 hours after the PMSG injection.<br />
96
Once prepared, the solutions can be kept for several days in the fridge, but can NOT always be frozen<br />
and can NOT be kept longer. Make sure to double check expiry date /instructions and the time that it can<br />
be stored !!<br />
Procedure for blood collection<br />
1. The animal will be sedated with an intramuscular injection of Zoletil. In general 3 mg/kg was<br />
generally enough to keep the animal asleep/ drousy enough for all required handling<br />
2. Take a heparinized blood sample (ideally before start of superovulation and several times during the<br />
protocol, and also on the day of the LH administration), approximately 5 ml which will allow most<br />
hormonal assays. To do this, advisable is to visualize a vein in the peripheral circulation (forelimb or<br />
hindlimb). Alternate the leg you take blood from to avoid complications. The heparinised tube will be<br />
centrifuged at 1600 x g for 10 minutes. Plasma will then be collected from tubes, and stored at -20<br />
degrees.<br />
97
Superovulation, oocyte collection, in vitro maturation, semen collection and<br />
intracytoplasmic sperm injection in the tammar wallaby<br />
Genevieve Magarey<br />
Center for Conservation and Research of Endangered Wildlife, Cincinnati Zoo<br />
September 2006<br />
Contact information for further details:<br />
Genevieve Magarey at: gmagarey@yahoo.com<br />
Publications using this protocol:<br />
1) Magarey G. M. and Mate K. E. (2003). Fertilization following intracytoplamic sperm injection of in<br />
vivo and in vitro matured oocytes from an Australian marsupial, the tammar wallaby (Macropus<br />
eugenii). Zygote 11: 339-346.<br />
2) Magarey G. M., Rodger, J. C., Buist, J. M. and Mate K. E. (2003). Effects of repeated superovulation<br />
and surgical oocyte collection on ovarian response and natural breeding ability of the tammar<br />
wallaby (Macropus eugenii). Reproduction 125: 701-707.<br />
3) Magarey G. M. and Mate K. E. (2004). Comparison of glucose metabolism in in vivo- and in vitromatured<br />
tammar wallaby oocytes and its relationship to developmental potential following<br />
intracytoplasmic sperm injection. Reproduction, Fertility and Development 16: 617-623.<br />
4) Magarey G. M. and Mate K. E. (2003). Timing and ultrastructure of events following<br />
intracytoplasmic sperm injection in a marsupial, the tammar wallaby (Macropus eugenii).<br />
Reproduction, Fertility and Development 15: 397-406.<br />
Superovulation<br />
Procedures<br />
The tammar wallaby is naturally monovular and highly seasonal, with breeding restricted to the<br />
period of decreasing day length between the summer and winter solstice (reviewed by Hinds, 1990). To<br />
collect multiple oocytes at one time wallabies are superovulated with exogenous hormones. The<br />
hormone regime varies according to whether immature (GV stage) or mature (MII stage) oocytes are to<br />
be collected.<br />
For collection of immature oocytes<br />
Follicular development is induced with 6mg porcine follicle stimulating hormone (pFSH)<br />
(Folltropin-V, Vetrepharm, Canada) administered intramuscularly (i.m.) twice daily at 12 hourly<br />
intervals for four days. On the fifth day, 12 hours after the last pFSH injection, immature oocytes (from<br />
follicles >1.5mm diameter) are harvested for in vitro maturation.<br />
For collection of in vivo matured oocytes<br />
As for immature oocytes, follicular development is induced with eight, 12 hourly pFSH<br />
injections administered i.m. over 4 days. Oocyte maturation is induced on day 5 with a single<br />
subcutaneous (s.c.) injection of 4mg porcine luteinizing hormone (pLH) (Lutropin-V, Vetrepharm) 12<br />
hours after the last pFSH injection (Molinia et al., 1998a). This protocol induces superovulation of a<br />
similar number of eggs in both cycling and non-cycling wallabies year round (Molinia et al., 1998a). On<br />
98
day 6 mature oocytes are collected 24-30 hours after the pLH injection, prior to the onset of ovulation,<br />
either surgically or after euthanasia.<br />
In vitro maturation<br />
Oocytes collected from wallabies primed with pFSH only are left granulosa-cell-enclosed for in<br />
vitro culture. The in vitro maturation protocol is similar to that described by Mate and Buist (1999). The<br />
maturation media is Dulbecco‘s modification of Eagle‘s medium (DMEM) (Trace Biosciences NZ Ltd.,<br />
New Zealand), supplemented with 10% (v/v) foetal calf serum (FCS), 10µg ml-1 pFSH, 10µg ml-1<br />
pLH, 100IU ml-1 penicillin and 100µg ml-1 streptomycin. Granulosa-cell-enclosed oocytes are washed<br />
once in maturation media, then incubated individually in 400µl wells of maturation media at 36C in 5%<br />
carbon dioxide (CO2) (CO2 incubator, Sanyo Electric Co. Ltd., Japan) in air for approximately 42<br />
hours. This technique resulted in maturation of 60 – 70% of oocytes to MII stage by the end of the<br />
culture period.<br />
Oocyte collection after euthanasia<br />
At the time of oocyte collection, 12 hours after the last pFSH injection for immature oocytes, or<br />
24-30 hours after the pLH injection for mature oocytes, each superovulated wallaby is euthanased.<br />
Euthanasia is performed by injection of 150mg ml-1 sodium pentobarbitone (Lethabarb: Virbac Pty.<br />
Ltd., NSW, Australia) either via the lateral tail vein, or by intracardiac injection following gaseous<br />
anaesthesia with 5% halothane (Halothane – M&B, Rhone Merieux, Victoria, Australia) or 5%<br />
isoflurane (Isoflo, Abbot Australia Pty Ltd, NSW, Australia) in oxygen. The ventral abdomen is shaved<br />
and sprayed with 70% ethanol to minimise contamination. An incision is made through the skin and<br />
linea alba from the xiphisternum to the pubis. The pouch is avoided by diverting the skin incision around<br />
the pouch opening, and moving it to one side before incising the linea alba. The median and lateral<br />
vaginae are transected at the point of attachment to the urogenital sinus, and lifted to enable excision of<br />
the entire reproductive tract cranial to the transection, including vaginae, uteri, oviducts and ovaries. The<br />
tract is then washed twice in Dulbecco‘s phosphate buffered saline (DPBS) (ICN Biomedicals Inc.,<br />
USA) containing 12.5IU ml-1 heparin. The ovaries are dissected free of the fimbriae and ovarian<br />
ligaments and placed in a sterile petri dish. Under a dissecting microscope, each ovarian follicle over<br />
2mm in diameter is flushed with a 26 gauge needle attached to a 3ml syringe. The flushing media is<br />
warm DMEM modified for bench-top use with reduced (0.34g l-1) sodium bicarbonate (NaHCO3) and<br />
additional 4.77g l-1 N-2-hydroxyethylpiperazine-N‘-2-ethanesulfonic acid (HEPES) (bench top DMEM)<br />
supplemented with heparin 12.5IU ml-1, 10% (v/v) FCS, 100IU ml-1 penicillin and 100µg ml-1<br />
streptomycin. Oocytes are collected from the flushings under a dissecting microscope, using a finely<br />
pulled glass pasteur pipette attached to a mouthpiece and placed into fresh, warmed (35°C) DMEM<br />
supplemented with 10% (v/v) FCS, 100 IU ml-1 penicillin and 100 µg ml-1 streptomycin.<br />
Premedication and general anaesthesia<br />
Surgical Oocyte Collection<br />
Prior to surgery animals receive prophylactic procaine penicillin (Table.1). Some wallabies are<br />
premedicated with the sedative midazolam. General anaesthesia is induced with 5% halothane or<br />
isoflurane in oxygen delivered via a T-piece and face-mask. When an adequate depth of anaesthesia is<br />
achieved a cuffed endotracheal tube (size 4 or 3.5mm) is placed into the trachea to more accurately<br />
maintain the depth of anaesthesia during the procedure. The anaesthetic depth is monitored closely and<br />
heart and respiratory rates are recorded every 5 minutes. The percentage oxygen saturation of the blood<br />
99
is monitored and maintained above 95% using a Cardio II pulse oximeter (Datex, USA) with sensor<br />
attached to the tongue. A surgical plane of anaesthesia is maintained during the procedure by adjusting<br />
the halothane or isoflurane levels between 1.5 and 3%. Atropine sulfate is given if required during<br />
anaesthesia.<br />
Preparation of surgical site<br />
After induction and stabilisation of general anaesthesia wallabies are placed in dorsal<br />
recumbency and tilted, head down, to an angle of 30 to improve access to the reproductive tract. The<br />
surgical site is prepared by shaving, then scrubbing the area with 4% chlorhexidine gluconate<br />
(Chlorhexidine surgical scrub, Drion Laboratories Pty Ltd, WA, Australia) or iodine (Betadine Surgical<br />
Scrub, Faulding Pharmaceuticals, SA, Australia). The skin is sterilised by swabbing three times with<br />
70% ethanol and three times with iodine. The surgical area is then draped. All surgical instruments and<br />
drapes are autoclaved before every use and standard aseptic techniques are used throughout the<br />
procedure.<br />
Surgical procedure<br />
The local anaesthetic bupivicane hydrochloride is injected at the incision site for post-operative<br />
pain management (Table.1). The incision site varied depending upon the presence and age of a pouch<br />
young. When a permanently attached pouch young is present, a 3 centimetre skin incision is made lateral<br />
to the pouch opening, at the cranial end of the epipubic bone. The pouch fold underlying the skin is<br />
pushed medially to reveal the deeper oblique abdominal muscles. These muscles are then split along the<br />
direction of the fibres (3 layers) until the peritoneum is revealed which is cut in the same direction as the<br />
last muscle layer.<br />
When there is no pouch young (or the pouch young could be removed for the duration of the<br />
surgery and easily reattached to the teat) a 3 centimetre midline skin incision is made inside the pouch,<br />
midway between the teats and the cranial pouch border. After blunt dissection of the subcutaneous<br />
layers the linea alba is picked up with tissue forceps to allow a small stab incision into the peritoneal<br />
cavity without risk of puncturing internal organs. The linea alba incision is extended with blunt tip<br />
scissors and the peritoneum is incised. The wound is held open using small eyelid retractors.<br />
Visible immediately are the swollen vaginae, which are pushed out of the way medially to reveal the two<br />
uterine bodies. The ovaries are located dorsal to each uteri. The flat handle of a spay hook and one<br />
finger are used to manipulate one ovary, unrolling it (cranio-medially) from the fimbriae and uterine<br />
ligaments. Special care is taken not to rupture any of the mature ovarian follicles, nor tear any ovarian<br />
vessels or ligaments. The ovary is exteriorised through the laparotomy incision and gently held for<br />
follicle aspiration. Follicle aspiration is performed as described below (section 0). The ovary is then<br />
replaced to its original position in the abdominal cavity with the fimbria replaced around it. The<br />
procedure is then repeated on the opposite ovary. At the time of each surgery the ovaries are assessed<br />
visually and the number of normal mature follicles flushed and aspirated are counted. Abnormalities,<br />
such as cyst formation or adhesions, are assessed and recorded. The muscle layers or linea alba are<br />
closed using absorbable sutures (size 3.0 Dexon, Davis & Geck, USA). For lateral incisions, the pouch<br />
is replaced in its original position. A continuous absorbable suture (size 3.0 Dexon) is placed in the<br />
subcutaneous layer and the skin is closed using absorbable subcuticular sutures (size 3.0 Vicryl, Ethicon<br />
Inc., USA). The analgesic carprofen is administered during wound closure (Table.1). Vitamin E and<br />
selenium is administered as a prophylactic against myopathy.<br />
100
Table.1 Drugs administered to superovulated wallabies during anaesthesia for surgical follicle aspiration<br />
Drug Dose Route Time of<br />
administration<br />
Procaine<br />
penicillin<br />
Midazolam<br />
hydrochloride<br />
Isoflurane or<br />
halothane<br />
Atropine<br />
sulfate<br />
Bupivicane<br />
hydrochloride<br />
Effect<br />
15 mg kg -1 i.m. Before surgery Prophylactic<br />
antibiotic<br />
0.25 mg kg -1 i.m Premedication<br />
(before general<br />
anaesthesia)*<br />
5% for<br />
induction,<br />
1.5-3% for<br />
maintenance<br />
in oxygen at<br />
1.5 litre min -<br />
1<br />
Via face<br />
mask for<br />
induction;<br />
via<br />
endotracheal<br />
tube for<br />
maintenance<br />
General<br />
anaesthesia<br />
0.05 mg kg -1 i.m. If required<br />
during<br />
anaesthesia<br />
1mg kg -1<br />
Locally at<br />
surgical site<br />
Before<br />
incision<br />
Carprofen 4 mg kg -1 s.c. After wound<br />
closure<br />
Vitamin E and<br />
selenium<br />
* not given to all animals<br />
Vitamin E<br />
3IU kg -1 ,<br />
selenium<br />
0.01mg kg -1<br />
(0.02ml kg -1 )<br />
i.m.<br />
During<br />
procedure*<br />
Sedation<br />
Induction<br />
and<br />
maintenance<br />
of general<br />
anaesthesia<br />
Reduction of<br />
bradycardia<br />
or excessive<br />
salivary<br />
secretions<br />
Local<br />
anaesthesia<br />
(12 hours)<br />
Analgesia<br />
Prophylactic<br />
against<br />
myopathy<br />
Trade name and<br />
Supplier<br />
Benacillin, Troy<br />
Laboratories Pty<br />
Ltd, NSW,<br />
Australia<br />
Hypnoval,<br />
Roche Products<br />
Pty Ltd, NSW,<br />
Australia<br />
Isoflo, Abbot<br />
Australia Pty<br />
Ltd, NSW,<br />
Australia;<br />
Halothane –<br />
M&B, Rhone<br />
Merieux,<br />
Victoria,<br />
Australia<br />
Atrosite, Troy<br />
Laboratories<br />
Bupivicane<br />
Injection B.P.<br />
0.5%, Delta<br />
West Pty Ltd,<br />
WA, Australia<br />
Rimadyl, Pfizer<br />
Animal Health,<br />
NSW, Australia<br />
Vitamin-E-<br />
Selen, Hoechst<br />
Australia Ltd,<br />
Victoria,<br />
Australia<br />
Follicle flushing and aspiration<br />
Based on the results of a preliminary trial in the possum (see Appendix 1), an 18 gauge double<br />
lumen needle (Cook Veterinary Products, Queensland, Australia) with flushing and aspiration systems is<br />
used for oocyte collection. One line of the double gauge needle is connected to a culture tube and a V-<br />
MAR-5100 Regulated Vacuum Pump (Cook Veterinary Products) providing follicular aspiration. The<br />
second line is connected to a 50ml syringe containing warmed bench top DMEM supplemented with<br />
heparin 12.5IU ml-1, 2.5-5% (v/v) FCS, 100IU ml-1 penicillin and 100μg ml-1 streptomycin, operated<br />
within a V-MAR-4000 Flushing System (Cook Veterinary Products) to flush the media through the<br />
101
follicle. Follicles greater than 2mm in diameter are flushed and aspirated. The double lumen needle is<br />
inserted into each follicle, bevel facing down, with a suction of less than 100mm Hg applied (Error!<br />
Reference source not found.). The needle is twisted to ensure the entire follicular contents are aspirated<br />
and the follicle is flushed with culture media at a rate of 0.15ml per second. The flushed follicular<br />
contents and culture media are collected in a 12ml culture tube held at 36C in a LEC 960 portable<br />
incubator (Lec Instruments, Victoria, Australia). Oocytes are susceptible to considerable damage during<br />
collection if aspiration pressures over 100mm Hg are used.<br />
Small, unaspirated follicles (0.5 – 1.9mm) are pricked with a 26 gauge needle before the ovary is<br />
returned to the abdomen. This procedure is adopted for the second and third superovulation treatments<br />
due to the observation of large ‗cystic‘ follicles (6-8mm) diameter after the first treatment. Small<br />
follicles are pricked in an attempt to minimise further cyst formation, since the cysts may have<br />
originated from continued growth of small unaspirated follicles stimulated by the first treatment.<br />
Post surgical recovery and monitoring<br />
On completion of the surgery, 100% oxygen is administered while the wallabies are placed<br />
partly in a hessian sack to recover from the anaesthetic. The endotracheal tube is only removed when<br />
consciousness is returning, and the animal showed a swallowing reflex by chewing the tube. Earlier tube<br />
removal resulted in respiratory obstruction. The wallabies are then kept in the hessian sack and closely<br />
observed for 1-2 hours. When full coordination is regained wallabies are returned to outside yards.<br />
Postoperatively, the animals are observed daily, for 5-7 days, for normal behaviour. One week after the<br />
surgery, the wallabies are caught and the wound is checked.<br />
Electroejaculation<br />
Sperm Collection and Preparation<br />
Semen is collected from adult male tammar wallabies using a modified electroejaculation<br />
technique based on that previously described for marsupials (Rodger and White, 1978; Rodger and<br />
Pollitt, 1981; Mate and Rodger, 1991). Anaesthesia is induced with 5% isoflurane in oxygen delivered at<br />
a rate of 1-1.5L per minute via a T-piece and mask. The isoflurane concentration is reduced when an<br />
appropriate depth of anaesthesia is achieved. The penis is cleaned and a mild commercial microenema<br />
(Microlax, Pharmacia Australia Pty Ltd, NSW, Australia) inserted into the rectum to loosen any faeces<br />
and aid in evacuation once the procedure is complete. A lubricated rectal probe, 12 mm diameter and<br />
200 mm long with 3 longitudinal brass electrodes at one end, is inserted into the rectum to induce<br />
electroejaculation by delivery of an electrical stimulus to the region of the prostate gland. The stimulus<br />
consisted of a 7-8 Volt, 32-45 Hertz, square wave direct current delivered in 10 cycles. The current limit<br />
is set at 100 milli-Amperes. Each cycle consisted of 5 seconds on and 5 seconds off. The stimulus is<br />
repeated once if necessary to obtain a sufficiently sperm rich sample. After the procedure the animal is<br />
allowed to recover on oxygen alone until consciousness returned. All animals are ‗rested‘ for at least 4<br />
weeks between electroejaculations.<br />
Sperm preparation<br />
The ejaculate (approximately 2-5 ml volume) is collected into a clean/sterile 50ml plastic tube<br />
and allowed to coagulate at room temperature for 30 minutes. A small sample of semen is<br />
microscopically examined immediately after collection to confirm the presence of motile spermatozoa.<br />
Spermatozoa are washed from the ejaculate by ‗swim-up‘ (Mate and Rodger, 1991; Sistina et al., 1993b;<br />
Sistina et al., 1993a). Here, approx 5-10ml Minimum Essential Medium Eagle with Earle‘s Salts (Trace<br />
102
Biosciences NZ Ltd.), supplemented with 4.77g l-1 HEPES, 2.2g l-1 NaHCO3, 253mg l-1 pyruvate<br />
100IU ml-1 penicillin and 100µg ml-1 streptomycin, is gently layered over the coagulated semen and<br />
incubated at 36C for 30 minutes to allow the motile spermatozoa to ‗swim-up‘ into the medium,<br />
leaving behind the seminal plasma and prostatic bodies. Washed spermatozoa are then collected with a<br />
Pasteur pipette from the top layer. This ‗swim up‘ is repeated once to provide a cleaner spermatozoon<br />
preparation. The concentration of spermatozoa is estimated using a haemocytometer and then diluted to<br />
between 2 and 5 x 10⁶ spermatozoa per ml. This preparation is then divided into 0.5ml aliquots in 1ml<br />
centrifuge tubes and stored at 36C in 5% CO2 until required for micromanipulation.<br />
Intracytoplasmic sperm injection<br />
Techniques for ICSI have been described previously (Van Steirteghem et al., 1993a; Catt et al.,<br />
1995; Payne, 1995; Joris et al., 1998) and a combination is employed for the tammar wallaby (Magarey<br />
and Mate 2003). Prior to micromanipulation, granulosa cells are mechanically stripped from the oocytes<br />
by gently pipetting them through a narrowly pulled glass pipette. Micromanipulations are performed in<br />
60mm culture dishes under equilibrated tissue culture grade mineral oil (Sigma Chemical Company,<br />
Missouri, USA) pre-warmed to 36°C. Each culture dish contained 6 x 5µl individually numbered<br />
droplets of DMEM culture medium supplemented with 10% (v/v) FCS, 100IU ml-1 penicillin and<br />
100µg ml-1 streptomycin, around a central 5µl droplet of 10% polyvinylpyrrolidone (PVP). The oocytes<br />
are washed once in DMEM before being transferred into the labelled 5µl DMEM droplets and held at<br />
36°C in 5% CO2. Immediately prior to micromanipulation, 0.5-1µl of sperm suspension is added to the<br />
central PVP droplet and gently mixed.<br />
Holding pipettes are either hand pulled or commercially purchased (Cook IVF, Queensland,<br />
Australia). Hand pulled pipettes are made from glass capillary tubing pulled by heating in a microflame<br />
and broken to an outside diameter of approximately 150μm. The tip is then heat polished with a<br />
microforge to an inside diameter of approximately 70μm. A bend of about 35 degrees is ‗introduced‘<br />
about 2mm from the tip. Commercial injection pipettes (Cook IVF) had with inside diameter 5μm and<br />
35 degree angle at the tip.<br />
All micromanipulations are preformed on a 36°C heated stage (Minitub HT200, Germany) of an<br />
inverted microscope (Zeiss Axiovert 35, Germany) with modulation contrast optics (Hoffman, USA).<br />
Holding and injection pipettes are each connected directly to approximately 60 centimetres of vinyl<br />
tubing (Nalge Company, USA) which are connected to 0.5ml threaded plunger syringes (Hamilton<br />
Company, USA) via bluntened 18 gauge needles. The plunger syringes and tubing are filled with<br />
Fluorinert FC40 (Sigma Chemical Company), ensuring there are no air pockets. The syringe is used to<br />
completely fill the pipettes. Dental floss is used to seal the connection between the pipettes and the<br />
tubing. The pipettes are held with H-7 Pipette Holders (Narishige Scientific Instrument Lab., Japan)<br />
which are moved using mechanical micromanipulators (Leitz, Germany). The pipettes are carefully<br />
positioned so that the tips are directly opposed and at an angle of about 10 degrees to the bottom of the<br />
culture plate. The tip of the injection pipette is lowered into a drop of 10% PVP under oil and backfilled<br />
with approximately 5mm PVP. The holding pipette is back filled with DMEM culture medium.<br />
For ICSI, a single motile spermatozoon, in the central PVP droplet, is immobilised by striking the tail,<br />
perpendicular to the tail, with the injection pipette against the bottom of the dish. The spermatozoon is<br />
then aspirated, tail first, into the pipette and just back from the tip of the pipette. Both pipettes are then<br />
moved into a DMEM droplet containing an oocyte. The oocyte is held against the holding pipette with<br />
gentle aspiration with the first polar body positioned at 12 o‘clock for mature oocytes. The holding<br />
pipette is moved up slightly so that the oocyte is no longer on the bottom of the dish then, with the<br />
sperm head immediately behind the bevel, the injection pipette is inserted through the zona pellucida<br />
103
into the middle of the oocyte. Suction is applied to the injection pipette until a sudden rush of cytoplasm<br />
into the pipette past the spermatozoon, indicated the breakage of the plasmalemma. The cytoplasm and<br />
spermatozoon are then injected into the oocyte with a minimal amount of PVP. The injection pipette is<br />
withdrawn and the oocyte released from the holding pipette. The procedure is repeated for each oocyte.<br />
After micromanipulation, oocytes are transferred to individual 400µl wells of a 96 well flat bottom<br />
culture plate containing DMEM supplemented with 10% (v/v) FCS, 100IU ml-1 penicillin and 100µg<br />
ml-1 streptomycin and incubated at 36°C in humidified air with 5% CO2 for the specified time. Each<br />
oocyte is assigned with the number from it‘s DMEM droplet during micromanipulation and records are<br />
kept including the appearance of the oocyte and characteristics of the procedure.<br />
Micrograph of a mature tammar wallaby oocyte with a polar body positioned at 12 o‘clock (arrow)<br />
during intracytoplasmic sperm injection. The injection pipette (right hand side) contains a single wallaby<br />
spermatozoon to be injected into the cytoplasm of the oocyte.<br />
Assessment of Oocytes After Culture<br />
Modulation contrast and fluorescence microscopy – Hoechst stained<br />
For fluorescence microscopy, oocytes are stained with the DNA specific dye bis-benzimide<br />
(Hoechst 33342, Sigma Chemical Company) (Pursel et al., 1985), diluted to 40µg ml-1 in DPBS.<br />
Oocytes are transferred individually into wells of a 96 well culture plate containing Hoechst<br />
staining solution and incubated in the dark for 20 minutes at room temperature. Oocytes are then rinsed<br />
3 times in DPBS before examination.<br />
For initial examination, oocytes are left in the 96 well plate in DPBS. Examination is conducted<br />
using an inverted microscope (Zeiss Axiovert 35) with either Hoffman modulation contrast optics or<br />
fluorescence. If details are not obvious, then the oocytes are transferred individually to a clean glass<br />
slide in a small drop of DPBS. A coverslip, supported at each corner with a drop of vaseline: wax<br />
mixture (9 parts vaseline: 1 part wax) is lowered over the oocyte and depressed until the oocyte is lightly<br />
held. When placed on the microscope stage, the oocyte could be gently rolled under the cover slip to<br />
enable observation from all angles. The slightly squashed effect improved visualisation of nuclear<br />
structures under fluorescence.<br />
104
Light microscopy – acetic lacmoid stained<br />
As an alternative method of assessment, or for confirmation of morphology after Hoechst<br />
staining and fluorescence microscopy, oocytes are stained with the DNA specific stain acetic lacmoid<br />
(Mate and Buist, 1999). Oocytes are placed on individual glass slides and lightly held under cover slips<br />
supported with a Vaseline: wax mixture, as described above (section 0). Quarter strength fixative (1 part<br />
glacial acetic acid: 15 parts 100% ethanol) is then introduced to one side of the cover slip with a glass<br />
pipette, while a tissue is held at the opposite side of the coverslip to draw the fluid through. The oocyte<br />
is observed under a dissecting microscope during this procedure, to ensure that it is not washed away<br />
with the fluid. Additional drops of fixative are added as required to prevent the oocyte from drying out.<br />
After 5 to 10 minutes, half strength fixative (1 part glacial acetic acid: 7 parts 100% ethanol) is drawn<br />
under the cover slip in a similar fashion. After a further 5 to 10 minutes, full strength fixative (1 part<br />
glacial acetic acid: 3 parts 100% ethanol) is drawn under the cover slip. The slides are then placed in a<br />
flat, shallow container of full strength fixative and stored at 4°C. After 1 to 4 days, filtered stain (1%<br />
lacmoid in 45% glacial acetic acid) is drawn under the cover slip using the pipette and tissue technique<br />
while observing the oocyte. The oocytes are assessed by light microscopy after 3 to 5 minutes. If<br />
necessary, an oocyte could be gently rolled under the cover slip to enable observation from different<br />
angles. For storage, the oocytes are washed with 45% (glacial) acetic acid and stored in 45% acetic acid.<br />
Additional References<br />
Catt J. W., Ryan J. P., Pike I. L., O'Neill C. and Saunders D. M. (1995). Clinical intracytoplasmic sperm injection results<br />
from Royal North Shore Hospital. Reproduction, Fertility & Development 7: 255-262.<br />
Hinds L. A. (1990). Control of pregnancy, parturition and luteolysis in marsupials. Reproduction, Fertility & Development 2:<br />
535-552.<br />
Joris H., Nagy Z., Van de Velde H., De Vos A. and Van Steirteghem A. (1998). Intracytoplasmic sperm injection: laboratory<br />
set-up and injection procedure. Humna Reproduction (Supplement 1) 13: 76-86.<br />
Mate K. E. and Buist J. M. (1999). Timing and regulatory aspects of oocyte maturation in vitro in the tammar wallaby<br />
(Macropus eugenii). Reproduction, Fertility & Development 11: 247-254.<br />
Mate K. E. and Rodger J. C. (1991). Stability of the acrosome of the brush-tailed possum (Trichosurus vulpecula) and the<br />
tammar wallaby (Macropus eugenii) in vitro and after exposure to conditions and agents known to cause<br />
capacitation or acrosome reaction of eutherian spermatozoa. Journal of Reproduction & Fertility 91: 41-48.<br />
Molinia F. C., Gibson R. J., Smedley M. A. and Rodger J. C. (1998a). Further observations of the ovarian response of the<br />
tammar wallaby (Macropus eugenii) to exogenous gonadotrophins - an improved method for superovulation using<br />
FSH/LH. Animal Reproduction Science 53: 253-263.<br />
Payne D. (1995). Intracytoplasmic sperm injection: Instrumentation and injection technique. Reproduction, Fertility &<br />
Development 7: 185-196.<br />
Pursel V.G., Wall R. J., Rexroad J., Hammer R. E. and Brinster R. L. (1985). A rapid whole mount staining procedure for<br />
nuclei of mammalian embryos. Theriogenology 24: 687-691<br />
Rodger J. C. and Pollitt C. C. (1981). Radiographic examination of electroejaculation in marsupials. Biology of Reproduction<br />
24: 1125-1134.<br />
Rodger J. C. and White I. G. (1978). The collection, handling and some properties of marsupial semen. In "The artificial<br />
breeding of non-domestic animals" (P. F. Watson, Ed.), pp. 289-301, Academic press, London.<br />
Sistina Y., Lin M. J. and Rodger J. C. (1993a). Lysophosphatidylcholine disrupts the acrosome of tammar wallaby<br />
(Macropus eugenii) spermatozoa. Molecular Reproduction & Development 35: 277-284.<br />
Sistina Y., Lin M., Mate K. E. and Rodger J. C. (1993b). Induction of the marsupial sperm acrosome reaction in vitro by<br />
treatment with diacylglycerols. Journal of Reproduction & Fertility 99: 335-341.<br />
Van Steirteghem A. C., Nagy Z., Joris H., Liu J., Staessen C., Smitz J., Wisanato A. and Devroey P. (1993a). High<br />
fertilization and implantation rates after intracytoplasmic sperm injection. Human Reproduction 8: 1061-1066.<br />
105
Estrous Cycle Monitoring in Wombat Species<br />
(established for both common and southern hairy-nosed wombats)<br />
M.C.J. Paris 1 & G. Finlayson 2<br />
1 University of Glasgow, Glasgow, UK;<br />
2 Institute of Wildlife Research, University of Sydney, Australia<br />
January 2006<br />
Contact information for further details:<br />
Monique Paris at: m_wolvekamp@hotmail.com<br />
Publications using this protocol:<br />
1) Finlayson GR, Shimmin GA, Taggart DA, Skinner JF, Gilmore A, and Paris MCJ (2005). The<br />
oestrous cycle of the southern hairy-nosed wombats (Lasiorhinus latifrons) in captivity. Anim<br />
Reprod Sci (in press).<br />
2) Paris MCJ, White A, Reiss A, West M, Schwarzenberger F (2002). Faecal progesterone metabolites<br />
and behavioural observations for the non-invasive assessment of oestrous cycles in the common<br />
wombat (Vombatus ursinus) and the southern hairy-nosed wombat (Lasiorhinus latifrons). Anim<br />
Reprod Sci 2296:1-13.<br />
3) West M, Galloway D, Shaw J, Trounson A, Paris MCJ (2004). The oestrous cycle of the common<br />
wombat, Vombatus ursinus, in Victoria. Reprod Fert Dev 16:339-346.<br />
4) West M, Paris MCJ, Galloway D, Wright P, Shaw J, Trounson AO (2001). The oestrous cycle of the<br />
common wombat (Vombatus ursinus) assessed by comparing vaginal smears and plasma<br />
progesterone concentrations. Proceedings of the 32 nd annual conference of the Australian <strong>Society</strong><br />
for Reproductive Biology, Brisbane, Queensland, Australia, p. 62.<br />
Materials needed for vaginal smear collection and assessment<br />
Zoletil (Virbac Pty Ltd., Australia)<br />
For Vaginal Smear Monitoring<br />
Glass tubes (10 cm long)<br />
Cotton swaps (long ones)<br />
Sterilization bags that will fit a 12-15 cm long object<br />
Sterile PBS / Saline<br />
Diff-Quick Stain (Laboratory Aids Pty Ltd), Staining set up available with beakers<br />
Microscope slides<br />
Microscope coverslips<br />
Mounting medium<br />
Light microscope for analysis<br />
Using Diff Quick: exact staining protocol is supplied with the bottles<br />
For Blood collection<br />
Syringes (5 ml)<br />
Needles (21 G)<br />
Ethanol<br />
106
Gauze<br />
Elastic band (Garrot) to visualize the vein<br />
Heparinized blood tubes to collect plasma<br />
Eppendorftubes<br />
Centrifuge<br />
Freezer for storage, minimum required temperature: –20 degrees.<br />
(Optional if you wish to measure weight, body temperature, pouch secretion, saliva secretion): weighing<br />
scale, rectal thermometer, and eppendorf tubes and filterpaper for saliva and pouch secretions).<br />
Procedure<br />
The animal will be sedated (ideally 3 times per week) with an intramuscular injection of Zoletil.<br />
In general 3 mg/kg was generally enough to keep the animal asleep/ drousy enough for all required<br />
handling<br />
For Vaginal Assessments<br />
A) Record status of the vaginal opening / urogenital sinus (extended, contracted/swollen/redish)<br />
B) Make digital photos of pouch/urogenital status to get a record of cycling changes, can be<br />
correlated later on with findings in vaginal smear and Progesterone levels<br />
C) Collect a vaginal smear, wet sterile glass tube in sterile PBS/saline, put into the vagina up to<br />
about 5 cm (mark the glass tubes before sterilisation process) and then push the cotton swab through and<br />
around and pull back before removing the glass tube again. This way you can ensure you always collect<br />
your sample from the same side, which is very important (to avoid that you get differences in results<br />
simply because you sampled from different regions !).<br />
Blood Collection for Hormone Assessments<br />
Take a heparinized blood sample, approximately 5 ml which will allow both Progesteron and<br />
Oestradiol assays. To do this, advisable is to visualize a vein in the peripheral circulation (forelimb or<br />
hindlimb). Alternate the leg you take blood from to avoid complications. The heparinised tube will be<br />
centrifuged at 1600 x g for 10 minutes. Plasma will then be collected from tubes, and stored at -20<br />
degrees.<br />
Optional other measurements that can be collected at that given time<br />
A) Record Pouch Condition each time…moist/dry/dirty/clean,<br />
B) measurement of Body Weight,<br />
C) measurement of Body Temperature,<br />
D) collect saliva sample (sterile on filter paper) and store at –20degrees in a microcentrifuge<br />
tube,<br />
E) collect pouch secretion (sterile on filter paper again) and store at –20 in a microcentrifuge<br />
tube.<br />
Vaginal smear assessment<br />
Examine vaginal smears under a light microscope (100 X magnification) to differentiate between<br />
cell types. For analysis, cells will be grouped according to morphology as either parabasal-intermediate<br />
type cells (including basal, parabasal and intermediate) or superficial type cells (cornified cells with and<br />
without nuclei). In publications referred to above (Finlayson 2005, West 2004), vaginal smears are<br />
analysed using a 100-cell counting method, where 100 randomly selected cells were counted from each<br />
slide. The proportions of the two cell morphologies are compared to determine the oestrous cycle<br />
107
lengths (hormonal profiles, if collected, can be compared with relative epithelial changes found) . The<br />
number of leucocytes is also counted per 100 epithelial cells.<br />
Vaginal cell cytology of the female southern hairy-nosed wombat:<br />
(a) intermediate type cells;<br />
(b) intermediate type cell and leucocytes (arrow);<br />
(c) superficial epithelial cell with nuclei.<br />
(a and b) typical of the luteal phase in cycling wombats and also in non-cycling or anoestrous<br />
individuals.<br />
(c) Typical in the follicular phase of a cycling southern hairy-nosed wombat.<br />
108
Wombat Faecal Progesterone Metabolite Analysis: Faecal Pregnanes:<br />
5β-pregnane-20α-OH-pregnane assay<br />
M.C.J. Paris 1 & F Schwarzenberger 2<br />
1 Melbourne, Australia and 2 Vienna, Austria<br />
March 2003<br />
Protocol prepared by: Dr MCJ Paris<br />
Contact details for further information:<br />
Monique Paris at m_wolvekamp@hotmail.com, and/or parism@murdoch.rch.unimelb.edu.au or<br />
Franz Schwarzenberger at franz.schwarzenberger@vu-wien.ac.at<br />
Publication using this protocol:<br />
Paris MCJ, White A, Reiss A, West M, Schwarzenberger F. Faecal progesterone metabolites and<br />
behavioural observations for the non-invasive assessment of oestrous cycles in the common wombat<br />
(Vombatus ursinus) and the southern hairy-nosed wombat (Lasiorhinus latifrons). Animal Reproduction<br />
Science 2002: 2296: 1-13.<br />
Enzyme Immunoassay (EIA) of steroid (Preganediol) on microtiter plate using a biotinylated steroid as<br />
label<br />
Materials Needed:<br />
Fridge<br />
Centrifuge<br />
MTP shaker<br />
Pipettes<br />
SEP-PAK filters<br />
Glass beakers<br />
PH meter<br />
Washer Machine for automatic washing of microtiter plate (MTP) plates<br />
(If available otherwise manual washing is feasible)<br />
Reagents & Ingredients<br />
Absorbance reader<br />
Sample preparation<br />
Samples that were analysed in the publication ―Paris et al, 2002‖ were collected fresh and stored at -<br />
20˚C until analysis. During the collection care was taken to collect samples that were not contaminated<br />
with urine. If samples need to be transported to another location, then please ensure the frozen status by<br />
transport on dry ice.<br />
For the actual analysis:<br />
Take 0.5 gram of the fecal sample (wet weight)<br />
Put in 10 ml glass tube<br />
Add 0.5 ml distilled water and 4 ml methanol<br />
Shake for 30 minutes at Room temperature<br />
109
Centrifuge for 15 minutes, 3700 rpm, at 5 degrees<br />
Dilute sample (supernatant) 1:10 in assay buffer, make this dilution immediately, it is not possible to<br />
keep the concentrated sample because the methanol will evaporate.<br />
It is this sample that is then used for the EIA.<br />
Coating of microtiter plates<br />
1.1 Prepare before coating: Coating buffer; 1.59 gram Na2CO3 (Merck 6392), 2.93 gram NaHCO3<br />
(Merck 6329), dissolve and fill up to 1 liter with DDW adjust to pH 9.6 with (about 10 ml) HCl (1<br />
mol/l)<br />
1.2 HCL (1 mol/l), stable at RT (920 ml DDW + 80 ml 37% HCl (Merck 317))<br />
Antibody coating on microtiter plate (MTP)<br />
Nunc-Immunoplates (Nalge Nunc, <strong>International</strong>) F96 Maxisorp, 96 well plates<br />
For one MPT prepare a solution of 50 l coating AB (for purchase / details contact Prof<br />
Schwarzenberger) dissolved in 25 ml coating buffer (see 1.1). Dispense 0.25 ml/well of diluted<br />
antibody to MTP. Incubate the plate at Room temperature overnight. Discard the solution and refill each<br />
well with 0.3 ml "―second‖ coating buffer.<br />
Second coating buffer :Prepare before use, store at 4 degrees if prepared before:<br />
1.3 3.146 g Trishydroxyaminomethane (Merck 8382, 20 mmol/l)<br />
23.3 g NaCl (Merck 6404)<br />
13 g BSA (Sigma A-4503)<br />
1.3 g Sodium azide (Merck 6688) dissolve and fill up to 1.3 l with DDW and adjust to pH 7.5<br />
with (about 40 ml) HCL (1 mol/l)<br />
Cover the filled MTP with parafilm and dust cover and keep it at room temperature until use. You can<br />
use the MTP after 3 hours, store the plates no longer than 4 weeks at room temperature.<br />
Reagents<br />
Keep all stock solutions frozen at –20 until use. Waterproof color label marked on small vial indicates<br />
different content as follows (when purchased from Vienna)<br />
Blue: Antibody (AB)<br />
for details used in the publication: contact Prof<br />
Red: Biotin-labelled steroid (BL)<br />
Schwarzenberger<br />
for details used in the publication: contact Prof<br />
Schwarzenberger<br />
Green: Standard<br />
for details used in the publication: contact Prof Schwarzenberger<br />
Dilute 0.01 ml of a stock solution (1mg steroid per ml CH3OH) with 20 ml of assay buffer, mix for 2<br />
minutes in the supersonic bath and wait 3 hours to fill it in portions of 0.05 ml. One vial has a<br />
concentration of 25,000 pg. (this applies to the standard)<br />
These are the stock solutions as they can be purchased from Vienna<br />
110
Preparation of dilutions for the MTP<br />
Assay buffer<br />
1.4 Assay buffer, store at 4 degrees:<br />
2.42 g Trishydro-aminomethane (Merck 8382), 20 mmol/l, 17.9 g NaCL (Merck 6404), 0.3<br />
mol/l, 1 g Bovine serum albumin (Sigma A-4503), 1 ml Tween 80 (Merck 822187), dissolve and<br />
fill up to 1 l with DDW and adjust to pH 7.5 with (about 17 ml) HCL (1mol/l), filter through<br />
SEP-PAK C18<br />
Filtration through SEP-PAK C18. You need SEP-PAK C18 catridge column (Millipore 51910), rinse<br />
with 5 ml Methanol (Merck 6009); rinse with 10 ml DDW, connect column to tubing of peristaltic<br />
pump, discard the first 10 ml of filtrated buffer, collect buffer in a clean bottle.<br />
DAY 1<br />
Do the preparations as above:<br />
Then:<br />
Prepare standard. Add 0.15 ml of assay buffer to 0.05 ml standard vial (one portion), shake/vortex and<br />
wait 15-20 minutes.<br />
Also both the standard, antibody and biotin label solution have to incubate 20 minutes before you can<br />
work with them so also prepare now:<br />
AB & EL to be made up to certain concentrations depending on the batch used, check with Prof<br />
Schwarzenberger<br />
In the mean time you can prepare other solutions/dilutions.<br />
Such as eg for serial dilutions, dilute if already 1:10, then do 1:20, 1:40, 1:80, 1:160<br />
Then dilute the standard, till this gives you a dilution from 500 pg till 2 pg per 0.01 ml<br />
Plate procedure<br />
Before use, wash coated MTP three times with washing solution.<br />
Washing solution: 0.5 ml Tween (Merck 822184), add 2.5 l DDW (double distilled water)..mix well !!!<br />
Stored in big plastic bottle, stored at RT during day but at night at 4 degrees because the last step of the<br />
assay (after the O/N incubation) should happen at 4 degrees.<br />
Remove the rest of the liquid by pushing the MTP on paper towels. Do not touch the bottom side of the<br />
plate, cover directly with parafilm so the plate does not drie out !!!!! Very important !!!!<br />
Then add samples and so on to the plate (see diagram)<br />
111
NSB: 0.15 ml buffer + 0.1 ml EL<br />
0: 0.05 ml buffer, 0.1 ml AB + 0.1 ml EL<br />
samples: 0.05 ml samples (0.01 ml sample + 0.04 ml buffer) + 0.1 ml AB + 0.1 ml EL<br />
the amount of sample depends, eg for cow stress hormones you take 0.05 ml sample instead of 0.01 ml +<br />
0.04 buffer)<br />
step 1: add buffer or samples<br />
step 2: add 0.1 ml of antibody solution into each well but not in NSB wells<br />
step 3: dispense 0.1 ml biotin steroid into each well.<br />
Step 4: Cover MTP with parafilm and dust cover, shake mild) the MTP overnight at 4 degrees.<br />
Important to do this correctly so that nothing dries out !!!!<br />
DAY 2<br />
After O/N incubation, decant incubated MTP, and wash MTP four times with COLD (4 degrees)<br />
washing solution. Between washing, shake for 10-30 seconds on a MTP-shaker<br />
Solution needed:<br />
Substrate buffer for peroxidase, can be stored at 4 degrees:<br />
1.36 g Sodium acetate (Merck 6267)= 10 mmol/l, dissolve and fill up to 1 liter with DDW and adjust to<br />
pH 5.0 with 5% citric acid (Merck 244)<br />
Stop reagent, can be prepared many weeks before usage, can be kept at RT:<br />
2 mol/l H2SO4; 900 ml DDW + 100 ml H2SO4 (95-97 %, Merck 731)<br />
Then:<br />
Streptavidin reaction:<br />
Prepare before usage:<br />
0.001 ml streptavidin-POD-conjugate (=0.5 U; Boehringer 1089153, 500 U) with 30 ml assay buffer,<br />
mix on a magnetic stirrer for a few minutes IMMEDIATELY before use !<br />
Dispense 0.25 ml of enzyme solution in each well and incubate the covered plate for 45 minutes at 4<br />
degrees by shaking<br />
Wash again as above<br />
Colour reaction (should turn blue)<br />
Substrate solution for peroxidase:<br />
30 ml of substrate buffer<br />
0.5 ml 3,3,5,5 tetramethylbenzidine (0.4%; Fluka 87748) in DMSO (Fluka 41641)<br />
0.1 ml 0.6% H2O2 (0.1 ml H2O2, 30% Merck 8600 + 5 ml DDW), mix on a magnetic stirrer a few<br />
minutes before use<br />
Dispense 0.25 ml of substrate solution in each well and incubate the covered plate 45 minutes at 4<br />
degrees (shaking)<br />
112
Stop reaction (should turn yellow)<br />
Dispense 0.05 ml of stop reagent<br />
Absorbance measuring<br />
Reference filter: 620 nm<br />
Measuring filter: 450 nm<br />
The obtained results should measure pregnane values up to around 500 ng/g faeces in the elevated<br />
periods of the cycle.<br />
113
LH Radioimmunoassay<br />
Monique C.J. Paris<br />
Murdoch Childrens Research Institute, Victoria, Australia<br />
September 2002<br />
Contact Information for further details:<br />
Monique Paris at: m_wolvekamp@hotmail.com<br />
Publications using this protocol:<br />
1) Matteri RL, Roser JF, Baldwin DM, Lipovetsky V, and Papkoff H. Characterization of a<br />
monoclonal antibody which detects luteinizing hormone from diverse mammalian species.<br />
Domest Anim Endocrinol. 1987 Jul;4(3):157-65.<br />
2) McFarlane JR, Rudd CD, Foulds LM, Fletcher TP, and Renfree MB (1997) Isolation and partial<br />
characterisation of tammar wallaby luteinizing hormone and development of a<br />
radioimmunoassay. J Reprod. Fert. 9: 475-480.<br />
This assay has been used to measure LH in a range of marsupial species and can also be used many<br />
other species. The assay was originally published by Matteri et al (1987) and modified by us (McFarlane<br />
et al (1997) for use in marsupial species. We use ovine LH (oLH) as both standard and tracer but if<br />
authentic hormone is available this can also be used.<br />
Preparation of the LH tracer<br />
Reagents: Make up a stock of IODOGEN at 10ug/ml in methylene chloride or chloroform. Store in a<br />
tightly sealed bottle at –20 o C.<br />
Method:<br />
1. Evaporate 50 ul of IODOGEN in the bottom of an eppindorf tube or 12x75mm glass tube<br />
(reaction tube) with nitrogen.<br />
2. Dissolve hormone 2-5ug in 50ul of PBS buffer.<br />
3. Add hormone to the reaction tube.<br />
4. Add 0.25mCi of I 125 to reaction tube.<br />
5. Allow the reaction to proceed for up to 10 minutes with occasional mixing.<br />
6. Stop reaction by removing the reaction tube contents and mixing with 950ul of RIA buffer.<br />
7. Add the 1ml reaction / RIA buffer mixture to a equilibrated PD10 column (Pharmacia), do<br />
not collect the 1ml waste.<br />
8. Add 1ml of RIA buffer and discard waste.<br />
9. Add a further 3ml of RIA buffer in 1ml lots collecting each eluted buffer.<br />
114
10. Count 2-5ul from each fraction and record.<br />
11. The iodinated tracer should elute in the 2 tube and may be processed further depending on<br />
hormone.<br />
Buffers<br />
10X PBS (O.5M Phosphate, 1.5M NaCl) pH 7.4<br />
Na 2 HPO 4 (FW = 141.96) 57.49g<br />
KH 2 PO 4 (FW = 136.09) 12.93g<br />
NaCl (58.44) 87.66g<br />
Water<br />
Make up to 1,000ml<br />
RIA Buffer (0.05M Phosphate, 0.15M NaCl)<br />
10x PBS stock 100ml<br />
2mM EDTA 0.68<br />
BSA<br />
1g<br />
NaN 3<br />
1ml of 10% solution<br />
Water<br />
Make up to 1000ml<br />
Normal Mouse Serum<br />
Dilute normal mouse serum 1:10 with a 50% glycerol / PBS<br />
Primary Antibody<br />
The primary antibody is the Monoclonal Antibody Mab5186<br />
Secondary Antibody<br />
Our lab uses an in house sheep anti mouse Ig but any commercial antisera is sutiable. This is<br />
stored at 1:2 50% glycerol.<br />
PROCEDURE: (all tubes to be done in duplicate)<br />
Standards: Dilute the standard aliquot (100ng/ml oLH) serially in half dilutions for 9 dilutions. This<br />
will give you 10 standard tubes in duplicate (20 tubes).<br />
Samples: Into each sample tube, in duplicate pipette 100 uL of plasma or serum.<br />
QC: A quality control plasma should be prepared and used in every assay. This can be made by<br />
combining small volumes of plasma from all the samples to make a pool of plasma. This plasma<br />
should be stored frozen in small aliquots until used.<br />
Tracer: Dilute the tracer to a concentration of 10,000 cpm/100ul.<br />
Primary Antibody: Determine the total amount of solution to make up by the number to tubes in assay<br />
plus a couple of mLs. (100 uL of solution per tube). Normal Mouse serum (NMS) is stored at 1:10 and<br />
115
is used at 1:200. Calculate the uLs of NMS required by dividing the total mLs needed by 20, then<br />
multiplying by 1,000. This will give you the amount in ul that you need to add to the volume of RIA<br />
buffer. Before adding the primary antibody add 100ul of this to each NSB tube. The primary antibody is<br />
stored at 1:1000 and is used at 1:250,000. Use the same calculation as you used for the NMS except<br />
divide by 250. Add this amount to the RIA/NMS buffer and vortex.<br />
Controls: Three controls are to be run with each assay: Tc (total count), B 0, and NSB. B 0 tubes<br />
evaluate the maximum binding of tracer to antibody and NSB tubes monitor the non-specific<br />
binding.<br />
Tc tubes: 100 uL tracer.<br />
B 0 tubes: 100 uL RIA buffer + 100 uL (NMS + Ab) + 100 uL tracer.<br />
NSB tubes: 100 uL RIA buffer + 100 uL (NMS) + 100 uL tracer.<br />
DAY 1:<br />
100 uL of Samples and Standards are each delivered into respective, labelled, duplicate tubes.<br />
100ul of NMS/Ab (primary antibody solution) to all tubes except the TC and NSB.<br />
100ul of Tracer to all tubes<br />
Vortex all tubes and incubate overnight (at least 12 hrs) at room temperature covered with<br />
aluminium foil.<br />
DAY 2:<br />
SECONDARY ANTIBODY<br />
To determine the total amount of secondary antibody required, multiply the volume of CTS used<br />
above by 2. This is the volume of RIA BUFFER needed. The secondary antibody goat-anti-mouse<br />
(GAM) is stored at 1:2 and used at 1:80. Calculate the uLs of GAM needed by dividing the total<br />
volume needed by 40 and multiplying this by 1,000. Add GAM to RIA buffer and vortex.<br />
Deliver 100 uL of GAM + RIA buffer to all tubes EXCEPT Tc.<br />
VORTEX ALL TUBES.<br />
INCUBATE OVERNIGHT (AT LEAST 12 HRS) IN COLD ROOM COVERED WITH<br />
ALUMINIUM FOIL.<br />
DAY 3:<br />
Add 1.6 mL of cold saline to all tubes, EXCEPT Tc, and immediately cold centrifuge all tubes,<br />
EXCEPT Tc, at 3500 RPM for 30 minutes. Only add saline to tubes for 1 centrifuge run. If more<br />
tubes, wait to add saline until just before spinning. Ensure one pair of Qc in every centrifuge run.<br />
ASPIRATE IMMEDIATELY<br />
Load tubes into gamma counter for counting, use Protocol 13 rack for I 125 assays.<br />
After counting enter and analyse data.<br />
116
Contact Information for further details:<br />
Jill Shaw at jill.shaw@med.monash.edu.au<br />
Publications using this protocol:<br />
Ovarian Tissue Cryopreservation<br />
J. Shaw<br />
Monash Institute of Reproduction and Development<br />
Monash University<br />
September 2003<br />
1) Paris MCJ., Snow, M., Cox, S-L, and Shaw JM. (2003) Xenotransplantation: can this technology<br />
provide a tool for reproductive biology and animal conservation ? Theriogenology (In press)<br />
2) Shaw JM & Nakagata. N. (2002) Cryopreservation of transgenic mouse lines. Ch 10 in: Methods<br />
in Molecular biology, vol 180:207-228 ―Transgenesis techniques: Principles and Protocols‖ 2nd<br />
Edn Editor A. Clark Humana press Totowa.<br />
3) Shaw JM. & Trounson AO. (2002) Ovarian tissue transplantation and cryopreservation: its<br />
application to the maintenance and recovery of transgenic mouse Ch 11 in: Methods in<br />
Molecular biology, vol 180:229-251 ―Transgenesis techniques: Principles and Protocols‖ 2nd<br />
Edn Editor A. Clark Humana press Totowa<br />
4) Cleary, M. Snow, M. Wolvekamp, M. Shaw, J.M. Cox S-L and Jenkin G. (2001)<br />
Cryopreservation of mouse ovarian tissue following prolonged exposure to an ischaemic<br />
environment. Cryobiology. 42:121-133.<br />
5) Snow, M. Cleary, M. Cox, S-L. Shaw J., Paris M. and G. Jenkin (2001) Comparison of the<br />
effects of in vitro and in situ storage on the viability of mouse ovarian tissue collected after<br />
death. Reprod. Fertil. Dev. 13:389-394.<br />
Application<br />
Ovarian tissue cryopreservation has been applied to a wide range of species including:<br />
<br />
<br />
<br />
Eutherians: Mouse, rat, rabbit, sheep, pig, cow, marmoset, macaque, human, cat, elephant, dog.<br />
Marsupials: Wallabies, Sminthopsis, common wombat.<br />
Others: e.g. Silkworm.<br />
In all these cases the tissue has been viable after thawing (as assessed by in vitro or in vivo assays). Live<br />
young can be derived from frozen thawed grafted ovarian tissue, but to date only a small number of<br />
studies have proven that this is possible (mainly mouse and sheep). This indicates that ovarian tissue<br />
banking should be possible for a wide range of species. Most studies have used protocols that are<br />
identical or very similar to that described in this document. We recommend that it, or another proven<br />
procedure, be followed as closely as possible, because even though some variations to this protocol have<br />
relatively little impact on the outcome [e.g. using a different buffer, an equivalent cryoprotectant<br />
117
(ethylene glycol instead of DMSO), or dehydrating agent (e.g. trehalose instead of sucrose) or slightly<br />
different equilibration temperatures or times], other changes can be detrimental (e.g. using glycerol<br />
rather than DMSO) or lethal (e.g. altered cooling or warming rates). The protocol provided here is a<br />
―slow cooling‖ procedure because this is the one that has (to date) proven most versatile and reliable.<br />
Background<br />
Cryopreservation of ovarian tissue is a simple procedure which can be used to store the germline of<br />
valuable female animals. In brief, it involves putting ovarian tissue into antifreeze solution and then<br />
cooling it to a low sub zero temperature (liquid nitrogen) for storage. The tissue can subsequently be<br />
thawed for use or analysis. For best results use good quality tissue. Ideally the tissue should be collected<br />
from young healthy females and processed for cryopreservation immediately after collection with<br />
sterile/ aseptic techniques. The reasons for this are:<br />
<br />
<br />
<br />
<br />
Age: ovarian tissue of mammals contains the maximum number of germ cells (eggs/ oocytes) at<br />
or around the time of birth, after this time there is an exponential loss with age. In some species<br />
old females may have no viable oocytes left in their ovaries.<br />
Health: Diseased cells present within ovarian tissue (e.g. cancer cells) can survive frozen storage.<br />
Other infectious agents can also survive frozen storage.<br />
Sterile/aseptic technique: Frozen material may be used to generate offspring by any of a range of<br />
techniques including in vitro maturation, in vivo maturation (following grafting to a suitable<br />
recipient), or nuclear transfer. The presence of contaminating bacteria, fungi or other infectious<br />
agents could prevent or compromise these uses.<br />
Rapid processing. Aim to collect ovaries by surgery or immediately after the death of an animal.<br />
Delays between the death of the animal and collection have a detrimental effect on the tissue.<br />
The viability of follicles declines as the delay between collection and cryopreservation increases.<br />
A delay of only a few hours within the body of the dead animal, is highly detrimental and kills<br />
most follicles. Ovarian tissue which is removed from an animal immediately after its death (or is<br />
removed by surgery) and placed in e.g. Phosphate buffered saline on ice or at room temperature,<br />
deteriorates less rapidly than within a dead animal, but even with this treatment few, if any,<br />
viable follicles remain 48 h after collection.<br />
Current cryopreservation procedures focus on collecting the outermost ovarian cortex. The reason for<br />
this is that the primordial follicles (the oocyte stage which is most abundant in the ovary, and which<br />
tolerate cryopreservation very well) are mainly located within the outermost layer (2mm or less from the<br />
surface) of the ovary. Unfortunately primordial follicles are very small (
Summary: Media and Products<br />
a. For collection: PBS or other bench type handling media (100 ml per large ovary) (sterile,<br />
without protein)<br />
o Note: If oocytes are to be collected approx. 10 ml of protein containing bench solution<br />
for oocyte handling (e.g. 3-8 mg/ml Bovine Serum Albumin or 5-10% serum) should be<br />
prepared.<br />
b. For equilibration and freezing: Cryoprotectant solution: one 10 ml tube per large ovary (1.1 ml<br />
DMSO; 0.32g sucrose made up to 10 ml with buffer. Sterile without protein)<br />
c. For dilution after thawing:<br />
o First dilution solution: 0.55 ml DMSO and 0.62 g sucrose in a 10 ml tube (3ml per vial).<br />
Sterile without protein<br />
o Second dilution solution: 0.62 g sucrose in a 10 ml tube (3ml per vial). Sterile without<br />
protein<br />
Solutions should be sterile. They can be sterilized by filtration through a sterile 0.22 micron filter<br />
(e.g. syringe type filter).<br />
Summary: Large equipment<br />
<br />
<br />
<br />
<br />
<br />
<br />
<br />
Storage tank (liquid nitrogen or equivalent)<br />
A vapour shipper may be needed if specimens are to be transported frozen.<br />
Cooling device<br />
Freezing machine (Note most freezing machines require access to electricity)<br />
OR Passive cooling container or equivalent (this requires dry ice in an eski or a –80 freezer)<br />
Sterile work area (biohazard hood or equivalent is best)<br />
Microscope if there is a need to look for/ collect eggs.<br />
119
Summary Other Materials and Equipment<br />
Note: If the tissue has to be sterile then it is advisable to presterilize<br />
items marked with *<br />
Collection &<br />
dissection<br />
For<br />
freezing<br />
For<br />
thawing<br />
ITEM<br />
*Gloves (mask/ cap) Yes Yes Yes<br />
Safety goggles (Optional) Yes Yes<br />
Betadine/ alcohol or equivalent to sterilize skin prior to dissection Yes -- --<br />
Clippers (to remove/ shave fur /wool/hair) (Optional) -- --<br />
*Dissection equipment (e.g. scalpel, scissors, forceps, retractor) Yes -- --<br />
*Specimen jar/ tube (e.g. 50 ml screwcap) for transport of the<br />
ovary/ ovaries Yes No No<br />
Ice, crushed, in container (e.g. polystyrene eski) Recommended Yes No<br />
*Tubes containing the required solutions (outlined above) Yes Yes Yes<br />
*Petridishes, 10 cm (allow at least 2 per ovary) Yes (Optional) No<br />
*Petridishes, 35 mm Yes (for oocytes) No Yes<br />
*Pipettes or equivalent for measuring solutions (e.g. 1 and 10 ml) Yes Yes Yes<br />
Test tube rack (optional) Yes Yes Yes<br />
*Scalpel #20 or #22 blade (for ovary dissection) Yes No (Optional)<br />
*Scissors (small for ovary dissection) Yes No No<br />
*Forceps: Small, for holding and moving the tissue. Yes Yes Yes<br />
*Forceps: large (or equivalent, for handling and seeding) (Optional) Yes Yes<br />
*Pipettes or equivalent (e.g. pasteur pipettes with pipette bulb/<br />
plastic transfer pipette) to move small volumes of solution Yes Yes Yes<br />
*1 ml syringe with 26 g needles or equivalent (for puncturing<br />
follicles) Yes No No<br />
Tissues Yes Yes Yes<br />
Alcohol (in squirter bottle) Yes Yes Yes<br />
Pen/ paper for taking notes Yes Yes Yes<br />
Indelible pen (for marking dishes and tubes) Yes Yes Yes<br />
Garbage bin/ bin liner Yes Yes Yes<br />
Sharps container Yes Yes Yes<br />
Hand wash soap/ water to wash hands Yes Yes --<br />
Bench cover (e.g. plastic backed paper) (Optional) (Optional) (Optional)<br />
Plastic apron/ gown/ labcoat Advisable Advisable Advisable<br />
Liquid nitrogen No Yes Yes<br />
Benchtop container for liquid nitrogen (can be eski) No Yes Yes<br />
*Cryovials 1.7 ml star-foot, external thread, conical or round base<br />
(2 per person) No Yes No<br />
Test tube rack (for Cryo tubes) (optional) No Yes No<br />
Cryo Canes No Yes No<br />
Timer No Yes Yes<br />
Insulating Cryo-gloves No Yes Yes<br />
Thermometer (for water temperature) No No Yes<br />
Waterbath or Beaker (warm water for thawing) No No Yes<br />
If eggs are to be collected then a pipettor or equivalent that can be used to move eggs between dishes is<br />
needed. If eggs are to be stored or used for ART, then additional solutions and materials (not listed here)<br />
would be required<br />
120
Steps in preparing specimens for cryopreservation:<br />
It is advisable to prepare all equipment and solutions needed for collection, dissection and<br />
cryopreservation (listed in the table above) in advance.<br />
For collection<br />
Prepare the media, equipment and items listed above:<br />
Procedure<br />
If possible remove fur/ hair/ wool and swab the skin over the intended incision site with<br />
antiseptic. Use sterilized dissection instruments. Access the ovary via one (or more) incision<br />
through the skin and abdominal wall. Excise the ovary(s) /piece of ovary and place it in a sterile<br />
pot/ tube/ dish with sterile (protein free) media e.g. saline or PBS as soon as possible after<br />
collection. If the specimen cannot be processed immediately, or has to be transported to another<br />
location then place the specimen on ice.<br />
For dissection<br />
Prepare the media, equipment and items listed above:<br />
Procedures<br />
Very small ovaries (less than 5x5x5 mm) do not need to be dissected, as they can be frozen<br />
whole (skip to the section on freezing).<br />
If only a part of an ovary has been collected then identify the outer and inner surfaces. If the<br />
piece(s) is less than 1 mm thick it can be cryopreserved without further dissection. (Skip to the<br />
section on freezing).<br />
For larger ovaries or large ovarian pieces (> 1 mm thick) dissection is recommended as it<br />
facilitates the entry of the cryoprotectant into the tissue. The aim of the dissection is to remove<br />
the outer cortical tissue (tough, white, fibrous) for freezing.<br />
If a whole (large) ovary has been collected, place it ovary in a dish of PBS at room temperature<br />
(condensation makes it difficult to work with ice cold specimens). Use your instruments to<br />
separate the white firm (outermost) region from the underlying red tissue. It can be difficult to<br />
separate the two layers, but it can usually be achieved using a combination of sharp, scissors<br />
(large and small), and scalpel blades<br />
(e.g. #22 &/or #20). If the white tissue surrounding the ovary is normal (smooth, elastic, and<br />
tough, around 1mm thick) it can be cut into ―sheets‖ (5 x 5 mm x 1 mm) or ―strips‖ (1-2 mm<br />
wide x 0.5 to 1 cm long, 1 mm deep) relatively easily.<br />
Figure: In larger species the cortex (the outermost region of the ovary) is the region that is<br />
collected and frozen because it contains most primordial follicles.<br />
121
Large follicle: may<br />
contain usable oocytes<br />
OVARY<br />
Collet & freeze:<br />
Optional for ~1-2 mm deep<br />
collection/storage<br />
Medulla<br />
Low Magnification<br />
Cut just inside the cortex (indicated by dotted line)<br />
High Magnification<br />
Small ~50 micron<br />
resting follicles<br />
(reserve)<br />
Figure: In larger species, the ovarian cortex (outermost region of ovary) is the region that is<br />
collected and frozen because it contains most of the primodial follicles and oocyte reserves.<br />
Cryopreservation<br />
Have the media, equipment and items listed above prepared in advance:<br />
The protocol outlined here allows ovarian tissue to be cooled to and stored at –196C. Access to a liquid<br />
nitrogen storage tank or the equivalent (nitrogen vapour storage tank) in which this tissue can be stored<br />
long term is essential.<br />
Preparation of the freezing machine (or equivalent)<br />
<br />
<br />
If a programmable freezing machine is available a suitable programme is: hold at -6C until the<br />
chamber is loaded and seeded. Once seeding is complete cool the chamber at 0.3°C/ min to -<br />
40°C, then rapidly cool to –196C.<br />
If a programmable freezing machine is not available then low cost equipment such as the<br />
―Nalgene Mr frosty‖ (Sigma C1562) can be used. These will, when placed in a –80C freezer,<br />
cool ampoules/vials at around 1C/ min to –80C. This is adequate for ovarian tissue freezing.<br />
Place the Mr Frosty in the refrigerator or on ice for at least 1 hr before freezing is due to<br />
commence. If there is no –80 C freezer available then the Mr Frosty can be placed in a<br />
polystyrene box with pellets (or a block) of dry ice (frozen CO2).<br />
Preparation of the solutions and vials<br />
Cryoprotectant should be made up, filtered and cooled to 0-1°C (in ice) before the dissection starts.<br />
Ovarian tissue is most commonly frozen in 1.5 M DMSO (i.e. 5.5 ml Dimethyl sulphoxide (e.g. Sigma<br />
122
Hybrimax, D-2650)) and 0.1 M sucrose (i.e. 1.71g sucrose (e.g. Sigma S-7903)) made up to 50 ml with<br />
physiological, protein free, buffer (e.g. PBS). If filters which tolerate DMSO are available then sterilize<br />
the DMSO+ sucrose solution. If DMSO tolerant filters are not available then filter the sucrose + PBS<br />
and then add the DMSO. If DMSO is not available then 1.5 M ethylene glycol or 1.5 M propane diol can<br />
be used instead. If a different cryoprotectant is used then the dilution solutions should be made up with<br />
the same (corresponding) cryoprotectant.<br />
Prepare at least 10 ml cryoprotectant per ovary<br />
Pre-cool cryovials (e.g. 1.7 ml Nunc conical, star based, internal thread, CRYO tubes Cat #<br />
377224) on ice. It is easiest if these are each pre-filled with 1 ml cryoprotectant.<br />
It is best if at least 2 ml cryoprotectant be prepared for each tube that is frozen (1 ml for the first<br />
equilibration step, a further 1 ml for each freezing ampoule/vial). This can be made up the day before.<br />
Equilibration procedure:<br />
Once tissue has been dissected, placed it in a tube (e.g. 5 or 10 ml Falcon tube) containing pre-cooled<br />
(ice cold) cryoprotectant solution. Every 5-10 minutes agitate the tube so that all pieces become exposed<br />
to the cryoprotectant. After 15-20 min tip the contents of the tube out into a sterile dish and rapidly<br />
allocate tissue to each vial. Distribute the material as evenly as possible between all vials.<br />
Note: label the vials before freezing commences.<br />
Screw the cap back onto each vial and return to the ice. After the tissue has had a total of 30 min on ice<br />
they are ready to be placed in the freezing machine or in the passive cooling device (―Mr Frosty‖).<br />
Passive cooling:<br />
Place the passive cooling container in a –80 freezer or on dry ice. After 12 to 24 h, remove the vials and<br />
place them in liquid nitrogen for storage.<br />
Cryoporeservation in a freezing machine<br />
Ovarian tissue cryopreserved at 0.3C/ min in a biological freezer is better preserved than material<br />
cryopreserved in a passive cooling device (e.g. Mr Frosty). The difference is however not big, and must<br />
be counterbalanced against the detrimental effect of deterioration with time after collection. Thus<br />
material will be of better quality if it is frozen at 1C/ min (Mr Frosty on dry ice) as soon as possible after<br />
collection, than if the cryopreservation is delayed but then cooled at 0.3C/ min (e.g. by being transported<br />
to a site with a biological freezer).<br />
After loading the vials containing ovarian tissue into a freezing machine they should be seeded to initiate<br />
ice formation (vials placed in a ―mr frosty‖ are not seeded). Seeding is usually performed once the vials<br />
have reached –6ºC (this can take 5 minutes). Seed each vial by pulling it up and touching its outer<br />
surface with a large pair of forceps pre-cooled in liquid nitrogen (place the forceps just above the<br />
meniscus of the liquid, taking care to not touch the sample). After all vials have been seeded re-examine<br />
each one in turn to establish that the solution still contains ice crystals.<br />
123
Cooling programme:<br />
Once it has been confirmed that ice is present in all tubes the cooling program can start. The cooling rate<br />
should be 0.3°C/min to -40°C. On reaching -40°C the vials can be plunged directly into liquid nitrogen,<br />
and placed on labelled canes for storage. There may be a benefit from introducing a further rapid cooling<br />
ramp (e.g. 10 or 40C/ min) to a temperature of –140ºC or less before moving the vials into liquid<br />
nitrogen.<br />
Thawing Procedure:<br />
Solutions and a water bath should be prepared and sterilized in advance:<br />
The first thawing solution contains 0.75M DMSO and 0.25 M sucrose (i.e. 0.55 ml DMSO and<br />
0.86 g sucrose/10 ml PBS), at room temperature (20-22°C). The second solution contains only<br />
0.25 M sucrose (i.e. 0.86 g sucrose/10ml PBS) at room temperature (20- 22°C).<br />
The water bath should be at 37°C.<br />
After long term storage vials may have filled with liquid nitrogen. Eliminate the risk of explosions by<br />
holding the vial deep in the nitrogen vapour (just above the surface of the liquid nitrogen). Once there is<br />
no sign of liquid nitrogen in the vial immerse the vial into a 37°C waterbath until thawed (this may take<br />
several minutes).<br />
Write down the details written of the vial then wipe it over with alcohol before removing the lid.<br />
The tissue is then either grasped with sterile forceps and placed in the first thawing solution (0.75M<br />
DMSO+0.25 M sucrose), or the whole contents of the vial decanted into it. After 10 min the ovarian<br />
tissue is moved to the second solution (0.25 M sucrose), and 10 min later placed in PBS ready for<br />
grafting or culture.<br />
Remember sterile technique should be applied throughout, all solutions, equipment, and containers<br />
should be sterile.<br />
Oocytes<br />
Optimized freezing protocols for immature oocytes have yet to be established. Thus it is not currently<br />
possible to recommend a strategy by which to preserve the immature oocytes which are released into the<br />
collection dish during the dissection of the ovarian tissue. If the embryologist wishes to try to preserve<br />
these oocytes for the patient, they could use an existing human oocyte slow cooling (e.g. Fabbri et al<br />
2001; Boldt et al 2003) or rapid cooling protocol (Chen et al 2000; Liebermann and Tucker 2002) either<br />
before, or after in vitro maturation.<br />
Other Tissues<br />
Note that the protocol given above can be applied to tissues from other organs including skin. Note that<br />
cell suspensions may be better cryopreserved using standard cell freezing protocols.<br />
124
Acknowledgements:<br />
I thank Monash IVF and Planer Pty Ltd for support.<br />
Additional References (for oocyte cryopreservation):<br />
1) Boldt J, Cline D, McLaughlin D. 2003 Human oocyte cryopreservation as an adjunct to IVFembryo<br />
transfer cycles. Hum Reprod. 18:1250-5.<br />
2) Chen SU, Lien YR, Chao Kh, Lu HF, Ho HN, Yang YS. 2000 Cryopreservation of mature<br />
human oocytes by vitrification with ethylene glycol in straws. Fertil Steril. 74:804-8.<br />
3) Fabbri R, Porcu E, Marsella T, Rocchetta G, Venturoli S, Flamigni C. 2001 Human oocyte<br />
cryopreservation: new perspectives regarding oocyte survival. Hum Reprod. 16:411-6.<br />
4) Liebermann J, Tucker MJ. 2002 Effect of carrier system on the yield of human oocytes and<br />
embryos as assessed by survival and developmental potential after vitrification. Reproduction.<br />
124:483-9.<br />
125
Fish Semen Cryopreservation.<br />
Patterns for Common Carp (Cyprinus carpio), Barbel Sturgeon (Acipenser<br />
nudiventris) and Haarder (Mugil soiuy).<br />
Boris Dzyuba<br />
Institute for Problems of Cryobiology and Cryomedicine of NAS of Ukraine<br />
March 2006<br />
Contact information for further details:<br />
Boris Dzyuba at: bdzuba@yahoo.com, sidrokin@rambler.ru<br />
Publications using these protocols:<br />
1) Kopeika E.F., Novikov A.N. (1983) Fish sperm cryopreservation. In Cryopreservation of cell<br />
suspensions. Kiev, Naukova Dumka (A.A. Tsutsaeva ed.), 204-239.<br />
2) Kopeika E.F. Instructions on low temperature preservation of carp sperm (1986) Kharkov,<br />
Institute for Problems of Cryobiology & Cryomedicine, 10p.<br />
3) Dzyuba B.B., Kopeika E.F., Cherepanov V.V., Drokin SI. (1999). Study of the quality of<br />
sturgeon semen after 6 years of cryopreservation. Journal of Applied Ichthyology, V. 15 (4-5),<br />
312.<br />
4) Kopieka E.F., P.Williot and B.F.Goncharov (2000). Cryopreservation of Atlantic sturgeon<br />
Acipenser sturio L., 1758 sperm: First results and associated problems. Boletin. Institututo<br />
Espanol de Oceanografia, 16(1-4), 167-173.<br />
5) Dzyuba B.B., Kopeika E.F. (2002). Relationship between the changes in cellular volume of fish<br />
spermatosoa and their cryoresistance. CryoLetters 23, 353-360.<br />
6) S.I. Drokin, H.Stein and T.P.Govorukha (2002). Ultrastructure of carp Cyprinus carpio<br />
Spermatozoa after cooling, dilution and freeze-thawing. CryoLetters, 24,49-55.<br />
Introduction<br />
Speaking about fish sperm cryopreservation we should remember some important aspects of this task:<br />
1) Fish exhibit a wide range of reproductive strategies (from viviparity to oviparity), involving<br />
different internal or external gametes activation factors, both environmental and biological.<br />
The ranges of external activation factors such as salinity, pH and ion composition vary<br />
significantly for different taxa.<br />
2) Fish sperm biochemistry, morphology, ultrastructure and other biological parameters varies<br />
significantly depending on reproductive mode, fish reproduction environment and genome.<br />
3) There is phenomenon of fish sperm quality variability within species and it is closely related<br />
to sperm cryoresistance. Parameters listed in issue 2 affect significantly fish sperm resistance and<br />
are very important for cryopreservation technology.<br />
Basic description of sperm structure and methodology on sperm cryopreservation can be found in<br />
(Jamieson ,1991 ) and modern review on fish sperm cryopreservation is presented in (Tiersh and<br />
Mazik,2000, Billard,2001 and Zhang, 2004).<br />
Described above protocols are the examples for fish species different on environmental factors of sperm<br />
motility activation ( inclusive dependence on hypotonic conditions for common carp, the one on<br />
hypotonic conditions as well as certain ion composition for barbel sturgeon and no dependency on<br />
osmotic pressure for haarder ) and sperm ultrastructures (no acrosome for common carp, haarder and<br />
126
acrosome presence in barbel sturgeon ). That is why we selected these species to demonstrate some<br />
differences in sperm cryopreservation procedures.<br />
Jamieson, B.G.M. (1991). Fish Evolution and Systematics: Evidence from Spermatozoa. Cambridge<br />
University Press, Cambridge. p.319<br />
Tiersch, T.R. and P.M.Mazik, editors. (2000) Cryopreservation in Aquatic Species. World Aquaculture<br />
<strong>Society</strong>. Baton Rouge, Luisiana, USA. pp. 91-160<br />
Billard R. (2001). Cryopreservation of fish spermatozoa. In: ―Cryobanking the genetic resource: wildlife<br />
conservation for the future?‖ (P.F. Watson, W.V. Holt, Eds.) pp. 143-170. Taylor&Francis, London,<br />
New York.<br />
Tiantian Zhang (2004). Cryopreservation of Gametes and <strong>Embryo</strong>s of Aquatic Species. In ―Life in<br />
frozen state‖/Edited by Fuller B.J., Lane N., Benson E.E.- CRC Press LLC, pp 415-435.<br />
Materials Needed:<br />
1 0.5- 1.5 ml plastic conical ampoules (cryovial Nunc)<br />
2. Sterile tubes (e.g., 50 ml polystyrene, conical tubes)<br />
3. Sterile pipettes<br />
4. Glass slides and cover glasses<br />
5. Compound microscope<br />
6. Cryodiluents (see table below)<br />
7. Refrigerator<br />
8. Liquid nitrogen storage tank<br />
9.Wide necked cryocan (Dewar), height 30-50 cm<br />
10.Thermometer (scale -80 0 C +30 0 C)<br />
11. Support with plastic (metal) stick ( length 40-50 cm, diameter 0,5-1 cm ) connected to<br />
plastic (metal) net diameter of which smaller than cryocane neck (see details in fig 1.).<br />
12. Water thermostat<br />
13. Forceps<br />
Sperm collection<br />
To obtain sperm it is necessary to use mature males. Sperm may be obtained both after hormonal<br />
injections and during natural spawning period. We used the suspension of dried hypophyses of carps and<br />
sturgeons and haarder sperm was collected from males during natural spawning period. Spermiation<br />
was induced by an intramuscular injection of self-prepared carp pituitary homogenate<br />
It is expedient to use injections in accordance with the recommendations of companies producing them.<br />
Sperm should be collected into dry vials with no contamination by urine or feces. Fish abdomen must be<br />
dry not to let water come to sperm. Sperm storage time before dilution with cryoprotective medium<br />
should be minimized.<br />
127
1<br />
2<br />
3<br />
4<br />
5<br />
Fig.1 Example of easy assembly for sperm cryopreservation<br />
1 – tripod, 2- guide bar, 3 – thermometer, 4 – round holder for vials<br />
5 – Dewar vessel<br />
Table 1. Cryodiluents’ composition<br />
Chemicals Common Carp Haarder Barbel Sturgeon<br />
mg mmol/l mg mmol/l mg mmol/l<br />
Tris–HCl, pH8.1 1700 140 242 20 600 50<br />
MgSo 4 62 2.5 - - - -<br />
CaCl 2 18 0.8 - - - -<br />
Succrose 137 4 - - - -<br />
NaHCO 3 280 33 - - - -<br />
NaCl 420 72 - - - -<br />
KCl 6 0,8 - - - -<br />
Egg yolk, ml 10 10 9.6<br />
mannitol 1500 82 - - - -<br />
MeSO2, ml 16 2300 16 2300 14.4 2300<br />
Glutathione reduced 56 0.002 - - - -<br />
Glucose - - 5400 0.3 - -<br />
Distilled water Up to 100 ml Up to 100 ml Up to 100 ml<br />
128
Next step is express assessment of sperm motility for each male. For this aim the water solutions are<br />
used depending on species: 60 mM NaHCO 3 for carp, 9.3 mM tris-HCl (pH 8.0), 12 mM NaHCO 3 for<br />
sturgeons, 0.48 M NaCl for haarder. Haarder sperm motility is maximum in sperm plasm obtained after<br />
sperm centrifugation for 20 min at 4000g. This sperm plasm may be used as activating solution.<br />
Measurement procedure consists in as follows: 20 mcl activating solution is placed into object glass,<br />
minimal amount of sperm is put with an injection needle and percent of forwardly moving cells is<br />
assessed within not more than 20 seconds after being mixed. The best cryopreservation results can be<br />
achieved if samples with 80-100% motility are used.<br />
Dilution<br />
To prevent temperature and osmotic shock sperm must be diluted with cryoprotective medium of the<br />
same temperature as sperm was, cryoprotective medium should be slowly (by droplets) added to sperm<br />
and mixed carefully. Compositions of cryoprotective media are given in table 1.<br />
For Barbel Sturgeon it is expedient after dilution to incubate sperm with cryoprotective medium for 30-<br />
40 min at 4 о С. For Haarder sperm should be diluted rapidly and frozen with no incubation.<br />
To note: non-activating media are optimal to obtain maximum motile cell percentage after thawing.<br />
Differences in procedures of dilution for carp, sturgeon (as one group) and in contrast to haarder are<br />
associated with the fact that for carps and sturgeons this medium is easily found and for haarder we<br />
failed to find it.<br />
Dilution with cryoprotective medium results in activation of haarder sperm movement therefore freezing<br />
of motile cells has to be performed and so the duration of diluting-freezing procedure must be<br />
minimized.<br />
Cryopreservation<br />
Before sperm dilution start with cryoprotective medium round holder (4, see Fig. 1) should be placed<br />
inside Dewar vessel in the vapors of liquid nitrogen at the level of minus 80C.<br />
After dilution the samples are poured into 1.5ml ampoules and placed into a round holder. In 20 min‘s<br />
exposure in liquid nitrogen vapors thermometer is taken away and a holder with samples is placed into<br />
liquid nitrogen.<br />
In our researches there was described more complicated three-step cooling method requiring the use of<br />
thermocouple and recording device. However we observed the differences in sperm motility after<br />
thawing when comparing these two methods only in case when the sperm initial quality was very poor.<br />
Storage<br />
After freezing sperm samples must be removed into labeled containers and placed into a storehouse.<br />
Thawing<br />
Please keep the safety instructions when working with liquid nitrogen, especially during thawing<br />
samples. Use protective gloves and eye-protection. Covers of ampoules to be thawed should be directed<br />
towards the side opposite to the researcher‘s face.<br />
129
Samples are warmed on water bath at 40C. For this aim with forceps the sample is taken out of a round<br />
holder for freezing and placed onto water bath with constant shaking the samples in water.<br />
In 30-40 seconds‘ shaking (when about 10% of sample volume transformed into liquid phase) the<br />
sample is removed out of water bath, carefully shaked in air up to complete disappearance of liquid<br />
phase and dried and assess the motility of sperm as it was mentioned above.<br />
Time between thawing and estimation of motility or use of sperm for insemination should be minimized.<br />
This requirement is extremely important for haarder sperm, because these species sperm will be motile<br />
just after thawing and the time of their movement will be limited as a rule by 10 min.<br />
To obtain maximum percentage of fertilization it is expedient to increase the sperm/egg ratio 3-5 times<br />
more (depending on species) in comparison with native sperm.<br />
Our results<br />
This method enables to obtain following results for sperm after freeze-thawing:<br />
20-50% of motile cells for carp, up to 10-70% fertilization<br />
20-60% of motile cells for sturgeon, up to 5-90% fertilization<br />
40-80% of motile cells for haarder, fertilizing ability was not examined.<br />
130
Measurement Techniques for Fish Larvae Morphometric Parameters on Early<br />
Stages of Postnatal Growth<br />
Borys Dzyuba 1 , Katrien J. W. Van Look 2 , Nana Satake 2 and William V. Holt 2<br />
1 Institute for Problems of Cryobiology and Cryomedicine of the<br />
National Academy of Sciences of the Ukraine,<br />
2 Institute of Zoology, Zoological <strong>Society</strong> of London<br />
September 2006<br />
Contact information for further details:<br />
Boris Dzyuba at: bdzuba@yahoo.com<br />
Publications using these protocols:<br />
Borys Dzyuba, Katrien J. W. Van Look, Alex Cliffe, Heather J. Koldewey, and William V. Holt<br />
Effect of parental age and associated size on fecundity, growth and survival in the yellow seahorse<br />
Hippocampus kuda. J. Exp. Biol. 2006 209: 3055-3061<br />
Introduction<br />
The measurements of morphometric parameters of fish on early stages of postnatal growth<br />
related with certain problems. These problems arise from small size of animals and their sensitivity to<br />
restraint during the measuring procedure. Therefore to reduce stress we elaborated techniques which<br />
allowed us to measure body length and width of fish larvae at an early stage of growth (starting from<br />
first week after hatching) without removing the animals from water and tactile contacts.<br />
Materials Needed:<br />
1 Wide-ended clear plastic pipette (diameter of pipette depends on size of animal)<br />
2. Sterile tubes (e.g.: 50 ml polystyrene, conical tubes)<br />
3. Video camcorder (Sony, Hi-8)<br />
4. Video player with stop-frame function.<br />
5. Image analysis software (Image Pro Plus, Media Cybernetics or Scion Image, Scion Corporation<br />
software)<br />
Methods:<br />
1. Individual larva (fig 1A, 1) should be captured within a wide-ended clear plastic pipette large enough<br />
to permit the juveniles free vertical movement, but sufficiently small to restrict their lateral movement<br />
(fig. 1A, 2). This pipette should be placed near the inside-front of the tank and image sequences of the<br />
captured larva should be recorded using a video camcorder. Duration of each larva recorded can differ<br />
from animal to animal but usually from 30-60 sec record is sufficient to find a suitable image.<br />
2. The sequences are analysed and examined for identification and capture of suitable still images in<br />
which the larvae assumed an orientation where they were positioned vertically with their bodies<br />
sideways to the camera and fully extended and straight as possible. Measurements of total length, body<br />
length and width should be made manually from the still images by image analysis software. To make<br />
the procedure of measurement quick and simple, we plotted the lines that corresponds to the measured<br />
parameters by drawing them on transparent film placed against the screen of monitor with still image of<br />
131
larvae inside the pipette (fig.1B, 1). The image of scale, which located on the pipette should be drawn<br />
on the same film for future calibration (fig. 1 B,2). On the same film few images can be drawn together<br />
and after that film can be scanned. The scanned image is then analysed by the image analysis software<br />
(Image Pro or Scion Image software).<br />
A<br />
B<br />
Fig.1. A – example still images for newborn seahorse morphometric parameter measurement (1-<br />
seahorse inside plastic pipetteе located inside aquarium, 2 – scale on the surface of pipette); 1 B- scan<br />
received from drawing line which corresponds to seahorse body shape (1) and image of scale (2).<br />
1<br />
2<br />
2<br />
132
Chinchilla lanigera<br />
Order: Rodentia<br />
Suborder: Hystricomorpha<br />
Family: Chinchillidae<br />
Genus: Chinchilla<br />
Species: Ch. lanigera, Ch. Brevicaudata<br />
Status: Endangered, CITES I<br />
The following protocols were developed using the domestic chinchilla as a model.<br />
Dra. Marina F Ponzio<br />
Instituto de Fisiología<br />
Facultad de Ciencias Médicas<br />
Universidad Nacional de Córdoba<br />
Santa Rosa 1085 – X5000ESU<br />
Córdoba – Argentina<br />
(54)-0351-4332019<br />
mponzio@mater.fcm.unc.edu.ar<br />
SEMEN COLLECTION<br />
Semen can be obtained by electroejaculation with a probe designed in our laboratory (Ponce et al. 1998).<br />
Briefly, the chinchilla is placed in a box covering the cranial half of the body in the prone position. The<br />
caudal half rested on a metal grid, that also supported the semen collection tube. The tail is gently raised<br />
and, after cleaning the genital area, the prepuce is retracted, and the penis introduced into a 2 ml<br />
Eppendorf plastic tube. The collection tube contains 150 µl of modified Tyrodes medium in order to<br />
prevent coagulation of the sample. The bronze bipolar electrode (length 40 mm, diameter 4.2 mm) is<br />
lubricated with glycerin, inserted into the rectum to a depth of 20–30 mm and held in place by a<br />
technician. An alternating current (sinusoidal wave, 50 cycles/s) is applied for 5 of every 10 s (one<br />
pulse). The electrical potential across the poles of the electrode is controlled with a rheostat and<br />
measured with a voltimeter. The circuit is calibrated in advance using a known resister. Tree series of up<br />
to 5 pulses can be applied to each animal, yet one to 3 pulses were usually enough to produce the<br />
ejaculate. Together with the ejaculate, a white gel-like viscous plug was obtained, which was<br />
immediately discarded to prevent coagulation. All the materials coming in contact with the semen were<br />
kept at 37 C throughout the analysis. Using this technique in concious animals, 100% of the animals<br />
produce ejaculates. Anesthesia can be used, using ketamine (40 mg/kg body weight, i.m.; (Morgan et al.,<br />
1981), but ejaculates will be obtained in only 60% of the animals.<br />
SPERM INCUBATION MEDIA (MODIFIED TYRODES MEDIUM)<br />
Sperm obtained by electroejaculation or from epididimus (caudal section) can be incubated in a<br />
modified Tyrode‘s medium with the following composition (mM):<br />
CaCl2, 1.8; MgCl2, 0.929; KCl, 2.68; NaHCO3, 11.903; NaCl, 136.86; NaH2PO4, 0.287; glucose, 5.56;<br />
penicillin 0.5 mg/mL and streptomycin 0.075 mg/mL. pH 7.0–7.5; 270–290 mOsm.<br />
133
SPERM CAPACITATION<br />
To support sperm capacitation, the incubation media has to be supplemented with 3 mg/mL BSA<br />
fraction V (Sigma Chemical Co., St. Louis, MO, USA). Capacitation is reached after 4h of in vitro<br />
incubation at 37°C.<br />
EVALUATION OF SPERM FUNCTIONAL ACTIVITY<br />
Motility<br />
Can be evaluated in a Makler counting chamber (Makler 1980) (Sefi Medical Instruments, Haifa, Israel),<br />
placed over a thermostatized chamber to keep the sperm warm during the evaluation (37°C). Evaluations<br />
are made under inverted microscope at 200 X magnification (Olympus CK2, Tokyo, Japan). A drop of<br />
no more than 5-10 µl is sufficient for an even distributed cell layer. Results should be expressed as<br />
percentage of motile cells (progressive plus nonprogressive sperm).<br />
Viability<br />
It is assessed by supravital staining with Hoechst 33258 (1.5 µg/ml) (Yelian and Dukelow 1992)<br />
(Calbiochem, San Diego, CA, USA). Using the appropriate ultraviolet fluorescence optics, (Axiolab;<br />
Zeiss, Stuttgart, Germany) sperm having brightly blue fluorescent nuclei are scored as dead whereas<br />
those without fluorescence are scored as viable. No fewer than 200 cells should be assessed. Results are<br />
expressed as percentage of viable cells.<br />
H33258 Stock solution<br />
3 mg of H33258 in 1 ml of isotonic solution or DPBS, aliquot and store at -20 C.<br />
H33258 Assay solution<br />
10 µl stock solution + 990 µl modified Tyrodes medium, put this tube in the dark inside the incubator.<br />
For semen viability evaluation, 950 µl of semen are mixed with 50 µl of H33258 assay solution, kept for<br />
5 min in the incubator and then analized as described above.<br />
Response of sperm membranes to hypo-osmotic shock<br />
The procedure used was adapted according to Ruiz et al. (1996). An aliquot of the sperm suspensión<br />
(100 µl) are mixed with 1 ml of the hypo-osmotic solution (100 mOsm; 1 ml, pH 7.4) of fructose and<br />
sodium citrate in distilled water. After 45 min incubation (37°C), evaluations are made in a phasecontrast<br />
microscope at 400 x magnification, and the percentage of spermatozoa that showed tail swelling<br />
are determined. No fewer than 100 cells should be assessed. Results are expressed as percentage of<br />
swollen cells.<br />
Distilled water 500 ml + Sodium citrate 3.68 g + Fructose 6.76 g<br />
Acrosome reaction<br />
Double staining with Pisum sativum agglutinin labelled with fluorescein isothiocyanate (FITC-PSA) as<br />
described by Cross et al. (1986) with slight modifications. Briefly, after supravital staining, samples are<br />
washed out of unbound stain by centrifuging twice at low speed (400 rpm) for 10 min with 4–6 ml of<br />
isotonic solution; the supernatant is removed, and the final sperm pellet is resuspended in 200 µl isotonic<br />
solution. Smears are produced on glass slides and dried in an incubator at 40°C. Subsequently, they are<br />
fixed with pure methanol for 30 s. Slides are then washed with a stream of distilled water for 2 min.<br />
After slides are dried, spermatozoa are stained with 30 µg/ml FITC-PSA in DPBS (stock solution: 2<br />
mg/ml) for 30 min and washed again with a stream of distilled water for 2 min. Slides are evaluated at<br />
134
1000 x magnification in an epifluorescence microscope and the viability and acrosomal status of at least<br />
100 spermatozoa are assessed. Under blue wavelength, spermatozoa with brightly yellow fluorescents<br />
acrosomes are considered acrosome intact, whereas those with no fluorescence or only in the equatorial<br />
region are considered acrosome reacted. The filter is then changed to ultraviolet and each cell is<br />
additionally scored as viable or non-viable. The results are expressed as percentage of viable<br />
spermatozoa with intact acrosome, dead spermatozoa with intact acrosome, viable spermatozoa with<br />
reacted acrosome or dead spermatozoa with reacted acrosome.<br />
SPERM CRYOPRESERVATION<br />
Preparation of cryoprotective media<br />
The procedure and preparation of the cryoprotectant media is performed as previously reported by Ponce<br />
et al. (1998).<br />
A zwitterionic buffer system was prepared by titrating 325 mOsm/L TES (N-tris[Hydroxymethyl]<br />
methyl-2-aminoethanesulfonic acid) with 325 mOsm/L Tris to make the TEST solution. To prepare the<br />
cryobuffer, 48% (vol/vol) TEST, 30% sodium citrate, 20% egg yolk, and 2% fructose are mixed. The<br />
mixture then is centrifuged in an ultracentrifuge at 10.000 g for 10 min, and the supernatant is filtered<br />
through filter paper (Whatman I). Penicillin 0.15 mg/mL and streptomycin 0.25 mg/mL are then added<br />
and the pH (7.4-7.5) and osmolality of extenders measured. The cryobuffers are finally added with<br />
glycerol (TESTY-G) or ethylene glycol (TESTY-EG) at a 2 M concentration. Aliquots of the<br />
cryoprotectants can be stored at -20ºC for later use.<br />
The same media can be used to store in liquid nitrogen for indefinite periods of time, or to store the<br />
sperm upo to 72 h in the refrigerator (4°C).<br />
For 10 mL of each component<br />
Fructose 0,6 g 323 mOsm<br />
Tris 0,5 g<br />
405-335 mOsm<br />
Tes 1 g<br />
408-334 mOsm<br />
Sodium citrate 0,6 g 494-334 mOsm<br />
Measure Ph in all solutions (should be near 7)<br />
Mix Tes and Tris for the TEST solution until a Ph of 7 is reached<br />
To obain 20 ml of cryoprotectant media:<br />
TEST 9,6 ml<br />
Sodium citrate 6 ml<br />
Egg yolk 4 ml<br />
Fructose 0,4 ml<br />
Centrifuge, filter and add antibiotics. Mix with ethileneglycol or glicerol and store. Both<br />
cryoprotectants yield very similar sperm recovery rates.<br />
Add 8,5266 ml of cryoprotectant media with 1,4734 ml GLICEROL<br />
Add 8,8816 ml of cryoprotectant media with 1,1184 ETHILENE GLYCOL<br />
Spermatozoa freezing<br />
The sperm suspension is added drop by drop with the glycerol-based or the ethylene glycol-based<br />
cryoprotectant medium (1:1 dilution; 1 M final concentration of the cryoprotectants). The suspensions<br />
are gently shaken to achieve a complete semen-medium mixture. Plastic cryostraws (0.5 mL) are filled<br />
at room temperature with the obtained suspension, and heat sealed. Then they are slowly cooled at 4ºC<br />
at a rate of approximately 2 ºC/min. (measured with an analogical thermometer) in the refrigerator. After<br />
135
10 min, the cryostraws were exposed to -20ºC for 15 min in the freezer, and afterwards cooled by<br />
exposure to liquid nitrogen gas vapor (10 cm above the liquid nitrogen level of the tank) for 10 min; the<br />
cryostraws were finally immersed into liquid nitrogen (-196ºC), and stored. In order to avoid excessive<br />
temperature fluctuations, fast transfer was performed at all steps.<br />
The same cryopreservation media can be used to store spermatozoa at 4 C for up to 72 hs with very good<br />
sperm function recovery rates.<br />
Thawing procedure<br />
For thawing, straws are rapidly immersed in a water bath (37ºC) for 60 sec and wiped dry. Depending<br />
on its use, samples can be processed without removing the cryoprotectant media (the content of the<br />
straws was released directly into 500 l of Tyrode´s buffered medium) or, the cryoprotectant can be<br />
removed by flushing the sperm suspension into an Eppendorf tube with 500 l Dulbecco´s phosphatebuffer<br />
saline-2% (w/v) polyvinylpyrrolidone-40 (DPBS-PVP, pH 7.4, Sigma Chemical Co.) per straw.<br />
The sperm suspension is washed twice by centrifugation (100 g, 10 min). The precipitate is then<br />
resuspended in Tyrode´s medium and adjusted to a final sperm concentration as needed.<br />
136
Cortisol Enzyme Immunoassay Protocol<br />
Astrid Bellem 1 , Coralie Munro 2 and Nadja Wielebnowski 1<br />
1 Brookfield Zoo, Chicago and 2 U.C. Davis, California<br />
March 2004<br />
Protocol prepared by: Astrid Bellem<br />
Contact information for further details:<br />
asbellem@brookfieldzoo.org<br />
nawieleb@brookfieldzoo.org<br />
Publications using this protocol:<br />
1) Shepherdson DJ, Carlstead KC, Wielebnowski N. 2004. Cross-Institutional assessment of stress<br />
responses in zoo animals using longitudinal monitoring of faecal corticoids and behaviour.<br />
Animal Welfare 13:S105-113.<br />
Reagents<br />
Antibody (R4866) and horseradish peroxidase (HRP) enzyme label can be purchased from Coralie<br />
Munro at the Clinical Endocrinology Laboratory at UC Davis.<br />
Standards were prepared from ICN Cortisol (Cat. #194569) by dissolving 1.000g in 10.00mL 100%<br />
EtOH for the primary stock and diluting downward into assay buffer.<br />
The high control was prepared by spiking assay buffer with standard stock to read about 30% on the<br />
%binding scale on the standard curve.<br />
1. COATING BUFFER 1.59 g Na 2 CO 3 and 2.93 g NaHCO 3 per liter dH 2 O, pH to 9.6<br />
2. ASSAY BUFFER 195 mL Stock A (0.2M NaH 2 PO 4 ), 305 mL Stock B (0.2M Na 2 HPO 4 ), 8.7 g<br />
NaCl and 1.0 g BSA/L dH 2 O, pH to 7.0<br />
3. WASH SOLUTION CONCENTRATE (10X)<br />
87.7 g NaCl and 5.0 mL Tween 20/L dH 2 O dilute 10-fold for<br />
working wash solution<br />
4. SUBSTRATE BUFFER 9.61 g citric acid (anhydrous)/L dH 2 O, pH to 4.0<br />
5. ABTS STOCK (40 mM) 0.55 g ABTS (azino-bis-ethylbenzthiazoline<br />
sulfonic acid)/25mL dH 2 O<br />
6. PEROXIDE (0.5 M) 500 uL H2O2 (30% solution)/8mL dH 2 O<br />
EIA PROTOCOL<br />
1. Plate Coating 1.1 Use Nunc Maxisorb plates only<br />
137
1.2 Add 40 ul antibody stock (1:100, -20C) to 5 ml coating buffer (working<br />
dilution, 1:12500)<br />
1.3 Add 50 ul per well using an Eppendorf repeater pipette<br />
1.4 Do not coat column 1<br />
1.5 Tap plate gently to ensure that coating solution covers well bottom, being<br />
careful not to touch well bottoms at all times<br />
1.6 Cover tightly with a plate sealer to avoid evaporation and incubate overnight<br />
at 4C<br />
2. Standards 2.1 Standard values are 20, 10, 5, 2.5, 1.25, 0.625, 0.312, 0.156 and 0.078 ng/ml<br />
2.2 Dilute high standard (20 ng/ml, -20C) serially 2-fold using 200 ul standard<br />
and 200 ul assay buffer<br />
2.3 Use assay buffer as 0 standard<br />
3. Samples/Controls 3.1 Dilute samples in assay buffer to the appropriate dilution, according to<br />
linearity test<br />
3.2 Use control as is for high control and dilute 4-fold in assay buffer for low<br />
control, ie. 150 ul buffer + 50 ul high control<br />
4. HRP 4.1 Add 25 ul HRP stock (1:100, 4C) to 5 ml assay buffer (working dilution,<br />
1:20,000)<br />
4.2 Do not freeze diluted HRP<br />
5. Plate Washing 5.1 Wash the plate 5 times with wash solution using Dynex Ultrawash II<br />
5.2 Blot on paper towel to remove excess wash solution<br />
5.3 Do not allow coated plates to dry<br />
6. Plate Loading 6.1 Add 50 ul standard, sample or control to each well as quickly and accurately<br />
as possible, according to plate map<br />
6.2 Start at A2 and go down each column, pipetting samples and controls in<br />
duplicate<br />
6.3 Using Eppendorf repeater pipette, immediately add 50 ul per well diluted<br />
HRP, including wells A1 and B1 (blanks), being careful not to splash<br />
6.4 Cover plates tightly with plate sealer and incubate at RT (22˚C) for 1 hour<br />
7. Plate Washing 7.1 Wash the plate 5 times with wash solution<br />
7.2 Blot on paper towel to remove excess wash solution using plate washer<br />
7.3 Plates are relatively stable at this point and can be left upside<br />
down for up to an hour<br />
8. Substrate 8.1 Prepare ABTS substrate immediately before use<br />
8.2 Add 40 ul 0.5M H2O2 and 125 ul 40mM ABTS to 12.5 ml substrate buffer<br />
and mix well<br />
8.3 Add 100 ul substrate to all wells, including A1 and B1, with Eppendorf<br />
repeater pipette<br />
8.4 Cover tightly and incubate at RT for 30-60 minutes with shaking (Lab-line<br />
titerplate shaker)<br />
9. Plate Reading 9.1 Read at 405 nm (test filter 1, reference filter 4) on Dynex MRX Revelation<br />
9.2 Maximum OD should be about 1.0<br />
138