Download Manual - Tanita
Download Manual - Tanita
Download Manual - Tanita

You also want an ePaper? Increase the reach of your titles
YUMPU automatically turns print PDFs into web optimized ePapers that Google loves.
E<br />
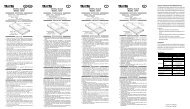
Multi-Frequency<br />
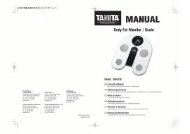
Body Composition Analyzer<br />
MC-180MA<br />
Instruction <strong>Manual</strong><br />
GB<br />
Please read this Instruction <strong>Manual</strong> carefully and keep it handy<br />
for future reference.<br />
Copyright © 2005 TANITA Corporation. All Rights Reserved.<br />
MC1807001(1)
GB<br />
Applications<br />
•This equipment can be used in the screening of<br />
certain adult diseases and conditions related to body<br />
weight and composition.<br />
•It can be used in the monitoring and prevention of<br />
conditions caused by excessive deposits of fat tissue<br />
such as diabetes, hyperlipidemia, cholelithiasis and<br />
fatty liver.<br />
•It can be used in the monitoring of changes in<br />
individuals‘ body composition related to differences in<br />
the ratio of fat tissue to lean.<br />
•It can be used to assess the effectiveness of<br />
individuals‘ nutrition and exercise programmers, both<br />
for health and physical fitness.<br />
Benefits<br />
Before use<br />
(safety precautions)<br />
How to use<br />
(cautions for safety)<br />
Contents<br />
Safety Notes ••••••••••••••••••••••••••••••••••••••• 4<br />
Instructions •••••••••••••••••••••••••••••••••••••••• 6<br />
•Explanation of terminology •••••••••••••••••••••••••••• 7<br />
Part names / Connection procedure ••••••••• 8<br />
•Using the touch panel ••••••••••••••••••••••••••••••••• 9<br />
Preparation •••••••••••••••••••••••••••••••••••••• 10<br />
Various settings ••••••••••••••••••••••••••••••••• 12<br />
How to measure •••••••••••••• 24<br />
When used as a body composition analyser<br />
••••••••••••••••••••••••••••••••••••• 24<br />
When used as scales •••••••••••••••••••••••••• 36<br />
Explanation of printouts •••••••••••••••••••••• 38<br />
Assessment criteria •••••••••••••••••••••••••••• 40<br />
GB<br />
1. This product is simple to use, and requires no<br />
specialized facilities or expertise to take<br />
measurements.<br />
2. Measurements can be taken quickly and easily,<br />
causing minimal inconvenience to the patient during<br />
measurments.<br />
When necessary<br />
(cautions for safety)<br />
Troubleshooting ••••••••••••••••••••••••••••••••• 42<br />
Connection to PC ••••••••••••••••••••••••••••••• 44<br />
Technical notes ••••••••••••••••••••••••••••••••• 52<br />
New Regression Formula<br />
for Basal Metabolic Rate (BMR •••••••••••• 58<br />
Product specifications ••••••••••••••••••••••••• 60<br />
MC-180MA<br />
2<br />
3
Safety Notes must be observed<br />
GB<br />
GB<br />
Before use<br />
(cautions for safety)<br />
These symbols are used to indicate safe and correct use of the equipment, and to prevent injury to users or<br />
damage to the product. Please review these symbols and their meanings before proceeding with this<br />
instruction manual.<br />
Warning<br />
Caution<br />
This symbol indicates details of<br />
any prohibitions.<br />
This symbol indicates the possibility of death or serious injury if the product is<br />
mishandled or instructions are ignored.<br />
This symbol indicates the possibility of physical injury or equipment damage if<br />
instructions are ignored.<br />
This symbol indicates details of any compulsory<br />
measures.<br />
Place the equipment on a stable and<br />
level surface.<br />
Compulsory<br />
Caution<br />
Do not jump on the equipment.<br />
Prohibited<br />
Do not lean on the equipment.<br />
Prohibited<br />
Before use<br />
(cautions for safety)<br />
The power cord must be connected to<br />
a 3-pin plug (with an earth terminal).<br />
Compulsory<br />
Warning<br />
Individuals fitted with electronic<br />
medical devices,<br />
such as pacemakers,<br />
must not use this product.<br />
Prohibited<br />
Do not attempt to disassemble or<br />
remodel this product.<br />
Prohibited<br />
Failure to do so may result in injury due<br />
to the individual stumbling over, or<br />
measurement may not be possible.<br />
Such action may result in injury due to<br />
the indivdual stumbling over.<br />
•Do not insert your finger into any gaps or holes in this equipment.<br />
Such action may result in injury.<br />
Such action may result in injury due to<br />
the indivdual stumbling over.<br />
•Clean the electrode panels and their peripheries with alcohol before measurement.<br />
Failure to do so may result in the spread of contagious disease, because the equipment comes into contact<br />
with bare hands and feet.<br />
Failure to do so may result in an electric<br />
shock or leakage.<br />
Do not handle the plug with a wet<br />
hand.<br />
This product passes a very small electrical<br />
current through the body, which may<br />
cause such electronic medical devices to<br />
operate erroneously, with possibly<br />
serious consequences.<br />
Do not connect too many plugs to a<br />
single socket.<br />
Such action may result in electric shock or<br />
injury, and may impair the products<br />
accuracy.<br />
Touch panel<br />
•Before use, ensure that this equipment does not interfere electromagnetically with other<br />
electronic devices that are susceptible to electromagnetic interference.<br />
This equipment is designated a Class B IT equipment (mainly for systems intended to be used in domestic<br />
environments) and CE (EMC), but weak equipment may be affected.<br />
•When it is moved;<br />
• Remove the power cord from the main unit.<br />
Failure to do so may result in damage.<br />
Prohibited<br />
Prohibited<br />
Handle for moving<br />
4<br />
Such action may result in electric shock,<br />
fire, or leakage.<br />
Such action may result in fire.<br />
•Do not attempt to assess the analysis results or to base an<br />
exercise routine on them by yourself.<br />
Always heed to your doctor’s or qualified expert’s advice.<br />
•Physically disabled persons should not attempt to take<br />
measurements alone, but should have their caretakers<br />
assist them in using the device.<br />
•Distance from water<br />
Do not use this product near a water supply or in any other place<br />
where it may become wet. The product is liable to fail or produce<br />
erroneous readings if wet.<br />
Electrode panels<br />
(x 8)<br />
• Grip the handle for moving at the top, tilt the unit<br />
until the adjusteble foot are off the floor, and wheel<br />
it along on the casters.<br />
Do not attempt to pick the unit up, as such action may<br />
result in a back injury.<br />
•Touch panel<br />
•Avoid any impact on the panel<br />
Such action may result in injury if the panel is broken,<br />
as it is made of glass.<br />
• Do not leave water droplets for prolonged periods.<br />
Prolonged exposure to water may result in deformation,<br />
color change, staining or blistering.<br />
• Do not operate with a pointed object.<br />
Such action may result in failure.<br />
Casters (x 2)<br />
Adjusteble foot (x 4)<br />
Feet must be screwed<br />
upwards into the base while<br />
moving.<br />
5
Instructions<br />
GB<br />
GB<br />
Before use<br />
(cautions for safety)<br />
Do not take measurements<br />
immediately after strenuous<br />
exercise.<br />
For correct measurement<br />
Do not take measurements in areas<br />
subject to significant temperature<br />
changes.<br />
Do not attempt to take measurements<br />
after excessive consumption of either<br />
food or drink, or while dehydrated.<br />
Installation<br />
For accurate measurements<br />
This product is precisely manufactured and accurately calibrated. Please observe the following instructions to ensure best results.<br />
• Do not position in direct sunlight, in areas subject to airflow directly from an air conditioner, or near a heater.<br />
• Do not position in locations subject to significant temperature fluctuation.<br />
• Do not position in locations subject to high humidity or near a water supply.<br />
• Do not position on surfaces subject to strong vibration.<br />
• Do not position in close proximity to stored chemicals, or where gas is generated.<br />
Before use<br />
(cautions for safety)<br />
Prohibited<br />
The results may be erroneous. Please<br />
ensure that the individual being<br />
measured is sufficiently rested first.<br />
Prohibited<br />
The results may be erroneous. In the<br />
event of the product being moved<br />
somewhere with a temperature<br />
difference of 20˚C or more, do not use<br />
for at least 2 hours after such a<br />
relocation.<br />
Prohibited<br />
Measurements are significantly affected<br />
by changes in bodily water volume and<br />
body temperature. It is therefore<br />
recommended that measurements be<br />
taken after going to the toilet, and<br />
ideally measurements should be taken at<br />
the same time every day under the same<br />
conditions.<br />
• Do not use this equipment near other products that emit electromagnetic waves.<br />
Erroneous operation is possible as a result of interference with certain lighting equipment, medical instruments, and communications<br />
equipment (such as inverter fluorescent lighting, microwave therapy devices, and mobile<br />
phones), so these factors should be checked before use.<br />
Handling<br />
Storage<br />
Clean-up<br />
• Do not wash with water.<br />
• Avoid subjecting the equipment to excessive shock or vibration.<br />
• Do not unplug the power cord by pulling on the cord.<br />
• When it is not to be used for a prolonged period, turn off the power, and unplug the power cord.<br />
• Do not store on a surface subject to strong vibration.<br />
• Do not store in locations subject to high humidity or dust.<br />
• Do not store in locations subject to temperatures outside its storage range.<br />
• When it has not been used for a long time, confirm it can be operated correctly and safely before use.<br />
• Cover the main unit to prevent it from becoming dirty.<br />
•Do not wipe the equipment with hot water, benzene.<br />
Please use a damp cloth or a neutral detergent to clean the equipment, and wipe it dry with a dry cloth immediately<br />
afterwards.<br />
• Bare feet should be placed correctly on the electrode panel for<br />
measurement.<br />
Incorrect positioning may result in a lower fat % than is actually the case, or an error<br />
message may be shown.<br />
Feet should be positioned on the heel and toe electrodes on each side in roughly equal<br />
proportions as indicated in the illustration on the right.<br />
• Place arms straight down during measurement.<br />
Other positions may induce a lower than actual fat %, or an error message may be shown.<br />
• As far as possible, you should try to take measurements under the same conditions<br />
each day in order to determine any fluctuations.<br />
Otherwise, errors may be observed in the measured value. In order to enhance overall accuracy,<br />
measurements should be taken at the same time every day, but not during the three hours after getting<br />
up in the morning, or three hours after meals.<br />
• Clean any dust or dirt from the palms and soles of the feet before measurement.<br />
Such contaminants may induce a lower than actual fat %, or an error message may be shown.<br />
• Avoid contact between the arms and torso, and between the inner thighs.<br />
Such contact may induce a lower than actual fat %, or an error message may be shown. If they come<br />
into contact because the measurement is being taken while naked or partially naked, a dry towel or<br />
similar should be used as a barrier during measurement.<br />
<br />
<br />
Explanation of terminology<br />
This equipment and the attached instruction manual use expressions including terminology sited in the NAWI directive.<br />
Please review the following terminology explanations before use.<br />
• Max (Maximum capacity)<br />
This shows the maximum weight that can be measured by the scale.<br />
[Example] In the case of “Max = 270 kg”, it can be used to measure an individual up to 270 kg.<br />
* Individuals exceeding the weight capacity cannot be measured.<br />
•e(Minimum graduation)<br />
This shows the amount of one scale mark (graduation). In the case of a digital display, this shows the numeric interval value.<br />
[Example] In the case of e = 0.05 kg”, the display increases or decreases in intervals of 0.05 kg.<br />
•PT<br />
To measure the body weight more accurately, the “Preset Tare Deduction” function automatically subtracts the pre-input weight of the<br />
clothes (TARE). The pre-input weight of the clothes is called “Preset Tare” (PT).<br />
<br />
Temperature Range for Use : 5°C / 35°C<br />
Relative Humidity : 30% / 80%<br />
<br />
Monitoring any fluctuations is recommended for reference for the following types of<br />
people.<br />
• Patients undergoing artificial dialysis or with swellings<br />
Temperature Range of Environment : -10°C / 50°C<br />
Range of Relative Humidity : 10% / 90% (without condensation)<br />
To prevent malfunction, do not store the equipment in direct sunlight or subject it to significant changes in<br />
temperature. Do not store in damp or dusty areas, near a fire or where the equipment may be subject to vibration or<br />
shock.<br />
6<br />
Method of abandoning product<br />
• When disposing of this unit, please do so in accordance with the prevailing regulations in each country.<br />
<br />
Value Range<br />
Model Name MC-180MA<br />
Voltage Range 230VAC<br />
Frequency Range 50 / 60Hz<br />
Electric Current Range 2.5A<br />
<br />
On<br />
Caution<br />
Refer to the attached<br />
notes.<br />
Off<br />
Input,<br />
Output<br />
Conformity with<br />
Medical Device<br />
Directive 93/42/EEC<br />
Type BF<br />
applied<br />
part<br />
Clothes<br />
Weight<br />
Setting<br />
Class I<br />
equipment<br />
Alternating<br />
current<br />
7
Part names / Connection procedure<br />
GB<br />
Before use<br />
(cautions for safety)<br />
Check accessories<br />
• Power cord x 1 • Allen wrench x 1<br />
(to assemble the<br />
column)<br />
• Main unit cover x 1<br />
(for storage)<br />
• Dropper x 1<br />
( page 42)<br />
• Instruction manual (this book)<br />
• Hexagon socket<br />
setscrews / washers x 2<br />
each (to assemble the<br />
column)<br />
Checking the level<br />
Handle for moving<br />
(back)<br />
Left handgrip<br />
Right handgrip<br />
Touch panel<br />
ON<br />
OFF<br />
Power switch<br />
USB<br />
Back<br />
RS-232C<br />
Caution<br />
Printer cable<br />
connection<br />
Computer Connection<br />
• We do not supply computers. If connecting a computer,<br />
please ensure that it is IEC60601-1 (EN60601-1)<br />
compliant, or follow the IEC60601-1-1 (EN60601-1-1)<br />
environment settings for products that conform to<br />
IEC60950 (EN60950).<br />
• Before using the USB port, read “Connection to PC”<br />
( page 58).<br />
Printer Connection (optional)<br />
• We do not supply printers. Please select one that is<br />
IEC60601-1 (EN60601-1) compliant, or follow the<br />
IEC60601-1-1 (EN60601-1-1) setting conditions for<br />
products that conform to IEC60950 (EN60950).<br />
• The installation manual provided with the printer must<br />
be read before setting up the printer.<br />
Using the touch panel<br />
After turning on the power, follow the procedure<br />
below.<br />
•Operation<br />
•Measurement<br />
eSelect measurement mode (body composition<br />
analyzer / weight only (i.e. scales)).<br />
•Setting<br />
e Press Set<br />
Mode setting<br />
buttons<br />
Used to change<br />
each function<br />
setting.<br />
Maintenance mode<br />
button<br />
cannot be used by<br />
general customers<br />
<br />
Cancel button<br />
Used to cancel a<br />
setting.<br />
GB<br />
Before use<br />
(cautions for safety)<br />
•For accurate measurement, position the scale to be<br />
as level as possible.<br />
•Rotate the four height-adjustable foot so that the air<br />
bubble in the level gauge is perfectly centered.<br />
Level gauge<br />
Next button<br />
Used to display the<br />
next setting screen.<br />
black ring<br />
air bubble<br />
Status when the level gauge is viewed from above<br />
Power cord<br />
connection<br />
AC 230V<br />
50/60 Hz<br />
Toe electrodes<br />
Heel electrodes<br />
Back button<br />
Used to return to<br />
the previous screen.<br />
Enter button<br />
Used to set the<br />
input information.<br />
Adjustable foot<br />
(x 4)<br />
Measuring platform<br />
Clear button<br />
Used to correct the<br />
input.<br />
8<br />
9
Preparation<br />
Setting up the main unit<br />
GB<br />
GB<br />
Before use<br />
(cautions for safety)<br />
1<br />
Check<br />
Request<br />
•Please allow the retail sales staff to open the package and assemble the main unit.<br />
the top and bottom of the<br />
box and remove the main unit.<br />
Warning<br />
•The main unit is very heavy and should<br />
therefore be taken out by two or more<br />
people. Attempting to do this alone may<br />
result in serious injury.<br />
4<br />
black ring<br />
Rotate the height-adjustable<br />
feet (at the four corners) to<br />
level the unit, and confirm that<br />
the air bubble in the level<br />
gauge is dead center.<br />
Before use<br />
(cautions for safety)<br />
2<br />
3<br />
Note<br />
•Unlocking the column to lay it flat<br />
Press the tab just below the moving edge to<br />
release the lock lever, and then gently lower the<br />
column.<br />
Positioning the column upright.<br />
Raise the column until the lever clicks to indicate<br />
it is in a locked position.<br />
•During assembly,<br />
be careful not to<br />
insert or trap a<br />
finger, foot or<br />
suchlike in the<br />
movable part of<br />
the column. Such<br />
action may result<br />
in serious injury.<br />
Lock lever<br />
Warning<br />
Secure the column and<br />
measuring platform tightly<br />
using the included screws and<br />
washers.<br />
Warning<br />
•During assembly, hold the column firmly to<br />
prevent it toppling over, and use the Allen<br />
button supplied to tighten up the screws.<br />
10 11<br />
5<br />
6<br />
Turn<br />
air bubble<br />
Status when the level gauge is viewed from above<br />
ON<br />
OFF<br />
Connect the power cord.<br />
Warning<br />
•The power cord must be connected to a 3-pin plug (with earth<br />
terminal).<br />
Failure to do so may result in an electric shock or leakage.<br />
s<br />
Note<br />
•If an “Error” message is shown;<br />
Refer to “Troubleshooting” ( page 42) for details.<br />
on the power.<br />
The screen counts down from “99999”, “88888”,<br />
“77777” to “00000” before displaying the initial<br />
screen.<br />
<br />
s<br />
s
Various settings How to set<br />
GB<br />
GB<br />
•Check: Is the procedure as per page 12 complete?<br />
Before use<br />
(cautions for safety)<br />
1<br />
Turn on the power<br />
•The initial screen is displayed.<br />
Activating the setting screen<br />
ON<br />
3<br />
On the “Setting item selection” screen,<br />
press<br />
1<br />
Setting the date and time<br />
(Date and Time)<br />
•The input screen for “Set Date, Time and Year” is displayed.<br />
(The default setting when shipped is as per the screen in the<br />
right.)<br />
Before use<br />
(cautions for safety)<br />
ON<br />
OFF<br />
OFF<br />
Back<br />
4<br />
Input<br />
the current date and time<br />
•Input the year, month, date, and time (hours and minutes) in sequential two-digit format as<br />
indicated.<br />
Example: To input 9:47 a.m. on January 21st, 2006;<br />
2<br />
Press<br />
Set<br />
9:47 a.m., January 21, 2006<br />
1<br />
2<br />
1<br />
2<br />
0<br />
6<br />
0<br />
9<br />
4<br />
7<br />
(Initial screen)<br />
Press the (Set button).<br />
Month: 12 Date: 12 Year: 2006<br />
Use the 24-hour clock.<br />
e.g. 6 p.m. would be input as 1 8 0 0 .<br />
Notes<br />
•“Setting item selection”<br />
screen is displayed.<br />
1<br />
Register the date and time. ( page 13)<br />
•Input 0 first in the case of single-digit numbers (0~9)<br />
•To erase erroneous input,<br />
ePress Clear (Input data is deleted.)<br />
•To terminate the input process,<br />
ePress Cancel (Returns to the “Setting item selection” screen without changing the date and time.)<br />
•After inputting the item displayed,<br />
ePress Next (The next input item is selected.)<br />
(Setting item selection screen)<br />
2<br />
3<br />
4<br />
5<br />
6<br />
7<br />
8<br />
Setting the measurement mode. ( page 14)<br />
Setting of screen display items. ( page 15)<br />
Setting up the printer. ( page 16)<br />
Setting up of print items. ( page 18)<br />
Adjust printing position. ( page 19)<br />
Setting the communication details. ( page 20)<br />
Setting the touch panel. ( page 21)<br />
5<br />
Press<br />
Enter after all items have been input<br />
•Returns to the “Setting item selection” screen.<br />
Notes<br />
•To return to the previous item,<br />
ePress Before .<br />
12<br />
: After setting, press Back to return to the initial<br />
screen.<br />
Notes<br />
•The clock function is backed up by rechargeable batteries, but if it is not used for a prolonged<br />
period (two weeks or more), the setting is cleared naturally as the rechargeable batteries<br />
discharge, so this must be reset. (Charging time: 5 hours or more)<br />
•When various settings are performed in sequence, •Once all settings have been made,<br />
ePress each number to be set.<br />
ePress Back on the “Setting item<br />
•Set details are retained until next modified.<br />
selection” screen. (Returns to the initial screen.)<br />
13
Various settings How to set (continued)<br />
GB<br />
GB<br />
•Check: Is the procedure as per page 12 complete?<br />
•Check: Is the procedure as per page 12 complete?<br />
Before use<br />
(cautions for safety)<br />
14<br />
Power switch<br />
(back)<br />
“Athletic”<br />
•It is recommended to select<br />
“Athletic” for individuals aged 18<br />
or more who consider themselves<br />
to be athletes or to whom the<br />
following conditions apply, and<br />
to use measured values for<br />
reference.<br />
•People who do 12 or more<br />
hours of training (exercise) a<br />
week<br />
•Members of gymnastics or sports<br />
organizations aiming to<br />
participate competitively<br />
•People such as bodybuilders who<br />
undergo training to build up<br />
muscles<br />
•Sports professionals<br />
Setting the measurement mode (continued from page 12)<br />
3<br />
4<br />
Press<br />
On the “Setting item selection” screen,<br />
(1) Press 2 (Measurement mode)<br />
•The “Measurement mode<br />
selection” screen is displayed.<br />
(The default setting when<br />
shipped is shown as the<br />
following screen.)<br />
(2) Select functions<br />
•Athletic selection e Decide whether or not to select<br />
“Athletic” on the screen as the “Body Type”.( page 28)<br />
•Unit to input height e Input and output units can be<br />
switched between millimetres and centimeters.<br />
•Decide whether or not an ID number is to be input. Any ID<br />
number that is input is displayed, printed and output serially<br />
together with measurement results.<br />
Serial ID: Specify : [Check before measurement] to enable input of the<br />
ID number. The input ID number is automatically increased serially after<br />
each measurement.<br />
ID : The ID number input screen is shown after measuring the weight (or<br />
immediately after that if skipped). If [Check before measurement] it is<br />
specified, the ID number can be changed. It does not increase serially<br />
after measurement, and the next user must input their ID.<br />
•Stand-by screen<br />
eSelect whether or not the stand-by screen display<br />
function is to be activated or not. When ON is<br />
selected, the stand-by screen is displayed for five minutes<br />
after the last operation while the measuring platform is<br />
clear.<br />
Enter<br />
•Returns to the “Setting item selection” screen. ( page 12)<br />
•When various settings are performed in sequence,<br />
ePress each number to be set.<br />
•Set details are retained until next modified.<br />
Notes<br />
•To terminate the input process,<br />
ePress Cancel . (Returns to<br />
the “Setting item selection”<br />
screen without changing any<br />
details that have been set.)<br />
indicates current selection,<br />
and indicates alternative<br />
options.<br />
Setting of screen display items (continued from page 12)<br />
3<br />
On<br />
4<br />
Press<br />
the “Setting item<br />
selection” screen:<br />
(1) Press 3<br />
(Display item)<br />
•The “Display item selection<br />
– Body composition<br />
analyzer (1)” screen is<br />
displayed. (The default<br />
setting when shipped is as<br />
per the screen in the<br />
right.)<br />
(2) Select items to<br />
be displayed<br />
•Pressing the or<br />
mark beside each item<br />
switches the selection.<br />
* Items marked with an are not displayed on the screen<br />
for measurement results ( page 31) or the screen for<br />
whole body details ( page 32).<br />
•To terminate the input process,<br />
ePress Cancel (Returns to the “Setting item<br />
selection” screen without changing any items to be<br />
displayed on the screen.)<br />
•To terminate the input process,<br />
ePress Cancel (Returns to the “Setting item selection”<br />
screen without changing the date and time.)<br />
•To re-input the previous item,<br />
ePress Back (The previous input item is selected.)<br />
Notes<br />
Enter<br />
d<br />
Press<br />
•Returns to the “Setting item selection” screen.<br />
( page 12)<br />
Next<br />
•Once all settings have been made,<br />
ePress Back on the “Setting item selection” screen. (Returns to<br />
the initial screen.)<br />
Before use<br />
(cautions for safety)<br />
15
Various settings How to set (continued)<br />
GB<br />
GB<br />
Before use<br />
(cautions for safety)<br />
•Check: Is the procedure as per page 12 complete?<br />
Setting up the printer (continued from page 12)<br />
3<br />
On the “Setting item<br />
selection” screen:<br />
(1) Press<br />
4<br />
(printer)<br />
•The “Printer Setting” screen<br />
is displayed. (The default<br />
setting when shipped is<br />
shown as the following screen.)<br />
Printer Connection Example<br />
(2)<br />
ON<br />
OFF<br />
(4)<br />
Before use<br />
(cautions for safety)<br />
(2) Setting of external printer<br />
operation<br />
• indicates current selection, and indicates<br />
alternative options.<br />
(1)<br />
(3)<br />
(5)<br />
Power switch<br />
(back)<br />
(3) Setting of automatic printing after<br />
measurement<br />
• indicates current selection, and indicates<br />
alternative options.<br />
* While OFF is selected, a printout is issued only when Print is pressed<br />
on the “Measurement results” screen.<br />
* If the external printer operation is turned OFF , nothing is printed even<br />
if 1sheet or 2sheets is selected.<br />
(4) Set to automatically end after<br />
printing<br />
• indicates current selection, and indicates<br />
alternative options.<br />
* When in ON mode, the “Measurement preparation” screen will<br />
automatically appear only when 1sheet or 2sheets is specified for<br />
automatic printing after measurement; the “Measurement preparation”<br />
screen will appear automatically when printing finishes.<br />
* When in OFF mode, the "Measurement preparation" screen will<br />
appear only when the Quit button is pressed.<br />
(1) Turn on the power on the main unit.<br />
(2)On the “Setting item selection” screen ( page 12), select “ 4 Printer”,<br />
press printer operation ON , and the number of sheets to print 1sheet (or<br />
2sheets ).<br />
(3) Prepare operation of the printer.<br />
* Refer to the manual provided with the printer. (Check ink settings and operation, etc.)<br />
* Printing is not possible until at least 10 seconds after the printer has been turned on.<br />
(4) Connect the attached printer cable as per the above illustration.<br />
(5) Set the dedicated printing forms.<br />
* Insert from the top of the printing form when setting. (Refer to the following illustration.)<br />
Form insertion direction<br />
s<br />
Press 4<br />
4<br />
Press<br />
Enter<br />
•Returns to the “Setting item selection” screen.<br />
( page 12)<br />
16<br />
•When various settings are performed in sequence,<br />
ePress each number to be set.<br />
•Set details are retained until next modified.<br />
•Once all settings have been made,<br />
ePress Back on the “Setting item selection” screen. (Returns to<br />
the initial screen.)<br />
d<br />
• The ink lamp starts to flash once the ink<br />
volume falls below a level sufficient to print<br />
another 100 forms. (It is recommended that<br />
the ink be replaced as soon as possible after<br />
the lamp starts flashing.)<br />
17
Various settings How to set (continued)<br />
GB<br />
GB<br />
•Check: Is the procedure as per page 12 complete?<br />
•Check: Is the procedure as per page 12 complete?<br />
Before use<br />
(cautions for safety)<br />
Setting up of print items (continued from page 12)<br />
3<br />
On the “Setting item<br />
selection” screen:<br />
(1) Press 5<br />
(Printing item)<br />
•The “Printing item setting –<br />
Body composition analyzer<br />
(1)” screen is displayed.<br />
(The default setting when<br />
shipped is as per the<br />
screen in the right.)<br />
s<br />
Press Next<br />
3<br />
Adjust printing position (continued from page 12)<br />
On the “Setting item selection” screen:<br />
(1) Press 6 (Print position selection)<br />
•The “Adjust printing position” screen is displayed. (The default<br />
setting when shipped is as per the screen in the right.)<br />
(2) Adjust the printing position<br />
•The printing position can be adjusted in the direction indicated by the arrow in 0.1mm increments.<br />
(Adjustable range: ±10.0)<br />
Before use<br />
(cautions for safety)<br />
Power switch<br />
(back)<br />
(2) Select items to<br />
be printed.<br />
•Pressing the or<br />
mark beside each item<br />
switches the selection.<br />
Notes<br />
•To terminate the input process,<br />
ePress Cancel (Returns to the “Setting item<br />
selection” screen without changing any items to be<br />
displayed on the screen.)<br />
•To re-input the previous item,<br />
ePress Back (Returns to the "Printing item selection<br />
(1)" screen without changing the print items.)<br />
Notes<br />
Cross mark<br />
•To confirm the printing position,<br />
ePress Test Print .<br />
Adjust so that the printing position<br />
adjustment mark on the form and<br />
cross mark for printing are perfectly<br />
aligned. ( pages 38 and 39)<br />
•To return the printing position to its initial status,<br />
ePress Clear (Returns all numeric values to 0.0.)<br />
•To terminate the input process,<br />
ePress Cancel (Returns to the “Setting item selection” screen without changing the printing<br />
position.)<br />
•To confirm the printing position,<br />
ePress Enter (Returns to the “Setting item selection” screen.)<br />
4<br />
Press<br />
Enter .<br />
•Returns to the “Setting item selection” screen.<br />
( page 12)<br />
4<br />
Press<br />
Enter<br />
•Returns to the “Setting item selection” screen. ( page 12)<br />
•When various settings are performed in sequence,<br />
ePress each number to be set.<br />
•Set details are retained until next modified.<br />
•Once all settings have been made,<br />
ePress Back on the “Setting item selection” screen. (Returns to the initial screen.)<br />
18 19
Various settings How to set (continued)<br />
GB<br />
GB<br />
•Check: Is the procedure as per page 12 complete?<br />
•Check: Is the procedure as per page 12 complete?<br />
Before use<br />
(cautions for safety)<br />
Setting the communication details (continued from page 12)<br />
3<br />
On the “Setting item<br />
selection” screen:<br />
(1) Press 7<br />
(Communication<br />
Selection)<br />
•The “Communication<br />
selection” screen is<br />
displayed. (The default setting when shipped is as per the<br />
screen in the right.)<br />
3<br />
Setting the touch panel (continued from page 12)<br />
On the “Setting item selection” screen:<br />
(1) Press 8 (Touch panel)<br />
•The “Touch Panel Selection” screen is displayed. (The default setting<br />
when shipped is shown as the following screen.)<br />
Before use<br />
(cautions for safety)<br />
(2) Select a communication port<br />
• indicates current selection, and indicates<br />
alternative options.<br />
(3) Select a flow control<br />
• indicates current selection, and indicates<br />
alternative options.<br />
(4) Select a baud rate<br />
• indicates current selection, and indicates<br />
alternative options.<br />
(2) Select the touch panel (Brightness) setting<br />
•The touch panel darkens with each touch of the Dark button, and brightens with each<br />
touch of the Bright button.<br />
Notes<br />
•To terminate the input process,<br />
ePress Cancel (Returns to the “Setting item selection” screen without changing any function<br />
items.)<br />
Power switch<br />
(back)<br />
4<br />
•To terminate the input process,<br />
ePress Cancel (Returns to the “Setting item<br />
selection” screen without changing any function<br />
items.)<br />
•Select USB or RS-232C, Hardware, and 9600 to use the<br />
dedicated application supplied. ( the attached CD-<br />
ROM manual.)<br />
•When an application other than that supplied is used,<br />
change the settings to suit the software.<br />
Press<br />
Notes<br />
Enter<br />
•Returns to the “Setting item selection” screen.<br />
( page 12)<br />
4<br />
Press<br />
Enter<br />
•Returns to the “Setting item selection” screen. ( page 12)<br />
•When various settings are performed in sequence,<br />
ePress each number to be set.<br />
•Set details are retained until next modified.<br />
•Once all settings have been made,<br />
ePress Back on the “Setting item selection” screen. (Returns to the initial screen.)<br />
20<br />
21
Various settings How to set (continued)<br />
GB<br />
GB<br />
•Check: Is the procedure as per page 12 complete?<br />
Before use<br />
(cautions for safety)<br />
2<br />
Input the clothes weight (PT)<br />
On the initial screen:<br />
Press<br />
Clothes<br />
•The “Clothes weight (PT)<br />
input” screen is displayed.<br />
(The default setting when<br />
shipped is as per the screen<br />
in the right.)<br />
Input the clothes<br />
weight (PT)<br />
Press buttons 0 ~<br />
9 to input clothes<br />
weight.<br />
* The clothes weight (PT) that is<br />
input is memorized, even<br />
when the power is turned<br />
off.<br />
s<br />
Notes<br />
•The input range for clothes weight (PT) is 0.00 ~ 10.00 kg.<br />
•Scale interval for this equipment is 50 g (0.05 kg). The value input for the second decimal place is<br />
automatically modified as follows.<br />
Input value 0 1 2 3 4 5 6 7 8 9<br />
Displayed<br />
value<br />
0<br />
•To erase erroneous input,<br />
ePress Clear (Input data is deleted.)<br />
•To re-input the previous item,<br />
ePress Back (Settings remain unchanged.)<br />
5<br />
0<br />
(Rounded up)<br />
Before use<br />
(cautions for safety)<br />
•When , , or<br />
is pressed, the<br />
respective value is directly<br />
input, and automatically<br />
returns to the initial screen.<br />
Power switch<br />
(back)<br />
3<br />
Press<br />
Enter<br />
•Returns to the initial screen.<br />
•Set details are retained until next modified.<br />
22<br />
23
How to measure When used as a body composition analyser<br />
GB<br />
GB<br />
Flowchart for body composition analysis<br />
How to use<br />
(cautions for safety)<br />
Select “Body<br />
composition analyser”.<br />
Input of personal data<br />
Measurement of body<br />
composition<br />
How to use<br />
(cautions for safety)<br />
Measurement<br />
of weight<br />
Page 27: Step 1<br />
s<br />
s<br />
Check measurement<br />
results<br />
Page 27: Step 3<br />
s<br />
s<br />
s<br />
Preparing for weight<br />
measurement<br />
When<br />
Skip<br />
is pressed;<br />
s<br />
Measurement<br />
of weight<br />
s<br />
Page 31: Step 12<br />
~<br />
Page 31: Step 13<br />
Page 27: Step 2<br />
s<br />
Page 27: Step 4<br />
~<br />
Page 30: Step 9<br />
Page 27: Step 3<br />
Page 30: Step 10~11<br />
24<br />
25
How to measure When used as a body composition analyser (continued)<br />
GB<br />
GB<br />
How to use<br />
(cautions for safety)<br />
“Athletic”<br />
•It is recommended to select “Athletic” should be<br />
selected by individuals aged 18 or over who<br />
consider themselves to be athletes or to whom<br />
the following conditions apply. Measured values<br />
should be used for reference.<br />
•People who do 12 or more hours of training<br />
(exercise) a week<br />
•Members of gymnastics or sports organizations<br />
aiming to participate competitively<br />
•People such as bodybuilders who undergo<br />
training to build up muscles<br />
•Sports professionals<br />
Instructions<br />
•Posture for measurement<br />
•Stand barefoot on the electrode panels with feet<br />
parallel.<br />
•Let arms hang naturally.<br />
•Do not bend knees or elbows, and face forwards.<br />
•Do not lean on the main unit.<br />
•Input age range is 5 ~ 99 years old.<br />
Input 99 for centenarians.<br />
Notes<br />
•For athletic individuals, the impedance<br />
used for measurement fluctuates<br />
significantly before and after competition<br />
or after hard training, so body<br />
composition calculated under such<br />
circumstances also changes, and accurate<br />
measurement may not be possible in<br />
some cases.<br />
•Even when athletic mode is selected for<br />
body type, individuals aged 17 or<br />
younger automatically revert to the<br />
standard setting.<br />
•When the clothes weight is input, weight<br />
after deducting the weight of the clothes<br />
(i.e. net weight) is shown as the<br />
measured results.<br />
•When the measuring platform is clear and<br />
operation is suspended for five minutes,<br />
the stand-by screen is displayed.<br />
e.g.)<br />
ON<br />
OFF<br />
Back<br />
Power switch<br />
1<br />
2<br />
3<br />
<br />
s<br />
Turn on the power, and Press<br />
(Body composition analyser)<br />
The “Weight Measurement – Now preparing”<br />
screen is displayed.<br />
Please wait a while without stepping on the measuring platform.<br />
Notes<br />
•When data is input under “Input the clothes weight (PT)” segment, “Tare<br />
weighing” is displayed.<br />
•When Skip is pressed, the screen advances to “ID input” (or<br />
“Gender selection”) ( page 28). (After inputting all items, weight<br />
measurement and body composition analysis are performed<br />
continuously.)<br />
•When Back is pressed, returns to the screen for “Weight<br />
Measurement – Now preparing”.<br />
Step on the measuring platform, and weigh<br />
yourself.<br />
The value displayed is net, i.e. with the registered weight of the clothes<br />
deducted.<br />
Once the scale measures more than 1.00 kg, and the reading steadies, it<br />
automatically advances to the “ID input” (or “Gender selection”) screen.<br />
Notes<br />
•When data is input under “Input the clothes weight (PT)” segment, “Tare<br />
weighing” is displayed.<br />
Press Clothes (PT) to change the setting details. ( page 23 “Input<br />
the clothes weight (PT).”<br />
•When Skip is pressed, the screen advances to “ID input” (or<br />
“Gender selection”) ( page 28). (After inputting all items, weight<br />
measurement and body composition analysis are performed<br />
continuously.)<br />
•When Back is pressed, the screen returns to “Weight Measurement -<br />
Now preparing”.<br />
How to use<br />
(cautions for safety)<br />
26<br />
27
How to measure When used as a body composition analyser (continued)<br />
GB<br />
GB<br />
How to use<br />
(cautions for safety)<br />
4<br />
5<br />
6<br />
s<br />
<br />
Input the ID number<br />
(In cases where the ID is selected on the “Measurement Mode Setting”<br />
screen)<br />
Input by pressing 0 ~ 9 .<br />
After input, press [Enter] and it automatically advances to the “Select<br />
Gender” screen.<br />
Notes<br />
•ID numbers can be input in the range from 1~9999999999.<br />
•To erase erroneous input,<br />
ePress Clear (Input data is deleted.)<br />
•When Back is pressed, screen returns to “Weight Measurement –<br />
Now preparing”.<br />
Select gender<br />
Select or by pressing the relevant button.<br />
After input, automatically advances to “Select Body Type”.<br />
Notes<br />
•When Back is pressed, returns to the “ID input” screen (or “Weight<br />
Measurement – Now preparing” is displayed).<br />
Select body type<br />
Select by pressing or .<br />
After input, automatically advances to the “Your Age?” screen.<br />
Notes<br />
•When Back is pressed, returns to the “Select Gender” screen.<br />
•When Quit is pressed, returns to the “Weight Measurement – Now<br />
preparing” screen, ( page 27)<br />
•When is pressed, the “Help (explanation)” screen is displayed.<br />
* When “Athletic selection” is deactivated, this screen is not displayed, and<br />
instead advances to the “Age input” screen. ( page 14 “Setting of<br />
measurement modes”.)<br />
7<br />
8<br />
s s<br />
In the case of input units:<br />
0.1 cm (millimetre units)<br />
Input age<br />
Input by pressing 0 ~ 9 .<br />
After input, when Enter is pressed, automatically advances to the<br />
“Height input” screen.<br />
Notes<br />
•-Age input range is 6 ~ 99 years old.<br />
•When a single digit age (5~9) is input,<br />
ePress Enter after input.<br />
•To erase erroneous input,<br />
ePress Clear . (Input data is deleted.)<br />
•When Back is pressed, returns to the “Select Body Type” screen.<br />
*Only returns to the “Select Body Type” screen when “Athletic” has been<br />
selected under “Setting of measurement modes” ( page 14).<br />
•When Quit is pressed, returns to the “Weight Measurement – Now<br />
preparing” screen, ( page 27)<br />
After input of numeric data, automatically advances to the “Your Height?”<br />
screen if no more data is input for five seconds.<br />
Input the height<br />
Input by pressing 0 ~ 9 .<br />
After input, when Enter is pressed, automatically advances to the<br />
“Data Chack” screen.<br />
Notes<br />
•The height input range is 90.0 ~ 249.9 cm.<br />
•Settings under “Input height unit” ( page 14) are reflected as the<br />
input unit.<br />
•After input of integral numbers, if no more data is input for five seconds,<br />
automatically returns to the “Confirm input details” screen. (0 is<br />
automatically shown after the decimal point.)<br />
•To erase erroneous input,<br />
ePress Clear (Input data is deleted.)<br />
•When Back is pressed, returns to the “Age input” screen.<br />
•When Quit is pressed, returns to the “Weight Measurement – Now<br />
preparing” screen, ( page 27)<br />
How to use<br />
(cautions for safety)<br />
28<br />
29
How to measure When used as a body composition analyser (continued)<br />
GB<br />
GB<br />
How to use<br />
(cautions for safety)<br />
9<br />
In<br />
10<br />
11<br />
<br />
<br />
the case of 18 year-old<br />
older with ID<br />
or<br />
In the case when “Athletic” is<br />
not selected or 17 year-old<br />
or younger without ID<br />
<br />
Hold the handgrips lightly, and let the<br />
arms hang down naturally.<br />
Notes<br />
Confirm input details<br />
s<br />
Feet should be positioned<br />
on the heel and toe<br />
electrodes on each side in<br />
roughly equal proportions<br />
as indicated in the<br />
following illustration.<br />
<br />
<br />
•When Back is pressed, returns to the “Data Chack” screen.<br />
•When Quit is pressed, returns to the “Weight Measurement – Now preparing”<br />
screen, ( page 27)<br />
(1) (2) (3)<br />
s s<br />
After confirmation, if setting (input) details are correct, press<br />
measurement to start the measurement.<br />
Notes<br />
Start<br />
•To change or correct input details,<br />
ePress Change for the item to be changed or corrected.<br />
On each screen, when Enter is pressed after input, the input<br />
data is changed/corrected, and the screen returns to “Confirm input<br />
details”. When Back is pressed, the screen returns to “Confirm<br />
input details” without changing the input data.<br />
* No. (ID number) is not displayed when “OFF” is specified under “Setting of<br />
measurement modes” ( page 14).<br />
* No. (ID number) is sed at “0000000001” after the power is turned on. After it is<br />
changed, the new value will be sed. (10 digits)<br />
*1 is automatically added to the No. (ID number) per measurement. (Maximum<br />
9999999999)<br />
* When “Athletic” is not selected (Refer to “Setting of measurement modes” ( page<br />
14)) or in the case of 17 year-old or younger, the body type cannot be changed.<br />
Correct<br />
measurement<br />
posture<br />
12<br />
13<br />
Sample values for<br />
18 year-old or older<br />
Button to display details<br />
Sample values for<br />
17 year-old or younger<br />
Button to display details<br />
Measurement completed.<br />
Replace both handgrips.<br />
Notes<br />
•The external printer operates in accordance with the input details under<br />
“Setting up the printer” ( page 16).<br />
* This screen is not displayed when printer operation is set to OFF , or<br />
automatic printing after measurement is set to OFF under “Setting up<br />
the printer” ( page 16).<br />
Display measurement results<br />
Notes<br />
•Data is automatically output from the output port in accordance with the<br />
communication setting as per page 20. ( page 48 for output details.)<br />
•When Print is pressed, the external printer operates in accordance<br />
with the details set under “Setting up the printer” ( page 16).<br />
* When OFF is selected for printer operation, this button is not<br />
displayed.<br />
*When ON is selected for automatic ending after printing, it<br />
automatically returns to the “Weight Measurement – Now<br />
preparing” screen ( page 27) once printing is complete.<br />
•When the button to display details is pressed, the information details are<br />
displayed. ( page 32.)<br />
•If OFF is specified for automatic ending after printing under “Setting up<br />
the printer”, when Quit is pressed, items other than the input<br />
clothes weight (PT) and ID number are cleared, and it returns to the<br />
“Weight measurement – Now preparing” screen ( page 27). When<br />
ON is specified, it automatically returns to the “Weight Measurement –<br />
Now preparing” screen ( page 27).<br />
How to use<br />
(cautions for safety)<br />
s<br />
(4) (5) Measurements for (1)whole<br />
body, (2)left arm, (3)left leg,<br />
s<br />
(4)right arm, and (5)right leg,<br />
are performed in that order.<br />
30<br />
Notes<br />
•When Back is pressed, returns to the “Confirm input details” screen.<br />
•When Quit is pressed, returns to the “Weight Measurement – Now preparing”<br />
screen, ( page 27)<br />
31
How to measure When used as a body composition analyser (continued)<br />
GB<br />
GB<br />
Measurement result details screen for an 18 year-old or older (Example)<br />
How to use<br />
(cautions for safety)<br />
Display of the standard range<br />
Displays the standard range of fat %.<br />
A blue dot blinks at one-second intervals to<br />
indicate the current value. ( pages 40 and<br />
41.)<br />
Display of comprehensive fat % details per<br />
segment<br />
Fat % measurement results are displayed per segment on the chart.<br />
How to use<br />
(cautions for safety)<br />
<br />
<br />
Display details of the body type assessment<br />
Body type assessment table comprising fat % and muscle mass is displayed. A<br />
red dot blinks at one-second intervals to indicate the current value.<br />
Display of muscle mass details per segment<br />
Muscle mass measurement results are displayed per segment.<br />
Colours are categorised into the following three types depending on<br />
assessment results.<br />
[Example] Less (–4 ~ –2): Light blue<br />
Normal (-1 ~ +1): Light green<br />
More (+2 ~ +4): Orange<br />
Display of comprehensive muscle mass per<br />
segment<br />
Measurement results of muscle mass are displayed per segment on the chart.<br />
When “OFF” is selected for<br />
ID number input<br />
When “ON” is selected for<br />
ID number input<br />
When “Athletic” is selected<br />
Whole body details<br />
Measurement results for the whole body are displayed in detail.<br />
Notes<br />
•When “Athletic” is selected, standard weight and obesity level results are not<br />
displayed.<br />
Display of fat % details per segment<br />
Measurement results of fat % per segment are displayed.<br />
Colours are categorised into the following three types depending on<br />
assessment results.<br />
[Example] Less (–4 ~ –2): Light blue<br />
Normal (-1 ~ +1): Light green<br />
More (+2 ~ +4): Orange<br />
Display of BMR assessment details<br />
Assessment results of BMR data are displayed. (<br />
Formula for Basal Metabolic Rate (BMR)”.)<br />
[Example] Less (1~6): Light blue<br />
Normal (7~10): Purple<br />
More (11~16): Red<br />
page 57 “New Regression<br />
Notes<br />
•When the button to display details is pressed, all information details are displayed.<br />
•When is pressed, returns to the “Measurement results” screen ( page 31).<br />
Back<br />
•When<br />
is pressed, the “Help (explanation)” screen is displayed.<br />
32<br />
33
How to measure When used as a body composition analyser (continued)<br />
GB<br />
GB<br />
How to use<br />
(cautions for safety)<br />
Measurement result details screen for an 18 year-old or older (Example)<br />
Screen for measurement results details for a 17 year-old or younger (Example)<br />
Display of the whole body details<br />
Measurement results of the whole body are displayed in detail.<br />
How to use<br />
(cautions for safety)<br />
Example of visceral fat rating<br />
measurement results<br />
Example of visceral fat rating<br />
assessment results<br />
Display of visceral fat rating and assessment<br />
details<br />
Visceral fat rating measurement results and assessment results are displayed<br />
in detail. ( page 40 “Assessment criteria”.)<br />
Result : Displays measurement results.<br />
Rating : Displays assessment results.<br />
Display of total body water details<br />
Total body water measurement results and assessment results are displayed<br />
on the chart. ( page 53 “Assessment criteria”.)<br />
Display of details per segment<br />
Measurement results per segment are displayed.<br />
Example of total body water<br />
measurement results<br />
Example for a boy<br />
Example for a girl<br />
Display of standard range for fat %<br />
Standard range for fat % is displayed.<br />
A blinking blue dot indicates the current value.<br />
Notes<br />
•When the button to display details is pressed, all information details are displayed.<br />
•When is pressed, returns to the “Measurement results” screen ( page 31).<br />
Back<br />
•When<br />
is pressed, the “Help (explanation)” screen is displayed.<br />
34<br />
35
How to measure<br />
When used as scales<br />
GB<br />
GB<br />
How to measure weight<br />
How to use<br />
(cautions for safety)<br />
(Initial screen)<br />
Power switch<br />
(Back)<br />
1<br />
Turn on power and<br />
press (Scales)<br />
(After displaying “88888 kg”, it reverts to<br />
“0.00 kg”.)<br />
Notes<br />
• If it does not read “0.00 kg” when the scales are clear,<br />
e Press ZeroReset to recalibrate to “0.00 kg”.<br />
* Zero Reset cannot be used while “Tare” is specified.<br />
• To change the clothes weight,<br />
e Press PresetTare ( page 23.)<br />
Input values are displayed negatively.<br />
• To return to the previous screen,<br />
e Press Back<br />
How to use<br />
(cautions for safety)<br />
2<br />
Input ID number<br />
(When ID is selected on the<br />
“Measurement mode setting” screen)<br />
Input by pressing 0 ~ 9 . After<br />
input, when Enter is pressed, it<br />
automatically advances to the “Scale<br />
operation” screen.<br />
Notes<br />
• ID numbers can be input in the range<br />
from 1~9999999999.<br />
• To erase erroneous input,<br />
e Press Clear (Input data is deleted.)<br />
• When Back is pressed, it returns to<br />
the initial screen.<br />
s<br />
<br />
3<br />
Step on the measuring platform<br />
• Weight is displayed.<br />
• Once the reading steadies, data is output from the output port.<br />
Notes<br />
• The external printer operates in accordance with the details set<br />
under “Setting up the printer” ( page 16).<br />
4<br />
Display<br />
measurement results<br />
( pages 50 ~ 51)<br />
Upon stepping off the measuring platform, returns to the “ID input”<br />
(or initial) screen.<br />
<br />
<br />
<br />
Weight :Body weight<br />
PT : Clothes Weight (PT)<br />
36<br />
37
Explanation of printouts<br />
GB<br />
GB<br />
How to use<br />
(cautions for safety)<br />
Whole body data<br />
Weight : Measured weight. Values based on BMI of 22 being defined as standard weight.<br />
Fat % : Indicates fat ratio of the weight.<br />
Fat mass : Indicates fat mass of the body.<br />
FFM : Weight of non-fat components (i.e. muscle, water, bone, etc.).<br />
Muscle mass :Indicates constituent mass other than fat and bone mineral. Muscle mass displayed by this equipment is the value<br />
including skeletal muscles, plain muscle (i.e. internal organs, etc.) and TBW.<br />
TBW : Indicates amount of total body water and is composed of blood, lymph fluid, intercellular fluid, intracellular fluid, etc.<br />
BMI : Calculated as weight (kg) divided by height squared (m) 2 . “22” is considered the optimum value, i.e. least susceptible to<br />
illness.<br />
Bone Mass : Indicates bone mineral level of all bones.<br />
* Standard values are for standard mode. These standard values should only be used as reference for athletic types. For 17 year-old or younger, only the fat % is<br />
displayed as the standard value. Muscle mass, TBW, and bone mass values should be used for reference.<br />
How to use<br />
(cautions for safety)<br />
<br />
<br />
Body type assessment based on fat % and muscle mass<br />
Body type is comprehensively assessed in accordance with the fat % and muscle mass.<br />
* Fat % only is displayed for 17 year-old or younger.<br />
Total Body Water (TBW)<br />
Indicates the amount of water included in the body, for example, blood, lymph fluid, intercellular fluids, intracellular fluids, etc. Body<br />
water functions to transport nutrition, collect waste products, and maintain your body temperature at a certain level. Appropriate fat<br />
% ranges are about 55~ 65% for male and 45~60% for female.<br />
<br />
<br />
<br />
<br />
ECW/TBW<br />
Body water can be roughly classified as intercellular and intracellular fluids, but the ratio differs depending on each person. It is known<br />
that this ratio is dependent on body composition rate, and obese individuals tend to have more intracellular fluid.<br />
* Not displayed for 17 year-old or younger.<br />
Visceral fat rating<br />
Visceral fat indicates the fat in the internal abdominal cavity and is not easily analysed visually. It can be used for health control by<br />
checking changes in long-term visceral fat ratings.<br />
* Not displayed for 17 year-old or younger.<br />
<br />
<br />
BMR/BMR analysis<br />
This equipment shows BMR categorized under three levels, namely : less, normal and more relative to average BMR values and<br />
statistical distribution per age group.<br />
* Not displayed for 17 year-old or younger.<br />
Segmental analysis<br />
Fat and muscle segmental analysis. Proportion and muscle training results can be confirmed figuratively. Fat content on the trunk,<br />
which is considered to be closely associated with lifestyle-related diseases, can easily be checked.<br />
* Graphs showing comparisons with the average are not displayed for 17 year-old or younger.<br />
<br />
Muscle mass balance<br />
Muscle mass balance between the left and right arms and legs is compared and analyzed. Loss of balance may indicate abnormal<br />
body function.<br />
* Graphs showing comparisons with the average are not displayed for 17 year-old or younger.<br />
<br />
<br />
<br />
Body fat ranges<br />
The amount of fat in the trunk is divided by the lower legs value. Which part of the body (upper or lower segment) contains more fat<br />
can be assessed. As the fat ratio around the abdomen increases, so does this value.<br />
* Not displayed for 17 year-old or younger.<br />
Other information<br />
Reactance/resistance data is displayed. (Analysis results do not affect assessment.)<br />
•Measurement results for scale mode are printed in this segment.<br />
•In the case of 17 year-old or younger, the Rohrer index *** is printed. (*** changes in accordance with the measurement results.)<br />
Printing position adjustment mark<br />
Adjust the position so that the mark on the form and cross symbol align exactly. ( page 19.)<br />
38<br />
39
Assessment criteria<br />
GB<br />
GB<br />
How to use<br />
(cautions for safety)<br />
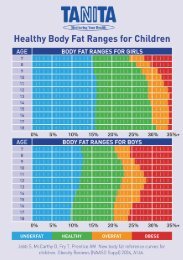
Assessment criteria based on fat % (targeted at 5 year-old or older) (Whole body)<br />
changes or increasing exercise.<br />
Source : Data from Columbia University (New York) & <strong>Tanita</strong> Institute (Tokyo)<br />
Note:<br />
•Even if you have a low body fat rate, you may have a high visceral fat level.<br />
•For medical diagnosis, consult your GP.<br />
• WHAT IS BONE MASS?<br />
This feature indicates the amount of bone (bone mineral level, calcium or other minerals) in the<br />
body.<br />
Research has shown that exercise and the development of muscle tissue are related to stronger, healthier bones.<br />
While bone structure is unlikely to make noticeable changes in a short period, it is important that you develop<br />
and maintain healthy bones by having a balanced diet and plenty of exercise. People worried about bone<br />
disease should consult their GP. People who suffer from osteoporosis or low bone densities due to advanced<br />
age, young age, pregnancy, hormonal treatment or other causes, may not get accurate estimates of their bone<br />
mass.<br />
How to use<br />
(cautions for safety)<br />
Below is the result of estimated bone masses of persons aged 20 to 40, who are said to have the largest<br />
amounts of bone masses, by weight. (Source : <strong>Tanita</strong> Body Weight Science Institute)<br />
Please use the charts below as a guide to compare your bone mass reading.<br />
Women : Average of estimated bone mass (kg)<br />
Weight<br />
Less than 50 kg<br />
1.95 kg<br />
50 kg – 75 kg<br />
2.40 kg<br />
75 kg and over<br />
2.95 kg<br />
Men : Average of estimated bone mass (kg)<br />
Weight<br />
Less than 65 kg<br />
2.66 kg<br />
65 kg – 95 kg<br />
3.29 kg<br />
95 kg and over<br />
3.69 kg<br />
Healthy Range Indicator<br />
Underfat : below the healthy body fat range. Increased risk for health problems.<br />
Healthy : within the healthy body fat percentage range for your age/gender.<br />
Overfat : above the healthy range. Increased risk for health problems.<br />
Obese : high above the healthy body fat range.<br />
Greatly increased risk of obesity-related health problems.<br />
• WHAT IS VISCERAL FAT RATING?<br />
This feature indicates the rating of visceral fat in your body.<br />
Visceral fat is the fat that is in the internal abdominal cavity, surrounding the vital organs in the trunk (abdominal)<br />
area. Research shows that, even if your weight and body fat remain constant, the distribution of fat changes as<br />
you get older and is more likely to shift to the trunk area - especially post menopause. Ensuring you have<br />
healthy levels of visceral fat may reduce the risk of certain diseases such as heart disease, high blood pressure,<br />
and the onset of type 2 diabetes.<br />
The <strong>Tanita</strong> Body Composition Monitor will provide you with a visceral fat rating from 1 – 59.<br />
Note:<br />
•Persons described below may obtain varying readings and should take the values given for reference purposes<br />
only.<br />
- Elderly persons - Women during or after menopause<br />
- People receiving hormone therapy<br />
•“Estimated bone mass” is a value estimated statistically based on its correlation with the fat-free amount (tissues<br />
other than fat). "Estimated bone mass" does not give a direct judgement on the hardness or strength of the<br />
bones or the risks of bone fractures. If you have concerns about your bones, it is recommended that you<br />
consult a specialist.<br />
• WHAT IS MUSCLE MASS?<br />
This feature indicates the weight of muscle in your body. The muscle mass displayed includes the skeletal<br />
muscles, smooth muscles (such as cardiac and digestive muscles) and the water contained in these muscles.<br />
Muscles play an important role as they act as an engine in consuming energy. As your muscle mass Increases,<br />
your energy consumption increases, thus helping you to reduce excess body fat levels and lose weight in a<br />
healthy way.<br />
Rating from 1 – 12<br />
Indicates you have a healthy level of visceral fat. Continue monitoring your rating to ensure that it stays within<br />
the healthy range.<br />
40<br />
Rating from 13 – 59<br />
Indicates you have an excess level of visceral fat. Consider making changes in your lifestyle, possibly through diet<br />
41
GB<br />
Troubleshooting<br />
•Check the following before requesting repair.<br />
GB<br />
Problem<br />
Solution<br />
Problem<br />
Solution<br />
When necessary<br />
(cautions for safety)<br />
How to<br />
measure<br />
Error with impedance<br />
measurement<br />
Error with zeroing<br />
•Hold the handgrips and electrodes firmly with<br />
fingers and palms.<br />
•Stand barefoot on the platform for measurement.<br />
•If the soles of the feet are dry, use the attached<br />
dropper to drip about 0.5 ml of water before<br />
measurement.<br />
•Reconfirm the input details.<br />
•Turn off the power and remove anything on the<br />
platform, then turn on the power and try<br />
measuring again.<br />
Printer<br />
Printer paper is exhausted<br />
No paper is output<br />
Ink is exhausted<br />
•Printer paper is not provided.<br />
eSupply paper, and press the button for printer<br />
paper.<br />
eWhen the printer is not being used, press<br />
and turn off power to the printer.<br />
Cancel<br />
Confirm the setting.<br />
•Is printer operation set to OFF under “Setting<br />
up the printer”?<br />
ePress ON . ( page 16)<br />
•The printer may have failed.<br />
eContact the retailer from whom the<br />
equipment was purchased.<br />
•No ink in the printer.<br />
eReplace the ink cartridge.<br />
eWhen the printer is not being used, press<br />
and turn off power to the printer.<br />
Cancel<br />
When necessary<br />
(cautions for safety)<br />
Weight value does not<br />
stabilise.<br />
•Is the equipment placed on a vibrating surface?<br />
Is the measuring platform tilted?<br />
eLevel the platform. ( page 10)<br />
•Is something blocking the gap in the measuring<br />
platform?<br />
eRemove any inserted objects.<br />
Paper outputs without<br />
printing<br />
•Is “X” specified against items to be printed under<br />
“Setting of print items”?<br />
eSwitch to . ( page 18)<br />
eContact the retailer from whom the<br />
equipment was purchased.<br />
Display<br />
Nothing is displayed<br />
even when the power is<br />
turned on.<br />
Touch panel screen<br />
appears dark.<br />
•Confirm that the power is connected correctly.<br />
( page 11)<br />
•Backlight failure. Contact the retailer from whom<br />
the equipment was purchased.<br />
Printer error<br />
•Problems with the printer.<br />
eSort out any paper jam and restart the printer.<br />
eWhen the printer is not being used, press<br />
and turn off power to the printer.<br />
Cancel<br />
“------” is displayed.<br />
•The weight to be measured exceeds the<br />
weighing capacity.<br />
42 43
Connection to PC<br />
GB<br />
GB<br />
When necessary<br />
(cautions for safety)<br />
•Specifications<br />
Communications standard<br />
Communications method<br />
Signal speed<br />
Data bit length<br />
Parity<br />
Stop bit<br />
Flow control<br />
Terminator<br />
EIA RS-232C compatible<br />
Asynchronous transaction<br />
4800/9600/19200 baud<br />
8 bits<br />
None<br />
1 bit<br />
None / Hardware / XON / XOFF<br />
CR+LF<br />
•Transmission data<br />
Transmission data will be output immediately after measurement regardless of the status of the personal computer<br />
or other device at the receiving end. Accordingly, the personal computer or other receiving device must be ready<br />
to receive data before measurement.<br />
•When used under PC mode, download and check the attached “PC mode communication specifications” from<br />
the TANITA homepage.<br />
* PC mode refers to the mode in which you can send personal data from the PC side and receive the<br />
measurement results.<br />
(1) Output data format<br />
Measurement data is output in the following format :<br />
•All data is divided by commas (,).<br />
•The terminator (end of the data) is signified by CR (ASCII code 0DH) and LF (ASCII code 0AH).<br />
When necessary<br />
(cautions for safety)<br />
Notes<br />
•An RS-232C connector (D sub 9-pin female) and USB connector (B-type 4-pin female) are located on the<br />
back of the main unit.<br />
•To connect to a PC, select the communication port under “Setting communication details” ( page 20),<br />
and use an appropriate connection cable.<br />
•Please provide your own cables as necessary as none are included.<br />
RS-232C : Straight D sub 9-pin (male) – D sub 9-pin (female)<br />
USB : A-type 4-pin (male) – B-type 4-pin (male)<br />
* Compatible with both USB 1.1 and 2.0.<br />
USB cable<br />
D sub 9-pin female<br />
Caution<br />
•When communicating via the USB port, a USB driver must be installed on the PC. Refer to<br />
“USB driver installation” in the CD-ROM manual supplied for details.<br />
44<br />
45
GB<br />
GB<br />
(2) Output data items<br />
When necessary<br />
(cautions for safety)<br />
Name of item Header Format Output data Body composition analyser<br />
Segmental error<br />
Scales<br />
Adult Athletic Child<br />
(Not output for X)<br />
Control data {0 Fix to 16<br />
1~5 bytes variable<br />
1 1 1 1<br />
Control data ~0 Fix to 1<br />
1~5 bytes variable<br />
2<br />
2 2 2<br />
Control data ~1 Fix to 1<br />
1~5 bytes variable<br />
3 3 3<br />
Control data ~2 Fix to 1<br />
1~5 bytes variable<br />
4 4 4<br />
Model MO "XXXXXX"<br />
8 bytes fixed (“MC-180”) (“MC-190”)<br />
5 5 5 3<br />
ID number ID "XXXXXXXXXX"<br />
12 bytes fixed (in the case of no input, “000000000”)<br />
6 6 6 4<br />
Status<br />
St<br />
0 or 1<br />
1 byte fixed (0: No error; 1: Segmental error)<br />
7 7 7<br />
Date<br />
Da "dd/mm/yyyy"<br />
12 bytes fixed (dd: Date; mm: Month; yyyy: Year)<br />
8 8 8 5<br />
Time<br />
TI "hh:mm"<br />
7 bytes fixed (hh: Hours; mm: Minutes)<br />
9 9 9 6<br />
Body type Bt<br />
0, 2<br />
1 byte fixed (0: Standard; 2: Athletic)<br />
10 10 10<br />
Gender GE 1 or 2<br />
1 byte fixed (1: Male; 2: Female)<br />
11 11 11<br />
Age<br />
AG<br />
XX<br />
1~2 bytes variable (unit: Year-old; right aligned)<br />
12 12 12<br />
Height Hm XXX.X<br />
4~5 bytes variable, up to 1 decimal place (unit: cm)<br />
13 13 13<br />
Clothes weight (PT) Pt<br />
XX.XX<br />
4~5 byte variable, up to 2 decimal places (unit: kg)<br />
14 14 14 7<br />
Weight Wk XXX.XX (XXX.X) 4~6 bytes variable, 2 decimal places up to 200.00, and 1 decimal place from 200.1 (unit: kg)<br />
15 15 15 8<br />
Fat % FW<br />
XX.X<br />
3~4 bytes variable, up to 1 decimal place (unit: %)<br />
16 16 16<br />
Fat mass fW XXX.XX (XXX.X) 4~6 bytes variable, 2 decimal places up to 200.00, and 1 decimal place from 200.1 (unit: kg)<br />
17 17 17<br />
FFM MW XXX.XX (XXX.X) 4~6 bytes variable, 2 decimal places up to 200.00, and 1 decimal place from 200.1 (unit: kg)<br />
18 18 18<br />
Muscle mass mW XXX.XX (XXX.X) 4~6 bytes variable, 2 decimal places up to 200.00, and 1 decimal place from 200.1 (unit: kg)<br />
19 19 19<br />
Whole body muscle mass score sW -44<br />
1~2 bytes variable<br />
20 20<br />
Bone mass bW XXX.XX<br />
4~6 bytes variable, up to 2 decimal places (unit: kg)<br />
21 21 20<br />
TBW (Total body water) wW XXX.XX (XXX.X) 4~6 bytes variable, 2 decimal places up to 200.00, and 1 decimal place from 200.1 (unit: kg)<br />
22 22 21<br />
Body water rate ww XXX.X<br />
3~5 bytes variable, up to 1 decimal place (unit: %)<br />
23 23 22<br />
ICW (Intercellular Water) wI XXX.XX<br />
4~6 bytes variable (unit: kg)<br />
24 24<br />
ECW (Extracellular Water) wO XXX.XX<br />
4~6 bytes variable (unit: kg)<br />
25 25<br />
ECW / TBW wo XXX.XX (XXX.X)<br />
3~5 bytes variable, up to 1 decimal place (unit: %)<br />
26 26<br />
BMI<br />
MI XXX.X<br />
3~5 bytes variable, up to 1 decimal place<br />
27 27 23<br />
Standard weight Sw XXX.XX<br />
4~6 bytes variable, up to 2 decimal places (unit: kg)<br />
28<br />
Obesity OV XXX.X<br />
3~5 bytes variable, up to 1 decimal place (unit: %)<br />
29<br />
Visceral fat rating IF<br />
159<br />
1~2 bytes variable<br />
30 28 –<br />
BMR<br />
rB<br />
XXXX<br />
1~4 bytes variable (unit: kcal)<br />
31 29 24<br />
BMR<br />
rb XXXXX<br />
1~5 bytes variable (unit: J)<br />
32 30 25<br />
Basal metabolism analysis<br />
Rohrer index<br />
rJ<br />
RO<br />
116<br />
XXXX<br />
1~2 bytes variable<br />
2~4 bytes variable<br />
33 31<br />
26<br />
Fat % FR<br />
XX.X<br />
3~4 bytes variable, up to 1 decimal place (unit: %)<br />
34 32 27 –<br />
Fat mass fR XXX.XX (XXX.X) 4~6 bytes variable, 2 decimal places up to 200.00, and 1 decimal place from 200.1 (unit: kg)<br />
35 33 28 –<br />
Right FFM MR XXX.XX (XXX.X) 4~6 bytes variable, 2 decimal places up to 200.00, and 1 decimal place from 200.1 (unit: kg)<br />
36 34 29 –<br />
leg Muscle mass mR XXX.XX (XXX.X) 4~6 bytes variable, 2 decimal places up to 200.00, and 1 decimal place from 200.1 (unit: kg)<br />
37 35 30 –<br />
Fat % score SR<br />
-44<br />
1~2 bytes variable<br />
38 36 –<br />
Muscle mass score sR<br />
-44<br />
1~2 bytes variable<br />
39 37 –<br />
Output order<br />
When necessary<br />
(cautions for safety)<br />
*1, *2: 17 year-old or younger<br />
*3: If error occurs when segmental data is calculated, data is not output for the items indicated “X”.<br />
46<br />
47
GB<br />
GB<br />
When necessary<br />
(cautions for safety)<br />
Output order<br />
Name of item Header Format Output data Body composition analyser<br />
Segmental error<br />
Scales<br />
Adult Athletic Child<br />
(Not output for X)<br />
Fat % FL<br />
XX.X<br />
3~4 bytes variable, up to 1 decimal place (unit: %)<br />
40 38 31 –<br />
Fat mass fL XXX.XX (XXX.X) 4~6 bytes variable, 2 decimal places up to 200.00, and 1 decimal place from 200.1 (unit: kg)<br />
41<br />
39 32 –<br />
Left FFM ML XXX.XX (XXX.X) 4~6 bytes variable, 2 decimal places up to 200.00, and 1 decimal place from 200.1 (unit: kg)<br />
42 40 33 –<br />
leg Muscle mass mL XXX.XX (XXX.X) 4~6 bytes variable, 2 decimal places up to 200.00, and 1 decimal place from 200.1 (unit: kg)<br />
43 41 34 –<br />
Fat % score SL<br />
-44<br />
1~2 bytes variable<br />
44 42 –<br />
Muscle mass score sL<br />
-44<br />
1~2 bytes variable<br />
45 43 –<br />
Fat % Fr<br />
XX.X<br />
3~4 bytes variable, up to 1 decimal place (unit: %)<br />
46 44 35 –<br />
Fat mass fr XXX.XX (XXX.X) 4~6 bytes variable, 2 decimal places up to 200.00, and 1 decimal place from 200.1 (unit: kg)<br />
47 45 36 –<br />
Right FFM Mr XXX.XX (XXX.X) 4~6 bytes variable, 2 decimal places up to 200.00, and 1 decimal place from 200.1 (unit: kg)<br />
48 46 37 –<br />
arm Muscle mass mr XXX.XX (XXX.X) 4~6 bytes variable, 2 decimal places up to 200.00, and 1 decimal place from 200.1 (unit: kg)<br />
49 47 38 –<br />
Fat % score Sr<br />
-44<br />
1~2 bytes variable<br />
50 48 –<br />
Muscle mass score sr<br />
-44<br />
1~2 bytes variable<br />
51 49 –<br />
Fat % Fl<br />
XX.X<br />
3~4 bytes variable, up to 1 decimal place (unit: %)<br />
52 50 39 –<br />
Fat mass fl XXX.XX (XXX.X) 4~6 bytes variable, 2 decimal places up to 200.00, and 1 decimal place from 200.1 (unit: kg)<br />
53 51 40 –<br />
Left FFM Ml XXX.XX (XXX.X) 4~6 bytes variable, 2 decimal places up to 200.00, and 1 decimal place from 200.1 (unit: kg)<br />
54 52 41 –<br />
arm Muscle mass ml XXX.XX (XXX.X) 4~6 bytes variable, 2 decimal places up to 200.00, and 1 decimal place from 200.1 (unit: kg)<br />
55 53 42 –<br />
Fat % score Sl<br />
-44<br />
1~2 bytes variable<br />
56 54 –<br />
Muscle mass score sl<br />
-44<br />
1~2 bytes variable<br />
57 55 –<br />
Fat % FT<br />
XX.X<br />
3~4 bytes variable, up to 1 decimal place (unit: %)<br />
58 56 43 –<br />
Fat mass fT XXX.XX (XXX.X) 4~6 bytes variable, 2 decimal places up to 200.00, and 1 decimal place from 200.1 (unit: kg)<br />
59 57 44 –<br />
Trunk<br />
FFM MT XXX.XX (XXX.X) 4~6 bytes variable, 2 decimal places up to 200.00, and 1 decimal place from 200.1 (unit: kg)<br />
60 58 45 –<br />
Muscle mass mT XXX.XX (XXX.X) 4~6 bytes variable, 2 decimal places up to 200.00, and 1 decimal place from 200.1 (unit: kg)<br />
61 59 46 –<br />
Fat % score ST<br />
-44<br />
1~2 bytes variable<br />
62 60 –<br />
Muscle mass score sT<br />
-44<br />
1~2 bytes variable<br />
63 61 –<br />
R(5kHz) GH XXXX.X<br />
5~6 bytes variable, up to 1 decimal place (unit: Ω)<br />
64 62 47<br />
X(5kHz) HH XXXX.X<br />
3~6 bytes variable, up to 1 decimal place (unit: Ω)<br />
65 63 48<br />
Left<br />
R(50kHz) RH XXXX.X<br />
5~6 bytes variable, up to 1 decimal place (unit: Ω)<br />
66 64 49<br />
side X(50kHz) XH XXXX.X<br />
3~6 bytes variable, up to 1 decimal place (unit: Ω)<br />
67 65 50<br />
of the R(250kHz) JH XXXX.X<br />
5~6 bytes variable, up to 1 decimal place (unit: Ω)<br />
68 66 51<br />
body<br />
X(250kHz) KH XXXX.X<br />
3~6 bytes variable, up to 1 decimal place (unit: Ω)<br />
69 67 52<br />
R(500kHz) LH XXXX.X<br />
5~6 bytes variable, up to 1 decimal place (unit: Ω)<br />
70 68 53<br />
X(500kHz) QH XXXX.X<br />
3~6 bytes variable, up to 1 decimal place (unit: Ω)<br />
71 69 54<br />
R(5kHz) GR XXXX.X<br />
5~6 bytes variable, up to 1 decimal place (unit: Ω)<br />
72 70 55<br />
X(5kHz) HR XXXX.X<br />
3~6 bytes variable, up to 1 decimal place (unit: Ω)<br />
73 71 56<br />
R(50kHz) RR XXXX.X<br />
5~6 bytes variable, up to 1 decimal place (unit: Ω)<br />
74 72 57<br />
Right X(50kHz) XR XXXX.X<br />
3~6 bytes variable, up to 1 decimal place (unit: Ω)<br />
75 73 58<br />
leg R(250kHz) JR XXXX.X<br />
5~6 bytes variable, up to 1 decimal place (unit: Ω)<br />
76 74 59<br />
X(250kHz) KR XXXX.X<br />
3~6 bytes variable, up to 1 decimal place (unit: Ω)<br />
77 75 60<br />
R(500kHz) LR XXXX.X<br />
5~6 bytes variable, up to 1 decimal place (unit: Ω)<br />
78 76 61<br />
X(500kHz) QR XXXX.X<br />
3~6 bytes variable, up to 1 decimal place (unit: Ω)<br />
79 77 62<br />
When necessary<br />
(cautions for safety)<br />
*1, *2: 17 year-old or younger<br />
*3: If error occurs when segmental data is calculated, data is not output for the items indicated “X”.<br />
48<br />
49
GB<br />
GB<br />
Output order<br />
Name of item Header Format Output data Body composition analyser<br />
Adult Athletic Child<br />
Scales<br />
Segmental error<br />
(Not output for X)<br />
When necessary<br />
(cautions for safety)<br />
Left<br />
leg<br />
R(5kHz)<br />
X(5kHz)<br />
R(50kHz)<br />
X(50kHz)<br />
R(250kHz)<br />
X(250kHz)<br />
R(500kHz)<br />
X(500kHz)<br />
GL<br />
HL<br />
RL<br />
XL<br />
JL<br />
KL<br />
LL<br />
QL<br />
XXXX.X<br />
XXXX.X<br />
XXXX.X<br />
XXXX.X<br />
XXXX.X<br />
XXXX.X<br />
XXXX.X<br />
XXXX.X<br />
5~6 bytes variable, up to 1 decimal place (unit: Ω)<br />
3~6 bytes variable, up to 1 decimal place (unit: Ω)<br />
5~6 bytes variable, up to 1 decimal place (unit: Ω)<br />
3~6 bytes variable, up to 1 decimal place (unit: Ω)<br />
5~6 bytes variable, up to 1 decimal place (unit: Ω)<br />
3~6 bytes variable, up to 1 decimal place (unit: Ω)<br />
5~6 bytes variable, up to 1 decimal place (unit: Ω)<br />
3~6 bytes variable, up to 1 decimal place (unit: Ω)<br />
80 78 63<br />
81<br />
79 64<br />
82 80 65<br />
83 81 66<br />
84 82 67<br />
85 83 68<br />
86 84 69<br />
87 85 70<br />
When necessary<br />
(cautions for safety)<br />
R(5kHz)<br />
Gr<br />
XXXX.X<br />
5~6 bytes variable, up to 1 decimal place (unit: Ω)<br />
88 86 71<br />
X(5kHz)<br />
Hr<br />
XXXX.X<br />
3~6 bytes variable, up to 1 decimal place (unit: Ω)<br />
89 87 72<br />
R(50kHz)<br />
Rr<br />
XXXX.X<br />
5~6 bytes variable, up to 1 decimal place (unit: Ω)<br />
90 88 73<br />
Right<br />
arm<br />
X(50kHz)<br />
R(250kHz)<br />
Xr<br />
Jr<br />
XXXX.X<br />
XXXX.X<br />
3~6 bytes variable, up to 1 decimal place (unit: Ω)<br />
5~6 bytes variable, up to 1 decimal place (unit: Ω)<br />
91 89 74<br />
92 90 75<br />
X(250kHz)<br />
Kr<br />
XXXX.X<br />
3~6 bytes variable, up to 1 decimal place (unit: Ω)<br />
93 91 76<br />
R(500kHz)<br />
Lr<br />
XXXX.X<br />
5~6 bytes variable, up to 1 decimal place (unit: Ω)<br />
94 92 77<br />
X(500kHz)<br />
Qr<br />
XXXX.X<br />
3~6 bytes variable, up to 1 decimal place (unit: Ω)<br />
95 93 78<br />
R(5kHz)<br />
Gl<br />
XXXX.X<br />
5~6 bytes variable, up to 1 decimal place (unit: Ω)<br />
96 94 79<br />
X(5kHz)<br />
Hl<br />
XXXX.X<br />
3~6 bytes variable, up to 1 decimal place (unit: Ω)<br />
97 95 80<br />
R(50kHz)<br />
Rl<br />
XXXX.X<br />
5~6 bytes variable, up to 1 decimal place (unit: Ω)<br />
98 96 81<br />
Left<br />
arm<br />
X(50kHz)<br />
R(250kHz)<br />
Xl<br />
Jl<br />
XXXX.X<br />
XXXX.X<br />
3~6 bytes variable, up to 1 decimal place (unit: Ω)<br />
5~6 bytes variable, up to 1 decimal place (unit: Ω)<br />
99 97 82<br />
100 98 83<br />
X(250kHz)<br />
Kl<br />
XXXX.X<br />
3~6 bytes variable, up to 1 decimal place (unit: Ω)<br />
101 99 84<br />
R(500kHz)<br />
Ll<br />
XXXX.X<br />
5~6 bytes variable, up to 1 decimal place (unit: Ω)<br />
102 100 85<br />
X(500kHz)<br />
Ql<br />
XXXX.X<br />
3~6 bytes variable, up to 1 decimal place (unit: Ω)<br />
103 101 86<br />
R(5kHz)<br />
GF<br />
XXXX.X<br />
5~6 bytes variable, up to 1 decimal place (unit: Ω)<br />
104 102 87<br />
X(5kHz)<br />
HF<br />
XXXX.X<br />
3~6 bytes variable, up to 1 decimal place (unit: Ω)<br />
105 103 88<br />
R(50kHz)<br />
RF<br />
XXXX.X<br />
5~6 bytes variable, up to 1 decimal place (unit: Ω)<br />
106 104 89<br />
Both<br />
legs<br />
X(50kHz)<br />
R(250kHz)<br />
XF<br />
JF<br />
XXXX.X<br />
XXXX.X<br />
3~6 bytes variable, up to 1 decimal place (unit: Ω)<br />
5~6 bytes variable, up to 1 decimal place (unit: Ω)<br />
107 105 90<br />
108 106 91<br />
X(250kHz)<br />
KF<br />
XXXX.X<br />
3~6 bytes variable, up to 1 decimal place (unit: Ω)<br />
109 107 92<br />
R(500kHz)<br />
LF<br />
XXXX.X<br />
5~6 bytes variable, up to 1 decimal place (unit: Ω)<br />
110 108 93<br />
X(500kHz)<br />
QF<br />
XXXX.X<br />
3~6 bytes variable, up to 1 decimal place (unit: Ω)<br />
111 109 94<br />
Checksum CS XX 2 bytes fixed<br />
112 110 95 9<br />
*1, *2: 17 year-old or younger<br />
*3: If error occurs when segmental data is calculated, data is not output for the items indicated “X”.<br />
50<br />
51
Technical notes<br />
GB<br />
When necessary<br />
(cautions for safety)<br />
Estimation of body composition using multifrequency<br />
8-electrode BIA method<br />
Introduction<br />
This system provides estimated values based on the bioelectrical impedance analysis (BIA) method for fat %, fat<br />
mass, FFM, muscle mass, and bone mass using the DXA method targeted at Europeans and Americans, and total<br />
body water (TBW) value measured by the dilution method.<br />
Select the appropriate mode based on the body type being measured.<br />
1) Standard (Target: 6~99 years old)<br />
2) Athletic (Sportsmen and women, etc. who do much more exercise than average)<br />
Reliability of the analysed body composition values for sportsmen, etc. who have a different body composition<br />
from average can be improved by providing a separate analysis mode per body type as above.<br />
• Principle of the body composition estimation based on BIA method<br />
• Multi-frequency measurement<br />
Water contained in the human body can roughly be roughly separated<br />
into two categories.<br />
ICW: Intercellular water<br />
ECW: Extracellular water (i.e. intercellular water, blood, etc.)<br />
Multi-frequency measurement can be used to measure these two types<br />
of water.<br />
When the human body is likened to an electrical circuit, the cell<br />
membrane that separates the ICW and ECW is considered to be a<br />
condenser. At low frequency, the cell membrane acts like a condenser and does not allow the electricity through,<br />
so electricity does not flow through the cells. Accordingly, impedance measured at low frequency has a significant<br />
correlation with ECW. At high frequency, the electric current flows through the cells via the cell membrane<br />
condenser. Impedance in this case has a significant correlation with TBW (total body water). ECW is estimated<br />
from the low-frequency results while TBW is estimated from the high-frequency results. ICW is calculated as the<br />
difference.<br />
GB<br />
When necessary<br />
(cautions for safety)<br />
BIA method refers to the method of estimating body composition by measuring the body’s impedance.<br />
Electrolytes within the body are naturally conductive. More electrolytes are contained in muscle and blood, but<br />
fairly few in fat, etc. In other words, electricity flows more easily through body tissue with more muscle and less fat<br />
while, conversely, electricity experiences more resistance in body tissue with less muscle and more fat.<br />
Using this fact, the component ratios of each can be estimated by measuring body impedance.<br />
• BIA based on 8-electrode method<br />
Using the conventional 4-electrode method, an electric current is supplied from electrodes near the toes of both<br />
feet and the voltage is measured at the heel. In this case, current flows from one lower leg to the other via the<br />
lower abdomen, and the measured body impedance (hereafter, impedance) is the impedance between both<br />
legs. Using the 8-electrode method, an electric current is supplied from electrodes at the ends of the fingers on<br />
both hands and the toes on both feet, and the voltage is measured at the ball of the thumbs on both hands and<br />
at the heels of both feet. This method enables measurement of impedance per segment – in other words for the<br />
whole body, right leg, left leg, right arm or left arm – by switching the points at which the current is applied and<br />
the voltage is measured. For example, to measure the impedance of the right leg, the current flows between the<br />
right hand and leg, and the voltage between both legs is measured.<br />
The impedance measurement method per segment is shown below for reference.<br />
• Reactance technology<br />
Reactance technology is a method that reduces<br />
fluctuations during the day when analysing body<br />
composition.<br />
The primary cause of fluctuations during the day is<br />
changes in impedance value, because the ECW (i.e.<br />
intercellular water, blood, lymph fluid, etc.) moves<br />
between the upper and lower legs and the trunk in<br />
accordance with food and drink intake, exercise, and<br />
changes in posture, etc. This impedance value<br />
fluctuation significantly affects the estimation of body<br />
composition values.<br />
In order to minimise the effects of such fluctuations,<br />
TANITA not only uses impedance values in the<br />
conventional way, but also adopts reactance values<br />
that can be acquired by breaking down impedance<br />
values under a regression formula to reduce<br />
fluctuations during the day.<br />
The examples on the right show an approximate 30%<br />
reduction in fluctuations during the day.<br />
Impedance measurement method per segment of the body<br />
52<br />
53
GB<br />
When necessary<br />
(cautions for safety)<br />
•Reliability of body composition estimations based<br />
on the multi-frequency 8-electrode BIA method<br />
A regression formula derived from the<br />
multiple-regression analysis while specifying<br />
the height, weight, age, and impedance<br />
values between the arms and legs as<br />
variables is adopted for the fat %, fat mass,<br />
FFM, muscle mass, and total body water<br />
calculations using the body composition<br />
analyser in accordance with the data<br />
acquired from the DXA method and dilution<br />
method targeted at Europeans and<br />
Americans. The regression formula is created<br />
from segmental impedance based on the<br />
data also acquired from the DXA method for<br />
segmental fat %, fat mass, FFM, and muscle<br />
mass. The analysed body composition<br />
values calculated using this regression<br />
formula bear a close correlation with the<br />
calculations based on the DXA method or<br />
dilution method, and offer high<br />
reproducibility. As mentioned above, we can<br />
state that body composition analysis based<br />
on the BIA method is highly reliable.<br />
<br />
<br />
•Factors that affect measurement integrity<br />
The BIA method is used to measure impedance and calculate body composition based on the results. It is known<br />
that impedance fluctuates as a result of changes in the total body water – which accounts for about 60% by<br />
weight –, changes in its distribution status, and body temperature. Therefore, measurement conditions need to be<br />
fixed to use the data for studies and when repeated measurements are taken daily.<br />
Accordingly, we recommend that measurements be taken on the following in order to obtain steady values.<br />
1) Measurements should be taken at least three hours after getting up, assuming normal activity during this<br />
period. (If the person has been sedentary since rising or travelling by car, there is a high level of impedance<br />
changes.)<br />
2) Avoid taking measurements within three hours of eating. (Impedance tends to be lower during the three hours<br />
following a meal.)<br />
3) If strenuous exercise is undertaken, the next measurements should be taken at least 12 hours later. (Impedance<br />
tendency does not settle consistently in accordance with the type or level of exercise.)<br />
4) Urinate shortly before measurement.<br />
5) As far as possible, measurements should be taken at approximately the same time each day if done repeatedly.<br />
(Consistent timing together with measurement of weight enables comparison of stable values.)<br />
Stable values can be obtained if measurements are taken under the above conditions.<br />
The following six conditions were stipulated to obtain the regression formula when this equipment was<br />
developed.<br />
1) Prohibition on imbibing alcohol during the twelve hours before measurement<br />
2) Prohibition on strenuous exercise during the twelve hours before measurement<br />
3) Prohibition on excessive consumption of food or drink on the day before measurement<br />
4) Prohibition of intake of food or drink during the three hours before measurement<br />
5) Urination just before measurement<br />
6) Avoid measurements during menstruation (for female)<br />
GB<br />
When necessary<br />
(cautions for safety)<br />
• DXA method<br />
Dual-energy X-ray Absorptiometry (DXA) uses two types<br />
of X-ray, and can distinguish anatomically between bone<br />
mineral, fat, and FFM based on the extent to which X-ray<br />
permeability differs between these substances.<br />
The DXA method is an accurate measurement method<br />
with minimum imposition compared with conventional<br />
immersed weighing. It can be applied to a wide range of<br />
individuals, including children and the elderly. Segmental<br />
measurements of arms and legs are also possible, and<br />
this has been used as the standard method for body<br />
composition analysis thus far.<br />
Results of the body composition based<br />
on DXA method (LUNAR DPX-L)<br />
• Dilution method<br />
The dilution method is used to calculate the total mass of a solvent containing a labelled substance by<br />
administering a known amount of the labelled substance and measuring the density at equilibrium.<br />
Heavy water (D2O) is generally used as the labelled substance to measure total body water (TBW). TBW can<br />
be calculated because the TBW is considered as dilution space for heavy water. Sodium bromide (NaBr) has<br />
been used as the labelled substance in the method to calculate ECW. It is known that bromine (Br) is not<br />
contained in cells, and is diluted in the ECW.<br />
54<br />
55
GB<br />
When necessary<br />
(cautions for safety)<br />
2Fluctuations during the course of the day<br />
The following graphs are examples of fluctuations during the course of the day. This data was used to check how<br />
impedance levels between both legs change under dehydration status. Normal activities were performed for two<br />
days, while the data for the next two days shows the result of forced dehydration by taking a sauna.<br />
When normal activities are carried out, there is little fluctuation<br />
in weight, and impedance between both legs and the fat % do<br />
not fluctuate much during the day either. When dehydrated,<br />
the individual’s weight dropped by 1 kg, impedance between<br />
both legs increased by about 15 on day one while dehydrated,<br />
and increased by 30~35 on day two under the same<br />
conditions.<br />
As indicated above, impedance increased with a reduction in<br />
weight (dehydration) and, conversely, when weight increased<br />
as a result of excessive consumption of food or drink,<br />
impedance declined. Accordingly, in terms of daily fluctuations,<br />
changes in impedance are inversely related to changes in<br />
weight.<br />
The following may be the cause of fluctuations during the day.<br />
1) Temporary increase in weight (total body water) due to<br />
excess intake of food and drink<br />
2) Dehydration due to excessive sweating in relation to<br />
strenuous exercise<br />
3) Dehydration due to intake of alcohol or use of diuretic<br />
4) Dehydration due to excessive sweating by taking a sauna,<br />
etc.<br />
Accordingly, we recommend avoiding these factors when<br />
measurements are taken if accuracy is crucial.<br />
GB<br />
When necessary<br />
(cautions for safety)<br />
56<br />
57
The New Regression Formula<br />
for Basal Metabolic Rate (BMR)<br />
GB<br />
GB<br />
When necessary<br />
(cautions for safety)<br />
It has long been said among medical and nutritional specialists that "The Basal Metabolic Rate (BMR) is determined<br />
more by the Fat Free Mass (FFM) than by the body weight" (Persons of a given body weight with a higher FFM<br />
will have a higher BMR) and that, from the aspect of evaluating body composition, should be estimated from the<br />
FFM. In addition, in cases of simple estimation formulae where calculations can be based on height, weight and<br />
age without evaluating body composition, there was a problem height, weight and age, without evaluating the<br />
body composition, there was a problem with excessively high evaluations being given to obese persons with a<br />
large body weight and, conversely, excessively small BMR evaluations given to muscular athletes, though these are<br />
not as many in number.<br />
Currently, the BMR estimation recursion formula developed by <strong>Tanita</strong>, the manufacturer of body composition<br />
analysers, and based on their research, works by multiple regressive analysis using this FFM, and has a higher<br />
degree of accuracy in terms of the individual differences in body composition. In order to derive the BMR, resting<br />
respiratory metabolism (Resting Energy Expenditure: REE) was measured using a breath gas analysis device, and<br />
this estimation recursion formula was created based on this data.<br />
The Relationship Between Resting Energy Expenditure (REE) According to Breath<br />
Gas Analysis and Weight, FFM<br />
(Presented at Nutrition Week, held in San Diego in 2002)<br />
As shown in Figure 1: the REE (BMR) has a stronger relationship to the FFM than to body weight, and a<br />
difference is visible between males and females in the distribution trends. We see that, in principle, we should<br />
calculate from the FFM rather than by the old formula centred on the relationship with weight.<br />
Comparison of BMR Values from the TANITA Multiple regression model and Breath<br />
Analysis<br />
(Presented at Nutrition Week held in San Diego in 2002)<br />
The current BMR retrogression formula is a formula that acts on the principle of using the FFM value from the<br />
results of body composition measurement according to the BIA, A good relationship is shown in the BMR value<br />
based on actual breath analysis REE or R=0.9 (p
Product specifications<br />
GB<br />
GB<br />
Model number<br />
MC-180MA<br />
Model number<br />
MC-180MA<br />
Accuracy Grade<br />
MDD: CLASS IIa<br />
NAWI: CLASS III<br />
Clothes weight<br />
ID number<br />
0.05 kg units (0~10 kg)<br />
0000000001~9999999999 (10 digits)<br />
When necessary<br />
(cautions for safety)<br />
Impedance measuring<br />
part<br />
Measurement system<br />
Measurement frequency<br />
Measurement current *3<br />
Electrode materials<br />
Measurement part<br />
Measurement range<br />
Accuracy at first calibration<br />
Measurement system<br />
Multi-frequency 8-electrode method<br />
5 kHz / 50 kHz / 250 kHz / 500 kHz<br />
90 µA or less<br />
Feet: Stainless steel / handgrips: plated<br />
Whole body / Right arm / Left arm / Right leg / Left leg<br />
75.0~1,500.00 Ω (0.1 Ω units)<br />
±2%<br />
Resistance scale<br />
Input /<br />
selection<br />
items<br />
Input<br />
Selection<br />
Body type<br />
Height<br />
Date and time<br />
Mode<br />
Setting up the printer<br />
Display item selection / system<br />
Printing item selection / system<br />
Display<br />
Standard (5~99 years old) Athletic (18~99 years old)<br />
90.0~249.9 cm (switchable between 0.1 cm and 1 cm)<br />
Year / Month / Date / Hours / Minutes (24-hour format)<br />
Body composition analyser / scales<br />
Automatic (number of sheets printed: 1~2) / <strong>Manual</strong><br />
Output data interface<br />
When necessary<br />
(cautions for safety)<br />
Weight measuring<br />
part<br />
Maximum capacity (maximum weight)<br />
Model authorization No. & accuracy level<br />
Minimum graduation (minimum display)<br />
270 kg (including tare)<br />
T7063 CLASS III<br />
0~200 kg: 0.05 kg; 200~270 kg: 0.1 kg<br />
Output data interface<br />
320 x 240 dot TFT colour LCD touch panel<br />
RS-232C input/output (Female D sub 9-pin connector)<br />
USB input/output (B-type connector)<br />
Accuracy at first calibration<br />
± 0.2 kg<br />
Power source<br />
230 V AC (50/60 Hz)<br />
Weight<br />
0~270 kg<br />
Power consumption<br />
30 W max.<br />
Clothes weight<br />
0~10.00 kg (0.05 kg units)<br />
Operating temperature range (storage temperature range)<br />
5°C / 35°C (–10°C / +60°C)<br />
ID number<br />
0000000001~9999999999 (10 digits)<br />
Product weight<br />
About 35 kg<br />
Fat %<br />
Fat % analysis<br />
Fat mass<br />
Muscle mass<br />
Standard weight *2<br />
1.0~75.0% (0.1% units)<br />
5-point scale<br />
Weight 0~200 kg: 0.05 kg units<br />
Weight 200~270 kg: 0.1 kg units<br />
*1 When Athletic is selected, this item is not displayed, printed or output.<br />
*2 When measuring individuals of aged 17 years or younger, this item is not displayed, printed or output.<br />
*3 Values are measured using measurement circuits compatible with electronic JIS medical instruments<br />
(IEC-60601-1).<br />
Total body water<br />
BMR<br />
BMR *2<br />
BMR analysis *2<br />
0~9,999 kcal/day (1 kcal/day)<br />
16-point scale<br />
Obesity *2<br />
0.1% units<br />
Display<br />
BMI<br />
Body type index: weight (kg)/height squared (m) 2<br />
Height<br />
90.0~249.9 cm (switchable between 0.1 cm and 1 cm)<br />
Output<br />
items<br />
Printing<br />
Evaluation<br />
Bone mass *2<br />
Fat % *2<br />
Muscle *2<br />
±4 (segmental)<br />
±4 (whole body / segmental)<br />
0.05 kg units<br />
Visceral fat rating *2<br />
1~59<br />
TBW<br />
ICW *2<br />
5.00~200.00 kg 0.05 kg units<br />
TBW ECW *2<br />
ECW / TBW *2<br />
1% units<br />
Rohrer index *1<br />
Weight (kg) / Height squared (cm) 3 x 10 7<br />
(for a 17 year-old or younger)<br />
Body type analysis *2<br />
45-point scale<br />
Date and time<br />
Year / Month / Date / Hours / Minutes (24-hour format)<br />
Body type<br />
Standard (5~99 years old) Athletic (18~99 years old)<br />
Gender<br />
Male / Female<br />
Age<br />
Standard (5~99 years old) Athletic (18~99 years old)<br />
Resistance<br />
75.0~1500.0 Ω (0.1 Ω units)<br />
Reactance<br />
-375.0~0 Ω (0.1 Ω units)<br />
60<br />
61