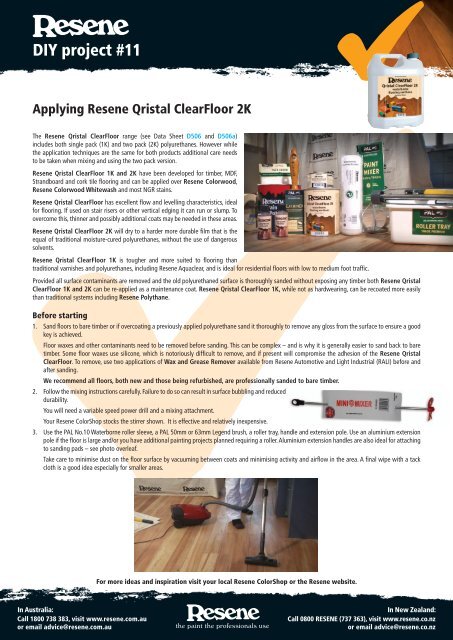
Applying Resene Qristal ClearFloor 2K polyurethane to floors
Applying Resene Qristal ClearFloor 2K polyurethane to floors
Applying Resene Qristal ClearFloor 2K polyurethane to floors
You also want an ePaper? Increase the reach of your titles
YUMPU automatically turns print PDFs into web optimized ePapers that Google loves.
DIY project #11<br />
<strong>Applying</strong> <strong>Resene</strong> <strong>Qristal</strong> <strong>ClearFloor</strong> <strong>2K</strong><br />
The <strong>Resene</strong> <strong>Qristal</strong> <strong>ClearFloor</strong> range (see Data Sheet D506 and D506a)<br />
includes both single pack (1K) and two pack (<strong>2K</strong>) <strong>polyurethane</strong>s. However while<br />
the application techniques are the same for both products additional care needs<br />
<strong>to</strong> be taken when mixing and using the two pack version.<br />
<strong>Resene</strong> <strong>Qristal</strong> <strong>ClearFloor</strong> 1K and <strong>2K</strong> have been developed for timber, MDF,<br />
Strandboard and cork tile flooring and can be applied over <strong>Resene</strong> Colorwood,<br />
<strong>Resene</strong> Colorwood Whitewash and most NGR stains.<br />
<strong>Resene</strong> <strong>Qristal</strong> <strong>ClearFloor</strong> has excellent flow and levelling characteristics, ideal<br />
for flooring. If used on stair risers or other vertical edging it can run or slump. To<br />
overcome this, thinner and possibly additional coats may be needed in these areas.<br />
<strong>Resene</strong> <strong>Qristal</strong> <strong>ClearFloor</strong> <strong>2K</strong> will dry <strong>to</strong> a harder more durable film that is the<br />
equal of traditional moisture-cured <strong>polyurethane</strong>s, without the use of dangerous<br />
solvents.<br />
<strong>Resene</strong> <strong>Qristal</strong> <strong>ClearFloor</strong> 1K is <strong>to</strong>ugher and more suited <strong>to</strong> flooring than<br />
traditional varnishes and <strong>polyurethane</strong>s, including <strong>Resene</strong> Aquaclear, and is ideal for residential <strong>floors</strong> with low <strong>to</strong> medium foot traffic.<br />
Provided all surface contaminants are removed and the old <strong>polyurethane</strong>d surface is thoroughly sanded without exposing any timber both <strong>Resene</strong> <strong>Qristal</strong><br />
<strong>ClearFloor</strong> 1K and <strong>2K</strong> can be re-applied as a maintenance coat. <strong>Resene</strong> <strong>Qristal</strong> <strong>ClearFloor</strong> 1K, while not as hardwearing, can be recoated more easily<br />
than traditional systems including <strong>Resene</strong> Polythane.<br />
Before starting<br />
1. Sand <strong>floors</strong> <strong>to</strong> bare timber or if overcoating a previously applied <strong>polyurethane</strong> sand it thoroughly <strong>to</strong> remove any gloss from the surface <strong>to</strong> ensure a good<br />
key is achieved.<br />
Floor waxes and other contaminants need <strong>to</strong> be removed before sanding. This can be complex – and is why it is generally easier <strong>to</strong> sand back <strong>to</strong> bare<br />
timber. Some floor waxes use silicone, which is no<strong>to</strong>riously difficult <strong>to</strong> remove, and if present will compromise the adhesion of the <strong>Resene</strong> <strong>Qristal</strong><br />
<strong>ClearFloor</strong>. To remove, use two applications of Wax and Grease Remover available from <strong>Resene</strong> Au<strong>to</strong>motive and Light Industrial (RALI) before and<br />
after sanding.<br />
We recommend all <strong>floors</strong>, both new and those being refurbished, are professionally sanded <strong>to</strong> bare timber.<br />
2. Follow the mixing instructions carefully. Failure <strong>to</strong> do so can result in surface bubbling and reduced<br />
durability.<br />
You will need a variable speed power drill and a mixing attachment.<br />
Your <strong>Resene</strong> ColorShop s<strong>to</strong>cks the stirrer shown. It is effective and relatively inexpensive.<br />
3. Use the PAL No.10 Waterborne roller sleeve, a PAL 50mm or 63mm Legend brush, a roller tray, handle and extension pole. Use an aluminium extension<br />
pole if the floor is large and/or you have additional painting projects planned requiring a roller. Aluminium extension handles are also ideal for attaching<br />
<strong>to</strong> sanding pads – see pho<strong>to</strong> overleaf.<br />
Take care <strong>to</strong> minimise dust on the floor surface by vacuuming between coats and minimising activity and airflow in the area. A final wipe with a tack<br />
cloth is a good idea especially for smaller areas.<br />
For more ideas and inspiration visit your local <strong>Resene</strong> ColorShop or the <strong>Resene</strong> website.
DIY project #11<br />
Continued >><br />
4. Wear two pairs of thick cot<strong>to</strong>n socks, without shoes, <strong>to</strong> prevent perspiration and shoe marks on the surface.<br />
5. Ensure there is adequate ventilation and that safety information is followed.<br />
Mixing<br />
It is very important the instructions for mixing the two parts of the <strong>Resene</strong> <strong>Qristal</strong> <strong>ClearFloor</strong> 2k are carefully followed.<br />
1. Shake the can of <strong>Resene</strong> <strong>Qristal</strong> <strong>ClearFloor</strong> base, open and tip in<strong>to</strong><br />
a larger container, such as a 2 litre paint pot. The mix ratio is 10<br />
parts of <strong>Resene</strong> <strong>Qristal</strong> <strong>ClearFloor</strong> base <strong>to</strong> 1 part of <strong>Resene</strong> <strong>Qristal</strong><br />
<strong>ClearFloor</strong> hardener. The <strong>Resene</strong> <strong>Qristal</strong> <strong>ClearFloor</strong> will appear<br />
milky in the can but will dry <strong>to</strong> a clear finish.<br />
2. Shake the <strong>Resene</strong> <strong>Qristal</strong> <strong>ClearFloor</strong> hardener, open and tip in<strong>to</strong><br />
the paint pot.<br />
3. Attach the stirrer <strong>to</strong> the variable speed power drill and mix for 60 seconds. Use a low speed <strong>to</strong> reduce air entrapment and prevent the coating from<br />
‘spraying’ around.<br />
4. Tip approx 100ml of the partially mixed product back in<strong>to</strong> the hardener can, firmly replace the lid and thoroughly shake.<br />
5. Remove the lid and tip the contents back in<strong>to</strong> the paint pot. Use your brush <strong>to</strong> remove the excess from the can and the lid. Once the hardener can is as<br />
empty as possible dip the brush in<strong>to</strong> the mixing can and wipe on the side <strong>to</strong> ensure all the hardener is discharged. If you are unsure if the hardener has<br />
been mixed and discharged from the can repeat this step.<br />
The amount of the hardener <strong>to</strong> the base is comparatively small so it is important <strong>to</strong> get the maximum amount of the hardener in<strong>to</strong> the mixing can or<br />
the durability of the coating will be compromised.<br />
6. Continue power mixing for a further two minutes, before setting the mixer aside and allowing the mixed coating <strong>to</strong> sit for 15 minutes <strong>to</strong> allow<br />
entrapped air from the mixing process <strong>to</strong> escape.<br />
You are now ready <strong>to</strong> apply the <strong>Resene</strong> <strong>Qristal</strong> <strong>ClearFloor</strong> <strong>2K</strong>.<br />
For more ideas and inspiration visit your local <strong>Resene</strong> ColorShop or the <strong>Resene</strong> website.
DIY project #11<br />
Continued >><br />
Application<br />
Tip three quarters of the mixed <strong>Resene</strong> <strong>Qristal</strong> <strong>ClearFloor</strong> in<strong>to</strong> the roller<br />
tray and work the roller well in<strong>to</strong> the coating. (Note we are using a mixed<br />
litre of <strong>Resene</strong> <strong>Qristal</strong> <strong>ClearFloor</strong>. The amount will vary if using larger<br />
pack sizes).<br />
Remember <strong>to</strong> plan the application sequence <strong>to</strong><br />
avoid polyurethaning yourself in<strong>to</strong> a corner!<br />
Using your brush, cut in around the edges, working <strong>to</strong> logical start and<br />
finish points on the floor. Bring the coating out from the edge by approx<br />
50mm.<br />
Once done attach an extension pole <strong>to</strong> the roller handle and carefully apply the coating <strong>to</strong> the floorboards working up and down the length of the boards<br />
ensuring an even finish and taking care <strong>to</strong> lay-off <strong>to</strong> eliminate any air bubbles.<br />
Allow two <strong>to</strong> three hours <strong>to</strong> dry and apply a second coat. The surface is ready <strong>to</strong> recoat if the coating does not leave a print when pressed with the thumb.<br />
A third coat and possibly fourth coat will be needed.<br />
<strong>Resene</strong> <strong>Qristal</strong> <strong>ClearFloor</strong> has a four hour pot life at 18 degrees before the mixed product becomes unusable; this means that two coats can be applied<br />
from the mixed batch provided the application window is not breached.<br />
Two pack products have a limited life once the components are mixed<br />
<strong>to</strong>gether, this is called the pot life. As the product approaches the end<br />
of its pot life the adhesion properties are highly compromised and will<br />
result in system failure. Do not be tempted <strong>to</strong> apply the product after<br />
its stated pot life has expired, even if the product still looks fine.<br />
It is important <strong>to</strong> determine quantities required for each coat, allowing a 15 <strong>to</strong><br />
20% margin for error and <strong>to</strong> plan your project accordingly.<br />
Lightly sand the surface using 220 grit sandpaper <strong>to</strong> remove dust and resin<br />
nodules before the application of the final coat. Sanding after the penultimate<br />
coat (second <strong>to</strong> last coat) ensures the coating’s film build is maximised. This rule<br />
applies <strong>to</strong> most clear finishes.<br />
For more ideas and inspiration visit your local <strong>Resene</strong> ColorShop or the <strong>Resene</strong> website.
DIY project #11<br />
Continued >><br />
Too often paint films and clear finishes are over-sanded either by being aggressively sanded or sanding after each coat in a multiple coat system.<br />
Ensure the surface is dust and contaminant free before applying additional coats.<br />
<strong>Resene</strong> <strong>Qristal</strong> <strong>ClearFloor</strong> is a significant advance in floor finishing. It is relatively straightforward <strong>to</strong> apply and does not have the dangerous solvents<br />
associated with older technology flooring systems. It is a safer option than traditional solventborne systems for both DIY and professional flooring applica<strong>to</strong>rs<br />
and can be applied over <strong>Resene</strong> Colorwood.<br />
<strong>Resene</strong> Colorwood Enhance can also be added <strong>to</strong> <strong>Resene</strong> <strong>Qristal</strong> <strong>ClearFloor</strong> 1K or <strong>2K</strong> and brush applied. It is not suitable for roller application.<br />
Please take the time <strong>to</strong> carefully read through the instructions on the label. More information including Data Sheets for the <strong>Resene</strong> products mentioned and<br />
Safety Data Sheet/s (SDS) can be found on the <strong>Resene</strong> website and please note the following:<br />
WARNING<br />
It is important that after use any lef<strong>to</strong>ver quantities of mixed product are not sealed in the can – i.e. with the lid pressed back in<strong>to</strong><br />
place. The mixed product generates carbon dioxide gas which can cause the lid of a tightly sealed can <strong>to</strong> pop with force. The volume<br />
of gas produced is directly related <strong>to</strong> the volume of left over paint.<br />
Leave the mixed material uncovered in a safe place for at least 48 hours for outgassing <strong>to</strong> be completed. After this the cans can be<br />
sealed up and disposed of through a <strong>Resene</strong> PaintWise location or an approved hazard waste site.<br />
Key accessories<br />
• Variable speed power drill and mixing attachment<br />
• PAL No 10 waterborne roller sleeve<br />
• Roller tray and handle<br />
• PAL 50mm or 63mm Legend brush<br />
• Extension pole (aluminium if more work planned)<br />
• Painters gloves<br />
• Tack cloths<br />
• Sandpaper<br />
You may also need<br />
• <strong>Resene</strong> Colorwood Enhance<br />
• Wood filler<br />
• Sanding pad<br />
For more ideas and inspiration visit your local <strong>Resene</strong> ColorShop or the <strong>Resene</strong> website.


