Presonus Digimax D8 Manual - zZounds.com
Presonus Digimax D8 Manual - zZounds.com
Presonus Digimax D8 Manual - zZounds.com

Create successful ePaper yourself
Turn your PDF publications into a flip-book with our unique Google optimized e-Paper software.
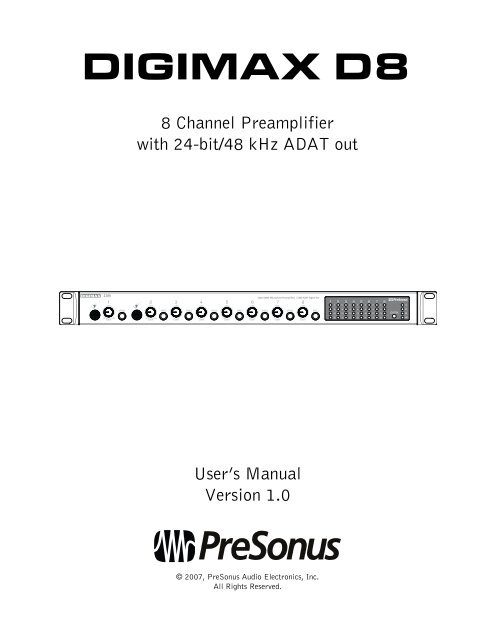
DIGIMAX <strong>D8</strong><br />
8 Channel Preamplifier<br />
with 24-bit/48 kHz ADAT out<br />
User’s <strong>Manual</strong><br />
Version 1.0<br />
© 2007, PreSonus Audio Electronics, Inc.<br />
All Rights Reserved.
PRESONUS LIMITED WARRANTY<br />
PreSonus Audio Electronics Inc. warrants this product to be free of defects in material and workmanship for a<br />
period of one year from the date of original retail purchase. This warranty is enforceable only by the original<br />
retail purchaser. To be protected by this warranty, the purchaser must <strong>com</strong>plete and return the enclosed<br />
warranty card within 14 days of purchase. During the warranty period PreSonus shall, at its sole and absolute<br />
option, either repair or replace, free of charge, any product that proves to be defective on inspection by<br />
PreSonus or its authorized service representative. To obtain warranty service, the purchaser must first call or<br />
write PreSonus at the address and telephone number printed below to obtain a Return Authorization Number<br />
and instructions of where to return the unit for service. All inquiries must be ac<strong>com</strong>panied by a description of<br />
the problem. All authorized returns must be sent to the PreSonus repair facility postage prepaid, insured and<br />
properly packaged. PreSonus reserves the right to update any unit returned for repair. PreSonus reserves the<br />
right to change or improve the design of the product at any time without prior notice. This warranty does not<br />
cover claims for damage due to abuse, neglect, alteration or attempted repair by unauthorized personnel, and is<br />
limited to failures arising during normal use that are due to defects in material or workmanship in the product.<br />
Any implied warranties, including implied warranties of merchantability and fitness for a particular purpose, are<br />
limited in duration to the length of this limited warranty. Some states do not allow limitations on how long an<br />
implied warranty lasts, so the above limitation may not apply to you. In no event will PreSonus be liable for<br />
incidental, consequential or other damages resulting from the breach of any express or implied warranty,<br />
including, among other things, damage to property, damage based on inconvenience or on loss of use of the<br />
product, and, to the extent permitted by law, damages for personal injury. Some states do not allow the<br />
exclusion of limitation of incidental or consequential damages, so the above limitation or exclusion may not<br />
apply to you. This warranty gives you specific legal rights, and you may also have other rights, which vary from<br />
state to state. This warranty only applies to products sold and used in the United States of America. For<br />
warranty information in all other countries please refer to your local distributor.<br />
PreSonus Audio Electronics, Inc.<br />
7257 Florida Blvd.<br />
Baton Rouge, LA 70806<br />
www.PreSonus.<strong>com</strong><br />
© 2007, PreSonus Audio Electronics, Inc.<br />
All Rights Reserved.
TABLE OF CONTENTS<br />
1 OVERVIEW<br />
1.1 Introduction ........................................................................................................................................... 3<br />
1.2 Features ................................................................................................................................................ 4<br />
1.3 What is in the Box ................................................................................................................................. 5<br />
2 CONTROLS & CONNECTIONS<br />
2.1 Front Panel Layout ................................................................................................................................ 6<br />
2.2 Back Panel Layout ................................................................................................................................. 8<br />
3 OPERATION<br />
3.1 Microphones ........................................................................................................................................ 10<br />
3.1.1 Condenser .................................................................................................................................... 10<br />
3.1.2 Dynamic ...................................................................................................................................... 10<br />
3.2 Digital Connections and Synchronization .............................................................................................. 11<br />
3.2.1 ADAT Optical Lightpipe ............................................................................................................... 11<br />
3.2.2 BNC Sync .................................................................................................................................... 11<br />
3.2.3 Master/Slave and Multiple Digital Devices .................................................................................... 11<br />
3.2.4 Setting up your DAW Software .................................................................................................... 12<br />
3.3 Sample Hook up Diagrams ................................................................................................................... 13<br />
3.3.1 Using the DigiMax <strong>D8</strong> with ProTools ........................................................................................... 13<br />
3.3.2 Using multiple DigiMax <strong>D8</strong> with the FireStudio LightPipe ............................................................ 14<br />
3.3.3 Using the DigiMax <strong>D8</strong> to add preamps to a line level input device .................................................. 15<br />
4 TECHNICAL INFORMATION<br />
4.1 Specifications ...................................................................................................................................... 16
OVERVIEW<br />
1.1 INTRODUCTION<br />
Thank you for purchasing the PreSonus DigiMax <strong>D8</strong>. PreSonus Audio Electronics has designed the DigiMax <strong>D8</strong><br />
utilizing high-grade <strong>com</strong>ponents to ensure optimum performance that will last a lifetime. The DigiMax <strong>D8</strong> is an<br />
eight-channel microphone preamplifier, with 24-bit 48 kHz ADAT output, eight PreSonus X-MAX microphone<br />
preamplifiers, and BNC word clock in for digital sync. Loaded with 8 direct outputs, individual channel input<br />
metering and -20 dB pads on every channel, the DigiMax <strong>D8</strong> is the perfect hardware expansion for your<br />
FireStudio LightPipe, FireStudio 26x26, or any digital recording system with optical Lightpipe expansion<br />
capability including Digidesign’s HD and 003 systems, RME, Yamaha, Alesis, Mackie and many others.<br />
We encourage you to contact us at 225-216-7887 or at techsupport@presonus.<strong>com</strong> with any questions or<br />
<strong>com</strong>ments you may have regarding your PreSonus DigiMax <strong>D8</strong>. PreSonus Audio Electronics is <strong>com</strong>mitted to<br />
constant product improvement, and we value your suggestions highly. We believe the best way to achieve our<br />
goal of constant product improvement is by listening to the real experts, our valued customers. We appreciate<br />
the support you have shown us through the purchase of this product.<br />
We suggest you use this manual to familiarize yourself with the features, applications and correct connection<br />
procedure for your DigiMax <strong>D8</strong> before trying to connect it to your recording system. This will hopefully<br />
alleviate any unforeseen issues that you may encounter during installation and set up. Please pay close attention<br />
when connecting your DigiMax <strong>D8</strong> to your system. Bad cables and improper grounding are the most <strong>com</strong>mon<br />
causes of problems encountered in recording and live P. A. environments. We re<strong>com</strong>mend checking your cables,<br />
connections and grounding if you experience any noise or sonic performance problems.<br />
Thank you, once again, for buying our product, and we hope you enjoy your DigiMax <strong>D8</strong>!<br />
3 | PreSonus 2007
OVERVIEW<br />
1.2 FEATURES<br />
The DigiMax <strong>D8</strong> is high quality and affordable eight-channel preamplifier with analog to digital conversion,<br />
perfect for expanding an audio interface or digital mixer with ADAT input or upgrading the preamps on an<br />
analog console. The DigiMax <strong>D8</strong> <strong>com</strong>es <strong>com</strong>plete with eight high-quality PreSonus X-MAX microphone<br />
preamps, ADAT output, BNC word clock input, as well as input metering, direct analog output and -20 dB pads<br />
on every channel.<br />
Summary of features<br />
• 8 Class A X-MAX microphone preamps<br />
• 8 Balanced direct outputs<br />
• -20 dB pads on every channel<br />
• Instrument preamplifiers on Channels 1 & 2<br />
• 24-bit / 48 kHz conversion<br />
• ADAT Output<br />
• BNC word clock input<br />
• Front panel input metering display<br />
4 | PreSonus 2007
1.3 WHAT IS IN THE BOX<br />
OVERVIEW<br />
Your DigiMax <strong>D8</strong> package contains the following:<br />
• DigiMax <strong>D8</strong> Eight-channel microphone<br />
preamplifier<br />
• 6’ Standard IEC Power Cable<br />
• PreSonus Warranty Card<br />
5 | PreSonus 2007
CONTROLS & CONNECTIONS<br />
2.1 FRONT PANEL LAYOUT<br />
• Instrument Inputs (Channels 1 and 2). The ¼” TS connector on channels 1 and 2 are for use with an<br />
instrument (guitar, bass, etc.). When an instrument is plugged into the instrument input, the<br />
microphone preamp is bypassed, and the DigiMax <strong>D8</strong> be<strong>com</strong>es an active instrument preamplifier.<br />
NOTE: Active instruments are those that have an internal preamp or a line level output. Active<br />
instruments should be plugged into a line input rather than into an instrument input. Plugging a line<br />
level source into the instrument inputs on the front of the DigiMax <strong>D8</strong> not only risks damage to these<br />
inputs but also results in a very loud and often distorted audio signal.<br />
(In other words, don’t plug a line level source into the front panel jacks of channel 1 or 2.)<br />
• -20 dB Pad. These buttons attenuate the input signal on each channel by 20dB. The pad can be used<br />
to keep a hot signal from overdriving the microphone preamp.<br />
• Input Gain/Trim Control. These knobs provide the following gain structure:<br />
o<br />
o<br />
XLR Microphone Inputs. 54dB of variable gain (-4 dB to +50 dB)<br />
TS Instrument/Hi-Z Inputs (Channels 1 & 2 only). 54dB of variable gain (-4dB to +50dB)<br />
• LED Meters / Clip Indicator. Each channel features four LED level indicators. The green LEDs will<br />
light up when your input signal from the XLR (Mic) or ¼” (Hi-Z Channels 1&2 only) reaches -24 dBFS<br />
and -18 dBFS respectively. The yellow LED will light up when the channel’s input signal reaches -6<br />
dBFS (+4 dBu). The red clip indicator LED will illuminate when the channel’s input signal reaches 0<br />
dBFS. At this level, your mic preamp trim signal will exhibit signs of clipping such as distortion. It is<br />
highly re<strong>com</strong>mended you do not allow your converters to clip (the red clip indicators to light up) as the<br />
sound quality will not be desirable. If you are having difficulty achieving a useable signal level without<br />
clipping, engage the -20 dB pad.<br />
6 | PreSonus 2007
CONTROLS & CONNECTIONS<br />
• Clock. This button sets the DigiMax <strong>D8</strong> to External digital sync or sets the Internal sample rate.<br />
o<br />
o<br />
o<br />
Press the Clock button once to set the clock to internal sync and your sample rate to 44.1 kHz.<br />
This will make the DigiMax <strong>D8</strong> the Master clock of your system. It will be sending out word clock<br />
via the ADAT output.<br />
Press the Clock button twice to set the clock to internal sync and your sample rate to 48 kHz.<br />
Press the Clock button three times to set the clock to external sync. This will make the DigiMax<br />
<strong>D8</strong> look for a master clock via the BNC word clock input. Your sample rate will automatically<br />
change to match that of your master clock.<br />
Please note: If you are using the DigiMax <strong>D8</strong> to record into a DAW application like Logic, ProTools,<br />
Cubase or Sonar, you must set the sample rate inside your host application to match the sample rate<br />
you set on your master clock generator.<br />
7 | PreSonus 2007
CONTROLS & CONNECTIONS<br />
2.2 BACK PANEL LAYOUT<br />
• Microphone Pre-Amplifier. Your DigiMax <strong>D8</strong> is equipped with eight custom designed PreSonus XMAX<br />
microphone preamplifiers for use with all types of microphones including Dynamics, Condensers and<br />
Ribbons as well as instruments and line level signals. The award winning PreSonus preamplifier design<br />
is a Class A input buffer followed by a dual servo gain stage. This arrangement results in ultra low<br />
noise and wide gain control allowing the DigiMax <strong>D8</strong> user to boost desirable signal without increasing<br />
unwanted background noise.<br />
o<br />
48 Volt Phantom Power. The FireStudio Project has 48V Phantom power available in groups of<br />
two via push button switches on the back panel. From right to left, each button activates Phantom<br />
power for channels 1&2, 3&4, 5&6 and 7&8 respectively.<br />
XLR connector wiring for Phantom Power<br />
Pin 1 = GND<br />
Pin 2 = +48V<br />
Pin 3 = +48V<br />
o<br />
+22dBu Headroom. The DigiMax <strong>D8</strong> microphone preamplifier has +22 dBu headroom. This<br />
feature gives you wide dynamic range and excellent transient response characteristics.<br />
• Direct Analog Outputs (TRS Balanced). These are general purpose line-level direct outputs for each<br />
input channel. They are post gain and pre-converter.<br />
8 | PreSonus 2007
CONTROLS & CONNECTIONS<br />
• BNC In. The BNC input allows the DigiMax <strong>D8</strong> to be connected and slaved to an external word clock<br />
generator.<br />
• ADAT Output. This optical ADAT output sends eight channels of digital audio output. Word clock is<br />
also being sent through this output so you can use the DigiMax <strong>D8</strong> as a clock master.<br />
• Power Adaptor Input. This is where you plug the provide IEC power cable into the DigiMax <strong>D8</strong>.<br />
• Power Switch. Push the top part of the switch to turn your DigiMax <strong>D8</strong> on ( | ). Push the bottom part<br />
of the switch to turn your DigiMax <strong>D8</strong> off ( O ).<br />
9 | PreSonus 2007
OPERATION<br />
3.1 MICROPHONES<br />
The DigiMax <strong>D8</strong> works with all standard microphones including dynamic, ribbon and condenser microphones.<br />
3.1.1 Condenser<br />
Condenser microphones tend to generate a high-quality audio signal and are one of the most popular mic<br />
choices for today’s studio recording applications. Because of their design technology, condenser microphones<br />
require a power source, which can be provided from a small battery, external power supply or from<br />
microphone inputs as phantom power. The DigiMax <strong>D8</strong> sends phantom power over XLR inputs only.<br />
3.1.2 Dynamic<br />
Dynamic microphones are possibly the most widely used microphone type – especially in live shows and when<br />
recording loud source signals such as guitar amplifiers and kick drums. They are usually less expensive than<br />
condenser and ribbon microphones, resistant to physical damage and typically handle high sound pressure<br />
levels (SPL) very well. Unlike condenser microphones, dynamic microphones do not require a power source.<br />
In the vast majority of cases, phantom power will have no effect on a dynamic microphone’s audio quality or<br />
sensitivity and will not damage the microphone. You should consult your microphone’s documentation to<br />
confirm.<br />
Dynamic microphones, especially ribbon microphones, tend to generate low output voltages, so they typically<br />
need more preamp gain than a condenser microphone.<br />
Ribbon<br />
Ribbon microphones are a special type of dynamic microphone and get their name from the thin metal ribbon<br />
used in their design. Ribbon microphones have very high quality sound reproduction qualities – especially<br />
higher frequencies sounds. However, they are very fragile and typically cannot handle high SPL’s.<br />
The most important thing to note about Ribbon microphones is that nearly all Ribbon Microphones do not<br />
require phantom power. PLEASE NOTE: unless a Ribbon microphone call specifically for phantom power,<br />
sending phantom power to a ribbon microphone will severely damage it – usually beyond repair.<br />
Regardless of the microphone type you are using, we re<strong>com</strong>mend reading your microphone’s user’s manual<br />
thoroughly before engaging phantom power or if any other usage questions may arise.<br />
10 | PreSonus 2007
OPERATION<br />
3.2 DIGITAL CONNECTIONS AND SYNCRONIZATION<br />
3.2.1 ADAT Optical Lightpipe<br />
ADAT is an industry standard abbreviation for the ADAT Lightpipe protocol, which transfers eight tracks in<br />
a single fiber optic cable. Supported sample rates are 44.1 kHz and 48 kHz.<br />
When you are utilizing the eight DigiMax <strong>D8</strong> preamplifiers and converting to the digital optical output,<br />
connect one ADAT optical cable from the ADAT output on the back of the DigiMax <strong>D8</strong> to the ADAT optical<br />
input on your digital audio interface, workstation or digital mixer.<br />
To synchronize your system to the DigiMax <strong>D8</strong>’s internal clock, set your other device to receive external word<br />
clock via its ADAT optical input. You may need to consult your device’s user manual for instructions on how<br />
to do so.<br />
3.2.2 BNC Sync and Word Clock<br />
When using multiple devices connected through digital audio formats like S/PDIF, AES/EBU, ADAT or<br />
TDIF, it is necessary to synchronize them to a single word clock generator. Word clock is used to keep a<br />
perfectly timed and constant bit rate between all synced devices to avoid data errors. A word clock generator<br />
creates digital pulses that contain no other data (i.e. audio). These pulses clock the internal oscillators of<br />
each device and are essential to avoid frequency drift.<br />
A word clock signal is bundled with the audio data in the ADAT Lightpipe protocol; however, many engineers<br />
prefer to keep word clock sync and audio separate from each other. This is where BNC word clock<br />
connections <strong>com</strong>e into play and the DigiMax <strong>D8</strong> has a BNC word clock input for just this purpose. You will<br />
find BNC cables used to deliver dedicated word clock in many quality studios and broadcast facilities<br />
worldwide. BNC cables are rugged, lock into position, and can carry clock signals much farther than the<br />
standard optical cable. A BNC word clock cable is a 75Ω, shielded coaxial cable with standard ‘twist-lock’<br />
BNC-type connections on each end. Please note: BNC cables are made in several impedances. The DigiMax<br />
<strong>D8</strong> requires an impedance of 75 Ωs to achieve consistent sync.<br />
To synchronize the DigiMax <strong>D8</strong> via BNC word clock, you will need to run a BNC word clock cable from the<br />
BNC word clock output of your external device to the BNC word clock input of your DigiMax <strong>D8</strong>. From the<br />
front panel of your DigiMax <strong>D8</strong>, select external sync using the clock button.<br />
11 | PreSonus 2007
OPERATION<br />
3.2.3 Master/Slave and Multiple Digital Devices<br />
Whether you are using the ADAT output of the DigiMax <strong>D8</strong> to generate word clock or you are using the BNC<br />
word clock output of another device as your word clock generator, it is necessary to denote one device as the<br />
“master” word clock device to which all other digital devices are synced or “slaved”. The DigiMax <strong>D8</strong><br />
should perform equally well as a master or a slave in most cases, although syncing it to a lesser quality clock<br />
source may affect performance. Not all word clock generators are created equal. The general approach is to<br />
determine which device has the best clock from which to reference and to designate that device as the word<br />
clock master. This is done with careful listening and A/B testing.<br />
Once you’ve determined which device is to be your Master clock, you will need to sync the remaining digital<br />
devices either through series or parallel distribution or some <strong>com</strong>bination thereof. Of course, if your digital<br />
device chain only consists of one master and one slave, syncing the two is as simple as connecting a 75 Ω<br />
BNC word clock cable from the output of your master device to the input of the device you are slaving. When<br />
working with multiple slaved devices, the job gets a bit more <strong>com</strong>plicated. Series distribution requires that<br />
your digital devices have both a BNC word clock input and a BNC word clock output. Parallel distribution<br />
uses a BNC “T-connector” attached to the BNC word clock input of each slaved device. This allows the word<br />
clock signal to be sent to that device and then sent on to another. A BNC word clock output on the slaved<br />
devices is not used or required for parallel word clock distribution. If the last device in the chain does not<br />
have a word clock terminate switch, it will require a BNC terminator plug to be attached to the other side of<br />
the “T-connector”. This helps to stabilize the word clock sync as well as to keep the word clock signal clean.<br />
Both word clock terminator plugs and BNC T-connectors can be purchased at most recording supply<br />
retailers. For a <strong>com</strong>plete description of parallel word clock distribution as it relates directly to the DigiMax<br />
<strong>D8</strong>, see section 3.3.2: “Using multiple DigiMax <strong>D8</strong>s with the FireStudio LightPipe”.<br />
A third option for syncing your digital devices is to purchase a high quality dedicated word clock generator;<br />
and many engineers believe that using dedicated word clock generators, rather than utilizing series or parallel<br />
word clock distribution, enhances the performance of their digital audio devices. A dedicated word clock<br />
generator and distribution amplifier exists for one purpose and one purpose only: to be a Master clock. Word<br />
clock generators usually have one BNC word clock input and multiple BNC word clock outputs (sometimes<br />
TDIF, S/PDIF, or ADAT outputs as well to make them <strong>com</strong>patible with as many types of digital devices as<br />
possible). Without a dedicated word clock generator, it is necessary to split the word clock signal generated<br />
by the Master device by daisy chaining the slaved devices as described above. Because of this, many engineers<br />
feel that the resulting digital audio signals will be of a higher quality when a dedicated word clock generator<br />
is used; because all the digital devices are receiving the same digital pulse from the same source at exactly<br />
the same time.<br />
Whichever approach one uses, it is always advisable to use good quality BNC cables that are not excessively<br />
longer than necessary for the job at hand and, as with any audio cabling, it is always good to keep word clock<br />
cables separate from AC cable lines or other possible sources of interference.<br />
3.2.4 Setting Up Your DAW Software<br />
If you are planning on using your DigiMax <strong>D8</strong> as the master clock for your digital device system, you will<br />
need to refer to the instructions on external synchronization provided by the manufacturer of both your audio<br />
interface and your DAW recording application. Setting external sync usually must be done in both the audio<br />
interface’s control panel software application (if it has one) and your recording application. As a general<br />
rule of thumb, this will be necessary when you are using any device other than your audio interface as the<br />
master clock for your system.<br />
12 | PreSonus 2007
3.3 SAMPLE HOOK UP DIAGRAMS<br />
OPERATION<br />
3.3.1 Using the DigiMax <strong>D8</strong> with ProTools<br />
The DigiMax <strong>D8</strong> is the perfect solutions to expand your ADAT <strong>com</strong>patible Digidesign interface.<br />
For example: To set up a Digi 003 with ProTools LE software:<br />
1. Plug in an ADAT cable from the optical output of the DigiMax <strong>D8</strong> to the optical input of the Digi 003<br />
2. Plug in a BNC word clock cable from the Digi 003 BNC word clock output to the BNC input of the<br />
DigiMax <strong>D8</strong><br />
3. Push the ‘clock’ button on the DigiMax <strong>D8</strong> three times, until the yellow “external” LED is lit.<br />
Please note: When using Digidesign interfaces that do not have word clock output, you will need to set the<br />
DigiMax <strong>D8</strong> as the master clock of the system. Push the ‘clock’ button to the internal setting you prefer (48<br />
kHz or 44.1 kHz). In ProTools, go to Setups>Hardware setup. Select “RCA = S/PDIF, Optical = ADAT”<br />
and set the clock to “ADAT”.<br />
Digi003, ProTools, and Digidesign are trademarks of Avid<br />
13 | PreSonus 2007
OPERATION<br />
3.3.2 Using multiple DigiMax <strong>D8</strong> with the FireStudio LightPipe<br />
The DigiMax <strong>D8</strong> is a great low cost solution to expand your FireStudio LightPipe for live or mobile<br />
recordings where a large number of simultaneous inputs are needed and two track output is enough for<br />
monitoring. To clock more than one DigiMax <strong>D8</strong> to the same external sync you will need a BNC T-Connector<br />
for each DigiMax <strong>D8</strong> you are connecting to your system. This is called parallel clock distribution and will<br />
allow word clock to be sent to and relayed from each DigiMax <strong>D8</strong> in the chain. The last device in the chain<br />
will need to have a BNC terminator attached to the other side of the T-connection. All the devices between<br />
the master clock and the last device in the chain are un-terminated so as not to load the signal down.<br />
14 | PreSonus 2007
OPERATION<br />
3.3.3 Using the DigiMax <strong>D8</strong> to Add Preamps to a Multiple Line Level Input Device<br />
The inputs of many audio interfaces and mixers are blended between microphone preamps and line level<br />
inputs. Balanced ¼” inputs are a great way to conserve space. Because of its direct analog outputs, the<br />
DigiMax <strong>D8</strong> can also be used to add preamps to devices of this nature. It is important to note that when<br />
connecting two digital devices with an analog connection it is not necessary to use word clock sync.<br />
The FireStudio Tube offers six line level inputs in addition to its 10 microphone preamps. The DigiMax <strong>D8</strong><br />
is an easy way to expand the number of microphone preamps to 16. Connecting the DigiMax <strong>D8</strong> to the<br />
FireStudio Tube is as simple as connecting 6 ¼” TRS-TRS cables:<br />
15 | PreSonus 2007
TECHNICAL INFORMATION<br />
4.1 SPECIFICATIONS<br />
Microphone Preamp<br />
Type ............................................................................................................................. XLR Female Balanced<br />
Frequency Response (±0.5 dB) ............................................................................................... 20 Hz to 50 kHz<br />
Frequency Response (±3.0 dB) ............................................................................................. 20 Hz to 150 kHz<br />
Input Impedance (Balanced) ................................................................................................................ 1600 Ω<br />
THD+N (unwtd, 1 kHz @ +4 dBu Output, Unity Gain) ..................................................................... < 0.003%<br />
EIN (unwtd, 55dB Gain, 150 Ω Input, 20Hz to 22 kHz) .................................................................... -126 dBu<br />
S/N Ratio (Unity Gain, unwtd, Ref. = +4 dBu, 20Hz to 22 kHz) ........................................................ > 101 dB<br />
Common Mode Rejection Ratio (1 kHz, 55 dB Gain) ........................................................................... > 55 dB<br />
Gain Control Range (± 1dB) .................................................................................................... -4 dB to 50 dB<br />
Maximum Input Level (Unity Gain, 1 kHz @ 0.5% THD+N) .............................................................. +14 dBu<br />
Signal Level LEDs<br />
Red / Clip (±0.5 dBu) .......................................................................... +10 dBu (0 dBFS)<br />
Yellow (±0.5 dBu) ............................................................................... +4 dBu (-6 dBFS)<br />
Green (±0.5 dBu) ................................................................................ -8 dBu (-18 dBFS)<br />
Green (±0.5 dBu) .............................................................................. -14 dBu (-24 dBFS)<br />
Phantom Power (±2 VDC) ................................................................................................................ +48 VDC<br />
Instrument Input (channels 1 & 2 only)<br />
Type .................................................................................................................... ¼” TRS Female Unbalanced<br />
Input Impedance .................................................................................................................................... 1 MΩ<br />
Line Outputs<br />
Type .................................................................................................................................... ¼” TRS Balanced<br />
Output Impedance .................................................................................................................................... 51 Ω<br />
Digital Audio<br />
ADC Dynamic Range (Awtd, 48 kHz Sample Rate) ............................................................................... 107 dB<br />
Bit Depth .................................................................................................................................................... 24<br />
Reference Level for 0dBFS ................................................................................................................ +10 dBu<br />
Internal Sample Frequency Selections (kHz) ...................................................................................... 44.1, 48<br />
External Sample Frequency Input .................................................................................................... 75 Ω BNC<br />
Power<br />
Input Connector Type ................................................................................................................................ IEC<br />
Input Voltage Range ................................................................................................................ 90 to 230 VAC<br />
Power Requirements (Continuous) ............................................................................................................ 20W<br />
As a <strong>com</strong>mitment to constant improvement, PreSonus Audio Electronics, Inc. reserves the<br />
right to change any specification stated herein at any time without notification.<br />
16 | PreSonus 2007