MX-M850/M950/M1100 Operation-Manual Software GB - Sharp
MX-M850/M950/M1100 Operation-Manual Software GB - Sharp
MX-M850/M950/M1100 Operation-Manual Software GB - Sharp

You also want an ePaper? Increase the reach of your titles
YUMPU automatically turns print PDFs into web optimized ePapers that Google loves.
MODEL: <strong>MX</strong>-<strong>M850</strong><br />
<strong>MX</strong>-<strong>M950</strong><br />
<strong>MX</strong>-<strong>M1100</strong><br />
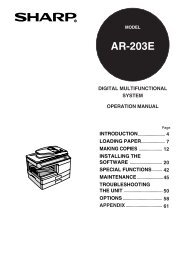
DIGITAL MULTIFUNCTIONAL SYSTEM<br />
<strong>Software</strong> Setup Guide<br />
BEFORE INSTALLING THE<br />
SOFTWARE<br />
SETUP IN A WINDOWS<br />
ENVIRONMENT<br />
SETUP IN A MACINTOSH<br />
ENVIRONMENT<br />
TROUBLESHOOTING AND<br />
USEFUL INFORMATION<br />
Keep this manual close at hand for reference<br />
whenever needed.
Thank you for purchasing this product. This manual explains how to install and configure the software that allows the<br />
machine to be operated from a computer when an expansion kit such as for the printer function is installed.<br />
Read this manual when the printer function or the image send function has been added onto the machine.<br />
Please note<br />
• The explanations in this manual assume that you have a working knowledge of your Windows or Macintosh computer.<br />
• For information on your operating system, please refer to your operating system manual or the online Help function.<br />
• The explanations of screens and procedures in this manual are primarily for Windows ® XP in Windows ® environments, and<br />
Mac OS X v10.4 in Macintosh environments. The screens may vary depending on the version of the operating system.<br />
• Wherever "<strong>MX</strong>-xxxx" appears in this manual, please substitute your model name for "xxxx".<br />
• This manual contains references to the fax function. However, please note that the fax function is not available in some<br />
countries and regions.<br />
• Considerable care has been taken in preparing this manual. If you have any comments or concerns about the manual, please<br />
contact your dealer or nearest authorized service representative.<br />
• This product has undergone strict quality control and inspection procedures. In the unlikely event that a defect or other problem<br />
is discovered, please contact your dealer or nearest authorized service representative.<br />
• Aside from instances provided for by law, SHARP is not responsible for failures occurring during the use of the product or its<br />
options, or failures due to incorrect operation of the product and its options, or other failures, or for any damage that occurs due<br />
to use of the product.<br />
Warning<br />
• Reproduction, adaptation or translation of the contents of the manual without prior written permission is prohibited, except as<br />
allowed under copyright laws.<br />
• All information in this manual is subject to change without notice.<br />
Illustrations and the operation panel and touch panel shown in this manual<br />
The peripheral devices are generally optional, however, some models include certain peripheral devices as standard equipment.<br />
The explanations in this manual assume that a finisher, punch module, saddle unit, folding unit, inserter, large capacity trays, and<br />
bypass tray are installed on the <strong>MX</strong>-<strong>M1100</strong>.<br />
For some functions and procedures, the explanations assume that devices other than the above are installed.<br />
The display screens, messages, and key names shown in the manual may differ from those on the actual machine<br />
due to product improvements and modifications.<br />
SOFTWARE LICENSE<br />
The SOFTWARE LICENSE will appear when you install the software from the CD-ROM. By using all or any portion of the<br />
software on the CD-ROM or in the machine, you are agreeing to be bound by the terms of the SOFTWARE LICENSE.<br />
The explanations in this manual are based on American English and the North American version of the software.<br />
<strong>Software</strong> for other countries and regions may vary slightly from the North American version.
TABLE OF CONTENTS<br />
1<br />
BEFORE INSTALLING THE<br />
SOFTWARE<br />
CD-ROMS AND SOFTWARE. . . . . . . . . . . . . . . . . . . . 2<br />
• SOFTWARE CD-ROM THAT ACCOMPANIES<br />
THE PRINTER EXPANSION KIT . . . . . . . . . . . . . . 2<br />
• OTHER CD-ROMS. . . . . . . . . . . . . . . . . . . . . . . . . 4<br />
VERIFYING SYSTEM REQUIREMENTS . . . . . . . . . . . 5<br />
• SYSTEM REQUIREMENTS. . . . . . . . . . . . . . . . . . 5<br />
• SOFTWARE REQUIREMENTS . . . . . . . . . . . . . . . 6<br />
CONNECTING THE MACHINE . . . . . . . . . . . . . . . . . . 7<br />
• CONNECTING TO A NETWORK. . . . . . . . . . . . . . 7<br />
• CONNECTING THE MACHINE WITH A USB<br />
CABLE (Windows) . . . . . . . . . . . . . . . . . . . . . . . . . 7<br />
3<br />
SETUP IN A MACINTOSH<br />
ENVIRONMENT<br />
MAC OS X . . . . . . . . . . . . . . . . . . . . . . . . . . . . . . . . . 29<br />
MAC OS 9.0 - 9.2.2. . . . . . . . . . . . . . . . . . . . . . . . . . . 34<br />
4<br />
TROUBLESHOOTING AND USEFUL<br />
INFORMATION<br />
TROUBLESHOOTING . . . . . . . . . . . . . . . . . . . . . . . . 36<br />
CHANGING THE PORT . . . . . . . . . . . . . . . . . . . . . . . 39<br />
REMOVING THE SOFTWARE. . . . . . . . . . . . . . . . . . 41<br />
2<br />
SETUP IN A WINDOWS<br />
ENVIRONMENT<br />
INSTALLING THE PRINTER DRIVER / PC-FAX<br />
DRIVER. . . . . . . . . . . . . . . . . . . . . . . . . . . . . . . . . . . . . 8<br />
• WHEN THE MACHINE IS CONNECTED TO A<br />
NETWORK . . . . . . . . . . . . . . . . . . . . . . . . . . . . . . . 8<br />
• WHEN THE MACHINE WILL BE<br />
CONNECTED WITH A USB CABLE . . . . . . . . . . 15<br />
• USING THE MACHINE AS A SHARED<br />
PRINTER . . . . . . . . . . . . . . . . . . . . . . . . . . . . . . . 20<br />
• USING THE STANDARD WINDOWS PS<br />
PRINTER DRIVER (Windows 98/Me/NT 4.0) . . . 22<br />
• CONFIGURING THE PRINTER DRIVER FOR<br />
THE OPTIONS INSTALLED ON THE<br />
MACHINE . . . . . . . . . . . . . . . . . . . . . . . . . . . . . . . 23<br />
INSTALLING THE PRINTER STATUS MONITOR . . 26<br />
INSTALLING THE PS DISPLAY FONTS. . . . . . . . . . 28<br />
1
1<br />
BEFORE INSTALLING THE<br />
SOFTWARE<br />
This chapter mainly describes the software programs that allow you to use the printer functions of the machine, the<br />
CD-ROMs that contain the software, and the pages where the installation procedures can be found.<br />
CD-ROMS AND SOFTWARE<br />
The software that can be used with the machine is on the CD-ROMs that accompany the expansion kits.<br />
Before installing the software, make sure that your computer and the machine meet the system requirements described<br />
in "VERIFYING SYSTEM REQUIREMENTS" (page 5).<br />
SOFTWARE CD-ROM THAT ACCOMPANIES THE<br />
PRINTER EXPANSION KIT<br />
The "<strong>Software</strong> CD-ROM" that accompanies the printer expansion kit contains the printer driver and other software. The<br />
"<strong>Software</strong> CD-ROM" consists of 2 discs.<br />
For users of Windows NT 4.0<br />
The CD-ROM does not include software for Windows NT 4.0.<br />
Contact your dealer or nearest authorized service representative if you want software for Windows NT 4.0.<br />
Disc 1<br />
<strong>Software</strong> for Windows<br />
• Printer driver<br />
These allow the machine to be used as a printer.<br />
- PCL6 and PCL5e printer driver<br />
The machine supports the Hewlett-Packard PCL6 and PCL5e printer control languages. It is recommended<br />
that you use the PCL6 printer driver. If you have a problem printing from older software using the PCL6<br />
printer driver, use the PCL5e printer driver.<br />
- PS printer driver<br />
The PS printer driver supports the PostScript 3 page description language developed by Adobe Systems<br />
Incorporated.<br />
- PPD driver<br />
The PPD driver enables the machine to use the standard Windows PS printer driver.<br />
☞ WHEN THE MACHINE IS CONNECTED TO A NETWORK (page 8)<br />
☞ WHEN THE MACHINE WILL BE CONNECTED WITH A USB CABLE (page 15)<br />
• Printer Status Monitor (can only be used when the machine is connected to a network)<br />
This allows you to monitor the status of the machine on your computer screen.<br />
☞ INSTALLING THE PRINTER STATUS MONITOR (page 26)<br />
2
CD-ROMS AND SOFTWARE<br />
Disc 2<br />
<strong>Software</strong> for Windows<br />
• PC-Fax driver<br />
This enables you to send a file from your computer as a fax using the same procedure as when printing the file.<br />
(When the fax option is installed.)<br />
Even if the fax function is not installed, the PC-Fax driver can be updated using the CD-ROM in the Internet fax<br />
expansion kit to enable you to send a file from your computer as an Internet fax in the same way as you print a file.<br />
☞ INSTALLING THE PRINTER DRIVER / PC-FAX DRIVER (page 8)<br />
The following software can be used only when the machine is connected to a network.<br />
• Printer Administration Utility<br />
This allows the administrator to monitor the machine and configure machine settings from a computer. To install<br />
and use the Printer Administration Utility, see the Readme file and the manual in PDF format on the "<strong>Software</strong><br />
CD-ROM" (Disc 2). The Readme file and manual are in the following folder on the CD-ROM. (Substitute the<br />
letter of your CD-ROM drive for "R" in the following path.)<br />
R:\Sadmin\Documents\EnglishA *<br />
* "English A" in North America. "English" in Europe.<br />
<strong>Software</strong> for Macintosh<br />
• PPD file<br />
This is the printer description file which enables the machine to be used as a PostScript 3 compatible printer.<br />
The PS3 expansion kit is required to use the machine in a Macintosh environment.<br />
☞ MAC OS X (page 29)<br />
☞ MAC OS 9.0 - 9.2.2 (page 34)<br />
• To use the machine as a printer in a Macintosh environment, the printer expansion kit and PS3 expansion<br />
kit are necessary. In addition, the machine must be connected to a network. A USB connection cannot be<br />
used.<br />
• The PC-Fax driver cannot be used in a Macintosh environment.<br />
3
CD-ROMS AND SOFTWARE<br />
OTHER CD-ROMS<br />
"PRINTER UTILITIES" CD-ROM that accompanies the PS3 expansion kit<br />
(for Windows/Macintosh)<br />
This contains the display fonts that are used with the PS printer driver.<br />
(Install the PS printer driver and Macintosh PPD file from the "<strong>Software</strong> CD-ROM".)<br />
☞ INSTALLING THE PS DISPLAY FONTS (page 28)<br />
"PRINTER UTILITIES" CD-ROM that accompanies the Internet fax<br />
expansion kit (for Windows)<br />
This CD-ROM is used to update the PC-Fax driver on the "<strong>Software</strong> CD-ROM" that accompanies the printer<br />
expansion kit so that it can be used to send Internet faxes (PC-I-Fax function).<br />
If you wish to use the PC-I-Fax function, first install the PC-Fax driver from the "<strong>Software</strong> CD-ROM" and then run the<br />
installer on this CD-ROM * . If the PC-Fax driver is already installed, run only the installer. (There is no need to<br />
reinstall the PC-Fax driver.)<br />
* To obtain the PC-Fax driver when the printer expansion kit is not installed, consult your dealer or nearest<br />
authorized service representative.<br />
☞ INSTALLING THE PRINTER DRIVER / PC-FAX DRIVER (page 8)<br />
"<strong>Sharp</strong>desk/Network Scanner Utilities" CD-ROM that accompanies the<br />
network scanner expansion kit (for Windows)<br />
This contains software that helps you get the most out of the images that you scan on the machine. The software<br />
includes "<strong>Sharp</strong>desk", a desktop document management application that enables integrated management of<br />
scanned images and files created using a variety of applications. To use the "Scan to Desktop" scanner function, the<br />
"Network Scanner Tool" must be installed from the CD-ROM.<br />
For the system requirements of the software, see the manual (PDF format) or the Readme file on the CD-ROM. For<br />
the procedures for installing the software, see the separate "<strong>Sharp</strong>desk Installation Guide".<br />
4
VERIFYING SYSTEM REQUIREMENTS<br />
SYSTEM REQUIREMENTS<br />
Before installing the software described in this manual, make sure that your computer satisfies the following requirements.<br />
Windows Macintosh* 5<br />
Operating system *1<br />
Windows 98, Windows Me,<br />
Windows NT Workstation 4.0 (Service Pack 5 or later)* 2 ,<br />
Windows 2000 Professional, Windows XP Professional,<br />
Windows XP Home Edition, Windows 2000 Server,<br />
Windows Server 2003, Windows Vista<br />
Mac OS 9.0 to 9.2.2,<br />
Mac OS X v10.1.5,<br />
Mac OS X v10.2.8,<br />
Mac OS X v10.3.9,<br />
Mac OS X v10.4 to 10.4.8<br />
Computer type<br />
Display<br />
Other hardware requirements<br />
IBM PC/AT compatible computer<br />
Equipped with a 10Base-T/100Base-TX LAN board or<br />
equipped standard with a USB 2.0 *3 /1.1 *4 port.<br />
800 x 600 resolution (SVGA) with 256 colors or higher<br />
(32,000 colors (16 bit) or higher is recommended)<br />
An environment that allows any of the above operating<br />
systems to fully operate.<br />
An environment in which any<br />
of the operating systems<br />
listed above can fully operate<br />
(including Macintosh<br />
computers with an Intel<br />
processor).<br />
*1 Printing is not possible in MS-DOS mode.<br />
*2 USB is not supported.<br />
*3 The machine's USB 2.0 port will transfer data at the speed specified by the USB2.0 (Hi-Speed) standard only if the<br />
Microsoft USB 2.0 driver is preinstalled in the computer, or if the USB 2.0 driver for Windows 2000 Professional/XP/Vista<br />
that Microsoft provides through "Windows Update" is installed.<br />
*4 Compatible with models preinstalled with Windows 98, Windows Me, Windows 2000 Professional, Windows XP<br />
Professional, Windows XP Home Edition, Windows 2000 Server, Windows Server 2003, or Windows Vista, and<br />
which are equipped standard with a USB interface.<br />
*5 Cannot be used when the machine is connected with a USB cable. The PC-Fax driver cannot be used.<br />
For users of Windows NT 4.0<br />
The CD-ROM does not include software for Windows NT 4.0.<br />
Contact your dealer or nearest authorized service representative if you want software for Windows NT 4.0.<br />
5
VERIFYING SYSTEM REQUIREMENTS<br />
SOFTWARE REQUIREMENTS<br />
The following requirements must be met to use the software described in this manual.<br />
Operating<br />
system<br />
<strong>Software</strong> Required expansion kits Type of connection* 1<br />
environment* 1<br />
Windows<br />
PCL6 printer driver,<br />
PCL5e printer driver<br />
Printer expansion kit<br />
Network/ USB<br />
PS printer driver,<br />
PPD driver<br />
Printer expansion kit,<br />
PS3 expansion kit<br />
PC-Fax driver* 2 Facsimile expansion kit* 3<br />
Macintosh<br />
Printer Status Monitor<br />
Printer Administration Utility<br />
Macintosh PPD file<br />
Printer expansion kit<br />
Printer expansion kit,<br />
PS3 expansion kit<br />
Network only (cannot be<br />
used with a USB connection)<br />
*1 For the types of computers and operating systems that can run the software, see "SYSTEM REQUIREMENTS" (page 5).<br />
*2 To obtain the PC-Fax driver when the printer expansion kit is not installed, consult your dealer or nearest authorized<br />
service representative. To use the PC-Fax driver, Internet Explorer 4.0 or later must be installed on your computer.<br />
*3 When the Internet fax expansion kit is installed, the PC-Fax driver can be updated using the "PRINTER UTILITIES"<br />
CD-ROM to enable the driver to be used as a PC-I-Fax driver. In this case, the driver can be used without the<br />
facsimile expansion kit.<br />
6
CONNECTING THE MACHINE<br />
CONNECTING TO A NETWORK<br />
To connect the machine to a network, connect the LAN cable to the machine's network connector. Use a shielded LAN<br />
cable.<br />
After connecting the machine to a network, be sure to configure the IP address and other network settings before<br />
installing the software. (The factory default setting for the IP address is to receive the IP address automatically when the<br />
machine is used in a DHCP environment.)<br />
Network settings can be configured using "Network Settings" in the system settings (administrator) on the machine.<br />
• If the machine is used in a DHCP environment, the IP address of the machine may change. If this happens, printing will not<br />
be possible. This problem can be avoided by using a WINS server or by assigning a permanent IP address to the machine.<br />
• This manual explains how to set up the software in a Windows network environment and in a Macintosh network<br />
environment.<br />
Checking the IP address of the machine<br />
You can check the IP address of the machine by printing out the "All Custom Setting List" in the system settings. Follow<br />
these steps to print out the "All Custom Setting List".<br />
Press the [SYSTEM SETTINGS] key, touch the [List Print (User)] key, and then touch the [Print] key of "All Custom<br />
Setting List".<br />
CONNECTING THE MACHINE WITH A USB CABLE<br />
(Windows)<br />
The machine can be connected to a computer using a USB cable if the computer is a Windows computer. (The USB<br />
interface on the machine cannot be used in a Macintosh environment.)<br />
The machine and computer should be connected while the printer driver is being installed. If a USB cable is connected<br />
before the printer driver is installed, the printer driver will not be installed correctly. For the procedure for connecting a<br />
USB cable, see "WHEN THE MACHINE WILL BE CONNECTED WITH A USB CABLE" (page 15).<br />
7
2<br />
SETUP IN A WINDOWS<br />
ENVIRONMENT<br />
This chapter explains how to install the software and configure settings so that the printer function and other features of<br />
the machine can be used with a Windows computer.<br />
For users of Windows NT 4.0<br />
The CD-ROM does not include software for Windows NT 4.0.<br />
Contact your dealer or nearest authorized service representative if you want software for Windows NT 4.0.<br />
INSTALLING THE PRINTER DRIVER / PC-FAX<br />
DRIVER<br />
To install the printer driver or the PC-Fax driver, follow the appropriate procedure in this section depending on whether<br />
the machine is connected to a network or connected by USB cable.<br />
☞ WHEN THE MACHINE WILL BE CONNECTED WITH A USB CABLE (page 15)<br />
WHEN THE MACHINE IS CONNECTED TO A NETWORK<br />
This section explains how to install the printer driver and the PC-Fax driver when the machine is connected to a<br />
Windows network (TCP/IP network).<br />
TCP/IP network<br />
(Local area network)<br />
Printing using LPR protocol<br />
Windows computer connected to<br />
the same network as the machine<br />
Supported operating systems: Windows 98/Me/NT 4.0 * /2000 * /XP * /Server 2003 * /Vista *<br />
* Administrator's rights are required to install the software.<br />
• The PS3 expansion kit is required to use the PS printer driver or the PPD driver.<br />
• To install the PPD driver when Windows 98/Me/NT 4.0 is used, see "USING THE STANDARD WINDOWS PS PRINTER<br />
DRIVER (Windows 98/Me/NT 4.0)" (page 22) and install the driver using the Add Printer Wizard.<br />
• To use the machine as a network printer in Windows NT 4.0, "TCP/IP Protocol" must be installed on your computer. If this<br />
is not installed, see Windows NT 4.0 Help to install "TCP/IP Protocol".<br />
• To print to the machine over the Internet using the IPP function when the machine is installed in a remote<br />
location, or to print using the SSL (encrypted communication) function, see "Printing using the IPP function and<br />
the SSL function" (page 12) and install the printer driver or the PC-Fax driver.<br />
• The installation procedure in this section is for both the printer driver and the PC-Fax driver, although the explanations are<br />
centered on the printer driver.<br />
8
INSTALLING THE PRINTER DRIVER / PC-FAX DRIVER<br />
1<br />
Insert the "<strong>Software</strong> CD-ROM" into your<br />
computer's CD-ROM drive.<br />
• If you are installing the printer driver, insert the<br />
"<strong>Software</strong> CD-ROM" that shows "Disc 1" on the front of<br />
the CD-ROM.<br />
• If you are installing the PC-Fax driver, insert the<br />
"<strong>Software</strong> CD-ROM" that shows "Disc 2" on the front of<br />
the CD-ROM.<br />
6<br />
Click the [Printer Driver] button.<br />
• To install the PC-Fax driver, click the [PC-Fax Driver] button.<br />
• Before installing the software, be sure to click the<br />
[Display Readme] button and view the detailed<br />
information on the software.<br />
2<br />
Click the [start] button, click [My<br />
Computer] ( ), and then double-click<br />
the [CD-ROM] icon ( ).<br />
• In Windows 98/Me/2000, double-click [My Computer]<br />
and then double-click the [CD-ROM] icon.<br />
• In Windows Vista, click the [Start] button ( ), click<br />
[Computer], and then double-click the [CD-ROM] icon.<br />
3<br />
4<br />
Double-click the [Setup] icon ( ).<br />
In Windows Vista, if a message screen appears<br />
asking you for confirmation, click [Allow].<br />
The "SOFTWARE LICENSE" window<br />
will appear. Make sure that you<br />
understand the contents of the license<br />
agreement and then click the [Yes]<br />
button.<br />
7<br />
8<br />
* The above screen appears when the printer<br />
driver is being installed.<br />
Click the [Next] button.<br />
Click the [Standard installation] button.<br />
You can show the "SOFTWARE LICENSE" in a<br />
different language by selecting the desired language<br />
from the language menu. To install the software in the<br />
selected language, continue the installation with that<br />
language selected.<br />
5<br />
Read the message in the "Welcome"<br />
window and then click the [Next]<br />
button.<br />
When [Custom installation] is selected, you can change<br />
any of the items below. When [Standard installation] is<br />
selected, the installation will take place as indicated below.<br />
• Machine connection method: LPR Direct Print<br />
• Set as default printer: Yes (excluding the PC-Fax driver)<br />
• Printer driver name: Cannot be changed<br />
• PCL printer display fonts: Installed<br />
If you selected [Custom installation], select [LPR<br />
Direct Print] and click the [Next] button.<br />
If you selected other than [LPR Direct Print], see the<br />
following pages:<br />
• IPP: page 12 • Shared printer: page 20<br />
• Connected to this computer: page 15<br />
9
INSTALLING THE PRINTER DRIVER / PC-FAX DRIVER<br />
9<br />
Printers connected to the network are<br />
detected. Select the machine and click<br />
the [Next] button.<br />
12<br />
When you are asked whether or not you<br />
want the printer to be your default<br />
printer, make a selection and click the<br />
[Next] button.<br />
If you are installing multiple drivers, select the printer<br />
driver to be used as the default printer.<br />
If you do not wish to set one of the printer drivers as the<br />
default printer, select [No].<br />
If you clicked the [Custom installation] button in step 8,<br />
the following windows will appear.<br />
• Printer name window<br />
If you wish to change the printer name, enter the<br />
desired name and click the [Next] button.<br />
• Window confirming installation of the display<br />
fonts<br />
To install the display fonts for the PCL printer driver,<br />
select [Yes] and click the [Next] button.<br />
• When the PC-Fax driver is being installed, this<br />
screen does not appear. Go to the next step.<br />
• If you are not installing the PCL printer driver (you<br />
are installing the PS printer driver or the PPD<br />
driver), select [No] and click the [Next] button.<br />
• If the machine is not found, make sure that the machine<br />
is powered on and that the machine is connected to the<br />
network, and then click the [Re-search] button.<br />
• You can also click the [Specify condition] button and<br />
search for the machine by entering the machine's<br />
name (host name) or IP address.<br />
☞ Checking the IP address of the machine (page 7)<br />
10<br />
11<br />
A confirmation window appears. Check the<br />
contents and then click the [Next] button.<br />
When the printer driver selection window<br />
appears, select the printer driver to be<br />
installed and click the [Next] button.<br />
Click the checkbox of the printer driver to be installed so<br />
that a checkmark ( ) appears.<br />
13<br />
Follow the on-screen instructions.<br />
Read the message in the window that appears and click<br />
the [Next] button.<br />
Installation begins.<br />
• If you are using Windows 2000/XP/Server 2003<br />
If a warning message regarding the Windows logo<br />
test or digital signature appears, be sure to click the<br />
[Continue Anyway] or [Yes] button.<br />
• If you are using Windows Vista<br />
If a security warning window appears, be sure to click<br />
[Install this driver software anyway].<br />
14<br />
When the installation completed screen<br />
appears, click the [OK] button.<br />
• When the PC-Fax driver is being installed, this<br />
screen does not appear. Go to the next step.<br />
• The PS3 expansion kit is required to use the PS<br />
printer driver or the PPD driver.<br />
• The [PPD] checkbox only appears if you are using<br />
Windows 2000/XP/Server 2003/Vista.<br />
10
INSTALLING THE PRINTER DRIVER / PC-FAX DRIVER<br />
15<br />
Click the [Close] button in the window<br />
of step 6.<br />
After the installation, a message prompting you to<br />
restart your computer may appear. If this message<br />
appears, click the [Yes] button to restart your<br />
computer.<br />
This completes the installation.<br />
• After installation, see "CONFIGURING THE PRINTER<br />
DRIVER FOR THE OPTIONS INSTALLED ON THE<br />
MACHINE" (page 23) to configure the printer driver<br />
settings.<br />
• If you installed the PS printer driver or the PPD driver,<br />
the PS display fonts can be installed from the<br />
"PRINTER UTILITIES" CD-ROM that accompanies<br />
the PS3 expansion kit. See "INSTALLING THE PS<br />
DISPLAY FONTS" (page 28).<br />
• If you are using the machine as a shared printer, see<br />
"USING THE MACHINE AS A SHARED PRINTER"<br />
(page 20) to install the printer driver on each of the<br />
client computers.<br />
11
INSTALLING THE PRINTER DRIVER / PC-FAX DRIVER<br />
Printing using the IPP function and the SSL function<br />
The IPP function can be used to print to the machine over a network using HTTP protocol.<br />
When the machine is in a remote location, this function can be used in place of the fax function to print a higher quality<br />
image than a fax. The IPP function can also be used in combination with the SSL (encrypted communication) function to<br />
encrypt the print data. This enables secure printing with no concern that the data will be leaked to others.<br />
To use the SSL function, configure the "SSL Settings" in the system settings (administrator) of the machine. To configure the<br />
settings, see the Administrator's Guide.<br />
1<br />
Insert the "<strong>Software</strong> CD-ROM" into your<br />
computer's CD-ROM drive.<br />
• If you are installing the printer driver, insert the<br />
"<strong>Software</strong> CD-ROM" that shows "Disc 1" on the front of<br />
the CD-ROM.<br />
• If you are installing the PC-Fax driver, insert the<br />
"<strong>Software</strong> CD-ROM" that shows "Disc 2" on the front of<br />
the CD-ROM.<br />
6<br />
Click the [Printer Driver] button.<br />
• To install the PC-Fax driver, click the [PC-Fax Driver]<br />
button.<br />
• Before installing the software, be sure to click the<br />
[Display Readme] button and view the detailed<br />
information on the software.<br />
2<br />
Click the [start] button, click [My<br />
Computer] ( ), and then double-click<br />
the [CD-ROM] icon ( ).<br />
• In Windows 98/Me/2000, double-click [My Computer]<br />
and then double-click the [CD-ROM] icon.<br />
• In Windows Vista, click the [Start] button ( ), click<br />
[Computer], and then double-click the [CD-ROM] icon.<br />
3<br />
Double-click the [Setup] icon ( ).<br />
In Windows Vista, if a message screen appears<br />
asking you for confirmation, click [Allow].<br />
* The above screen appears when the printer<br />
driver is being installed.<br />
4<br />
The "SOFTWARE LICENSE" window<br />
will appear. Make sure that you<br />
understand the contents of the license<br />
agreement and then click the [Yes]<br />
button.<br />
7<br />
8<br />
Click the [Next] button.<br />
Click the [Custom installation] button.<br />
You can show the "SOFTWARE LICENSE" in a<br />
different language by selecting the desired language<br />
from the language menu. To install the software in the<br />
selected language, continue the installation with that<br />
language selected.<br />
5<br />
Read the message in the "Welcome"<br />
window and then click the [Next]<br />
button.<br />
12
INSTALLING THE PRINTER DRIVER / PC-FAX DRIVER<br />
9<br />
When you are asked how the printer is<br />
connected, select [IPP] and click the<br />
[Next] button.<br />
11<br />
Enter the machine's URL and click the<br />
[Next] button.<br />
Enter the URL in the following format:<br />
Normal format:<br />
http://:/ipp<br />
*2 Normally the port number and the colon ":"<br />
immediately preceding the port number can be<br />
omitted. If the IPP port number for SSL has been<br />
changed on the machine, enter the new port number.<br />
10<br />
If a proxy server is used, specify the<br />
proxy server and click the [Next]<br />
button.<br />
To specify a proxy server, select [Print via the proxy<br />
server] and then enter the [Address] and [Port number].<br />
If your computer and the machine are connected to<br />
the same local area network, you can click the<br />
[Search] button to search for the machine. The<br />
machine's URL will appear. Select the URL and click<br />
the [OK] button. You will return to the above screen<br />
and the machine's URL will be automatically entered.<br />
12<br />
When the model selection window<br />
appears, select the model name of your<br />
machine and click the [Next] button.<br />
13
INSTALLING THE PRINTER DRIVER / PC-FAX DRIVER<br />
13<br />
When the printer driver selection<br />
window appears, select the printer<br />
driver to be installed and click the<br />
[Next] button.<br />
17<br />
Follow the on-screen instructions.<br />
Read the message in the window that appears and click<br />
the [Next] button.<br />
Installation begins.<br />
Click the checkbox of the printer driver to be installed so<br />
that a checkmark ( ) appears.<br />
• If you are using Windows 2000/XP/Server 2003<br />
If a warning message regarding the Windows logo<br />
test or digital signature appears, be sure to click the<br />
[Continue Anyway] or [Yes] button.<br />
• If you are using Windows Vista<br />
If a security warning window appears, be sure to click<br />
[Install this driver software anyway].<br />
18<br />
When the installation completed screen<br />
appears, click the [OK] button.<br />
14<br />
15<br />
16<br />
• When the PC-Fax driver is being installed, this<br />
screen does not appear. Go to the next step.<br />
• The PS3 expansion kit is required to use the PS<br />
printer driver or the PPD driver.<br />
• The [PPD] checkbox only appears if you are using<br />
Windows 2000/XP/Server 2003/Vista.<br />
Select whether or not you wish the<br />
printer to be your default printer and<br />
click the [Next] button.<br />
If you are installing multiple drivers, select the printer<br />
driver to be used as the default printer.<br />
If you do not wish to set one of the printer drivers as the<br />
default printer, select [No].<br />
When the printer name window<br />
appears, click the [Next] button.<br />
If you wish to change the printer name, enter the desired<br />
name.<br />
When you are asked if you wish to<br />
install the display fonts, select an<br />
answer and click the [Next] button.<br />
• When the PC-Fax driver is being installed, this screen<br />
does not appear. Go to the next step.<br />
• If you are not installing the PCL printer driver (you are<br />
installing the PS printer driver or the PPD driver),<br />
select [No] and click the [Next] button.<br />
19<br />
Click the [Close] button in the window<br />
of step 6.<br />
After the installation, a message prompting you to<br />
restart your computer may appear. If this message<br />
appears, click the [Yes] button to restart your<br />
computer.<br />
This completes the installation.<br />
• After installation, see "CONFIGURING THE PRINTER<br />
DRIVER FOR THE OPTIONS INSTALLED ON THE<br />
MACHINE" (page 23) to configure the printer driver<br />
settings.<br />
• If you installed the PS printer driver or the PPD driver,<br />
the PS display fonts can be installed from the<br />
"PRINTER UTILITIES" CD-ROM that accompanies<br />
the PS3 expansion kit. See "INSTALLING THE PS<br />
DISPLAY FONTS" (page 28).<br />
14
INSTALLING THE PRINTER DRIVER / PC-FAX DRIVER<br />
WHEN THE MACHINE WILL BE CONNECTED WITH A<br />
USB CABLE<br />
Supported operating systems: Windows 98/Me/2000 * /XP * /Server 2003 * /Vista *<br />
* Administrator's rights are required to install the software.<br />
• The PS3 expansion kit is required to use the PS printer driver or the PPD driver.<br />
• To install the PPD driver when Windows 98/Me is used, see "USING THE STANDARD WINDOWS PS PRINTER DRIVER<br />
(Windows 98/Me/NT 4.0)" (page 22) and install the driver using the Add Printer Wizard.<br />
• To use the port created when the printer driver is installed for fax data transfer, install the printer driver first and then install<br />
the PC-Fax driver.<br />
1<br />
2<br />
Make sure that a USB cable is not<br />
connected to your computer and the<br />
machine.<br />
If a cable is connected, a Plug and Play window will<br />
appear. If this happens, click the [Cancel] button to close<br />
the window and disconnect the cable.<br />
The cable will be connected in step 14.<br />
Insert the "<strong>Software</strong> CD-ROM" into your<br />
computer's CD-ROM drive.<br />
4<br />
5<br />
Double-click the [Setup] icon ( ).<br />
In Windows Vista, if a message screen appears<br />
asking you for confirmation, click [Allow].<br />
The "SOFTWARE LICENSE" window<br />
will appear. Make sure that you<br />
understand the contents of the license<br />
agreement and then click the [Yes]<br />
button.<br />
3<br />
Insert the "<strong>Software</strong> CD-ROM" that shows "Disc 1" on the<br />
front of the CD-ROM.<br />
Click the [start] button, click [My<br />
Computer] ( ), and then double-click<br />
the [CD-ROM] icon ( ).<br />
• In Windows 98/Me/2000, double-click [My Computer]<br />
and then double-click the [CD-ROM] icon.<br />
• In Windows Vista, click the [Start] button ( ), click<br />
[Computer], and then double-click the [CD-ROM] icon.<br />
6<br />
You can show the "SOFTWARE LICENSE" in a<br />
different language by selecting the desired language<br />
from the language menu. To install the software in the<br />
selected language, continue the installation with that<br />
language selected.<br />
Read the message in the "Welcome"<br />
window and then click the [Next]<br />
button.<br />
15
INSTALLING THE PRINTER DRIVER / PC-FAX DRIVER<br />
7<br />
Click the [Printer Driver] button.<br />
Before installing the software, be sure to click the<br />
[Display Readme] button and view the detailed<br />
information on the software.<br />
11<br />
When you are asked if you wish to<br />
install the display fonts, select an<br />
answer and click the [Next] button.<br />
12<br />
Follow the on-screen instructions.<br />
Read the message in the window that appears and click<br />
the [Next] button.<br />
When the installation completed screen appears, click<br />
the [OK] button.<br />
• If you are using Windows 2000/XP/Server 2003<br />
If a warning message regarding the Windows logo<br />
test or digital signature appears, be sure to click the<br />
[Continue Anyway] or [Yes] button.<br />
• If you are using Windows Vista<br />
If a security warning window appears, be sure to click<br />
[Install this driver software anyway].<br />
8<br />
9<br />
Click the [Next] button.<br />
Click the [Custom installation] button.<br />
13<br />
Click the [Close] button in the window<br />
of step 7.<br />
When a message appears prompting you to connect the<br />
machine to your computer, click the [OK] button.<br />
After the installation, a message prompting you to<br />
restart your computer may appear. If this message<br />
appears, click the [Yes] button to restart your<br />
computer.<br />
10<br />
When you are asked how the printer is<br />
connected, select [Connected to this<br />
computer] and click the [Next] button.<br />
16
INSTALLING THE PRINTER DRIVER / PC-FAX DRIVER<br />
14<br />
Connect the machine to your computer<br />
with a USB cable.<br />
15<br />
Installation of the PCL6 printer driver<br />
begins.<br />
(1) Make sure that the machine is powered<br />
on.<br />
(2) Connect the cable to the USB<br />
connector (B type) on the machine.<br />
The USB interface on the machine complies with<br />
the USB 2.0 (Hi-Speed) standard. Please purchase<br />
a shielded USB cable.<br />
When the "Found New Hardware Wizard" appears,<br />
select [Install the software automatically<br />
(Recommended)], click the [Next] button, and follow the<br />
on-screen instructions.<br />
• If you are using Windows 2000/XP/Server 2003<br />
If a warning message regarding the Windows logo<br />
test or digital signature appears, be sure to click the<br />
[Continue Anyway] or [Yes] button.<br />
• If you are using Windows Vista<br />
If a security warning window appears, be sure to click<br />
[Install this driver software anyway].<br />
(3) Connect the other end of the cable to<br />
the USB connector (A type) on your<br />
computer.<br />
The machine is found and a Plug and Play window<br />
appears.<br />
This completes the installation.<br />
• After installing the printer driver, see "CONFIGURING<br />
THE PRINTER DRIVER FOR THE OPTIONS<br />
INSTALLED ON THE MACHINE" (page 23) to<br />
configure the printer driver settings.<br />
• If you are using the machine as a shared printer, see<br />
"USING THE MACHINE AS A SHARED PRINTER"<br />
(page 20) to install the printer driver on each of the<br />
client computers.<br />
When installing the PCL5e printer driver, PS printer driver, PPD driver, or PC-Fax driver<br />
Installation is possible even after the USB cable has been connected.<br />
1<br />
Insert the "<strong>Software</strong> CD-ROM" into your<br />
computer's CD-ROM drive.<br />
3<br />
Double-click the [Setup] icon ( ).<br />
• If you are installing the printer driver, insert the<br />
"<strong>Software</strong> CD-ROM" that shows "Disc 1" on the front of<br />
the CD-ROM.<br />
• If you are installing the PC-Fax driver, insert the<br />
"<strong>Software</strong> CD-ROM" that shows "Disc 2" on the front of<br />
the CD-ROM.<br />
In Windows Vista, if a message screen appears<br />
asking you for confirmation, click [Allow].<br />
2<br />
Click the [start] button, click [My<br />
Computer] ( ), and then double-click<br />
the [CD-ROM] icon ( ).<br />
4<br />
The "SOFTWARE LICENSE" window<br />
will appear. Make sure that you<br />
understand the contents of the license<br />
agreement and then click the [Yes]<br />
button.<br />
• In Windows 98/Me/2000, double-click [My Computer]<br />
and then double-click the [CD-ROM] icon.<br />
• In Windows Vista, click the [Start] button ( ), click<br />
[Computer], and then double-click the [CD-ROM] icon.<br />
You can show the "SOFTWARE LICENSE" in a<br />
different language by selecting the desired language<br />
from the language menu. To install the software in the<br />
selected language, continue the installation with that<br />
language selected.<br />
17
INSTALLING THE PRINTER DRIVER / PC-FAX DRIVER<br />
5 Read the message in the "Welcome" 9<br />
window and then click the [Next]<br />
button.<br />
6 Click the [Printer Driver] button.<br />
• To install the PC-Fax driver, click the [PC-Fax Driver]<br />
button.<br />
• Before installing the software, be sure to click the<br />
[Display Readme] button and view the detailed<br />
information on the software.<br />
10<br />
11<br />
* The above screen appears when the printer<br />
driver is being installed.<br />
7 Click the [Next] button.<br />
8 Click the [Custom installation] button.<br />
When you are asked how the printer is<br />
connected, select [Connected to this<br />
computer] and click the [Next] button.<br />
When the port selection window<br />
appears, select the port that the PCL6<br />
printer driver is using (USB001, etc.)<br />
and click the [Next] button.<br />
When the printer driver selection<br />
window appears, remove the [PCL6]<br />
checkmark and click the [PCL5e], [PS]<br />
or [PPD] checkbox so that a checkmark<br />
( ) appears, and then click the [Next]<br />
button.<br />
• When the PC-Fax driver is being installed, this<br />
screen does not appear. Go to the next step.<br />
• The PS3 expansion kit is required to use the PS<br />
printer driver or the PPD driver.<br />
• The [PPD] checkbox only appears if you are using<br />
Windows 2000/XP/Server 2003/Vista.<br />
18
INSTALLING THE PRINTER DRIVER / PC-FAX DRIVER<br />
12<br />
Select whether or not you wish the<br />
printer to be your default printer and<br />
click the [Next] button.<br />
17<br />
Click the [Close] button in the window<br />
of step 6.<br />
If you are installing multiple drivers, select the printer<br />
driver to be used as the default printer.<br />
If you do not wish to set one of the printer drivers as the<br />
default printer, select [No].<br />
After the installation, a message prompting you to<br />
restart your computer may appear. If this message<br />
appears, click the [Yes] button to restart your<br />
computer.<br />
13<br />
14<br />
15<br />
When the printer name window<br />
appears, click the [Next] button.<br />
If you wish to change the printer name, enter the desired<br />
name.<br />
When you are asked if you wish to<br />
install the display fonts, select [No] and<br />
click the [Next] button.<br />
When the PC-Fax driver is being installed, this screen<br />
does not appear. Go to the next step.<br />
Follow the on-screen instructions.<br />
Read the message in the window that appears and click<br />
the [Next] button.<br />
Installation begins.<br />
• If you are using Windows 2000/XP/Server 2003<br />
If a warning message regarding the Windows logo<br />
test or digital signature appears, be sure to click the<br />
[Continue Anyway] or [Yes] button.<br />
• If you are using Windows Vista<br />
If a security warning window appears, be sure to click<br />
[Install this driver software anyway].<br />
This completes the installation.<br />
• After installation, see "CONFIGURING THE PRINTER<br />
DRIVER FOR THE OPTIONS INSTALLED ON THE<br />
MACHINE" (page 23) to configure the printer driver<br />
settings.<br />
• Make sure that the port of the installed driver is the<br />
same as the port used by the PCL6 printer driver.<br />
The port used by the printer driver of the machine is<br />
indicated by a checkmark on the [Ports] tab of the<br />
printer driver properties window. (In Windows 98/Me,<br />
this is the port selected in [Print to the following port]<br />
on the [Details] tab.)<br />
☞ CHANGING THE PORT (page 39)<br />
• If you installed the PS printer driver or the PPD driver,<br />
the PS display fonts can be installed from the<br />
"PRINTER UTILITIES" CD-ROM that accompanies<br />
the PS3 expansion kit. See "INSTALLING THE PS<br />
DISPLAY FONTS" (page 28).<br />
16<br />
When the installation completed screen<br />
appears, click the [OK] button.<br />
19
INSTALLING THE PRINTER DRIVER / PC-FAX DRIVER<br />
USING THE MACHINE AS A SHARED PRINTER<br />
If you are going to use the machine as a shared printer on a Windows network with the printer driver or the PC-Fax driver<br />
installed on a print server, follow the steps below to install the printer driver or the PC-Fax driver on the client computers.<br />
• Ask your network administrator for the server name and printer name of the machine on the network.<br />
• For the procedure for configuring settings on the print server, see the operation manual or the Help file of the operating<br />
system. The "print server" explained here is a computer that is connected directly to the machine, and "clients" are other<br />
computers connected to the same network as the print server.<br />
• Install the same printer driver on client computers as the printer driver that is installed on the print server.<br />
• If the PPD driver is installed on the print server and the client computers are running Windows 98/Me/NT 4.0, see "USING<br />
THE STANDARD WINDOWS PS PRINTER DRIVER (Windows 98/Me/NT 4.0)" (page 22) to install the printer driver using<br />
the Add Printer Wizard.<br />
1<br />
Insert the "<strong>Software</strong> CD-ROM" into your<br />
computer's CD-ROM drive.<br />
• If you are installing the printer driver, insert the<br />
"<strong>Software</strong> CD-ROM" that shows "Disc 1" on the front of<br />
the CD-ROM.<br />
• If you are installing the PC-Fax driver, insert the<br />
"<strong>Software</strong> CD-ROM" that shows "Disc 2" on the front of<br />
the CD-ROM.<br />
6<br />
Click the [Printer Driver] button.<br />
• To install the PC-Fax driver, click the [PC-Fax Driver] button.<br />
• Before installing the software, be sure to click the<br />
[Display Readme] button and view the detailed<br />
information on the software.<br />
2<br />
Click the [start] button, click [My<br />
Computer] ( ), and then double-click<br />
the [CD-ROM] icon ( ).<br />
• In Windows 98/Me/2000, double-click [My Computer]<br />
and then double-click the [CD-ROM] icon.<br />
• In Windows Vista, click the [Start] button ( ), click<br />
[Computer], and then double-click the [CD-ROM] icon.<br />
3<br />
Double-click the [Setup] icon ( ).<br />
4<br />
In Windows Vista, if a message screen appears<br />
asking you for confirmation, click [Allow].<br />
The "SOFTWARE LICENSE" window<br />
will appear. Make sure that you<br />
understand the contents of the license<br />
agreement and then click the [Yes]<br />
button.<br />
7<br />
8<br />
* The above screen appears when the printer<br />
driver is being installed.<br />
Click the [Next] button.<br />
Click the [Custom installation] button.<br />
5<br />
Read the message in the "Welcome"<br />
window and then click the [Next]<br />
button.<br />
20
INSTALLING THE PRINTER DRIVER / PC-FAX DRIVER<br />
9<br />
Select [Shared Printer] and click the<br />
[Next] button.<br />
12<br />
When the printer driver selection window<br />
appears, select the printer driver to be<br />
installed and click the [Next] button.<br />
Be sure to select the same printer driver as the printer<br />
driver installed on the print server.<br />
10<br />
Select the printer name (configured as a<br />
shared printer).<br />
• When the PC-Fax driver is being installed, this<br />
screen does not appear. Go to the next step.<br />
• The PS3 expansion kit is required to use the PS<br />
printer driver or the PPD driver.<br />
• The [PPD] checkbox only appears if you are using<br />
Windows 2000/XP/Server 2003/Vista.<br />
13<br />
Follow the on-screen instructions.<br />
Read the message in the window that appears and click<br />
the [Next] button. Installation begins.<br />
(1) (2)<br />
(1) Select the printer name (configured as<br />
a shared printer on a print server) from<br />
the list.<br />
If you are using Windows 98/Me/NT 4.0/2000/XP, you<br />
can also click the [Add Network Port] button and select<br />
the printer to be shared by browsing the network in the<br />
window that appears. (In Windows Vista, the [Add<br />
Network Port] button does not appear.)<br />
(2) Click the [Next] button.<br />
14<br />
• If you are using Windows 2000/XP/Server 2003<br />
If a warning message regarding the Windows logo<br />
test or digital signature appears, be sure to click the<br />
[Continue Anyway] or [Yes] button.<br />
• If you are using Windows Vista<br />
If a security warning window appears, be sure to click<br />
[Install this driver software anyway].<br />
When the installation completed screen<br />
appears, click the [OK] button.<br />
If the shared printer does not appear in the list, check<br />
the settings on the print server.<br />
15<br />
Click the [Close] button in the window<br />
of step 6.<br />
11<br />
When the model selection window<br />
appears, select the model name of your<br />
machine and click the [Next] button.<br />
If you are installing the PC-Fax driver, go to step 13.<br />
After the installation, a message prompting you to<br />
restart your computer may appear. If this message<br />
appears, click the [Yes] button to restart your computer.<br />
This completes the installation.<br />
If you installed the PS printer driver or the PPD driver, the PS<br />
display fonts can be installed from the "PRINTER UTILITIES"<br />
CD-ROM that accompanies the PS3 expansion kit. See<br />
"INSTALLING THE PS DISPLAY FONTS" (page 28).<br />
21
INSTALLING THE PRINTER DRIVER / PC-FAX DRIVER<br />
USING THE STANDARD WINDOWS PS PRINTER<br />
DRIVER (Windows 98/Me/NT 4.0)<br />
If the PS3 expansion kit is installed on the machine and you wish to use the standard Windows 98/Me/NT 4.0 PS printer<br />
driver, follow the steps below to install the PPD driver using the Add Printer Wizard.<br />
• The CD-ROM does not include software for Windows NT 4.0.<br />
Contact your dealer or nearest authorized service representative if you want software for Windows NT 4.0.<br />
• If you are using Windows 2000/XP/Server 2003/Vista, you can install the PPD driver from the installer.<br />
• Be sure to view the Readme file (Readme.txt) before installing the PPD driver. If you are using Windows 98/Me, the<br />
Readme file is in the [EnglishA] * folder of the "<strong>Software</strong> CD-ROM". If you are using Windows NT 4.0, the Readme file will<br />
be in the [EnglishA] * folder inside the folder that contains the extracted files after you get the software. For the location of<br />
the folder, see step 4.<br />
1<br />
2<br />
3<br />
Insert the "<strong>Software</strong> CD-ROM" into your<br />
computer's CD-ROM drive.<br />
Insert the "<strong>Software</strong> CD-ROM" that shows "Disc 1" on the<br />
front of the CD-ROM.<br />
Click the [Start] button, select<br />
[Settings] and then click [Printers].<br />
Double-click the [Add printer] icon.<br />
The "Add Printer Wizard" will appear.<br />
4<br />
Follow the on-screen instructions.<br />
When you are asked to specify the path of the PPD file,<br />
enter the path as follows.<br />
Substitute the letter of your CD-ROM drive for "R" in the<br />
following paths.<br />
Operating system<br />
Windows 98/Me<br />
Windows NT 4.0<br />
PPD file path<br />
R:\Drivers\Printer<br />
\EnglishA * \PPD\9XME<br />
(Folder containing extracted<br />
files) \EnglishA * \PPD\NT40<br />
* "EnglishA" in North America. "English" in Europe.<br />
After installation, see "CONFIGURING THE PRINTER<br />
DRIVER FOR THE OPTIONS INSTALLED ON THE<br />
MACHINE" (page 23) to configure the printer driver<br />
settings.<br />
Installing the resident font information (Windows 98/Me)<br />
If you have installed the PPD driver on Windows 98/Me and will be using the resident fonts in the machine, you must<br />
install the resident font information. Follow the procedure below to install the resident font information.<br />
• Before installing the resident font information, be sure to install the PPD driver.<br />
• In the event that a resident font cannot be selected in a software application, install the resident font information again.<br />
1<br />
2<br />
Insert the "<strong>Software</strong> CD-ROM" into your<br />
computer's CD-ROM drive.<br />
Insert the "<strong>Software</strong> CD-ROM" that shows "Disc 1" on the<br />
front of the CD-ROM.<br />
Double-click [My Computer] ( ) and<br />
then double-click the [CD-ROM] icon<br />
( ).<br />
3<br />
4<br />
Double-click the [Drivers] folder, the<br />
[Printer] folder, the [EnglishA] folder<br />
(the [English] folder in areas other than<br />
the U.S.), the [PPD] folder, the [9XME]<br />
folder, and then [PFMSetup.exe].<br />
Follow the on-screen instructions.<br />
After the resident font information has been installed,<br />
restart your computer.<br />
22
INSTALLING THE PRINTER DRIVER / PC-FAX DRIVER<br />
CONFIGURING THE PRINTER DRIVER FOR THE<br />
OPTIONS INSTALLED ON THE MACHINE<br />
After installing the printer driver, you must configure the printer driver settings appropriately for the options that have<br />
been installed and the size and type of paper loaded in the machine. Follow the steps below to configure the printer<br />
driver.<br />
If the PPD driver is installed, see "When the PPD driver is installed" (page 25).<br />
When the PCL printer driver or PS printer driver is installed<br />
1<br />
Click the [start] button and then click<br />
[Printers and Faxes].<br />
• In Windows 98/Me/NT 4.0/2000, click the [Start]<br />
button, select [Settings], and then click [Printers].<br />
• In Windows Vista, click the [Start] button ( ), click<br />
[Control Panel], and then click [Printer].<br />
If [Printers and Faxes] does not appear in the [start]<br />
menu in Windows XP, click the [start] button, click<br />
[Control Panel], click [Printers and Other Hardware],<br />
and then click [Printers and Faxes].<br />
3<br />
4<br />
Click the [Configuration] tab.<br />
In Windows 98/Me, click the [Setup] tab and then click<br />
the [Configuration] tab in the window that appears.<br />
Click the [Auto Configuration] button.<br />
The settings are automatically configured based on the<br />
detected machine status.<br />
2<br />
Open the printer properties window.<br />
(1) Right-click the printer driver icon of the<br />
machine.<br />
(2) Select [Properties].<br />
23
INSTALLING THE PRINTER DRIVER / PC-FAX DRIVER<br />
5<br />
Configure the image of the machine.<br />
An image of the machine is formed in the printer driver<br />
configuration window based on the options that are<br />
installed.<br />
(1) (2)<br />
(1) Select the options that are installed on<br />
the machine.<br />
(2) Click the [OK] button.<br />
To cancel the image settings, click the [Cancel]<br />
button.<br />
6<br />
Click the [OK] button in the printer<br />
properties window.<br />
If automatic configuration fails, configure the settings manually.<br />
• You can check the options that are installed and the tray settings by printing out the "All Custom Setting List" in the system<br />
settings of the machine. Follow these steps to print out the "All Custom Setting List": Press the [SYSTEM SETTINGS] key,<br />
touch the [List Print (User)] key, and then touch the [Print] key of "All Custom Setting List".<br />
• Click the [Set Tray Status] button and the [Paper Type Name] button to check the settings of each.<br />
Set Tray Status: The "Tray Settings" in "Paper Tray Settings" in system settings of the machine are reflected in the<br />
settings shown here. Specify the size and type of paper loaded in each tray.<br />
Paper Type Name: The "Paper Type Registration" settings in "Paper Tray Settings" in the system settings of the machine<br />
are reflected in the settings shown here. If a user type name (1 to 10) was changed, enter the changed<br />
name.<br />
24
INSTALLING THE PRINTER DRIVER / PC-FAX DRIVER<br />
When the PPD driver is installed<br />
1<br />
Click the [start] button and then click<br />
[Printers and Faxes].<br />
3<br />
Configure the printer driver for the<br />
options installed on the machine.<br />
• In Windows 98/Me/NT 4.0/2000, click the [Start]<br />
button, select [Settings], and then click [Printers].<br />
(1)<br />
• In Windows Vista, click the [Start] button (<br />
[Control Panel], and then click [Printer].<br />
), click<br />
If [Printers and Faxes] does not appear in the [start]<br />
menu in Windows XP, click the [start] button, click<br />
[Control Panel], click [Printers and Other Hardware],<br />
and then click [Printers and Faxes].<br />
2<br />
Open the printer properties window.<br />
(1) Right-click the printer driver icon of the<br />
machine.<br />
(2) Select [Properties].<br />
(2) (3)<br />
(1) Click the [Device Settings] tab.<br />
In Windows 98/Me, click the [Device Options] tab.<br />
(2) Configure each item based on the<br />
machine configuration.<br />
The items and the procedures for configuring the<br />
items vary depending on the operating system<br />
version.<br />
(3) Click the [OK] button.<br />
You can check the options that are installed on the<br />
machine by printing out the "All Custom Setting List" in<br />
the system settings. Follow these steps to print out the<br />
"All Custom Setting List": Press the [SYSTEM<br />
SETTINGS] key, touch the [List Print (User)] key, and<br />
then touch the [Print] key of "All Custom Setting List".<br />
25
INSTALLING THE PRINTER STATUS<br />
MONITOR<br />
Printer Status Monitor is a printer utility that allows general users to check the current status of the machine on their<br />
computer screen, such as whether or not the machine is ready to print. The Printer Status Monitor shows error<br />
information such as paper misfeeds, printer configuration information (whether or not a finisher is installed, etc.) as an<br />
image, the paper sizes that can be used, and the amount of paper remaining.<br />
The Printer Status Monitor cannot be used in the following situations:<br />
• When the machine is connected by a USB cable.<br />
• When printing to the machine using the IPP function.<br />
Supported operating systems: Windows 98/Me/NT 4.0 * /2000 * /XP * /Server 2003 * /Vista *<br />
* Administrator's rights are required to install the software.<br />
1<br />
2<br />
Insert the "<strong>Software</strong> CD-ROM" into your<br />
computer's CD-ROM drive.<br />
Insert the "<strong>Software</strong> CD-ROM" that shows "Disc 1" on the<br />
front of the CD-ROM.<br />
Click the [start] button, click [My<br />
Computer] ( ), and then double-click<br />
the [CD-ROM] icon ( ).<br />
5<br />
6<br />
Read the message in the "Welcome"<br />
window and then click the [Next]<br />
button.<br />
Click the [Printer Status Monitor] button.<br />
Before installing the software, be sure to click the<br />
[Display Readme] button and view the detailed<br />
information on the software.<br />
• In Windows 98/Me/2000, double-click [My Computer]<br />
and then double-click the [CD-ROM] icon.<br />
• In Windows Vista, click the [Start] button ( ), click<br />
[Computer], and then double-click the [CD-ROM] icon.<br />
3<br />
Double-click the [Setup] icon ( ).<br />
In Windows Vista, if a message screen appears<br />
asking you for confirmation, click [Allow].<br />
4<br />
The "SOFTWARE LICENSE" window<br />
will appear. Make sure that you<br />
understand the contents of the license<br />
agreement and then click the [Yes]<br />
button.<br />
You can show the "SOFTWARE LICENSE" in a<br />
different language by selecting the desired language<br />
from the language menu. To install the software in the<br />
selected language, continue the installation with that<br />
language selected.<br />
26
INSTALLING THE PRINTER STATUS MONITOR<br />
7<br />
8<br />
9<br />
Follow the on-screen instructions.<br />
When the installation completed screen<br />
appears, click the [Finish] button.<br />
To have the Printer Status Monitor start automatically<br />
when your computer is started, select the [Add this<br />
program to your Startup folder] checkbox and click<br />
the [Finish] button.<br />
Click the [Close] button in the window<br />
of step 6.<br />
After the installation, a message prompting you to<br />
restart your computer may appear. If this message<br />
appears, click the [Yes] button to restart your<br />
computer.<br />
This completes the installation.<br />
For the procedures for using the Printer Status Monitor, see the Help file. Follow these steps to view the Help file:<br />
Click the Windows [start] button, select [All Programs] ([Programs] in versions of Windows other than Windows<br />
XP/Server 2003), select [SHARP Printer Status Monitor] and then select [Help].<br />
27
INSTALLING THE PS DISPLAY FONTS<br />
Fonts that can be used by the PS printer driver are contained on the "PRINTER UTILITIES" CD-ROM that accompanies<br />
the PS3 expansion kit. Install these fonts as needed for the PS printer driver.<br />
1<br />
2<br />
Insert the "PRINTER UTILITIES"<br />
CD-ROM that accompanies the PS3<br />
expansion kit into your computer's<br />
CD-ROM drive.<br />
Click the [start] button, click [My<br />
Computer] ( ), and then double-click<br />
the [CD-ROM] icon ( ).<br />
5<br />
6<br />
Read the message in the "Welcome"<br />
window and then click the [Next]<br />
button.<br />
Click the [PS Display Font] button.<br />
• In Windows 98/Me/NT 4.0/2000, double-click [My<br />
Computer], and then double-click the [CD-ROM] icon.<br />
• In Windows Vista, click the [Start] button ( ), click<br />
[Computer], and then double-click the [CD-ROM] icon.<br />
3<br />
Double-click the [Setup] icon ( ).<br />
In Windows Vista, if a message screen appears<br />
asking you for confirmation, click [Allow].<br />
4<br />
The "SOFTWARE LICENSE" window<br />
will appear. Make sure that you<br />
understand the contents of the license<br />
agreement and then click the [Yes]<br />
button.<br />
7<br />
8<br />
Follow the on-screen instructions.<br />
Click the [Close] button in the screen of<br />
step 6.<br />
You can show the "SOFTWARE LICENSE" in a<br />
different language by selecting the desired language<br />
from the language menu. To install the software in the<br />
selected language, continue the installation with that<br />
language selected.<br />
28
3<br />
SETUP IN A MACINTOSH<br />
ENVIRONMENT<br />
This chapter explains how to install the PPD file to enable printing from a Macintosh and how to configure the printer<br />
driver settings.<br />
☞ MAC OS X: this page<br />
(v10.1.5, v10.2.8, v10.3.9, v10.4 - v10.4.8)<br />
☞ MAC OS 9.0 - 9.2.2: page 34<br />
• To use the machine as a printer in a Macintosh environment, the printer expansion kit and PS3 expansion kit are<br />
necessary. In addition, the machine must be connected to a network. A USB connection cannot be used.<br />
• The PC-Fax driver cannot be used in a Macintosh environment.<br />
MAC OS X<br />
The explanations of screens and procedures are primarily for Mac OS X v10.4. The screens may vary in other versions of the<br />
operating system.<br />
1<br />
Insert the "<strong>Software</strong> CD-ROM" into your<br />
computer's CD-ROM drive.<br />
5<br />
Double-click the [<strong>MX</strong>-B03] icon ( ).<br />
2<br />
Insert the "<strong>Software</strong> CD-ROM" that shows "Disc 2" on the<br />
front of the CD-ROM.<br />
Double-click the [CD-ROM] icon ( ) on<br />
the desktop.<br />
• If the "Authorization" window appears in Mac OS X<br />
v10.1.5, click the lock icon ( ), enter the<br />
password, and click the [OK] button.<br />
• If the "Authenticate" window appears in Mac OS X<br />
v10.2.8, enter the password and click the [OK]<br />
button.<br />
3<br />
Double-click the [MacOSX] folder.<br />
Before installing the software, be sure to read "ReadMe<br />
First". "ReadMe First" is in the [US-English] folder<br />
([English] folder in areas other than the U.S.) in the<br />
[Readme] folder.<br />
6<br />
Click the [Continue] button.<br />
4<br />
Double-click the folder corresponding<br />
to the versions of the operating system.<br />
v10.1.5<br />
v10.2.8<br />
v10.3.9<br />
v10.4 -<br />
10.4.8<br />
29
MAC OS X<br />
7<br />
The License Agreement window will<br />
appear. Make sure that you understand<br />
the contents of the license agreement<br />
and then click the [Continue] button.<br />
11<br />
Select [Utilities] from the [Go] menu.<br />
If you are using Mac OS X v10.1.5 or v10.2.8, select<br />
[Applications] from the [Go] menu.<br />
A message will appear asking you if you agree to the<br />
terms of the license. Click the [Agree] button.<br />
If the license appears in the different language,<br />
change the language in the language menu.<br />
8<br />
Select the hard drive where the PPD file<br />
will be installed and click the [Continue]<br />
button.<br />
Be sure to select the hard drive on which your operating<br />
system is installed.<br />
12<br />
Double-click the [Printer Setup Utility]<br />
icon ( ).<br />
If you are using Mac OS X v10.1.5 or v10.2.8,<br />
double-click the [Utilities] folder and then double-click the<br />
[Print Center] icon.<br />
If this is the first time you are installing a printer driver<br />
on your computer, a confirmation message will<br />
appear. Click the [Add] button.<br />
9<br />
Click the [Install] button.<br />
Installation begins.<br />
13<br />
Click [Add].<br />
If you are using Mac OS X v10.1.5, click the [Add Printer]<br />
button.<br />
If the "Authenticate" window appears, enter the<br />
password and click the [OK] button.<br />
10<br />
30<br />
When the message "The software was<br />
successfully installed" appears in the<br />
installation window, click the [Close]<br />
button.<br />
This completes the installation of the software. Next,<br />
configure the printer driver settings.
MAC OS X<br />
+<br />
14<br />
Configure the printer driver.<br />
• The procedure for configuring the printer driver varies depending on the operating system version. The procedure for versions<br />
10.4 - 10.4.8 and the procedure for other versions are explained separately below.<br />
• The machine can print using the IPP function. If you wish to use the IPP function, see "Printing using the IPP function" (page<br />
33) to configure the printer driver settings.<br />
v10.4 - 10.4.8<br />
v10.1.5, v10.2.8, v10.3.9<br />
(1)<br />
(1)<br />
(2)<br />
(2)<br />
(3)<br />
(4)<br />
(1) Click the [Default Browser] icon.<br />
If multiple AppleTalk zones are displayed, select the<br />
zone that includes the printer from the menu.<br />
(2) Click the machine's model name.<br />
• The machine's model name usually appears as<br />
[SCxxxxxx]. ("xxxxxx" is a sequence of<br />
characters that varies depending on your model.)<br />
• The PPD file of the machine is automatically<br />
selected.<br />
(3) Make sure that the PPD file of your<br />
model is selected.<br />
(4) Click the [Add] button.<br />
The PPD file of the machine is automatically<br />
selected and the peripheral devices installed on the<br />
machine are detected and automatically configured.<br />
(3)<br />
(4)<br />
(1) Select [AppleTalk].<br />
If multiple AppleTalk zones are displayed, select the<br />
zone that includes the printer from the menu.<br />
(2) Click the machine's model name.<br />
The machine's model name usually appears as<br />
[SCxxxxxx]. ("xxxxxx" is a sequence of characters<br />
that varies depending on your model.)<br />
(3) Select the PPD file of the machine.<br />
• If you are using Mac OS X v10.1.5, select [Other].<br />
The PPD file selection window will appear. Click<br />
"Startup disk name" - [Library] - [Printers] -<br />
[PPDs] - [Contents] - [Resources] - [en.lproj] -<br />
"PPD file for your model", and then click the<br />
[Choose] button.<br />
• If you are using Mac OS X v10.2.8, select [<strong>Sharp</strong>]<br />
and click the PPD file of your model.<br />
• If you are using Mac OS X v10.3.9, select [Auto<br />
Select].<br />
(4) Click the [Add] button.<br />
If you are using Mac OS X v10.3.9, the PPD file of<br />
the machine is automatically selected and the<br />
peripheral devices installed on the machine are<br />
detected and automatically configured.<br />
The PPD file is installed in the following folders on the startup disk.<br />
[Library] - [Printers] - [PPDs] - [Contents] - [Resources] - [en.lproj]<br />
If you are using Mac OS X v10.1.5, this completes the configuration of the printer driver. If you are using a<br />
version other than Mac OS X v10.1.5, go to the next step.<br />
31
MAC OS X<br />
15<br />
Display printer information.<br />
(2)<br />
(1)<br />
(1) Click the machine's name.<br />
(2) Click [Show Info].<br />
If you are using Mac OS X v10.2.8, select [Show<br />
Info] from the [Printers] menu.<br />
16<br />
Select the machine configuration.<br />
If you selected [Auto Select] in (3) of step 14, the<br />
machine configuration is detected and automatically<br />
configured. Check the configured settings to make sure<br />
they are correct.<br />
(4)<br />
(1)<br />
(2)<br />
(1) Select [Installable Options].<br />
(2) Select the options that are installed on<br />
the machine.<br />
(3) Click the [Apply Changes] button.<br />
(4) Click to close the window.<br />
(3)<br />
You can check the options that are installed on the<br />
machine by printing out the "All Custom Setting List" in<br />
the system settings. Follow these steps to print out the<br />
"All Custom Setting List": Press the [SYSTEM<br />
SETTINGS] key, touch the [List Print (User)] key, and<br />
then touch the [Print] key of "All Custom Setting List".<br />
This completes the configuration of the printer<br />
driver.<br />
32
Printing using the IPP function<br />
MAC OS X<br />
The machine can print using the IPP function. When the machine is in a remote location, this function can be used in<br />
place of the fax function to print a higher quality image than a fax. If you wish to use the IPP function, follow these steps<br />
to select the PPD file when configuring the printer driver (step 14 on page 31).<br />
v10.4 - 10.4.8<br />
v10.1.5, v10.2.8, v10.3.9<br />
(1)<br />
(1)<br />
(2)<br />
(2)<br />
(3)<br />
(1) Click the [IP Printer] icon.<br />
(2) Select [Internet Printing Protocol] in<br />
"Protocol". Enter the address of the<br />
machine (IP address or domain name)<br />
and the queue name.<br />
Enter "ipp" in "Queue".<br />
(3) Select [<strong>Sharp</strong>] in "Print Using" and<br />
click the PPD file of your model.<br />
(4) Click the [Add] button.<br />
☞ Checking the IP address of the machine (page 7)<br />
(3)<br />
(4)<br />
(1) Select [IP Printing].<br />
If you are using Mac OS X v10.1.5, select [LPR<br />
Printers using IP].<br />
(2) Select [Internet Printing Protocol] in<br />
"Printer Type". Enter the address of the<br />
machine (IP address or domain name)<br />
and the "Queue Name".<br />
• If you are using Mac OS X v10.1.5, enter the<br />
address of the machine (IP address or domain<br />
name) in "LPR Printer's Address".<br />
• If you are using Mac OS X v10.2.8, enter the<br />
address of the machine (IP address or domain<br />
name) in "Printer's Address".<br />
• Enter "ipp" in "Queue Name".<br />
(3) Select [<strong>Sharp</strong>] in "Printer Model" and<br />
click the PPD file of your model.<br />
If you are using Mac OS X v10.1.5, select [Other].<br />
The PPD file selection window will appear. Click<br />
"Startup disk name" - [Library] - [Printers] - [PPDs] -<br />
[Contents] - [Resources] - [en.lproj] - "PPD file for<br />
your model", and then click the [Choose] button.<br />
(4) Click the [Add] button.<br />
☞ Checking the IP address of the machine (page 7)<br />
(4)<br />
33
MAC OS 9.0 - 9.2.2<br />
If you are using Mac OS 9.0 to 9.2.2, make sure that "LaserWriter 8" has been installed and that the "LaserWriter 8"<br />
checkbox is selected in "Extensions Manager" in "Control Panels". If not, install it from the system CD-ROM supplied with<br />
your Macintosh computer.<br />
1<br />
2<br />
Insert the "<strong>Software</strong> CD-ROM" into your<br />
computer's CD-ROM drive.<br />
Insert the "<strong>Software</strong> CD-ROM" that shows "Disc 2" on the<br />
front of the CD-ROM.<br />
Double-click the [CD-ROM] icon ( ) on<br />
the desktop.<br />
8<br />
9<br />
Select [Chooser] from the Apple Menu.<br />
Create a printer.<br />
(1)<br />
(2)<br />
3<br />
4<br />
5<br />
Double-click the [MacOS] folder.<br />
Before installing the software, be sure to read "ReadMe<br />
First". "ReadMe First" is in the [US-English] folder<br />
([English] folder in areas other than the U.S.) in the<br />
[Readme] folder.<br />
Double-click the [Installer] icon ( ).<br />
Click the [Install] button.<br />
(1) Click the [LaserWriter 8] icon.<br />
If multiple AppleTalk zones are displayed, select the<br />
zone that includes the printer.<br />
(2) Click the machine's model name.<br />
The machine's model name usually appears as<br />
[SCxxxxxx]. ("xxxxxx" is a sequence of characters<br />
that varies depending on your model.)<br />
(3)<br />
(3) Click the [Create] button.<br />
6<br />
The License Agreement window will<br />
appear. Make sure that you understand<br />
the contents of the license agreement<br />
and then click the [Yes] button.<br />
7<br />
Read the message in the window that<br />
appears and click the [Continue]<br />
button.<br />
Installation of the PPD file begins.<br />
After the installation, a message prompting you to restart<br />
your computer will appear. Click the [OK] button and<br />
restart your computer.<br />
This completes the installation of the software. Next,<br />
configure the printer driver settings.<br />
34
10 Select the PPD file.<br />
13<br />
(1)<br />
(2)<br />
(1) Click the PPD file for your model.<br />
(2) Click the [Select] button.<br />
• If the above dialog box does not appear and you<br />
return to the "Chooser" dialog box, follow these<br />
steps to select the PPD file manually.<br />
(1) Make sure that the machine is selected in the<br />
"Select a PostScript Printer" list, and then click<br />
the [Setup] button followed by the [Select PPD]<br />
14<br />
button.<br />
(2) Select the PPD file for your model and click the<br />
[Open] button.<br />
(3) Click the [OK] button.<br />
15<br />
• The PPD file is installed in the [Printer Descriptions]<br />
folder in the [Extensions] folder.<br />
11 Make sure that the machine is selected<br />
in the "Select a PostScript Printer" list<br />
and then click the [Setup] button.<br />
12 Click the [Configure] button.<br />
MAC OS 9.0 - 9.2.2<br />
Select the machine configuration.<br />
(1) Select the options that are installed on<br />
the machine.<br />
(2) Click the [OK] button.<br />
Click the [OK] button in the window of<br />
step 12 to close the window.<br />
Click the close box ( ) to close the<br />
"Chooser".<br />
This completes the configuration of the printer<br />
driver.<br />
Installing the screen fonts<br />
The screen fonts for Mac OS 9.0 - 9.2.2 are contained in<br />
the [Font] folder of the "PRINTER UTILITIES" CD-ROM<br />
that accompanies the PS3 expansion kit. Copy the fonts<br />
that you wish to install to the [System Folder] of the<br />
startup disk.<br />
(1)<br />
(2)<br />
You can check the options that are installed on the<br />
machine by printing out the "All Custom Setting List" in<br />
the system settings. Follow these steps to print out the<br />
"All Custom Setting List": Press the [SYSTEM<br />
SETTINGS] key, touch the [List Print (User)] key, and<br />
then touch the [Print] key of "All Custom Setting List".<br />
If you experience problems that may be due to the<br />
installed screen fonts, immediately delete the installed<br />
fonts from the system.<br />
To automatically configure the settings based on the<br />
installed machine options that are detected, click the<br />
[Auto Setup] button.<br />
35
4<br />
TROUBLESHOOTING AND<br />
USEFUL INFORMATION<br />
TROUBLESHOOTING<br />
This section provides solutions to possible installation problems. See the following table of contents to locate the<br />
appropriate page for your question or problem.<br />
• The software cannot be installed. . . . . . . . . . . . . . . . . . . . . . . . . . . . . . . . . . . . . . . . . . . . . . . . . . . . . . 36<br />
• The machine is not detected (when connected to a network). . . . . . . . . . . . . . . . . . . . . . . . . . . . . . . . 36<br />
• The plug and play screen does not appear (USB connection in Windows). . . . . . . . . . . . . . . . . . . . . . 37<br />
• The printer driver is not installed correctly by plug and play (USB connection in Windows). . . . . . . . . 38<br />
• The printer driver cannot be installed (Windows 2000/XP/Server 2003) . . . . . . . . . . . . . . . . . . . . . . . 38<br />
Problem Point to check Solution<br />
The software cannot<br />
be installed.<br />
The machine is not<br />
detected (when<br />
connected to a<br />
network).<br />
Is there sufficient free space on your<br />
hard drive?<br />
Are you using an operating system that<br />
is not supported?<br />
Is the IP address of the machine<br />
configured?<br />
Is your computer connected to the same<br />
network as the machine?<br />
Delete any unneeded files and applications to increase<br />
free space on your hard drive.<br />
Make sure that the software can run on your operating<br />
system.<br />
For detailed information on installation requirements for<br />
each software program in Windows, click the [Display<br />
Readme] button in the installer.<br />
In a Macintosh environment, this can be checked in<br />
"ReadMe First" in the [US-English] folder ([English]<br />
folder in areas other than the U.S.) in the [Readme]<br />
folder of the "<strong>Software</strong> CD-ROM".<br />
If the IP address of the machine is not configured, the<br />
machine will not be detected. Make sure that the IP<br />
address is configured correctly in "Network Settings" in<br />
the machine's system settings (administrator).<br />
➞ System Settings (Administrator) > "Network Settings"<br />
Windows:<br />
If the machine and your computer are not connected<br />
to the same local area network, the machine will not<br />
be detected. If the two are connected to different<br />
sub-networks, click the [Specify condition] button and<br />
enter the machine's name (host name) or IP address<br />
to search for the machine.<br />
Macintosh:<br />
If multiple AppleTalk zones exist, select the zone to<br />
which the machine is connected from the menu.<br />
36
TROUBLESHOOTING<br />
Problem Point to check Solution<br />
The machine is not<br />
detected (when<br />
connected to a<br />
network).<br />
The plug and play<br />
screen does not<br />
appear (USB<br />
connection in<br />
Windows).<br />
Is the machine power on?<br />
Is your computer connected correctly to<br />
the machine?<br />
Is the machine power on?<br />
Can your computer use a USB<br />
connection?<br />
If the machine is powered off, it will not be detected.<br />
Switch on the main power switch and the [POWER] key<br />
( ) in that order. (In Windows, search again after<br />
powering on the machine.)<br />
Make sure that the cable is connected securely to the<br />
LAN connectors on your computer and the machine.<br />
Check the connections at the hub as well.<br />
☞ CONNECTING TO A NETWORK (page 7)<br />
When a USB cable is connected, make sure the power<br />
of the machine is "ON" and then connect a USB cable to<br />
the machine. When the machine is not powered on,<br />
switch on the main power switch and the [POWER] key<br />
( ) in that order.<br />
Check your computer whether or not a USB interface<br />
can be used on the Device Manager in your computer.<br />
(For information on "Device Manager", see Help in<br />
Windows.)<br />
If USB can be used, your controller chipset type and<br />
root hub will appear in "Universal Serial Bus controllers"<br />
in "Device Manager". (The items that appear will vary<br />
depending on your computer.)<br />
If these two items appear, USB should be useable. If a<br />
yellow exclamation point appears next to "Universal<br />
Serial Bus controllers" or the two items do not appear,<br />
refer to your computer manual or check with the<br />
manufacturer of your computer to enable USB and then<br />
reinstall the printer driver.<br />
37
TROUBLESHOOTING<br />
Problem Point to check Solution<br />
The printer driver is<br />
not installed correctly<br />
by plug and play (USB<br />
connection in<br />
Windows).<br />
Did you connect the machine to your<br />
computer before installing the printer<br />
driver?<br />
In Windows 2000/XP/Server 2003/Vista, if the machine<br />
was connected to your computer with a USB cable<br />
before the printer driver was installed from the installer,<br />
check if information on the unsuccessful installation<br />
remains in "Device Manager". (For information on<br />
"Device Manager", see Help in Windows.)<br />
If the model name of the machine appears in "Other<br />
devices" in "Device Manager", delete it, restart your<br />
computer, and install the printer driver again.<br />
The printer driver cannot be installed (Windows 2000/XP/Server 2003)<br />
If the printer driver cannot be installed on Windows 2000/XP/Server 2003, follow the steps below to check your<br />
computer settings.<br />
1<br />
Click the [start] button and then click<br />
[Control Panel].<br />
In Windows 2000, click the [Start] button, point to<br />
[Settings], and click [Control Panel].<br />
4<br />
Check the settings in "What action do<br />
you want Windows to take?" ("File<br />
signature verification" in Windows 2000).<br />
2<br />
Click [Performance and Maintenance]<br />
and then [System].<br />
In Windows 2000, double-click the [System] icon.<br />
3<br />
Click the [Hardware] tab and then the<br />
[Driver Signing] button.<br />
If [Block] is selected, the printer driver cannot be installed.<br />
Select [Warn] and install the printer driver again.<br />
38
CHANGING THE PORT<br />
When using the machine in a Windows environment, follow the steps below to change the port when you have changed<br />
the IP address of the machine or have installed the PC-Fax driver when the machine is connected with a USB cable.<br />
1<br />
Click the [start] button and then click<br />
[Printers and Faxes].<br />
3<br />
Adding or changing a port.<br />
• In Windows 98/Me/NT 4.0/2000, click the [Start]<br />
button, select [Settings], and then click [Printers].<br />
• In Windows Vista, click the [Start] button (<br />
[Control Panel], and then click [Printer].<br />
), click<br />
(2) (1)<br />
(1) Click the [Ports] tab.<br />
2<br />
If [Printers and Faxes] does not appear in the [start]<br />
menu in Windows XP, click the [start] button, click<br />
[Control Panel], click [Printers and Other Hardware],<br />
and then click [Printers and Faxes].<br />
Open the printer properties window.<br />
In Windows 98/Me, click the [Details] tab.<br />
(2) Click the [Add Port] button.<br />
To change to a previously created port such as USB<br />
port, select the desired port (USB001, etc.) from the<br />
list and click the [Apply] button. This changes the port.<br />
(1) Right-click the printer driver icon of the<br />
machine.<br />
(2) Select [Properties].<br />
39
CHANGING THE PORT<br />
4<br />
Select [SC TCP/IP Port] and then click<br />
the [New Port] button.<br />
5<br />
Create the new port.<br />
In Windows 98/Me, select [Other], [SC TCP/IP Port], and<br />
then click the [OK] button.<br />
• The "SC TCP/IP Port" is added when the printer<br />
driver is installed using a "Standard installation", or<br />
a "Custom installation" with "LPR Direct Print"<br />
selected.<br />
• If the printer driver is installed using a "Custom<br />
installation" with "IPP" selected, the [SC-Print2005<br />
Port] is added. If you need to change the printer port<br />
when the machine is connected to an intranet or a<br />
wide area network (WAN) using the IPP function,<br />
select [SC-Print2005 Port], click the [New Port]<br />
button (the [OK] button in Windows 98/Me), and<br />
follow the on-screen instructions to create the port<br />
again.<br />
6<br />
(1) (2) (3)<br />
(1) Enter the machine's IP address.<br />
☞ Checking the IP address of the machine (page 7)<br />
(2) Make sure that [LPR] is selected.<br />
(3) Make sure that [lp] is entered.<br />
(4) Click the [OK] button.<br />
Click the [Close] button in the screen of<br />
step 4.<br />
(4)<br />
In Windows 98/Me, this step is not required. Go to the<br />
next step.<br />
7<br />
Make sure the created printer port is<br />
selected in the printer properties<br />
window and then click the [Apply]<br />
button.<br />
When using a port created with "Standard TCP/IP Port"<br />
When using a port created using "Standard TCP/IP Port" in Windows 2000/XP/Server 2003/Vista, in the screen that<br />
appears after you click the [Configure Port] button in the screen of step 3, make sure the [SNMP Status Enabled]<br />
checkbox is not selected ( ). If the [SNMP Status Enabled] checkbox is selected ( ), it may not be possible to print<br />
correctly.<br />
40
REMOVING THE SOFTWARE<br />
To remove the printer driver or software installed using the installer, follow the steps below.<br />
Windows<br />
Mac OS X<br />
1 Click the [start] button and then click 1 Delete the printer that uses the<br />
[Control Panel].<br />
machine's PPD file from the printer list.<br />
To show the printer list, see step 11 and 12 of "MAC OS<br />
In Windows 98/Me/NT 4.0/2000, click the [Start] button,<br />
X" (page 29).<br />
point to [Settings], and click [Control Panel].<br />
2 Click [Add or Remove Programs]. 2 Delete the PPD file.<br />
The PPD file has been copied to the following folder on<br />
• In Windows 98/Me/NT 4.0/2000, double-click the<br />
the startup disk.<br />
[Add/Remove Programs] icon.<br />
[Library] - [Printers] - [PPDs] - [Contents] - [Resources] -<br />
• In Windows Vista, click [Uninstall a program].<br />
[en.lproj]<br />
Delete the PPD file of the machine from this folder.<br />
3 Select the program or driver that you<br />
wish to delete.<br />
3 Delete the installation information.<br />
For more information, see the manual for the operating<br />
The installation information file has been copied to the<br />
system or Help.<br />
following folder on the startup disk.<br />
[Library] - [Receipts]<br />
4 Restart your computer. Delete the [<strong>MX</strong>-B03.pkg] file from this folder.<br />
Mac OS 9.0 - 9.2.2<br />
After deleting the icon of the printer that uses the<br />
machine's PPD file from the desktop, follow the steps<br />
below.<br />
1<br />
Insert the "<strong>Software</strong> CD-ROM" into your<br />
CD-ROM drive.<br />
Insert the "<strong>Software</strong> CD-ROM" that shows "Disc 2" on the<br />
front of the CD-ROM.<br />
2<br />
3<br />
4<br />
Double-click the [CD-ROM] icon ( ) on<br />
the desktop and double-click the<br />
[MacOS] folder.<br />
Double-click the [Installer] icon ( ).<br />
Select [Remove] in the Install menu and<br />
click the [Remove] button.<br />
41
PRINTED IN FRANCE<br />
TINSE3788GHZZ<br />
<strong>MX</strong>-<strong>M850</strong>/<strong>MX</strong>-<strong>M950</strong>/<strong>MX</strong>-<strong>M1100</strong> <strong>Software</strong> Setup Guide