ER-A440 Operation-Manual GB - Sharp
ER-A440 Operation-Manual GB - Sharp
ER-A440 Operation-Manual GB - Sharp

You also want an ePaper? Increase the reach of your titles
YUMPU automatically turns print PDFs into web optimized ePapers that Google loves.
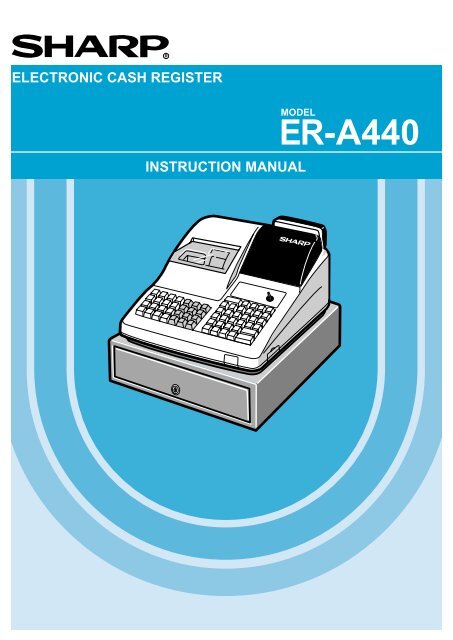
ELECTRONIC CASH REGIST<strong>ER</strong><br />
INSTRUCTION MANUAL<br />
MODEL<br />
<strong>ER</strong>-<strong>A440</strong>
CAUTION:<br />
The cash register and the remote drawer should be securely fitted to the supporting<br />
platforms to avoid instability when the drawers are open.<br />
CAUTION:<br />
The socket-outlet shall be installed near the equipment and shall be easily accessible.<br />
VORSICHT:<br />
Die Netzsteckdose muß nahe dem Gerät angebracht und leicht zugänglich sein.<br />
ATTENTION:<br />
La prise de courant murale devra être installée a proximité de l’équipement et devra être<br />
facilement accessible.<br />
AVISO:<br />
El tomacorriente debe estar instalado cerca del equipo y debe quedar bien accesible.<br />
VARNING:<br />
Det matande vägguttaget skall placeras nära apparaten och vara lätt atkomligt.<br />
CAUTION:<br />
For a complete electrical disconnection pull out the mains plug.<br />
VORSICHT:<br />
Zur vollständigen elektrischen Trennung vom Netz den Netzstecker ziehen.<br />
ATTENTION:<br />
Pour obtenir une mise hors-circuit totale, débrancher la prise de courant secteur.<br />
AVISO:<br />
Para una desconexión eléctrica completa, desenchufar el enchufe de tomacorriente.<br />
VARNING:<br />
För att helt koppla fran strömmen, dra ut stickproppen.
INTRODUCTION<br />
Thank you very much for your purchase of the SHARP Electronic Cash Register, Model <strong>ER</strong>-<strong>A440</strong>.<br />
Please read this <strong>Manual</strong> carefully before operating your machine in order to gain full understanding of functions<br />
and features.<br />
Please keep this manual for future reference, it will help you, if you encounter any operational problems.<br />
IMPORTANT<br />
• Install your register in a location that is not subject to direct radiation, unusual temperature changes,<br />
high humidity or exposed to water sources.<br />
Installation in such locations could cause damage to the cabinet and the electronic components.<br />
• The register should not be operated by an individual with wet hands.<br />
The water could seep into the interior of the register and cause component failure.<br />
• When cleaning your register, use a dry, soft cloth. Never use solvents, such as benzine and/or thinner.<br />
The use of such chemicals will lead to discoloration or deterioration of the cabinet.<br />
• The register plugs into any standard wall outlet (Official (nominal) voltage).<br />
Other electrical devices on the same electrical circuit could cause the register to malfunction.<br />
• If the register malfunctions, call your local dealer for service - do not try to repair the register yourself.<br />
• For a complete electrical disconnection, pull out the mains plug.<br />
PRECAUTION<br />
This Electronic Cash Register has a built-in memory protection circuit which is operated by rechargeable<br />
batteries.<br />
As you know, all batteries will, in time, dissipate their charge even if not used. Therefore to insure an adequate<br />
initial charge in the protection circuit, and to prevent any possible loss of memory upon installation, it is<br />
recommended that each unit be allowed to recharge for a period of 24 to 48 hours prior to use by the customer.<br />
In order to charge the batteries, the machine must be plugged in. This recharging precaution can prevent<br />
unnecessary initial service calls.<br />
1
CONTENTS<br />
INTRODUCTION····················································································································································1<br />
IMPORTANT ··························································································································································1<br />
PRECAUTION························································································································································1<br />
CONTENTS····························································································································································2<br />
EXT<strong>ER</strong>NAL VIEW··················································································································································6<br />
Front view ···············································································································································6<br />
Rear view················································································································································6<br />
PRINT<strong>ER</strong>································································································································································7<br />
KEYBOARD···························································································································································8<br />
1 Standard keyboard layout··························································································································8<br />
2 Standard key number layout······················································································································9<br />
KEYS AND SWITCHES·······································································································································10<br />
1 Mode switch and mode keys ···················································································································10<br />
2 Drawer lock key ·······································································································································10<br />
DISPLAYS ···························································································································································11<br />
Machine state symbols ·························································································································11<br />
FOR THE MANAG<strong>ER</strong><br />
PRIOR TO PROGRAMMING·······························································································································12<br />
1 General instructions·································································································································12<br />
2 How to program alphanumeric characters·······························································································12<br />
Using character keys on the keyboard ·································································································12<br />
Entering character codes······················································································································13<br />
PROGRAMMING ·················································································································································15<br />
Preparations for Programming ·············································································································15<br />
Direct Programming···········································································································································15<br />
1 Setting the date and time·························································································································15<br />
Date ······················································································································································15<br />
Time······················································································································································16<br />
2 Programming for departments·················································································································16<br />
Unit price ··············································································································································16<br />
Functional selection······························································································································17<br />
3 Price lookup (PLU) programming ············································································································19<br />
Unit price ··············································································································································19<br />
Functional selection······························································································································19<br />
PLU assignment to departments ··········································································································21<br />
4 Programming for discount keys ···············································································································22<br />
Deduction amount (-)························································································································22<br />
High amount lockout (HALO) and +/- sign (-) ···················································································23<br />
5 Programming for percent keys ················································································································24<br />
Percent rate (% ) ·································································································································24<br />
Sign (+/-) (% ) ······································································································································24<br />
6 Programming for exchange keys·············································································································25<br />
Currency exchange rate (e) ··············································································································25<br />
7 Programming for the Å, r, p, ' and î keys··············································································25<br />
High amount lockout (HALO) (Å, r, p, ', and î) ··································································25<br />
8 Programming the tax rate ························································································································26<br />
Tax rate ················································································································································26<br />
2
Job-Code-Based Programming ························································································································27<br />
1 Setting the date and time·························································································································27<br />
Setting the date (#2610) ·······················································································································27<br />
Setting the time (#2611) ·······················································································································27<br />
2 Setting the register and consecutive numbers ························································································28<br />
Setting the register number (#2612)·····································································································28<br />
Setting the consecutive number (#2613)······························································································28<br />
3 Programming the tax rate ························································································································29<br />
The tax rate (#2711) ·····························································································································29<br />
4 Programming for departments·················································································································30<br />
Functional programming (#2110) ·········································································································30<br />
Tax status (#2111)································································································································31<br />
A limit amount (HALO) of entry (#2112) ·······························································································32<br />
Alphanumeric characters (#2114) ········································································································33<br />
Unit price (#1110) ·································································································································33<br />
Commission group assignment (#2115)·······························································································34<br />
Group number (#2116) ·························································································································34<br />
Department key positioning (#2119)·····································································································35<br />
5 Price lookup (PLU) programming ············································································································36<br />
Department assignment (#1200, 2230) ································································································37<br />
Unit prices (#1210) ·······························································································································38<br />
Base quantity (#1211) ··························································································································38<br />
PLU/subdepartment mode (#2210, 2231) ····························································································39<br />
Sign (+/-) and tax status (#2211, 2232)································································································40<br />
Alphanumeric characters (#2214) ········································································································41<br />
Assigning of PLUs to commission groups (#2215, 2235)·····································································42<br />
Link PLU (#2220)··································································································································43<br />
Direct PLU key positioning (#2219) ······································································································43<br />
6 Programming for miscellaneous keys······································································································44<br />
Programming the rate (% , e , commission) and the deduction ( - ) (#1310)··································44<br />
A limit amount (HALO) of entry (- , r , p ) (#2312)········································································45<br />
+/- sign (% , -) (#2311) ····················································································································46<br />
Item % or subtotal % selection (%) (#2315) ·······················································································47<br />
Percent rate limitation (% ) (#2313)·····································································································47<br />
Item â or subtotal â selection (-) (#2316) ······················································································48<br />
7 Programming for the ;, Å, ( through +, and ] through ’ keys·············································49<br />
Functional programming (#2320) ·········································································································49<br />
High amount lockout (HALO) for cheque change, cheque cashing, and cash in drawer (#2321)········50<br />
High amount lockout (HALO) of entry for media keys (#2322)·····························································50<br />
8 Programming of function text···················································································································51<br />
Programming (#2314)···························································································································51<br />
List of function texts······························································································································52<br />
9 Cashier and clerk programming ··············································································································53<br />
Cashier code (#1500) ···························································································································53<br />
Cashier name (#1514)··························································································································54<br />
Functional programming for cashiers (#2510)······················································································54<br />
Clerk code (#1400) ·······························································································································55<br />
Clerk name (#1414)······························································································································55<br />
10 Programming various functions ···············································································································56<br />
Programming for optional feature selection (#2616) ············································································56<br />
Programming the limit on the number of times of validation printing and feed line after printing of a<br />
difference subtotal (#2615)···················································································································59<br />
Programming alarm length of time with drawer opening (#2617)·························································59<br />
Programming of print messages (#2614) ·····························································································60<br />
Selection of X1/Z1 and X2/Z2 reports to be printed in the stacked report sequence (#2620)··············61<br />
Setting the time range for hourly reports (#2619)·················································································62<br />
3
RS-232C channel assignment (#2690) ································································································62<br />
Secret codes to control access to the PGM1 mode, X1/Z1 mode and X2/Z2 mode<br />
(#2630, 2631, 2632) ·····························································································································63<br />
Currency description text programming (#2334) ·················································································63<br />
Assigning the drawer number to the drawer for foreign currency (#2680) ··········································64<br />
Setting the AUTO key - Automatic sequencing key - (#2900) ······························································65<br />
11 Reading stored programs ························································································································66<br />
Program details and procedures for their reading ················································································66<br />
Sample printouts···································································································································67<br />
12 Training mode··········································································································································72<br />
READING (X) AND RESETTING (Z) OF SALES TOTALS·················································································73<br />
1 Summary of reading (X) and resetting (Z) reports and the key operations to obtain the reports ············73<br />
2 Automatic modification of register system for introduction of EURO·······················································75<br />
3 Daily sales totals······································································································································76<br />
Full reading and resetting of sales totals ······························································································76<br />
Cashier reading and resetting ··············································································································79<br />
Clerk reading and resetting ··················································································································80<br />
Reading and resetting of hourly sales information ···············································································81<br />
Full department reading ·······················································································································82<br />
Individual group reading ·······················································································································83<br />
Full group reading·································································································································83<br />
Reading and resetting of sales information for a range of PLUs/subdepartments ·······························84<br />
Reading of sales information on PLUs/subdepartments associated with an individual department·····85<br />
Reading of sales information on PLUs/subdepartments whose sales amounts are zeros···················85<br />
Reading of sales information for the price amount range of PLUs/subdepartments ····························85<br />
Commission sales information··············································································································85<br />
Transaction reading······························································································································86<br />
Total in drawer reading·························································································································86<br />
Reading and resetting of a stacked report····························································································86<br />
4 Periodic consolidation······························································································································87<br />
Generality ·············································································································································87<br />
Reading and resetting of daily net totals ······························································································88<br />
Reading and resetting of a stacked report····························································································88<br />
COMPULSORY CASH/CHEQUE DECLARATION·····························································································89<br />
OV<strong>ER</strong>RIDE ENTRIES ··········································································································································91<br />
CORRECTION AFT<strong>ER</strong> FINALIZING A TRANSACTION (AFT<strong>ER</strong> GEN<strong>ER</strong>ATING A RECEIPT)························92<br />
FOR THE OP<strong>ER</strong>ATOR<br />
PRIOR TO ENTRIES ···········································································································································93<br />
1 Preparations for entries ···························································································································93<br />
Receipt and journal paper rolls·············································································································93<br />
Receipt ON/OFF function ·····················································································································93<br />
Cashier and clerk assignment ··············································································································93<br />
2 Error warning ···········································································································································94<br />
ENTRIES······························································································································································95<br />
1 Item entries··············································································································································95<br />
Single item entries ································································································································95<br />
Repeat entries ······································································································································96<br />
Multiplication entries ·····························································································································96<br />
Successive multiplication entries··········································································································97<br />
Split-pricing entries ·······························································································································98<br />
Single item cash sale (SICS)/single item finalize (SIF) entries·····························································99<br />
Link PLU entries ···································································································································99<br />
2 Displaying subtotals·······························································································································100<br />
Normal subtotal ··································································································································100<br />
4
Difference subtotal (Differ ST) ············································································································100<br />
3 Finalization of transaction······················································································································101<br />
Cash or cheque tendering ··················································································································101<br />
Mixed tendering (cheque + cash) ·······································································································101<br />
Cash or cheque sale that does not need any tender entry·································································101<br />
Credit sale ··········································································································································102<br />
Mixed-tender sale (cash or cheque tendering + credit tendering) ······················································102<br />
4 Computation of VAT (Value Add Tax)/tax ·····························································································102<br />
VAT/tax system ··································································································································102<br />
VAT shift entries ·································································································································104<br />
5 Auxiliary entries ······································································································································104<br />
Percent calculations (premium or discount) ·······················································································104<br />
Deduction entries································································································································105<br />
Refund entries ····································································································································106<br />
Printing of non-add code numbers ·····································································································106<br />
6 Payment treatment ·································································································································106<br />
Currency exchange ····························································································································106<br />
Received on account entries ··············································································································107<br />
Paid out entries···································································································································107<br />
No sale (exchange) ····························································································································108<br />
Cashing a cheque·······························································································································108<br />
7 Automatic sequencing key (` key) entries··························································································108<br />
CORRECTION ···················································································································································109<br />
1 Correction of the last entry (direct void)·································································································109<br />
2 Correction of the next-to-last or earlier entries (indirect void)································································109<br />
3 Subtotal void··········································································································································110<br />
4 Correction of incorrect entries not handled by the direct or indirect void function ·································110<br />
SPECIAL PRINTING FUNCTIONS····················································································································111<br />
1 Copy receipt printing······························································································································111<br />
2 Guest check copy ··································································································································112<br />
3 Validation printing function ····················································································································112<br />
Validation slip setting and printing ······································································································112<br />
Validation printing examples···············································································································113<br />
Validation slip specification·················································································································115<br />
4 Printing of the employee arrival and departure times ············································································115<br />
OV<strong>ER</strong>LAPPED CASHI<strong>ER</strong> ENTRY ····················································································································116<br />
OP<strong>ER</strong>ATOR MAINTENANCE ···························································································································117<br />
1 In case of power failure ·························································································································117<br />
2 In case of printer's motor locking ···········································································································117<br />
3 Paper roll near-end sensing function (only for the journal paper) ···········································117<br />
4 Installing and removing the paper roll····································································································118<br />
Recording paper specifications ··········································································································118<br />
Installing the paper roll ·······················································································································118<br />
Removing the paper roll ·····················································································································119<br />
Removing a paper jam ·······················································································································120<br />
5 Installing the ink ribbon cassette ···········································································································121<br />
6 Removing the till and the drawer ···········································································································122<br />
7 Opening the drawer by hand ·················································································································122<br />
8 Installing the fixing angle bracket ··········································································································123<br />
9 Before calling for service ·······················································································································124<br />
Error code table ··································································································································124<br />
LIST OF OPTIONS ············································································································································125<br />
SPECIFICATIONS ·············································································································································126<br />
5
EXT<strong>ER</strong>NAL VIEW<br />
Front view<br />
Printer cover<br />
Customer display (Pop-up type)<br />
Receipt paper<br />
Operator display<br />
Journal window<br />
Mode switch<br />
Keyboard<br />
RS-232C connector cover<br />
Drawer lock<br />
Drawer<br />
Rear view<br />
Validation opening<br />
6
PRINT<strong>ER</strong><br />
INSTALLING AND REMOVING THE PRINT<strong>ER</strong> COV<strong>ER</strong><br />
When removing the printer cover, lift up its rear.<br />
When installing the printer cover, hook it on the<br />
pawls on the cabinet and shut it.<br />
Take-up spool<br />
Paper roll location<br />
Paper chute<br />
Receipt paper<br />
release lever<br />
Journal paper release lever<br />
Ink ribbon cassette<br />
• Paper release lever<br />
Used to load or unload the machine with paper roll (receipt and journal paper). Keep the lever down to take in<br />
or out the paper roll.<br />
Note<br />
Do not attempt to take in or out the paper roll without pressing this lever. This may result in<br />
damage to the printer.<br />
7
KEYBOARD<br />
1<br />
Standard keyboard layout<br />
PLU/SUB<br />
AMT<br />
VAT<br />
EX1<br />
CASH<br />
#<br />
5<br />
10<br />
15<br />
20<br />
EX2<br />
CR3<br />
RECEIPT<br />
JOURNAL<br />
#<br />
CL<br />
7 8 9<br />
4<br />
9<br />
14<br />
19<br />
CR1<br />
CR2<br />
RCPT<br />
NS<br />
4 5 6<br />
3<br />
8<br />
13<br />
18<br />
CH1<br />
CH2<br />
%1 PO RA<br />
AUTO<br />
1<br />
1 2 3<br />
2<br />
7<br />
12<br />
17<br />
ST<br />
%2<br />
RF<br />
AUTO<br />
2<br />
0<br />
00<br />
•<br />
1<br />
6<br />
11<br />
16<br />
TL<br />
Note<br />
All the keys but the receipt paper feed and journal paper feed keys can be re-positioned. If you<br />
want to change the layout, contact your dealer.<br />
RECEIPT<br />
Receipt paper feed key<br />
VAT<br />
Value added tax key<br />
JOURNAL<br />
Journal paper feed key<br />
#<br />
Non-add code key<br />
0<br />
CASH<br />
#<br />
Cashier code entry key<br />
9<br />
Numeric keys<br />
RCPT<br />
Receipt print key<br />
Discount key<br />
00<br />
•<br />
Decimal point key<br />
AUTO<br />
1<br />
AUTO<br />
2<br />
Automatic sequencing 1 and 2 keys<br />
CL<br />
Multiplication/split-pricing key<br />
Clear key<br />
%1<br />
%2<br />
Percent 1 and 2 keys<br />
1<br />
NS<br />
No-sale key<br />
Department keys<br />
RA<br />
Received-on-account key<br />
20<br />
PO<br />
Paid-out key<br />
PLU/SUB<br />
Price lookup/subdepartment key<br />
RF<br />
Refund key<br />
AMT<br />
Amount entry key<br />
Void key<br />
8
EX1<br />
EX2<br />
Foreign currency exchange<br />
1 and 2 keys<br />
AUTO<br />
3<br />
Automatic sequencing 3 through 10 keys<br />
CR1<br />
AUTO<br />
10<br />
Credit 1 through 3 keys<br />
RA2<br />
Received-on-account 2 key<br />
CR3<br />
PO2<br />
Paid-out 2 key<br />
CH1<br />
CH2<br />
Cheque 1 and 2 keys<br />
CR4<br />
CA2<br />
Credit 4 key<br />
Cash total 2 key<br />
ST<br />
TL<br />
Subtotal key<br />
Total (cash total) key<br />
EX3<br />
EX4<br />
Foreign currency exchange<br />
3 and 4 keys<br />
000<br />
21<br />
Numeric key<br />
CH3<br />
CH4<br />
Cheque 3 and 4 keys<br />
Department keys<br />
VAT<br />
SHIFT<br />
Value added tax shift key<br />
50<br />
DIFF<strong>ER</strong><br />
ST<br />
Difference subtotal key<br />
%3<br />
%4<br />
Percent 3 and 4 keys<br />
VP<br />
1/2<br />
Validation print key<br />
1/2 key<br />
2<br />
CL<strong>ER</strong>K<br />
#<br />
Clerk code entry key<br />
Discount 2 through 4 keys<br />
1<br />
4<br />
Direct price lookup/subdepartment keys<br />
GC<br />
COPY<br />
Guest check copy key<br />
68<br />
Note<br />
The standard keyboard is not equipped with those keys that are marked with ( ).<br />
2<br />
Standard key number layout<br />
These key numbers are used for positioning of department keys and direct PLU keys. Refer to pages 35 and 43.<br />
This layout can be changed by your dealer.<br />
5 10 15 20<br />
4<br />
9<br />
14<br />
19<br />
3<br />
8<br />
13<br />
18<br />
2<br />
7<br />
12<br />
17<br />
1<br />
6<br />
11<br />
16<br />
9
KEYS AND SWITCHES<br />
1<br />
Mode switch and mode keys<br />
The mode switch can be operated by inserting one of the three supplied mode keys - manager (MA),<br />
submanager (SM), and operator (OP) keys. These keys can be inserted or removed only when the switch is in<br />
the “REG” or “ ” position.<br />
Operative range<br />
• Manager key (MA)<br />
• Submanager key (SM)<br />
MA<br />
SM<br />
OP<br />
OP X / Z<br />
PGM1<br />
PGM2<br />
REG<br />
MGR<br />
X1/Z1<br />
X2/Z2<br />
The mode switch has these settings:<br />
: This mode locks all register operations.<br />
No change occurs to register data.<br />
OP X/Z: This setting allows cashiers/clerks to take X or Z reports for their<br />
sales information. (This setting may be used only when your<br />
register has been programmed for “OP X/Z mode available” in the<br />
PGM2 mode.) It can also be used for displaying the time and printing the employee arrival and<br />
departure times. And it can be used to toggle receipt state “ON” and “OFF” by pressing the q key.<br />
REG: For entering sales<br />
PGM1: To program those items that need to be changed often: e.g., unit prices of departments or PLUs, and<br />
percentages<br />
PGM2: To program all PGM1 items and those items that do not require frequent changes: e.g., date, time, or<br />
a variety of register functions<br />
MGR: For manager's and submanager's entries<br />
The manager can use this mode to make entries that are not permitted to be made by cashiers - for<br />
example, after-transaction voiding and override entry.<br />
X1/Z1: To take the X/Z report for various daily totals<br />
X2/Z2: To take the X/Z report for various periodic (weekly or monthly) consolidation<br />
MA<br />
• Operator key (OP)<br />
SM OP<br />
2<br />
Drawer lock key<br />
This key locks and unlocks the drawer. To lock it, turn 90 degrees counterclockwise. To unlock it, turn 90<br />
degrees clockwise.<br />
SK1-1<br />
10
DISPLAYS<br />
Operator display<br />
Customer display (Pop-up type)<br />
PLU/SUB<br />
DEPT<br />
REPEAT<br />
RCPT<br />
OFF<br />
CID sentinel indicator<br />
Cashier/clerk code<br />
Amount:<br />
Appears in the far-right eight (max.) positions.<br />
Cashier code: Appears in the second and third positions (two digits).<br />
Clerk code: Appears in the second and third positions (two digits) with “C” in the fifth position.<br />
Number of repeats for repetitive registrations:<br />
The number of repeats is displayed, starting at “2” and incremented with each repeat.<br />
When you have registered ten times, the display will show “0.”<br />
Example: (2 → 3 → 4 ..... 9 → 0 → 1 → 2 ... )<br />
Receipt function status:<br />
The indicator “_” appears in the ninth position when the receipt function is put in the OFF<br />
status.<br />
Time:<br />
Appears in the second to sixth positions (using 24-hour format) in the OP X/Z, REG, or<br />
MGR mode. In the REG, or MGR mode, press the = key to display the time.<br />
Machine state symbols<br />
: Appears in the tenth place during programming.<br />
: Appears in the tenth place when an error is detected.<br />
– (Floating): Appears when a minus department or PLU/subdepartment entry is made or when a discount,<br />
refund, or void entry is made.<br />
: Appears in the tenth place when the subtotal is displayed or when the amount tendered is smaller<br />
than the sale amount.<br />
key is pressed to calculate a subtotal in<br />
: Appears in the tenth place when the [ through ”<br />
foreign currency.<br />
: Appears in the tenth place when a transaction is finalized by pressing the ; , Å , ( through<br />
+ , or ] through ’ key.<br />
: Appears in the tenth place when the change due amount is displayed or when the cash/cheque<br />
declaration is compulsory.<br />
: Appears in the tenth place when the validation printing is compulsory.<br />
: Appears in the tenth place when the ? key is pressed in the MGR mode, indicating the entry into<br />
the VOID mode. While your register is in the VOID mode, this symbol continues to be in the<br />
display except when department codes, PLU codes or subtotals are displayed. Also appears<br />
when a subtotal void is made.<br />
: Appears right below the tenth place when the cash in drawer amount exceeds a programmed<br />
sentinel amount. The sentinel check is performed for the total cash in drawer.<br />
Also appears right below the eighth place when the VAT shift is effective.<br />
11
PRIOR TO PROGRAMMING<br />
1<br />
FOR THE MANAG<strong>ER</strong><br />
General instructions<br />
This chapter illustrates how to program your cash register.<br />
All the programming items can be programmed by the Job-Code-Based Programming described later.<br />
However, your machine allows you to program some items using the Direct Programming, which does not<br />
require you to enter the job code.<br />
Job-Code-Based Programming<br />
Simplified procedure<br />
XXXX Data entry<br />
. ≈ ;<br />
(Job code)<br />
Direct Programming<br />
Sample procedure<br />
Data entry<br />
- ;<br />
(Object key)<br />
2<br />
How to program alphanumeric characters<br />
You can program alphanumeric characters for departments, PLUs, functions and so on in the character entry<br />
mode.<br />
There are two ways for programming characters: using character keys on the keyboard and entering character<br />
codes with numeric keys on the keyboard.<br />
Using character keys on the keyboard<br />
Enter a character according to the position of the figure shown below.<br />
[Ex.]<br />
í<br />
To enter the letter “#”, press éí<br />
To enter the upper-case letter “K”, press í<br />
To enter the lower-case letter “k”, press Óí<br />
12
• Numerals, letters and symbols are programmable simply by pressing the corresponding keys.<br />
• Characters may only be entered in single size or in double size. By default, the single-size character mode<br />
is selected. To enter a character in double size, press the Î key before you enter the corresponding<br />
character.<br />
Example<br />
To program the word “SHARP” in double size, do the following key-in.<br />
ÎSÎHÎAÎRÎP<br />
• Letters of alphabets “A” through “Z”, “Ø” and “Æ”are possible to be entered in lower case or in upper case. By<br />
default, the upper-case letter mode is selected. To enter a character in lower case, press the Ó key<br />
before you enter the character. To return to the upper-case letter mode, press the Ó key again.<br />
Example<br />
To program the word “<strong>Sharp</strong>”, do the following key-in.<br />
SÓHARP<br />
• Symbols and special letters are programmable by using the é key. To enter a character, press the é<br />
key before you enter the corresponding character.<br />
Example<br />
To program letters “# Ä Å” with the letter “#” being double size<br />
Îé=éêAéëA<br />
Editing the characters<br />
You can edit the characters you entered. Pressing a character key replaces the current character with a new<br />
one. To edit the characters, use the apple key.<br />
apple: Backs up the cursor, erasing the character to the left.<br />
Entering character codes<br />
• Numerals, letters and symbols are programmable by entering character codes and the º key. See the<br />
alphanumeric character code table on the next page. In this way, you can program characters other than the<br />
characters on the programming key sheet.<br />
XXX º<br />
XXX: Character code (3 digits)<br />
• Double-size characters can be made by entering the character code 253.<br />
Example<br />
To program the word “SHARP” with the letter “S” being double size<br />
253 º 083 º 072 º 065 º 082 º 080 º<br />
S H A R P<br />
13
14<br />
Alphanumeric character code table<br />
(DC): Double-size character code<br />
✱<br />
✱<br />
Code<br />
001<br />
002<br />
003<br />
004<br />
005<br />
006<br />
007<br />
008<br />
009<br />
010<br />
011<br />
012<br />
013<br />
014<br />
015<br />
016<br />
017<br />
018<br />
019<br />
020<br />
021<br />
022<br />
023<br />
024<br />
025<br />
026<br />
027<br />
028<br />
029<br />
030<br />
031<br />
032<br />
033<br />
034<br />
035<br />
036<br />
037<br />
038<br />
039<br />
040<br />
041<br />
042<br />
043<br />
044<br />
045<br />
Character<br />
á<br />
â<br />
ê<br />
î<br />
ì<br />
í<br />
ô<br />
ó<br />
û<br />
ú<br />
œ<br />
u<br />
ú<br />
o<br />
ó<br />
<br />
<br />
<br />
¨<br />
<br />
<br />
<br />
<br />
<br />
<br />
<br />
<br />
U<br />
Ú<br />
O<br />
Ó<br />
(space)<br />
!<br />
”<br />
#<br />
$<br />
%<br />
&<br />
’<br />
(<br />
)<br />
+<br />
,<br />
-<br />
Code<br />
046<br />
047<br />
048<br />
049<br />
050<br />
051<br />
052<br />
053<br />
054<br />
055<br />
056<br />
057<br />
058<br />
059<br />
060<br />
061<br />
062<br />
063<br />
064<br />
065<br />
066<br />
067<br />
068<br />
069<br />
070<br />
071<br />
072<br />
073<br />
074<br />
075<br />
076<br />
077<br />
078<br />
079<br />
080<br />
081<br />
082<br />
083<br />
084<br />
085<br />
086<br />
087<br />
088<br />
089<br />
090<br />
Character<br />
.<br />
/<br />
0<br />
1<br />
2<br />
3<br />
4<br />
5<br />
6<br />
7<br />
8<br />
9<br />
:<br />
;<br />
<<br />
=<br />
><br />
?<br />
@<br />
A<br />
B<br />
C<br />
D<br />
E<br />
F<br />
G<br />
H<br />
I<br />
J<br />
K<br />
L<br />
M<br />
N<br />
O<br />
P<br />
Q<br />
R<br />
S<br />
T<br />
U<br />
V<br />
W<br />
X<br />
Y<br />
Z<br />
Code<br />
091<br />
092<br />
093<br />
094<br />
095<br />
096<br />
097<br />
098<br />
099<br />
100<br />
101<br />
102<br />
103<br />
104<br />
105<br />
106<br />
107<br />
108<br />
109<br />
110<br />
111<br />
112<br />
113<br />
114<br />
115<br />
116<br />
117<br />
118<br />
119<br />
120<br />
121<br />
122<br />
123<br />
124<br />
125<br />
126<br />
127<br />
128<br />
129<br />
130<br />
131<br />
132<br />
133<br />
134<br />
135<br />
Character<br />
Ä<br />
Ö<br />
Ü<br />
^<br />
_<br />
a<br />
b<br />
c<br />
d<br />
e<br />
f<br />
g<br />
h<br />
i<br />
j<br />
k<br />
l<br />
m<br />
n<br />
o<br />
p<br />
q<br />
r<br />
s<br />
t<br />
u<br />
v<br />
w<br />
x<br />
y<br />
z<br />
{<br />
|<br />
}<br />
ß<br />
¢<br />
!!<br />
1<br />
2<br />
3<br />
4<br />
1/2<br />
F/T<br />
←<br />
Code<br />
136<br />
137<br />
138<br />
139<br />
140<br />
141<br />
142<br />
143<br />
144<br />
145<br />
146<br />
147<br />
148<br />
149<br />
150<br />
151<br />
152<br />
153<br />
154<br />
155<br />
156<br />
157<br />
158<br />
159<br />
160<br />
161<br />
162<br />
163<br />
164<br />
165<br />
177<br />
178<br />
180<br />
181<br />
182<br />
183<br />
184<br />
185<br />
186<br />
187<br />
188<br />
189<br />
190<br />
191<br />
192<br />
Character<br />
→<br />
F<br />
T<br />
↓<br />
ç<br />
°<br />
¿<br />
Ù<br />
à<br />
Æ<br />
ø<br />
Å<br />
¤<br />
é<br />
è<br />
Pt<br />
i<br />
Ñ<br />
ò<br />
£<br />
¥<br />
°<br />
Á<br />
Í<br />
A<br />
a<br />
E<br />
e<br />
I<br />
i<br />
U<br />
u<br />
N<br />
n<br />
C<br />
S<br />
C<br />
▲<br />
▲<br />
´´<br />
´´<br />
´´<br />
´´<br />
193<br />
194<br />
195<br />
196<br />
197<br />
198<br />
199<br />
200<br />
201<br />
202<br />
203<br />
204<br />
205<br />
206<br />
207<br />
208<br />
209<br />
210<br />
211<br />
212<br />
213<br />
214<br />
215<br />
216<br />
217<br />
218<br />
219<br />
224<br />
225<br />
226<br />
227<br />
228<br />
229<br />
230<br />
231<br />
232<br />
233<br />
234<br />
235<br />
236<br />
237<br />
238<br />
253<br />
I<br />
G<br />
S<br />
G<br />
g<br />
K<br />
k<br />
L<br />
l<br />
Z<br />
D<br />
d<br />
C<br />
c<br />
P<br />
e<br />
s<br />
c<br />
z<br />
y<br />
u<br />
n<br />
r<br />
§<br />
Ø<br />
↑<br />
]<br />
[<br />
ä<br />
ö<br />
ü<br />
æ<br />
å<br />
É<br />
ñ<br />
*(DC)<br />
’<br />
.<br />
.<br />
.<br />
.<br />
.<br />
.<br />
.<br />
.<br />
.<br />
.<br />
.<br />
.<br />
”<br />
Code<br />
Character
PROGRAMMING<br />
Your machine allows you to program in two modes: PGM1 and PGM2. The PGM1 mode is for programming<br />
those items that need to be changed often: unit prices of departments/PLUs, and percentages. The PGM2<br />
mode is used for programming all PGM1-mode programs and those items that require less frequent changes:<br />
date, time, tax rate, and the functions of each key. We describe below the programming or setting procedures of<br />
various items.<br />
Program every item necessary for your store following the appropriate procedures.<br />
* To set the mode switch to the PGM1 position, use the manager or submanager key; and to set to the PGM2<br />
position, use the manager key.<br />
Preparations for Programming<br />
1. Plug your machine into a standard wall outlet.<br />
2. Put the manager or submanager key in the mode switch and turn it to the PGM1 or PGM2 position<br />
depending upon the programming you are about to do.<br />
3. Check to see whether both journal and receipt rolls are present in the machine. If they are missing, install<br />
journal and receipt paper rolls correctly referring to the procedure in “4. Installing and removing the paper<br />
roll” under “OP<strong>ER</strong>ATOR MAINTENANCE”.<br />
4. Program necessary items into your machine.<br />
Direct Programming<br />
1<br />
Setting the date and time<br />
Date<br />
PGM 2<br />
Enter the day (one or two digits), month (two digits), and year (two digits) in this sequence.<br />
Procedure<br />
XXXXXX<br />
Date (five or six digits)<br />
=<br />
Example<br />
Aug. 26, 1998<br />
Key operation<br />
260898 =<br />
Print<br />
Date<br />
15
Time<br />
PGM 2<br />
Set the time using the 24-hour format. For example, when the time is set to 2:30 AM, enter 230; and when it is<br />
set to 2:30 PM, enter 1430. Once you set the time, the internal clock unit will continue to run as long as the<br />
built-in battery is alive and update the date (day, month, year) properly.<br />
Procedure<br />
XXXX<br />
Time (max. four digits)<br />
=<br />
Example<br />
Setting the time as 2:30 PM (14:30)<br />
Key operation<br />
1430 =<br />
Print<br />
Time<br />
2<br />
Programming for departments<br />
Your machine is equipped with 20 standard departments and up to 50 optional departments.<br />
Your machine allows you to perform the following programming for each department:<br />
Unit price<br />
Procedure<br />
PGM 1<br />
PGM 2<br />
Department<br />
key<br />
To keep the current setting<br />
*<br />
Unit price<br />
: ;<br />
To program for the following dept.<br />
To program for another dept.<br />
* Unit price: max. six digits (9999.99)<br />
Example<br />
Programming the unit price 10.00 for department 1<br />
1. Press the department 1 key. 1<br />
• The current unit price will be displayed.<br />
2. Enter the unit price “1000.” 1000<br />
3. Press the : key to program this setting. :<br />
01 0.00<br />
01 1000<br />
02 0.00<br />
4. Press the ; key to finalize the programming<br />
and generate a programming report. ; 0.00<br />
16
Print<br />
Dept. code<br />
Unit price<br />
Functional selection<br />
PGM 2<br />
Procedure<br />
Department<br />
key<br />
Department<br />
key<br />
To keep the current setting<br />
*ABCDEFGHIJ<br />
≈ ;<br />
Department<br />
key<br />
To program for the following dept.<br />
c<br />
To program for another dept.<br />
* Item: Selection: Entry:<br />
A Always enter 0. 0<br />
B VAT6 or TAX6 No 0<br />
Yes 1<br />
C VAT5 or TAX5 No 0<br />
Yes 1<br />
D VAT4 or TAX4 No 0<br />
Yes 1<br />
E VAT3 or TAX3 No 0<br />
Yes 1<br />
F VAT2 or TAX2 No 0<br />
Yes 1<br />
G VAT1 or TAX1 No 0<br />
Yes 1<br />
H Normal/SICS (Single Item Cash Sale)/ Normal 0<br />
SIF (Single Item Finalization) SICS 1<br />
SIF 2<br />
I Significant digit for HALO 1 through 9<br />
J Number of zeros to follow the significant digit for HALO 0 through 7<br />
Note<br />
Tax status<br />
• The tax system of your machine has been factory–set to automatic VAT1–6. If you desire to<br />
select any of automatic tax 1–6, manual VAT1–6, manual VAT1, manual tax 1–6, and the<br />
combination of the automatic VAT 1–3 and the automatic tax 4–6, consult your dealer.<br />
• When the combination of the automatic VAT1–3 and automatic tax 4–6 system is selected, one of<br />
the VAT1(G), VAT2(F) and VAT3(E) can be selected in combination with tax 4–6.<br />
Example: BCDEFG= 100100, 110100, 111010<br />
17
Normal department/SICS (Single Item Cash Sale) / SIF (Single Item Finalization)<br />
• If an entry of a department programmed for SICS is made first, the sale will be finalized as soon<br />
as the department key is pressed. If the entry is made after entering a department not<br />
programmed for SICS, the sale will not be finalized until the ; key is pressed.<br />
• Whenever a sale is made to a department set for SIF, the sale is finalized as soon as the<br />
department key is pressed.<br />
HALO (High Amount Lockout)<br />
• You can set an upper limit amount (HALO) for each department. The limit is effective for the<br />
REG-mode operations and can be overridden in the MGR mode.<br />
• IJ is the same as I x 10 J .<br />
For example, presetting 14 (100.00) here means that amount entries of up to 100.00 are allowed<br />
in the REG mode. When you preset 17, however, the upper limit amount is 99999.99.<br />
Example<br />
Programming for department 4 as follows: A=0, B=0, C=0, D=0, E=0, F=0, G=1, H=0, I=9 and<br />
J=5.<br />
ABCDEFGH I J<br />
1. Press the department 4 key twice. 4 4<br />
• The current parameter setting will be displayed.<br />
0000000017<br />
2. Set the parameters as follows:<br />
• You can change the value at the blinker.<br />
Go to the desired position with the following keys:<br />
. ....... Moves the blinker to the right. 0000000017 ➞<br />
º ....... Moves the blinker to the left. 0000000017 ➞<br />
• Enter the figure. 0000001095<br />
3. Press the ≈ key to program this setting. ≈<br />
0000000017<br />
0000000017<br />
0000001095<br />
0000000017<br />
4. Press the ; key to finalize the programming<br />
and generate a programming report. ;<br />
0.00<br />
Print<br />
Taxable 1<br />
HALO limit<br />
Normal dept.<br />
18
3<br />
Price lookup (PLU) programming<br />
A PLU code can be up to six digits (free code).<br />
Unit price<br />
Procedure<br />
PGM 1<br />
PGM 2<br />
XXXXXX<br />
PLU code<br />
Direct PLU<br />
key<br />
To keep the current setting<br />
*<br />
ß<br />
Unit price<br />
: ;<br />
*Unit price: max. six digits (9999.99)<br />
Example<br />
Programming the unit price 1.25 for PLU code 1<br />
1. Enter the PLU code “1” and press the ß key. 1 ß<br />
2. Enter the unit price “125.” 125<br />
3. Press the : key to program this setting. :<br />
4. Press the ; key to finalize the programming<br />
and generate a programming report. ;<br />
000001 0.00<br />
000001 125<br />
000002 0.00<br />
0.00<br />
Print<br />
PLU code<br />
Unit price<br />
Functional selection<br />
PGM 2<br />
Procedure<br />
<br />
XXXXXX<br />
PLU code<br />
Direct PLU<br />
key<br />
To keep the current setting<br />
*<br />
ßß ABCDEFGH<br />
≈ ;<br />
Direct PLU<br />
key<br />
XXXXXX<br />
PLU code<br />
ß<br />
c<br />
Direct PLU<br />
key<br />
19
* Item: Selection: Entry:<br />
A Sign (plus/minus) Plus 0<br />
Minus 1<br />
B VAT6 or TAX6 No 0<br />
Yes 1<br />
C VAT5 or TAX5 No 0<br />
Yes 1<br />
D VAT4 or TAX4 No 0<br />
Yes 1<br />
E VAT3 or TAX3 No 0<br />
Yes 1<br />
F VAT2 or TAX2 No 0<br />
Yes 1<br />
G VAT1 or TAX1 No 0<br />
Yes 1<br />
H Mode Prohibit mode 0<br />
Subdepartment mode 1<br />
PLU mode 2<br />
PLU/subdepartment mode 3<br />
Delete mode 4<br />
Note<br />
Sign (plus/minus)<br />
The function of every PLU/subdepartment varies according to the combination of its sign and the<br />
sign of its associated department as follows:<br />
Sign<br />
Function of PLU/subdepartment<br />
Department PLU/<br />
subdepartment<br />
+ + Serves as a normal plus PLU/subdepartment<br />
– – Serves as a normal minus PLU/subdepartment<br />
+ – Accepts store coupon entries, but not split-pricing entries<br />
– + Not valid; not accepted<br />
Tax status<br />
• The tax system of your machine has been factory–set to automatic VAT1–6. If you desire to<br />
select any of automatic tax 1–6, manual VAT1–6, manual VAT1, manual tax 1–6, and the<br />
combination of the automatic VAT 1–3 and the automatic tax 4–6, consult your dealer.<br />
• When the combination of the automatic VAT1–3 and automatic tax 4–6 system is selected, one of<br />
the VAT1(G), VAT2(F) and VAT3(E) can be selected in combination with tax 4–6.<br />
Example: BCDEFG= 100100, 110100, 111010<br />
• A PLU not programmed for any of these tax statuses is registered depending on the tax status of<br />
the department which the PLU belongs to.<br />
Mode parameter<br />
• PLU mode: Allows a PLU entry to be made by entering an assigned PLU code and depressing<br />
the ß key.<br />
• Subdepartment mode: Allows a subdepartment entry to be made by entering a unit price,<br />
pressing the å key, assigned PLU code and then pressing the ß key.<br />
• PLU/subdepartment mode: Allows PLU entries to be made in both the PLU and subdepartment<br />
modes.<br />
• Delete mode: Deletes program data for each PLU.<br />
• Prohibit mode: Prohibits the entry of any assigned PLU code. This mode does not clear the<br />
PLU/subdepartment program data.<br />
20
Example<br />
Programming for PLU code 1 as follows: A=0, B=0, C=0, D=0, E=0, F=0, G=1, and H=2.<br />
1. Enter the PLU code “1”<br />
and press the ß key twice.<br />
1 ß ß<br />
ABCDEFGH<br />
P 00000002<br />
2. Set the parameters A to H. 00000012<br />
•You can go to the desired position with the º<br />
or . key.<br />
3. Press the ≈ key to program this setting. ≈<br />
4. Press the ; key to finalize the programming<br />
and generate a programming report. ;<br />
P 00000012<br />
P 00000002<br />
0.00<br />
Print<br />
Taxable 1<br />
PLU mode<br />
PLU assignment to departments<br />
PGM 1<br />
PGM 2<br />
Procedure<br />
XXXXXX<br />
PLU code<br />
Direct PLU<br />
key<br />
*Department key to be associated with the entered PLU<br />
Note<br />
Example<br />
*<br />
ß<br />
ßß Department key<br />
;<br />
XXXXXX<br />
ß c<br />
Direct PLU<br />
key<br />
Direct PLU<br />
key<br />
PLU code<br />
• The following functions of the PLU depend on the programming for its associated department:<br />
• Grouping (Group 1 through 14)<br />
• SICS (Single Item Cash Sale)/SIF (Single Item Finalization)/Normal<br />
• Item validation print compulsory/non-compulsory<br />
• HALO (high amount lockout)<br />
Assigning PLU codes 1 and 2 to department 2<br />
To delete the entered PLU<br />
Direct PLU key<br />
?<br />
To keep the current setting<br />
Associated dept. code<br />
(1 to 50) :<br />
1. Enter the PLU code “1”<br />
and press the ß key three times.<br />
1 ß ß ß<br />
000001 01<br />
2. Press the the department 2 key to assign<br />
PLU code 1 to department 2. 2 000002 01<br />
21
3. Press the department 2 key to assign<br />
PLU code 2 to department 2. 2<br />
4. Press the ; key to finalize the programming<br />
and generate a programming report. ;<br />
000003 01<br />
0.00<br />
Print<br />
Associated<br />
dept.<br />
4<br />
Programming for discount keys<br />
Deduction amount (-)<br />
PGM 1<br />
PGM 2<br />
Procedure<br />
-<br />
≠<br />
To keep the current setting<br />
* Deduction amount<br />
: ;<br />
*Deduction amount: 0 - 999999<br />
Example<br />
Assigning “10.00” to the - key<br />
1. Press the - key. -<br />
2. Enter the deduction amount “1000.” 1000<br />
3. Press the : key to program this setting. :<br />
4. Press the ; key to finalize the programming<br />
and generate a programming report. ;<br />
001 0.00<br />
001 1000<br />
001 10.00<br />
0.00<br />
Print<br />
Deduction<br />
amount<br />
22
High amount lockout (HALO) and +/- sign (-)<br />
PGM 2<br />
Procedure<br />
- -<br />
≠ ≠<br />
To keep the current setting<br />
* ABC<br />
≈ ;<br />
* Item: Selection: Entry:<br />
A Sign (plus/minus) Plus 0<br />
Minus 1<br />
B Significant digit for HALO 1 through 9<br />
C Number of zeros to follow the significant digit for HALO 0 through 7<br />
Note<br />
Example<br />
HALO (High Amount Lockout)<br />
BC is the same as B x 10 C .<br />
For example, presetting 14 (100.00) here means that amount entries of up to 100.00 are allowed in<br />
the REG mode. When you preset 17, however, the upper limit amount is 99999.99.<br />
Programming for the - key as follows: A=1, B=1, and C=3.<br />
1. Press the - key twice. - -<br />
ABC<br />
001 117<br />
2. Set the parameters A to C. 113<br />
•You can go to the desired position with the º<br />
or . key.<br />
3. Press the ≈ key to program this setting. ≈<br />
4. Press the ; key to finalize the programming<br />
and generate a programming report. ;<br />
001 113<br />
001 113<br />
0.00<br />
Print<br />
HALO limit<br />
23
5 Programming for percent keys<br />
Percent rate (%)<br />
PGM 1 PGM 2<br />
Procedure<br />
∞<br />
•<br />
To keep the current setting<br />
* Percent rate<br />
: ;<br />
* Percent rate: 0.00 - 100.00<br />
Note<br />
You must use a decimal point when setting percentage rates that are fractional.<br />
Example<br />
Assigning 10.25% to the ∞ key<br />
Key operation<br />
Print<br />
∞ 10 . 25 :<br />
;<br />
Percent rate<br />
Sign (+/-) (%)<br />
PGM 2<br />
Procedure<br />
∞<br />
•<br />
∞<br />
* A<br />
•<br />
To keep the current setting<br />
≈ ;<br />
* Item: Selection: Entry:<br />
A Sign (plus/minus) Plus (premium) 0<br />
Minus (discount) 1<br />
Example<br />
Programming minus sign for the ∞ key<br />
Key operation<br />
Print<br />
∞ ∞ 1 ≈<br />
;<br />
Discount<br />
24
6 Programming for exchange keys<br />
Currency exchange rate (e)<br />
PGM 1<br />
PGM 2<br />
Procedure<br />
To keep the current setting<br />
[ through<br />
*<br />
“ Exchange rate<br />
: ;<br />
* Currency exchange rate: 0.000000 - 999.999999<br />
Note<br />
You must use a decimal point when setting conversion rates that are fractional.<br />
Example<br />
Assigning 0.6068 to the [ key<br />
Key operation<br />
Print<br />
[ 0 . 6068 :<br />
;<br />
Exchange<br />
rate<br />
7<br />
Programming for the Å , r , p , ' and î keys<br />
High amount lockout (HALO) (Å , r , p , ' and î)<br />
Procedure<br />
To keep the current setting<br />
Corresponding key * AB<br />
≈ ;<br />
PGM 2<br />
* AB is the same as A x 10 B<br />
A: Significant digit (1 through 9)<br />
B: Number of zeros to follow the significant digit (0 through 8)<br />
Example<br />
Programming a HALO limit of 1000.00 (15) for the } key<br />
Key operation<br />
} 15 ≈<br />
;<br />
Print<br />
HALO limit<br />
25
8<br />
Programming the tax rate<br />
Tax rate<br />
PGM 2<br />
Procedure<br />
*A<br />
◊<br />
1-6<br />
To program zero<br />
≈<br />
**Sign and tax rate<br />
≈<br />
Lowest taxable amount<br />
;<br />
max. five digits:<br />
0.00 to 999.99<br />
* A: Enter a corresponding tax rate number. For example, when you program a tax rate as tax rate 1, enter “1”,<br />
and when you program it as tax rate 6, enter “6”.<br />
** Sign and tax rate: XYYY.YYYY<br />
Tax rate= 0.0001 to 100.0000<br />
Sign - /+ = 1 /0<br />
Note<br />
• The lowest taxable amount is valid only when you select add on tax system. If you select VAT<br />
(Value added tax) system, it is ignored.<br />
• If you make an incorrect entry before pressing the second ≈ key in programming a tax rate,<br />
cancel it with the c key; and if you make an error after pressing the second ≈ key, cancel it<br />
with the : key. Then program again from the beginning.<br />
• If you select VAT system, the sign which you program is ignored.<br />
Example<br />
Programming the tax rate (+4%) as tax rate 2 with lowest taxable income as 0.12.<br />
1. Press the ◊ key. ◊<br />
2. Enter the tax rate “2”. 2 ≈<br />
3. Enter the tax rate “+4%.” 4 ≈<br />
4. Enter the lowest taxable amount “12.” 12<br />
5. Press the ; key to finalize the programming ;<br />
and generate a programming report.<br />
Print<br />
P 0.00<br />
P 0.00<br />
P 0.00<br />
P 12<br />
0.00<br />
Tax rate 2<br />
Tax rate : 4%<br />
Lowest taxable<br />
amount<br />
26
Job-Code-Based Programming<br />
This section illustrates how to program items using job codes. Using job codes allows you to program a wide<br />
variety of items in comparison with direct programming.<br />
Start this programming by entering a corresponding job code as shown below.<br />
2110<br />
. ≈<br />
All the items which can be programmed by the job-code-based programming are listed on this page and the<br />
following, and those which can also be programmed by the direct programming are marked with the symbol<br />
“ Direct ” that follows job codes.<br />
Note<br />
When setting the parameters for a job code, the digit that is blinking is the one that can be changed.<br />
To go to the position of the parameter that you want to change, press either of the following keys :<br />
. Moves the blinker to the right.<br />
º Moves the blinker to the left.<br />
1<br />
Setting the date and time<br />
Setting the date<br />
Enter day (one or two digits), month (two digits), and year (two digits) in this sequence.<br />
Procedure<br />
PGM 2<br />
2610<br />
Direct<br />
2610 Date (five or six digits)<br />
. ≈ ;<br />
Example<br />
Key operation<br />
2610 . ≈<br />
260898 ;<br />
Print<br />
Date<br />
Setting the time<br />
Set the time using the 24-hour format. For example, when the time is set to 2:30 AM, enter 230; and when it is<br />
set to 2:30 PM, enter 1430.<br />
Procedure<br />
PGM 2<br />
2611<br />
Direct<br />
2611 Time (max. four digits)<br />
. ≈ ;<br />
27
Example<br />
Key operation<br />
2611 . ≈<br />
1430 ;<br />
Print<br />
Time<br />
2<br />
Setting the register and consecutive numbers<br />
Setting the register number<br />
When your store has two or more registers, it is practical to set separate register numbers for their identification.<br />
You may set them in a maximum of six digits.<br />
Procedure<br />
PGM 2<br />
2612<br />
To set the register number “0”<br />
Register number<br />
2612<br />
. ≈ (one to six digits) ;<br />
Example<br />
Key operation<br />
2612 . ≈<br />
123456 ;<br />
Print<br />
Register number<br />
Setting the consecutive number<br />
The consecutive number is increased by one each time a receipt is issued.<br />
Enter a number (one to four digits) that is one less than the desired starting number.<br />
Procedure<br />
. ≈<br />
PGM 2<br />
2613<br />
To begin the count from 0001<br />
;<br />
2613 A number (one to four digits) that is one<br />
less than the desired starting number<br />
28
Example<br />
Key operation<br />
2613 . ≈<br />
1000 ;<br />
Print<br />
Consecutive<br />
number<br />
3<br />
Programming the tax rate<br />
The tax rate<br />
PGM 2 2711 Direct<br />
Procedure<br />
2711<br />
When the lowest taxable amount is zero<br />
*<br />
. ≈<br />
A<br />
**Sign and<br />
Lowest taxable<br />
≈ ≈ ;<br />
1 to 6<br />
tax rate<br />
amount<br />
max. five digits:<br />
0.00 to 999.99<br />
*A: Enter a corresponding tax rate number. For example, when you program a tax rate as tax rate 1, enter 1<br />
and when you program it as tax rate 6, enter 6.<br />
** Sign and tax rate: XYYY.YYYY<br />
Example<br />
Tax rate= 0.0001 to 100.0000<br />
Sign - /+ = 1 /0<br />
Key operation<br />
2711 . ≈<br />
2 ≈<br />
4 ≈<br />
12 ;<br />
Print<br />
Note<br />
• The lowest taxable amount is valid only when you select add on tax system. If you select VAT<br />
(Value added system), it is ignored.<br />
• If you make an incorrect entry before pressing the third ≈ key in programming a tax rate, cancel<br />
it with the c key; and if you make an error after pressing the third ≈ key, cancel it with the :<br />
key. Then program again from the beginning correctly.<br />
• If you select VAT system, the sign which you program is ignored.<br />
29
4<br />
Programming for departments<br />
Your machine is equipped with 20 standard departments and up to 50 optional departments.<br />
Your machine allows you to perform the following programming for each department:<br />
Functional programming<br />
You can set each department for:<br />
PGM 2<br />
2110<br />
Compulsory item validation print<br />
If item entries must be validated, program corresponding departments for compulsory item validation print.<br />
SICS (Single Item Cash Sale) / SIF (Single Item Finalization)<br />
• SICS<br />
If the first registration is to a department set for SICS, the sale is finalized as soon as the department key is<br />
pressed. If the sale is preceded by registrations to departments not set for SICS, a sale to a department set<br />
for SICS does not finalize and can be repeated until the ; key is pressed.<br />
• SIF<br />
Whenever a sale is made to a department set for SIF, the sale is finalized as soon as the department key is<br />
pressed.<br />
Type of unit price entry<br />
You may select one of the following four types of unit price entry for each department.<br />
• Open and preset<br />
• Preset only<br />
• Open only<br />
• Inhibit department key<br />
Procedure<br />
To program for the dept. other than the following dept.<br />
c<br />
To keep the current setting<br />
2110 Dept. code<br />
*ABCDEFG<br />
. ≈ ≈ : ;<br />
The current<br />
setting<br />
is displayed.<br />
To program for the following dept.<br />
* Item: Selection: Entry:<br />
A Always enter 0. 0<br />
B Item validation print Compulsory 1<br />
Non-compulsory 0<br />
C and D Always enter 0. 0<br />
E SIF/SICS /Normal SIF 2<br />
SICS 1<br />
Normal 0<br />
F Always enter 0. 0<br />
G Type of unit price entry Open and preset 3<br />
Preset only 2<br />
Open only 1<br />
Inhibit department key 0<br />
30
Example<br />
Key operation<br />
Print<br />
2110 . ≈<br />
3 ≈ 0000003 :<br />
;<br />
A through G<br />
Tax status<br />
PGM 2<br />
2111<br />
Direct<br />
Assign a tax status to each department. When entries are made into taxable departments in a transaction, tax is<br />
automatically computed according to the associated tax rate as soon as the transaction is completed.<br />
Procedure<br />
To program for the dept. other than the following dept.<br />
c<br />
To keep the current setting<br />
2111 Dept. code<br />
*ABCDEFG<br />
. ≈ ≈ : ;<br />
The current<br />
setting<br />
is displayed.<br />
To program for the following dept.<br />
* Item: Selection: Entry:<br />
A Always enter 0. 0<br />
B VAT6 or TAX6 Yes 1<br />
No 0<br />
C VAT5 or TAX5 Yes 1<br />
No 0<br />
D VAT4 or TAX4 Yes 1<br />
No 0<br />
E VAT3 or TAX3 Yes 1<br />
No 0<br />
F VAT2 or TAX2 Yes 1<br />
No 0<br />
G VAT1 or TAX1 Yes 1<br />
No 0<br />
Note<br />
• The tax system of your machine has been factory–set to automatic VAT1–6. If you desire to<br />
select any of automatic tax 1–6, manual VAT1–6, manual VAT1, manual tax 1–6, and the<br />
combination of the automatic VAT 1–3 and the automatic tax 4–6, consult your dealer.<br />
• When the combination of the automatic VAT1–3 and automatic tax 4–6 system is selected, one of<br />
the VAT1(G), VAT2(F) and VAT3(E) can be selected in combination with tax 4–6.<br />
Example: BCDEFG= 100100, 110100, 111010<br />
31
Example<br />
Key operation<br />
2111 . ≈<br />
4 ≈ 0000110 :<br />
c 10 ≈ 0000101 :<br />
;<br />
Print<br />
Tax status<br />
A limit amount (HALO) of entry<br />
You can set upper limit amounts (HALO: High Amount Lockout) for each department. The limit is effective for<br />
the REG-mode operations and can be overridden in the MGR mode. HALO limit is represented by two figures<br />
as follows:<br />
Procedure<br />
PGM 2<br />
2112 Dept. code<br />
*AB<br />
. ≈ ≈ : ;<br />
2112<br />
Direct<br />
c<br />
To keep the current setting<br />
The current<br />
setting<br />
is displayed.<br />
* AB is the same as A x 10 B .<br />
A: Significant digit (1 through 9)<br />
B: Number of zeros to follow significant digit (0 through 7)<br />
For example, presetting 14 (100.00) here means that amount entries of up to 100.00 are allowed in the REG<br />
mode. But when you preset 17, the upper limit amount is 99999.99.<br />
Example<br />
Key operation<br />
Print<br />
2112 . ≈<br />
1 ≈ 95 :<br />
;<br />
HALO limit<br />
32
Alphanumeric characters<br />
PGM 2 2114<br />
You can program a maximum of 16 characters (item label) for each department. (However, the default setting is<br />
for a 12-character label.)<br />
Select the characters you want to program, referring to section “2 How to program alphanumeric characters” in<br />
chapter “PRIOR TO PROGRAMMING”.<br />
Procedure<br />
c<br />
To program spaces<br />
Character keys<br />
2114 Dept. code<br />
. ≈ ≈ (max. 16 digits) : ;<br />
Example<br />
Key operation<br />
2114 . ≈<br />
1 ≈<br />
STEAK :<br />
;<br />
Print<br />
Label<br />
programmed<br />
for dept. 1<br />
Unit price<br />
PGM 1 PGM 2 1110 Direct<br />
You can program unit prices up to a maximum of six digits (9999.99). Even if a department is not programmed<br />
to allow the entry of preset unit prices in functional programming (job 2110), the department is automatically<br />
changed to allow the entry of preset unit prices by this programming entry.<br />
Procedure<br />
The current<br />
setting<br />
is displayed.<br />
Unit price<br />
1110 Dept. code<br />
. ≈ ≈ (max. six digits) : ;<br />
To keep the current setting<br />
c<br />
Example<br />
Key operation<br />
Print<br />
1110 . ≈<br />
1 ≈ 1000 :<br />
;<br />
Unit price<br />
33
Commission group assignment<br />
Your machine allows you to assign a commission group (1-9) to each department.<br />
Procedure<br />
PGM 2<br />
The current<br />
setting<br />
is displayed.<br />
2115 Dept. code<br />
*A<br />
. ≈ ≈ : ;<br />
2115<br />
To keep the current setting<br />
* A: Commission group 0-9 (0 = no commission)<br />
To program for the follwing dept.<br />
c<br />
Example<br />
Key operation<br />
2115 . ≈<br />
1 ≈ 1 :<br />
c 5 ≈ 2 :<br />
;<br />
Print<br />
Commission<br />
group number<br />
Group number<br />
You can assign departments to a maximum of 14 groups (1 through 14).<br />
This programming enables you to take group department sales reports.<br />
Procedure<br />
PGM 2<br />
2116<br />
The current setting<br />
is displayed.<br />
To keep the current setting<br />
2116 Dept. code<br />
*Group no.<br />
. ≈ ≈ : ;<br />
c<br />
(1 through 14)<br />
* Group number: Dept. (+) 1 through 9 (groups 1 through 9)<br />
Dept. (–) 10<br />
Hash (+) dept. 11<br />
Hash (–) dept. 12<br />
Bottle return (+) dept. 13<br />
Bottle return (–) dept. 14<br />
Note<br />
The standard model provides no hash dept./bottle return dept. If you need them, please consult<br />
your dealer.<br />
34
Example<br />
Key operation2 :<br />
;<br />
Print<br />
2116 . ≈<br />
1 ≈ 1 :<br />
Group no.<br />
Department key positioning<br />
You can assign a department number to each key position. Each key position has a corresponding key number.<br />
Departments may be freely selected for the number of department keys and their positions.<br />
To assign the department to a key position, select the key number of the position.<br />
For key number position, refer to section “2 Standard key number layout” in chapter “KEYBOARD”.<br />
Procedure<br />
Cancellation<br />
*<br />
2119<br />
. ≈ 1 *<br />
Key no.<br />
AB<br />
≈ 2<br />
: ;<br />
(1 through 68)<br />
PGM 2<br />
2119<br />
To program for the key number other than the following key number<br />
To program for the following key number<br />
* 1 The key number placement is determined by your local Authorized SHARP Dealer.<br />
* 2 AB is a department code.<br />
Example<br />
Key operation2 :<br />
;<br />
Print<br />
2119 . ≈<br />
1 ≈ 1 :<br />
Key no.<br />
Dept. code<br />
35
5<br />
Price lookup (PLU) programming<br />
Your machine has two kinds of PLU registration methods.<br />
Direct PLU registration: Accomplished by depressing item key (direct PLU key) directly.<br />
Indirect PLU registration: Accomplished by making an entry of PLU code and pressing the ß key.<br />
Each PLU requires you to program the following:<br />
PLU code (six digits)<br />
Associated department<br />
When a PLU is associated with a department, the following functions of the PLU depend on the<br />
programming for the corresponding department.<br />
• Grouping (Group 1 through14)<br />
• HALO (only for the subdepartment)<br />
• Single item cash sale/Single item finalization<br />
• Item validation print compulsory/non-compulsory<br />
Unit price (max. six digits)<br />
You will usually have unit prices programmed for individual PLUs as PLU preset unit prices. If you program<br />
unit price “0” for a PLU, you can enter only the selling quantity of the PLU, i.e. the PLU can be used only as<br />
a counter.<br />
Base quantity for split-pricing entries - two digits<br />
Program a base quantity for each PLU/subdepartment dedicated to split-pricing entries.<br />
PLU, subdepartment, PLU/subdepartment, delete, or prohibit mode<br />
• If the PLU mode (i.e. automatic preset unit price entry) is selected, individual PLU entries can be made by<br />
entering the assigned code and depressing the ß key (or by depressing a direct PLU key without any<br />
PLU code entry).<br />
• If the subdepartment mode is selected, the å key must be depressed after the price entry followed by the<br />
PLU code entry. The entry is finalized by the ß key depressed.<br />
• If the PLU/subdepartment mode is selected, the entries in both the PLU and subdepartment modes are<br />
available.<br />
• If the delete mode is selected, the corresponding program data for each PLU is deleted.<br />
• If the prohibit mode is selected, the assigned PLU code cannot be entered. This mode does not clear the<br />
PLU/subdepartment program data.<br />
Sign (+/-)<br />
The function of every PLU/subdepartment varies according to the combination of its sign and its associate<br />
department's sign as follows:<br />
Sign<br />
Function of PLU/subdepartment<br />
Dept.<br />
+<br />
PLU/subdept.<br />
+<br />
Serves as a normal plus PLU/subdept.<br />
– –<br />
Serves as a normal minus PLU/subdept.<br />
+ –<br />
Accepts store coupon entries, but not split-pricing entries.<br />
–<br />
+ Not valid; not accepted.<br />
Tax status<br />
Item label (12 characters) (option: max. 16 characters)<br />
Commission group (1 to 9)<br />
Link PLU<br />
Any PLU is able to link to any other PLU (e.g. bottle deposit). However, the number of links is a maximum of<br />
5. Even if more than 5 PLUs are linked, the sixth or higher link is not actualized.<br />
Direct PLU key positioning<br />
36
Note<br />
For some items, you can program in two ways: programming an individual PLU code and for a<br />
range of sequential PLU codes. The procedure marked “For each PLU” shows individual PLU<br />
programming. “For a range of PLUs” shows sequential range PLU programming.<br />
Department assignment<br />
PGM 1<br />
PGM 2<br />
1200<br />
2230<br />
Direct<br />
Procedure<br />
For each PLU<br />
The current<br />
setting<br />
is displayed.<br />
*1 *4<br />
1200 PLU code<br />
. ≈ ≈<br />
c<br />
To keep the<br />
current setting<br />
AB<br />
To program for the following PLU<br />
: ;<br />
Note<br />
As soon as the programming is completed for one PLU, the next PLU code appears in the display.<br />
For a range of PLUs<br />
2230<br />
. ≈<br />
*2 *3<br />
Start PLU code<br />
The current setting<br />
of start PLU code<br />
is displayed.<br />
To apply the current<br />
setting of start PLU code<br />
to PLUs within the range<br />
*4<br />
End PLU code<br />
AB<br />
≈ ≈ : ;<br />
*1, 2, 3: 1 to 999999 (free code)<br />
*4: AB: Associated department code<br />
Example<br />
For each PLU<br />
Key operation<br />
1200 . ≈<br />
1 ≈ 2 :<br />
2 :<br />
;<br />
Print<br />
PLU code<br />
Associated dept.<br />
For a range<br />
of PLUs<br />
Key operation<br />
2230 . ≈<br />
11 ≈ 20 ≈<br />
3 :<br />
;<br />
Print<br />
PLU range<br />
Associated dept.<br />
37
Unit prices<br />
PGM 1<br />
PGM 2<br />
1210<br />
Direct<br />
Procedure<br />
Example<br />
Key operation<br />
The current setting<br />
is displayed.<br />
To keep the current setting<br />
Unit price<br />
1210 PLU code<br />
. ≈ ≈ (max. six digits) : ;<br />
c<br />
Print<br />
1210 . ≈<br />
1 ≈ 125 :<br />
;<br />
Unit price<br />
Base quantity<br />
PGM 1<br />
PGM 2<br />
1211<br />
Procedure<br />
The current<br />
setting<br />
is displayed.<br />
To keep the current setting<br />
Base q'ty<br />
1211 PLU code<br />
. ≈ ≈ (max. 2 digits) : ;<br />
c<br />
Example<br />
Key operation<br />
Print<br />
1211 . ≈<br />
2 ≈ 12 :<br />
;<br />
Base q'ty<br />
38
PLU/subdepartment mode<br />
PGM 2<br />
2210<br />
2231<br />
Direct<br />
Procedure<br />
For each PLU<br />
For a range of PLUs<br />
2231<br />
. ≈<br />
*2 *3<br />
Start PLU code<br />
The current<br />
setting is<br />
displayed.<br />
The current setting<br />
of start PLU code<br />
is displayed.<br />
To keep the current setting<br />
*1 *4<br />
2210 PLU code<br />
ABC<br />
. ≈ ≈ : ;<br />
c<br />
To apply the current setting of<br />
start PLU code to PLUs within the range<br />
*4<br />
End PLU code<br />
ABC<br />
≈ ≈ : ;<br />
*1,2,3: 1 through 999999<br />
*4: Item: Selection: Entry:<br />
A and B Always enter 0. 0<br />
C Mode parameter Prohibit mode 0<br />
Subdept. mode 1<br />
PLU mode 2<br />
PLU/subdept. mode 3<br />
Delete mode 4<br />
Example<br />
For each PLU<br />
Key operation<br />
Print<br />
2210 . ≈<br />
1 ≈ 003 :<br />
;<br />
3: PLU/subdept.<br />
mode<br />
For a range<br />
of PLUs<br />
Key operation<br />
2231 . ≈<br />
11 ≈ 20 ≈<br />
003 :<br />
;<br />
Print<br />
PLU range<br />
3: PLU/subdept.<br />
mode<br />
39
Sign (+/-) and tax status<br />
PGM 2<br />
2211<br />
2232<br />
Direct<br />
Procedure<br />
For each PLU<br />
2211<br />
. ≈<br />
*1<br />
*4<br />
PLU code<br />
ABCDEFG<br />
≈ : ;<br />
c<br />
For a range of PLUs<br />
2232<br />
. ≈<br />
*2 *3<br />
Start PLU code<br />
The current<br />
setting<br />
is displayed.<br />
The current setting<br />
of start PLU code<br />
is displayed.<br />
To keep the current setting<br />
To apply the current setting of start<br />
PLU code to PLUs within the range<br />
*4<br />
End PLU code<br />
ABCDEFG<br />
≈ ≈ : ;<br />
*1,2,3: 1 through 999999<br />
*4: Item: Selection: Entry:<br />
A Sign (+/-) Minus PLU 1<br />
Plus PLU 0<br />
B VAT6 or TAX6 Yes 1<br />
No 0<br />
C VAT5 or TAX5 Yes 1<br />
No 0<br />
D VAT4 or TAX4 Yes 1<br />
No 0<br />
E VAT3 or TAX3 Yes 1<br />
No 0<br />
F VAT2 or TAX2 Yes 1<br />
No 0<br />
G VAT1 or TAX1 Yes 1<br />
No 0<br />
Note<br />
• The tax system of your machine has been factory–set to automatic VAT1–6. If you desire to<br />
select any of automatic tax 1–6, manual VAT1–6, manual VAT1, manual tax 1–6, and the<br />
combination of the automatic VAT 1–3 and the automatic tax 4–6, consult your dealer.<br />
• When the combination of the automatic VAT1–3 and automatic tax 4–6 system is selected, one of<br />
the VAT1(G), VAT2(F) and VAT3(E) can be selected in combination with tax 4–6.<br />
Example: BCDEFG= 100100, 110100, 111010<br />
• A PLU not programmed for any of these tax statuses is registered depending on the tax status of<br />
the department which the PLU belongs to.<br />
40
Example<br />
For each PLU<br />
Key operation<br />
Print<br />
2211 . ≈<br />
2 ≈ 0000001 :<br />
0000000 :<br />
;<br />
Taxable 1<br />
For a range<br />
of PLUs<br />
Key operation<br />
Print<br />
2232 . ≈<br />
11 ≈ 20 ≈<br />
0000001 :<br />
;<br />
PLU range<br />
Taxable 1<br />
Alphanumeric characters<br />
PGM 2 2214<br />
You can program a maximum of 16 characters (item label) for each PLU or subdepartment. (However, the<br />
default setting is for a 12-character label.) Select the characters you want to program, referring to section “2<br />
How to program alphanumeric characters” in chapter “PRIOR TO PROGRAMMING”.<br />
Procedure<br />
To program spaces<br />
Character keys<br />
2214 PLU code<br />
. ≈ ≈ (max. 16 digits) : ;<br />
c<br />
Example<br />
Key operation<br />
2214 . ≈<br />
1 ≈<br />
MILK :<br />
;<br />
Print<br />
Label<br />
programmed<br />
for PLU code 1<br />
41
Assigning of PLUs to commission groups<br />
PGM 2<br />
2215<br />
2235<br />
You can assign PLUs (or subdepartments) to commission groups.<br />
Procedure<br />
For each PLU<br />
For a range of PLUs<br />
2235<br />
. ≈<br />
*2<br />
*3<br />
Start PLU code End PLU code *A<br />
≈<br />
*1<br />
The current<br />
setting<br />
is displayed.<br />
The current<br />
setting<br />
is displayed.<br />
To keep the current setting<br />
2215 PLU code<br />
*A<br />
. ≈ ≈ : ;<br />
To program for the follwing PLU<br />
c<br />
To apply the current setting of start<br />
PLU code to PLUs within the range<br />
≈ : ;<br />
*1,2,3 : 1 through 999999<br />
*A : Commission group 0-9 (0=no commission)<br />
Example<br />
For each PLU<br />
Key operation<br />
2215 . ≈<br />
1 ≈ 1 :<br />
;<br />
Print<br />
Commission<br />
group number<br />
For a range<br />
of PLUs<br />
Key operation<br />
2235 . ≈<br />
12 ≈ 14 ≈<br />
1 :<br />
;<br />
Print<br />
PLU range<br />
Commission<br />
group number<br />
42
Link PLU<br />
Procedure<br />
PGM 2<br />
2220<br />
Cancellation<br />
2220 PLU code<br />
Linked PLU code<br />
. ≈ ≈ : ;<br />
To repeat up to 5 times<br />
Note<br />
• PLU codes must have already been defined.<br />
Example<br />
Key operation<br />
Print<br />
2220 . ≈<br />
21 ≈ 25 :<br />
26 :<br />
27 :<br />
;<br />
Linked<br />
PLU code<br />
Direct PLU key positioning<br />
You can assign a PLU code to each key position. PLUs may be selected for the number of direct PLU keys and<br />
their positions. For key number positions, refer to section “2 Standard key number layout” in the chapter<br />
“KEYBOARD”.<br />
Procedure<br />
PGM 2<br />
Cancellation<br />
* Key no.<br />
2219 PLU code<br />
. ≈ (1 through 68) ≈ : ;<br />
2219<br />
To program for the following key number<br />
To program for the key number other than the following key number<br />
* The key number placement is determined by your local Authorized SHARP Dealer.<br />
Example<br />
Key operation1 :<br />
;<br />
Print<br />
2219 . ≈<br />
16 ≈<br />
Key no.<br />
PLU code<br />
43
6<br />
Only function keys which you have programmed on the keyboard will be allowed the rate, HALO and tax status<br />
programming.<br />
PGM 2<br />
Programming for miscellaneous keys<br />
Programming the rate (%, e, commission) and the deduction (-)<br />
1310<br />
You can program percent rates, currency exchange rates, deduction amounts and commission rates.<br />
Procedure<br />
Direct<br />
The current<br />
setting is<br />
displayed.<br />
To keep the current setting<br />
*1 *2<br />
1310 Function no.<br />
Rate or amount<br />
. ≈ ≈ : ;<br />
PGM 1<br />
*1: Function no.<br />
1: For the - key 8: For the • key 74: For the commission sale 4<br />
2: For the – key 52: For the [ key 75: For the commission sale 5<br />
3: For the — key 53: For the { key 76: For the commission sale 6<br />
4: For the ≠ key 54: For the “ key 77: For the commission sale 7<br />
5: For the ∞ key 71: For the commission sale 1 78: For the commission sale 8<br />
6: For the § key 72: For the commission sale 2 79: For the commission sale 9<br />
7: For the key 73: For the commission sale 3<br />
*2: Rate or amount<br />
0 — 999999 (Deduction amount)<br />
0.00 — 100.00 (% rate)<br />
0.000000 — 999.999999 (Currency exchange rate)<br />
0.00 — 999.99 (Commission rate)<br />
Example<br />
Key operation<br />
Print<br />
1310 .≈<br />
1 ≈ 1000 :<br />
5 ≈ 10 . 25 :<br />
52 ≈ 0 . 6068 :<br />
;<br />
Deduction<br />
amount<br />
Percent rate<br />
Currency<br />
exchange rate<br />
Note<br />
You must use a decimal point when setting percentages rates that are fractional.<br />
44
A limit amount (HALO) of entry (-, r, p)<br />
The HALO limit is in effect for the REG-mode operations but can be overridden in the MGR mode. The HALO<br />
limit is represented by two figures as follows:<br />
Procedure<br />
The current<br />
setting is<br />
displayed.<br />
PGM 2<br />
2312 Function no.<br />
AB<br />
. ≈ ≈ : ;<br />
2312<br />
To keep the current setting<br />
*1 *2<br />
Direct<br />
*1: Function no.<br />
1: For the - key 37: For the r key<br />
2: For the – key 38: For the ® key<br />
3: For the — key 39: For the p key<br />
4: For the ≠ key 40: For the π key<br />
*2: AB is the same as A x 10 B .<br />
A: Significant digit (0 through 9)<br />
B: Number of zeros to follow significant digit<br />
0 through 7 (for the - through ≠ keys)<br />
0 through 8 (for the r, ®, p, and π keys)<br />
For example, presetting 13 (10.00) here means that amount entries of up to 10.00 are allowed in the REG mode.<br />
You can set up AB = 17 for no limitation (for the - through ≠ keys).<br />
You can set up AB = 18 for no limitation (for the r, ®, p, and π keys).<br />
Example<br />
Key operation<br />
Print<br />
2312 . ≈<br />
1 ≈ 13 :<br />
;<br />
HALO limit<br />
45
+/- sign (%, -)<br />
Programming of the +/- sign assigns the premium or discount function for each key.<br />
Procedure<br />
PGM 2<br />
2311<br />
Direct<br />
The current<br />
setting is<br />
displayed.<br />
To keep the current setting<br />
*1 *2<br />
2311 Function no.<br />
ABCDEFG<br />
. ≈ ≈ : ;<br />
*1: Function no.<br />
1: For the - key 5: For the ∞ key<br />
2: For the – key 6: For the § key<br />
3: For the — key 7: For the key<br />
4: For the ≠ key 8: For the • key<br />
*2:<br />
Item: Selection: Entry:<br />
A +/- sign + (premium) sign 0<br />
- (discount) sign 1<br />
B to G Always enter 0. 0<br />
Example<br />
Key operation<br />
Print<br />
2311 . ≈<br />
5 ≈ 0000000 :<br />
6 ≈ 1000000 :<br />
;<br />
“–”: Discount<br />
46
Item % or subtotal % selection (%)<br />
Item %<br />
Select this when a percent calculation is desired for the individual department and PLU.<br />
Subtotal %<br />
Select this when a percent calculation is desired for subtotals.<br />
Procedure<br />
PGM 2<br />
The current<br />
setting is<br />
displayed.<br />
*1 *2<br />
2315 Function no.<br />
. ≈ ≈ A : ;<br />
To repeat<br />
2315<br />
To keep the current setting<br />
*1: Function no. *2: A<br />
5: For the ∞ key 0: Subtotal %<br />
6: For the § key 1: Item %<br />
7: For the key<br />
8: For the • key<br />
Example<br />
Key operation<br />
Print<br />
2315 . ≈<br />
5 ≈ 1 :<br />
6 ≈ 0 :<br />
;<br />
Item %<br />
Subtotal %<br />
Percent rate limitation (%)<br />
PGM 2 2313<br />
You can program the upper limit of percent rates for percent entries.<br />
(Percent entries that exceed the upper limit may be overridden in the MGR mode.)<br />
Procedure<br />
The current<br />
setting is<br />
displayed.<br />
To keep the current setting<br />
*1 *2<br />
2313 Function no.<br />
Rate<br />
. ≈ ≈ : ;<br />
*1: Function no.<br />
5: For the ∞ key<br />
6: For the § key<br />
7: For the key<br />
8: For the • key<br />
*2: Rate<br />
0.00 – 100.00 (Entering 0.00 inhibits the<br />
open percent rate entry.)<br />
Note<br />
10.00% can be entered as 1 0 or 1 0 . 0 0. The . key is needed only for<br />
fractional entry.<br />
47
Example<br />
Key operation<br />
Print<br />
2313 . ≈<br />
5 ≈ 15 . 00 :<br />
;<br />
Percentage limit<br />
Item â or subtotal â selection (-)<br />
Item â<br />
Select this when a deduction calculation is desired for the individual department and PLU.<br />
Subtotal â<br />
Select this when a deduction calculation is desired for subtotals.<br />
Procedure<br />
PGM 2<br />
The current<br />
setting is<br />
displayed.<br />
To keep the current setting<br />
*1 *2<br />
2316 Function no.<br />
. ≈ ≈ A : ;<br />
2316<br />
*1: Function no. *2: A<br />
1: For the - key 0: Subtotal â<br />
2: For the – key 1: Item â<br />
3: For the — key<br />
4: For the ≠ key<br />
Example<br />
Key operation<br />
Print<br />
2316 . ≈<br />
1 ≈ 1 :<br />
2 ≈ 0 :<br />
;<br />
Item<br />
Subtotal<br />
48
7<br />
Programming for the ;, Å, ( through +, and ] through ’ keys<br />
Functional programming<br />
You can set each media for:<br />
PGM 2<br />
2320<br />
EFT Transaction<br />
For ( through + keys, and ] through ’ keys<br />
Footer printing<br />
This programming decides whether or not your machine should print a message at the foot of a receipt when<br />
a specified media key is used.<br />
Non-add code compulsory<br />
You can enforce the non-add code entry when a media entry is accepted.<br />
Change enable (over-tender)<br />
Either change enable or disable can be selected for a corresponding media key.<br />
Compulsory validation print<br />
If media entries must be validated, set the corresponding media for compulsory validation print.<br />
Drawer open<br />
You can program each media key to or not to open the drawer.<br />
Amount tendered compulsory<br />
You may select amount tendered compulsory or optional for the ;, Å and ( through + keys.<br />
You may select amount tendered compulsory or inhibited for the ] through ’ keys.<br />
Procedure<br />
The current<br />
setting is<br />
displayed.<br />
To keep the current setting<br />
*1 *2<br />
2320 Function no.<br />
ABCDEFG<br />
. ≈ ≈ : ;<br />
*1: Function no.<br />
42: For the ; key 46: For the * key 50: For the ‘ key<br />
43: For the Å key 47: For the + key 51: For the ’ key<br />
44: For the ( key 48: For the ] key<br />
45: For the ) key 49: For the } key<br />
*2 Item: Selection: Entry:<br />
A EFT transaction Compulsory 1<br />
Non-compulsory 0<br />
B Footer print Yes 1<br />
No 0<br />
C Non-add code Compulsory 1<br />
Non-compulsory 0<br />
D Change due Disable 1<br />
Enable 0<br />
E Validation print Compulsory 1<br />
Non-compulsory 0<br />
F Drawer open No 1<br />
Yes 0<br />
G Amount tendered entry Compulsory 1<br />
Non-compulsory for TL, CA2 or CH1 through CH4 keys 0<br />
Inhibit for the CR1 through CR4 keys 0<br />
49
Example<br />
Key operation<br />
Print<br />
2320 . ≈<br />
50 ≈ 0000001 :<br />
;<br />
A through G<br />
High amount lockout (HALO) for cheque change, cheque cashing,<br />
and cash in drawer PGM 2 2321<br />
You can program the upper limit amounts for cheque change, cheque cashing, and cash in drawer.<br />
Procedure<br />
The current<br />
setting is<br />
displayed.<br />
To keep the current setting<br />
*2<br />
*1<br />
Limit<br />
2321 Function no.<br />
. ≈ ≈ amount : ;<br />
*1: Function no.<br />
41: For cheque cashing<br />
62: For cheque change<br />
59: For cash in drawer (Sentinel)<br />
*2: Limit amount<br />
0 through 999999.99<br />
(Cheque change and cheque cashing)<br />
0 through 9999999.99 (Cash in drawer)<br />
Example<br />
Key operation<br />
Print<br />
2321 . ≈<br />
41 ≈ 9999 :<br />
;<br />
HALO limit<br />
High amount lockout (HALO) of entry for media keys<br />
PGM 2 2322 Direct<br />
The HALO limit is in effect for REG-mode operations but can be overridden in the MGR mode. The HALO limit<br />
is represented by two figures as follows:<br />
Procedure<br />
The current<br />
setting is<br />
displayed.<br />
To keep the current setting<br />
*1 *2<br />
2322 Function no.<br />
AB<br />
. ≈ ≈ : ;<br />
50<br />
*1: Function no.<br />
42: For the ; key 48: For the ] key<br />
43: For the Å key 49: For the } key<br />
44: For the ( key 50: For the ‘ key<br />
45: For the ) key 51: For the ’ key<br />
46: For the * key<br />
47: For the + key<br />
*2: AB is the same as A x 10 B .<br />
A: Significant digit (1 through 9)<br />
B: Number of zeros to follow significant digit<br />
(0 through 8)<br />
You can set up AB = 18 for no limitation.
Example<br />
Key operation<br />
Print<br />
2322 . ≈<br />
50 ≈ 15 :<br />
;<br />
HALO limit<br />
8<br />
Programming of function text<br />
Programming<br />
You can program a maximum of 8 characters for each function key and other functions using the table on the<br />
following pages. Select the characters you want to program referring to section “2 How to program alphanumeric<br />
characters” in chapter “PRIOR TO PROGRAMMING.”<br />
Procedure<br />
PGM 2<br />
2314<br />
To program spaces<br />
Function no.<br />
Character keys<br />
2314<br />
. ≈ (max. 3 digits) ≈ (max. 8 digits) : ;<br />
* Function no.: See “List of function texts” on the following pages.<br />
Example<br />
Key operation<br />
Print<br />
2314 . ≈<br />
48 ≈ VISA :<br />
;<br />
51
52<br />
List of function texts<br />
Function<br />
no.<br />
Key or function<br />
1 1 (–)1<br />
2 2 (–)2<br />
3 3 (–)3<br />
4 4 (–)4<br />
5 %1 %1<br />
6 %2 %2<br />
7 %3 %3<br />
8 %4 %4<br />
Default<br />
setting<br />
9 Differ DIFF<strong>ER</strong><br />
10 Taxable 1 subtotal TAX1 ST<br />
11 Taxable 2 subtotal TAX2 ST<br />
12 Taxable 3 subtotal TAX3 ST<br />
13 Taxable 4 subtotal TAX4 ST<br />
14 Taxable 5 subtotal TAX5 ST<br />
15 Taxable 6 subtotal TAX6 ST<br />
16 VAT/tax 1 VAT 1<br />
17 VAT/tax 2 VAT 2<br />
18 VAT/tax 3 VAT 3<br />
19 VAT/tax 4 VAT 4<br />
20 VAT/tax 5 VAT 5<br />
21 VAT/tax 6 VAT 6<br />
22 Net 1 NET1<br />
23 Net 2 NET2<br />
24 Coupon-like PLU CP PLU<br />
25 Refund REFUND<br />
26<br />
27 mode total MODE<br />
28 MGR MGR<br />
29 Subtotal SBTL<br />
30 Hash HASH<br />
31 Hash refund HASH RF<br />
32 VAT shift VAT SFT<br />
33 VAT/tax delete TAX DELE<br />
34 VP counter VP CNT<br />
35 No sale NO SALE<br />
36 Guest check counter G.C. CNT<br />
37 RA RA<br />
38 RA2 RA2<br />
39 PO PO<br />
40 PO2 PO2<br />
41 Cheque cashing CA/CHK<br />
42 Cash CASH<br />
43 Cash 2 CASH2<br />
44 Cheque 1 CHECK<br />
45 Cheque 2 CHECK2<br />
46 Cheque 3 CHECK3<br />
47 Cheque 4 CHECK4<br />
Function<br />
no.<br />
Key or function<br />
Default<br />
setting<br />
48 Credit 1 CREDIT1<br />
49 Credit 2 CREDIT2<br />
50 Credit 3 CREDIT3<br />
51 Credit 4 CREDIT4<br />
52 Exchange 1 EXCH1<br />
53 Exchange 2 EXCH2<br />
54 Exchange 3 EXCH3<br />
55 Exchange 4 EXCH4<br />
56 Exchange 1 is EXCH1 IS<br />
57 Exchange 2 is EXCH2 IS<br />
58 Exchange 3 is EXCH3 IS<br />
59 Cash in drawer CID<br />
60 Cash/cheque is CA/CH IS<br />
61 Cash/cheque in drawer CA/CH ID<br />
62 Change for cheque CHK/CG<br />
63 Customer GUEST<br />
64 Order total ORD<strong>ER</strong> TL<br />
65 Paid total PAID TL<br />
66 Domestic currency 1 DOM.CUR1<br />
67 Domestic currency 2 DOM.CUR2<br />
68 Domestic currency 3 DOM.CUR3<br />
69 Domestic currency 4 DOM.CUR4<br />
70 Cheque in drawer CH ID<br />
71 Commission sale 1 COM.SAL1<br />
72 Commission sale 2 COM.SAL2<br />
73 Commission sale 3 COM.SAL3<br />
74 Commission sale 4 COM.SAL4<br />
75 Commission sale 5 COM.SAL5<br />
76 Commission sale 6 COM.SAL6<br />
77 Commission sale 7 COM.SAL7<br />
78 Commission sale 8 COM.SAL8<br />
79 Commission sale 9 COM.SAL9<br />
80 Non commission sale NON.COM<br />
81 (+) Dept total DEPT TL<br />
82 (-) Dept total DEPT (-)<br />
83 Hash (+) total HASH TL<br />
84 Hash (-) total HASH (-)<br />
85 Bottle return (+) total BTTL TL<br />
86 Bottle return (-) total BTTL (-)<br />
87 Net 1 (Taxable 1 - VAT/tax 1) NET 1<br />
88 Net 2 (Taxable 2 - VAT/tax 2) NET 2<br />
89 Net 3 (Taxable 3 - VAT/tax 3) NET 3<br />
90 Net 4 (Taxable 4 - VAT/tax 4) NET 4<br />
91 Net 5 (Taxable 5 - VAT/tax 5) NET 5<br />
92 Net 6 (Taxable 6 - VAT/tax 6) NET 6<br />
93 Subtotal SUBTOTAL<br />
94 Merchandise subtotal MDSE ST
Function<br />
no.<br />
Key or function<br />
Default<br />
setting<br />
95 Difference subtotal DIFF ST<br />
96 Total TOTAL<br />
97 Change CHANGE<br />
98 Sales q'ty ITEMS<br />
99 PLU subtotal PLU ST<br />
100 Copy receipt title COPY<br />
101 Guest check copy title G.C COPY<br />
102 Average AVE.<br />
103 Group 1 for departments GROUP01<br />
104 Group 2 for departments GROUP02<br />
105 Group 3 for departments GROUP03<br />
106 Group 4 for departments GROUP04<br />
107 Group 5 for departments GROUP05<br />
108 Group 6 for departments GROUP06<br />
109 Group 7 for departments GROUP07<br />
110 Group 8 for departments GROUP08<br />
111 Group 9 for departments GROUP09<br />
112 CCD CCD<br />
113 CCD differ CCD DIF.<br />
114 CCD differ total DIF. TL<br />
115 Order total-Paid total O - P<br />
116 Total tax TTL TAX<br />
117 Net without tax NET<br />
Function<br />
no.<br />
Key or function<br />
Default<br />
setting<br />
118 Commission amount 1 COM.AMT1<br />
119 Commission amount 2 COM.AMT2<br />
120 Commission amount 3 COM.AMT3<br />
121 Commission amount 4 COM.AMT4<br />
122 Commission amount 5 COM.AMT5<br />
123 Commission amount 6 COM.AMT6<br />
124 Commission amount 7 COM.AMT7<br />
125 Commission amount 8 COM.AMT8<br />
126 Commission amount 9 COM.AMT9<br />
127 Commission amount total COM.TTL<br />
128 Department report title DEPT<br />
129 Group report title GROUP<br />
130 PLU report title PLU<br />
131 Transaction report title TRANS.<br />
132 Total in drawer report title TL-ID<br />
133 Clerk report title CL<strong>ER</strong>K<br />
134 Cashier report title CASHI<strong>ER</strong><br />
136 Hourly report title HOURLY<br />
137 Daily net report title DAILY<br />
138 PLU zero sales report title Z<strong>ER</strong>O SAL<br />
139 PLU price category report title CATEGORY<br />
140 Commission sales report title SALES<br />
9<br />
Cashier and clerk programming<br />
Cashier code<br />
You can assign a cashier code to each cashier. (If the cashier's file is upgraded, a maximum of 99 cashiers can<br />
be programmed. Consult your dealer.)<br />
Procedure<br />
PGM 1<br />
PGM 2<br />
1500<br />
To keep the current setting<br />
Cashier no.<br />
*Cashier code<br />
1500<br />
. ≈ (1 to 99) ≈ (0 - 99) : ;<br />
The current setting is displayed.<br />
* Programming cashier code “0” inhibits entries of the cashier code.<br />
Example<br />
Key operation<br />
Print<br />
1500 . ≈<br />
1 ≈ 11 :<br />
4 ≈ 14 :<br />
;<br />
Cashier no.<br />
Cashier code<br />
53
Cashier name<br />
You can program a maximum of 8 characters (cashier name) for each cashier. Select the characters you want to<br />
program referring to section “2 How to program alphanumeric characters” in chapter “PRIOR TO<br />
PROGRAMMING.”<br />
Procedure<br />
PGM 1<br />
*<br />
PGM 2<br />
1514<br />
To program spaces<br />
Cashier code<br />
Character keys<br />
1514<br />
. ≈ (1 - 99) ≈ (max. 8 digits) : ;<br />
*: A cashier code you have programmed for the cashier by job code 1500<br />
Example<br />
Key operation<br />
Print<br />
1514 . ≈<br />
11 ≈ MAY<strong>ER</strong> :<br />
;<br />
Functional programming for cashiers<br />
PGM 2<br />
2510<br />
Procedure<br />
*<br />
To keep the current setting<br />
Cashier code<br />
2510<br />
. ≈ (1 - 99)<br />
**ABCDE<br />
≈ : ;<br />
The current setting is displayed.<br />
*: A cashier code you have programmed for the cashier by job code 1500<br />
** Item: Selection: Entry:<br />
A Guest check copy Disable 1<br />
Enable 0<br />
B VAT shift Yes 1<br />
No 0<br />
C and D Always enter 0. 0<br />
E Drawer Set the drawer no. 1 or 2 1 or 2<br />
Use no drawer 0<br />
Example<br />
Key operation<br />
Print<br />
2510 . ≈<br />
11 ≈ 00001 :<br />
;<br />
E(Drawer no.)<br />
A through D<br />
54
Clerk code<br />
You can assign a clerk code to each of 99 clerks. The standard machine has no clerk function. If you need this<br />
function, consult your dealer.<br />
Procedure<br />
PGM 1<br />
PGM 2<br />
1400<br />
Clerk no.<br />
*Clerk code<br />
1400<br />
. ≈ (1 to 99) ≈ (0 - 99) : ;<br />
The current setting is displayed.<br />
To keep the current setting<br />
*: Programming clerk code “0” inhibits entries of the clerk code.<br />
Example<br />
Key operation<br />
Print<br />
1400 . ≈<br />
1 ≈ 11 :<br />
4 ≈ 14 :<br />
;<br />
Clerk no.<br />
Clerk code<br />
Clerk name<br />
You can program a maximum of 8 characters (clerk name) for each clerk. Select the characters you want to<br />
program referring to section “2 How to program alphanumeric characters” in chapter “PRIOR TO<br />
PROGRAMMING.”<br />
Procedure<br />
PGM 1<br />
PGM 2<br />
1414<br />
To program spaces<br />
*: A code you have programmed for * the clerk by the job code 1400.<br />
Clerk code<br />
Character keys<br />
(1 - 99)<br />
(max. 8 digits)<br />
1414<br />
. ≈ ≈ : ;<br />
*: A clerk code you have programmed for the clerk by the job code 1400<br />
Example<br />
Key operation<br />
Print<br />
1414 . ≈<br />
11 ≈ NILS :<br />
;<br />
55
10<br />
Programming various functions<br />
Programming for optional feature selection<br />
PGM 2<br />
OP X/Z mode availability<br />
When a cashier needs to take the cashier/clerk X or Z report, he or she will use the OP X/Z mode. This<br />
programming determines whether he or she will be allowed to use this mode.<br />
2616<br />
Note<br />
You can take cashier/clerk X and Z reports in the X1/Z1 mode regardless of the above<br />
programming.<br />
Paid out in the REG-mode<br />
Refund key in the REG-mode<br />
Direct void in the REG-mode<br />
Indirect void in the REG-mode<br />
Subtotal void in the REG-mode<br />
Refund validation printing<br />
First item direct void<br />
Printing of the number of purchased items<br />
Journal print form<br />
You may choose either of the following forms.<br />
• Detailed journal print that shows the details of all entries - the same information as printed on the receipt.<br />
• Summary journal print that shows information about all entries other than normal department entries<br />
(entries into “+” departments and their associated “+” PLUs).<br />
Item validation print<br />
Validation print for â entry<br />
Zero skip for various reports<br />
VAT/tax amount, taxable amount and net amount printing on the receipt/journal<br />
VAT shift type<br />
VAT shift by cashier:<br />
VAT shift is performed by the operation of a cashier who has been assigned to do the<br />
VAT shift operation (Refer to job# 2510).<br />
VAT shift by shift key: VAT shift is performed by pressing the VAT shift key.<br />
No sale in REG-mode<br />
Finalization when the subtotal amount is zero in the REG mode<br />
Printing of the exchange 1 total amount and change amount on the receipt/journal<br />
Total and change amounts in exchange 1 currency are printed respectively below each of the total and<br />
exchange amounts in domestic currency.<br />
Credit counting when received-on-account/paid out finalized with the credit key<br />
Separator line in the report<br />
Link PLU printing on the receipt<br />
Procedure<br />
To keep the current setting<br />
**<br />
2616 P<br />
*ABCDEFGH<br />
. ≈ ≈ : ;<br />
(1 to 13)<br />
The current setting is displayed.<br />
56
**P: 1<br />
*<br />
Item: Selection: Entry:<br />
A OP X/Z mode Enable 0<br />
Disable 1<br />
B Paid-out in REG-mode Enable 0<br />
Disable 1<br />
C Always enter 0. 0<br />
D Refund key entry in the REG-mode Enable 0<br />
Disable 1<br />
E Direct void in the REG-mode Enable 0<br />
Disable 1<br />
F Indirect void in the REG-mode Enable 0<br />
Disable 1<br />
G Subtotal void in the REG-mode Enable 0<br />
Disable 1<br />
H Refund validation printing Non-compulsory 0<br />
Compulsory 1<br />
**P: 2<br />
*<br />
Item: Selection: Entry:<br />
A The first item direct void Enable 0<br />
Disable 1<br />
B and C Always enter 0. 0<br />
D Printing of the number of purchased items No 0<br />
Yes 1<br />
E Always enter 0. 0<br />
F Journal print form Detailed 0<br />
Limited 1<br />
G Item validation printing Enable 0<br />
Disable 1<br />
H â validation printing Non-compulsory 0<br />
Compulsory 1<br />
**P: 3<br />
*<br />
Item: Selection: Entry:<br />
A Always enter 0. 0<br />
B Zero skip in clerk report Yes 0<br />
No 1<br />
C Zero skip in cashier report Yes 0<br />
No 1<br />
D Zero skip in transaction report Yes 0<br />
No 1<br />
E Zero skip in department report Yes 0<br />
No 1<br />
F Zero skip in PLU report Yes 0<br />
No 1<br />
G Zero skip in hourly report Yes 0<br />
No 1<br />
H Zero skip in daily net report Yes 0<br />
No 1<br />
57
**P: 4<br />
*<br />
Item: Selection: Entry:<br />
A and B Always enter 0. 0<br />
C VAT/tax amount printing on the Yes 0<br />
receipt/journal No 1<br />
D Taxable amount printing on the Yes 0<br />
receipt/journal No 1<br />
E Net amount printing on the receipt/journal Yes 0<br />
No 1<br />
F to H Always enter 0. 0<br />
**P: 5<br />
*<br />
Item: Selection: Entry:<br />
A to C Always enter 0. 0<br />
D VAT shift type By cashier 0<br />
By shift key 1<br />
E to H Always enter 0. 0<br />
**P: 6 (ABCDEFGH: Always enter 0.)<br />
**P: 7<br />
*<br />
Item: Selection: Entry:<br />
A and B Always enter 0. 0<br />
C No sale in REG-mode Enable 0<br />
Disable 1<br />
D Finalization in the REG-mode Enable 0<br />
when the subtotal amount is zero Disable 1<br />
E to H Always enter 0. 0<br />
**P: 8 (ABCDEFGH: Always enter 0.)<br />
**P: 9<br />
*<br />
Item: Selection: Entry:<br />
A to C Always enter 0. 0<br />
D Printing exchange 1 total amount and change No 0<br />
amount on receipt and journal Yes 1<br />
E to H Always enter 0. 0<br />
**P: 10 to 12 (ABCDEFGH: Always enter 0.)<br />
58<br />
**P: 13<br />
*<br />
Item: Selection: Entry:<br />
A Credit counting when received-on-account/paid Yes 1<br />
out is finalized with the credit key No 0<br />
B Separator line in the report Separator line 1<br />
1 line space 0<br />
C Way to print the information for the link PLU on Leading link PLU with total amount 1<br />
the receipt Each PLU 0<br />
D to H Always enter 0. 0
Example<br />
Key operation<br />
Print<br />
2616 . ≈<br />
3 ≈ 00000010 :<br />
;<br />
P: 1 through 13<br />
A through H<br />
Programming the limit on the number of times of validation printing and<br />
feed line after printing of a difference subtotal PGM 2 2615<br />
Procedure<br />
When A and B are zeroes<br />
2615 *AB<br />
. ≈ ;<br />
* A: Validation printing counter (1 through 9 times)<br />
To inhibit validation printing, enter 0.<br />
B: Feed lines after printing of difference subtotal (0 through 9)<br />
Example<br />
Key operation<br />
2615 . ≈<br />
10 ;<br />
Print<br />
Programming alarm length of time with drawer opening<br />
If the drawer still remains open when a specified length of time has elapsed, your machine gives the alarm.<br />
Procedure<br />
To disable the alarm function<br />
Time<br />
2617<br />
. ≈ 1 to 255 seconds ;<br />
PGM 2 2617<br />
Example<br />
Key operation<br />
2617 . ≈<br />
30 ;<br />
Print<br />
Note<br />
Your machine starts to monitor how long the drawer is kept open the moment the drawer is opened<br />
at the end of a transaction in the REG/VOID mode. It stops the time monitoring when a valid key<br />
(except the ∑ and q keys) is pressed for the next transaction. It restarts the time monitoring<br />
after that transaction is ended. You can stop the buzzer alarm by closing the drawer. No key entries<br />
can be made while the buzzer is sounding.<br />
59
Programming of print messages<br />
PGM 2 2614<br />
Your register can print programmed messages for customers on every receipt.<br />
Procedure<br />
To program spaces<br />
*Line number<br />
Character keys<br />
2614<br />
. ≈ (1 to 6) ≈ (max. 24 digits) : ;<br />
* “Header 3-line message” type: 1 to 3<br />
“Footer 3-line message” type : 4 to 6<br />
“Header 6-line message” type: 1 to 6<br />
“Header 3-line and footer 3-line message” type: 1 to 6 (1 to 3 as header, 4 to 6 as footer)<br />
A maximum of 6 lines are available. The type of printing “header 3-line message” is available for the standard<br />
model. The line numbers you select are according to the four types of printing: default setting, “header 3-line<br />
message” type, “footer 3-line message” type, “header 6-line message” type and “header 3-line and footer 3-line<br />
message” type. If you want to change the type of printing, please consult your dealer.<br />
Select the characters you want to program, referring to section “2 how to program alphanumeric characters” in<br />
chapter “PRIOR TO PROGRAMMING.”<br />
Example<br />
To program the following logo messages by using 3 lines:<br />
=== YOUR ===<br />
== STORE ==<br />
MESSAGE<br />
Key operation<br />
2614 . ≈<br />
1 ≈ / / / é = é = é = /<br />
Î Y Î O Î U Î R<br />
/ é = é = é = :<br />
2 ≈ / / / é = é = /<br />
Î S Î T Î O Î R Î E<br />
/ é = é = :<br />
3 ≈ / / / /<br />
Î M Î E Î S Î S Î A Î G Î E<br />
:<br />
;<br />
(/:Space key)<br />
Print<br />
60
Selection of X1/Z1 and X2/Z2 reports<br />
to be printed in the stacked report sequence<br />
Your register is equipped with the stacked report printing function that enables multiple X/Z reports to be printed<br />
in sequence with only a single request, up to maximum of 13 reports*. This function continuously prints a<br />
maximum of 13 kinds of reports with a single operation.<br />
Procedure<br />
2620<br />
. ≈<br />
*1<br />
Job no.<br />
Start range<br />
End range<br />
≈ parameter ≈ parameter : ;<br />
*: Maximum 70 steps are programmable. “1 step” means the memory size used for one no-range type job no.<br />
The range type job no. needs “8 steps”.<br />
Job code numbers to be used are as follows.<br />
*1 *2<br />
Job no. Report Available mode Range parameter<br />
00<br />
10<br />
General report<br />
Full department report X1/X2 mode only<br />
13 Full department group report X1/X2 mode only<br />
20 PLU report *3 Start PLU code/end PLU code (1 through 999999)<br />
27 PLU zero sales report X1/X2 mode only<br />
29 PLU price category report X1/X2 mode only *3 Start price amount/end price amount<br />
30 Transaction report<br />
X1/X2 mode only<br />
31 Total in drawer report X1/X2 mode only<br />
32<br />
40<br />
50<br />
60<br />
Commission sales report<br />
Full clerk report<br />
Full cashier report<br />
Hourly sales information Range report is available *3 Start time/end time (0 through 2330)<br />
only in the X1 mode.<br />
70 Daily net report<br />
X1/X2 mode only<br />
*3: Both range setting and full setting are allowed.<br />
To cancel the stacked report sequence<br />
For full reporting (non-range report)<br />
*2<br />
To repeat*<br />
*2<br />
PGM 2<br />
For individual reporting<br />
2620<br />
Note<br />
When Z of stacked report is initiated, X only reports will be skipped.<br />
Example<br />
Key operation<br />
2620 . ≈<br />
10 :<br />
13 :<br />
;<br />
Print<br />
61
Setting the time range for hourly reports<br />
You can set the time range for an hourly report.<br />
Procedure<br />
PGM 2<br />
2619<br />
When A through C are all zeros<br />
*<br />
2619 ABC<br />
. ≈ ;<br />
*A: Time range<br />
To set the time range to 30 minutes (in the 24-hour system), enter 0.<br />
To set the time range to 60 minutes (in the 24-hour system), enter 1.<br />
BC: Starting time (hour = 00 to 23)<br />
Example<br />
Key operation<br />
2619 . ≈<br />
107 ;<br />
Print<br />
Note<br />
To perform this setting, an hourly Z report (# 160) must be done.<br />
RS-232C channel assignment<br />
Your machine is equipped with an RS-232C interface. If you use the on-line communication function, the<br />
channel number of the RS-232C interface must be programmed by using the following procedure.<br />
To realize the on-line communication, consult your dealer.<br />
Procedure<br />
When A through D are all zeroes<br />
2690 *P<br />
**ABCD<br />
. ≈ ≈ : ;<br />
1 to 3<br />
PGM 2<br />
*P: 1<br />
** Item: Selection: Entry:<br />
A For the ON-LINE communication Disable 0<br />
Enable (enter the channel number) 8<br />
B to D Always enter 0. 0<br />
*P: 2 and 3 (ABCD: Not used. Always enter 0.)<br />
2690<br />
Example<br />
Key operation<br />
2690 . ≈<br />
1 ≈ :<br />
;<br />
Print<br />
P<br />
A through D<br />
62
Secret codes to control access to PGM1 mode, X1/Z1 mode and X2/Z2<br />
mode PGM 2 2630 2631 2632<br />
You must enter a secret code according to the following procedure before performing any PGM1-mode, X1/Z1-<br />
mode or X2/Z2-mode operation when a secret code has been set for that specific mode operation.<br />
Operating<br />
Procedure<br />
;<br />
Secret code<br />
;<br />
Max. 4 digits<br />
Note<br />
Programming<br />
Procedure<br />
Once a secret code is entered, it does not need to be entered again unless the mode switch setting<br />
is changed and any operation, such as a sales registration, reporting, or programming, is<br />
performed.<br />
*<br />
2630<br />
2631<br />
* 2630 for the PGM1 mode<br />
2631 for the X1/Z1 mode<br />
2632 for the X2/Z2 mode<br />
Example<br />
No code (zero)<br />
Secret code<br />
. ≈ ;<br />
2632<br />
Max. 4 digits<br />
Key operation<br />
2631 . ≈<br />
1234 ;<br />
Print<br />
Currency description text programming<br />
PGM 2 2334<br />
You can program a maximum of 4 characters for each of the [ through ” keys.<br />
Procedure<br />
To program spaces<br />
Character keys<br />
2334 *Function no.<br />
. ≈ ≈ (max. 4 digits) : ;<br />
*Function no.:<br />
52: For the [ key<br />
53: For the { key<br />
54: For the “ key<br />
55: For the ” key<br />
63
Example<br />
Key operation<br />
Print<br />
2334 . ≈<br />
52 ≈<br />
/ / DM :<br />
;<br />
Assigning the drawer number to the drawer for foreign currency<br />
PGM 2<br />
You can assign a number of the drawer which opens when one of the following operations is performed.<br />
• One of [ through ” is pressed without any entry.<br />
• A transaction is completed with a payment entry of foreign currency.<br />
• An X/Z report is issued.<br />
2680<br />
Procedure<br />
2680 *Drawer no.<br />
. ≈ ;<br />
*Drawer no.:<br />
0: Inhibit (No drawer opens.)<br />
1: Drawer no. 1<br />
2: Drawer no. 2<br />
Example<br />
Key operation<br />
2680 . ≈<br />
2 ;<br />
Print<br />
Note<br />
To perform this programming, an optional drawer must be connected with your register.<br />
64
. . . . .<br />
. . . . .<br />
Setting the AUTO key — Automatic sequencing key —<br />
If you program frequently performed transactions or report sequences for the AUTO keys, you can call those<br />
transactions and/or reports simply by pressing the corresponding AUTO keys in key operations. This<br />
programming can be done when your machine is in the X2/Z2 mode.<br />
Procedure<br />
Delete<br />
2900 Transaction<br />
. ≈ £ 1 £ 1 ;<br />
¡¢<br />
max. 25 times<br />
¡<br />
<br />
¢<br />
10 10<br />
X2/Z2<br />
2900<br />
Example<br />
Programming for ~ key and ¡ key as follows:<br />
~<br />
¡<br />
; entering a PLU 2 item (programmed unit price: 1.50) and a dept. 6 item (unit price: 1.00)<br />
; selling a dept. 7 item (programmed unit price: 5.00) for cash<br />
AUTO1<br />
setting<br />
AUTO2<br />
setting<br />
Key operation<br />
2900 . ≈<br />
£1<br />
2 ß 100 6<br />
£1<br />
¡<br />
7 ;<br />
¡;<br />
Print<br />
Note<br />
When the AUTO key has been programmed to execute a report job function etc., the mode switch<br />
must be in the appropriate position (X1/Z1 or X2/Z2).<br />
65
11<br />
Your machine allows you to read every program stored in the PGM1 and PGM2 modes.<br />
Program details and procedures for their reading<br />
1<br />
2<br />
3<br />
4<br />
6<br />
Reading stored programs<br />
Program for:<br />
Departments<br />
PLUs/<br />
subdepartments<br />
Key nos. for<br />
departments and<br />
PLUs<br />
Mode<br />
switch<br />
position<br />
For reading all codes<br />
Link PLUs PGM2 2220<br />
2220<br />
For individual reading<br />
Clerks<br />
PGM2 or<br />
PGM1<br />
PGM2 or<br />
PGM1<br />
PGM2<br />
PGM2 or<br />
PGM1<br />
Job<br />
code no.<br />
1100<br />
1200<br />
2119<br />
1400<br />
Procedure<br />
2119 ≈ ;<br />
1400 ≈ ;<br />
PGM2 or<br />
7 Function preset 1<br />
PGM1<br />
1300<br />
1300 ≈ ;<br />
8 Function preset 2 PGM2 2600<br />
2600 ≈ ;<br />
9 Tax rates PGM2 2700<br />
2700 ≈ ;<br />
Related PGM1/<br />
PGM2 job<br />
code nos.<br />
1400, 1414<br />
1310, 2311,<br />
2312, 2313,<br />
2314, 2315,<br />
2316, 2320,<br />
2321, 2322,<br />
2334<br />
2614, 2615,<br />
2616, 2617,<br />
2619, 2620,<br />
2630, 2631,<br />
2632, 2680,<br />
2690<br />
10 Auto keys PGM2 2900<br />
2900 ≈ ;<br />
2900<br />
1100<br />
Start<br />
dept. code<br />
1200<br />
Start<br />
PLU code<br />
2220<br />
Start<br />
PLU code<br />
≈<br />
For reading all codes<br />
For individual reading<br />
≈<br />
For reading all codes<br />
For individual reading<br />
≈<br />
≈<br />
≈<br />
≈<br />
PGM2 or<br />
5 Cashiers<br />
PGM1<br />
1500<br />
1500 ≈ ;<br />
End<br />
dept. code<br />
End<br />
PLU code<br />
End<br />
PLU code<br />
;<br />
;<br />
;<br />
1110, 2110,<br />
2111, 2112,<br />
2114, 2115,<br />
2116<br />
1200, 1210,<br />
1211, 2210,<br />
2211, 2214,<br />
2215, 2230,<br />
2231, 2232,<br />
2235<br />
2119, 2219<br />
1500, 1514,<br />
2510<br />
2711<br />
66
Sample printouts<br />
1 Reading of programmed items for departments<br />
(Reading in the PGM1 and PGM2 modes)<br />
2 Reading of programmed items for<br />
PLUs/subdepartments<br />
(Reading in the PGM1 and PGM2 modes)<br />
Job code no.<br />
Range<br />
Mode switch<br />
position*<br />
Mode switch<br />
position*<br />
Range<br />
Dept. code<br />
Item label<br />
Tax status<br />
Unit price<br />
Group no.<br />
HALO limit.<br />
Commission<br />
group<br />
PLU code<br />
Item label<br />
Associated<br />
dept. code<br />
Unit price<br />
Tax status<br />
Base q'ty<br />
002<br />
Function<br />
programming<br />
0000003<br />
Type of unit<br />
price entry<br />
Mode<br />
parameter<br />
Commission<br />
group<br />
Type<br />
(SIF/SICS/Normal)<br />
Item validation print<br />
compulsory/noncompulsory<br />
Minus department<br />
Link PLU<br />
* When you take this report in the PGM1 mode, the PGM2 indication is replaced by a “PGM1”.<br />
67
3 Reading of programmed key nos. for<br />
departments and PLUs<br />
(Reading in the PGM2 mode)<br />
4 Reading of programmed items for link PLUs<br />
(Reading in the PGM2 mode)<br />
Key no.<br />
Dept. code<br />
Leading<br />
PLU code<br />
Range<br />
Linked<br />
PLU code<br />
5 Reading of programmed items for cashiers<br />
(Reading in the PGM1 and PGM2 modes)<br />
Mode switch<br />
position*<br />
PLU code<br />
Cashier no.<br />
Cashier name<br />
Cashier code<br />
Drawer no.<br />
VAT shift yes/no<br />
Guest check<br />
copy yes/no<br />
6 Reading of programmed items for clerks<br />
(Reading in the PGM1 and PGM2 mode)<br />
Clerk no.<br />
Clerk name<br />
Mode switch<br />
position*<br />
Clerk code<br />
* When you take this report in the PGM1 mode, the PGM2<br />
indication is replaced by a “PGM1”.<br />
68
7 Reading of programmed items for functions - 1<br />
(Reading in the PGM1 and PGM2 modes)<br />
Mode switch<br />
position*<br />
To be continued on the next page<br />
* When you take this report in the PGM1 mode,<br />
the PGM2 indication is replaced by a “PGM1”.<br />
To be continued on the next page<br />
69
8 Reading of programmed items for functions - 2<br />
(Reading in the PGM2 mode)<br />
9 Reading of programmed tax rates<br />
(Reading in the PGM2 mode)<br />
Print message<br />
Tax rate<br />
Lowest taxable<br />
amount<br />
Line feed for differ ST<br />
Validation printing counter<br />
Optional feature selection<br />
10 Reading of programmed items for auto keys<br />
(Reading in the PGM2 mode)<br />
Drawer open alarm time<br />
Hourly report format/start<br />
hour<br />
Stacked report<br />
Secret code<br />
Drawer no. for the drawer<br />
for foreign currency<br />
RS-232C channel data<br />
71
12<br />
Training mode<br />
The training mode is used when the operator or the manager practices register operations.<br />
When a cashier set in training is selected, the machine automatically enters the training mode. When a cashier<br />
not set in training is selected, the machine automatically enters the ordinary REG mode. (For programming,<br />
consult your dealer.)<br />
The training operations is valid only in REG, MGR and VOID mode.<br />
The corresponding cashier memory is updated in the training mode. Other memories are not updated.<br />
Key operation<br />
1000 5<br />
3 ≈<br />
3;<br />
Print<br />
72
READING (X) AND RESETTING (Z)<br />
OF SALES TOTALS<br />
• Use the reading function (X) when you need to take a reading of sales information entered since the last<br />
resetting. You can take this reading any number of times. It does not affect the register's memory.<br />
• Use the resetting function (Z) when you need to clear the register's memory. Resetting prints all sales<br />
information and clears the entire memory except for the GT1 through GT3, reset count, and consecutive<br />
number.<br />
1<br />
Summary of reading (X) and resetting (Z) reports and the key operations<br />
to obtain the reports<br />
X1 and Z1 reports: Daily sales reports<br />
X2 and Z2 reports: Periodic (monthly) consolidation reports<br />
Item<br />
Flash report:<br />
(Only display)<br />
To clear the display,<br />
press the c key<br />
or turn the mode<br />
switch to another<br />
position.<br />
Full reading and<br />
resetting<br />
Individual clerk<br />
reading and<br />
resetting<br />
Individual cashier<br />
reading and<br />
resetting<br />
Full clerk<br />
reading and<br />
resetting<br />
Full cashier reading<br />
and resetting<br />
Full department<br />
reading<br />
Individual group<br />
reading<br />
Full group reading<br />
Mode switch<br />
position<br />
X1/Z1<br />
X2/Z2<br />
X1, Z1 X1, Z1<br />
X2, Z2<br />
X1, Z1 X1, Z1<br />
X2, Z2<br />
X1, Z1 X1, Z1<br />
X2, Z2<br />
Job<br />
code<br />
X1 — —<br />
100<br />
200<br />
141<br />
241<br />
X, Z 41<br />
151<br />
251<br />
X, Z 51<br />
X1, Z1<br />
X1, Z1<br />
X2, Z2<br />
X1, Z1 X1, Z1<br />
X2, Z2<br />
140<br />
240<br />
150<br />
250<br />
X1 X1 110<br />
X2 210<br />
X1 X1 112<br />
X2 212<br />
X1 X1 113<br />
X2 213<br />
Reading<br />
Key operation<br />
Dept. key ( 1 to ÿ ) : Department total amount<br />
≈ key: Amount of cash in drawer<br />
: key: Sales total<br />
100<br />
200 . ≈ ;<br />
Resetting<br />
Reading<br />
141<br />
241 . ≈ ;<br />
Resetting<br />
Reading<br />
41 . ≈ ;<br />
Resetting<br />
Reading<br />
151<br />
251 . ≈ ;<br />
Resetting<br />
Reading<br />
51 . ≈ ;<br />
Resetting<br />
Reading<br />
140<br />
240 . ≈ ;<br />
Resetting<br />
Reading<br />
150<br />
250 . ≈ ;<br />
Resetting<br />
110<br />
210 ≈ ;<br />
112<br />
212 ≈ Group no. ;<br />
113<br />
213 ≈ ;<br />
73
Item<br />
Commission sales<br />
report<br />
Reading and<br />
resetting of sales<br />
information for a<br />
range of PLUs/<br />
subdepartments<br />
Reading of sales<br />
information of PLUs/<br />
subdepartments<br />
associated with an<br />
individual department<br />
Reading of sales<br />
information on<br />
PLUs/<br />
subdepartments<br />
whose sales<br />
amounts are zeros<br />
Reading of sales<br />
information<br />
for the price amount<br />
range of PLUs/sub<br />
department<br />
Mode switch<br />
position<br />
X1/Z1<br />
X2/Z2<br />
X1, Z1 X1, Z1<br />
X2, Z2<br />
Job<br />
code<br />
X1 X1 132<br />
X2 232<br />
X1<br />
X1<br />
X1<br />
X1<br />
X2<br />
X1<br />
X2<br />
X1<br />
120<br />
220<br />
121<br />
221<br />
132<br />
232 ≈ ;<br />
120<br />
220<br />
121<br />
221<br />
129<br />
229<br />
. ≈<br />
127<br />
227 ≈ ;<br />
Key operation<br />
≈ Dept. code ;<br />
X2 229<br />
Start price<br />
amount ≈<br />
Transaction reading<br />
X1 X1 130 130<br />
X2 230 230 ≈ ;<br />
Total in drawer<br />
X1 X1 131 131<br />
X2 231 231 ≈ ;<br />
≈<br />
X1<br />
127<br />
227<br />
129<br />
Reading<br />
Resetting<br />
Start PLU code<br />
≈<br />
Reading: 160<br />
(For individual<br />
time range)<br />
All PLUs<br />
≈<br />
All prices<br />
Start*<br />
time<br />
End<br />
PLU code ;<br />
End price<br />
amount ;<br />
≈<br />
Reading and<br />
resetting of hourly<br />
sales information<br />
Reading and<br />
resetting of a<br />
stacked report<br />
Reading and<br />
resetting of the<br />
daily net totals<br />
X1, Z1<br />
X1, Z1 X1, Z1<br />
X2, Z2<br />
190<br />
290<br />
X2, Z2 270<br />
End*<br />
160 time ;<br />
* Enter the time in the 24-hour system.<br />
Reading<br />
Reading<br />
and<br />
Resetting: 160<br />
Resetting<br />
Reading<br />
190<br />
290 . ≈ ;<br />
Resetting<br />
Reading<br />
270 . ≈ ;<br />
Resetting<br />
. ≈ ;<br />
When Z of stacked report<br />
is initiated, X only reports<br />
will be skipped.<br />
Note<br />
Individual and full clerk reading and resetting are available only in the cashier and clerk system. In<br />
the factory setting, the register provides the “cashier only” system. So, if you want to change the<br />
system, consult your dealer.<br />
74
2<br />
Automatic modification of register system for introduction of EURO<br />
To make your register correspond to the introduction of EURO, your register system can be automatically<br />
modified when the procedure shown below is executed in the Z2 mode.<br />
Procedure<br />
800 *A (1 or 2)<br />
. ≈ ;<br />
*A=1: Applicable for the period of co-existence of EURO and national currency. (During the transition period)<br />
*A=2: Applicable for the time the national currency is withdrawn from circulation. (At the completion of<br />
transition period.)<br />
Note<br />
• You can perform the each operation only once with the substitution of “A=1” and “A=2”. If you<br />
performed the operation with the substitution of “A=2” first, you cannot perform the operation with<br />
the substitution of “A=1”.<br />
• After the execution of the procedure above, EURO is treated as domestic currency, and National<br />
currency as foreign currency. Program the rate of national currency for EURO to the exchange<br />
1([) key.<br />
The details of the register system modification are as follows:<br />
When “1” is substituted to “A”:<br />
1. Issuing a general Z1 report (Job #100).<br />
2. Issuing a general Z2 report (Job #200).<br />
3. Resetting GT1, GT2 and GT3.<br />
4. Setting “Yes” for a PGM function “Printing exchange 1 total amount and change amount on receipt and<br />
journal” (Job #2616)<br />
5. Changing the domestic currency symbol to EURO symbol.<br />
When “2” is substituted to “A”:<br />
1. Issuing a general Z1 report (Job #100).<br />
2. Issuing a general Z2 report (Job #200).<br />
3. Resetting GT1, GT2 and GT3.<br />
4. Setting “No” for a PGM function “Printing exchange 1 total amount and change amount on receipt and journal”<br />
(Job #2616)<br />
5. Changing the domestic currency symbol to EURO symbol.<br />
Note<br />
When the operation with the substitution of “A=1” has been performed already, only 1, 2, and 4 are<br />
executed.<br />
75
3<br />
Daily sales totals<br />
Full reading and resetting of sales totals<br />
You can take X and Z reports in the X1/Z1 mode. The use of the decimal key (.) determines when the report<br />
will actually reset the sales totals.<br />
• Sample X report<br />
• Sample Z report<br />
Report no.<br />
Read symbol<br />
Dept. code<br />
Sales q'ty<br />
Sales amount<br />
Ratio of dept.1<br />
sales amount to “+”<br />
dept. total<br />
Reset symbol<br />
Reset counter<br />
Net grand total<br />
(GT2 - GT3)<br />
Grand total of<br />
plus registration<br />
Grand total of<br />
minus registration<br />
Grand total of training<br />
mode registration<br />
The subsequent printout occurs in the<br />
same format as in the X report.<br />
Group1 sales q'ty<br />
Group1 sales amount<br />
Ratio of dept. group1<br />
sales amount to “+”<br />
department<br />
“+” dept. counter<br />
and total<br />
“-” dept. counter<br />
and total<br />
To be continued on the next page<br />
Note<br />
Not all reports provide the resetting capability. Please refer to the chart on pages 73 and 74.<br />
76
“+” hash dept. counter and total<br />
“-” hash dept. counter and total<br />
“+” bottle return dept. counter and total<br />
“-” bottle return dept. counter and total<br />
Subtotal<br />
2 counter and total<br />
Subtotal percent 1 counter and total<br />
Net sales total<br />
Taxable 1 total<br />
VAT 1 total<br />
Tax total<br />
Net total without tax<br />
VAT shift total<br />
Item<br />
1counter and total<br />
Item percent 2 counter and total<br />
Refund counter and total<br />
REG-mode void counter and total<br />
Void-mode transaction counter and total<br />
Manager item void counter and total<br />
Subtotal void counter and total<br />
77
Validation print counter<br />
No-sale (exchange) counter<br />
Gest check copy counter<br />
Customer counter<br />
Order total<br />
Paid total<br />
Paid total average per costomer<br />
Order total - paid total<br />
Received on account counter and total<br />
Paid out counter and total<br />
Cheque cashing counter and total<br />
Cash counter and total<br />
Cheque 1 sales counter and total<br />
Credit 1 sale and tendering counter and total<br />
Exchange 1 counter and total<br />
Cash in drawer<br />
Cheque in drawer<br />
Cash + cheque in drawer<br />
Change total for cheque tendering<br />
78
Cashier reading and resetting<br />
Using this function, you can take X and Z reports for individual cashiers or all cashiers.<br />
Individual cashier reading and resetting<br />
The OP X/Z-mode reading and resetting is allowed only when your machine has been programmed<br />
Note<br />
for “OP X/Z mode available” in the PGM2 mode.<br />
• Sample X report<br />
• Sample Z report<br />
Cashier no./cashier code<br />
Cashier name<br />
Order total<br />
Paid total<br />
Average<br />
The subsequent printout occurs in the<br />
same format as in the sample X report.<br />
Full cashier reading and resetting<br />
The subsequent printout occurs in the same format as in the<br />
sample reports of individual cashier reading and resetting,<br />
and sales data for cashiers print in this sequence.<br />
79
Clerk reading and resetting<br />
Using this function, you can take X and Z reports for individual clerks or all clerks.<br />
Individual clerk reading and resetting<br />
The OP X/Z-mode reading and resetting is allowed only when your machine has been programmed<br />
Note<br />
for “OP X/Z mode available” in the PGM2 mode.<br />
• Sample X report<br />
• Sample Z report<br />
Clerk no./clerk code<br />
Clerk name<br />
Order total<br />
Commission sales<br />
1 total amount<br />
The subsequent printout occurs in the<br />
same format as in the sample X report.<br />
Non-commission<br />
sales amount<br />
Full clerk reading and resetting<br />
The subsequent printout occurs in the same format as<br />
in the reports of individual clerk reading and resetting,<br />
and sales data for clerks print in this sequence.<br />
* When you take these reports in the OP X/Z mode, the X report shows an “OP X” and the Z report shows an<br />
“OP Z”.<br />
80
Reading and resetting of hourly sales information<br />
You can take X and Z reports for sales totals and transaction (customer) counters for 48 half hours, or 24 hours.<br />
If both quantity and amount are zero, their print is skipped.<br />
• Sample X report<br />
• Sample Z report<br />
The subsequent printout occurs in the<br />
same format as in the sample X report.<br />
Customer counter<br />
Sales total<br />
Average sales amount per customer<br />
(sales total ÷ customer counter)<br />
81
Full department reading<br />
Sales q'ty and total<br />
Ratio of dept. 1 sales<br />
amount to “+”<br />
dept. total<br />
82
Individual group reading<br />
Full group reading<br />
Group 1 sales q'ty and<br />
total<br />
Group 1 sales q'ty and<br />
total<br />
83
Reading and resetting of sales information for a range of<br />
PLUs/subdepartments<br />
This function provides you with X and Z reports for sales information of a certain range of PLUs/subdepartments.<br />
You must enter the start and end PLU/subdepartment code of the range. Of course, the range may represent all<br />
of the PLUs/subdepartments in your register.<br />
• Sample X report<br />
• Sample Z report<br />
PLU code<br />
Item label<br />
Range<br />
Sales q'ty and total<br />
The subsequent printout occurs in the same<br />
format as in the sample X report.<br />
Range sum<br />
84
Reading of sales information on<br />
PLUs/subdepartments associated<br />
with an individual department<br />
Reading of sales information for<br />
the price amount range of<br />
PLUs/subdepartments<br />
PLU code<br />
Associated dept.code<br />
Sales q'ty and total<br />
Price amount<br />
range<br />
Sales q'ty<br />
and total<br />
Reading of sales information on<br />
PLUs/subdepartments whose<br />
sales amounts are zeros<br />
Commission sales information<br />
PLU code<br />
Item label<br />
Commission<br />
sales 1 amount total<br />
Non-commission<br />
sales amount<br />
85
Transaction reading<br />
Total in drawer reading<br />
In this report the same transaction data as those<br />
printed when full reading is taken are printed<br />
except department sales totals.<br />
Exchange 1 counter<br />
Currency<br />
exchange 1<br />
total<br />
Domestic<br />
currency for<br />
currency<br />
exchange 1<br />
total<br />
Cash in drawer<br />
Cheque in drawer<br />
Cash/Cheque<br />
in drawer<br />
Reading and resetting of a stacked report<br />
You can print multiple X1/Z1 reports in sequence at a time.<br />
In this case, you need to program in advance what X1/Z1 reports should be printed in the stacked report<br />
sequence.<br />
Note<br />
The following job code numbers alone can be used for stacked report printing.<br />
Job code number: 100, 110, 113, 120, 127, 129, 130, 131, 132, 140, 150, 160<br />
Refer to “Selection of X/Z reports to be printed in the stacked report sequence” for details.<br />
86
4<br />
Periodic consolidation<br />
Your register allows you to take consolidation X and Z reports of a chosen period (normally one week or a<br />
month).<br />
Generality<br />
The periodic reading or resetting reports are the same in format as those in the X1/Z1 report for daily total<br />
except job code no. (#2xx) and mode indication (“X2” or “Z2”.)<br />
• Sample X report<br />
• Sample Z report<br />
Read symbol<br />
Reset symbol<br />
Reset counter<br />
of daily total<br />
Reset counter<br />
of periodic<br />
consolidation<br />
Grand total<br />
The subsequent printouts are the same in format as<br />
those in the X/Z report for daily total.<br />
87
Reading and resetting of the daily net totals<br />
The subsequent printout occurs in the<br />
same format as in the sample X report.<br />
Reading and resetting of a stacked report<br />
You can print multiple X1/Z1 reports in sequence at a time.<br />
In this case, you need to program in advance what X1/Z1 reports should be printed in the stacked report<br />
sequence.<br />
Note<br />
The following job code numbers alone can be used for stacked report printing.<br />
Job code number: 200, 210, 213, 220, 227, 229, 230, 231, 232, 240, 250, 270<br />
Refer to “Selection of X1/Z1 and X2/Z2 reports to be printed in the stacked report sequence” for<br />
details.<br />
88
COMPULSORY CASH/CHEQUE<br />
DECLARATION<br />
If you want to make mandatory the declaration of the cash and cheque amount in the drawer before<br />
outputting cashier Z reports, consult your dealer and have your register programmed for compulsory<br />
cash/cheque declaration.<br />
If your register is programmed for compulsory cash/cheque declaration (CCD), a cashier must first count and<br />
declare the cash and cheque amounts (of domestic and foreign currency) in the drawer, before he or she can<br />
output a cashier report. The procedure for outputting a CCD report is shown below.<br />
Types of compulsory cash/cheque declaration<br />
• Compulsory declaration prior to individual cashier resetting<br />
• Compulsory declaration prior to full cashier resetting<br />
Note<br />
• Compulsory cash/cheque declaration is available in the above two types. You can choose either<br />
of these. Consult your dealer for details.<br />
• When cash/cheque declaration is compulsory, flash reports are not available.<br />
Key operation<br />
After the first ; key is pressed, the register prompts the cashier to input the cash and cheque accounts for<br />
both domestic and foreign currency. The cashier can simply input the total amounts of each currency unit, or the<br />
number of bills or coins of each denomination of each currency unit.<br />
• Individual cashier report<br />
OP X/Z mode<br />
51<br />
X1/Z1 mode<br />
. ≈<br />
151 Q'ty<br />
. ≈ ; ≈<br />
• Full cashier report<br />
X1/Z1 mode<br />
150<br />
. ≈<br />
The drawer opens and the cashier is prompted to<br />
enter the cash and cheque amounts. (“ ” is displayed.)<br />
Amount<br />
Input the total<br />
amount of cash<br />
or cheques<br />
Input the cheque or<br />
currency denomination<br />
X<br />
=<br />
[ “<br />
to<br />
To repeat<br />
:<br />
=<br />
[<br />
to“<br />
? ;<br />
Cancel<br />
previous<br />
entry<br />
To display cash/cheque subtotal<br />
= :When inputting the cash or cheque amount in the drawer<br />
[ to “ :When inputting the amount of a foreign currency in the drawer<br />
89
CCD entry amount<br />
Currency exchange 1 in drawer to be obtained<br />
Total of entered (declared) exchange 1 in drawer<br />
Difference<br />
Cash in drawer to be obtained<br />
Cash/cheque in drawer to be obtained<br />
Total of entered (declared) cash/cheque in drawer<br />
Difference<br />
Total of difference<br />
90
OV<strong>ER</strong>RIDE ENTRIES<br />
Programmed limit for functions (such as for maximum amounts) can be overridden by making an entry in the<br />
MGR mode.<br />
Procedure<br />
1. Turn the mode switch to the MGR position.<br />
2. Make an override entry.<br />
Example<br />
On this example, the register has been programmed not to allow deduction entries over<br />
2.00.<br />
REG-mode<br />
entries<br />
Key operation<br />
1500 2<br />
250 - ...Error<br />
c<br />
Print<br />
Turn the mode switch<br />
to the MGR position.<br />
250 -<br />
Return the mode switch<br />
to the REG position.<br />
;<br />
91
CORRECTION AFT<strong>ER</strong> FINALIZING A<br />
TRANSACTION<br />
(AFT<strong>ER</strong> GEN<strong>ER</strong>ATING A RECEIPT)<br />
When you need to void incorrect entries that cashiers cannot correct (incorrect entries that are found after<br />
finalizing a transaction or cannot be corrected by direct or indirect void), follow this procedure in the MGR mode.<br />
1. Turn the mode switch to the MGR position.<br />
2. Press the ? key to put your register in the VOID mode.<br />
3. Repeat the entries that are recorded on an incorrect receipt. (All data for the incorrect receipt are removed<br />
from register memory; the voided amounts are added to the void register totalizer.)<br />
Incorrect receipt<br />
Cancellation receipt<br />
Note<br />
Your machine leaves the VOID mode whenever a transaction is canceled (i.e. finalized in the VOID<br />
mode.) To void additional transactions repeat steps 2. and 3. above.<br />
92
FOR THE OP<strong>ER</strong>ATOR<br />
PRIOR TO ENTRIES<br />
1<br />
Preparations for entries<br />
Before registrations, insert the operator key into the mode switch and turn it to the REG position and check the<br />
following items:<br />
Receipt and journal paper rolls<br />
If the receipt and journal paper rolls are not set in the machine or there are low rolls, install new ones according<br />
to section “4. Installing and removing the paper rolls” under “OP<strong>ER</strong>ATOR MAINTENANCE.”<br />
Receipt ON/OFF function<br />
You can disable receipt printing in the REG mode to save paper using the receipt function. To disable receipt<br />
printing, press the q key in the OP X/Z position. This key toggles the receipt printing status ON and OFF.<br />
To check the receipt printing status, turn the mode switch to the OP X/Z position or press the c key in the REG<br />
mode. When the function is in the OFF status, the receipt off indicator “_” illuminates.<br />
Note<br />
Your register will print reports regardless of the receipt state. This means that the receipt roll must<br />
be installed even when the receipt state is “OFF”.<br />
Cashier and clerk assignment<br />
Prior to any item entries, cashiers must enter their cashier codes into the register, and may also be required to<br />
enter a clerk code. However, these code entries may not be necessary when the same cashier or clerk code is<br />
used in the next transaction.<br />
Cashier codes and clerk codes are available in two variants: Variant 1, in which they are displayed (“-00-” to<br />
“-99-”), and Variant 2, in which they are not displayed (always “-00-”).<br />
When the cashier or clerk code is assigned by the following procedure, the register prints the two-digit cashier<br />
code or clerk code (variant 2: “<br />
transaction.<br />
✱<br />
✱<br />
”) and the cashier or clerk name both on the receipt and journal for every<br />
Note<br />
All of these settings depend on how the register has been programmed. For the selection of these<br />
settings, consult your local dealer.<br />
Clerk code<br />
(“ ” is printed in Variant 2.)<br />
Clerk name<br />
✱<br />
✱<br />
Cashier code<br />
(“ ” is printed in Variant 2.)<br />
Cashier name<br />
✱<br />
✱<br />
93
Procedure<br />
Cashier assignment<br />
■ Sign-on<br />
Variant 1 :<br />
(Code is displayed)<br />
Variant 2 :<br />
(Code is not displayed)<br />
To display the signed-on cashier code<br />
‹<br />
Cashier code<br />
Cashier code<br />
‹<br />
‹<br />
■ Sign-off<br />
Variant 1 / Variant 2 :<br />
‹<br />
‹<br />
Note<br />
Clerk assignment<br />
■ Sign-on<br />
Variant 1 :<br />
(Code is displayed)<br />
Variant 2 :<br />
(Code is not displayed)<br />
The real cashier key system is also available. In this system put one of the 1 through 15 keys in the<br />
cashier switch to sign on. If you want to choose this system, consult your dealer.<br />
To display the signed-on clerk code<br />
^<br />
Clerk code<br />
Clerk code<br />
^<br />
^<br />
■ Sign-off<br />
Variant 1 / Variant 2 :<br />
^<br />
^<br />
Note<br />
• On the current factory setting, only the entry of the cashier code is required. When cashier & clerk<br />
codes entries are desirable for your register, consult your dealer.<br />
• If you want to enter cashier and/or clerk codes before every transaction, consult your dealer.<br />
• For the display type selection of cashier code and clerk code, “Variant 1” has been preset. For the<br />
selection of “Variant 2,” consult your dealer.<br />
• Clerk can be changed during the transaction. Consult your dealer.<br />
2<br />
Error warning<br />
In the following examples, your register will go into an error state accompanied with a warning beep and the<br />
error symbol “ ” on the display. Clear the error state by pressing the c key and take proper action.<br />
Please refer to the error code table on page 124.<br />
• When you enter an over 32-digit number (entry limit overflow): Cancel the entry and re-enter a correct number.<br />
• When you make an error in key operation: Clear the error and continue operation.<br />
• When you make an entry beyond a programmed amount entry limit: Check to see if the entered amount is<br />
correct. If it is correct, it can be rung up in the MGR mode. Contact your manager.<br />
• When an including-tax subtotal exceeds eight digits: Delete the subtotal by pressing the c key and press the<br />
;, Å, ( through + , or ] through ’ key to finalize the transaction.<br />
94
ENTRIES<br />
1<br />
Item entries<br />
Single item entries<br />
Procedure<br />
Department entries<br />
Enter a unit price and press a department key. If you use a programmed unit price, press a department key only.<br />
When using a programmed unit price<br />
Note<br />
Unit price *<br />
(max. 7 digits)<br />
Department key<br />
*Less than the programmed upper limit amounts<br />
When those departments for which the unit price has been programmed as zero (0) are entered,<br />
only the sales quantity is added.<br />
PLU entries (indirect PLU entries)<br />
Enter a PLU code and press the ß key.<br />
Note<br />
PLU code<br />
ß<br />
When those PLUs for which the unit price has been programmed as zero (0) are entered, only the<br />
sales quantity is added.<br />
Subdepartment (open PLU) entries<br />
Unit price *<br />
å ß<br />
PLU code (max. 7 digits)<br />
*Less than the programmed upper<br />
limit amounts<br />
PLU entries (direct PLU entries)<br />
When using a programmed price<br />
Unit price<br />
(for subdept.)<br />
Example<br />
Direct PLU key<br />
Key operation<br />
Print<br />
1200 3<br />
5<br />
2 ß<br />
1200 å 11 ß<br />
ô;<br />
95
Repeat entries<br />
You can use this function for entering a sale of two or more same items.<br />
Example<br />
Key operation<br />
Repeated<br />
department<br />
entry<br />
Repeated PLU<br />
entry<br />
(indirect)<br />
Repeated PLU<br />
entry<br />
(direct)<br />
Repeated<br />
subdepartment<br />
entry<br />
Print<br />
200 8<br />
88<br />
10 ß<br />
ßßóó<br />
500 å<br />
60 ß<br />
ß;<br />
Multiplication entries<br />
Use this feature entry method when you need to enter two or more same items.<br />
This feature helps when you sell a large quantity of items or need to enter quantities that contain decimals.<br />
Procedure<br />
Q'ty<br />
≈<br />
When you use a programmed<br />
unit price<br />
Unit price<br />
PLU code<br />
Dept.<br />
ß<br />
Dept. entry<br />
PLU entry (indirect)<br />
Unit price<br />
Unit price<br />
Direct PLU<br />
å<br />
• Q'ty: Up to four digits integer + three digits decimal<br />
• Unit price: Less than a programmed upper limit<br />
• Q'ty x unit price: Up to seven digits<br />
PLU code<br />
ß<br />
PLU/subdept. entry (direct)<br />
Subdept. entry<br />
Example<br />
Department<br />
entry<br />
PLU entry<br />
Direct PLU<br />
entry<br />
Subdepartment<br />
entry<br />
Key operation60 ß<br />
;<br />
Print<br />
7 . 5 ≈<br />
165 8<br />
15 ≈<br />
13 ß<br />
8 . 25 ≈<br />
ò<br />
3 ≈<br />
100 å<br />
96
Successive multiplication entries<br />
This function is practical for example when you enter a sale of items sold by area (square meter).<br />
Procedure<br />
Length<br />
≈<br />
Width<br />
PLU code<br />
When you use a programmed<br />
unit price<br />
≈<br />
ß<br />
Unit price<br />
Dept.<br />
Dept. entry<br />
PLU entry (indirect)<br />
Unit price<br />
per m 2<br />
Unit price<br />
per m 2<br />
Direct PLU<br />
å<br />
PLU code<br />
ß<br />
PLU/subdept. entry (direct)<br />
Subdept. entry<br />
• Length or width: up to seven digits (4-digit integer + 3-digit decimal)<br />
• Unit price: less than a programmed upper limit<br />
• Length x Width x Unit price: up to seven digits (4-digit integer + 3-digit decimal)<br />
Note<br />
For actual use of this function, consult your dealer.<br />
Example<br />
Key operation6 ß<br />
;<br />
Print<br />
Department entry<br />
PLU entry<br />
Subdepartment entry<br />
3 ≈<br />
4 ≈<br />
400 5<br />
1 . 5 ≈<br />
2 . 5 ≈<br />
8 ß<br />
1 . 75 ≈<br />
1 . 75 ≈<br />
600 å<br />
97
Split-pricing entries<br />
You will use this function when your customer wants to purchase items normally sold in bulk.<br />
Procedure<br />
Selling q'ty<br />
≈<br />
Base q'ty<br />
≈<br />
Only when you use a<br />
base q'ty programmed<br />
for PLU code<br />
When you use a programmed<br />
unit price<br />
Unit price<br />
per base q'ty<br />
PLU code<br />
Unit price<br />
per base q'ty<br />
Unit price<br />
per base q'ty<br />
PLU code<br />
Unit price<br />
per base q'ty<br />
Unit price<br />
per base q'ty<br />
• Selling quantity: Up to four digits integer + three digits decimal<br />
• Base quantity: Up to two digits (integer)<br />
Dept.<br />
ß<br />
Direct PLU<br />
å<br />
ß<br />
Direct PLU<br />
å<br />
PLU code<br />
PLU code<br />
ß<br />
ß<br />
Note<br />
For actual use of this function, consult your dealer.<br />
Example<br />
Key operation<br />
Department<br />
entry<br />
PLU entry<br />
Print<br />
7 ≈<br />
10 ≈<br />
600 7<br />
8 ≈<br />
5 ≈<br />
35 ß<br />
;<br />
98
Single item cash sale (SICS)/single item finalize (SIF) entries<br />
SICS entries<br />
• This function is useful when a sale is for only one item and is for cash; such as a pack of cigarettes. This<br />
function is applicable only to those departments that have been set for SICS or to their associated PLUs or<br />
subdepartments.<br />
• The transaction is finalized and the drawer opens as soon as you press the department key, ß key or the<br />
direct PLU key.<br />
Example<br />
Key operation<br />
250<br />
For finishing 9<br />
the transaction<br />
Print<br />
Note<br />
If an entry to a department or PLU/subdepartment set for SICS follows the ones to departments or<br />
PLUs/subdepartments not set for SICS, it does not finalize and results in a normal sale.<br />
SIF entries<br />
• If an entry to a department or PLU/subdepartment set for SIF follows the ones to departments or<br />
PLUs/subdepartments not set for SIF, the transaction is finalized immediately as a cash sale.<br />
• Like the SICS function, this function is available for single-item cash settlement.<br />
Example<br />
Key operation<br />
1745 8<br />
1500<br />
For finishing 9<br />
the transaction<br />
Print<br />
Link PLU entries<br />
<strong>Operation</strong> is the same as normal PLU’s. The print of a link PLU entry on the receipt varies according to the<br />
PGM2 programming (#2616).<br />
Printing detailed information<br />
When a link PLU is entered, the linked PLUs total amount and text and their individual amounts are printed<br />
automatically.<br />
Example<br />
Key operation<br />
Print<br />
ü21 ß<br />
;<br />
Linked PLUs<br />
99
Printing leading link PLUs and total sales amount<br />
When a link PLU is entered, only the leading link PLUs’ text and the total sales amount (the sum of prices for<br />
PLU’s which are included in the link PLU) are printed.<br />
Example<br />
Key operation<br />
21 ß<br />
;<br />
Print<br />
Total amount<br />
Note<br />
If a discount entry is made for a link PLU, the discount amount is calculated based on the total<br />
sales amount. The discount itself is given to the leading link PLU.<br />
2<br />
Displaying subtotals<br />
Your machine provides the following two types of subtotals:<br />
Normal subtotal<br />
This is a subtotal which is displayed by pressing the : key. When you press it, the subtotal of all entries which<br />
have been made is displayed and the symbol “ ” will light up in the display.<br />
Example<br />
Key operation<br />
Print<br />
100 9<br />
100 2<br />
700 3<br />
:;<br />
Note<br />
Subtotal will not be printed on a receipt on the current factory setting. If you want to print it, consult<br />
your dealer.<br />
Difference subtotal (Differ ST)<br />
This is a subtotal which is printed by pressing the ÷ key. You can get two or more difference subtotals in one<br />
transaction.<br />
When you press it first, the difference subtotal of all entries which have been made is displayed and printed. If<br />
you press it second, you will get the difference subtotal of entries which have been made after you last got it.<br />
Taxes are calculated each time you press the ÷ key, and taxes and taxable subtotals are printed on the receipt<br />
according to the programming (job #2616).<br />
Example<br />
Key operation<br />
100 9<br />
Print<br />
200 2<br />
÷<br />
700 3<br />
;
3 Finalization of transaction<br />
Cash or cheque tendering<br />
Press the : key to get a subtotal, enter the amount tendered by your customer, then press the ; or Å<br />
it is a cash tender or press one of the ( through +<br />
key if<br />
key if it is a cheque tender. When the amount tendered is<br />
greater than the amount of the sale, your register will show the change due amount and the symbol “ ” will light<br />
up. Otherwise your register will show a deficit and the symbol “ ” will light up. Make a correct tender entry.<br />
Example<br />
Cash tendering<br />
Key operation<br />
Print<br />
:<br />
1000 ;<br />
Cheque tendering<br />
Key operation<br />
Print<br />
:<br />
1000 (<br />
Mixed tendering (cheque + cash)<br />
Example<br />
Key operation<br />
Print<br />
:<br />
1000 (<br />
500 ;<br />
Cash or cheque sale that does not need any tender entry<br />
Enter items and press the ; or Å key if it is a cash sale or press one of the ( through + if it is a cheque<br />
sale. Your register will display the total sale amount.<br />
Example<br />
Key operation<br />
Print<br />
300 6<br />
10 ß<br />
;<br />
In the case of cheque sale
Credit sale<br />
Enter items and press the corresponding credit keys (] through ’).<br />
Example<br />
Key operation<br />
Print<br />
2500 6<br />
3250 7<br />
]<br />
Amount tendering operations (i.e., change calculations) can be achieved by the ] through ’ key when a<br />
PGM2 programming allows them.<br />
Mixed-tender sale (cash or cheque tendering + credit tendering)<br />
Example<br />
Key operation<br />
Print<br />
:<br />
950 ;<br />
}<br />
Note<br />
Press one of the ( through + keys or the ] through ’ keys in place of the ; key when<br />
your customer makes payment in cheques or by credit account.<br />
4<br />
Computation of VAT (Value Added Tax)/tax<br />
VAT/ tax system<br />
The machine may be programmed for the following six tax systems by your dealer.<br />
Automatic VAT 1-6 system (Automatic operation method using programmed percentages)<br />
This system, at settlement, calculates VAT for taxable 1 through 6 subtotals by using the corresponding<br />
programmed percentages.<br />
Automatic tax 1-6 system (Automatic operation method using programmed percentages)<br />
This system, at settlement, calculates taxes for taxable 1 through 6 subtotals by using the corresponding<br />
programmed percentages, and also adds the the calculated taxes to those subtotals, respectively.<br />
<strong>Manual</strong> VAT 1-6 system (<strong>Manual</strong> entry method using programmed percentages)<br />
Procedure<br />
: ◊<br />
This system provides the VAT calculation for taxable 1 through 6 subtotals. This calculation is performed using<br />
the corresponding programmed percentages when the ◊ key is pressed just after the : key.<br />
102
<strong>Manual</strong> VAT 1 system (<strong>Manual</strong> entry method for subtotals that uses VAT 1 preset percentages)<br />
Procedure<br />
To use a programmed rate<br />
VAT rate<br />
: ◊<br />
This system enables the VAT calculation for the then subtotal. This calculation is performed using the VAT 1<br />
preset percentages when the ◊ key is pressed just after the : key. For this system, the keyed-in tax rate can<br />
be used.<br />
<strong>Manual</strong> tax 1-6 system (<strong>Manual</strong> entry method using preset percentages)<br />
Procedure<br />
: ◊<br />
This system provides the tax calculation for taxable 1 through 6 subtotals. This calculation is performed using<br />
the corresponding programmed percentages when the ◊ key is pressed just after the : key.<br />
After this calculation, you must finalize the transaction.<br />
Automatic VAT 1-3 and automatic tax 4-6 system<br />
This system enables the calculation in the combination with automatic VAT 1 through 3 and automatic tax 4<br />
through 6. The combination can be any of VAT1 through VAT3 corresponding to taxable 1 through taxable 3 and<br />
any of tax 4 through 6 corresponding to taxable 4 through taxable 6 for each item. The tax amount is calculated<br />
automatically with the percentages previously programmed for these taxes.<br />
Note<br />
• A PLU not programmed for any of the tax statuses is registered depending on the tax status of<br />
the department which the PLU belongs to.<br />
• VAT/tax assignment is printed at the fixed right position near the amount on the receipt as<br />
follows:<br />
VAT1/tax1<br />
A<br />
VAT2/tax2<br />
B<br />
VAT3/tax3<br />
C<br />
VAT4/tax4<br />
D<br />
VAT5/tax5<br />
E<br />
VAT6/tax6<br />
F<br />
When the multiple VAT/tax is assigned to a department or a PLU, a smaller number of the VAT/tax<br />
will be printed. For details, contact your authorized SHARP dealer.<br />
Example<br />
Key operation<br />
(When the manual<br />
VAT 1-6 system<br />
is selected)<br />
550 4<br />
:◊;<br />
Print<br />
103
VAT shift entries<br />
This feature is intended to shift the tax status of a particular department (or PLU) programmed for taxable 1 or<br />
taxable 1 and taxable 3.<br />
1. When the VAT shift entry is made for a particular department or PLU programmed for taxable 1, their tax<br />
status shifts to taxable 2.<br />
2. When this entry is made for a particular department (or PLU) programmed for taxable 1 and taxable 3, the tax<br />
status “taxable 1” remains unchanged, but the other “taxable 3” is ignored.<br />
Procedure<br />
Press the „ to activate the VAT shift prior to entering department(s) or PLU(s) concerned.<br />
Example<br />
Key operation<br />
(When the manual<br />
VAT 1-6 system<br />
is selected.)<br />
Print<br />
„<br />
550 4<br />
:◊;<br />
5<br />
Auxiliary entries<br />
Percent calculations (premium or discount)<br />
• Your register provides the percent calculation for the subtotal or each item entry depending on the<br />
programming.<br />
• Percentage: 0.01 to 99.99%<br />
Percent calculation for the subtotal<br />
Example<br />
(When a discount<br />
of 10% is<br />
programmed for<br />
the ∞ key)<br />
Key operation<br />
Print<br />
4 ≈<br />
140 5<br />
225 7<br />
7:∞;<br />
104
Percent calculation for item entries<br />
Example<br />
(When a premium<br />
of 15% is<br />
programmed for<br />
the § key)<br />
Key operation<br />
Print<br />
800 6<br />
§<br />
90 ß<br />
7 . 5 §<br />
;<br />
Deduction entries<br />
Your register allows you to deduct a certain amount less than a programmed upper limit after the entry of an<br />
item or the computation of subtotal depending on the programming.<br />
Deduction for the subtotal<br />
Example<br />
Key operation<br />
Print<br />
575 6<br />
80 ß<br />
:<br />
100 –<br />
;<br />
Deduction for item entries<br />
Example<br />
Key operation75 -<br />
;<br />
Print<br />
675 7<br />
105
Refund entries<br />
If a refund item is the one entered into a department, enter the amount of the refund, then press the © key and<br />
the corresponding department key in this order; and if an item entered into a PLU is returned, enter the<br />
corresponding PLU code, then press the © and ß keys, or press the © and direct PLU keys without<br />
entry of PLU code, in this order.<br />
Example<br />
Key operation<br />
Print<br />
250 © 6<br />
7 ≈<br />
13 ©ß<br />
;<br />
Printing of non-add code numbers<br />
Enter a non-add code number such as a customer's code number and credit card number within a maximum of<br />
16 digits and press the = key at any point during the entry of a sale. Your register will print it at once.<br />
Example<br />
Key operation<br />
Print<br />
1230 =<br />
1500 6<br />
]<br />
6<br />
Payment treatment<br />
Currency exchange<br />
Your register allows payment entries of foreign currency. Pressing one of the [ through ” key creates a<br />
subtotal in foreign currency. Cash alone can be handled after currency exchange.<br />
Procedure<br />
After an entry<br />
is completed<br />
or<br />
After the amount<br />
tendered is found<br />
smaller than the<br />
sales amount in<br />
a sales entry<br />
Preset exchange rate<br />
*Exchange rate<br />
*Exchange rate: 0.000000 to 999.999999<br />
For an additional payment in foreign currency<br />
For direct finalization<br />
[<br />
{<br />
“<br />
” c<br />
Reentry<br />
Amount<br />
tendered<br />
(max. 8 digits)<br />
;<br />
Å<br />
Next registration<br />
or<br />
payment in<br />
domestic currency<br />
Note<br />
When the amount tendered is short, the deficit is shown in domestic currency.<br />
106
Example<br />
Preset exchange rate (0.6068) - EX1<br />
Key operation<br />
Currency<br />
exchange<br />
Amount<br />
tendered in<br />
foreign currency<br />
2300 6<br />
4650 7<br />
[<br />
10000 ;<br />
Print<br />
Domestic<br />
currency<br />
Exchange rate<br />
Foreign currency<br />
Domestic<br />
currency<br />
<strong>Manual</strong> exchange rate - EX4 (The ” key can be used only for the manual entry of an<br />
exchange rate.)<br />
Key operation<br />
2300 6<br />
4650 7<br />
0 . 6070 ”<br />
10000 ;<br />
Print<br />
Received on account entries<br />
Procedure<br />
Amount<br />
(max. 8 digits)<br />
or<br />
r<br />
or<br />
® ( ;<br />
]<br />
+<br />
Å<br />
through<br />
through<br />
’<br />
Example<br />
Key operation<br />
12345 =<br />
4800 r<br />
(<br />
Print<br />
Paid out entries<br />
Procedure<br />
Amount<br />
(max. 8 digits)<br />
or<br />
p<br />
or<br />
π ( ;<br />
]<br />
+<br />
Å<br />
through<br />
through<br />
’<br />
107
Example<br />
Key operation<br />
Print<br />
6789 =<br />
3000 p<br />
(<br />
No sale (exchange)<br />
Simply press the n key without any entry. The drawer will open and the printer will print “NO SALE” on both<br />
the journal and the receipt. If you let your machine print a non-add code number before pressing the n key, a<br />
no sale entry is achieved with a non-add code number printed.<br />
Cashing a cheque<br />
Enter the cheque amount, then press one of the ( through + key.<br />
Procedure<br />
Non-add code<br />
Cheque<br />
number = amount ( +<br />
through<br />
Example<br />
Key operation<br />
6789 =<br />
3000 (<br />
Print<br />
7<br />
Automatic sequencing key (` key) entries<br />
You can achieve a programmed transaction simply by pressing a corresponding automatic sequencing key.<br />
Example<br />
(¡ = 500 7 ; )<br />
Key operation<br />
¡<br />
Print<br />
108
CORRECTION<br />
1<br />
Correction of the last entry (direct void)<br />
If you make an incorrect entry relating to a department, PLU/subdepartment, percentage (∞ through •),<br />
deduction (- through ≠) or refund, you can void this entry by pressing the ? key immediately after the<br />
incorrect entry.<br />
Example<br />
Key operation<br />
Print<br />
1250 6<br />
?<br />
2 ß<br />
?<br />
600 8<br />
§?<br />
328 9<br />
28 -<br />
?<br />
250 © 6<br />
?;<br />
2<br />
Correction of the next-to-last or earlier entries (indirect void)<br />
With the ? key, you can void any incorrect positive department or PLU/subdepartment entry made during a<br />
transaction if you find it before finalizing the transaction (e.g. pressing the ; key). This function is applicable to<br />
plus department and PLU/subdepartment entries only.<br />
Example<br />
Correction<br />
of a<br />
department<br />
entry<br />
Correction<br />
of a PLU<br />
entry<br />
(direct PLU)<br />
Correction<br />
of a PLU<br />
entry<br />
(indirect PLU)<br />
Key operation<br />
Print<br />
1310 6<br />
1755 7<br />
10 ß<br />
ô<br />
58 ß<br />
825 7<br />
1310 ? 6<br />
? ô<br />
58 ? ß<br />
;<br />
109
3<br />
Subtotal void<br />
You can void an entire transaction. Once subtotal void is executed, the transaction is aborted and the register<br />
issues a receipt.<br />
Example<br />
Key operation<br />
Print<br />
1310 2<br />
1755 6<br />
10 ß<br />
35 ß<br />
:?:<br />
Subtotal void<br />
4<br />
Correction of incorrect entries not handled by the direct or indirect void<br />
function<br />
Any errors found after the entry of a transaction has been completed or during an amount tendered entry cannot<br />
be voided. These errors must be corrected by the manager.<br />
The following steps should be taken:<br />
1. If you are making the amount tendered entry, finalize the transaction.<br />
2. Make correct entries from the beginning.<br />
3. Hand the incorrect receipt to your manager for its cancellation.<br />
110
SPECIAL PRINTING FUNCTIONS<br />
1<br />
Copy receipt printing<br />
If your customer wants a receipt after you have finalized a transaction with the receipt function being in the<br />
“OFF” status (no receipting), press the q key. This will produce a receipt. Your register can also print a copy<br />
receipt when the receipt function is in the “ON” status.<br />
Note<br />
Pressing the q key in the OP X/Z mode before registration toggles the status “ON” and “OFF”.<br />
Example<br />
Printing a copy receipt after making the entries shown below with the receipt function being in<br />
the “OFF” status<br />
Key operation<br />
850 2<br />
3 ≈<br />
150 1<br />
;<br />
Print on the<br />
journal<br />
Print<br />
For receipting→ q<br />
Print on the<br />
receipt<br />
When the receipt function is in the “ON” status and you press<br />
the q key to make a second copy<br />
When the receipt function is in the “ON” status,<br />
the “ COPY ” symbol will be printed on the receipt.<br />
111
2<br />
Guest check copy<br />
You can use this function when you want to take a copy of guest check.<br />
Press the g key and make a desired entry.<br />
Procedure<br />
g<br />
Item<br />
q<br />
entries Finalization<br />
When the receipt<br />
ON/OFF function is<br />
in the “OFF” status<br />
Note<br />
The guest check copy has nothing to do with the memory.<br />
Example<br />
Key operation<br />
Print<br />
g<br />
1480 2<br />
;<br />
3<br />
Validation printing function<br />
Your cash register can perform a validation printing.<br />
Validation slip setting and printing<br />
Insert a validation slip into the printer with its printed face to the front of the machine (see the figure below), then<br />
press the ∑ key.<br />
Slip<br />
Slip guide<br />
Note<br />
To insure proper validation, insert the slip securely until it stops.<br />
112
Validation printing examples<br />
Validation printing of item entries<br />
Example<br />
•Department entry<br />
Date<br />
Register no.<br />
Cashier<br />
code<br />
Consecutive no.<br />
Time Item label Amount<br />
(Selected by<br />
programming)<br />
• PLU entry<br />
• Deduction entry (â through â 4)<br />
• Refund entry<br />
• Item percent entry (%1 through %4)<br />
113
• Void entry<br />
Validation printing after the finalization of a transaction<br />
Transaction symbol<br />
Amount<br />
; or Å key Transaction symbol Amount<br />
•When an amount tendered entry is made TOTAL Sales amount<br />
•When no amount tendered entry is made CASH or CASH2 Sales amount<br />
( to + key<br />
•When an amount tendered entry is made<br />
•When no amount tendered entry is made<br />
CHECK or CHECK2 to CHECK4 Amount tendered<br />
CHECK or CHECK2 to CHECK4 Sales amount<br />
•When a check cashing operation is made CA/CHK Amount tendered<br />
] to ’ key CREDIT1 to CREDIT4 Sales amount<br />
r key RA Amount received on account<br />
® key RA2 Amount received on account<br />
p key PO Amount paid out<br />
π key PO2 Amount paid out<br />
Validation printing of the training mode<br />
Training mode symbol<br />
Note<br />
• When you make an entry for which compulsory validation printing has been programmed, the “ ”<br />
will light up in the display. Carry out the validation printing successively until the “ ” goes off<br />
(or by the programmed number of times) while replacing validation slips. You cannot proceed to<br />
any further entry unless this printing is completed.<br />
• Programmed compulsory validation printing can be overridden by performing the following<br />
operation depending upon your initial program setup.<br />
1. Turn the mode switch to the “MGR” position.<br />
2.<br />
. Ú<br />
114
Validation slip specification<br />
Make validation slips according to the following specification. The use of any slips other than specified causes<br />
the printer to malfunction.<br />
• Type of paper: plain paper<br />
• Paper thickness: 0.07 to 0.14 mm<br />
• Paper width: 130 mm or more<br />
• Paper height: 70 mm or more<br />
• Print position<br />
87.0mm<br />
20mm<br />
70mm<br />
22mm<br />
130 mm<br />
4<br />
Printing of the employee arrival and departure times<br />
The register allows the cashier to print the employee arrival and departure times, etc. using the validation<br />
printing function.<br />
1. Turn the mode switch to the “OP X/Z” position.<br />
2. Put a card into the paper chute and perform the following key operation.<br />
• Arrival time<br />
Numeric key 1 → Ú<br />
• Departure time<br />
Numeric key 2 → Ú<br />
3. Sample printout<br />
Arrival time Cashier code Departure time<br />
115
OV<strong>ER</strong>LAPPED CASHI<strong>ER</strong> ENTRY<br />
This function allows you to switch from one cashier to another and to interrupt the first cashier’s entry. So the<br />
second cashier can do his or her entry in this mode. For actual use of this function, consult your dealer.<br />
Example<br />
Cashier 1: Entry started<br />
Cashier 2: Cashier change (1 to 2), interrupt initiated<br />
Cashier 2: Transaction finished (2)<br />
Cashier 1: Cashier change (2 to 1), entry restart<br />
Note<br />
• When the cashier and clerk system is applied for your register, you cannot operate the overlapped<br />
cashier entry.<br />
• The overlapped cashier entry is not effective while the tendering sale is going on.<br />
• If any cashier is still making an entry (or has not finalized the transaction yet), the machine does<br />
not run in any mode other than REG and MGR and can print no X/Z reports. The error code “E22”<br />
and the corresponding cashier code(s) are displayed at this time.<br />
Key operation<br />
1. Cashier 1 is assigned.<br />
2. Cashier 2 is assigned.<br />
3. Cashier 1 is assigned.<br />
Comments<br />
The entry by cashier 1 is started.<br />
(1‹)<br />
100 1<br />
360 3<br />
3<br />
The entry by cashier 2 is started.<br />
2 ‹ (The entry by cashier 1 is interrupted.)<br />
3 ≈<br />
150 2<br />
; The transaction by cashier 2 is finalized.<br />
1‹ The entry by cashier 1 is restarted.<br />
100 1<br />
360 3<br />
;<br />
The transaction by cashier 1 is finalized.<br />
116
OP<strong>ER</strong>ATOR MAINTENANCE<br />
1<br />
In case of power failure<br />
When power is lost, the machine retains its memory contents and all information on sales entries.<br />
• When power failure is encountered in register idle state or during an entry, the machine returned to the normal<br />
state of operation after power recovery.<br />
• When power failure is encountered during a printing cycle, the register<br />
prints “========” and then carries out the correct printing procedure<br />
after power recovery. (See the sample print.)<br />
2<br />
In case of printer's motor locking<br />
If the printer’s motor happens to lock, the printing stalls, the register will continuously start an intermittent<br />
beeping tone. If this occurs, please follow the procedure below.<br />
1. Unplug the power cord from the outlet.<br />
2. Insure the printer is clear of any obstructions (e.g paper jams, etc).<br />
3. Plug the power cord into the outlet. The following format appears in the display.<br />
“ – – – – – – – – – – ”<br />
4. Feed the receipt and journal paper to the proper position.<br />
5. Press the c key.<br />
6. The register prints the power failure symbol and continues printing.<br />
3<br />
Paper roll near-end sensing function (only for the journal paper) <br />
When the journal paper roll comes near the end or is not loaded, the machine senses this condition and sounds<br />
an alarm, displaying the error code “E04”. At this time, clear the alarm with the c key and replace the paper roll<br />
as soon as possible. The following entry can be made after clearing the alarm. However, since this function<br />
works each time one transaction is completed, the alarm sound will be emitted again as the following transaction<br />
is completed unless the paper roll is replaced.<br />
• The sensing position depends upon the size of the paper tube.<br />
Therefore, it is advisable to use paper rolls - whose paper tube is<br />
18 mm in O.D. and 12 mm in I.D. - specified by SHARP.<br />
• If the sensing occurs too early or late, contact your dealer.<br />
Paper roll<br />
Paper tube<br />
12 mm<br />
18 mm<br />
117
4<br />
Installing and removing the paper roll<br />
Recording paper specifications<br />
Be sure to use paper rolls specified by SHARP.<br />
The use of any other paper rolls than specified could cause paper jamming, resulting in register malfunction.<br />
Paper specification<br />
Paper width:<br />
44.5 ± 0.5 mm<br />
Max. outside diameter: 80 mm<br />
Weight: 52.3 — 64.0 g/m 2<br />
Quality:<br />
bond paper<br />
Paper tube:<br />
18 mm<br />
• Be sure to set paper roll(s) prior to using your machine, otherwise it may cause a malfunction.<br />
Install the paper roll in the printer. Be careful then to set the roll and cut the paper end correctly.<br />
(How to set the paper roll)<br />
(How to cut the paper end)<br />
To the printer<br />
To the printer<br />
Incorrect<br />
Correct<br />
Correct<br />
Incorrect<br />
Paper replease lever<br />
To release the paper, press the paper release lever down. It is<br />
also used for removing a paper jam. The method for removing a<br />
paper jam is described in “Removing a paper jam” later in this<br />
section.<br />
Receipt side<br />
Journal side<br />
Installing the paper roll<br />
Installing the receipt paper roll<br />
1. Turn the mode switch to the “REG” position with the AC cord<br />
connected.<br />
2. Remove the printer cover.<br />
3. Set the paper roll correctly and drop it into the printer.<br />
4. Press the receipt paper release lever down and insert the<br />
paper end into the paper chute of the printer.<br />
5. Pull the paper end that has come out of the printer, holding<br />
down the lever.<br />
6. Advance the paper by a required length by pressing the receipt<br />
paper feed key.<br />
7. Replace the printer cover.<br />
118
Installing the journal paper roll<br />
Wind two or<br />
three turns.<br />
Slit<br />
1. Turn the mode switch to the “REG” position with the AC cord<br />
connected.<br />
2. Remove the printer cover.<br />
3. Set the paper roll correctly and drop it into the printer.<br />
4. Press the journal paper release lever down, insert the paper<br />
end that has come out of the printer into the slit in the paper<br />
take-up spool, wind it two or three turns around spool shaft.<br />
5. Set the spool on the bearing.<br />
6. Replace the printer cover.<br />
Note<br />
Make sure the ink ribbon cassette has been mounted<br />
on the printer when installing the receipt paper roll or<br />
the journal paper roll.<br />
Removing the paper roll<br />
When a red dye appears on the paper roll, it is time to replace the existing paper roll. Replace the paper roll<br />
with a new one.<br />
Removing the receipt paper roll<br />
1. Remove the printer cover.<br />
2. Press and hold the receipt paper release lever down and<br />
remove the existing paper roll from the paper roll location.<br />
Note<br />
Be sure to pull the roll in the direction of the arrow.<br />
Paper release lever<br />
Removing the journal paper roll<br />
Area to cut<br />
1. Remove the printer cover.<br />
2. Press the journal paper feed key to advance the paper by<br />
several lines and then cut it.<br />
119
3. Press and hold the journal paper release lever down and<br />
remove the existing paper roll from the paper roll location.<br />
Note<br />
Be sure to pull the roll in the direction of the arrow.<br />
Paper release lever<br />
4. Remove the paper roll from the take-up spool.<br />
Removing a paper jam<br />
1. Remove the printer cover.<br />
2. Pressing the receipt and journal paper release levers at the same time, lift part A up. (See the drawing<br />
below.)<br />
3. Remove the paper jam.<br />
4. Replace part A gently.<br />
5. Reset the paper roll correctly following the steps shown in “Installing the paper roll”.<br />
6. Replace the printer cover.<br />
120
5<br />
Installing the ink ribbon cassette<br />
1. Remove the printer cover.<br />
2. Rotate the knob on the ink ribbon cassette in the direction of<br />
the arrow to stretch the ribbon tight.<br />
3. Put the ink ribbon cassette in the location indicated in the<br />
figure at left and fix it by using the right and left guides.<br />
4. Rotate the knob two or three turns in the direction of the arrow<br />
to make sure it rotates smoothly. Also, make sure the ribbon is<br />
not folded.<br />
5. To remove the cassette, lift it up.<br />
Precautions:<br />
• Be sure to use an ink ribbon cassette specified by SHARP. The use of any ink ribbon cassettes other<br />
than specified could cause troubles in the printer.<br />
• After opening the parcel, be careful not to make the surface of the ink ribbon dirty, and install it soon.<br />
• If you preserve the ink ribbon cassette for a long time, the ink will be dry and the ink ribbon cassette's<br />
life will be shortened. Please use it soon. If you do not use it soon, put it in an airtight receptacle and<br />
preserve it in a cool and dark place.<br />
121
6<br />
Removing the till and the drawer<br />
The till in the register is detachable. After closing your business for the day, remove the till from the drawer and<br />
keep the drawer open. The coin case is also detachable from the till. To detach the drawer, pull it forward fully<br />
with the till removed, and remove it by lifting it up.<br />
Coin case<br />
Till<br />
Drawer<br />
1<br />
2<br />
7<br />
Opening the drawer by hand<br />
The drawer automatically opens in the usual way. However, when power failure is encountered or the machine<br />
becomes out of order, slide the lever located on the machine bottom toward the rear. (See the figure below.)<br />
The drawer will not open, if it is locked with a drawer lock key.<br />
Lever<br />
122
8<br />
Installing the fixing angle bracket<br />
To prevent the register from moving when the drawer opens, the fixing angle bracket is supplied with the<br />
register. By attaching the bracket to the table where the register is installed, you can hook the register on this<br />
bracket and secure the register to its position.<br />
How to install the fixing angle bracket<br />
1. Thoroughly clean the location where the fixing angle<br />
bracket (B) is to be placed.<br />
2. Peel off the adhesive tape on the fixing angle bracket.<br />
3. Hook the angle bracket onto the hook (A) that is located<br />
at the bottom rear of the register.<br />
4. Firmly stick the fixing angle bracket to the table surface<br />
that your cleaned above.<br />
B<br />
A<br />
How to remove the register from the fixing angle bracket<br />
1. Lift up the front of the register and pull the register<br />
towards you.<br />
123
9<br />
The malfunctions shown in the left-hand column below, labeled “Fault,” do not necessarily indicate functional<br />
faults of the machine. It is therefore advisable to refer to the “Checking” shown in the right-hand column before<br />
calling for service.<br />
Fault<br />
(1) The display won't be illuminated even when<br />
the mode switch is turned to any other<br />
position than " ".<br />
(2) The display is illuminated, but the whole machine<br />
refuses registrations.<br />
Error code table<br />
When the following error codes are displayed, press the c key and take a proper action according to the table<br />
below.<br />
Error<br />
code<br />
Before calling for service<br />
(3) No receipt is issued.<br />
(4) No journal paper is taken up.<br />
(5) Printing is unusual.<br />
Error status<br />
Checking<br />
• Is power supplied to the electric outlet?<br />
• Is the power cord plug out or loosely connected to the<br />
electrical outlet?<br />
• Is a cashier code assigned to the register?<br />
• Is a clerk code assigned to the register?<br />
• Is the mode switch set properly at the "REG" position?<br />
• Is the receipt paper roll properly installed?<br />
• Is there a paper jam?<br />
• Is the receipt function in the "OFF" status?<br />
• Is the take-up spool installed on the bearing properly?<br />
• Is there a paper jam?<br />
• Is the ink ribbon cassette installed properly?<br />
• Is the ink ribbon life completed?<br />
Action<br />
E01 Registration error Make a correct key entry.<br />
E02 Misoperation error Make a correct key entry.<br />
E03 Undefined code is entered. Enter a correct code, or declare it by the programming.<br />
E04 Paper empty Replace a journal paper roll with a new one.<br />
E05 Secret code error Enter a correct secret code.<br />
E07 Memory is full. Expand the file within a capacity of memory.<br />
E11 Compulsory depression of the : key for direct Press the : key and continue the operation.<br />
finalization<br />
E12 Compulsory tendering Make a tendering operation.<br />
E22 Overlapped cashier error<br />
E23 Cashier resetting over error<br />
E31 Compulsory non-add code entry Enter a non-add code.<br />
E32 No entry of your cashier code Make a cashier code entry.<br />
E33 The current cashier code should not be changed. Change a cashier after finalizing the transaction.<br />
E34 Overflow limitation error Make a registration within a limit of entry.<br />
E35 The open price entry is inhibited. Make a preset price entry.<br />
E36 The preset price entry is inhibited. Make an open price entry.<br />
E37 The direct finalization is inhibited. Make a tendering operation.<br />
E39 Power-off during validation printing Print a validation again.<br />
E58 Undefined clerk code is entered Enter a correct clerk code<br />
E67 Registration buffer is full.<br />
E76 The drawer is still opened. Close the drawer.
LIST OF OPTIONS<br />
For your register, the following options are available.<br />
For details, contact your dealer.<br />
•RAM memory chip model <strong>ER</strong>-03RA<br />
•Remote drawer model <strong>ER</strong>-05DW<br />
•Till model <strong>ER</strong>-58CC and till cover model <strong>ER</strong>-03CV<br />
•EFT interface board model <strong>ER</strong>-01EF<br />
•Key kit models<br />
By using the following key kits, you can change the keyboard layout of your register including the<br />
expansion of the number of departments.<br />
<strong>ER</strong>-11KT7: 30 regular size key kits<br />
<strong>ER</strong>-12KT7: 30 1 x 2 size key kits<br />
<strong>ER</strong>-22KT7: 10 2 x 2 size key kits<br />
<strong>ER</strong>-11DK7G: 30 regular size dummy key kits<br />
<strong>ER</strong>-51DK7G: 10 5 x 1 size dummy key kits<br />
125
SPECIFICATIONS<br />
Model:<br />
<strong>ER</strong>-<strong>A440</strong><br />
Dimensions:<br />
355 (W) x 424 (D) x 308 (H) mm<br />
Weight:<br />
13.5 kg<br />
Power source:<br />
Official (nominal) voltage and frequency<br />
Power consumption: Stand-by 11.5W<br />
Operating 42W (max.)<br />
Working temperature: 0 °C to 40 °C<br />
Electronics:<br />
LSI (CPU) etc.<br />
Built-in battery:<br />
Rechargeable battery, memory holding time about 1 month<br />
(with fully charged built-in battery, at room temperature)<br />
Display:<br />
Operator display:<br />
7-segment display (10 positions)<br />
Customer display: 7-segment display (7 positions)<br />
Printer:<br />
Type:<br />
2-station serial dot-matrix (7 x 7 font) printer<br />
Printing speed:<br />
Approx. 3.0 lines/second<br />
Printing capacity:<br />
24 digits each for receipt and journal paper<br />
Other functions:<br />
• Logo message function<br />
• Receipt (ON-OFF) function, journal selective function<br />
• Receipt and journal independent paper feed function<br />
• Validation printing function<br />
Ink ribbon:<br />
Color: Purple (single color)<br />
(Cassette type)<br />
Width: 13 mm<br />
Length: 9 meters<br />
Paper roll:<br />
Width: 44.5 ± 0.5 mm<br />
Max. diam.: 80 mm<br />
Weight: 52.3 - 64.0 g/m 2 (bond paper)<br />
Cash drawer:<br />
5 slots for bill and 8 for coin denominations<br />
Accessories: Manager key 2<br />
Submanager key 2<br />
Operator key 2<br />
Drawer lock key 2<br />
Ink ribbon cassette 1<br />
Paper roll 2<br />
Take-up spool 1<br />
Fixing angle bracket 1<br />
Instruction manual<br />
1 copy<br />
* Specifications and appearance subject to change without notice for improvement.<br />
126
FOR CUSTOM<strong>ER</strong>S IN U.K.<br />
BLUE:<br />
BROWN:<br />
IMPORTANT<br />
The wires in this mains lead are coloured in accordance with the following code:<br />
Neutral<br />
Live<br />
As the colours of the wires in the mains lead of this apparatus may not correspond with the coloured<br />
markings identifying the terminals in your plug proceed as follows.<br />
The wire which is coloured BLUE must be connected to the terminal which is marked with the letter<br />
N or coloured black.<br />
The wire which is coloured BROWN must be connected to the terminal which is marked with the<br />
letter L or coloured red.<br />
The apparatus must be protected by a 3A fuse in the mains plug or distribution board.<br />
CAUTION: DO NOT CONNECT THE LIVE (BROWN) WIRE OR THE NEUTRAL (BLUE) WIRE<br />
TO THE EARTH T<strong>ER</strong>MINAL OF YOUR 3-PIN MAINS PLUG.<br />
Environment Protection<br />
The device is supported by a battery. To dispose the battery safely to protect the environment,<br />
please note the following points:<br />
• Take the used battery to your local waste depot, dealer or customer service centre for recycling.<br />
• Do not throw the used battery into fire, into water or into the household waste!<br />
Umweltschutz<br />
Das Gerät wird durch eine Batterie gestützt. Um die Batterie sicher und umweltschonend zu<br />
entsorgen, beachten Sie bitte folgende Punkte:<br />
• Bringen Sie die leere Batterie zu Ihrer örtlichen Mülldeponie, zum Händler oder zum<br />
Kundenservice-Zentrum zur Entsorgung.<br />
• Werfen Sie die leere Batterie niemals ins Feuer, ins Wasser oder in den Hausmüll.<br />
Protection de l’environnement<br />
L’appareil est supporté sur pile. Afin de protéger l’environnement, nous vous recommendons de<br />
traiter la pile usagée la façon suivante:<br />
• Apporter la pile usagée à votre centre de traitement des ordures ménagères le plus proche ou,<br />
à votre revendeur ou, au service après-vente, pour recyclement.<br />
• Ne jamais jeter la pile usagée dans une source de chaleur, dans l’eau ou dans les vide-ordures.<br />
Miijöskydd<br />
Denna produkt nöddrivs av batteri.<br />
Vid batteribyte skall följande iakttagas:<br />
• Det förbrukade batteriet skall inlämnas till er lokala handlare eller till kommunal miljöstation för<br />
återinssamling.<br />
• Kasta ej batteriet i vattnet eller i hushållssoporna. Batteriet får ej heller utsätttas för öppen eld.
SHARP CORPORATION<br />
Printed in Korea / Imprimé en Corée / Gedruckt in Korea / Impreso en Corea<br />
T(TINSE7408BHZZ)➀