50x-1200x Microscope Manual - Bresser
50x-1200x Microscope Manual - Bresser
50x-1200x Microscope Manual - Bresser
You also want an ePaper? Increase the reach of your titles
YUMPU automatically turns print PDFs into web optimized ePapers that Google loves.
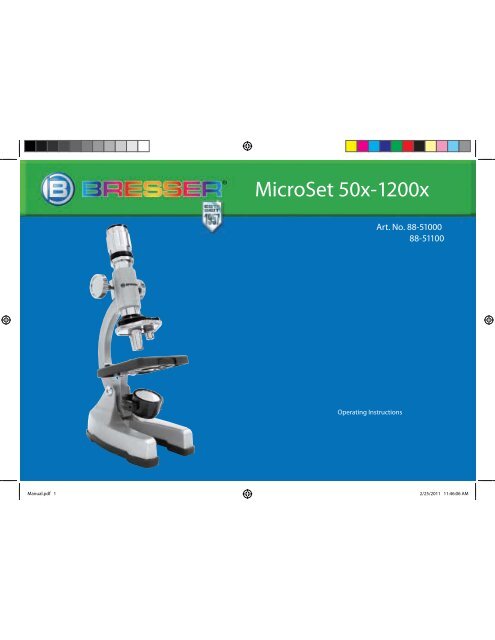
MicroSet <strong>50x</strong>-<strong>1200x</strong><br />
Art. No. 88-51000<br />
88-51100<br />
Operating Instructions<br />
<strong>Manual</strong>.pdf 1<br />
2/25/2011 11:46:06 AM
Dear parents,<br />
This product is ideal for children wanting to<br />
explore their world in a completely new way.<br />
The device is as such, easy to use and care for,<br />
rugged and good-looking.<br />
More important to you and of course to us is<br />
that it is safe to use. During manufacture, we<br />
made sure that this product is as safe as it can<br />
be for children to use. Some residual risk is,<br />
however, unavoidable. This product, after all, is<br />
not a toy in the usual sense but rather an<br />
optical instrument that children can use to -<br />
experiment, research and discover their world.<br />
That‘s why we request your cooperation here.<br />
These operating instructions were written for<br />
children but please read them through -<br />
together with your child or children and<br />
answer his/her/their questions. Don‘t forget to -<br />
explain possible risks.<br />
These are summarised under the<br />
heading”Warnings“. Please adjust/set up the<br />
device together with your child or children and -<br />
never allow any child to use any of our optical<br />
products unsupervised.<br />
We hope all users and their parents will enjoy<br />
our products.<br />
Your <strong>Bresser</strong> team<br />
Dear junior researcher,<br />
Congratulations on becoming the proud<br />
owner of this product.<br />
You‘ll be amazed when reading these<br />
instructions just how much can be done and<br />
explored with your new device.<br />
Take a look and emerge yourself into the<br />
adventurous world of nature and discovery.<br />
It really is exciting and a lot of fun discovering<br />
the world with this product.<br />
Before you get started, read the operating<br />
instructions fully, as there are a few things you<br />
need to know to get the best out of your new<br />
device.<br />
The „Warnings“ should be read carefully. Use<br />
the product exactly as per the operating instructions<br />
to avoid any risk or injury. Keep these<br />
instructions in a safe place for later reference.<br />
If you give the device away or make a present<br />
of it make sure these instructions accompany<br />
it.<br />
And now it just remains to say, „Have loads of<br />
fun researching and discovering“
All Parts<br />
1 Zoom eyepiece<br />
2 Focus knob<br />
3 Objective turret<br />
4 Stage<br />
5 Mirror<br />
6 Electronic light source<br />
7 Base with battery compartment<br />
8 Rubber base<br />
9 <strong>Microscope</strong> arm<br />
10 <strong>Microscope</strong> “Biotar”<br />
11 Prepared Slides<br />
12 Cover Plates<br />
13 Blank Slides<br />
14 Petri dish<br />
15 Micro projector<br />
16 Replacement bulb<br />
17 3x magnifying glass<br />
18 Settling cylinder<br />
19 Reservoir<br />
20 Shrimp farming accessories<br />
21 <strong>Microscope</strong> instruments<br />
22 Micro-slicer<br />
23 Hatchery<br />
Your <strong>Microscope</strong><br />
What is a <strong>Microscope</strong>?<br />
The microscope is made of two lens<br />
systems: the eyepiece and the objective. We’re<br />
presenting these systems as one lens each,<br />
so that it‘s easier to understand. In reality,<br />
however, the eyepiece (1) and the objective in<br />
the turret (3) are made up of multiple lenses.<br />
prepared specimen (e.g. 11), which leads<br />
once more by the second lens (eyepiece, 1).<br />
Then, you can see the “microscope picture.”<br />
Assembly and Location<br />
Before you start, choose an ideal location for<br />
using your microscope. On the one hand,<br />
it‘s important there is enough light (normal<br />
observation). On the other hand, it’s<br />
important that you can quickly make the<br />
room dark when you want to (projector<br />
observation). Furthermore, I recommend that<br />
you place the microscope on a stable surface,<br />
since you won’t be able to get any satisfactory<br />
results on a shaky surface.<br />
Normal Observation<br />
For normal observation, place the microscope<br />
in a bright location (near a window or desk<br />
lamp, for example). Remove the microscope<br />
from the package and tilt the microscope<br />
arm (9) so that it’s in a comfortable viewing<br />
position for you.<br />
The focus knob (2) is turned to the upper stop<br />
and the objective turret (3) is set to the lowest<br />
Now, take a look through the eyepiece<br />
and adjust the mirror (5) so that you get a<br />
uniformly bright circle of light. Or, you can use<br />
in the next chapter. Now, place a prepared<br />
slide (e.g. 11) under the clips on the stage (4),<br />
directly under the objective. When you take a<br />
look through the eyepiece, you can see the<br />
be a slightly fuzzy picture. The sharpness is<br />
adjusted by slowly turning the focus knob (2).<br />
turning the objective turret and selecting a<br />
different objective.<br />
In doing so, note that the sharpness of<br />
the picture must be adjusted again for the<br />
good illumination of the picture.<br />
TIP: Avoid positioning the mirror so that it is<br />
exposed to direct sunlight, since it can cause<br />
a glare, which won’t allow you to get a clear<br />
picture.<br />
Electric Illumination<br />
To use the electric light source (6), you need<br />
two 1.5 V batteries, which are installed in<br />
the base of the microscope (7). Remove the<br />
rubber base (8) on the microscope and insert<br />
<strong>Manual</strong>.pdf 3<br />
2/25/2011 11:47:00 AM
the batteries according to the displayed +/-<br />
information. Reattach the rubber base to the<br />
microscope.<br />
You can turn on the light by rotating it in the<br />
direction of the stage (4). Take a look through<br />
the eyepiece and adjust the light so that you<br />
get optimal picture brightness. Now you can<br />
observe in the same way as described in<br />
point 1.3.<br />
The bulbs for the electric light can be<br />
replaced. One replacement bulb (16) is<br />
included. When you use another bulb, make<br />
sure to pay attention to the maximum wattage,<br />
which is displayed on the lamp body.<br />
TIP:<br />
the more light is required for a good<br />
illumination of the picture. Therefore, always<br />
start your experiments with one of the lower<br />
microscope and place the micro-projector on<br />
the open eyepiece support so that the matt<br />
screen is pointing behind you. Adjust the light<br />
so that the matt screen is lit up brightly.<br />
You can adjust the focus of the prepared<br />
slide image using the focus knob (2). Make<br />
sure to swivel the microscope arm (9) back<br />
into an upright position so that you can<br />
comfortably observe the specimen. In a dark<br />
room, it is also possible to project the microscope<br />
picture on a white wall. To do this, remove<br />
the matt screen. Swivel the tripod so that the<br />
upper edge of the projector is horizontal.<br />
Keep in mind that the image brightness is<br />
reduced and the picture will be darker if the<br />
projector is far away from the wall.<br />
Projector<br />
The included micro-projector (15) is ideal for<br />
looking at a specimen with multiple people<br />
at the same time. To use the projector, you<br />
absolutely must use the electric illuminator.<br />
The best image quality is achieved at the<br />
way, you can show your results to your friends<br />
and family.<br />
Unscrew the zoom eyepiece (1) from the<br />
<strong>Manual</strong>.pdf 4<br />
2/25/2011 11:47:00 AM
DISPOSAL<br />
Dispose of the packaging material/s<br />
as legally required. Consult the local<br />
authority on the matter if necessary.<br />
GB<br />
Do not dispose of electrical equipment<br />
in your ordinary refuse. The European<br />
guideline 2002/96/EU on Electronic and<br />
Electrical Equipment Waste and relevant laws<br />
applying to it require such used equipment to<br />
be separately collected and recycled in an<br />
environment-friendly manner. Empty batteries<br />
and accumulators must be disposed of separately.<br />
Information on disposing of all such<br />
equipment made after 01 June 2006 can be<br />
obtained from your local authority.<br />
<strong>Manual</strong>.pdf 5<br />
2/25/2011 11:47:00 AM
RISK to your child.<br />
Aids with sharp edges and tips are<br />
sometimes used with this device.<br />
Please store the device and all of its<br />
accessories and aids out of the reach of<br />
children. There is a risk of INJURY .<br />
This device contains electronic components<br />
that are powered by either a mains<br />
connection or batteries. Never leave a child<br />
unsupervised with this device. The<br />
device should only be used as per these<br />
instructions otherwise there is a serious RISK<br />
of ELECTRICAL SHOCK.<br />
Batteries should be kept out of children’s<br />
reach. When inserting batteries please<br />
ensure the polarity is correct. Leaking or<br />
damaged batteries can cause injury if they<br />
come into contact with the skin. If you need<br />
to handle such batteries please wear suitable<br />
safety gloves.<br />
In case of accidental contact with the eyes<br />
or mouth rinse with water. Seek medical<br />
treatment for ailments arising from contact<br />
with the chemical substances and take the<br />
chemicals with you to the doctor.<br />
FIRE-/ DANGER OF EXPLOSION!<br />
Do not expose the device to high<br />
temperatures. Use only the mains<br />
adapter supplied or those battery types<br />
recommended. Never short circuit the<br />
Exposure to high temperatures or misuse of<br />
even explosion!<br />
RISK of material damage.<br />
Never take the device apart. Please<br />
consult your dealer if there are any<br />
defects. The dealer will contact our service<br />
centre and send the device in for repair if<br />
needed.<br />
Clean the exterior of device with a dry cloth.<br />
causing damage to electronic components.<br />
Clean the lens (objective and eyepiece) only<br />
with the cloth supplied or some other soft<br />
excessive pressure - this may scratch the<br />
lens.<br />
Protect the device from dust and moisture.<br />
Store the device in the bag supplied or in<br />
its original packaging. Batteries should be<br />
removed from the device if it is not going to be<br />
used for a long period of time.<br />
Children should only use this device under<br />
supervision. Keep packaging materials<br />
(plastic bags, rubber bands, etc.) away from<br />
children. There is a risk of SUFFOCATION.<br />
The chemicals and liquids provided should<br />
be kept out of reach of children. Do not drink<br />
the chemicals! Hands should be washed<br />
thoroughly under running water after use.<br />
12<br />
Do not subject the device to temperatures exceeding<br />
60 C.<br />
TIPS on cleaning<br />
Remove the device from it’s energy<br />
source before cleaning (remove plug<br />
from socket / remove batteries)<br />
<strong>Manual</strong>.pdf 6<br />
2/25/2011 11:47:00 AM
<strong>Bresser</strong><br />
621 Madison St<br />
Springdale, AR 72762<br />
www.bresser.com<br />
<strong>Manual</strong>.pdf 7<br />
2/25/2011 11:47:01 AM


