Downloading
Downloading
Downloading

Create successful ePaper yourself
Turn your PDF publications into a flip-book with our unique Google optimized e-Paper software.
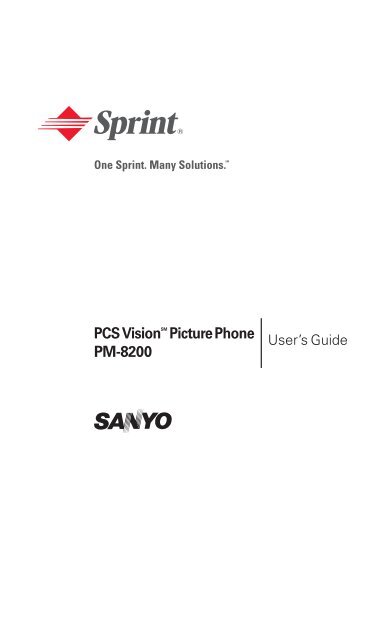
PCS Vision SM Picture Phone<br />
PM-8200<br />
User’s Guide
Table of Contents<br />
Welcome to Sprint . . . . . . . . . . . . . . . . . . . . . . . . . . . . . . . . . . . . .i<br />
Introduction . . . . . . . . . . . . . . . . . . . . . . . . . . . . . . . . . . . . . . . . . . .ii<br />
Section 1: Getting Started . . . . . . . . . . . . . . . . . . . . . . . . . . . . . .1<br />
1A. Setting Up Service . . . . . . . . . . . . . . . . . . . . . . . . . . . . . . . . . . . . . . . . .2<br />
Getting Started With PCS Service . . . . . . . . . . . . . . . . . . . . . . . . . . . . . . . . . . . .3<br />
Setting Up Your Voicemail . . . . . . . . . . . . . . . . . . . . . . . . . . . . . . . . . . . . . . . . . .4<br />
PCS Account Passwords . . . . . . . . . . . . . . . . . . . . . . . . . . . . . . . . . . . . . . . . . . . .5<br />
Getting Help . . . . . . . . . . . . . . . . . . . . . . . . . . . . . . . . . . . . . . . . . . . . . . . . . . . . . . .6<br />
Section 2: Your PCS Vision Phone . . . . . . . . . . . . . . . . . . . . . .8<br />
2A. Your PCS Vision Phone: The Basics . . . . . . . . . . . . . . . . . . . . . . . .9<br />
Front View of Your Phone . . . . . . . . . . . . . . . . . . . . . . . . . . . . . . . . . . . . . . . . .10<br />
Key Features . . . . . . . . . . . . . . . . . . . . . . . . . . . . . . . . . . . . . . . . . . . . . . . . . . .11<br />
Viewing the Display Screen . . . . . . . . . . . . . . . . . . . . . . . . . . . . . . . . . . . . . . . .13<br />
Features of Your PCS Vision SM Picture Phone PM-8200 . . . . . . . . . . . . . . . .14<br />
Turning Your Phone On and Off . . . . . . . . . . . . . . . . . . . . . . . . . . . . . . . . . . . .15<br />
Using Your Phone’s Battery and Charger . . . . . . . . . . . . . . . . . . . . . . . . . . . .16<br />
Displaying Your Phone Number . . . . . . . . . . . . . . . . . . . . . . . . . . . . . . . . . . .18<br />
Making and Answering Calls . . . . . . . . . . . . . . . . . . . . . . . . . . . . . . . . . . . . . . .18<br />
Making Calls . . . . . . . . . . . . . . . . . . . . . . . . . . . . . . . . . . . . . . . . . . . . . . . . . . . .18<br />
Dialing Options . . . . . . . . . . . . . . . . . . . . . . . . . . . . . . . . . . . . . . . . . . . . . . . . .20<br />
Answering Calls . . . . . . . . . . . . . . . . . . . . . . . . . . . . . . . . . . . . . . . . . . . . . . . .21<br />
Using the Speakerphone . . . . . . . . . . . . . . . . . . . . . . . . . . . . . . . . . . . . . . . .23<br />
Changing the Ringer Volume . . . . . . . . . . . . . . . . . . . . . . . . . . . . . . . . . . . .24<br />
Adjusting Volume During a Conversation . . . . . . . . . . . . . . . . . . . . . . . . .24<br />
Muting a Call . . . . . . . . . . . . . . . . . . . . . . . . . . . . . . . . . . . . . . . . . . . . . . . . . . .24<br />
Missed Call Notification . . . . . . . . . . . . . . . . . . . . . . . . . . . . . . . . . . . . . . . . .25<br />
Calling Emergency Numbers . . . . . . . . . . . . . . . . . . . . . . . . . . . . . . . . . . . .25<br />
In-Call Options . . . . . . . . . . . . . . . . . . . . . . . . . . . . . . . . . . . . . . . . . . . . . . . . .26<br />
End-of-Call Options . . . . . . . . . . . . . . . . . . . . . . . . . . . . . . . . . . . . . . . . . . . . .27<br />
Saving a Phone Number . . . . . . . . . . . . . . . . . . . . . . . . . . . . . . . . . . . . . . . . .27<br />
Finding a Phone Number . . . . . . . . . . . . . . . . . . . . . . . . . . . . . . . . . . . . . . . .28<br />
Dialing and Saving Phone Numbers With Pauses . . . . . . . . . . . . . . . . . .28<br />
Dialing From the Contacts Directory . . . . . . . . . . . . . . . . . . . . . . . . . . . . .29
Using Speed Dialing . . . . . . . . . . . . . . . . . . . . . . . . . . . . . . . . . . . . . . . . . . . . .30<br />
Using Abbreviated Dialing . . . . . . . . . . . . . . . . . . . . . . . . . . . . . . . . . . . . . . .30<br />
Entering Text . . . . . . . . . . . . . . . . . . . . . . . . . . . . . . . . . . . . . . . . . . . . . . . . . . . . .31<br />
Selecting a Character Input Mode . . . . . . . . . . . . . . . . . . . . . . . . . . . . . . . .31<br />
Entering Characters Using T9 Text Input . . . . . . . . . . . . . . . . . . . . . . . . .32<br />
Entering Characters by Tapping the Keypad . . . . . . . . . . . . . . . . . . . . . .33<br />
Entering Symbols, Numbers, Preset Suffixes, and Smileys . . . . . . . . . .34<br />
2B. Controlling Your Phone’s Settings . . . . . . . . . . . . . . . . . . . . . . . . .35<br />
Sound Settings . . . . . . . . . . . . . . . . . . . . . . . . . . . . . . . . . . . . . . . . . . . . . . . . . . . .36<br />
Ringer Types . . . . . . . . . . . . . . . . . . . . . . . . . . . . . . . . . . . . . . . . . . . . . . . . . . .36<br />
Selecting a Tone Length . . . . . . . . . . . . . . . . . . . . . . . . . . . . . . . . . . . . . . . . .40<br />
Setting a Start-up/Power-off Tone . . . . . . . . . . . . . . . . . . . . . . . . . . . . . . . .40<br />
Using Voice Prompt . . . . . . . . . . . . . . . . . . . . . . . . . . . . . . . . . . . . . . . . . . . . .40<br />
Adjusting the Phone’s Volume Settings . . . . . . . . . . . . . . . . . . . . . . . . . . .41<br />
Alert Notification . . . . . . . . . . . . . . . . . . . . . . . . . . . . . . . . . . . . . . . . . . . . . . .42<br />
Silence All . . . . . . . . . . . . . . . . . . . . . . . . . . . . . . . . . . . . . . . . . . . . . . . . . . . . . .43<br />
Display Settings . . . . . . . . . . . . . . . . . . . . . . . . . . . . . . . . . . . . . . . . . . . . . . . . . . .44<br />
Changing the Text Greeting . . . . . . . . . . . . . . . . . . . . . . . . . . . . . . . . . . . . .44<br />
Changing the Backlight Time Length . . . . . . . . . . . . . . . . . . . . . . . . . . . . .45<br />
Changing the Display Screen Animation . . . . . . . . . . . . . . . . . . . . . . . . . .46<br />
Changing the Display for Incoming Calls . . . . . . . . . . . . . . . . . . . . . . . . .47<br />
Changing the Display for Area Name . . . . . . . . . . . . . . . . . . . . . . . . . . . . .48<br />
Changing the Display for Standby Mode . . . . . . . . . . . . . . . . . . . . . . . . . .49<br />
Changing the Screen Saver . . . . . . . . . . . . . . . . . . . . . . . . . . . . . . . . . . . . . .50<br />
Changing the Display for My Buddy . . . . . . . . . . . . . . . . . . . . . . . . . . . . . .51<br />
Changing the Background . . . . . . . . . . . . . . . . . . . . . . . . . . . . . . . . . . . . . . .51<br />
Changing the Font Size . . . . . . . . . . . . . . . . . . . . . . . . . . . . . . . . . . . . . . . . . .52<br />
Location Settings . . . . . . . . . . . . . . . . . . . . . . . . . . . . . . . . . . . . . . . . . . . . . . . . .53<br />
Airplane Mode . . . . . . . . . . . . . . . . . . . . . . . . . . . . . . . . . . . . . . . . . . . . . . . . . . . .54<br />
TTY Use With PCS Service From Sprint . . . . . . . . . . . . . . . . . . . . . . . . . . . . .55<br />
Phone Setup Options . . . . . . . . . . . . . . . . . . . . . . . . . . . . . . . . . . . . . . . . . . . . .56<br />
Shortcut . . . . . . . . . . . . . . . . . . . . . . . . . . . . . . . . . . . . . . . . . . . . . . . . . . . . . . .56<br />
Auto Answer Mode . . . . . . . . . . . . . . . . . . . . . . . . . . . . . . . . . . . . . . . . . . . . .56<br />
Setting the Open/Close Flip Option . . . . . . . . . . . . . . . . . . . . . . . . . . . . . .57<br />
Setting Any Key Answer . . . . . . . . . . . . . . . . . . . . . . . . . . . . . . . . . . . . . . . . .58
Setting the Side Key Guard . . . . . . . . . . . . . . . . . . . . . . . . . . . . . . . . . . . . . .58<br />
Setting Abbreviated Dialing . . . . . . . . . . . . . . . . . . . . . . . . . . . . . . . . . . . . . .59<br />
Headset Mode . . . . . . . . . . . . . . . . . . . . . . . . . . . . . . . . . . . . . . . . . . . . . . . . . .60<br />
Sleep Mode . . . . . . . . . . . . . . . . . . . . . . . . . . . . . . . . . . . . . . . . . . . . . . . . . . . . .60<br />
Setting Message Notification . . . . . . . . . . . . . . . . . . . . . . . . . . . . . . . . . . . . .61<br />
Editing Preset Messages . . . . . . . . . . . . . . . . . . . . . . . . . . . . . . . . . . . . . . . . .61<br />
Setting a Callback Number . . . . . . . . . . . . . . . . . . . . . . . . . . . . . . . . . . . . . .62<br />
Setting the Current Time . . . . . . . . . . . . . . . . . . . . . . . . . . . . . . . . . . . . . . . .62<br />
Display Language . . . . . . . . . . . . . . . . . . . . . . . . . . . . . . . . . . . . . . . . . . . . . . .63<br />
Using the Mini Flashlight . . . . . . . . . . . . . . . . . . . . . . . . . . . . . . . . . . . . . . . .63<br />
2C. Setting Your Phone’s Security . . . . . . . . . . . . . . . . . . . . . . . . . . . . .64<br />
Accessing the Security Menu . . . . . . . . . . . . . . . . . . . . . . . . . . . . . . . . . . . . . .65<br />
Using Your Phone’s Lock Feature . . . . . . . . . . . . . . . . . . . . . . . . . . . . . . . . . . .66<br />
Locking Your Phone . . . . . . . . . . . . . . . . . . . . . . . . . . . . . . . . . . . . . . . . . . . .66<br />
Unlocking Your Phone . . . . . . . . . . . . . . . . . . . . . . . . . . . . . . . . . . . . . . . . . .66<br />
Locking the Pictures Menu . . . . . . . . . . . . . . . . . . . . . . . . . . . . . . . . . . . . . .67<br />
Changing the Lock Code . . . . . . . . . . . . . . . . . . . . . . . . . . . . . . . . . . . . . . . .67<br />
Calling in Lock Mode . . . . . . . . . . . . . . . . . . . . . . . . . . . . . . . . . . . . . . . . . . . .67<br />
Restricting Calls . . . . . . . . . . . . . . . . . . . . . . . . . . . . . . . . . . . . . . . . . . . . . . . . . .68<br />
Using Special Numbers . . . . . . . . . . . . . . . . . . . . . . . . . . . . . . . . . . . . . . . . . . . .69<br />
Erasing the Contacts Directory . . . . . . . . . . . . . . . . . . . . . . . . . . . . . . . . . . . . .69<br />
Erasing All Downloads . . . . . . . . . . . . . . . . . . . . . . . . . . . . . . . . . . . . . . . . . . . .70<br />
Resetting Your Pictures Account . . . . . . . . . . . . . . . . . . . . . . . . . . . . . . . . . . .70<br />
Resetting Your Phone . . . . . . . . . . . . . . . . . . . . . . . . . . . . . . . . . . . . . . . . . . . . .70<br />
Resetting and Locking Your Phone Through SMS . . . . . . . . . . . . . . . . . . . .71<br />
Security Features for PCS Vision SM . . . . . . . . . . . . . . . . . . . . . . . . . . . . . . . . . . .72<br />
Enabling and Disabling PCS Vision Services . . . . . . . . . . . . . . . . . . . . . . .72<br />
2D. Controlling Your Roaming Experience . . . . . . . . . . . . . . . . . . . . .73<br />
Understanding Roaming . . . . . . . . . . . . . . . . . . . . . . . . . . . . . . . . . . . . . . . . . .74<br />
Setting Your Phone’s Roam Mode . . . . . . . . . . . . . . . . . . . . . . . . . . . . . . . . . .76<br />
Controlling Roaming Charges Using Call Guard . . . . . . . . . . . . . . . . . . . . .77<br />
2E. Navigating Through Menus . . . . . . . . . . . . . . . . . . . . . . . . . . . . . . .78<br />
Menu Navigation . . . . . . . . . . . . . . . . . . . . . . . . . . . . . . . . . . . . . . . . . . . . . . . . .79<br />
Menu Structure . . . . . . . . . . . . . . . . . . . . . . . . . . . . . . . . . . . . . . . . . . . . . . . . . . .79<br />
Viewing the Menus . . . . . . . . . . . . . . . . . . . . . . . . . . . . . . . . . . . . . . . . . . . . . . .80
2F. Managing Call History . . . . . . . . . . . . . . . . . . . . . . . . . . . . . . . . . . . .83<br />
Viewing History . . . . . . . . . . . . . . . . . . . . . . . . . . . . . . . . . . . . . . . . . . . . . . . . . .84<br />
Call History Options . . . . . . . . . . . . . . . . . . . . . . . . . . . . . . . . . . . . . . . . . . . . . .85<br />
Making a Call From Call History . . . . . . . . . . . . . . . . . . . . . . . . . . . . . . . . . . . .85<br />
Saving a Phone Number From Call History . . . . . . . . . . . . . . . . . . . . . . . . . .86<br />
Prepending a Phone Number From Call History . . . . . . . . . . . . . . . . . . . . .87<br />
Erasing Call History . . . . . . . . . . . . . . . . . . . . . . . . . . . . . . . . . . . . . . . . . . . . . . .87<br />
2G. Using the Contacts Directory . . . . . . . . . . . . . . . . . . . . . . . . . . . . .88<br />
Displaying the Contacts List . . . . . . . . . . . . . . . . . . . . . . . . . . . . . . . . . . . . . . .89<br />
Adding a New Contacts Entry . . . . . . . . . . . . . . . . . . . . . . . . . . . . . . . . . . . . . .89<br />
Finding Contacts List Entries . . . . . . . . . . . . . . . . . . . . . . . . . . . . . . . . . . . . . . .90<br />
Contacts List Entry Options . . . . . . . . . . . . . . . . . . . . . . . . . . . . . . . . . . . . . . . .92<br />
Adding a Phone Number to a Contacts Entry . . . . . . . . . . . . . . . . . . . . . . . .93<br />
Editing a Contacts Entry’s Phone Number . . . . . . . . . . . . . . . . . . . . . . . . . .93<br />
Assigning Speed Dial Numbers . . . . . . . . . . . . . . . . . . . . . . . . . . . . . . . . . . . . .94<br />
Editing a Contacts Entry . . . . . . . . . . . . . . . . . . . . . . . . . . . . . . . . . . . . . . . . . . .95<br />
Selecting a Ringer/Image Type for an Entry . . . . . . . . . . . . . . . . . . . . . . . . .95<br />
Secret Contacts Entries . . . . . . . . . . . . . . . . . . . . . . . . . . . . . . . . . . . . . . . . . . . .97<br />
Dialing PCS Services . . . . . . . . . . . . . . . . . . . . . . . . . . . . . . . . . . . . . . . . . . . . . .98<br />
2H. Personal Organizer . . . . . . . . . . . . . . . . . . . . . . . . . . . . . . . . . . . . . . .99<br />
Managing the Scheduler . . . . . . . . . . . . . . . . . . . . . . . . . . . . . . . . . . . . . . . . . .100<br />
Using Your Phone’s Scheduler . . . . . . . . . . . . . . . . . . . . . . . . . . . . . . . . . . . .101<br />
Adding an Event to the Scheduler . . . . . . . . . . . . . . . . . . . . . . . . . . . . . . .101<br />
Event Alerts . . . . . . . . . . . . . . . . . . . . . . . . . . . . . . . . . . . . . . . . . . . . . . . . . . .102<br />
Event Alert Menu . . . . . . . . . . . . . . . . . . . . . . . . . . . . . . . . . . . . . . . . . . . . . .103<br />
Viewing Events . . . . . . . . . . . . . . . . . . . . . . . . . . . . . . . . . . . . . . . . . . . . . . . .103<br />
Erasing a Day’s Events or Call Alarms . . . . . . . . . . . . . . . . . . . . . . . . . . . .103<br />
Adding a Call Alarm to the Scheduler . . . . . . . . . . . . . . . . . . . . . . . . . . . . . .104<br />
Call Alarm Alerts . . . . . . . . . . . . . . . . . . . . . . . . . . . . . . . . . . . . . . . . . . . . . .105<br />
Call Alarm Menu . . . . . . . . . . . . . . . . . . . . . . . . . . . . . . . . . . . . . . . . . . . . . . .105<br />
Editing a Call Alarm . . . . . . . . . . . . . . . . . . . . . . . . . . . . . . . . . . . . . . . . . . . .106<br />
Viewing a Future/Past Day’s Scheduled Events . . . . . . . . . . . . . . . . . . .106<br />
Adding To Do List Items . . . . . . . . . . . . . . . . . . . . . . . . . . . . . . . . . . . . . . . . . .107<br />
Viewing the To Do List . . . . . . . . . . . . . . . . . . . . . . . . . . . . . . . . . . . . . . . . .107<br />
Editing To Do List Items . . . . . . . . . . . . . . . . . . . . . . . . . . . . . . . . . . . . . . . .107
Adding a To Do List Item to the Schedule . . . . . . . . . . . . . . . . . . . . . . . .108<br />
Deleting Items From the To Do List . . . . . . . . . . . . . . . . . . . . . . . . . . . . .108<br />
Viewing Memory in Your Scheduler . . . . . . . . . . . . . . . . . . . . . . . . . . . . .109<br />
Purging All Events, Call Alarms, or To Do List Items . . . . . . . . . . . . . . . . .109<br />
Personal Information Management . . . . . . . . . . . . . . . . . . . . . . . . . . . . . . .110<br />
Displaying Your User Address . . . . . . . . . . . . . . . . . . . . . . . . . . . . . . . . . .110<br />
Finding Icon Definitions . . . . . . . . . . . . . . . . . . . . . . . . . . . . . . . . . . . . . . .110<br />
Displaying the Version Information . . . . . . . . . . . . . . . . . . . . . . . . . . . . .110<br />
Displaying Advanced Information . . . . . . . . . . . . . . . . . . . . . . . . . . . . . .111<br />
Using Your Phone’s Tools . . . . . . . . . . . . . . . . . . . . . . . . . . . . . . . . . . . . . . . .111<br />
Using the Alarm Clock . . . . . . . . . . . . . . . . . . . . . . . . . . . . . . . . . . . . . . . . .111<br />
Using the Calculator . . . . . . . . . . . . . . . . . . . . . . . . . . . . . . . . . . . . . . . . . . .112<br />
Using the World Clock . . . . . . . . . . . . . . . . . . . . . . . . . . . . . . . . . . . . . . . . .112<br />
<strong>Downloading</strong> Files Through PCS Vision . . . . . . . . . . . . . . . . . . . . . . . . . . .113<br />
Confirming the Downloaded Data . . . . . . . . . . . . . . . . . . . . . . . . . . . . . .117<br />
Viewing the Downloaded Data Size . . . . . . . . . . . . . . . . . . . . . . . . . . . . .122<br />
2I. Using Your Phone’s Voice Services . . . . . . . . . . . . . . . . . . . . . . .123<br />
Using Voice-Activated Dialing . . . . . . . . . . . . . . . . . . . . . . . . . . . . . . . . . . . .124<br />
Making a Call Using Voice-Activated Dialing . . . . . . . . . . . . . . . . . . . . .124<br />
Programming Voice Dial Tags . . . . . . . . . . . . . . . . . . . . . . . . . . . . . . . . . . .124<br />
Reviewing Voice Dial Tags . . . . . . . . . . . . . . . . . . . . . . . . . . . . . . . . . . . . . .125<br />
Erasing All Voice Dial Tags . . . . . . . . . . . . . . . . . . . . . . . . . . . . . . . . . . . . . .125<br />
Managing Voice Memos . . . . . . . . . . . . . . . . . . . . . . . . . . . . . . . . . . . . . . . . . .126<br />
Recording Voice Memos . . . . . . . . . . . . . . . . . . . . . . . . . . . . . . . . . . . . . . .126<br />
Voice Memo Options . . . . . . . . . . . . . . . . . . . . . . . . . . . . . . . . . . . . . . . . . .127<br />
Erasing Voice Memos . . . . . . . . . . . . . . . . . . . . . . . . . . . . . . . . . . . . . . . . . .128<br />
Setting Up Screen Call . . . . . . . . . . . . . . . . . . . . . . . . . . . . . . . . . . . . . . . . . . . .129<br />
Activating Screen Call . . . . . . . . . . . . . . . . . . . . . . . . . . . . . . . . . . . . . . . . . .129<br />
Selecting an Announcement for Screen Call . . . . . . . . . . . . . . . . . . . . .130<br />
Recording Your Name for a Pre-Recorded Announcement . . . . . . . .130<br />
Recording a Customized Announcement . . . . . . . . . . . . . . . . . . . . . . . .131<br />
Reviewing an Announcement . . . . . . . . . . . . . . . . . . . . . . . . . . . . . . . . . .131<br />
Erasing an Announcement . . . . . . . . . . . . . . . . . . . . . . . . . . . . . . . . . . . . .131<br />
2J. Using PCS Ready Link . . . . . . . . . . . . . . . . . . . . . . . . . . . . . . . . . . .132<br />
Getting Started With PCS Ready Link . . . . . . . . . . . . . . . . . . . . . . . . . . . . . .133
Setting PCS Ready Link Mode . . . . . . . . . . . . . . . . . . . . . . . . . . . . . . . . . . .133<br />
Preparing Your Phone for PCS Ready Link Service . . . . . . . . . . . . . . . .134<br />
Ready Link Call Alerts . . . . . . . . . . . . . . . . . . . . . . . . . . . . . . . . . . . . . . . . . .134<br />
Making and Receiving a PCS Ready Link Call . . . . . . . . . . . . . . . . . . . . . . .135<br />
Displaying the PCS Ready Link List . . . . . . . . . . . . . . . . . . . . . . . . . . . . . .135<br />
Selecting Contact Lists . . . . . . . . . . . . . . . . . . . . . . . . . . . . . . . . . . . . . . . . .135<br />
Making a PCS Ready Link Call (1-to-1 Call) . . . . . . . . . . . . . . . . . . . . . . .136<br />
Making a PCS Ready Link Call (Group Call) . . . . . . . . . . . . . . . . . . . . . .137<br />
Making a PCS Ready Link Call by Entering a Number . . . . . . . . . . . . .138<br />
Missed Call Notification for PCS Ready Link Calls . . . . . . . . . . . . . . . . .138<br />
Receiving a PCS Ready Link Call (1-to-1 Call) . . . . . . . . . . . . . . . . . . . . .139<br />
Receiving a PCS Ready Link Call (Group Call) . . . . . . . . . . . . . . . . . . . .139<br />
Redialing a PCS Ready Link Call . . . . . . . . . . . . . . . . . . . . . . . . . . . . . . . . .140<br />
PCS Ready Link Options . . . . . . . . . . . . . . . . . . . . . . . . . . . . . . . . . . . . . . . .140<br />
Adding and Editing Ready Link Contacts . . . . . . . . . . . . . . . . . . . . . . . . . . .141<br />
Copying an Entry to Personal List or Personal Group List . . . . . . . . .141<br />
Saving a PCS Ready Link Number . . . . . . . . . . . . . . . . . . . . . . . . . . . . . . .142<br />
Finding an Entry in the PCS Ready Link List . . . . . . . . . . . . . . . . . . . . . .142<br />
Adding a New Contact to Your Personal List . . . . . . . . . . . . . . . . . . . . .143<br />
Adding a New Group to Your Personal Group List . . . . . . . . . . . . . . . .144<br />
Editing a Contact in Your Personal List . . . . . . . . . . . . . . . . . . . . . . . . . .145<br />
Editing a Group in Your Personal Group List . . . . . . . . . . . . . . . . . . . . .145<br />
Erasing Ready Link List Entries . . . . . . . . . . . . . . . . . . . . . . . . . . . . . . . . . . . .147<br />
Erasing an Entry in Your Personal List or Personal Group List . . . . . .147<br />
Erasing a PCS Ready Link List . . . . . . . . . . . . . . . . . . . . . . . . . . . . . . . . . . .147<br />
Updating Your PCS Ready Link Lists . . . . . . . . . . . . . . . . . . . . . . . . . . . . . . .148<br />
Updating the Company List and Personal List . . . . . . . . . . . . . . . . . . . .148<br />
Managing PCS Ready Link Settings . . . . . . . . . . . . . . . . . . . . . . . . . . . . . . . .148<br />
Setting Speed Dialing for PCS Ready Link Entries . . . . . . . . . . . . . . . . .148<br />
Restarting the Ready Link Service . . . . . . . . . . . . . . . . . . . . . . . . . . . . . . .149<br />
Setting Ready Link Guard . . . . . . . . . . . . . . . . . . . . . . . . . . . . . . . . . . . . . . .149<br />
Setting Ringer Types for PCS Ready Link Calls . . . . . . . . . . . . . . . . . . . .150<br />
Setting an Alert Notification for PCS Ready Link Calls . . . . . . . . . . . . .150<br />
Setting the Speakerphone for PCS Ready Link Calls . . . . . . . . . . . . . . .151<br />
Setting the Default View of the PCS Ready Link List . . . . . . . . . . . . . . .151
2K. Using Your Phone’s Built-in Camera . . . . . . . . . . . . . . . . . . . . . .152<br />
Taking Pictures . . . . . . . . . . . . . . . . . . . . . . . . . . . . . . . . . . . . . . . . . . . . . . . . . .153<br />
Creating Your Picture Mail SM Password . . . . . . . . . . . . . . . . . . . . . . . . . . .154<br />
Camera Mode Options . . . . . . . . . . . . . . . . . . . . . . . . . . . . . . . . . . . . . . . . .155<br />
Selecting Camera Settings . . . . . . . . . . . . . . . . . . . . . . . . . . . . . . . . . . . . . .159<br />
Viewing Your Camera’s Status Area Display . . . . . . . . . . . . . . . . . . . . . .160<br />
Sending Picture Mail SM . . . . . . . . . . . . . . . . . . . . . . . . . . . . . . . . . . . . . . . . . . . .162<br />
Sending Picture Mail From the In Camera Folder . . . . . . . . . . . . . . . . .162<br />
Sending Picture Mail from Messaging . . . . . . . . . . . . . . . . . . . . . . . . . . .164<br />
Storing Pictures in My Pictures . . . . . . . . . . . . . . . . . . . . . . . . . . . . . . . . . . . .165<br />
In Camera Folder . . . . . . . . . . . . . . . . . . . . . . . . . . . . . . . . . . . . . . . . . . . . . .165<br />
In Camera Folder Options . . . . . . . . . . . . . . . . . . . . . . . . . . . . . . . . . . . . . .166<br />
Saved to Phone Folder . . . . . . . . . . . . . . . . . . . . . . . . . . . . . . . . . . . . . . . . .168<br />
Managing Picture Mail . . . . . . . . . . . . . . . . . . . . . . . . . . . . . . . . . . . . . . . . . . .170<br />
Using the Picture Mail Website . . . . . . . . . . . . . . . . . . . . . . . . . . . . . . . . .170<br />
Managing Online Picture Mail From Your PCS Vision Phone . . . . . .170<br />
Uploading Your Pictures . . . . . . . . . . . . . . . . . . . . . . . . . . . . . . . . . . . . . . .171<br />
Sending Online Picture Mail . . . . . . . . . . . . . . . . . . . . . . . . . . . . . . . . . . . .171<br />
Accessing Online Picture Mail Options From Your PCS Vision Phone . .172<br />
Section 3: PCS Service Features . . . . . . . . . . . . . . . . . . . . . .174<br />
3A. PCS Service Features:The Basics . . . . . . . . . . . . . . . . . . . . . . . .175<br />
Using Voicemail . . . . . . . . . . . . . . . . . . . . . . . . . . . . . . . . . . . . . . . . . . . . . . . . .176<br />
Setting Up Your Voicemail . . . . . . . . . . . . . . . . . . . . . . . . . . . . . . . . . . . . .176<br />
Voicemail Notification . . . . . . . . . . . . . . . . . . . . . . . . . . . . . . . . . . . . . . . . .176<br />
New Voicemail Message Alerts . . . . . . . . . . . . . . . . . . . . . . . . . . . . . . . . .177<br />
Retrieving Your Voicemail Messages . . . . . . . . . . . . . . . . . . . . . . . . . . . .177<br />
Voicemail Options . . . . . . . . . . . . . . . . . . . . . . . . . . . . . . . . . . . . . . . . . . . . .179<br />
Clearing the Message Icon . . . . . . . . . . . . . . . . . . . . . . . . . . . . . . . . . . . . .181<br />
Voicemail Menu Key . . . . . . . . . . . . . . . . . . . . . . . . . . . . . . . . . . . . . . . . . . .182<br />
Using Caller ID . . . . . . . . . . . . . . . . . . . . . . . . . . . . . . . . . . . . . . . . . . . . . . . . . .183<br />
Responding to Call Waiting . . . . . . . . . . . . . . . . . . . . . . . . . . . . . . . . . . . . . . .183<br />
Making a Three-Way Call . . . . . . . . . . . . . . . . . . . . . . . . . . . . . . . . . . . . . . . . .184<br />
Using Call Forwarding . . . . . . . . . . . . . . . . . . . . . . . . . . . . . . . . . . . . . . . . . . .185<br />
3B. PCS Vision SM . . . . . . . . . . . . . . . . . . . . . . . . . . . . . . . . . . . . . . . . . . . . .186<br />
Getting Started With PCS Vision . . . . . . . . . . . . . . . . . . . . . . . . . . . . . . . . . .187
Your User Name . . . . . . . . . . . . . . . . . . . . . . . . . . . . . . . . . . . . . . . . . . . . . . .187<br />
Launching a PCS Vision Connection . . . . . . . . . . . . . . . . . . . . . . . . . . . .189<br />
Net Guard . . . . . . . . . . . . . . . . . . . . . . . . . . . . . . . . . . . . . . . . . . . . . . . . . . . . .190<br />
PCS Vision Connection Status and Indicators . . . . . . . . . . . . . . . . . . . .190<br />
Navigating the Web . . . . . . . . . . . . . . . . . . . . . . . . . . . . . . . . . . . . . . . . . . . .191<br />
Understanding Messaging . . . . . . . . . . . . . . . . . . . . . . . . . . . . . . . . . . . . . . . .193<br />
Message Types . . . . . . . . . . . . . . . . . . . . . . . . . . . . . . . . . . . . . . . . . . . . . . . .193<br />
New Messages . . . . . . . . . . . . . . . . . . . . . . . . . . . . . . . . . . . . . . . . . . . . . . . .193<br />
Message Storage . . . . . . . . . . . . . . . . . . . . . . . . . . . . . . . . . . . . . . . . . . . . . . .194<br />
Displaying Messages . . . . . . . . . . . . . . . . . . . . . . . . . . . . . . . . . . . . . . . . . . .194<br />
Displaying Picture Mail . . . . . . . . . . . . . . . . . . . . . . . . . . . . . . . . . . . . . . . .194<br />
Sending a Message . . . . . . . . . . . . . . . . . . . . . . . . . . . . . . . . . . . . . . . . . . . . .195<br />
Sending a Message in the Drafts Folder . . . . . . . . . . . . . . . . . . . . . . . . . .196<br />
Sending a Message in the Outbox Folder . . . . . . . . . . . . . . . . . . . . . . . .197<br />
Message Options . . . . . . . . . . . . . . . . . . . . . . . . . . . . . . . . . . . . . . . . . . . . . .197<br />
Changing the Display Font Size of a Message . . . . . . . . . . . . . . . . . . . . .199<br />
Prepending a Phone Number From a Message . . . . . . . . . . . . . . . . . . .199<br />
Message Folders . . . . . . . . . . . . . . . . . . . . . . . . . . . . . . . . . . . . . . . . . . . . . . .200<br />
Erasing All Messages . . . . . . . . . . . . . . . . . . . . . . . . . . . . . . . . . . . . . . . . . . .201<br />
Moving a Message Into Another Folder . . . . . . . . . . . . . . . . . . . . . . . . . .201<br />
Erasing a Folder . . . . . . . . . . . . . . . . . . . . . . . . . . . . . . . . . . . . . . . . . . . . . . .202<br />
Erasing Selected Messages in All Folders . . . . . . . . . . . . . . . . . . . . . . . . .202<br />
Signing Up for Updates . . . . . . . . . . . . . . . . . . . . . . . . . . . . . . . . . . . . . . . . .203<br />
Using Email . . . . . . . . . . . . . . . . . . . . . . . . . . . . . . . . . . . . . . . . . . . . . . . . . . . . .204<br />
Accessing Email Messages . . . . . . . . . . . . . . . . . . . . . . . . . . . . . . . . . . . . . .204<br />
Composing Email Messages . . . . . . . . . . . . . . . . . . . . . . . . . . . . . . . . . . . .204<br />
Accessing Alternate Email Providers . . . . . . . . . . . . . . . . . . . . . . . . . . . . . .205<br />
Using Alternate Email Providers . . . . . . . . . . . . . . . . . . . . . . . . . . . . . . . .205<br />
Using Instant Messaging . . . . . . . . . . . . . . . . . . . . . . . . . . . . . . . . . . . . . . . . . .206<br />
Accessing Instant Messaging . . . . . . . . . . . . . . . . . . . . . . . . . . . . . . . . . . .206<br />
Experiencing Wireless Online Chat . . . . . . . . . . . . . . . . . . . . . . . . . . . . . . .207<br />
<strong>Downloading</strong> Premium Services Content . . . . . . . . . . . . . . . . . . . . . . . . .208<br />
Accessing Games . . . . . . . . . . . . . . . . . . . . . . . . . . . . . . . . . . . . . . . . . . . . . . . .210<br />
Accessing Ringers . . . . . . . . . . . . . . . . . . . . . . . . . . . . . . . . . . . . . . . . . . . . . . .212<br />
Accessing Screen Savers . . . . . . . . . . . . . . . . . . . . . . . . . . . . . . . . . . . . . . . . .214<br />
Exploring the Web . . . . . . . . . . . . . . . . . . . . . . . . . . . . . . . . . . . . . . . . . . . . . . .216
Using the Browser Menu . . . . . . . . . . . . . . . . . . . . . . . . . . . . . . . . . . . . . . .217<br />
Using PCS Business Connection Personal Edition . . . . . . . . . . . . . . . . . .221<br />
PCS Vision FAQs . . . . . . . . . . . . . . . . . . . . . . . . . . . . . . . . . . . . . . . . . . . . . . . . .222<br />
3C. PCS Voice Command SM . . . . . . . . . . . . . . . . . . . . . . . . . . . . . . . . . . .223<br />
Getting Started With PCS Voice Command SM . . . . . . . . . . . . . . . . . . . . . . . .224<br />
Creating Your Own Address Book . . . . . . . . . . . . . . . . . . . . . . . . . . . . . . . . .224<br />
Making a Call With PCS Voice Command . . . . . . . . . . . . . . . . . . . . . . . . . .225<br />
Accessing Information Using PCS Voice Command . . . . . . . . . . . . . . . . .225<br />
Section 4:Safety Guidelines and Warranty Information . .226<br />
4A. Safety . . . . . . . . . . . . . . . . . . . . . . . . . . . . . . . . . . . . . . . . . . . . . . . . . . .227<br />
Getting the Most Out of Your Reception . . . . . . . . . . . . . . . . . . . . . . . . . . .228<br />
Maintaining Safe Use of and Access to Your Phone . . . . . . . . . . . . . . . . . .229<br />
Caring for the Battery . . . . . . . . . . . . . . . . . . . . . . . . . . . . . . . . . . . . . . . . . . . .231<br />
Acknowledging Special Precautions and the FCC Notice . . . . . . . . . . .232<br />
Consumer Information on Wireless Phones . . . . . . . . . . . . . . . . . . . . . . . .234<br />
Owner’s Record . . . . . . . . . . . . . . . . . . . . . . . . . . . . . . . . . . . . . . . . . . . . . . . . .249<br />
User’s Guide Proprietary Notice . . . . . . . . . . . . . . . . . . . . . . . . . . . . . . . . . .249<br />
4B. Terms & Conditions and Manufacturer’s Warranty . . . . . . .250<br />
Terms and Conditions . . . . . . . . . . . . . . . . . . . . . . . . . . . . . . . . . . . . . . . . . . . .251<br />
Manufacturer’s Warranty . . . . . . . . . . . . . . . . . . . . . . . . . . . . . . . . . . . . . . . . .272<br />
Index . . . . . . . . . . . . . . . . . . . . . . . . . . . . . . . . . . . . . . . . . . . . . . .275
Welcome to Sprint<br />
Sprint has the most complete, all-digital wireless network in the nation.<br />
Depend on it. We are committed to bringing you the best wireless<br />
technology available. With Sprint, you get the most complete,<br />
all-digital wireless network in the nation so all your services work<br />
the same wherever you go on the network. We built our network<br />
right from the start, so no matter where you are on the enhanced<br />
Sprint Nationwide PCS Network, all your services – whether it’s<br />
Voicemail, Caller ID, email, or Picture Mail – will work the same.<br />
This guide will familiarize you with our technology and your new<br />
PCS Vision Phone through simple, easy-to-follow instructions. If<br />
you have already reviewed the Start Here to Activate guide that was<br />
packaged with your new phone, then you’re ready to explore the<br />
advanced features outlined in this guide.<br />
If you have not read your Start Here to Activate guide, go to<br />
Section One – Getting Started. This section provides all the<br />
information you need to unlock your phone, set up your voicemail,<br />
and much more. It also contains information on how to contact<br />
Sprint if you have any questions about your service, wish to check<br />
your account balance, or want to purchase additional products or<br />
services.<br />
Sprint is different. All your services work the same wherever you<br />
go on the most complete, all-digital wireless network in the nation.<br />
Welcome and thank you for choosing Sprint.<br />
i
Introduction<br />
This User’s Guide introduces you to PCS Service and all the features<br />
of your new phone. It’s divided into four sections:<br />
Section 1: Getting Started<br />
Section 2: Your PCS Vision Phone<br />
Section 3: PCS Service Features<br />
Section 4: Safety Guidelines and Warranty Information<br />
Throughout this guide, you’ll find tips that highlight special<br />
shortcuts and timely reminders to help you make the most of your<br />
new phone and service. The Table of Contents and Index will also<br />
help you quickly locate specific information.<br />
You’ll get the most out of your phone if you read each section.<br />
However, if you’d like to get right to a specific feature, simply locate<br />
that section in the Table of Contents and click on the page number<br />
to go directly to that page. Follow the instructions in that section,<br />
and you’ll be ready to use your phone in no time.<br />
Note: You can view this guide online or print it to keep it on hand. If you’re viewing<br />
it online, simply click on a topic in the Table of Contents or Index or on any page<br />
reference. The PDF will automatically display the appropriate page.<br />
ii
Getting Started<br />
Section 1
Section 1A<br />
Setting Up Service<br />
In This Section<br />
<br />
<br />
<br />
<br />
Getting Started With PCS Service<br />
Setting Up Your Voicemail<br />
PCS Account Passwords<br />
Getting Help<br />
Setting up service on your new PCS Vision Phone is quick and easy.<br />
This section walks you through the necessary steps to set up<br />
your phone, unlock your phone, set up your voicemail, establish<br />
passwords, and contact Sprint for assistance with your PCS Service.<br />
Section 1A: Setting Up Service 2
Getting Started With PCS Service<br />
Determining if Your Phone is Already Activated<br />
If you received your phone in the mail or purchased it at a Sprint Store,<br />
it probably has already been activated. All you need to do is unlock<br />
your phone.<br />
If your phone is not activated, please refer to the Start Here Guide<br />
included with your phone.<br />
Unlocking Your Phone<br />
To unlock your phone, follow these easy steps:<br />
1. Press to turn the phone on.<br />
2. Press Unlock (left softkey).<br />
Note: To select a softkey, press the softkey button directly below the softkey text<br />
that appears at the bottom left and bottom right of your phone’s display screen.<br />
Softkey actions change according to the screen you’re viewing and will not<br />
appear if there is no corresponding action available.<br />
3. Enter your four-digit lock code. (For security purposes, the<br />
code is not visible as you type.)<br />
Tip: If you can’t recall your lock code, try using the last four digits of either your<br />
Social Security number or PCS Phone Number or try 0000. If none of these work,<br />
call PCS Customer Solutions at 1-888-211-4PCS (4727).<br />
Section 1A: Setting Up Service 3
Setting Up Your Voicemail<br />
All unanswered calls to your PCS Vision Phone are automatically<br />
transferred to your voicemail, even if your phone is in use or turned<br />
off. Therefore, you will want to set up your voicemail and personal<br />
greeting as soon as your PCS Vision Phone is activated.<br />
To set up your voicemail:<br />
1. Press and hold .<br />
2. Follow the system prompts to:<br />
<br />
<br />
<br />
<br />
Create your passcode<br />
Record your greeting<br />
Record your name announcement<br />
Choose whether or not to activate One-Touch Message<br />
Access (a feature that lets you access messages simply by<br />
pressing and holding , bypassing the need for you to<br />
enter your passcode)<br />
Note: The voicemail setup process may vary in certain Affiliate areas.<br />
For more information about using your voicemail, see<br />
“Using Voicemail” on page 176.<br />
Section 1A: Setting Up Service 4
PCS Account Passwords<br />
As a PCS customer, you enjoy unlimited access to your personal<br />
account information, your voicemail account, and your PCS Vision<br />
account. To ensure that no one else has access to your information,<br />
you will need to create passwords to protect your privacy.<br />
Account Password<br />
If you are the account owner, you’ll have an account password to sign<br />
on to www.sprintpcs.com and to use when calling PCS Customer<br />
Solutions. Your default account password is the last four digits of your<br />
Social Security number. If you are not the account owner (if someone<br />
else pays for your PCS Service), you can get a sub-account password<br />
at www.sprintpcs.com.<br />
Voicemail Password<br />
You’ll create your voicemail password (or passcode) when you set up<br />
your voicemail. See “Setting Up Your Voicemail” on page 176 for<br />
more information on your voicemail password.<br />
PCS Vision Password<br />
If you have a PCS Vision Phone, you can set up a PCS Vision Password.<br />
This optional password may be used to authorize purchase of<br />
Premium Services content and to protect personal information on<br />
multi-phone accounts.<br />
For more information or to change your passwords, sign on to<br />
www.sprintpcs.com or call PCS Customer Solutions at 1-888-211-4PCS<br />
(4727).<br />
Section 1A: Setting Up Service 5
Getting Help<br />
Visit Our Website<br />
You can get up-to-date information on PCS Services and Options by<br />
signing onto our Website at www.sprintpcs.com.<br />
When you visit us online, you can<br />
Review coverage maps<br />
Learn how to use voicemail<br />
Access your account information<br />
Purchase accessories<br />
Add additional options to your service plan<br />
Check out frequently asked questions<br />
And more<br />
Reaching PCS Customer Solutions<br />
You can reach PCS Customer Solutions many different ways:<br />
Dial on your PCS Vision Phone<br />
Sign on to your account at www.sprintpcs.com<br />
Call us toll-free at 1-888-211-4727 (Consumer customers),<br />
1-877-CLEARPY (253-2779) (PCS Clear Pay SM customers), or<br />
1-888-788-4727 (Business customers)<br />
Write to us at PCS Customer Solutions, P.O. Box 8077,<br />
London, KY 40742<br />
Receiving Automated Invoicing Information<br />
For your convenience, your phone gives you access to invoicing<br />
information on your PCS Account. This information includes<br />
balance due, payment received, invoicing cycle, and the number of<br />
minutes used since your last invoicing cycle. (Normal airtime usage<br />
will apply.)<br />
To access automated invoicing information:<br />
Press .<br />
Note: This service may not be available in all Affiliate areas.<br />
Section 1A: Setting Up Service 6
PCS Directory Assistance<br />
You have access to a variety of services and information through<br />
PCS Directory Assistance, including residential, business, and<br />
government listings; assistance with local or long-distance calls;<br />
movie listings; and hotel, restaurant, shopping, and major local event<br />
information. There is a per-call charge and you will be billed for<br />
airtime.<br />
To call PCS Directory Assistance:<br />
Press .<br />
PCS Operator Services<br />
PCS Operator Services provides assistance when placing collect calls<br />
or when placing calls billed to a local telephone calling card or third<br />
party.<br />
To access PCS Operator Services:<br />
Press .<br />
For more information or to see the latest in products and services,<br />
visit us online at www.sprintpcs.com.<br />
Note: PCS Operator Services may not be available in all Affiliate areas.<br />
Section 1A: Setting Up Service 7
Your PCS Vision Phone<br />
Section 2
Section 2A<br />
Your PCS Vision Phone: The Basics<br />
In This Section<br />
<br />
<br />
<br />
<br />
<br />
<br />
<br />
<br />
Front View of Your Phone<br />
Viewing the Display Screen<br />
Features of Your PCS Vision SM Picture Phone PM-8200<br />
Turning Your Phone On and Off<br />
Using Your Phone’s Battery and Charger<br />
Displaying Your Phone Number<br />
Making and Answering Calls<br />
Entering Text<br />
Your PCS Vision Phone is packed with features that simplify your life and<br />
expand your ability to stay connected to the people and information that<br />
are important to you. This section will guide you through the basic<br />
functions and calling features of your phone.<br />
Section 2A: Your PCS Vision Phone – The Basics 9
Front View of Your Phone<br />
1. Earpiece<br />
2. Main LCD<br />
Sprint<br />
Mar 01, 04 (Mon)<br />
12:30pm<br />
R-Link<br />
Web<br />
3. Softkey (left)<br />
4. Navigation Key<br />
5. MENU/OK<br />
6. Camera Key<br />
7. TALK<br />
17. Softkey (right)<br />
16. Side Call Key<br />
15. BACK<br />
14. Side Camera Key<br />
13. END/POWER<br />
12. SPEAKER Key<br />
8. Microphone 11. Keypad<br />
9. Accessories Connector 10. Charger Jack<br />
23. Antenna<br />
18. Speaker<br />
19. LED<br />
Indicator<br />
24. Headset<br />
Jack<br />
25. Ready Link<br />
(Memo) Button<br />
Sprint<br />
12:30p Mar 01<br />
20. Sub LCD 26. Side Volume<br />
21. Flash<br />
22. Camera<br />
Lens<br />
Key<br />
Section 2A: Your PCS Vision Phone – The Basics 10
Key Features<br />
1. Earpiece: Lets you hear the caller’s voice.<br />
2. Main LCD (display): Displays the phone’s main menu, features,<br />
modes, etc.<br />
3. Softkey (left): Lets you select the menu corresponding to the<br />
bottom left line on the Main LCD.<br />
4. Navigation Key: Lets you navigate quickly and easily through the<br />
menu options. You can access menu shortcuts by pressing<br />
Right : Contacts, Left : My Shortcut, Up : Messaging, and<br />
Down : Downloads.<br />
5. MENU/OK: Lets you access the phone’s menus and select menu<br />
options.<br />
6. Camera Key: Lets you access the Pictures menu and take pictures.<br />
7. TALK: Lets you place or receive calls, answer Call Waiting, or use<br />
Three-Way Calling and Voice Dial.<br />
8. Microphone: To speak into or record your voice.<br />
9. Accessories Connector: Connects optional accessories such as a<br />
USB cable.<br />
10. Charger Jack: Connects the travel charger (included).<br />
11. Keypad: Lets you enter numbers, letters, and characters, and<br />
navigate within menus. Press and hold keys 2-9 for speed dialing.<br />
12. SPEAKER Key: Lets you place or receive calls in speakerphone<br />
mode. You can also use it to activate Voice Dial and Memo<br />
recording.<br />
13. END/POWER: Lets you turn the phone on/off, end a call, or<br />
return to standby mode.<br />
14. Side Camera Key: Lets you display the Pictures menu and take<br />
pictures.<br />
15. BACK: Lets you clear characters from the screen or display the<br />
previous page.<br />
Section 2A: Your PCS Vision Phone – The Basics 11
16. Side Call Key: Lets you place or receive calls without opening the<br />
phone.<br />
17. Softkey (right): Lets you select the menu corresponding to the<br />
bottom right line on the Main LCD.<br />
18. Speaker: Lets you hear the different ringers and sounds.<br />
You can mute the ringer when receiving incoming calls by<br />
pressing , , , , , or Side Camera key.<br />
19. LED Indicator: Shows your phone’s connection status at a glance.<br />
20. Sub LCD: Lets you monitor the phone’s status and see who’s<br />
calling without opening the phone.<br />
21. Flash: The built-in flash lets you take pictures in low light.<br />
You can also use it as a mini flashlight.<br />
22. Camera Lens: The built-in camera lens lets you take pictures.<br />
23. Antenna: Fully extend the antenna for the best reception.<br />
24. Headset Jack: Lets you insert the plug of a headset (sold<br />
separately) for hands-free phone use.<br />
25. Ready Link (Memo) Button: Allows you to access the PCS Ready<br />
Link List or Voice Memo menu. (See “Using PCS Ready Link” on<br />
page 132 or “Managing Voice Memos” on page 126.)<br />
26. Side Volume Key: Lets you adjust the receiver volume during a<br />
call or ringer volume in standby mode.<br />
Section 2A: Your PCS Vision Phone – The Basics 12
Viewing the Display Screen<br />
Your phone’s display screen provides a wealth of information about<br />
your phone’s status and options. This list identifies the symbols you’ll<br />
see on your phone’s display screen:<br />
shows your current signal strength. The more lines you have, the<br />
stronger your signal.<br />
means your phone cannot find a signal.<br />
tells you a call is in progress.<br />
indicates PCS Vision/PCS Ready Link access is dormant.<br />
indicates PCS Vision/PCS Ready Link access is active.<br />
indicates PCS Vision/PCS Ready Link access is disabled.<br />
indicates you have new text messages waiting.<br />
indicates you have new voicemail messages waiting. Press and<br />
hold to call your voicemail box.<br />
indicates you have text messages and voicemail messages waiting.<br />
indicates you are “roaming” off the Sprint Nationwide PCS Network.<br />
indicates the PCS Ready Link Service is enabled.<br />
indicates the PCS Ready Link Service is disabled.<br />
shows the level of your battery charge. The more black you see,<br />
the more power you have left. It displays while charging.<br />
indicates you have menus to scroll (in four directions).<br />
indicates a beep sound is set at level 1.<br />
indicates the vibrate feature is set.<br />
indicates volume level 4 or 1 and vibrate feature is set.<br />
indicates the voice call ringer setting is off.<br />
indicates all the sound settings are off.<br />
indicates the Location Service of your phone is enabled.<br />
indicates the Location Service of your phone is disabled.<br />
indicates you have a new caller’s message.<br />
indicates the Screen Call Auto setting is on.<br />
indicates you have new downloaded data.<br />
indicates your phone is in TTY mode.<br />
indicates Headset mode is set to PCS Ready Link and a headset is<br />
connected.<br />
indicates the speakerphone mode is set to on.<br />
Note: Display indicators help you manage your roaming charges by letting you<br />
know when you’re off the Sprint Nationwide PCS Network and whether you’re<br />
operating in digital or analog mode. (For more information, see Section 2D:<br />
Controlling Your Roaming Experience on page 73.)<br />
Section 2A: Your PCS Vision Phone – The Basics 13
Features of Your PCS Vision SM Picture Phone<br />
PM-8200<br />
Congratulations on the purchase of your PCS Vision SM Picture Phone<br />
PM-8200 by Sanyo. This phone is lightweight, easy-to-use and<br />
reliable, and it also offers many significant features and service<br />
options. The following list previews some of those features and<br />
options and provides page numbers where you can find out more:<br />
Dual-band/tri-mode capability allows you to make and receive<br />
calls while on the Sprint Nationwide PCS Network and to roam<br />
on other analog and 800 and 1900 MHz digital networks where<br />
Sprint has implemented roaming agreements (page 73).<br />
PCS Vision SM provides access to the wireless Internet in digital<br />
mode (page 186).<br />
Email provides quick and convenient text messaging capabilities<br />
(page 204).<br />
PCS Voice Command SM lets you dial phone numbers by speaking<br />
someone’s name or the digits of their phone number (page 223).<br />
Games, ringers, screen savers, and other applications can be<br />
downloaded to your phone to make your PCS Vision Phone as<br />
unique as you are (page 208).<br />
The built-in organizer lets you schedule alerts to remind you of<br />
important events (page 99).<br />
Speed Dialing lets you call a phone number stored in your<br />
Contacts directory using one touch dialing (page 30).<br />
The Contacts directory can store up to 500 numbers and<br />
300 email and Web addresses in 300 entries (entries can store up<br />
to seven numbers each). A separate PCS Ready Link Contacts List<br />
provides easy access to up to 200 personal contacts and<br />
200 company-provided contacts.<br />
The built-in camera allows you to take full-color digital pictures,<br />
view your pictures using the phone’s display, and instantly send<br />
them to a family and friends using Picture Mail SM service (page 152).<br />
PCS Ready Link allows you to enjoy quick, two-way,<br />
“walkie-talkie-style” communication with one or several<br />
PCS Ready Link users (page 132).<br />
Large 1.8-inch, full-color display screen plus external display.<br />
The Side Call key lets you place or receive calls without opening<br />
the phone (page 19).<br />
Section 2A: Your PCS Vision Phone – The Basics 14
Turning Your Phone On and Off<br />
Turning Your Phone On<br />
To turn your phone on:<br />
Press .<br />
Once your phone is on, it displays “Looking for service...” which<br />
indicates that your phone is searching for a signal. When your phone<br />
finds a signal, it automatically enters standby mode – the phone’s idle<br />
state. At this point, you are ready to begin making and receiving calls.<br />
If your phone is unable to find a signal after 15 minutes of searching, a<br />
Power Save feature is automatically activated. When a signal is found,<br />
your phone automatically returns to standby mode.<br />
In Power Save mode, your phone searches for a signal periodically<br />
without your intervention. You can also initiate a search for<br />
PCS Service by pressing any key (when your phone is turned on).<br />
Tip: The Power Save feature helps to conserve your battery power when you are<br />
in an area where there is no signal.<br />
Turning Your Phone Off<br />
To turn your phone off:<br />
Press and hold until you see the powering down<br />
animation on the display screen.<br />
Your screen remains blank while your phone is off (unless the battery<br />
is charging).<br />
Section 2A: Your PCS Vision Phone – The Basics 15
Using Your Phone’s Battery and Charger<br />
Battery Capacity<br />
Your PCS Vision Phone is equipped with a Lithium Ion (LiIon) battery.<br />
It allows you to recharge your battery before it is fully drained.<br />
The battery provides approximately 3.0 hours of continuous digital<br />
talk time (1.7 hours in analog) or approximately 288 hours of<br />
continuous digital standby time (17 hours in analog).<br />
When the battery reaches 5% of its capacity, the low battery icon<br />
appears. When there are approximately two minutes of talk time left,<br />
the phone sounds an audible alert and then powers down.<br />
Note: Long backlight settings, searching for service, vibrate mode, PCS Ready<br />
Link mode, and browser use affect the battery’s talk and standby times.<br />
Tip: Be sure to watch your phone’s battery level indicator and charge the battery<br />
before it runs out of power.<br />
Installing the Battery<br />
To install the LiIon battery:<br />
1. Place the battery into the space beneath<br />
the antenna with the metal contacts at<br />
the bottom, facing downward.<br />
2. Gently press down until it’s in place and<br />
the battery release latch snaps.<br />
Removing the Battery<br />
To remove your battery:<br />
1. Make sure the power is off so that you<br />
don’t lose any stored numbers or<br />
messages.<br />
2. Push the battery release latch up and<br />
hold the battery.<br />
3. Pull the battery up and out at a 45-degree<br />
angle.<br />
Section 2A: Your PCS Vision Phone – The Basics 16
Charging the Battery<br />
Your PCS Vision Phone’s LiIon battery is rechargeable and should be<br />
charged as soon as possible so you can begin using your phone.<br />
Keeping track of your battery’s charge is important. If your battery<br />
level becomes too low, your phone automatically turns off and you<br />
will lose all the information you were just working on. For a quick<br />
check of your phone’s battery level, glance at the battery charge<br />
indicator located in the upper-right corner of your phone’s display<br />
screen. If the battery charge is getting too low, the low battery icon<br />
( ) appears and the phone sounds a warning tone.<br />
Always use a Sprint-approved travel charger or vehicle power adapter<br />
to charge your battery.<br />
Warning! Using the wrong battery charger could cause damage to your phone<br />
and void the warranty.<br />
Using the Travel Charger<br />
To use the travel charger provided with your phone:<br />
1. Plug the travel charger into a wall outlet.<br />
2. Plug the other end of the travel charger into the bottom of your<br />
phone (with the battery installed).<br />
Charging when your phone is turned on:<br />
The battery icon appears on the display while charging.<br />
The battery icon turns to when charging is complete.<br />
Charging when your phone is turned off:<br />
The battery icon appears, and the message “BATTERY<br />
CHARGING--Power Off--” is shown on the display while<br />
charging. When the battery is completely discharged, you<br />
may wait for several minutes until the message is shown on<br />
the display. The battery icon turns to , and the message<br />
changes to “CHARGING COMPLETE--Power Off--” when<br />
charging is complete.<br />
It takes approximately 3.5 hours to fully recharge a completely<br />
rundown battery. With the Sprint-approved LiIon battery,<br />
you can recharge the battery before it becomes completely<br />
run down.<br />
Section 2A: Your PCS Vision Phone – The Basics 17
DisplayingYour Phone Number<br />
Just in case you forget your phone number, your PCS Vision Phone<br />
can remind you.<br />
To display your phone number:<br />
1. Press to access the main menu.<br />
2. Select Contacts and press .<br />
3. Select My Phone# and press .<br />
Note: To access the phone’s main menu, press from standby mode. Menu<br />
items may be selected by highlighting them with the navigation key and pressing<br />
, or you can press the number corresponding to the menu item on your keypad.<br />
Making and Answering Calls<br />
Making Calls<br />
Placing a call from your PCS Phone is as easy as making a call from any<br />
land line phone. Just enter the number and press and you’re on<br />
your way to clear calls.<br />
To place a call using your keypad:<br />
1. Make sure your phone is on.<br />
2. Enter a phone number. (If you make a mistake while dialing,<br />
press to erase one digit at a time. Press and hold to erase<br />
the entire number.)<br />
3. Press or . (To place a call when you are roaming and<br />
Call Guard is enabled, see “Controlling Roaming Charges Using<br />
Call Guard” on page 77.)<br />
4. When you’re finished, press to end the call.<br />
Tip: To redial your last outgoing call, press or twice.<br />
Tip: When making calls off the Sprint Nationwide PCS Network, always dial<br />
using 11 digits (1 + area code + phone number).<br />
You can also place calls from your PCS Phone by using PCS Voice<br />
Command SM (page 223), Speed Dialing (page 30), and using your<br />
Call History listings (page 83).<br />
Section 2A: Your PCS Vision Phone – The Basics 18
Important: To maximize performance when using your PCS Phone, extend the<br />
antenna before a call and do not touch the antenna during a call (see page 228).<br />
Correct<br />
Incorrect<br />
To place a call with the flip closed:<br />
1. Make sure your phone is on.<br />
2. Press and hold the Side Call key ( ) on the right side of the<br />
phone. (You will see a message on the Sub LCD.)<br />
3. Follow the system prompts. (The call will be made in<br />
speakerphone mode, unless you have a headset attached to the<br />
phone.)<br />
Redial to redial the last number you called.<br />
Voice Dial to use the Voice Dial function (see “Using Voice-<br />
Activated Dialing” on page 124).<br />
4. When you’re finished, press and hold .<br />
Note: To use a Voice Dial, you must have stored Voice Dial entries (see<br />
“Programming Voice Dial Tags” on page 124).<br />
Section 2A: Your PCS Vision Phone – The Basics 19
Dialing Options<br />
Dialing options are displayed when you press Options (right softkey)<br />
after entering numbers in the phone’s standby mode.<br />
To select an option, highlight it and press .<br />
Call to dial the phone number.<br />
<br />
<br />
<br />
<br />
<br />
<br />
<br />
Call:Speaker On to dial the phone number in speakerphone mode.<br />
Send Message to send a text message. See page 195 for details.<br />
To send Picture Mail, see page 162.<br />
Save Phone# to save the phone number in your Contacts list. (See<br />
“Saving a Phone Number” on page 27.)<br />
Find to display Contacts list entries that end with the digits you<br />
entered. (See “Finding a Phone Number” on page 28.)<br />
H Hard Pause to insert a hard pause. (See “Dialing and Saving<br />
Phone Numbers With Pauses” on page 28.)<br />
T 2-Sec. Pause to insert a 2-second pause. (See “Dialing and<br />
Saving Phone Numbers With Pauses” on page 28.)<br />
Hyphen to insert a hyphen. (Hyphens are generally for visual<br />
appeal only; they are not necessary when entering numbers.)<br />
Note: To speed dial a phone number, press and hold the appropriate speed dial<br />
key (locations 2-9). See “Assigning Speed Dial Numbers” on page 94.<br />
This option appears when you enter four digits and press .<br />
Abbrev. Dial to dial the phone number in your Contacts list that<br />
ends with the four digits you entered. (See “Using Abbreviated<br />
Dialing” on page 30.)<br />
Section 2A: Your PCS Vision Phone – The Basics 20
Answering Calls<br />
To answer an incoming call with the flip open:<br />
1. Make sure your phone is on. (If your phone is off, incoming calls<br />
go to voicemail.)<br />
2. Press or to answer an incoming call. (Depending on<br />
your phone’s settings, you may also answer incoming calls by<br />
opening the phone or by pressing any number key. See “Setting<br />
Any Key Answer” on page 58 for more information.)<br />
To answer an incoming call with the flip closed:<br />
1. Make sure your phone is on. (If your phone is off, incoming calls<br />
go to voicemail.)<br />
2. When your phone rings or vibrates, press and hold the Side Call<br />
key ( ) on the right side of the phone. (The call will be<br />
answered in speakerphone mode.)<br />
– or –<br />
Open the phone to use the earpiece.<br />
Note: If the setting for Open Flip is not set to “Answer Call,” opening the phone<br />
will not answer the call. (See “Setting the Open/Close Flip Option” on page 57.)<br />
Your PCS Vision Phone notifies you of incoming calls in the<br />
following ways:<br />
The phone rings or vibrates.<br />
The LED flashes.<br />
The backlight illuminates.<br />
The screen displays an incoming call message.<br />
If available, the phone number of the caller is displayed.<br />
If the phone number is in your Contacts list, the contact’s name is<br />
displayed.<br />
Section 2A: Your PCS Vision Phone – The Basics 21
The following options are also displayed by pressing Options (right<br />
softkey). To select an option, highlight it and press .<br />
Call Guard to answer the call when you are in roaming mode.<br />
See page 77 for setting Call Guard.<br />
Answer to answer the call.<br />
<br />
<br />
<br />
<br />
Answer:Speaker to answer the call in speakerphone mode.<br />
Don’t Answer to hang up the incoming call and return to the Web<br />
or camera mode while you are in Web or Camera operation.<br />
(This feature appears only when PCS Vision access is dormant or<br />
when your phone is in camera mode.)<br />
Screen Call to answer the call by using a pre-recorded<br />
announcement. (This feature appears only when you are in a<br />
PCS Service area or digital roaming area. See page 129.)<br />
Quiet Ringer to mute the ringer. (This feature appears only when<br />
the ringer is set.)<br />
Tip: Your PCS Phone offers additional ways to answer calls. (See page 56 for<br />
Auto Answer and see page 58 for Any Key Answer.)<br />
Answering a Roam Call With Call Guard Enabled<br />
Call Guard is an option that helps you manage your roaming charges<br />
when making or receiving calls while outside the Sprint Nationwide<br />
PCS Network. Please see Section 2D: Controlling Your Roaming<br />
Experience for more information about roaming.<br />
To answer a call when you are roaming and Call Guard is enabled:<br />
1. Press or . (The following message will appear:<br />
“Roaming rate applies. Please press [1] to accept.”)<br />
2. Press to answer the call.<br />
Note: When your phone is off, in an active PCS Vision Connection, or on a<br />
PCS Ready Link call, incoming calls go directly to voicemail.<br />
Section 2A: Your PCS Vision Phone – The Basics 22
Ending a Call<br />
To disconnect a call when you are finished:<br />
With the Flip open:<br />
Close the phone or press .<br />
With the Flip closed:<br />
Press and hold .<br />
Note: If the setting for Close Flip is not set to “end call,” closing the phone will not<br />
end the call. (See “Setting the Open/Close Flip Option” on page 57.)<br />
Tip: Time/Date is displayed when you press<br />
while the phone is in use.<br />
Using the Speakerphone<br />
The speakerphone feature lets you hear audio through the speaker<br />
and talk without holding the phone. When the speakerphone is<br />
activated, use the volume control keys on the side of the phone to<br />
adjust the volume.<br />
To turn the speakerphone on during a call:<br />
Press .<br />
– or –<br />
Press Options (right softkey), highlight Speaker On, and press .<br />
To turn the speakerphone off during a call:<br />
Press .<br />
– or –<br />
Press Options (right softkey), highlight Speaker Off, and press .<br />
Warning! Due to higher volume levels, do not place the phone near your ear<br />
during speakerphone use.<br />
Section 2A: Your PCS Vision Phone – The Basics 23
Changing the Ringer Volume<br />
To change the ringer volume, press the Side Volume key when the<br />
phone is open and in standby mode.<br />
Note: To change the ringer volume from the main menu, see “Adjusting the<br />
Phone’s Volume Settings” on page 41.<br />
Adjusting Volume During a Conversation<br />
When you need to adjust the receiver volume during a conversation,<br />
use the side volume key, or press the navigation key up or down<br />
while a call is in progress.<br />
Muting a Call<br />
There are times when it’s necessary to mute a call so that your caller<br />
does not hear you or certain background noise.<br />
To mute a call with the Flip open:<br />
Press Options (right softkey), highlight Mute, and press .<br />
(When the phone is muted, “Mute” appears on the display.)<br />
To unmute a call with the Flip open:<br />
Press Options (right softkey), highlight Unmute, and press .<br />
To mute a call with the Flip closed:<br />
Simply press (side of the phone).<br />
To unmute a call with the Flip closed:<br />
Press once again during a call.<br />
Section 2A: Your PCS Vision Phone – The Basics 24
Missed Call Notification<br />
When an incoming call is not answered, the Missed Call log is<br />
displayed on your screen.<br />
To display the Missed Call entry:<br />
<br />
Press View (left softkey). (To call an entry, highlight the entry<br />
you want to call and press or .)<br />
Calling Emergency Numbers<br />
You can place calls to 911 (dial and press ),<br />
even if your phone is locked or your account is restricted. Once you<br />
dial the numbers, your phone will enter Emergency mode.<br />
Press Options (right softkey) to display the options. To select an option,<br />
highlight it and press .<br />
My Phone# to display your phone number.<br />
<br />
<br />
Speaker On to activate speakerphone mode. (If you are in<br />
speakerphone mode, the option will appear as Speaker Off to<br />
deactivate.)<br />
Unlock Phone to unlock your phone (appears only if the phone is<br />
locked).<br />
To exit Emergency mode:<br />
1. Press .<br />
2. Press Options (right softkey) to display the options.<br />
Call 911 to call 911.<br />
<br />
<br />
Call 911:Speaker to call 911 in speakerphone mode.<br />
My Phone# to display your phone number.<br />
Exit Emergency to exit Emergency mode.<br />
3. Highlight Exit Emergency and press .<br />
Section 2A: Your PCS Vision Phone – The Basics 25
In-Call Options<br />
During a call, your phone displays menu options when you press<br />
Options (right softkey).<br />
To select an option, highlight it and press .<br />
Flash to answer an incoming Call Waiting call or to connect a third<br />
party during Three-Way Calling.<br />
Mute or Unmute<br />
Select Mute to mute your phone’s microphone. Select Unmute to<br />
reactivate the microphone.<br />
Speaker On or Speaker Off to activate or deactivate speakerphone<br />
mode. You can adjust the speakerphone volume using the Side<br />
Volume key.<br />
Warning! Due to higher volume levels, do not place the phone near your ear<br />
during speakerphone use.<br />
<br />
<br />
<br />
<br />
<br />
<br />
<br />
Three -Way Call to call a third party.<br />
Call History to access the Call History menu. (See “Managing Call<br />
History” on page 83.)<br />
Contacts to access the Contacts menu. (See “Using the Contacts<br />
Directory” on page 88.)<br />
Messaging to access the Messaging menu. (See “PCS Messaging”<br />
on page 193.)<br />
Settings to access the Settings menu. (See “Controlling Your<br />
Phone’s Settings” on page 35.)<br />
Tools/Extras to access the Tools/Extras menu. (See “Personal<br />
Organizer” on page 99.)<br />
Voice Services to access the Voice Services menu. (See “Using<br />
Your Phone’s Voice Services” on page 123.)<br />
Note: The Flash menu appears only for Call Waiting and Three-Way Calling.<br />
The Mute menu does not appear during a 911 call. The Three-Way Call menu<br />
does not appear in Roaming areas.<br />
Section 2A: Your PCS Vision Phone – The Basics 26
End-of-Call Options<br />
To display the following options, press Options (right softkey) within<br />
10 seconds after disconnecting a call.<br />
To select an option, highlight it and press .<br />
Call Again to dial the phone number.<br />
<br />
<br />
Call:Speaker On to dial the phone number in speakerphone mode.<br />
Save Phone# to save the phone number in your Contacts list.<br />
Go to Phone Book appears when the number is already in your<br />
Contacts list. (See “Saving a Phone Number” below.)<br />
Note: The End-of-Call options are not displayed for calls identified as No ID or<br />
Restricted.<br />
Saving a Phone Number<br />
Your PCS Vision Phone can store up to 500 phone numbers in up to<br />
300 Contacts entries (an entry may contain up to seven numbers).<br />
Each entry’s name can contain 16 characters. Your phone<br />
automatically sorts the Contacts entries alphabetically. (For more<br />
information, see Section 2G: Using the Contacts Directory on page 88.)<br />
To save a number from standby mode:<br />
1. Enter a phone number.<br />
2. Press Options (right softkey).<br />
3. Highlight Save Phone# and press .<br />
4. Select a label by highlighting Mobile, Home, Work, Pager, Fax,<br />
Other, or No Label and press .<br />
5. Enter a name and press .<br />
If you have already stored entries in the Contacts list, you are<br />
prompted to select the following entry modes:<br />
New Name to enter a new name.<br />
From Ph. Book to select a name from the Contacts entry list.<br />
6. Press Save (left softkey).<br />
After you have saved the number, the new Contacts entry is<br />
displayed. (See “Contacts List Entry Options” on page 92.)<br />
Section 2A: Your PCS Vision Phone – The Basics 27
Finding a Phone Number<br />
You can search Contacts list entries for phone numbers that contain a<br />
specific string of numbers.<br />
To find a phone number:<br />
1. Enter the last four or more digits of the number and press<br />
Options (right softkey). The more numbers you enter, the more<br />
specific the search becomes.<br />
2. Highlight Find and press . (The Contacts entry that ends with<br />
the digits you entered appears.)<br />
3. Highlight your desired entry.<br />
Press to display the entry details.<br />
Press or to dial.<br />
Dialing and Saving Phone Numbers With Pauses<br />
You can dial or save phone numbers with pauses for use with<br />
automated systems, such as voicemail or credit card billing numbers.<br />
There are two types of pauses available on your phone:<br />
Hard Pause sends the next set of numbers when you press .<br />
2-Sec. Pause automatically sends the next set of numbers after<br />
two seconds.<br />
Note: You can have multiple pauses in a phone number and combine 2-second<br />
and hard pauses.<br />
To dial or save phone numbers with pauses:<br />
1. Enter the phone number and press Options (right softkey).<br />
2. Highlight either Hard Pause or 2-Sec. Pause and press .<br />
(Hard pauses are displayed as a “H” and 2-second pauses as a “T”.)<br />
3. Enter additional numbers (for example, a passcode or an<br />
extension).<br />
4. To dial the number, press or . (When dialing a number<br />
with a hard pause, press to send the next set of numbers.)<br />
– or –<br />
To save the number in your Contacts list, press Options (right<br />
softkey), highlight Save Phone#, and press .<br />
Section 2A: Your PCS Vision Phone – The Basics 28
Dialing From the Contacts Directory<br />
To dial directly from a Contacts entry:<br />
1. Press to access the main menu.<br />
2. Select Contacts and press .<br />
3. Select Find/Add Entry and press .<br />
Shortcut: Press the navigation key right to list entries.<br />
4. Use your navigation key to scroll through the Contacts list,<br />
highlight your desired entry, and press .<br />
5. Highlight the number you want to call.<br />
6. Press Options (right softkey) for the menu options.<br />
7. Highlight Call or Call:Speaker On and press to place a call.<br />
Tip: You can also place a call by pressing , , or Call (left softkey) during<br />
step 5 above.<br />
Note: The icons next to each entry represent the Contacts labels (for example,<br />
Mobile, Home, Work, etc.). A triangle next to an icon means there is another<br />
number for the entry. Press the navigation key right or left to select the desired<br />
label/number.<br />
Section 2A: Your PCS Vision Phone – The Basics 29
Using Speed Dialing<br />
With this feature, you can dial your favorite entries using one key press<br />
for locations 2-9. (See “Assigning Speed Dial Numbers” on page 94.)<br />
To use speed dial for voice calls:<br />
From standby mode, press and hold the appropriate key for<br />
approximately two seconds.<br />
– or –<br />
From standby mode, press the appropriate key and<br />
press or .<br />
The display confirms that the number has been dialed when it shows<br />
“Connecting...”.<br />
To use speed dial for PCS Ready Link calls:<br />
From standby mode, press the appropriate key then press and<br />
hold . (See “Setting Speed Dialing for PCS Ready Link<br />
Entries” on page 148.)<br />
The display confirms that the number has been dialed when it shows<br />
“R-Link calling...”.<br />
Note: Speed dialing is not available when you are roaming; when you are<br />
roaming off the Sprint Nationwide PCS Network, you must always dial using<br />
eleven digits (1 + area code + number).<br />
Using Abbreviated Dialing<br />
Abbreviated Dialing is another form of speed dialing. It allows you to<br />
dial a number by entering just the last four digits of any number in<br />
your Contacts directory. The Abbreviated Dialing option becomes<br />
available when you enter the last four digits of a phone number and<br />
press Options (right softkey).<br />
To place a call using Abbreviated Dialing:<br />
1. Dial the last four digits of a contact’s phone number.<br />
2. Press Options (right softkey) to display the dialing options.<br />
3. Highlight Abbrev. Dial and press , , or .<br />
Note: If there are two or more matched numbers in your Contacts list, the<br />
number that comes first alphabetically will be dialed. If there is no matched<br />
number, your phone dials the number you set for abbreviated dial with the last<br />
4-digits you entered. (See “Setting Abbreviated Dialing” on page 59.)<br />
Section 2A: Your PCS Vision Phone – The Basics 30
Entering Text<br />
Selecting a Character Input Mode<br />
Your PCS Vision Phone provides convenient ways to enter words,<br />
letters, punctuation, and numbers whenever you are prompted to<br />
enter text (for example, when adding a Contacts entry or when<br />
sending email messages).<br />
To change the character input mode:<br />
1. When you display a screen where you can enter text, press<br />
Mode (right softkey).<br />
2. Select a character input mode:<br />
T9 Word to enter characters using predictive<br />
T9 Text Input (see next page).<br />
Alphabet to enter characters by tapping the keypad<br />
(see page 33).<br />
SYMBOL to enter symbols (see page 34).<br />
NUMBER to enter numbers (see page 34).<br />
PRESET SUFFIX to enter a preset suffix (see page 34).<br />
SMILEYS to enter “emoticons” (see page 34).<br />
Section 2A: Your PCS Vision Phone – The Basics 31
Entering Characters Using T9 Text Input<br />
T9 Text Input lets you enter text in your PCS Vision Phone by<br />
pressing keys just once per letter. (To select the T9 Word mode when<br />
entering text, see “Selecting a Character Input Mode” on the<br />
previous page.)<br />
T9 Text Input analyzes the letters you enter using an intuitive word<br />
database and creates a suitable word. (The word may change as you<br />
enter more letters.) If the word you want does not display after you<br />
have entered all the letters, press to scroll through additional<br />
word selections. To accept a word and insert a space, press .<br />
If you make a mistake, press to erase a single character. Press and<br />
hold to delete an entire entry.<br />
Adding a Word to the T9 Database<br />
If a word you want to enter does not display as an option when you<br />
are using T9 Text Input, you can add it to the database.<br />
To add a word to the T9 Text Input database:<br />
1. Select the Alphabet input mode. (See “Selecting a Character<br />
Input Mode” on the previous page.)<br />
2. Enter the word using multi-tap text entry. (See “Entering<br />
Characters by Tapping the Keypad” on the next page.)<br />
3. Press Mode (right softkey), highlight T9 Word, and press .<br />
(The word will appear as an option the next time you scroll<br />
through options during T9 Text Input.)<br />
For more information about T9 Text Input, visit the Tegic Website at<br />
www.T9.com.<br />
Section 2A: Your PCS Vision Phone – The Basics 32
Entering Characters by Tapping the Keypad<br />
To enter characters by tapping the keypad, select the Alphabet mode<br />
(see “Selecting a Character Input Mode” on page 31). Press the<br />
corresponding key repeatedly until the desired character appears.<br />
By default, the first letter of an entry is capitalized and following<br />
letters are lowercase.<br />
Characters scroll in the following order:<br />
English Sequence<br />
Key<br />
Upper Case Lower Case<br />
In Spanish mode, characters scroll in the following order:<br />
Key<br />
. , @ 1 ? !<br />
* # /<br />
A B C 2<br />
D E F 3<br />
G H I 4<br />
J K L 5<br />
M N O 6<br />
P Q R S 7<br />
T U V 8<br />
W X Y Z 9<br />
Spanish Sequence<br />
Upper Case Lower Case<br />
. , @ 1 ¿ ? ¡ !<br />
* # /<br />
A Á B C 2<br />
D E É F 3<br />
G H I Í 4<br />
J K L 5<br />
M N Ñ O Ó 6<br />
P Q R S 7<br />
T U Ú Ü V 8<br />
W X Y Z 9<br />
a b c 2<br />
d e f 3<br />
g h i 4<br />
j k l 5<br />
m n o 6<br />
p q r s 7<br />
t u v 8<br />
w x y z 9<br />
0<br />
Space<br />
Unshifted One-character- shifted Caps Lock<br />
a á b c 2<br />
d e é f 3<br />
g h i í 4<br />
j k l 5<br />
m n ñ o ó 6<br />
p q r s 7<br />
t u ú ü v 8<br />
w x y z 9<br />
0<br />
Space<br />
Unshifted One-character- shifted Caps Lock<br />
(See page 63 for changing to Spanish language mode.)<br />
After a character is entered, the cursor automatically advances to the<br />
next space after two seconds or when you enter a character on a<br />
different key.<br />
Tip: The beginning of the word after the space is changed to upper/lower case<br />
depending on shift mode. You can change the shift mode by pressing .<br />
Section 2A: Your PCS Vision Phone – The Basics 33
Entering Symbols, Numbers, Preset Suffixes, and<br />
Smileys<br />
To enter symbols:<br />
1. In a text entry field, press Mode (right softkey).<br />
2. Highlight SYMBOL and press .<br />
3. Highlight the line that includes your desired symbol.<br />
4. Press the corresponding key (1-8) with each symbol.<br />
– or –<br />
Highlight your desired symbol by using the navigation key and<br />
press .<br />
To enter numbers:<br />
1. In a text entry field, press Mode (right softkey).<br />
2. Highlight NUMBER and press .<br />
3. Press the corresponding number key to enter the number.<br />
Shortcut: Press and hold the corresponding number key to enter the number<br />
directly in alphabet mode or T9 mode.<br />
To enter preset suffixes:<br />
The Preset Suffix menu is a preprogrammed list of common prefixes,<br />
suffixes, and punctuation strings (for example, “www.”, “.com”, and<br />
“//”) designed to make text entry easier and more efficient.<br />
1. In a text entry field, press Mode (right softkey).<br />
2. Highlight PRESET SUFFIX and press .<br />
3. Highlight your desired word by using the navigation key and<br />
press .<br />
To enter “emoticons”(smileys):<br />
1. In a text entry field, press Mode (right softkey).<br />
2. Highlight SMILEYS and press .<br />
3. Highlight the line that includes your desired smiley.<br />
4. Press the corresponding key (1-4) with each smiley.<br />
– or –<br />
Highlight your desired smiley by using the navigation key and<br />
press .<br />
Note: Preset Suffix and Smileys do not apply in PCS Ready Link mode.<br />
Section 2A: Your PCS Vision Phone – The Basics 34
Section 2B<br />
Controlling Your Phone’s Settings<br />
In This Section<br />
<br />
<br />
<br />
<br />
<br />
<br />
Sound Settings<br />
Display Settings<br />
Location Settings<br />
Airplane Mode<br />
TTY Use With PCS Service From Sprint<br />
Phone Setup Options<br />
Using the menu options available on your PCS Vision Phone, you can<br />
customize your phone to sound, look, and operate just the way you want it to.<br />
This section describes how you can change your phone’s settings to<br />
best suit your needs. Take a few moments to review these options and<br />
to adjust or add settings that are right for you.<br />
Section 2B: Controlling Your Phone’s Settings 35
Sound Settings<br />
Ringer Types<br />
Ringer types help you identify incoming calls and messages. You can<br />
assign ringer types to individual Contacts entries, types of calls, and<br />
types of messages.<br />
Preprogrammed Ringers include a variety of standard ringer types<br />
and familiar music.<br />
Vibrating Ringer alerts you to calls or messages without<br />
disturbing others.<br />
Downloaded Ringers can be downloaded right to your phone.<br />
(See “<strong>Downloading</strong> Premium Services Content” on page 208 and<br />
“Ringers” on page 212.)<br />
Selecting Ringer Types for Voice Calls<br />
Your PCS Vision Phone provides a variety of ringer options that allow<br />
you to customize your ringer and volume settings. These options<br />
allow you to identify incoming calls by the ringer.<br />
To select a ringer type for voice calls:<br />
1. Press to access the main menu.<br />
2. Select Settings and press .<br />
3. Select Sounds and press .<br />
4. Select Ringer Type and press .<br />
5. Select Voice Calls and press .<br />
6. Select the menu under With Caller ID or No Caller ID and press .<br />
7. Select your desired ringer type and press .<br />
<br />
<br />
<br />
<br />
Ringer Type to select a ringer type. Scroll through available<br />
ringers to hear previews.<br />
Ringer & Voice to notify you with Ringer & Voice for voice calls.<br />
Vibrate to notify you by vibrating.<br />
Get New to start up the browser so you can select an item to<br />
download (see page 115).<br />
Section 2B: Controlling Your Phone’s Settings 36
To select a distinctive ringer for voice calls while roaming:<br />
1. Follow steps 1-5 on the previous page.<br />
2. Select the menu under Roaming and press .<br />
3. Select Distinctive and press .<br />
<br />
<br />
To confirm the ringer, press Play (right softkey).<br />
If you want to deactivate this feature, select Normal during<br />
step 3 above.<br />
Selecting Ringer Types for PCS Ready Link Calls<br />
To select a ringer type for PCS Ready Link calls:<br />
1. Press to access the main menu.<br />
2. Select Settings and press .<br />
3. Select Sounds and press .<br />
4. Select Ringer Type and press .<br />
5. Select Ready Link Calls and press .<br />
6. Select the menu under Ready Link Calls and press .<br />
7. Select your desired ringer type and press .<br />
<br />
Ringer Type to select a ringer type. Scroll through available<br />
ringers to hear previews.<br />
Section 2B: Controlling Your Phone’s Settings 37
Selecting Ringer Types for Missed PCS Ready Link Calls<br />
To select a ringer type for Missed PCS Ready Link calls:<br />
1. Press to access the main menu.<br />
2. Select Settings and press .<br />
3. Select Sounds and press .<br />
4. Select Ringer Type and press .<br />
5. Select R-Link Missed and press .<br />
6. Select the menu under R-Link Missed and press .<br />
7. Select your desired ringer type and press .<br />
<br />
<br />
Ringer Type to select a ringer type. Scroll through available<br />
ringers to hear previews.<br />
Vibrate to notify you by vibrating.<br />
Selecting Ringer Types for Voicemail<br />
To select a ringer type for voicemail:<br />
1. Press to access the main menu.<br />
2. Select Settings and press .<br />
3. Select Sounds and press .<br />
4. Select Ringer Type and press .<br />
5. Select Voicemail and press .<br />
6. Select the menu under Voicemail and press .<br />
7. Select your desired ringer type and press .<br />
<br />
<br />
<br />
<br />
Ringer Type to select a ringer type. Scroll through available<br />
ringers to hear previews.<br />
Voice Ringer to notify you with Voice for voicemail.<br />
Vibrate to notify you by vibrating.<br />
Get New to start up the browser so you can select an item to<br />
download (see page 115).<br />
Section 2B: Controlling Your Phone’s Settings 38
Selecting Ringer Types for Messages<br />
To select a ringer type for messages:<br />
1. Press to access the main menu.<br />
2. Select Settings and press .<br />
3. Select Sounds and press .<br />
4. Select Ringer Type and press .<br />
5. Select Messaging and press .<br />
6. Select the menu under Messaging and press .<br />
7. Select your desired ringer type and press .<br />
<br />
<br />
<br />
<br />
Ringer Type to select a ringer type. Scroll through available<br />
ringers to hear previews.<br />
Voice Ringer to notify you with Voice for Messages.<br />
Vibrate to notify you by vibrating.<br />
Get New to start up the browser so you can select an item to<br />
download (see page 115).<br />
Selecting Ringer Types for Calendar<br />
To select a ringer type for calendar:<br />
1. Press to access the main menu.<br />
2. Select Settings and press .<br />
3. Select Sounds and press .<br />
4. Select Ringer Type and press .<br />
5. Select Calendar and press .<br />
6. Select the menu under Calendar and press .<br />
7. Select your desired type and press .<br />
<br />
<br />
<br />
<br />
Ringer Type to select a ringer type. Scroll through available<br />
ringers to hear previews.<br />
Voice Ringer to notify you with Voice for calendar events.<br />
Vibrate to notify you by vibrating.<br />
Get New to start up the browser so you can select an item to<br />
download (see page 115).<br />
Section 2B: Controlling Your Phone’s Settings 39
Selecting a Tone Length<br />
Longer tone lengths may be better for tone recognition when dialing<br />
voicemail or other automated systems.<br />
To select a tone length:<br />
1. Press to access the main menu.<br />
2. Select Settings and press .<br />
3. Select Sounds and press .<br />
4. Select Others and press .<br />
5. Select the menu under Tone Length and press .<br />
6. Select Short or Long and press .<br />
Setting a Start-up/Power-off Tone<br />
1. Follow steps 1-4 in “Selecting a Tone Length.”<br />
2. Select the menu under Start-up Tone or Power-off Tone and<br />
press .<br />
3. Select your desired tone and press .<br />
<br />
<br />
Tone to select a tone. Scroll through available tones to hear<br />
previews.<br />
Get New to start up the browser so you can select a tone to<br />
download (see page 115).<br />
Tip: You can set the volume of Start-up Tone and Power-off Tone. See next page.<br />
Using Voice Prompt<br />
This feature allows you to hear voice prompts at Voice Memo,<br />
Screen Call setting, Voice Dial, etc. (default setting is On).<br />
To deactivate this feature:<br />
1. Press to access the main menu.<br />
2. Select Settings and press .<br />
3. Select Sounds and press .<br />
4. Select Others and press .<br />
5. Select the menu under Voice Prompt and press .<br />
6. Select Off and press .<br />
Tip: When ringer volume is set to “Silence All,” voice prompts cannot be heard.<br />
Section 2B: Controlling Your Phone’s Settings 40
Adjusting the Phone’s Volume Settings<br />
You can adjust your phone’s volume settings to suit your needs and<br />
your environment.<br />
To adjust the ringer, start-up/power-off, or key beep volume:<br />
1. Press to access the main menu.<br />
2. Select Settings and press .<br />
3. Select Sounds and press .<br />
4. Select Ringer/Key Vol. and press .<br />
5. Select the item you wish to change and press .<br />
<br />
<br />
Ringer Volume to adjust Ringer tone volume.<br />
Start-up/Pw-off to adjust Start-up/Power-off tone volume.<br />
Key Beep to adjust Key Beep tone volume.<br />
6. Adjust a volume level by pressing the navigation key up or down<br />
and press .<br />
Ringer Off to set the Voice Call ringer volume to off. (Only<br />
appears in Ringer Volume setting.)<br />
Silence All to set all the ringer volumes settings to off.<br />
(Only appears in Ringer Volume setting. See “Silence All” on<br />
page 43.)<br />
To adjust the earpiece or speaker volume:<br />
1. Follow steps 1-3 above.<br />
2. Select Receiver Vol. and press .<br />
3. Select either Earpiece or Speaker and press .<br />
4. Adjust a volume level by pressing the navigation key up or down<br />
and press .<br />
Tip: You can adjust the ringer volume in standby mode (or the earpiece volume<br />
during a call) by using the Side Volume key.<br />
Section 2B: Controlling Your Phone’s Settings 41
Alert Notification<br />
Your PCS Phone can alert you with an audible tone when you change<br />
service areas, once a minute during a voice call, for incoming or<br />
missed PCS Ready Link calls, or when a call has been connected.<br />
Service sets alert on or off for network services parameter<br />
changes.<br />
Ready Link Calls sets an alert to notify you of PCS Ready Link calls.<br />
<br />
<br />
<br />
<br />
<br />
R-Link Missed sets an alert to notify you of missed PCS Ready Link<br />
calls.<br />
Voicemail sets an alert to notify you of voice messages.<br />
Messaging sets an alert to notify you of text messages.<br />
Minute Beep sets a minute reminder that beeps ten seconds before<br />
the end of each minute during a call.<br />
Signal Fade sets an alert to notify you when your phone loses a<br />
signal during a call.<br />
To set alerts:<br />
1. Press to access the main menu.<br />
2. Select Settings and press .<br />
3. Select Sounds and press .<br />
4. Select Alerts and press .<br />
5. Select your desired option and press .<br />
6. If you selected Service, Minute Beep, or Signal Fade, select On and<br />
press . If you selected Ready Link Calls, R-Link Missed,<br />
Voicemail, or Messaging, select Once or Repeat Alert and press .<br />
<br />
To deactivate this feature, select Off during step 6 above.<br />
Tip: Repeat Alert sounds an alert every two minutes for twenty minutes.<br />
Tip: To set alerts for PCS Ready Link calls, see “Setting an Alert Notification for<br />
PCS Ready Link Calls” on page 150 for details.<br />
Section 2B: Controlling Your Phone’s Settings 42
Silence All<br />
There may be times when you need to silence your phone entirely.<br />
The phone’s Silence All option allows you to mute all sounds without<br />
turning your phone off.<br />
To activate Silence All:<br />
1. Press to access the main menu.<br />
2. Select Settings and press .<br />
3. Select Sounds and press .<br />
4. Select Ringer/Key Vol. and press .<br />
5. Select Ringer Volume and press .<br />
6. Press the navigation key down until Silence All appears on the<br />
display and press .<br />
Tip: When Ringer Volume is set as Silence All, other items are changed to Off and<br />
cannot be highlighted.<br />
To deactivate Silence All:<br />
Press the volume key up repeatedly to select a desired<br />
volume level.<br />
Section 2B: Controlling Your Phone’s Settings 43
Display Settings<br />
Changing the Text Greeting<br />
The text greeting can be up to fifteen characters and is displayed on<br />
your phone’s screen in standby mode. You may choose to display a<br />
custom greeting or you may display “Sprint” on the phone’s screen.<br />
To display or change your custom greeting:<br />
1. Press to access the main menu.<br />
2. Select Settings and press .<br />
3. Select Display and press .<br />
4. Select Greeting and press .<br />
5. Select Custom and press .<br />
You can customize the greeting by entering a personalized<br />
greeting. (See “Entering Text” on page 31.)<br />
6. Press .<br />
To display the default greeting (“Sprint”):<br />
1. Follow steps 1-4 above.<br />
2. Select Default and press .<br />
<br />
When you are in PCS Ready Link mode, “Ready Link”<br />
appears on the display instead of “Sprint.”<br />
Section 2B: Controlling Your Phone’s Settings 44
Changing the Backlight Time Length<br />
The backlight setting lets you select how long the display screen and<br />
keypad are backlit after any key press is made.<br />
To change the Main LCD or Sub LCD backlight setting:<br />
1. Press to access the main menu.<br />
2. Select Settings and press .<br />
3. Select Display and press .<br />
4. Select Backlight and press .<br />
5. Select Main LCD or Sub LCD and press .<br />
6. Select Always On, Always Off, or your defined time length and<br />
press .<br />
Always Off always turns the backlight off.<br />
<br />
Always On keeps the backlight on indefinitely.<br />
Note: The Always On setting returns to the previous value the next time you turn<br />
on the phone.<br />
To change the Keypad backlight setting:<br />
1. Select Key during step 5 above, and press .<br />
2. Select Always Off or your defined time length and press .<br />
Note: Long backlight settings affect the battery’s talk and standby times.<br />
Section 2B: Controlling Your Phone’s Settings 45
Changing the Display Screen Animation<br />
Your new PCS Vision Phone offers options for what you see on the<br />
display screen during various phone functions.<br />
To change the display animation:<br />
1. Press to access the main menu.<br />
2. Select Settings and press .<br />
3. Select Display and press .<br />
4. Select Animation and press .<br />
5. Select Standby, Outgoing Calls, or Service Search, and press .<br />
6. Select the menu under the item and press .<br />
7. Select your desired option and press .<br />
<br />
<br />
<br />
<br />
Press Preview (right softkey) to see a sample display.<br />
For standby, you will also set the animation starting time.<br />
Select the option under after and press , then highlight<br />
your desired setting time and press .<br />
Get New to start up the browser so you can select an item to<br />
download (see page 116).<br />
To deactivate this feature, select Off during step 7 above.<br />
Section 2B: Controlling Your Phone’s Settings 46
Changing the Display for Incoming Calls<br />
You can set the color or downloaded image to be shown on the<br />
Incoming Calls display.<br />
To set your incoming calls display:<br />
1. Press to access the main menu.<br />
2. Select Settings and press .<br />
3. Select Display and press .<br />
4. Select Incoming Calls and press .<br />
5. Select the menu under Incoming Calls and press .<br />
6. Select your desired color or downloaded image and press .<br />
<br />
<br />
<br />
<br />
<br />
<br />
<br />
Preset to select the pre-programmed color image.<br />
Off to turn the image type off.<br />
Downloads to set a downloaded image saved in your phone.<br />
Get New to start up the browser so you can select an item to<br />
download (see page 116).<br />
In Camera to set a picture saved in your In Camera folder.<br />
Saved to Ph. to set a picture saved in your Saved to Phone<br />
folder.<br />
Press Preview (right softkey) during step 6 above to see an<br />
example display. Press the right softkey to switch between<br />
Main/Sub LCD’s display preview.<br />
Section 2B: Controlling Your Phone’s Settings 47
Changing the Display for Area Name<br />
This feature enables you to show the area of the phone number you<br />
are calling or are called from when the number is not registered in<br />
your Contacts list. For example, a call to or from 213-555-5555 will<br />
display “California.”<br />
To set your area name display:<br />
1. Press to access the main menu.<br />
2. Select Settings and press .<br />
3. Select Display and press .<br />
4. Select Match Area Code and press .<br />
5. Select On or Off and press .<br />
<br />
<br />
This feature is available only when the phone number is<br />
10 digits, or 11 digits beginning with 1 and matches an<br />
area code.<br />
The area name will not be displayed for numbers in your<br />
Contacts list or for incoming calls when an Animation<br />
Ringer is assigned.<br />
Section 2B: Controlling Your Phone’s Settings 48
Changing the Display for Standby Mode<br />
This feature enables you to select a variety of items to display in<br />
standby mode.<br />
To set your standby display:<br />
1. Press to access the main menu.<br />
2. Select Settings and press .<br />
3. Select Display and press .<br />
4. Select Standby Display and press .<br />
5. Select your desired item and press .<br />
<br />
<br />
<br />
<br />
<br />
Screen Saver selects the screen saver to display.<br />
Calendar displays the Calendar.<br />
Digital Clock displays the local time in digital view.<br />
Analog Clock displays the local time in analog view.<br />
World Clock displays the time of the selected city or country<br />
along with the local time. You can scroll the World Clock list<br />
by pressing the navigation key right or left. Press Summer<br />
(left softkey) or Standard (right softkey) to change between<br />
Daylight Savings and standard time if applicable. (The “ ”<br />
icon indicates Daylight Savings time.)<br />
Tip: You can also display the World Clock from Tools/Extras menu. (See “Using<br />
the World Clock” on page 112.)<br />
Default returns the standby display to its default setting.<br />
6. Press to save the setting to follow each system prompt or<br />
when confirming the preview display.<br />
Tip: In an area without service, Screen Saver, Calendar, Digital Clock,<br />
Analog Clock, or World Clock cannot be shown on the standby display.<br />
Section 2B: Controlling Your Phone’s Settings 49
Changing the Screen Saver<br />
Your new PCS Phone offers you the option of displaying a screen<br />
saver while in standby mode.<br />
To assign a screen saver:<br />
1. Press to access the main menu.<br />
2. Select Settings and press .<br />
3. Select Display and press .<br />
4. Select Standby Display and press .<br />
5. Select Screen Saver and press .<br />
6. Select the menu under Screen Saver and press .<br />
7. Select your desired screen saver and press .<br />
<br />
<br />
<br />
<br />
Preset to select a pre-installed screen saver.<br />
Downloads to set a downloaded image saved in your phone.<br />
Get New to start up the browser so you can select an item to<br />
download (see page 116).<br />
In Camera to set a picture saved in your In Camera folder.<br />
Saved to Ph. to set a picture saved in your Saved to Phone<br />
folder.<br />
8. Press Save (left softkey) to save the screen saver.<br />
<br />
To see a display preview of an image, press Preview (right<br />
softkey) during step 7 above. Press the right softkey to<br />
switch between Main/Sub LCD’s display preview.<br />
Section 2B: Controlling Your Phone’s Settings 50
Changing the Display for My Buddy<br />
This feature enables you to see a funny animation for 30 seconds on<br />
the Main LCD by opening the flip.<br />
To activate or deactivate My Buddy:<br />
1. Press to access the main menu.<br />
2. Select Settings and press .<br />
3. Select Display and press .<br />
4. Select My Buddy and press .<br />
5. Select On or Off and press .<br />
<br />
<br />
Press Preview (right softkey) during step 5 above to see a<br />
display preview. Press the right softkey to switch between<br />
Main/Sub LCD’s display preview.<br />
Press Info (left softkey) to see My Buddy information.<br />
Changing the Background<br />
You can customize your phone display’s appearance by selecting a<br />
color scheme to reflect your personality.<br />
To change the display’s background:<br />
1. Press to access the main menu.<br />
2. Select Settings and press .<br />
3. Select Display and press .<br />
4. Select Background and press .<br />
5. Select Main LCD or Sub LCD and press .<br />
6. Select your desired color and press .<br />
Section 2B: Controlling Your Phone’s Settings 51
Changing the Font Size<br />
You can change the font size settings for the message notification and<br />
browser.<br />
To change the font size:<br />
1. Press to access the main menu.<br />
2. Select Settings and press .<br />
3. Select Display and press .<br />
4. Select Font Size and press .<br />
5. Select either Message or Browser and press .<br />
6. Select your desired font size.<br />
Press Preview (right softkey) to display a font size example.<br />
7. Press to set the selected font.<br />
Tip: From the font example display, select your desired font size by pressing the<br />
navigation key right or left.<br />
Section 2B: Controlling Your Phone’s Settings 52
Location Settings<br />
Your PCS Vision Phone is equipped with a Location feature for use in<br />
connection with location-based services that may be available<br />
in the future.<br />
The Location feature allows the network to detect your position.<br />
Turning Location off will hide your location from everyone<br />
except 911.<br />
Note: Even if the Location feature is enabled, no service may use your location<br />
without your express permission.<br />
To enable your phone’s Location feature:<br />
1. Press to access the main menu.<br />
2. Select Settings and press .<br />
3. Select Location and press .<br />
4. You will see a message on the display. Press or OK (left<br />
softkey) to continue.<br />
Press the navigation key down to read the whole message.<br />
5. Select On and press .<br />
To deactivate this feature, select Off during step 5 above.<br />
When the Location feature is on, your phone’s standby screen will<br />
display the icon. When Location is turned off, the icon will<br />
display.<br />
Section 2B: Controlling Your Phone’s Settings 53
Airplane Mode<br />
Airplane Mode allows you to use many of your phone’s features, such<br />
as Games, Voice Memos, etc., when you are in an airplane or in any<br />
other area where making or receiving calls or data is prohibited.<br />
When your phone is in Airplane Mode, it cannot send or receive any<br />
calls or access online information.<br />
To set your phone to Airplane Mode:<br />
1. Press to access the main menu.<br />
2. Select Settings and press .<br />
3. Select Others and press .<br />
4. Select Airplane Mode and press .<br />
5. You will see a message on the display. Press or OK (left<br />
softkey) to continue.<br />
Press Cancel (right softkey) to return to previous menu.<br />
6. Select On and press .<br />
To deactivate this feature, select Off during step 6.<br />
While in Airplane Mode, your phone’s standby screen will display<br />
“Phone Off.”<br />
Section 2B: Controlling Your Phone’s Settings 54
TTY Use With PCS Service From Sprint<br />
A TTY (also known as a TDD or Text Telephone) is a<br />
telecommunications device that allows people who are deaf or hard<br />
of hearing, or who have speech or language disabilities, to<br />
communicate by telephone.<br />
Your phone is compatible with select TTY devices. Please check with<br />
the manufacturer of your TTY device to ensure that it supports digital<br />
wireless transmission. Your phone and TTY device will connect via a<br />
special cable that plugs into your phone’s headset jack. If this cable<br />
was not provided with your TTY device, contact your TTY device<br />
manufacturer to purchase the connector cable.<br />
When establishing your PCS Service, please call PCS Customer<br />
Solutions via the state Telecommunications Relay Service (TRS) by<br />
first dialing<br />
. Then provide the state TRS with<br />
this number: 866-727-4889.<br />
To turn TTY mode on or off:<br />
1. Press to access the main menu.<br />
2. Select Settings and press .<br />
3. Select Others and press .<br />
4. Select TTY and press . (You will see a message on the display.)<br />
5. Press or OK (left softkey) to continue.<br />
6. Select Enable or Disable and press .<br />
Note: When you connect TTY devices, your phone will display in TTY mode.<br />
If TTY mode is enabled, the audio quality of non-TTY devices connected to the<br />
headset jack may be impaired.<br />
IMPORTANT NOTICE: 911 Emergency Calling<br />
Sprint recommends that TTY users make Emergency calls by other means,<br />
including Telecommunications Relay Services (TRS), analog cellular, and<br />
landline communications. Wireless TTY calls to 911 may be corrupted when<br />
received by public safety answering points (PSAPs) rendering some<br />
communications unintelligible. The problem encountered appears related to TTY<br />
equipment or software used by PSAPs. This matter has been brought to the<br />
attention of the FCC, and the wireless industry and PSAP community are<br />
currently working to resolve this.<br />
Section 2B: Controlling Your Phone’s Settings 55
Phone Setup Options<br />
Shortcut<br />
Your phone offers you the option of assigning a shortcut key to a<br />
favorite or often-used function. Pressing the navigation key to the left<br />
in standby mode will launch your personally designated shortcut.<br />
To assign your shortcut key:<br />
1. Press to access the main menu.<br />
2. Select Settings and press .<br />
3. Select Others and press .<br />
4. Select My Shortcut and press .<br />
5. Select the menu under My Shortcut and press .<br />
6. Select your desired menu option and press .<br />
<br />
Press Info (right softkey) during step 5 above to see an<br />
information screen.<br />
Auto Answer Mode<br />
You may set your phone to automatically pick up incoming calls<br />
when connected to an optional hands-free car kit and headset (sold<br />
separately).<br />
To set Auto Answer mode:<br />
1. Press to access the main menu.<br />
2. Select Settings and press .<br />
3. Select Others and press .<br />
4. Select Auto Answer and press .<br />
5. Select Car Kit/Headset or Speaker Phone and press .<br />
6. Select either 5 Seconds or 15 Seconds and press .<br />
<br />
To deactivate this feature, select Off during step 6 above.<br />
Section 2B: Controlling Your Phone’s Settings 56
Setting the Open/Close Flip Option<br />
This feature enables you to answer an incoming call by opening the<br />
flip or to end a call by closing the flip.<br />
To activate the Open Flip feature:<br />
1. Press to access the main menu.<br />
2. Select Settings and press .<br />
3. Select Others and press .<br />
4. Select Open/Close Flip and press .<br />
5. Select Open and press .<br />
6. Select Answer Call and press .<br />
To deactivate this feature, select No Action during step 6.<br />
To activate the Close Flip feature:<br />
1. Follow steps 1-4 above.<br />
2. Select Close and press . (You will see a message on the display.)<br />
3. Press OK (left softkey) to continue.<br />
4. Select End Call and press .<br />
To deactivate this feature, select Mute during step 4.<br />
Note: This feature does not apply when you are using the speakerphone,<br />
a headset, or a car kit.<br />
Section 2B: Controlling Your Phone’s Settings 57
Setting Any Key Answer<br />
This feature allows you to answer incoming calls by pressing<br />
any key (except , , , , , , Side Camera Key,<br />
Softkey [right], or Navigation Key).<br />
To activate this feature:<br />
1. Press to access the main menu.<br />
2. Select Settings and press .<br />
3. Select Others and press .<br />
4. Select Any Key Answer and press .<br />
5. Select On and press .<br />
<br />
To deactivate this feature, select Off during step 5 above.<br />
Setting the Side Key Guard<br />
This feature enables you to lock your side keys (Ready Link [Memo]<br />
button, Side Volume key, Side Call key, and Side Camera key) while<br />
the flip is closed.<br />
To activate this feature:<br />
1. Press to access the main menu.<br />
2. Select Settings and press .<br />
3. Select Others and press .<br />
4. Select Side Key Guard and press .<br />
5. Select On and press .<br />
<br />
<br />
Key Guard appears on the Sub LCD when you press any side<br />
key while the flip is closed.<br />
To deactivate this feature, select Off during step 5 above.<br />
Note: This feature does not apply when the flip is open.<br />
Section 2B: Controlling Your Phone’s Settings 58
Setting Abbreviated Dialing<br />
Abbreviated Dialing is another form of speed dialing. It allows you to<br />
dial a number by entering just the last four digits of any number in<br />
your Contacts Directory. If the last four digits you enter do not match<br />
any stored Contacts entry, the digits are automatically prepended<br />
with the area code and prefix you specify.<br />
To activate this feature:<br />
1. Press to access the main menu.<br />
2. Select Settings and press .<br />
3. Select Others and press .<br />
4. Select Abbrev. Dial and press .<br />
5. Select Enable and press .<br />
6. Enter a six-digit number (area code and prefix) and press or<br />
OK (left softkey).<br />
To deactivate this feature, highlight Disable during step 5<br />
above.<br />
Tip: If you enter fewer than 6 digits, the display shows a warning message.<br />
(See “Using Abbreviated Dialing” on page 30.)<br />
Section 2B: Controlling Your Phone’s Settings 59
Headset Mode<br />
This feature allows you hands-free phone use. Set the headset mode<br />
to Voice Call or Ready Link and press the Turbo Button (the operation<br />
button) on the headset to activate useful functions.<br />
To set headset mode:<br />
1. Press to access the main menu.<br />
2. Select Settings and press .<br />
3. Select Others and press .<br />
4. Select Headset Mode and press .<br />
5. Select Voice Call or Ready Link and press .<br />
<br />
<br />
Press Info (right softkey) during step 5 above to see the<br />
Headset Mode information screen.<br />
To deactivate this feature, select Off during step 5 above.<br />
Using the phone with headset mode activated:<br />
<br />
<br />
Voice Call: Press the Turbo Button to activate Voice dial. Press<br />
twice to redial the last call. Press and hold the button to record a<br />
Voice Memo.<br />
Ready Link: Press and hold the Turbo Button to redial the last<br />
PCS Ready Link call.<br />
Note: If your headset doesn’t have a Turbo Button, set headset mode to Off.<br />
Sleep Mode<br />
This feature helps conserve your battery power by restricting the<br />
display.<br />
To set sleep mode:<br />
1. Press to access the main menu.<br />
2. Select Settings and press .<br />
3. Select Display and press .<br />
4. Select Sleep Mode and press .<br />
5. Select Main LCD or Sub LCD and press .<br />
6. Select your desired option and press .<br />
<br />
To deactivate this feature, highlight Off during step 6 above.<br />
Section 2B: Controlling Your Phone’s Settings 60
Setting Message Notification<br />
You can see a pop-up message notification when you receive a text<br />
message or Voicemail while you are in PCS Vision applications,<br />
browser mode, or Voice Calls.<br />
To set message notification:<br />
1. Press to access the main menu.<br />
2. Select Settings and press .<br />
3. Select Messaging and press .<br />
4. Select Display Pop-up and press .<br />
5. Highlight the box and press to check/uncheck the box next<br />
to Games/Apps, Browser, or Voice Calls.<br />
6. Press Save (left softkey).<br />
<br />
Press Info (right softkey) during step 5 above to see the<br />
Messages information.<br />
Editing Preset Messages<br />
Your phone can store pre-set messages for use with text messaging<br />
and Picture Mail. You can edit your phone’s default preset messages<br />
through the Settings menu. (For more information on using preset<br />
messages, see page 195.)<br />
To edit your phone’s preset messages:<br />
1. Press to access the main menu.<br />
2. Select Settings and press .<br />
3. Select Messaging and press .<br />
4. Select Preset Msgs and press .<br />
5. Select the message you want to edit and press .<br />
6. Use your keypad to edit the message and press OK (left softkey)<br />
or to save your changes. (“Preset Msg Saved” will display.)<br />
To reset all messages, press Options (right softkey), select<br />
Reset All Msgs, and press during step 5 above.<br />
Note: For information on editing text, see “Entering Text” on page 31.<br />
Section 2B: Controlling Your Phone’s Settings 61
Setting a Callback Number<br />
With this feature, you can notify your recipients of your callback<br />
number with the text message.<br />
To set the callback number:<br />
1. Press to access the main menu.<br />
2. Select Settings and press .<br />
3. Select Messaging and press .<br />
4. Select Send Callback# and press .<br />
5. Select an option from the following and press .<br />
<br />
<br />
<br />
None to send no callback number.<br />
My Phone# to send your phone number.<br />
Other to send a specific callback number. To set a number,<br />
enter a phone number and press .<br />
Setting the Current Time<br />
To set the current time when you are roaming in an area with no<br />
digital network:<br />
1. Press to access the main menu.<br />
2. Select Settings and press .<br />
3. Select Others and press .<br />
4. Select Set Time/Date and press .<br />
5. Set the current time and date and press .<br />
Note: This feature is only available when you are in an area with no digital<br />
network available.<br />
Section 2B: Controlling Your Phone’s Settings 62
Display Language<br />
You can choose to display your PCS Phone’s onscreen menus in<br />
English or in Spanish.<br />
To assign a language for the phone’s display:<br />
1. Press to access the main menu.<br />
2. Select Settings and press .<br />
3. Select Others and press .<br />
4. Select Language and press .<br />
5. Select English or Español and press .<br />
Using the Mini Flashlight<br />
This function allows you to use the phone’s camera flash as a<br />
miniature flashlight. To use this function, your phone must be in<br />
standby mode with the Side Key Guard unlocked. (See page 58 for<br />
unlocking the Side Key Guard.)<br />
To use the mini flashlight:<br />
<br />
With the phone closed and in standby mode, press and hold the<br />
Side Volume key ( ). (The light flashes for 8 seconds.)<br />
Note: This function doesn’t apply when a Missed Call or Notification is displayed.<br />
Section 2B: Controlling Your Phone’s Settings 63
Section 2C<br />
Setting Your Phone’s Security<br />
In This Section<br />
<br />
<br />
<br />
<br />
<br />
<br />
<br />
<br />
<br />
<br />
Accessing the Security Menu<br />
Using Your Phone’s Lock Feature<br />
Restricting Calls<br />
Using Special Numbers<br />
Erasing the Contacts Directory<br />
Erasing All Downloads<br />
Resetting Your Pictures Account<br />
Resetting Your Phone<br />
Resetting and Locking Your Phone Through SMS<br />
Security Features for PCS Vision SM<br />
By using the security settings on your PCS Vision Phone, you receive<br />
peace of mind without sacrificing flexibility. This section will<br />
familiarize you with your phone’s security settings. With several<br />
options available, you can customize your phone to meet your<br />
personal needs.<br />
Section 2C: Setting Your Phone’s Security 64
Accessing the Security Menu<br />
All of your phone’s security settings are available through the<br />
Security menu. You must enter your lock code to view the<br />
Security menu.<br />
To access the Security menu:<br />
1. Press to access the main menu.<br />
2. Select Settings and press .<br />
3. Select Security and press .<br />
4. Enter your lock code. (The Security menu is displayed.)<br />
Tip: If you can’t recall your lock code, try using the last four digits of either your<br />
Social Security number or PCS Phone Number or try 0000. If none of these work,<br />
call PCS Customer Solutions at 1-888-211-4PCS (4727).<br />
Section 2C: Setting Your Phone’s Security 65
Using Your Phone’s Lock Feature<br />
Locking Your Phone<br />
When your phone is locked, you can only receive incoming calls or<br />
make calls to 911, PCS Customer Solutions, or special numbers.<br />
To lock your phone:<br />
1. From the Security menu (see “Accessing the Security Menu” on<br />
the previous page), select Lock Phone and press .<br />
2. Highlight Lock Now or On Power-up and press .<br />
3. Depending on your preference, highlight either Full Lock or<br />
Excp. Incom.Calls and press .<br />
<br />
<br />
Full Lock: No phone calls can be made, except for<br />
Emergency number, (PCS Customer Solutions),<br />
or special numbers. No phone calls can be received except<br />
for special numbers.<br />
Excp. Incom.Calls: No phone calls can be made, except for<br />
Emergency number, (PCS Customer Solutions),<br />
or special numbers, but all incoming calls can be received.<br />
Tip: If you want to cancel the “On Power-up” setting before turning the phone off,<br />
select Unlocked during step 2 above.<br />
Unlocking Your Phone<br />
To unlock your phone:<br />
1. Press Unlock (left softkey).<br />
2. Enter your lock code. (Your phone will unlock and return to<br />
standby mode.)<br />
Section 2C: Setting Your Phone’s Security 66
Locking the Pictures Menu<br />
With this feature,you must enter your lock code when you access the<br />
Pictures menu.<br />
To lock the Pictures menu:<br />
1. From the Security Menu (see “Accessing the Security Menu” on<br />
page 65), select Lock Picture and press .<br />
2. Select Lock Now and press .<br />
To deactivate this feature, select Unlocked during step 2<br />
above.<br />
Changing the Lock Code<br />
To change your lock code:<br />
1. From the Security Menu display (see “Accessing the Security<br />
Menu” on page 65), select Others and press .<br />
2. Select Change Lock and press .<br />
3. Enter a new lock code, (“1234” for example) under New Code.<br />
4. Reenter the new code under Reenter Code.<br />
Calling in Lock Mode<br />
You can place calls to 911, PCS Customer Solutions, and to your<br />
special numbers when in lock mode. (For information on special<br />
numbers, see “Using Special Numbers” on page 69.)<br />
To place an outgoing call in lock mode:<br />
<br />
To call an Emergency number, special number, or PCS Customer<br />
Solutions, enter the phone number and press .<br />
Section 2C: Setting Your Phone’s Security 67
Restricting Calls<br />
There may be occasions when you want to limit the numbers your<br />
phone can call or from which it can receive calls. You can use the<br />
Restrict Calls setting to do just that. (The Restrict Calls setting does<br />
not apply to 911 or PCS Customer Solutions.)<br />
To restrict calls:<br />
1. From the Security Menu display (see “Accessing the Security<br />
Menu” on page 65), select Others and press .<br />
2. Select Limit Use and press .<br />
3. Select Outgoing Calls or Incoming Calls and press .<br />
4. Select your desired option and press .<br />
<br />
<br />
<br />
Allow All lets you make or receive all calls.<br />
Phone Book Only lets you make or receive calls to or from<br />
Contacts entries, Voicemail, or special numbers only.<br />
Special #s Only lets you make or receive calls to or from three<br />
special numbers only. (See “Using Special Numbers” on the<br />
next page.)<br />
Note: Restricted incoming calls are forwarded to voicemail.<br />
Section 2C: Setting Your Phone’s Security 68
Using Special Numbers<br />
Special numbers are important numbers that you have designated as<br />
being “always available.” You can call and receive calls from special<br />
numbers even if your phone is locked.<br />
You can save 3 special numbers in addition to your Contacts entries<br />
(the same number may be in both directories).<br />
To add or replace a special number:<br />
1. From the Security Menu display (see “Accessing the Security<br />
Menu” on page 65), select Others and press .<br />
2. Select Special #s and press .<br />
3. Select the box under an entry number and press .<br />
4. Enter your desired phone number and press .<br />
– or –<br />
Press Options (right softkey), select From Phone Book or<br />
Voicemail, and press .<br />
5. When you have finished entering or changing your special<br />
numbers, press Done (left softkey).<br />
To insert pauses into a special number:<br />
1. From step 4 above, enter the phone number and press Options<br />
(right softkey) for the options.<br />
2. Highlight Hard Pause, 2-Sec. Pause, or Hyphen and press .<br />
3. Finish entering the rest of the numbers and press .<br />
Erasing the Contacts Directory<br />
You can quickly and easily erase all of the contents of your<br />
Contacts Directory.<br />
To erase all the names and phone numbers in your Contacts Directory:<br />
1. From the Security Menu display (see “Accessing the Security<br />
Menu” on page 65), select Erase Ph. Book and press .<br />
2. If you’re sure you want to erase your Contacts, select Yes and<br />
press .<br />
Section 2C: Setting Your Phone’s Security 69
Erasing All Downloads<br />
To erase all data downloaded from the Web:<br />
1. From the Security Menu display (see “Accessing the Security<br />
Menu” on page 65), select Erase Download and press .<br />
2. If you’re sure you want to erase all data downloaded from the<br />
Web, select Yes and press .<br />
<br />
If you have assigned downloaded data, the function returns<br />
to its default setting.<br />
ResettingYour Pictures Account<br />
This option resets your authentication ID for your PCS Vision<br />
pictures account.<br />
To reset your pictures account:<br />
1. From the Security Menu display (see “Accessing the Security<br />
Menu” on page 65), select Reset Pictures and press .<br />
2. If you’re sure you want to reset your pictures account, select Yes<br />
and press .<br />
After resetting, you are prompted to reenter the password when you<br />
use Online Pictures.<br />
Note: Your account will be locked if you enter wrong password 10 times after<br />
resetting your acount. In this case, please contact Sprint PCS Customer Solutions.<br />
Resetting Your Phone<br />
Resetting the phone restores all the factory defaults, including the<br />
ringer types and display settings. The Contacts, Call History,<br />
Scheduler, and Messaging are not affected.<br />
To reset your phone:<br />
1. From the Security Menu display (see “Accessing the Security<br />
Menu” on page 65), select Reset Phone and press .<br />
2. If you’re sure you want to reset your phone, select Yes and<br />
press .<br />
Section 2C: Setting Your Phone’s Security 70
Resetting and Locking Your Phone Through SMS<br />
When your phone is lost or stolen, you can erase your important<br />
personal information (such as Contacts entries, call history, and<br />
messages) and lock your phone by sending a special formatted SMS<br />
message to your phone.<br />
From your computer, sign on to www.sprintpcs.com and send a<br />
message to your phone (input your 10-digit PCS Phone Number<br />
followed by “@messaging.sprintpcs.com.”) in the following format:<br />
\ \ RESET **** RESET<br />
– your defined passcode.<br />
The default passcode is your phone’s 11-digit ESN<br />
(Electronic Serial Number), which is written on the<br />
package or on the phone itself.<br />
The locked phone will display the following message:<br />
“If found, please call PCS Customer Solutions 1-888-211-4727.”<br />
To activate this feature, the following presetting is required:<br />
1. Press to access the main menu.<br />
2. Select Settings and press .<br />
3. Select Security and press .<br />
4. Enter your lock code.<br />
5. Select Others and press .<br />
6. Select Found Me and press .<br />
7. Select Reset/Lock and press .<br />
8. Select Enable and press .<br />
To unlock a phone that has been locked through SMS, bring the<br />
phone to a Sprint Store.<br />
Changing the Passcode<br />
To change the passcode for the special formatted SMS messages:<br />
1. Follow steps 1-6 above.<br />
2. Select Chg Passcode and press .<br />
3. Enter new passcode in the box under New Passcode (11 digits).<br />
4. Reenter the new passcode in the box under Reenter Code.<br />
Section 2C: Setting Your Phone’s Security 71
Security Features for PCS Vision SM<br />
Enabling and Disabling PCS Vision Services<br />
You can disable PCS Vision services without turning off your phone;<br />
however, you will not have access to all PCS Vision services,<br />
including Web and messaging. Disabling PCS Vision will avoid any<br />
charges associated with PCS Vision services. While signed out, you<br />
can still place or receive phone calls, check voicemail, and use other<br />
voice services. You may enable PCS Vision services again at any time.<br />
To disable PCS Vision services:<br />
1. Press to access the main menu.<br />
2. Select Settings and press .<br />
3. Select PCS Vision and press .<br />
4. Select Disable Vision and press . (A message will appear.)<br />
5. Press Disable (right softkey) to confirm that you want to sign out.<br />
To enable PCS Vision services:<br />
1. Press to access the main menu.<br />
2. Select Settings and press .<br />
3. Select PCS Vision and press .<br />
4. Select Enable Vision and press .<br />
5. Press OK (left softkey) to sign in.<br />
Section 2C: Setting Your Phone’s Security 72
Section 2D<br />
Controlling Your Roaming Experience<br />
In This Section<br />
<br />
<br />
<br />
Understanding Roaming<br />
Setting Your Phone’s Roam Mode<br />
Controlling Roaming Charges Using Call Guard<br />
Roaming is the ability to make or receive calls when you’re off the<br />
Sprint Nationwide PCS Network. Your new dual-band/tri-mode<br />
PCS Vision Phone works anywhere on the Sprint Nationwide<br />
PCS Network and allows you to roam on other analog and 1900 and<br />
800 MHz digital networks where we’ve implemented roaming<br />
agreements with other carriers.<br />
This section explains how roaming works as well as special features<br />
that let you manage your roaming experience.<br />
Section 2D: Controlling Your Roaming Experience 73
Understanding Roaming<br />
Recognizing Icons on the Display Screen<br />
Your phone’s display screen always lets you know when you’re off<br />
the Sprint Nationwide PCS Network and whether your phone is<br />
operating in analog or digital mode. The following chart indicates<br />
what you’ll see depending on where you’re using your phone.<br />
Main LCD/Sub LCD Roaming Indicator Analog Indicator<br />
Sprint Nationwide PCS Network<br />
Other Digital Networks<br />
Digital Roam<br />
Analog Networks<br />
Analog Roam<br />
Tip: Remember, when you are using your phone off the Sprint Nationwide<br />
PCS Network, always dial numbers using 11 digits (1 + area code + number).<br />
Note: Unless your PCS Service Plan includes roaming, you will pay a higher<br />
per-minute rate for roaming calls.<br />
Roaming on Other Digital Networks<br />
When you’re roaming on digital networks, your call quality and<br />
security will be similar to the quality you receive when making calls<br />
on the Sprint Nationwide PCS Network. However, you may not be<br />
able to access certain features, such as PCS Vision.<br />
Note: PCS Ready Link Service is not available in roaming areas.<br />
Section 2D: Controlling Your Roaming Experience 74
Roaming on Analog Networks<br />
When you roam on analog networks, you will experience a similar<br />
quality provided by other analog carriers today. Although some<br />
features, such as PCS Vision, PCS Ready Link, and PCS Voice Command,<br />
will be unavailable, you can still make and receive calls and access<br />
voicemail. If you are accustomed to PCS Service, you may notice some<br />
of the following differences when using analog service:<br />
You are more likely to experience static, cross-talk, fade-out, and<br />
dropped calls.<br />
Some features which are standard on the enhanced<br />
Sprint Nationwide PCS Network, such as call waiting, PCS Vision,<br />
PCS Ready Link, and direct international dialing, may not be<br />
available.<br />
Though callers can leave voicemail messages while you are<br />
roaming, you may not receive notification until you return to the<br />
Sprint Nationwide PCS Network. (See “Checking for Voicemail<br />
Messages While Roaming” on the next page).<br />
There are security and privacy risks (eavesdropping and cloning)<br />
that exist with conventional analog services today.<br />
Your battery’s charge will deplete more quickly and you will need<br />
to recharge it more often when you use your phone for analog<br />
roaming.<br />
Note: If you’re on a call when you leave the Sprint Nationwide PCS Network and<br />
enter an area where roaming is available (whether digital or analog), your call is<br />
dropped. If your call is dropped in an area where you think PCS Service is<br />
available, turn your phone off and on again to reconnect to the Sprint Nationwide<br />
PCS Network.<br />
Note: When using your phone in analog mode, the phone may feel warm. This is<br />
normal for analog operation.<br />
Section 2D: Controlling Your Roaming Experience 75
Checking for Voicemail Messages While Roaming<br />
When you are roaming off the Sprint Nationwide PCS Network, you<br />
may not receive on-phone notification of new voicemail messages.<br />
Callers can still leave messages, but you will need to periodically<br />
check your voicemail for new messages if you are in a roaming<br />
service area for an extended period of time.<br />
To check your voicemail while roaming:<br />
Dial 1+area code+your PCS Phone Number.<br />
When you return to the Sprint Nationwide PCS Network, voicemail<br />
notification will resume as normal.<br />
SettingYour Phone’s Roam Mode<br />
Your PCS Vision Phone allows you to control your roaming<br />
capabilities. By using the Roaming menu option, you can determine<br />
which signals your phone accepts.<br />
Set Mode<br />
Choose from three different settings on your dual-band/tri-mode<br />
phone to control your roaming experience.<br />
To set your phone’s roam mode:<br />
1. Press to access the main menu.<br />
2. Select Settings and press .<br />
3. Select Roaming and press .<br />
4. Select Set Mode and press .<br />
5. Select an option from the following, and press .<br />
<br />
<br />
<br />
Sprint allows you to access the enhanced Sprint Nationwide<br />
PCS Network only and prevents roaming on other networks.<br />
Automatic seeks PCS Service. When PCS Service is<br />
unavailable, the phone searches for an alternate system.<br />
Analog forces the phone to seek an analog roaming system.<br />
The previous setting (Sprint or Automatic) is restored the<br />
next time the phone is turned on.<br />
Section 2D: Controlling Your Roaming Experience 76
Controlling Roaming Charges Using Call Guard<br />
Your phone has two ways of alerting you when you are roaming off<br />
the Sprint Nationwide PCS Network: the onscreen roaming icon and<br />
Call Guard. Call Guard makes it easy to manage your roaming charges<br />
by requiring an extra step before you can place or answer a roaming<br />
call. (This additional step is not required when you make or receive<br />
calls while on the Sprint Nationwide PCS Network.)<br />
To turn Call Guard on or off:<br />
1. Press to access the main menu.<br />
2. Select Settings and press .<br />
3. Select Roaming and press .<br />
4. Select Call Guard and press .<br />
5. Select On or Off and press .<br />
To place roaming calls with Call Guard on:<br />
1. From standby mode, dial 1 + area code + the seven-digit<br />
number. (You can also initiate a call from the Contacts directory,<br />
Call History, or Messaging.)<br />
2. Press or (or press Options (right softkey) and<br />
highlight Call or Call:Speaker On) and press .<br />
3. Press to proceed while the pop-up message is displayed.<br />
– or –<br />
Press any key to erase the pop-up message, press Options (right<br />
softkey), highlight Roam Call, or Roam:Speaker On, and press .<br />
To answer incoming roaming calls with Call Guard on:<br />
Press Options (right softkey), highlight Answer or<br />
Answer:Speaker, and press .<br />
– or –<br />
1. Press or .<br />
2. Press to proceed while the pop-up message is displayed.<br />
Reminder: If the Call Guard feature is set to On, you need to take extra steps to<br />
make and receive roaming calls, even if you have selected the Analog setting<br />
(see the previous page).<br />
Section 2D: Controlling Your Roaming Experience 77
Section 2E<br />
Navigating Through Menus<br />
In This Section<br />
<br />
<br />
<br />
Menu Navigation<br />
Menu Structure<br />
Viewing the Menus<br />
Every function and feature of your PM-8200 by Sanyo can be accessed<br />
through an onscreen menu. This section is a road map to using your<br />
PCS Vision Phone. Please take a few moments to learn your way<br />
around and you’ll find your phone easier to use.<br />
Section 2E: Navigating Through Menus 78
Menu Navigation<br />
The navigation key on your PCS Vision Phone allows you to scroll<br />
through menus quickly and easily. The scroll bar at the right of the<br />
menu keeps track of your position in the menu at all times.<br />
To navigate through a menu, simply press the navigation key up<br />
or down.<br />
Menu Structure<br />
Selecting Menu Items<br />
As you navigate through the menu, menu options are highlighted.<br />
Select any numbered option by simply pressing the corresponding<br />
number on the phone’s keypad. You may also select any item by<br />
highlighting it and pressing .<br />
For example, if you want to view your last incoming call:<br />
1. Press to access the main menu.<br />
2. Select Call History by pressing . (It may already be highlighted.)<br />
3. Select Incoming by pressing or by highlighting it and<br />
pressing . (If you have received any calls, they are displayed<br />
on the screen.)<br />
Backing Up Within a Menu<br />
To go to the previous menu:<br />
Press .<br />
To return to standby mode:<br />
Press .<br />
Shortcuts<br />
Right navigation key to take a shortcut to the Contacts menu.<br />
Left navigation key to take a shortcut to the My Shortcut menu.<br />
(See page 56 for setting.)<br />
Up navigation key to take a shortcut to the Messaging menu.<br />
Down navigation key to take a shortcut to the Downloads menu.<br />
Section 2E: Navigating Through Menus 79
Viewing the Menus<br />
Menu Diagram<br />
The following list outlines your phone’s menu structure.<br />
1. Call History<br />
1. Outgoing<br />
2. Incoming<br />
3. Missed<br />
4. Erase History<br />
2. Contacts<br />
1. Find/Add Entry<br />
2. Speed Dial #s<br />
3. My Phone#<br />
4. Services<br />
3. Messaging<br />
1. Send Message<br />
2. Picture Mail<br />
3. Text Msg<br />
4. Go to Email<br />
5. Voicemail<br />
4. Web<br />
5. Pictures<br />
1. Camera<br />
2. My Pictures<br />
3. Online Albums<br />
4. Account Info<br />
6. Downloads<br />
1. Games<br />
2. Ringers<br />
3. Screen Savers<br />
4. Applications<br />
5. Dynamic 1-10 (If applicable)<br />
6. Others<br />
Section 2E: Navigating Through Menus 80
7. Settings<br />
1. Sounds<br />
1. Ringer/Key Vol.<br />
2. Ringer Type<br />
3. Alerts<br />
4. Receiver Vol.<br />
5. Others<br />
2. Display<br />
1. Backlight<br />
2. Greeting<br />
3. Font Size<br />
4. Background<br />
5. Animation<br />
6. Incoming Calls<br />
7. Match Area Code<br />
8. Standby Display<br />
9. My Buddy<br />
10.Sleep Mode<br />
3. PCS Vision<br />
1. Enable (or Disable) Vision<br />
2. Net Guard<br />
3. Update Profile<br />
4. Ready Link<br />
1. Enable/Disable<br />
2. List Update<br />
3. Restart R-Link<br />
4. R-Link Guard<br />
5. Ringer Type<br />
6. Alerts<br />
7. Speakerphone<br />
8. Default View<br />
5. Location<br />
6. Roaming<br />
1. Set Mode<br />
2. Call Guard<br />
7. Messaging<br />
1. Display Pop-up<br />
2. Preset Msgs<br />
3. Send Callback#<br />
8. Security<br />
1. Lock Phone<br />
2. Lock Picture<br />
3. Erase Ph. Book<br />
4. Erase Download<br />
5. Reset Pictures<br />
6. Reset Phone<br />
7. Others<br />
Section 2E: Navigating Through Menus 81
9. Others<br />
1. Any Key Answer<br />
2. Auto Answer<br />
3. Open/Close Flip<br />
4. Abbrev. Dial<br />
5. Headset Mode<br />
6. TTY<br />
7. Side Key Guard<br />
8. My Shortcut<br />
9. Airplane Mode<br />
10.Set Time/Date<br />
11.Language<br />
0. Phone Info<br />
1. Phone#/User ID<br />
2. Help<br />
3. Version<br />
4. Advanced<br />
8. Tools/Extras<br />
1. Calendar<br />
2. Alarm Clock<br />
3. Calculator<br />
4. World Clock<br />
5. PC Sync<br />
1. Ringers<br />
2. Images<br />
3. Erase Data<br />
9. Voice Services<br />
1. Voice Memo<br />
1. Record<br />
2. Play<br />
3. Play:Speaker<br />
4. Erase All<br />
2. Screen Call<br />
1. Auto<br />
2. Annoucement<br />
3. Voice Dial<br />
1. Program<br />
2. Review<br />
3. Review:Speaker<br />
4. Erase All<br />
Section 2E: Navigating Through Menus 82
Section 2F<br />
Managing Call History<br />
In This Section<br />
<br />
<br />
<br />
<br />
<br />
<br />
Viewing History<br />
Call History Options<br />
Making a Call From Call History<br />
Saving a Phone Number From Call History<br />
Prepending a Phone Number From Call History<br />
Erasing Call History<br />
The Call History keeps track of incoming calls, calls made from your<br />
PCS Vision Phone, and missed calls. This section guides you through<br />
accessing and making the most of your Call History.<br />
Section 2F: Managing Call History 83
Viewing History<br />
You’ll find the Call History feature very helpful. They are lists of the<br />
last 20 voice calls and the last 10 Ready Link calls that you placed,<br />
accepted, or missed. Call History makes redialing a number fast and<br />
easy. It is continually updated as new numbers are added to the<br />
beginning of the list and the oldest entries are removed from the<br />
bottom of the list.<br />
Each entry contains the phone number (if it is available) and<br />
contact’s name (if the phone number is in your Contacts). Duplicate<br />
calls (same number and type of call) may only appear once on the list.<br />
To view a Call History entry:<br />
1. Press to access the main menu.<br />
2. Select Call History and press .<br />
3. Select Outgoing, Incoming, or Missed and press . (The selected<br />
Call History list will display.)<br />
Tip: You can switch the Voice Call history to the PCS Ready Link call history by<br />
pressing R-Link (left softkey). To return to the Voice Call history, press Voice Call<br />
(left softkey).<br />
Section 2F: Managing Call History 84
Call History Options<br />
For additional information and options on a particular call, highlight<br />
a Call History entry and press Options (right softkey).<br />
Call to dial the phone number.<br />
Call:Speaker On to dial the phone number in speakerphone mode.<br />
Send Message to send a text message. See page 195 for details.<br />
To send Picture Mail, see page 162.<br />
Save Phone# to save the phone number (if applicable). If the<br />
caller’s phone number is already saved in your Contacts list,<br />
Go to Phone Book appears. (See “Saving a Phone Number From Call<br />
History” on the next page.)<br />
Prepend to add numbers to the beginning of the phone number.<br />
(See “Prepending a Phone Number From Call History” on<br />
page 87.)<br />
Copy to Personal to copy the phone number to the Ready Link<br />
Personal List. (Only appears when PCS Ready Link mode is set to<br />
Enable and the number does not match any stored entry in your<br />
Personal List.)<br />
Erase to erase the entry.<br />
Making a Call From Call History<br />
To place a call from Call History:<br />
1. Press to access the main menu.<br />
2. Select Call History and press .<br />
3. Select Outgoing, Incoming or Missed and press .<br />
4. Highlight the entry you want to call by scrolling through the list.<br />
5. Press or .<br />
– or –<br />
Press Options (right softkey), highlight Call or Call:Speaker On,<br />
and press .<br />
Note: You cannot make calls from Call History to entries identified as No ID or<br />
Restricted.<br />
Section 2F: Managing Call History 85
Saving a Phone Number From Call History<br />
Your PCS Vision Phone can store up to 500 phone numbers in up to<br />
300 Contacts entries (an entry may contain up to seven numbers).<br />
Each entry’s name can contain sixteen characters.<br />
To save a phone number from Call History:<br />
1. Highlight the call history entry you want to save.<br />
2. Press Options (right softkey) to display the options.<br />
3. Highlight Save Phone# and press .<br />
4. Highlight the appropriate label (Mobile, Home, Work, Pager,<br />
Fax, Other, or No Label) and press .<br />
5. Enter a name and press .<br />
If you have already stored entries in the Contacts list, you are<br />
prompted to select the following entry mode:<br />
New Name to enter a name directly.<br />
From Ph. Book to select a name from the Contacts list.<br />
6. Press Save (left softkey).<br />
After you have saved the number, the new Contacts entry is<br />
displayed. (See “Contacts List Entry Options” on page 92.)<br />
Note: You cannot save phone numbers already in your Contacts list or from calls<br />
identified as No ID or Restricted. If the selected entry has already been stored in<br />
the Contacts list, Go to Phone Book appears during step 3 above.<br />
Section 2F: Managing Call History 86
Prepending a Phone Number From Call History<br />
If you need to place a call from Call History and you happen to be<br />
outside your local area code, you can add the appropriate prefix by<br />
prepending the number.<br />
To prepend a phone number from Call History:<br />
1. Highlight a call history entry and press Options (right softkey).<br />
2. Highlight Prepend and press .<br />
3. Enter the digits you want to add to the number.<br />
4. Press or to place a call.<br />
To select another option, press Options (right softkey), highlight it<br />
and press .<br />
Call to dial the phone number.<br />
Call:Speaker On to dial the phone number in speakerphone mode.<br />
Save Phone# to store the phone number in your Contacts<br />
directory.<br />
H Hard Pause to insert a hard pause.<br />
T 2-Sec. Pause to insert a 2-second pause.<br />
Erasing Call History<br />
To erase individual Call History entries, see “Call History Options” on<br />
page 85.<br />
To erase Call History:<br />
1. Press to access the main menu.<br />
2. Select Call History and press .<br />
3. Select Erase History and press .<br />
4. Select Outgoing, Incoming, Missed, or All and press .<br />
5. Select Voice Calls or Ready Link and press .<br />
<br />
Voice Calls to erase call history for voice calls.<br />
Ready Link to erase call history for PCS Ready Link calls.<br />
6. Select Yes and press .<br />
Section 2F: Managing Call History 87
Section 2G<br />
Using the Contacts Directory<br />
In This Section<br />
<br />
<br />
<br />
<br />
<br />
<br />
<br />
<br />
<br />
<br />
<br />
Displaying the Contacts List<br />
Adding a New Contacts Entry<br />
Finding Contacts List Entries<br />
Contacts List Entry Options<br />
Adding a Phone Number to a Contacts Entry<br />
Editing a Contacts Entry’s Phone Number<br />
Assigning Speed Dial Numbers<br />
Editing a Contacts Entry<br />
Selecting a Ringer/Image Type for an Entry<br />
Secret Contacts Entries<br />
Dialing PCS Services<br />
Now that you know the basics that make it easier to stay in touch with<br />
people and information, you’re ready to explore your phone’s more<br />
advanced features. This section explains how to use your phone’s<br />
Contacts and helps you make the most of your contacts and time<br />
when you are trying to connect with the important people in<br />
your life.<br />
Section 2G: Using the Contacts Directory 88
Displaying the Contacts List<br />
Press the navigation key right.<br />
– or –<br />
1. Press to access the main menu.<br />
2. Select Contacts and press .<br />
3. Select Find/Add Entry and press .<br />
Adding a New Contacts Entry<br />
Your PCS Vision Phone can store up to 500 phone numbers in up to<br />
300 Contacts entries (an entry may contain up to seven numbers).<br />
Each entry’s name can contain sixteen characters.<br />
To add a new entry:<br />
1. Press to access the main menu.<br />
2. Select Contacts and press .<br />
3. Select Find/Add Entry and press .<br />
Press the navigation key right for the shortcut (steps 1<br />
through 3).<br />
4. Highlight and press .<br />
5. Enter a name and press .<br />
6. Select a label by using your navigation key and press .<br />
7. Enter the phone number or address and press .<br />
8. Press Save (left softkey).<br />
– or –<br />
1. Press the navigation key right to display the Contacts list.<br />
2. Highlight an entry and press Options (right softkey).<br />
3. Highlight Add New Contact and press .<br />
4. Follow steps 5-8 above.<br />
After you have saved the number, the new Contacts entry is<br />
displayed. (See “Contacts List Entry Options” on page 92.)<br />
Tip: You can also add a new Contacts entry by entering a number from standby<br />
mode. See “Saving a Phone Number” on page 27.<br />
Section 2G: Using the Contacts Directory 89
Finding Contacts List Entries<br />
There are several ways to display your Contacts entries: by name, by<br />
speed dial number, by group, and by voice dial tags. Follow the steps<br />
outlined in the sections below to display entries from the Contacts<br />
list menu.<br />
Finding Names<br />
To find Contacts list entries by name:<br />
1. Press to access the main menu.<br />
2. Select Contacts and press .<br />
3. Select Find/Add Entry and press .<br />
Press the navigation key right for the shortcut (steps 1<br />
through 3).<br />
4. Use your navigation key to scroll through the Contacts list.<br />
– or –<br />
Enter the first letter of the name or part of the name. (The<br />
display shows the entries beginning with the letter entered.)<br />
5. Press to display the entry’s details.<br />
To find PCS Ready Link List entries:<br />
1. From standby mode, press the navigation key right to display<br />
your Contacts list.<br />
2. Press Go to (left softkey). Highlight your desired list and press .<br />
<br />
<br />
<br />
<br />
Phone Book to display the Contacts list.<br />
Company List to display the Company List.<br />
Company Groups to display the Company Group List.<br />
Personal List to display the Personal List.<br />
Personal Groups to display the Personal Group List.<br />
3. Scroll through the list to select your desired entry.<br />
Note: The Go to (left softkey) option does not appear when PCS Ready Link mode<br />
is set to Disable (see “Setting PCS Ready Link Mode” on page 133).<br />
Section 2G: Using the Contacts Directory 90
Finding Speed Dial Numbers<br />
To find phone numbers you have stored in speed dial locations:<br />
1. Press to access the main menu.<br />
2. Select Contacts and press .<br />
3. Select Speed Dial #s and press . (The Speed Dial numbers list<br />
appears.)<br />
Finding Voice Dial Numbers<br />
To find phone numbers you have stored in Voice Dial:<br />
1. Press to access the main menu.<br />
2. Select Voice Services and press .<br />
3. Select Voice Dial and press .<br />
4. Select Review or Review:Speaker and press . (The Voice Dial<br />
numbers list appears.)<br />
Section 2G: Using the Contacts Directory 91
Contacts List Entry Options<br />
To access a contact’s options, display the Contacts list, highlight an<br />
entry and press . Then select a phone number and press Options<br />
(right softkey). To select an option, highlight it and press .<br />
Edit to edit the selected entry.<br />
<br />
<br />
<br />
<br />
<br />
<br />
<br />
<br />
Call to dial the selected number.<br />
Call:Speaker On to dial the phone number in speakerphone mode.<br />
Send Message to send a text message. (See page 195 for details.)<br />
To send Picture Mail, see page 162.<br />
Call Alarm to set a call alarm for the entry. (See page 104 for Call<br />
Alarm.)<br />
Set Speed Dial to assign speed dial numbers to your favorite<br />
entries. (See “Assigning Speed Dial Numbers” on page 94.)<br />
Set Voice Dial to set a voice dial for the entry. (See page 124 for<br />
Voice Dial.)<br />
Prepend to alter a phone number by adding numbers to the<br />
beginning of the entry. (See “Prepending a Phone Number From<br />
Call History” on page 87.)<br />
Copy to Personal to copy the phone number to your Ready Link<br />
Personal List. (Only appears when PCS Ready Link mode is set to<br />
Enable and the number does not match any stored entry in your<br />
Personal List.)<br />
To erase the selected entry from the Contacts list:<br />
1. From standby mode, press the navigation key right to display<br />
the Contacts list.<br />
2. Highlight the entry you wish to delete by using the navigation<br />
key.<br />
3. Press Options (right softkey).<br />
4. Highlight Erase Contact and press .<br />
5. Select Yes and press .<br />
Section 2G: Using the Contacts Directory 92
Adding a Phone Number to a Contacts Entry<br />
To add a phone number to an entry:<br />
1. Display a Contacts entry (see “Finding Contacts List Entries” on<br />
page 90).<br />
2. Highlight a phone number, press Options (right softkey),<br />
highlight Edit, and press .<br />
3. Highlight the label field you want to add and press .<br />
4. Enter the number and press .<br />
5. Press Save (left softkey).<br />
Editing a Contacts Entry’s Phone Number<br />
To edit an entry’s phone number:<br />
1. Press the navigation key right.<br />
2. Highlight the entry you wish to edit and press .<br />
3. Highlight a phone number, press Options (right softkey),<br />
highlight Edit, and press .<br />
4. Select the number you want to edit and press .<br />
5. Edit the entry by using your keypad and press .<br />
6. Press Save (left softkey) to save your changes.<br />
Section 2G: Using the Contacts Directory 93
Assigning Speed Dial Numbers<br />
With this feature you can dial Contacts Directory entries with one<br />
key press for locations 2-9. Save your memory locations 2-9 for speed<br />
dialing your most commonly used phone numbers. Speed Dial<br />
numbers must be stored in your Contacts to use this feature.<br />
To set Speed Dial:<br />
1. Press to access the main menu.<br />
2. Select Contacts and press .<br />
3. Select Speed Dial #s and press .<br />
4. To select a corresponding speed dial number from 2-9,<br />
highlight an unassigned number and press .<br />
5. Select an entry from the list and press .<br />
6. Select the phone number you want to set as a speed dial and<br />
press .<br />
– or –<br />
1. Press the navigation key right.<br />
2. Highlight your desired entry by scrolling through the Contacts<br />
list and press .<br />
3. Highlight the phone number you want to set as a speed dial and<br />
press Options (right softkey).<br />
4. Highlight Set Speed Dial and press .<br />
5. Highlight an unassigned number and press .<br />
When you highlight an assigned number and press ,<br />
you’ll be asked whether you want to overwrite the assigned<br />
number. Select Yes to overwrite or No to cancel.<br />
To cancel a stored speed dial number:<br />
1. Press to access the main menu.<br />
2. Select Contacts and press .<br />
3. Select Speed Dial #s and press .<br />
4. Highlight the stored speed dial number you want to cancel and<br />
press .<br />
5. Highlight Unassign and press .<br />
To use Speed Dial:<br />
<br />
From standby mode, just press and hold the appropriate key.<br />
Section 2G: Using the Contacts Directory 94
Editing a Contacts Entry<br />
To make changes to an entry:<br />
1. Press the navigation key right.<br />
2. Highlight the entry you wish to edit and press .<br />
3. Highlight a phone number, press Options (right softkey),<br />
highlight Edit, and press .<br />
– or –<br />
Highlight an email address or Web address and press Edit (right<br />
softkey).<br />
4. Select the field you want to edit and press .<br />
5. Edit the entry by using your keypad and press .<br />
6. Press Save (left softkey) to save your changes.<br />
Selecting a Ringer/Image Type for an Entry<br />
You can assign a ringer or an image type to a Contacts entry so you can<br />
identify the caller by the ringer or image type. (See “Ringer Types” on<br />
page 36.)<br />
To select a ringer type for an entry:<br />
1. Press the navigation key right.<br />
2. Select the entry for which you want to set the incoming ringer<br />
and press .<br />
3. Highlight a phone number, press Options (right softkey),<br />
highlight Edit, and press .<br />
– or –<br />
Highlight an email address or Web address and press Edit (right<br />
softkey).<br />
4. Scroll to Ringer and press .<br />
5. Use your navigation key to scroll through available ringers.<br />
(When you highlight a ringer type, a sample ringer will sound.)<br />
Section 2G: Using the Contacts Directory 95
6. Highlight your desired ringer type and press .<br />
<br />
<br />
<br />
<br />
<br />
<br />
Ringer Type to select a ringer type. Scroll through available<br />
ringers to hear previews.<br />
Ringer & Voice to notify you with Ringer and Voice.<br />
Vibrate to notify you by vibrating.<br />
Normal to set Ringer to the incoming calls setting<br />
(see page 36).<br />
None to turn the ringer type off.<br />
Downloads to set a downloaded image saved in your phone.<br />
Get New to start up the browser so you can select an item to<br />
download.<br />
7. Press Save (left softkey) to save the ringer type.<br />
<br />
To confirm the ringer, highlight Ringer and press Play (right<br />
softkey).<br />
To select an image type for an entry:<br />
1. Follow steps 1-3 on the previous page.<br />
2. Scroll to Picture ID and press .<br />
3. Select a menu by scrolling up or down and press .<br />
4. Highlight your desired image type and press .<br />
<br />
<br />
<br />
<br />
<br />
Normal to set Image to the incoming calls setting<br />
(see page 47).<br />
None to turn the image type off.<br />
Downloads to set a downloaded image saved in your phone.<br />
Get New to start up the browser so you can select an item to<br />
download.<br />
In Camera to set a picture saved in your In Camera folder.<br />
Saved to Ph. to set a picture saved in your Saved to Phone<br />
folder.<br />
5. Press Save (left softkey) to save the image type.<br />
<br />
To see a display preview of an image, press Preview (right<br />
softkey) during step 5 above. Press the right softkey to<br />
switch between Main/Sub LCD’s display preview.<br />
Note: If you set an animation ringer (indicated with icon) and an image, your<br />
PCS Phone plays the ringer (audio) of the animation ringer and displays the<br />
image you selected.<br />
Section 2G: Using the Contacts Directory 96
Secret Contacts Entries<br />
You can hide an entry’s phone number(s) and require your lock code<br />
to edit the entry by making it secret. The entry name is still displayed,<br />
but the entry’s phone numbers are replaced with “(Secret)”.<br />
To make an entry secret:<br />
1. Press the navigation key right.<br />
2. Scroll to the Contacts entry you want to tag secret.<br />
3. Press Options (right softkey) to display the menu options.<br />
4. Highlight Set Secret and press .<br />
5. Enter the 4-digit lock code.<br />
6. Select On and press .<br />
To make an entry public:<br />
1. Press the navigation key right.<br />
2. Scroll to the Contacts entry you want to tag public.<br />
3. Press Options (right softkey) to display the menu options.<br />
4. Highlight Set Secret and press .<br />
5. Enter the 4-digit lock code.<br />
6. Select Off and press .<br />
Tip: If you can’t recall your lock code, try using the last four digits of either your<br />
Social Security number or your PCS Phone Number or try 0000.<br />
If none of these work, call PCS Customer Solutions at 1-888-211-4PCS (4727).<br />
Section 2G: Using the Contacts Directory 97
Dialing PCS Services<br />
Your Contacts list is preprogrammed with contact numbers for various<br />
PCS Services. You must be in digital mode to access PCS Services.<br />
To dial a service:<br />
1. Press to access the main menu.<br />
2. Select Contacts and press .<br />
3. Select Services and press .<br />
4. Select Cust Solutions, Dir Assistance, Account Info, Sprint Operator,<br />
or Voice Command and press .<br />
5. Press or .<br />
– or –<br />
Press Options (right softkey), highlight Call or Call:Speaker On,<br />
and press .<br />
Section 2G: Using the Contacts Directory 98
Section 2H<br />
Personal Organizer<br />
In This Section<br />
<br />
<br />
<br />
<br />
<br />
<br />
<br />
<br />
Managing the Scheduler<br />
Using Your Phone’s Scheduler<br />
Adding a Call Alarm to the Scheduler<br />
Adding To Do List Items<br />
Purging All Events, Call Alarms, or To Do List Items<br />
Personal Information Management<br />
Using Your Phone’s Tools<br />
<strong>Downloading</strong> Files Through PCS Vision<br />
Your PCS Vision Phone is equipped with several personal information<br />
management features that help you manage your busy lifestyle.<br />
This section shows you how to use these features to turn your<br />
phone into a time management planner that helps you keep up<br />
with your contacts, schedules, and commitments. It takes<br />
productivity to a whole new level.<br />
Section 2H: Personal Organizer 99
Managing the Scheduler<br />
Calendar<br />
Use the Calendar to remind you of events or important calls you need<br />
to make. You can schedule up to 100 events, 15 Call Alarms, and<br />
20 To-Do List items.<br />
Setting the Time/Date<br />
In a no-service area or an analog service area, it’s necessary to set the<br />
actual time and date to use the Calendar function. Set the current<br />
Time/Date by using numeric keys and/or the navigation key<br />
(Right/Left: move cursor, Up/Down: change value). To display the<br />
time setting mode, press , select Tools/Extras and press .<br />
Then select Calendar and press .<br />
You can set any time from 12:00 AM, Jan 1, 2000 to 11:59 PM,<br />
Dec 31, 2099.<br />
Setting Holidays<br />
You can set your personal holidays by displaying the date in red on<br />
the Calendar display. The default holidays displayed in red are<br />
Sundays and national holidays.<br />
Note: You can set holidays from Jan 1, 2000 to Dec 31, 2020.<br />
To set personal holidays:<br />
1. Press to access the main menu.<br />
2. Select Tools/Extras and press .<br />
3. Select Calendar and press .<br />
4. Highlight the day you want to set to the holiday by using the<br />
navigation key (Left: previous day, Right: next day, Up: previous<br />
week, Down: next week, : previous/next month).<br />
5. Press Options (right softkey), highlight Holiday, and press .<br />
6. Highlight Set Date or Set Weekly from the options and press .<br />
Section 2H: Personal Organizer 100
Options:<br />
<br />
<br />
<br />
<br />
<br />
Set Date sets the selected date for the holiday.<br />
Set Weekly sets weekly holidays.<br />
Reset Date resets the holiday setting for the selected date.<br />
Reset Weekly resets the weekly holiday setting.<br />
Reset All resets all the holiday settings and returns to the default<br />
settings.<br />
7. If you selected Set Weekly, Reset Weekly, or Reset All, you’ll be<br />
prompted to select Yes or No.<br />
Tip: The current day is framed by a rectangle.<br />
Using Your Phone’s Scheduler<br />
Adding an Event to the Scheduler<br />
Your Scheduler helps organize your time and reminds you of<br />
important events (up to 100 events).<br />
To add an event:<br />
1. Press to access the main menu.<br />
2. Select Tools/Extras and press .<br />
3. Select Calendar and press .<br />
4. Select the day you want to add an event to by using the<br />
navigation key and press .<br />
5. Press Options (right softkey) to display the options.<br />
6. Select Add Event and press .<br />
7. Select Schedule and press .<br />
8. Enter the description using your keypad, and press (or<br />
press Mode [right softkey] to select a description from<br />
“From To Do List”).<br />
Note: The “From To Do List ”option will not appear if there are no items stored in<br />
the To Do List. See “Adding To Do List Items” on page 107 for details.<br />
Section 2H: Personal Organizer 101
9. Select the menu under the following options and press .<br />
Description to enter a description of your event (up to 14<br />
characters).<br />
From to schedule the start time.<br />
<br />
To to schedule the end time.<br />
Location to edit the location of your event (up to 14<br />
characters).<br />
Alarm to select your desired ringer.<br />
Alarm Time to edit the alarm time (number of hours or<br />
minutes before the event starts). Default alarm time is 10<br />
minutes before.<br />
Repeat to set the event’s repeating status. Select None, Daily,<br />
Weekly, Monthly, or Yearly.<br />
10. Press Save (left softkey) to schedule the event.<br />
Tip: The date you have scheduled events for is indicated by “ ”.<br />
Tip: Press the navigation key up or down to scroll by week through the Scheduler<br />
calendar and the Side Volume key to scroll by month.<br />
Event Alerts<br />
There are several ways your PCS Vision Phone alerts you of scheduled<br />
events:<br />
By playing the alert tone (depending on the Ringer Type and<br />
Ringer Volume setting).<br />
By blinking the LED.<br />
By displaying the event’s description on the Main LCD when the<br />
flip is open.<br />
By displaying the event’s description on the Sub LCD when the<br />
flip is closed.<br />
By lighting the LCD backlight (depending on the backlight setting).<br />
Section 2H: Personal Organizer 102
Event Alert Menu<br />
When your phone is turned on and you have an event alarm<br />
scheduled, your phone alerts you and displays the event summary.<br />
To respond to an event alert:<br />
1. Press or View (left softkey) to silence the alarm and see the<br />
event details.<br />
2. Highlight the unchecked event and press to see the event<br />
details or press Options (right softkey) for the following options.<br />
To select an option, highlight it and press .<br />
Snooze to repeat the alarm in ten minutes.<br />
<br />
Exit to exit the options.<br />
Note: If you press Exit (left softkey) during step 2 above, you are prompted to<br />
erase the unchecked event. Select Yes to erase or No to cancel.<br />
Viewing Events<br />
To view your scheduled events:<br />
1. Press to access the main menu.<br />
2. Select Tools/Extras and press .<br />
3. Select Calendar and press .<br />
4. Select the date for which you set events and press . (The<br />
selected day’s events list will display.)<br />
Erasing a Day’s Events or Call Alarms<br />
To erase a scheduled day’s events or call alarms:<br />
1. From the Event list display (see above), highlight one of the<br />
events or call alarms and press Options (right softkey).<br />
2. Highlight Erase Event and press .<br />
3. Select Yes and press .<br />
Section 2H: Personal Organizer 103
Adding a Call Alarm to the Scheduler<br />
You can set call alarms to notify you when you need to place a call.<br />
The call alarm will let you know when and to whom to place a<br />
scheduled call. You can set up to 15 call alarms.<br />
To add a call alarm to the Scheduler:<br />
1. Press to access the main menu.<br />
2. Select Tools/Extras and press .<br />
3. Select Calendar and press .<br />
4. Select the day you want to add a call alarm to by using the<br />
navigation key and press .<br />
5. From the event list display, press Options (right softkey) to<br />
display the options.<br />
6. Select Add Event and press .<br />
7. Select Call Alarm and press .<br />
8. Enter the phone number directly or press Options (right softkey)<br />
for options.<br />
From Phone Book to select the desired number from your<br />
Contacts list.<br />
Voicemail to select the number for voicemail access.<br />
9. Select the box under the following items and press .<br />
<br />
<br />
Time/Date to edit the start time/date.<br />
Alarm to select the ringer alarm.<br />
Repeat to set the Call Alarm’s repeat status. Select None,<br />
Daily, Weekly, Monthly, or Yearly.<br />
10. Press Save (left softkey).<br />
Tip: You can also add a call alarm from the Contacts menu (see “Contacts List<br />
Entry Options” on page 92).<br />
Section 2H: Personal Organizer 104
Call Alarm Alerts<br />
There are several ways your PCS Phone alerts you of a scheduled call<br />
alarm:<br />
By playing the alert tone (depending on the Ringer Type and<br />
Ringer Volume setting).<br />
By blinking the LED.<br />
By displaying the call alarm notification on the Main LCD when<br />
the flip is open.<br />
By displaying the call alarm notification on the Sub LCD when the<br />
flip is closed.<br />
By lighting the LCD backlight (depending on the backlight setting).<br />
Call Alarm Menu<br />
When your phone is turned on and you have scheduled a call alarm,<br />
your phone alerts you and displays the name or phone number you<br />
wish to call.<br />
To respond to a call alarm:<br />
1. Press or View (left softkey) to silence the alarm and see the<br />
call alarm details.<br />
2. Highlight the unchecked event and press to see the call<br />
alarm details, or press Options (right softkey) for the following<br />
options (to select an option, highlight it and press ):<br />
Call to dial the scheduled phone number.<br />
<br />
<br />
<br />
Call:Speaker On to dial the scheduled phone number in<br />
speakerphone mode.<br />
Snooze to repeat the alarm in ten minutes.<br />
Save Phone# to save the scheduled phone number in your<br />
Contacts list. Go to Phone Book appears when the number is<br />
already in your Contacts list. (See “Saving a Phone Number”<br />
on page 27.)<br />
Note: If you press Exit (left softkey) during step 2 above, you are prompted to<br />
erase the unchecked event. Select Yes to erase or No to cancel.<br />
Section 2H: Personal Organizer 105
Editing a Call Alarm<br />
To edit a call alarm:<br />
1. From the Event list display (see page 103), highlight one of the<br />
call alarms and press . (The call alarm details appear.)<br />
2. Select the box you want to edit and press .<br />
3. Enter or select a new setting and press .<br />
4. Press Save (left softkey).<br />
Viewing a Future/Past Day’s Scheduled Events<br />
To view a future/past day’s scheduled events:<br />
1. From the Event list display (see page 103), press Options (right<br />
softkey).<br />
2. Highlight Go To Date and press .<br />
3. Enter the date by using numeric keys and the navigation key<br />
and press or OK (left softkey).<br />
4. Press once again to view the day’s Event list.<br />
Section 2H: Personal Organizer 106
Adding To Do List Items<br />
Your phone can store and manage up to 20 To Do List items.<br />
To add an item to your To Do List:<br />
1. From the Event list display (see page 103), press Options (right<br />
softkey).<br />
2. Highlight To Do List and press .<br />
3. Press Options (right softkey).<br />
4. Highlight Add Item and press .<br />
5. Enter the description (up to 14 characters) and press .<br />
6. Select the menu under Priority and press to edit the To Do’s<br />
priority. You can select from Normal, !Urgent, or √Done.<br />
7. Press Save (left softkey).<br />
Viewing the To Do List<br />
To view your To Do List:<br />
1. From the Event list display (see page 103), press Options (right<br />
softkey).<br />
2. Highlight To Do List and press .<br />
<br />
To see the details of each To Do List item, select an item and<br />
press .<br />
EditingTo Do List Items<br />
To edit a To Do List item:<br />
1. From the To Do List display, highlight the item you want to edit<br />
and press .<br />
2. Highlight the box you want to edit and press .<br />
3. Edit the description or change the priority and press .<br />
4. Press Save (left softkey).<br />
Section 2H: Personal Organizer 107
Adding a To Do List Item to the Schedule<br />
To add your To Do List item to the schedule:<br />
1. From the To Do List display, highlight the item you want to add<br />
to the schedule and press Options (right softkey).<br />
2. Highlight Add To Schedule and press .<br />
Add To Schedule to extract the item from the To Do List and<br />
make it a scheduled event.<br />
3. Enter the description using your keypad and press . (See<br />
“Adding an Event to the Scheduler” on page 101 for entering.)<br />
4. Press Save (left softkey).<br />
Deleting Items From the To Do List<br />
To delete To Do List items:<br />
1. From the To Do List display (see the previous page), highlight<br />
the item you want to erase and press Options (right softkey).<br />
2. Highlight your desired option and press .<br />
<br />
<br />
Erase Item erases an item from the To Do List.<br />
Erase Selection erases multiple selected To Do List items at<br />
one time. Press to check the box(es) next to the To Do<br />
List item(s) you want to delete and press Erase (left softkey)<br />
to erase. To check all boxes, press Options (right softkey),<br />
highlight Check All, and press .<br />
Erase All erases all To Do List items.<br />
3. Select Yes and press .<br />
Section 2H: Personal Organizer 108
Viewing Memory in Your Scheduler<br />
To view available memory space and options:<br />
1. From the Event list display (see page 103), press Options (right<br />
softkey).<br />
2. Highlight View Memory and press .<br />
3. Highlight Schedule, Call Alarm, or To Do List and press . (The<br />
available memory space and options display.)<br />
For further options:<br />
4. Press Options (right softkey).<br />
5. Highlight an option and press .<br />
<br />
Erase Old deletes old events or call alarms.<br />
Erase Selection deletes the To Do List items you selected.<br />
(See “Deleting Items From the To Do List ” on the<br />
previous page.)<br />
Erase Done deletes the To Do List items that have been<br />
completed.<br />
Erase All deletes all events, call alarms, or To Do List items.<br />
6. Select Yes or No and press .<br />
Purging All Events, Call Alarms, or<br />
To Do List Items<br />
To delete all scheduled events, call alarms, or To Do List items:<br />
1. From the Event list display (see page 103), press Options (right<br />
softkey).<br />
2. Highlight Erase Memory and press .<br />
3. Highlight one item from the options and press .<br />
Erase Old deletes old events, call alarms, and To Do List items<br />
that are done.<br />
Erase All deletes all events, call alarms, and To Do List items.<br />
4. Select Yes or No and press .<br />
Section 2H: Personal Organizer 109
Personal Information Management<br />
Displaying Your User Address<br />
To display the phone’s current user address:<br />
1. Press to access the main menu.<br />
2. Select Settings and press .<br />
3. Select Phone Info and press .<br />
4. Select Phone#/User ID and press .<br />
<br />
If you sign out, appears on the display.<br />
Finding Icon Definitions<br />
To view an explanation of icons that appear on the display:<br />
1. Press to access the main menu.<br />
2. Select Settings and press .<br />
3. Select Phone Info and press .<br />
4. Select Help and press .<br />
5. Select the item for which you want to see the explanation and<br />
press . (The icon’s explanation appears.)<br />
6. Press Done (left softkey) or to end.<br />
Tip: Press the navigation key up or down to scroll the message manually.<br />
Displaying the Version Information<br />
To display the version number of the software, hardware, PRL<br />
(Preferred Roaming List), PRI (Product Release Instructions), etc.,<br />
installed on your PCS Phone:<br />
1. Press to access the main menu.<br />
2. Select Settings and press .<br />
3. Select Phone Info and press .<br />
4. Select Version and press .<br />
Section 2H: Personal Organizer 110
Displaying Advanced Information<br />
To display advanced information such as technology and frequency:<br />
1. Press to access the main menu.<br />
2. Select Settings and press .<br />
3. Select Phone Info and press .<br />
4. Select Advanced and press .<br />
Using Your Phone’s Tools<br />
In addition to helping you be more efficient and organized, your<br />
PCS Vision Phone offers useful and entertaining tools.<br />
Using the Alarm Clock<br />
Your phone comes with a built-in alarm clock with alarm capabilities.<br />
To use the alarm clock:<br />
1. Press to access the main menu.<br />
2. Select Tools/Extras and press .<br />
3. Select Alarm Clock and press .<br />
4. A caution message will appear on the display. Press Continue<br />
(left softkey) to continue.<br />
5. Select the box under the following items and press .<br />
Alarm to set the alarm On/Off. Select On and press .<br />
Time to enter the alarm time. Enter the desired alarm time<br />
and press .<br />
Repeat to select the alarm frequency. Select None to set your<br />
alarm once or Daily to set your alarm daily.<br />
6. Press Done (left softkey) to save the alarm settings.<br />
Note: Alarm will not sound when the phone is powered off.<br />
To stop the alarm:<br />
Press any key to stop the alarm.<br />
Press Exit (right softkey) to exit the alarm clock display.<br />
Tip: The alarm stops in 30 seconds automatically.<br />
Note: You can adjust the ringer type and ringer volume in your Settings menu.<br />
To change the ringer type, see “Selecting Ringer Types for Calendar” on page 39.<br />
To change the ringer volume, see “Adjusting the Phone’s Volume Settings” on<br />
page 41.<br />
Section 2H: Personal Organizer 111
Using the Calculator<br />
Your phone comes with a built-in calculator.<br />
To use the calculator:<br />
1. Press to access the main menu.<br />
2. Select Tools/Extras and press .<br />
3. Select Calculator and press .<br />
4. Enter numbers using your keypad. Press the left softkey to<br />
insert a decimal point.<br />
5. Press the appropriate navigation key for an arithmetic option<br />
(Up for addition, Down for subtraction, Left for multiplication,<br />
Right for division).<br />
6. Enter numbers and press for the result.<br />
<br />
To clear the numbers, press CLR (right softkey).<br />
To exit the Calculator, press .<br />
Using the World Clock<br />
This feature is available only in digital service areas.<br />
To set the world clock display:<br />
1. Press to access the main menu.<br />
2. Select Tools/Extras and press .<br />
3. Select World Clock and press .<br />
4. The world clock display appears.<br />
Press the navigation key right or left to change countries.<br />
Press Summer (left softkey) or Standard (right softkey) to select<br />
between daylight savings and standard time (if applicable). “ ” is<br />
shown in summer mode.<br />
Section 2H: Personal Organizer 112
<strong>Downloading</strong> Files Through PCS Vision<br />
Your PCS Phone allows you to download images (screen savers),<br />
ringers, games, etc., from a PCS Vision connection. It is also possible<br />
to download from certain menus (Contacts list, Ringer Setting, or<br />
Display Setting).<br />
To download a file from the Web:<br />
1. Press to access the main menu.<br />
2. Select Downloads and press .<br />
3. Select your desired data folder (for example, Games, Ringers,<br />
Screen Saver, or Applications) and press .<br />
4. Select Get New and press .<br />
5. Select your desired file and follow the system prompts.<br />
6. Press the left softkey to start downloading.<br />
7. Wait for the download to complete.<br />
8. Press to end or press the right or left softkey for further<br />
operation.<br />
Right softkey returns to the Download page and you can<br />
continue to download.<br />
Left softkey assigns the downloaded data. (See “Confirming<br />
the Downloaded Data” on page 117.)<br />
Section 2H: Personal Organizer 113
To download a file from a Contacts list entry:<br />
1. Press to access the main menu.<br />
2. Select Contacts and press .<br />
3. Select Find/Add Entry and press .<br />
4. Select the entry for which you want to set the downloaded<br />
ringer or image and press .<br />
5. Highlight a phone number and press Options (right softkey).<br />
Then highlight Edit and press .<br />
– or –<br />
Highlight an email address or Web address, then press Edit (right<br />
softkey).<br />
6. Scroll to Ringer or Picture ID and press .<br />
7. Highlight Get New and press . (The browser launches and<br />
displays the Download page.)<br />
8. Select your desired image or ringer file and follow the system<br />
prompts.<br />
9. Press the left softkey to start downloading.<br />
10. Wait for the download to complete.<br />
11. Press to end or press the right or left softkey for further<br />
operation.<br />
Right softkey returns to the Download page and you can<br />
continue to download.<br />
Left softkey assigns the downloaded data. (See “To confirm<br />
the downloaded ringers folder” on page 117 or “To confirm<br />
the downloaded images [screen savers] folder” on<br />
page 118.)<br />
Section 2H: Personal Organizer 114
To download a ringer file from the Ringer Setting Menu (Ringer Type<br />
and Start-up/Power-off Tone):<br />
1. Press to access the main menu.<br />
2. Select Settings and press .<br />
3. Select Sounds and press .<br />
4. Select Ringer Type and press .<br />
5. Select one item from Voice Calls, Voicemail, Messaging,or<br />
Calendar, and press . The following item requires an extra step:<br />
For Voice Calls, select the menu under With Caller ID or<br />
No Caller ID.<br />
6. Select the menu under each item and press .<br />
7. Select Get New and press . (The browser launches and<br />
displays the Download page.)<br />
8. Select your desired ringer file and follow the system prompts.<br />
9. Press the left softkey to start downloading.<br />
10. Wait for the download to complete.<br />
11. Press to end or press the right or left softkey for further<br />
operation.<br />
Right softkey returns to the Download page and you can<br />
continue to download.<br />
Left softkey assigns the downloaded data. (See “To confirm<br />
the downloaded ringers folder” on page 117.)<br />
To download a ringer file from the Start-up/Power-off Tone menu:<br />
1. Select Others during step 4 above and press .<br />
2. Select the menu under Start-up Tone or Power-off Tone and<br />
press .<br />
3. Follow the previous steps 7 to 11.<br />
Section 2H: Personal Organizer 115
To download an image file from the Display Setting Menu<br />
(Animation, Incoming Calls, and Screen Saver):<br />
1. Press to access the main menu.<br />
2. Select Settings and press .<br />
3. Select Display and press .<br />
4. Select Animation or Incoming Calls and press .<br />
The following item requires an extra step:<br />
For Animation, select the menu under Standby, Outgoing Calls,<br />
or Service Search.<br />
5. Select the menu under each item and press .<br />
6. Select Get New and press . (The browser launches and<br />
displays the Download page.)<br />
7. Select your desired image file and follow the system prompts.<br />
8. Press the left softkey to start downloading.<br />
9. Wait for the download to complete.<br />
10. Press to end or press the right or left softkey for further<br />
operation.<br />
Right softkey returns to the Download page and you can<br />
continue to download.<br />
Left softkey assigns the downloaded data. (See “To confirm<br />
the downloaded images [screen savers] folder” on page 118.)<br />
To download an image file from the Screen Saver menu:<br />
1. Select Standby Display during step 4 above and press .<br />
2. Select Screen Saver and press .<br />
3. Select the menu under Screen Saver and press .<br />
4. Follow the previous steps 6 to 10.<br />
Section 2H: Personal Organizer 116
Confirming the Downloaded Data<br />
The downloaded data will be classified as games, ringers, images<br />
(screen savers), or applications automatically. However, if any data<br />
has a different category, it is classified as Dynamic. If data doesn’t<br />
belong to any of the above, it is classified as Others.<br />
To confirm the downloaded games folder:<br />
1. Press to access the main menu.<br />
2. Select Downloads and press .<br />
3. Select Games and press .<br />
4. Select the downloaded game you want to confirm and press .<br />
5. Select Run from the options and press .<br />
Options:<br />
Run to play the downloaded game.<br />
<br />
<br />
<br />
Settings to set the Network Access availability.<br />
Options to select the options of the downloaded game.<br />
Properties shows the downloaded game properties.<br />
Online Info shows the downloaded game online information (if<br />
applicable).<br />
Shop allows you to continue downloading (if applicable).<br />
Logo/Trademark displays logo and description.<br />
Erase erases the selected downloaded game.<br />
Exit to return to the downloaded data list display.<br />
To confirm the downloaded ringers folder:<br />
1. Press to access the main menu.<br />
2. Select Downloads and press .<br />
3. Select Ringers and press .<br />
4. Select the downloaded ringer you want to confirm and press .<br />
5. Select Play from the options and press .<br />
Section 2H: Personal Organizer 117
Options:<br />
<br />
<br />
<br />
<br />
Play to play the downloaded ringer.<br />
Assign to assign the downloaded ringer to the Voice Calls,<br />
Voicemail, Messaging, Calendar, Start-up/Power-off Tone, or<br />
Phone Book.<br />
Options to select the options of the downloaded ringer.<br />
Properties shows the downloaded ringer properties.<br />
Online Info shows the downloaded ringer online information (if<br />
applicable).<br />
Shop allows you to continue downloading (if applicable).<br />
Erase erases the selected downloaded ringer.<br />
Exit to return to the downloaded data list display.<br />
To confirm the downloaded images (screen savers) folder:<br />
1. Press to access the main menu.<br />
2. Select Downloads and press .<br />
3. Select Screen Savers and press .<br />
4. Select the downloaded image you want to confirm and press .<br />
5. Select View from the options and press .<br />
Options:<br />
View to display the downloaded image.<br />
<br />
<br />
<br />
Assign to assign the downloaded image to the Incoming Calls,<br />
Screen Saver, or Phone Book.<br />
Options to select the options of the downloaded image.<br />
Properties shows the downloaded image properties.<br />
Online Info shows the downloaded image online information (if<br />
applicable).<br />
Shop allows you to continue downloading (if applicable).<br />
Erase erases the selected downloaded image.<br />
Exit to return to the downloaded data list display.<br />
Note: Depending on the data, you can select where to assign your downloaded<br />
files: Image data can be assigned to Incoming Calls, Screen Saver, or Phone Book.<br />
Animation data can be assigned to Standby, Outgoing Calls, or Service Search.<br />
Section 2H: Personal Organizer 118
To confirm the downloaded applications folder:<br />
1. Press to access the main menu.<br />
2. Select Downloads and press .<br />
3. Select Applications and press .<br />
4. Select the downloaded application you want to confirm and<br />
press .<br />
5. Select Run from the options and press .<br />
Options:<br />
Run to play the downloaded application.<br />
<br />
<br />
<br />
Settings to set the Network Access availability.<br />
Options to select the options of the downloaded application.<br />
Properties shows the downloaded application properties.<br />
Online Info shows the downloaded application online<br />
information (if applicable).<br />
Shop allows you to continue downloading (if applicable).<br />
Logo/Trademark displays logo and description.<br />
Erase erases the selected downloaded application.<br />
Exit to return to the downloaded data list display.<br />
To confirm the downloaded Dynamic folder:<br />
The downloaded data in the Dynamic folder are varied (options<br />
subject to change).<br />
1. Press to access the main menu.<br />
2. Select Downloads and press .<br />
3. Select Dynamic- (1 to 10) and press .<br />
4. Select the downloaded data you want to confirm and press .<br />
5. Select Open from the options and press .<br />
Section 2H: Personal Organizer 119
Options:<br />
<br />
<br />
<br />
Open to play the downloaded content.<br />
Options to select the options of the downloaded data.<br />
Properties shows the downloaded data properties.<br />
Online Info shows the downloaded data online information (if<br />
applicable).<br />
Shop allows you to continue downloading (if applicable).<br />
Logo/Trademark displays logo and description (if applicable).<br />
Erase erases the selected downloaded data.<br />
Exit to return to the downloaded data list display.<br />
To confirm the downloaded Others folder:<br />
The downloaded data in the Others folder are varied (options subject<br />
to change).<br />
1. Press to access the main menu.<br />
2. Select Downloads and press .<br />
3. Select Others and press .<br />
4. Select the downloaded data you want to confirm and press .<br />
5. Select Open from the options and press .<br />
Options:<br />
Open to play the downloaded content.<br />
<br />
<br />
Options to select the options of the downloaded data.<br />
Properties shows the downloaded data properties.<br />
Online Info shows the downloaded data online information (if<br />
applicable).<br />
Shop allows you to continue downloading (if applicable).<br />
Logo/Trademark displays logo and description (if applicable).<br />
Erase erases the selected downloaded data.<br />
Exit to return to the downloaded data list display.<br />
Section 2H: Personal Organizer 120
Icon Indication<br />
Type<br />
From Web<br />
Item<br />
Ringers (~128KB)<br />
Icon (appears at the left side<br />
of the downloaded data)<br />
(New Data)<br />
(Assigned Data)<br />
Voice (~128KB)<br />
Screen Savers/Images (~128KB)<br />
Animation (~128KB)<br />
Animation Ringer (~128KB)<br />
Game (~128KB)<br />
Application (~128KB)<br />
Unknown type (~128KB)<br />
(New Data)<br />
(New Data)<br />
(New Data)<br />
(New Data)<br />
(New Data)<br />
(New Data)<br />
(New Data)<br />
(Assigned Data)<br />
(Assigned Data)<br />
(Assigned Data)<br />
(Assigned Data)<br />
Note: Download icon subject to change<br />
Sorting the Downloaded Data<br />
Files downloaded via the Web are stored in alphabetical order. You<br />
may also store the data in memory size order.<br />
To sort downloaded files:<br />
1. Press to access the main menu.<br />
2. Select Downloads and press .<br />
3. Select one of each folder that includes the downloaded data you<br />
want to sort.<br />
4. Press .<br />
5. Press Options (right softkey).<br />
6. Highlight Sorting from the options and press .<br />
<br />
<br />
Sorting to sort the downloaded data in alphabetical (Name)<br />
or memory size (Size) order.<br />
Icon/Size to show the downloaded data list with memory size.<br />
Erase All to erase all downloaded files you selected during<br />
step 3. (Downloaded data that has already been assigned<br />
cannot be erased.)<br />
7. Highlight Name or Size and press .<br />
Section 2H: Personal Organizer 121
Viewing the Downloaded Data Size<br />
This feature allows you to confirm each downloaded file’s size and<br />
the remaining download capacity.<br />
To view the data size:<br />
1. Press to access the main menu.<br />
2. Select Downloads and press .<br />
3. Select one of each folder that includes the downloaded data you<br />
want to confirm and press .<br />
4. Press Options (right softkey).<br />
5. Highlight Icon/Size and press . (Data size is displayed at the<br />
left of the downloaded data name.)<br />
Viewing the Memory Space Available for Downloads<br />
This feature allows you to confirm how much memory is left and may<br />
be used for downloading files.<br />
To view the available memory space:<br />
1. Press to access the main menu.<br />
2. Select Downloads and press .<br />
3. Press Options (right softkey).<br />
4. Highlight View Memory and press . (Used and Free memory<br />
size are displayed.)<br />
Erasing Old Downloaded Data<br />
If you try to download new data when the downloaded data’s<br />
memory is full, a warning message appears and you will be prompted<br />
to erase some old downloaded data.<br />
To erase downloaded data:<br />
1. When the warning message appears, press Erase (left softkey)<br />
to make a space for new download data. (Press the right softkey<br />
to cancel the download.)<br />
2. Select one of each folder that includes the data you want to<br />
erase and press .<br />
3. Select the data you want to erase and press Erase (left softkey).<br />
4. Select Yes and press . (You can now continue to download<br />
the new file.)<br />
Section 2H: Personal Organizer 122
Section 2I<br />
Using Your Phone’s Voice Services<br />
In This Section<br />
<br />
<br />
<br />
Using Voice-Activated Dialing<br />
Managing Voice Memos<br />
Setting Up Screen Call<br />
Your PCS Vision Phone’s Voice Services let you place calls using your<br />
voice, store voice reminders, and record memos right on your phone.<br />
This section includes easy-to-follow instructions on using voiceactivated<br />
dialing and managing voice memos.<br />
Section 2I: Using Your Phone’s Voice Services 123
Using Voice-Activated Dialing<br />
In addition to PCS Voice Command SM (see page 223), you can use a<br />
voice dial tag to automatically dial a phone number in your Contacts.<br />
(A voice dial tag is a command you record and use to place calls<br />
without using the keypad.) Your phone can store up to 30 voice dial<br />
tags. (To create a voice dial tag, see “Adding a New Contacts Entry” on<br />
page 89 or “Editing a Contacts Entry’s Phone Number” on page 93.)<br />
Making a Call Using Voice-Activated Dialing<br />
To use a voice dial tag to call a phone number:<br />
With the flip open:<br />
1. Press or briefly.<br />
2. Follow the voice prompts and recite the entry’s Voice Dial tag<br />
into your phone’s microphone.<br />
With the flip closed:<br />
1. Press and hold .<br />
2. Follow the voice prompts and recite the entry’s Voice Dial tag<br />
into your phone’s microphone.<br />
Note: To use the Voice Dial function, you must have a stored entries for Voice Dial<br />
(see “Programming Voice Dial Tags” below).<br />
Programming Voice DialTags<br />
To program a voice dial tag:<br />
1. Press to access the main menu.<br />
2. Select Voice Services and press .<br />
3. Select Voice Dial and press .<br />
4. Select Program and press .<br />
5. The phone will prompt you to say the name you want to<br />
program. Wait for the beep and then say the name.<br />
6. Respond to the prompt by repeating the name after the beep.<br />
Section 2I: Using Your Phone’s Voice Services 124
7. Enter or highlight the Voice Dial entry (name) in the Contacts<br />
list and press .<br />
8. Select the labeled category that includes your desired phone<br />
number and press . (The display shows “Voice Dial<br />
Recorded.”)<br />
Note: Record Voice Dial tags in a quiet environment and without the aid of an<br />
accessory (for example, a headset or hands-free car kit).<br />
Reviewing Voice Dial Tags<br />
To review voice dial tags:<br />
1. Press to access the main menu.<br />
2. Select Voice Services and press .<br />
3. Select Voice Dial and press .<br />
4. Select Review or Review:Speaker and press .<br />
5. Select the desired entry and press .<br />
– or –<br />
Select the desired entry and press Options (right softkey). To<br />
select an option, highlight it and press .<br />
Options:<br />
Play to play the recorded voice dial tag.<br />
<br />
<br />
Speaker On to play the recorded voice dial tag in speakerphone<br />
mode. (If you are in speakerphone mode, the option will appear<br />
as Speaker Off to deactivate.)<br />
Erase to erase the voice dial tag. Select Yes to erase and No to cancel.<br />
Erasing All Voice Dial Tags<br />
To erase all voice dial tags:<br />
1. Press to access the main menu.<br />
2. Select Voice Services and press .<br />
3. Select Voice Dial and press .<br />
4. Select Erase All and press .<br />
5. Select Yes and press .<br />
Section 2I: Using Your Phone’s Voice Services 125
Managing Voice Memos<br />
You can use your phone’s Voice Services to record brief memos to<br />
remind you of important events, phone numbers, or grocery list items.<br />
Tip: If you haven’t signed up for the PCS Ready Link service and PCS Ready Link<br />
mode is set to Disable, you can use the Ready Link (Memo) Button ( ) as a<br />
Voice Memo button in standby mode. You can use it to record memos or display<br />
Memo options.<br />
Recording Voice Memos<br />
To record a voice memo:<br />
1. Press to access the main menu.<br />
2. Select Voice Services and press .<br />
3. Select Voice Memo and press .<br />
4. Select Record and press .<br />
5. Start recording after the beep.<br />
To end the recording of your memo:<br />
Press , , or .<br />
Tip: Recording terminates automatically after 18 seconds.<br />
Tip: To record in speakerphone mode, press and hold<br />
in standby mode.<br />
To record a conversation during a phone call:<br />
1. During a call, press to see the options.<br />
2. Select Voice Services and press .<br />
3. Select Voice Memo and press .<br />
4. Select Record and press .<br />
5. Start recording after the beep.<br />
To end the recording of your conversation:<br />
Press or while recording.<br />
– or –<br />
Press<br />
to stop recording and disconnect the call.<br />
Section 2I: Using Your Phone’s Voice Services 126
Recording also stops when the other party hangs up the call.<br />
<br />
<br />
Memo recording is disabled while you are roaming in analog<br />
service areas.<br />
When the recording capacity is full, highlight an old memo, and<br />
press Erase (left softkey). Then select Yes and press to make<br />
room for additional memos.<br />
Note: Your phone can store up to 12 memos and the total available recording time<br />
is 72 seconds (maximum of 18 seconds per memo).<br />
Tip: Voice Memos are stored with the date and time stamp in reverse<br />
chronological order, except when recorded in a no service area.<br />
Voice Memo Options<br />
To play the voice memos you have recorded:<br />
1. Press to access the main menu.<br />
2. Select Voice Services and press .<br />
3. Select Voice Memo and press .<br />
4. Select Play or Play:Speaker and press .<br />
5. Select one memo from the list and press .<br />
– or –<br />
If you want to play all memos continuously, highlight All and<br />
press .<br />
6. Press to stop playing.<br />
<br />
<br />
Press Slow (left softkey) or Fast (right softkey) to change the<br />
playing speed.<br />
To play the newer/older memo, press the navigation key<br />
right or left.<br />
Tip: To set the speakerphone mode on or off, press Options (right softkey),<br />
highlight Speaker On/Off, and press during step 5 above.<br />
Section 2I: Using Your Phone’s Voice Services 127
Erasing Voice Memos<br />
To erase all voice memos:<br />
1. Follow steps 1-4 on the previous page.<br />
2. Press Options (right softkey).<br />
3. Select Erase All and press .<br />
4. Select Yes and press .<br />
– or –<br />
1. Press to access the main menu.<br />
2. Select Voice Services and press .<br />
3. Select Voice Memo and press .<br />
4. Select Erase All and press .<br />
5. Select Yes and press .<br />
To erase individual memos:<br />
1. Press to access the main menu.<br />
2. Select Voice Services and press .<br />
3. Select Voice Memo and press .<br />
4. Select Play or Play:Speaker and press .<br />
5. Display the memo list, highlight the memo you want to erase,<br />
and press Options (right softkey).<br />
6. Select Erase and press .<br />
7. Select Yes and press .<br />
Section 2I: Using Your Phone’s Voice Services 128
Setting Up Screen Call<br />
This feature enables you to screen incoming calls by using a recorded<br />
announcement, either one that is pre-recorded or one that you record.<br />
You can also record the caller’s message into the Voice Memo list.<br />
To listen to the message, see “Voice Memo Options” on page 127.<br />
Activating Screen Call<br />
To start Screen Call when you have incoming calls:<br />
1. When the phone rings or vibrates, press Options (right softkey)<br />
to display the options.<br />
2. Highlight Screen Call and press .<br />
To set Auto Screen Call:<br />
1. Press to access the main menu.<br />
2. Select Voice Services and press .<br />
3. Select Screen Call and press .<br />
4. Select Auto and press .<br />
5. Select On and press .<br />
6. Set the answering time by using numeric keys or by pressing the<br />
navigation key up or down.<br />
7. Press or OK (left softkey). (The icon is displayed on the<br />
standby display.)<br />
Tip: If a new caller’s message is waiting, appears on the display. The memos<br />
recorded while activating “Screen Call” are shown with “√” or “!” icon in the list<br />
(“√”: once played, “!”: not played yet).<br />
Tip: While the caller’s message is being recorded: Pressing<br />
and disconnects the call, pressing answers the call.<br />
stops recording<br />
Section 2I: Using Your Phone’s Voice Services 129
Selecting an Announcement for Screen Call<br />
To select a Screen Call announcement:<br />
1. Press to access the main menu.<br />
2. Select Voice Services and press .<br />
3. Select Screen Call and press .<br />
4. Select Announcement and press .<br />
5. Depending on your preference, highlight Pre-Recorded or<br />
Custom and press .<br />
RecordingYour Name for a Pre-Recorded Announcement<br />
You can use a pre-recorded announcement with or without your<br />
name. If you record your name, your phone uses your name to<br />
announce that you are not available to answer the call.<br />
To record your name:<br />
1. Press to access the main menu.<br />
2. Select Voice Services and press .<br />
3. Select Screen Call and press .<br />
4. Select Announcement and press .<br />
5. Select Pre-Recorded and press Edit (right softkey).<br />
6. Select Record Name and press .<br />
If your name has already been recorded, select Yes or No to<br />
overwrite the existing recording.<br />
7. Press to start the first recording. (Press to stop recording.)<br />
8. After the first recording, press again to start the second<br />
recording.<br />
9. Press to stop recording.<br />
Tip: Recording terminates automatically after 12 seconds.<br />
Section 2I: Using Your Phone’s Voice Services 130
Recording a Customized Announcement<br />
To record an announcement:<br />
1. Follow steps 1-4 on the previous page.<br />
2. Select Custom and press Edit (right softkey).<br />
3. Highlight Record and press .<br />
When an announcement has already been recorded, select<br />
Yes or No to overwrite the existing recording.<br />
4. Press to start the first recording. (Press to stop recording.)<br />
5. After the first recording, press again to start the second<br />
recording.<br />
6. Press to stop recording.<br />
Tip: Recording terminates automatically after 12 seconds.<br />
Reviewing an Announcement<br />
To review an announcement:<br />
1. Press to access the main menu.<br />
2. Select Voice Services and press .<br />
3. Select Screen Call and press .<br />
4. Select Announcement and press .<br />
5. Select Pre-Recorded or Custom and press Edit (right softkey).<br />
6. Highlight Play or Play:Speaker and press .<br />
Erasing an Announcement<br />
To erase an announcement:<br />
1. Follow steps 1-5 above.<br />
2. Select Erase Name to erase the name for a Pre-Recorded<br />
announcement and press .<br />
– or –<br />
Select Erase to erase the message for a Custom announcement<br />
and press .<br />
3. Select Yes and press .<br />
Section 2I: Using Your Phone’s Voice Services 131
Section 2J<br />
Using PCS Ready Link<br />
In This Section<br />
<br />
<br />
<br />
<br />
<br />
<br />
Getting Started With PCS Ready Link<br />
Making and Receiving a PCS Ready Link Call<br />
Adding and Editing Ready Link Contacts<br />
Erasing Ready Link List Entries<br />
Updating Your PCS Ready Link Lists<br />
Managing PCS Ready Link Settings<br />
Your PCS Vision Ready Link Phone gives you the ability to quickly connect<br />
with other PCS Ready Link users for walkie-talkie-style communication<br />
from anywhere, to anywhere on the Sprint Nationwide PCS Network.<br />
It’s ideal for quick two-way conversations with your friends, family,<br />
and co-workers.<br />
This section explains the features and options of your PCS Vision<br />
Ready Link Phone.<br />
Section 2J: Using PCS Ready Link 132
Getting Started With PCS Ready Link<br />
PCS Ready Link allows you to enjoy quick, two-way, “walkie-talkie-style”<br />
communication with your friends, family, and co-workers. You can<br />
make 1-to-1 or 1-to-many calls (up to 5 others on the same call) to any<br />
other PCS Ready Link user, anywhere on the Sprint Nationwide<br />
PCS Network. You can make and receive PCS Ready Link calls when<br />
your phone displays .<br />
Setting PCS Ready Link Mode<br />
To enable or disable PCS Ready Link mode:<br />
1. Press to access the main menu.<br />
2. Select Settings and press .<br />
3. Select Ready Link and press .<br />
4. Select Enable/Disable and press .<br />
5. Select Enable and press . (The default setting is Disable.)<br />
Enable: Lets you make or receive PCS Ready Link calls any<br />
time your phone is not in use.<br />
Disable: Disables your phone’s PCS Ready Link service; you<br />
will not be able to make or receive PCS Ready Link calls or<br />
access your Ready Link contacts.<br />
Tip: If you haven’t signed up for the PCS Ready Link service and PCS Ready Link<br />
mode is set to Disable, you can use the Ready Link (Memo) Button ( ) as a<br />
Voice Memo button in standby mode.<br />
Section 2J: Using PCS Ready Link 133
PreparingYour Phone for PCS Ready Link Service<br />
The first time you use your PCS Vision Ready Link Phone, your phone<br />
must identify itself and make itself available to the Ready Link network.<br />
1. When you activate PCS Ready Link for the first time, you will be<br />
prompted to activate Ready Link service. Press OK (left softkey)<br />
to activate. (You will see “Preparing Ready Link service... Please<br />
wait.”)<br />
2. Press R-Link (left softkey) or the Ready Link (Memo) button on<br />
the side of your phone ( ). (The PCS Ready Link Help<br />
message will appear.)<br />
3. Press Yes (left softkey) to read a brief introduction to PCS Ready<br />
Link, and press Next (left softkey) to continue through the tutorial.<br />
Your phone is now ready to make and receive PCS Ready Link calls.<br />
Ready Link Call Alerts<br />
There are several ways your PCS Phone alerts you during PCS Ready<br />
Link calls.<br />
When you make or receive a PCS Ready Link call:<br />
The phone sounds (depending on the Ringer Type and Ringer<br />
Volume setting).<br />
The backlight illuminates.<br />
The screen displays a PCS Ready Link call message.<br />
The other party’s PCS Ready Link number and name (if available)<br />
are displayed.<br />
The screen displays who has the floor.<br />
The status of a PCS Ready Link call:<br />
The Green LED On indicates you have the floor and may speak.<br />
The Red LED On indicates another contact has the floor.<br />
The LED Off indicates the floor is open. (You can take the floor<br />
and speak by pressing and holding .)<br />
Section 2J: Using PCS Ready Link 134
Making and Receiving a PCS Ready Link Call<br />
Displaying the PCS Ready Link List<br />
<br />
From standby mode, press R-Link (left softkey) or the Ready Link<br />
(Memo) button on the side of your phone ( ) to access the<br />
PCS Ready Link List.<br />
Selecting Contact Lists<br />
When your phone displays a PCS Ready Link List, the left softkey is<br />
labeled Go to. To switch to another contact list, press Go to (left<br />
softkey), highlight your desired list, and press .<br />
Company List/ Company Groups contain company-provided contacts<br />
(up to 200 entries). Your company list can only be created and<br />
modified by an authorized administrator on the PCS Ready Link<br />
server. You cannot add, edit, or delete Company List items, but<br />
you can copy entries to your Personal Lists.<br />
Personal List/Personal Groups contain your personal Ready Link<br />
contact names and numbers, separately or in groups. You can<br />
create and edit your own Personal List. Your phone can store a<br />
total of 200 entries (you may include up to five contacts per<br />
group).<br />
Outgoing shows the last 10 different PCS Ready Link calls you<br />
placed.<br />
Incoming shows the last 10 different PCS Ready Link calls you<br />
accepted.<br />
Missed shows the last 10 PCS Ready Link calls you missed.<br />
Note: The<br />
icon next to the group name indicates a group.<br />
Section 2J: Using PCS Ready Link 135
Making a PCS Ready Link Call (1-to-1 Call)<br />
You can place a 1-to-1 PCS Ready Link call by entering a PCS Ready<br />
Link number or by selecting a contact from the PCS Ready Link List.<br />
To place a PCS Ready Link call by selecting a contact:<br />
1. Press R-Link (left softkey) or press to access the PCS Ready<br />
Link List.<br />
2. Press Go to (left softkey), highlight the list from which you want<br />
to place a call (Company List, Personal List, Outgoing, Incoming,or<br />
Missed), and press .<br />
Tip: You can also select Enter R-Link# from the Go to option to enter a PCS Ready<br />
Link number directly. (See page 138 for details.)<br />
3. Highlight the contact you want to call, and press and hold<br />
to place the call and get the floor. (You will see R-Link calling...<br />
and Connecting... followed by “You have floor.” You can now<br />
begin speaking.)<br />
– or –<br />
Highlight the contact you want to call and press and release<br />
to place the call. (The call will connect as described above,<br />
but “Floor is open.” will appear on the screen and either you or<br />
your contact may press and hold to take the floor and<br />
speak.)<br />
To see an entry’s information, press during step 3 above.<br />
Note: During a PCS Ready Link call, the “floor” is the right to speak. When you see<br />
“Floor is open.,” the first person to press the Ready Link (Memo) button ( ) can<br />
speak (while holding the button). Only the person who has the floor can speak.<br />
The phone beeps if you press the Ready Link (Memo) button when another<br />
contact has the floor.<br />
4. Continue holding as you speak. When you are finished<br />
speaking, release the Ready Link (Memo) button to allow other<br />
contacts to speak. (When the other party takes the floor, you<br />
will see the speaker’s name and phone number and the text<br />
“has floor.”)<br />
5. When you are finished, press .<br />
Note: When neither party has the floor during a PCS Ready Link call,<br />
“Floor is open.” appears on the display. If no one takes the floor for 20 seconds,<br />
the PCS Ready Link call ends automatically.<br />
Tip: If you press or during step 3 above, you can make a standard<br />
voice call.<br />
Section 2J: Using PCS Ready Link 136
Making a PCS Ready Link Call (Group Call)<br />
You can make a PCS Ready Link call to all members in a Group entry,<br />
which you have in your PCS Ready Link List. You can communicate<br />
with up to five members at a time.<br />
To place a PCS Ready Link Group call:<br />
1. Press R-Link (left softkey) or press to access the PCS Ready<br />
Link List.<br />
2. Press Go to (left softkey), highlight the list from which you want<br />
to make a Group call (Company Groups or Personal Groups), and<br />
press .<br />
3. Highlight the group you want to call, and press and hold to<br />
place the call and take the floor. (You will see R-Link calling... and<br />
Connecting... followed by “You have floor.” Continue with the<br />
PCS Ready Link call as described on the previous page.)<br />
To display a group member’s details, press , highlight<br />
your desired group member, then press View (left softkey)<br />
during step 3 above. Press to make a PCS Ready Link<br />
call to the member.<br />
If one of the group members takes the floor, you will see the<br />
member’s name and PCS Ready Link number on the display.<br />
The phone beeps if you press the Ready Link (Memo)<br />
button when another contact has the floor.<br />
4. When the call is finished, press .<br />
Tip: You can also make a Group Call after checking the group member. Press<br />
to display group members, highlight and press and hold during<br />
step 3 above.<br />
Section 2J: Using PCS Ready Link 137
Making a PCS Ready Link Call by Entering a Number<br />
To place a PCS Ready Link call by entering a number:<br />
1. From standby mode, enter the PCS Ready Link number you<br />
want to dial.<br />
2. Press to place the PCS Ready Link call. Continue holding<br />
to take the floor and speak.<br />
The contact’s name appears on the display if there is a<br />
matched number in your PCS Ready Link List.<br />
3. Continue with the PCS Ready Link call, pressing and holding<br />
to speak and releasing it to allow others to reply.<br />
4. When the call is finished, press .<br />
– or –<br />
1. Press R-Link (left softkey) or press to access the PCS Ready<br />
Link List.<br />
2. Press Go to (left softkey), highlight Enter R-Link# and press .<br />
3. Enter the PCS Ready Link number you want to dial.<br />
4. Follow steps 2-4 above.<br />
Note: PCS Ready Link numbers must contain ten digits (area code + phone<br />
number). Your PCS Ready Link number is the same as your PCS Phone number.<br />
Missed Call Notification for PCS Ready Link Calls<br />
When an incoming PCS Ready Link call is not answered, the Missed<br />
Call Notification is displayed on your screen.<br />
To call the last Missed PCS Ready Link call:<br />
Simply press and hold while the Missed Call Notification is<br />
displayed. (Continue with the PCS Ready Link call as described<br />
previously.)<br />
To display the Missed Ready Link Call Log:<br />
Press View (left softkey). To call the entry, highlight the entry<br />
you want to call, and press and hold . (Continue with the<br />
PCS Ready Link call as described previously.)<br />
Note: When you display Missed Calls entries, you will see the icon next to the<br />
name. The icon will remain until you make or receive a PCS Ready Link call to<br />
or from the entry. The icon appears next to the new missed call entry.<br />
Section 2J: Using PCS Ready Link 138
Receiving a PCS Ready Link Call (1-to-1 Call)<br />
1. Make sure your phone’s PCS Ready Link mode is enabled (see<br />
“Setting PCS Ready Link Mode” on page 133).<br />
2. When you receive a PCS Ready Link call from a contact, “R-Link<br />
Call,” the contact’s name, and the PCS Ready Link number<br />
appear on the display. (You do not need to take any action to<br />
answer the call.)<br />
3. If the person placing the call has kept the floor (held the<br />
Ready Link [Memo] button), you will see the contact name and<br />
PCS Ready Link number along with “has floor.”, and you will<br />
hear the caller speaking.<br />
4. When the caller finishes speaking and releases the Ready Link<br />
(Memo) button, you will see “Floor is open.” on the display<br />
screen. Press and hold to take the floor and reply to the<br />
caller. (You will see “You have floor.” and hear a tone confirming<br />
that you may speak.)<br />
5. When the conversation is finished, press .<br />
Receiving a PCS Ready Link Call (Group Call)<br />
1. When you receive a PCS Ready Link call from one of the group<br />
members, “Group Call,” the group member’s name, and the<br />
PCS Ready Link number appear on the display.<br />
2. Continue with the PCS Ready Link call as described previously.<br />
3. When the conversation is finished, press .<br />
Section 2J: Using PCS Ready Link 139
Redialing a PCS Ready Link Call<br />
You can redial to the last PCS Ready Link call that you dialed or<br />
received (whichever was more recent).<br />
To redial a PCS Ready Link call:<br />
1. From the PCS Ready Link List, highlight Redial, and press and<br />
hold .<br />
You will see R-Link redialing... and Connecting... followed by<br />
the text “You have floor.”<br />
2. Speak after the beep (keep pressing down while you are<br />
speaking). After speaking, release the button to allow others to<br />
reply.<br />
3. When you are finished, press .<br />
Note: You can change the volume and the speaker setting while a PCS Ready<br />
Link call is activated. Volume: Adjust the voice volume by using the Side Volume<br />
key or by pressing the navigation key up or down except when you are pressing<br />
and holding . Speaker: Switch the speaker on or off by pressing .<br />
PCS Ready Link Options<br />
When you use PCS Ready Link, several user options are available by<br />
pressing Options (right softkey). To select an option, highlight it and<br />
press .<br />
Copy to copy a contact to the Personal List. Copy Group appears<br />
when you highlight a group. (This option doesn’t appear if the<br />
entry is already in the Personal List or when you select Personal<br />
List/Personal Groups.)<br />
Edit to edit a PCS Ready Link number and/or name. See page 145.<br />
<br />
<br />
<br />
<br />
Erase to erase a contact. Erase Group appears when you highlight a<br />
group.<br />
Add Contact to add a new contact. Add Group appears when you<br />
highlight a group list. See page 143 for details.<br />
Erase R-Link List to erase entries saved in the PCS Ready Link List<br />
(except Company List/Company Groups).<br />
Help to see the PCS Ready Link instruction page.<br />
Note: When you use additional accessories, the volume of Ready Link floor tones<br />
is fixed as follows. Speaker/Car Kit: Level 3. Earpiece/Headset: Level 2.<br />
Section 2J: Using PCS Ready Link 140
Adding and Editing Ready Link Contacts<br />
Copying an Entry to Personal List or Personal Group List<br />
You can copy an entry to your Personal Lists from several different<br />
sources. If the selected entry is already stored in the Personal Lists,<br />
the “copy” option does not appear.<br />
To copy an entry from the last PCS Ready Link call:<br />
1. From the PCS Ready Link List, highlight Redial and press .<br />
2. Press Copy (right softkey).<br />
3. Press Yes (left softkey) to complete copying.<br />
To copy an entry from the PCS Ready Link List:<br />
1. Press R-Link (left softkey) or press to access the PCS Ready<br />
Link List.<br />
2. Press Go to (left softkey), highlight the list from which you want<br />
to copy a contact (Company List, Company Groups, Outgoing,<br />
Incoming, or Missed), and press .<br />
3. Highlight the entry you want to copy (or scroll to highlight the<br />
Redial entry at the top of your screen) and press Options (right<br />
softkey).<br />
4. Highlight Copy and press .<br />
Copy Group appears when you highlight a group during<br />
step 3 above.<br />
5. Press Yes (left softkey) to copy and save the entry to your<br />
Personal List or Personal Group List.<br />
To copy an entry from the Company List:<br />
1. Press to access the main menu.<br />
2. Select Contacts and press .<br />
3. Select Find/Add Entry and press .<br />
4. Press Go to (left softkey), highlight Company List, and press .<br />
5. Highlight a contact you want to copy and press Options (right<br />
softkey). To select an option, highlight it and press .<br />
Copy to Personal to copy the entry to the Personal List.<br />
Copy to Ph. Book to copy the entry to the Contacts list.<br />
6. Press Yes (left softkey) to complete copying.<br />
Section 2J: Using PCS Ready Link 141
To copy an entry from the Company Group List:<br />
1. From step 4 on the previous page, highlight Company Groups and<br />
press .<br />
2. Highlight a group you want to copy and press Options (right<br />
softkey). To select an option, highlight it and press .<br />
Copy to Personal to copy the entry to your Personal Group List.<br />
Exit to exit the options.<br />
3. Press Yes (left softkey) to complete copying.<br />
Note: Your Company Lists can only be set up and edited by an authorized<br />
administrator on the PCS Ready Link server. You cannot add or edit<br />
contacts/groups to your Company Lists.<br />
Saving a PCS Ready Link Number<br />
When you have finished a PCS Ready Link call, you will see the<br />
caller’s name, PCS Ready Link number, and the text “R-Link call<br />
ended.” on the display. You can save a PCS Ready Link number from<br />
the ending display to your Personal Lists.<br />
To save the number:<br />
1. From the ending display, press Save (right softkey).<br />
2. Press Yes (left softkey).<br />
<br />
If the entry has no name, you are prompted to enter a name.<br />
Note: If the number is already stored in the Personal List or Personal Groups, the<br />
“Save” softkey does not appear.<br />
Finding an Entry in the PCS Ready Link List<br />
You can find your desired entry by entering a few letters.<br />
To find a PCS Ready Link entry:<br />
1. Press R-Link (left softkey) or press to access the PCS Ready<br />
Link List.<br />
2. Press Go to (left softkey), highlight your desired list (Company List,<br />
Company Groups, Personal List, or Personal Groups), and press .<br />
3. Enter the first letter or the first few letters of the name.<br />
The display shows the list beginning with the letter(s) you<br />
entered.<br />
4. Scroll through the list and press to select your desired entry.<br />
Section 2J: Using PCS Ready Link 142
Adding a New Contact to Your Personal List<br />
You can store a total of 200 entries in the Personal Lists.<br />
To add a new PCS Ready Link contact:<br />
1. Press R-Link (left softkey) or press to access the PCS Ready<br />
Link List.<br />
2. Press Go to (left softkey), highlight Personal List, and press .<br />
3. Highlight and press .<br />
– or –<br />
Highlight an entry and press Options (right softkey). Then<br />
highlight Add Contact and press .<br />
If the Personal List is full, you will see a warning message on<br />
the display. (Your phone can store a total of 200 Ready Link<br />
Personal List or Personal Group contacts.)<br />
4. Enter a name for the new contact and press . (This is the<br />
name you will see when calling or receiving a call from the<br />
contact.)<br />
5. Highlight the R-Link Number field, enter the contact’s 10-digit<br />
PCS Ready Link number (their PCS Phone number) and<br />
press .<br />
6. Press Save (left softkey) to save the new contact to your<br />
Personal List.<br />
Tip: You are not allowed to use the following symbols during step 4: “:”, “@”, “;”,<br />
“/”, “*”, “)”, and “(”.<br />
Section 2J: Using PCS Ready Link 143
Adding a New Group to Your Personal Group List<br />
You can add new groups to the Personal Group List. Each group can<br />
include up to five members. You can enter a group member directly,<br />
or select the member from the Company List or Personal List.<br />
To add a new PCS Ready Link group entry:<br />
1. Press R-Link (left softkey) or press to access the PCS Ready<br />
Link List.<br />
2. Press Go to (left softkey), highlight Personal Groups, and press .<br />
3. Highlight and press .<br />
– or –<br />
Highlight an entry and press Options (right softkey). Then<br />
highlight Add Group and press .<br />
4. Enter a Group Name, press , and press Next (left softkey).<br />
5. To add contacts to the group, press Add (right softkey).<br />
6. Highlight one item from the following and press :<br />
<br />
<br />
New to add a new contact. See the previous page for details.<br />
from Company to add a contact from your Company List.<br />
from Personal to add a contact from your Personal List.<br />
7. Scroll to select the contacts you want to add and press or<br />
Pick (right softkey) to include the entries.<br />
8. Press Done (left softkey) when you are finished selecting<br />
contacts, then press Update (left softkey) to update your<br />
Personal Group List with the new group entry.<br />
Tip: You can also add members directly. From step 5 above, highlight<br />
and press . Enter the new member’s name and R-Link number<br />
and press Save (left softkey) to save the entry.<br />
Section 2J: Using PCS Ready Link 144
Editing a Contact in Your Personal List<br />
To edit a Personal List contact:<br />
1. Follow steps 1-2 in “Adding a New Contact to Your Personal<br />
List” on page 143.<br />
2. Highlight the entry you want to edit and press Options (right<br />
softkey).<br />
Edit to edit the selected contact.<br />
<br />
<br />
Erase to erase the selected contact.<br />
Add Contact to add a new contact.<br />
Erase R-Link List to erase the PCS Ready Link List.<br />
See page 147 for details.<br />
Help to view the PCS Ready Link instruction page.<br />
3. Highlight Edit and press .<br />
4. Highlight the field you want to edit (Name or R-Link Number),<br />
and press .<br />
5. Edit the entry, press OK (left softkey), and press Save (left<br />
softkey) to save your changes.<br />
Editing a Group in Your Personal Group List<br />
To edit a group name:<br />
1. Follow steps 1-2 in “Adding a New Group to Your Personal<br />
Group List” on the previous page.<br />
2. Highlight the group entry you want to edit and press Options<br />
(right softkey).<br />
Edit to edit the selected group.<br />
<br />
<br />
<br />
<br />
Erase Group to erase the selected group.<br />
Add Group to add a new group.<br />
Erase R-Link List to erase the PCS Ready Link List.<br />
See page 147 for details.<br />
Help to view the PCS Ready Link instruction page.<br />
Section 2J: Using PCS Ready Link 145
3. Highlight Edit and press .<br />
4. Edit the group name and press or OK (left softkey).<br />
If you don’t need to edit the group name, press Next (left<br />
softkey) during step 4 above and skip step 5.<br />
5. Press Save (left softkey) to save your changes.<br />
6. To edit a group member, highlight the contact you want to edit<br />
and press Options (right softkey).<br />
<br />
<br />
Edit to edit a group member’s name and phone number.<br />
Erase to erase the group member.<br />
Add New to add a new group member in the Personal Group<br />
List.<br />
Add (Company) to add a new group member from the<br />
Company List.<br />
Add (Personal) to add a new group member from the<br />
Personal List.<br />
Details to display a group member’s information.<br />
7. Highlight Edit and press .<br />
8. Highlight the field you want to edit (Name or R-Link Number) and<br />
press .<br />
9. Edit the entry, press OK (left softkey), and press Save (left<br />
softkey) to save your changes.<br />
10. Press Update (left softkey) to update your Personal Group List.<br />
Section 2J: Using PCS Ready Link 146
Erasing Ready Link List Entries<br />
Erasing an Entry in Your Personal List or Personal<br />
Group List<br />
To erase a contact or a group:<br />
1. From the PCS Ready Link List, press Go to (left softkey),<br />
highlight Personal List or Personal Groups, and press .<br />
2. Highlight the entry you want to erase and press Options (right<br />
softkey).<br />
3. Highlight Erase and press .<br />
Erase Group appears when you select Personal Groups.<br />
4. Select Yes and press .<br />
To erase a group member:<br />
1. From the PCS Ready Link List, press Go to (left softkey),<br />
highlight Personal Groups, and press .<br />
2. Highlight your desired group and press to display the group<br />
members.<br />
3. Highlight the contact you want to erase and press Options (right<br />
softkey).<br />
4. Highlight Erase and press .<br />
5. Select Yes and press .<br />
6. Press Update (left softkey) to update your Personal Group List.<br />
Erasing a PCS Ready Link List<br />
You can erase all entries saved in the PCS Ready Link List (except<br />
Company List/Company Groups).<br />
To erase a PCS Ready Link List:<br />
1. From the PCS Ready Link List, press Options (right softkey).<br />
2. Highlight Erase R-Link List and press .<br />
Section 2J: Using PCS Ready Link 147
3. Highlight your desired option and press .<br />
<br />
<br />
<br />
<br />
Outgoing to erase all outgoing PCS Ready Link calls.<br />
Incoming to erase all incoming PCS Ready Link calls.<br />
Missed to erase all missed PCS Ready Link calls.<br />
All to erase all PCS Ready Link call history, except redial.<br />
All Personal Ent. to erase all entries in Personal List and<br />
Personal Groups. You are prompted to enter your 4-digit<br />
lock code. (See “Unlocking Your Phone” on page 66.)<br />
4. Select Yes and press .<br />
Tip: The Redial number will not be erased.<br />
UpdatingYour PCS Ready Link Lists<br />
Updating the Company List and Personal List<br />
To update your Company List and Personal List manually through<br />
the PCS Ready Link server:<br />
1. Press to access the main menu.<br />
2. Select Settings and press .<br />
3. Select Ready Link and press .<br />
4. Select List Update and press .<br />
Managing PCS Ready Link Settings<br />
Setting Speed Dialing for PCS Ready Link Entries<br />
To set Speed Dialing for PCS Ready Link entries:<br />
1. Press to access the main menu.<br />
2. Select Contacts and press .<br />
3. Select Speed Dial #s and press .<br />
4. Highlight an unassigned number and press .<br />
When you highlight an assigned number and press ,<br />
you’ll be asked whether you want to overwrite the assigned<br />
number. Select Yes or No, or you can also select Unassign to<br />
cancel the stored speed dial.<br />
5. Press Go to (left softkey), highlight the list from which you want<br />
to set a speed dial (Company List, Company Groups, Personal List,<br />
or Personal Groups) and press .<br />
Section 2J: Using PCS Ready Link 148
6. Select the contact and press .<br />
– or –<br />
Select the group and press , select an option, and press .<br />
Assign to assign the selected group as a speed dial.<br />
<br />
Details to display the group details. You can select the entry<br />
from the group list.<br />
To use Speed Dial for a PCS Ready Link entry:<br />
<br />
From standby mode, press the appropriate key and press and<br />
hold .<br />
Restarting the Ready Link Service<br />
To restart the PCS Ready Link service:<br />
1. Press to access the main menu.<br />
2. Select Settings and press .<br />
3. Select Ready Link and press .<br />
4. Select Restart R-Link and press .<br />
Setting Ready Link Guard<br />
This feature enables you to display the warning message when you<br />
cannot receive PCS Ready Link calls. The warning message will<br />
appear when you are launching a Web or Java application, or<br />
sending/uploading your pictures.<br />
To set the Ready Link Guard:<br />
1. Press to access the main menu.<br />
2. Select Settings and press .<br />
3. Select Ready Link and press .<br />
4. Select R-Link Guard and press . (A message will appear.)<br />
5. Press OK (left softkey) to continue.<br />
6. Select On and press .<br />
<br />
To deactivate this feature, select Off during step 6 above.<br />
Section 2J: Using PCS Ready Link 149
Setting Ringer Types for PCS Ready Link Calls<br />
Your PCS Vision Phone provides a variety of ringer types that allow<br />
you to customize your ringer and volume settings.<br />
To select a ringer type for PCS Ready Link calls:<br />
1. Press to access the main menu.<br />
2. Select Settings and press .<br />
3. Select Ready Link and press .<br />
4. Select Ringer Type and press .<br />
5. Select the menu under Ready Link Calls and press .<br />
6. Select your desired ringer type and press .<br />
<br />
To confirm the ringer, press Play (right softkey).<br />
Tip: You can also change the ringer type from the Settings menu (see “Selecting<br />
Ringer Types for PCS Ready Link Calls” on page 37).<br />
Setting an Alert Notification for PCS Ready Link Calls<br />
Your PCS Phone can alert you with an audible tone when you receive<br />
a PCS Ready Link call.<br />
To set alerts for PCS Ready Link calls:<br />
1. Press to access the main menu.<br />
2. Select Settings and press .<br />
3. Select Ready Link and press .<br />
4. Select Alerts and press .<br />
5. Select Once or Repeat Alert and press .<br />
Tip: You can also set alerts from the Settings menu (see “Alert Notification” on<br />
page 42).<br />
Section 2J: Using PCS Ready Link 150
Setting the Speakerphone for PCS Ready Link Calls<br />
You can set the speakerphone on or off when PCS Ready Link call is<br />
activated. By default, the speakerphone is set to on.<br />
To set the speakerphone on or off:<br />
1. Press to access the main menu.<br />
2. Select Settings and press .<br />
3. Select Ready Link and press .<br />
4. Select Speakerphone and press .<br />
5. Select On or Off and press .<br />
Note: If the phone’s ringer volume is set to Vibrate, Ringer off, or Silence All, the<br />
speakerphone turns off. Press to turn the speakerphone mode on.<br />
Setting the Default View of the PCS Ready Link List<br />
You can select the default PCS Ready Link List when PCS Ready Link<br />
is launched.<br />
To select the default view of the PCS Ready Link List:<br />
1. Press to access the main menu.<br />
2. Select Settings and press .<br />
3. Select Ready Link and press .<br />
4. Select Default View and press . (The default setting is<br />
Company List.)<br />
5. Select your desired list and press .<br />
Note: If there are no data in the Company lists, your phone will display your<br />
Personal List.<br />
Section 2J: Using PCS Ready Link 151
Section 2K<br />
Using Your Phone’s Built-in Camera<br />
In This Section<br />
<br />
<br />
<br />
<br />
Taking Pictures<br />
Sending Picture Mail SM<br />
Storing Pictures in My Pictures<br />
Managing Picture Mail SM<br />
Your PCS Vision Picture Phone’s built-in camera gives you the ability to<br />
take full-color digital pictures, view your pictures using the phone’s<br />
display, and instantly send them to your family and friends. It’s fun<br />
and as easy to use as a traditional point-and-click camera: just take a<br />
picture, view it on your phone’s display, and send it from your<br />
phone to up to ten people.<br />
This section explains the features and options of your PCS Vision<br />
Picture Phone’s built-in camera.<br />
Section 2K: Using Your Phone’s Built-in Camera 152
Taking Pictures<br />
Taking pictures with your phone’s built-in camera is as simple as<br />
choosing a subject, pointing the lens, and pressing a button. You can<br />
activate camera mode and take pictures whether the phone is open<br />
or closed.<br />
To take a picture with the phone open:<br />
1. Press to access the main menu.<br />
2. Select Pictures and press to access the Pictures menu.<br />
3. Select Camera and press to activate camera mode.<br />
(Additional user options are available through the camera mode<br />
Options menu. See “Camera Mode Options” on page 155 for<br />
more information.)<br />
Shortcut: To activate camera mode, you can also press and hold<br />
camera key (see illustration on page 10).<br />
or the side<br />
4. Using the phone’s main LCD as a viewfinder, aim the camera<br />
lens at your subject.<br />
5. To take the picture, press , , Capture (left softkey), or the<br />
Side Camera key. (The picture will be saved automatically in<br />
your In Camera folder.)<br />
To return to camera mode to take another picture, press .<br />
6. Press Next (right softkey) to go to the next step.<br />
Steps:<br />
Send Picture to send the picture. (See page 162 for details.)<br />
Upload to upload the picture you just took to the Picture Mail<br />
Website. Depending on your settings, you may be prompted to<br />
accept a PCS Vision connection.<br />
Set as Picture ID to assign the picture as a Picture ID.<br />
Set as Scrn Saver to assign the picture as a Screen Saver.<br />
Go to Camera to return to camera mode to take another picture.<br />
Pics in camera to go to the In Camera folder to review your saved<br />
pictures.<br />
Delete to delete the picture you just took.<br />
Section 2K: Using Your Phone’s Built-in Camera 153
To take a picture with the phone closed:<br />
1. Press and hold the side camera key to activate camera mode.<br />
2. Point the camera lens at your subject. (You can check the<br />
picture framing through the Sub LCD.)<br />
Note: When taking a picture with the phone closed, the subject image appears in<br />
reverse on the external display. The captured image will not be saved in reverse.<br />
3. Press the side camera key to take the picture. (The picture will<br />
be saved automatically in your In Camera folder.)<br />
Open the flip to review the picture and go to the next step.<br />
Note: While you are taking a picture, the backlight turns on even if your backlight<br />
is set to Always Off.<br />
Note: In some cases, the screen may flicker and the stripes may appear on the<br />
display under fluorescent lighting.<br />
Creating Your Picture Mail SM Password<br />
The first time you use any of the Picture Mail management options<br />
involving the Picture Mail Website, you will need to establish a<br />
Picture Mail password through your PCS Vision Picture Phone. This<br />
password will also allow you to sign in to the Picture Mail Website at<br />
picturemail.sprintpcs.com to access and manage your uploaded pictures<br />
and albums.<br />
To create your Picture Mail password:<br />
1. Press to access the main menu.<br />
2. Select Pictures and press to access the Pictures menu.<br />
3. Select Online Albums and press .<br />
4. Select View Albums and press . (You will be prompted to<br />
create a pictures password.)<br />
Note: If your PCS Service Plan does not include Picture Mail, you will first be<br />
prompted to subscribe to the service for an additional monthly charge.<br />
5. Enter a four- to eight-digit password and press or OK (left<br />
softkey).<br />
6. Please wait while the system creates your account.<br />
Tip: Write down your Picture Mail password in a secure place.<br />
Once your account has been successfully registered, you may upload<br />
and send pictures and access the Picture Mail Website.<br />
Section 2K: Using Your Phone’s Built-in Camera 154
Camera Mode Options<br />
When the phone is open and in camera mode, several user options<br />
are available.<br />
Press Options (right softkey) to display additional user options:<br />
<br />
<br />
<br />
<br />
<br />
<br />
Flash to activate the flash function. (See “Setting the Flash<br />
Function” on the next page for details.)<br />
Self-timer to activate the camera’s timer function. (See “Setting<br />
the Self-timer” on the next page for details.)<br />
Fun Tools to select an option from the following:<br />
<br />
<br />
<br />
Fun Frames to select your favorite fun picture frame to<br />
decorate your picture.<br />
Multiple Shots to take multiple shots. (See “Taking Multiple<br />
Shots” on page 157 for details.)<br />
Color Tone to select a wide variety of color tones for the<br />
picture (Normal, Sepia, Black & White, Negative, Posterization<br />
or Emboss).<br />
Image Controls to select an option from the following:<br />
<br />
<br />
Brightness to select Auto or Manual brightness control. If you<br />
select Manual, press the navigation key right (increase) or<br />
left (decrease) to select a setting and press to apply the<br />
desired setting.<br />
White Balance to adjust white balance based on changing<br />
conditions. Select from Auto, Sunny, Cloudy, Tungsten,<br />
Fluorescent, or Manual.<br />
Camera Settings to select Resolution, Quality, Shutter Sound,<br />
Status Area, or Auto Delete. (See “Selecting Camera Settings” on<br />
page 159 for details.)<br />
Pics in camera to go to your phone’s In Camera folder. (See “In<br />
Camera Folder” on page 165 for details.)<br />
Section 2K: Using Your Phone’s Built-in Camera 155
Setting the Flash Function<br />
To activate the flash function:<br />
1. With the phone open and in camera mode, press Options (right<br />
softkey).<br />
2. Select Flash and press .<br />
3. Select an option from the following and press .<br />
<br />
<br />
On This Shot to activate the flash for one shot.<br />
On Always to activate the flash all the time.<br />
Auto to activate the flash automatically.<br />
4. Take a picture using the phone’s main LCD as a viewfinder.<br />
To deactivate this feature, select Off during step 3.<br />
Tip: When the phone is open and in camera mode, press<br />
between flash modes.<br />
to switch<br />
Setting the Self-timer<br />
To activate the Self-timer:<br />
1. With the phone open and in camera mode, press Options (right<br />
softkey).<br />
2. Highlight Self-timer and press .<br />
3. Highlight the length of delay you want the timer to use<br />
(10 seconds or 5 seconds) and press .<br />
4. Press Start (left softkey) when you are ready to start the timer.<br />
( appears on the lower left portion of the main LCD during<br />
the Self-timer countdown.)<br />
5. Get ready for the picture. (When the timer is down to three<br />
seconds, the Self-timer icon will turn red and the phone will<br />
begin to beep.)<br />
Note: After taking a picture, Self-timer settings return to their default settings.<br />
To cancel the Self-timer after it has started:<br />
Press Cancel (right softkey).<br />
Note: While the Self-timer is active, all keys are disabled except , , and<br />
Cancel (right softkey).<br />
Section 2K: Using Your Phone’s Built-in Camera 156
Taking Multiple Shots<br />
This feature allows you to take up to 8 continuous shots of one<br />
moment. When you take multiple shots, will appear in the<br />
viewfinder.<br />
To take multiple shots:<br />
1. With the phone open and in camera mode, press Options (right<br />
softkey).<br />
2. Highlight Fun Tools and press .<br />
3. Highlight Multiple Shots and press .<br />
Note: If your phone’s memory is full, the “Multiple Shots”option will not appear.<br />
4. Select your desired option from the following and press .<br />
<br />
2 Shots to take series of 2 shots.<br />
4 Shots to take series of 4 shots. (Only appears when the<br />
reslolution setting is Low or Medium.)<br />
8 Shots to take series of 8 shots. (Only appears when the<br />
reslolution setting is Low.)<br />
5. Select the duration of the interval between shots from<br />
Normal or Fast and press .<br />
6. To take the pictures, press . (The Multiple Shots folder will<br />
display, up to four thumbnail pictures per screen.)<br />
To deactivate this feature,select Off during step 4 above.<br />
Tip: After taking multiple shots, the pictures are automatically saved in the<br />
In Camera folder. (See “In Camera Folder” on page 165 for details.)<br />
When you are in Multiple Shots folder,several user options are<br />
available.<br />
Press Options (right softkey) to display the following options:<br />
<br />
<br />
<br />
<br />
<br />
<br />
Upload to upload pictures saved in your phone to the Picture Mail<br />
Website.<br />
Set as Picture ID to display the picture as a Picture ID.<br />
Set as Scrn Saver to display the picture as a screen saver.<br />
Go to Camera to activate camera mode.<br />
Pics in camera to access the In Camera folder.<br />
Delete to delete pictures in the In Camera folder.<br />
Section 2K: Using Your Phone’s Built-in Camera 157
Slideshow to display your pictures as a slideshow. (Only appears<br />
when you have two or more pictures in the folder.)<br />
Info Bar to display information on the currently highlighted<br />
picture. (Expanded picture only)<br />
Thumbnail/Expand to switch the display from full-screen to<br />
thumbnail view (up to four pictures per screen).<br />
Using the Zoom Function<br />
This feature allows you to zoom in on an object when you take a<br />
picture. Depending on your resolution settings, you can adjust the<br />
zoom from 1-step to 20-step.<br />
To use the zoom function:<br />
1. With the phone open and in camera mode, press the navigation<br />
key right or left to adjust the zoom. (The zoom icon changes as<br />
you press.)<br />
2. Press to take the picture. (The picture will be saved<br />
automatically in your In Camera folder.)<br />
Note: The Zoom icons will not appear when the Resolution setting is High.<br />
Section 2K: Using Your Phone’s Built-in Camera 158
Selecting Camera Settings<br />
To select your camera settings:<br />
1. With the phone open and in camera mode, press Options (right<br />
softkey).<br />
2. Select Camera Settings and press .<br />
3. Select an option from the following and press .<br />
<br />
<br />
<br />
<br />
<br />
Resolution to select a file size (High, Medium, or Low) for a<br />
picture.<br />
Quality to select Economy, Normal, or Fine picture quality.<br />
Shutter Sound to select a shutter sound. (See “Setting the<br />
Shutter Sound” below for details.)<br />
Status Area to select a picture status display setting. Select<br />
Off to hide picture status, such as icons and number of<br />
captured pictures. To display the status, select On.<br />
(See “Viewing Your Camera’s Status Area Display” on the<br />
next page for details.)<br />
Auto Delete to set the auto delete function. (See “Setting the<br />
Auto Delete Function” on the next page for details.)<br />
Setting the Shutter Sound<br />
To select the Shutter Sound:<br />
1. With the phone open and in camera mode, press Options (right<br />
softkey).<br />
2. Select Camera Settings and press .<br />
3. Select Shutter Sound and press .<br />
4. Select an option from the following and press .<br />
<br />
<br />
<br />
<br />
Default plays the default shutter sound.<br />
Say “Cheez” plays a recording of the phrase “Say Cheez.”<br />
Off makes no sound.<br />
Record Your Own allows you to record your own voice.<br />
Press to display options, highlight Record and press .<br />
Press to start recording. (Maximum recording time is<br />
5 seconds.) To save the recording, press Save (right<br />
softkey).<br />
Section 2K: Using Your Phone’s Built-in Camera 159
Setting the Auto Delete Function<br />
With this feature, pictures which have been uploaded to your online<br />
Picture Mail account will be erased automatically from your phone.<br />
To set the Auto Delete function:<br />
1. With the phone open and in camera mode, press Options (right<br />
softkey).<br />
2. Select Camera Settings and press .<br />
3. Select Auto Delete and press .<br />
4. Select Yes and press to activate the auto delete function.<br />
<br />
To deactivate this feature, select No during step 4 above.<br />
Note: The locked pictures will not be deleted automatically.<br />
Viewing Your Camera’s Status Area Display<br />
Camera Status Area<br />
(Viewfinder)<br />
Brightness<br />
White Balance<br />
Zoom<br />
Multiple Shots<br />
Self-Timer<br />
Flash<br />
Capture<br />
Options<br />
Resolution<br />
Memory Gauge<br />
Camera Status Area<br />
Section 2K: Using Your Phone’s Built-in Camera 160
Icon Indication<br />
No.<br />
1<br />
Flash<br />
Function<br />
On This Shot<br />
On Always<br />
Icons<br />
Details<br />
To use a flash only one shot after setting<br />
this function.<br />
To use a flash every time you take a picture.<br />
Auto<br />
To use the auto flash function.<br />
Sunny<br />
Use this setting for sunny weather.<br />
Cloudy<br />
Use this setting for cloudy weather.<br />
2<br />
White<br />
Balance<br />
Tungsten<br />
Use this setting for tungsten lighting.<br />
Fluorescent<br />
Use this setting for fluorescent lighting.<br />
Manual<br />
For the manual setting of white balance.<br />
3<br />
4<br />
Brightness<br />
Zoom<br />
Manual<br />
1 step<br />
2 step<br />
8 step<br />
20 step<br />
5 Multiple Shots<br />
Memory Gauge<br />
For the manual setting of brightness.<br />
For 1-step zoom. Appears when the<br />
resolution setting is Medium or Low.<br />
For 2-step zoom. Appears when the<br />
resolution setting is Medium or Low.<br />
For 8-step zoom. Appears when the<br />
resolution setting is Low.<br />
For 8-step zoom. Appears when the<br />
resolution setting is Medium.<br />
For 20-step zoom. Appears when the<br />
resolution setting is Low.<br />
Use this setting for Multiple Shots.<br />
Shows the remaining memory.<br />
6<br />
Picture Number<br />
The number of stored pictures.<br />
Remaining Pictures<br />
7 Self-timer<br />
High<br />
5s<br />
The count of pictures you can take with<br />
current resolution.<br />
Use this setting for self portralts.<br />
Numeric countdown will appear during<br />
the self-timer countdown.<br />
For high picture resolution.<br />
8<br />
Resolution<br />
Medium<br />
For medium picture resolution.<br />
Low<br />
For low picture resolution.<br />
Section 2K: Using Your Phone’s Built-in Camera 161
Sending Picture Mail SM<br />
Once you’ve taken a picture, you can use the messaging capabilities<br />
of your PM-8200 by Sanyo to instantly send it to family and friends.<br />
You can send a picture to up to ten people at a time using their email<br />
addresses or their PCS Vision Phone numbers.<br />
Sending Picture Mail From the In Camera Folder<br />
To send Picture Mail from the In Camera folder:<br />
1. With the clamshell open, press to access the Pictures menu.<br />
2. Select My Pictures and press .<br />
3. Select In Camera and press .<br />
4. Press to select a picture. (The check box on the lower right<br />
corner will be marked. You can select multiple pictures.)<br />
If there is no selected picture, the currently highlighted picture<br />
will be selected.<br />
5. Press Send (left softkey).<br />
6. Select an option from the following and press .<br />
<br />
<br />
<br />
From Phone Book to select a recipient from your Contacts list.<br />
Highlight a recipient and press to select.<br />
Mobile Phone# to enter a mobile phone number directly.<br />
Email Address to enter an email address directly.<br />
Note: If there are no entries in your contact list, you will be prompted to enter<br />
either an email address or a mobile phone number.<br />
Note: The M and @ icons next to contact’s names represent Mobile Phone<br />
and email. When entering a new contact, use your navigation key to select the<br />
correct icon for the entry. You can also select both the mobile phone number and<br />
email address at once by selecting M@ icon.<br />
7. Press Next (left softkey) when you are finished<br />
selecting/entering recipients. (You may include up to ten<br />
recipients per Picture Mail.)<br />
Section 2K: Using Your Phone’s Built-in Camera 162
8. If you wish to record and include a Voice Memo with the picture<br />
you are sending, highlight the box under Voice Memo and press<br />
Record (right softkey). Press to start recording. (Maximum<br />
recording time is 10 seconds.)<br />
9. If you wish to enter a text message, highlight the box under<br />
Message and press Change (right softkey). Enter your message<br />
using your keypad (or press Mode [right softkey] to select from<br />
Preset Messages or Recent Messages) and press .<br />
(See “Entering Text” on page 31.)<br />
10. Confirm the recipients, message, voice memo, and picture.<br />
<br />
<br />
<br />
To change a recipient, highlight the recipient, press Change<br />
(right softkey), and follow the instructions in step 6 on the<br />
previous page to select or edit the recipient.<br />
To change Voice Memo, highlight the box beneath<br />
Voice Memo and press Options (right softkey) to display<br />
options:<br />
VoiceMemo Play to play the attached voice memo.<br />
VoiceMemo Rec to re-record the voice memo.<br />
VoiceMemo Erase to delete the voice memo from the<br />
Picture Mail.<br />
To change the attached message, highlight the box beneath<br />
Message and press Change (right softkey).<br />
To change the attached pictures, select a thumbnail picture<br />
using your navigation key and press Change (right softkey).<br />
Select an alternate picture and press , then press Next<br />
(left softkey).<br />
11. Press Send (left softkey) to send the Picture Mail.<br />
Section 2K: Using Your Phone’s Built-in Camera 163
Sending Picture Mail from Messaging<br />
You can also send your pictures from your phone’s Messaging menu.<br />
To send Picture Mail from the Messaging menu:<br />
1. Press to access the main menu.<br />
2. Select Messaging and press to access the Messaging menu.<br />
Shortcut: Press the navigation key up from standby mode to access the<br />
Messaging menu.<br />
3. Select Picture Mail and press .<br />
4. Select Send Picture and press .<br />
5. Select From My Pics. and press . (The In Camera folder will<br />
display, up to four thumbnail pictures per screen.)<br />
6. Use the navigation key to display the picture you wish to send<br />
and press . (You can select multiple pictures.)<br />
Tip: To expand a selected picture from thumbnail to full-screen, press and hold .<br />
7. Press Next (left softkey). To complete and send the Picture Mail,<br />
follow steps 6-11 in “Sending Picture Mail From the In Camera<br />
Folder” on page 162.<br />
Tip: If you want to take a new picture and send it, select Take Picture during<br />
step 5 above. Take the new picture, press Next (right softkey) and follow<br />
steps 6-11 in “Sending Picture Mail From the In Camera Folder”on page 162.<br />
Section 2K: Using Your Phone’s Built-in Camera 164
Storing Pictures in My Pictures<br />
My Pictures is your phone’s picture storage area. There are two types<br />
of folders in My Pictures that can be used separately according to<br />
your needs. They are:<br />
In Camera Folder (see below)<br />
Saved to Phone Folder (see page 168)<br />
In Camera Folder<br />
Once a picture is taken, it is automatically saved to the folder called<br />
“In Camera.” You can enter the In Camera folder from My Pictures<br />
menu by selecting In Camera. From the In Camera folder, you can<br />
view all the pictures you have taken, store selected images in your<br />
phone, send pictures to the Picture Mail Website, delete images, and<br />
access additional picture options.<br />
To review your stored pictures in the In Camera folder:<br />
1. Press to access the main menu.<br />
2. Select Pictures and press to access the Pictures menu.<br />
3. Select My Pictures and press .<br />
4. Select In Camera and press . (Thumbnail pictures will display,<br />
up to four pictures at a time.)<br />
5. Use your navigation key to view and scroll through pictures.<br />
Section 2K: Using Your Phone’s Built-in Camera 165
In Camera Folder Options<br />
When you are in the In Camera folder, several user options are available.<br />
Press Options (right softkey) to display the following options:<br />
<br />
Upload to select an option from the following to upload pictures<br />
saved in your phone to the Picture Mail Website. Depending on<br />
your settings, you may be prompted to accept a PCS Vision<br />
connection.<br />
This Picture to upload the currently highlighted picture.<br />
Selected Pictures to upload the selected pictures. Press to<br />
select a picture (the check box on the lower right corner<br />
will be marked).<br />
All Pictures to upload all the pictures in your phone.<br />
Note: Erasing pictures will free up memory space in your phone to enable you to<br />
take more pictures. Once erased, pictures cannot be uploaded to your online<br />
Picture Mail account or saved to the Saved to Phone folder.<br />
<br />
<br />
<br />
<br />
<br />
<br />
<br />
<br />
<br />
Set as Picture ID to display the currently highlighted picture for<br />
incoming calls from a specific Contacts List entry. Select your<br />
desired entry and press .<br />
Set as Scrn Saver to display the currently highlighted picture as a<br />
screen saver.<br />
Details/Edit to display the currently highlighted picture’s details or<br />
edit the pictures. You can select from Text Caption, Picture Info,<br />
Color Tone, or Rotate Picture.<br />
Delete to delete pictures in the In Camera folder. Select This Picture,<br />
Selected Pictures, or All Pictures.<br />
Lock to lock your picture to protect from unintentional deletion.<br />
Unlock to unlock your picture.<br />
Save to Phone to save the selected images in the Saved to Phone<br />
folder.<br />
Sort by Date to sort pictures by date. (Thumbnail picture only.)<br />
Select Taken-Descending, Taken-Ascending, Uploaded-Descend,or<br />
Uploaded-Ascend.<br />
Slideshow to display your pictures as a slideshow. (Only appears<br />
when you have two or more pictures in the folder.)<br />
Section 2K: Using Your Phone’s Built-in Camera 166
Info Bar to display information on the selected picture, such as<br />
folder name, picture number, caption, etc. Select On to display<br />
the caption of a picture; select Off to hide the information.<br />
(Expanded picture only.)<br />
Tip: From expanded picture display, press the navigation key up or down to hide<br />
or display the Info Bar.<br />
<br />
<br />
<br />
Thumbnail/Expand to switch the display from full-screen to<br />
thumbnail view (up to four pictures per screen).<br />
Go to Saved to Ph. to access the Saved to Phone folder.<br />
Go to Camera to activate camera mode.<br />
Note: Save to Phone and Upload copy pictures from your phone’s In Camera<br />
folder to your Saved to Phone folder or your online Picture Mail account.<br />
Pictures that have been stored to your Saved to Phone folder or uploaded to your<br />
online account will remain available in the In Camera folder until you erase them.<br />
Note: If this is the first time you have accessed the Picture Mail account, you will<br />
be prompted to create your Picture Mail password. (See “Creating Your Picture<br />
Mail Password” on page 154.)<br />
In Camera Folder<br />
Folder name<br />
Uploaded icon<br />
In Camera 1/6<br />
(View 1)<br />
Latest<br />
(View 2)<br />
2nd latest<br />
Count of Saved Pictures<br />
Current Picture number<br />
Locked icon<br />
(View 3)<br />
3rd latest<br />
(View 4)<br />
4th latest<br />
Check Box<br />
Caption<br />
left softkey<br />
Title-1<br />
Send<br />
Options<br />
right softkey<br />
Section 2K: Using Your Phone’s Built-in Camera 167
Saved to Phone Folder<br />
When you assign or download a picture, the picture will be saved<br />
automatically to the separate folder called “Saved to Phone.”<br />
The Saved to Phone folder allows you to store copies of pictures on<br />
your phone and to assign pictures to various phone tasks.<br />
To save a picture to the Saved to Phone folder:<br />
1. From the In Camera folder (see “In Camera Folder” on page 165),<br />
select a picture you wish to save to the Saved to Phone folder<br />
and press . (You may select multiple pictures.)<br />
2. Press Options (right softkey). (The In Camera folder options will<br />
display.)<br />
3. Select Save to Phone and press . (A copy of the picture will be<br />
saved to the Saved to Phone folder.)<br />
To view pictures stored in the Saved to Phone folder:<br />
1. Press to access the main menu.<br />
2. Select Pictures and press .<br />
Shortcut: Instead of steps 1 and 2 above, press .<br />
3. Select My Pictures and press .<br />
4. Select Saved to Phone and press . (Thumbnail pictures will<br />
display, up to four pictures at a time.)<br />
5. Use your navigation key to view and scroll through pictures.<br />
6. To expand the selected picture, press Expand (left softkey).<br />
Tip: From expanded view, press and hold the navigation key right or left to display<br />
the stored picture continuously.<br />
7. Press Options (right softkey) to display a list of options for the<br />
selected picture. To select an option, highlight it and press .<br />
Set as Picture ID to display the currently highlighted picture<br />
for incoming calls from a specific Contacts List entry.<br />
Set as Scrn Saver to display the currently highlighted picture<br />
as a screen saver.<br />
Section 2K: Using Your Phone’s Built-in Camera 168
Details/Edit to display the currently highlighted picture’s<br />
details or edit the pictures. You can select from Text Caption,<br />
Picture Info, Color Tone, or Rotate Picture.<br />
<br />
<br />
<br />
<br />
<br />
<br />
<br />
<br />
Delete to delete pictures stored in the Saved to Phone folder.<br />
Select This Picture, Selected Pictures, or All Pictures.<br />
Lock to lock your picture to protect from unintentional<br />
deletion.<br />
Unlock to unlock your picture.<br />
Sort by Date to sort pictures by date. (Thumbnail picture only.)<br />
Select Saved-Descending, or Saved-Ascending.<br />
Slideshow to display your pictures as a slideshow. (Only<br />
appears when you have two or more pictures in the folder.)<br />
Info Bar to display information on the currently highlighted<br />
picture, such as folder name, picture number, caption, etc.<br />
(Expanded picture only.)<br />
Pics in camera to access the In Camera folder.<br />
Go to Camera to activate camera mode.<br />
Note: Pictures may be assigned to more than one task.<br />
Note: Assigned pictures will be identified with the .<br />
Saved To Phone Folder<br />
Folder name<br />
Assigned icon<br />
Saved toPhone 1/6<br />
(View 1)<br />
Latest<br />
(View 2)<br />
2nd latest<br />
Count of Saved Pictures<br />
Current Picture number<br />
Locked icon<br />
(View 3)<br />
3rd latest<br />
(View 4)<br />
4th latest<br />
Check Box<br />
Caption<br />
left softkey<br />
Title-1<br />
Expand<br />
Options<br />
right softkey<br />
Section 2K: Using Your Phone’s Built-in Camera 169
Managing Picture Mail<br />
Using the Picture Mail Website<br />
Once you have uploaded pictures from your phone to your online<br />
Picture Mail account (see “In Camera Folder” on page 165), you can<br />
use your personal computer to manage your pictures. From the<br />
Picture Mail Website you can send pictures, edit album titles and<br />
picture captions, organize and move images, and do much more.<br />
You will also have access to picture management tools to improve<br />
and customize your pictures. You’ll be able to lighten, darken, crop,<br />
add antique effects, add comic bubbles and cartoon effects, and use<br />
other features to transform your pictures.<br />
To access the Picture Mail Website:<br />
1. From your computer’s Internet connection, go to<br />
www.picturemail.sprintpcs.com.<br />
2. Enter your PCS Phone Number and Picture Mail password to sign<br />
on. (See “Creating Your Picture Mail Password” on page 154.)<br />
Managing Online Picture Mail From Your<br />
PCS Vision Phone<br />
You can use your phone to manage, edit, or send pictures you have<br />
uploaded to the Picture Mail Website. (See “In Camera Folder<br />
Options” on page 166 for information about uploading.)<br />
To view your online Picture Mail from your PCS Vision Phone:<br />
1. Press to access the main menu.<br />
2. Select Pictures and press to access the Pictures menu.<br />
Shortcut: Instead of steps 1 and 2 above, press .<br />
3. Select Online Albums and press .<br />
4. Select View Albums and press . (Depending on your settings<br />
you may be prompted to accept a PCS Vision connection.)<br />
(The Uploads folder and your albums will appear.)<br />
5. Highlight Uploads or an album title and press to display.<br />
(Thumbnail pictures, up to four per screen are displayed.)<br />
Tip: To expand a selected picture from thumbnail to full-screen, press and hold .<br />
6. Use your navigation key to select a picture.<br />
Section 2K: Using Your Phone’s Built-in Camera 170
UploadingYour Pictures<br />
To upload pictures:<br />
1. Press to access the Pictures menu.<br />
2. Select Online Albums and press .<br />
3. Select Upload Pics and press .<br />
4. Use your navigation key to select a picture, and press Upload<br />
(left softkey).<br />
5. Select an option from the following and press .<br />
<br />
This Picture to upload the currently highlighted picture.<br />
Selected Pictures to upload the selected pictures. Press to<br />
select a picture (the check box on the lower right corner<br />
will be marked).<br />
All Pictures to upload all the pictures in your phone.<br />
Sending Online Picture Mail<br />
To send pictures from the online Address Book:<br />
1. From the online Picture Mail display, select a picture you wish<br />
to send and press Send (left softkey). (See “Managing Online<br />
Picture Mail From Your PCS Vision Phone” on the previous page.)<br />
2. Select Online Addr. Book and press .<br />
3. To select a recipient, highlight a recipient and press .<br />
(You may select up to 10 recipients.)<br />
4. Press Done (left softkey) when you are finished selecting<br />
recipients.<br />
5. To complete and send the Picture Mail, follow steps 8-11 in<br />
“Sending Picture Mail From the In Camera Folder” on page 163.<br />
To send an album from online mode:<br />
1. From the online Albums display, select an album you wish to<br />
send and press Send (left softkey). (See “Managing Online<br />
Picture Mail From Your PCS Vision Phone” on the previous page.)<br />
2. Follow steps 2-5 above to complete and send your Picture Mail.<br />
Section 2K: Using Your Phone’s Built-in Camera 171
Accessing Online Picture Mail Options From Your<br />
PCS Vision Phone<br />
1. Select a picture from your online Picture Mail (see “Managing<br />
Online Picture Mail From Your PCS Vision Phone” on page 170).<br />
2. Press Options (right softkey) to display options.<br />
3. To select an option, highlight it and press .<br />
<br />
Copy/Move to copy or move pictures to a selected album:<br />
Move This to move the currently highlighted picture to<br />
the album.<br />
Move Selection to move the selected pictures to the album.<br />
Move All to move all pictures in the current album<br />
(or Uploads) to the target album.<br />
Copy This to copy the currently highlighted picture to the<br />
album.<br />
Copy Selection to copy the selected pictures to the album.<br />
Copy All to copy all pictures in the current album<br />
(or Uploads) to the target album.<br />
Tip: Press New (right softkey) to copy/move pictures to a new folder.<br />
<br />
<br />
Details/Edit to select Text Caption, Picture Info, or Rotate Picture.<br />
Text Caption to edit the caption of a currently highlighted<br />
picture.<br />
Picture Info to display information on the currently<br />
highlighted picture, such as caption, time/date, size, etc.<br />
Rotate Picture to rotate the currently highlighted picture.<br />
After selecting this option, you can rotate the currently<br />
highlighted picture by pressing the navigation key right<br />
or left, or Rotate (right softkey).<br />
Delete to select This Picture, Selected Pictures, or All Pictures<br />
to erase a single picture, selected pictures, or all pictures<br />
saved in the current album (or Uploads).<br />
Section 2K: Using Your Phone’s Built-in Camera 172
Save to Phone to download to the Saved to Phone folder to<br />
assign the pictures to the phone task.<br />
as Picture ID to display the currently highlighted picture<br />
for incoming calls from a specific Contacts List entry.<br />
as Screen Saver to display the currently highlighted<br />
picture as a screen saver.<br />
Download Only to only download the picture to the Saved<br />
to Phone folder.<br />
Info Bar to display picture’s information, such as folder<br />
name, picture number, caption, etc. Select On to display the<br />
information; select Off to hide the information. (Expanded<br />
picture only.)<br />
Tip: From expanded picture display, press the navigation key up or down to hide<br />
or display the Info Bar.<br />
<br />
<br />
<br />
Thumbnail/Expand to switch the display from thumbnail view<br />
(up to four pictures per screen) to full-screen.<br />
Create Album to create a new album (from Uploads only).<br />
Enter the album name and select Save (left softkey).<br />
Online Albums to switch the display to the online album list.<br />
To access your online Albums options from your PCS Vision Phone:<br />
1. Display the album list in the online Picture Mail menu (see<br />
“Managing Online Picture Mail From Your PCS Vision Phone”<br />
on page 170).<br />
2. Use your navigation key to select an album (or Uploads).<br />
3. Press Options (right softkey) to display options.<br />
4. To select an option, highlight it and press .<br />
<br />
<br />
<br />
Create Album to create a new album. Enter a new album<br />
name and press Save (left softkey).<br />
Delete Album to delete the selected album.<br />
Rename Album to rename the selected album. Enter a new<br />
name and press Save (left softkey).<br />
Note: Uploads cannot be erased or renamed.<br />
<br />
Album Info to display album information:name, created<br />
time/date, and the number of stored pictures.<br />
Section 2K: Using Your Phone’s Built-in Camera 173
PCS Service Features<br />
Section 3
Section 3A<br />
PCS Service Features: The Basics<br />
In This Section<br />
<br />
<br />
<br />
<br />
<br />
Using Voicemail<br />
Using Caller ID<br />
Responding to Call Waiting<br />
Making a Three-Way Call<br />
Using Call Forwarding<br />
Now that you’ve mastered your phone’s fundamentals, it’s time to explore<br />
the calling features that enhance your PCS Service. This section<br />
outlines your basic PCS Service features.<br />
Section 3A: PCS Service Features – The Basics 175
Using Voicemail<br />
Setting Up Your Voicemail<br />
All unanswered calls to your PCS Vision Phone are automatically<br />
transferred to your voicemail, even if your phone is in use or turned<br />
off. Therefore, you will want to set up your PCS Voicemail and<br />
personal greeting as soon as your PCS Vision Phone is activated.<br />
To set up your voicemail:<br />
1. Press and hold .<br />
2. Follow the system prompts to:<br />
<br />
<br />
<br />
<br />
Create your passcode<br />
Record your greeting<br />
Record your name announcement<br />
Choose whether or not to activate One-Touch Message<br />
Access (a feature that lets you access messages and<br />
bypassing the need for you to enter your passcode)<br />
Note: The voicemail setup process may vary in certain Affiliate areas.<br />
Voicemail Notification<br />
There are several ways your PCS Vision Phone alerts you of a<br />
new message:<br />
By displaying a message on the screen.<br />
By sounding the assigned ringer type.<br />
By the LED blinking red.<br />
By displaying at the top of your screen.<br />
Section 3A: PCS Service Features – The Basics 176
New Voicemail Message Alerts<br />
When you receive a new voice message, your phone alerts you and<br />
prompts you to call your voicemail.<br />
To call your voicemail:<br />
Press .<br />
To display your Missed Log:<br />
Press or OK (left softkey).<br />
Important: When you are roaming off the Sprint Nationwide PCS Network, you<br />
may not receive notification of new voicemail messages. It is recommended that<br />
you periodically check your voicemail by dialing 1 + area code + your PCS Phone<br />
Number. When your voicemail answers, press and enter your passcode.<br />
You will be charged roaming rates when accessing voicemail while roaming off<br />
the Sprint Nationwide PCS Network.<br />
Note: Your phone accepts messages even when it is turned off. However, you are<br />
only notified of new messages when your phone is turned on and you are in a<br />
PCS Service Area.<br />
RetrievingYour Voicemail Messages<br />
You can review your messages directly from your PCS Vision Phone or<br />
from any other touch-tone phone. To dial from your PCS Vision Phone,<br />
you can either speed dial your voicemail or use the menu keys.<br />
Using One-Touch Message Access<br />
Press and hold . (Your phone will dial your voicemail box.)<br />
Using the Menu Keys on Your Phone to Access Your Messages<br />
1. Press to access the main menu.<br />
2. Select Messaging and press .<br />
3. Select Voicemail and press .<br />
4. Select Call Voicemail and press .<br />
Note: You are charged for airtime minutes when you are accessing your<br />
voicemail from your PCS Vision Phone.<br />
Section 3A: PCS Service Features – The Basics 177
Using a Phone Other Than Your PCS Vision Phone to<br />
Access Messages<br />
1. Dial your PCS Phone number.<br />
2. When your voicemail answers, press .<br />
3. Enter your passcode.<br />
Tip: When you call into voicemail you first hear the header information (date,<br />
time, and sender information) for the message. To skip directly to the message,<br />
press during the header.<br />
Voicemail Button Guide<br />
Here’s a quick guide to your keypad functions while listening to<br />
voicemail messages. For further details and menu options, see<br />
“Voicemail Menu Key” on page 182.<br />
Date/Time Send Reply Advance<br />
Replay Rewind Forward<br />
Erase Call Back Save<br />
Cancel Help Skip<br />
Section 3A: PCS Service Features – The Basics 178
Voicemail Options<br />
Your PCS Vision Phone offers several options for organizing and<br />
accessing your voicemail.<br />
Using Expert Mode<br />
Using the Expert Mode setting for your personal voicemail box helps<br />
you navigate through the voicemail system more quickly by<br />
shortening the voice prompts you hear at each level.<br />
To turn Expert Mode on or off:<br />
1. Press and hold to access your voicemail. (If your voicemail<br />
box contains any new or saved messages, press to access<br />
the main voicemail menu.)<br />
2. Press to change your Personal Options, following the<br />
system prompts.<br />
3. Press for Expert Mode.<br />
4. Press to turn Expert Mode on or off.<br />
Setting Up Group Distribution Lists<br />
Create up to 20 separate group lists, each with up to 20 customers.<br />
1. Press and hold to access your voicemail. (If your voicemail<br />
box contains any new or saved messages, press to access<br />
the main voicemail menu.)<br />
2. Press to change your Personal Options, following the<br />
system prompts.<br />
3. Press for Administrative Options.<br />
4. Press for Group Distribution Lists.<br />
5. Follow the voice prompts to create, edit, rename, or delete<br />
group lists.<br />
PCS Callback<br />
Return a call after listening to a message without disconnecting<br />
from voicemail.<br />
Press after listening to a message. (Once the call is<br />
complete, you’re returned to the voicemail main menu.)<br />
Section 3A: PCS Service Features – The Basics 179
Voicemail-to-Voicemail Message<br />
Record and send a voice message to other PCS Voicemail users.<br />
1. From the main voicemail menu, press to send a message.<br />
2. Follow the voice prompts to enter the phone number.<br />
3. Follow the voice prompts to record and send your voice<br />
message.<br />
Voicemail-to-Voicemail Message Reply<br />
Reply to a voice message received from any other PCS Voicemail user.<br />
1. After listening to a voice message, press .<br />
2. Follow the voice prompts to record and send your reply.<br />
Voicemail-to-Voicemail Message Forwarding<br />
Forward a voice message, except those marked “Private,” to other<br />
PCS Voicemail users.<br />
1. After listening to a message, press .<br />
2. Follow the voice prompts to enter the phone number.<br />
3. Follow the voice prompts to record your introduction and<br />
forward the voice message.<br />
Voicemail-to-Voicemail Receipt Request<br />
Receive confirmation that your voice message has been listened to<br />
when you send, forward, or reply to other PCS users.<br />
1. After you have recorded a message, press to indicate you<br />
are satisfied with the message you recorded.<br />
2. Press to mark receipt requested.<br />
3. Press to send your voicemail message.<br />
Section 3A: PCS Service Features – The Basics 180
Continue Recording<br />
When leaving a voice message, you can choose to continue recording<br />
even after you’ve stopped.<br />
Before pressing to indicate that you are satisfied with the<br />
message you recorded, press to continue recording.<br />
Extended Absence Greeting<br />
When your phone is turned off or you are off the Sprint Nationwide<br />
PCS Network for an extended period, this greeting can be played<br />
instead of your normal personal greeting.<br />
1. From the main voicemail menu, press for Personal<br />
Options.<br />
2. Press for Greetings.<br />
3. Press to record an Extended Absence Greeting.<br />
Clearing the Message Icon<br />
Your phone may temporarily continue to display the message icon<br />
after you have checked your voice and text messages.<br />
To clear the icon from the display screen:<br />
1. Press to access the main menu.<br />
2. Select Messaging and press .<br />
3. Select Voicemail and press .<br />
4. Select Clear Count and press .<br />
5. Select Yes and press .<br />
Section 3A: PCS Service Features – The Basics 181
Voicemail Menu Key<br />
Following the prompts on the voicemail system, you can use your<br />
keypad to navigate through the voicemail menu. The following list<br />
outlines your phone’s voicemail menu structure.<br />
Listen<br />
Envelope Information<br />
Reply<br />
Advance 8 Seconds<br />
Replay<br />
Rewind<br />
Forward Message<br />
Erase<br />
Callback<br />
Save<br />
Options<br />
Send a Message<br />
Personal Options<br />
Notification Options<br />
Phone Notification<br />
Numeric Paging to a PCS Phone<br />
Return to Personal Options Menu<br />
Administrative Options<br />
Skip Pass code<br />
Autoplay<br />
Message Date & Time On/Off<br />
Change Pass code<br />
Group Distribution List<br />
Return to Personal Options Menu<br />
Greetings<br />
Personal Greetings<br />
Name Announcement<br />
Extended Absence Greeting<br />
Return to Personal Options Menu<br />
Expert Mode (On/Off)<br />
Place a Call<br />
Disconnect<br />
Section 3A: PCS Service Features – The Basics 182
Using Caller ID<br />
Caller ID allows people to identify a caller before answering the<br />
phone by displaying the number of the incoming call. If you do not<br />
want your number displayed when you place a call, just follow these<br />
easy steps.<br />
To block your phone number from being displayed for a specific<br />
outgoing call:<br />
1. Press .<br />
2. Enter the number you want to call.<br />
3. Press .<br />
To permanently block your number, call PCS Customer Solutions.<br />
Responding to Call Waiting<br />
When you’re on a call, Call Waiting alerts you of incoming calls by<br />
sounding two beeps. Your phone’s screen informs you that another<br />
call is coming in and displays the caller’s phone number (if it is<br />
available and you are in digital mode).<br />
To respond to an incoming call while you’re on a call:<br />
Press (or press Options [right softkey], highlight Flash, and<br />
press ). (This puts the first caller on hold and answers the<br />
second call.)<br />
To switch back to the first caller:<br />
Press again (or press Options [right softkey], highlight<br />
Flash, and press ).<br />
Tip: For those calls where you don’t want to be interrupted, you can temporarily<br />
disable Call Waiting by pressing<br />
before placing your call.<br />
Call Waiting is automatically reactivated once you end the call.<br />
Section 3A: PCS Service Features – The Basics 183
Making a Three-Way Call<br />
With Three-Way Calling, you can talk to two people at the same time.<br />
When using this feature, the normal airtime rates will be charged for<br />
each of the two calls.<br />
To make a Three-Way Call:<br />
1. Enter a number you wish to call and press or .<br />
2. Once you have established the connection, press (or press<br />
Options [right softkey], highlight Three-Way Call, and press ).<br />
(This puts the first caller on hold.)<br />
3. Dial the second number you wish to call and press (or<br />
press Options [right softkey], highlight Call or Call:Speaker On,<br />
and press ).<br />
4. When you’re connected to the second party, press again<br />
(or press Options [right softkey], highlight Flash, and press )<br />
to begin your three-way call.<br />
If one of the people you called hangs up during your call, you and the<br />
remaining caller stay connected. If you initiated the call and are the<br />
first to hang up, all three callers are disconnected.<br />
Tip: You can also begin a Three-Way Call by displaying a phone number stored in<br />
your Contacts, Call History, or Messaging. To call the third party, press during<br />
step 3 above.<br />
Note: Call Waiting and Three-Way Calling are not available while roaming off the<br />
Sprint Nationwide PCS Network.<br />
Section 3A: PCS Service Features – The Basics 184
Using Call Forwarding<br />
Call Forwarding lets you forward all your incoming calls to another<br />
phone number – even when your phone is turned off. You can<br />
continue to make calls from your phone when Call Forwarding is<br />
activated.<br />
To activate Call Forwarding:<br />
1. Press .<br />
2. Enter the area code and phone number to which your future<br />
calls should be forwarded.<br />
3. Press . (You will hear a tone to confirm the activation of<br />
Call Forwarding.)<br />
To deactivate Call Forwarding:<br />
1. Press .<br />
2. Press . (You will hear a tone to confirm the deactivation.)<br />
Note: You are charged a higher rate for calls you have forwarded.<br />
Note: PCS Ready Link calls cannot be forwarded. If Call Forwarding is activated,<br />
incoming PCS Ready Link calls will not be completed.<br />
Section 3A: PCS Service Features – The Basics 185
Section 3B<br />
PCS Vision SM<br />
In This Section<br />
Getting Started With PCS Vision Accessing Games<br />
Understanding Messaging Accessing Ringers<br />
Using Email Accessing Screen Savers<br />
<br />
Accessing Alternate Email Providers Exploring the Web<br />
Using Instant Messaging Using PCS Business Connection<br />
<br />
<br />
Experiencing Wireless Online Chat PCS Vision FAQs<br />
<strong>Downloading</strong> Premium Services Content<br />
PCS Vision SM brings you clarity you can see and hear with advanced<br />
multimedia services. These features, including PCS Messaging,<br />
games, downloadable ringers and screen savers, Web access, and<br />
PCS Business Connection SM are easy to learn and use. The rich,<br />
colorful graphic experience is visually comparable to your home or<br />
office computer. Clearly, it’s a whole new way to look at wireless.<br />
This section introduces these advanced services and walks you<br />
through the necessary steps to start taking advantage of PCS Vision.<br />
Section 3B: PCS Vision 186
Getting Started With PCS Vision<br />
With your PCS Vision Phone and PCS Service, you are ready to start<br />
enjoying the advantages of PCS Vision. This section will help you<br />
learn the basics of using your PCS Vision services, including<br />
managing your User Name, launching a Vision connection, and<br />
navigating the Web with your PCS Vision Phone.<br />
Your User Name<br />
When you buy a PCS Vision Phone and sign up for service, you’re<br />
automatically assigned a User Name. A User Name is typically based<br />
on your name and a number, followed by “@sprintpcs.com.” For<br />
example, the third John Smith to sign up for PCS Vision services<br />
might have jsmith003@sprintpcs.com as his User Name. If you want a<br />
particular User Name, you can visit www.sprintpcs.com and get the<br />
name you want – as long as nobody else has it.<br />
When you use PCS Vision services, your User Name is submitted to<br />
identify you to the Sprint Nationwide PCS Network. The User Name<br />
is also useful as an address for Email, as a way to personalize Web<br />
services, and as an online virtual identity.<br />
Your User Name will be automatically programmed into your<br />
PCS Vision Phone. You don’t have to enter it.<br />
Updating Your User Name<br />
When you change the programmed User Name and select a new one,<br />
you have to update your User Name through your PCS Phone.<br />
To update your User Name:<br />
1. Press to access the main menu.<br />
2. Select Settings and press .<br />
3. Select PCS Vision and press .<br />
4. Select Update Profile and press .<br />
If you want to cancel, press while processing.<br />
Section 3B: PCS Vision 187
Finding Your User Name<br />
If you aren’t sure what your PCS Vision User Name is, you can easily<br />
find it online or on your PCS Vision Phone.<br />
To find your User Name:<br />
At www.sprintpcs.com. Sign on to your account using your<br />
PCS Phone Number and password. To view your PCS Vision User<br />
Name, click on the My Personal Information menu and then click<br />
PCS Vision User Name.<br />
<br />
On your PCS Vision Phone. To find your User Name, access your<br />
phone’s main menu, go to Settings > Phone Info > Phone#/User ID.<br />
Section 3B: PCS Vision 188
Launching a PCS Vision Connection<br />
To launch a PCS Vision connection:<br />
1. Press to access the main menu.<br />
2. Select Web and press . (Your PCS Vision connection will<br />
launch and the PCS Vision Home page will display.)<br />
The PCS Vision Home Page<br />
Vision Home<br />
Personalize with<br />
Downloads<br />
1. Messaging<br />
2. Downloads<br />
3. News<br />
4. Weather<br />
5. Sports<br />
6. Entertainment<br />
Go<br />
Shortcut: You can also press Web (right softkey) in standby mode.<br />
Note: If Net Guard is enabled and displayed (see the next page), press OK (left<br />
softkey) to continue and launch the Web.<br />
Tip: When Ready Link Guard is set to On, a warning message will appear.<br />
Press Continue (left softkey) to continue. (See page 149 for Ready Link Guard.)<br />
While connecting, the following will appear on the screen:<br />
Connecting...Please wait..<br />
If you had a previous PCS Vision connection, the last page you visited<br />
(for example, Email or ESPN Top News) will display when you launch<br />
your browser. When this occurs, you may not see the “Connecting...”<br />
message when you launch the session. Though the browser is open,<br />
you are not currently in an active data session - that is, no data is being<br />
sent or received. As soon as you navigate to another page, the active<br />
session will launch and you will see the “Connecting...” message.<br />
Section 3B: PCS Vision 189
Net Guard<br />
When you first connect to the Web, the Net Guard will appear to<br />
confirm that you want to connect. This feature helps you avoid<br />
accidental connections. You can disable the Net Guard in the future<br />
by selecting Always Auto-Connect when the Net Guard is displayed.<br />
To change your Net Guard settings:<br />
1. Press to access the main menu.<br />
2. Select Settings and press .<br />
3. Select PCS Vision and press .<br />
4. Select Net Guard and press .<br />
5. Select On or Off and press .<br />
<br />
<br />
On to activate the Net Guard.<br />
Off to deactivate the Net Guard.<br />
Note: When enabled, the Net Guard appears only once per session. The Net<br />
Guard does not appear if the phone is merely re-connecting due to a time-out.<br />
PCS Vision Connection Status and Indicators<br />
Your phone’s display lets you know the current status of your<br />
PCS Vision connection through indicators which appear at the top<br />
of the screen. The following symbols are used:<br />
Your PCS Vision connection is active (data is being transferred);<br />
the transmit/receive symbol will blink to indicate data<br />
transmission. Incoming voice calls go directly to voicemail;<br />
outgoing voice calls can be made, but the PCS Vision<br />
connection will terminate.<br />
Your PCS Vision connection is dormant (no data is being sent<br />
or received). Though not currently active, when dormant the<br />
phone can restart an active connection quickly; voice calls can<br />
be made and received.<br />
Your phone is not currently able to access PCS Vision service<br />
features.<br />
If no indicator appears, your phone does not have a current<br />
PCS Vision connection. To launch a connection, see “Launching a<br />
PCS Vision Connection” on the previous page.<br />
Section 3B: PCS Vision 190
Navigating the Web<br />
Navigating through menus and Websites during a PCS Vision<br />
session is easy once you’ve learned a few basics. Here are some tips<br />
for getting around:<br />
Softkeys<br />
During a PCS Vision session, the bottom line of your phone’s display<br />
contains one or more softkeys. These keys are shortcut controls for<br />
navigating around the Web, and they correspond to the softkey<br />
buttons directly below the phone’s display screen.<br />
Tip: Depending on which Websites you visit, the labels on the softkeys may<br />
change to indicate their function.<br />
To use softkeys:<br />
Press the desired softkey button. (If an additional pop-up menu<br />
appears when you press the softkey button, select the menu<br />
items using your keypad [if they’re numbered] or by<br />
highlighting the option and pressing .)<br />
Scrolling<br />
As with other parts of your phone’s menu, you’ll have to scroll up and<br />
down to see everything on some Websites.<br />
To scroll line by line through Websites:<br />
<br />
Press the navigation key up or down.<br />
To scroll page by page through Websites:<br />
<br />
left softkey<br />
1. Messaging<br />
2. Downloads<br />
3. News<br />
4. Weather<br />
5. Sports<br />
6. Entertainment<br />
7. Money<br />
8. Find if...<br />
9. Portals<br />
10. My Account<br />
Go<br />
right softkey<br />
Press the volume buttons on the side of the phone.<br />
Section 3B: PCS Vision 191
Selecting<br />
Once you’ve learned how to use softkeys and scroll, you can start<br />
navigating the Web.<br />
To select on-screen items:<br />
<br />
Use the navigation key to highlight the desired item, then press<br />
the desired softkey button (or press ).<br />
Tip: You’ll find that the left softkey is used primarily for selecting items. This<br />
softkey is often labeled “Go.”<br />
Tip: If the items on a page are numbered, you can use your keypad (number keys)<br />
to select an item. (The tenth item in a numbered list may be selected by pressing<br />
the key on your phone’s keypad, even though the number 0 doesn’t appear<br />
on the screen.)<br />
Links allow you to jump to different Web pages, select special<br />
functions, or even place phone calls.<br />
To select links:<br />
<br />
Highlight the link and select the appropriate softkey.<br />
Going Back<br />
To go back one page:<br />
Press the key on your phone.<br />
Note: The key is also used for deleting text (like a BACKSPACE key) when you<br />
are entering text.<br />
Going Home<br />
To return to the PCS Vision Home page from any other Web page:<br />
<br />
Press the right softkey, then highlight Home and press<br />
OK (left softkey).<br />
Tip: You can also return to the PCS Vision Home page by pressing and holding<br />
the key.<br />
Section 3B: PCS Vision 192
PCS Messaging<br />
Understanding Messaging<br />
Now you can send and receive emails and text messages and<br />
participate in Web-based chatrooms right from your PCS Vision<br />
Phone. Messaging allows you to stay connected to friends, family,<br />
and co-workers 24 hours a day anywhere on the Sprint Nationwide<br />
PCS Network.<br />
Note: In some instances, when you receive a text message, characters with<br />
accents will be displayed as question marks.<br />
Message Types<br />
There are many types of text messaging available on your phone.<br />
These appear on your screen as Notifications and include numeric<br />
messages (pages), Messages, Updates, and Mail.<br />
(PCS Voicemail provides voicemail-to-mailbox messaging.<br />
For information on using your phone’s voicemail feature, see<br />
“Using Voicemail” on page 176.)<br />
New Messages<br />
When you receive a new Message, your phone will alert you.<br />
Press View (left softkey) to display the message details.<br />
Press Call (left softkey) to dial the phone number. (Appears when<br />
a phone number is highlighted.)<br />
Press Reply (left softkey) to reply to the message. (Appears when<br />
a phone number or email address is highlighted.)<br />
Press Go (left softkey) to go to the Website. (Appears when a URL<br />
is highlighted.)<br />
Press Forward (left softkey) to forward the message. (Appears<br />
only if there are no phone numbers or URLs in the message.)<br />
Press Options (right softkey) to display options. (See page 197 for<br />
details.)<br />
Tip: When you highlight a phone number, the left softkey may display Call or<br />
Reply depending on the circumstance.<br />
Tip: To make a Ready Link call from the message, press and hold<br />
applicable).<br />
(if<br />
Section 3B: PCS Vision 193
Message Storage<br />
Your PCS Phone can store up to 200 received and 180 sent Messages.<br />
When the message memory is full, the oldest unlocked message will<br />
be deleted automatically. (See page 198 for locking messages.)<br />
Displaying Messages<br />
To display a Message from the message notification alert, see “New<br />
Messages” on the previous page.<br />
To display a Message from the main menu:<br />
1. Press to access the main menu.<br />
2. Select Messaging and press .<br />
3. Select Text Msg and press . (The folder list appears.)<br />
4. Select Inbox, Sent, Outbox, Drafts, or your defined folder and<br />
press . (The message list appears.)<br />
5. Highlight the header of the message you want to see and<br />
press . (The message detail appears.)<br />
If the sender’s or addressee’s information has already been stored in<br />
the Contacts list, the corresponding name or phone number appears<br />
as the header of the message.<br />
To read other messages:<br />
<br />
<br />
Press the navigation key left to read the previous message.<br />
Press the navigation key right to read the next message.<br />
Displaying Picture Mail<br />
When you receive a Picture Mail, your phone will save it into the<br />
Picture Mail Inbox automatically.<br />
To display a Picture from the main menu:<br />
1. Press to access the main menu.<br />
2. Select Messaging and press .<br />
3. Select Picture Mail and press .<br />
4. Select Inbox and press .<br />
5. Select your desired message and press .<br />
6. Highlight the URL in the message and press Go (left softkey).<br />
(The browser will launch and display the picture.)<br />
Section 3B: PCS Vision 194
Sending a Message<br />
With Messaging, you can use a person’s wireless phone number to<br />
send and receive text messages from your PCS Vision Phone to their<br />
messaging-ready phone – and they can send messages to you. When<br />
you receive a new message, you’ll automatically be notified with a<br />
two-way text message.<br />
To send a text message:<br />
1. Press to access the main menu.<br />
2. Select Messaging and press .<br />
3. Select Send Message and press .<br />
4. Select Text Message and press .<br />
5. Select From Phone Book, Mobile Phone#, or Email Address and<br />
press to enter recipients.<br />
From Phone Book to select a recipient from your Contacts list.<br />
Highlight an entry and press to select. Or select<br />
to enter a new entry. Press Done (left softkey)<br />
when you are finished selecting/entering recipients.<br />
Mobile Phone# to enter a mobile phone number directly.<br />
Email Address to enter an email address directly.<br />
6. To add a recipient, press Options (right softkey), select<br />
Add Recipients, and press .<br />
<br />
<br />
<br />
Edit to edit the selected entry.<br />
Erase to erase the selected entry.<br />
Erase All to erase all entries you have selected/entered.<br />
Add Recipient to add recipients.<br />
7. Press Next (left softkey) when you are finished selecting/entering<br />
recipients (you may include up to 10 recipients).<br />
8. To enter a message, select the box under Message and press .<br />
9. Use your keypad to enter a text message (or press Mode [right<br />
softkey] to select from Preset Messages or Recent Messages),<br />
and press OK (left softkey).<br />
10. To set the message priority, select the box under Priority and<br />
press .<br />
11. Select Ordinary or Urgent and press .<br />
Tip: If you select Urgent, the message will be sent with .<br />
12. Press Send (left softkey) to send the message.<br />
Section 3B: PCS Vision 195
To change the recipients or to save the message as a draft, press<br />
Options (right softkey) and select an option from the following during<br />
steps 7-11 on the previous page.<br />
Chg Recipients to change Recipients.<br />
<br />
<br />
Send Callback# to select from None, My Phone#, or Other to notify<br />
your recipients of your callback number. (See “Setting a Callback<br />
Number” on page 62.)<br />
Save to Drafts to save the message to a Drafts folder. (See below to<br />
edit and send the draft message.)<br />
Note: If there is a failure when sending a message in no-service area, you are<br />
prompted to select to send the message automatically. Press Yes (left softkey),<br />
and the message goes to the Outbox folder with . If you press No (right softkey),<br />
the message goes to the folder with . (See next page to send the message.)<br />
Sending a Message in the Drafts Folder<br />
To edit and send a message in the drafts folder:<br />
1. Press to access the main menu.<br />
2. Select Messaging and press .<br />
3. Select Text Msg and press .<br />
4. Select Drafts and press .<br />
5. Select the message you wish to edit and press Edit (left softkey).<br />
6. After editing the message, press Send (left softkey) to send the<br />
message.<br />
Tip: The oldest message in the drafts folder will be erased when you save more<br />
than 10 messages.<br />
Section 3B: PCS Vision 196
Sending a Message in the Outbox Folder<br />
If a failure occurs when you try to send a message, the message goes<br />
to the Outbox folder.<br />
To send a message from the Outbox folder:<br />
1. Press to access the main menu.<br />
2. Select Messaging and press .<br />
3. Select Text Msg and press .<br />
4. Select Outbox and press .<br />
5. Select the message you wish to send and press Send (left softkey).<br />
Message Options<br />
Several options are available when you display a folder list, message<br />
list, or message details.<br />
Folder List Options<br />
Select Inbox, Sent, Outbox, Drafts, or your defined folder and press<br />
Options (right softkey). To select an option, highlight it and press .<br />
<br />
<br />
<br />
<br />
<br />
Edit Folder to edit the folder (user-defined folder only).<br />
Erase Folder to erase the folder (user-defined folder only).<br />
Create Folder to create a new user-defined folder.<br />
Compose New to compose a new message.<br />
Erase Messages to erase messages (if applicable).<br />
Message List Options<br />
To display a message list, select Inbox (or defined folder), Sent, Outbox,<br />
or Drafts and press . To display your Picture Mail message list,<br />
select Picture Mail from the Messaging menu, press , select Inbox,<br />
and press . Then highlight a message and press Options (right<br />
softkey) to display options.<br />
Reply to reply to the message. (See page 195 to send a message.)<br />
(Inbox only.)<br />
Forward to forward the message. Select from From Phone Book,<br />
Mobile Phone#, or Email Address. (Inbox and Sent only.)<br />
<br />
<br />
<br />
Edit to edit a message. (Outbox and Drafts only.)<br />
Send to send a message. (Outbox and Drafts only.)<br />
Move to move a message to the Inbox or to your defined folder.<br />
Select a folder and press , or press to create a new<br />
folder. (See page 200 to create a folder.) (Inbox only.)<br />
Section 3B: PCS Vision 197
Lock to lock a message. Locked messages will not be erased<br />
automatically. To unlock the message, select Unlock and press .<br />
(Picture Mail Inbox, Inbox, and Sent only.)<br />
Compose New to compose a new message. (See page 195 to<br />
compose a new message.)<br />
Erase to erase the selected message.<br />
Erase Read Msgs to erase read messages in the folder (except<br />
locked messages). (Picture Mail Inbox, Inbox only.)<br />
Erase All to erase all messages in the folder (except locked messages).<br />
A warning message appears if there are unread messages.<br />
Tip: Locked messages will be displayed with .<br />
Tip: To make a call from the list, highlight a message and press or (if<br />
applicable).<br />
Message Details Options<br />
After you display the Message list in the Picture Mail Inbox, Inbox,<br />
Sent, or your defined folder, press to display the message details.<br />
Press Options (right softkey) to display message options. To select an<br />
option, highlight it and press .<br />
Call(Go to List) to call a number in the message. Select a number<br />
and press or Call (left softkey) to place a call. Press and hold<br />
to make a Ready Link call.<br />
Call:Speaker On to call in speaker mode. Select a number and<br />
or Call (left softkey) to place a call. Press and hold to make a<br />
Ready Link call.<br />
Prepend to add numbers to the beginning of the phone number (if<br />
applicable).<br />
Go to URL List to display URLs in the message. Press Go (left<br />
softkey) or select a URL and press to go to the site.<br />
Send Message to display phone numbers and email addresses to<br />
send a message. (See page 195 for details.) (Except Picture Mail)<br />
Reply to reply to the message. (See page 195 to send a message.)<br />
(Message in Inbox and defined folder only.)<br />
Forward to forward the message. Select from From Phone Book,<br />
Mobile Phone#, or Email Address. (Except Picture Mail)<br />
<br />
Move to move the message to another folder. Select a folder and<br />
press or press to create a new folder.<br />
(See page 200 to create a folder.) (Message in Inbox and defined<br />
folder only.)<br />
Section 3B: PCS Vision 198
Lock to lock the message. Locked messages will not be erased<br />
automatically. To unlock the message, select Unlock and press .<br />
Font Size to change the font size from Small or Normal.<br />
Save to Ph. Book to save the phone number, email address, and<br />
URLs. Select a data category and press to save.<br />
Go to Phone Book to go to the Contacts list (if applicable).<br />
Compose New to compose a new message. (See page 195 to<br />
compose a message.)<br />
Erase to erase the message.<br />
Changing the Display Font Size of a Message<br />
After you display a Message (except in the Outbox and Drafts folder),<br />
press Options (right softkey) to display message options.<br />
To adjust the display font size:<br />
1. Select Font Size and press .<br />
2. Select Small or Normal and press .<br />
Prepending a Phone Number From a Message<br />
After you display a Message (except in the Outbox and Drafts folder),<br />
press Options (right softkey) to display message options.<br />
To add a prefix to a phone number:<br />
1. Select Prepend and press .<br />
2. Highlight your desired phone number and press or OK (left<br />
softkey).<br />
3. Enter the digits or pauses (see below) you want to add to the<br />
number.<br />
4. Press or to make a call.<br />
To select another option, press Options (right softkey), highlight it<br />
and press .<br />
Call to dial the phone number.<br />
Call:Speaker On to dial the phone number in speakerphone<br />
mode.<br />
Save Phone# to store the phone number in your Contacts<br />
Directory.<br />
H Hard Pause to insert a hard pause. (See “Dialing and<br />
Saving Phone Numbers With Pauses” on page 28.)<br />
T 2-Sec. Pause to insert a 2-second pause. (See “Dialing and<br />
Saving Phone Numbers With Pauses” on page 28.)<br />
Section 3B: PCS Vision 199
Message Folders<br />
Incoming Updates and numeric pages are stored in folders in your<br />
phone’s Messaging menu. You may add your own folders or use the<br />
phone’s default folder.<br />
You can create up to ten folders to store your Messages. When ten<br />
user-defined folders exist, the “Create Folder ”option will not appear.<br />
To add a new folder:<br />
1. Press to access the main menu.<br />
2. Select Messaging and press .<br />
3. Select Text Msg and press .<br />
4. Press Options (right softkey).<br />
5. Select Create Folder and press .<br />
6. Enter a folder name and press or OK (left softkey).<br />
Pressing Save (left softkey) allows you to save the folder<br />
name.<br />
7. If you want messages to be filed into the folder automatically,<br />
select the menu under Auto Filing and press .<br />
8. Select On and press .<br />
9. Select the box under Keyword by scrolling down and press .<br />
10. Enter a keyword and press or OK (left softkey).<br />
11. Press Save (left softkey).<br />
To set an optional feature for the added folder:<br />
1. During step 9 above, scroll down to select other menu options.<br />
Highlight the menu under each item and press .<br />
Notify to set the display notification to on or off when you<br />
have unread messages matching the defined folder.<br />
Envelope Icon to set the envelope icon display to on or off<br />
when you have unread messages matching the defined folder.<br />
2. After selecting each setting, press Save (left softkey).<br />
Section 3B: PCS Vision 200
To edit a folder:<br />
1. From the folder list display, highlight a defined folder.<br />
2. Press Options (right softkey).<br />
3. Select Edit Folder and press .<br />
4. Select the box you wish to edit and press .<br />
5. Enter or select a new folder name/setting.<br />
6. Press or OK (left softkey).<br />
7. Press Save (left softkey).<br />
Erasing All Messages<br />
To erase all messages within a folder:<br />
1. Press to access the main menu.<br />
2. Select Messaging and press .<br />
3. Select Text Msg and press .<br />
4. Select Inbox, Sent, Outbox, Drafts, or your defined folder and<br />
press .<br />
5. Press Options (right softkey).<br />
6. Select Erase All and press . (A confirmation will display.)<br />
7. Select Yes and press .<br />
Moving a Message Into Another Folder<br />
You can move messages from the Inbox folder to a user-defined folder.<br />
To move a message into another folder:<br />
1. After you display a message in your Inbox folder, press Options<br />
(right softkey) to display the message options.<br />
2. Highlight Move and press .<br />
3. Highlight your desired folder and press . (You must have at<br />
least one defined folder to move a message.)<br />
Section 3B: PCS Vision 201
Erasing a Folder<br />
To erase a text message folder:<br />
1. From the folder list display, highlight the defined folder you<br />
want to erase.<br />
2. Press Options (right softkey).<br />
3. Highlight Erase Folder and press .<br />
4. Select Yes and press .<br />
Note: When you erase a folder, the messages within the folder are also erased.<br />
If the folder contains a new (unread) message or locked message, you are<br />
prompted to select Erase or Don’t Erase.<br />
Erasing Selected Messages in All Folders<br />
To erase selected messages:<br />
1. From the folder list display, press Options (right softkey).<br />
2. Select Erase Messages and press .<br />
3. Select Read, Unread, and/or Sent and press to check the<br />
appropriate box(es).<br />
4. After selecting the boxes, press Done (left softkey).<br />
5. Select Erase and press to erase selected messages (except<br />
locked messages).<br />
Note: To erase an individual message, see “Message List Options” on page 197.<br />
Section 3B: PCS Vision 202
Signing Up for Updates<br />
With Updates, you can have news and information sent directly to<br />
your PCS Vision Phone at the times you choose.<br />
To select the information you want to send to your PCS Vision Phone:<br />
1. Log on to the Internet from your computer.<br />
2. Go to the site from which you want to receive information.<br />
(A few of the sites you can visit are America Online ® , Yahoo! ® ,<br />
MSN ®, and eBay ® . The location where you request updates<br />
within each site will vary.)<br />
3. Where indicated on the site, input your 10-digit PCS Phone<br />
number followed by “@messaging.sprintpcs.com.” (For<br />
example: 5551234567@messaging.sprintpcs.com.)<br />
Upon completing the registration process, you should begin<br />
receiving updates on your PCS Vision Phone as requested.<br />
Section 3B: PCS Vision 203
Using Email<br />
With Email, you can set up an account at no additional charge and<br />
perform many of the typical email functions from your PCS Vision<br />
Phone that you can from your personal computer.<br />
You can manage your Email account from your PCS Vision Phone or<br />
from your personal computer at www.sprintpcs.com. You can also<br />
access other select email providers from the Web through your Email.<br />
Accessing Email Messages<br />
To access Email messages:<br />
1. Press to access the main menu.<br />
2. Select Messaging and press .<br />
3. Select Go to Email and press . (If you’re a first-time user, your<br />
phone will prompt you to set up your Email account by<br />
establishing a User Name and password.)<br />
4. To view your messages, press Inbox (left softkey).<br />
5. Scroll to select the message you wish to read and press the left<br />
softkey.<br />
6. Once you’ve read a message, use the quick actions at the end of<br />
each message (Reply, Reply All, Forward, Erase, Add to Folder,<br />
or Main).<br />
Composing Email Messages<br />
To compose an Email message:<br />
1. From the Email menu (see steps 1-3 above), press Compose (left<br />
softkey).<br />
2. Scroll to select the address box and enter the address of the<br />
person to whom you ’re sending a message and press the left<br />
softkey.<br />
3. Scroll to select the message box and enter the subject and your<br />
message.<br />
4. Select Send when your message is ready to be delivered.<br />
Section 3B: PCS Vision 204
Accessing Alternate Email Providers<br />
With PCS Vision, you can use popular email services such as<br />
AOL ® Mail, Yahoo! ® Mail, MSN Hotmail, and EarthLink ® to keep in<br />
touch even while you’re on the go.<br />
Using Alternate Email Providers<br />
To access email providers from your PCS Vision Phone:<br />
1. From the PCS Vision Home page, select Messaging.<br />
2. Select Email.<br />
3. Select an email provider, such as AOL Mail, Yahoo! Mail, or<br />
EarthLink.<br />
4. Use your keypad to enter the required sign in information for<br />
the selected provider, such as user name, email address, and/or<br />
password, and select Sign In. (Your mailbox for the selected<br />
provider will display.)<br />
Note: The information required for sign in will vary depending on the email<br />
provider you are accessing.<br />
5. Follow the onscreen instructions to read, reply to, compose,<br />
send, and manage your email account.<br />
Section 3B: PCS Vision 205
Using Instant Messaging<br />
PCS Vision also provides you with access to popular instant<br />
messaging (IM) clients, including Yahoo! ® Messenger, and<br />
AOL ® Instant Messenger TM .<br />
Accessing Instant Messaging<br />
To access instant messaging clients from your PCS Vision Phone:<br />
1. From the PCS Vision Home page, select Messaging.<br />
2. Select Instant Messaging.<br />
3. Select an email provider, such as AOL Instant Messenger or<br />
Yahoo! Messenger.<br />
4. Use your keypad to enter the required sign in information for<br />
the selected provider, such as user name and/or password, and<br />
select Sign In. (Your IM screen for the selected provider will<br />
display.)<br />
Note: The information required for sign in will vary depending on the instant<br />
messaging provider you are accessing.<br />
5. Follow the onscreen instructions to read, reply to, compose,<br />
send, and manage your IM account.<br />
Section 3B: PCS Vision 206
Experiencing Wireless Online Chat<br />
PCS Vision gives you the ability to join wireless chatrooms from<br />
your PCS Vision Phone, to send text messages and icons to chatroom<br />
participants, or to launch a one-on-one (private) chatroom.<br />
To access a chatroom from the browser:<br />
1. Press to access the main menu.<br />
2. Highlight Web and press .<br />
3. Select Messaging.<br />
4. Select Chat.<br />
5. Select Enter. (You will see a disclaimer for Wireless Chat.)<br />
6. Select I Agree to enter the Chat menu.<br />
7. Select a chatroom from the menu (for example, “Friends”<br />
or “Singles”).<br />
8. Use your keypad to enter a nickname and select Enter. (Once in<br />
the chatroom, you may scroll through the postings to read<br />
messages from other chatroom participants.)<br />
To post a message:<br />
1. During an active chatroom session, select Add text.<br />
2. Enter your message.<br />
3. Select Send.<br />
To set up a private chatroom:<br />
1. During an active chatroom session, select 1->1.<br />
2. Select a chatter with whom you’d like to launch a private<br />
chatroom.<br />
To exit a chatroom:<br />
<br />
Select Leave Room.<br />
Note: To avoid inadvertent data usage charges, you should sign out of<br />
chatrooms when you are ready to exit.<br />
Section 3B: PCS Vision 207
<strong>Downloading</strong> Premium Services Content<br />
With PCS Vision and your new PCS Vision Phone, you have access to a<br />
dynamic variety of Premium Service content such as downloadable<br />
Games, Ringers, Screen Savers, and other applications. The basic<br />
steps required to access and download Premium Service content are<br />
outlined below.<br />
Accessing the Download Menus<br />
To access the PCS Vision download menus:<br />
1. Press to access the main menu.<br />
2. Select Downloads and press .<br />
3. Select the type of file you wish to download (Games, Ringers,<br />
Screen Savers, or Applications) and press .<br />
4. Select Get New and press . (The browser will launch and take<br />
you to the corresponding download menu.)<br />
To access the PCS Vision download menus from the Web browser:<br />
<br />
From the PCS Vision Home page, select Games, Ringers,or<br />
Screen Savers to go to the corresponding download menu.<br />
(For more information on navigating the Web, see “Navigating<br />
the Web” on page 191.)<br />
Selecting an Item to Download<br />
You can search for available items to download in a number of ways:<br />
Featured displays a rotating selection of featured items.<br />
<br />
<br />
Browse Category allows you to narrow your search to a general<br />
category, such as Movie/TV Themes for Ringers or College Logos<br />
for Screen Savers. (There may be several pages of available<br />
content in a list. Select Next 9 to view additional items.)<br />
Search allows you to use your keypad to enter search criteria to<br />
locate an item. You may enter an entire word or title or perform a<br />
partial-word search (for example, entering “goo” returns “Good<br />
Ol’ Boy,” “The Good, the Bad, and the Ugly,” and “Goofy - Club”).<br />
Section 3B: PCS Vision 208
<strong>Downloading</strong> an Item<br />
Once you’ve selected an item you wish to download, highlight it and<br />
press or OK (left softkey). You will see a summary page for the<br />
item including its title, the vendor, the download detail, the file size,<br />
and the cost. Links allow you to view the License Details page, which<br />
outlines the price, license type, and length of license for the<br />
download, and the Terms of Use page, which details the Premium<br />
Services Terms of Use and your responsibility for payment.<br />
To download a selected item:<br />
1. From the information page, select Buy. (The item will download<br />
automatically. When the New Download screen appears, the<br />
item has been successfully downloaded to your phone.)<br />
Note: If you have not previously purchased an item, you will be prompted to<br />
create your purchasing profile.<br />
2. Select an option to continue:<br />
Select Use (left softkey) to assign the downloaded item (or<br />
to launch, in the case of a game or application).<br />
Your PCS Vision session will end and you will be redirected<br />
to the appropriate phone menu screen.<br />
Select Shop (right softkey) to browse for other items to<br />
download.<br />
Press to quit the browser and return to standby mode.<br />
Section 3B: PCS Vision 209
Games<br />
Accessing Games<br />
You can play a variety of entertaining and graphically-rich games on<br />
your PCS Vision Phone. New games are easy to download and play.<br />
Tip: For complete instructions on downloading, see “<strong>Downloading</strong> Premium<br />
Services Content” on page 208.<br />
<strong>Downloading</strong> Games<br />
To download an available game to your phone:<br />
1. Press to access the main menu.<br />
2. Select Downloads and press .<br />
3. Highlight Games and press .<br />
4. Highlight Get New and press . (The browser will launch and<br />
take you to the Games download menu.)<br />
5. Use your navigation key to highlight and select a game you wish<br />
to download. (For more information on navigating the Web, see<br />
“Navigating the Web” on page 191.)<br />
6. Select Buy from the item information page. (The game will<br />
download automatically. When the New Download screen<br />
appears, the game has been successfully downloaded to<br />
your phone.)<br />
Note: If you have not previously purchased an item, you will be prompted to<br />
create your purchasing profile.<br />
7. Select an option to continue:<br />
Select Use (left softkey) to launch the downloaded game.<br />
Your PCS Vision session will end and you will be redirected<br />
to the appropriate phone menu screen.<br />
Select Shop (right softkey) to browse for other items to<br />
download.<br />
Press to quit the browser and return to standby mode.<br />
Section 3B: PCS Vision 210
Playing Games<br />
To play a downloaded game on your PCS Vision Phone:<br />
1. Press to access the main menu.<br />
2. Select Downloads and press .<br />
3. Highlight Games and press .<br />
4. Select the game you wish to play and press .<br />
5. Highlight Run and press .<br />
6. Press OK (left softkey) if a prompt displays the days remaining<br />
on the game license.<br />
7. Follow the onscreen instructions to play the game.<br />
To quit a game:<br />
1. When you are finished playing, press . (A prompt will<br />
display: “Resume the Application?”)<br />
2. Select Yes to continue playing.<br />
– or –<br />
Select No to exit.<br />
Section 3B: PCS Vision 211
Ringers<br />
Accessing Ringers<br />
You can personalize your PCS Vision Phone by downloading and<br />
assigning different ringers to numbers in your Contacts list.<br />
Tip: For complete instructions on downloading, see “<strong>Downloading</strong> Premium<br />
Services Content” on page 208.<br />
<strong>Downloading</strong> Ringers<br />
To download an available ringer to your phone:<br />
1. Press to access the main menu.<br />
2. Select Downloads and press .<br />
3. Highlight Ringers and press .<br />
4. Highlight Get New and press . (The browser will launch and<br />
take you to the Ringers download menu.)<br />
5. Use your navigation key to highlight and select a ringer you<br />
wish to download. (For more information on navigating the<br />
Web, see “Navigating the Web” on page 191.)<br />
6. From the item information page, select Buy. (The ringer will<br />
download automatically. When the New Download screen<br />
appears, the ringer has been successfully downloaded to<br />
your phone.)<br />
Note: If you have not previously purchased an item, you will be prompted to<br />
create your purchasing profile.<br />
7. Select an option to continue:<br />
Select Use (left softkey) to assign the downloaded ringer.<br />
Your PCS Vision session will end and you will be redirected<br />
to the appropriate phone menu screen.<br />
Select Shop (right softkey) to browse for other items to<br />
download.<br />
Press to quit the browser and return to standby mode.<br />
Note: You may store total of 1024 KB of downloaded data on your phone.<br />
Section 3B: PCS Vision 212
Assigning Downloaded Ringers<br />
You can assign downloaded ringers directly from the Downloads<br />
menu or through your phone’s Settings menu.<br />
To assign a downloaded ringer from the Downloads menu:<br />
1. Press to access the main menu.<br />
2. Select Downloads and press .<br />
3. Highlight Ringers and press .<br />
4. Highlight a downloaded ringer and press .<br />
5. Highlight Assign and press .<br />
6. Highlight Voice Calls, Voicemail, Messaging, Calendar,<br />
Start-up Tone, Power-off Tone or Phone Book and press .<br />
The following two items need an extra step:<br />
Voice Calls requires you to highlight With Caller ID or<br />
No caller ID and press .<br />
Phone Book requires you to highlight the Contacts entry you<br />
want to assign and press .<br />
(A message appears confirming that the ringer has been assigned.)<br />
To assign a downloaded ringer from the Settings menu:<br />
See “Selecting Ringer Types for Voice Calls” on page 36;<br />
see “Selecting Ringer Types for Voicemail” on page 38;<br />
see “Selecting Ringer Types for Messages” on page 39;<br />
see “Selecting Ringer Types for Calendar” on page 39;<br />
see “Setting a Start-up/Power-off Tone” on page 40;<br />
– or –<br />
see “Selecting a Ringer/Image Type for an Entry” on page 95.<br />
Note: You may assign a ringer to more than one type of call.<br />
Purchasing Ringers<br />
You can purchase ringers directly from your phone by following the<br />
instructions on page 209 or through www.sprintpcs.com.<br />
Section 3B: PCS Vision 213
Screen Savers<br />
Accessing Screen Savers<br />
Download unique images to use as screen savers – or make it easy to<br />
tell who’s calling by assigning specific images to numbers in your<br />
Contacts list.<br />
Tip: For complete instructions on downloading, see “<strong>Downloading</strong> Premium<br />
Services Content” on page 208.<br />
<strong>Downloading</strong> Screen Savers<br />
To download an available Screen Saver to your phone:<br />
1. Press to access the main menu.<br />
2. Select Downloads and press .<br />
3. Highlight Screen Savers and press .<br />
4. Highlight Get New and press . (The browser will launch and<br />
take you to the Screen Savers download menu.)<br />
5. Use your navigation key to highlight and select a Screen Saver<br />
you wish to download. (For more information on navigating the<br />
Web, see “Navigating the Web” on page 191.)<br />
6. From the item information page, select Buy. (The screen saver<br />
will download automatically. When the New Download screen<br />
appears, the screen saver has been successfully downloaded to<br />
your phone.)<br />
Note: If you have not previously purchased an item, you will be prompted to<br />
create your purchasing profile.<br />
7. Select an option to continue:<br />
Select Use (left softkey) to assign the downloaded screen<br />
saver. Your PCS Vision session will end and you will be<br />
redirected to the appropriate phone menu screen.<br />
Select Shop (right softkey) to browse for other items to<br />
download.<br />
Press to quit the browser and return to standby mode.<br />
Note: You may store total of 1024 KB of downloaded data on your phone.<br />
Section 3B: PCS Vision 214
Assigning Downloaded Screen Savers<br />
Downloaded Screen Savers may be assigned directly from the<br />
Downloads menu or through the Settings menu.<br />
To assign a downloaded Screen Saver from the Downloads menu:<br />
1. Press to access the main menu.<br />
2. Select Downloads and press .<br />
3. Highlight Screen Savers and press .<br />
4. Highlight a downloaded Screen Saver and press .<br />
5. Select Assign and press .<br />
6. Highlight one of Incoming Calls, Screen Saver, or Phone Book and<br />
press .<br />
The following item needs an extra step:<br />
Phone Book requires you to highlight your desired Contacts<br />
entry and press .<br />
(A message appears confirming that the image has been assigned.)<br />
Note: Depending on the data, you can select where to assign downloaded images:<br />
Image data can be assigned to Incoming Calls, Screen Saver, or Phone Book.<br />
Animation data can be assigned to Standby, Outgoing Calls, or Service Search.<br />
Note: You may assign a Screen Saver to more than one task.<br />
Purchasing Screen Savers<br />
You can purchase Screen Savers directly from your phone by following<br />
the instructions on page 209, or through www.sprintpcs.com.<br />
Section 3B: PCS Vision 215
Web<br />
Exploring the Web<br />
With Web access on your PCS Vision Phone, you can browse fullcolor<br />
graphic versions of your favorite Websites, making it easier than<br />
ever to stay informed while on the go. Follow sports scores and<br />
breaking news and weather and shop on your PCS Vision Phone<br />
anywhere on the Sprint Nationwide PCS Network.<br />
In addition to the features already covered in this section, the<br />
PCS Vision Home page offers access to these colorful, graphically<br />
rich Web categories. Many sites are available under more than one<br />
menu – choose the one that’s most convenient for you.<br />
News. Get up-to-the-minute news regarding finance, business,<br />
sports, and entertainment at sites like CNNtoGo, Bloomberg,<br />
USA Today, and Forbes.<br />
Weather. Access The Weather Channel to get current weather<br />
conditions and forecasts.<br />
Entertainment. Get the latest buzz on your favorite stars as well as<br />
movie and music reviews at Websites like E! Online, Pocket<br />
BoxOffice TM , and TastNtalk.<br />
Sports. Enjoy current news, statistics, and sports scores, as well as<br />
updates of events in progress at ESPN.com and other sports sites.<br />
Finance. Use Websites like Bloomberg, Fidelity, and Forbes to get<br />
stock quotes, make trades, and check your bank account online.<br />
Travel. Access flight information and make dining arrangements<br />
from travel Websites like Saber and Fodors.com.<br />
Shopping. Browse or purchase from popular shopping Websites<br />
like Amazon.com or Edmunds.<br />
Tools. Use tools like Switchboard to access yellow pages, white<br />
pages – even reverse phone number look-up or use Google to<br />
search for other Websites or images.<br />
Business Links. Access your PCS Business Connection Personal or<br />
Enterprise Edition along with links to many business-related sites.<br />
My Account. Check minutes and PCS Vision usage, view your<br />
current invoice, or make a payment.<br />
Search. Use Google to search keywords, articles, and even images.<br />
Section 3B: PCS Vision 216
Using the Browser Menu<br />
Navigating the Web from your phone using the PCS Vision Home<br />
page is easy once you get the hang of it. For details on how to<br />
navigate the Web, select menu items, and more, see “Navigating the<br />
Web” on page 191.<br />
Although the PCS Vision Home page offers a broad and convenient<br />
array of sites and services for you to browse, not all sites are<br />
represented, and certain functions, such as going directly to specific<br />
Websites, are not available. For these and other functions, you will<br />
need to use the browser menu. The browser menu offers additional<br />
functionality to expand your use of the Web on your PCS Vision Phone.<br />
Opening the Browser Menu<br />
The browser menu may be opened anytime you have an active<br />
PCS Vision session, from any page you are viewing.<br />
To open the browser menu:<br />
Press (right softkey) from any page during an active<br />
PCS Vision session. (The browser menu will display.)<br />
(To launch a PCS Vision session, please see “Launching a<br />
PCS Vision Connection” on page 189.)<br />
Options available under the browser menu include:<br />
Home. Returns the browser to the PCS Vision Home page.<br />
<br />
<br />
<br />
<br />
<br />
<br />
<br />
<br />
<br />
Forward. Allows you to go forward to the pages you have visited.<br />
Mark this page. Allows you to create new bookmarks.<br />
View Bookmarks. Allows you to view and access bookmarked sites.<br />
Search. Launches a Google search.<br />
Show URL. Displays the URL (Website address) of the site you’re<br />
currently viewing.<br />
Go to URL.... Allows you to navigate directly to a Website by<br />
entering its URL (Website address).<br />
History. Displays the pages you have visited.<br />
Refresh this page. Reloads the current Web page.<br />
More.... Displays the additional menu options. (Restart Browser,<br />
Send Page, and Preferences.)<br />
Section 3B: PCS Vision 217
Creating a Bookmark<br />
Bookmarks allow you to store the address of your favorite Websites<br />
for easy access at a later time.<br />
To create a bookmark:<br />
1. Launch the Web page you want to mark.<br />
2. Press (right softkey) to go to the browser menu.<br />
3. Select Mark this page and press or OK (left softkey).<br />
Note: Bookmarking a page does not store the page contents, just its address.<br />
Some pages cannot be bookmarked. Whether a particular Web page may be<br />
marked is controlled by its creator.<br />
Accessing a Bookmark<br />
To access a bookmark:<br />
1. Access the browser menu by pressing (right softkey).<br />
2. Select View Bookmarks and press OK (left softkey).<br />
3. Highlight the bookmark you’d like to access and press or<br />
OK (left softkey) to go to the Website.<br />
Editing a Bookmark<br />
To edit a bookmark:<br />
1. Launch the Web and press (right softkey) to access the<br />
browser menu.<br />
2. Select View Bookmarks and press OK (left softkey).<br />
3. Select the bookmark you wish to edit and press (right<br />
softkey).<br />
4. Select Edit Address or Edit Title and press OK (left softkey).<br />
5. Press Edit (right softkey), use your keypad to edit the address or<br />
title, and press OK (left softkey).<br />
6. To save the bookmark, press OK (left softkey).<br />
Section 3B: PCS Vision 218
Deleting a Bookmark<br />
To delete a bookmark:<br />
1. Launch the Web and press (right softkey) to access the<br />
browser menu.<br />
2. Select View Bookmarks and press OK (left softkey).<br />
3. Highlight the bookmark you wish to erase and press (right<br />
softkey).<br />
4. Select Delete and press OK (left softkey).<br />
5. Press Yes (right softkey).<br />
Tip: To delete all bookmarks, select Delete All during step 3 above.<br />
Moving a Bookmark<br />
To move a bookmark:<br />
1. Access the View Bookmarks menu as outlined above in steps 1-2,<br />
and press (right softkey).<br />
2. Select Reorder and press OK (left softkey).<br />
3. Highlight the bookmark you wish to move and press Move (left<br />
softkey).<br />
4. Move the bookmark to a new location by pressing the<br />
navigation key up or down and press Drop (left softkey).<br />
5. When you’re finished, press Finish (right softkey).<br />
Going to a Specific Website<br />
To go to a particular Website by entering a URL (Website address):<br />
1. Launch the Web and press (right softkey) to display the<br />
browser menu.<br />
2. Select Go to URL... and press OK (left softkey).<br />
3. Select Address and press OK (left softkey).<br />
4. Press Edit (right softkey), use your keypad to enter the URL of<br />
the Website you wish to go to, and press OK (left softkey).<br />
5. Press OK (left softkey) to go to the Website.<br />
Note: Not all Websites are viewable on your phone.<br />
Section 3B: PCS Vision 219
Reloading a Web Page<br />
To reload (refresh) a Web page:<br />
1. Launch the Web and press (right softkey) to display the<br />
browser menu.<br />
2. Select Refresh this page and press OK (left softkey).<br />
Restarting the Web Browser<br />
If the Web browser appears to be malfunctioning or stops<br />
responding, you can usually fix the problem by simply restarting<br />
the browser.<br />
To restart the Web browser:<br />
1. From an active PCS Vision connection, press (right softkey)<br />
to display the browser menu.<br />
2. Select More... and press OK (left softkey).<br />
3. Select Restart Browser and press OK (left softkey).<br />
Sending a Web Page<br />
This feature allows you to send a URL (Website address) you’re<br />
viewing through SMS text messaging.<br />
To send a Web page:<br />
1. From an active PCS Vision connection, press (right softkey)<br />
to display the browser menu.<br />
2. Select More... and press OK (left softkey).<br />
3. Select Send Page and press OK (left softkey).<br />
4. To complete and send a Web Page, follow steps 5-12 in<br />
“Sending a Message” on page 195.<br />
Adjusting the Browser Sound Volume<br />
To adjust the browser sound volume:<br />
1. From an active PCS Vision connection, press (right softkey)<br />
to display the browser menu.<br />
2. Select More... and press OK (left softkey).<br />
3. Select Preferences and press OK (left softkey).<br />
4. Select Sound Volume and press OK (left softkey).<br />
5. Select your desired volume level by pressing the navigation key<br />
up or down and press .<br />
Section 3B: PCS Vision 220
PCS Business Connection SM<br />
Using PCS Business Connection<br />
Personal Edition<br />
PCS Business Connection SM Personal Edition gives you secure,<br />
real-time access to your Microsoft ® Outlook ® or Lotus Notes ®<br />
company email, calendar, business directory, and personal contacts.<br />
You’ll have the features and functions of your Microsoft Outlook and<br />
Lotus Notes so you can view, create, reply to, and delete email;<br />
schedule appointments; and look up phone numbers in real time,<br />
anywhere on the Sprint Nationwide PCS Network.<br />
PCS Business Connection Personal Edition delivers the<br />
following features:<br />
Business email access. Read, reply to, forward, delete, and<br />
compose your company email.<br />
Company directory and contacts. Search, view, call, and email<br />
contacts from your company’s directory. Do all this and add/edit<br />
your personal contacts.<br />
Work calendar. Accept and decline meetings, view daily<br />
summaries and details, and navigate to various dates.<br />
Files/information on your PC. Browse folders, download, and<br />
view documents from any device using a PC browser or<br />
Pocket Internet Explorer.<br />
PCS Business Connection Personal Edition requires no hardware<br />
or software installation on your company’s network. Just install the<br />
PCS Business Connection Personal Edition software on your work<br />
PC. This allows data to be securely retrieved in real-time by your<br />
wireless device when connected to the Sprint Nationwide<br />
PCS Network. There is a monthly charge for PCS Business<br />
Connection and usage charges will also apply.<br />
When your work PC isn’t on, you can share connections with your coworkers<br />
so that you always have access to your email, calendar, and<br />
contacts. Your data remains secure behind the corporate firewall, and<br />
any changes you make on your wireless device are instantly updated on<br />
your company server without the need to synchronize.<br />
Additional PCS Business Connection solutions are available for your<br />
company. For more details, visit businessconnection.sprintpcs.com.<br />
Section 3B: PCS Vision 221
PCS Vision FAQs<br />
How will I know when my phone is ready for PCS Vision service?<br />
When your phone is ready, your User Address will be displayed in the<br />
Phone# UserID menu. Go to Settings > Phone Info > Phone#/User ID.<br />
How do I sign-in for the first time?<br />
You are automatically signed in to access PCS Vision services when<br />
you turn on your phone.<br />
How do I know when my phone is connected to PCS Vision services?<br />
Your phone automatically connects when PCS Vision service is used<br />
or an incoming message arrives. Your phone will also display the<br />
icon. (Connecting takes about 10-12 seconds.)<br />
Can I make calls and use PCS Vision services at the same time?<br />
You cannot use voice and PCS Vision services simultaneously. If you<br />
receive a call while PCS Vision service is active, the call will be<br />
forwarded to voicemail. You can place an outgoing call anytime, but<br />
it will interrupt any in-progress PCS Vision session.<br />
When is my data connection active?<br />
Your connection is active when data is being transferred. Outgoing<br />
calls are allowed; incoming calls go directly to voicemail. When<br />
active, the (Sending) or (Receiving) indicator flashes on your<br />
phone’s display screen.<br />
When is my data connection dormant?<br />
If no data is received for 10 seconds, the connection goes dormant.<br />
When the connection is dormant, voice calls are allowed. (The<br />
connection may become active again quickly.) If no data is received<br />
for an extended period of time, the connection will terminate.<br />
Can I sign out of data services?<br />
You can sign out without turning off your phone; however, you will<br />
not be able to browse the Web or use other PCS Vision services.<br />
While signed out, you can still place or receive phone calls, check<br />
voicemail, and use other voice services. You may sign in again at any<br />
time. To sign out, go to Settings > PCS Vision > Disable Vision in your<br />
phone’s menu.<br />
Section 3B: PCS Vision 222
Section 3C<br />
PCS Voice Command SM<br />
In This Section<br />
<br />
<br />
<br />
<br />
Getting Started With PCS Voice Command SM<br />
Creating Your Own Address Book<br />
Making a Call With PCS Voice Command<br />
Accessing Information Using PCS Voice Command<br />
With Sprint, the first wireless provider to offer innovative<br />
PCS Voice Command technology, reaching your friends, family, and<br />
co-workers has never been easier – especially when you’re on the go.<br />
You can even listen to Web-based information such as news, stock<br />
quotes, weather, sports, and much more. Your voice does it all<br />
with PCS Voice Command.<br />
This section outlines the PCS Voice Command service.<br />
Section 3C: PCS Voice Command 223
Getting Started With PCS Voice Command SM<br />
With PCS Voice Command:<br />
You can store all your contacts’ phone numbers, so you can<br />
simply say the name of the person you want to call.<br />
There’s no need to punch in a lot of numbers, memorize<br />
voicemail passwords, or try to dial while you’re driving.<br />
You can call anyone in your address book – even if you don’t<br />
remember their phone number.<br />
It’s Easy to Get Started<br />
Just dial from your PCS Vision Phone to activate the<br />
service and listen to the brief instructions directly from your<br />
phone. There is a monthly charge for PCS Voice Command.<br />
Note: Beginning Fall 2004, dial<br />
to activate your PCS Voice<br />
Command service. PCS Voice Command calls will still be made using .<br />
Creating Your Own Address Book<br />
You can program up to 500 names into your personal address book,<br />
with each name having up to five phone numbers. That’s 2,500<br />
phone numbers, and with the advanced technology of PCS Voice<br />
Command, you can have instant access to all of them.<br />
There are four ways to update your address book:<br />
Use Voice Recordings. Simply dial and say, “Add name.”<br />
You will then be asked to say the name and number you want to<br />
add to your personal address book. Your address book can store<br />
up to 20 voice recorded names at once.<br />
On the Web. Go to www.talk.sprintpcs.com to receive a fully<br />
functional Web-based address book to create and update<br />
your contacts.<br />
Use an Existing Address Book. Automatically merge address books<br />
from desktop software applications with Sprint Sync SM Services for<br />
no additional charge. Simply click on the “Click to synchronize”<br />
button within your PCS Voice Command personal address book<br />
at www.talk.sprintpcs.com.<br />
Call Directory Assistance. If you don’t have a computer or Internet<br />
access handy, you can have PCS Directory Assistance look up<br />
phone numbers for you and automatically add them to your<br />
address book. Just say “Call operator” and we’ll add two names<br />
and numbers to your address book for our standard directory<br />
assistance charge.<br />
Section 3C: PCS Voice Command 224
Making a Call With PCS Voice Command<br />
To place a call with PCS Voice Command:<br />
1. Press and create your address book once you’ve<br />
signed up for PCS Voice Command. (You’ll hear a tone followed<br />
by the prompt “Ready.”)<br />
2. After the “Ready” prompt, simply say, in a natural voice,<br />
“Call” and the name of the person or the number you’d<br />
like to call. (For example, you can say, “Call Jane Smith at work,”<br />
“Call John Baker on the mobile phone,” “Call 555-1234,” or<br />
“Call Bob Miller.”)<br />
3. Your request will be repeated and you will be asked to verify.<br />
Say “Yes” to call the number or person. (The number will<br />
automatically be dialed.) Say “No” if you wish to cancel.<br />
Tip: Keep in mind that PCS Voice Command recognizes not only your voice,<br />
but any voice, so that others can experience the same convenience if they use<br />
your phone.<br />
For more helpful hints on PCS Voice Command, including a list<br />
of recognized commands and an interactive tutorial, visit<br />
www.talk.sprintpcs.com.<br />
Accessing Information Using<br />
PCS Voice Command<br />
To access information using PCS Voice Command:<br />
1. Press .<br />
2. Say “Call the Web.” (To access, listen to and respond to email,<br />
once email has been set up, say “Call My Email.”)<br />
3. Choose from a listing of information categories like news,<br />
weather, sports, and more.<br />
Note: PCS Voice Command is not available while roaming off the<br />
Sprint Nationwide PCS Network.<br />
Section 3C: PCS Voice Command 225
Section 4<br />
Safety Guidelines<br />
and<br />
Warranty Information
Section 4A<br />
Safety<br />
In This Section<br />
<br />
<br />
<br />
<br />
<br />
<br />
<br />
Getting the Most Out of Your Reception<br />
Maintaining Safe Use of and Access to Your Phone<br />
Caring for the Battery<br />
Acknowledging Special Precautions and the FCC Notice<br />
Consumer Information on Wireless Phones<br />
Owner’s Record<br />
User’s Guide Proprietary Notice<br />
Part of getting the most out of your PCS Vision Phone is learning how the<br />
phone works and how to care for it. This section outlines performance<br />
and safety guidelines that help you understand the basic features of<br />
your phone’s operation.<br />
Section 4A: Safety Guidelines 227
Getting the Most Out of Your Reception<br />
Keeping Tabs on Signal Strength<br />
The quality of each call you make or receive depends on the signal strength in your<br />
area. Your phone informs you of the current signal strength by displaying a number<br />
of bars next to the signal strength icon. The more bars displayed, the stronger the<br />
signal. If you’re inside a building, being near a window may give you better<br />
reception.<br />
Understanding the Power Save Feature<br />
If your phone is unable to find a signal after 15 minutes of searching, a Power Save<br />
feature is automatically activated. If your phone is active, it periodically rechecks<br />
service availability; you can also check it yourself by pressing any key. Anytime the<br />
Power Save feature is activated, a message is displayed on the screen. When a signal<br />
is found, your phone returns to standby mode.<br />
Understanding How Your Phone Operates<br />
Your phone is basically a radio transmitter and receiver. When it’s turned on, it<br />
receives and transmits radiofrequency (RF) signals. When you use your phone, the<br />
system handling your call controls the power level. This power can range from<br />
0.01µ watts to 0.2 watts in digital mode.<br />
Knowing Radio Frequency Safety<br />
The design of your PCS Vision Phone complies with updated NCRP standards<br />
described below.<br />
In 1991-92, the Institute of Electrical and Electronics Engineers (IEEE) and the<br />
American National Standards Institute (ANSI) joined in updating ANSI’s 1982<br />
standard for safety levels with respect to human exposure to RF signals. More than<br />
120 scientists, engineers and physicians from universities, government health<br />
agencies and industries developed this updated standard after reviewing the<br />
available body of research. In 1993, the Federal Communications Commission<br />
(FCC) adopted this updated standard in a regulation. In August 1996, the FCC<br />
adopted hybrid standard consisting of the existing ANSI/IEEE standard and the<br />
guidelines published by the National Council of Radiation Protection and<br />
Measurements (NCRP).<br />
Maintaining Your Phone’s Peak Performance<br />
There are several simple guidelines to operating your phone properly and<br />
maintaining safe, satisfactory service.<br />
Hold the phone with the antenna raised, fully-extended, and over your shoulder.<br />
Try not to hold, bend, or twist the phone’s antenna.<br />
Don’t use the phone if the antenna is damaged.<br />
Speak directly into the mouthpiece.<br />
Avoid exposing your phone and accessories to rain or liquid spills. If your phone<br />
does get wet, immediately turn the power off and remove the battery.<br />
Section 4A: Safety Guidelines 228
Note: For the best care of your phone, only Sprint authorized personnel should service your<br />
phone and accessories. Faulty service may void the warranty.<br />
Maintaining Safe Use of and Access to<br />
Your Phone<br />
FAILURE TO FOLLOW THE INSTRUCTIONS OUTLINED MAY LEAD TO SERIOUS<br />
PERSONAL INJURY AND POSSIBLE PROPERTY DAMAGE<br />
Using Your Phone While Driving<br />
Talking on your phone while driving (or operating the phone without a hands-free<br />
device) is prohibited in some jurisdictions. Laws vary as to specific restrictions.<br />
Remember that safety always comes first.<br />
When using your phone in the car:<br />
Get to know your phone and its features, such as speed dial<br />
and redial.<br />
When available, use a hands-free device.<br />
Position your phone within easy reach.<br />
Let the person you are speaking to know you are driving; if necessary, suspend<br />
the call in heavy traffic or hazardous<br />
weather conditions.<br />
Do not take notes or look up phone numbers while driving.<br />
Dial sensibly and assess the traffic; if possible, place calls when stationary or<br />
before pulling into traffic.<br />
Do not engage in stressful or emotional conversations that may divert your<br />
attention from the road.<br />
Dial to report serious emergencies. It’s free from your<br />
wireless phone.<br />
Use your phone to help others in emergencies.<br />
Call roadside assistance or a special non-emergency wireless number when<br />
necessary.<br />
Tip: Purchase an optional hands-free car kit at your local Sprint Store, or call the PCS Accessory<br />
Hotline SM at 1-800-974-2221 or by dialing<br />
on your PCS Vision Phone.<br />
Following Safety Guidelines<br />
To operate your phone safely and efficiently, always follow any special regulations<br />
in a given area. Turn your phone off in areas where use is forbidden or when it may<br />
cause interference or danger.<br />
Section 4A: Safety Guidelines 229
Using Your Phone Near Other Electronic Devices<br />
Most modern electronic equipment is shielded from radiofrequency (RF) signals.<br />
However, RF signals from wireless phones may affect inadequately shielded<br />
electronic equipment.<br />
RF signals may affect improperly installed or inadequately shielded electronic<br />
operating systems and/or entertainment systems in motor vehicles. Check with the<br />
manufacturer or their representative to determine if these systems are adequately<br />
shielded from external RF signals. Also check with the manufacturer regarding any<br />
equipment that has been added to your vehicle.<br />
Consult the manufacturer of any personal medical devices, such as pacemakers and<br />
hearing aids, to determine if they are adequately shielded from external RF signals.<br />
Note: Always turn off the phone in health care facilities and request permission before using the<br />
phone near medical equipment.<br />
Turning Off Your Phone Before Flying<br />
Turn off your phone before boarding any aircraft. To prevent possible interference<br />
with aircraft systems, the U.S. Federal Aviation Administration (FAA) regulations<br />
require you to have permission from a crew member to use your phone while the<br />
plane is on the ground. To prevent any risk of interference, FCC regulations<br />
prohibit using your phone while the plane is in the air.<br />
Turning Off Your Phone in Dangerous Areas<br />
To avoid interfering with blasting operations, turn your phone off when in a<br />
blasting area or in other areas with signs indicating two-way radios should be<br />
turned off. Construction crews often use remote-control RF devices to set off<br />
explosives.<br />
Turn your phone off when you’re in any area that has a potentially explosive<br />
atmosphere. Although it’s rare, your phone and accessories could generate sparks.<br />
Sparks can cause an explosion or fire, resulting in bodily injury or even death.<br />
These areas are often, but not always, clearly marked. They include:<br />
Fueling areas such as gas stations.<br />
Below deck on boats.<br />
Fuel or chemical transfer or storage facilities.<br />
Areas where the air contains chemicals or particles such as grain, dust, or metal<br />
powders.<br />
Any other area where you would normally be advised to turn off your vehicle’s<br />
engine.<br />
Note: Never transport or store flammable gas, liquid or explosives in the compartment of your<br />
vehicle that contains your phone or accessories.<br />
Section 4A: Safety Guidelines 230
Restricting Children’s Access to Your Phone<br />
Your phone is not a toy. Do not allow children to play with it as they could hurt<br />
themselves and others, damage the phone or make calls that increase your<br />
PCS Invoice.<br />
Caring for the Battery<br />
Protecting Your Battery<br />
The guidelines listed below help you get the most out of your battery’s<br />
performance.<br />
Use only Sprint-approved batteries and chargers. These chargers are designed to<br />
maximize battery life. Using other batteries or chargers voids your warranty and<br />
may cause damage.<br />
In order to avoid damage, charge the battery only in temperatures that range<br />
from 32º F to 113º F (0º C to 45º C).<br />
Don’t use the battery charger in direct sunlight or in high humidity areas, such<br />
as the bathroom.<br />
<br />
<br />
<br />
Never dispose of the battery by incineration.<br />
Keep the metal contacts on top of the battery clean.<br />
Don’t attempt to disassemble or short-circuit the battery.<br />
The battery may need recharging if it has not been used for a long period of<br />
time.<br />
It’s best to replace the battery when it no longer provides acceptable<br />
performance. It can be recharged hundreds of times before it needs replacing.<br />
Don’t store the battery in high temperature areas for long periods of time. It’s<br />
best to follow these storage rules:<br />
Less than one month:<br />
4º F to 140º F (-20º C to 60º C)<br />
More than one month:<br />
4º F to 113º F (-20º C to 45º C)<br />
Disposal of Lithium Ion (LiIon) Batteries<br />
For safe disposal options of your LiIon batteries, contact your nearest Sprint<br />
authorized service center.<br />
Special Note: Be sure to dispose of your battery properly. In some areas, the<br />
disposal of batteries in household or business trash may<br />
be prohibited.<br />
Note: For safety, do not handle a damaged or leaking LiIon battery.<br />
Section 4A: Safety Guidelines 231
Acknowledging Special Precautions and the<br />
FCC Notice<br />
FCC Notice<br />
This phone may cause TV or radio interference if used in close proximity to<br />
receiving equipment. The FCC can require you to stop using the phone if such<br />
interference cannot be eliminated.<br />
Vehicles using liquefied petroleum gas (propane or butane) must comply with the<br />
National Fire Protection Standard (NFPA-58). For a copy of this standard, contact<br />
the National Fire Protections Association, One Batterymarch Park, Quincy, MA<br />
02269, Attn.: Publication Sales Division.<br />
Cautions<br />
Any changes or modifications to your phone not expressly approved in this<br />
document could void your warranty for this equipment and void your authority to<br />
operate this equipment. Only use approved batteries, antennas and chargers. The<br />
use of any unauthorized accessories may be dangerous and void the phone<br />
warranty if said accessories cause damage or a defect to the phone.<br />
Although your phone is quite sturdy, it is a complex piece of equipment and can be<br />
broken. Avoid dropping, hitting, bending or sitting on it.<br />
Body-Worn Operation<br />
To maintain compliance with FCC RF exposure guidelines, if you wear a handset on<br />
your body, use the Sprint supplied or approved carrying case, holster or other<br />
body-worn accessory. If you do not use a body-worn accessory, ensure the antenna<br />
is at least 1.9 cm from your body when transmitting. Use of non-Sprint approved<br />
accessories may violate FCC RF exposure guidelines.<br />
For more information about RF exposure, visit the FCC Website at www.fcc.gov.<br />
Section 4A: Safety Guidelines 232
Specific Absorption Rates (SAR) for Wireless Phones<br />
The SAR is a value that corresponds to the relative amount of RF energy absorbed in<br />
the head of a user of a wireless handset.<br />
The SAR value of a phone is the result of an extensive testing, measuring and<br />
calculation process. It does not represent how much RF the phone emits. All<br />
phone models are tested at their highest value in strict laboratory settings. But<br />
when in operation, the SAR of a phone can be substantially less than the level<br />
reported to the FCC. This is because of a variety of factors including its proximity to<br />
a base station antenna, phone design and other factors. What is important to<br />
remember is that each phone meets strict federal guidelines. Variations in SARs do<br />
not represent a variation in safety.<br />
All phones must meet the federal standard, which incorporates a substantial<br />
margin of safety. As stated above, variations in SAR values between different model<br />
phones do not mean variations in safety. SAR values at or below the federal standard<br />
of 1.6 W/kg are considered safe for use by the public.<br />
The highest reported SAR values of the PM-8200 are:<br />
AMPS/CDMA modes (Part 22):<br />
Head: 1.30 W/kg; Body-worn: 1.01 W/kg<br />
PCS mode (Part 24):<br />
Head: 1.13 W/kg; Body-worn: 1.01 W/kg<br />
FCC Radiofrequency Emission<br />
This phone meets the FCC Radiofrequency Emission Guidelines.<br />
FCC ID number: AEZSCP-82H. More information on the phone’s SAR can be found<br />
from the following FCC Website: http://www.fcc.gov/oet/fccid.<br />
Section 4A: Safety Guidelines 233
Consumer Information on Wireless Phones<br />
(The following information comes from a consumer information Website jointly<br />
sponsored by the U.S. Food and Drug Administration (FDA) and the Federal<br />
Communications Commission (FCC), entitled “Cell Phone Facts: Consumer<br />
Information on Wireless Phones.” The information reproduced herein is dated<br />
July 29, 2003. For further updates, please visit the Website:<br />
http://www.fda.gov/cellphones/qa.html.)<br />
What is radiofrequency energy (RF)?<br />
Radiofrequency (RF) energy is another name for radio waves. It is one form of<br />
electromagnetic energy that makes up the electromagnetic spectrum. Some of<br />
the other forms of energy in the electromagnetic spectrum are gamma rays, x-<br />
rays and light. Electromagnetic energy (or electromagnetic radiation) consists of<br />
waves of electric and magnetic energy moving together (radiating) through<br />
space. The area where these waves are found is called an electromagnetic field.<br />
Radio waves are created due to the movement of electrical charges in antennas.<br />
As they are created, these waves radiate away from the antenna. All<br />
electromagnetic waves travel at the speed of light. The major differences<br />
between the different types of waves are the distances covered by one cycle of<br />
the wave and the number of waves that pass a certain point during a set time<br />
period. The wavelength is the distance covered by one cycle of a wave. The<br />
frequency is the number of waves passing a given point in one second. For any<br />
electromagnetic wave, the wavelength multiplied by the frequency equals the<br />
speed of light. The frequency of an RF signal is usually expressed in units called<br />
hertz (Hz). One Hz equals one wave per second. One kilohertz (kHz) equals one<br />
thousand waves per second, one megahertz (MHz) equals one million waves per<br />
second, and one gigahertz (GHz) equals one billion waves per second.<br />
RF energy includes waves with frequencies ranging from about 3000 waves per<br />
second (3 kHz) to 300 billion waves per second (300 GHz). Microwaves are a<br />
subset of radio waves that have frequencies ranging from around 300 million<br />
waves per second (300 MHz) to three billion waves per second (3 GHz).<br />
How is radiofrequency energy used?<br />
Probably the most important use of RF energy is for telecommunications. Radio<br />
and TV broadcasting, wireless phones, pagers, cordless phones, police and fire<br />
department radios, point-to-point links and satellite communications all rely on<br />
RF energy.<br />
Other uses of RF energy include microwave ovens, radar, industrial heaters and<br />
sealers, and medical treatments. RF energy, especially at microwave<br />
frequencies, can heat water. Since most food has a high water content,<br />
microwaves can cook food quickly. Radar relies on RF energy to track cars and<br />
airplanes as well as for military applications. Industrial heaters and sealers use<br />
RF energy to mold plastic materials, glue wood products, seal leather items such<br />
Section 4A: Safety Guidelines 234
as shoes and pocketbooks, and process food. Medical uses of RF energy include<br />
pacemaker monitoring and programming.<br />
How is radiofrequency radiation measured?<br />
RF waves and RF fields have both electrical and magnetic components. It is<br />
often convenient to express the strength of the RF field in terms of each<br />
component. For example, the unit “volts per meter” (V/m) is used to measure<br />
the electric field strength, and the unit “amperes per meter” (A/m) is used to<br />
express the magnetic field strength. Another common way to characterize an RF<br />
field is by means of the power density. Power density is defined as power per<br />
unit area. For example, power density can be expressed in terms of milliwatts<br />
(one thousandth of a watt) per square centimeter (mW/cm2 or microwatts (one<br />
millionth of a watt) per square centimeter (µW/cm2).<br />
The quantity used to measure how much RF energy is actually absorbed by the<br />
body is called the Specific Absorption Rate or SAR. The SAR is a measure of the<br />
rate of absorption of RF energy. It is usually expressed in units of watts per<br />
kilogram (W/kg) or milliwatts per gram (mW/g).<br />
What biological effects can be caused by RF energy?<br />
The biological effects of radiofrequency energy should not be confused with the<br />
effects from other types of electromagnetic energy.<br />
Very high levels of electromagnetic energy, such as is found in X-rays and gamma<br />
rays can ionize biological tissues. Ionization is a process where electrons are<br />
stripped away from their normal locations in atoms and molecules. It can<br />
permanently damage biological tissues including DNA, the genetic material.<br />
Ionization only occurs with very high levels of electromagnetic energy such as<br />
X-rays and gamma rays. Often the term radiation is used when discussing<br />
ionizing radiation (such as that associated with nuclear power plants).<br />
The energy levels associated with radiofrequency energy, including both radio<br />
waves and microwaves, are not great enough to cause the ionization of atoms<br />
and molecules. Therefore, RF energy is a type of non-ionizing radiation. Other<br />
types of non-ionizing radiation include visible light, infrared radiation (heat) and<br />
other forms of electromagnetic radiation with relatively low frequencies.<br />
Large amounts of RF energy can heat tissue. This can damage tissues and<br />
increase body temperatures. Two areas of the body, the eyes and the testes, are<br />
particularly vulnerable to RF heating because there is relatively little blood flow<br />
in them to carry away excess heat.<br />
The amount of RF radiation routinely encountered by the general public is too<br />
low to produce significant heating or increased body temperature. Still, some<br />
people have questions about the possible health effects of low levels of RF<br />
energy. It is generally agreed that further research is needed to determine what<br />
effects actually occur and whether they are dangerous to people. In the<br />
meantime, standards-setting organizations and government agencies are<br />
continuing to monitor the latest scientific findings to determine whether<br />
changes in safety limits are needed to protect human health.<br />
Section 4A: Safety Guidelines 235
FDA, EPA and other US government agencies responsible for public health and<br />
safety have worked together and in connection with WHO to monitor<br />
developments and identify research needs related to RF biological effects.<br />
What levels of RF energy are considered safe?<br />
Various organizations and countries have developed standards for exposure to<br />
radiofrequency energy. These standards recommend safe levels of exposure for<br />
both the general public and for workers. In the United States, the FCC has used<br />
safety guidelines for RF environmental exposure since 1985.<br />
The FCC guidelines for human exposure to RF electromagnetic fields are<br />
derived from the recommendations of two expert organizations, the National<br />
Council on Radiation Protection and Measurements (NCRP) and the Institute of<br />
Electrical and Electronics Engineers (IEEE). In both cases, the recommendations<br />
were developed by scientific and engineering experts drawn from industry,<br />
government, and academia after extensive reviews of the scientific literature<br />
related to the biological effects of RF energy.<br />
Many countries in Europe and elsewhere use exposure guidelines developed by<br />
the International Commission on Non-Ionizing Radiation Protection (ICNIRP).<br />
The ICNIRP safety limits are generally similar to those of the NCRP and IEEE,<br />
with a few exceptions. For example, ICNIRP recommends different exposure<br />
levels in the lower and upper frequency ranges and for localized exposure from<br />
certain products such as hand-held wireless telephones. Currently, the World<br />
Health Organization is working to provide a framework for international<br />
harmonization of RF safety standards.<br />
The NCRP, IEEE, and ICNIRP all have identified a whole-body Specific<br />
Absorption Rate (SAR) value of 4 watts per kilogram (4 W/kg) as a threshold<br />
level of exposure at which harmful biological effects may occur. Exposure<br />
guidelines in terms of field strength, power density and localized SAR were then<br />
derived from this threshold value. In addition, the NCRP, IEEE, and ICNIRP<br />
guidelines vary depending on the frequency of the RF exposure. This is due to<br />
the finding that whole-body human absorption of RF energy varies with the<br />
frequency of the RF signal. The most restrictive limits on whole-body exposure<br />
are in the frequency range of 30-300 MHz where the human body absorbs RF<br />
energy most efficiently. For products that only expose part of the body, such as<br />
wireless phones, exposure limits in terms of SAR only are specified.<br />
The exposure limits used by the FCC are expressed in terms of SAR, electric and<br />
magnetic field strength, and power density for transmitters operating at<br />
frequencies from 300 kHz to 100 GHz. The specific values can be found in two<br />
FCC bulletins, OET Bulletins 56 and 65:<br />
http://www.fcc.gov/oet/info/documents/bulletins/#56;<br />
http://www.fcc.gov/oet/info/documents/bulletins/#65.<br />
Why has the FCC adopted guidelines for RF exposure?<br />
The FCC authorizes and licenses products, transmitters, and facilities that<br />
generate RF and microwave radiation. It has jurisdiction over all transmitting<br />
services in the U.S. except those specifically operated by the Federal<br />
Section 4A: Safety Guidelines 236
Government. While the FCC does not have the expertise to determine radiation<br />
exposure guidelines on its own, it does have the expertise and authority to<br />
recognize and adopt technically sound standards promulgated by other expert<br />
agencies and organizations, and has done so . (Our joint efforts with the FDA in<br />
developing this website is illustrative of the kind of inter-agency efforts and<br />
consultation we engage in regarding this health and safety issue.)<br />
Under the National Environmental Policy Act of 1969 (NEPA), the FCC has<br />
certain responsibilities to consider whether its actions will significantly affect<br />
the quality of the human environment. Therefore, FCC approval and licensing of<br />
transmitters and facilities must be evaluated for significant impact on the<br />
environment. Human exposure to RF radiation emitted by FCC-regulated<br />
transmitters is one of several factors that must be considered in such<br />
environmental evaluations. In 1996, the FCC revised its guidelines for RF<br />
exposure as a result of a multi-year proceeding and as required by the<br />
Telecommunications Act of 1996.<br />
Radio and television broadcast stations, satellite-earth stations, experimental<br />
radio stations and certain wireless communication facilities are required to<br />
undergo routine evaluation for RF compliance when they submit an application<br />
to the FCC for construction or modification of a transmitting facility or renewal<br />
of a license. Failure to comply with the FCC’s RF exposure guidelines could lead<br />
to the preparation of a formal Environmental Assessment, possible<br />
Environmental Impact Statement and eventual rejection of an application.<br />
Technical guidelines for evaluating compliance with the FCC RF safety<br />
requirements can be found in the FCC’s OET Bulletin 65.<br />
http://www.fcc.gov/oet/info/documents/bulletins/#65<br />
Low-powered, intermittent, or inaccessible RF transmitters and facilities are<br />
normally excluded from the requirement for routine evaluation for RF exposure.<br />
These exclusions are based on standard calculations and measurement data<br />
indicating that a transmitting station or equipment operating under the<br />
conditions prescribed is unlikely to cause exposures in excess of the guidelines<br />
under normal conditions of use. Such exclusions are not exclusions from<br />
compliance, but, rather, exclusions from routine evaluation. The FCC’s policies<br />
on RF exposure and categorical exclusion can be found in Section 1.1307(b) of<br />
the FCC’s Rules and Regulations [(47 CFR 1.1307(b)].<br />
How can I obtain the Specific Absorption Rate (SAR) value for my<br />
wireless phone?<br />
The FCC requires that wireless phones sold in the United States demonstrate<br />
compliance with human exposure limits adopted by the FCC in 1996. The<br />
relative amount of RF energy absorbed in the head of a wireless telephone-user<br />
is given by the Specific Absorption Rate (SAR), as explained above. The FCC<br />
requires wireless phones to comply with a safety limit of 1.6 watts per kilogram<br />
(1.6 W/kg) in terms of SAR.<br />
Information on SAR for a specific phone model can be obtained for many<br />
recently manufactured phones using the FCC identification (ID) number for that<br />
Section 4A: Safety Guidelines 237
model. The FCC ID number is usually printed somewhere on the case of the<br />
phone. Sometimes it may be necessary to remove the battery pack to find the<br />
number. Once you have the ID number, go to the following Web address:<br />
www.fcc.gov/oet/fccid. On this page, you will see instructions for entering the<br />
FCC ID number. Type the FCC ID number exactly as requested (the Grantee<br />
Code is the first three characters, the Equipment Product Code is the rest of the<br />
FCC ID number). Then click on “Start Search.” The “Grant of Equipment<br />
Authorization” for your telephone should appear. Read through the grant for the<br />
section on “SAR Compliance,” “Certification of Compliance with FCC Rules for<br />
RF Exposure” or similar language. This section should contain the value(s) for<br />
typical or maximum SAR for your phone.<br />
Phones and other products authorized since June 2, 2000, should have the<br />
maximum SAR levels noted directly on the “Grant of Equipment Authorization.”<br />
For phones and products authorized between about mid-1998 and June 2000,<br />
detailed information on SAR levels is typically found in the exhibits associated<br />
with the grant. Once a grant is accessed, the exhibits can be viewed by clicking<br />
on “View Exhibit.” Grants authorized prior to 1998 are not part of the electronic<br />
database but, rather, have been documented in the form of paper records.<br />
The FCC database does not list phones by model number. However, consumers<br />
may find SAR information from other sources as well. Some wireless phone<br />
manufacturers make SAR information available on their own Web sites. In<br />
addition, some non-government Web sites provide SARs for specific models of<br />
wireless phones. However, the FCC has not reviewed these sites and makes no<br />
guarantees of their accuracy. Finally, phones certified by the Cellular<br />
Telecommunications and Internet Association (CTIA) are required to provide<br />
SAR information to consumers in the instructional materials that come with<br />
the phones.<br />
Do hands-free kits for wireless phones reduce risks from exposure to RF<br />
emissions?<br />
Since there are no known risks from exposure to RF emissions from wireless<br />
phones, there is no reason to believe that hands-free kits reduce risks. Handsfree<br />
kits can be used with wireless phones for convenience and comfort. These<br />
systems reduce the absorption of RF energy in the head because the phone,<br />
which is the source of the RF emissions, will not be placed against the head. On<br />
the other hand, if the phone is mounted against the waist or other part of the<br />
body during use, then that part of the body will absorb more RF energy. Wireless<br />
phones marketed in the U.S. are required to meet safety requirements regardless<br />
of whether they are used against the head or against the body. Either<br />
configuration should result in compliance with the safety limit.<br />
Do wireless phone accessories that claim to shield the head from RF<br />
radiation work?<br />
Since there are no known risks from exposure to RF emissions from wireless<br />
phones, there is no reason to believe that accessories that claim to shield the<br />
head from those emissions reduce risks. Some products that claim to shield the<br />
Section 4A: Safety Guidelines 238
user from RF absorption use special phone cases, while others involve nothing<br />
more than a metallic accessory attached to the phone. Studies have shown that<br />
these products generally do not work as advertised. Unlike “hand-free” kits,<br />
these so-called “shields” may interfere with proper operation of the phone. The<br />
phone may be forced to boost its power to compensate, leading to an increase in<br />
RF absorption. In February 2002, the Federal trade Commission (FTC) charged<br />
two companies that sold devices that claimed to protect wireless phone users<br />
from radiation with making false and unsubstantiated claims. According to FTC,<br />
these defendants lacked a reasonable basis to substantiate their claim.<br />
What are wireless telephone base stations?<br />
Fixed antennas used for wireless telecommunications are referred to as cellular<br />
base stations, cell stations, PCS (“Personal Communications Service”) stations or<br />
telephone transmission towers. These base stations consist of antennas and<br />
electronic equipment. Because the antennas need to be high in the air, they are<br />
often located on towers, poles, water tanks, or rooftops. Typical heights for<br />
freestanding base station towers are 50-200 feet.<br />
Some base stations use antennas that look like poles, 10 to 15 feet in length, that<br />
are referred to as “omni-directional” antennas. These types of antennas are<br />
usually found in rural areas. In urban and suburban areas, wireless providers<br />
now more commonly use panel or sector antennas for their base stations. These<br />
antennas consist of rectangular panels, about 1 by 4 feet in dimension. The<br />
antennas are usually arranged in three groups of three antennas each. One<br />
antenna in each group is used to transmit signals to wireless phones, and the<br />
other two antennas in each group are used to receive signals from wireless<br />
phones.<br />
At any base station site, the amount of RF energy produced depends on the<br />
number of radio channels (transmitters) per antenna and the power of each<br />
transmitter. Typically, 21 channels per antenna sector are available. For a typical<br />
cell site using sector antennas, each of the three transmitting antennas could be<br />
connected to up to 21 transmitters for a total of 63 transmitters. However, it is<br />
unlikely that all of the transmitters would be transmitting at the same time.<br />
When omni-directional antennas are used, a cellular base station could<br />
theoretically use up to 96 transmitters, but this would be very unusual, and,<br />
once again, it is unlikely that all transmitters would be in operation<br />
simultaneously. Base stations used for PCS communications generally require<br />
fewer transmitters than those used for cellular radio transmissions, since PCS<br />
carriers usually have a higher density of base station antenna sites.<br />
Are wireless telephone base stations safe?<br />
The electromagnetic RF signals transmitted from base station antennas stations<br />
travel toward the horizon in relatively narrow paths. For example, the radiation<br />
pattern for an antenna array mounted on a tower can be likened to a thin<br />
pancake centered around the antenna system. The individual pattern for a single<br />
array of sector antennas is wedge-shaped, like a piece of pie. As with all forms of<br />
electromagnetic energy, the power decreases rapidly as one moves away from<br />
Section 4A: Safety Guidelines 239
the antenna. Therefore, RF exposure on the ground is much less than exposure<br />
very close to the antenna and in the path of the transmitted radio signal. In fact,<br />
ground-level exposure from such antennas is typically thousands of times less<br />
than the exposure levels recommended as safe by expert organizations. So<br />
exposure to nearby residents would be well within safety margins.<br />
Cellular and PCS base stations in the United States are required to comply with<br />
limits for exposure recommended by expert organizations and endorsed by<br />
government agencies responsible for health and safety. Measurements made<br />
near cellular and PCS base station antennas mounted on towers have confirmed<br />
that ground-level exposures are typically thousands of times less than the<br />
exposure limits adopted by the FCC. In fact, in order to be exposed to levels at or<br />
near the FCC limits for cellular or PCS frequencies an individual would<br />
essentially have to remain in the main transmitted radio signal (at the height of<br />
the antenna) and within a few feet from the antenna. This is, of course, very<br />
unlikely to occur.<br />
When cellular and PCS antennas are mounted on rooftops, RF levels on that roof<br />
or on others near by would probably be greater than those typically<br />
encountered on the ground. However, exposure levels approaching or<br />
exceeding safety guidelines should be encountered only very close to or directly<br />
in front of the antennas. In addition, for sector-type antennas, typically used for<br />
such rooftop base stations, RF levels to the side and in back of these antennas are<br />
insignificant. General guidelines on antenna installations and circumstances<br />
that might give rise to a concern about an facility’s conformance with FCC<br />
regulations can be found in A Local Government Official’s Guide to<br />
Transmitting Antenna RF Emission Safety:Rules, Procedures, and Practical<br />
Guidance. This Guide can be accessed at: http://www.fcc.gov/oet/rfsafety.<br />
Who regulates exposure to radiation from microwave ovens, television sets<br />
and computer monitors?<br />
The Food and Drug Administration is responsible for protecting the public from<br />
harmful radiation emissions from these consumer products.<br />
Does the FCC routinely monitor radiofrequency radiation from antennas?<br />
The FCC does not have the resources or the personnel to routinely monitor the<br />
emissions for all the thousands of transmitters that are subject to FCC<br />
jurisdiction. However, the FCC does have measurement instrumentation for<br />
evaluating RF levels in areas that may be accessible to the public or to workers. If<br />
there is evidence for potential non-compliance with FCC exposure guidelines<br />
for a FCC-regulated facility, staff from the FCC’s Office of Engineering and<br />
Technology or the FCC Enforcement Bureau can conduct and investigation, and,<br />
if appropriate, perform actual measurements. Circumstances that could give<br />
rise to a concern about an facility’s conformance with FCC regulations can be<br />
found in in A Local Government Official’s Guide to Transmitting Antenna RF<br />
Emission Safety:Rules, Procedures, and Practical Guidance. This Guide can be<br />
accessed at: http://www.fcc.gov/oet/rfsafety. Potential exposure problems should<br />
Section 4A: Safety Guidelines 240
e brought to the FCC’s attention by contacting the FCC RF Safety Program at:<br />
202-418-2464 or by email: rfsafety@fcc.gov.<br />
Does the FCC maintain a database that includes information on the location<br />
and technical parameters of all the transmitting towers it regulates?<br />
Each of the FCC Bureaus maintains its own licensing database system for the<br />
service(s) it regulates (e.g., television, cellular service, satellite earth stations.)<br />
The FCC issues two types of licenses: site specific and market based. In the case<br />
of site specific licensed facilities, technical operating information is collected<br />
from the licensee as part of the licensing process. However, in the case of<br />
market based licensing (e.g., PCS, cellular), the licensee is granted the authority<br />
to operate a radio communications system in a geographic area using as many<br />
facilities as are required, and the licensee is not required to provide the FCC with<br />
specific location and operating parameters of these facilities.<br />
Information on site specific licensed facilities can be found the “General Menu<br />
Reports” (GenMen) at http://gullfoss2.fcc.gov/cgi-bin/ws.exe/genmen/index.hts.<br />
The various FCC Bureaus also publish on at least a weekly basis, bulk extracts of<br />
their licensing databases. Each licensing database has its own unique file<br />
structure. These extracts consist of multiple, very large files. The FCC’s Office of<br />
Engineering and Technology (OET) maintains an index to these databases at<br />
http://www.fcc.gov/oet/info/database/fadb.html. Entry points into the various<br />
databases include frequency, state/county, latitude/longitude, call-sign and<br />
licensee name. For further information on the Commission’s existing databases,<br />
you can contact Donald Campbell at dcampbel@fcc.gov or 202-418-2405.<br />
Can local and state governmental bodies establish limits for<br />
RF exposure?<br />
Although some local and state governments have enacted rules and regulations<br />
about human exposure to RF energy in the past, the Telecommunications Act of<br />
1996 requires the Federal Government to control human exposure to RF<br />
emissions. In particular, Section 704 of the Act states that, “No State or local<br />
government or instrumentality thereof may regulate the placement,<br />
construction, and modification of personal wireless service facilities on the<br />
basis of the environmental effects of radio frequency emissions to the extent<br />
that such facilities comply with the Commission’s regulations concerning such<br />
emissions.” Further information on federal authority and FCC policy is available<br />
in a fact sheet from the FCC’s Wireless Telecommunications Bureau at<br />
www.fcc.gov/wtb.<br />
Do wireless phones pose a health hazard?<br />
The available scientific evidence does not show that any health problems are<br />
associated with using wireless phones. There is no proof, however, that wireless<br />
phones are absolutely safe. Wireless phones emit low levels of radiofrequency<br />
energy (RF) in the microwave range while being used. They also emit very low<br />
levels of RF when in the stand-by mode. Whereas high levels of RF can produce<br />
health effects (by heating tissue), exposure to low level RF that does not<br />
Section 4A: Safety Guidelines 241
produce heating effects causes no known adverse health effects. Many studies<br />
of low level RF exposures have not found any biological effects. Some studies<br />
have suggested that some biological effects may occur, but such findings have<br />
not been confirmed by additional research. In some cases, other researchers<br />
have had difficulty in reproducing those studies, or in determining the reasons<br />
for inconsistent results.<br />
What is FDA’s role concerning the safety of wireless phones?<br />
Under the law, FDA does not review the safety of radiation-emitting consumer<br />
products such as wireless phones before they can be sold, as it does with new<br />
drugs or medical devices. However, the agency has authority to take action if<br />
wireless phones are shown to emit radiofrequency energy (RF) at a level that is<br />
hazardous to the user. In such a case, FDA could require the manufacturers of<br />
wireless phones to notify users of the health hazard and to repair, replace or<br />
recall the phones so that the hazard no longer exists.<br />
Although the existing scientific data do not justify FDA regulatory actions, FDA<br />
has urged the wireless phone industry to take a number of steps, including the<br />
following:<br />
Support needed research into possible biological effects of RF of the<br />
type emitted by wireless phones;<br />
Design wireless phones in a way that minimizes any RF exposure to the<br />
user that is not necessary for device function; and<br />
Cooperate in providing users of wireless phones with the best possible<br />
information on possible effects of wireless phone use on human health<br />
FDA belongs to an interagency working group of the federal agencies that have<br />
responsibility for different aspects of RF safety to ensure coordinated efforts at<br />
the federal level. The following agencies belong to this working group:<br />
National Institute for Occupational Safety and Health<br />
Environmental Protection Agency<br />
Federal Communications Commission<br />
Occupational Safety and Health Administration<br />
National Telecommunications and Information Administration<br />
The National Institutes of Health participates in some interagency working<br />
group activities, as well.<br />
FDA shares regulatory responsibilities for wireless phones with the Federal<br />
Communications Commission (FCC). All phones that are sold in the United<br />
States must comply with FCC safety guidelines that limit RF exposure. FCC relies<br />
on FDA and other health agencies for safety questions about wireless phones.<br />
FCC also regulates the base stations that the wireless phone networks rely upon.<br />
While these base stations operate at higher power than do the wireless phones<br />
themselves, the RF exposures that people get from these base stations are<br />
typically thousands of times lower than those they can get from wireless<br />
Section 4A: Safety Guidelines 242
phones. Base stations are thus not the primary subject of the safety questions<br />
discussed in this document.<br />
What kinds of phones are the subject of this update?<br />
The term “wireless phone” refers here to hand-held wireless phones with builtin<br />
antennas, often called “cell,” “mobile,” or “PCS” phones. These types of<br />
wireless phones can expose the user to measurable radiofrequency energy (RF)<br />
because of the short distance between the phone and the user’s head. These RF<br />
exposures are limited by Federal Communications Commission safety<br />
guidelines that were developed with the advice of FDA and other federal health<br />
and safety agencies. When the phone is located at greater distances from the<br />
user, the exposure to RF is drastically lower because a person’s RF exposure<br />
decreases rapidly with increasing distance from the source. The so-called<br />
“cordless phones,” which have a base unit connected to the telephone wiring in<br />
a house, typically operate at far lower power levels, and thus produce RF<br />
exposures well within the FCC’s compliance limits.<br />
What are the results of the research done already?<br />
The research done thus far has produced conflicting results, and many studies<br />
have suffered from flaws in their research methods. Animal experiments<br />
investigating the effects of radiofrequency energy (RF) exposures characteristic<br />
of wireless phones have yielded conflicting results that often cannot be<br />
repeated in other laboratories. A few animal studies, however, have suggested<br />
that low levels of RF could accelerate the development of cancer in laboratory<br />
animals. However, many of the studies that showed increased tumor<br />
development used animals that had been genetically engineered or treated with<br />
cancer-causing chemicals so as to be pre-disposed to develop cancer in the<br />
absence of RF exposure. Other studies exposed the animals to RF for up to 22<br />
hours per day. These conditions are not similar to the conditions under which<br />
people use wireless phones, so we don’t know with certainty what the results of<br />
such studies mean for human health.<br />
Three large epidemiology studies have been published since December 2000.<br />
Between them, the studies investigated any possible association between the<br />
use of wireless phones and primary brain cancer, glioma, meningioma, or<br />
acoustic neuroma, tumors of the brain or salivary gland, leukemia, or other<br />
cancers. None of the studies demonstrated the existence of any harmful health<br />
effects from wireless phone RF exposures. However, none of the studies can<br />
answer questions about long-term exposures, since the average period of phone<br />
use in these studies was around three years.<br />
What research is needed to decide whether RF exposure from wireless<br />
phones poses a health risk?<br />
A combination of laboratory studies and epidemiological studies of people<br />
actually using wireless phones would provide some of the data that are needed.<br />
Lifetime animal exposure studies could be completed in a few years. However,<br />
very large numbers of animals would be needed to provide reliable proof of a<br />
cancer promoting effect if one exists. Epidemiological studies can provide data<br />
Section 4A: Safety Guidelines 243
that is directly applicable to human populations, but 10 or more years’ follow-up<br />
may be needed to provide answers about some health effects, such as cancer.<br />
This is because the interval between the time of exposure to a cancer-causing<br />
agent and the time tumors develop - if they do - may be many, many years. The<br />
interpretation of epidemiological studies is hampered by difficulties in<br />
measuring actual RF exposure during day-to-day use of wireless phones. Many<br />
factors affect this measurement, such as the angle at which the phone is held, or<br />
which model of phone is used.<br />
What is FDA doing to find out more about the possible health effects of<br />
wireless phone RF?<br />
FDA is working with the U.S. National Toxicology Program and with groups of<br />
investigators around the world to ensure that high priority animal studies are<br />
conducted to address important questions about the effects of exposure to<br />
radiofrequency energy (RF).<br />
FDA has been a leading participant in the World Health Organization<br />
International Electromagnetic Fields (EMF) Project since its inception in 1996.<br />
An influential result of this work has been the development of a detailed agenda<br />
of research needs that has driven the establishment of new research programs<br />
around the world. The Project has also helped develop a series of public<br />
information documents on EMF issues.<br />
FDA and the Cellular Telecommunications & Internet Association (CTIA) have a<br />
formal Cooperative Research and Development Agreement (CRADA) to do<br />
research on wireless phone safety. FDA provides the scientific oversight,<br />
obtaining input from experts in government, industry, and academic<br />
organizations. CTIA-funded research is conducted through contracts to<br />
independent investigators. The initial research will include both laboratory<br />
studies and studies of wireless phone users. The CRADA will also include a<br />
broad assessment of additional research needs in the context of the latest<br />
research developments around the world.<br />
What steps can I take to reduce my exposure to radiofrequency energy from<br />
my wireless phone?<br />
If there is a risk from these products--and at this point we do not know that there<br />
is--it is probably very small. But if you are concerned about avoiding even<br />
potential risks, you can take a few simple steps to minimize your exposure to<br />
radiofrequency energy (RF). Since time is a key factor in how much exposure a<br />
person receives, reducing the amount of time spent using a wireless phone will<br />
reduce RF exposure.<br />
If you must conduct extended conversations by wireless phone every day,<br />
you could place more distance between your body and the source of the<br />
RF, since the exposure level drops off dramatically with distance. For<br />
example, you could use a headset and carry the wireless phone away from<br />
your body or use a wireless phone connected to a remote antenna.<br />
Section 4A: Safety Guidelines 244
Again, the scientific data do not demonstrate that wireless phones are harmful.<br />
But if you are concerned about the RF exposure from these products, you can<br />
use measures like those described above to reduce your RF exposure from<br />
wireless phone use.<br />
What about children using wireless phones?<br />
The scientific evidence does not show a danger to users of wireless phones,<br />
including children and teenagers. If you want to take steps to lower exposure to<br />
radiofrequency energy (RF), the measures described above would apply to<br />
children and teenagers using wireless phones. Reducing the time of wireless<br />
phone use and increasing the distance between the user and the RF source will<br />
reduce RF exposure.<br />
Some groups sponsored by other national governments have advised that<br />
children be discouraged from using wireless phones at all. For example, the<br />
government in the United Kingdom distributed leaflets containing such a<br />
recommendation in December 2000. They noted that no evidence exists that<br />
using a wireless phone causes brain tumors or other ill effects. Their<br />
recommendation to limit wireless phone use by children was strictly<br />
precautionary; it was not based on scientific evidence that any health hazard<br />
exists.<br />
What about wireless phone interference with medical equipment?<br />
Radiofrequency energy (RF) from wireless phones can interact with some<br />
electronic devices. For this reason, FDA helped develop a detailed test method<br />
to measure electromagnetic interference (EMI) of implanted cardiac<br />
pacemakers and defibrillators from wireless telephones. This test method is<br />
now part of a standard sponsored by the Association for the Advancement of<br />
Medical instrumentation (AAMI). The final draft, a joint effort by FDA, medical<br />
device manufacturers, and many other groups, was completed in late 2000. This<br />
standard will allow manufacturers to ensure that cardiac pacemakers and<br />
defibrillators are safe from wireless phone EMI.<br />
FDA has tested hearing aids for interference from handheld wireless phones and<br />
helped develop a voluntary standard sponsored by the Institute of Electrical and<br />
Electronic Engineers (IEEE). This standard specifies test methods and<br />
performance requirements for hearing aids and wireless phones so that that no<br />
interference occurs when a person uses a “compatible” phone and a<br />
“compatible” hearing aid at the same time. This standard was approved by the<br />
IEEE in 2000.<br />
FDA continues to monitor the use of wireless phones for possible interactions<br />
with other medical devices. Should harmful interference be found to occur, FDA<br />
will conduct testing to assess the interference and work to resolve the problem.<br />
Which other federal agencies have responsibilities related to potential RF<br />
health effects?<br />
Certain agencies in the Federal Government have been involved in monitoring,<br />
researching or regulating issues related to human exposure to RF radiation.<br />
Section 4A: Safety Guidelines 245
These agencies include the Food and Drug Administration (FDA), the<br />
Environmental Protection Agency (EPA), the Occupational Safety and Health<br />
Administration (OSHA), the National Institute for Occupational Safety and<br />
Health (NIOSH), the National Telecommunications and Information<br />
Administration (NTIA) and the Department of Defense (DOD).<br />
By authority of the Radiation Control for Health and Safety Act of 1968, the<br />
Center for Devices and Radiological Health (CDRH) of the FDA develops<br />
performance standards for the emission of radiation from electronic products<br />
including X-ray equipment, other medical devices, television sets, microwave<br />
ovens, laser products and sunlamps. The CDRH established a product<br />
performance standard for microwave ovens in 1971 limiting the amount of RF<br />
leakage from ovens. However, the CDRH has not adopted performance<br />
standards for other RF-emitting products. The FDA is, however, the lead federal<br />
health agency in monitoring the latest research developments and advising<br />
other agencies with respect to the safety of RF-emitting products used by the<br />
public, such as cellular and PCS phones.<br />
The FDA’s microwave oven standard is an emission standard (as opposed to an<br />
exposure standard) that allows specific levels of microwave leakage (measured<br />
at five centimeters from the oven surface). The standard also requires ovens to<br />
have two independent interlock systems that prevent the oven from generating<br />
microwaves the moment that the latch is released or the door of the oven is<br />
opened. The FDA has stated that ovens that meet its standards and are used<br />
according to the manufacturer’s recommendations are safe for consumer and<br />
industrial use. More information is available from: www.fda.gov/cdrh.<br />
The EPA has, in the past, considered developing federal guidelines for public<br />
exposure to RF radiation. However, EPA activities related to RF safety and health<br />
are presently limited to advisory functions. For example, the EPA now chairs an<br />
Inter-agency Radiofrequency Working Group, which coordinates RF healthrelated<br />
activities among the various federal agencies with health or regulatory<br />
responsibilities in this area.<br />
OSHA is responsible for protecting workers from exposure to hazardous<br />
chemical and physical agents. In 1971, OSHA issued a protection guide for<br />
exposure of workers to RF radiation [29 CFR 1910.97]. However, this guide was<br />
later ruled to be only advisory and not mandatory. Moreover, it was based on an<br />
earlier RF exposure standard that has now been revised. At the present time,<br />
OSHA uses the IEEE and/or FCC exposure guidelines for enforcement purposes<br />
under OSHA’s “general duty clause” (for more information see: http://www.oshaslc.gov/SLTC/radiofrequencyradiation/index.html.<br />
NIOSH is part of the U.S. Department of Health and Human Services. It conducts<br />
research and investigations into issues related to occupational exposure to<br />
chemical and physical agents. NIOSH has, in the past, undertaken to develop RF<br />
exposure guidelines for workers, but final guidelines were never adopted by the<br />
agency. NIOSH conducts safety-related RF studies through its Physical Agents<br />
Effects Branch in Cincinnati,Ohio.<br />
Section 4A: Safety Guidelines 246
The NTIA is an agency of the U.S. Department of Commerce and is responsible<br />
for authorizing Federal Government use of the RF electromagnetic spectrum.<br />
Like the FCC, the NTIA also has NEPA responsibilities and has considered<br />
adopting guidelines for evaluating RF exposure from U.S. Government<br />
transmitters such as radar and military facilities.<br />
The Department of Defense (DOD) has conducted research on the biological<br />
effects of RF energy for a number of years. This research is now conducted<br />
primarily at the U.S. Air Force Research Laboratory located at Brooks Air Force<br />
Base, Texas. The DOD Web site for RF biological effects information is listed<br />
with other sites in conjunction with a question on other sources of information,<br />
below.<br />
Who funds and carries out research on the biological effects of<br />
RF energy?<br />
Research into possible biological effects of RF energy is carried out in<br />
laboratories in the United States and around the world. In the U.S., most<br />
research has been funded by the Department of Defense, due to the extensive<br />
military use of RF equipment such as radar and high-powered radio transmitters.<br />
In addition, some federal agencies responsible for health and safety, such as the<br />
Environmental Protection Agency (EPA) and the U.S. Food and Drug<br />
Administration (FDA), have sponsored and conducted research in this area. At<br />
the present time, most of the non-military research on biological effects of RF<br />
energy in the U.S. is being funded by industry organizations. More research is<br />
being carried out overseas, particularly in Europe.<br />
In 1996, the World Health Organization (WHO) established the International<br />
EMF Project to review the scientific literature and work towards resolution of<br />
health concerns over the use of RF technology. WHO maintains a Web site that<br />
provides extensive information on this project and about RF biological effects<br />
and research (www.who.ch/peh-emf).<br />
FDA, EPA and other US government agencies responsible for public health and<br />
safety have worked together and in connection with WHO to monitor<br />
developments and identify research needs related to RF biological effects.<br />
How does FCC Audit Cell Phone RF?<br />
After FCC grants permission for a particular cellular telephone to be marketed,<br />
FCC will occasionally conduct “post-grant” testing to determine whether<br />
production versions of the phone are being produced to conform with FCC<br />
regulatory requirements. The manufacturer of a cell phone that does not meet<br />
FCC’s regulatory requirements may be required to remove the cell phone from<br />
use and to refund the purchase price or provide a replacement phone, and may<br />
be subject to civil or criminal penalties. In addition, if the cell phone presents a<br />
risk of injury to the user, FDA may also take regulatory action. The most<br />
important post-grant test, from a consumer’s perspective, is testing of the RF<br />
emissions of the phone. FCC measures the Specific Absorption Rate (SAR) of the<br />
phone, following a very rigorous testing protocol. As is true for nearly any<br />
scientific measurement, there is a possibility that the test measurement may be<br />
Section 4A: Safety Guidelines 247
less than or greater than the actual RF emitted by the phone. This difference<br />
between the RF test measurement and actual RF emission is because test<br />
measurements are limited by instrument accuracy, because test measurement<br />
and actual use environments are different, and other variable factors. This<br />
inherent variability is known as “measurement uncertainty.” When FCC<br />
conducts post-grant testing of a cell phone, FCC takes into account any<br />
measurement uncertainty to when determining whether regulatory action is<br />
appropriate. This approach ensures that when FCC takes regulatory action, it<br />
will have a sound, defensible scientific basis.<br />
FDA scientific staff reviewed the methodology used by FCC to measure cell<br />
phone RF, and agreed it is an acceptable approach, given our current<br />
understanding of the risks presented by cellular phone RF emissions. RF<br />
emissions from cellular phones have not been shown to present a risk of injury<br />
to the user when the measured SAR is less than the safety limits set by FCC (an<br />
SAR of 1.6 w/kg). Even in a case where the maximum measurement uncertainty<br />
permitted by current measurement standards was added to the maximum<br />
permissible SAR, the resulting SAR value would be well below any level known<br />
to produce an acute effect. Consequently, FCC’s approach with measurement<br />
uncertainty will not result in consumers being exposed to any known risk from<br />
the RF emitted by cellular telephones.<br />
FDA will continue to monitor studies and literature reports concerning acute<br />
effects of cell phone RF, and concerning chronic effects of long-term exposure<br />
to cellular telephone RF (that is, the risks from using a cell phone for many<br />
years). If new information leads FDA to believe that a change to FCC’s<br />
measurement policy may be appropriate, FDA will contact FCC and both<br />
agencies will work together to develop a mutually-acceptable approach.<br />
Section 4A: Safety Guidelines 248
Owner’s Record<br />
The model number, regulatory number and serial number are located on a<br />
nameplate inside the battery compartment. Record the serial number in the space<br />
provided below. This will be helpful if you need to contact us about your phone in<br />
the future.<br />
Model: PCS Vision SM Picture Phone PM-8200 by Sanyo<br />
Serial No.:<br />
User’s Guide Proprietary Notice<br />
CDMA Technology is licensed by QUALCOMM Incorporated under one or more of<br />
the following patents:<br />
4,901,307 5,109,390 5,267,262 5,416,797<br />
5,506,865 5,544,196 5,657,420 5,101,501<br />
5,267,261 5,414,796 5,504,773 5,535,239<br />
5,600,754 5,778,338 5,228,054 5,337,338<br />
5,710,784 5,056,109 5,568,483 5,659,569<br />
5,490,165 5,511,073<br />
T9 Text Input is licensed by Tegic Communications and is covered by U.S. Pat.<br />
5,818,437, U.S. Pat. 5,953,541, U.S. Pat. 6,011,554 and other patents pending.<br />
User’s Guide template version 3D (09-01-03)<br />
Section 4A: Safety Guidelines 249
Section 4B<br />
Terms & Conditions and<br />
Manufacturer’s Warranty<br />
In This Section<br />
<br />
<br />
Terms and Conditions<br />
Manufacturer’s Warranty<br />
Your PCS Vision Phone has been designed to provide you with reliable,<br />
worry-free service. If for any reason you have a problem with your<br />
equipment, please refer to the manufacturer’s warranty.<br />
This section contains the Terms and Conditions of Service for<br />
your PCS Phone and Service and the manufacturer’s warranty for<br />
your PCS Phone.<br />
Section 4B: Terms & Conditions / Warranty 250
Terms and Conditions<br />
Terms and Conditions of Services<br />
(Effective as of November 24, 2003 until replaced)<br />
Thanks for choosing Sprint. These terms and conditions are part of your agreement<br />
with Sprint for PCS Services.<br />
The terms and conditions included with your PCS Phone may not be the most<br />
current version. For the most current version of the terms and conditions, please<br />
visit our website at www.sprintpcs.com or call PCS Customer Service Solutions at<br />
1-888-211-4PCS. If you activated PCS Services before the effective date of these<br />
terms and conditions, these terms and conditions replace and supersede any<br />
previous terms and conditions.<br />
If you have questions about your PCS Services, please visit our website at<br />
www.sprintpcs.com or call PCS Customer Service Solutions at<br />
1-888-211-4PCS (4727).<br />
Para solicitar esta literatura en español, por favor contactar a<br />
1-888-211-4PCS(4727).<br />
Agreement. Your agreement (“Agreement”) with Sprint Spectrum L.P. and any of its<br />
affiliates doing business as Sprint providing PCS Services (“Services”) to you is made<br />
up of these Terms and Conditions of Service (“Terms”) and the Service Plan that we<br />
agree to provide you. Your “Service Plan” is described in our marketing materials,<br />
and includes the terms, rates and features we set for that Service Plan. In the<br />
agreement, we use the words “we,” “us,” “our” or “Sprint” to refer to Sprint<br />
Spectrum L.P. and its affiliates doing business as Sprint. You accept the agreement<br />
when you activate PCS Services or make any attempt to use our PCS Services (for<br />
example, attempting to place any call while on or roaming off the Sprint Nationwide<br />
PCS Network, using data services, etc.). We may change the Agreement at any time<br />
by giving you prior notice. Any changes to the Agreement are effective when we<br />
publish them. If you use our Services or make any payment to us on or after the<br />
effective date of the changes, you accept the changes. If we change a material term<br />
of the Agreement and that change has a material adverse effect on you, you may<br />
terminate the Agreement without an early termination fee by calling 1-888-211-4727<br />
within 30 days after the invoice date of the first invoice your receive after the<br />
changes go into effect. You understand and agree that taxes, Universal Service fees<br />
and other charges imposed by the government or based on government calculations<br />
may increase or decrease on a monthly basis, and that this paragraph does not apply<br />
to any increases in such taxes, Universal Service fees and other charges.<br />
Provision of Service. Your purchase of a PCS Phone or other equipment does not<br />
mean that we must provide Services to you. We may decide not to provide Services to<br />
you for any lawful reason. We may request that you provide us with any information<br />
we reasonably require to determine whether you qualify for Services. Services in<br />
some areas are managed and provided under contract with Sprint by independent<br />
affiliates with access to the Sprint Nationwide PCS Network. Some Services may not<br />
be available or may operate differently in certain affiliate markets or other areas.<br />
Section 4B: Terms & Conditions / Warranty 251
Credit Verification. You must have and maintain satisfactory credit to receive and<br />
continue to receive Services. We will verify your credit before agreeing to provide<br />
Services to you and we may verify your credit at any time while we provide Services<br />
to you. Credit verification may include a review of credit reports that we receive from<br />
credit bureaus. If at any time we determine, in our sole discretion, that payment for<br />
Services may not be made when due, we may suspend Services and require that you<br />
provide payment on account or a guarantee of payment before we resume Services.<br />
Service Plan. You may be eligible for a fixed length PCS Service Plan (“Term Service<br />
Plan”) or for a month-to-month Service Plan (“Non-Term Service Plan”). We<br />
determine the Service Plan for which you qualify. Except as permitted by the<br />
Agreement, you must maintain service with us on your Term Service Plan for the<br />
minimum term associated with that Term Service Plan. We may offer non-identical<br />
Service Plans to different individuals or entities. Services and coverage under some<br />
Service Plans may be more limited than available under other Service Plans. Your<br />
Service Plan sets out the charges for Services and is your Service Plan until that<br />
Service Plan is changed, you switch to a different Service Plan, or your Services<br />
terminate. Based on your credit rating or other factors, we may require that you<br />
make a deposit, prepayment, or a series of deposits or prepayments, or be subject<br />
to an account spending limit, before Services are activated or maintained.<br />
Changing Service Plans. If you are on a Non-Term Service Plan, you may change to a<br />
different Service Plan for which you qualify. Any change is effective at the start of<br />
your next full invoicing cycle unless otherwise specified by us at the time that you<br />
place your change order. If you change or add a different Service Plan or service<br />
feature and the change is effective prior to the start of your next full invoicing<br />
cycle, you will be invoiced a prorated amount. We may require a service charge for<br />
implementing any change directed by you in addition to the charges associated<br />
with the Service Plan or optional service features you select. If you are on a Term<br />
Service Plan and you want to change your service plan, you may be required to<br />
accept a new Term Service Plan and we may require you to pay the early<br />
termination fee set out in your Service Plan or other fee.<br />
Termination. Non-Term Service Plan. If you are on a Non-Term Service Plan, you may<br />
terminate Services at any time by giving us notice. Subject to the terms of this<br />
Agreement, we may terminate Services at any time, with or without notice. If your<br />
Service has been suspended due to non-payment, you may be charged a reactivation<br />
fee. We may deactivate any Number before you receive notice of termination<br />
without liability to you. Termination by either of us may be with or without cause.<br />
Termination. Term Service Plan. EXCEPT AS PERMITTED BY THE AGREEMENT, IF<br />
YOU TERMINATE YOUR TERM SERVICE PLAN BEFORE THE END OF THE TERM,<br />
OR IF WE TERMINATE SERVICES FOR CAUSE BEFORE THE END OF THE TERM,<br />
YOU WILL BE REQUIRED TO PAY THE EARLY TERMINATION FEE ASSOCIATED<br />
WITH YOUR TERM SERVICE PLAN. No early termination fee is charged if you<br />
terminate a Term Service Plan in accordance with the return policy associated with<br />
your Term Service Plan. After the expiration of the term, the Terms relating to Non-<br />
Term Service Plans apply.<br />
Section 4B: Terms & Conditions / Warranty 252
Termination. General. Regardless of whether you have a Non-Term or a Term<br />
Service Plan, we may terminate or suspend Services to you without liability if: (1)<br />
you breach any provision of this Agreement (including if you fail to pay any charges<br />
for Services); or (2) you fail to pay any charges due us for equipment or otherwise.<br />
If Services are terminated before the end of your current invoicing cycle, we will<br />
not prorate the monthly recurring charge to the date of termination, and you will<br />
not receive a credit or refund for any unused minutes in your Service Plan.<br />
Use of Services and Equipment; Availability. You must be at least 18 years old to<br />
subscribe to our Services. We may require you to provide proof of your age and<br />
identity. If you are under 18 years old you may be eligible for certain Services that<br />
have Account Spending Limits if a person 18 years or older is also named as a<br />
subscriber on the Account. Your PCS Phone will not accept the services of any<br />
wireless provider other than Sprint (but see Roaming). Services and equipment may<br />
not be used for any unlawful, fraudulent or abusive purpose. By requesting Services,<br />
you agree that you will not use Services and equipment in any unlawful, fraudulent<br />
or abusive manner. You may not resell or lease Services or equipment to anyone.<br />
Coverage. Most services are only available within the operating range of the Sprint<br />
Nationwide PCS Network (also see Roaming). Coverage is not available<br />
everywhere. Coverage and quality of Services may be affected by conditions within<br />
or beyond our control, including network problems, signal strength, your<br />
equipment, and atmospheric, geographic, or topographic conditions. We do not<br />
guarantee service availability or that there will be no interruptions or delays in<br />
Services (e.g., dropped calls, blocked calls, etc.).<br />
Number. We may change the phone number (“Number”) assigned to your<br />
PCS device without compensation by giving you prior notice. You do not own the<br />
Number. You may not modify the Number we program into any phone or other<br />
equipment, duplicate the Number to any device other than that authorized by us<br />
or, except as allowed for by law, transfer (port) the Number to any other individual<br />
or entity. If you transfer the Number to another carrier, the terms of the Agreement<br />
(including the rights and obligations set forth in the Termination paragraphs) still<br />
apply. In certain instances, you may transfer a Number from another carrier to<br />
Sprint. Sprint does not in any way guarantee that such transfers to (or from) Sprint<br />
will be successful. If a transfer to Sprint is not successful, you will be responsible<br />
any discounts provided to you with the purchase of your PCS device. See our<br />
printed in-store materials or visit www.sprintpcs.com for additional important<br />
information on Number transfers.<br />
Phone Activation Fee. You may be required to pay a non-refundable phone<br />
activation fee when you activate a new Number, have us switch a Number to a<br />
different phone, have your current Number changed, we activate a different phone<br />
on your existing account or your Service Plan says so.<br />
Charges. For most forms of wireless Service, your usage will be charged from the time<br />
you first initiate contact between your phone or other wireless device and the<br />
network until the network connection is broken, whether or not you are successful<br />
in connecting with the service with which you seek to connect, even if the<br />
connection is later broken or dropped. An exception is that you are not charged for<br />
Section 4B: Terms & Conditions / Warranty 253
voice calls that are not completed. You are charged for completed calls to your<br />
Number from the time shortly before the phone starts ringing until the call is<br />
terminated. You will be charged peak rates for the entire duration of calls initiated<br />
during the peak time periods applicable to your Service. You will be charged off-peak<br />
rates for the entire duration of calls initiated during the off-peak time periods<br />
applicable to your Service. In addition to these usage charges, you may be charged for<br />
recurring monthly service charges, applicable local and long-distance toll charges,<br />
other usage charges, (including voicemail access, call waiting, call forwarding, etc.),<br />
connection fees, roaming charges, directory assistance, call completion charges,<br />
account review and management charges, optional features you select at an extra<br />
cost, surcharges related to government programs, and taxes. Charges for most<br />
Services are incurred in one-minute increments, with partial minutes of use rounded<br />
up to the next highest minute. You must pay, by each invoice due date, all charges for<br />
Services provided to the Number for each phone or other equipment that our<br />
records show you activated, no matter who actually uses or has possession of the<br />
phone or other equipment at the time Services are provided.<br />
PCS Vision (Third Generation) Charges. For PCS Vision wireless services, you will be<br />
charged on a per kilobyte basis for data used, rather than for airtime used. As long as<br />
your PCS Vision device is connected to the Sprint Nationwide PCS Network<br />
(“PCS Vision network”), you will be incurring data usage charges. You are<br />
responsible for all data activity from and directed to your PCS Phone, regardless of<br />
who initiates the activity. We will invoice you for all data directed to the internet<br />
address (or “IP address”) assigned to your device in a given PCS Vision session,<br />
regardless of whether your device actually receives the data. You will be charged for<br />
data usage initiated by others as well as those you initiate. You will be charged for<br />
additional data used in transporting and routing on the network. You will be charged<br />
for partial and interrupted data downloads or other use, including re-sent data, and<br />
for unsuccessful attempts to reach websites and use other applications and services,<br />
including those resulting from dropped network connections. If you use a Premium<br />
Service (including services provided by third parties but for which you are billed on<br />
your PCS Invoice), you will be charged for data used in transport and routing in<br />
addition to the charge for the Premium Service. The amount of data used and<br />
charged to you will vary widely, depending upon the specific PCS Vision wireless<br />
application or other service you use, the amount of data used in the specific<br />
application or service, and network congestion and other matters. For this and other<br />
reasons, estimates of data usage - for example, the size of downloadable files - will<br />
vary from what you actually use. You cannot receive incoming calls while using<br />
third generation services. Data usage will be rounded up to the next whole kilobyte.<br />
Kilobyte usage will be rounded up to the next full cent. Rounding up will occur at<br />
the end of each separate session or each clock hour (at the top of each hour), if the<br />
session spans more than 1 clock hour. When traveling on our PCS Vision network, a<br />
session may be ended and new session initiated, although no interruption to the<br />
actual data session will occur. Your invoice will not separately identify the number<br />
of kilobytes attributable to your use of specific sites, sessions or services used.<br />
Section 4B: Terms & Conditions / Warranty 254
PCS Vision Premium Services. Your PCS Vision wireless services may allow you to<br />
access or download premium content for an additional charge. Certain PCS Vision<br />
services (e.g., games, ringers and screen savers) primarily contain premium<br />
services content. Access to and downloading of premium content is not included<br />
with PCS Vision services. The additional charges for this premium content will be<br />
billed to you on your PCS Invoice. You will be charged for this content (at rates and<br />
charges specified at the time of access or download) that will be in addition to data<br />
usage charges you will incur while connected to the enhanced PCS Vision network.<br />
We provide no warranties and make no representations or claims with regard to<br />
third-party Premium Services. In certain instances, subject to the terms of the<br />
content purchased, we may delete premium and non-premium items downloaded<br />
to available storage areas (e.g., your vault), including any pictures, games and other<br />
content. We may limit the amount of Premium Services you may purchase in a<br />
specific timeframe (month, week, day, or other time period). We may suspend your<br />
use of Premium Services without prior consent or notice if we have reason to<br />
suspect fraudulent or unauthorized use of your Premium Services account, but we<br />
make no assurances that we will suspend your account.<br />
Other Terms Applicable to PCS Vision Wireless Usage. Use of PCS Vision wireless<br />
services requires the purchase of a separate third generation wireless compatible<br />
phone or other device and is subject to any software, memory, storage or other<br />
limitation in the phone or other equipment. Not all applications and services work,<br />
or work the same, on all third generation wireless phones and devices. Check the<br />
materials accompanying your phone or device to determine which applications<br />
and services it will support. PCS Vision wireless services are not available while off<br />
the PCS Vision network. PCS Vision services are not available for server devices or<br />
host computer applications, other systems that drive continuous heavy traffic or<br />
data sessions, or as substitutes for private lines or frame relay connections.<br />
Unlimited PCS Vision plans/options are only available with phones or PCS smart<br />
phones where the device is not being used as a modem in connection with other<br />
equipment (e.g., computers, PDAs, etc.) through use of connection kits or other<br />
phone-to-computer/PDA accessories, or Bluetooth or other wireless technology.<br />
Sprint reserves the right to deny or to terminate service without notice for any<br />
misuse. Sprint is not responsible for any opinions, advice, statements, services<br />
applications or other information provided by third parties and accessible through<br />
PCS Vision wireless services. Neither Sprint nor its vendors or licensors guarantees<br />
the accuracy, completeness or usefulness of information that is obtained through<br />
the PCS Vision wireless services. You are responsible for evaluating such content.<br />
Use of certain PCS Vision wireless services, including some messaging services,<br />
may result in the disclosure to others of your email address and other information<br />
about you in connection with your internet usage. Your accessing of, or use of,<br />
third party sites or services accessible PCS Vision wireless services may require the<br />
disclosure of information about you, subject to the policies of those sites and<br />
services. You consent to receiving advertising, warnings, alerts and other<br />
messages, including broadcast messages. Your access to PCS Vision wireless<br />
services is controlled by a password.<br />
Section 4B: Terms & Conditions / Warranty 255
Voice Command. PCS Voice Command is an optional service that allows you to<br />
place calls by using speech recognition technology. Calls to 911 or similar<br />
emergency numbers cannot be placed through the Voice Command feature.<br />
Airtime and applicable long distance charges for a call completed from your<br />
Number using the Voice Command feature begin when you press or activate the<br />
TALK or similar key(s) and end when your call is terminated by hitting the END key<br />
or by returning to the Voice Command platform. If you initiate and complete<br />
another call without leaving the Voice Command platform, a separate charge for<br />
that call will begin from the time the previous call was terminated. Airtime and<br />
applicable long distance charges will be applied to the entire length of a completed<br />
call initiated from Voice Command. Using Directory Assistance to input names into<br />
your Voice Command address book will incur additional charges.<br />
Invoicing. Invoicing cycles are approximately 30 days in length. Invoicing cycles<br />
and dates may change from time to time. Except as otherwise provided in your<br />
Service Plan, monthly recurring charges (MRCs) are invoiced one invoicing cycle in<br />
advance. Charges for Services are usually invoiced as soon as possible after the<br />
charges accrue. We may, however, invoice you for usage and charges occurring<br />
before the invoicing cycle being invoiced, if they were not previously invoiced. If<br />
you are invoiced for usage incurred during a prior invoicing cycle, those minutes<br />
will be applied to your Service Plan minutes for the current invoicing cycle.<br />
However, if you change your PCS Service Plan between the time the usage was<br />
incurred and the beginning of the current invoicing cycle, those minutes from the<br />
prior invoicing cycle will be charged at the rate per minute for usage over included<br />
minutes provided in the Service Plan in effect at the time the usage was incurred.<br />
Payment. If you have authorized payment for Services or equipment by credit card<br />
or by debiting a bank account, no additional notice or consent is required before we<br />
invoice the credit card or debit the bank account for all amounts due to us or billed<br />
by us on behalf of a third party. You must promptly notify us of any change in your<br />
invoicing address or of the credit card or bank account used for payment. We<br />
reserve the right to require payment by money order, cashier’s check or other<br />
secured form of payment. If we take action to receive payment beyond invoicing<br />
you for charges for Services or equipment, you must pay our costs and expenses of<br />
collection, including attorneys’ fees and expenses, the fees of any collection agency<br />
and court costs. If we act as an invoicing agent for a third-party service provider,<br />
payments received are first applied to amounts due and owing to us and any<br />
remaining amounts are applied to sums due and owing to the third-party service<br />
provider. We may immediately charge an additional fee for any check or other<br />
negotiable instrument endorsed by you and returned unpaid by a financial<br />
institution for any reason. You may be charged fees for certain methods of payment.<br />
Late Payment Charges. Payment is past due if we do not receive it by the due date<br />
shown on your invoice. Any payment for Services and equipment not made when<br />
due accrues late charges until paid at the rate of 5% per month or at the highest rate<br />
allowed by law. Acceptance of late or partial payments (even if marked “paid in full”)<br />
does not waive our right to collect all amounts that you owe us. If your Service has<br />
been suspended due to non-payment, you may be charged a reactivation fee.<br />
Section 4B: Terms & Conditions / Warranty 256
Disputed Charges. You must raise any dispute that you have about any charges<br />
invoiced to you within 15 days of the date of the invoice or you have accepted the<br />
invoice. You may notify us of any dispute by notifying PCS Customer Service<br />
Solutions. Calls to our sales or general business offices are not notice of a dispute. If<br />
disputed invoice procedures are described on the invoice, you must follow them.<br />
Account Spending Limit. If we agree to provide Services to you on an Account<br />
Spending Limit basis, we will tell you your Account Spending Limit before we start<br />
Services to your Number, or as reasonably practicable after the limit is imposed. If<br />
we require a deposit for you to establish or keep Services on an Account Spending<br />
Limit basis, we will hold the deposit as partial guarantee of payment for Services (see<br />
Deposits). Charges for Services accrue against your Account Spending Limit as they<br />
are incurred. We may charge an initial ASL start up fee. We may charge a monthly ASL<br />
service fee, in addition to your recurring monthly service charge. We may suspend<br />
Services to your Number without prior notice to you when your account balance<br />
reaches your Account Spending Limit. Services are restored when you have paid any<br />
past due balance and pay a specified minimum amount to reduce your account<br />
balance below your Account Spending Limit. We may change this minimum amount<br />
at any time upon notice to you. You may pay any past due balance and the minimum<br />
amount by any method authorized by Sprint. Contact PCS Customer Service<br />
Solutions for information about authorized methods of making these payments. We<br />
may charge you a fee for calls that involve our live customer care services. If we<br />
provide Services to you on an Account Spending Limit basis, Services and coverage<br />
may be limited in certain ways. You must pay all charges for Services even if they<br />
exceed the amount of your Account Spending Limit.<br />
Clear Pay. If we agree to provide Services to you as a Clear Pay customer, we may<br />
suspend Services to your Number without prior notice to you immediately when<br />
your bill becomes past due. Even if your bill is not past due, we may suspend<br />
services if your unpaid usage exceeds $125 or another amount to be determined by<br />
your past credit or usage history. If we require a deposit for you to establish or keep<br />
Services as a Clear Pay customer, we will hold the deposit as partial guarantee of<br />
payment for Services (see Deposits, below). Contact PCS Customer Service<br />
Solutions for information about authorized methods of making these payments. We<br />
may charge you a fee for calls that involve our live customer care services. If we<br />
provide Services to you on as a Clear Pay basis, Services and coverage may be<br />
limited in certain ways. You must pay all charges for Services whether or not your<br />
Services are suspended or terminated.<br />
Deposits. If we require a deposit for you to establish or keep Services, we will hold<br />
the deposit as partial guarantee of payment for Services. We may change the<br />
deposit amount at any time to reflect revised estimated monthly charges based<br />
upon your usage. A deposit may not be used to pay any invoice (unless it is used to<br />
pay a final invoice) or delay payment. The deposit amount, the length of time we<br />
hold the deposit and changes to the deposit amount are determined based on your<br />
credit and payment history. The rate of interest, if any, on the deposit is subject to<br />
change. We may mix deposits with our other funds. If Services are terminated for<br />
any reason, we may, without notice to you, apply your deposit toward payment of<br />
Section 4B: Terms & Conditions / Warranty 257
outstanding charges and return any excess to you at your last known address within<br />
75 days after termination of Services. If the U.S. Postal Service cannot deliver the<br />
money to you and returns it to us, we will hold it for you for one year from the date<br />
of return and, during that period, we may charge a servicing fee against the deposit<br />
balance. Any money held during this one-year period will not accrue interest for<br />
your benefit. You forfeit any portion of the money left after the one-year period.<br />
Wireless Web and Voice Portal Services. Wireless Web Services are part of the<br />
Services that can be obtained through Sprint. Wireless Web Services are not<br />
available in all markets or while roaming off the Sprint Nationwide PCS Network.<br />
Use of Wireless Web Services requires an Internet-ready PCS Phone or certain other<br />
equipment (or both) and is subject to any memory, storage or other limitation in the<br />
phone or other equipment. Wireless Web Services are not available on PCS Vision<br />
phones or devices. The Caller ID blocking feature is not available when using<br />
Wireless Web Services. Any use of Wireless Web Services deducts from your Service<br />
Plan minutes. For data calls (including Wireless Web and Voice Portal calls) that are<br />
attempted, but not completed, you are charged for the time during which the<br />
network attempts to connect the call. You are charged for time spent connected to<br />
the Wireless Web or Voice Portal, including time spent browsing on the Internet or<br />
Voice Portal and reviewing or scrolling through Internet information on-line while<br />
still connected to the Sprint Nationwide PCS Network. Not all Internet sites can be<br />
accessed and you may receive an error message if you attempt to access a site that<br />
cannot be accessed through Wireless Web Services. You are also charged for<br />
Wireless Web connections to review your PCS account information. Wireless Web<br />
Services are not available with all Service Plans. Sprint is not responsible for any<br />
opinions, advice, statements, services or other information provided by thirdparties<br />
and accessible through Wireless Web Services or Voice Portal Services.<br />
Neither Sprint nor its vendors or licensors guarantees the accuracy, completeness or<br />
usefulness of information that is obtained through the Wireless Web Services or<br />
Voice Portal Services. You are responsible for evaluating such content.<br />
Taxes and Surcharges. We invoice you for taxes, fees and other charges levied by or<br />
remitted directly to federal, state or local authorities, or foreign government on<br />
Services including, without limitation, sales, gross receipts, use, and excise taxes. If<br />
you claim any tax exemption, you must provide us with a valid tax-exempt<br />
document. Any tax exemption applies only from the date we receive a valid taxexempt<br />
document. We also invoice you for fees that we collect and remit to the<br />
government such as Universal Service, and for surcharges that we collect and keep<br />
to pay for the costs of complying with government mandates such as number<br />
pooling and portability, and Enhanced 911 service. These charges are neither taxes<br />
nor government imposed assessments.<br />
Roaming. Calls made while off the Sprint Nationwide PCS Network are “roaming”<br />
calls. Your PCS Phone is specifically designed and engineered to work only on the<br />
Sprint Nationwide PCS Network. It works on another CDMA PCS provider’s system<br />
only when a roaming agreement is in place between Sprint and the other providers.<br />
If your PCS Phone is a dual-mode phone, it works on both a CDMA PCS provider’s<br />
system (in addition to the Sprint Nationwide PCS Network) and a wireless analog<br />
telecommunications provider’s system only when roaming agreements are in place<br />
Section 4B: Terms & Conditions / Warranty 258
etween Sprint and the other providers. If we do not have a roaming agreement in<br />
place, you may be able to place roaming calls “manually” by using a valid credit card.<br />
If there is a gap or other interruption of coverage within a PCS coverage area that<br />
prevents connection with the Sprint Nationwide PCS Network and your dual-band<br />
phone is set to roam automatically when outside PCS coverage, you may incur<br />
roaming fees within a PCS coverage area. Certain features and services may not be<br />
available when roaming (including PCS Vision, voicemail, call waiting, call<br />
forwarding, etc.).<br />
Phones and Other Equipment. Phones and other equipment may be purchased and<br />
returned as provided in the purchase documents. We are not the manufacturer of<br />
the phones or other equipment. The only warranties on the phones or other<br />
equipment are any limited warranties extended by the manufacturers. We have no<br />
liability in connection with the phones and other equipment or for the<br />
manufacturers’ acts or omissions.<br />
Lost or Stolen Equipment. If your phone or other equipment is lost or stolen, you<br />
must notify us by calling PCS Customer Service Solutions. You are responsible for<br />
all charges for Services provided to the Number for the lost or stolen equipment<br />
before you notify us of the loss or theft. We will deactivate Services to the Number<br />
upon notification to us of any loss or theft. You may be required to provide<br />
evidence of the loss or theft (for example, a police report or sworn statement). If<br />
the equipment is later found, we may require that you exchange it for another<br />
phone or other equipment before we reactivate Services (if we do reactivate<br />
Services), as well as require you to pay a reactivation fee. We will deactivate<br />
Services to any Number without prior notice to you if we suspect any unlawful or<br />
fraudulent use of the Number. You agree to cooperate reasonably with us in<br />
investigating suspected unlawful or fraudulent use.<br />
Messages. You will incur airtime usage charges when accessing your voicemail<br />
from your PCS Phone. You may also incur charges in accessing text messages from<br />
your PCS Phone. You may access your voicemail without incurring airtime usage<br />
charges by checking your voicemail from a wireline phone. We may impose limits<br />
on the number of voicemail or text message that can be retained through your<br />
PCS account. Audible or visual indicators of text or voicemail messages, including<br />
mailbox icons on your PCS Phone, may not always provide an up to date indication<br />
of new messages. In certain instances, you may be required to manually reset or<br />
clear your mailbox indicator.<br />
Caller ID. If you do not want people you call to receive the Number assigned to your<br />
phone, you must call PCS Customer Service Solutions for information about<br />
automatic Caller ID blocking. The Number assigned to your phone can be blocked<br />
on a per-call basis by dialing *67 + Destination Number + TALK (or similar key), but<br />
Caller ID delivery resumes on the next call you make. Caller ID display on incoming<br />
calls to your Number depends on receiving the information from the calling party.<br />
Section 4B: Terms & Conditions / Warranty 259
TTY Access. A TTY (also known as TDD or Text Telephone) is a telecommunications<br />
device that allows people who are deaf or hard of hearing, or who have speech or<br />
language disabilities, to communicate by telephone. TTY doesn’t work with all<br />
PCS Phones. If you have a PCS TTY-capable phone, it may not function effectively, or<br />
at all, when attempting 911 calls due to the equipment or software of the answering<br />
agency. Therefore, a TTY device should not be relied on for 911 calls.<br />
Pay-Per-Call Service. We will not complete calls from your Number to 900, 976 and<br />
similar numbers for pay-per-call services.<br />
International Calling. You may be limited in the international destinations that you<br />
can call with Services. You should contact PCS Customer Service Solutions for<br />
information about international destinations that you cannot call.<br />
Limitation of Liability. Except as otherwise provided in this section, our sole liability<br />
to you for any loss or damage arising out of providing or failing to provide Services<br />
(including mistakes, omissions, interruptions, delays, errors, or defects) does not<br />
exceed (1) in cases related to a specific piece of equipment, the prorated MRC for<br />
Services to the piece of equipment during the affected period, or (2) in cases not<br />
related to a specific piece of equipment, the prorated MRCs for Services to you<br />
during the affected period. Neither we nor our vendors, suppliers or licensors are<br />
liable for any damage arising out of or in connection with:<br />
a) any act or omission of any telecommunications service or other service<br />
provider other than us;<br />
b) any directory listing;<br />
c) any dropped calls or inability to place or receive calls;<br />
d) any interruption of Services, including interruptions caused by equipment or<br />
facilities failure or shortages, transmission limitations or system capacity<br />
limitations;<br />
e) traffic or other accidents, or any health-related claims allegedly arising from the<br />
use of Services, phones, equipment or accessories used in connection with the<br />
Services;<br />
f) the use of Wireless Web Services and PCS Vision applications and services,<br />
including the accuracy or reliability of any information obtained from the Internet<br />
using Wireless Web Services or from Voice Portal Services, PCS Vision wireless<br />
services or Internet services, content or applications not supported by Sprint PCS;<br />
g) any late or failed message delivery;<br />
h) any interruption or failure of 911 or E911 emergency services or identification<br />
of the Number, address or name associated with any person accessing or<br />
attempting to access emergency services from your phone;<br />
i) the installation or repair of any products or equipment by parties who are not<br />
our authorized employees or agents;<br />
j) events due to factors beyond our control, including acts of God (including,<br />
without limitation, weather-related phenomena, fire or earthquake), war, riot,<br />
strike, or orders of governmental authority;<br />
Section 4B: Terms & Conditions / Warranty 260
k) any act or omission of any third party or independent contractor that offers<br />
products or services in conjunction with or through the Services; or<br />
l) your negligent or intentional act or omission.<br />
NO CONSEQUENTIAL OR OTHER DAMAGES. UNDER NO CIRCUMSTANCES ARE WE<br />
LIABLE FOR ANY INCIDENTAL, CONSEQUENTIAL, PUNITIVE OR SPECIAL<br />
DAMAGES OF ANY NATURE WHATSOEVER ARISING OUT OF OR IN<br />
CONNECTION WITH PROVIDING OR FAILING TO PROVIDE SERVICES, PHONES<br />
OR OTHER EQUIPMENT USED IN CONNECTION WITH THE SERVICES,<br />
INCLUDING, WITHOUT LIMITATION, LOST PROFITS, LOSS OF BUSINESS, OR<br />
COST OF REPLACEMENT PRODUCTS AND SERVICES. THIS SECTION SURVIVES<br />
TERMINATION OF THIS AGREEMENT.<br />
Indemnification. You indemnify and defend us, our partners, directors, officers,<br />
employees and agents from and against any claim, action, damage, liability and<br />
expense arising out of or in connection with: (1) your acts or omissions that occur<br />
in connection with your use of the Services or equipment used in connection with<br />
the Services, and (2) any communications you make or receive using the Services.<br />
This indemnification extends to and includes any attorney’s fees and costs incurred<br />
by us arising from any actions or claims to which this indemnification applies, or<br />
from the contesting of the applicability of this provision. This section survives<br />
termination of this Agreement.<br />
MANDATORY ARBITRATION OF DISPUTES. ANY CLAIM, CONTROVERSY OR<br />
DISPUTE OF ANY KIND BETWEEN THE CUSTOMER AND THE COMPANY AND/OR<br />
ANY OF ITS EMPLOYEES, AGENTS, AFFILIATES OR OTHER REPRESENTATIVES,<br />
WHETHER SOUNDING IN CONTRACT, STATUTE, OR TORT, INCLUDING FRAUD,<br />
MISREPRESENTATION, FRAUDULENT INDUCEMENT, OR ANY OTHER LEGAL OR<br />
EQUITABLE THEORY AND REGARDLESS OF THE DATE OF ACCRUAL OF SUCH<br />
CLAIM, CONTROVERSY OR DISPUTE SHALL BE RESOLVED BY FINAL AND<br />
BINDING ARBITRATION AS PRESCRIBED IN THIS SECTION. THE FEDERAL<br />
ARBITRATION ACT, NOT STATE LAW, GOVERNS THE QUESTION OF WHETHER A<br />
CLAIM IS SUBJECT TO ARBITRATION. HOWEVER, NOTHING CONTAINED IN<br />
THIS ARBITRATION PROVISION SHALL PRECLUDE THE CUSTOMER FROM<br />
RESOLVING ANY CLAIM, CONTROVERSY OR DISPUTE IN SMALL CLAIMS COURT<br />
HE OR SHE OTHERWISE WOULD HAVE THE RIGHT TO PURSUE.<br />
A single arbitrator engaged in the practice of law will conduct the arbitration. The<br />
arbitrator will be selected according to the rules of CPR or, alternatively, may be<br />
selected by agreement of the parties, who shall cooperate in good faith to select the<br />
arbitrator. The arbitration will be conducted by, and under the then-applicable<br />
rules of the CPR Institute for Dispute Resolution. All expedited procedures<br />
prescribed by the applicable rules will apply. Any required hearing fees and costs<br />
shall be paid by the parties as required by the applicable rules or as required by<br />
applicable law, but the arbitrator shall have the power to apportion such costs as<br />
the arbitrator deems appropriate.The arbitrator’s decision and award will be final<br />
and binding (subject to the appeal clause below), and judgment on the award<br />
rendered by the arbitrator may be entered in any court with jurisdiction.<br />
Section 4B: Terms & Conditions / Warranty 261
An appeal may be taken under the CPR Arbitration Appeal Procedure from any final<br />
award of any arbitral panel in any arbitration arising out of or related to this<br />
agreement that is conducted in accordance with the requirements of such Appeal<br />
Procedure. Unless otherwise agreed by the parties and the appeal tribunal, the<br />
appeal shall be conducted at the place of the original arbitration.<br />
If any party files a judicial or administrative action asserting a claim that is subject to<br />
arbitration and another party successfully stays such action or compels arbitration,<br />
the party filing that action must pay the other party’s costs and expenses incurred<br />
in seeking such stay or compelling arbitration, including attorney’s fees.<br />
Notices. You may get our current address for written notice by calling PCS Customer<br />
Service Solutions. Written notice to you is sent to your last known address in our<br />
invoicing records. Written notice is effective three days after deposit in the U.S.<br />
mail, postage prepaid, and properly addressed. Unless required by this Agreement<br />
or Applicable Laws, (1) you may notify us by calling PCS Customer Service Solutions,<br />
and (2) we may notify you by leaving a message for you on your PCS Phone,<br />
answering machine or with your answering service. Notice addresses may be<br />
changed by giving notice as provided in this section.<br />
Choice of Law; Jurisdiction. This Agreement is governed by and must be construed<br />
under federal law and the laws of the State of Kansas, without regard to choice of<br />
law principles.<br />
General. If either of us does not enforce any right or remedy available under this<br />
Agreement, that failure is not a waiver of the right or remedy for any other breach or<br />
failure by the other party. Our waiver of any requirement in any one instance is not a<br />
general waiver of that requirement and does not amend this Agreement. This<br />
Agreement is subject to any applicable federal and state law (collectively,<br />
“Applicable Laws”). If any part of this Agreement is held invalid or unenforceable,<br />
that part is interpreted consistent with Applicable Laws as nearly as possible to<br />
reflect the original intentions of the parties and the rest of this Agreement remains in<br />
full force and effect. Section headings are for descriptive purposes only and are not<br />
used to interpret this Agreement. You may not assign this Agreement to any other<br />
person or entity without our prior written approval. This Agreement (including any<br />
referenced documents and attachments) makes up the entire agreement between<br />
you and us and replaces all prior written or spoken agreements, representations,<br />
promises or understandings between you and us. The provisions of this Agreement<br />
that are contemplated to be enforceable after the termination of this Agreement<br />
survive termination of this Agreement. If there is a conflict, the Service Plan<br />
(including any Term Service Plan) controls over the Terms.<br />
Section 4B: Terms & Conditions / Warranty 262
Terms of Picture Mail Service<br />
The Picture Mail service (“Service”) – including access to and use of the services at<br />
www.picturemail.sprintpcs.com – is provided to you by Sprint under the following<br />
terms and conditions and incorporate the Terms and Conditions set forth at<br />
www.sprintpcs.com which include the Terms and Conditions of Service provided<br />
with your PCS Phone User’s Guide, terms regarding copyright and trademark<br />
matters, and other terms relating to the use of our services. Your use of the Service<br />
indicates your acceptance of all of these terms (collectively “Terms”). Sprint may<br />
change these Terms from time to time at our discretion with or without notice to<br />
you. Any changes will be posted on the Service.<br />
1. Eligibility<br />
The Service is provided to individuals who are at least 18 years old and to minors<br />
who have parental permission. We encourage parents and guardians to take an<br />
active role in protecting the privacy and security of their children. If you as a parent<br />
have any concerns regarding this issue, please feel free to contact us at<br />
picturemail@sprintpcs.com.<br />
2. Membership Fees<br />
Picture Mail is available at an additional monthly charge (in addition to any charges<br />
you may pay for PCS Vision services) through Sprint and provides you basic<br />
services, such as the ability to store and share pictures taken on select PCS Vision<br />
Picture Phones or devices. Additional features or services (beyond basic services)<br />
may also be available from time to time for an additional charge. If you have<br />
previously not signed up for the Service with activation of your PCS Service Plan,<br />
you may add this Service to your account for an additional monthly charge through<br />
a PCS Vision Picture Phone.<br />
3. Picture Mail Password<br />
We will have access to your Picture Mail Password and User Name. We may remind<br />
you of your password, at your request, by sending an email to the address you used<br />
when creating your account. We will not disclose your Picture Mail Password to<br />
third parties, but we may access your account if necessary to maintain the Service,<br />
to comply with lawful requests from governmental authorities, or in response to<br />
court orders, subpoenas, complaints.<br />
4. Photo Loss<br />
Sprint does not warrant that pictures or albums stored will not be deleted,<br />
modified or damaged. If pictures or images are particularly valuable, have<br />
sentimental or other intangible value or are otherwise unique or irreplaceable,<br />
reliable storage alternatives should be used, including hard copy duplication and<br />
electronic back up and storage.<br />
Section 4B: Terms & Conditions / Warranty 263
5. Use of Related Software<br />
Any software that is provided for download and installation on your personal<br />
computer or electronic device in connection with the Service is licensed under the<br />
terms and conditions of a separate software license agreement. These license<br />
agreements are available for your review upon download, installation and/or use of<br />
that software.<br />
6. Use of Picture Mail<br />
Solely for the purposes of displaying your pictures to selected persons and fulfilling<br />
your print orders, you grant us permission to use, download, upload, copy, print,<br />
display, reproduce, modify, publish, post, transmit and distribute any material<br />
included in your albums.<br />
7. Member Conduct<br />
(a) In consideration for use of the Service, you agree to provide true, accurate,<br />
current and complete information about you as prompted during the registration<br />
process, and to maintain and update this information to keep it true, accurate,<br />
current and complete.<br />
(b) You are responsible for maintaining the confidentiality of your Picture Mail<br />
Password and Account, and you agree to be fully responsible for all activities which<br />
occur through anyone’s use of your Picture Mail Password or account, whether or<br />
not authorized by you. You agree to notify Sprint immediately of any unauthorized<br />
use of your password or account or any other breach of security.<br />
(c) You must provide at your own expense all equipment and software required to<br />
use the Service, including computer and photography equipment, application<br />
software, modems, and access to the Internet. We are not responsible for delays<br />
resulting from incompatibility of such equipment and software, or from improper<br />
configuration or maintenance of such equipment and software.<br />
(d) While we do not control the content of any member submissions to the Service<br />
and do not have any obligation to monitor such content, if we have any reason to<br />
believe that any language, content, graphics or other materials contained within<br />
your content is inappropriate, we may, in our sole discretion, refuse to process any<br />
print orders, remove your pictures from our servers, suspend your account, restrict<br />
access to it, remove content from it, or terminate it.<br />
(e) You agree (1) not to use the Service for illegal purposes; (2) not to interfere with<br />
or disrupt the Service or servers or networks or software or data connected to the<br />
Service; (3) to comply with all requirements, procedures, policies and regulations of<br />
networks connected to the Service; and (4) to comply with all applicable laws<br />
regarding the transmission of technical data exported from the United States. You<br />
agree to abide by all applicable local, state, national, and international laws and<br />
regulations in your use of the Service and in your use of any software downloaded<br />
from the Service, including, without limitation, copyright, trademark, obscenity and<br />
defamation laws.<br />
Section 4B: Terms & Conditions / Warranty 264
(f) You agree not to interfere with the use and enjoyment of the Service by other<br />
users of the Service. You agree not to attempt to gain unauthorized access to other<br />
computer systems or networks connected to the Service.<br />
(g) You agree not to transmit through the Service, or upload to it (1) any pictures or<br />
other content in violation of the copyrights, privacy rights or other rights of any<br />
other person; (2) any unlawful, harassing, libelous, privacy invading, abusive,<br />
hateful, threatening, harmful, vulgar, defamatory, obscene or otherwise<br />
objectionable material of any kind; (3) any material that violates the rights of<br />
another, including, but not limited to, the intellectual property rights of another;<br />
(4) any material that harms minors; (5) any material that violates any applicable<br />
local, state, national, or international law or regulation; or (6) “junk mail,” “spam,”<br />
“chain letters,” or unsolicited mass distribution of email.<br />
8. Privacy Statement<br />
In order to register you as a member of the Service, we ask you to supply us with<br />
some basic information (email address, user selected Picture Mail Password, name)<br />
during the registration process and, occasionally, at other times while using the<br />
Service. All uses of your information will be in accordance with our privacy policy,<br />
as set forth in the following Privacy Policy. As this policy may be updated from time<br />
to time, a current version can be found at www.sprintpcs.com.<br />
PRIVACY POLICY<br />
(a) Sprint respects the privacy of its customers, and other individuals and<br />
businesses using the Websites owned and operated by Sprint and its Affiliates<br />
(“Sprint Websites”). This updated Privacy Policy effective October 22, 2001, is to<br />
keep you informed about the types of information collected on Sprint Websites and<br />
how the information is used and protected. The revised Privacy Policy includes<br />
information about advertisements on Sprint Websites and access to your account<br />
information.<br />
Sprint protects the privacy of its local, long distance and wireless customers<br />
consistent with the Federal Telecommunications Act and rules and regulations<br />
issued by the Federal Communications Commission.<br />
Sprint’s Privacy Policy for its high speed Internet services can be accessed at:<br />
www.sprint.com/privacypolicy/broadbandservices.<br />
There are two types of information that may be exchanged between the Sprint site<br />
and the user during each visit to a Sprint site. They are:<br />
1. General technical data transmitted between your computer and the Sprint site<br />
that does not identify you personally.<br />
2. Personally identifiable information that you voluntarily share. The types of<br />
personally identifiable information that you might share include your name,<br />
address, phone number, email address and credit card number.<br />
Section 4B: Terms & Conditions / Warranty 265
(b) Anonymous Information<br />
In order to provide you with the information and services that you look for from the<br />
Sprint Websites, Sprint gathers certain types of information from you that are not<br />
personally identifiable. This is called anonymous information and includes:<br />
1. The type of Internet browser you use when you visit<br />
2. The types of computer operating system you use<br />
3. The search engine you use to access the Sprint Websites (such as “AOL.com,”<br />
“Yahoo.com” or “Go.com”)<br />
4. The specific Sprint Website that you visit (sprint.com, sprintpcs.com, etc.).<br />
The anonymous information collected is not associated with you personally or<br />
your business. Sprint uses this anonymous information in the aggregate to improve<br />
Sprint Websites and the services we provide through those sites.<br />
(c) Use Of Cookies<br />
Sprint Websites may use “cookies” to collect the anonymous information described<br />
in this Privacy Policy. Cookies are bits of encrypted data that are loaded by a Sprint<br />
server onto your computer or other device when you visit a Sprint Website. The<br />
server can retrieve the cookies the next time you visit a site and use them to identify<br />
the computer as a return visitor. Sprint uses cookies to collect non-personally<br />
identifiable information and generically track usage patterns on the Sprint Websites<br />
in order to monitor activity and administer the sites. Sprint also uses information<br />
obtained from cookies to improve Sprint Websites, and make decisions concerning<br />
advertising, product offerings and services. Most users can disable cookies from<br />
their Internet browsers, receive a warning before a cookie is placed on their<br />
computer, and erase all cookies from their computer hard drives by following the<br />
instructions provided by the browser.<br />
(d) Advertisements On Sprint Websites<br />
Advertising companies deliver ads on some Sprint Websites. You should be aware<br />
that when you click on these ads, the advertising companies may also deploy<br />
cookies to receive anonymous information about ad viewing by Internet users on<br />
Sprint Websites and other Websites. This information is associated with your Web<br />
browser, but cannot be associated with your name or email address without your<br />
permission. Therefore, advertising companies may know where your computer<br />
goes on the Web, but they do not know who you are unless you tell them. Sprint<br />
does not provide personally identifiable information about its customers or Sprint<br />
Website visitors to these advertising companies.<br />
(e) Personally Identifiable Information<br />
Sprint may ask you to provide what is often referred to as “personally identifiable<br />
information” such as your name, address, telephone number and email address<br />
when you use Sprint Websites to: purchase a service or product online, enter a<br />
contest or sweepstakes, ask to receive information, respond to a survey, register<br />
with a Sprint Website, access your account, ask for a personalized service, request<br />
customer service online, or apply for a job. You always have the alternative of<br />
mailing or calling Sprint with the information requested if you do not wish to<br />
provide it online. Personally identifiable information provided at a Sprint Website<br />
Section 4B: Terms & Conditions / Warranty 266
to order Sprint services other than Internet services will be protected in the same<br />
manner as when the information is provided by other means such as over the<br />
telephone or by mail. We protect customer information obtained from the local,<br />
long distance and wireless service customers of Sprint consistent with federal laws<br />
governing telecommunications services and with regulations issued by the Federal<br />
Communications Commission. Sprint’s Privacy Policy for its Internet services can<br />
be accessed at: www.sprint.com/privacypolicy/broadbandservices.<br />
We use personally identifiable information provided at a Sprint Website in the<br />
following ways unless otherwise specified:<br />
1. For its intended purpose (such as to complete an online order for service).<br />
2. To provide you with information about new PCS Products and Services or<br />
products and services offered in conjunction with Sprint business partners.<br />
(f) Disclosure To Third Parties<br />
Sprint will not sell or disclose to outside parties any personally identifiable<br />
information obtained from a Sprint online service or the registration at a Sprint<br />
Website without your consent except under the following circumstances:<br />
1. When required by law,<br />
2. When disclosure is necessary to protect the safety of a customer, third party or<br />
Sprint’s property,<br />
3. If it is required in connection with any sale or transfer of all or a portion of<br />
Sprint’s assets.<br />
When Sprint uses agents, contractors or other companies to perform services on<br />
its behalf, Sprint will require that they protect your personally identifiable<br />
information consistent with this Privacy Policy. Sprint may share the anonymous<br />
information described in this Privacy Policy with third parties from time-to-time.<br />
(g) Email Communications<br />
Email is an increasingly popular communication tool through which you and your<br />
business may communicate with Sprint. Likewise, Sprint may use email to<br />
communicate with you, respond to your email, and to tell you about new products<br />
and services. If you do not wish to receive email promotions and new products and<br />
service announcements from Sprint, please follow the instructions that appear at<br />
the end of the email communication that you receive from Sprint to have your<br />
name removed from the list.<br />
(h) Security<br />
Sprint utilizes several encryption methods to ensure that the data you submit on<br />
any of the Sprint Websites is secure. Through this “secure session,” information<br />
that you input into a Sprint online order form will be sent and will arrive privately<br />
and unaltered at a Sprint server. This security prohibits access to your information<br />
by other companies and Web users.<br />
Section 4B: Terms & Conditions / Warranty 267
(i) Children<br />
Sprint does not intend to collect personally identifiable information from<br />
individuals under 18 years of age. If Sprint becomes aware that a user who is under<br />
18 is using a Sprint Website, Sprint will specifically instruct that individual that they<br />
are not to submit information on Sprint Websites without a parent or guardian’s<br />
consent. If a child has provided Sprint with personally identifiable information<br />
without the knowledge of Sprint, a parent or guardian of the child may contact<br />
Sprint at privacy@mail.sprint.com and Sprint will delete the child’s information from<br />
our existing files.<br />
(j) Links<br />
Some Sprint Websites contain links to other Websites that are owned and operated<br />
by parties other than Sprint. Please be aware that this Privacy Policy does not<br />
extend to any Websites other than those owned and controlled by Sprint.<br />
(k) Account Information<br />
You may always contact us at privacy@mail.sprint.com or by telephone or mail to<br />
verify your name, address, email address, telephone number and/or billing<br />
information. Sprint will correct any information that is inaccurate.<br />
(l) Questions<br />
If you have questions or comments regarding this Privacy Policy, you may contact<br />
us at privacy@mail.sprint.com. If you have submitted personally identifiable<br />
information, and would like that information deleted from our records, please<br />
contact us at our email address, privacy@mail.sprint.com. We will use reasonable<br />
efforts to delete that information from our files.<br />
(m) Updates<br />
Sprint may amend this Privacy Policy from time-to- time. These changes will be<br />
posted online.<br />
9. Usage and Storage<br />
We and our suppliers assume no responsibility for: (1) any full or partial loss,<br />
deletion or failure to store your pictures or any other data; (2) any notice or lack of<br />
notice of such loss, deletion or failure to store your data; or (3) any correct or<br />
erroneous informing of or failure to inform user of such loss, deletion or failure to<br />
store your data. From time to time we may establish an upper limit on the size of<br />
data storage that you are permitted to use on the Service and/or an upper limit on<br />
the frequency or amount of usage that you are permitted on the Service or related<br />
software. We may establish a reasonable period of time (for example, three<br />
months) such that if you do not use the Service at least once during such period, we<br />
may terminate the Service to you for non-use, and delete pictures and other data<br />
that you may have stored through the Service.<br />
Section 4B: Terms & Conditions / Warranty 268
10. No Resale of Service or Software<br />
Your membership account is intended only for personal, noncommercial use. You<br />
agree not to reproduce, duplicate, copy, sell, resell or exploit for any commercial<br />
purposes, any portion of the Service, use of the Service, access to the Service, or<br />
related software.<br />
11. Proprietary Rights<br />
You agree that content, including but not limited to software, text, pictures,<br />
graphics, video, music, sound, or other materials or information, contained in the<br />
Service or contained in sponsor advertisements or presented to you through the<br />
Service or advertisers is protected by copyrights, trademarks, service marks,<br />
patents, or other proprietary rights, laws, and/or treaties. You agree that you are<br />
permitted to use such materials and information only as expressly authorized by us<br />
or the true owner of the right in question and you may not copy, reproduce,<br />
transmit, distribute, or create derivative works of such materials or information<br />
without proper express, written authorization from us or the true owner of the<br />
right in question.<br />
12. Changes to the Service and Termination of the Service<br />
(a) We may change these Terms from time to time without notice to you. Should<br />
you object to any of these Terms or any changes to them, or should you become<br />
dissatisfied with the Service in any way, your only recourse is to immediately: (1)<br />
discontinue use of the Service; and (2) terminate the Service and notify us of the<br />
termination. Termination of the Service may, in some instances, require you to<br />
change your PCS Service Plan.<br />
(b) We may discontinue the Service or any feature or portion of the Service at any<br />
time, with or without notice. You agree that upon modification or discontinuance<br />
of the Service, we may delete the data you have stored on the Service.<br />
(c) You agree that we may terminate your membership in the Service and delete any<br />
and all information, posting, communications, albums and pictures at any time,<br />
without notice, if we believe: (1) that you have failed to use the Service at least<br />
once during a reasonable span of time as determined by us; (2) that you have<br />
violated or acted inconsistently with the letter or spirit of these Terms; (3) that you<br />
have violated our rights or the rights of other users or parties; or (4) that you have<br />
abused or misused the Service in any way, including but not limited to exceeding<br />
any limits that we may place on the amount of data that any individual may store on<br />
the Service.<br />
(d) We reserve the right at all times to disclose any information posted by you or any<br />
other user as necessary to satisfy any law, regulation or governmental request, or to<br />
edit, remove, or refuse to post any information or materials, in whole or in part,<br />
that in our sole discretion are objectionable or in violation of these terms and<br />
conditions.<br />
(e) Except as otherwise set forth in this provision, in the event your Service is<br />
terminated we will make reasonable efforts to provide 30 days prior notice before<br />
may delete any data from the Service.<br />
Section 4B: Terms & Conditions / Warranty 269
13. Disclaimers<br />
(a) We hereby disclaim any and all responsibility or liability for the accuracy,<br />
content, completeness, legality, reliability, operability or availability of information<br />
or material in this Service. We further disclaim any responsibility for the deletion,<br />
misdelivery, failure to store or untimely delivery of any information or material. We<br />
disclaim any responsibility for any harm resulting from downloading or accessing<br />
any information or material through the Service. You agree that you, the member,<br />
will bear all risk associated with any content that you access.<br />
(b) All processing of film, prints, slides, negatives or digital images is subject to our<br />
Terms. You agree that your sole remedy for any damage or loss of any materials that<br />
you submit to us for processing, printing, storage, transmission or other handling,<br />
even if caused by negligence or other fault, will only entitle you to replacement<br />
with a like amount of unexposed film and processing. EXCEPT FOR THE<br />
EXCLUSIVE REMEDY OF REPLACEMENT, THE HANDLING OF ANY FILM, PRINT,<br />
SLIDE, NEGATIVE OR DIGITAL IMAGE IS WITHOUT WARRANTY OR LIABILITY<br />
AND RECOVERY FOR ANY INCIDENTAL OR CONSEQUENTIAL DAMAGES IS<br />
EXCLUDED.<br />
(c) THIS SITE AND ALL PRODUCTS, SERVICES AND CONTENT PROVIDED<br />
THROUGH IT ARE PROVIDED “AS IS” AND “AS AVAILABLE” AND WITH NO<br />
WARRANTIES WHATSOEVER. TO THE FULLEST EXTENT PERMITTED BY<br />
APPLICABLE LAW, WE EXPRESSLY DISCLAIM ALL WARRANTIES OF ANY KIND,<br />
WHETHER EXPRESS OR IMPLIED, INCLUDING, BUT NOT LIMITED TO, IMPLIED<br />
WARRANTIES OF MERCHANTABILITY, FITNESS FOR A PARTICULAR PURPOSE,<br />
TITLE AND NON-INFRINGEMENT. WE DISCLAIM ANY WARRANTIES FOR THE<br />
SECURITY, RELIABILITY, TIMELINESS, AND PERFORMANCE OF THIS SERVICE,<br />
OR THAT THIS SITE OR OUR SERVER IS FREE OF VIRUSES OR OTHER HARMFUL<br />
COMPONENTS. WE DISCLAIM, TO THE FULLEST EXTENT PERMITTED BY LAW,<br />
ANY WARRANTIES FOR OTHER SERVICES OR GOODS RECEIVED THROUGH OR<br />
ADVERTISED ON THIS SERVICE OR RECEIVED THROUGH ANY LINKS PROVIDED<br />
IN THE SERVICE, AS WELL AS FOR ANY INFORMATION OR ADVICE RECEIVED<br />
THROUGH THE SERVICE OR THROUGH ANY LINKS PROVIDED IN THE SERVICE.<br />
(d) YOU EXPRESSLY AGREE THAT, TO THE MAXIMUM EXTENT PERMITTED BY<br />
APPLICABLE LAW, UNDER NO CIRCUMSTANCES SHALL SPRINT BE LIABLE TO<br />
ANY USER ON ACCOUNT OF THAT USER’S USE OR MISUSE OF AND RELIANCE<br />
ON THE SITE OR ITS ASSOCIATED PRODUCTS AND SERVICES. SUCH<br />
LIMITATION OF LIABILITY SHALL APPLY TO PREVENT RECOVERY OF DIRECT,<br />
INDIRECT, INCIDENTAL, CONSEQUENTIAL, SPECIAL, EXEMPLARY, AND<br />
PUNITIVE DAMAGES (EVEN IF WE HAVE BEEN ADVISED OF THE POSSIBILITY OF<br />
SUCH DAMAGES). SUCH LIMITATION OF LIABILITY SHALL APPLY WHETHER<br />
THE DAMAGES ARISE FROM USE OR MISUSE OF AND RELIANCE ON THE SITE,<br />
PRODUCTS OR SERVICES, FROM INABILITY TO USE THE SITE OR FROM THE<br />
INTERRUPTION, SUSPENSION, OR TERMINATION OF THE SITE OR DAMAGES<br />
INCURRED BY REASON OF OTHER SERVICES OR GOODS RECEIVED THROUGH<br />
OR ADVERTISED ON THIS SERVICE OR RECEIVED THROUGH ANY LINKS<br />
PROVIDED ON THIS SITE, AS WELL AS BY REASON OF ANY INFORMATION OR<br />
Section 4B: Terms & Conditions / Warranty 270
ADVICE RECEIVED THROUGH OR ADVERTISED ON THE SERVICES OR RECEIVED<br />
THROUGH ANY LINKS PROVIDED IN THE PRODUCTS AND SERVICES.<br />
(e) BECAUSE SOME JURISDICTIONS PROHIBIT THE EXCLUSION OF CERTAIN<br />
WARRANTIES OR THE EXCLUSION OR LIMITATION OF LIABILITY FOR<br />
CONSEQUENTIAL OR INCIDENTAL DAMAGES, THE ABOVE LIMITATION MAY<br />
NOT APPLY TO YOU. OUR OWN AND OUR SUPPLIERS’ TOTAL LIABILITY FOR<br />
DAMAGES, LOSSES, AND CAUSES OF ACTION, REGARDLESS OF LEGAL THEORY,<br />
WILL IN NO EVENT EXCEED THE AGGREGATE DOLLAR AMOUNT YOU HAVE<br />
PAID TO US UNDER THESE TERMS, OR US $25.00, WHICHEVER IS GREATER.<br />
14. Indemnity<br />
You agree to indemnify and hold Sprint and its parents, suppliers, licensors,<br />
subsidiaries, affiliates, officers, and employees harmless from any claim or demand,<br />
including reasonable attorneys’ fees, made by any third party due to or arising out<br />
of: (1) use of the Service by you or by anyone using your account; (2) violation of<br />
these Terms by you or by anyone using your account; or (3) violation or<br />
infringement by you, or by anyone using your account, of intellectual property<br />
rights or any other rights of any other person.<br />
15. General Provisions<br />
We may assign our rights and duties under these Terms to any third party at any<br />
time without notice to you. These Terms and the relationship between you and<br />
Sprint shall be governed by the laws of the State of California without regard to its<br />
conflict of law provisions. You and Sprint agree to submit to the personal and<br />
exclusive jurisdiction of the courts located within the State of California. You agree<br />
that regardless of any statute or law to the contrary, any claim or cause of action<br />
arising out of or related to use of the Service must be filed within one (1) year after<br />
such claim or cause of action arose or be forever barred. The failure of Sprint to<br />
exercise or enforce any right or provision of these Terms shall not constitute a<br />
waiver of such right or provision.<br />
If any provision of these Terms is found by a court of competent jurisdiction to be<br />
invalid, the parties nevertheless agree that the court should endeavor to give effect<br />
to the parties’ intentions as reflected in the provision, and that the other provisions<br />
of the Terms shall be valid and remain in full force and effect.<br />
Section 4B: Terms & Conditions / Warranty 271
Manufacturer’s Warranty<br />
Customer Limited Warranty<br />
SPRINT SPECTRUM, L.P., (Sprint) offers you a limited warranty that the enclosed<br />
subscriber unit (Product), including accessories in the product package, will be<br />
free from defects in material or workmanship as follows:<br />
SUBSCRIBER UNIT:<br />
A. SPRINT ONE (1) YEAR LIMITED WARRANTY: For a period of one (1) year from<br />
the date of purchase, Sprint will, at its option, either pay the parts and labor charges<br />
to any authorized PCS ® Phone service facility to repair or replace a defective<br />
product (with new or rebuilt parts/replacements). After this one (1) year period,<br />
you must pay all parts, shipping and labor charges.<br />
B. REPAIRS: For a period equal to the remainder of the original limited warranty<br />
period on an original Product or for the 180 days after the date of<br />
repair/replacement, whichever is longer, Sprint will repair or replace (with new or<br />
rebuilt replacement) defective parts or Product used in the repair or replacement<br />
of the original Product under this Limited Warranty.<br />
Proof of purchase in the from of a bill of sale or receipted invoice warranty repair<br />
document which is evidence that the Product is within the warranty period must<br />
be presented to obtain warranty service. This limited warranty is not transferable<br />
to any third party, including but not limited to any subsequent purchaser or owner<br />
of the Products.<br />
Transfer or resale of a Product will automatically terminate warranty coverage with<br />
respect to the Products.<br />
This limited warranty dose not cover and is void with respect to the following: (i)<br />
Products which have been improperly installed, repaired, maintained or modified<br />
(including the antenna); (ii) Products which have been subjected to misuse<br />
(including Products used in conjunction with hardware electrically or<br />
mechanically incompatible or used with accessories not supplied by Sprint), abuse<br />
accident, physical damage, abnormal operation, improper handling and storage,<br />
neglect, exposure to fire, water or excessive moisture or dampness or extreme<br />
changes in climate or temperature, (iii) Products operated outside published<br />
maximum ratings; (iv) cosmetic damage; (v) Products on which warranty stickers<br />
or Product serial numbers have been removed, altered, or rendered illegible; (vi)<br />
customer instruction; (vii) cost of installation, removal or reinstallation; (viii) signal<br />
reception problems (unless caused by defect in material and workmanship); (ix)<br />
damage the result of fire, flood, acts of God or other acts which are not the fault of<br />
Sprint and which the Product is not specified to tolerate, including damage caused<br />
by mishandling and blown fuses; (x) consumables (such as fuses); or (xi) any<br />
Products which have been opened, repaired, modified or altered by anyone other<br />
than Sprint or a Sprint authorized service center.<br />
Section 4B: Terms & Conditions / Warranty 272
This warranty does not cover customer education, instruction, installation, set up<br />
adjustments, or signal reception problems.<br />
This warranty is valid only in the United States.<br />
USE WITH ACCESSORIES NOT SUPPLIED BY SPRINT OR OTHERWISE NOT<br />
EXPRESSLY AUTHORIZED BY SPRINT MAY BE DANGEROUS.<br />
SPRINT SPECIFICALLY DISCLAIMS LIABILITY, AND SHALL HAVE NO<br />
OBLIGATION TO PROVIDE TO BUYER ANY OTHER REMEDY, FOR ANY AND ALL<br />
DIRECT, INDIRECT, SPECIAL, GENERAL, INCIDENTAL OR CONSEQUENTIAL<br />
DAMAGES, INCLUDING, BUT NOT LIMITED TO LOSS OF PROFITS, LOST SALES,<br />
LOSS OF USE OF THE PRODUCT, OR ANTICIPATED PROFITS ARISING OUT OF<br />
USE OF OR INABILITY TO USE ANY PRODUCT (FOR EXAMPLE, WASTED AIRTIME<br />
CHARGES DUE TO THE MALFUNCTION OF A PRODUCT), DAMAGE DUE TO<br />
IMPROPER OPERATION OR MAINTENANCE, INSTALLATION, CONNECTION TO<br />
IMPROPER VOLTAGE SUPPLY. OR ATTEMPTED REPAIR OF THE PRODUCT BY<br />
ANYONE OTHER THAN A FACILITY AUTHORIZED BY SPRINT. THIS WARRANTY<br />
DOES NOT COVER PRODUCTS SOLD AS IS OR WITH ALL FAULTS, OR<br />
CONSUMABLES, (SUCH AS FUSES). THIS WARRANTY DOES NOT APPLY WHEN<br />
THE MALFUNCTION RESULTS FROM USE OF THE PRODUCT IN CONJUNCTION<br />
WITH ACCESSORIES, PRODUCTS OR ANCILLARY OR PERIPHERAL EQUIPMENT<br />
NOT SUPPLIED BY OR EXPRESSLY AUTHORIZED FOR USE BY SPRINT, AND<br />
WHERE IT IS DETERMINED BY SPRINT THAT THERE IS NO FAULT WITH THE<br />
PRODUCT ITSELF.<br />
REPAIR OR REPLACEMENT, AS PROVIDED UNDER THE WARRANTY, IS YOUR<br />
SOLE AND EXCLUSIVE REMEDY FOR BREACH OF THE LIMITED WARRANTY. TO<br />
THE EXTENT PERMITTED BY APPLICABLE LAW,<br />
SPRINT MAKES NO OTHER WARRANTIES OF ANY KIND, EXPRESS OR IMPLIED,<br />
WITH RESPECT TO THE PRODUCTS FOR A PARTICULAR PURPOSE OR AGAINST<br />
INFRINGEMENT WITHIN THE TIME PERIOD SPECIFIED IN THE LIMITED<br />
WARRANTY OF MERCHANTABILITY OR FITNESS FOR A PARTICULAR PURPOSE<br />
ON THIS PRODUCT IS LIMITED IN DURATION TO THE DURATION OF THIS<br />
WARRANTY.<br />
Some States do not allow the exclusion or limitation of incidental or consequential<br />
damages, or allow limitations on how long an implied warranty last, so the above<br />
limitations or exclusions may not apply to you.<br />
This limited warranty gives you specific legal rights, and you may have other rights<br />
which vary from State to State.<br />
For other Warranty Service Information, please call PCS CUSTOMER SOLUTIONS at<br />
1- 888- 211- 4727.<br />
Section 4B: Terms & Conditions / Warranty 273
Copyright(c) 2004 ACCESS Systems America Inc. ACCESS, NetFront are registered trademarks or trademarks<br />
owned by ACCESS Co., Ltd. in Japan and selected countries worldwide. NetFront is a registered trademark of<br />
NetFront Communications, Inc.in the United States and is used under a license. Portions of this software are<br />
based in part on the work of the Independent JPEG Group.<br />
Powered by JBlend TM Copyright 1997-2004 Aplix Corporation. All right reserved. JBlend and all JBlend-based<br />
trademarks and logos are trademarks or registered trademarks of Aplix Corporation in Japan and other countries.<br />
Copyright © 2004 Sprint Spectrum L.P. All rights reserved. No reproduction in whole or in part without prior<br />
written approval. Sprint, the diamond logo design, and all other Sprint marks referenced herein are trademarks<br />
of Sprint Communications Company L.P. All other trademarks are property of their respective owners.<br />
Section 4B: Terms & Conditions / Warranty 274
Index<br />
A<br />
Abbreviated Dialing 30, 59<br />
Advanced Information 111<br />
Airplane Mode 54<br />
Alarm Clock 111<br />
Alert Notification 42<br />
Answering Calls 21<br />
Any Key Answer 58<br />
Area Name 48<br />
Auto Answer 56<br />
B<br />
Background 51<br />
Backlight Time Length 45<br />
Battery<br />
Capacity 16<br />
Charging 17<br />
Disposal 231<br />
Installing 16<br />
Removing 16<br />
Standby Time 16<br />
Talk Time 16<br />
C<br />
Calculator 112<br />
Call Alarm<br />
Adding 104<br />
Alerts 105<br />
Editing 106<br />
Erasing 103, 109<br />
Menu 105<br />
Viewing 106<br />
Call Forwarding 185<br />
Call Guard 77<br />
Call History<br />
Erasing 87<br />
Making a Call 85<br />
Options 85<br />
Prepending 87<br />
Saving 86<br />
Viewing 84<br />
Call Waiting 183<br />
Callback Number 62<br />
Caller ID 183<br />
Calling in Lock Mode 67<br />
Chat 207<br />
Contacts<br />
Adding 89, 93<br />
Dialing 29<br />
Editing 93, 95<br />
Erasing 92<br />
Finding 28, 90<br />
Options 92<br />
Saving 27<br />
Secret 97<br />
Current Time Setting 62<br />
D<br />
Dialing<br />
Abbreviated 30, 59<br />
Contacts 29<br />
Numbers With Pauses 28<br />
Options 20<br />
PCS Services 98<br />
Speed Dialing 30, 94, 148<br />
Voice-Activated Dialing 124<br />
Display Settings<br />
Area Name 48<br />
Background 51<br />
Backlight Time Length 45<br />
Display Screen 46<br />
Font Size 52<br />
Greeting 44<br />
Incoming Calls 47<br />
My Buddy 51<br />
Screen Saver 50<br />
Standby Mode 49<br />
<strong>Downloading</strong><br />
Accessing Menus 208<br />
Data Size 122<br />
Erasing 70, 122<br />
Icon Indication 121<br />
Sorting 121<br />
Viewing Memory 122<br />
Index 275
E<br />
Email 204<br />
Emergency Calling 25<br />
End-of-Call Options 27<br />
Event<br />
Adding 101<br />
Alerts 102<br />
Erasing 103, 109<br />
Menu 103<br />
Viewing 103, 106<br />
F<br />
FCC Notice 232<br />
Features 14<br />
Font Size 52, 199<br />
G<br />
Games<br />
<strong>Downloading</strong> 210<br />
Playing 211<br />
Greeting 44<br />
H<br />
Hard Pause 28<br />
Headset Mode 60<br />
Help 6<br />
I<br />
Icon Indication 121, 161<br />
In-Call Options 26<br />
Input Mode<br />
Alphabet Mode 33<br />
Numbers 34<br />
Preset Suffixes 34<br />
Smileys 34<br />
Symbols 34<br />
T9 Text Mode 32<br />
Instant Messaging 206<br />
L<br />
Language 63<br />
Limit Use 68<br />
Location Settings 53<br />
Lock Code 67<br />
Locking Phone 66<br />
Locking Picture 67<br />
Locking through SMS 71<br />
M<br />
Making Calls 18<br />
Making Ready Link Call 136, 137,<br />
138<br />
Menu Diagram 80<br />
Message Notification 61<br />
Messaging<br />
Displaying 194<br />
Folder<br />
Creating 200<br />
Drafts 196<br />
Editing 201<br />
Erasing 201, 202<br />
Outbox 197<br />
Font Size 199<br />
Moving a Message 201<br />
Options 197<br />
Picture Mail 194<br />
Prepending 199<br />
Sending 195, 196, 197<br />
Storage 194<br />
Mini Flashlight 63<br />
Missed Call Notification 25, 138<br />
Muting 24<br />
My Buddy 51<br />
My Shortcut 56<br />
N<br />
Net Guard 190<br />
Index 276
O<br />
Online Picture Mail<br />
Auto Delete 160<br />
Managing 170<br />
Options 172<br />
Sending 171<br />
Uploading 171<br />
Open/Close Flip Option 57<br />
P<br />
Passcode 71<br />
PCS Business Connection 221<br />
PCS Ready Link<br />
Adding 143, 144<br />
Alert 134, 150<br />
Contacts List 135<br />
Copying 141<br />
Default View 151<br />
Editing 145<br />
Erasing 147<br />
Finding 142<br />
Making Calls<br />
by Entering Number 138<br />
Contact 136<br />
Group 137<br />
Options 140<br />
Preparing 134<br />
Ready Link Guard 149<br />
Receiving 139<br />
Redialing 140<br />
Restarting 149<br />
Ringer Types 150<br />
Saving 142<br />
Setting 133<br />
Speakerphone 151<br />
Speed Dialing 148<br />
Updating 148<br />
PCS Services<br />
Call Forwarding 185<br />
Call Waiting 183<br />
Caller ID 183<br />
Customer Solutions 3, 5, 6, 65,<br />
71, 97, 273<br />
Directory Assistance 7<br />
Operator Services 7<br />
PCS Vision<br />
Chat 207<br />
<strong>Downloading</strong> 208<br />
Email 204<br />
Enabling and Disabling 72<br />
FAQs 222<br />
Games 210<br />
Launching 189<br />
Ringers 212<br />
Screen Savers 214<br />
Web 216<br />
PCS Voice Command 223<br />
Phone Number<br />
Dialing with Pauses 28<br />
Displaying 18<br />
Finding 28<br />
Saving 27<br />
PictureMail Password 154<br />
Pictures<br />
Auto Delete 160<br />
Flash 156<br />
Multiple Shots 157<br />
Options 155<br />
Self-timer 156<br />
Sending 162, 164<br />
Settings 159<br />
Shutter Sound 159<br />
Status Area 160<br />
Storing 165<br />
Taking 153<br />
Zoom 158<br />
Power-off Tone 40<br />
Premium Services Content 208<br />
Prepend Dialing 87, 199<br />
Preset Messages 61<br />
Preset Suffixes 34<br />
Index 277
Q<br />
Quiet Ringer 22<br />
R<br />
Resetting<br />
Phone 70<br />
Picture Account 70<br />
Through SMS 71<br />
Ringer<br />
Assigning 213<br />
<strong>Downloading</strong> 212<br />
Purchasing 213<br />
Tone Length 40<br />
Types 36<br />
Volume 24, 41<br />
Roaming<br />
Analog Networks 75<br />
Digital Networks 74<br />
Setting 76<br />
S<br />
Safety Guideline 226<br />
Scheduler<br />
Calendar 100<br />
Call Alarm 104<br />
Erasing 108, 109<br />
Event 101<br />
Memory 109<br />
Setting Holidays 100<br />
Setting the Time/Date 100<br />
To Do 107<br />
Screen Call<br />
Activating 129<br />
Erasing 131<br />
Recording 130, 131<br />
Reviewing 131<br />
Selecting Announcement 130<br />
Screen Savers<br />
Assigning 215<br />
<strong>Downloading</strong> 214<br />
Purchasing 215<br />
Secret Mode 97<br />
Security Menu<br />
Accessing 65<br />
Changing the Lock Code 67<br />
Locking Phone 66<br />
Unlocking Phone 66<br />
Shortcut 56<br />
Side Key Guard 58<br />
Silence All 43<br />
Sleep Mode 60<br />
Sound Settings<br />
Silence All 43<br />
Start-up/Power-off Tone 40<br />
Volume Settings 24, 41<br />
Speakerphone 23<br />
Special Number 69<br />
Speed Dialing 30, 94, 148<br />
Standby Time 16<br />
Start-up Tone 40<br />
Symbols 34<br />
T<br />
T9 Text Input 32<br />
Talk Time 16<br />
Three-Way Call 184<br />
To Do Items<br />
Adding 107, 108<br />
Deleting 108, 109<br />
Editing 107<br />
Viewing 107<br />
Tone Length 40<br />
TTY 55<br />
Turning On and Off 15<br />
2-Second Pause 28<br />
U<br />
Unlocking Phone 66<br />
Unmute 24<br />
Updates 203<br />
User Address 110<br />
User Name 187<br />
Index 278
V<br />
Version 110<br />
Voice Command<br />
Creating Address Book 224<br />
Getting Started 224<br />
Making a Call 225<br />
Voice Dial<br />
Erasing 125<br />
Programming 124<br />
Reviewing 125<br />
Using 124<br />
Voice Memo<br />
Erasing 128<br />
Options 127<br />
Recording 126<br />
Voice Prompt 40<br />
Voicemail<br />
Button Guide 178<br />
Clearing Message Icon 181<br />
Menu Key 182<br />
Message Alerts 177<br />
Notification 176<br />
Options 179<br />
Retrieving 177<br />
Setting Up 176<br />
Volume Settings<br />
During a Conversation 24<br />
Muting 24<br />
Ringer 24, 41<br />
W<br />
Warranty 272<br />
Web<br />
Launching 189<br />
Navigating 191<br />
Net Guard 190<br />
User Name 187<br />
World Clock 49, 112<br />
Index 279