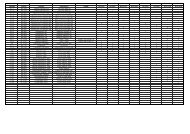
Contents List of Figures List of tables - Porkka
Contents List of Figures List of tables - Porkka
Contents List of Figures List of tables - Porkka

Create successful ePaper yourself
Turn your PDF publications into a flip-book with our unique Google optimized e-Paper software.
en<br />
7. THERMOSTAT SERVICE<br />
7.1. „IGLOO” thermostat<br />
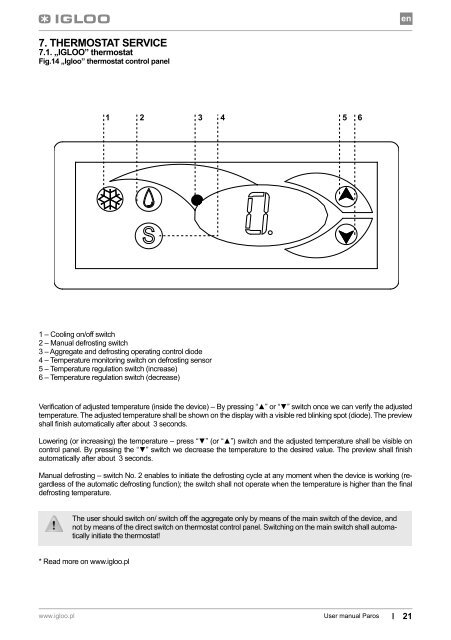
Fig.14 „Igloo” thermostat control panel<br />
1 2<br />
3 4 5 6<br />
1 – Cooling on/<strong>of</strong>f switch<br />
2 – Manual defrosting switch<br />
3 – Aggregate and defrosting operating control diode<br />
4 – Temperature monitoring switch on defrosting sensor<br />
5 – Temperature regulation switch (increase)<br />
6 – Temperature regulation switch (decrease)<br />
Verification <strong>of</strong> adjusted temperature (inside the device) – By pressing “▲” or “▼” switch once we can verify the adjusted<br />
temperature. The adjusted temperature shall be shown on the display with a visible red blinking spot (diode). The preview<br />
shall finish automatically after about 3 seconds.<br />
Lowering (or increasing) the temperature – press “▼” (or “▲”) switch and the adjusted temperature shall be visible on<br />
control panel. By pressing the “▼” switch we decrease the temperature to the desired value. The preview shall finish<br />
automatically after about 3 seconds.<br />
Manual defrosting – switch No. 2 enables to initiate the defrosting cycle at any moment when the device is working (regardless<br />
<strong>of</strong> the automatic defrosting function); the switch shall not operate when the temperature is higher than the final<br />
defrosting temperature.<br />
The user should switch on/ switch <strong>of</strong>f the aggregate only by means <strong>of</strong> the main switch <strong>of</strong> the device, and<br />
not by means <strong>of</strong> the direct switch on thermostat control panel. Switching on the main switch shall automatically<br />
initiate the thermostat!<br />
* Read more on www.igloo.pl<br />
www.igloo.pl<br />
User manual Paros<br />
21