You also want an ePaper? Increase the reach of your titles
YUMPU automatically turns print PDFs into web optimized ePapers that Google loves.
OPICO LIMITED<br />
South Road, Bourne, Lincs, PE10 9LG<br />
Tel: 01778 421111 email: ask@<strong>opico</strong>.co.uk<br />
Fax: 01778 425080 website: www.<strong>opico</strong>.co.uk<br />
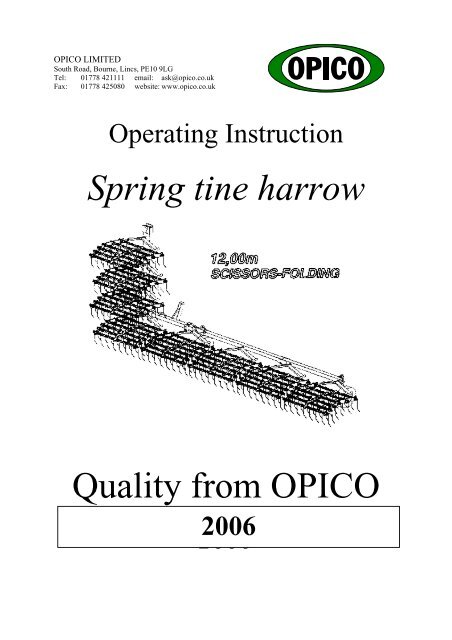
Operating Instruction<br />
Spring tine <strong>harrow</strong><br />
Quality from OPICO<br />
OUR ADVANTAGES ARE LYING IN THE DETAIL<br />
2006<br />
2000
Contents for<br />
Spring tine <strong>harrow</strong><br />
1. Declaration of EU conformity<br />
2. Safety instructions<br />
3. Harrow assembly instructions<br />
4. Working instructions<br />
4.1 Basic <strong>harrow</strong> adjustments<br />
4.2 Work in the field<br />
4.3 Safe use of <strong>harrow</strong><br />
5. Maintenance<br />
5.1 Daily<br />
5.2 Weekly<br />
5.3 Storage<br />
6. Spare <strong>parts</strong> list for Harrow
ATTENTION!!! very important!!!<br />
Safety instructions<br />
- Do not remain in the working area of the implement<br />
- It is prohibited to remain in the folding area of the implement<br />
during the process of folding – danger of being crushed<br />
- Put a mechanical support to prevent the implement from lowering,<br />
if you do repair or maintenaince work under the implement in the<br />
raised position on the tractor<br />
- Riding on the implement is not allowed, either during transport or<br />
during work<br />
- Lower the tractor linkage and machine when leaving the tractor seat<br />
(either in folded or unfolded position)<br />
- Take extra care when crossing or driving on slopes
3. Harrow assembly instructions<br />
Assembly instructions relate to Fig. 1 below<br />
A. Fit the support wheels, support beam and parking stand, secure with pins<br />
B. Attach the tractor lower links and top link to the <strong>harrow</strong>, adjust the top link until the<br />
<strong>harrow</strong> frame is horizontal, adjust the tractor lower link stabilisers so the machine is held<br />
stable and rigid<br />
C. Fit the hydraulic hose coupling (hydraulic folding models only) into the tractor hydraulic<br />
service, remove the safety pin on the auto lock mechanism, pull the auto lock handle,<br />
operate the tractor spool valve to unfold wings, lower fully to the ground<br />
NOTE: Single acting hydraulic cylinders are fitted with an accumulator<br />
pressurised at 8-10 bar (116-145 psi) when in the working position<br />
D. Fit the carrier forks for the <strong>harrow</strong> sections Ref. Fig. 2, securing with washer and roll pin.<br />
E. Hang the <strong>harrow</strong> beds onto the carrier fork with chains on the outside of the carrier tube<br />
using the last chain link and secure with safety pins<br />
F. Fit the stabiliser bars between adjoining carrier frames, adjust so the carrier frame is<br />
horizontal and secure with safety pins. Failure to fit the stabiliser bars will result in poor<br />
machine performance and damage to the machine<br />
G. Raise the tractor lift arms to lift the machine clear of the ground<br />
H. Lift up the rear support stand and depth wheels, secure with pins<br />
I. Operate the tractor spool valve to fold the wings to the upright transport position. The auto<br />
lock mechanism needs to be operated every time a hydraulic model is unfolded.<br />
J. Re-tighten all nuts and bolts after initial use<br />
C<br />
I<br />
B<br />
A<br />
D<br />
C<br />
I<br />
A<br />
H<br />
E<br />
A<br />
B<br />
G<br />
H Fig. 1
Placement of carrier forks<br />
It is important that the carrier frames are fitted in the correct position, with left and right hand forks postioned as shown in Fig. 2<br />
If the carrier forks are incorrectly mounted the stabiliser bars will not fit or operate correctly when the machine is folded into the transport<br />
position<br />
Harrow - 12m working width<br />
Fig. 2
4. Working Instructions<br />
4.1) Basic <strong>harrow</strong> adjustments<br />
Tine angle<br />
Fig. 3<br />
1. Raise the machine clear of the ground<br />
2. Remove the locking pin Ref. A Fig. 3 at the base of the adjusting handle<br />
3. Operate the adjusting handle Ref. B Fig. 3 to increase / decrease the agressiveness of<br />
the tines, there are ten possible settings. The flatter adjustment will produce less<br />
vigorous weeding than the steeper adjustment.<br />
4. Carry out the above operation on each individual <strong>harrow</strong> bed section. (Ensure that<br />
each section is adjusted to the same setting)<br />
Height setting<br />
1. Park the machine on a flat area<br />
2. Lower the machine until tine contact with the ground is made, adjust the top link to<br />
ensure the <strong>harrow</strong> bed is horizontal and tines are in even contact with the ground<br />
3. Set the depth wheels using the locking pin to suit the required effect, this will depend<br />
on crop, soil type & moisture and operating conditions. The ware pad on the carrier<br />
fork transfers pressure onto the <strong>harrow</strong> bed when working, the <strong>harrow</strong> bed must<br />
always be pressurised.<br />
4. The more aggressive tine setting required, the higher the wheels should be set<br />
4.2) Work in the field<br />
Spring tine <strong>harrow</strong> weeders can be used in a wide range of crops, including grassland,<br />
maize, winter and spring cereals, winter and spring pulses, potatoes and some<br />
vegetables crops. Different weed control strategies will be needed for different weeds,<br />
with the effectiveness of the <strong>harrow</strong> being dependent on the individual weed species<br />
present and their growth stage. Weeding timing, the number of passes and the intensity<br />
of weeding needs to be specific to the weed type present, the crop and soil conditions
4.2) Work in the field (cont)<br />
1. Use of the spring tine <strong>harrow</strong>:<br />
- Mechanical weed control<br />
- Aerating the soil structure<br />
- Activates natural nitrogen<br />
- To maintain optimum soil condition<br />
- Stimulating crop tillering<br />
- Scarifying the soil surface<br />
2. Blind Harrowing:<br />
Use to flush the weed bank prior to drilling this will improve crop<br />
establishment by reducing weed competition. Use immediately before<br />
or after planting to break soil cap and remove germinating weeds<br />
• For breaking soil caps, use the strongest pressure settings<br />
3. Grassland:<br />
For effective grassland management, use to rip out moss and dead<br />
thatch, open up the soil surface, improve aeration and encourage new<br />
growth. Improve manure dispersal and incorporation<br />
• A medium to strong pressure setting should be used for a single pass in<br />
grassland, to loosen weeds, remove dead thatch and scarify the ground<br />
surface. A second pass may be required depending on conditions<br />
4. Maize:<br />
Use to germinate weed seed in stale seedbeds and perform weed strikes<br />
pre drilling. Harrow pre-emergence to ‘blind <strong>harrow</strong>’. Spring <strong>harrow</strong>ing<br />
when maize plants are between 10-30cm<br />
• A less vigorous, flatter setting<br />
5. Winter Cereals:<br />
Use to germinate weed seed in stale seedbeds and perform weed strikes<br />
pre drilling. Weed pre-emergence & 6-7 days after sowing. When soil<br />
conditions allow, cereal crops should be autumn weeded at the 2-leaf<br />
stage (growth stage 13) onwards. Weeding in the spring should take<br />
place at the tillering stage (growth stage 22-30).<br />
• A medium to strong pressure setting should be used for a single pass in<br />
cereals (to loosen weeds), followed by second pass at a lower pressure<br />
setting<br />
6. Spring Cereals:<br />
Use to germinate seeds in stale seedbeds and perform weed strikes pre<br />
drilling. Weed pre-emergence 6-7 days after sowing. Early spring weed<br />
at the 2 nd leaf stage (growth stage 13) followed up with a second<br />
weeding at tillering stage (growth stage 22-30)<br />
• A medium to strong pressure setting should be used for a single pass in<br />
cereals (to loosen weeds), followed by second pass at a lower pressure<br />
setting
7. Field Beans:<br />
Use to germinate weed seed in stale seedbeds and perform weed strikes<br />
pre drilling. Early autumn or spring weeding at 8-leaf stage<br />
• A light <strong>harrow</strong> pressure setting to minimise crop damage<br />
8. Vegetables & Root crops:<br />
Pre-drilling, stale seedbed weed strikes (may knock edges of beds). Post<br />
emergence in-row weeding. Brassicas pre-emergence to germinate<br />
weed seed in stale seedbeds and perform weed strikes, three weeding<br />
passes up to 6 weeks after planting, with a maximum of 10 days gap<br />
between weeding<br />
• A low to medium setting<br />
4.3) Safe use of the <strong>harrow</strong><br />
1. Fully lower the machine to the ground, ensure the carrier fork is pressurising the<br />
<strong>harrow</strong> bed via the ware pads. Do not allow the <strong>harrow</strong> bed to operate loose, this will<br />
cause premature ware on the carrier chains and damage the machine<br />
2. The <strong>harrow</strong> is set up correctly when the tines vibrate vigorously from side to side as<br />
the <strong>harrow</strong> moves forward. This produces the most effective weeding & scarifying<br />
action.<br />
3. Operating speed will vary dependant on the type of work and conditions, the <strong>harrow</strong><br />
operates best between 6–12 km/h (3.5-7.5 m.p.h)<br />
4. The machine should be lifted clear of the ground when turning<br />
5. Do not reverse the tractor when the machine is in contact with the ground<br />
5.1) Daily<br />
1. Check all frame nuts and bolts are tight<br />
2. Check hydraulic hoses for damage<br />
3. Check tine condition & tine bolts<br />
5.2) Weekly<br />
5. Maintenance<br />
1. Lubricate all grease points on the machine<br />
2. Maintain a maximum tyre pressure of 2.5 bar (35 psi) [16x6.50-8]<br />
3. Check wheel nuts are tight<br />
5.3) Storage<br />
1. While out of use park on parking stands<br />
2. Ensure that the tines are not under any pressure / loading and are free floating<br />
3. Clean the machine thoroughly, and paint any bare metal<br />
4. Check for any oil leaks on hydraulic hoses and rams<br />
5. Grease hydraulic ram piston rod (if left unfolded)<br />
6. Oil / grease all pivots<br />
7. Check <strong>harrow</strong> section for ware and/or breakage
OPICO LIMITED<br />
South Road, Bourne, Lincs, PE10 9LG<br />
Tel: 01778 421111 email: ask@<strong>opico</strong>.co.uk<br />
Fax: 01778 425080 website: www.<strong>opico</strong>.co.uk<br />
Spare part list<br />
for<br />
Harrow


