High Pressure Washer Operator Manual - Karcher
High Pressure Washer Operator Manual - Karcher
High Pressure Washer Operator Manual - Karcher

You also want an ePaper? Increase the reach of your titles
YUMPU automatically turns print PDFs into web optimized ePapers that Google loves.
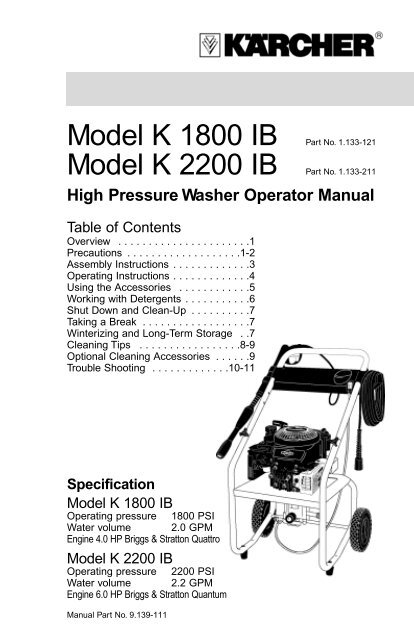
Model K 1800 IB Part No. 1.133-121<br />
Model K 2200 IB Part No. 1.133-211<br />
<strong>High</strong> <strong>Pressure</strong> <strong>Washer</strong> <strong>Operator</strong> <strong>Manual</strong><br />
Table of Contents<br />
Overview . . . . . . . . . . . . . . . . . . . . . .1<br />
Precautions . . . . . . . . . . . . . . . . . . .1-2<br />
Assembly Instructions . . . . . . . . . . . . .3<br />
Operating Instructions . . . . . . . . . . . . .4<br />
Using the Accessories . . . . . . . . . . . .5<br />
Working with Detergents . . . . . . . . . . .6<br />
Shut Down and Clean-Up . . . . . . . . . .7<br />
Taking a Break . . . . . . . . . . . . . . . . . .7<br />
Winterizing and Long-Term Storage . .7<br />
Cleaning Tips . . . . . . . . . . . . . . . . .8-9<br />
Optional Cleaning Accessories . . . . . .9<br />
Trouble Shooting . . . . . . . . . . . . .10-11<br />
Specification<br />
Model K 1800 IB<br />
Operating pressure 1800 PSI<br />
Water volume 2.0 GPM<br />
Engine 4.0 HP Briggs & Stratton Quattro<br />
Model K 2200 IB<br />
Operating pressure 2200 PSI<br />
Water volume 2.2 GPM<br />
Engine 6.0 HP Briggs & Stratton Quantum<br />
<strong>Manual</strong> Part No. 9.139-111
MODEL K 1800 IB/2200 IB OVERVIEW<br />
NOTE: Engines controls shown may appear different.<br />
Item Description<br />
1. Water inlet<br />
2. Detergent suction tube<br />
3. Oil fill cap<br />
4. Knob Assembly (two each):<br />
Hex Head Screw<br />
Serrated <strong>Washer</strong> Knob<br />
5. <strong>High</strong> pressure hose<br />
6. Detergent filter<br />
7. Handle<br />
8. Trigger gun safety lock<br />
9. Trigger gun<br />
10. Pull start<br />
11. Gas tank<br />
12. Vario spray wand<br />
13. <strong>High</strong> pressure outlet<br />
14. Accessory rack<br />
15. <strong>Manual</strong><br />
16. 4 screws for accessory<br />
rack (not pictured)<br />
12<br />
14<br />
10<br />
11<br />
9 8<br />
7 6<br />
5<br />
3<br />
4<br />
1<br />
2<br />
13<br />
14<br />
1<br />
NEVER!<br />
Never<br />
Never<br />
Never<br />
Never<br />
Never<br />
Never<br />
Never<br />
Never<br />
point nozzle at people or animals.<br />
drink alcohol or use drugs while operating this equipment.<br />
spray electrical connections, electrical outlets or fixtures.<br />
add fuel with the engine running or operate where fuel has been spilled.<br />
touch hot surfaces or allow accessories to contact hot surfaces.<br />
operate in an enclosed space, exhaust fumes are dangerous.<br />
operate near utilities with open flames.<br />
operate without the water turned on and never use hot water.
IMPORTANT PRECAUTIONS – Read First!<br />
Safety Warnings<br />
When using this product basic<br />
precautions should always be followed:<br />
• Read all the instructions before using the<br />
product.<br />
• FIRE HAZARD! Do not add fuel with the<br />
engine running. Do not operate if fuel has<br />
been spilled. Instead move the machine to<br />
a different location and avoid creating<br />
sparks.<br />
• Operate and fuel machine in a well ventilated<br />
area, free of devices featuring an<br />
open pilot or flame such as boilers, water<br />
heaters, etc.<br />
• <strong>High</strong> pressure jets can be dangerous<br />
if subject to misuse. The jet must not be<br />
directed at persons, animals, electrical<br />
devices, or the machine itself.<br />
• Wear safety goggles.<br />
• Do not use acids, solvents, or any other<br />
flammable material in this product. These<br />
products can cause physical injuries to the<br />
operator and irreversible damage to the<br />
machine.<br />
• The machine has hot surfaces which can<br />
cause burns. Operate the unit in a safe<br />
environment and away from children.<br />
• Do not allow the high pressure hose to<br />
come into contact with the muffler guard.<br />
• Do not leave the machine running<br />
unattended.<br />
• Learn how to stop the machine and<br />
release pressure quickly. Be thoroughly<br />
familiar with the controls.<br />
• Stay alert — watch what you are doing.<br />
• Do not operate the product when fatigued<br />
or under the influence of alcohol or drugs.<br />
• Do not stand on unstable surfaces. Stand<br />
with both feet balanced at all times.<br />
• The Gun Safety Lock PREVENTS the<br />
trigger from accidentally being engaged.<br />
This safety feature DOES NOT lock trigger<br />
in the on position.<br />
Water Supply<br />
(Cold Water Only)<br />
• Water hose must be at least 3/4 inch in<br />
diameter.<br />
• Flow rate of water supply must not fall<br />
below 2.5 GPM (gallons per minute).<br />
• Flow rate can be determined by running<br />
the water for one minute into an empty<br />
5-gallon container.<br />
• The water supply temperature must not<br />
exceed 104°F/40°C.<br />
• Never use the pressure washer to draw in<br />
water contaminated with solvents, e.g.<br />
paint thinners, gasoline, oil, etc.<br />
• Always prevent debris from being drawn<br />
into the unit by using a clean water<br />
source.<br />
We strongly recommend that this high pressure<br />
washer not be left running for periods of<br />
5 minutes or longer without the trigger gun<br />
being engaged.<br />
This Kärcher high pressure washer is<br />
equipped with thermal protection to extend<br />
the life of your pressure washer. The thermal<br />
protector will automatically activate at a predetermined<br />
high temperature ejecting hot<br />
water before resetting. This ensures that the<br />
pump does not become damaged.<br />
Caution<br />
• Follow the maintenance instructions<br />
specified in the manual.<br />
• This machine has been designed for<br />
use with cleaning detergent supplied<br />
or recommended by the manufacturer.<br />
The use of other cleaning detergents<br />
may affect the operation of the<br />
machine and void the warranty.<br />
2
ASSEMBLY INSTRUCTIONS<br />
Step 1 Slide the handle through the<br />
accessory rack.<br />
Step 2 Align the holes of the accessory<br />
rack to the handle and fasten the four (4) screws.<br />
3<br />
Step 3 Check oil level. Oil level should<br />
always be between the “FULL” and “ADD”<br />
marks on the dipstick. Be sure the machine is<br />
level when checking the oil level. (Refer to the<br />
engine’s operating manual for seasonal<br />
grades.)<br />
Step 4 Insert the detergent tray into one<br />
of the slots of your choice and screw in the<br />
fastener. Fill with the proper detergent for<br />
your cleaning project.<br />
Important! Do not run the engine with a<br />
high or low oil level as this can cause<br />
engine damage. If you have further<br />
questions regarding the engine, please<br />
refer to the engine’s operating manual<br />
included with the unit.<br />
You are now ready to<br />
operate your <strong>Karcher</strong><br />
<strong>Pressure</strong> <strong>Washer</strong>.<br />
Step 5 Fill gas tank with unleaded<br />
gasoline. Do not use leaded gasoline.
OPERATING INSTRUCTIONS<br />
NOTE: Engines controls shown may appear different.<br />
Step 1 Connect the high pressure hose to the<br />
unit’s high pressure outlet.<br />
Step 2 Insert the Vario spray wand<br />
into the gun. Push in and turn clockwise<br />
to lock spray wand in place.<br />
4<br />
Step 3 Connect<br />
garden hose to unit’s<br />
water inlet.<br />
Step 4 Connect garden<br />
hose to the cold water<br />
source and turn water on<br />
completely.<br />
Step 5 Trigger the gun to<br />
eliminate trapped air, wait for a steady<br />
flow of water to emerge<br />
from the spray nozzle.<br />
Step 6 Model K 1800 IB:<br />
Slide the throttle control to the fast<br />
position. Then push primer ball three<br />
times. Wait 3 seconds between each<br />
push.<br />
Note: in cold weather push 5 times<br />
Step 6 Model K 2200 IB: Slide the throttle control<br />
to the fast position. Thenmove the choke lever<br />
to the “CHOKE” position (only if engine is<br />
cool).After starting, move the choke to “RUN”.<br />
Step 7 Pull the starter handle. If<br />
the engine fails to start after 3 pulls<br />
squeeze the trigger gun to release pressure,<br />
and repeat step 7.
USING THE ACCESSORIES<br />
Vario spray wand<br />
The Vario spray wand allows you to adjust the cleaning pressure. To clean at maximum pressure,<br />
the Vario wand must be positioned to the high pressure setting (+). To apply detergent,<br />
the wand must be positioned to the low pressure setting (-).<br />
For high pressure turn<br />
wand collar in the plus<br />
(+) direction.<br />
For low pressure turn<br />
wand collar in the<br />
minus (-) direction.<br />
5<br />
WARNING TO AVOID SERIOUS<br />
INJURY, NEVER POINT SPRAY<br />
NOZZLE AT YOURSELF, OTHER<br />
PERSONS OR ANIMALS
WORKING WITH DETERGENT<br />
Detergents can only be applied at low pressure (-).<br />
Step 1 Install the Vario spray wand and<br />
set the Vario spray wand to the low pressure<br />
setting (-) by turning the wand collar. The<br />
wand must be set in the low pressure<br />
(-) position to apply detergents.<br />
For best results see Cleaning Tips<br />
on pages 8 & 9 for specific information<br />
on how to clean<br />
different surfaces.<br />
Step 2<br />
Adjust the filter end of the<br />
detergent tube for light (-), or maximum (+)<br />
detergent coverage.<br />
Step 3 Fill a container with <strong>Karcher</strong><br />
detergent. Place the filter end of detergent<br />
suction tube into the container.<br />
Always Use Kärcher<br />
Detergents for Best Results.<br />
Kärcher biodegradable detergents are<br />
specially formulated to protect the<br />
environment and your pressure washer.<br />
The special formula won’t clog the suction<br />
tube filter and will protect the internal parts<br />
of the pressure washer for a longer life.<br />
For Kärcher Detergents, check your<br />
retailer or call:<br />
In USA Call:<br />
1-800-537-4129<br />
or visit our website:<br />
www.karcher-usa.com<br />
The following Kärcher detergents<br />
are available:<br />
• Vehicle Wash • House Wash<br />
• Degreaser • Deck Wash<br />
• All Purpose Cleaner<br />
6<br />
Step 4 With the engine running, pull<br />
trigger to operate unit: Liquid detergent is<br />
drawn into the unit and mixed with water.<br />
Apply detergent to work area. Do not allow<br />
detergent to dry on surface.<br />
Caution: Never use:<br />
• Bleach, Chlorine products and other<br />
corrosive chemicals<br />
• Liquids containing solvents<br />
(i.e., paint thinners, gasoline, oils)<br />
• Tri-sodium phosphate products<br />
• Ammonia products<br />
• Acid-based products<br />
These chemicals will harm the unit and<br />
will damage the surface being cleaned.
SHUTTING DOWN & CLEAN-UP<br />
Step 1 Remove<br />
detergent suction tube<br />
from container and insert<br />
into one gallon of fresh<br />
water. Siphon water at low<br />
pressure for one minute.<br />
Step 2<br />
Turn off the<br />
engine.<br />
Step 3<br />
Turn off the water<br />
source.<br />
Step 4<br />
Press trigger to<br />
release water<br />
pressure.<br />
7<br />
Step 5 Disconnect the<br />
garden hose from the<br />
water inlet on the unit.<br />
Step 6 Disconnect the high pressure hose from the<br />
high pressure outlet and engage the gun safety lock.<br />
TAKING A BREAK... five minutes or more<br />
Step 1 Turn off the<br />
engine.<br />
Step 2 Press trigger to<br />
release water pressure.<br />
Step 3 Engage gun<br />
safety lock.<br />
WINTERIZING AND LONG-TERM STORAGE<br />
1. Disconnect all water connections.<br />
2. Start the machine for a few seconds, until<br />
the water which had remained in the pump<br />
exits. Turn off immediately.<br />
3. Drain the gas and oil from the engine.<br />
4. Do not allow high pressure hose to<br />
become kinked.<br />
5. Store the machine and accessories in<br />
a room which does not reach freezing<br />
temperatures. The machine should not be<br />
placed near an open flame i.e. furnace,<br />
hot water heater etc.<br />
Caution: Failure to follow the above directions<br />
will result in damage to the pump<br />
assembly and accessories.
CLEANING TIPS<br />
Deck Cleaning<br />
(with or without detergent)<br />
Pre-rinse deck and surrounding area with<br />
fresh water. If using Kärcher Deck Wash,<br />
place detergent suction tube directly into<br />
cleaning solution and apply to surface at low<br />
pressure. For best results, limit your work<br />
area to smaller sections of approximately 25<br />
square feet. Allow Kärcher Deck Wash to<br />
remain on surface 1-3 minutes. Do not allow<br />
detergent to dry on surface. Rinse at high<br />
pressure in a long sweeping motion keeping<br />
the spray nozzle approximately 3-6 inches<br />
from the cleaning surface. Always clean<br />
from top to bottom and from left to right.<br />
When moving on to a new section of the<br />
cleaning surface, be sure to overlap the previous<br />
section to eliminate stop marks and<br />
ensure a more even cleaning result.<br />
Caution: Do not use rotating nozzle spray<br />
wand on wood surface as it may cause<br />
damage.<br />
House Siding<br />
(with or without detergent)<br />
Pre-rinse cleaning surface with fresh water.<br />
If using Kärcher House Wash, place detergent<br />
suction tube directly into cleaning solution<br />
and apply to surface at low pressure<br />
(for best results, limit your work area<br />
to sections of approximately 6 feet and<br />
always apply detergent from bottom to top).<br />
Allow <strong>Karcher</strong> House Wash to remain on<br />
surface 1-3 minutes. Do not allow detergent<br />
to dry on surface, if surface appears to be<br />
drying, simply wet down surface with fresh<br />
water. If needed, use special Wash Brush<br />
Attachment to remove stubborn dirt. Rinse<br />
at high pressure from top to bottom in an<br />
even sweeping motion keeping the spray<br />
nozzle approximately 6 inches from the<br />
cleaning surface.<br />
Caution: Do not use rotating nozzle spray<br />
wand on siding as it may cause damage.<br />
Cement Patios,<br />
Brick and Stone<br />
(with or without detergent)<br />
Pre-rinse cleaning surface with fresh water.<br />
If using <strong>Karcher</strong> All Purpose Cleaner, place<br />
detergent suction tube directly into cleaning<br />
solution and apply to surface at low pressure.<br />
For best results, limit your work area<br />
to smaller sections of approximately 25<br />
square feet. Allow Kärcher All Purpose<br />
Cleaner to remain on surface 1-3 minutes.<br />
Do not allow detergent to dry on surface.<br />
Rinse at high pressure in a sweeping<br />
motion keeping the spray nozzle approximately<br />
3-6 inches from the cleaning surface.<br />
Always clean from top to bottom and from<br />
left to right. For removing extremely stubborn<br />
stains, use Kärcher Rotating Nozzle<br />
Spray Wand.<br />
Cars, Boats & Motorcycles<br />
(with or without detergent)<br />
Pre-rinse vehicle with fresh water. If using<br />
<strong>Karcher</strong> Vehicle Wash, place detergent suction<br />
tube directly into cleaning solution and<br />
apply to surface at low pressure. For best<br />
results, clean one side of vehicle at a time<br />
and always apply detergent from bottom to<br />
top, do not allow detergent to dry on surface.<br />
If needed, use special Wash Brush<br />
Attachment to remove stubborn dirt. Rinse<br />
at high pressure in a sweeping motion keeping<br />
the spray nozzle approximately 6-8 inches<br />
from the cleaning surface (distance<br />
should increase when rinsing pin-striping<br />
or other sensitive surfaces). Always clean<br />
from top to bottom and from left to right. For<br />
best results, wipe surface dry with a<br />
chamois or soft dry cloth.<br />
Caution: Do not use rotating nozzle spray<br />
wand on vehicles as it may<br />
cause damage.<br />
8
CLEANING TIPS - continued<br />
9<br />
Barbecue Grills, Outdoor Power<br />
Equipment &<br />
Gardening Tools<br />
(with or without detergent)<br />
Pre-rinse cleaning surface with fresh water. If<br />
using Kärcher All Purpose Cleaner or<br />
Degreaser, place detergent suction tube<br />
directly into cleaning solution and apply<br />
detergent at low pressure. Allow Kärcher<br />
detergent to remain on surface 1-3 minutes.<br />
Do not allow detergent to dry on surface.<br />
Rinse at high pressure keeping the spray<br />
nozzle approximately 3-6 inches from the<br />
cleaning surface. For removing extremely<br />
stubborn dirt, it may be necessary to move<br />
the spray nozzle even closer to the surface<br />
for greater dirt cutting action. To remove<br />
caked on mud from garbage cans, lawn<br />
mower blades, wheel barrels or other<br />
non-sensitive metal surfaces, you may<br />
want to use the <strong>Karcher</strong> Rotating Nozzle<br />
Spray Wand.<br />
Caution: Do not use rotating nozzle spray<br />
wand on cloth, plastic or other sensitive surfaces<br />
as it may cause damage.<br />
Patio & Lawn Furniture<br />
(with or without detergent)<br />
Pre-rinse furniture and surrounding area with<br />
fresh water. If using Kärcher All Purpose<br />
Cleaner, place detergent suction tube directly<br />
into cleaning solution and apply to surface<br />
at low pressure. Allow Kärcher All Purpose<br />
Cleaner to remain on surface 1-3 minutes.<br />
Do not allow detergent to dry on surface. If<br />
needed use special Wash Brush Attachment<br />
to remove stubborn dirt. Rinse at high pressure<br />
in a sweeping motion keeping the spray<br />
nozzle approximately 3-6 inches from the<br />
cleaning surface. For best results, clean from<br />
top to bottom and from left to right. Caution:<br />
Do not use rotating nozzle spray wand on<br />
patio or lawn furniture as it may cause damage.<br />
Recommendations<br />
• Before cleaning any surface an inconspicuous<br />
area should be cleaned to test spray<br />
pattern and distance for maximum cleaning<br />
results.<br />
• If painted surfaces are pealing or chipping,<br />
use extreme caution as pressure washer<br />
may remove the loose paint from the<br />
surface.<br />
OPTIONAL CLEANING ACCESSORIES<br />
Optional cleaning accessories are available to further enhance your cleaning capabilities:<br />
See accessories order form for product descriptions and ordering instructions.<br />
• Rotating Wash Brush<br />
• Wash Brush<br />
• House Washing Wand<br />
• Extension Wand<br />
• Rotating Spray Wand<br />
• Flexible Spray Wand<br />
• Underbody Spray Wand<br />
• Telescopic Spray Wand<br />
• Pipe Drain Cleaner<br />
• Floor Washing Tool<br />
• Sandblasting Attachment<br />
• Detergent Foamer Attachment<br />
• Water Pumping Kit<br />
• Water Suction Hose<br />
• Extension Hose 25’
TROUBLE SHOOTING<br />
Symptom Cause Solution<br />
Engine will not start<br />
No gasoline.<br />
Fill gas tank.<br />
Low oil level.<br />
Add oil.<br />
Choke is not in correct<br />
position.<br />
Slide choke lever to “CHOKE”<br />
position.<br />
Model K 1800 IB:<br />
Engine needs to be<br />
primed<br />
Model K 1800 IB:<br />
Slide the throttle control to the fast<br />
position. Then push primer ball<br />
three times. Wait 3 seconds<br />
between each push.<br />
Note: in cold weather push 5 times<br />
For additional<br />
engine problems<br />
refer to the engine<br />
owners manual.<br />
Engine throttle is not in<br />
correct position.<br />
<strong>Pressure</strong> built up in the<br />
high pressure washer.<br />
Position the throttle to “FAST”.<br />
Squeeze the trigger to release the<br />
pressure.<br />
Unit does not reach<br />
high pressure.<br />
Diameter of garden hose<br />
is too small.<br />
Replace with a 3/4 inch garden<br />
hose.<br />
10<br />
Water supply is restricted.<br />
Check garden hose for kinks, leaks<br />
and blockage.<br />
Not enough inlet water supply.<br />
Open water source full force.<br />
Water inlet filter is clogged.<br />
Remove filter and rinse out in warm<br />
water.<br />
Spray wand is in low<br />
pressure position.<br />
Turn spray wand tip to high pressure<br />
position.<br />
Output pressure<br />
varies high and low.<br />
Not enough inlet water supply.<br />
Turn water on full force. Check garden<br />
hose for kinks, leaks or blockage.<br />
Pump is sucking air.<br />
Check that hoses and fittings are air<br />
tight. Turn off machine and purge<br />
pump by squeezing trigger gun until<br />
a steady flow of water emerges<br />
through the nozzle.<br />
Water inlet filter is clogged.<br />
Remove filter and rinse out in warm<br />
water.<br />
Discharge nozzle is<br />
obstructed.<br />
Blow out or remove debris with a<br />
fine needle.<br />
Calcified gun, hose or<br />
spray wand.<br />
Run distilled vinegar through<br />
detergent suction tube.
TROUBLE SHOOTING - continued<br />
Symptom Cause Solution<br />
No detergent.<br />
Detergent suction tube not<br />
properly connected to the<br />
machine.<br />
Check connection.<br />
Detergent is too thick.<br />
Dilute detergent, for best results<br />
use Kärcher detergent.<br />
Filter on detergent suction<br />
tube is clogged.<br />
Run warm water through filter to<br />
remove debris.<br />
Damaged or clogged<br />
detergent suction tube.<br />
Remove obstruction or replace<br />
detergent suction tube.<br />
Spray wand is in high<br />
pressure position.<br />
Turn spray wand tip to low pressure<br />
position.<br />
Discharge nozzle is<br />
obstructed.<br />
Blow out or remove debris with a<br />
fine needle.<br />
Garden hose<br />
connection leaks.<br />
Loose fitting.<br />
Missing/worn rubber washer.<br />
Tighten fittings.<br />
Insert new washer.<br />
11<br />
Spray wand leaks.<br />
Spray wand not properly<br />
attached.<br />
Insert the spray wand into the trigger<br />
gun. Carefully press in against the<br />
spring tension and twist into the<br />
locked position.<br />
Broken o-ring or plastic<br />
insert.<br />
Call Kärcher customer service<br />
hotline and order repair kit<br />
(part no. 2.883-111.0).<br />
Pump is noisy.<br />
Pump is sucking air.<br />
Check that hoses and fittings are air<br />
tight. Turn off machine and purge<br />
pump by squeezing trigger gun until<br />
a steady flow of water emerges<br />
through the nozzle.<br />
Water leaks from<br />
pump (up to 10 drops<br />
per minute<br />
is permissible).<br />
Loose fittings.<br />
Thermal protection device<br />
has been activated.<br />
Check that all fittings are tight.<br />
Thermal protection device will<br />
automatically reset.<br />
Water seals are damaged<br />
or worn.<br />
Call service center.<br />
Oil Drip.<br />
Oil seals are damaged or<br />
worn.<br />
Call service center.<br />
If you encounter any additional<br />
difficulties not listed, please call<br />
our service center for help.<br />
<strong>Karcher</strong> Customer Support USA<br />
1-800-537-4129