How to obtain X.509 Certificates - Innominate Security Technologies ...
How to obtain X.509 Certificates - Innominate Security Technologies ...
How to obtain X.509 Certificates - Innominate Security Technologies ...

Create successful ePaper yourself
Turn your PDF publications into a flip-book with our unique Google optimized e-Paper software.
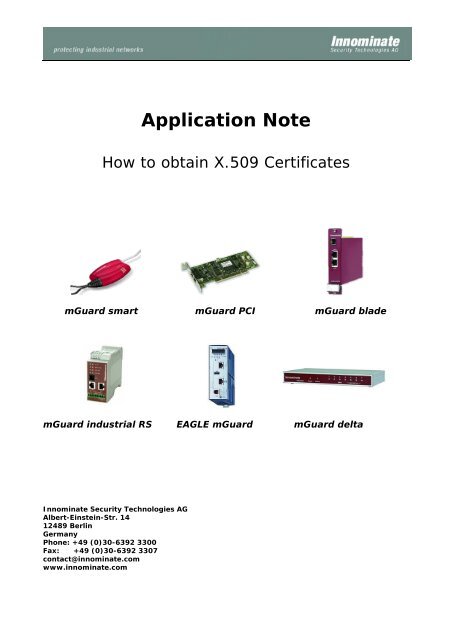
Application Note<br />
<strong>How</strong> <strong>to</strong> <strong>obtain</strong> <strong>X.509</strong> <strong>Certificates</strong><br />
mGuard smart mGuard PCI mGuard blade<br />
mGuard industrial RS EAGLE mGuard mGuard delta<br />
<strong>Innominate</strong> <strong>Security</strong> <strong>Technologies</strong> AG<br />
Albert-Einstein-Str. 14<br />
12489 Berlin<br />
Germany<br />
Phone: +49 (0)30-6392 3300<br />
Fax: +49 (0)30-6392 3307<br />
contact@innominate.com<br />
www.innominate.com
Application Note: <strong>How</strong> <strong>to</strong> <strong>obtain</strong> <strong>X.509</strong> <strong>Certificates</strong><br />
CONTENTS<br />
1 Disclaimer _______________________________________________________________________________ 3<br />
2 Introduction _____________________________________________________________________________ 4<br />
3 OpenSSL _________________________________________________________________________________ 5<br />
3.1 Create self signed <strong>Certificates</strong> ____________________________________________________________ 6<br />
3.1.1 Creating a password protected RSA Key ________________________________________________ 6<br />
3.1.2 Creating the OpenSSL Configuration File _______________________________________________ 7<br />
3.1.3 Creating the mGuard Certificate _______________________________________________________ 8<br />
3.1.4 Creating the PKCS#12 File ___________________________________________________________ 9<br />
3.2 Using a Certification Authority (CA) Environment ___________________________________________ 10<br />
3.2.1 Preparing the CA environment _______________________________________________________ 10<br />
3.2.2 Modifying the OpenSSL Configuration File _____________________________________________ 11<br />
3.2.3 Create the CA Certificate and Key ____________________________________________________ 13<br />
3.2.4 Create a Certificate Request for the mGuard ___________________________________________ 14<br />
3.2.5 Sign the mGuard’s Certificate Request with the CA______________________________________ 15<br />
3.2.6 Creating the mGuard’s PKCS#12 File (Machine Certificate)_______________________________ 16<br />
3.2.7 Example: Obtaining <strong>X.509</strong> <strong>Certificates</strong> for a VPN Connection between two mGuards _________ 17<br />
4 XCA_____________________________________________________________________________________ 18<br />
4.1 Options ______________________________________________________________________________ 18<br />
4.2 Create a Certificate Template____________________________________________________________ 19<br />
4.3 Create a Certification Authority (CA) Certificate ____________________________________________ 20<br />
4.4 Create a Client Certificate _______________________________________________________________ 21<br />
4.5 Certificate Export ______________________________________________________________________ 22<br />
4.6 Signing a Certificate Request with the CA _________________________________________________ 22<br />
4.7 Certificate Revocation List (CRL) _________________________________________________________ 23<br />
4.8 Required <strong>Certificates</strong> - Examples_________________________________________________________ 24<br />
4.8.1 VPN between two mGuards__________________________________________________________ 24<br />
4.8.2 VPN between mGuard and Netscreen 5GT/204/5400____________________________________ 24<br />
4.8.3 VPN between mGuard and Cisco VPN 3000 Concentra<strong>to</strong>r Series __________________________ 25<br />
4.8.4 L2TP/IPsec connection between Windows client and mGuard ____________________________ 25<br />
4.8.5 VPN between SafeNet SoftRemote and mGuard ________________________________________ 25<br />
5 Microsoft Certification Authority (CA) Server ____________________________________________ 26<br />
5.1 Request the mGuard Certificate from the Certification Authority ______________________________ 26<br />
5.2 Issue the mGuard Certificate Request on the MS CA Server__________________________________ 28<br />
5.3 Retrieve the issued mGuard Certificate ___________________________________________________ 28<br />
5.4 Export of the mGuard Machine Certificate _________________________________________________ 29<br />
5.5 Export of the mGuard Certificate_________________________________________________________ 31<br />
Document ID: AN201002907-004 Version: 1.00 Page 2 of 32
Application Note: <strong>How</strong> <strong>to</strong> <strong>obtain</strong> <strong>X.509</strong> <strong>Certificates</strong><br />
1 Disclaimer<br />
© <strong>Innominate</strong> <strong>Security</strong> <strong>Technologies</strong> AG<br />
Oc<strong>to</strong>ber 2007<br />
“<strong>Innominate</strong>” and “mGuard” are registered trademarks of the <strong>Innominate</strong> <strong>Security</strong> <strong>Technologies</strong> AG. All<br />
other brand names or product names are trade names, service marks, trademarks, or registered trade<br />
marks of their respective owners.<br />
mGuard technology is protected by the German patents #10138865 and #10305413. Further national<br />
and international patent applications are pending.<br />
No part of this documentation may be reproduced or transmitted in any form, by any means without prior<br />
written permission of the publisher.<br />
All information contained in this documentation is subject <strong>to</strong> change without previous notice. <strong>Innominate</strong><br />
offers no warranty for these documents. This also applies without limitation for the implicit assurance of<br />
scalability and suitability for specific purposes.<br />
In addition, <strong>Innominate</strong> is neither liable for errors in this documentation nor for damage, accidental or<br />
otherwise, caused in connection with delivery, output or use of these documents.<br />
This documentation may not be pho<strong>to</strong>copied, duplicated or translated in<strong>to</strong> another language, either in<br />
part or in whole, without the previous written permission of <strong>Innominate</strong> <strong>Security</strong> <strong>Technologies</strong> AG.<br />
Document ID: AN201002907-004 Version: 1.00 Page 3 of 32
Application Note: <strong>How</strong> <strong>to</strong> <strong>obtain</strong> <strong>X.509</strong> <strong>Certificates</strong><br />
2 Introduction<br />
The enrolment of certificates requires a certification authority (CA) which issues public key certificates for<br />
a specific period of time. A CA can be a private (in-house) CA, run by your own organization, or a public<br />
CA. A public CA is operated by a third party that you trust <strong>to</strong> validate the identity of each client or server<br />
<strong>to</strong> which it issues a certificate.<br />
There are several <strong>to</strong>ols available for creating and managing certificates, as for example Microsoft<br />
Certification Authority (CA) Server, OpenSSL and XCA. This application note explains how <strong>to</strong> create<br />
<strong>X.509</strong> certificates with those <strong>to</strong>ols for setting up a VPN connection using <strong>X.509</strong> certificates as<br />
authentication method.<br />
The scope of this document is not <strong>to</strong> be a complete user’s guide for the described <strong>to</strong>ols. It shall help you<br />
getting familiar with them and <strong>to</strong> create the required certificates in a short term.<br />
Document ID: AN201002907-004 Version: 1.00 Page 4 of 32
Application Note: <strong>How</strong> <strong>to</strong> <strong>obtain</strong> <strong>X.509</strong> <strong>Certificates</strong><br />
3 OpenSSL<br />
OpenSSL is available for several platforms (Linux, UNIX, Windows) and can be downloaded from the<br />
Internet. We have used OpenSSL 0.9.8a on a Windows XP platform. Please refer <strong>to</strong><br />
http://www.openssl.org for getting further information about OpenSSL and the supported command line<br />
options.<br />
OpenSSL provides various ways for specifying the required options. You can enter them at the command<br />
line, specify them in a configuration file or you’ll be prompted <strong>to</strong> enter them when the openssl command<br />
is executed. When using configuration files, you can either specify all required parameters in one single<br />
file or use different ones, depending on the kind of certificate you want <strong>to</strong> create. The OpenSSL<br />
configuration file which comes with OpenSSL is called openssl.cnf. Please note that Windows hides the file<br />
extension .cnf, even if you’ve configured the Windows Explorer not <strong>to</strong> do so. Therefore we use the<br />
extension .conf.<br />
In the following chapters we will explain how <strong>to</strong> create self signed certificates with OpenSSL and how <strong>to</strong><br />
setup a CA environment as well. You can use self signed certificates if you only need a small number of<br />
certificates for establishing VPN connections between mGuards. If appliances from other manufacturers<br />
are involved in the VPN connection or if you need certificates for a huge number of mGuards then you<br />
should use the CA environment.<br />
Here is a small legend with file extensions we will use for the created files and their meaning. All files<br />
that will be created will have one of these extensions:<br />
key<br />
csr<br />
crt<br />
p12<br />
- Private key (Restrictive permissions should be set on this).<br />
- Certificate Request (This will be signed by the CA in order <strong>to</strong> create the<br />
certificate. Afterwards it is not needed and can be deleted).<br />
- Certificate (This can be publicly distributed).<br />
- PKCS#12 export of the certificate, containing its private and public key.<br />
Document ID: AN201002907-004 Version: 1.00 Page 5 of 32
Application Note: <strong>How</strong> <strong>to</strong> <strong>obtain</strong> <strong>X.509</strong> <strong>Certificates</strong><br />
3.1 Create self signed <strong>Certificates</strong><br />
This chapter explains how <strong>to</strong> create self signed certificates which must not be signed by a Certification<br />
Authority (CA). You can use self signed certificates if you only need a small number of certificates for<br />
establishing VPN connections between mGuards. You need <strong>to</strong> execute the described steps for each<br />
mGuard for which a certificate is required.<br />
Basically you can use the examples of the following chapters for creating the certificates. You only need<br />
<strong>to</strong> adjust the parameters in the section mGuard_dn of the OpenSSL configuration file mGuard.conf (refer<br />
<strong>to</strong> Creating the OpenSSL configuration file).<br />
3.1.1 Creating a password protected RSA Key<br />
At first create the private key <strong>to</strong> use when creating the mGuard certificate. The private key is protected<br />
by a pass phrase (password). The pass phrase will be requested whenever you use this RSA private key<br />
for anything, so make sure you remember it.<br />
Following is the syntax <strong>to</strong> create a password-protected private RSA key:<br />
openssl genrsa - -out <br />
Option<br />
genrsa<br />
-<br />
-out <br />
<br />
Description<br />
This command generates an RSA private key.<br />
Specifies the algorithm <strong>to</strong> be used for encrypting the private key (using a password<br />
supplied by the user).<br />
The output filename.<br />
The size of the private key <strong>to</strong> generate in bits. This must be the last option<br />
specified. The default is 512.<br />
Example:<br />
C:\ssl>openssl genrsa -out mGuard.key -des3 1024<br />
Loading 'screen' in<strong>to</strong> random state - done<br />
Generating RSA private key, 1024 bit long modulus<br />
................................++++++<br />
.............++++++<br />
e is 65537 (0x10001)<br />
Enter pass phrase for mGuard.key: - choose a memorable pass phrase <strong>to</strong> use for this key<br />
Verifying - Enter pass phrase for mGuard.key: - type your pass phrase again for verification<br />
C:\ssl><br />
The pass phrase will be requested whenever you use this certificate for anything, so make sure you<br />
remember it. This command will create a file called mGuard.key, containing the mGuard certificate<br />
private key.<br />
Document ID: AN201002907-004 Version: 1.00 Page 6 of 32
Application Note: <strong>How</strong> <strong>to</strong> <strong>obtain</strong> <strong>X.509</strong> <strong>Certificates</strong><br />
3.1.2 Creating the OpenSSL Configuration File<br />
In our example we have named the configuration file mGuard.conf. The "req" section of the configuration<br />
file is used when creating certificate requests, and supplies defaults and length limits (if specified) for the<br />
various distinguished name fields. Some of these fields (e.g. commonName) will be different for each<br />
certificate request, while others will use the default (e.g. countryName). In our examples the "req"<br />
section contains the following options:<br />
[ req ]<br />
prompt<br />
distinguished_name<br />
x509_extensions<br />
string_mask<br />
[ mGuard_dn ]<br />
countryName<br />
countryName_default<br />
organizationName<br />
organizationName_default<br />
organizationalUnitName<br />
organizationalUnitName_default<br />
commonName<br />
= yes<br />
= mGuard_dn<br />
= mGuard_ext<br />
= utf8only<br />
= Country Name (2 letter code)<br />
= DE<br />
= Organization Name (company)<br />
= <strong>Innominate</strong> <strong>Security</strong> <strong>Technologies</strong> AG<br />
= Organizational Unit Name (department, division)<br />
= Support<br />
= Common Name (hostname, IP, or your name)<br />
#emailAddress<br />
= Email Address<br />
#emailAddress_default =<br />
#localityName<br />
= Locality Name (city, district)<br />
#localityName_default =<br />
#stateOrProvinceName<br />
= State or Province Name (full name)<br />
#stateOrProvinceName_default =<br />
[ mGuard_ext ]<br />
basicConstraints<br />
= CA:false<br />
Contents of the configuration file mGuard.conf<br />
The section mGuard_dn is called when the distinguished name of the certificate is created. In the<br />
example above we have only used four parameters and commented out emailAddress, localityName and<br />
stateOrProvinceName. Apart of this we have defined default values (*_default) for consistency reasons<br />
and less typing. We don’t have specified a default value for commonName because this field will be<br />
different for each certificate request. You’ll be prompted <strong>to</strong> modify or enter those values when calling<br />
openssl with the option req.<br />
Document ID: AN201002907-004 Version: 1.00 Page 7 of 32
Application Note: <strong>How</strong> <strong>to</strong> <strong>obtain</strong> <strong>X.509</strong> <strong>Certificates</strong><br />
3.1.3 Creating the mGuard Certificate<br />
Now create the mGuard certificate based on the RSA private key you have created previously. The output<br />
file contains the public key only and needs <strong>to</strong> be imported on the remote VPN gateway as connection<br />
certificate.<br />
Following is the syntax <strong>to</strong> create the mGuard certificate:<br />
openssl req -new -config -days 365 -key -keyform PEM<br />
-sha256 -x509 -outform PEM -out <br />
Option<br />
Description<br />
req<br />
The req command primarily creates and processes certificate requests. It can<br />
additionally create self signed certificates when the option –x509 is specified.<br />
-new<br />
This option generates a new certificate request.<br />
-config <br />
This allows an alternative configuration file <strong>to</strong> be specified.<br />
-days <br />
When the -x509 option is being used this specifies the number of days the<br />
certificate will be valid.<br />
-key <br />
This specifies the file <strong>to</strong> read the private key from. This is the filename containing<br />
the RSA private key you’ve created in the previous step.<br />
-keyform PEM<br />
The format of the private key file specified in the -key argument.<br />
-sha256<br />
This specifies the message digest <strong>to</strong> sign the request with.<br />
-x509 This option outputs a self signed certificate instead of a certificate request.<br />
-outform PEM<br />
This specifies the output format.<br />
-out <br />
This specifies the output filename <strong>to</strong> write <strong>to</strong>.<br />
Example:<br />
C:\ssl>openssl req -new -config mGuard.conf -days 365 -key mGuard.key -keyform PEM -sha256 -x509 -outform PEM<br />
-out mGuard.crt<br />
Enter pass phrase for mGuard.key: - enter the password of the mGuard’s private key<br />
You are about <strong>to</strong> be asked <strong>to</strong> enter information that will be incorporated<br />
in<strong>to</strong> your certificate request.<br />
What you are about <strong>to</strong> enter is what is called a Distinguished Name or a DN.<br />
There are quite a few fields but you can leave some blank<br />
For some fields there will be a default value,<br />
If you enter '.', the field will be left blank.<br />
-----<br />
Country Name (2 letter code) [DE]: - we have kept the default value<br />
Organization Name (company) [<strong>Innominate</strong> <strong>Security</strong> <strong>Technologies</strong> AG]: - we have kept the default value<br />
Organizational Unit Name (department, division) [Support]: - we have kept the default value<br />
Common Name (hostname, IP, or your name) []:mGuard - we have entered the common name for this certificate<br />
C:\ssl><br />
This command will create the certificate called mGuard.crt, containing the public key. This certificate is a<br />
self signed certificate valid for 365 days.<br />
Document ID: AN201002907-004 Version: 1.00 Page 8 of 32
Application Note: <strong>How</strong> <strong>to</strong> <strong>obtain</strong> <strong>X.509</strong> <strong>Certificates</strong><br />
3.1.4 Creating the PKCS#12 File<br />
This file combines the private and public key and is the mGuard’s machine certificate which needs <strong>to</strong> be<br />
imported through the menu Authentication -> <strong>Certificates</strong>, tab Machine Certificate. You’ll be prompted <strong>to</strong><br />
enter a password which protects the PKCS#12 export of the certificate against unauthorized usage.<br />
Following is the syntax <strong>to</strong> create the mGuard machine certificate:<br />
openssl pkcs12 -export -in -inkey -out <br />
Option<br />
pkcs12<br />
-export<br />
-in <br />
-inkey <br />
-out <br />
Description<br />
The pkcs12 command allows PKCS#12 files <strong>to</strong> be created and parsed.<br />
This option specifies that a PKCS#12 file will be created rather than parsed.<br />
The filename <strong>to</strong> read the certificate from. The format of the file must be PEM. This<br />
is the mGuard’s certificate you have created in the previous step.<br />
File <strong>to</strong> read private key from. This is the file which contains the private key of the<br />
mGuard’s certificate.<br />
The filename <strong>to</strong> write certificates and private keys <strong>to</strong>. They are all written in PEM<br />
format.<br />
Example:<br />
C:\ssl>openssl pkcs12 -export -in mGuard.crt -inkey mGuard.key -out mGuard.p12<br />
Loading 'screen' in<strong>to</strong> random state - done<br />
Enter pass phrase for mGuard.key: - enter the password of the mGuard’s private key<br />
Enter Export Password: - choose a memorable pass phrase <strong>to</strong> use for this machine certificate<br />
Verifying - Enter Export Password: - type your pass phrase again for verification<br />
C:\ssl><br />
This command will create a file called mGuard.p12, containing the mGuard’s certificate public und<br />
private key. The file is protected by the entered password.<br />
Document ID: AN201002907-004 Version: 1.00 Page 9 of 32
Application Note: <strong>How</strong> <strong>to</strong> <strong>obtain</strong> <strong>X.509</strong> <strong>Certificates</strong><br />
3.2 Using a Certification Authority (CA) Environment<br />
This chapter explains how <strong>to</strong> setup OpenSSL <strong>to</strong> act as certification authority (CA). A certificate request<br />
must be signed by the CA <strong>to</strong> become a valid certificate. You should use the CA environment if appliances<br />
from other manufacturers are involved in the VPN connection or if you need certificates for a huge<br />
number of mGuards.<br />
Basically you can use the examples of the following chapters for creating the certificates. You only need<br />
<strong>to</strong> follow the instructions and adjust the parameters in the section req_dn of the OpenSSL configuration<br />
file openssl.conf (refer <strong>to</strong> chapter Modifying the OpenSSL configuration file) <strong>to</strong> your company needs.<br />
3.2.1 Preparing the CA environment<br />
First of all we will create a direc<strong>to</strong>ry structure where all certificate stuff will be kept. In the following<br />
examples we use C:\CA as root direc<strong>to</strong>ry. The following subdirec<strong>to</strong>ries need <strong>to</strong> be created:<br />
Subdirec<strong>to</strong>ry<br />
.\certs<br />
.\newcerts<br />
.\private<br />
Purpose<br />
Direc<strong>to</strong>ry where the certificates will be placed.<br />
Direc<strong>to</strong>ry where OpenSSL puts the created certificates in PEM (unencrypted) format<br />
and in the form cert_serial_number.pem (eg 07.pem). OpenSSL requires this<br />
direc<strong>to</strong>ry, so we create it.<br />
Direc<strong>to</strong>ry for s<strong>to</strong>ring the private keys. Be sure that you set restrictive permissions<br />
<strong>to</strong> this direc<strong>to</strong>ry so that they can be read only by user with the appropriate<br />
privileges. If anyone steals your private keys things could get really bad.<br />
Apart of the direc<strong>to</strong>ry tree the following two files need <strong>to</strong> be created:<br />
• index.txt: This file is used as certificate “database” by OpenSSL. To create this file:<br />
o Open a DOS prompt.<br />
o Switch <strong>to</strong> the CA root direc<strong>to</strong>ry (in our example C:\CA).<br />
o Execute the command copy NUL: index.txt. This command creates the empty file index.txt.<br />
• serial: This file contains the certificate serial number counter. This counter will be incremented<br />
au<strong>to</strong>matically by OpenSSL when its value has been used for creating a certificate. To create this file:<br />
o Open a DOS prompt.<br />
o Switch <strong>to</strong> the CA root direc<strong>to</strong>ry (in our example C:\CA).<br />
o Execute the command echo 0001 > serial. This command creates the file serial with the<br />
initial serial number 0001.<br />
Document ID: AN201002907-004 Version: 1.00 Page 10 of 32
Application Note: <strong>How</strong> <strong>to</strong> <strong>obtain</strong> <strong>X.509</strong> <strong>Certificates</strong><br />
3.2.2 Modifying the OpenSSL Configuration File<br />
We have named the OpenSSL configuration file openssl.conf and placed it in<strong>to</strong> the CA root direc<strong>to</strong>ry (in<br />
our example C:\CA). The OpenSSL configuration file has multiple sections. Each section is used for a<br />
different purpose, and the sections include the following:<br />
• ca, CA_default: Defines certification authority configuration.<br />
• policy_any: Defines request policies.<br />
• req, req_dn: Defines request defaults.<br />
In our examples the configuration file has the following entries:<br />
[ req ]<br />
prompt<br />
= yes<br />
default_bits = 1024<br />
distinguished_name<br />
= req_dn<br />
x509_extensions<br />
= req_ext<br />
string_mask<br />
= utf8only<br />
[ ca ]<br />
default_ca<br />
= CA_default<br />
[ CA_default ]<br />
dir = .<br />
certs<br />
= $dir/certs<br />
database<br />
= $dir/index.txt<br />
new_certs_dir<br />
= $dir/newcerts<br />
certificate<br />
serial<br />
private_key<br />
= $dir/certs/ca.crt<br />
= $dir/serial<br />
= $dir/private/ca.key<br />
default_md<br />
= sha1<br />
default_days = 365<br />
x509_extensions<br />
policy<br />
[ req_dn ]<br />
countryName<br />
countryName_default<br />
organizationName<br />
organizationName_default<br />
organizationalUnitName<br />
organizationalUnitName_default<br />
commonName<br />
# Not used in our example<br />
#emailAddress<br />
#localityName<br />
#stateOrProvinceName<br />
[ policy_any ]<br />
countryName<br />
organizationName<br />
organizationalUnitName<br />
commonName<br />
# Not used in our example<br />
#emailAddress<br />
#localityName<br />
#stateOrProvinceName<br />
[ req_ext ]<br />
basicConstraints<br />
= req_ext<br />
= policy_any<br />
= Country Name (2 letter code)<br />
= DE<br />
= Organization Name (company)<br />
= <strong>Innominate</strong> <strong>Security</strong> <strong>Technologies</strong> AG<br />
= Organizational Unit Name (department, division)<br />
= Support<br />
= Common Name (hostname, IP, or your name)<br />
= Email Address<br />
= Locality Name (city, district)<br />
= State or Province Name (full name)<br />
= supplied<br />
= supplied<br />
= optional<br />
= supplied<br />
= optional<br />
= optional<br />
= optional<br />
= critical, CA:false<br />
[ ca_ext ]<br />
basicConstraints<br />
= critical, CA:true, pathlen:0<br />
keyUsage<br />
= critical, cRLSign, keyCertSign<br />
Contents of the file openssl.conf<br />
Document ID: AN201002907-004 Version: 1.00 Page 11 of 32
Application Note: <strong>How</strong> <strong>to</strong> <strong>obtain</strong> <strong>X.509</strong> <strong>Certificates</strong><br />
Section Option Description<br />
[ req ]<br />
This section is called when requesting a certificate by calling the openssl command with the option<br />
req.<br />
prompt<br />
If set <strong>to</strong> the value no this disables prompting of certificate fields and<br />
just takes values from the configuration file directly. You should<br />
enable this option for being able <strong>to</strong> enter the common name or <strong>to</strong><br />
modify the default values of the certificate’s distinguished name for<br />
each requested certificate.<br />
default_bits<br />
This specifies the default key size in bits. If not specified then 512 is<br />
used.<br />
distinguished_name This specifies the section containing the distinguished name fields <strong>to</strong><br />
prompt for when generating a certificate or certificate request. In<br />
our example this section is called [ req_dn ].<br />
x509_extensions<br />
This specifies the configuration file section containing a list of<br />
extensions <strong>to</strong> add <strong>to</strong> certificate generated when the -x509 switch is<br />
used. It can be overridden by the -extensions command line<br />
switch.<br />
string_mask<br />
This option masks out the use of certain string types in certain<br />
fields. If the utf8only option is used then only UTF8Strings will be<br />
used: this is the PKIX recommendation in RFC2459 after 2003.<br />
[ ca ]<br />
This section is called when signing certificate requests by calling the openssl command with the<br />
option ca.<br />
default_ca<br />
If the -name command line option is used, then it names the<br />
section <strong>to</strong> be used. Otherwise the section <strong>to</strong> be used must be named<br />
in the default_ca option of the ca section of the configuration file,<br />
in our example [ CA_default ].<br />
[ CA_default ] This section is called when signing certificate requests by calling the openssl command with the<br />
option ca, referenced by the default_ca option of the ca section.<br />
dir<br />
Root direc<strong>to</strong>ry of the CA environment. If the configuration file is<br />
located in this direc<strong>to</strong>ry and if you execute all openssl command<br />
from this direc<strong>to</strong>ry, you simply can specify “dir = .”.<br />
certs<br />
<strong>Certificates</strong> output direc<strong>to</strong>ry.<br />
database<br />
The text database file <strong>to</strong> use (manda<strong>to</strong>ry parameter). This file must<br />
be present though initially it will be empty.<br />
new_certs_dir<br />
It specifies the direc<strong>to</strong>ry where new certificates will be placed.<br />
Manda<strong>to</strong>ry.<br />
certificate<br />
Location and filename of the CA certificate.<br />
serial<br />
A text file containing the next serial number <strong>to</strong> use in hex.<br />
Manda<strong>to</strong>ry. This file must be present and contain a valid serial<br />
number.<br />
private_key<br />
Location and filename of the file which contains the CA’s private<br />
key.<br />
default_md<br />
This option specifies the digest algorithm <strong>to</strong> use. Possible values<br />
include md5 sha1. If not present then MD5 is used. This option can<br />
be overridden on the command line.<br />
default_days<br />
The default number of days the certificate will be valid. This default<br />
value can be overridden by the -days command line switch.<br />
x509_extensions<br />
This specifies the configuration file section containing a list of<br />
extensions <strong>to</strong> add <strong>to</strong> certificate generated when the -x509 switch is<br />
used. It can be overridden by the -extensions command line<br />
switch.<br />
[ req_dn ]<br />
This specifies the parameters containing the distinguished name fields <strong>to</strong> prompt for when<br />
generating a certificate or certificate request, referenced by the distinguished_name option of<br />
the req section. If the prompt option in the req section is absent or set <strong>to</strong> yes then the section<br />
contains field prompting information. is the field name being used, for example<br />
commonName (or CN).<br />
=<br />
“prompt”<br />
The "prompt" string is used <strong>to</strong> ask the user <strong>to</strong> enter the relevant<br />
details.<br />
_default<br />
=”default field value”<br />
If the user enters nothing then the default value is used if no default<br />
value is present then the field is omitted.<br />
[ policy_any ] This option defines the CA "policy" <strong>to</strong> use and needs <strong>to</strong> be specified by the –policy command line<br />
switch. This is a section in the configuration file which decides which fields should be manda<strong>to</strong>ry<br />
or match the CA certificate. The policy section consists of a set of variables corresponding <strong>to</strong><br />
certificate DN fields. If the value is match then the field value must match the same field in the<br />
CA certificate. If the value is supplied then it must be present. If the value is optional then it<br />
may be present. Any fields not mentioned in the policy section are silently deleted.<br />
[ …_ext ]<br />
Those sections specify the <strong>X.509</strong> extensions and are referenced by the x509_extensions option<br />
within the configuration file (section [ req ] and [ CA_default ]). It can be overridden by the<br />
-extensions command line switch.<br />
basicConstraints<br />
This flag is used <strong>to</strong> determine whether the certificate can be used as<br />
a CA.<br />
Document ID: AN201002907-004 Version: 1.00 Page 12 of 32
Application Note: <strong>How</strong> <strong>to</strong> <strong>obtain</strong> <strong>X.509</strong> <strong>Certificates</strong><br />
3.2.3 Create the CA Certificate and Key<br />
Now, that all initial configuration is done, we may create a self signed certificate, that will be used as our<br />
CA certificate. In other words, we will use this <strong>to</strong> sign other certificate requests.<br />
Change <strong>to</strong> the CA root direc<strong>to</strong>ry. From there we should issue all the openssl commands because here is<br />
our openssl configuration file (openssl.conf).<br />
Following is the syntax <strong>to</strong> create the CA certificate and private key:<br />
openssl req -new -config -x509 -extensions -keyout <br />
-out -days <br />
Option<br />
Description<br />
req<br />
The req command primarily creates and processes certificate requests. It can<br />
instead create self signed certificates when the option –x509 is specified.<br />
-new<br />
This option generates a new certificate request.<br />
-config <br />
This allows an alternative configuration file <strong>to</strong> be specified.<br />
-x509 This option outputs a self signed certificate instead of a certificate request.<br />
-extensions Specifies the section in the openssl configuration file (specified by -config<br />
) where the <strong>X.509</strong> certificate extensions are defined.<br />
-keyout <br />
Filename of the CA’s private key. Although it is protected with a pass phrase you<br />
should restrict access <strong>to</strong> it, so that only authorized users can read it.<br />
-out <br />
Filename of the CA certificate.<br />
-days <br />
When the -x509 option is being used this specifies the number of days <strong>to</strong> certify<br />
the certificate for.<br />
Example:<br />
C:\CA>openssl req -new -config openssl.conf -x509 -extensions ca_ext -keyout private/ca.key -out certs/ca.crt -days<br />
3640<br />
Loading 'screen' in<strong>to</strong> random state - done<br />
Generating a 1024 bit RSA private key<br />
...........++++++<br />
.......................................................................++++++<br />
writing new private key <strong>to</strong> 'private/ca.key'<br />
Enter PEM pass phrase: - choose a memorable pass phrase <strong>to</strong> use for this key<br />
Verifying - Enter PEM pass phrase: - type your pass phrase again for verification<br />
-----<br />
You are about <strong>to</strong> be asked <strong>to</strong> enter information that will be incorporated<br />
in<strong>to</strong> your certificate request.<br />
What you are about <strong>to</strong> enter is what is called a Distinguished Name or a DN.<br />
There are quite a few fields but you can leave some blank<br />
For some fields there will be a default value,<br />
If you enter '.', the field will be left blank.<br />
-----<br />
Country Name (2 letter code) [DE]: - we have kept the default value<br />
Organization Name (company) [<strong>Innominate</strong> <strong>Security</strong> <strong>Technologies</strong> AG]: - we have kept the default value<br />
Organizational Unit Name (department, division) [Support]: - we have kept the default value<br />
Common Name (hostname, IP, or your name) []:CA – here we have entered the common name for the CA certificate<br />
C:\CA><br />
Two files are created:<br />
• certs/ca.crt: This is the CA’s certificate and can be publicly available and of course world readable.<br />
• private/ca.key: This is the CA’s private key. Although it is protected with a pass phrase you should<br />
restrict access <strong>to</strong> it, so that only authorized users can read it.<br />
Document ID: AN201002907-004 Version: 1.00 Page 13 of 32
Application Note: <strong>How</strong> <strong>to</strong> <strong>obtain</strong> <strong>X.509</strong> <strong>Certificates</strong><br />
3.2.4 Create a Certificate Request for the mGuard<br />
For <strong>obtain</strong>ing a valid mGuard certificate you need <strong>to</strong> create a certificate request first and then sign it with<br />
the CA certificate (explained in the next chapter).<br />
Following is the syntax for creating a certificate request for the mGuard:<br />
openssl req –new -config -keyout -out -days <br />
Option<br />
req<br />
-new<br />
-config <br />
-keyout <br />
-out <br />
-days <br />
Description<br />
The req command primarily creates and processes certificate requests.<br />
This option generates a new certificate request.<br />
This allows an alternative configuration file <strong>to</strong> be specified.<br />
Filename of the mGuard’s private key. Although it is protected with a pass phrase<br />
you should restrict access <strong>to</strong> it, so that only authorized users can read it.<br />
Filename of the mGuard certificate.<br />
The number of days the certificate should be valid.<br />
Example:<br />
C:\CA>openssl req -new -config openssl.conf -keyout private/mGuard.key -out mGuard.csr -days 364<br />
Loading 'screen' in<strong>to</strong> random state - done<br />
Generating a 1024 bit RSA private key<br />
.......................................++++++<br />
...++++++<br />
writing new private key <strong>to</strong> 'private/mGuard.key'<br />
Enter PEM pass phrase: - choose a memorable pass phrase <strong>to</strong> use for this key<br />
Verifying - Enter PEM pass phrase: - type your pass phrase again for verification<br />
-----<br />
You are about <strong>to</strong> be asked <strong>to</strong> enter information that will be incorporated<br />
in<strong>to</strong> your certificate request.<br />
What you are about <strong>to</strong> enter is what is called a Distinguished Name or a DN.<br />
There are quite a few fields but you can leave some blank<br />
For some fields there will be a default value,<br />
If you enter '.', the field will be left blank.<br />
-----<br />
Country Name (2 letter code) [DE]: - we have kept the default value<br />
Organization Name (company) [<strong>Innominate</strong> <strong>Security</strong> <strong>Technologies</strong> AG]: - we have kept the default value<br />
Organizational Unit Name (department, division) [Support]: - we have kept the default value<br />
Common Name (hostname, IP, or your name) []:mGuard – enter the common name for the mGuard certificate<br />
C:\CA><br />
Two files are created:<br />
• mGuard.csr: This is the certificate request which needs <strong>to</strong> be signed by the CA certificate.<br />
• private/mGuard.key: This is the private key, which is not protected with a pass phrase.<br />
Document ID: AN201002907-004 Version: 1.00 Page 14 of 32
Application Note: <strong>How</strong> <strong>to</strong> <strong>obtain</strong> <strong>X.509</strong> <strong>Certificates</strong><br />
3.2.5 Sign the mGuard’s Certificate Request with the CA<br />
The mGuard’s certificate request needs <strong>to</strong> be signed by the CA <strong>to</strong> become a valid certificate.<br />
Following is the syntax for signing the mGuard’s certificate request with the CA:<br />
openssl ca –config -out -infiles <br />
Option<br />
ca<br />
-config <br />
-out <br />
-infiles <br />
Description<br />
The ca command is a minimal CA application. It can be used <strong>to</strong> sign certificate<br />
requests in a variety of forms and generate CRLs it also maintains a text database<br />
of issued certificates and their status.<br />
This allows an alternative configuration file <strong>to</strong> be specified.<br />
Filename of the signed mGuard certificate.<br />
Filename of the mGuard’s certificate request. This must be the last option.<br />
Example:<br />
C:\CA>openssl ca -config openssl.conf -out certs/mGuard.crt -infiles mGuard.csr<br />
Using configuration from openssl.conf<br />
Loading 'screen' in<strong>to</strong> random state - done<br />
Enter pass phrase for ./private/ca.key: - enter the pass phrase of the CA’s private key<br />
Check that the request matches the signature<br />
Signature ok<br />
The Subject's Distinguished Name is as follows<br />
countryName :PRINTABLE:'DE'<br />
organizationName :ASN.1 12:'<strong>Innominate</strong> <strong>Security</strong> <strong>Technologies</strong> AG'<br />
organizationalUnitName:ASN.1 12:'Support'<br />
commonName :ASN.1 12:'mGuard'<br />
Certificate is <strong>to</strong> be certified until Feb 21 09:48:47 2008 GMT (365 days)<br />
Sign the certificate? [y/n]:y<br />
1 out of 1 certificate requests certified, commit? [y/n]y<br />
Write out database with 1 new entries<br />
Data Base Updated<br />
C:\CA><br />
After all this is done two new files are created:<br />
• certs/mGuard.crt: This is the mGuards’s certificate, which can be made available publicly.<br />
• newcerts/01.pem: This is exactly the same certificate, but with the certificate’s serial number (hex<br />
number) as filename. For subsequent requests the number is incremented. This file is not needed<br />
anymore and can be removed.<br />
Now you can delete the mGuard’s certificate request (mGuard.csr). It’s no longer needed.<br />
Document ID: AN201002907-004 Version: 1.00 Page 15 of 32
Application Note: <strong>How</strong> <strong>to</strong> <strong>obtain</strong> <strong>X.509</strong> <strong>Certificates</strong><br />
3.2.6 Creating the mGuard’s PKCS#12 File (Machine Certificate)<br />
This file combines the private and public key and is the mGuard’s machine certificate which needs <strong>to</strong> be<br />
imported through the menu IPsec VPN -> Global, tab Machine Certificate. You’ll be prompted <strong>to</strong> enter a<br />
password which protects the PKCS#12 export of the certificate against unauthorized usage.<br />
Following is the syntax <strong>to</strong> create the mGuard machine certificate:<br />
openssl pkcs12 -export -in -inkey -out <br />
Option<br />
pkcs12<br />
-export<br />
-in <br />
-inkey <br />
-out <br />
Description<br />
The pkcs12 command allows PKCS#12 files <strong>to</strong> be created and parsed.<br />
This option specifies that a PKCS#12 file will be created rather than parsed.<br />
The filename <strong>to</strong> read the certificate from. The format of the file must be PEM. This<br />
is the mGuard’s certificate you have created in the previous step.<br />
File <strong>to</strong> read private key from. This is the file which contains the private key of the<br />
mGuard’s certificate.<br />
The filename <strong>to</strong> write certificates and private keys <strong>to</strong>. They are all written in PEM<br />
format.<br />
Example:<br />
C:\ssl>openssl pkcs12 -export -in certs/mGuard.crt -inkey private/mGuard.key -out certs/mGuard.p12<br />
Loading 'screen' in<strong>to</strong> random state - done<br />
Enter pass phrase for mGuard.key: - enter the password of the mGuard’s private key<br />
Enter Export Password: - choose a memorable pass phrase <strong>to</strong> use for this machine certificate<br />
Verifying - Enter Export Password: - type your pass phrase again for verification<br />
C:\ssl><br />
This command will create a file called certs/mGuard.p12, containing the mGuard certificate public und<br />
private key. The file is protected by the entered password.<br />
Document ID: AN201002907-004 Version: 1.00 Page 16 of 32
Application Note: <strong>How</strong> <strong>to</strong> <strong>obtain</strong> <strong>X.509</strong> <strong>Certificates</strong><br />
3.2.7 Example: Obtaining <strong>X.509</strong> <strong>Certificates</strong> for a VPN Connection between two mGuards<br />
We assume that you already have setup the CA environment, configured the openssl’s configuration file<br />
and created the CA certificate and key as described in the previous chapters.<br />
Step 1: Create a certificate request for each mGuard<br />
mGuard 1:<br />
openssl req -new -config openssl.conf -keyout private/mGuard1.key -out mGuard1.csr -days 364<br />
mGuard 2:<br />
openssl req -new -config openssl.conf -keyout private/mGuard2.key -out mGuard2.csr -days 364<br />
Step 2: Sign each certificate request with the CA<br />
mGuard 1:<br />
openssl ca -config openssl.conf -out certs/mGuard1.crt -infiles mGuard1.csr<br />
mGuard 2:<br />
openssl ca -config openssl.conf -out certs/mGuard2.crt -infiles mGuard2.csr<br />
The two certificates certs/mGuard1.crt and certs/mGuard2.crt are created. mGuard1.crt needs <strong>to</strong><br />
be imported on mGuard 2 as connection certificate through the menu IPsec VPN -> Connections, tab<br />
Authentication. mGuard2.crt on mGuard 1 correspondingly.<br />
Step 3: Obtain the machine certificate for each mGuard<br />
mGuard 1:<br />
openssl pkcs12 -export -in certs/mGuard1.crt -inkey private/mGuard1.key -out certs/mGuard1.p12<br />
mGuard 2:<br />
openssl pkcs12 -export -in certs/mGuard2.crt -inkey private/mGuard2.key -out certs/mGuard2.p12<br />
The two certificates certs/mGuard1.p12 and certs/mGuard2.p12 are created. mGuard1.p12 needs<br />
<strong>to</strong> be imported on mGuard 1 as machine certificate through the menu Authentication -> <strong>Certificates</strong>, tab<br />
Machine Certificate. mGuard2.p12 on mGuard 2 correspondingly.<br />
Document ID: AN201002907-004 Version: 1.00 Page 17 of 32
Application Note: <strong>How</strong> <strong>to</strong> <strong>obtain</strong> <strong>X.509</strong> <strong>Certificates</strong><br />
4 XCA<br />
This section explains briefly how <strong>to</strong> create <strong>X.509</strong> certificates with the <strong>to</strong>ol XCA. XCA provides much more<br />
functionality than explained in this document. Please refer <strong>to</strong> the XCA documentation for further<br />
information. You can download XCA from http://xca.sourceforge.net. The screenshots and descriptions in<br />
this chapter are related <strong>to</strong> XCA v0.6.3.<br />
After installing XCA you need <strong>to</strong> create a database. To do this:<br />
• From the menu, select File -> New DataBase.<br />
• Specify the s<strong>to</strong>rage location and filename of the database.<br />
• Click Save.<br />
⇒ You’ll be prompted <strong>to</strong> enter a password which protects the database against unauthorized usage.<br />
When restarting XCA you need <strong>to</strong> reconnect <strong>to</strong> the database first through the menu File -> Open<br />
DataBase.<br />
4.1 Options<br />
Before you start creating certificates you should set the default hash algorithm do SHA 1 because not all<br />
appliances support SHA 2. If you don’t set the default hash algorithm do SHA 1 you’d need <strong>to</strong> do it every<br />
time when creating a certificate.<br />
• From the menu, select File -> Options.<br />
• Set Default hash algorithm <strong>to</strong> SHA 1.<br />
• Click OK.<br />
Document ID: AN201002907-004 Version: 1.00 Page 18 of 32
Application Note: <strong>How</strong> <strong>to</strong> <strong>obtain</strong> <strong>X.509</strong> <strong>Certificates</strong><br />
4.2 Create a Certificate Template<br />
If you need <strong>to</strong> create a bunch of certificates it is useful <strong>to</strong> define a template for consistency reasons and<br />
less typing and <strong>to</strong> use this template when creating the certificates.<br />
• Switch <strong>to</strong> the tab Templates.<br />
• Click New Template.<br />
• In the tab Subject, use the entry fields from Internal<br />
name <strong>to</strong> E-Mail address for entering the identifying<br />
parameters which shall be common for all certificates. The<br />
template will be s<strong>to</strong>red in XCA under the Internal Name.<br />
• Switch <strong>to</strong> the tab Extensions.<br />
• Set Type <strong>to</strong> End Entity. In this case the template can be<br />
used for creating client certificates. Set Type <strong>to</strong><br />
Certification Authority if the template should be used for<br />
creating CA certificates.<br />
• Select in the section Time Range the default lifetime of<br />
the certificates and click Apply.<br />
• Click OK.<br />
⇒ The created template is displayed in the tab Templates.<br />
Document ID: AN201002907-004 Version: 1.00 Page 19 of 32
Application Note: <strong>How</strong> <strong>to</strong> <strong>obtain</strong> <strong>X.509</strong> <strong>Certificates</strong><br />
4.3 Create a Certification Authority (CA) Certificate<br />
If you don’t use self signed client certificates, a client certificate must be signed by the CA certificate <strong>to</strong><br />
become a valid certificate. Therefore you need <strong>to</strong> create the CA certificate first before creating the client<br />
certificates. The CA certificate is a self signed certificate.<br />
• Switch <strong>to</strong> the tab <strong>Certificates</strong>.<br />
• Click New Certificate.<br />
• Ensure that Create a self signed certificate with the<br />
serial is selected.<br />
• You may enter a serial number for the certificate or leave<br />
the default value.<br />
• If you have created a template for creating CA<br />
certificates, you may select it in the section Template and<br />
click Apply.<br />
• Switch <strong>to</strong> the tab Subject.<br />
• Use the entry fields from Internal name <strong>to</strong> E-Mail<br />
address for entering the identifying parameters of the<br />
CA.<br />
• Click Generate a new key for creating the private RSA<br />
key for the CA.<br />
• Enter a Name for the key, specify the desired Keysize<br />
and click Create.<br />
• Switch <strong>to</strong> the tab Extensions.<br />
• Set Type <strong>to</strong> Certification Authority.<br />
• Select in the section Time Range the lifetime of the CA<br />
certificate. For a CA certificate you may want it <strong>to</strong> last<br />
longer than the client certificates so that you do not have<br />
<strong>to</strong> reissue the certificates so often. We have chosen a<br />
lifetime of 10 years. Click Apply.<br />
• Click OK.<br />
⇒ The created CA certificate is displayed in the tab<br />
<strong>Certificates</strong>.<br />
Document ID: AN201002907-004 Version: 1.00 Page 20 of 32
Application Note: <strong>How</strong> <strong>to</strong> <strong>obtain</strong> <strong>X.509</strong> <strong>Certificates</strong><br />
4.4 Create a Client Certificate<br />
• Switch <strong>to</strong> the tab <strong>Certificates</strong>.<br />
• Click New Certificate.<br />
• Ensure that the correct CA is selected in the field Use this<br />
certificate for signing.<br />
• If you have created a client template, select it in the field<br />
Template for the new certificate and click Apply.<br />
• Switch <strong>to</strong> the tab Subject.<br />
• Use the entry fields from Internal name <strong>to</strong> E-Mail<br />
address for entering the identifying parameters of the<br />
client certificate.<br />
• Click Generate a new key for creating the private RSA<br />
key.<br />
• Enter a Name for the key, specify the desired Keysize<br />
and click Create.<br />
• Switch <strong>to</strong> the tab Extensions.<br />
• Set Type <strong>to</strong> End Entity.<br />
• Select in the section Time Range the lifetime of the<br />
client certificates and click Apply.<br />
• Note: The mGuard uses as default VPN identifier the<br />
subject name of the certificate. If you want <strong>to</strong> use<br />
another VPN identifier, as for example email address,<br />
hostname or IP address, this identifier must be present in<br />
the certificate as subject alternative name. To add<br />
another identifier, click Edit in the line subject alternative<br />
name, select the identifier type (email, DNS or IP), enter<br />
its value, click Add and then Apply.<br />
• Click OK.<br />
⇒ The created client certificate is displayed in the tab<br />
<strong>Certificates</strong> beneath the CA.<br />
Document ID: AN201002907-004 Version: 1.00 Page 21 of 32
Application Note: <strong>How</strong> <strong>to</strong> <strong>obtain</strong> <strong>X.509</strong> <strong>Certificates</strong><br />
4.5 Certificate Export<br />
• Switch <strong>to</strong> the tab <strong>Certificates</strong>.<br />
• Highlight the certificate you’d like <strong>to</strong> export.<br />
• Click Export.<br />
• Select the Export Format (PEM or PKCS#12).<br />
• Specify the desired Filename and the location where the<br />
export should be s<strong>to</strong>red.<br />
• Click OK.<br />
• If you export the certificate as PKCS#12 then you’ll be<br />
prompted <strong>to</strong> enter a password which protects the export<br />
against unauthorized usage. Enter the Password and<br />
click OK.<br />
4.6 Signing a Certificate Request with the CA<br />
• Switch <strong>to</strong> the tab Certificate signing requests.<br />
• Click Import.<br />
• Select the certificate request which should be signed by the CA and click Open.<br />
⇒ The imported certificate request is displayed in the tab Certificate signing requests.<br />
• Right click the certificate request and select Sign from the context menu.<br />
• Ensure that Use this Certificate for signing and the<br />
corresponding CA are selected.<br />
• Switch <strong>to</strong> the tab Extensions.<br />
• Leave Type as Not defined. Otherwise XCA would copy<br />
the certificate extensions twice in<strong>to</strong> the signed certificate.<br />
• Select in the section Time Range the lifetime of the<br />
certificates and click Apply.<br />
• Click OK.<br />
⇒ The signed certificate request is displayed in the tab<br />
<strong>Certificates</strong> beneath the CA.<br />
Document ID: AN201002907-004 Version: 1.00 Page 22 of 32
Application Note: <strong>How</strong> <strong>to</strong> <strong>obtain</strong> <strong>X.509</strong> <strong>Certificates</strong><br />
4.7 Certificate Revocation List (CRL)<br />
Revoke a certificate<br />
• Switch <strong>to</strong> the tab <strong>Certificates</strong>.<br />
• Right click the client certificate that should be revoked and select Revoke from the context menu.<br />
⇒ The revoked certificate is marked with a red question mark and the Trust state is Not trusted.<br />
Specify the CRL renewal period<br />
• Switch <strong>to</strong> the tab <strong>Certificates</strong>.<br />
• Right click the CA and select CA -> Properties from the context menu.<br />
• Enter the desired renewal period in<strong>to</strong> the field Days until next CRL issuing.<br />
• Click OK.<br />
Create the CRL<br />
• Switch <strong>to</strong> the tab <strong>Certificates</strong>.<br />
• Right click the CA and select CA -> Generate CRL from the context menu.<br />
• Click OK.<br />
⇒ The CRL is displayed in the tab Revocation lists.<br />
Obtain information about a CRL<br />
• Switch <strong>to</strong> the tab Revocation lists.<br />
• Highlight the CRL and click Show Details.<br />
Export of the CRL<br />
• Switch <strong>to</strong> the tab Revocation lists.<br />
• Highlight the CRL.<br />
• Click Export.<br />
• Specify the filename and location for s<strong>to</strong>ring the CRL.<br />
• Chose the export format (DER or PEM).<br />
• Click OK.<br />
Document ID: AN201002907-004 Version: 1.00 Page 23 of 32
Application Note: <strong>How</strong> <strong>to</strong> <strong>obtain</strong> <strong>X.509</strong> <strong>Certificates</strong><br />
4.8 Required <strong>Certificates</strong> - Examples<br />
4.8.1 VPN between two mGuards<br />
• Create the CA as described in chapter Create a Certification Authority (CA) Certificate.<br />
• Create a client certificate for mGuard #1 and a client certificate for mGuard #2 as described in<br />
chapter Create a Client Certificate.<br />
• Export the certificates as described in chapter Certificate Export. The following exports are required:<br />
o mGuard #1 as PKCS#12: This export needs <strong>to</strong> be imported on mGuard #1 as machine<br />
certificate (menu: Authentication -> <strong>Certificates</strong>, tab Machine <strong>Certificates</strong>).<br />
o mGuard #2 as PKCS#12: This export needs <strong>to</strong> be imported on mGuard #2 as machine<br />
certificate (menu: Authentication -> <strong>Certificates</strong>, tab Machine <strong>Certificates</strong>).<br />
o mGuard #1 as PEM: This export needs <strong>to</strong> be imported on mGuard #2 as connection<br />
certificate (menu: IPSec VPN -> Connections, tab Authentication).<br />
o mGuard #2 as PEM: This export needs <strong>to</strong> be imported on mGuard #1 as connection<br />
certificate (menu: IPSec VPN -> Connections, tab Authentication).<br />
For further information about how <strong>to</strong> setup a VPN connection between two mGuards refer <strong>to</strong> the<br />
document mGuard Configuration Examples which can be downloaded from our homepage<br />
(http://www.innominate.com, Downloads -> Documentation).<br />
4.8.2 VPN between mGuard and Netscreen 5GT/204/5400<br />
• Create a certificate request on the Netscreen (menu: Objects -> <strong>Certificates</strong>).<br />
• Create the CA as described in chapter Create a Certification Authority (CA) Certificate.<br />
• Import the certificate request of the Netscreen and sign it with the CA as described in chapter Signing<br />
a Certificate Request with the CA.<br />
• Create a client certificate for the mGuard as described in chapter Create a Client Certificate.<br />
• Create the CRL as described in chapter Certificate Revocation List (CRL).<br />
• Export the certificates as described in chapter Certificate Export. The following exports are required:<br />
o CA as PEM: This export needs <strong>to</strong> be imported on the Netscreen (menu: Objects -><br />
<strong>Certificates</strong>).<br />
o Signed Netscreen certificate as PEM: This export needs <strong>to</strong> be imported on the Netscreen<br />
(menu: Objects -> <strong>Certificates</strong>) and on the mGuard as connection certificate (menu: IPSec<br />
VPN -> Connections, tab Authentication).<br />
o Certificate Revocation List (CRL) as PEM (refer <strong>to</strong> chapter 4.7 Certificate Revocation List<br />
(CRL)): This export needs <strong>to</strong> be imported on the Netscreen (menu: Objects -> <strong>Certificates</strong>).<br />
o mGuard certificate as PKCS#12: This export needs <strong>to</strong> be imported on the mGuard as machine<br />
certificate (menu: Authentication -> <strong>Certificates</strong>, tab Machine <strong>Certificates</strong>).<br />
For further information about how <strong>to</strong> setup a VPN connection between mGuard and Netscreen refer <strong>to</strong> the<br />
interoperability document mGuard – Netscreen 5GT/204/5400 which can be downloaded from our<br />
homepage (http://www.innominate.com, Downloads -> Application Notes).<br />
Document ID: AN201002907-004 Version: 1.00 Page 24 of 32
Application Note: <strong>How</strong> <strong>to</strong> <strong>obtain</strong> <strong>X.509</strong> <strong>Certificates</strong><br />
4.8.3 VPN between mGuard and Cisco VPN 3000 Concentra<strong>to</strong>r Series<br />
• Create the CA as described in chapter Create a Certification Authority (CA) Certificate.<br />
• Export the CA as PEM. This export needs <strong>to</strong> be imported on the Cisco device (menu: Administration -<br />
> Certificate Management -> Installation).<br />
• Request a certificate on the Cisco device (menu: Administration -> Certificate Management -><br />
Enrollment).<br />
• Import the certificate request of the Cisco device and sign it with the CA as described in chapter<br />
Signing a Certificate Request with the CA.<br />
• Export the signed Cisco certificate as PEM. This export needs <strong>to</strong> be imported on the Cisco device<br />
(menu: Administration -> Certificate Management -> Installation) and on the mGuard as connection<br />
certificate (menu: IPSec VPN -> Connections, tab Authentication).<br />
• Create a client certificate for the mGuard as described in chapter Create a Client Certificate.<br />
• Export the mGuard certificate as PKCS#12 as described in chapter Certificate Export. This export<br />
needs <strong>to</strong> be imported on the mGuard as machine certificate (menu: Authentication -> <strong>Certificates</strong>,<br />
tab Machine <strong>Certificates</strong>).<br />
For further information about how <strong>to</strong> setup a VPN connection between mGuard and Cisco VPN 3000<br />
Concentra<strong>to</strong>r refer <strong>to</strong> the interoperability document mGuard – Cisco VPN3000 Concentra<strong>to</strong>r which can be<br />
downloaded from our homepage (http://www.innominate.com, Downloads -> Application Notes).<br />
4.8.4 L2TP/IPsec connection between Windows client and mGuard<br />
• Create the CA as described in chapter Create a Certification Authority (CA) Certificate.<br />
• Create a client certificate for the Windows client and for the mGuard as described in chapter Create a<br />
Client Certificate.<br />
• Export the certificates as described in chapter Certificate Export. The following exports are required:<br />
o CA as PEM: This export needs <strong>to</strong> be imported on the Windows client as Trusted Root Certification<br />
Authorities.<br />
o Windows certificate as PKCS#12: This export needs <strong>to</strong> be imported on the Windows client as<br />
Personal certificate.<br />
o Windows certificate as PEM: This export needs <strong>to</strong> be imported on the mGuard as connection<br />
certificate (menu: IPSec VPN -> Connections, tab Authentication).<br />
o mGuard certificate as PKCS#12: This export needs <strong>to</strong> be imported on the mGuard as machine<br />
certificate (menu: Authentication -> <strong>Certificates</strong>, tab Machine <strong>Certificates</strong>).<br />
For further information about how <strong>to</strong> setup a L2TP/IPsec connection between a Windows client and the<br />
mGuard refer <strong>to</strong> the document mGuard Configuration Examples which can be downloaded from our<br />
homepage (http://www.innominate.com, Downloads -> Documentation).<br />
4.8.5 VPN between SafeNet SoftRemote and mGuard<br />
Note: Ensure that you use different values for the certificate identifying parameters (CountryName<br />
<strong>to</strong> CommonName) when creating the certificates. Otherwise, if you would use the same value more<br />
than one, e.g. organizationName=<strong>Innominate</strong> and organizationUnitName=<strong>Innominate</strong>, SoftRemote<br />
would complain about an invalid certificate ID.<br />
• Create the CA as described in chapter Create a Certification Authority (CA) Certificate.<br />
• Create a client certificate for the SoftRemote client and for the mGuard as described in chapter<br />
Create a Client Certificate.<br />
• Export the certificates as described in chapter Certificate Export. The following exports are required:<br />
o CA as PEM: This export needs <strong>to</strong> be imported on the SoftRemote client through the Certificate<br />
Manager, tab Root CA <strong>Certificates</strong>.<br />
o SoftRemote certificate as PKCS#12: This export needs <strong>to</strong> be imported on the SoftRemote<br />
client through the Certificate Manager, tab My <strong>Certificates</strong>.<br />
o SoftRemote certificate as PEM: This export needs <strong>to</strong> be imported on the mGuard as<br />
connection certificate (menu: IPSec VPN -> Connections, tab Authentication).<br />
o mGuard certificate as PKCS#12: This export needs <strong>to</strong> be imported on the mGuard as machine<br />
certificate (menu: Authentication -> <strong>Certificates</strong>, tab Machine <strong>Certificates</strong>).<br />
Document ID: AN201002907-004 Version: 1.00 Page 25 of 32
Application Note: <strong>How</strong> <strong>to</strong> <strong>obtain</strong> <strong>X.509</strong> <strong>Certificates</strong><br />
5 Microsoft Certification Authority (CA) Server<br />
We have installed the Microsoft Certification Authority on a Windows 2000 Advanced Server (SP 4).<br />
Details about how <strong>to</strong> install the Certification Authority are beyond the scope of this document. Please<br />
refer <strong>to</strong> the documentation of your Windows Server. The CA certificate was created during the installation<br />
of the Certification Authority.<br />
You need <strong>to</strong> execute the described steps twice for <strong>obtain</strong>ing the certificates for mGuard 1 and mGuard 2.<br />
The PKCS#12 (*.PFX, *.P12) export of the mGuard certificate is the machine certificate. It needs <strong>to</strong> be<br />
imported on the corresponding mGuard through the menu Authentication -> <strong>Certificates</strong>, tab Machine<br />
<strong>Certificates</strong>.<br />
The base-64 encoded (*.CER) export of the mGuard certificate is the connection certificate. It needs <strong>to</strong><br />
be imported on the remote mGuard through the menu IPsec VPN -> Connections, tab Authentication.<br />
5.1 Request the mGuard Certificate from the Certification Authority<br />
Start the Internet Explorer and access the Certification Authority by calling http:///certsrv.<br />
• Select Request a certificate.<br />
• Select submit an advanced certificate<br />
request.<br />
• Select Create and submit a request <strong>to</strong><br />
this CA.<br />
Document ID: AN201002907-004 Version: 1.00 Page 26 of 32
Application Note: <strong>How</strong> <strong>to</strong> <strong>obtain</strong> <strong>X.509</strong> <strong>Certificates</strong><br />
• In Identifying information, enter the<br />
certificate identifying parameters (subject<br />
name).<br />
• In Type of Certificate Needed, select IPSec<br />
Certificate.<br />
• In Key Options, leave the CSP and Key<br />
Usage fields as the default. Change the<br />
Key Size <strong>to</strong> 1024, leave the Au<strong>to</strong>matic<br />
key container name selected, and select<br />
Mark keys as exportable.<br />
• In Additional Options, leave Request<br />
Format as CMC, and the Hash Algorithm<br />
as SHA-1. Do not select Save request <strong>to</strong> a<br />
file. In Friendly Name, type a name.<br />
• Click Submit.<br />
• You will receive the following warning when<br />
requesting the certificate.<br />
• To continue, select Yes.<br />
⇒ You should see the prompt Waiting for server response while the request is being submitted.<br />
• Finally the following screen appears,<br />
displaying the certificate Request ID.<br />
Document ID: AN201002907-004 Version: 1.00 Page 27 of 32
Application Note: <strong>How</strong> <strong>to</strong> <strong>obtain</strong> <strong>X.509</strong> <strong>Certificates</strong><br />
5.2 Issue the mGuard Certificate Request on the MS CA Server<br />
• On the Windows Server, on which the Certification Authority is running, select Start-><br />
Administration Tools -> Certification Authority (you can also use MMC with the Certification<br />
Authority snap-in).<br />
• Navigate <strong>to</strong> the Pending Requests node.<br />
• Find the certificate request with the<br />
corresponding Request ID.<br />
• Right-click it, select All Tasks -> Issue.<br />
⇒ The certificate should then move <strong>to</strong> the<br />
Issued <strong>Certificates</strong> node.<br />
5.3 Retrieve the issued mGuard Certificate<br />
Start the Internet Explorer and access the Certification Authority by going <strong>to</strong> http:///certsrv.<br />
• Select View the status of a pending<br />
certificate request.<br />
• Select IPSec Certificate.<br />
Document ID: AN201002907-004 Version: 1.00 Page 28 of 32
Application Note: <strong>How</strong> <strong>to</strong> <strong>obtain</strong> <strong>X.509</strong> <strong>Certificates</strong><br />
• Select Install this certificate.<br />
• A Potential Scripting Violation warning<br />
appears.<br />
• After reading and understanding the<br />
warning, select Yes <strong>to</strong> install the certificate.<br />
• The following screen appears, letting you<br />
know that the certificate was installed.<br />
5.4 Export of the mGuard Machine Certificate<br />
• From the Internet Explorer menu, select Tools -> Internet Options.<br />
• Switch <strong>to</strong> the tab Content and click <strong>Certificates</strong>.<br />
• Switch <strong>to</strong> the tab Personal.<br />
• Highlight the mGuard certificate.<br />
• Click Export.<br />
⇒ The Certificate Export Wizard appears.<br />
• Click Next.<br />
Document ID: AN201002907-004 Version: 1.00 Page 29 of 32
Application Note: <strong>How</strong> <strong>to</strong> <strong>obtain</strong> <strong>X.509</strong> <strong>Certificates</strong><br />
• Select Yes, export the private key.<br />
• Click Next.<br />
• Verify that Personal Information Exchange<br />
– PKCS #12 (.PFX) is selected.<br />
• Select Enable strong protection.<br />
• Click Next.<br />
• Enter a Password which protects the<br />
certificate against unauthorized usage.<br />
• Click Next.<br />
Document ID: AN201002907-004 Version: 1.00 Page 30 of 32
Application Note: <strong>How</strong> <strong>to</strong> <strong>obtain</strong> <strong>X.509</strong> <strong>Certificates</strong><br />
• Specify the filename and the location where<br />
the export should be s<strong>to</strong>red.<br />
• Click Next.<br />
• Review the settings in the summary screen,<br />
click Finish <strong>to</strong> complete the export.<br />
This certificate needs <strong>to</strong> be imported on the mGuard as machine certificate (menu Authentication -><br />
<strong>Certificates</strong>, tab Machine <strong>Certificates</strong>).<br />
5.5 Export of the mGuard Certificate<br />
• From the Internet Explorer menu, select Tools -> Internet Options.<br />
• Switch <strong>to</strong> the tab Content and click <strong>Certificates</strong>.<br />
• Switch <strong>to</strong> the tab Personal.<br />
• Highlight the mGuard certificate.<br />
• Click Export.<br />
⇒ The Certificate Export Wizard appears.<br />
• Click Next.<br />
• Select No, do not export the private key.<br />
• Click Next.<br />
Document ID: AN201002907-004 Version: 1.00 Page 31 of 32
Application Note: <strong>How</strong> <strong>to</strong> <strong>obtain</strong> <strong>X.509</strong> <strong>Certificates</strong><br />
• Select Base-64 encoded <strong>X.509</strong> (.CER).<br />
• Click Next.<br />
• Specify the filename and the location where<br />
the export should be s<strong>to</strong>red.<br />
• Click Next.<br />
• Review the settings in the summary screen,<br />
click Finish <strong>to</strong> complete the export.<br />
This certificate needs <strong>to</strong> be imported on the remote mGuard as connection certificate (menu IPsec VPN -<br />
> Connections, tab Authentication).<br />
Document ID: AN201002907-004 Version: 1.00 Page 32 of 32