User Manual IDM V1.4.2 - Innominate Security Technologies AG
User Manual IDM V1.4.2 - Innominate Security Technologies AG
User Manual IDM V1.4.2 - Innominate Security Technologies AG

Create successful ePaper yourself
Turn your PDF publications into a flip-book with our unique Google optimized e-Paper software.
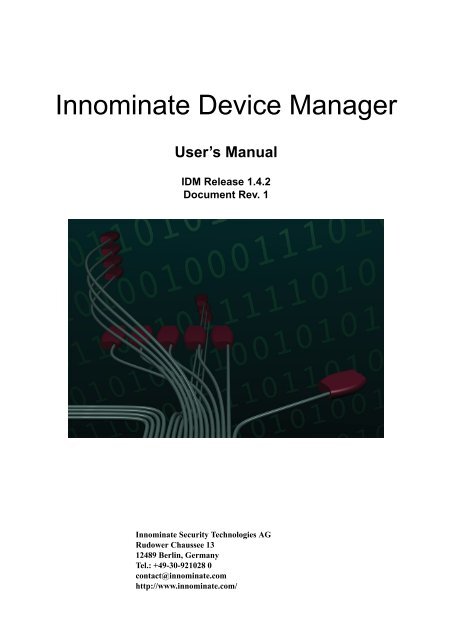
<strong>Innominate</strong> Device Manager<br />
<strong>User</strong>’s <strong>Manual</strong><br />
<strong>IDM</strong> Release 1.4.2<br />
Document Rev. 1<br />
<strong>Innominate</strong> <strong>Security</strong> <strong>Technologies</strong> <strong>AG</strong><br />
Rudower Chaussee 13<br />
12489 Berlin, Germany<br />
Tel.: +49-30-921028 0<br />
contact@innominate.com<br />
http://www.innominate.com/
Copyright © 2006-2012 <strong>Innominate</strong> <strong>Security</strong> <strong>Technologies</strong> <strong>AG</strong><br />
February 2012<br />
“<strong>Innominate</strong>” and “mGuard” are registered trade names of <strong>Innominate</strong> <strong>Security</strong><br />
<strong>Technologies</strong> <strong>AG</strong>. The mGuard technology is protected by the German patents<br />
#10138865 and #10305413. Further national and international patent<br />
applications are pending.<br />
This document may not be copied or transferred in whole or in part without prior<br />
written approval.<br />
<strong>Innominate</strong> reserves the right to modify this document at any time without notice.<br />
<strong>Innominate</strong> provides no warranty for the contents of this document. This<br />
disclaimer shall also apply to any implicit warranty of marketability or suitability<br />
for a specific purpose.<br />
Furthermore, <strong>Innominate</strong> assumes no liability for errors in this manual or for<br />
accidental or consequential damages in connection with the delivery,<br />
performance or utilization of this document.<br />
This manual may not be photocopied, duplicated or translated into another<br />
language in whole or in part without the prior written approval of <strong>Innominate</strong><br />
<strong>Security</strong> <strong>Technologies</strong> <strong>AG</strong>.<br />
SSH®, SSH Secure Shell are trademarks of SSH Communications <strong>Security</strong>.<br />
Windows®, Windows NT®,and Windows Server are trademarks of<br />
Microsoft® Corporation.<br />
This product includes the following software:<br />
PostgreSQL JDBC driver:<br />
Copyright © 1997-2010 PostgreSQL Global Development Group.<br />
Jetty:<br />
Copyright © 1995-2007 Mort Bay Consulting Pty. Ltd.<br />
Copyright © 1999 Jason Gilbert.<br />
Copyright © 1999-2005 Sun Microsystems, Inc. All rights reserved.<br />
Copyright © 2002 International Business Machines Corporation.<br />
Copyright © 2004-2006 The Apache Software Foundation.<br />
Copyright © 2006 Tim Vernum.<br />
Copyright © 2007 CSC Scientific Computing Ltd.<br />
Commons DBCP:<br />
Copyright © 1999-2007 The Apache Software Foundation.<br />
Commons Pool:<br />
Copyright © 1999-2004 The Apache Software Foundation.<br />
Commons Codec:<br />
Copyright © 2001-2004 The Apache Software Foundation.<br />
Commons HttpClient:<br />
Copyright © 1999-2007 The Apache Software Foundation.<br />
Commons Logging:<br />
Copyright © 2003-2007 The Apache Software Foundation.
Tar library from Ant:<br />
Copyright © 1999-2006 The Apache Software Foundation.<br />
Bouncy Castle Provider and CMS:<br />
Copyright © 2000-2010 The Legion Of The Bouncy Castle<br />
(http://www.bouncycastle.org).<br />
jSCEP:<br />
Copyright © 2009-2010 David Grant.<br />
Copyright © 2010 ThruPoint Ltd.<br />
JSch and JZlib:<br />
Copyright © 1995-1998 Jean-loup Gailly and Mark Adler.<br />
Copyright © 2000-2009 Atsuhiko Yamanaka, JCraft, Inc. All rights reserved.<br />
JGoodies Common library from JGoodies:<br />
Copyright © 2009-2011 JGoodies Karsten Lentzsch. All rights reserved.<br />
JGoodies Looks library from JGoodies:<br />
Copyright © 2001-2011 JGoodies Karsten Lentzsch. All rights reserved.<br />
TinyRadius:<br />
Copyright © 2005-2010 Matthias Wuttke.<br />
See the license texts included in the software distribution for the copying terms<br />
applying to these software components.<br />
The source code for these software components is contained on the <strong>Innominate</strong><br />
Device Manager CD.<br />
<strong>Innominate</strong> Document Number: UG301412112-041
Contents<br />
1 Introduction ....................................................................................................................... 6<br />
2 Installation .......................................................................................................................... 7<br />
2.1 System requirements ................................................................................................ 7<br />
2.2 Upgrading from an earlier <strong>IDM</strong> version .................................................................. 7<br />
2.3 Installation of the <strong>IDM</strong> client, the <strong>IDM</strong> server and the database ............................. 8<br />
2.3.1 Installation on Windows ........................................................................... 8<br />
2.3.2 Installation on Linux ............................................................................... 13<br />
2.4 Installation of the license ........................................................................................ 15<br />
2.5 <strong>IDM</strong> server configuration ....................................................................................... 15<br />
2.6 Start the <strong>IDM</strong> server and the <strong>IDM</strong> client ................................................................ 21<br />
2.7 <strong>IDM</strong> Certification Authority (CA) installation ...................................................... 23<br />
2.7.1 Overview ................................................................................................. 24<br />
2.7.2 Installation procedure .............................................................................. 24<br />
2.7.3 Creation of the keys and certificates using the demoCA scripts ............. 25<br />
2.7.4 <strong>Manual</strong> creation of the CA keys and certificates .................................... 29<br />
2.7.5 Configuration of the <strong>IDM</strong> CA ................................................................. 29<br />
2.7.6 Starting the CA ........................................................................................ 33<br />
2.8 Pre-configuration of the mGuards .......................................................................... 34<br />
2.9 Installation of an HTTPS configuration pull server ............................................... 34<br />
2.10 Securing the communication between <strong>IDM</strong> components ...................................... 34<br />
2.10.1 Create the private key and the keystore for each component .................. 35<br />
2.10.2 Create the truststores ............................................................................... 37<br />
3 <strong>IDM</strong> client overview ........................................................................................................ 39<br />
3.1 Login ...................................................................................................................... 39<br />
3.2 The <strong>IDM</strong> main window .......................................................................................... 40<br />
3.3 Device overview table ............................................................................................ 40<br />
3.3.1 The device context menu ........................................................................ 45<br />
3.4 Template overview table ........................................................................................ 48<br />
3.4.1 The template context menu ..................................................................... 49<br />
3.5 Pool value overview table ...................................................................................... 50<br />
3.5.1 The pool context menu ............................................................................ 52<br />
3.6 VPN group overview table ..................................................................................... 52<br />
3.6.1 The VPN group context menu ................................................................. 54<br />
3.6.2 Editing device membership in VPN groups ............................................ 55<br />
3.7 Log window ............................................................................................................ 56<br />
3.7.1 The persistent event log .......................................................................... 57<br />
3.7.2 Logging events via syslog ....................................................................... 57<br />
3.8 The <strong>IDM</strong> main menu and tool bar .......................................................................... 58<br />
3.8.1 The <strong>IDM</strong> main menu ............................................................................... 58<br />
3.8.2 The <strong>IDM</strong> tool bar .................................................................................... 60<br />
3.9 Uploading configurations to the mGuards ............................................................. 60<br />
3.10 Managing license vouchers and device licenses .................................................... 64<br />
3.11 Managing users, roles, and permissions ................................................................. 65<br />
3.11.1 Managing users ....................................................................................... 66<br />
3.11.2 Managing roles ........................................................................................ 67<br />
3.11.3 Permissions ............................................................................................. 67<br />
4 of 122
3.11.4 <strong>User</strong> authentication .................................................................................. 68<br />
3.12 Managing firmware upgrades with <strong>IDM</strong> ................................................................ 68<br />
4 Template, device, pool, and VPN group configuration ................................................ 71<br />
4.1 General remarks ..................................................................................................... 71<br />
4.2 The Template Properties Dialog ............................................................................ 78<br />
4.2.1 Template configuration ........................................................................... 80<br />
4.3 The Device Properties Dialog ................................................................................ 81<br />
4.4 The Pool Properties Dialog .................................................................................... 84<br />
4.5 VPN configuration ................................................................................................. 86<br />
4.6 Managing X.509 certificates .................................................................................. 88<br />
4.6.1 Machine certificates ................................................................................ 88<br />
4.6.2 CA certificates (mGuard firmware 5.0 or newer) ................................... 90<br />
4.6.3 Remote certificates (mGuard firmware 5.0 or newer) ............................ 90<br />
4.6.4 Connection certificates ............................................................................ 91<br />
4.7 Using X.509 certificates (mGuard firmware 5.0 or newer) ................................... 91<br />
4.8 The VPN Group Properties Dialog (Meshed VPN networks) ............................... 91<br />
4.9 Rollback support .................................................................................................... 93<br />
4.10 Redundancy mode .................................................................................................. 93<br />
5 Working with templates .................................................................................................. 94<br />
5.1 Inheritance .............................................................................................................. 94<br />
5.2 Miscellaneous ......................................................................................................... 96<br />
5.2.1 Complex table variables and permissions ............................................... 96<br />
5.2.2 Firmware release settings and inheritance .............................................. 96<br />
6 Configuration history ...................................................................................................... 97<br />
6.1 The configuration history dialog ............................................................................ 97<br />
6.2 Viewing historic configurations ............................................................................. 99<br />
6.3 Comparison of historic configurations ................................................................. 100<br />
6.4 Reconstructing a device from a historic configuration ........................................ 101<br />
6.5 Report of changes ................................................................................................. 101<br />
7 Creating and managing certificates ............................................................................. 103<br />
7.1 Certificates and keys for SSL ............................................................................... 103<br />
7.2 Certificates and keys for a PKI ............................................................................ 106<br />
7.2.1 Create the CA certificates ..................................................................... 109<br />
7.2.2 Create the keystores .............................................................................. 117<br />
7.2.3 Requirements for certificates ................................................................ 119<br />
8 Glossary .......................................................................................................................... 120<br />
5 of 122
1 Introduction<br />
Introduction<br />
Thank your for choosing <strong>Innominate</strong> Device Manager.<br />
Please read this document for information on<br />
• the installation of <strong>Innominate</strong> Device Manager,<br />
• how to efficiently generate configurations for your <strong>Innominate</strong> mGuards, and<br />
• how to upload configurations to your <strong>Innominate</strong> mGuards.<br />
Overview<br />
Supported devices<br />
Supported mGuard<br />
features<br />
Related<br />
documentation<br />
The <strong>Innominate</strong> Device Manager enables the convenient management of<br />
<strong>Innominate</strong> mGuard security appliances. The tool offers a template mechanism<br />
that allows to centrally configure and manage thousands of <strong>Innominate</strong> mGuard<br />
devices.<br />
With a click of your mouse you can generate the desired firewall rules, NAT<br />
settings, etc., and upload the generated configurations to the devices in the<br />
network, deploying in an instant your desired device configurations.<br />
<strong>IDM</strong> is a client-server application, the client offering full control of all <strong>IDM</strong><br />
features, the server storing the configuration in a database, generating<br />
configuration files, and uploading those files to the devices upon request.<br />
If a configuration is uploaded to a device, <strong>IDM</strong> generates a configuration file<br />
which is transferred via SSH to the device and is subsequently taken into<br />
operation. Furthermore <strong>IDM</strong> can generate configuration files to be used for the<br />
configuration pull feature of the <strong>Innominate</strong> mGuard. Additionally, <strong>IDM</strong> can<br />
trigger firmware upgrades and deploy device licenses.<br />
<strong>IDM</strong> 1.4 supports <strong>Innominate</strong> mGuard firmware 4.2 and newer.<br />
The <strong>Innominate</strong> Device Manager supports all features of mGuard firmware 5.0<br />
and newer. The following features of mGuard firmware 4.2 are supported:<br />
• Router mode / Stealth mode / PPPoE mode<br />
• Stealth modes: automatic, static, and multiple-client<br />
• VLAN configuration<br />
• Firewall rules<br />
• NAT: Masquerading, Port forwarding, and 1:1 NAT<br />
• Server configuration: Syslog, NTP, and DNS<br />
• Rollout support<br />
• VPN<br />
Detailed information on the <strong>Innominate</strong> mGuard can be found in the following<br />
documents:<br />
• <strong>Innominate</strong> mGuard manual<br />
• Application note “Rollout support”<br />
6 of 122
Installation<br />
2 Installation<br />
2.1 System requirements<br />
<strong>IDM</strong> Client <strong>IDM</strong> Server <strong>IDM</strong> CA<br />
Hardware<br />
• A minimum of 512 MB<br />
RAM<br />
• 500 MB free hard disk<br />
space<br />
• Color monitor with at<br />
least 1280 x 1024<br />
resolution<br />
• A minimum of 4 GB RAM<br />
• 100 GB free hard disk<br />
space<br />
• A minimum of 512 MB<br />
RAM<br />
• 5 GB free hard disk<br />
space<br />
Software<br />
• Windows 2000 SP 2 / XP<br />
(or later), Windows<br />
Server 2003 (or later), or<br />
Linux<br />
• Java Runtime<br />
Environment JRE SE 6<br />
• Windows 2000 SP 2 / XP<br />
(or later), Windows<br />
Server 2003 (or later), or<br />
Linux<br />
• Java Runtime<br />
Environment JRE SE 6<br />
• PostgreSQL Version 9.0<br />
or later<br />
• Windows 2000 SP 2 / XP<br />
(or later), Windows<br />
Server 2003 (or later), or<br />
Linux<br />
• Java Runtime<br />
Environment JRE SE 6<br />
• PostgreSQL Version 9.0<br />
or later<br />
Download<br />
Please note that the <strong>IDM</strong> server requires more RAM and hard disk space<br />
than earlier versions.<br />
The PostgreSQL database does not support the FAT32 file system. In case you<br />
would like to install the PostgreSQL database on a system with FAT32 file<br />
system, it is strongly recommended to convert the file system to NTFS by using<br />
the convert.exe command before installing PostgreSQL. For more information<br />
on the convert-tool please enter help convert on the command line.<br />
Contact the <strong>Innominate</strong> Sales Department for information on how to obtain the<br />
software and a license. Please visit the web site http://www.innominate.com/<br />
and click on Contacts » Inquiries.<br />
2.2 Upgrading from an earlier <strong>IDM</strong> version<br />
To upgrade from an earlier <strong>IDM</strong> version to <strong>IDM</strong> 1.4.2, it is necessary to make<br />
irreversible changes to the backing PostgreSQL database. Once these changes<br />
have been made, the database can no longer be accessed with an earlier <strong>IDM</strong><br />
version. Furthermore, <strong>IDM</strong> 1.4.2 requires PostgreSQL version 9.x, while <strong>IDM</strong><br />
1.3.x and earlier <strong>IDM</strong> versions require PostgreSQL version 8.x. It is therefore<br />
necessary to upgrade PostgreSQL as well.<br />
1. Stop the <strong>IDM</strong> server if it is running.<br />
2. Dump the content of the <strong>IDM</strong> database. The command line tools pg_dump or<br />
pg_dumpall (part of the PostgreSQL distribution), the graphical front-end<br />
pgAdmin III, or another mechanism can be used for this. See the PostgreSQL<br />
documentation for details.<br />
3. If the <strong>IDM</strong> CA is used, dump the content of the CA database.<br />
It is strongly advised to keep a copy of the database dumps as a backup.<br />
4. Install PostgreSQL 9.x. Restore the content of the <strong>IDM</strong> database and the CA<br />
database (if applicable) from the dumps. The command line tool psql, the<br />
graphical front-end pgAdmin III, or another mechanism can be used for this.<br />
See the PostgreSQL documentation for details.<br />
7 of 122
Installation<br />
5. Install the <strong>IDM</strong> 1.4.2 server. Since the server configuration file<br />
preferences.xml has been extended, it is recommended to use and customize<br />
the file provided with <strong>IDM</strong> 1.4.2. By default, the passwords for the Java trust<br />
store, Java key store, and database connection are read from environment<br />
variables; set these environment variables accordingly.<br />
6. <strong>IDM</strong> 1.4.2 requires the Java SE 6 Runtime Environment (JRE). Make sure<br />
the java command refers to a JRE of this version, or use an appropriate<br />
pathname to run a Java SE 6 JRE.<br />
7. Invoke the server with the following command:<br />
java -Xmx1024m -jar idm-server-1.4.2.jar update preferences.xml<br />
The server will connect to the PostgreSQL database, upgrade it, and<br />
terminate. After this step, the database is ready to be used by <strong>IDM</strong> 1.4.2, i.e.<br />
the <strong>IDM</strong> 1.4.2 server can now be started.<br />
8. The first time the server is started after an upgrade from <strong>IDM</strong> 1.3.x or an<br />
earlier version, it creates one initial configuration history entry for each<br />
device. This process can take a long time (typically 30 minutes per 1000<br />
devices in the database) during which it is not possible to connect to the<br />
server with an <strong>IDM</strong> client. Subsequent server starts will not be affected.<br />
2.3 Installation of the <strong>IDM</strong> client, the <strong>IDM</strong> server and the database<br />
Client-server<br />
communication<br />
Communication<br />
between <strong>IDM</strong> and<br />
mGuard<br />
2.3.1 Installation on Windows<br />
Required<br />
components<br />
Database<br />
installation<br />
This section describes the installation of the <strong>Innominate</strong> Device Manager. Prior<br />
to the installation please make sure that your system fulfills the system<br />
requirements (see Chapter 2.1).<br />
<strong>IDM</strong> is a client-server application, i.e. the communication path between the client<br />
and the server must not be blocked by a firewall or a NAT device. In case you are<br />
using a NAT router in your environment, configure your environment in a way<br />
that the communication between client and server can proceed.<br />
The service port configured in the login window of the client (please refer to<br />
Chapter 3.1 and Chapter 2.5) is used to communicate with the <strong>IDM</strong> server. In a<br />
NAT scenario you have to make sure that this port on the server is accessible from<br />
the client.<br />
The communication between client and server is encrypted using the SSL<br />
protocol.<br />
The configuration is uploaded from the <strong>IDM</strong> server to the device using SSH or<br />
pulled by the mGuard using HTTPS. Please make sure that the communication<br />
between the server and the mGuard is not blocked by a firewall or a NAT device.<br />
For a full installation of <strong>IDM</strong> you need the following files and components:<br />
• Java Runtime Environment JRE SE 6<br />
• PostgreSQL installation files: postgresql-9.1.2.zip<br />
• <strong>IDM</strong> server: idm-server-1.4.2.zip<br />
• <strong>IDM</strong> client: idm-client-1.4.2.zip<br />
• License file: idm_license.dat<br />
• <strong>IDM</strong>-CA: idm-ca-1.4.2.zip (optional)<br />
• OpenSSL (optional)<br />
Except for the license file, these components are contained on the <strong>IDM</strong><br />
CD-ROM.<br />
Install the PostgreSQL database first. PostgreSQL is distributed with an installer<br />
for Windows. Please follow the instructions of the PostgreSQL-installer. The<br />
<strong>IDM</strong> server and the database can be be installed on different computers.<br />
8 of 122
Installation<br />
PostgreSQL can only be installed using an account with administrative<br />
privileges. But the PostgreSQL service has to run with nonadministrative<br />
privileges. For this purpose please create an appropriate<br />
account, use one of the existing accounts, or let the PostgreSQL installer<br />
automatically create an account for you (install option).<br />
During the installation this account will get the “Log on as a service”<br />
permission.<br />
If the access rights of the drive onto which you are planning to install or<br />
upgrade the PostgreSQL database are limited to special groups only, ensure<br />
that the Windows <strong>User</strong>s group has also the following access rights to this<br />
drive:<br />
• Read<br />
• Read & Execute<br />
• List Folder Contents<br />
These access rights are only required temporarily during the installation process<br />
and can be removed once the installation has been completed. If these access<br />
rights are not set prior to installation, then the installation process will fail to<br />
complete and display the error message:<br />
Failed to run initdb: 1!<br />
To check or set access rights for a drive/folder:<br />
1. In Windows Explorer, right-click on the drive you are checking.<br />
2. Select Properties from the right-click menu.<br />
3. In the Properties window, click on the <strong>Security</strong> tab. If this tab is not present,<br />
then you have to disable the simple file sharing:<br />
a.Click Start, and then click My Computer.<br />
b.On the Tools menu, click Folder Options, and then click the View tab.<br />
c.In the Advanced Settings section, clear the Use simple file sharing<br />
(Recommended) check box.<br />
4. Select the <strong>User</strong>s group or the user from the list. The current access rights for<br />
the <strong>User</strong>s group or the user will be displayed in the bottom half of the dialog<br />
box. If the <strong>User</strong>s group is not listed, click on the Add... button to add it.<br />
5. Make any necessary changes, then click Apply.<br />
Use the following options for the installation:<br />
• If you would like to get error and system messages in a language other than<br />
English, please select National Language Support in the Installation<br />
Options as additional package to be installed.<br />
• In the Service configuration please enter the login information of the account<br />
to be used for PostgreSQL. If you have not yet created an account and you<br />
would not like to use an existing account, the installer can also create an<br />
account for you.<br />
• Please confirm to grant the permission Log in as a service.<br />
• If the <strong>IDM</strong> server and PostgreSQL are to be installed on different computers,<br />
please select the option Accept connections on all addresses, not just<br />
localhost in Initialize database cluster.<br />
Please enter a password for the internal database superuser, to prevent<br />
unauthorized access to the database.<br />
• Accept the default settings in the following windows and start the installation<br />
process.<br />
Here are some common recommendations, in case you encounter problems<br />
during the installation. They were copied from the “Running & Installing<br />
PostgreSQL On Native Windows FAQ”, which can be found at:<br />
9 of 122
Installation<br />
http://wiki.postgresql.org/wiki/<br />
Running_%26_Installing_PostgreSQL_On_Native_Windows<br />
In case the following hints cannot solve your problems, please check the FAQ for<br />
more detailed information.<br />
If you cannot install PostgreSQL using mstsc, use<br />
mstsc /console<br />
(You cannot use a Terminal Server console to install PostgreSQL, but<br />
only a local console.)<br />
If you decide to create the user account to run the PostgreSQL service<br />
manually, make sure that the account has Log on as a service and Log<br />
on locally rights. The Log on locally is only required for the install<br />
part, and can be removed once the installation is completed if security<br />
policies require it. (Rights are granted and revoked using the Local<br />
<strong>Security</strong> Policy MMC snapin. Log on locally is default, and Log on as a<br />
service will normally be granted automatically by the installer). Note<br />
that if your computer is a member of a domain, the settings of the<br />
security policies may be controlled at the domain level using Group<br />
Policy.<br />
Make sure that the specific postgres account has the correct access rights<br />
for the PostgreSQL installation directory:<br />
The PostgreSQL service account needs read permissions on all<br />
directories leading up to the service directory. It needs write permissions<br />
on the data directory only. Specifically, it should not be granted<br />
anything other than read permissions on the directories containing<br />
binary files. (All directories below the installation directory are set by<br />
the installer, so unless you change something, there should be no<br />
problem with this).<br />
PostgreSQL also needs read permissions on system DLL files like<br />
kernel32.dll and user32.dll (among others), which is normally granted<br />
by default, and on the CMD.EXE binary, which may in some scenarios<br />
be locked down and need opening.<br />
PostgreSQL initialization<br />
After the installation the database has to be created and initialized:<br />
1. To initialize the database, start pgAdmin III (All programs »<br />
PostgreSQL 90/pgAdmin III) which has been installed with PostgreSQL.<br />
2. Connect to the database by opening the context menu in the menu tree on the<br />
10 of 122
Installation<br />
left and by selecting Connect.<br />
Figure 1: Connecting to the PostgreSQL database with pgAdmin III<br />
3. Enter your login data.<br />
Figure 2: Login to the PostgreSQL database with pgAdmin III<br />
4. Create a new login role by selecting New login role from the context menu.<br />
Please make sure that the values your_user and your_password are identical<br />
to the values specified in the preference file of the <strong>IDM</strong> server (see<br />
Chapter 2.5):<br />
• <strong>User</strong>: your_user<br />
• Password: your_password<br />
Figure 3: PostgreSQL initialization: create a new login role<br />
5. Select the rights:<br />
• Inherits rights ...<br />
11 of 122
Installation<br />
in the tab Properties<br />
and select the option<br />
• With admin option<br />
in the tab Role memberships.<br />
Figure 4: PostgreSQL installation: Configure the new login role<br />
6. Create a database by selecting New database in the context menu:<br />
Figure 5: PostgreSQL installation: Create a new database<br />
7. Enter your_user as owner and your_database_name as name, set the<br />
Encoding to UTF8, grant all privileges, and close the dialog by clicking on<br />
OK. Make sure that the values your_user and your_database_name are<br />
identical to the values specified in the preference file of the <strong>IDM</strong> server (see<br />
12 of 122
Installation<br />
Chapter 2.5).<br />
Figure 6: PostgreSQL installation: Configure the new database<br />
Securing the communication with the database<br />
If you install the database and the <strong>IDM</strong> server or the <strong>IDM</strong> CA on differerent<br />
computers it is highly recommended to encrypt the communication between the<br />
components. Please refer to Chapter 2.10 on how to setup a secure connection to<br />
the database server.<br />
Server installation<br />
Create a directory <strong>Innominate</strong> in your standard software installation directory<br />
(e.g.: C:\Program Files\<strong>Innominate</strong>) and unpack the file idm-server-1.4.2.zip<br />
into that directory.<br />
Complete the server installation by configuring the server (Chapter 2.5) and by<br />
creating entries in the registry if you would like to start the server automatically<br />
(Chapter 2.6).<br />
Finally initialize the database: Make sure that the preferences file matches the<br />
values you used when installing the database. To initialize the database you have<br />
to start the <strong>IDM</strong> server with the init option:<br />
java -Xmx512m -jar idm-server-1.4.2.jar init preferences.xml<br />
Remarks:<br />
• You have to add the full path for idm-server-1.4.2.jar and<br />
preferences.xml.<br />
• Make sure that the environment variables containing passwords are<br />
initialized (see Chapter 2.5).<br />
Client installation<br />
Create a directory <strong>Innominate</strong> in your standard software installation directory<br />
(e.g.: C:\Program Files\<strong>Innominate</strong>) and unpack the file idm-client-1.4.2.zip into<br />
that directory.<br />
2.3.2 Installation on Linux<br />
Required<br />
components<br />
For a full installation of <strong>IDM</strong> you need the following files and components:<br />
• Java Runtime Environment JRE SE 6<br />
• PostgreSQL installation files: postgresql-9.1.2.zip<br />
• <strong>IDM</strong> server: idm-server-1.4.2.zip<br />
• <strong>IDM</strong> client: idm-client-1.4.2.zip<br />
• License file: idm_license.dat<br />
• <strong>IDM</strong>-CA: idm-ca-1.4.2.zip (optional)<br />
• OpenSSL (optional)<br />
13 of 122
Database<br />
installation<br />
Except for the license file, these components are contained on the <strong>IDM</strong><br />
CD-ROM.<br />
Installation<br />
Please install the PostgreSQL database first. Choose the installation method that<br />
is suitable for your distribution, e.g. for Debian use aptitude or Synaptic. You<br />
will also find installation packages for Fedora and Red Hat on<br />
www.postgresql.org.<br />
PostgreSQL initialization<br />
After the installation of PostgreSQL the <strong>IDM</strong> database has to be created and<br />
initialized.<br />
1. If the <strong>IDM</strong> server and the database will not be installed on the same<br />
computer, add the following line to the configuration file pg_hba.conf in the<br />
PostgreSQL directory (e.g. for Debian:/etc/postgresql/9.0/main):<br />
host your_database_name your_user 0.0.0.0 0.0.0.0 md5<br />
Please make sure that the values your_database_name and your_user are<br />
identical to the values specified in the preference file of the <strong>IDM</strong> server (see<br />
Chapter 2.5).<br />
2. Restart the PostgreSQL service:<br />
/etc/init.d/postgresql-9.0 restart<br />
3. Enter the following commands (in a single line each) as superuser. Make<br />
sure that the values your_user, your_database_name, your_password are<br />
identical to the values specified in the preference file of the <strong>IDM</strong> server (see<br />
Chapter 2.5):<br />
• su postgres<br />
• createdb your_database_name<br />
• createuser --no-adduser --no-createdb your_user<br />
• echo "ALTER USER \"your_user\" WITH PASSWORD<br />
'your_password' ;" | psql your_database_name<br />
• echo "GRANT ALL ON DATABASE \"your_database_name\"<br />
TO \"your_user\" ;" | psql your_database_name<br />
Securing the communication with the database<br />
If you install the database and the <strong>IDM</strong> server or the <strong>IDM</strong> CA on different<br />
computers it is highly recommended to encrypt the communication between the<br />
components. Please refer to Chapter 2.10 on how to setup a secure connection to<br />
the database server.<br />
Server installation<br />
First create a new user, e.g. idm.<br />
Unpack the file idm-server-1.4.2.zip into the home directory of the user idm.<br />
If you would like to start the server when the system is started, please include a<br />
script in the /etc/init.d directory. It is also necessary to create symbolic links in<br />
system specific directories; please consult the documentation of your Linux<br />
distribution for details.<br />
The SQL database and the <strong>IDM</strong> server can be installed on different computers.<br />
Finally initialize the database:<br />
Make sure that the preferences file matches the values you used when installing<br />
the database. To initialize the database you have to start the <strong>IDM</strong> server with the<br />
init option. Enter the following command in a single line:<br />
java -Xmx512m -jar idm-server-1.4.2.jar init<br />
preferences.xml<br />
Remarks:<br />
• You have to add the full path for idm-server-1.4.2.jar and<br />
preferences.xml.<br />
• Make sure that the environment variables containing passwords are<br />
initialized with the correct values (see Chapter 2.5).<br />
14 of 122
Installation<br />
Client installation<br />
Unpack the file idm-client-1.4.2.zip into your home directory.<br />
2.4 Installation of the license<br />
2.5 <strong>IDM</strong> server configuration<br />
Copy the license file to a folder of your choice and configure the path in the<br />
preferences.xml file (see next chapter). If you do not specify a path for the license<br />
file in the preferences.xml file, <strong>IDM</strong> assumes the license file to be in the same<br />
directory as the <strong>IDM</strong> server. Install the license file prior to the start of the server.<br />
In order to operate properly, the server requires an XML preferences file as a<br />
configuration file, which can be specified during server start-up (see<br />
Chapter 2.6).<br />
A default configuration file (preferences.xml) is contained in the<br />
idm-server-1.4.2.zip file. Please unpack the ZIP file to get access to the<br />
preferences.xml file.<br />
There are several passwords to be configured in the preferences.xml file.<br />
The respective keys accept the ENV:VARNAME pattern as value to take<br />
the password from the environment variable with name VARNAME. If<br />
you decide to use this pattern, please make sure that the respective<br />
environment variables are initialized before starting the server.<br />
The entries in the preferences file are:<br />
Key expertMode<br />
If set to true, some unsupported configuration variables which are normally<br />
hidden are made available in the Device and Template Properties Dialog<br />
(default: false). Additionally, the mGuards are configured such that unsupported<br />
configuration variables become visible in their web interfaces. Please do not<br />
change this value.<br />
Node license<br />
Key licenseFile<br />
Name and path of the license file.<br />
Node device<br />
Node licenseServer<br />
Key proto<br />
The protocol to be used to access the license server (default: http). Please<br />
do not change this value.<br />
Key address<br />
The address of the license server (default:<br />
online.license.innominate.com). Please do not change this value.<br />
Key port<br />
The port to be used to access the license server (default: 80). Please do<br />
not change this value.<br />
Key reqPage<br />
The CGI script to be called when requesting licenses (default:<br />
cgi-bin/autoreq.cgi). Please do not change this value.<br />
15 of 122
Node service<br />
Key refPage<br />
The CGI script to be called when refreshing licenses (default:<br />
cgi-bin/autorefresh.cgi). Please do not change this value.<br />
Installation<br />
Key retries<br />
The number of retries to contact the license server (default: 3). Please do<br />
not change this value.<br />
Key timeout<br />
The timeout in seconds when contacting the license server (default: 60).<br />
Please do not change this value.<br />
Node connection<br />
Key useProxy<br />
Here you can configure whether a proxy should be used to contact the<br />
license server (default: false).<br />
Key proxyAddress<br />
The address of the proxy to contact the license server (default: 127.0.0.1).<br />
Key proxyPort<br />
The port of the proxy to be used to access the license server (default:<br />
3128).<br />
Key proxyRequiresAuthentication<br />
Boolean defining whether the proxy requires authentication (default:<br />
false).<br />
Key proxyAuthentication<strong>User</strong>name<br />
Key proxyAuthenticationPassword<br />
Key proxyAuthenticationRealm<br />
The credentials to be used, if the proxy requires authentication (default:<br />
empty).<br />
Key address<br />
The IP address designating the network interface on which the server is listening<br />
for client connections. If you specify 0.0.0.0, the server is listening on all<br />
interfaces (default: 127.0.0.1).<br />
Key port<br />
The port number on which the server is listening for client connections (default:<br />
7001).<br />
Key backlog<br />
Number of log entries to be stored (default: 50).<br />
Key storage<br />
The storage to be used (default: database).<br />
Node security<br />
Key keyStore<br />
Name and path of the keystore file (see Chapter 2.10.1 and Chapter 2.7).<br />
Key keyStoreType<br />
Format of the keystore, either JKS (Java JRE keytool, default) or PKCS12<br />
(OpenSSL).<br />
16 of 122
Installation<br />
Key keyStorePassword<br />
Password for the keystore file (see Chapter 2.10.1 and Chapter 2.7). The<br />
special value ENV:PASSWORD_SSL will cause the <strong>IDM</strong> server to read this<br />
password upon startup from the environment variable named<br />
PASSWORD_SSL; the name PASSWORD_SSL is just an example and can be<br />
changed if desired.<br />
Key trustStore<br />
Name and path of the truststore file (see Chapter 2.10.2 and Chapter 2.7).<br />
Key trustStoreType<br />
Format of the truststore, either JKS (Java JRE keytool, default) or PKCS12<br />
(OpenSSL).<br />
Key trustStorePassword<br />
Password for the truststore file (see Chapter 2.10.2 and Chapter 2.7). The<br />
special value ENV:PASSWORD_SSL will cause the <strong>IDM</strong> server to read this<br />
password upon startup from the environment variable named<br />
PASSWORD_SSL; the name PASSWORD_SSL is just an example and can be<br />
changed if desired.<br />
Node session<br />
Key maxInactiveInterval<br />
The maximum time interval of inactivity (in seconds) that the server will keep<br />
a session open between client accesses.<br />
A negative or zero time (default) indicates a session should never time out.<br />
Please note that this timeout will be reset only, if there is an interaction<br />
between client and server. Actions that are local to the client, i.e.<br />
scrolling in a table or changing between the device, template, pool, or<br />
VPN group tab will not reset the inactive timeout.<br />
Key maxConcurrentSessions<br />
The maximum number of concurrent sessions (= connected clients). A<br />
negative or zero count (default) indicates that the upper limit of the number of<br />
concurrent sessions is defined by the license.<br />
Node storage<br />
Node database<br />
Key host<br />
The IP address (or host name) <strong>IDM</strong> should connect to to get access to the<br />
PostgreSQL database (default: 127.0.0.1).<br />
Key port<br />
The port that <strong>IDM</strong> should use to connect to the database (default: 5432).<br />
Key name<br />
The name of the database (default: innomms).<br />
Key user<br />
The user of the database (default: innomms).<br />
Key password<br />
The password to be used to connect to the database (default:<br />
ENV:PASSWORD_DB).The special value ENV:PASSWORD_DB will<br />
cause the <strong>IDM</strong> server to read this password upon startup from the<br />
17 of 122
Installation<br />
environment variable named PASSWORD_DB; the name<br />
PASSWORD_DB is just an example and can be changed if desired.<br />
Please make sure that the values for port, name, user and password<br />
match the values you specified during the PostgreSQL installation.<br />
Key ssl<br />
Enable/disable secure connection between the <strong>IDM</strong> server and the<br />
PostgreSQL server. Please note that enabling this option requires<br />
additional installation steps, see Chapter 2.10 (default: false).<br />
Node update<br />
Node scheduler<br />
Key tries<br />
Maximum number of attempts for an upload or export of a device<br />
configuration. If this maximum is reached, <strong>IDM</strong> will stop trying to<br />
upload a configuation to the device (default: 5).<br />
Key timeout<br />
Maximum number of seconds until an upload of the device<br />
configuration is cancelled. After the timeout is reached, <strong>IDM</strong> will<br />
stop trying to upload a configuation to the device (default: 600).<br />
Key rescheduleDelay<br />
Number of seconds between upload attempts (default: 45).<br />
Node firmwareUpgradeScheduler<br />
Key tries<br />
Maximum number of connections <strong>IDM</strong> should attempt to get<br />
feedback from the device on the result of the firmware upgrade. If<br />
this maximum is reached, <strong>IDM</strong> will stop trying to contact the device<br />
(default: 5).<br />
Key timeout<br />
Maximum number of seconds until <strong>IDM</strong> stops to contact a device for<br />
the result of a firmware upgrade. After the timeout is reached, <strong>IDM</strong><br />
will indicate that the firmware upgrade failed (default: 3600).<br />
Key rescheduleDelay<br />
Intervall in seconds between two attempts to obtain the result of a<br />
firmware upgrade from the device (default: 300).<br />
Node ssh<br />
Key connectTimeout<br />
Timeout for the initial SSH connect to a device (default: 60).<br />
Key socketTimeout<br />
Timeout for the SSH connection TCP/IP socket, e.g. lost connection<br />
(default: 120).<br />
Key deadPeerDetectionTimeout<br />
This timeout will get activated, if a device did not answer a<br />
command started on the device (default: 120).<br />
18 of 122
Installation<br />
Node service<br />
Node radius<br />
Node pull<br />
Node export<br />
Key directory<br />
The export base directory on the server where the configuration<br />
files should be exported to (e.g. for the configuration pull).<br />
Please note that the configuration files are always exported by<br />
the server and not the client, i.e. the client does not have any<br />
access to the files. The specified directory pathname should<br />
have the appropriate format of the respective OS (default: the<br />
default temporary directory of your installation, e.g. /tmp for<br />
Linux).<br />
Key filenames<br />
A comma-separated list of naming schemes for pull<br />
configuration exports.<br />
dbid: A unique ID (automatically assigned) is used as filename<br />
and the files are written to the export base directory.<br />
serial: The serial number is used as filename and the files are<br />
written to the serial/ subdirectory of the export base directory.<br />
mgntid: The Management ID is used as filename and the files<br />
are written to the mgntid/ subdirectory of the export base<br />
directory (default: dbid,serial,mgntid).<br />
Node feedback<br />
Key port<br />
The mGuards can pull their configurations from an HTTPS<br />
server. Since the HTTPS server is a separate application, <strong>IDM</strong><br />
does not get any direct feedback about the result of a<br />
configuration pull. To enable the feedback mechanism, <strong>IDM</strong><br />
has to be configured as a Syslog server in the HTTPS server<br />
settings. <strong>IDM</strong> will then receive and analyze the HTTS server<br />
syslog messages and display the result of configuration pulls in<br />
the client.<br />
It is recommend to use an unprivileged port (above 1024) so that<br />
the server can be run without administrator/root privileges<br />
(default: 7514).<br />
Key numServers<br />
Set this to the number of RADIUS servers to enable RADIUS authentication.<br />
Please refer to Chapter 3.11.4 for more detailed information. If set to 0,<br />
RADIUS authentication is disabled (default: 0).<br />
Key timeout<br />
The number of seconds that the <strong>IDM</strong> server waits for a reply from a RADIUS<br />
server. Only used if RADIUS authentication is enabled (default: 5).<br />
Key retries<br />
The number of times that the <strong>IDM</strong> server sends requests to the RADIUS<br />
servers. If no reply is received within timeout seconds for retries times, the<br />
authentication request is considered failed. Only used if RADIUS<br />
authentication is enabled (default: 3).<br />
19 of 122
Installation<br />
Key nasIdentifier<br />
The NAS Identifier included in RADIUS requests sent by the <strong>IDM</strong> server.<br />
Some RADIUS servers ignore this, in which case the default value can be left<br />
unchanged (default: nas.identifier.example).<br />
Nodes 0, 1, … (up to the number of RADIUS servers minus one)<br />
Each numbered node identifies a single RADIUS server.<br />
Key host<br />
The hostname or IP address of the RADIUS server (default: localhost).<br />
Key port<br />
The port on which the RADIUS server listens for incoming requests (default:<br />
1812).<br />
Key sharedSecret<br />
The shared secret used to authenticate the RADIUS request. The same shared<br />
secret must be configured in the RADIUS server (default: secret).<br />
Node locale<br />
Country and language specific settings. Please leave the defaults, since these<br />
settings are not fully supported yet.<br />
Node logging<br />
Node syslog<br />
Node configurationHistory<br />
Key numReceivers<br />
Set this to the number of syslog receivers to which <strong>IDM</strong> sends log messages.<br />
If set to 0, logging via syslog is disabled (default: 1).<br />
Key logLevel<br />
The minimum severity of the messages to log via syslog. Messages with a<br />
severity lower than the specified one are suppressed (default: INFO).<br />
The following severities can be used:<br />
• SEVERE (highest severity)<br />
• WARNING<br />
• INFO<br />
• CONFIG<br />
• FINE<br />
• FINER<br />
• FINEST (lowest severity)<br />
Nodes 0, 1, … (up to the number of syslog servers minus one)<br />
Each numbered node identifies a single syslog server.<br />
Key host<br />
The hostname or IP address of the syslog server (default: localhost).<br />
Key port<br />
The port on which the syslog server listens for incoming log messages<br />
(default: 514).<br />
Key expireAfterDays<br />
Configuration history entries older than the specified number of days are<br />
automatically expired (i.e. removed from the history). If the value 0 is used,<br />
configuration history entries are never expired (default: 14).<br />
20 of 122
Installation<br />
Node CA<br />
Please refer to Chapter 6 for more detailed information on configuration history<br />
entries.<br />
These settings are required only if a CA is used.<br />
Key type<br />
The type of CA to use. Valid values are <strong>IDM</strong>-CA to use the <strong>IDM</strong> CA or SCEP to<br />
communicate with a CA via SCEP (default: <strong>IDM</strong>-CA). Please refer to<br />
Chapter 4.6.1 for more detailed information on SCEP.<br />
Key protocol<br />
The protocol to be used to connect to the <strong>IDM</strong> CA. Valid values are http or https<br />
(default: https). When using the <strong>IDM</strong> CA, only https should be used since the<br />
<strong>IDM</strong> CA relies on transport layer security for authentication purposes. SCEP<br />
includes application layer authentication mechanisms, so http is usually used<br />
with SCEP.<br />
Key host<br />
The hostname or IP address of the CA server (default: localhost).<br />
Key port<br />
The port on which the CA server listens for incoming requests (default: 7070). If<br />
0 is specified, the https or http default port is used.<br />
Key requestDirectory<br />
The path within the URL the <strong>IDM</strong> server uses for certification requests (default:<br />
request). When using the <strong>IDM</strong> CA, request must be used. When using SCEP,<br />
consult the documentation of the CA server. If e.g. the Microsoft Windows<br />
Server 2008 CA is used, CertSrv/mscep/mscep.dll should be specified.<br />
Key revocationDirectory<br />
The path within the URL the <strong>IDM</strong> server uses for certificate revocation requests<br />
(default: revoke). When using the <strong>IDM</strong> CA, revoke must be used. Not applicable<br />
when SCEP is used.<br />
Key rsaKeySize<br />
The size (in bits) of the RSA modulus the <strong>IDM</strong> server uses to generate RSA key<br />
pairs (default: 2048).<br />
Node SCEP<br />
Key name<br />
The instance name used in SCEP requests (default: <strong>IDM</strong>). Please note that<br />
some CAs ignore the instance name, but still require a non-empty value.<br />
2.6 Start the <strong>IDM</strong> server and the <strong>IDM</strong> client<br />
To configure the <strong>IDM</strong> server a preferences file is required. A standard<br />
preferences file (preferences.xml) is contained in the idm-server-<br />
1.4.2.zip file. Please unpack the ZIP file to get access to the<br />
preferences.xml file.<br />
In general the server is started with the following command (in a single<br />
line):<br />
java -Xmx1024m -jar idm-server-1.4.2.jar start<br />
preferences.xml<br />
Remarks:<br />
• You have to add the full path for idm-server-1.4.2.jar and<br />
preferences.xml.<br />
• Make sure that the environment variables containing passwords are<br />
21 of 122
Installation<br />
Memory allocation<br />
Windows<br />
initialized (see Chapter 2.5).<br />
You should also specify the size of the memory allocation pool using the -Xmx<br />
and -Xms options.<br />
Initial size of the memory allocation pool<br />
Use the option -Xms to specify the initial size, in bytes, of the memory allocation<br />
pool. This value must be a multiple of 1024. Append the letter k or K to indicate<br />
kilobytes, or m or M to indicate megabytes. The default value is 2 MB. Examples:<br />
-Xms33554432<br />
-Xms32768k<br />
-Xms32m<br />
Maximum size of the memory allocation pool<br />
Use the option -Xmx to specify the maximum size, in bytes, of the memory<br />
allocation pool. This value must be a multiple of 1024. Append the letter k or K<br />
to indicate kilobytes, or m or M to indicate megabytes. The default value is<br />
64 MB. Examples:<br />
-Xmx268435456<br />
-Xmx262144k<br />
-Xmx256m<br />
For the client a value of 512 MB (-Xmx512m) is recommended,<br />
especially if <strong>IDM</strong> is used to configure VPN connections.<br />
The server should generally have as much memory as possible, so that it<br />
can make efficient use of its caching mechanisms, but not so much that<br />
the machine starts swapping. Recommended is a value between 50%<br />
and 75% of the physical RAM size, depending on which other<br />
applications are running on the same machine.<br />
Server<br />
In case you would like to start the server as a service, two tools from the<br />
Windows Resource Kit (can be downloaded from www.microsoft.com) are<br />
required:<br />
• srvany.exe<br />
• instsrv.exe<br />
Please download and install the Windows Resource Kit.<br />
The required installation steps for running the <strong>IDM</strong> Server as Windows service<br />
are:<br />
1. Execute the command:<br />
instsrv <br />
e.g.: instsrv <strong>IDM</strong>_Server_1.4 c:\ntreskit\srvany.exe<br />
2. Open the registry editor and navigate to the key:<br />
HEY_LOCAL_MACHINE\SYSTEM\CurrentControlSet\Services\<br />
e.g. HEY_LOCAL_MACHINE\SYSTEM\CurrentControlSet\Services\<strong>IDM</strong>_Server_1.4<br />
3. Create a new key called Parameters.<br />
4. Beneath Parameters, create the following three REG_SZ entries:<br />
Application, AppDirectory, AppParameters<br />
5. Assign the following values to the entries:<br />
Application = <br />
e.g. Application=C:\Program Files\Java\jre1.6.0_06\bin\java.exe<br />
AppDirectory = <br />
e.g. AppDirectory=C:\Program Files\<strong>Innominate</strong>\<strong>IDM</strong>\Server<br />
22 of 122
Installation<br />
AppParameters=<br />
e.g. AppParameters=-Xmx1024m -jar C:\Program<br />
Files\<strong>Innominate</strong>\<strong>IDM</strong>\Server\idm-server-1.4.2.jar start<br />
c:\Inno\<strong>IDM</strong>\preferences.xml<br />
6. To start the service from the command line, execute:<br />
net start <br />
e.g. net start <strong>IDM</strong>_Server_1.4<br />
The service appears to be running if the the “wrapper service” srvany<br />
has been started successfully. It could therefore be possible that the <strong>IDM</strong><br />
server has not been started, even if the service is running.<br />
7. To stop the service from the command line, execute:<br />
net stop <br />
e.g. net stop <strong>IDM</strong>_Server_1.4<br />
8. To remove the service, execute:<br />
instsrv remove<br />
e.g. instsrv <strong>IDM</strong>_Server_1.4 remove<br />
Linux<br />
If you would like to run the server as an application, but start it automatically<br />
with the login, add the following REG_SZ value to the<br />
HKEY_LOCAL_MACHINE\SOFTWARE\Microsoft\Windows\CurrentVersion\Run<br />
folder of your registry:<br />
name: <strong>IDM</strong>_Server<br />
value: "full_path\\java.exe" -Xmx1024m<br />
-jar full_path\idm-server-1.4.2.jar start<br />
full_path\preferences.xml<br />
e.g.:<br />
"C:\\Program Files\\Java\\jre1.6.0_06\\bin\\java.exe" -Xmx1024m<br />
-jar C:\Program Files\<strong>Innominate</strong>\idm-server-1.4.2.jar<br />
start C:\Program Files\<strong>Innominate</strong>\preferences.xml<br />
Client<br />
You can start the client either with the command line:<br />
full_path\java -Xmx384m -jar idm-client-1.4.2.jar<br />
or with a double-click on idm-client-1.4.2.jar in the Explorer-Window.<br />
Server<br />
The server can be started manually with the command (in a single line):<br />
full_path/java -Xmx1024m<br />
-jar full_path/idm-server-1.4.2.jar start<br />
full_path/preferences.xml<br />
Client<br />
You can start the client by entering the command:<br />
full_path/java -Xmx384m -jar idm-client-1.4.2.jar<br />
2.7 <strong>IDM</strong> Certification Authority (CA) installation<br />
<strong>IDM</strong> provides its own Certification Authority (CA). The <strong>IDM</strong> CA is a separate<br />
server instance. The CA is used to issue machine certificates for the mGuards,<br />
e.g. if you would like to use X.509 authentication for your VPN tunnels. Please<br />
refer to Chapter 4.5 on how to request certificates for an mGuard using the CA.<br />
23 of 122
Installation<br />
2.7.1 Overview<br />
If you are not going to configure VPN tunnels with <strong>IDM</strong> or if you would like to<br />
use your own CA or pre-shared keys (PSK), the installation of the <strong>IDM</strong>-CA is not<br />
required.<br />
The purpose of the <strong>IDM</strong> CA is to issue certificates, which are requested by the<br />
<strong>IDM</strong> server to be used as machine certificates for mGuards.<br />
The <strong>IDM</strong> CA is implemented as a stand alone server. Its interface to the <strong>IDM</strong><br />
server is a servlet driven web server (HTTP), which can be secured with SSL<br />
(HTTPS) and which can enforce client authentication. Especially in production<br />
environments <strong>Innominate</strong> highly recommends to use HTTPS with client<br />
authentication, because only then is it assured that the <strong>IDM</strong> CA will issue<br />
certificates to authenticated clients only.<br />
The configuration file of the <strong>IDM</strong> CA server allows to configure different<br />
keystores (isolation) for the generation of certificates (CA-keystore) and for the<br />
SSL authentication (SSL-keystore, SSL-truststore). This assures that the CA<br />
private key (intended for issuing machine certificates) is not accidentally used for<br />
SSL authentication.<br />
The <strong>IDM</strong> CA stores all required information in a PostgreSQL database. The<br />
communication between the <strong>IDM</strong> CA and the database should be also secured<br />
using SSL.<br />
All the required keys and certificates to secure the communication between <strong>IDM</strong><br />
CA, <strong>IDM</strong> server and the database have to be generated, installed in the file<br />
system and configured in the ca-preferences.xml file of the CA component and<br />
also in the preferences.xml file of the <strong>IDM</strong> server.<br />
There are many tools to create and manage keys and certificates. This document<br />
describes the usage of the OpenSSL tools, which are available for Linux and<br />
Windows (e.g. as stand-alone binary or as part of the cygwin package). The tools<br />
to create the certificates, keys, and keystores need not be installed on the <strong>IDM</strong><br />
CA target system.<br />
The use of OpenSSL 0.9.8 or newer is recommended, due to the support<br />
of SHA-256.<br />
Certificate Revocation Lists (CRLs) are not supported by mGuard 4.2,<br />
but are supported with mGuard firmware 5.0 and newer. If using<br />
mGuard 4.2 it is recommended to include the CRL distribution points<br />
(CDP) information already in the certificates when rolling out a PKI,<br />
since then an exchange of the certificates will not be required when<br />
updating to a newer mGuard firmware.<br />
Chapter 2.7.2 contains an overview over the installation procedure.<br />
Chapter 2.7.3 describes how to use the demoCA scripts contained in the<br />
installation archive idm-ca-1.4.2.zip to create the required keys and certificates.<br />
Chapter 2.7.4 provides detailed information on how to manually create and<br />
install the keys and certificates.<br />
2.7.2 Installation procedure<br />
1. Create an OS user for the <strong>IDM</strong> CA server. The user for the <strong>IDM</strong> server could<br />
be reused though that is not recommended (isolation).<br />
2. Unpack idm-ca-1.4.2.zip into that user's home directory.<br />
3. Make sure the PostgreSQL database 9.0 is installed (see Chapter 2.3). The<br />
<strong>IDM</strong> CA can use the same database instance as the <strong>IDM</strong> server but for<br />
separation of name spaces it is required to create a different database schema<br />
(= user) for the CA, e.g. idmca.<br />
4. Create the database schema from scratch analogous to the <strong>IDM</strong> server but<br />
24 of 122
Installation<br />
instead of initializing the database using the init option of the <strong>IDM</strong> server use<br />
the script idmca.sql from the archive idm-ca-1.4.2.zip (see below).<br />
For Windows please refer to the section Database installation in<br />
Chapter 2.3.1. For Linux refer to the section Database installation in<br />
Chapter 2.3.2.<br />
To initialize the database schema on Linux please enter the following<br />
command in a single line:<br />
psql -h 127.0.0.1 -f idmca.sql your_database_name your_CA_user<br />
--password<br />
To initialize the database schema on Windows please start pgAdmin III as<br />
described in Chapter 2.3.1. Select the database schema you just created in the<br />
previous steps and click on the icon, select File » Open in the menu of the<br />
query-window, select the <strong>IDM</strong> initialization script idmca.sql in the file<br />
chooser and finally start the query by clicking on the icon in the query<br />
window. The database is initialized now.<br />
5. Adapt the database node of the ca-preferences.xml file (see Chapter 2.7.5) to<br />
your environment.<br />
6. Either create the required keys and certificates automatically using the<br />
demoCA scripts (see Chapter 2.7.3) or follow the instructions in<br />
Chapter 2.7.4 (manual creation). After this step the keys, certificates and<br />
keystores should be located in your file system.<br />
7. If required, change further keys of the ca-preferences.xml file not mentioned<br />
in the previous step (for an explanation of all keys refer to Chapter 2.7.5).<br />
8. Start the CA server (see Chapter 2.7.6)<br />
2.7.3 Creation of the keys and certificates using the demoCA scripts<br />
Installation<br />
Contents of the<br />
demoCA directory<br />
Instead of manually creating the keys and certificates you can also use the scripts<br />
provided in the installation archive idm-ca-1.4.2.zip. This chapter describes how<br />
to adapt the scripts and configuration files to meet your requirements. If you<br />
prefer to create the certificates and keys manually you can skip this chapter and<br />
continue with Chapter 2.7.4. However, if you are interested in detailed<br />
information about creating keys and certificates please refer to Chapter 7.<br />
The scripts generate all required keys, keystores and certificates,<br />
including the CA certificates and the SSL certificates, i.e. after<br />
following the steps described in this chapter the communication paths<br />
between the <strong>IDM</strong> components are already secured (see Chapter 2.10).<br />
If you would like to use an OpenSSL version older than the<br />
recommended version 0.9.8 you have to change the digest algorithm in<br />
the scripts to an algorithm supported by your OpenSSL version. The<br />
digest algorithm is configured in the files set-env.bat/set-env.sh.<br />
The demoCA directory contains scripts to be used with Linux and with Windows.<br />
The names of the scripts for the different OS are alike, just the extension differs:<br />
.sh for Linux and .bat for Windows.<br />
The Linux scripts must be made executable before they can be invoked. Change<br />
into the demoCA directory and type the following command:<br />
chmod +x *.sh<br />
The following files are contained in the demoCA directory:<br />
Tools<br />
• ImportKey.class, ImportKey.java<br />
Java tool to create and manage keystores.<br />
25 of 122
Installation<br />
Adapting the<br />
scripts<br />
General purpose scripts<br />
• gen-all.bat, gen-all.sh<br />
These scripts generate all required keys and certificates.<br />
• gen-dirs.bat, gen-dirs.sh<br />
These scripts create the sub directories in your target directory (see section<br />
Running the scripts below) in which the certificates and keys are stored.<br />
• set-env.bat, set-env.sh<br />
These scripts contain the initialization of the environment variables that are<br />
used in the subsequent scripts.<br />
Scripts to generate the CA certificates<br />
• gen-template.bat, gen-template.sh<br />
Scripts to generate the template certificate.<br />
• gen-ca.bat, gen-ca.sh<br />
Scripts to generate the intermediate CA certificate and keys.<br />
• gen-root.bat, gen-root.sh<br />
Scripts to generate the root CA certificate and keys.<br />
OpenSSL configuration files (to be used for the generation of the CA<br />
certificates)<br />
• caCert.conf<br />
• rootCert.conf<br />
• templateCert.conf<br />
Scripts to generate the SSL certificates<br />
• gen-ssl.bat, gen-ssl.sh<br />
Scripts to generate all required SSL certificates.<br />
• gen-ssl-idm-ca.bat, gen-ssl-idm-ca.sh<br />
Scripts to generate the <strong>IDM</strong> CA certificates.<br />
• gen-ssl-idm-server.bat, gen-ssl-idm-server.sh<br />
Scripts to generate the <strong>IDM</strong> server certificates.<br />
• gen-ssl-postgres.bat, gen-ssl-postgres.sh<br />
Scripts to generate the certificates for the PostgreSQL database.<br />
The scripts have to be adapted to your environment:<br />
Default passwords<br />
The passwords in the scripts set-env.bat,set-env.sh have to be changed:<br />
PASSWORD_ROOT='geheimRoot'<br />
PASSWORD_CA='geheimCA'<br />
PASSWORD_SSL='geheimSSL'<br />
Please use your own, secure passwords.<br />
Location of OpenSSL<br />
If you are using Windows, you might have to adapt the installation path for<br />
openssl.exe in the file set-env.bat to your environment.<br />
OpenSSL configuration files<br />
For further information on certificate extensions and on the Subject<br />
Distinguished Name please refer to Chapter 7.2.<br />
In all three configuration files (caCert.conf, rootCert.conf, templateCert.conf)<br />
the section which determines the Subject Distinguished Name has to be adapted<br />
to your environment:<br />
C= DE<br />
O= <strong>Innominate</strong> <strong>Security</strong> <strong>Technologies</strong> <strong>AG</strong><br />
OU= Research & Development<br />
CN= Test Root CA<br />
26 of 122
Installation<br />
Running the scripts<br />
Using the output of<br />
the scripts<br />
Furthermore in the extension section of the files caCert.conf and<br />
templateCert.conf the entries crlDistributionPoints and<br />
authorityInfoAccess have to be adapted to your environment:<br />
crlDistributionPoints=URI:http://ca.example/ca.crl<br />
authorityInfoAccess=OCSP;URI:http://ca.example/ocsp/ca<br />
The gen-all scripts require as argument the target directory, e.g.<br />
gen-all my_directory_incl_full_path<br />
If a target directory is omitted a subdirectory named security will be<br />
automatically created in the <strong>IDM</strong> installation directory. All generated scripts and<br />
certificates will be created in subdirectories of the target directory.<br />
The gen-all script creates all required files in the target directory. The location of<br />
the files has to be manually configured in the preferences file of the respective<br />
<strong>IDM</strong> component.<br />
The names used for certificates and keys in the following sections refer<br />
to the names introduced in Figure 7 and in Chapter 7.2.1.<br />
The preferences files support the construct ENV:MY_PASSWORD for<br />
passwords, i.e. the password is read from the environment variable<br />
MY_PASSWORD (the name of the environment variable is just an<br />
example and can be changed if desired).<br />
Subdirectory idm_ca<br />
• ca-keystore.jks<br />
A keystore in JKS format containing the certificate chain up to the root<br />
certificate (CA cert , CA rootCert ) and CA key .<br />
• The filename of this keystore (including the absolute or relative path)<br />
has to be configured in the ca-preferences.xml file in the node<br />
certificateFactory » keyStore.<br />
• The password to access the keystore (default:<br />
ENV:PASSWORD_CA) has to be configured in the<br />
ca-preferences.xml file in the node certificateFactory »<br />
keyStorePassword.<br />
• The format of this keystore (JKS) has to be configured in the<br />
ca-preferences.xml file in the node certificateFactory »<br />
keyStoreType.<br />
• The password to access the private key (default:<br />
ENV:PASSWORD_CA) has to be configured in the<br />
ca-preferences.xml file in the node certificateFactory »<br />
keyPassword.<br />
• The alias (default: ca) of the key has to be configured in the<br />
ca-preferences.xml file in the node certificateFactory » keyAlias.<br />
• https-keystore.jks<br />
A keystore containing IC cert and IC key .<br />
• The full pathname of this keystore has to be configured in the<br />
ca-preferences.xml file in the node<br />
httpServer » https » keyStore<br />
• The format of this keystore (JKS) has to be configured in the<br />
ca-preferences.xml file in the node httpServer » https »<br />
keyStoreType<br />
• The password to access the keystore (default:<br />
ENV:PASSWORD_SSL) has to be configured in the<br />
ca-preferences.xml file in the node httpServer » https »<br />
keyStorePassword<br />
• https-truststore.jks<br />
A keystore containing IS cert .<br />
27 of 122
Installation<br />
• The filename including the path of this keystore has to be configured<br />
in the ca-preferences.xml file in the node httpServer » https »<br />
trustStore<br />
• The format of this keystore (JKS) has to be configured in the<br />
ca-preferences.xml file in the node httpServer » https »<br />
trustStoreType<br />
• The password to access the keystore (default:<br />
ENV:PASSWORD_SSL) has to be configured in the<br />
ca-preferences.xml file in the node httpServer » https »<br />
trustStorePassword<br />
• database-truststore.jks<br />
A keystore containing DB cert .<br />
• The location of this keystore has to be configured in the<br />
ca-preferences.xml file in the node certificateFactory » storage »<br />
database » security » trustStore<br />
• The format of this keystore (JKS) has to be configured in the<br />
ca-preferences.xml file in the node certificateFactory » storage »<br />
database » security » trustStoreType<br />
• The password to access the keystore (default:<br />
ENV:PASSWORD_SSL) has to be configured in the<br />
ca-preferences.xml file in the node certificateFactory » storage »<br />
database » security » trustStorePassword<br />
• templateCert.pem<br />
This file contains CA templCert .<br />
The location of this file has to be configured in the ca-preferences.xml<br />
file in the node certificateFactory » certTemplate<br />
Subdirectory idm_server<br />
• keystore.jks<br />
A keystore containing IS cert and IS key .<br />
• The location of this keystore has to be configured in the<br />
preferences.xml file of the <strong>IDM</strong> server in the node service »<br />
security » keyStore<br />
• The format of this keystore (JKS) has to be configured in the<br />
preferences.xml file of the <strong>IDM</strong> server in the node service »<br />
security » keyStoreType<br />
• The password to access the keystore (default:<br />
ENV:PASSWORD_SSL) has to be configured in the preferences.xml<br />
file of the <strong>IDM</strong> server in the node service » security »<br />
keyStorePassword<br />
• truststore.jks<br />
A keystore containing DB cert and IC cert<br />
• The location of this keystore has to be configured in the<br />
preferences.xml file of the <strong>IDM</strong> server in the node service »<br />
security » trustStore<br />
• The format of this keystore (JKS) has to be configured in the<br />
preferences.xml file of the <strong>IDM</strong> server in the node service »<br />
security » trustStoreType<br />
• The password to access the keystore (default:<br />
ENV:PASSWORD_SSL) has to be configured in the preferences.xml<br />
file of the <strong>IDM</strong> server in the node service » security »<br />
trustStorePassword<br />
Subdirectory postgres-server<br />
• server.crt<br />
28 of 122
Installation<br />
• server.key<br />
These are the files containing DB cert and DB key . The files have to be copied<br />
to the PostgreSQL data directory (i.e. the subdirectory of the PostgreSQL<br />
directory usually named pgdata).<br />
Subdirectory archive<br />
This directory contains certificates and keys that were created during the process,<br />
but are not required for the installation. Please do not delete this directory since<br />
it contains e.g. the root key which might be required when signing further<br />
intermediate CA certificate requests.<br />
Further keys in the configuration files<br />
To enable the SSL communication the following keys of the configuration files<br />
have to be configured as well:<br />
• ca-preferences.xml<br />
• certificateFactory » storage » database » ssl = true<br />
• httpServer » protocol = https<br />
• httpServer » https » clientAuth = true<br />
• preferences.xml<br />
• server » storage » database » ssl = true<br />
• ca » protocol = https<br />
2.7.4 <strong>Manual</strong> creation of the CA keys and certificates<br />
This section explains how to manually create and install the keys and certificates<br />
required for the CA. If you are not familiar with OpenSSL it is highly<br />
recommended to read Chapter 7 first, which introduces some of the basic<br />
concepts and explains the process in detail. The requirements for the certificates<br />
are summarized in Chapter 7.2.3.<br />
Follow these steps to manually create the <strong>IDM</strong> CA keys and certificates:<br />
1. Generate CA rootCert and a matching private key CA rootKey as described in<br />
Chapter „Create the root certificate” on page 110.<br />
2. Generate the CA certificate CA cert and the corresponding private key CA key<br />
as described in Chapter „Create the CA certificate” on page 112.<br />
3. Generate the template certificate CA templCert as described in Chapter „Create<br />
a certificate template” on page 115. The template certificate is used by the<br />
CA as template for creating the mGuard certificates.<br />
4. Create the CA keystore and configure the preferences file of the <strong>IDM</strong> CA as<br />
described in Chapter „Create the keystores” on page 117.<br />
5. Secure your communication paths and configure the preferences files of the<br />
<strong>IDM</strong> components as described in Chapter 2.10.<br />
2.7.5 Configuration of the <strong>IDM</strong> CA<br />
This chapter describes the contents of the configuration file ca-preferences.xml<br />
contained in the installation archive idm-ca-1.4.2.zip. Please adapt<br />
ca-preferences.xml according to your environment.<br />
Node certificateFactory<br />
Key validityPeriodDays<br />
Number of days certificates issued by the <strong>IDM</strong> CA shall be valid (i.e. each<br />
certificate will be valid for the specified number of days starting from the time of<br />
its issuance).<br />
Key certTemplate<br />
Name and path of a certificate file to be used as template for new VPN<br />
certificates issued by the <strong>IDM</strong> CA.<br />
29 of 122
Installation<br />
Key keyStore<br />
Name and path of the keystore file (see Chapter 2.10.1 and Chapter 2.7).<br />
Key keyStoreType<br />
Format of the keystore, either JKS (Java JRE keytool, default) or PKCS12<br />
(OpenSSL).<br />
Key keyStorePassword<br />
Password for the keystore file (see Chapter 2.10.1 and Chapter 2.7). The special<br />
value ENV:PASSWORD_CA will cause the <strong>IDM</strong> server to read this password<br />
upon startup from the environment variable named PASSWORD_CA; the name<br />
PASSWORD_CA is just an example and can be changed if desired.<br />
Key keyAlias<br />
Name of the entry within the keystore, where the private key and associated<br />
public key certificate can be found (the keystore may contain more than one<br />
entry) - default matches the one from the example scripts described in<br />
Chapter 2.7.3. To find out the alias names in a .p12 file please use the command:<br />
openssl pkcs12 -in .p12 -nodes<br />
The alias is shown as Friendly Name in the output.<br />
To find out the alias names in a JKS file please use the command:<br />
keytool -list filename<br />
Key keyPassword<br />
Password to decrypt the RSA private key contained within the keystore (see entry<br />
keyAlias); the special value ENV:PASSWORD_CA will cause the <strong>IDM</strong> CA server<br />
to read this password upon startup from the environment variable named<br />
PASSWORD_CA; the name PASSWORD_CA is just an example and can be<br />
changed if desired.<br />
Key crlExportDirectory<br />
The path to the directory that is used by the <strong>IDM</strong> CA to export the files containing<br />
the CRLs (Certificate Revocation Lists). Each file contains a PEM encoded<br />
X.509 CRL of revoked certificates from a single issuer. The filename of each<br />
CRL file is composed of the hash value of the issuer with a crl extension, e.g.<br />
5E84D566026616ED32169580A913661499FA6B03.crl. Please make sure that<br />
the files contained in this directory are accessible from the mGuards. To<br />
configure the CRL URL on the mGuards please navigate to Authentication »<br />
Certificates » CRLs in the Device or Template Properties Dialog (mGuard 5.0<br />
or newer only) and add the correct URL to the CRL table. Please refer to<br />
Chapter 4.6.1 for more details on certificate revocation (default: security/crl).<br />
Node storage<br />
Node database<br />
Key host<br />
The IP address (or host name) the <strong>IDM</strong> CA should connect to to get<br />
access to the PostgreSQL database (default: 127.0.0.1).<br />
Key port<br />
The port that the <strong>IDM</strong> CA should use to connect to the database (default:<br />
5432).<br />
Key name<br />
The name of the database (default: idmca).<br />
Key user<br />
The user of the database (default: idmca).<br />
30 of 122
Installation<br />
Key password<br />
The password to be used to connect to the database; the default value<br />
ENV:PASSWORD_DB will cause the <strong>IDM</strong> CA server to read this<br />
password upon startup from the environment variable named<br />
PASSWORD_DB; the name PASSWORD_DB is just an example and can<br />
be changed if desired.<br />
Please make sure that the values for port, name, user, and password<br />
match the values you specified during the database initialization.<br />
Key ssl<br />
Enable/disable secure connection between the <strong>IDM</strong> CA and the<br />
PostgreSQL server. Use the value true to enable secure connections (see<br />
Chapter 2.10.1).<br />
Key loglevel<br />
Internal use only. Please do not change (default: 0).<br />
Node security<br />
Node certificationRequestHandler<br />
Key trustStore<br />
Name and path of the truststore file containing the trusted certificate<br />
of the database server.<br />
Key trustStoreType<br />
Format of the truststore, either JKS (Java JRE keytool, default) or<br />
PKCS12 (OpenSSL).<br />
Key trustStorePassword<br />
Password for the truststore file (see Chapter 2.10.2 and Chapter 2.7).<br />
The special value ENV:PASSWORD_SSL will cause the <strong>IDM</strong> server<br />
to read this password upon startup from the environment variable<br />
named PASSWORD_SSL; the name PASSWORD_SSL is just an<br />
example and can be changed if desired.<br />
Key maxRequestLength<br />
Number of bytes PKCS#10 certification requests can have at most; longer<br />
requests will be rejected to defend against simple DoS attacks (default: 102400).<br />
Node revocationRequestHandler<br />
Key maxRequestLength<br />
Number of bytes revocation requests must have at most; longer requests will be<br />
rejected to defend against simple DoS attacks (default: 10240).<br />
Node httpServer<br />
Key host<br />
IP address or host name of the interface to listen on with the <strong>IDM</strong> CA's servlet<br />
interface; value 0.0.0.0 means to listen on any interface (default: 127.0.0.1).<br />
Key port<br />
Port number the server should listen on for incoming connections (default: 7070).<br />
Key minThreads<br />
Minimum number of instantiated HTTP server threads the <strong>IDM</strong> CA shall<br />
maintain in its pool (default: 2).<br />
Key lowThreads<br />
Internal use only. Please do not change.<br />
31 of 122
Node logging<br />
Installation<br />
Key maxThreads<br />
Maximum number of instantiated HTTP server threads the <strong>IDM</strong> CA shall keep<br />
in its pool (default: 5).<br />
Key protocol<br />
The protocol the <strong>IDM</strong> CA's servlet interface should use; either http or https. To<br />
enable secure communication, https should be used.<br />
Node https<br />
The configuration in this node is used only if protocol in node httpServer is https.<br />
Key keyStore<br />
Name and path of the keystore file.<br />
Key keyStoreType<br />
Format of the keystore, either JKS (Java JRE keytool, default) or PKCS12<br />
(OpenSSL).<br />
Key keyStorePassword<br />
Password for the keystore file. The special value ENV:PASSWORD_SSL will<br />
cause the <strong>IDM</strong> server to read this password upon startup from the<br />
environment variable named PASSWORD_SSL; the name PASSWORD_SSL<br />
is just an example and can be changed if desired.<br />
Key keyPassword<br />
The password required to decrypt the SSL private key contained in the<br />
keystore for the HTTPS server.<br />
Key clientAuth<br />
Boolean value; true means clients need to authenticate via SSL too (not just<br />
the server); false means clients do not need to authenticate. This value should<br />
be set to true.<br />
Key trustStore<br />
Name and path of the truststore file containing the trusted certificates for the<br />
SSL connection from the clients.<br />
Key trustStoreType<br />
Format of the truststore, either JKS (Java JRE keytool, default) or PKCS12<br />
(OpenSSL).<br />
Key trustStorePassword<br />
Password for the truststore file (see Chapter 2.10.2 and Chapter 2.7). The<br />
special value ENV:PASSWORD_SSL will cause the <strong>IDM</strong> server to read this<br />
password upon startup from the environment variable named<br />
PASSWORD_SSL; the name PASSWORD_SSL is just an example and can be<br />
changed if desired.<br />
Key file<br />
The base name of the rotated log file the <strong>IDM</strong> CA will produce; the file name<br />
may be used with a relative or absolute path name. The suffix n.log will be<br />
appended to the base name, with n being a non-negative integer.<br />
Key limit<br />
Maximum number of bytes a log file of the <strong>IDM</strong> CA can reach; when it grows<br />
beyond this number, it will be rotated.<br />
Key count<br />
Maximum number of rotated log files the <strong>IDM</strong> CA should keep.<br />
32 of 122
Installation<br />
2.7.6 Starting the CA<br />
Key level<br />
Defines granularity of the logging messages the <strong>IDM</strong> CA will produce;<br />
acceptable values are:<br />
• OFF<br />
• SEVERE (highest value)<br />
• WARNING<br />
• INFO<br />
• CONFIG<br />
• FINE<br />
• FINER<br />
• FINEST (lowest value)<br />
• ALL<br />
Start the CA with the following command in a single line (please note that the<br />
CA has its own preferences file ca-preferences.xml, as described above):<br />
java -Xmx384m -jar full_path/idm-ca-1.4.2.jar<br />
full_path/ca-preferences.xml<br />
Prior to starting the CA you should set the environment variables that<br />
contain the passwords:<br />
PASSWORD_CA=’your_CA_password’<br />
PASSWORD_SSL=’your_SSL_password’<br />
PASSWORD_DB=’your_DB_password’<br />
Depending on your settings for the keys in the ca-preferences.xml,<br />
different environment variables than the examples above need to be<br />
used.<br />
33 of 122
2.8 Pre-configuration of the mGuards<br />
Enable SSH access<br />
Please follow the steps described in the device manual for starting up and<br />
configuring the device (IP addresses of the interfaces etc.).<br />
Installation<br />
The <strong>IDM</strong> installs the configuration files on the mGuards using SSH. Therefore<br />
SSH access has to be permitted on the mGuards if <strong>IDM</strong> is using the external<br />
(untrusted) interface to upload the configuration.<br />
Select Management » System settings » Shell access in the menu of the Web<br />
user interface and enable SSH remote access. For more detailed information on<br />
SSH remote access please consult the mGuard <strong>User</strong>’s <strong>Manual</strong>.<br />
If you enable remote SSH access, make sure that you change the default<br />
admin and root passwords to secure passwords.<br />
<strong>IDM</strong> is using the admin password to log into the <strong>Innominate</strong> mGuard. If<br />
the password was changed locally on the device please change the<br />
password setting in <strong>IDM</strong> accordingly using the Set Current Device<br />
Passwords option in the context menu of the device overview table.<br />
Otherwise <strong>IDM</strong> is not able to log into the device.<br />
The current root password is part of the configuration file. If the<br />
password was changed locally on the device please change the password<br />
setting in <strong>IDM</strong> accordingly. Otherwise the mGuard will reject the<br />
configuration.<br />
2.9 Installation of an HTTPS configuration pull server<br />
To transmit information on the configuration status of an mGuard, the HTTPS<br />
pull server has to send SYSLOG messages to the <strong>IDM</strong> server (pull feedback).<br />
Please make sure that neither the communication between the HTTPS server and<br />
the <strong>IDM</strong> server nor the communication between the HTTPS pull server and the<br />
mGuards is blocked by a firewall or a NAT device.<br />
2.10 Securing the communication between <strong>IDM</strong> components<br />
Since critical information is exchanged between the <strong>IDM</strong> components it is highly<br />
recommended to secure the communication paths. This chapter describes the<br />
required steps to manually create the keys and certificates required for SSL.<br />
If you prefer to use the demoCA scripts, instead of manually creating<br />
and installing the required components, you can skip this chapter and<br />
read Chapter 2.7.3 instead.<br />
If you are not familiar with OpenSSL it is highly recommended to read<br />
Chapter 7 first, which introduces some of the basic concepts and the usage of the<br />
OpenSSL command line tool.<br />
Figure 7 shows an overview over the <strong>IDM</strong> components and their communication<br />
paths.<br />
Please note that the truststore and the keystore of the CA shown in<br />
Figure 7 are used for SSL communication only. The certificates and<br />
keys used to issue certificates are stored in a different keystore.<br />
34 of 122
Installation<br />
PostgreSQL DB<br />
PostgreSQL data directory<br />
DB key<br />
DB cert<br />
SSL server<br />
SSL client<br />
HTTPS client<br />
SSL client<br />
Keystore<br />
of the<br />
Truststore Truststore Keystore<br />
Truststore<br />
DB key Private key DB server<br />
IS cert<br />
DB cert IC key<br />
DB cert IS key<br />
IC cert<br />
IC cert<br />
IS cert<br />
<strong>IDM</strong> CA<br />
<strong>IDM</strong> server<br />
IC cert<br />
CA certificate (Important: This is not the root certificate of the CA.)<br />
IC key<br />
Private key of the CA (Important: This is not the key used to sign certificate requests.)<br />
IS cert<br />
<strong>IDM</strong> server certificate<br />
IS key<br />
Private key of the <strong>IDM</strong> server<br />
DB cert<br />
DB server certificate<br />
HTTPS server<br />
Figure 7: Communication paths between <strong>IDM</strong> components<br />
2.10.1 Create the private key and the keystore for each component<br />
PostgreSQL<br />
It is recommended to create a working directory, e.g. named security in your<br />
<strong>IDM</strong> installation directory, where all the keys, certificates and keystores are<br />
located.<br />
The PostgreSQL database does not need a keystore, the key and the certificate<br />
are located in the filesystem.<br />
1. First create a self-signed certificate (DB cert ) and an unencrypted private key<br />
(DB key ) for the database server as described in Chapter 7.1. Please do not<br />
encrypt DB key (see Chapter 7.1 for details).<br />
2. The database server is looking for the certificate and the private key in the<br />
PostgreSQL data directory (i.e. the subdirectory of the PostgreSQL directory<br />
usually named pgdata), therefore copy the files server.crt (DB cert ) and<br />
server.key (DB key ) to this directory.<br />
3. Edit the PostgreSQL configuration file postgresql.conf so that it contains the<br />
following line:<br />
ssl = on<br />
4. Restart the PostgreSQL server.<br />
35 of 122
Installation<br />
<strong>IDM</strong> server 1. First create an unencrypted private key (IS key ) as described in Chapter 7.1:<br />
openssl genrsa -des3 -passout pass:yourSSLPW<br />
-out idm-https-client-key.pem 2048<br />
2. Create the self-signed certificate (IS cert ) as described in Chapter 7.1:<br />
openssl req -batch -new -x509<br />
-key idm-https-client-key.pem -keyform PEM<br />
-passin pass:yourSSLPW -sha256 -outform PEM<br />
-out idm-https-client-cert.pem<br />
Create the keystore as described in Chapter 7.1:<br />
openssl pkcs8 -topk8 -in idm-https-client-key.pem<br />
-passin pass:yourSSLPW -inform PEM -nocrypt -outform DER |<br />
java -cp . ImportKey -alias idm -storetype JKS<br />
-keystore idm-keystore.jks -storepass pass:yourSSLPW<br />
-keypass pass:yourSSLPW -chain idm-https-client-cert.pem<br />
There should be 3 additional files in your directory:<br />
• idm-https-client-key.pem<br />
• idm-https-client-cert.pem<br />
• idm-keystore.jks<br />
Please store the key and the certficate at a secure location. Only the keystore is<br />
used by the <strong>IDM</strong> server, therefore copy it to its final destination. Then the<br />
preferences file of the <strong>IDM</strong> server has to be configured:<br />
• The location of the keystore has to be configured in the<br />
preferences.xml file of the <strong>IDM</strong> server in the node service »<br />
security » keyStore<br />
• The format of the keystore (JKS) has to be configured in the<br />
preferences.xml file of the <strong>IDM</strong> server in the node service »<br />
security » keyStoreType<br />
• The password to access the keystore (in the example: yourSSLPW )<br />
has to be configured in the preferences.xml file of the <strong>IDM</strong> server in<br />
the node service » security » keyStorePassword<br />
To enable the SSL communication to the <strong>IDM</strong> CA and to the database the<br />
following keys of the preferences.xml file have to be configured:<br />
• server » storage » database » ssl = true<br />
• ca » protocol = https<br />
<strong>IDM</strong> CA 1. First create an unencrypted private key (IC key ) as described in Chapter 7.1:<br />
openssl genrsa -des3 -passout pass:yourSSLPW<br />
-out ca-https-client-key.pem 2048<br />
2. Create the self-signed certificate (IC cert ) as described in Chapter 7.1:<br />
openssl req -batch -new -x509<br />
-key ca-https-client-key.pem -keyform PEM<br />
-passin pass:yourSSLPW -sha256 -outform PEM<br />
-out ca-https-client-cert.pem<br />
3. Create the keystore as described in Chapter 7.1:<br />
openssl pkcs8 -topk8 -in ca-https-client-key.pem<br />
-passin pass:yourSSLPW -inform PEM -nocrypt -outform DER |<br />
java -cp . ImportKey -alias ca -storetype JKS<br />
-keystore ca-keystore.jks -storepass pass:yourSSLPW<br />
-keypass pass:yourSSLPW -chain ca-https-client-cert.pem<br />
There should be 3 additional files in your directory:<br />
• ca-https-client-key.pem<br />
• ca-https-client-cert.pem<br />
• ca-keystore.jks<br />
36 of 122
Installation<br />
Please store the key and the certificate at a secure location. Only the keystore is<br />
used by the CA server, therefore copy it to its final destination. Then the<br />
preferences file of the CA server has to be configured:<br />
• The location of the keystore has to be configured in the<br />
ca-preferences.xml file of the <strong>IDM</strong> server in the node httpServer »<br />
https » keyStore<br />
• The format of the keystore (JKS) has to be configured in the<br />
ca-preferences.xml file of the <strong>IDM</strong> server in the node httpServer »<br />
https » keyStoreType<br />
• The password to access the keystore (in the example: yourSSLPW )<br />
has to be configured in the ca-preferences.xml file of the <strong>IDM</strong> server<br />
in the node httpServer » https » keyStorePassword<br />
To enable the SSL communication to the <strong>IDM</strong> server and to the database the<br />
following keys of the ca-preferences.xml file have to be configured:<br />
• certificateFactory » storage » database » ssl = true<br />
• httpServer » protocol = https<br />
To enable client authentication the following key has to be set to true:<br />
• httpServer » https » clientAuth = true<br />
2.10.2 Create the truststores<br />
Each component except for the database has a truststore containing the<br />
certificates of the trusted peers.<br />
<strong>IDM</strong> server<br />
1. Create the truststore and add DB cert as described in Chapter „Import a<br />
certificate” on page 106:<br />
java -cp . ImportKey -alias postgres -storetype JKS<br />
-file serverCert.pem -storepass pass:yourSSLPW<br />
-keystore idm-truststore.jks<br />
2. Add IC cert as described in Chapter „Import a certificate” on page 106 to the<br />
truststore:<br />
java -cp . ImportKey -alias ca -storetype JKS<br />
-file ca-https-client-cert.pem<br />
-storepass pass:yourSSLPW -keystore idm-truststore.jks<br />
3. If SCEP is used, the root certificate and any intermediate certificates the CA<br />
server uses to authenticate its reply must be imported into the truststore.<br />
Please refer to the documentation of your CA server for details on how to<br />
obtain these certificate(s). For example, if the CA server uses a root<br />
certificate scep-ca-cert.pem and an intermediate certificate scepintermediate-cert.pem:<br />
java -cp . ImportKey -alias scep -storetype JKS<br />
-file scep-ca-cert.pem<br />
-storepass pass:yourSSLPW -keystore idm-truststore.jks<br />
java -cp . ImportKey -alias scep1 -storetype JKS<br />
-file scep-intermediate-cert.pem<br />
-storepass pass:yourSSLPW -keystore idm-truststore.jks<br />
4. Copy the truststore to its final location and configure the preferences file<br />
preferences.xml of the <strong>IDM</strong> server:<br />
• The location of the truststore has to be configured in<br />
the preferences.xml file of the <strong>IDM</strong> server in the node service »<br />
security » trustStore<br />
37 of 122
Installation<br />
<strong>IDM</strong> CA<br />
• The format of the truststore (JKS) has to be configured in the<br />
preferences.xml file of the <strong>IDM</strong> server in the node service »<br />
security » trustStoreType<br />
• The password to access the truststore (in the example: yourSSLPW)<br />
has to be configured in the preferences.xml file of the <strong>IDM</strong> server in<br />
the node service » security » trustStorePassword<br />
The certificates of the database and the <strong>IDM</strong> server are stored in different<br />
truststores:<br />
1. Create the database truststore and add DB cert as described in Chapter<br />
„Import a certificate” on page 106:<br />
java -cp . ImportKey -alias postgres -storetype JKS<br />
-file serverCert.pem -storepass pass:yourSSLPW<br />
-keystore ca-database-truststore.jks<br />
2. Copy the truststore to its final location and configure the preferences file<br />
ca-preferences.xml of the <strong>IDM</strong> CA:<br />
• The location of the truststore has to be configured in the<br />
ca-preferences.xml file in the node certificateFactory » storage »<br />
database » security » trustStore<br />
• The format of the truststore (JKS) has to be configured in the<br />
ca-preferences.xml file in the node certificateFactory » storage »<br />
database » security » trustStoreType<br />
• The password to access the truststore (in the example: yourSSLPW)<br />
has to be configured in the ca-preferences.xml file in the node<br />
certificateFactory » storage » database » security »<br />
trustStorePassword<br />
3. Create the <strong>IDM</strong> server truststore and add IS cert as described in Chapter<br />
„Import a certificate” on page 106:<br />
java -cp . ImportKey -alias idm -storetype JKS<br />
-file idm-https-client-cert.pem -storepass pass:yourSSLPW<br />
-keystore ca-idm-truststore.jks<br />
4. Copy the truststore to its final location and configure the preferences file<br />
ca-preferences.xml of the <strong>IDM</strong> CA:<br />
• The name including the path of the truststore has to be configured in<br />
the ca-preferences.xml file in the node httpServer » https »<br />
trustStore<br />
• The format of the truststore (JKS) has to be configured in the<br />
ca-preferences.xml file in the node httpServer » https »<br />
trustStoreType<br />
• The password to access the truststore (in the example: yourSSLPW)<br />
has to be configured in the ca-preferences.xml file in the node<br />
httpServer » https » trustStorePassword<br />
38 of 122
3 <strong>IDM</strong> client overview<br />
<strong>IDM</strong> client overview<br />
The <strong>IDM</strong> client is the graphical front-end to access all features of <strong>IDM</strong>. It allows<br />
to create and manage devices, templates, pools, and VPN groups, initiates the<br />
upload of configurations to devices or initiates the export of configuration files<br />
to the file system.<br />
For information on how to start and stop the client, please refer to Chapter 2.6.<br />
3.1 Login<br />
Before connecting to the server, you have to authenticate yourself in the loginwindow.<br />
Furthermore the server IP/hostname and the server port to be used can<br />
be configured in the login-window.<br />
The following screenshot shows the login dialog:<br />
Figure 8: The login window<br />
Using multiple<br />
clients<br />
There are three predefined user accounts: root, admin and audit. root can access<br />
all settings, admin can by default modify all configuration settings and read user<br />
management settings, whereas audit has read-only permission by default, i.e. the<br />
audit user cannot change any settings, except for his password. The permissions<br />
for the users can be changed, if desired (see Chapter 3.11). The default passwords<br />
for user admin is admin, the default password for user audit is audit, the default<br />
password for root is root.<br />
It is highly recommended to change the default passwords after<br />
installation, please refer to Chapter 3.11 (subsection Changing user<br />
settings) for more information.<br />
It is possible to connect to the server with multiple clients at the same time. If a<br />
client opens the Device Properties Dialog the device and also the associated<br />
template (if applicable) will be locked and cannot be opened by another user. If<br />
another user tries to open the device or the template an error message will be<br />
displayed. If a client opens a Template Properties Dialog, then the template and<br />
all devices referencing this template will be locked and cannot be opened by<br />
another user.<br />
The same is true for pools and VPN groups.<br />
In case the connection between a client and a server is interrupted and cannot be<br />
terminated gracefully, the device/template/pool/VPN group that was locked by<br />
that client will get released after an inactivity timeout (can be configured in the<br />
server configuration, see Chapter 2.5, key maxInactiveInterval), i.e. it could<br />
happen that certain settings cannot be accessed until the inactivity timeout is<br />
reached.<br />
39 of 122
<strong>IDM</strong> client overview<br />
3.2 The <strong>IDM</strong> main window<br />
The following screenshot shows the <strong>IDM</strong> main window:<br />
3.3 Device overview table<br />
Device table<br />
columns<br />
Status C<br />
Figure 9: The <strong>IDM</strong> main window<br />
The <strong>IDM</strong> main window is divided into a tab area for the device/template/pool/<br />
VPN group overview tables and a log window. It also contains a tool bar and the<br />
main menu. The different sections and their functionality are explained in the<br />
following chapters.<br />
Please select the Device tab to access the device overview table.<br />
The device overview table contains the following columns:<br />
The column width can be changed by placing the cursor on the header of<br />
the table at the border of two columns and dragging the border to the<br />
desired location. The order of the columns can be changed by dragging<br />
the column header to a different location.<br />
The column labeled with C shows the configuration status of the device, which<br />
indicates whether the configuration on the <strong>Innominate</strong> mGuard differs from the<br />
configuration of the device in <strong>IDM</strong>.<br />
The configuration status can take the following values:<br />
• Unknown<br />
<strong>IDM</strong> is not able to determine whether the configuration of your<br />
<strong>Innominate</strong> mGuard is up-to-date.<br />
• OK<br />
The configuration in <strong>IDM</strong> is identical to the current configuration of<br />
your mGuard.<br />
• Changed<br />
The configuration in <strong>IDM</strong> is different to the current configuration of<br />
your mGuard, i.e. the changes made with <strong>IDM</strong> have not yet been<br />
uploaded to the device.<br />
40 of 122
<strong>IDM</strong> client overview<br />
Status U<br />
• Locked<br />
The configuration is locked by another user. This can happen if<br />
another user opens the Device Properties Dialog or the Template<br />
Properties Dialog of an assigned template.<br />
Please note that configuration changes performed by other means than<br />
<strong>IDM</strong> cannot be detected, i.e. the configuration status is displayed<br />
correctly only if solely the netadmin user changes the mGuard<br />
configuration locally on the device.<br />
If a template is changed the configuration status of all mGuards using<br />
this template is set to out-of-date, no matter whether the template change<br />
affected the device configuration or not.<br />
Please refer to Chapter 3.8.1 if you would like to manually reset the<br />
configuration status to up-to-date.<br />
The column labled with U shows the upload status of the device, which<br />
indicates the status of a pending upload or the result of the last upload. Please<br />
refer to Chapter 3.9 on how to upload configurations to the devices.<br />
The upload status can take the following values:<br />
• Unknown<br />
<strong>IDM</strong> could not determine the status yet, since no upload has taken<br />
place.<br />
• Up to date<br />
The configuration on the device has not changed because it already<br />
was up to date.<br />
• Updated<br />
The configuration on the device has been updated.<br />
• Configuration exported<br />
The configuration files have been successfully exported to the file<br />
system.<br />
• Pull feedback received<br />
The <strong>IDM</strong> server has received a configuration pull feedback from the<br />
HTTPS server, but it could not be determined whether the<br />
configuration on the device is now up to date. This status indicates<br />
that the device has pulled a configuration file, but has not yet applied<br />
it, or that the configuration is outdated, because it has been changed<br />
in <strong>IDM</strong> after the export to the HTTPS server.<br />
• SSH hostkey reset<br />
Indicates that an SSH host key reset was performed.<br />
• Configuration invalid<br />
<strong>IDM</strong> indicates that the current configuration is invalid, e.g. a None<br />
value (see Chapter 4.2.1) in the template has not been overriden in<br />
the device.<br />
• Upload or export error<br />
A permanent error has occured and <strong>IDM</strong> could not recover from the<br />
error or the maximum number of retries for the SSH configuation<br />
push has been reached without accessing the mGuard. The cause of<br />
the error is displayed in the log window.<br />
41 of 122
<strong>IDM</strong> client overview<br />
• Host authentication failed<br />
This error indicates that the SSH host authentication failed. This<br />
can be an indicator of an attack, but most likely it is due to the fact<br />
that a failing device was replaced. Before you continue please<br />
make sure that the devices in question was indeed replaced. To<br />
continue remove the device’s active SSH hostkey with the option<br />
Set Current Device Credentials in the context menu of the<br />
device overview table (select the Reset SSH Host Key<br />
checkbox). The new SSH hostkey will be set with the next SSH<br />
connection.<br />
• <strong>User</strong> authentication failed<br />
This error indicates that the user credentials – username admin<br />
and the password stored in the devices active password – were not<br />
accepted. It can also indicate that the SSH authentication method<br />
password was not accepted by the mGuard.<br />
• I/O failed / Upload failed<br />
This error indicates that an input/ouput (I/O) failure has occurred.<br />
In the case of SSH uploads this is probably a transient error and a<br />
retry should be scheduled. In the case of filesystem output (pull<br />
config) the failure is probably not transient and the cause should<br />
be examined by the user.<br />
• Concurrent configuration upload<br />
This indicates that another upload is currently active for the same<br />
device. An example is an SSH upload that detects a running pull<br />
config script. The usual way to handle this is to reschedule this<br />
update.<br />
• Configuration rejected<br />
This indicates that the device has rejected the configuration as<br />
invalid.<br />
• Upload timeout<br />
This indicates that the SSH connection to the device has timed out,<br />
i.e. the device has no reacted to the commands initiated by the <strong>IDM</strong><br />
within a given (configurable) time frame. If the configuration<br />
contains a large number of VPN connections, it might be necessary<br />
to increase the timeout; see Chapter 2.5, node service » storage »<br />
update » ssh » deadPeerDetectionTimeout.<br />
• License could not be installed<br />
This indicates that an mGuard license file could not be installed on<br />
the device.<br />
• Pull configuration rolled back<br />
This indicates that a configuration pulled by the device was rolled<br />
back.<br />
• Pull configuration blocked due to previous rollback<br />
This indicates that configuration is blocked due to a previous<br />
rollback.<br />
• Saving configuration for rollback failed<br />
This indicates that saving the rollback configuration failed, the<br />
configuration was not applied.<br />
• Pulled configuration invalid<br />
This indicates the device detected an invalid pull configuration and<br />
therefore the configuration was not applied.<br />
42 of 122
<strong>IDM</strong> client overview<br />
• Firmware upgrade failed<br />
The scheduled firmware upgrade failed.<br />
• Queued for upload or export<br />
The device is currently in the upload queue. Depending on the<br />
settings for the configuration push retries and the waiting time<br />
between retries the device might stay in the queue for a while.<br />
• Upload or export running<br />
The device has been accessed and the configuration file is currently<br />
being uploaded.<br />
• Requeued for upload or export<br />
If the device is not accessible, then it will be requeued and after<br />
waiting time between retries the upload will start again. If after<br />
configuration push retries the device has not been accessed an error<br />
is shown. This icon is also shown during an ongoing firmware<br />
upgrade, since <strong>IDM</strong> will periodically poll the device for the result of<br />
the firmware upgrade.<br />
Management ID<br />
The Management ID of the device.<br />
Templates<br />
Status V<br />
Version<br />
Status F<br />
A comma-separated list of the device’s ancestor templates. The first item in the<br />
list is the immediate parent template.<br />
VPN group status:<br />
• Not a member of a VPN group<br />
• Member of exactly one VPN group<br />
• Member of more than one VPN group<br />
Hovering over one of the latter two icons with the mouse cursor will display a<br />
tooltip listing the VPN group(s) in which the device is a member.<br />
The firmware version currently selected in <strong>IDM</strong> for this device.<br />
Firmware status:<br />
• Unknown<br />
• OK<br />
The firmware upgrade was successful and the firmware version configured<br />
in <strong>IDM</strong> corresponds to the firmware version on the device.<br />
• Upgrade scheduled<br />
• Upgrade running<br />
• Version mismatch<br />
Firmware version configured in <strong>IDM</strong> and firmware version on device do not<br />
match.<br />
• Error<br />
An error occured during firmware upgrade.<br />
43 of 122
<strong>IDM</strong> client overview<br />
Version on device<br />
The firmware version currently installed on the device. Please refer to<br />
Chapter 4.3 for more information.<br />
If the device is in redundancy mode (see Chapter 4.10 for more details), the<br />
firmware versions of both devices, separated by a comma, are shown.<br />
Accessible via<br />
The IP address or host name which is used by <strong>IDM</strong> to access the device. This<br />
address can be configured in the General settings of the Device Properties<br />
Dialog (see Chapter 4.3). Without an Accessible via address it is not possible<br />
to push configurations to the device or open the Web GUI of the device. Please<br />
note that this address might not correspond to the internal or external address of<br />
the mGuard if NAT is involved.<br />
If the device is in redundancy mode (see Chapter 4.10 for more details), the<br />
Accessible via addresses of both devices, separated by a comma, are shown.<br />
Upload scheduled at<br />
The date/time the next configuration upload is scheduled for this device.<br />
Serial number<br />
The serial number of this device. Please refer to Chapter 4.3.<br />
If the device is in redundancy mode (see Chapter 4.10 for more details), the<br />
serial numbers of both devices, separated by a comma, are shown.<br />
Pull config filename<br />
If the configuration is exported to the file system, a unique ID is used as name of<br />
the configuration file. The filename of the configuration file is shown in this<br />
column.<br />
Location<br />
Filtering and<br />
sorting the table<br />
Creating devices<br />
In this column the value of the SNMP Location variable (SYS_LOCATION) is<br />
shown. If the location is empty, a “-” character is displayed.<br />
If the device is in redundancy mode (see Chapter 4.10 for more details) and<br />
different locations are set for each physical device, the locations of both devices,<br />
separated by a comma, are shown.<br />
The header of the table can be used to sort the table entries. A click on a header<br />
of a column will activate the (primary) sort based on this column. This is<br />
indicated by the arrow in the column header. A second click on the same header<br />
will reverse the sort order. Clicking on another column header activates the sort<br />
based on this new column, the previously activated column will be used as<br />
secondary sorting criterion.<br />
The first row of the table accepts the input of regular expressions (please refer to<br />
Chapter 8, Regular expressions), which can be used to efficiently filter the table<br />
entries. Filtering based on regular expressions is not used for columns that do not<br />
contain text (columns C, U, V, or F).<br />
The filter history will be saved for the current user and can be accessed using the<br />
drop down functionality of the filter fields.<br />
There are several ways to create new devices:<br />
1. Open the context menu by clicking on the device table with the right mouse<br />
button. To open the Device Properties Dialog for a new mGuard please<br />
select Add in the context menu.<br />
2. Select the Device tab and click on the icon in the menu bar to open the<br />
Device Properties Dialog for a new mGuard.<br />
3. Select New » Device in the main menu to open the Device Properties Dialog<br />
for a new mGuard.<br />
4. Select New » Device Import in the main menu to import new devices.<br />
44 of 122
<strong>IDM</strong> client overview<br />
Editing devices<br />
Deleting devices<br />
There are several ways to edit a device:<br />
1. Double-click with the left mouse button on the device in the table to open the<br />
Device Properties Dialog.<br />
2. Select the device with the left mouse button and open the context menu by<br />
pressing the right mouse button. Then select Edit to open the Device<br />
Properties Dialog.<br />
3. Select the device to be modified in the device table. Select Edit » Edit Item<br />
in the main menu to open the Device Properties Dialog.<br />
The Edit entry in the context menu and the Edit button in the toolbar are<br />
only enabled if exactly one device is selected in the device table.<br />
There are several methods to delete devices:<br />
1. Select the device(s) in the device table and open the context menu by<br />
clicking with the right mouse button. To delete the devices please select<br />
Delete in the context menu.<br />
3.3.1 The device context menu<br />
2. Select the devices to be deleted in the table and click on the icon in the<br />
menu bar.<br />
Add<br />
Create a new device and open the Device Properties Dialog of the new device.<br />
Edit<br />
Edit the selected device (only active if exactly one device is selected in the<br />
overview table).<br />
Duplicate<br />
To create a duplicate of a device please open the context menu by clicking with<br />
the right mouse button on the device in the device table. Select Duplicate in the<br />
context menu. <strong>IDM</strong> will create a copy of the device and append the string<br />
_copy ( is a number) to the Management ID of the new device. Please<br />
note that the Duplicate menu entry is only enabled if exactly one device is<br />
selected in the device table.<br />
Import ATV Profile<br />
Import an ATV profile into the selected device(s):<br />
Figure 10: ATV import<br />
The following options are available when importing a profile:<br />
Select Inherited where possible<br />
If this option is selected, variables for which the imported value (i.e. the value<br />
in the ATV profile) is the same as the inherited value are set to Inherited.<br />
45 of 122
<strong>IDM</strong> client overview<br />
Otherwise, all variables contained in the profile are set to Custom, regardless<br />
of their value.<br />
Ignore table rows added by the netadmin user<br />
Tables rows that were created by the local netadmin user on the mGuard are<br />
not imported.<br />
Import into /<br />
If the device is in redundancy mode (see Chapter 4.10 for more details), the<br />
profile can be imported into the configuration variables for the first or the<br />
second physical device.<br />
A few configuration variables cannot be imported and must be set manually if<br />
necessary: the passwords of the root and admin users, the passwords of the user<br />
firewall users, and certificate revocation lists (CRLs). ATV profiles downloaded<br />
from an mGuard either do not contain these variables at all or contain them in<br />
encrypted (hashed) form. Please note that <strong>IDM</strong> does import the password of the<br />
netadmin user if it is found in the ATV profile, but a profile downloaded from an<br />
mGuard does not contain it.<br />
Web Configure<br />
Open the Web GUI of the device, if the device is accessible (see also Accessible<br />
via address in Chapter 4.3)<br />
Any change made with the Web GUI will be overwritten by the next<br />
<strong>IDM</strong> configuration upload (except for changes made as netadmin to<br />
local variables).<br />
Export<br />
Generate a CSV file containing the basic properties (but not the configurations)<br />
of the selected devices. The file is suitable to imported into <strong>IDM</strong> again (see<br />
Chapter 3.8.1, Device Import).<br />
Delete<br />
Delete the selected devices.<br />
Set Firmware Version<br />
Upgrade the firmware version to a new version. Please refer to Chapter 3.12 for<br />
more details.<br />
Assign Template<br />
Open the Assign template dialog and assign a template to the selected devices.<br />
Add to VPN Group<br />
Opens a dialog to add the selected devices to a VPN group.<br />
Remove from VPN Group<br />
Opens a dialog to remove the selected devices from a VPN group.<br />
Upload<br />
Open the Upload dialog. Please refer to Chapter 3.9 for more details.<br />
Cancel Upload<br />
Cancel the scheduled upload for the selected devices.<br />
Set Upload State<br />
The upload status will never be set to successfully uploaded automatically if no<br />
push upload is performed and no pull feedback from the configuration server is<br />
received (e.g. in a usage scenario where the exported configuration profiles are<br />
installed manually on the devices). You can use this option to set the upload state<br />
to successfully uploaded manually. Please select the device in the device table,<br />
open the context menu with a right click and then select Set upload state.<br />
46 of 122
<strong>IDM</strong> client overview<br />
If a device is in a state in which an upload would fail (e.g. if a None<br />
value has not been overridden, cf. Chapter 4.2.1), it is not possible to set<br />
the upload state to successfully uploaded.<br />
Show Device Configuration History<br />
Open the configuration history dialog. Please refer to Chapter 6.1 for more<br />
detailed information.<br />
Generate Report of Changes to Device Configuration<br />
Open a dialog to generate a report of changes to device configurations. Please<br />
refer to Chapter 6.5 for more detailed information.<br />
Upload History<br />
Display an overview over the last upload actions.<br />
Set Current Device Credentials<br />
Open a dialog in which the currently active passwords on the mGuard and/or the<br />
SSH hostkey of the device can be reset.<br />
<strong>IDM</strong> will use the current passwords to log into the mGuard.<br />
<strong>IDM</strong> stores the SSH key of an mGuard after the initial contact. In case an mGuard<br />
has been replaced, the SSH keys do not match and <strong>IDM</strong> will refuse any<br />
connection to the replaced device. In this case the key has to be deleted manually.<br />
Set Redundancy Mode<br />
Open a dialog in which redundancy mode can be enabled or disabled for the<br />
selected devices.<br />
Generate Redundancy Passphrases<br />
Set the redundancy passphrase variables in the device configuration to random<br />
values.<br />
Generate License<br />
Please refer to Chapter 3.10 for details regarding the license management.<br />
Refresh License<br />
Please refer to Chapter 3.10 for details regarding the license management.<br />
Firmware Upgrade » Schedule upgrade to latest patches<br />
Schedule a firmware upgrade to the latest available patches. Please refer to<br />
Chapter 3.12 for more details.<br />
Firmware Upgrade » Schedule upgrade to latest minor release<br />
Schedule a firmware upgrade to the latest available minor release. Please refer to<br />
Chapter 3.12 for more details.<br />
Firmware Upgrade » Schedule upgrade to next major version<br />
Schedule a firmware upgrade to the next major version. Please refer to<br />
Chapter 3.12 for more details.<br />
Firmware Upgrade » Unschedule upgrade<br />
Unschedule a firmware upgrade.<br />
Certificate Handling » Request additional certificate<br />
Request a machine certificate for the device and append it to the list of existing<br />
machine certificates. Please refer to Chapter 4.6.1 for more details.<br />
Certificate Handling » Request replacement certificate<br />
Request a machine certificate for the device and replace any existing machine<br />
certificates with the new one. Please refer to Chapter 4.6.1 for more details.<br />
All existing machine certificates in the device are deleted, even if they<br />
have been imported manually. As a result, the device has a single<br />
47 of 122
<strong>IDM</strong> client overview<br />
machine certificate (the newly requested one). This function is therefore<br />
most useful for devices which contain a single machine certificate.<br />
Certificate Handling » Issue and Export Certificate Requests<br />
Generate certificate requests for manual certificate enrollment. Please refer to<br />
Chapter 4.6.1 for more detailed information.<br />
Select All<br />
3.4 Template overview table<br />
Select all devices not excluded by the table filter.<br />
Please select the Template tab to access the template overview table.<br />
Template table<br />
columns<br />
Status<br />
Name<br />
Templates<br />
Version<br />
Comment<br />
Figure 11: The <strong>IDM</strong> main window with template table<br />
The template overview table contains the following columns:<br />
The column width can be changed by placing the cursor on the header of<br />
the table at the border of two columns and dragging the border to the<br />
desired location. The order of the columns can be changed by dragging<br />
the column header to a different location.<br />
The status icon shows whether the template is currently locked.<br />
The name assigned to the template. The name can be set in the General Settings<br />
of the Template Properties Dialog (see Chapter 4.2).<br />
A comma-separated list of the template’s ancestor templates. The first item in the<br />
list is the immediate parent template.<br />
The mGuard firmware version that is used for the template.<br />
Optional comment. The comment can be set in the General Settings of the<br />
Template Properties Dialog (see Chapter 4.2).<br />
Use count<br />
This column shows the number of devices or other templates using this template.<br />
48 of 122
<strong>IDM</strong> client overview<br />
Filtering and<br />
sorting the table<br />
Creating templates<br />
Editing templates<br />
Deleting templates<br />
The header of the table can be used to sort the table entries. A click on a header<br />
of a column will activate the (primary) sort based on this column. This is<br />
indicated by the arrow in the column header. A second click on the same header<br />
will reverse the sort order. Clicking on another column header activates the sort<br />
based on this new column, the previously activated column will be used as<br />
secondary sorting criterion.<br />
The first row of the table accepts the input of regular expressions (please refer to<br />
Chapter 8, Regular expressions), which can be used to efficiently filter the table<br />
entries. Filtering based on regular expressions is not used for the column that<br />
does not contain text (i.e. column S).<br />
The filter criterion for the Use count column is not interpreted as a regular<br />
expression, but as a comma-separated list of numbers or number ranges<br />
(e.g. 0,2-3).<br />
The filter history will be saved for the current user and can be accessed using the<br />
drop down functionality of the filter fields.<br />
There are several ways to create new templates:<br />
1. Open the context menu by clicking on the template table with the right<br />
mouse button. To open the Template Properties Dialog for a new template<br />
please select Add in the context menu.<br />
2. Select the Template tab and click on the icon in the menu bar to open the<br />
Template Properties Dialog for a new template.<br />
3. Select New » Template in the main menu to open the Template Properties<br />
Dialog for a new template.<br />
There are several ways to edit a template:<br />
1. Double-click with the left mouse button on the template in the table to open<br />
the Template Properties Dialog.<br />
2. Select the template with the left mouse button and open the context menu by<br />
pressing the right mouse button. Then select Edit to open the Template<br />
Properties Dialog.<br />
3. Select the template to be modified in the template table. Select Edit » Edit<br />
Item in the main menu to open the Template Properties Dialog.<br />
The Edit entry in the context menu and the Edit button in the toolbar are<br />
only enabled if exactly one template is selected in the template table.<br />
There are several methods to delete templates:<br />
1. Select the template(s) and open the context menu by clicking with the right<br />
mouse button. To delete the templates please select Delete in the context<br />
menu.<br />
2. Select the templates to be deleted in the template table and click on the<br />
icon in the menu bar.<br />
Please note that templates that are still assigned to devices or other<br />
templates cannot be deleted.<br />
3.4.1 The template context menu<br />
The following entries are available in the context menu of the template overview<br />
table:<br />
Add<br />
Create a new template and open the Template Properties Dialog of the new<br />
template.<br />
49 of 122
<strong>IDM</strong> client overview<br />
Edit<br />
Edit the selected template (only active if exactly one template is selected in the<br />
overview table).<br />
Duplicate<br />
To create a duplicate of a template please open the context menu by clicking with<br />
the right mouse button on the template in the template table. Select Duplicate in<br />
the context menu. <strong>IDM</strong> will create a copy of the template and append the string<br />
_copy ( is a number) to the name of the new template. Please note that<br />
the Duplicate menu entry is only enabled if exactly one template is selected in<br />
the template table.<br />
Import ATV Profile<br />
Import an ATV profile into the selected template(s). This works analogous to the<br />
ATV profile import into devices; please refer to Chapter 3.3.1 for details.<br />
Delete<br />
Delete the selected templates.<br />
Set Firmware Version<br />
Upgrade the firmware version to a new version. Please refer to Chapter 3.12 for<br />
more details.<br />
Assign Template<br />
Open the Assign template dialog and assign a parent template to the selected<br />
templates.<br />
Set Redundancy Mode<br />
Open a dialog in which redundancy mode can be enabled or disabled for the<br />
selected templates.<br />
Select All<br />
Select all templates not excluded by the table filter.<br />
3.5 Pool value overview table<br />
Please select the Pool tab to access the pool overview table. A pool defines a<br />
range of network addresses which can be automatically assigned to variables. For<br />
detailed information on pools and their usage please refer to Chapter 4.4.<br />
Figure 12: The <strong>IDM</strong> main window with pool table<br />
Pool table columns<br />
The pool overview table contains the following columns:<br />
50 of 122
Status<br />
Name<br />
Comment<br />
<strong>IDM</strong> client overview<br />
The column width can be changed by placing the cursor on the header of<br />
the table at the border of two columns and dragging the border to the<br />
desired location. The order of the columns can be changed by dragging<br />
the column header to a different location.<br />
The status icon shows whether the pool definition is valid.<br />
The name assigned to the pool.<br />
Optional comment.<br />
Reference count<br />
This column shows how many variables reference this pool (see Chapter 4.4).<br />
Use count<br />
This column shows how many values have been used from the pool (see<br />
Chapter 4.4).<br />
Available count<br />
This number shows how many values are still available in the pool (see<br />
Chapter 4.4).<br />
Filtering and<br />
sorting the table<br />
Creating pools<br />
Editing pools<br />
The header of the table can be used to sort the table entries. A click on a header<br />
of a column will activate the (primary) sort based on this column. This is<br />
indicated by the arrow in the column header. A second click on the same header<br />
will reverse the sort order. Clicking on another column header activates the sort<br />
based on this new column, the previously activated column will be used as<br />
secondary sorting criterion.<br />
The first row of the table accepts the input of regular expressions (please refer to<br />
Chapter 8, Regular expressions), which can be used to efficiently filter the table<br />
entries. Filtering based on regular expressions is not used for the column that<br />
does not contain text (i.e. column S).<br />
The filter criterion for the three count columns is not interpreted as a regular<br />
expression, but as a comma-separated list of numbers or number ranges<br />
(e.g. 0,2-3).<br />
The filter history will be saved for the current user and can be accessed using the<br />
drop down functionality of the filter fields.<br />
There are several ways to create new pools:<br />
1. Open the context menu by clicking on the pool table with the right mouse<br />
button. To open the Pool Properties Dialog for a new pool please select Add<br />
in the context menu.<br />
2. Select the Pool tab and click on the icon in the menu bar to open the Pool<br />
Properties Dialog for a new pool.<br />
3. Select New » Pool in the main menu to open the Pool Properties Dialog for<br />
a new pool.<br />
There are several ways to edit a pool:<br />
1. Double-click with the left mouse button on the pool in the table to open the<br />
Pool Properties Dialog.<br />
2. Select the pool with the left mouse button and open the context menu by<br />
pressing the right mouse button. Then select Edit to open the Pool<br />
Properties Dialog.<br />
51 of 122
<strong>IDM</strong> client overview<br />
Deleting pools<br />
3. Select the pool to be modified in the pool table. Select Edit » Edit Item in<br />
the main menu to open the Pool Properties Dialog.<br />
The Edit entry in the context menu and the Edit button in the toolbar are<br />
only enabled if exactly one pool is selected in the pool table.<br />
There are several methods to delete pools:<br />
1. Select the pool(s) and open the context menu by clicking with the right<br />
mouse button. To delete the pools please select Delete in the context menu.<br />
2. Select the pools to be deleted in the pool table and click on the icon in the<br />
menu bar.<br />
Please note that pools that are still referenced by variables cannot be<br />
deleted.<br />
3.5.1 The pool context menu<br />
The following entries are available in the context menu of the pool overview<br />
table:<br />
Add<br />
Create a new pool and open the Pool Properties Dialog of the new pool.<br />
Edit<br />
Delete<br />
Select All<br />
Edit the selected pool (only active if exactly one pool is selected in the overview<br />
table).<br />
Delete the selected pools.<br />
3.6 VPN group overview table<br />
Select all pools not excluded by the table filter.<br />
Please select the VPN Groups tab to access the VPN group overview table. A<br />
VPN group is used to group devices into a meshed VPN network. For detailed<br />
information on VPN groups and their usage please refer to Chapter 4.8.<br />
Figure 13: The <strong>IDM</strong> main window with VPN group table<br />
VPN group table<br />
columns<br />
The VPN group overview table contains the following columns:<br />
The column width can be changed by placing the cursor on the header of<br />
the table at the border of two columns and dragging the border to the<br />
desired location. The order of the columns can be changed by dragging<br />
52 of 122
Status<br />
Name<br />
Members<br />
Version<br />
Comment<br />
Filtering and<br />
sorting the table<br />
Creating VPN<br />
groups<br />
the column header to a different location.<br />
The status icon shows whether the VPN group is currently locked.<br />
<strong>IDM</strong> client overview<br />
The name assigned to the VPN group. The name can be set in the General<br />
Settings of the VPN Group Properties Dialog (see Chapter 4.8).<br />
A comma-separated list of the devices which are members of the VPN group (i.e.<br />
which are a part of the meshed VPN network defined by the VPN group).<br />
The mGuard firmware version that is used for the VPN group.<br />
Optional comment. The comment can be set in the General Settings of the VPN<br />
Group Properties Dialog (see Chapter 4.8).<br />
Member Count<br />
This column shows the number of devices which are members of the VPN group.<br />
The header of the table can be used to sort the table entries. A click on a header<br />
of a column will activate the (primary) sort based on this column. This is<br />
indicated by the arrow in the column header. A second click on the same header<br />
will reverse the sort order. Clicking on another column header activates the sort<br />
based on this new column, the previously activated column will be used as<br />
secondary sorting criterion.<br />
The first row of the table accepts the input of regular expressions (please refer to<br />
Chapter 8, Regular expressions), which can be used to efficiently filter the table<br />
entries. Filtering based on regular expressions is not used for the column that<br />
does not contain text (i.e. column S).<br />
The filter criterion for the Member Count column is not interpreted as a regular<br />
expression, but as a comma-separated list of numbers or number ranges<br />
(e.g. 0,2-3).<br />
The filter history will be saved for the current user and can be accessed using the<br />
drop down functionality of the filter fields.<br />
There are several ways to create new VPN groups:<br />
1. Open the context menu by clicking on the VPN group table with the right<br />
mouse button. To open the VPN Group Properties Dialog for a new VPN<br />
group please select Add in the context menu.<br />
Editing VPN groups<br />
2. Select the VPN Group tab and click on the icon in the menu bar to open<br />
the VPN Group Properties Dialog for a new VPN group.<br />
3. Select New » VPN Group in the main menu to open the VPN Group<br />
Properties Dialog for a new VPN group.<br />
There are several ways to edit a VPN group:<br />
1. Double-click with the left mouse button on the VPN group in the table to<br />
open the VPN Group Properties Dialog.<br />
2. Select the VPN group with the left mouse button and open the context menu<br />
by pressing the right mouse button. Then select Edit to open the VPN Group<br />
Properties Dialog.<br />
3. Select the device to be modified in the device table. Select Edit » Edit Item<br />
in the main menu to open the VPN Group Properties Dialog.<br />
The Edit entry in the context menu and the Edit button in the toolbar are<br />
only enabled if exactly one VPN group is selected in the VPN group<br />
53 of 122
<strong>IDM</strong> client overview<br />
Deleting VPN<br />
groups<br />
table.<br />
There are several methods to delete VPN groups:<br />
1. Select the VPN group(s) in the VPN group table and open the context menu<br />
by clicking with the right mouse button. To delete the VPN groups please<br />
select Delete in the context menu.<br />
2. Select the VPN groups to be deleted in the table and click on the icon in<br />
the menu bar.<br />
Please note that VPN groups that still have member devices cannot be<br />
deleted.<br />
3.6.1 The VPN group context menu<br />
The following entries are available in the context menu of the VPN group<br />
overview table:<br />
Add<br />
Create a new VPN group and open the VPN Group Properties Dialog of the new<br />
VPN group.<br />
Edit<br />
Edit the selected VPN group (only active if exactly one VPN group is selected in<br />
the overview table).<br />
Duplicate<br />
To create a duplicate of a VPN group please open the context menu by clicking<br />
with the right mouse button on the VPN group in the VPN group table. Select<br />
Duplicate in the context menu. <strong>IDM</strong> will create a copy of the VPN group and<br />
append the string _copy ( is a number) to the name of the new VPN<br />
group. Please note that the Duplicate menu entry is only enabled if exactly one<br />
VPN group is selected in the VPN group table.<br />
Delete<br />
Delete the selected VPN groups.<br />
Set Firmware Version<br />
Upgrade the firmware version to a new version. Please refer to Chapter 3.12 for<br />
more details.<br />
Assign/Remove Member Devices<br />
Edit member devices of one or more VPN groups. Please refer to Chapter 3.6.2<br />
for more details.<br />
Select All<br />
Select all VPN groups not excluded by the table filter.<br />
54 of 122
3.6.2 Editing device membership in VPN groups<br />
<strong>IDM</strong> client overview<br />
When Assign/Remove Member Devices in the VPN group context menu is<br />
activated, a dialog opens to edit the device membership of the selected VPN<br />
groups:<br />
VPN group<br />
membership table<br />
columns<br />
Status I<br />
Filtering and<br />
sorting the table<br />
Figure 14: The dialog to edit device membership in VPN groups<br />
The VPN group membership table contains the following columns:<br />
The column width can be changed by placing the cursor on the header of<br />
the table at the border of two columns and dragging the border to the<br />
desired location. The order of the columns can be changed by dragging<br />
the column header to a different location.<br />
The I status icon indicates whether a device is a member of none, some, or all of<br />
the selected VPN groups. Click on the<br />
the available icons and their meanings.<br />
icon to open a dialog which explains<br />
Status V<br />
The V status icon shows whether the firmware version of the device is<br />
compatible with (i.e. equal to or newer than) the firmware version of the selected<br />
VPN groups.<br />
Management ID<br />
The Management ID of the device.<br />
Templates<br />
A comma-separated list of the device’s ancestor templates. The first item in the<br />
list is the immediate parent template.<br />
Version<br />
The firmware version of the VPN group.<br />
VPN Groups<br />
A comma-separated list of VPN groups that the device is currently a member of.<br />
The header of the table can be used to sort the table entries. A click on a header<br />
of a column will activate the (primary) sort based on this column. This is<br />
indicated by the arrow in the column header. A second click on the same header<br />
will reverse the sort order. Clicking on another column header activates the sort<br />
based on this new column, the previously activated column will be used as<br />
secondary sorting criterion.<br />
55 of 122
<strong>IDM</strong> client overview<br />
Selecting devices<br />
Assigning or<br />
removing VPN<br />
group membership<br />
The first row of the table accepts the input of regular expressions (please refer to<br />
Chapter 8, Regular expressions), which can be used to efficiently filter the table<br />
entries. Filtering based on regular expressions is not used for the columns that do<br />
not contain text (i.e. columns I and V).<br />
Select the device(s) for which to modify the VPN group membership:<br />
• Click on a device to select it.<br />
• Click on a device, then hold down the Shift key and click on a second device<br />
to select a range of devices.<br />
• Click on a device while holding down the Ctrl key to toggle its selection<br />
state.<br />
Click on the Attach Selected Devices button to make the selected devices<br />
members of the selected VPN groups (i.e. the VPN groups that were selected in<br />
the VPN group table when the dialog was opened). Likewise, click on the Detach<br />
Selected Devices button to revoke the membership of the selected devices from<br />
the selected VPN groups.<br />
A device can only be a member of a VPN group if the device’s firmware<br />
version is equal to or newer than the firmware version of the VPN<br />
group.<br />
Any attempt to add a device to a VPN group of which it is already a<br />
member, or to remove a device from a VPN group of which it is not a<br />
member, is ignored.<br />
Devices are added to or removed from VPN groups in the background.<br />
The dialog can be closed while the operation is still being performed.<br />
3.7 Log window<br />
Sorting the table<br />
The context menu<br />
The log window shows various events, including the following:<br />
• Upload results.<br />
• Creation, deletion, modification of a device, template, pool, VPN group,<br />
user, or role.<br />
• Connect or disconnect of the client.<br />
For each event, the severity, the date and time, the username, and a message are<br />
logged. If an event is not the result of a user action, “–” is logged instead of the<br />
username. Double-clicking on a log entry opens a window with detail<br />
information.<br />
The header of the table can be used to sort the table entries. A click on a header<br />
of a column will activate the (primary) sort based on this column. This is<br />
indicated by the arrow in the column header. A second click on the same header<br />
will reverse the sort order. Clicking on another column header activates the sort<br />
based on this new column, the previously activated column will be used as<br />
secondary sorting criterion.<br />
The context menu is opened by clicking on the log window with the right mouse<br />
button. The following actions can be performed:<br />
Show Persistent Event Log<br />
Opens the Persistent Event Log Window. Please refer to Chapter 3.7.1 for more<br />
details.<br />
Clear<br />
Export<br />
Deletes the log entries. This applies to the current <strong>IDM</strong> client only, i.e. other<br />
clients are not affected.<br />
Opens a file chooser window and exports the log entries to an XML file.<br />
56 of 122
Auto-scrolling<br />
<strong>IDM</strong> client overview<br />
Filter Log Entries<br />
Enables or disables the filter for the log entry table. If the filter is enabled, the<br />
first row of the table accepts the input of regular expressions (please refer to<br />
Chapter 8, Regular expressions), which can be used to efficiently filter the table<br />
entries.<br />
Increase Verbosity<br />
Enables or disables verbose logging. If verbose logging is enabled, some events<br />
which are not normally useful and may be confusing are logged.<br />
If a new event is logged, the log window is automatically scrolled so that the new<br />
entry is visible by default. The auto-scrolling mechanism can be disabled and reenabled<br />
by clicking on the<br />
icon in the upper right corner of the log window.<br />
3.7.1 The persistent event log<br />
The Persistent Event Log Window shows selected events from the last 200 days<br />
in the same manner as the log window. Unlike the entries in the log window, the<br />
entries in the Persistent Event Log Window are stored persistently in the <strong>IDM</strong><br />
database, i.e. they are retained even if the <strong>IDM</strong> server is restarted.<br />
Range selection Since there can be a large number of persistent log entries, not all entries are<br />
automatically loaded from the <strong>IDM</strong> server when the dialog is opened. By<br />
changing the criteria in the Range Selection field and clicking the Apply button,<br />
the history entries matching the specified critera can be loaded.<br />
By default, the latest (i.e. newest) 100 entries are loaded.<br />
All Entries<br />
Loads all log entries.<br />
If the numer of entries is large (i.e. thousands or more), loading all<br />
entries may incur a significant delay.<br />
Time Range<br />
Loads all entries which have been created during a time range. The time range<br />
must be specified:<br />
• If a lower bound, but not an upper bound is specified, all entries newer than<br />
the lower bound are loaded.<br />
• If an upper bound, but not a lower bound is specified, all entries older than<br />
the upper bound are loaded.<br />
• If both a lower and an upper bound are specified, all entries created during<br />
the time interval given by the bounds are loaded.<br />
Times are specified as an ISO date (YYYY-MM-DD where YYYY is the year,<br />
MM is the month of the year between 01 and 12, and DD is the day of the month<br />
between 01 and 31) optionally followed by an ISO time (hh:mm:ss where hh is<br />
the hour according to the 24-hour timekeeping system, mm is the minute and ss<br />
is the second). For example, a quarter past 4 p.m. and 20 seconds on December<br />
22nd, 2010 would be written as 2010-12-22 16:15:20.<br />
Alternatively, click on the<br />
icon to select the date from a calender.<br />
Last Entries<br />
Loads the latest (i.e. newest) entries. The number of entries must be specified.<br />
3.7.2 Logging events via syslog<br />
The same events logged in the persistent event log (cf. Chapter 3.7.1), or a subset<br />
selected by the severity, can be sent to a syslog server. Please refer to Chapter 2.5<br />
for more details.<br />
57 of 122
<strong>IDM</strong> client overview<br />
3.8 The <strong>IDM</strong> main menu and tool bar<br />
3.8.1 The <strong>IDM</strong> main menu<br />
File<br />
Edit<br />
New<br />
Connect to Server/Disconnect from Server<br />
Connects to or disconnects from the server.<br />
Exit<br />
Exits the client.<br />
Edit Item<br />
Opens the Properties Dialog of the currently selected item (device, template,<br />
pool, or VPN group) in the overview table.<br />
Web Configure<br />
Opens the Web GUI for the selected devices in the device table.<br />
Only active if at least one device in the device table is selected.<br />
The Accessible via address is required for this option. It can be<br />
configured in the General settings of the Device Properties Dialog (see<br />
Chapter 4.3)<br />
Cut<br />
Cuts the marked text in the currently active table filter field to the<br />
clipboard.<br />
Copy<br />
Copies the marked text in the currently active table filter field to the<br />
clipboard.<br />
Paste<br />
Pastes the clipboard contents to the currently active table filter field .<br />
Select All<br />
Selects all entries in the currently active overview table.<br />
Device<br />
Creates a new device and opens the Device Properties Dialog.<br />
Template<br />
Creates a new template and opens the Template Properties Dialog.<br />
Pool<br />
Creates a new pool and opens the Pool Properties Dialog.<br />
VPN Group<br />
Creates a new VPN group and opens the VPN Group Properties Dialog.<br />
Device Import<br />
Opens a window that allows to select an import file.<br />
With the device import option, you can import an automatically (e.g. with a<br />
script) generated file of devices. This can be used to create a large number of<br />
devices in <strong>IDM</strong> without going through the process of creating them manually.<br />
The import file must be comma-separated value (CSV) formatted. Either a<br />
comma (,) or a semicolon (;) can be used as a field separator. Each record<br />
(line) in the file describes a single device and consists of the following fields:<br />
58 of 122
<strong>IDM</strong> client overview<br />
Field<br />
Description<br />
#0 Management ID<br />
#1 Firmware Version<br />
#2 Template Name<br />
#3 “Reachable via” address<br />
#4 Serial Number<br />
#5 Flash ID<br />
#6...#n<br />
Variable assigments<br />
Upload<br />
Licenses<br />
<strong>User</strong>s<br />
The Management ID and Firmware Version (fields #0 and #1) are mandatory,<br />
all other fields are optional. If a field is empty or non-existent, the<br />
corresponding attribute is not set.<br />
The Firmware Version field must be a supported firmware version (without<br />
patchlevel) as it would appear in the Version column of the device overview<br />
table, e.g. mGuard 6.1.<br />
The Template Name must either be the name of an existing template, which<br />
is assigned to the new device, or empty, in which case no template is assigned.<br />
Scalar variables (i.e. variables that store a single value and are not contained<br />
in a table) can be set with an assignment of the form<br />
=.<br />
Example record:<br />
My Device,mGuard 6.1,,192.168.2.3,17X46201,,ROUTERMODE=router,<br />
MY_LOCAL_IP=192.168.2.3<br />
(Please note that the record must be contained in a single line.)<br />
If a record is not valid, it is skipped and an error message is logged.<br />
Import X.509 Certificates<br />
Import certificates created during the manual certificate enrollment process.<br />
Please refer to Chapter 4.6.1 for more detailed information.<br />
For an overview of the configuration upload process and the different upload<br />
methods please refer to Chapter 3.9.<br />
Selected<br />
Uploads configurations to the devices currently selected in the device table.<br />
Changed<br />
Uploads configurations to the devices with a configuration status of out-ofdate.<br />
All<br />
Uploads configurations to all devices.<br />
Please refer to Chapter 3.10 for information on how to manage licenses and<br />
vouchers.<br />
Change Own Password<br />
Opens a dialog that enables the current user to change the password.<br />
59 of 122
<strong>IDM</strong> client overview<br />
Manage <strong>User</strong>s And Roles<br />
Please refer to Chapter 3.11 for details on how to manage users and roles.<br />
Options<br />
Default Browser<br />
Please specify a command line to be used to start the browser. The command<br />
line should start with the full path and the name of the binary. Append the<br />
string {url}, which will be replaced with the URL of the mGuard, e.g. on<br />
Windows enter:<br />
C:\Program Files\Firefox\Firefox.exe {url}<br />
Default Firmware Version<br />
This is the firmware version that will be used when creating a new device or<br />
template.<br />
Filter<br />
The filter in the device, template, pool, and VPN group table can be switched<br />
on and off using this option.<br />
3.8.2 The <strong>IDM</strong> tool bar<br />
The tool bar offers short-cuts to some of the functions in the main menu or the<br />
context menu:<br />
No connection to server; if clicked: connect to server.<br />
Connection established; if clicked: disconnect from server.<br />
Edit the selected entry (device, template, pool, or VPN group).<br />
Upload the configuration to the selected devices.<br />
Open the Web GUI of the selected devices in the device table.<br />
Add an entry (device, template, pool, or VPN group) and open its Properties<br />
Dialog.<br />
Delete the currently selected entries.<br />
Open a dialog to generate/request licenses from the <strong>Innominate</strong> license server<br />
for the selected devices.<br />
Filter of the current overview table (device, template, pool, or VPN group) is<br />
active. If clicked: deactivate the filter.<br />
Filter of the current overview table (device, template, pool, or VPN group) is<br />
inactive. If clicked: activate the filter.<br />
3.9 Uploading configurations to the mGuards<br />
Upload methods<br />
SSH push<br />
<strong>IDM</strong> offers several methods to upload the configuration files to the mGuards:<br />
The <strong>IDM</strong> server accesses the mGuards using the SSH protocol. Subsequently<br />
the configuration file is copied to the device and put into operation. Any<br />
failures during the upload process are shown in the log window. To use this<br />
method the following requirements have to be met:<br />
• In the General Settings of the Device Properties Dialog an IP<br />
address or a hostname has to be set for the field Accessible via.<br />
• The mGuard has to be accessible from the <strong>IDM</strong> server using the<br />
Accessible via address, i.e. a firewall must not block the traffic and a<br />
60 of 122
<strong>IDM</strong> client overview<br />
NAT device in the communication path has to be configured<br />
appropriately to allow the communication between the <strong>IDM</strong> server<br />
and the mGuard.<br />
• In case the mGuard is accessed on the untrusted interface, the SSH<br />
remote access from the <strong>IDM</strong> server has to be enabled on the mGuard.<br />
• The passwords to access the device have to be set correctly. For<br />
uploading the device configuration to the mGuard, <strong>IDM</strong> logs in as<br />
user admin. In case of a password change there are 2 passwords<br />
involved: the old password, which is used to access the device and<br />
the new password, which will be set after logging in. Therefore <strong>IDM</strong><br />
automatically keeps track of the active password to be used to access<br />
the device and does not use the password configured in the Device<br />
Properties Dialog for this purpose. If you would like to manually<br />
change the active password you can use the option Set Current<br />
Device Password in the context menu of the device table.<br />
If a device is not accessible <strong>IDM</strong> will retry the connection after a waiting time.<br />
As soon as the maximum count of retries is reached <strong>IDM</strong> will stop trying to<br />
upload the configuration and will show an error in the log.<br />
If a configuration change causes the mGuard to reboot (e.g. when<br />
switching from stealth to router mode), <strong>IDM</strong> is not immediately<br />
informed whether the configuration has been successfully applied. It<br />
will therefore reaccess the device after a waiting time. Adapt the<br />
Accessible via setting after the initial upload if necessary. Alternatively<br />
the configuration state can be set manually with the option Set Upload<br />
State in the context menu of the device overview table.<br />
If you change the password in the Device Properties Dialog and a<br />
subsequent upload of the device configuration fails, it may happen that<br />
the password change was applied on the mGuard but <strong>IDM</strong> was not able<br />
to keep track of the succesful change. In this case you have to manually<br />
set the active password in <strong>IDM</strong> using the option Set Current Device<br />
Password in the context menu of the device overview table, otherwise<br />
<strong>IDM</strong> will not be able to log in for the next upload.<br />
Due to this potential issue it is recommend to apply (upload) password<br />
changes separately from extensive configuration changes.<br />
<strong>Manual</strong> configuration upload<br />
In case there are only a few devices to be configured and the devices cannot<br />
be accessed by <strong>IDM</strong>, it is possible to export the configuration files to the file<br />
system and upload them manually to each device using the Web GUI of the<br />
respective device. Each device is identified by a unique identifier which is<br />
automatically assigned by <strong>IDM</strong>. This identifier (8-digit hex string with lower<br />
case characters) is used as file name for the export. The convention for the<br />
exported configuration file is: .atv. The filename for each<br />
configuration file is shown in the General settings of the Device Properties<br />
Dialog and in the device table.<br />
To export configuration files the following requirements have to be met:<br />
• An export directory has to be configured in the preferences file of the<br />
<strong>IDM</strong> server (see Chapter 2.5). Please note that it is not possible to<br />
export the files locally on the client side. The files are always<br />
exported on the server side to the export directory configured in the<br />
server preferences file.<br />
• The export directory has to be accessible and writeable from the<br />
server.<br />
• There has to be enough disk space to export the files.<br />
61 of 122
Performing an<br />
upload<br />
<strong>IDM</strong> client overview<br />
Configuration pull<br />
The mGuards are able to pull configuration files from an HTTPS server.<br />
mGuards running firmware version 5.0 or newer can additionally pull license<br />
files.<br />
To use the configuration pull feature please refer to the section <strong>Manual</strong><br />
configuration upload above for a description how to export configuration and<br />
license files. Additionally the following requirements have to be met:<br />
• An HTTPS configuration pull server has to be configured (see<br />
Chapter 2.9).<br />
• The configuration pull has to be configured on the mGuards (please<br />
refer to the mGuard manual).<br />
Additionally the mGuards have to be configured with the 2 following<br />
commands to pull their configuration according to the <strong>IDM</strong> file name<br />
convention:<br />
gaiconfig --set GAI_PULL_HTTPS_DIR <br />
gaiconfig --set GAI_PULL_HTTPS_FILE .atv<br />
• In case that the <strong>IDM</strong> server and the configuration server are installed<br />
on different machines you have to make sure that the <strong>IDM</strong> export<br />
files are synced to the file system of the configuration server.<br />
• Additional steps are necessary if you would like to get a feedback<br />
whether or not the configuration pull was successful. <strong>IDM</strong> is able to<br />
receive Syslog messages on port UDP 7514 in order to detect the<br />
configuration status of a device if <strong>IDM</strong> is configured as Syslog server<br />
in the configuration server settings.<br />
Remark: The pull request contains information about the current<br />
configuraton status of the mGuard. This information will be sent as<br />
Syslog message from the configuration server to <strong>IDM</strong>. The port on<br />
which <strong>IDM</strong> listens for Syslog messages can be configured in the<br />
preferences file of the <strong>IDM</strong> server (see Chapter 2.5).<br />
You have the following options to initiate an upload of the configuration to the<br />
devices:<br />
• Open the menu Upload in the main menu (Chapter 3.8.1) and select which<br />
devices should be uploaded (All, Selected or Changed, i.e. all devices with a<br />
configuration status of out-of-date).<br />
• Select the entry Upload in the context menu (right-click on the device table).<br />
This will schedule all currently selected devices in the device table for<br />
upload.<br />
• Click on the icon in the tool bar to initiate an upload for the currently<br />
selected devices in the device table.<br />
After initiating the upload please specify which upload method you prefer:<br />
Push upload via SSH<br />
<strong>IDM</strong> tries to upload all scheduled devices using SSH push.<br />
For SSH upload there has to be an IP address or a hostname specified in<br />
the field Accessible via in the General settings of the Device<br />
Properties Dialog (see Chapter 4.3). If this is not the case, an error will<br />
be displayed in the log window and the upload status will be set to error.<br />
If <strong>IDM</strong> cannot login to the device due to wrong SSH authentication<br />
information, an error will be displayed in the log window and the upload<br />
status will be set to error.<br />
If the mGuard is not accessible, <strong>IDM</strong> will retry to upload the<br />
configuration. After the maximum retry count is reached an error<br />
message will be displayed in the log window and the upload status will<br />
62 of 122
e set to error.<br />
<strong>IDM</strong> client overview<br />
Prepare pull configuration<br />
The configuration of all scheduled devices will be exported to the file system.<br />
The export directory can be configured in the preferences file of the<br />
server (see Chapter 2.5).<br />
The filename for each configuration file is shown in the General<br />
settings of the Device Properties Dialog and in the device table.<br />
In case the files cannot be written to the file system (no permission, disk<br />
capacity exceeded, export directory not existent, etc.), <strong>IDM</strong> displays an<br />
error in the log and the upload status will be set to error.<br />
Auto<br />
Depending on whether or not Accessible via in General settings is set, <strong>IDM</strong> will<br />
either perform an SSH upload or an export of the configuration to the file system.<br />
Upload time<br />
The time when upload should be performed. Times are specified as an ISO date<br />
(YYYY-MM-DD where YYYY is the year, MM is the month of the year<br />
between 01 and 12, and DD is the day of the month between 01 and 31)<br />
optionally followed by an ISO time (hh:mm:ss where hh is the hour according<br />
to the 24-hour timekeeping system, mm is the minute and ss is the second). For<br />
example, a quarter past 4 p.m. and 20 seconds on December 22nd, 2010 would<br />
be written as 2010-12-22 16:15:20. Alternatively, click on the icon to select<br />
the date from a calender.<br />
If the current time (which is the default value) or a time in the past is specified,<br />
the upload is performed as soon as possible.<br />
The Upload within … minutes after field is used to specify an upper bound on<br />
the time frame in which <strong>IDM</strong> will attempt to perform the upload. If it does not<br />
succeed within the specified time, <strong>IDM</strong> will perform no more upload attempts<br />
and consider the upload failed.<br />
Temporary Upload Password<br />
If a password is entered into this field, and a push upload is performed, <strong>IDM</strong> uses<br />
this password when logging into the mGuard via SSH. The password is used for<br />
all devices. If the field is left empty (default), <strong>IDM</strong> uses the known admin<br />
password of each device.<br />
The feature is useful if the mGuard does not use the configured admin<br />
password to authenticate the login request, e.g. if the mGuard uses<br />
RADIUS authentication.<br />
When a temporary upload password is used, <strong>IDM</strong> can use a username other than<br />
admin to log into the mGuard. This username can be configured in the Device<br />
Properties Dialog or the Template Properties Dialog. Please open the<br />
Authentication » Local <strong>User</strong>s » Temporary Upload <strong>User</strong> node in the<br />
navigation tree.<br />
Upload history Shows the upload history. The upload history contains details on the last upload<br />
actions and their results for each device. To review the upload history for a<br />
device, please select the mGuard in the device overview table and open the<br />
context menu with a click with the right mouse button. Select Upload History to<br />
open a window with the upload history.<br />
63 of 122
3.10 Managing license vouchers and device licenses<br />
Managing License<br />
Vouchers<br />
<strong>IDM</strong> client overview<br />
<strong>IDM</strong> enables you to centrally manage your license vouchers and device licenses.<br />
The main menu contains two entries: Licenses » Manage Device Licenses and<br />
Licenses » Manage License Vouchers which are explained in detail in the<br />
following sections.<br />
To open the Voucher Management Window please select Licenses » Manage<br />
License Vouchers from the main menu.<br />
Figure 15: The Voucher Management Window<br />
Requesting/<br />
generating licenses<br />
Managing Device<br />
Licenses<br />
The window shows the available number of vouchers per voucher type. To<br />
import vouchers either paste the voucher information into the import field, or<br />
select a file that contains the voucher data and then click on Import. Only CSV is<br />
supported as import format, i.e. each line of the import data has to contain the<br />
following information:<br />
,<br />
At least one voucher of the corresponding type (major release upgrade, VPN etc.)<br />
has to be imported into <strong>IDM</strong> before requesting a device license. Furthermore the<br />
flash ID and the serial number are required for the license request, i.e. the<br />
numbers have to be supplied in the General Settings of the device. These<br />
identification numbers may be entered manually or are automatically requested<br />
from the device during the push or pull upload procedure.<br />
To request licenses, select the devices in the device overview table and either<br />
press the icon in the tool bar or select Generate License from the context<br />
menu. The generated licenses are subsequently shown in the License<br />
Management Window and on the Management » Licensing page in the Device<br />
Properties Dialog and will be installed on the device with the next upload. The<br />
result of the license request is also shown in the log window.<br />
<strong>IDM</strong> has to be able to connect to the <strong>Innominate</strong> license server in order<br />
to generate/request licenses.<br />
To open the License Management Window please select Licenses » Manage<br />
Device Licenses from the main menu. All licenses managed by <strong>IDM</strong> and their<br />
licenses details are shown in the License Management Window. In addition to<br />
license requested/generated by the procedure described in the previous section,<br />
64 of 122
<strong>IDM</strong> client overview<br />
existing licenses can be imported. To import licenses either type or paste the<br />
filenames of the license files (one filename per line) into the import field and<br />
click on Import subsequently, or click on the Choose File button and select one<br />
or more files in the dialog.<br />
Figure 16: The License Management Window<br />
Refreshing licenses<br />
A double-click on a license (row) in the table opens the Device<br />
Properties Dialog of the corresponding device (if any).<br />
All licenses managed by <strong>IDM</strong> will be installed on the devices with every<br />
upload.<br />
The licenses are automatically assigned to the devices by using the flash<br />
ID contained in the license, i.e. without a flash ID in the General<br />
settings of the device an assignment of the licenses is not possible.<br />
To refresh all licenses in <strong>IDM</strong> for a device you can select the option Refresh<br />
Licenses in the context menu of the device overview table. <strong>IDM</strong> will contact the<br />
<strong>Innominate</strong> license server and retrieve all licenses that were bought for this<br />
device. The licenses will be installed with the next configuration upload. You can<br />
use this option, if you accidentally deleted licenses in <strong>IDM</strong> or if you would like<br />
to manage an mGuard that has already licenses installed that are not yet managed<br />
by <strong>IDM</strong>.<br />
3.11 Managing users, roles, and permissions<br />
The permission to log into the <strong>IDM</strong> client, and the permission to perform certain<br />
operations once logged in, are controlled through users and roles. A user<br />
corresponds to a person logging into the <strong>IDM</strong> client. Each user has one or more<br />
associated roles, and each role has an associated set of permissions. The union of<br />
all permissions associated with a user’s roles determine what permissions are<br />
granted to a user.<br />
The permissions are granted when a user logs in, and remain valid until<br />
the user logs out. Therefore, any modifications to the user, role, or<br />
permission configuration have no immediate effect on logged in users.<br />
65 of 122
<strong>IDM</strong> client overview<br />
<strong>User</strong> and role<br />
management<br />
<strong>User</strong>s, roles and permissions are managed in the <strong>User</strong>s and Roles Dialog, which<br />
is opened through the <strong>User</strong>s » Manage <strong>User</strong>s and Roles menu entry:<br />
3.11.1 Managing users<br />
Assigning roles to<br />
users<br />
The superuser root<br />
Initial users<br />
Resetting the root<br />
password<br />
Figure 17: The users and roles dialog<br />
The dialog consists of three panels, the <strong>User</strong>s Panel, the Roles Panel, and the<br />
Permissions Panel.<br />
The <strong>User</strong>s Panel does not appear if RADIUS authentication is used;<br />
please refer to Chapter 3.11.4 for more details. The buttons to modify<br />
users or roles do not appear if the user opening the <strong>User</strong>s and Roles<br />
Dialog does not have the permission to modify users and roles.<br />
<strong>User</strong>s are managed in the <strong>User</strong>s Panel of the <strong>User</strong>s and Roles Dialog. They can<br />
be added with the Add button, deleted with the Delete button, and edited with the<br />
Edit button or by double-clicking on the user in the table. The following data<br />
must be specified when adding or editing a user:<br />
• The username, which the user uses to log into the <strong>IDM</strong> client. <strong>User</strong>names<br />
must be unique.<br />
• The real name. It has no technical effect; its purpose is to make it easier to<br />
associate a user with a real person.<br />
• The password. The user must provide the correct password to log into the<br />
<strong>IDM</strong> client.<br />
If one or more users in the <strong>User</strong>s Panel and one or more roles in the Roles Panel<br />
are selected, the roles can be assigned to the users by clicking the Assign Role<br />
button or removed by clicking the Remove Role button. All of the selected roles<br />
are assigned to or removed from all of the selected users.<br />
A “superuser” with the username root always exists. Although it has no<br />
associated roles, it has all permissions (i.e. it is treated specially by <strong>IDM</strong>). The<br />
superuser cannot be deleted, nor can permissions be revoked from the superuser.<br />
Three users exist in a fresh <strong>IDM</strong> installation, root, admin, and audit. The initial<br />
password of each of these users is identical to the respective username.<br />
If the password for the superuser root is lost, it is possible to reset it to root with<br />
the following psql command (to be performed while the <strong>IDM</strong> server is not<br />
running):<br />
UPDATE mgnt_system_users SET "password" =<br />
'WNd6PePC4QrGiz2zeKv6bQ==' WHERE "username" = 'root';<br />
66 of 122
3.11.2 Managing roles<br />
Assigning<br />
permissions to<br />
roles<br />
Initial roles<br />
<strong>IDM</strong> client overview<br />
Roles are managed in the Roles Panel of the <strong>User</strong>s and Roles Dialog. They can<br />
be added with the Add button, deleted with the Delete button, and edited with the<br />
Edit button or by double-clicking on the role in the table. Each role has a name<br />
which must be unique.<br />
If one or more roles in the Roles Panel and one or more permissions in the<br />
Permissions Panel are selected, the permissions can be assigned to the roles by<br />
clicking the Grant Permission button or removed by clicking the Revoke<br />
Permission button. All of the selected permissions are assigned to or removed<br />
from all of the selected roles.<br />
Two roles exist in a fresh <strong>IDM</strong> installation, admin, and audit. The admin role has<br />
all permissions except modification of users and roles. The audit role has read<br />
permissions, but no modification permissions.<br />
3.11.3 Permissions<br />
The permissions table in the Permissions Panel of the <strong>User</strong>s and Roles Dialog<br />
lists all available permissions. The permissions grant the following actions:<br />
Permission<br />
Read Devices<br />
Write Devices<br />
Upload<br />
Device Configuration<br />
Read<br />
Configuration History<br />
Read Templates<br />
Write Templates<br />
Read Pools<br />
Write Pools<br />
Read VPN Groups<br />
Write VPN Groups<br />
Granted Actions<br />
View the list of devices, device configurations,<br />
device licenses, and license vouchers.<br />
Edit, add, remove, or duplicate device<br />
configurations; add or remove device licenses; add<br />
license vouchers.<br />
If the user has the Read Configuration History<br />
permission in addition to this permission:<br />
Reconstruct devices from device configuration<br />
history entries.<br />
Initiate the upload of configurations to devices or<br />
the export of pull configuration files.<br />
View and compare device configuration history<br />
entries.<br />
If the user has the Write Devices permission in<br />
addition to this permission: Reconstruct devices<br />
from device configuration history entries.<br />
View the list of templates and template<br />
configurations.<br />
Edit, add, remove, or duplicate template<br />
configurations.<br />
View the list of pools and pool configurations.<br />
Edit, add, or remove pool configurations.<br />
View the list of VPN groups and VPN group<br />
configurations.<br />
Edit, add, remove, or duplicate VPN group<br />
configurations.<br />
67 of 122
<strong>IDM</strong> client overview<br />
Permission<br />
Read <strong>User</strong>s and Roles<br />
Write <strong>User</strong>s and Roles<br />
Read Event Log<br />
Granted Actions<br />
View users, roles, and permissions.<br />
Manage users, roles, and permissions (including the<br />
permission to set other user’s passwords).<br />
View the persistent event log.<br />
Minimal permission<br />
set<br />
Filtering the<br />
permission table<br />
The permissions Read Devices, Read Templates, Read Pools, and Read VPN<br />
Groups form the minimal permission set. These permissions cannot be revoked<br />
from a role.<br />
The columns U and R show how each permission relates to the currently selected<br />
users and roles. They can be used to filter the permission table.<br />
The following icons can appear in the U column:<br />
The permission is not granted to any of the selected users.<br />
The permission is granted to some (but not all) of the selected users.<br />
The permission is granted to all of the selected users.<br />
Likewise, the same icons are used in the R column to express if the permission<br />
is assigned to none, some, or all of the selected roles.<br />
3.11.4 <strong>User</strong> authentication<br />
<strong>IDM</strong> supports two mechanisms to authenticate users logging into the <strong>IDM</strong> client,<br />
the <strong>IDM</strong> database and RADIUS.<br />
<strong>IDM</strong> database<br />
authentication<br />
RADIUS<br />
authentication<br />
Authentication against the <strong>IDM</strong> database is the default mechanism. It uses the<br />
usernames and passwords stored in the <strong>IDM</strong> database and configured in the<br />
<strong>User</strong>s Panel of the <strong>User</strong>s and Roles Dialog to authenticate users. Please refer to<br />
Chapter 3.11.1 for more details.<br />
Remote Authentication Dial In <strong>User</strong> Service (RADIUS) is a network protocol<br />
that provides a remote authentication service. If the <strong>IDM</strong> server is configured to<br />
use RADIUS authentication, the users stored in the <strong>IDM</strong> database are ignored.<br />
When a user attempts to log into the <strong>IDM</strong> client, the <strong>IDM</strong> server performs a<br />
request to one or more RADIUS servers to authenticate the user. The RADIUS<br />
reply must contain one or more Filter-Id attributes which the <strong>IDM</strong> server<br />
interprets as role names. If the login attempt is sucessful, the user is assigned to<br />
the roles specified in the Filter-Id attributes.<br />
If RADIUS authentication is used, <strong>IDM</strong> does not use the concept of a<br />
superuser. The username root is not treated specially in any way.<br />
Please refer to Chapter 2.5 for more information on how to configure the <strong>IDM</strong><br />
server to use RADIUS authentication.<br />
3.12 Managing firmware upgrades with <strong>IDM</strong><br />
Prerequisites<br />
<strong>IDM</strong> supports the management of the firmware of your mGuards. The firmware<br />
itself is not uploaded to the device by <strong>IDM</strong>. <strong>IDM</strong> instructs the device during the<br />
configuration upload to download a firmware upgrade package from an upgrade<br />
server and apply it.<br />
• An upgrade server has to be set up and the required update packages etc.<br />
have to be put on the server. The upgrade server has to be accessible from the<br />
devices (and not necessarily from <strong>IDM</strong>).<br />
• The server has to be configured in the device configuration (or in the<br />
68 of 122
<strong>IDM</strong> client overview<br />
Scheduling a<br />
firmware upgrade<br />
Canceling the<br />
scheduled firmware<br />
upgrade<br />
Upgrade process<br />
template configuration). For 4.2 devices please navigate in the Properties<br />
Dialog to Management » Firmware upgrade » Upgrade servers or for 5.0<br />
devices or newer navigate to Management » Update » Firmware<br />
upgrade » Upgrade servers to add your upgrade server to the configuration.<br />
• If you use the automatic firmware upgrade (see section below) together with<br />
a pull upload, make sure that the field Firmware Version on Device (see<br />
Chapter 4.3) has a valid value. The value can either be entered manually or<br />
alternatively <strong>IDM</strong> will automatically fill in this information after the initial<br />
push upload or pull configuration feedback. If entered manually the<br />
Firmware Version on Device field must exactly match the string shown in<br />
the icon in the upper-left corner of the mGuard’s web interface, e.g.<br />
6.1.0.default.<br />
There are two ways to schedule a firmware upgrade:<br />
• Explicitly specify the target firmware<br />
To do so please navigate in the Device Properties Dialog to Management »<br />
Firmware upgrade » Schedule firmware upgrade for 4.2 devices or<br />
navigate to Management » Update » Firmware upgrade » Schedule<br />
firmware upgrade for 5.0 or newer devices. Enter the name of the package<br />
in the field Package set name and set Install package set to Yes.<br />
• Perform an automated upgrade<br />
If you wish to use the automatic upgrade please navigate in the Device<br />
Properties Dialog to Management » Firmware upgrade » Schedule<br />
firmware upgrade for 4.2 devices or navigate to Management » Update »<br />
Firmware upgrade » Schedule firmware upgrade for 5.0 devices. Select<br />
one of the following options in Automatic upgrade:<br />
• Install latest patches<br />
This option will upgrade your device to the latest available patch<br />
release, e.g. from release 4.2.1 to release 4.2.3.<br />
• Install latest minor release<br />
This option will upgrade your device to the latest available minor<br />
release, e.g. from release 5.0.1 to release 5.1.0.<br />
• Install next major version<br />
This option will upgrade to the next major release, e.g. from release<br />
4.2.3 to release 5.1.0.<br />
Please make sure that the major upgrade licenses for the devices are<br />
present in <strong>IDM</strong> (see Chapter 3.10) prior to initiating a major release<br />
upgrade.<br />
Alternatively you can schedule the automatic firmware upgrade for one or<br />
more devices using the context menu of the device overview table. Please<br />
open the context menu by right-clicking on the device table, then select the<br />
desired upgrade option.<br />
To finally initiate the firmware upgrade the configuration has to be<br />
uploaded to the devices, after performing the steps above.<br />
You can unschedule a scheduled firmware upgrade with the option Unschedule<br />
upgrade in the context menu of the device overview table.<br />
When performing an upgrade it is important to follow the correct order of the<br />
steps. Let us assume you would like to upgrade a device from release 4.2.3 to<br />
5.1.0. The current firmware version configured (in the field Firmware Version<br />
in the Device Properties Dialog) in <strong>IDM</strong> is 4.2 corresponding to the firmware<br />
version on the device, which is also a 4.2 version. This should be indicated in the<br />
Version on Device field in the device overview table (see Chapter 3.3). Make<br />
sure that all required prerequisites (see section Prerequisites above) are fulfilled<br />
69 of 122
<strong>IDM</strong> client overview<br />
Monitoring the<br />
firmware upgrade<br />
and start a configuration upload for the device (see section Scheduling a<br />
firmware upgrade above). First the icon in the Version on Device column will<br />
change to , indicating that a firmware upgrade has been scheduled with the<br />
next upload. As soon as the configuration upload is started, the icon changes to<br />
, indicating that a firmware upgrade is ongoing on the device (the icon is<br />
only shown when performing a push upload). <strong>IDM</strong> polls the device periodically<br />
to get a feedback on the result of the firmware upgrade, which will finally be<br />
shown in the Version on Device field in the device overview table and in the U<br />
column of the device overview table. The Version on Device field should now<br />
indicate a firmware mismatch, since the device has been upgraded to 5.1.0, but<br />
the <strong>IDM</strong> configuration for the device is still set to version 4.2. Therefore you<br />
should change the firmware version for the device to match the currently<br />
installed firmware. This has to be performed after the firmware upgrade on the<br />
device took place. You can change the firmware version in the field Firmware<br />
Version on Device in the Device Properties Dialog or using the context menu of<br />
the device overview table. You can now start to configure features introduced<br />
with the new firmware version.<br />
The firmware upgrade progress and the result is indicated by the icon in the<br />
column Version on device in the device overview table. Please refer to<br />
Chapter 3.3 for more information.<br />
70 of 122
Template, device, pool, and VPN group configuration<br />
4 Template, device, pool, and VPN group configuration<br />
4.1 General remarks<br />
Navigation tree<br />
mGuard<br />
configuration<br />
The Device Properties Dialog, the Template Properties Dialog, the Pool Value<br />
Properties Dialog, and the VPN Group Properties Dialog are used to configure<br />
devices, templates, pools, or VPN groups, respectively. The device and template<br />
dialogs are very similar, therefore the common parts are described in this chapter.<br />
Chapter 4.2 and Chapter 4.3 discuss the differences between the two dialogs. The<br />
pool configuration is explained in Chapter 4.4. For detailed information on the<br />
template and inheritance concept please refer to Chapter 5. The VPN group<br />
configuration is described in Chapter 4.8.<br />
On the left side of the dialog you can find the navigation tree, which resembles<br />
the menu structure of the mGuard Web GUI. Compared to the mGuard GUI the<br />
navigation tree contains an additional entry General Settings, which contains<br />
template and device parameters only used in <strong>IDM</strong>. For more information on the<br />
General Settings please refer to the following chapters. The navigation tree also<br />
has a context menu, which can be opened by clicking on the tree with the right<br />
mouse button. The context menu contains various entries to fold/unfold parts of<br />
the tree. Furthermore the context menu shows the key shortcuts to access the<br />
menu entries.<br />
The navigation tree allows to navigate conveniently to the mGuard variables. If<br />
you click on a “leaf” of the tree, the corresponding mGuard variables and the<br />
associated settings are shown in the right area of the Properties Dialog.<br />
Depending on the variable, different value types can be selected (exemplarily<br />
shown for the Device Properties Dialog):<br />
Figure 18: Value types of an mGuard variable with a fixed value set<br />
Figure 19: Value types of an mGuard variable with an editable value<br />
Figure 20: Value types of an mGuard table variable<br />
Figure 21: Value types of an complex mGuard table variable<br />
71 of 122
Template, device, pool, and VPN group configuration<br />
Variables with a fixed value set<br />
Variables with a fixed value set allow the following choices:<br />
• Inherited<br />
Set the variable to the default value or to the value defined in an assigned<br />
template (if applicable). The usage of templates and inherited values is further<br />
explained in Chapter 4.2 and Chapter 5.<br />
• Local<br />
The mGuard supports (among others) two roles, the admin who is able to<br />
change all mGuard variables and the netadmin who is able to change only<br />
local variables. The Local value determines whether a variable is local, i.e.<br />
whether or not it can be managed by the netadmin on the mGuard. If a variable<br />
is local, it will not be managed by <strong>IDM</strong> anymore in order to avoid conflicts<br />
between <strong>IDM</strong> and the netadmin.<br />
• Fixed values<br />
A number of fixed values which can be selected for this variable. The<br />
selectable values depend on the variable. In the example above (Figure 18) the<br />
fixed values are: Provider defined and <strong>User</strong> defined for the variable<br />
Hostname mode.<br />
Variables with an editable value<br />
Variables with an editable value allow the following choices:<br />
• Inherited<br />
See above.<br />
• Local<br />
See above.<br />
• Custom<br />
If you select the Custom value entry, the combo box becomes editable and<br />
you can enter a specific value for the variable, e.g. prod2975 in the example<br />
in Figure 19. The value you entered is subsequentely shown as available<br />
selection in the combo box.<br />
Table variables (e.g. incoming firewall rules)<br />
Table variables allow the following choices (for more information on tables<br />
please see below in the Chapter Modifying mGuard table variables):<br />
• Inherited<br />
Set the variable to the default rows or to the rows defined in an assigned<br />
template (if applicable). The inherited rows are shown at the beginning of the<br />
table in a different color and are not editable or selectable. The usage of<br />
templates and inherited values is further explained in Chapter 4.2 and Chapter<br />
5.<br />
• Local<br />
See above.<br />
If you set a table variable to Local and <strong>IDM</strong> shows an error, please check<br />
whether May append is set as permission in the template (if any). If May<br />
append is selected as permission for the table in the template, it is only<br />
allowed to append rows in the Device Properties Dialog, therefore the<br />
selection of Local results in an error.<br />
• Custom<br />
If you select Custom the table and its associated menu elements become<br />
enabled. Table rows defined in a template are copied from the template to the<br />
device and can be deleted or edited in the Device Properties Dialog (please<br />
note that deleting or editing the rows does not change the rows in the<br />
template). You may also add new rows to the table.<br />
72 of 122
Additional<br />
configuration in the<br />
template<br />
Template, device, pool, and VPN group configuration<br />
Please note that it is possible to switch between Custom and the other<br />
value types without losing any data. But if you switch from Custom to<br />
e.g. Inherited and then apply your settings and leave the dialog, all<br />
custom rows you entered will be lost.<br />
• Custom + Locally appendable (Device Properties Dialog only)<br />
Basically the same as Custom, but this option allows the user netadmin on the<br />
mGuard to add further rows. (The rows defined in <strong>IDM</strong> cannot be edited or<br />
deleted by the user netadmin on the mGuard.)<br />
Complex table variables (e.g. VPN connections)<br />
Contrary to “normal” table variables, adding a row to or deleting a row from a<br />
complex table variable additionally adds or deletes a node from the navigation<br />
tree. An example for a complex table variable are the VPN connections: a VPN<br />
connection is represented by a table row in the overview table and by an<br />
additional node in the navigation tree, in which the settings for the connection<br />
can be made. Please note that the table cells of complex tables are not editable,<br />
i.e. all settings have to be made in the leafs of the navigation tree node.<br />
Complex table variables allow the following choices (for more information on<br />
tables please see below in the Chapter Modifying mGuard table variables):<br />
• Inherited<br />
The behaviour is basically the same as described for the “normal” table<br />
variables above. Inherited rows from a template which also appear as<br />
navigation tree nodes are all set to read-only if Inherited is selected for the<br />
complex table variable. The usage of templates and inherited values is further<br />
explained in Chapter 4.2 and Chapter 5.<br />
• Custom<br />
If you select Custom the table and its associated menu elements become<br />
enabled. Contrary to “normal” table variables the inherited table rows are not<br />
copied from the template to the device when switching to Custom. Inherited<br />
rows cannot be deleted, but can be edited if Custom is selected. Please note<br />
that changing or editing the rows does not change the rows in the template.<br />
You may also add new rows (nodes) to the table.<br />
Please note that it is possible to switch between Custom and Inherited<br />
without losing any data while the Properties Dialog is open. But if you<br />
switch from Custom to Inherited, apply your settings, and then leave<br />
the dialog, all custom rows you entered will be lost.<br />
In the Template Properties Dialog you can find additional settings for the<br />
variables. These settings are explained in Chapter 4.2.<br />
73 of 122
Template, device, pool, and VPN group configuration<br />
Indication of invalid<br />
input<br />
Invalid input will be immediately indicated by a red variable name and by error<br />
icons in the navigation tree, as shown in the following figure for the external IP<br />
address:<br />
Figure 22: Input verification / invalid input<br />
Indication of<br />
changed values<br />
The icon in the leafs of the navigation tree (see the following figure) indicates<br />
that a change has been made to a variable in the leaf but has not been applied yet.<br />
Figure 23: Indication of non-applied changes<br />
74 of 122
Template, device, pool, and VPN group configuration<br />
The icon in the leafs of the navigation tree (see the following figure) indicates<br />
that settings have been changed in the respective leaf and have been applied.<br />
Figure 24: Indication of applied changes<br />
Indication of None<br />
value<br />
The icon in the leafs of the navigation tree (see the following figure) indicates<br />
that a None value which has not been overridden (set) in the template hierarchy<br />
yet is selected in one of the ancestor templates.<br />
Figure 25: Indication of None value<br />
75 of 122
Template, device, pool, and VPN group configuration<br />
Modifying mGuard<br />
table variables<br />
The following figure shows an example of a table variable (incoming firewall<br />
rules):<br />
Figure 26: Modifying table variables<br />
Add, delete, copy, or move rows<br />
To add, delete, copy, or move rows, please use the respective buttons.<br />
If none of the rows is selected then a click on the Add button will add the row at<br />
the beginning of the table. If one or more rows are selected, a new row will be<br />
added after the last selected row.<br />
The Delete button is enabled only if at least one row is selected. It deletes the<br />
selected rows.<br />
The Copy button is enabled only if at least one row is selected. It copies the<br />
selected rows and inserts them after the last selected row.<br />
The Move buttons are enabled only if at least one row is selected. To move the<br />
current selection up one row press the<br />
button; to move it down please press<br />
the button.<br />
The Add, Delete, Copy, and Move buttons are enabled only if either<br />
Custom or Custom + locally appendable is selected. Please refer to the<br />
Section mGuard configuration above.<br />
Selecting table rows<br />
By clicking on a table row with the left mouse button you select it. Multiple rows<br />
can be selected as a contiguous block of rows either by first selecting the upper<br />
or lower row of the block and then selecting the opposite row with a left click<br />
while holding the key.<br />
Rows can be added to the selection or removed from the selection by clicking<br />
with the left mouse button on the row while pressing the key.<br />
Changing a table cell<br />
To edit a table cell please double click on the cell with the left mouse button. (A<br />
single click selects the table row).<br />
Invalid values in tables<br />
An invalid value in a table will not be indicated in the navigation tree, but the cell<br />
will be marked red. If you enter an invalid value in a table cell, and leave the cell<br />
e.g. by clicking on another navigation tree node, the last applied (valid) value will<br />
replace the invalid input.<br />
76 of 122
Template, device, pool, and VPN group configuration<br />
Row colors<br />
The rows of a table may have different colors, depending on the type of row.<br />
Inherited rows from an ancestor template are colored red, green or grey:<br />
Figure 27: Table row colors<br />
A green row indicates that the row is editable, a red row indicates that the row<br />
cannot be edited or deleted and a grey row indicates that this is an inherited<br />
default row (which can be changed).<br />
To change a green or grey row it is necessary to switch the value of the<br />
table from Inherited to Custom.<br />
Context menu<br />
Tables can also be edited using the context menu. Please click on the table with<br />
the right mouse button. The following menu will appear:<br />
Figure 28: Context menu<br />
77 of 122
Template, device, pool, and VPN group configuration<br />
Modifying complex<br />
table variables<br />
For the definition of a complex table variable please refer to the section mGuard<br />
configuration above. Basically the previous section also applies to complex table<br />
variables. However there are some differences that the user should be aware of.<br />
The following figure shows an example of a complex table variable (VPN<br />
connections):<br />
Figure 29: Modifying complex table variables<br />
A complex table does not allow to move rows (the respective buttons are<br />
missing). Furthermore the cells of complex tables cannot be edited. Adding a row<br />
to a complex table also results in adding a node to the navigation tree (see Figure<br />
29).<br />
The Add, Copy, and Delete buttons are enabled only if Custom or<br />
Custom+Locally appendable is selected. Please refer to the Section<br />
mGuard configuration above.<br />
Applying changes<br />
to the configuration<br />
Changes made to the configuration are permanently stored with the Apply button<br />
(at the bottom of the dialog). If you make any changes without applying them,<br />
you can discard your changes by closing the dialog with the Cancel button. You<br />
can also apply your changes by closing the dialog with the OK button.<br />
Please note that the configuration is not automatically transferred to the<br />
mGuard after applying a change. To transfer the configuration to an<br />
mGuard, you have to upload the configuration file (please refer to<br />
Chapter 3.9) to the mGuard.<br />
4.2 The Template Properties Dialog<br />
Templates offer a powerful mechanism to conveniently configure and manage a<br />
large number of devices.<br />
By assigning a template to a device (cf. Chapter 4.3), the device inherits the<br />
template settings and will use the values that are defined in the template.<br />
Depending on the permission settings, the template settings might be overridden<br />
in the device configuration.<br />
Please read this chapter for an introduction to the template concept and refer to<br />
Chapter 5 for detailed information on templates and inheritance.<br />
For information on how to create, delete, or edit templates please refer to Chapter<br />
3.2.<br />
78 of 122
Template, device, pool, and VPN group configuration<br />
The following screenshot shows the Template Properties Dialog:<br />
General settings<br />
Name<br />
Figure 30: The <strong>IDM</strong> Template Properties Dialog<br />
Similar to the Device Properties Dialog (see Chapter 4.3) the Template<br />
Properties Dialog contains a menu corresponding to the mGuard’s Web GUI<br />
structure on the left side of the window.<br />
Additionally the Template Properties Dialog contains the entry General settings<br />
for the configuration of parameters related to <strong>IDM</strong>:<br />
The name of the template.<br />
Firmware version<br />
Since different firmware versions of the mGuard have different sets of variables,<br />
the firmware version (or variable set) the template should use, has to be selected<br />
here.<br />
It is not possible to downgrade to an older release. So please be very<br />
careful when changing the firmware version. See Chapter 5.2.2 for more<br />
details.<br />
For more information on how to manage firmware upgrades of your<br />
devices with <strong>IDM</strong> please refer to Chapter 3.12.<br />
Template<br />
The parent template of this template.<br />
Accessible via<br />
This is the address used by the <strong>IDM</strong> server to access the mGuard for an SSH push<br />
of the configuration or to open the web interface. Please refer to Chapter 3.9 for<br />
more information on the upload procedure. The following values are available<br />
for Accessible via:<br />
• Not online manageable<br />
The device is not managed via SSH push.<br />
• Internal interface in auto stealth mode [1.1.1.1]<br />
<strong>IDM</strong> accesses the mGuard using the address 1.1.1.1 (address of internal<br />
interface in automatic stealth mode).<br />
• Stealth management address<br />
<strong>IDM</strong> accesses the external or internal interface of the mGuard in stealth<br />
mode.<br />
• First external IP address<br />
<strong>IDM</strong> accesses the external interface of the mGuard in router mode.<br />
• First internal IP address<br />
79 of 122
Template, device, pool, and VPN group configuration<br />
<strong>IDM</strong> accesses the internal interface of the mGuard in router mode.<br />
• Custom value<br />
A custom value might be required to access the mGuard in NAT scenarios. If<br />
necessary, you can additionally specify a port number:<br />
: or<br />
:<br />
Default Permission<br />
The permission <strong>IDM</strong> uses for variables set to Inherited when a device or<br />
template inherits from this template. The following permissions can be set:<br />
• May override<br />
Variables set to Inherited have May override permission, i.e. they can be<br />
set in the inheriting device or template.<br />
• May append<br />
Table variables set to Inherited have May append permission, i.e. rows can<br />
be appended in the inheriting device or template, but existing rows cannot be<br />
changed. Other variables set to Inherited have May override permission,<br />
i.e. they can be set in the inheriting device or template.<br />
• No override<br />
Variables set to Inherited have No override permission, i.e. they cannot be<br />
set in the inheriting device or template.<br />
Comment<br />
An additional optional comment which is also shown in the template table of the<br />
main window.<br />
4.2.1 Template configuration<br />
As explained above, the navigation tree on the left side of the Template<br />
Properties Dialog resembles the mGuard menu structure.<br />
Figure 31 shows an example of the configuration for the external interface.<br />
Figure 31: Template configuration<br />
Compared to the Device Properties Dialog there are additional settings in the<br />
template configuration which are explained in the following sections.<br />
For detailed information on the template and inheritance concept please refer to<br />
Chapter 5.<br />
80 of 122
None value type<br />
Template, device, pool, and VPN group configuration<br />
In the template None can be selected as value, as you can see in the variable IP<br />
of internal interface in Figure 31. This means that the template designer does<br />
not want to define a value in the template, but wants to make sure the value is<br />
overridden in an inheriting template or device. Any attempt to upload a device in<br />
which a None value has not been overridden or has been overridden with a Local<br />
value results in an error.<br />
Permission setting In Figure 31 the variable Netmask of internal network has an additional<br />
permission setting. The permission controls whether and how an inheriting<br />
device or template can override the settings. The permission settings can be<br />
assigned on a per-variable basis.<br />
Please note that the permission combo box is not visible if Inherited or<br />
None is selected as value.<br />
The following permissions can be selected:<br />
May override<br />
The value can be changed (overridden) in an inheriting template or device.<br />
No override<br />
The value cannot be changed in an inheriting template or device.<br />
May append<br />
This setting is only available for tables (e.g. firewall rules). If a table variable is<br />
set to May append, additional table rows can be appended in an inheriting device<br />
or template, but the inherited rows cannot be changed or removed.<br />
If Local is selected as value and May append as permission, new entries can be<br />
added in an inheriting device or template, as well as on the mGuard by the<br />
netadmin user.<br />
4.3 The Device Properties Dialog<br />
The Device Properties Dialog allows to configure the mGuard variables and<br />
their associated settings for a device.<br />
81 of 122
Template, device, pool, and VPN group configuration<br />
For information on how to create, delete or edit devices please refer to Chapter<br />
3.2.<br />
General settings<br />
Figure 32: The <strong>IDM</strong> Device Properties Dialog<br />
Similar to the Template Properties Dialog (see Chapter 4.2) the Device<br />
Properties dialog contains a navigation tree on the left side that resembles the<br />
menu structure of the mGuard Web GUI. The navigation tree allows you to<br />
conveniently navigate to each mGuard variable.<br />
The Device Properties Dialog contains the entry General settings for the<br />
configuration of additional parameters related to <strong>IDM</strong>. The following parameters<br />
can be set in the General settings:<br />
Management ID<br />
This ID is used to identify the device within <strong>IDM</strong>. The Management ID must be<br />
unique.<br />
Firmware Version<br />
Since different releases of the mGuard software have different sets of variables,<br />
the firmware version corresponding to the installed firmware on the mGuard has<br />
to be selected here.<br />
It is not possible to downgrade to an older release. So please be very<br />
careful when changing the firmware version. See Chapter 5.2.2 for more<br />
details.<br />
For more information on how to manage firmware upgrades of your<br />
devices with <strong>IDM</strong> please refer to Chapter 3.12.<br />
Firmware Version on Device<br />
This field represents the firmware version currently installed on the device. It can<br />
be manually set, but is overridden with the value found on the device every time<br />
a push upload is performed or a pull feedback is received.<br />
Template<br />
The parent template of the device.<br />
82 of 122
Template, device, pool, and VPN group configuration<br />
Accessible via<br />
This is the address used by the <strong>IDM</strong> server to access the mGuard for an SSH push<br />
of the configuration or to open the web interface. Please refer to Chapter 3.9 for<br />
more information on the upload procedure. The following values are available<br />
for Accessible via:<br />
• Not online manageable<br />
The device is not managed via SSH push.<br />
• Internal interface in auto stealth mode [1.1.1.1]<br />
<strong>IDM</strong> accesses the mGuard using the address 1.1.1.1 (address of internal<br />
interface in automatic stealth mode).<br />
• Stealth management address<br />
<strong>IDM</strong> accesses the external or internal interface of the mGuard in stealth<br />
mode.<br />
• First external IP address<br />
<strong>IDM</strong> accesses the external interface of the mGuard in router mode.<br />
• First internal IP address<br />
<strong>IDM</strong> accesses the internal interface of the mGuard in router mode.<br />
• Custom value<br />
A custom value might be required to access the mGuard in NAT scenarios. If<br />
necessary, you can additionally specify a port number:<br />
: or<br />
:<br />
Pull filename (read only)<br />
If the configuration is exported to the file system, a unique ID, which is<br />
automatically assigned and cannot be changed, is used as name for the<br />
configuration file. The filename is shown in this field. Optionally, additional<br />
export files following a different naming scheme can be generated; please refer<br />
to Chapter 2.5 for more information.<br />
Serial number<br />
The serial number of the device. The serial number is required for the license<br />
handling. It can be manually set, but is overridden with the value found on the<br />
device every time a push upload is performed or a pull feedback is received. If<br />
no push upload is ever performed and no pull feedback is ever received (e.g. in a<br />
usage scenario where the exported configuration profiles are installed manually<br />
on the devices), the serial number has to be entered here if you would like to<br />
create pull configuration filenames containing the serial number.<br />
Flash ID<br />
The flash ID of the device. The flash ID is required for the license handling. This<br />
field can be manually set, but is overridden with the value found on the device<br />
every time a push upload is performed or a pull feedback is received.<br />
Comment<br />
An optional comment.<br />
Additional ATV include<br />
This is a text field for additional settings that should be included in the<br />
configuration file of the mGuard. The input has to adhere to the mGuard<br />
configuration file conventions. You can also import the contents of a text file in<br />
the field by selecting a file with the File Chooser icon.<br />
Please note that the included configuration will be appended to the<br />
generated <strong>IDM</strong> settings, and therefore settings for the same variable in<br />
the include field will override settings generated by <strong>IDM</strong>.<br />
83 of 122
4.4 The Pool Properties Dialog<br />
Template, device, pool, and VPN group configuration<br />
The Pool Properties Dialog allows to define value pools, which can be used to<br />
automatically configure certain variables (e.g. the virtual address for VPNs).<br />
Currently <strong>IDM</strong> allows to define address range pools (CIDR notation), see below<br />
for an example.<br />
Figure 33: The <strong>IDM</strong> Pool Properties Dialog<br />
General settings<br />
Name<br />
Pool type<br />
Comment<br />
The entry General settings contains the following parameters for the pool:<br />
A name for the pool. This name will be used when referencing the pool in a<br />
variable (see section Pool values usage in variables below).<br />
Currently only the pool type IP Networks in CIDR Notation is available.<br />
A comment (optional).<br />
84 of 122
Template, device, pool, and VPN group configuration<br />
Pool definition<br />
The entry Pool Definition allows to define the value range of the pool and the<br />
address range of the values to be taken out of the pool. The following figure<br />
contains an example of a pool definition:<br />
Figure 34: Definition of a CIDR pool<br />
Pool value usage in<br />
variables<br />
The CIDR pool in the example contains all addresses defined in the table<br />
Network List. The field Network Mask defines the range of single values to be<br />
taken out of the pool, i.e. when using this pool in a variable, <strong>IDM</strong> will<br />
automatically assign an IP address range with a mask of 24 out of the available<br />
Source Networks to that variable.<br />
E.g. if the pool is used for the template variable Remote network (in a VPN<br />
connection), then <strong>IDM</strong> will automatically assign a value to the variable Remote<br />
network of all devices using the respective template. The pool overview table in<br />
the main window shows how many values have been taken out of the pool (Use<br />
count) and how many values are still available in the pool (Available count)<br />
Please note that once defined, it is not possible to change or delete the<br />
source address ranges and the network mask in the pool any more, e.g. it<br />
is not possible to decrease the network range 10.12.0.0/16 to<br />
10.12.0.0/19 in the example above. It is only possible to add further<br />
ranges to the pool, i.e. increase the pool value range. Please carefully<br />
plan the definition of the pool ranges in advance.<br />
Pool values can only be used in templates. For certain variables you can choose<br />
the pool you would like to use from the drop down box, e.g. in Figure 35 a<br />
number of pools (London, New York, Paris, etc.) are available to be used for the<br />
variable IP of external interface. Only pools that match the variable type (e.g.<br />
CIDR pool and variable of type IP address) are shown in the drop down box. If<br />
a pool is used in a template, no value is assigned to the respective variable, the<br />
pool is only referenced at this point. Therefore the Reference count in the pool<br />
table will be increased by one. If a value is assigned to a variable (which happens<br />
85 of 122
Template, device, pool, and VPN group configuration<br />
on device level, not on template level) the Use count is increased by one. This<br />
assignment happens automatically either if the Device Properties Dialog for the<br />
respective device is opened, or if the configuration for the device is uploaded to<br />
the mGuard.<br />
4.5 VPN configuration<br />
Adding and editing<br />
VPN connections<br />
Figure 35: Usage of pool values<br />
The following should be kept in mind when working with pools:<br />
In a variable that requires an IP address (not an IP network) only pools<br />
with a network mask of 32 can be referenced.<br />
If you decide to override a pool value in a device, the assigned pool<br />
value is not returned to the pool (i.e. the use count is not decreased), but<br />
remains assigned “in the background”, in case you decide to use the<br />
inherited value again.<br />
Pools must be large enough to provide a value for every device that<br />
inherits from the template in which the pool is referenced, even if some<br />
of the devices override their respective pool value (see above).<br />
With <strong>IDM</strong> you can easily generate the configuration for a large number of VPN<br />
tunnels. In general, the information contained in Chapter 4.1, Chapter 4.2,<br />
Chapter 4.3 and Chapter 5 applies also to the VPN configuration. But VPNs<br />
require some special settings to be taken into consideration, which are explained<br />
in this chapter, e.g. the automatic configuration of the VPN peer. You can find<br />
the VPN configuration in the node IPsec VPN of the navigation tree.<br />
To add, change or delete VPN connections, please open the node IPsec VPN »<br />
Connections. To create a new connection, create a new table row (see Chapter<br />
4.1, Modifiying table entries). As soon as you create a connection, it appears as<br />
node in the navigation tree. To edit the connection, open its node in the<br />
navigation tree and navigate to the desired settings. The structure of the<br />
connection node resembles the menu structure on the mGuard.<br />
The connection table is read-only, i.e. you have to navigate to the<br />
respective node to make changes to the connection, e.g. change the<br />
name of the connection or disable a connection.<br />
Please note that the permission setting of the connection table in a<br />
template applies to the table only, and not to the contents of the<br />
connections. If you set the table to No override, the settings of the VPN<br />
connection can still be modified on a device which uses this template,<br />
86 of 122
Template, device, pool, and VPN group configuration<br />
Automatic<br />
configuration of the<br />
VPN peer<br />
but the user on the device level is not allowed to add further connections<br />
to the table.<br />
You can automatically generate the VPN configuration for the peer device (see<br />
Figure 36): Place the cursor in the field Peer device and press the Cursor Down<br />
key. A list of available devices appears. You can limit the number of devices in<br />
the list by entering the first characters of the Management ID of the desired<br />
device. If you select a device, the VPN configuration for this device will be<br />
automatically generated.<br />
Not all settings of the peer can be automatically generated, therefore you<br />
have to enter parts of the configuration manually. Please check the subnodes<br />
of the VPN connection for those settings, they are in the relevant<br />
subnodes separated from the other settings by the text Configuration of<br />
peer device (for an example see Figure 36).<br />
The automatically generated VPN connections show up as read-only in<br />
the peer connection table, i.e. you cannot change the configuraton on the<br />
peer side.<br />
If the VPN gateways have different firmware versions the configuration<br />
of a peer is only possible in the Properties Dialog of the device with the<br />
older firmware version. If you configure the peer in the Properties<br />
Dialog of the device with newer firmware the connection will not be<br />
generated in the device with the older firmware. There will be no error<br />
or warning displayed.<br />
The automatically generated VPN connections can be used as<br />
alternative to the mGuard Tunnel Group feature (mGuard 5.0 or newer),<br />
see comments in section Hints for VPN configurations below.<br />
Figure 36: Automatic configuration of VPN peer<br />
Setting VPN<br />
identifiers<br />
automatically<br />
The local and the remote machine certificate are known to <strong>IDM</strong> in many typical<br />
usage scenarios (when VPN configuration for the peer device is generated by<br />
<strong>IDM</strong>). <strong>IDM</strong> can make use of this information to set the Local VPN Identifier<br />
and the Remote VPN Identifier variables automatically, i.e. derive the<br />
identifiers from the known certificates. It is necessary to set these variables when<br />
CA certificates are used to authenticate VPN connections.<br />
To make use of this feature, open the IPsec VPN » Connections » Connection<br />
Name » Authentication » VPN Identifiers node and set the variable Set VPN<br />
Identifiers automatically to yes. In this mode, the Local VPN Identifier and<br />
the Remote VPN Identifier variables are ignored; the identifiers are derived<br />
from the cerificates.<br />
87 of 122
Template, device, pool, and VPN group configuration<br />
Copying firewall<br />
rules<br />
Hints for VPN<br />
configurations<br />
The firewall tables within VPN connections contain a Copy from Main button.<br />
Clicking this button copies the content of the corresponding firewall table for<br />
non-VPN traffic (i.e. if the current firewall table is for incoming traffic, the<br />
incoming firewall table for non-VPN traffic is copied; likewise for outgoing<br />
traffic).<br />
A separate background color is used to indicate which firewall rules have been<br />
copied. The background color is cleared once a different navigation tree node is<br />
opened.<br />
These hints are useful if the tunnel group feature is not used and the VPN<br />
connections are explicitly defined:<br />
In 1:N VPN configurations it is recommended to define the VPN<br />
connection in a template and select the central device in the Peer device<br />
field (See section Automatic configuration of peer above). If you assign<br />
this template to the devices <strong>IDM</strong> will automatically generate the N<br />
connection configurations for the central device.<br />
In a 1:N VPN configuration it is required for the configuration of the<br />
peer to specify the gateway address of the current device (see Figure 36,<br />
Configuration of peer device » Gateway address of peer). If<br />
certificates are used %any (as shown in Figure 36) can be used as<br />
address in the template, but if PSK authentication is used, %any is not<br />
allowed. If PSK authentication is used, the external address (if no NAT<br />
us used) has to be entered into the field Configuration of peer device »<br />
Gateway address of peer for each device.<br />
4.6 Managing X.509 certificates<br />
Exporting<br />
Certificates<br />
4.6.1 Machine certificates<br />
The functionality of the certificate management depends on the mGuard release.<br />
Beginning with mGuard firmware release 5.0 it is possible to:<br />
• manage multiple machine certificates (prior to release 5.0 only one machine<br />
certificate was supported)<br />
• manage CA certificates (prior to release 5.0 CA certificates were not<br />
supported)<br />
• manage connection certificates at a central location (prior to 5.0 the<br />
connection certificate was part of the VPN connection only; beginning with<br />
5.0 the connection certificates can be managed centrally and then be<br />
referenced for SSH or HTTPS authentication)<br />
• manage CRLs (prior to release 5.0 CA CRLs were not supported)<br />
You can export certificates, e.g. if you would like to use the machine certificate<br />
as connection certificate for a VPN connection. To export a certificate please<br />
navigate to the respective certificate table (see below for more information) and<br />
click on the Export button. You can export the certificate to a folder of your<br />
choice.<br />
You can either import a machine certificate (PEM or PKCS#12 file), request a<br />
certificate from the <strong>IDM</strong> CA, request a certificate from any CA supporting the<br />
Simple Certificate Enrollment Protocol (SCEP), or manually enrol certificates.<br />
In a template it is not possible to request or import a machine certificate.<br />
(It is only possible to import the connection certificate of the peer).<br />
The file to be imported can be in PEM format containing the<br />
unencrypted private key and the certificate, or in PKCS#12 format<br />
protected by a password. The file type is automatically detected. When<br />
importing a PKCS#12 file, a dialog asking for the password is displayed.<br />
88 of 122
Template, device, pool, and VPN group configuration<br />
Requesting a<br />
machine certificate<br />
Importing a<br />
machine certificate<br />
(mGuard firmware<br />
4.2)<br />
Importing a<br />
machine certificate<br />
(mGuard firmware<br />
5.0 or newer)<br />
Deleting machine<br />
certificates<br />
Revoking machine<br />
certificates<br />
You can convert a PKCS#12 file to PEM using the command:<br />
openssl pkcs12 -in inputfile.p12 -nodes -out<br />
outputfile.pem<br />
When SCEP is used, the CA server must be configured to issue<br />
certificates immediately. Pending requests are not supported.<br />
In order to request a certificate from the <strong>IDM</strong> CA, the CA component<br />
has to be installed (see Chapter 2.7).<br />
Prior to requesting a certificate make sure that the certificate attribute fields<br />
contain the desired values (for mGuard firmware 4.2 navigate to IPsec VPN »<br />
Global » Machine certificate » Certificate attributes, for mGuard firmware<br />
5.0 or newer navigate to Authentication » Certificates » Certificate settings<br />
and Certificate attributes).<br />
To request a certificate select one or more devices in the device overview table<br />
and select Certificate Handling » Request Additional Certificate or<br />
Certificate Handling » Request Replacement Certificate from the context<br />
menu. The difference is that Request Additional Certificate will append the<br />
new certificate to the list of existing certificates while Request Replacement<br />
Certificate will replace the existing certificates with the new one, so that the<br />
device ends up with a single machine certificate.<br />
The <strong>IDM</strong> server will request certificate(s) from the CA and will assign them to<br />
the device(s).<br />
SCEP requires that a one-time challenge password is entered for each<br />
certificate request. Therefore, certificate requests can only be performed<br />
for a single device if SCEP is used. The <strong>IDM</strong> client will open a dialog<br />
window in which to enter the challenge password; please consult the<br />
documentation of your CA server on how to obtain the password.<br />
OCSP and CRLs are not supported by mGuard 4.2. Nevertheless, if you<br />
would like to use firmware releases newer than 4.2 with CRL/OCSP<br />
support, you should configure values for these attributes.<br />
To import a certificate navigate to IPsecVPN » Global » Machine certificate »<br />
Machine certificates and click on the Import button (the Import button is only<br />
enabled if Custom or Custom+Locally appendable is selected as value for the<br />
machine certificate table). Select the file containing the machine certificate and<br />
click on Open. The machine certificate is subsequently shown in the table if the<br />
import was successful, otherwise an error message will be displayed.<br />
Only the first entry of the machine certificate table is used as machine<br />
certificate.<br />
To import a certificate navigate to Authentication » Certificates » Machine<br />
Certificates and click on the Import button (the Import button is only enabled<br />
if Custom or Custom+Locally appendable is selected as value for the machine<br />
certificate table). Select the file containing the machine certificate and click on<br />
Open. The machine certificate is subsequently shown in the table if the import<br />
was successful, otherwise an error message will be displayed.<br />
To delete a machine certificate, navigate to Authentication » Certificates »<br />
Machine Certificates, select the certificate in the certificate table and click on<br />
the Delete certificate button.<br />
Deleting a certificate does not automatically revoke the certificate.<br />
To revoke a machine certificate, navigate to Authentication » Certificates »<br />
Machine Certificates, select the certificate and click on the button Revoke<br />
certificate. This button is enabled only if exactly one machine certificate is<br />
selected. After revoking a certificate the text *** REVOKED *** is<br />
89 of 122
Template, device, pool, and VPN group configuration<br />
<strong>Manual</strong> certificate<br />
enrollment<br />
automatically shown in the corresponding info field of the table. Any time a<br />
certificate is revoked, the <strong>IDM</strong> CA exports a new file containing all revoked<br />
certificates of this issuer. For more information on the export of CRL files please<br />
refer to Chapter 2.7.5.<br />
SCEP does not support revoking certificates.<br />
CRLs are only supported by mGuard firmware 5.0 and newer.<br />
Revoking a certificate does not delete the certificate from the table.<br />
If certificates issued by a CA are to be used, but requesting them online (from the<br />
<strong>IDM</strong> CA or via SCEP) is not an option, <strong>IDM</strong> supports manual certificate<br />
enrollment. Any CA software or service can be used. Follow these steps to enrol<br />
certificates manually for a number of devices:<br />
1. Select one or more devices in the device overview table and select<br />
Certificate Handling » Issue and Export Certificate Requests from the<br />
context menu.<br />
2. A file selection dialog opens. Select a directory and click on the Choose<br />
button.<br />
3. <strong>IDM</strong> will generate private keys and certificate requests for the devices. The<br />
private keys are (invisibly) associated with the respective devices. The<br />
certificate requests are stored in the selected directory as PEM encoded files<br />
(one request per device).<br />
4. Import the certificate requests into the CA and let the CA issue certificates.<br />
Please consult the documentation of your CA software or service for details<br />
of how to do this.<br />
5. Select New » Import X.509 Certificates from the main menu.<br />
6. A file selection dialog opens. Select the certifictate files issued by the CA.<br />
7. Select from the Import Settings whether to add the certificates or replace<br />
any certficate that may already exist in a device. Click on the Choose button.<br />
8. <strong>IDM</strong> automatically associates the certificates with the correct devices and<br />
stores them in the machine certificate tables.<br />
Only one pending certificate request per device is stored. If the<br />
Certificate Handling » Issue and Export Certificate Requests action<br />
is invoked more than once without importing the resulting certificates,<br />
only the certificates from the last invocation can be imported.<br />
4.6.2 CA certificates (mGuard firmware 5.0 or newer)<br />
Importing CA<br />
certificates<br />
Beginning with mGuard release 5.0 CA certificates (root or intermediate) are<br />
supported. To import a CA certificate navigate to Authentication »<br />
Certificates » CA Certificates and click on the Import button (the Import<br />
button is only enabled if Custom or Custom+Locally appendable is selected as<br />
value for the CA certificate table). Select the file containing the CA certificate<br />
and click on Open. The CA certificate is subsequently shown in the table if the<br />
import was successful, otherwise an error message will be displayed.<br />
4.6.3 Remote certificates (mGuard firmware 5.0 or newer)<br />
Importing remote<br />
certificates<br />
To import a remote certificate navigate to Authentication » Certificates »<br />
Remote Certificates and click on the Import button (the Import button is only<br />
enabled if Custom or Custom+Locally appendable is selected as value for the<br />
remote certificate table). Select the file containing the remote certificate and click<br />
on Open. The remote certificate is subsequently shown in the table if the import<br />
was successful, otherwise an error message will be displayed.<br />
90 of 122
4.6.4 Connection certificates<br />
Importing<br />
connection<br />
certificates<br />
Template, device, pool, and VPN group configuration<br />
The connection certificate can only be imported in a VPN connection. To import<br />
the certificate navigate to IPsec VPN » Connections » Connection Name »<br />
Authentication. To import a certificate select Custom as value for the Remote<br />
X.509 certificate and click on the icon. Select the file containing the<br />
certificate and click on Open. Subsequently the content of the file is shown in the<br />
certificate field. The validity of the data is checked when uploading the<br />
configuration to the mGuard.<br />
4.7 Using X.509 certificates (mGuard firmware 5.0 or newer)<br />
The certificates which are managed in the tables discussed in Chapter 4.6 can be<br />
used for the configuration of SSH and HTTPS authentication. The usage is<br />
exemplarily explained for the SSH authentication. Please navigate in the Device<br />
Properties Dialog to Management » System settings » Shell access » X.509<br />
authentication. To use a certificate, e.g. a CA certificate, you have to select<br />
Custom for the CA certificate table and then click on Add certificate. Please<br />
enter the short name of the certificate as specified in the CA certificate table in<br />
Authentication » Certificates » CA Certificates. <strong>IDM</strong> does not check whether<br />
the short name of the certificate exists.<br />
4.8 The VPN Group Properties Dialog (Meshed VPN networks)<br />
The member devices of a VPN group form a meshed VPN network: For each<br />
member device, <strong>IDM</strong> generates a VPN connection (referred to as a VPN group<br />
connection) to every other member device. A device can be a member of multiple<br />
VPN groups. If this results in multiple VPN connections between the same two<br />
devices, <strong>IDM</strong> generates only one such connection. VPN groups are not available<br />
for firmware versions earlier than 6.0.<br />
The VPN Group Properties Dialog allows to configure common variables used<br />
in all VPN connections within the group.<br />
For information on how to create, delete or edit VPN groups, and how to add or<br />
remove member devices, please refer to Chapter 3.6.<br />
Figure 37: The <strong>IDM</strong> VPN Group Properties Dialog<br />
Similar to the Device and Template Properties Dialogs the VPN Group<br />
Properties Dialog contains a navigation tree on the left side. It allows you to<br />
conveniently navigate to each variable.<br />
91 of 122
General settings<br />
VPN group<br />
connections<br />
Name<br />
The local VPN<br />
network<br />
Local 1:1 NAT<br />
Template, device, pool, and VPN group configuration<br />
The VPN Group Properties Dialog contains the entry General settings for the<br />
configuration of additional parameters related to <strong>IDM</strong>. The following parameters<br />
can be set in the General settings:<br />
The name is used to identify the VPN group within <strong>IDM</strong>. It must be unique.<br />
Firmware Version<br />
Since different releases of the mGuard software have different sets of variables,<br />
the firmware version corresponding to the installed firmware on the mGuard has<br />
to be selected here.<br />
It is not possible to downgrade to an older release. So please be very<br />
careful when changing the firmware version. See Chapter 5.2.2 for more<br />
details.<br />
Only devices with a firmware version equal to or newer than the<br />
firmware version of the VPN group can become its members.<br />
Member devices (read only)<br />
The devices which are currently members of the VPN group.<br />
Comment<br />
An optional comment.<br />
When generating VPN group connections, <strong>IDM</strong> combines the variables in the<br />
VPN group with additional variables in the device. While the variables in the<br />
VPN group are common to all connections in this group, the additional variables<br />
in the device are specific to the device, but common to all VPN group<br />
connections of the device.<br />
The VPN group contains the following variables:<br />
• General VPN settings<br />
• Protocol settings<br />
• Authentication settings<br />
• IKE options<br />
Devices and templates contain variables under the IPsec VPN » VPN Group<br />
Configuration node which are used when <strong>IDM</strong> adds VPN group connections to<br />
a device:<br />
• Tunnel settings<br />
• NAT settings<br />
• Firewall settings<br />
The local VPN network to be used in VPN group connections can either be<br />
specified in the template or device (IPsec VPN » VPN Group Configuration »<br />
Tunnel Settings » Local), or, if the device is operated in router mode, it can be<br />
automatically derived. If the IPsec VPN » VPN Group Configuration » Tunnel<br />
Settings » Use first internal address as local VPN network in router mode<br />
variable is set to Yes, <strong>IDM</strong> uses the first internal address and associated netmask,<br />
so that the corresponding local network is visible through the VPN tunnel. The<br />
setting has no effect in stealth mode, i.e. if the device is operated in stealth mode,<br />
the local VPN network must always be specified.<br />
VPN group connections can be configured to perform 1:1 NAT on local<br />
addresses. None of the other NAT mechanisms for VPN connections are<br />
available in VPN group connections.<br />
Local 1:1 NAT is enabled by setting the IPsec VPN » VPN Group<br />
Configuration » NAT » Enable 1:1 NAT of local addresses variable to Yes.<br />
The local network within the tunnel must be specified.<br />
Please note that the network within the tunnel (i.e. the network addresses<br />
as seen by the peer) is specified in the 1:1 NAT settings. This is different<br />
92 of 122
4.9 Rollback support<br />
4.10 Redundancy mode<br />
Separate settings<br />
Upload<br />
Pull export<br />
Template, device, pool, and VPN group configuration<br />
from the mGuard Web GUI where the network outside of the tunnel (i.e.<br />
the network addresses as seen from the local network) is specified in the<br />
1:1 NAT settings.<br />
Configuration rollback is supported on devices with firmware version 5.0 or<br />
newer. A rollback is performed by the device if it cannot access the configuration<br />
pull server after applying a pull configuration (this is interpreted by the device as<br />
misconfiguration). To enable rollback for a device please navigate in the<br />
Properties Dialog to Management » Configuration Pull and set the option<br />
Rollback misconfigurations to Yes.<br />
If a device or template is in redundancy mode, it represents a pair of redundant<br />
mGuards (i.e. two physical devices). Settings and configuration variables which<br />
must or may be different for the two physical devices of a redundant pair can be<br />
set separately.<br />
Additional navigation tree nodes and variables are visible in the Device and<br />
Template Properties Dialog in redundancy mode. Nodes and variables prefixed<br />
with Device#2 are used for the second device while those without prefix are used<br />
for the first device.<br />
The following settings exist separately for the physical devices, but are not<br />
normally set by the user:<br />
• Firmware Version on Device<br />
• Pull filename<br />
• Serial Number<br />
• Flash ID<br />
The following variables must be set to different values for the physical devices:<br />
• The external and internal network settings in router mode.<br />
• The stealth management address settings in stealth mode.<br />
• The IP settings for the dedicated redundancy state synchronization interface<br />
(if this interface is used).<br />
The following variables may be set to different values for the physical devices:<br />
• The hostname.<br />
• The SNMP system name, location, and contact.<br />
• The MTU settings.<br />
• The http(s) proxy settings.<br />
• The passwords of the mGuard users.<br />
• The Quality of Service settings.<br />
• The redundancy priority.<br />
• The redundancy connectivity check settings.<br />
• The remote logging settings.<br />
When an upload to a redundant device pair is initiated, the two configurations are<br />
uploaded to the physical devices. The two uploads to the mGuards forming a<br />
redundant pair are never performed simultaneously (but may be performed<br />
simultaneously with uploads to other devices). An upload to a redundant pair is<br />
considered successful once the upload to both physical devices has succeeded.<br />
A pull configuration export for a redundant device pair creates two configuration<br />
profiles. The filename of the profile for the second device has _2 appended to the<br />
base name.<br />
93 of 122
5 Working with templates<br />
5.1 Inheritance<br />
Working with templates<br />
Changes made to a template can potentially affect a large number of devices or<br />
other templates. Therefore please keep the following rules in mind when working<br />
with templates:<br />
• Before making changes to a variable in a template, make sure that the<br />
effect on inheriting templates or devices is really desired.<br />
• In particular, changes to a variable permission can have an<br />
irreversible effect on inheriting templates or devices. E.g. if a<br />
permission is changed from May override to No override, the value<br />
of the variable is discarded in all inheriting templates and devices.<br />
• Templates that are still assigned to devices or other templates cannot<br />
be deleted.<br />
This chapter gives more detailed information on the template mechanism.<br />
Templates are the means to efficiently configure a large number of devices.<br />
Templates contain the common aspects of a group of devices or a group of child<br />
templates. By assigning a template to a child (this may be a device or another<br />
template) the child “inherits” the parent template’s settings and may optionally<br />
override some of the settings (if the permission in the parent template allows<br />
this). Any change made to the parent template will potentially have an impact on<br />
all inheriting templates and devices, depending on the setting of the value and<br />
permission in the parent template.<br />
The permission setting in a template limits the choices in inheriting templates and<br />
devices.<br />
Whether or not a child inherits settings from an ancestor template is indicated by<br />
an icon in front of the variable name in the Properties Dialog. If no icon is<br />
shown, then either there is no template assigned, or the variable has the value<br />
Inherited in all ancestor templates, i.e. no restrictions are defined for this<br />
variable.<br />
According to the permissions listed in Chapter 4.2.1 the following icons are<br />
shown in front of the variable name:<br />
May override.<br />
No override.<br />
May append (tables only).<br />
No value defined (value = None), i.e. the value has to be set in the Device<br />
Properties Dialog or in one of the intermediate templates.<br />
94 of 122
Working with templates<br />
The following figures illustrate the inheritance mechanism. Figure 38 shows the<br />
settings for the DHCP server options in the parent template.<br />
Figure 38: Settings in the parent template<br />
Figure 39 shows the settings in the device configuration (child). They are the<br />
result of values and permissions inherited from the parent template and<br />
modifications made in the device.<br />
Figure 39: Settings in the inheriting device<br />
Enable dynamic IP address pool<br />
This variable is set to Yes in the template and the permission is set to No<br />
override. Therefore the value of the variable cannot be changed in the device<br />
configuration. This is indicated by the disabled controls and by the icon in<br />
front of the variable name in the Device Properties Dialog.<br />
DHCP range start, DHCP range end<br />
These variables are set to Local and the permission is set to No override, i.e. the<br />
Local setting cannot be changed in the device configuration. These values have<br />
to be set by the netadmin of the mGuard and are not managed by <strong>IDM</strong>.<br />
95 of 122
Working with templates<br />
Local netmask, Broadcast address<br />
There are no restrictions for these variables defined in the template, indicated by<br />
the missing icon in front of the variable name in the Device Properties Dialog.<br />
In the example the device configurator decided to use a custom value for<br />
Broadcast address and the (inherited) default value for Local netmask.<br />
Default gateway<br />
The value of this variable is set in the template and the permission is set to May<br />
override. Therefore the value of the variable can be changed in the device<br />
configuration. This is indicated by the enabled controls and by the icon in<br />
front of the variable name. In the example the value from the template is<br />
overridden with a custom value.<br />
DNS server<br />
The value of this variable is set in the template and the permission is set to May<br />
override. Therefore the value of the variable can be changed in the device<br />
configuration. This is indicated by the enabled controls and by the icon in<br />
front of the variable name. In this example the value from the template is<br />
overridden in the device configuration with a custom value.<br />
WINS server<br />
The value of this variable is set to None in the template. Therefore a value for<br />
this variable has to be assigned in the device configuration. This is indicated by<br />
the icon in front of the variable name and the blue-colored label. If a device<br />
for which None values have not been assigned is uploaded, an error occurs.<br />
Static mapping<br />
In the template, the table Static mapping is set to Custom and its permission is<br />
set to May append. As Figure 39 shows, rows can be added to the table in the<br />
device configuration after switching the table variable to Custom. Rows<br />
inherited from the template cannot be changed.<br />
5.2 Miscellaneous<br />
5.2.1 Complex table variables and permissions<br />
The permission setting for complex table variables (see Chapter 4.1) in the parent<br />
template applies to the table itself, but not to the contents of the rows. If the table<br />
is set to No Override, it is not possible to add or delete rows in the child<br />
configuration, but it might be possible to change the value of variables in the<br />
inherited rows in the child. Each variable of a row (node) has a separate<br />
permission setting in the parent template that determines whether the variable<br />
can be overridden in the child. The permission setting of the table and the<br />
permission setting of a single variable within the table are completely<br />
independent.<br />
5.2.2 Firmware release settings and inheritance<br />
Certain restrictions apply to the Firmware Version setting in the General<br />
Settings of the child and the parent template:<br />
• A child cannot inherit from a parent template that has a newer firmware<br />
version than the child itself.<br />
• It is possible to change the firmware version of a parent template to a newer<br />
version only if all childs inheriting from the parent template are already set to<br />
the new firmware version.<br />
96 of 122
6 Configuration history<br />
Configuration history<br />
<strong>IDM</strong> keeps track of mGuard device configurations in the configuration history.<br />
Whenever a change is made to a device, template, or VPN group configuration,<br />
a new history entry is automatically created for each device that changes as a<br />
result.<br />
Each device has its own independent history. When a device is deleted, its<br />
associated history is deleted as well.<br />
The history stores configurations as they are uploaded to the mGuards.<br />
Variable permissions and template inheritance relations are not part of<br />
the history.<br />
6.1 The configuration history dialog<br />
To access a device’s configuration history, select the device in the device<br />
overview table and activate the Show Device Configuration History option in<br />
the context menu. This opens the configuration history dialog which contains a<br />
list of history entries for the selected device.<br />
Figure 40: The configuration history dialog<br />
Range selection Since a device may have a large number of history entries, not all entries are<br />
automatically loaded from the <strong>IDM</strong> server when the dialog is opened. By<br />
changing the criteria in the Range Selection field and clicking the Apply button,<br />
the history entries matching the specified critera can be loaded.<br />
By default, the latest (i.e. newest) 100 entries are loaded.<br />
All Entries<br />
Loads all history entries associated with the device.<br />
If the numer of entries is large (i.e. thousands or more), loading all<br />
entries may incur a significant delay.<br />
Time Range<br />
Loads all entries which have been created during a time range. The time range<br />
must be specified:<br />
• If a lower bound, but not an upper bound is specified, all entries newer than<br />
the lower bound are loaded.<br />
• If an upper bound, but not a lower bound is specified, all entries older than<br />
the upper bound are loaded.<br />
• If both a lower and an upper bound are specified, all entries created during<br />
the time interval given by the bounds are loaded.<br />
97 of 122
Configuration<br />
history table<br />
columns<br />
Configuration history<br />
Times are specified as an ISO date (YYYY-MM-DD where YYYY is the year,<br />
MM is the month of the year between 01 and 12, and DD is the day of the month<br />
between 01 and 31) optionally followed by an ISO time (hh:mm:ss where hh is<br />
the hour according to the 24-hour timekeeping system, mm is the minute and ss<br />
is the second). For example, a quarter past 4 p.m. and 20 seconds on December<br />
22nd, 2010 would be written as 2010-12-22 16:15:20.<br />
Alternatively, click on the<br />
icon to select the date from a calender.<br />
Last Entries<br />
Loads the latest (i.e. newest) entries. The number of entries must be specified.<br />
The configuration history table contains the following columns:<br />
The column width can be changed by placing the cursor on the header of<br />
the table at the border of two columns and dragging the border to the<br />
desired location. The order of the columns can be changed by dragging<br />
the column header to a different location.<br />
Selection A, B<br />
The checkboxes in the A and B columns are used to “activate” either one or two<br />
history entires. The activated history entries are used when an action is<br />
performed; please refer to the sections below for more details.<br />
• Check the checkboxes A and B in the same row to activate the corresponding<br />
history entry.<br />
• Check the checkboxes A and B in different rows to activate two history<br />
entires.<br />
When two different history entries are activated, the entry checked in the<br />
A column is always older than the entry checked in the B column.<br />
Whenever a checkbox is checked, <strong>IDM</strong> automatically removes some<br />
checkboxes so that it is not possible to reverse the order. Activating two<br />
different entries is easiest when the table is sorted by creation date.<br />
Status U<br />
Status V<br />
The U column shows the upload status, if the configuration coressponding to the<br />
history entry has been uploaded to an mGuard or exported for pull config. Please<br />
refer to Chapter 3.3 for a list of available upload statuses and their meanings. One<br />
additional upload status is available in the configuration history dialog:<br />
• Not uploaded<br />
The configuration coressponding to the history entry has not been<br />
uploaded to an mGuard or exported for pull config.<br />
If the same configuration is uploaded or exported two or more times, the<br />
latest configuration history entry is duplicated, so that one entry exists<br />
for every successful or unsuccessful upload attempt.<br />
The V status indicates whether or not the configuration corresponding to the<br />
history is valid. A configuration is not valid if a None value in a template has not<br />
been overridden, so that the configuration cannot be uploaded to an mGuard.<br />
Please refer to Chapter 4.1 for more information.<br />
A history entry corresponding to an invalid configuration cannot be<br />
activated.<br />
Creation Date<br />
The date and time when the configuration history entry was created.<br />
Version<br />
The firmware version that was set for the device when the configuration history<br />
98 of 122
entry was created.<br />
Configuration history<br />
Creator<br />
The username of the user who made the change to a device, template, or VPN<br />
group configuration that caused the configuration history entry to be created.<br />
Upload Date<br />
The date and time when the configuration corresponding to the history entry was<br />
uploaded to an mGuard or exported for pull config. Empty if the configuration<br />
has not been uploaded or exported.<br />
Uploader<br />
Target<br />
Filtering and<br />
sorting the table<br />
Detail information<br />
The username of the user who initiated the upload or export. Empty if the<br />
configuration has not been uploaded or exported.<br />
• If the configuration has been uploaded, the address to which it has been<br />
uploaded.<br />
• If the configuration is exported, the name of the file to which it has been<br />
exported.<br />
• Otherwise empty.<br />
The header of the table can be used to sort the table entries. A click on a header<br />
of a column will activate the (primary) sort based on this column. This is<br />
indicated by the arrow in the column header. A second click on the same header<br />
will reverse the sort order. Clicking on another column header activates the sort<br />
based on this new column, the previously activated column will be used as<br />
secondary sorting criterion.<br />
The first row of the table accepts the input of regular expressions (please refer to<br />
Chapter 8, Regular expressions), which can be used to efficiently filter the table<br />
entries. Filtering based on regular expressions is not used for columns that do not<br />
contain text (columns U or V).<br />
Since the A and B columns do not contain information, but are used to activate<br />
history entries, they cannot be used for filtering or sorting.<br />
Double clicking on a row in the configuration history dialog opens a dialog which<br />
displays detail information about the configuration history entry. In particular, if<br />
the configuration has been uploaded, the messages received from the mGuard<br />
while applying the configuration are shown.<br />
6.2 Viewing historic configurations<br />
Special values<br />
When a single history entry is activated in the configuration history dialog, the<br />
View button is enabled. Clicking on this button opens the History View Dialog<br />
which shows the historic configuration.<br />
Although the History View Dialog looks similar to the Device<br />
Properties Dialog, the type of information that is visualized is different.<br />
History entries contain configurations as they are uploaded to the<br />
mGuards; variable permissions and template inheritance relations are<br />
not part of the history.<br />
In addition to the variable value (or Custom if the variable value cannot be<br />
displayed, e.g. password variables), two special values are used:<br />
• Local indicates that the variable has no value known to <strong>IDM</strong>. The value is<br />
set by the user netadmin on the mGuard.<br />
• Custom + Locally appendable is only applicable to table variables. It<br />
indicates that the user netadmin on the mGuard has the permission to append<br />
rows to the table.<br />
99 of 122
6.3 Comparison of historic configurations<br />
Navigation tree<br />
Configuration<br />
variables<br />
Special values<br />
Configuration history<br />
When two history entries are activated in the configuration history dialog, the<br />
Compare button is enabled. Clicking on this button opens the History<br />
Comparision Dialog which shows a comparison of the two historic<br />
configurations.<br />
Although the History Comparision Dialog looks similar to the Device<br />
Properties Dialog, the type of information that is visualized is different.<br />
History entries contain configurations as they are uploaded to the<br />
mGuards; variable permissions and template inheritance relations are<br />
not part of the history.<br />
Different icons and colors in the navigation tree are used to visualize where and<br />
how the older and newer configuration differ:<br />
• Unchanged (black label)<br />
The older and newer configuration are identical in the subtree below<br />
the node.<br />
• Modified (blue label)<br />
Variables have changed between the older and newer configuration<br />
in the subtree below the node.<br />
• Added (green label)<br />
The subtree has been added, i.e. it exists in the newer, but not in the<br />
older configuration.<br />
• Removed (red label)<br />
The subtree has been removed, i.e. it exists in the older, but not in the<br />
newer configuration.<br />
If a variable has not changed between the older and newer configuration, its<br />
single value is displayed. Otherwise, if a simple variable has changed, its old<br />
value is displayed above its new value. In cases where the variable value cannot<br />
be displayed (e.g. password variables), the text Custom is used instead.<br />
If the single value Custom is displayed for a password variable, this<br />
indicates that the password has not changed. However, if the value<br />
Custom is displayed twice, the password has changed between the older<br />
and the newer configuration.<br />
If a table variable has changed, the change is indicated by the background color<br />
of the changed row(s) and by a character in the “+/–” column:<br />
• “+” indicator / green background<br />
The row has been inserted, i.e. it exists in the newer, but not in the<br />
older configuration.<br />
• “–” indicator / red background<br />
The row has been deleted, i.e. it exists in the older, but not in the<br />
newer configuration.<br />
• “M” indicator / blue background<br />
The row has changed between the older and newer configuration.<br />
This indicator is only used for complex table variables (e.g. VPN<br />
connections); otherwise, a changed row is treated as a deletion of the<br />
row with the old contents followed by an insertion of a row with the<br />
new contents.<br />
In addition to the variable value or Custom, two special values are used:<br />
• Local indicates that the variable has no value known to <strong>IDM</strong>. The value is<br />
set by the user netadmin on the mGuard.<br />
• Custom + Locally appendable is only applicable to table variables. It<br />
100 of 122
Configuration history<br />
indicates that the user netadmin on the mGuard has the permission to append<br />
rows to the table.<br />
6.4 Reconstructing a device from a historic configuration<br />
Template<br />
assignment<br />
When a single history entry is activated in the configuration history dialog by<br />
checking the checkboxes in both the A and the B column, the Reconstruct<br />
Device button is enabled. Clicking on this button creates a new device in which<br />
all variables are set according to the historic configuration and opens the Device<br />
Properties Dialog for the reconstructed device.<br />
Once created, the new device is no longer linked to the device from<br />
which it has been reconstructed. It is an independent device with an<br />
independent device history.<br />
If the device was assigned to a template when the history entry was created, and<br />
if that template still exists, and if the firmware version the device had when the<br />
history entry was created is equal to or newer than the current firmware version<br />
of the template, the template can be assigned to the reconstructed device:<br />
6.5 Report of changes<br />
If the template is assigned to the device, variables in the device are set to<br />
Inherited if their value (in the historic configuration) matches the value in the<br />
template (in its current state).<br />
If the template uses the No override or May append permission, it may<br />
not be possible to reproduce the historic configuration exactly.<br />
The report of changes allows it to obtain an overview how multiple devices have<br />
changed between two points in time. Select one or more devices in the device<br />
overview table and activate the Generate Report of Changes to Device<br />
Configuration option in the context menu. This opens the history reporting<br />
dialog.<br />
Figure 41: The dialog to generate a report of changes to device configurations<br />
Selection criteria<br />
Oldest<br />
The two historic configurations to compare are selected by applying two<br />
selection criteria, one to select the older revision and one to select the newer<br />
revision, to each selected device individually. The following criteria can be<br />
chosen:<br />
The oldest device configuration.<br />
101 of 122
Newest<br />
Generating the<br />
report<br />
The newest device configuration.<br />
Configuration history<br />
Newest Before<br />
The newest device configuration prior to a date and time. The date and time is<br />
specified as an ISO date (YYYY-MM-DD where YYYY is the year, MM is the<br />
month of the year between 01 and 12, and DD is the day of the month between<br />
01 and 31) optionally followed by an ISO time (hh:mm:ss where hh is the hour<br />
according to the 24-hour timekeeping system, mm is the minute and ss is the<br />
second). For example, a quarter past 4 p.m. and 20 seconds on December 22nd,<br />
2010 would be written as 2010-12-22 16:15:20.<br />
Alternatively, click on the<br />
icon to select the date from a calender.<br />
Device configuration must have been uploaded or exported<br />
The criterion can be combined with the others. If the checkbox is checked, only<br />
history entries pertaining to configurations which have been uploaded to an<br />
mGuard or exported for pull configuration are considered.<br />
The report consists of an HTML file which can be viewed with any web browser.<br />
The name of the file to which to write the report is specified in the Report field.<br />
If the Open finished Report in Browser checkbox is checked, <strong>IDM</strong><br />
automatically opens a web browser and loads the report.<br />
102 of 122
7 Creating and managing certificates<br />
Keystores<br />
The OpenSSL<br />
configuration file<br />
Creating and managing certificates<br />
It is assumed that the reader has a basic knowledge of certificates and public key<br />
encryption.<br />
This chapter explains the usage of OpenSSL to create certificates.<br />
It is important to note that <strong>IDM</strong> requires two different types of certificates and<br />
keys:<br />
• Certificates and keys used to secure the communication between the <strong>IDM</strong><br />
components.<br />
• Certificates and keys used for the PKI.<br />
How to create certificates and keys to be used for the SSL communication is<br />
explained in Chapter 7.1. The certificates and keys used in a PKI are described<br />
in Chapter 7.2.<br />
Please note that the process described in this section to create<br />
certificates is just one example of the usage of OpenSSL. There are also<br />
alternative ways to create your certificates. If you are not familiar with<br />
OpenSSL you should exactly follow the instructions below.<br />
The use of OpenSSL 0.9.8 or newer is recommended, due to the support<br />
of SHA-256. If you would like to use an OpenSSL version older than the<br />
recommended version 0.9.8 you have to use a digest algorithm<br />
supported by your version in the commands.<br />
Certificates and keys are stored in databases called keystores. A keystore is a file,<br />
containing the certificates and keys in encrypted form. To access the information<br />
in a keystore a passphrase is required. Keystores can have different formats,<br />
common formats are e.g. PKCS#12 or the proprietary Java Keystore format<br />
(JKS). The encryption algorithm can usually be selected when creating the<br />
keystore. 3DES is recommended.<br />
OpenSSL uses default values specified in the configuration file openssl.cnf (the<br />
directory where this file is located depends on your distribution, e.g. check in the<br />
directory /usr/ssl or /usr/lib/ssl).<br />
If you omit mandatory arguments of a command, OpenSSL uses the default<br />
settings defined in the configuration file. If possible, all mandatory arguments for<br />
the example commands below are explicitly stated, i.e. if you use the commands<br />
as described below the important information is taken from the command line<br />
and not from the configuration file. If the configuration file is required for the<br />
respective command it is explicitly mentioned in the text.<br />
For further information about the syntax and content of the configuration files,<br />
please refer to OpenSSL's documentation, particularly to the manual pages<br />
genrsa(1ssl), req(1ssl), ca(1ssl) and openssl(1ssl).<br />
7.1 Certificates and keys for SSL<br />
To set up a secure connection between entities (e.g.: ET1, ET2) usually the<br />
following components are required<br />
• a private key for each entity participating in the communication:<br />
• ET1 key<br />
• ET2 key<br />
The term private key already implies that it is important to keep these keys<br />
private and store them at a location only accessible to the administrator.<br />
103 of 122
Creating and managing certificates<br />
Create the private<br />
key<br />
Create the<br />
certificate<br />
• and the corresponding certificates:<br />
• ET1 cert<br />
• ET2 cert<br />
The certificates contain among other information<br />
• the public key of the entity<br />
• information about the entity, e.g. the name and/or the IP address<br />
• further information about the certificate, e.g. the intended usage<br />
The certificate is either digitally signed with the private key of the respective<br />
entity (self-signed) or with a CA key.<br />
The certificates are public and can be distributed to anyone participating in the<br />
communication.<br />
ET1 will use the public key contained in ET2 cert to encrypt the data sent to ET2.<br />
This assures that only ET2 is able to decrypt the data. If ET2 cert is self-signed it<br />
is assured that public key contained in ET2 cert corresponds to ET2 key . If ET2 cert<br />
is signed by a CA it is assured that the public key contained in ET2 cert really<br />
belongs to ET2 (authentication).<br />
ET key has to be created first using the following command:<br />
openssl genrsa -des3 -passout pass:yourSSLPW<br />
-out privkey.pem 2048<br />
Explanation of the arguments:<br />
genrsa<br />
genrsa instructs OpenSSL to generate an RSA key.<br />
-des3<br />
Use 3DES to encrypt the key.<br />
-passout pass:password<br />
The password used to encrypt the private key (in the example:<br />
yourSSLPW). yourSSLPW is just an example and should be replaced by<br />
a secure password.<br />
-out filename<br />
Name of the file containing ET key (in the example: privkey.pem).<br />
2048<br />
The length of the key.<br />
The command above generates one output file:<br />
• privkey.pem<br />
This file contains ET key in PEM format. The key is encrypted with the 3DESalgorithm.<br />
To access the key you have to know the passphrase specified above<br />
(in the example: yourSSLPW). Please use your own, secure password to<br />
encrypt the private key.<br />
Sometimes it is necessary to create an unencrypted key. In this case just<br />
omit the -des3 and the -passout option in the command above.<br />
The certificate is created with the following command:<br />
openssl req -batch -new -x509 -key privkey.pem<br />
-keyform PEM -passin pass:yourSSLPW -sha256<br />
-outform PEM -out serverCert.pem<br />
Explanation of the arguments:<br />
req<br />
req instructs OpenSSL to generate a certificate request (default) or a<br />
certificate.<br />
-batch<br />
Non interactive mode.<br />
-new<br />
104 of 122
Creating and managing certificates<br />
Create a new request or a new certificate.<br />
-x509<br />
Create a self signed certificate instead of a certificate request.<br />
-key filename<br />
The corresponding private key (in the example: privkey.pem).<br />
-keyform PEM<br />
The private key is in PEM format.<br />
-passin pass:password<br />
Password required to decrypt the private key (in the example:<br />
yourSSLPW).<br />
-sha256<br />
Use the SHA256 algorithm to create the message digest for the signature<br />
(recommended).<br />
-outform PEM<br />
The format of the output file is PEM.<br />
-out filename<br />
The name of the output file, i.e. the certificate (in the example<br />
serverCert.pem).<br />
The command above generates one output file:<br />
• serverCert.pem<br />
This file contains the self-signed certificate ET cert .<br />
Create a keystore<br />
The keys and certificates have to be included in keystores. The installation<br />
archive idm-ca-1.4.2.zip contains the (proprietary) java tool ImportKey in the<br />
demoCA directory which can be used to create and manage keystores. Please<br />
copy the file ImportKey.class to your working directory.<br />
First ET key has to be converted to PKCS#8 format and both ET key and ET cert<br />
have to be included in a keystore. In the example, Java keystore format JKS is<br />
used. This can be accomplished with the tool ImportKey. ImportKey does accept<br />
the (unencrypted) key on standard input only, therefore the output of the pkcs8<br />
command has to be piped as follows:<br />
openssl pkcs8 -topk8 -in privkey.pem<br />
-passin pass:yourSSLPW -inform PEM -nocrypt -outform DER |<br />
java -cp . ImportKey -alias yourAlias -storetype JKS<br />
-keystore serverKeystore.jks -storepass pass:yourSSLPW<br />
-keypass pass:yourSSLPW -chain serverCert.pem<br />
Explanation of the openssl arguments:<br />
pkcs8<br />
The pkcs8 command is used to process private keys in PKCS#8 format.<br />
-topk8<br />
Use a traditional format private key as input and write a key in PKCS#8<br />
format key.<br />
-in filename<br />
The name and the location of the input file (in the example: privkey.pem).<br />
-passin pass:password<br />
Password required to decrypt the input (in the example: yourSSLPW).<br />
-inform PEM<br />
The input format of the key is PEM.<br />
-nocrypt<br />
The output (the key) is not encrypted.<br />
-outform DER<br />
105 of 122
Creating and managing certificates<br />
The ouput format is DER.<br />
Import a certificate<br />
Explanation of the ImportKey arguments:<br />
-alias name<br />
A keystore can contain multiple entries. The alias identifies the entry and<br />
therefore has to be unique in the keystore. Aliases are case-insensitive.<br />
-keystore filename<br />
The file containing the keystore (in the example:<br />
serverKeyStore.jks).<br />
-storetype JKS<br />
Use JKS as format for the keystore.<br />
-storepass pass:password<br />
Password required to decrypt the contents of the keystore (in the<br />
example: yourSSLPW).<br />
-keypass pass:password<br />
Additional password required to decrypt the private key in the keystore.<br />
-chain filename<br />
The certificate (in the example serverCert.pem).<br />
The command above creates one output file:<br />
• serverKeyStore.jks<br />
This is the keystore containing the certificate and the private key.<br />
After creating the keystore it is sometimes necessary to import additional<br />
certificates into the keystore. This can be accomplished by using the following<br />
command:<br />
java -cp . ImportKey -alias yourAlias -storetype JKS<br />
-file additionalCertificate.pem -storepass pass:yourSSLPW<br />
-keystore serverKeystore.jks<br />
Explanation of the ImportKey arguments:<br />
-alias name<br />
A keystore can contain multiple entries. The alias identifies the entry and<br />
therefore has to be unique in the keystore. Aliases are case-insensitive.<br />
-keystore filename<br />
The file containing the keystore (in the example:<br />
serverKeyStore.jks).<br />
-storetype JKS<br />
The format for the keystore.<br />
-storepass pass:password<br />
Password required to decrypt the contents of the keystore (in the<br />
example: yourSSLPW).<br />
-file filename<br />
The certificate to be imported (in the example<br />
additionalCertificate.pem).<br />
7.2 Certificates and keys for a PKI<br />
When rolling out a Private Key Infrastructure (PKI), which is basically your<br />
intent when using the <strong>IDM</strong> CA, there are more requirements to be taken into<br />
account than mentioned in the previous chapter. This chapter first describes some<br />
of the PKI basics and then the usage of OpenSSL to roll out a PKI.<br />
Please note that the certificates described in this section are not used for<br />
SSL.<br />
106 of 122
Creating and managing certificates<br />
PKI basics<br />
Contents of a<br />
certificate<br />
Please note that the certificates and keys described in this section are not<br />
stored in the SSL-keystore of the <strong>IDM</strong> CA, but in the CA-keystore.<br />
Among others the main reasons for using a PKI are:<br />
• Authentication<br />
When communicating using data networks it is in most cases not possible to<br />
“see” the entity on the remote side (exception: video telephony), i.e. one<br />
cannot be sure that the entity on the remote side is the one it claims to be. The<br />
usage of a PKI assures the authenticity of the entities communicating with<br />
each other.<br />
• Data confidentiality<br />
This is the reason VPNs are used to exchange data: The data packets are sent<br />
“in the public” (Internet), but unauthorized entities are prevented from<br />
accessing the information contained in the packets.<br />
• Data integrity<br />
The assurance that the information received is identical to the information<br />
sent by the other entity. This prevents information to be altered by an entity<br />
“in the middle” which is not authorized to participate in the communication.<br />
It is beyond the scope of this document to describe all components and their<br />
interactions involved in a complete PKI, therefore only the most important are<br />
mentioned here:<br />
• Certificates and private keys<br />
Certificates are the means in a PKI to assure authentication. The identity of<br />
the certificate owner is approved by a CA by signing the certificate request of<br />
the respective owner. The public and private keys are used to encrypt/decrypt<br />
data and therefore assure data confidentiality.<br />
• Certification Authority (CA)<br />
A Certification Authority is a component in a PKI which assures authenticity<br />
of the participating entities by signing certificate requests (i.e. issuing<br />
certificates). Usually there are multiple CAs in a PKI organized in a<br />
hierarchical structure with one root CA at the top.<br />
• CRL Distribution Points (CDP)<br />
See the following section Certificate extensions.<br />
• Entities communicating with each other<br />
The entities using a PKI use certificates to authenticate themselves and use the<br />
public/private key pairs to encrypt/decrypt the exchanged data. The entities<br />
request certificates from the CA. Usually a Registration Authority (RA) is<br />
also part of a PKI. The RA is responsible for the initial registration of entities<br />
that would like to use the PKI. An RA is not required in the <strong>IDM</strong> usage<br />
scenario.<br />
As mentioned in the previous chapter a certificate contains the following<br />
information:<br />
• the public key of the entity<br />
• information about the entity, e.g. the name and/or the IP address<br />
• further information, e.g. about the certificate and the infrastructure<br />
The following sections explain the contents in more detail.<br />
107 of 122
Creating and managing certificates<br />
The Subject Distinguished Name<br />
The Subject Distinguished Name is a unique identifier of the certificate and its<br />
owner. It is composed of several components:<br />
Abbreviation Name Explanation<br />
CN Common Name Identifies the person or object owning<br />
the certificate. For example:<br />
CN=server1<br />
E E-mail Address Identifies the e-mail address of the<br />
owner.<br />
OU Organizational Unit Identifies a unit within the organization.<br />
For example:<br />
OU=Research&Development<br />
O Organization Identifies the organization. For<br />
example: O=<strong>Innominate</strong><br />
L Locality Identifies the place where the entity<br />
resides. The locality can e.g. be a city:<br />
L=Berlin<br />
ST State Identifies the state. For example:<br />
ST=Berlin<br />
C Country Two letter code identifying the country.<br />
For example: C=DE (for Germany)<br />
Depending on your policy, not all of the components are mandatory, but if the<br />
extension Subject Alternative Name is not included in the certificate, at least one<br />
component that can be used as identifier has to be included, typically this is the<br />
Common Name (CN). Please note that currently the <strong>IDM</strong> CA cannot handle<br />
certificates with Subject Alternative Name extensions.<br />
Certificate extensions<br />
Information about the certificate or the infrastructure is contained in the so called<br />
certificate extensions. Basically anyone can define its own extensions, but the<br />
standard extensions (X.509version3) are defined in RFC 3280 Internet X.509<br />
Public Key Infrastructure - Certificate and CRL Profile. Here is a short<br />
description of the extensions that are important for the <strong>IDM</strong> CA:<br />
Critical Bit<br />
The Critical Bit is not an extension but used to force the usage of extensions<br />
in the certificate. The Critical Bit can be set for any extensions in the<br />
certificate. Applications verifying a certificate must be able to interpret an<br />
extension with the Critical Bit. If the application is not able to interpret the<br />
extension, the certificate must be rejected.<br />
Basic Constraints<br />
The Basic Constraints extension is used to indicate whether the certificate is<br />
a CA certificate or not. Basic Constraints consists of 2 fields:<br />
• cA field of type BOOLEAN and<br />
• pathLenConstraint field (optional) of type INTEGER<br />
For CA certificates the cA field must be set to true. pathLenConstraint is only<br />
used if the cA field is set to true and specifies the number of CA levels allowed<br />
below this certificate. Basic Constraints should be always marked as critical.<br />
Please refer to Chapter 7.2.3 for requirements regarding the Basic Constraints<br />
extension.<br />
108 of 122
Creating and managing certificates<br />
Key Usage<br />
Key Usage controls the intended use of the certificate’s corresponding keys.<br />
A key can be e.g. used to sign Certificate Revocation Lists (CRL), encrypt<br />
data or to sign certificates.<br />
Please refer to Chapter 7.2.3 for requirements regarding the Key Usage<br />
extension.<br />
Subject Alternative Name<br />
The extension Subject Alternative Name can be used to add more identifiers<br />
to the certificate. Subject Alternative Name can contain e.g. e-mail addresses,<br />
domain names etc. It can be used as substitute for the Subject as well, which<br />
must be empty in this case. Please note that the <strong>IDM</strong> CA is currently not able<br />
to handle Subject Alternative Name extensions.<br />
CRL Distribution Points (CDP)<br />
Certificates can be revoked, e.g. if a private key was compromised or if it is<br />
no longer valid. Usually an application has to check whether a certificate is<br />
still valid, by checking the validity period and/or by retrieving revocation<br />
information from a CRL distribution point (CDP). To retrieve the information<br />
either Certificate Revocation Lists (CRL) can be used or a dedicated protocol<br />
like OCSP. However, the certificate should contain the information, which<br />
CDP should be contacted.<br />
Authority Information Access<br />
Authority Information Access is not an X.509 standard extension, but an<br />
extension defined by the PKIX working group (http://www.ietf.org/<br />
html.charters/pkix-charter.html). Authority Information Access contains<br />
information about the issuing CA, e.g. policies, further root certificates or<br />
where to retrieve the higher certificates in the chain, if the complete chain is<br />
not contained in the certificate.<br />
Depending on the settings of these extensions the receiver (not the owner) of a<br />
certificate accepts or denies the communication with the peer, thus preventing<br />
any misuse of certificates and creating a higher level of security.<br />
7.2.1 Create the CA certificates<br />
Depending on your existing infrastructure the <strong>IDM</strong> CA needs the following<br />
certificates:<br />
• A self-signed root certificate (CA rootCert ) and the matching private key<br />
(CA rootKey ).<br />
If you have another upstream (root) CA in place, there is no need to generate<br />
the root certificate and the matching private key.<br />
The (self-signed) root certificate is distributed to all entities participating in<br />
the communication. It is used by the entities to verify the authenticity of the<br />
communication peer and of any intermediate CAs in the certificate chain. The<br />
private key CA rootKey is used to sign the self-signed root certificate.<br />
• A CA certificate (CA cert ) and the matching private key (CA key ). This is the<br />
certificate used by the CA to authenticate itself to other entities. This<br />
certificate has to be signed with the root private key, i.e. either with<br />
CA rootKey or with the key of your existing root CA. The private key CA key is<br />
used to sign the certificate request sent by the <strong>IDM</strong> server, i.e. it is used to<br />
issue certificates for the mGuards.<br />
109 of 122
Creating and managing certificates<br />
• A template certificate (CA templCert ) which is used by the CA as template<br />
when issuing end entity (mGuard) certificates.<br />
Figure 42 shows the certificate hierarchy:<br />
CA rootCert self-signed<br />
CA cert<br />
signed with CA rootKey<br />
signed with CA key<br />
CA templCert mGuard1 Cert ...<br />
Create the root<br />
certificate<br />
Figure 42: <strong>IDM</strong> CA certificate hierarchy<br />
In the following it is assumed that there is no other root CA in place and that the<br />
<strong>IDM</strong> CA is used as root CA.<br />
Important: Please keep the private key(s) at a secure location. In<br />
particular this is required for the root CA’s private key.<br />
It is recommended to create a working directory, e.g. called security in<br />
the <strong>IDM</strong> installation directory, where all the certificates and keys created<br />
during the following process are located.<br />
The following OpenSSL commands require input from the OpenSSL<br />
configuration file openssl.cnf (the directory where this file is located depends on<br />
your distribution, e.g. check in the directory /usr/ssl or /usr/lib/ssl). Instead of<br />
changing the standard configuration file of your OpenSSL installation, it is<br />
recommend to use the example configuration files provided in the <strong>IDM</strong> CA<br />
installation archive idm-ca-1.4.2.zip and adapt those files to your needs. You can<br />
instruct OpenSSL to use the provided configuration files instead of the standard<br />
configuration file.<br />
Adapt the OpenSSL configuration file<br />
Please copy the file rootCert.conf provided in the installation archive<br />
idm-ca-1.4.2.zip to your working directory. Adapt the [ root_dn ] section of<br />
the file, which contains the Subject Distinguished Name of your root CA<br />
certificate:<br />
[ root_dn ]<br />
C= DE<br />
O= <strong>Innominate</strong> <strong>Security</strong> <strong>Technologies</strong> <strong>AG</strong><br />
OU= Research & Development<br />
CN= Test Root CA<br />
Please note also the [ root_ext ] section of the configuration file, which is<br />
important for the proper generation of the root certificate (please refer to Section<br />
Certificate extensions for an explanation):<br />
[ root_ext ]<br />
keyUsage= cRLSign, keyCertSign<br />
basicConstraints= critical, CA:true, pathlen:1<br />
110 of 122
Creating and managing certificates<br />
Generate the private key<br />
CA rootKey has to be created first using the following command:<br />
openssl genrsa -des3 -passout pass:rootPW<br />
-out rootKey.pem 2048<br />
Explanation of the arguments:<br />
genrsa<br />
genrsa instructs OpenSSL to generate an RSA key.<br />
-des3<br />
Use 3DES to encrypt the key.<br />
-passout pass:password<br />
The password used to encrypt the private key (in the example: rootPW).<br />
rootPW is just an example and should be replaced by a secure password.<br />
-out filename<br />
Name of the file containing CA rootKey (in the example: rootKey.pem).<br />
2048<br />
The length of the key.<br />
The command above generates one output file:<br />
• rootKey.pem<br />
This file contains CA rootKey in PEM format. The key is encrypted with the 3DESalgorithm.<br />
To access the key you have to know the passphrase specified above<br />
(in the example: rootPW). Please use your own, secure password to encrypt the<br />
private key.<br />
Generate the root certificate<br />
The OpenSSL command used to generate CA rootCert is:<br />
openssl req -batch -new -config rootCert.conf -x509<br />
-key rootKey.pem -keyform PEM -passin pass:rootPW -sha256<br />
-days 5479 -outform PEM -out rootCert.pem<br />
Explanation of the arguments:<br />
req<br />
req instructs OpenSSL to generate a certificate request (default) or a<br />
certificate.<br />
-batch<br />
Non interactive mode.<br />
-new<br />
Create a new request or a new certificate.<br />
-config filename<br />
The name and the location of the openssl configuration file (in the<br />
example: rootCert.conf).<br />
-x509<br />
Create a self signed certificate instead of a certificate request.<br />
-key filename<br />
The corresponding private key (in the example: rootKey.pem).<br />
-keyform PEM<br />
The private key is in PEM format.<br />
-passin pass:password<br />
Password required to decrypt the private key (in the example: rootPW).<br />
-sha256<br />
Use the SHA256 algorithm to create the message digest for the signature<br />
(recommended).<br />
111 of 122
Create the CA<br />
certificate<br />
Creating and managing certificates<br />
-days 5479<br />
The period for which the certificate will be valid.<br />
-outform PEM<br />
The format of the output file is PEM.<br />
-out filename<br />
The name of the output file, i.e. the certificate (in the example<br />
rootCert.pem).<br />
The command above generates one output file:<br />
• rootCert.pem<br />
This file contains the self-signed root certificate CA rootCert .<br />
The intermediate CA certificate CA cert is not self-signed but will be issued<br />
(signed) by the root CA. Therefore you first have to create a private key and a<br />
corresponding certificate request and then “send” this certificate request to the<br />
root CA. The root CA will in return issue CA cert .<br />
First the configuration file has to be adapted to your needs, as described in the<br />
previous section.<br />
Adapt the OpenSSL configuration file and the environment<br />
Please copy the file caCert.conf contained in the installation archive<br />
idm-ca-1.4.2.zip to your working directory. Adapt the [ ca_dn ] section of the file,<br />
which contains the Subject Distinguished Name of your root CA certificate:<br />
[ ca_dn ]<br />
C= DE<br />
O= <strong>Innominate</strong> <strong>Security</strong> <strong>Technologies</strong> <strong>AG</strong><br />
OU= Research & Development<br />
CN= Test CA<br />
Please adapt also entries crlDistributionPoints and<br />
authorityInfoAccess of the [ ca_ext ] section of the configuration file<br />
(please refer to Section Certificate extensions for an explanation):<br />
[ ca_ext ]<br />
crlDistributionPoints=URI:http://ca.example.com/caca.crl<br />
authorityInfoAccess=OCSP;URI:http://ca.example.com/ocsp/<br />
ca-ca<br />
The configuration file contains some parameters, which cannot be entered on the<br />
command line. The entries specify files that have to be present in the file system.<br />
Therefore the files have to be created manually first (the filenames are also used<br />
in the configuration file caCert.conf , therefore please use exactly the file names<br />
as stated below):<br />
• Create a subdirectory archive in your working directory<br />
(Linux: mkdir ./archive)<br />
• Create a file named serial containing a valid serial number for the certificate<br />
in the subdirectory archive<br />
(Linux: echo 1234 > archive/serial)<br />
• Create an empty file to be used as openssl database.<br />
(Linux: touch archive/index.txt<br />
Windows: copy NUL: archive/index.txt)<br />
112 of 122
Creating and managing certificates<br />
Generate a private key<br />
The private key CA key has to be created first using the following command:<br />
openssl genrsa -des3 -passout pass:caPW<br />
-out caKey.pem 2048<br />
Explanation of the arguments:<br />
genrsa<br />
genrsa instructs OpenSSL to generate an RSA key.<br />
-des3<br />
Use 3DES to encrypt the key.<br />
-passout pass:password<br />
The password used to encrypt the private key (in the example: caPW).<br />
caPW is just an example and should be replaced by a secure password.<br />
-out filename<br />
Name of the file containing the private key (in the example:<br />
caKey.pem).<br />
2048<br />
The length of the key.<br />
This command creates one output file:<br />
• caKey.pem<br />
This file contains CA key in PEM format. The key is encrypted with the<br />
3DES-algorithm. To access the key you have to know the passphrase<br />
specified above (in the example: caPW). Please use your own, secure<br />
password to encrypt the private key.<br />
Generate a certificate request<br />
To create a certificate request enter the following command:<br />
openssl req -batch -new -config caCert.conf<br />
-key caKey.pem -keyform PEM -passin pass:caPW -sha256<br />
-out caCertReq.pem -outform PEM<br />
Explanation of the arguments:<br />
req<br />
req instructs OpenSSL to generate a certificate request (default) or a<br />
certificate.<br />
-batch<br />
Non interactive mode.<br />
-new<br />
Create a new request.<br />
-config filename<br />
The name and the location of the openssl configuration file (in the<br />
example: caCert.conf).<br />
-key filename<br />
The corresponding private key (in the example: caKey.pem).<br />
-keyform PEM<br />
The private key is in PEM format.<br />
-passin pass:password<br />
Password required to decrypt the private key (in the example: caPW).<br />
-sha256<br />
Use the SHA256 algorithm to create the message digest for the signature<br />
(recommended).<br />
-outform PEM<br />
The format of the output file is PEM.<br />
113 of 122
Creating and managing certificates<br />
-out filename<br />
The name of the output file, i.e. the certificate (in the example<br />
caCertReq.pem).<br />
The command above generates one output file:<br />
• caCertReq.pem<br />
This file contains the certificate request.<br />
Request the CA certificate<br />
The request has to be sent to the root CA. Since the <strong>IDM</strong> CA is the root CA in<br />
the example you can issue the certificate with the following command:<br />
openssl ca -batch -config caCert.conf -days 3653<br />
-in caCertReq.pem -cert rootCert.pem -keyfile rootKey.pem<br />
-passin pass:rootPW -md sha256 -notext -out caCert.pem<br />
-outdir .<br />
Explanation of the arguments:<br />
ca<br />
The ca command is a minimal CA application. It can be used to sign<br />
certificate requests and generate CRLs.<br />
-batch<br />
Non interactive mode.<br />
-config filename<br />
The name and the location of the openssl configuration file (in the<br />
example: caCert.conf).<br />
-days 3653<br />
The period for which the certificate will be valid.<br />
-in filename<br />
The name of the file containing the certificate request (in the example:<br />
caCertReq.pem).<br />
-cert filename<br />
The name of the file containing the root certificate (in the example:<br />
rootCert.pem).<br />
-keyfile filename<br />
The name of the file containing the key used to sign the certificate request<br />
(in the example: rootKey.pem).<br />
-passin pass:password<br />
Password required to decrypt the private key (in the example: rootPW).<br />
-md sha256<br />
Use the SHA256 algorithm to create the message digest for the signature<br />
(recommended).<br />
-notext<br />
openssl has an option to include human readable, explanatory text in the<br />
certificate. But this would create problems later in the process when<br />
creating the keystores, therefore do not include any text in the certificate.<br />
-outdir directoryName<br />
The output directory (in the example the current working directory “.”).<br />
The command above generates one output file:<br />
• caCert.pem<br />
This file contains CA cert .<br />
The file caCertReq.pem is not required any more and should be deleted.<br />
114 of 122
Create a certificate<br />
template<br />
Creating and managing certificates<br />
The purpose of the CA is to issue certificates. To do so the CA needs instructions<br />
how the certificates to be issued should look like, e.g. which extensions should<br />
be included. This can be accomplished by providing the CA with a certificate<br />
template (CA templCert ). CA templCert is a certificate issued by the CA. To issue a<br />
certificate you first have to adapt an OpenSSL configuration file again.<br />
Adapt the OpenSSL configuration file<br />
Please copy the file templateCert.conf contained in the installation archive<br />
idm-ca-1.4.2.zip to your working directory. Adapt the entries<br />
crlDistributionPoints and authorityInfoAccess of the<br />
[ template_ext ] section of the configuration file (please refer to Section<br />
Certificate extensions for an explanation):<br />
[ template_ext ]<br />
crlDistributionPoints=URI:http://ca.example.com/caee.crl<br />
authorityInfoAccess=OCSP;URI:http://ca.example.com/ocsp/<br />
ca-ee<br />
Please note that the configuration file templateCert.conf expects files to<br />
be existent that have to be manually created. (see previous section<br />
Create the CA certificate, subsection Adapt the OpenSSL configuration<br />
file and the environment).<br />
Generate a private key<br />
The private key has to be created first using the following command:<br />
openssl genrsa -des3 -passout pass:caPW<br />
-out templateKey.pem 2048<br />
Explanation of the arguments:<br />
genrsa<br />
genrsa instructs OpenSSL to generate an RSA key.<br />
-des3<br />
Use 3DES to encrypt the key.<br />
-passout pass:password<br />
The password used to encrypt the private key (in the example: caPW).<br />
caPW is just an example and should be replaced by a secure password.<br />
-out filename<br />
Name of the file containing the private key (in the example:<br />
templateKey.pem).<br />
2048<br />
The length of the key.<br />
This command creates one output file:<br />
• templateKey.pem<br />
This file contains the encrypted private key.<br />
Generate a certificate request<br />
To create a certificate request enter the following command:<br />
openssl req -new -batch -config templateCert.conf<br />
-key templateKey.pem -keyform PEM -passin pass:caPW<br />
-sha256 -outform PEM -out templateCertReq.pem<br />
Explanation of the arguments:<br />
req<br />
req instructs OpenSSL to generate a certificate request (default) or a<br />
certificate.<br />
-batch<br />
Non interactive mode.<br />
115 of 122
Creating and managing certificates<br />
-new<br />
Create a new request or a new certificate.<br />
-config filename<br />
The name and the location of the openssl configuration file (in the<br />
example: templateCert.conf).<br />
-key filename<br />
The corresponding private key (in the example: templateKey.pem).<br />
-keyform PEM<br />
The private key is in PEM format.<br />
-passin pass:password<br />
Password required to decrypt the private key (in the example: caPW).<br />
-sha256<br />
Use the SHA256 algorithm to create the message digest for the signature<br />
(recommended).<br />
-outform PEM<br />
The format of the output file is PEM.<br />
-out filename<br />
The name of the output file, i.e. the certificate (in the example<br />
templateCertReq.pem).<br />
The command above generates one output file:<br />
• templateCertReq.pem<br />
This file contains the certificate request.<br />
Request the template certificate<br />
The request has to be sent to the (intermediate) CA. You can sign the certificate<br />
request (issue the certificate) with the following command:<br />
openssl ca -batch -config templateCert.conf -days 1826<br />
-md sha256 -in templateCertReq.pem -keyfile caKey.pem<br />
-cert caCert.pem -passin pass:caPW -notext<br />
-out templateCert.pem -outdir .<br />
Explanation of the arguments:<br />
ca<br />
The ca command is a minimal CA application. It can be used to sign<br />
certificate requests and generate CRLs.<br />
-batch<br />
Non interactive mode.<br />
-config filename<br />
The name and the location of the openssl configuration file (in the<br />
example: templateCert.conf).<br />
-days 1826<br />
The period for which the certificate will be valid.<br />
-in filename<br />
The name of the file containing the certificate request (in the example:<br />
templateCertReq.pem).<br />
-cert filename<br />
The name of the file containing the root certificate (in the example:<br />
caCert.pem).<br />
-keyfile filename<br />
The name of the file containing the key used to sign the certificate request<br />
(in the example: caKey.pem).<br />
-passin pass:password<br />
Password required to decrypt the private key (in the example: caPW).<br />
116 of 122
Creating and managing certificates<br />
-md sha256<br />
Use the SHA256 algorithm to create the message digest for the signature<br />
(recommended).<br />
-notext<br />
openssl has an option to include human readable, explanatory text in the<br />
certificate. But this would create problems later in the process when<br />
creating the keystores, therefore do not include any text in the certificate.<br />
-outdir directoryName<br />
The output directory (in the example the current working directory “.”).<br />
The command above generates one output file:<br />
• templateCert.pem<br />
This file contains CA templCert . The file should be copied to its final<br />
destination, the location must be configured in ca-preferences.xml in the<br />
node<br />
certificateFactory » certTemplate<br />
The files templateCertReq.pem and templateKey.pem are not needed<br />
any more and should be deleted.<br />
7.2.2 Create the keystores<br />
After following the steps described in Chapter 7.2.1 you should find the<br />
following files in your working directory:<br />
• templateCert.pem<br />
This file contains CA templCert , signed with CA key .<br />
• caCert.pem<br />
This file contains CA cert , signed withCA rootKey .<br />
• caKey.pem<br />
This file contains CA key .<br />
• rootCert.pem<br />
This file contains the self-signed root certificate CA rootCert .<br />
• rootKey.pem<br />
This file contains the encrypted private root key CA rootKey .<br />
Some of those files have to be included in keystores. The installation archive<br />
idm-ca-1.4.2.zip contains the (proprietary) java tool ImportKey in the demoCA<br />
directory which can be used to create and manage keystores. Please copy the file<br />
ImportKey.class to your working directory.<br />
First the intermediate CA certificate and the root certificate have to be merged<br />
into one file (create a certificate chain):<br />
cat caCert.pem rootCert.pem > caCertWithChain.pem<br />
Then the key caKey.pem has to be converted to PKCS#8 format and both CA key<br />
and the certificate chain have to be included in a PKCS#12 keystore. This can be<br />
accomplished with the tool ImportKey. ImportKey does accept the (unencrypted)<br />
key on standard input only, therefore the output of the pkcs8 command has to be<br />
piped as follows:<br />
openssl pkcs8 -topk8 -in caKey.pem -passin pass:caPW<br />
-inform PEM -nocrypt -outform DER |<br />
java -cp . ImportKey -alias ca -keystore ca-keystore.jks<br />
-storetype JKS -storepass pass:caPW -keypass pass:caPW<br />
-chain caCertWithChain.pem<br />
117 of 122
Creating and managing certificates<br />
Explanation of the openssl arguments:<br />
pkcs8<br />
The pkcs8 command is used to process private keys in PKCS#8 format.<br />
-topk8<br />
Use a traditional format private key as input and write a key in PKCS#8<br />
format key.<br />
-in filename<br />
The name and the location of the input file (in the example: caKey.pem).<br />
-passin pass:password<br />
Password required to decrypt the input (in the example: caPW).<br />
-inform PEM<br />
The input format of the key is PEM.<br />
-nocrypt<br />
The output (the key) is not encrypted.<br />
-outform DER<br />
The output format is DER.<br />
Explanation of the ImportKey arguments:<br />
-alias name<br />
A keystore can contain multiple entries. The alias identifies the entry and<br />
therefore has to be unique in the keystore. Aliases are case-insensitive.<br />
-keystore filename<br />
The file containing the keystore (in the example: ca-keystore.jks).<br />
-storetype JKS<br />
Use JKS as format for the keystore.<br />
-storepass pass:password<br />
Password required to decrypt the contents of the keystore (in the<br />
example: caPW).<br />
-keypass pass:password<br />
Additional password required to decrypt the private key in the keystore.<br />
-chain filename<br />
The certificate chain including the root certificate.<br />
The command above creates one output file:<br />
• ca-keystore.jks<br />
This is the keystore for your CA containing the certificate chain and the<br />
private CA key. Please copy the keystore to its final destination.<br />
• The filename including the absolute or relative path of this keystore<br />
has to be configured in the ca-preferences.xml file in the node<br />
certificateFactory » keyStore.<br />
• The password to access the keystore (in the example caPW) has to be<br />
configured in the ca-preferences.xml file in the node<br />
certificateFactory » keyStorePassword.<br />
• The format of this keystore (JKS) has to be configured in the<br />
ca-preferences.xml file in the node certificateFactory »<br />
keyStoreType.<br />
• The password to access the private key (in the example caPW) has to<br />
be configured in the ca-preferences.xml file in the node<br />
certificateFactory » keyPassword.<br />
• The alias (ca) of the key has to be configured in the<br />
ca-preferences.xml file in the node certificateFactory » keyAlias.<br />
118 of 122
Creating and managing certificates<br />
The file caCertWithChain.pem is not needed any more and should be<br />
deleted.<br />
7.2.3 Requirements for certificates<br />
For proper function of the VPN certificates also with future versions of the<br />
mGuard firmware and the <strong>IDM</strong>, the certificates have to satisfy the following<br />
requirements:<br />
1. The private key should have a length of at least 1024 bits. <strong>Innominate</strong><br />
recommends a key length of 2048 bits for long term security.<br />
2. Any certificate must conform to RFC 3280.<br />
3. Any CA certificate must contain a Basic Constraints extension marked as<br />
critical and with the boolean cA field set to true.<br />
4. <strong>Innominate</strong> strongly recommends to include the pathLenConstraint field in<br />
any CA certificate's Basic Constraints extension. It must be set to one less<br />
than the number of descendant CA certificates. So for a typical scenario<br />
where a certification chain is made up of one root CA certificate, a single<br />
intermediate CA certificate and an end entity certificate (VPN certificate in<br />
this case), the pathLenConstraint must be one (1) for the root CA certificate<br />
and zero for the intermediate CA certificate.<br />
5. The template VPN certificate must have a Basic Constraints extension<br />
marked as critical with the boolean cA field set to false and without a<br />
pathLenConstraint field.<br />
6. Any CA certificate must contain a Key Usage extension marked as critical<br />
with the bit keyCertSign set. It is recommended to have the bit cRLSign set as<br />
well.<br />
7. The template VPN certificate does not need to contain any Key Usage<br />
extension.<br />
8. Any intermediate CA certificate must contain one or both of the extensions<br />
CRL Distribution Points and Authority Information Access, if it is planned to<br />
distribute revocation information online with a future release of the <strong>IDM</strong> and<br />
the mGuard firmware. The extensions must be marked as non-critical. The<br />
former extension is required if it is intended to use Certificate Revocation<br />
Lists (CRLs) in the future. The latter extension is required if it is intended to<br />
use the Online Certificate Status Protocol (OCSP, see RFC 2560) in the<br />
future. Any of the extensions must contain HTTP URLs only.<br />
9. The template VPN certificate should contain one or both of the extensions<br />
CRL Distribution Points and Authority Information Access, described above,<br />
if it is planned to distribute revocation information online in the future.<br />
Alternatively, the <strong>IDM</strong> server can be instructed to include them within the<br />
certification request sent to the <strong>IDM</strong> CA. The latter is more flexible, because<br />
this way the location of the revocation information (CRL) respectively<br />
information service (OCSP) can be set for groups of devices or even for<br />
individual devices.<br />
Please note: If the template VPN certificate already includes any of the<br />
extension and the <strong>IDM</strong> is instructed to include it within the certification<br />
request as well, the extension from the request overrides the one found<br />
within the template. The issued certificate will contain the extension copied<br />
from the request.<br />
10.The keystore containing the certificates has to contain the complete<br />
certificate chain up to and including the root certificate.<br />
119 of 122
Glossary<br />
8 Glossary<br />
admin / netadmin (on the mGuard)<br />
The user admin (mGuard user) can change all settings of the mGuard,<br />
whereas the user netadmin can change only local variables.<br />
AIA<br />
The certificate extension called Authority Information Access (AIA)<br />
indicates how to access CA information and services for the issuer of the<br />
certificate in which the extension appears. Such an extension is used to<br />
identify the OCSP server which provides current revocation status<br />
information for that certificate. <strong>IDM</strong> supports the inclusion of an AIA<br />
extension containing the URL of a single OCSP server. For detailed<br />
information on the AIA extension please refer to RFC 3280.<br />
CDP<br />
The certificate extension called CRL Distribution Points (CDP) identifies<br />
how CRL information is obtained for the certificate the extension is included<br />
in. <strong>IDM</strong> supports the creation of certificates containing the CDP extension<br />
with a single http:// URL enclosed therein. The URL specifies the download<br />
location of the actual CRL. For more detailed information on CRL<br />
Distribution Points please refer to RFC 3280.<br />
CRL<br />
A Certificate Revocation List (CRL) is issued regularly by a Certification<br />
Authority (CA) to provide (public) access the revocation status of the<br />
certificates it issued. A CRL is a list of revoked certificates identified by serial<br />
number. Once a certificate is revoked, it is considered to be invalid. A<br />
revocation becomes necessary in particular, if associated private key material<br />
has been compromised. For more detailed information on CRLs please refer<br />
to RFC 3280.<br />
Local (mGuard) variables<br />
Local mGuard variables are not managed by <strong>IDM</strong>, but only by the netadmin<br />
locally on the mGuard. Within <strong>IDM</strong> (in the Template Properties Dialog or the<br />
Device Properties Dialog) each variable can be defined as local variable by<br />
selecting Local as value.<br />
Inherited value<br />
Devices or templates using a parent template “inherit” the values defined in<br />
the parent template. Depending on the permission setting, the inherited value<br />
can or cannot be overridden in the inheriting devices and templates.<br />
Management ID<br />
A unique logical identifier independent of the physical hardware that<br />
identifies each device, as opposed to an identifier of the physical device, e.g.<br />
the serial number.<br />
OCSP<br />
The Online Certificate Status Protocol (OCSP) specifies the message format<br />
for a service responding with actual revocation status information on<br />
individual certificates upon request. Such a service is conventionally<br />
embedded within an HTTP server. Thus most OCSP servers use HTTP as<br />
transport layer for the OCSP messages. Such an OCSP server is operated by<br />
some Certification Authorities as alternative to or replacement for CRLs. For<br />
detailed information on OCSP please refer to RFC 2560.<br />
120 of 122
Glossary<br />
Permissions<br />
The permissions in a template determine whether the user configuring an<br />
inheriting device or template can override/modify the settings of the parent<br />
template.<br />
Regular expressions<br />
Regular expressions are text strings to match portions of a field using<br />
characters, numbers, wildcards and metacharacters. Regular expressions can<br />
be used in <strong>IDM</strong> to filter the device, template, or pool table. For detailed<br />
information on regular expressions please refer to<br />
www.regular-expressions.info.<br />
Template<br />
A set of mGuard variables and the corresponding values and permissions. The<br />
template can be used (i.e. inherited from) by a device or another template. A<br />
change in the template applies to all inheriting devices and templates,<br />
depending on the access privilege settings. The template is used in <strong>IDM</strong> only,<br />
but not on the mGuard.<br />
See also Inherited value and Permissions.<br />
X.509 certificates<br />
Digital certificates have been specified in the standard X.509 issued by the<br />
ITU-T. A profile of that standard is published as RFC 3280. Such certificates<br />
certify the identity of an entity. The certificate includes the entity's public key<br />
and an electronic signature from the Certification Authority (CA). X.509<br />
certificates are organized hierarchically: A root CA creates a self signed trust<br />
anchor which needs to be configured as such for applications verifying digital<br />
signatures or certificates. The identity and trustworthyness of the intermediate<br />
CAs is certified with a CA certificate issued by the root CA respectively the<br />
upstream intermediate CA. The identity of the end entities is certified with a<br />
certificate issued by the lowest CA. Each certificate can contain extensions<br />
for the inclusion of arbitary additional information. The <strong>IDM</strong> supports the<br />
creation of end entity certificates for VPN connection end points and the<br />
optional inclusion of the CDP and AIA extensions. For detailed information<br />
on digital certificates please refer to RFC 3280.<br />
121 of 122
This page is intentionally left blank.<br />
122 of 122