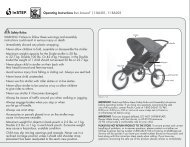
Schwinn M3 Single Jogging Stroller manual.pdf - Instep.net
Schwinn M3 Single Jogging Stroller manual.pdf - Instep.net
Schwinn M3 Single Jogging Stroller manual.pdf - Instep.net

Create successful ePaper yourself
Turn your PDF publications into a flip-book with our unique Google optimized e-Paper software.
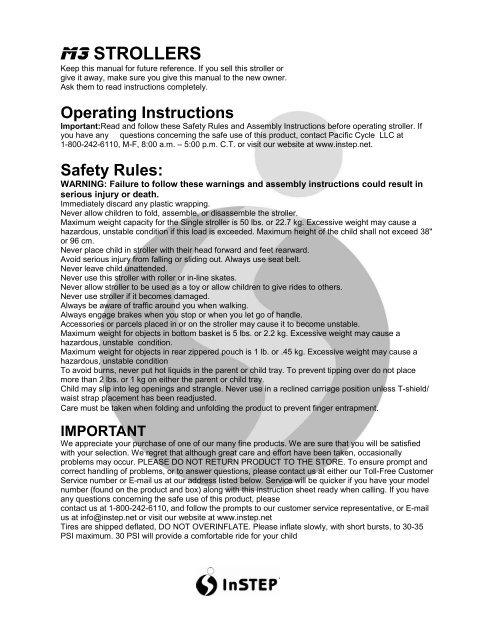
<strong>M3</strong> STROLLERS<br />
Keep this <strong>manual</strong> for future reference. If you sell this stroller or<br />
give it away, make sure you give this <strong>manual</strong> to the new owner.<br />
Ask them to read instructions completely.<br />
Operating Instructions<br />
Important:Read and follow these Safety Rules and Assembly Instructions before operating stroller. If<br />
you have any questions concerning the safe use of this product, contact Pacific Cycle LLC at<br />
1-800-242-6110, M-F, 8:00 a.m. – 5:00 p.m. C.T. or visit our website at www.instep.<strong>net</strong>.<br />
Safety Rules:<br />
WARNING: Failure to follow these warnings and assembly instructions could result in<br />
serious injury or death.<br />
Immediately discard any plastic wrapping.<br />
Never allow children to fold, assemble, or disassemble the stroller.<br />
Maximum weight capacity for the <strong>Single</strong> stroller is 50 lbs. or 22.7 kg. Excessive weight may cause a<br />
hazardous, unstable condition if this load is exceeded. Maximum height of the child shall not exceed 38"<br />
or 96 cm.<br />
Never place child in stroller with their head forward and feet rearward.<br />
Avoid serious injury from falling or sliding out. Always use seat belt.<br />
Never leave child unattended.<br />
Never use this stroller with roller or in-line skates.<br />
Never allow stroller to be used as a toy or allow children to give rides to others.<br />
Never use stroller if it becomes damaged.<br />
Always be aware of traffic around you when walking.<br />
Always engage brakes when you stop or when you let go of handle.<br />
Accessories or parcels placed in or on the stroller may cause it to become unstable.<br />
Maximum weight for objects in bottom basket is 5 lbs. or 2.2 kg. Excessive weight may cause a<br />
hazardous, unstable condition.<br />
Maximum weight for objects in rear zippered pouch is 1 lb. or .45 kg. Excessive weight may cause a<br />
hazardous, unstable condition<br />
To avoid burns, never put hot liquids in the parent or child tray. To prevent tipping over do not place<br />
more than 2 lbs. or 1 kg on either the parent or child tray.<br />
Child may slip into leg openings and strangle. Never use in a reclined carriage position unless T-shield/<br />
waist strap placement has been readjusted.<br />
Care must be taken when folding and unfolding the product to prevent finger entrapment.<br />
IMPORTANT<br />
We appreciate your purchase of one of our many fine products. We are sure that you will be satisfied<br />
with your selection. We regret that although great care and effort have been taken, occasionally<br />
problems may occur. PLEASE DO NOT RETURN PRODUCT TO THE STORE. To ensure prompt and<br />
correct handling of problems, or to answer questions, please contact us at either our Toll-Free Customer<br />
Service number or E-mail us at our address listed below. Service will be quicker if you have your model<br />
number (found on the product and box) along with this instruction sheet ready when calling. If you have<br />
any questions concerning the safe use of this product, please<br />
contact us at 1-800-242-6110, and follow the prompts to our customer service representative, or E-mail<br />
us at info@instep.<strong>net</strong> or visit our website at www.instep.<strong>net</strong><br />
Tires are shipped deflated, DO NOT OVERINFLATE. Please inflate slowly, with short bursts, to 30-35<br />
PSI maximum. 30 PSI will provide a comfortable ride for your child
Model <strong>M3</strong> <strong>Stroller</strong>s Assembly Instructions<br />
Parts List<br />
Description<br />
Qty<br />
Frame Assembly 1<br />
Fender 1<br />
Fender screws # 8 x 3/4" 4<br />
Parent Console 1<br />
Front Wheel Assembly 16" 1<br />
Rear Wheels 16" 2<br />
<strong>Stroller</strong> Assembly Instructions<br />
Step 1. Unfold <strong>Stroller</strong><br />
Grasp frame as shown and open until both<br />
side latches engage (Figure A).<br />
Step 2. Rear Wheel Assembly<br />
Turn stroller onto its side. Grasp rear wheel in one hand,<br />
slide wheel’s axle into the sides of the rear “ U “<br />
shaped crossbar hole located near the rear brake.<br />
Push firmly to lock in place. (Figure B1). Check to<br />
see that the wheel is properly inserted by pulling on<br />
the wheel firmly. The wheel should not come off if fully<br />
inserted/locked. Repeat for other side. To release<br />
wheel push up on axle release lever and pull off wheel<br />
(Figure B2).<br />
Fig. A<br />
Axel Hole<br />
Rear Axel<br />
Fig. B1<br />
Release Lever<br />
Fig. B2<br />
Step 3. Front Fender Assembly<br />
Turn stroller upright onto its rear wheels, then tip<br />
stroller back so the handlebar is down on the<br />
ground and the front fork is up. Align the fender’s<br />
4 boss’s with the 4 holes on the front frame push the<br />
4 boss’s into the frame’s hole. Insert the<br />
#8 x 3/4" screw into the hole and tighten with a<br />
Phillips screwdriver, repeat for the other 3 holes<br />
(Figure C).<br />
Boss<br />
Front Fender<br />
Holes<br />
Fig. C
Step 4. Front Wheel Assembly<br />
While stroller is still tipped back, attach the front wheel by loosening the wheel’s quick release<br />
(Q/R) lever on the front wheel far enough to allow the axle to slide into the front fork (Figure D1). The<br />
front caliper brake Q/R lever should be in the open position so the front wheel can be inserted easily Into<br />
the front fork . With wheel’s Q/R lever in open position, hand tighten the cone nut until<br />
almost tight, then close the wheel’s Q/R lever to lock wheel in place. Note this step may require minor<br />
adjustment until the Q/R lever flips back with firm pressure ( Figure D2 and D3). Pull outward<br />
on wheel to ensure it is locked in place. Close the Q/R lever on the front caliper brake and spin the front<br />
wheel to check if the brake pads are properly aligned and not rubbing on the rim. If brake pad alignment<br />
is off, loosen the brake pad nut with an adjustable wrench, reposition pad and re-tighten the brake pad<br />
nut (See Figure D1).<br />
NOTE: The alignment of the front wheel determines if the stroller will roll straight or veer to the right or<br />
left. In the event the stroller is veering to one direction, unloosen the front wheel’s Q/R lever, point the<br />
wheel in the opposite direction it is veering and retighten wheel’s Q/R lever. This may require a very<br />
slight adjustment to get your stroller rolling straight .<br />
NOTE: The black hex nuts should be on the inside of the wheel next to the hub. These are factory set<br />
and should not require adjusting (See Figure D3).<br />
Adjusting the front side pull caliper brake<br />
Properly adjusted brakes require attention to this detail. It is normal for the brake cable to stretch over a<br />
period of time and you will find it necessary to periodically adjust the front brake. This can be done 2<br />
ways: Micro adjustment- unloosen the locknut located next to the Micro adjustment screw, turn the micro<br />
adjustment screw out to move brake pads closer to the rim then re-tighten locknut (See Figure D1).<br />
Macro adjustment - unloosen the brake cable nut that holds the cable onto the caliper. With one hand<br />
hold the brake pads next to the rim of the wheel with the other hand pull firmly on the brake cable below<br />
the caliper brake While still holding the brake pads next to the rim re-tighten the nut with adjustable<br />
wrench. Use the micro adjustment to fine tune the position of the pads to the rim which should be about<br />
¼” from the rim. Check adjustment by squeezing the front brake lever (See Figure D4)<br />
Brake Pad<br />
Nut<br />
Closed<br />
Brake<br />
Pads<br />
Brake Pad<br />
Nut<br />
Open<br />
Lock Nut<br />
Micro Adjustment<br />
Screw<br />
Fig D1<br />
Fig. D2<br />
Brake Cable<br />
Cone Nut<br />
Wheel Q/R<br />
Lever<br />
Brake Cable<br />
Nut<br />
Black Hex Nut<br />
(Do Not Adjust)<br />
Fig. D3<br />
Fig. D4<br />
Brake Cable<br />
Brake Pad
Step 5. Installing Parent’s<br />
Convenience Tray<br />
Snap the parent tray onto the handle bar aligning the tray’s<br />
holes with the handlebar’s knobs (Figure E).<br />
Parent Tray<br />
Hole<br />
Step 6. Installing optional Child Tray<br />
(sold separately)<br />
Align the child tray onto the frame just below side latches,<br />
Handle Knob<br />
Fig. E<br />
Step 7. Installing optional Child booty cover (sold separately)<br />
Undo the shoulder and waist straps from the stroller seat center buckle. Place the booty into the seat and insert<br />
the shoulder, waist and crotch straps through the slits in the booty, snap the sides onto the bottom of the frame.<br />
Place child into booty and adjust the restraint straps to a snug fit. Zipper close (Figure F1,F2).<br />
Fig. F1<br />
Fig. F2<br />
Step 8. Adjusting the angle of the canopy and using the zipout weathershield.<br />
Unsnap the canopy sides from the frame loosen the hook loop tab from center of console, rotate canopy to the<br />
desired angle to help block the sun. Note the zipout weathershield should be zippered in when rotating the<br />
canopy forward (FigureG1)<br />
Unzip the canopy edge to expose the weathershield. Align the hook and loop of the inside flap so it does not<br />
hang down in your child’s face. Loop the 2 hooks together under the front fender. When not in use roll up<br />
weather shield into zippered area to store (Figure G2).<br />
Canopy Tab<br />
Canopy<br />
Snaps<br />
Fig. G1<br />
Fig. G2
Use Instructions<br />
WARNING: Always remove child from<br />
stroller before folding.<br />
To fold stroller:<br />
IMPORTANT Pull the seatback forward toward the front fender prior to folding! Pull the one hand fold<br />
handle located between the tray and handle of the stroller. The stroller will automatically begin to fold.<br />
(Figure H). Continue folding/pushing frame together.<br />
To engage rear brakes:<br />
Step lightly on the center brake bar to engage brakes. To disengage, lift up on brake bar (Figure I).<br />
DO NOT STAND ON REAR BRAKE BAR.<br />
One<br />
Hand Fold<br />
Lever<br />
Fig. H<br />
PROPER USE OF SEAT BELTS &<br />
SHOULDER STRAPS:<br />
WARNING: Avoid serious injury from falling<br />
or sliding out. Always use seatbelt.<br />
1. Place child in seat. Make sure T-strap is<br />
between the child’s legs.<br />
2. When child is seated, place shoulder straps<br />
over the child’s shoulders and clip onto the<br />
waist buckle.<br />
3. Buckle the waist straps into the center buckle<br />
on the T-strap repeat for other side. Adjust the<br />
T-Strap, waist and shoulder straps for snug fit<br />
(Figure J).<br />
To recline seat:<br />
To fully recline, unhook buckle on back of the seat<br />
(Figure K).<br />
To place seat in upright position, push seat forward<br />
and reconnect buckle located on back of seat.<br />
To adjust the recline position, adjust the slide on<br />
the strap.<br />
WARNING: Child may slip into leg openings<br />
and strangle. Never use in a reclined carriage<br />
position unless T-shield and shoulder<br />
straps have been readjusted to the new<br />
seat position.<br />
Linked Rear Brakes<br />
Waist<br />
Strap<br />
Center<br />
Buckle<br />
Fig. I<br />
Sternum<br />
Strap<br />
Waist<br />
Strap<br />
Fig. J<br />
Fig. K
To adjust handle height:<br />
While pushing the handle buttons in rotate handle<br />
to the desired height (Figure L).<br />
Care and Maintenance<br />
Check fasteners<br />
After one hour of use, check all fasteners to make sure they are secure. Adjust if necessary.<br />
Periodically check the stroller and fasteners to ensure that it is in good operating condition.<br />
Fig. L<br />
To clean seat and canopy:<br />
If light cleaning is required, use a soft cloth with warm water and mild soap, then air dry. Do not put into<br />
washing machine. Do not put in dryer. DO NOT BLEACH.<br />
To clean frame:<br />
Wipe using a soft cloth with warm water and mild soap. Air dry. DO NOT USE polish or abrasives.<br />
If you have any questions concerning the safe use of this product, please contact Pacific Cycle LLC<br />
before using:<br />
and <strong>Schwinn</strong><br />
are registered trademarks of<br />
Pacific Cycle LLC. Please direct all inquiries to:<br />
TEL 1-800-242-6110<br />
FAX 1-800-858-2800<br />
SCHWINN or InSTEP stroller questions can also be directed to: www.instep.<strong>net</strong> or info@instep.<strong>net</strong>