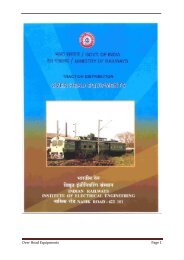
Traction Rolling Stock - Indian Railways Institute of Electrical ...
Traction Rolling Stock - Indian Railways Institute of Electrical ...
Traction Rolling Stock - Indian Railways Institute of Electrical ...

Create successful ePaper yourself
Turn your PDF publications into a flip-book with our unique Google optimized e-Paper software.
PREFACE<br />
The book on "<strong>Traction</strong> <strong>Rolling</strong> <strong>Stock</strong> - Maintenance" was brought out<br />
by Institution <strong>of</strong> Railway <strong>Electrical</strong> Engineers (IREE) long back. Since, lot <strong>of</strong><br />
changes have taken place in the maintenance practices in the field <strong>of</strong><br />
<strong>Traction</strong> <strong>Rolling</strong> <strong>Stock</strong>, it has become necessary to incorporate the changes<br />
in this volume. Few additions and modifications in the field <strong>of</strong> <strong>Traction</strong><br />
<strong>Rolling</strong> <strong>Stock</strong> maintenance are included in this book.<br />
For bringing out this book Shri Suryawanshi M.A., Raj Bhasha Supdtt.<br />
And Shri K.V.Gaikwad, Section Engineer(Loco) have made substantial<br />
efforts, under the guidance <strong>of</strong> Shri A.T.Dharmik, Pr<strong>of</strong>essor (Computer).<br />
I am delighted to note that lot <strong>of</strong> efforts have been undertaken in<br />
bringing out this book <strong>of</strong> "<strong>Traction</strong> <strong>Rolling</strong> <strong>Stock</strong> Maintenance" in the present<br />
form. I am sure that this book will serve the needs <strong>of</strong> <strong>Electrical</strong> Engineers<br />
working in the field <strong>of</strong> <strong>Electrical</strong> <strong>Traction</strong> <strong>Rolling</strong> <strong>Stock</strong>.<br />
Nasik Road<br />
A.K.RAWAL<br />
21 st May, 2010 DIRECTOR
MAINTENANCE<br />
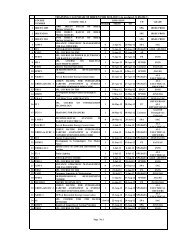
CONTENTS<br />
Chapter<br />
No.<br />
Subject<br />
Pg. No.<br />
01. A.C. Loco Equipments 01-15<br />
02. Locomotive Bogies 16-23<br />
03. Power Transmission & Drives 24-30<br />
04. Wheels 31-32<br />
05. Power Control & Auxiliary Circuit. 33-72<br />
06. Air Compressor 73-80<br />
07. Brake System <strong>of</strong> Electric Locomotive & EMU 81-103<br />
08. Maintenance and Overhaul Schedules <strong>of</strong> Locomotives 104-124<br />
09. Safety & Fire Prevention Precautions 125-128<br />
10. AC EMU Description <strong>of</strong> <strong>Electrical</strong> Circuits 129-141
A.C. LOCO EQUIPMENTS<br />
1.1: ROOF EQUIPMENT<br />
1.1.1: PANTOGRAPH<br />
Name <strong>of</strong> Suppliers<br />
: M/s J. Stone & Co (India ) Ltd.<br />
Type : AM 12<br />
Technical Data :<br />
1. Minimum air pressure for complete extension - 4.5 kg/cm 2 .<br />
2. The Pantograph starts to lower between - 3 and 3.5 kg/cm 2 .<br />
3. The articulated system is designed to allow an extension <strong>of</strong> 2.46 meters.<br />
4. A raising time included between 6 and 10 secs, from the moment one feeds the<br />
pantograph with compressed air, until the moment when the pantograph reaches<br />
an extension <strong>of</strong> about 1.5 meters.<br />
5. A lowering time below or equal to 10 secs, from the moment one drains the<br />
feeding pipe unit till the moment when the pantograph is folded on its stops,<br />
starting from an extension <strong>of</strong> 1.5 meters.<br />
6. The maximum height is 2460 + 0 mm<br />
– 20 mm<br />
1.1.2: OPERATION<br />
(a)<br />
Principle<br />
Basically, compressed air raise and the springs lower the pantograph. The sole<br />
function <strong>of</strong> air is to cancel the lowering effort <strong>of</strong> the springs and it has no direct<br />
effect on the pantograph. When the pantograph is working and the air pressure is<br />
maintained in the control cylinder, the piston is kept still and the articulated system<br />
is entirely free kept raised only by the up-spring device. It therefore, follows freely<br />
all the oscillations <strong>of</strong> the contact wire. Should lack <strong>of</strong> air occur, the equipment<br />
collapses by itself. The whole equipment is alive, its own parts are used as<br />
conductors. The current collection is made on the frame with shunts fitted at<br />
moving points. To take feeding <strong>of</strong> compressed air easier, the control cylinder is<br />
earthed.<br />
(b)<br />
Raising<br />
Air is admitted in the Servo-motor cylinder (23) (Fig. 1.1.2) the piston<br />
(24) (Fig. 1.1.2) compresses the holding down springs (25) and displaces the
Fig. 1.1.2
Fig.1.1.3
slotted link (28) thus permitting rotation <strong>of</strong> the horizontal spindle (4) under the<br />
action <strong>of</strong> the working springs. The pantograph rises until the collector reaches the<br />
catenary or contact wire and the articulated system then stops and the piston<br />
completes the stroke. From this point the air motor plays no further part, the piston<br />
being stationary and remaining in the position during normal operation. The pin <strong>of</strong><br />
the horizontal spindle being permitted to move freely in the slot <strong>of</strong> the control link,<br />
the pantograph operates purely on the up-springs, the design is such so as to<br />
permit free movement <strong>of</strong> the articulated system throughout the full distance <strong>of</strong> its<br />
rise and fall.<br />
(c)<br />
Lowering<br />
Opening the cylinder to atmosphere causes the piston to return under the force <strong>of</strong><br />
the holding down springs.<br />
1.1.3. ADJUSTMENT<br />
a. Air Pressure<br />
The pantograph operates at well determined pressures, depending only on the<br />
lowering springs (25). The minimum air pressure required for complete extension<br />
<strong>of</strong> the pantograph is 4.5 kg/cm 2 . The pantograph starts to lower only when this<br />
pressure drops between 3.0 and 3.5 kg/ cm 2 , per sq. centimeter.<br />
b. Static Adjustment <strong>of</strong> Counter Balancing (Fig. 1.1.3)<br />
The static force <strong>of</strong> the pantograph is adjusted at 7 kg. in the following manner:<br />
Feed the pantograph with compressed air at a minimum pressure <strong>of</strong><br />
5 kg/cm 2 . Screw as much as possible the four stud bolts (37-38-39-40) towards<br />
the spindle centre after having taken the locking plates <strong>of</strong>f. Balance the articulated<br />
system at a height <strong>of</strong> 2 metres after having hung a weight <strong>of</strong> 7 kg on the head<br />
by tensioning or releasing the two working springs (17) with adjusting nuts (42), to<br />
make the balancing member (18) stand perpendicular to the longitudinal axis <strong>of</strong><br />
the pantograph. Having obtained balance the tension <strong>of</strong> the main springs is set<br />
once for all and it is not necessary to adjust them any further to obtain perfect<br />
adjustment.<br />
1.2 TRANSFORMER<br />
The transformer, type HETT 3900 is a single phase, oil immersed, air cooled, with<br />
forced oil circulation. The magnetic circuit consists <strong>of</strong> a laminated core <strong>of</strong> interleaved construction<br />
comprising three legs. One <strong>of</strong> these carries the windings <strong>of</strong> the regulating transformer with tapings<br />
connected to the tap changer and the L.V. winding for supplying the auxiliary circuits.<br />
The primary windings <strong>of</strong> the fixed ratio transformer and the secondary windings feeding<br />
the rectifier traction motor circuits are distributed on the two other legs.<br />
1.2.1 Details <strong>of</strong> the transformer:<br />
The transformer has the following three legs :
Leg I A I = 704 cm 2 (Regulating transformer)<br />
Leg II A II = 1295 cm 2 {Fixed ratio main<br />
Leg III A III = 704 cm 2 transformer}<br />
FIG 1.2.1 Leg flux diagram<br />
Leg I carries the winding <strong>of</strong> the regulating transformer stepping down the voltage <strong>of</strong> the<br />
overhead system to a value permissible for the equipment.<br />
The series winding A 32 ...<br />
A 33 has 80 turns.<br />
Cross sectional area = 27.45 mm 2<br />
The main winding A0 ......<br />
A 32 has 960 turns<br />
Cross sectional Area = 27.45 mm 2<br />
According to the above, the complete winding <strong>of</strong> the regulating transformer has:<br />
N 1 = 80 + 960 = 1040 turns<br />
According to the actual position <strong>of</strong> the tap changer.<br />
The active number <strong>of</strong> turns varies from<br />
Pos. 0,1,2,3,4....... 28,29,30,31, 32.<br />
NR = 0, 30,60, 90, 120....... 840,870,900,930,960 turns.<br />
In addition to the winding <strong>of</strong> the regulating transformer leg I carries the electrically<br />
separated winding a0...al <strong>of</strong> the auxiliary circuits also. This winding has 18 turns.<br />
Cross sectional area = 248 mm 2<br />
The legs II and III carry the primary and secondary windings <strong>of</strong> the main transformer.<br />
The induction effect <strong>of</strong> the winding <strong>of</strong> leg III on the winding <strong>of</strong> leg II varies according to the position<br />
<strong>of</strong> the tap changer.<br />
The design <strong>of</strong> the two legs is similar, the difference being in the cross sectional area<br />
only. The primary windings <strong>of</strong> both legs are connected in series and each leg has
Np = 288 turns<br />
The beginning <strong>of</strong> the primary windings is led to the terminal A34 and is<br />
connected through the tap changer with the tapings A0 to A32 <strong>of</strong> the regulating<br />
transformer. The end <strong>of</strong> the winding is permanently connected to A0 internally<br />
Conductor cross Sectional area = 4 7 = 28 sq. mm - Auto winding<br />
3.8 5.5 sq. mm.- Primary winding<br />
The secondary windings (motor winding) are composed <strong>of</strong> two branches.<br />
a3..... a4 and<br />
a5..... a6<br />
Each branch has two sections connected in series, each having<br />
Ns = 12<br />
on both legs II and III<br />
Conductor cross area = 3.8 5.5 mm 2 (Primary and Secondary winding)<br />
1.2.2 BRIEF DATA OF POWER TRANSFORMER<br />
Type : HETT 3900<br />
Supplier : NGEF, CROMPTON GREAVES,BHEL
Voltage<br />
Primary output :<br />
Primary maximum : 27.5 kV<br />
Secondary<br />
nominal : 25.0 kV<br />
minimum : 22. 5 kV<br />
Secondary output : 3900 KVA<br />
Aux. Circuit output : 270 KVA<br />
maximum : 1058 V in each winding<br />
minimum : 865 in each winding<br />
4170 KVA (Regulating winding.)<br />
System : Single phase, 50 c/s, oil immersed, air cooled with forced oil<br />
circulation. Primary single winding and secondary with double<br />
winding with equal ratings.<br />
Rated Secondary : 2250 Amps<br />
current <strong>of</strong> each winding<br />
Impedence voltage : 10 % ± IEC (Referred to 865 V Secondary and 22. 5 KV Primary)<br />
1.2.3 Treatment <strong>of</strong> the Oil :<br />
The following methods can be adopted:<br />
a) drying with short circuiting method<br />
b) drying with oil heater<br />
c) drying in a vacuum chamber<br />
a) Short circuiting method :<br />
For this purpose the primary side <strong>of</strong> the transformer has to be connected to an<br />
outside source for approx. 2400 V and the secondary windings have to be short<br />
circuited.<br />
Connections :<br />
The transformer is fed between tapings A0 and A 33. The tap changer is in<br />
position 32. At the maximum voltage <strong>of</strong> 2400V the maximum rated current <strong>of</strong><br />
172.3A should flow in the primary windings.<br />
The windings for the feeding <strong>of</strong> the motors should be short-circuited between the<br />
terminals a3 and a4, a5 and a6 (the current is approx 2250 A).<br />
Oil temperature<br />
Should be measured at the top at the hottest place, and has to be checked<br />
continuously. To avoid damage to the winding, the absolute temperature should<br />
never be over 55°C above ambient.<br />
b) Drying with Oil Heater :
Drying with cold spray: This is the most efficient method <strong>of</strong> drying oil, and consists<br />
<strong>of</strong> spraying cold oil into a vacuum. The temperature vacuum, however, must be<br />
lower than the temperature <strong>of</strong> evaporation <strong>of</strong> water.<br />
The low pressure and fine dispersion thus obtained considerably aid in the<br />
separation <strong>of</strong> the water which is drawn <strong>of</strong>f by the vacuum pump.<br />
Oil can only be dried by this method if an airtight vessel is available.<br />
1.3 WORKING PRINCIPLE OF TAP CHANGER<br />
1.3.1 Description<br />
The tap changer is directly built on to the transformer. The tappings <strong>of</strong> the transformers<br />
are brought out and arranged in circular fashion on an insulated contact plate. There are two rows<br />
<strong>of</strong> contact segments which are aligned on outer and inner circles <strong>of</strong> the contact plate. An arm<br />
which is known as selector arm is driven by a shaft at the centre <strong>of</strong> the contact plate. Two rollers<br />
are situated at the edge <strong>of</strong> the selector arm. These rollers make connection between the<br />
respective segment in outer or inner rings. These rings are provided in front <strong>of</strong> the contact plate.<br />
The centre shaft which extends outside the tap changer casing is driven by an air servo motor<br />
known as SMGR. The design <strong>of</strong> the air servo motor is such that once the selector arm begins its<br />
movement, it can be stopped only at the required tap (not in between two taps). The connection<br />
between the inner or outer ring to the transformer is being established by means <strong>of</strong> CGR<br />
contactor.<br />
1.3.2 Method <strong>of</strong> operation (Ref. fig. 1.3.2)<br />
The selector arm is actuated by the driving shaft through an intermittent gearing<br />
comprising <strong>of</strong> drive wheel, lantern gear pinion and stopping wheel. This driving shaft also operates<br />
the CGR Cam shaft in sequence with the operation <strong>of</strong> contact rollers. The opening and closing<br />
sequence <strong>of</strong> CGR contactors are given below :<br />
CGR I CGR II CGR III<br />
Even Notches Open Closed Closed<br />
In bet. Notches Closed Closed Open<br />
Odd Notches Closed Open Open<br />
Before the moving contact roller leaves the zero tap contact segment, it touches the first tap<br />
segment. During this the CGRI contactor closes inserting the diverter resistance RGR in between<br />
the tapped winding. This results in shorting <strong>of</strong> the section <strong>of</strong> winding between Tap 'O' and Tap 1<br />
thro. RGR. This resistance RGR restrict the short circuit current when the selector arm further<br />
moves fully on Tap 1, the inner contact roller breaks the contact with zero tap. Meanwhile CGR II<br />
contactor opens and cuts <strong>of</strong>f RGR from circuit. Likewise when the selector arm moves from first<br />
tap to second tap the contact roller (outer) will continue to make connection with Tap 1 segment &<br />
the inner contact roller establishes connection between inner segment and inner ring. (This is due<br />
to over lapping contact segment). At the same time CGRI, CGR II are closed again inserting the<br />
resistor RGR in between the short circuited winding. Now the service current flows from the<br />
contact ring outer in the selector through the resistor RGR, when the selector arm further moves,<br />
the outer roller leaves the Tap l segment & breaks the contact. At the same time CGR I gets<br />
opened and CGR II & CGR III are closed. This again cuts <strong>of</strong>f the resistance RGR.<br />
The opening & closing <strong>of</strong> the CGR contacts is carried out by a cam shaft which is driven
y the main shaft through gear arrangements. This ensures a perfect relationship between the<br />
movement <strong>of</strong> selector arm and the operation <strong>of</strong> CGR contactors.<br />
A high resistor RPGR serves as the connection between equal potential, which ensures<br />
that the branches <strong>of</strong> the circuit being interrupted at the given potential.<br />
Fig. 1.3.2 Connection <strong>of</strong> tap changer<br />
1.4 SILICON RECTIFIER<br />
1.4.1 General Data <strong>of</strong> Silicon Rectifier :<br />
Continuous current rating … 1000 A<br />
Rated Voltage … 1500 A<br />
Maximum starting current … 1650 Amps.<br />
Maximum no. load voltage … 2115 V
Peak short ckt. current with smoothing … 27000 A<br />
reactor in circuit connection … Graetz bridge<br />
(a)<br />
Particulars <strong>of</strong> components in rectifier assly. <strong>of</strong> M/s AEG/NGEF Ltd.<br />
No. <strong>of</strong> cells in parallel per arm … 4 Nos.<br />
No. <strong>of</strong> cells in series … 3 Nos.<br />
Cell Type … D400/2000<br />
Cooling … 2 blowers - 3200m³ /hr<br />
Main fuse, 64 nos./loco … Type NG3, 500A, 800V<br />
Signal fuse 32 nos./loco … Type N300, 1200V<br />
Cell damping network :<br />
Resistor … Type RW 12/76 FST<br />
47 kohm ± 5%<br />
DC damping network :<br />
Resistor … Type GBs 30/B3-8 ohms with<br />
fixed central tap 4+4 ohms.<br />
Capacitor … 22uF 380 V<br />
DMVSI … 2 Nos./Loco-siemen's<br />
make (Imported)<br />
Micro Switch … Y-6, E-NR 910-161.500. 02.<br />
(b)<br />
Particulars <strong>of</strong> components in Rectifier Assly. <strong>of</strong> M/s Ruttonsha.<br />
Diode … Type 321 UMR 200 with<br />
heat sink type HK 1539A<br />
321 UFR 200 with Heat<br />
sink type WK1539/Bore<br />
No. <strong>of</strong> cells in series … 3<br />
No. <strong>of</strong> cells in parallel … 2<br />
Cooling … 2 blowers-3200m² /hr.<br />
Main fuse … 64 nos.<br />
Type NG3 500A 800 V.<br />
Single fuse … 32 nos<br />
Type IR 1 : 1000, 700.rms.<br />
Cell damping network<br />
Series resistor … 10 ohms, 25 W.<br />
Hole storage capacitor … 2.5mfd, 1200V.<br />
Potential divider resistor … 25 Kohms, 25W.<br />
DC damping network
Base load … 500 ohms,300W (12nos.)<br />
Micro Switch …<br />
Essen micro Switch made<br />
in India.<br />
(c)<br />
Particulars <strong>of</strong> components in Hind Rectifier Assly. <strong>of</strong> M/s Hind Rectifier.<br />
Diode type … Westinghouse Brand Direct<br />
diode S18FN350(SPL).<br />
No. <strong>of</strong> diodes in series/arm … 4 Nos.<br />
No. <strong>of</strong> diodes in parallel … 4 Nos.<br />
Fuse . … Type NG3 800 V/500A<br />
AEG/NGEF make<br />
Signal Fuse … Type GSL100EE (UK make)<br />
Cell damping network<br />
Resistance … Metox-35 K/10W<br />
(3 in parallel/cell)<br />
Paper condenser … Duconot 0.25mfd, 1800V<br />
surge ± 10% Dubilier<br />
(UK make)<br />
Micro switch …<br />
Type K3A/3, Kaycee make<br />
DC base load :<br />
Capacitor … 25±15% mfd, 440 V rms/<br />
50-60 c/s PLESSY make<br />
(Britain), 4 nos./set.<br />
Resistance non-inductive … Type 522/1/17012/380<br />
50 k ohm/10 W±4Nos/<br />
Resistance non-inductive … 4ohm/20 W<br />
Motor circuit breaker DMVSI … Type 3VA35 11-02/LBO,<br />
16A, 500V, Siemens make<br />
(India).<br />
1.4.2 Construction:<br />
The main rectifier comprises <strong>of</strong> two identical cubicles, the dimensions <strong>of</strong> which<br />
are 1030 x 1700 x 620 mm each. Each cubicle houses the diodes, the fan, signal and main<br />
fuses, DC damping network, etc. Each cell is attached to an individual heat-sink by 4 bolts<br />
and 1 fixing plate. The heat sinks are mounted inside the cooling ducts. The cooling ducts<br />
<strong>of</strong> each bridge <strong>of</strong> the rectifier cubicle are arranged vertically.<br />
The lower part <strong>of</strong> the cubicle takes up the fan unit with one motor-driven axail-flow fan<br />
per rectifier bridge, the circuit breaker, and the monitoring relay.
The fan draws the air through the cooling ducts inside the rectifier cubicle. The exhaust<br />
air is forced into the underfloor space <strong>of</strong> the locomotive.<br />
The rectifier unit has been provided with fuses for protection against over loads. Suitable<br />
signaling and rectifier cubicle fuses are provided to give failure indication both at the driver's Desk.<br />
A damping system comprising <strong>of</strong> capacitors and resistors is installed on the dc side <strong>of</strong><br />
for each bridge. The D.C. damping system is arranged next to the fan on the right side <strong>of</strong> the<br />
cubicle towards the aisle <strong>of</strong> locomotive.<br />
1.4.3 Connection:<br />
Each cubicle contains a Greatz bridge connection ; each <strong>of</strong> 4 arms consists <strong>of</strong> 4 cells<br />
connected in parallel and 3 cells connected in series in case <strong>of</strong> AEG/NGEF/Ruttonsha make and 4<br />
cells in parallel and 4 cells in series in HIRECT Type.<br />
1.4.4 Emergency Operation<br />
In order to permit emergency operation upon failure <strong>of</strong> one or more blowers, a bridging<br />
or changeover switch HVSI is fitted in each cubicle which permits the following types <strong>of</strong> operation:<br />
0 -- Motors and relay switched <strong>of</strong>f.<br />
I -- Motors and relay in operation,<br />
II -- Motors switched <strong>of</strong>f, relay in operation.<br />
III -- Motors switched on, relay in operative.<br />
The following operating procedures are possible for emergency operation :<br />
At position II - One rectifier cubicle is out <strong>of</strong> operation, the supervision <strong>of</strong> the second<br />
cubicle is switched on. The supervision <strong>of</strong> the faulty cubicle is switched on for test purpose.<br />
At position III - Upon failure <strong>of</strong> a blower motor this can be switched <strong>of</strong>f alone via the<br />
switch DMVSI. The second blower can continue to be operated. The blower supervision <strong>of</strong> this<br />
cubicle is then inoperative. However, the second cubicle can be operated at full power.<br />
The switch HVSI has the following additional functions :<br />
and L2.<br />
At position 0 and II - De-energizing the relay Ql18 and switching <strong>of</strong>f the line contactors LI<br />
The position 0 it is thus possible to disconnect one rectifier completely while the<br />
supervision <strong>of</strong> the second rectifier remains in operation.<br />
At position 0 the rectifier cubicles may be tested.<br />
1.4.5 Protective devices<br />
Protection against hole storage effect :- An assembly consisting <strong>of</strong> a capacitor and a resistor<br />
connected in parallel across each cell.<br />
This arrangement prevents dangerous over voltages across the cells which occur upon<br />
cut<strong>of</strong>f <strong>of</strong> the upon commutation.<br />
At the same time, these RC-elements also damp dangerous over-voltage which may be<br />
transmitted to the rectifier via the transformer, should surges occur in the catenary.
1.4.6 Over-voltage<br />
Over -voltage in the catenary, which may be transmitted via the main transformer are<br />
reduced to a safe value by the following circuit elements :<br />
• RC-element each consisting <strong>of</strong> a resistor RCAPTFP <strong>of</strong> 15 ohms in series with a<br />
capacitor CAPTFP <strong>of</strong> 6.25 mfd.<br />
• cathode-drop lightning arrestor ETTFP with a spark over voltage <strong>of</strong> 5200 V.<br />
• capacitors CAPTFP on the secondary winding <strong>of</strong> the main transformer with an<br />
assembly <strong>of</strong> 12 capacitors 0.5 mfd each with centre point earthed. These<br />
capacitors serve to discharge to earth any over-voltage transmitted capacitively.<br />
Further protection <strong>of</strong> the cells is obtained by the D.C. damping system for each bridge.<br />
1.4.7 Maintenance <strong>of</strong> Rectifier<br />
The maintenance <strong>of</strong> the rectifier is limited to an inspection every three months to check<br />
whether the cells are screwed tightly into position.<br />
Any dirt which may have accumulated in the rectifier must be removed by using a rag<br />
and brush. It should be specially observed that the protecting cover <strong>of</strong> each cell is always clean. If<br />
a protecting cover becomes brittle or is no longer tightly fitted to the cell casing, this cap must be<br />
replaced.<br />
Prior to replacing a cell, the contact faces <strong>of</strong> the heat-sink and the cell, as well as<br />
electrical connection angle are to be cleaned carefully. A thin coat <strong>of</strong> special grease ISOFLEX 18<br />
spez, AL 10 STL should then be applied to the base <strong>of</strong> the diode. Subsequently, an adequate<br />
quantity <strong>of</strong> the special paste should be appliance more to the base <strong>of</strong> the diode. The quantity <strong>of</strong><br />
the grease should be so ample that a small quantity emerges after the diode has been screwed<br />
on. The emerged grease should be removed with a clean dry rag.<br />
The cell should be mounted on the heat sink slightly turning it so that the ISOFLEX<br />
paste is evenly distributed and any air pockets are prevented.<br />
The cell is fixed by means <strong>of</strong> a fixing plate and 4 bolts. The fixing plate is to be tightened<br />
crosswise by socket head bolts M6 X 25, evenly by means <strong>of</strong> a torque wrench at a torque <strong>of</strong> 12 to<br />
18 KN for NGEF, 15KN for Usha and 14 to 18 KN for third. The threaded portion <strong>of</strong> the bolts<br />
should be slightly greased with the ISOFLEX paste.<br />
It should be specially observed that , when electrical contacts are loosened, the contact<br />
surfaces are cleaned and also coated with the ISOFLEX paste prior tightening the bolts. All<br />
insulating parts must be carefully protected from the ISOFLEX paste, as otherwise, electrical flashover<br />
may occur. Any cell in the rectifier must be replaced by a cell with same type designation.<br />
The last two numbers <strong>of</strong> the type designation, denote the forward voltage group <strong>of</strong> a cell.<br />
This forward voltage group should be equal in a rectifier bridge to ensure proper current<br />
distribution.<br />
The letter M denotes the reverse voltage class <strong>of</strong> a cell. Any cells with a lower reverse<br />
voltage must not be exchanged, but those cells with a higher reverse voltage class, for instance,<br />
marked by the letters "N" or "O" or "P" can be exchanged.
2. LOCOMOTIVE BOGIES<br />
2.1 INTRODUCTION<br />
Bogies in locomotive are provided to permit long length <strong>of</strong> locomotive body to negotiate<br />
the curves. A small length <strong>of</strong> bogie is desirable. The length <strong>of</strong> bogie is decided by the distance<br />
between the centre <strong>of</strong> extreme wheels <strong>of</strong> a bogie is known as bogie wheel base. Bogie wheel<br />
base shall be well proportioned to permit the bogie negotiating the curve and also prevent tipping<br />
and jerking. The locomotive has two or more bogies on which the body is mounted. The distance<br />
between the centres <strong>of</strong> extreme wheel is known as the total wheel base.<br />
2.1 BOGIE CLASSIFICATION<br />
Bogies are classified based on<br />
• No <strong>of</strong> axles<br />
• Type <strong>of</strong> axle drive<br />
The type <strong>of</strong> axle drive and no. <strong>of</strong> axles in a bogie is also called the wheel arrangement,<br />
Wheel arrangements are classified as B, Bo, Co.<br />
B — Two axles Axles mechanically coupled<br />
Bo — Two axles Axles independently driven<br />
Co — Three axles Axles independently driven<br />
Locomotive always have two or more bogies. So the wheel arrangement <strong>of</strong> the<br />
locomotive is designated as B-B, Bo-Bo or Co-Co.<br />
2.2 WHEEL ARRANGEMENT OF LOCOMOTIVES<br />
Different type <strong>of</strong> wheel arrangement is available on existing fleet <strong>of</strong> <strong>Indian</strong> Railway<br />
Locomotives are as under:<br />
WHEEL ARRANGEMENT<br />
B - B<br />
Bo – Bo<br />
Co-Co<br />
Bo-Bo-Bo<br />
LOCOMOTIVE TYPE<br />
WAG/1,WAG/2,WAG/3,WAG/4,YAM/1<br />
WAM/1, WAM/2, W AM/3, WAP/5<br />
WAM/4, WAG/5, WAG/6C<br />
WCAM/l,WAG/7-9<br />
WCG/2, WAP/1-3, WAP/4-7<br />
WAG/6A, WAG/6 B
2.3 BOGIE COMPONENTS<br />
Bogie <strong>of</strong> a locomotive is an assembly <strong>of</strong> following components.<br />
1. Bogie frame<br />
2. Wheels<br />
3. Axles<br />
4. Springs<br />
5. Axles boxes<br />
6. Supports for traction motors<br />
7. Supports for brake rigging and brake cylinder<br />
8. Friction dampers/Snubbers.<br />
2.4 CO-CO TRIMOUNT BOGIE<br />
Majority <strong>of</strong> the locomotives in <strong>Indian</strong> <strong>Railways</strong> is provided with this type <strong>of</strong> bogie. The<br />
bogie consists <strong>of</strong> single piece cast steel bogie frame carrying the centre pivot in the cross member<br />
located towards the end <strong>of</strong> the locomotive. Centre pivot carries 60% <strong>of</strong> vertical load, receives and<br />
transmits tractive and braking forces. The other 40% <strong>of</strong> the vertical load is taken by the side<br />
bearers. The side bearers do not receive or transmit tractive and braking forces. The frame is<br />
supported by four sets <strong>of</strong> double equalizers extending from the end axles to the centre axle. Full<br />
equalization is obtained by suitably positioning the springs and controlling their working height.<br />
The weight <strong>of</strong> the locomotive body is transferred to the bogie at centre pivot and two load bearers<br />
to form a three point support. This type <strong>of</strong> bogie is known as trimount bogie.<br />
The wheel base <strong>of</strong> trimount bogie is relatively small. The necessity for supporting two<br />
motors from one transon and holding the overall length <strong>of</strong> bogie to minimum results in unequal<br />
wheel spacing as shown in fig. 2.4.
Fig. 2.4. Co-Co Trimount Bogie<br />
2.5 SUSPENSIONS<br />
Suspensions in a bogie are provided to reduce the vibrations. The vibrations are picked<br />
up by the wheel which is mounted on railway track which itself is shaking up and down due to<br />
irregularities in the surface. The suspension system also balances the vertical loads between the<br />
wheels and provides passenger comfort by reducing vibrations in the vehicle body.<br />
The suspension between the axle and the bogie frame constitutes the primary suspension. The<br />
suspension between the bogie frame and the vehicle body is called secondary suspension.
Fig. 2.5. Primary and secondary suspension<br />
Co-Co trimount bogie <strong>of</strong> WAM4 and WAGS are provided with only primary suspension,<br />
consisting <strong>of</strong> 4 groups <strong>of</strong> helical coil springs. Each group <strong>of</strong> springs consist <strong>of</strong> two nests <strong>of</strong> one<br />
outer and one inner coil.<br />
To prevent uncontrolled bouncing effect <strong>of</strong> locomotive body, supported on<br />
helical coil spring, damper is provided as a resisting force. Types <strong>of</strong> dampers are<br />
• Friction damper<br />
• Hydraulic damper<br />
In trimount bogie friction damper or snubber is provided on four <strong>of</strong> the inner coils <strong>of</strong> each<br />
bogie. Friction dampers provide vertical damping by force <strong>of</strong> friction between two co-axial<br />
cylinders.<br />
2.6 FLEXICOIL BOGIE<br />
It is seen from the oscillation trials that the speed potential <strong>of</strong> Co-Co trimount bogie is<br />
limited because <strong>of</strong> single stage suspension and absence <strong>of</strong> lateral flexibility. Flexicoil bogies have<br />
superior riding qualities compared to Co-Co trimount bogies. In flexicoil design, the bogie bolster<br />
(on which the body rests) is resting on heavy coil springs and floats independent <strong>of</strong> the bogie<br />
frame. The bolster springs provide vertical cushioning and also flex laterally, permitting lateral -<br />
movements <strong>of</strong> the bolster. The fully floating frame eliminates the need <strong>of</strong> equaliser bar.<br />
This bogie is fabricated and has both primary and secondary suspension <strong>of</strong> helical<br />
spring. To provide damping in vertical and transverse mode two friction dampers are provided<br />
between the bolster and the bogie frame (in secondary suspension).<br />
These bogies known as Mark I is provided in WAP1 locomotives. The general<br />
arrangement drawing is given in fig.2.6.
2.7 HIGH SPEED BOGIES MODIFIED<br />
For achieving higher speed, the flexicoil bogies are further modified and provided with 4<br />
vertical hydraulic dampers in the secondary suspension and 6 friction dampers in primary<br />
suspension in each bogie (2 per axle). 2 hydraulic dampers per bogie is fitted laterally<br />
between the body and bogie frame to provide damping in the transverse mode. This<br />
improved bogie is known as flexicoil bogie Mark II and is provided in WAP3 locomotives. The<br />
general arrangement <strong>of</strong> the bogie is shown in Fig. 2.7<br />
2.8 BOGIES OF WAG6A<br />
This locomotive is equipped with three fabricated bogies in a Bo-Bo-Bo arrangement.<br />
Bogie No. l and 3 are identical. The intermediate bogie No.2 is specially designed to allow lateral<br />
displacement in the curve.
2.8 BOGIE OF WAG/7<br />
This is a 3 axle type bolster less bogie with two stage suspension, floating pivot and unidirectional<br />
arrangement <strong>of</strong> axle hung nose suspended traction motor. Bogie frame is <strong>of</strong> straight and fabricated<br />
box type construction with three transoms to carry nose suspension. The general arrangement <strong>of</strong><br />
bogie is shown in Fig.1<br />
The locomotive body weight is supported on bogie frame through four rubber side bearer directly<br />
mounted on bogie side beams. Shim have been provided below outer side bearer to distribute load<br />
on side bearers in a 60 : 40 ratio, 60% <strong>of</strong> the load being supported on side bearers adjusted to<br />
prevent to center pivot and 40% <strong>of</strong> the load at remaining two side bearers. Centre pivot does not<br />
take any vertical load and is used only for transfer <strong>of</strong> traction and braking forces.<br />
The bogie frame in turn is supported on axle through helical spring mounted on equilser beam The<br />
equilising mechanism consists <strong>of</strong> equilsers hung directly on end axle boxes and supported on<br />
middle axle box through a link and compensating beam. The equilising mechanism enables<br />
achievement <strong>of</strong> equal axle loads on uneven track and reduces weight transfer at start.
3. POWER TRANSMISSION & DRIVES<br />
3.0 TYPES OF DRIVES<br />
Arrangement <strong>of</strong> transmitting torque produced by traction motor to axle/wheel is<br />
known as drive.<br />
3.1 DRIVE LOCOMOTIVES<br />
Single Reduction gearing<br />
WAM/4, WAG/5, WCAM/l, WAP/l-3, WCG/2,<br />
WAG/6C,WAG/7,WAG/9,WAP/4,WAP/5, WAP/7<br />
Jacquemin Drive<br />
Quill Drive<br />
WN Coupling drive<br />
Rotor Hallow Shaft<br />
WAM/1, WAG/1,3,4.<br />
WAG/2<br />
WAM/6B, YAM<br />
WAG/6A.<br />
3.2 SINGLE REDUCTION GEAR DRIVE<br />
In this type <strong>of</strong> drive, pinion mounted on traction motor shaft, directly drives the main<br />
gear, which mounted on the axle, torque from motor pinion is transmitted through the main gear.<br />
3.3 JACQUEMIN DRIVE<br />
Torque is transmitted from traction motor pinion to elastic gear, Elastic gear to<br />
intermediate pinion Intermediate pinion to Intermediate gear wheel Intermediate gear wheel to<br />
Main gear<br />
Main gear is mounted on bearing, which is supported by gear case. Main gear is<br />
mechanically connected to cardan shaft (hollow shaft). Torque from main gear is transmitted to<br />
cardan shaft, and cardan ring, which is mechanically coupled to wheel by resilient arrangement. In<br />
this case one motor drives two wheel. This drive permits power transmission from the cog wheel<br />
(main gear) to the axle regardless <strong>of</strong> the vertical up and down movements <strong>of</strong> the axles due to<br />
springing.<br />
Transmission in Bo-Bo type wheel arrangement Jacquemin drives is <strong>Traction</strong> motor<br />
pinion to Intermediate gear Intermediate gear to main gear/main cog wheel Main cog wheel to<br />
cardan ring/driving ring driving ring to hollow shaft Hollow shaft other end driving ring Driving ring<br />
to wheel.<br />
Driving ring/ cardan ring is mechanically connected to wheel on the opposite side <strong>of</strong><br />
main gear through silent block articulation (this is elastic rubber bushes). Jacquemin transmission<br />
is designed for a tractive effort <strong>of</strong> 15t per bogie.
Fig. 1. Single Reduction Gear Drive<br />
3.4 QUILL DRIVE<br />
This drive consist <strong>of</strong> the traction motor pinion, intermediate gear and main gear. The<br />
main gear wheel mounted on two taper roller bearings and is coupled flexibly to a hollow shaft<br />
surrounding the axle through ten pieces <strong>of</strong> cylindrical quill rubber. This arrangement is capable <strong>of</strong><br />
absorbing the relative motion between axle and gear wheel.<br />
3.5 WN COUPLING DRIVE<br />
WN (Westinghouse Nippon) coupling consist <strong>of</strong> two hubs or pinions with external gear<br />
teeth which engage ring gears with internal teeth in each section <strong>of</strong> a two piece sleeve housing<br />
bolted together as a single unit. Sides and top <strong>of</strong> external teeth are crowned i.e rounded. The<br />
internal teeth are straight sided without crown. The assembly is totally enclosed by means <strong>of</strong><br />
rubber seals each lubricated. The driving pinion in the gear box is mounted on roller bearings and<br />
drives the main gear wheel. WN coupling permits. ±17 mm vertical and. . ±12 mm horizontal<br />
misalignment.<br />
3.6 ROTOR HOLLOW SHAFT DRIVE<br />
The drive/transmission consist <strong>of</strong> a torsion shaft passing through the centre <strong>of</strong> the hollow
otor One end <strong>of</strong> the torsion shaft is connected to the hollow rotor shaft via a gear coupling. The<br />
couplings in the transmission take up the various relative movements between the motor and gear<br />
unit due to the action <strong>of</strong> the bogie springs and the movements <strong>of</strong> the locomotive axle due to<br />
irregularities in the track.<br />
The axial clearance <strong>of</strong> the gear coupling allows the locomotive axle to make laterally<br />
relative to the motor. The torsional resilience <strong>of</strong> the shaft and rubber coupling compensate for any<br />
pulsation <strong>of</strong> the rotor torque.<br />
3.7 ADVANTAGES OF DRIVES<br />
3.7.1 JACQUEMIN DRIVE<br />
Power transmission from the cog-wheel to axle regardless <strong>of</strong> the vertical up and down<br />
movements <strong>of</strong> axle due to springing.<br />
3.7.2 QUILL DRIVE<br />
wheel.<br />
Quill drive is capable <strong>of</strong> absorbing the relative motion between the axle and the gear<br />
3.7.3 WN COUPLING<br />
WN Coupling permits mis-alignment<br />
Vertical ±17 mm.<br />
Horizontal ±12 mm.<br />
3.7.4 HOLLOW ROTOR SHAFT<br />
Tooth coupling for motor with hollow rotor design permits large axial movements and<br />
angular displacements. Rubber coupling absorbs angular and axial movements as well as<br />
simultaneously damping the torque pulsation.
FIG.3.6 ROTOR HOLLOW SHAFT DRIVE
4. WHEELS<br />
4.0 INTRODUCTION<br />
Some locos are provided with renewable steel tyres and have tyres as per specification<br />
IRS-R15-64-oil quenched with tensile strength <strong>of</strong> 100-110 kg/mm². Other locos are provided with<br />
solid wheel disc conforming to specifications IRS M2-65 and IS 1030-1962.<br />
After assembly wheels are inspected for diameter and pr<strong>of</strong>ile.<br />
4.1 DIAMETER<br />
The diameter <strong>of</strong> new wheel disc <strong>of</strong> WAG5, WAM4, WAP type locomotives is<br />
1090mm. The condemning diameter is 1016mm. In a locomotive following maximum<br />
variations are permitted in diameter <strong>of</strong> two wheels:<br />
New In service<br />
a) On the same axle 0.5 mm 1.5 mm<br />
b) On two axles <strong>of</strong> same bogie 2.0 mm 5.0 mm<br />
c) On two axles <strong>of</strong> different bogies <strong>of</strong> same loco 15.0 mm 20.0 mm<br />
New<br />
In service<br />
4.2: PROFILE (Ref. Fig 4.2)<br />
Variation in pr<strong>of</strong>ile <strong>of</strong> the wheel takes place due to root wear and flange wear. Both<br />
these wear is checked with condemning gauge. The permissible maximum clearance from the<br />
gauge is<br />
Root wear (checked at position Y)<br />
6 mm<br />
Flange wear (checked at position X)<br />
3 mm
5. POWER CONTROL AND<br />
AUXILIARY CIRCUIT<br />
(WAG5 CLASS OF LOCOMOTIVE)<br />
5.1 POWER CIRCUIT EQUIPMENT<br />
5.1.1 Ro<strong>of</strong>- equipments (Ref. fig.5.1.1)<br />
The HT current for feeding the locomotive is taken from the catenary line by means <strong>of</strong><br />
pantographs.<br />
PT2.<br />
The locomotive is equipped with two pneumatically controlled pantographs PT1 and<br />
Each <strong>of</strong> these two pantographs can be put out <strong>of</strong> operation and earthed by means <strong>of</strong> a<br />
hand-operated ro<strong>of</strong> bar HPT1 and HPT2.<br />
For ensuring safety <strong>of</strong> the operators during the maintenance work, to be carried out in<br />
the locomotive, a hand-operated earthing switch HOM is provided which makes it possible to earth<br />
simultaneously the entire ro<strong>of</strong> line and the HV input terminal <strong>of</strong> the locomotive after lowering the<br />
pantographs. When earthed, the earthing switch HOM cuts <strong>of</strong>f the compressed air supply to the<br />
pantographs, locks the electric control handle <strong>of</strong> the pantographs, release the keys in the key box<br />
for opening the HV compartment and the ladder leading to the ro<strong>of</strong>.<br />
On the contrary, in its "Normal" position (not earthed) the earthing switch HOM makes it<br />
possible to feed the pantographs with compressed air, releases the electric control handle <strong>of</strong> the<br />
pantographs, locks the interlocking keys <strong>of</strong> HT compartment doors and ladder in the key box. The<br />
protection <strong>of</strong> the locomotive against surge voltage is secured by means <strong>of</strong> two ro<strong>of</strong> surge arresters<br />
with spark gaps ET1 (mounted on a support insulator <strong>of</strong> the HT Ro<strong>of</strong> Bars) and ET2 (mounted on<br />
the HT input terminal <strong>of</strong> the locomotive). The compressed air operated high voltage circuit breaker<br />
DJ makes it possible, when closed, to feed the main transformer winding TFWR and thereby the<br />
windings for the auxiliary circuits TFWA. When tripping out, the circuit breaker DJ switches <strong>of</strong>f the<br />
feed to the main transformer and therefore also all locomotive circuits except the control circuits<br />
fed by the battery (for control <strong>of</strong> pantographs, high voltage circuit breaker, traction control circuits,<br />
running and braking control circuits, signaling and lighting circuits).<br />
5.1.2 Voltage regulating equipment<br />
The main transformer comprises <strong>of</strong> an auto-transformer with 32 taps (TFWR) and a<br />
step-down transformer (TFP) with two separate secondaries.<br />
The primary <strong>of</strong> the step-down transformer is connected to one <strong>of</strong> the 32 taps <strong>of</strong> the auto<br />
transformer by means <strong>of</strong> the 32 step tap changer GR, which is driven by a pneumatic servo-motor.<br />
The passage from one tap <strong>of</strong> the transformer to another takes place on load.<br />
The main transformer comprises moreover <strong>of</strong> an auxiliary winding (TFWA) for feeding<br />
the auxiliary circuits. The circuits for auxiliaries are connected to 380 V±22.5% V AC supply from<br />
terminal al – a0 <strong>of</strong> the tertiary winding <strong>of</strong> main transformer. The circuits are protected by capacitors<br />
CAPTFWA 1-2 against over voltages, and by 2 RC networks.
The secondary windings <strong>of</strong> the step-down transformer TFP (a3 - a4, a5 - a6) are<br />
protected against excess voltage by means <strong>of</strong> surge arrestors ETTFP 1-2, condensers CAPTFP<br />
and RC networks for each <strong>of</strong> the two secondaries.<br />
5.1.3 Silicon Rectifiers<br />
Conversation <strong>of</strong> alternating current supplied by the secondary (a3 - a4, a5 - a6) windings<br />
<strong>of</strong> the main transformer into direct current takes place by means <strong>of</strong> two silicon rectifiers.<br />
The undulation <strong>of</strong> the current thus rectified is reduced to a value acceptable for the<br />
traction motors by means <strong>of</strong> two smoothing reactors (SL) to two separate groups <strong>of</strong> three traction<br />
motors. In case <strong>of</strong> any one silicon rectifier is defective can be cut<strong>of</strong>f.<br />
5.1.4 <strong>Traction</strong> motor equipment<br />
The traction motor double reverser Jl-2, is pneumatically controlled and connects<br />
the field windings <strong>of</strong> the motors in such a way that these carry current in one direction or<br />
in the other thus enabling the locomotive to run in either directions.
Permanent field weakening resistance RPS 1-6 in parallel with the field windings <strong>of</strong><br />
motors are used to prevent the ripple components <strong>of</strong> the current from passing into the field<br />
windings.<br />
The traction/braking switch CTF 1-2 with pneumatic control connects the power circuits<br />
<strong>of</strong> motors for traction or braking.<br />
In traction position all the 6 motors Ml to M6 are supplied by the two silicon rectifiers in<br />
two groups <strong>of</strong> 3 motors each connected in parallel through contactors L-l to L6.<br />
<strong>Traction</strong> motors are connected in parallel, each rectifier unit catering to three motors.<br />
For electrical braking, the motors are disconnected from the silicon rectifiers and the<br />
armatures are connected to the braking resistances by means <strong>of</strong> the traction braking switch CTF<br />
1-2 . Braking resistances are cooled by blowers MVRF. The field windings <strong>of</strong> all the traction motors<br />
are connected in series and fed by the braking excitation transformer ATFEX and RSI1.<br />
5.2 THE PROTECTION RELAYS<br />
5.2.1 HIGH VOLTAGE OVERLOAD RELAY (QLM)<br />
The relay QLM is fed by means <strong>of</strong> the current transformer TFILM (250/5 A) which<br />
causes the high voltage circuit breaker to trip out, if the current taken in by the main transformer<br />
exceed the setting value <strong>of</strong> the relay (300 A).<br />
5.2.2 OVERLOAD RELAYS FOR SILICON RECTIFIERS (QRSI-1 & QRSI-2)<br />
The relays QRSI 1-2 are fed by means <strong>of</strong> the rectifier current transformer RSILM-1 and<br />
2 (4000/5 A) which cause the high voltage circuit breaker to trip, <strong>of</strong> the current taken in by the<br />
rectifiers exceeds the setting value <strong>of</strong> the relays (3600 A).<br />
5.2.3 BRAKING EXCITATION OVERLOAD RELAY (QE)<br />
The relay QE is fed by means <strong>of</strong> the excitation current transformer ELM (1000/5A) which causes<br />
the braking excitation contactor C-145 to trip out, if the current taken by the excitation winding <strong>of</strong><br />
the motors exceed the setting value <strong>of</strong> the relay (900 A).<br />
5.2.4 BRAKING OVERLOAD RELAY (QF-1 & QF-2)<br />
The relays <strong>of</strong> QF 1-2 are connected to the shunts SHF 1-2, which cause the braking<br />
excitation contactors C-145 to trip out, if the current taken by braking resistance RF-1 & RF-<br />
2 exceeds the setting value <strong>of</strong> the relays (700 A).<br />
5.2.5 SLIPPING DEVICE DIFFERENTIAL RELAY (QD-1 & QD-2)<br />
Current differential type <strong>of</strong> wheel slip relays are provided. When the current difference is<br />
125 A between motors 1 and 3 and motors 4 and 6, the relay operates. In case <strong>of</strong> slipping, it feeds<br />
relay Q-48, thereby energizing sanding electro-valves VESA and sand is applied to corresponding
wheels. Relay Q-51 is also energized causing auto regression <strong>of</strong> tap changer till the slipping stops.<br />
5.2.6 MAIN CIRCUITS EARTHING RELAY (QOP 1-2)<br />
In case <strong>of</strong> failure <strong>of</strong> insulation <strong>of</strong> traction power circuit to earth, the battery supply available to the<br />
relay trips the relay through the earth and it turn opens the HV circuit breaker DJ.<br />
The switch HQOP 1-2 makes it possible to isolate the relay QOP 1 or 2 and replaces it<br />
through a resistance RQOP in order to limit the fault current. With HQOP in OFF it is possible to<br />
switch again the circuit breaker DJ in order to bring the locomotive to the shed.<br />
5.2.7 TRACTION MOTOR OVER VOLTAGE RELAY (Q20)<br />
Relay Q20 which is connected via resistance RQ20 across rectifier output causes<br />
buzzer SON 1-2 to work, if voltage exceeds 865 V. When voltage falls to 740 V, buzzer stops<br />
working.<br />
5.2.8 NO VOLTAGE RELAY (Q30)<br />
The relay Q30 drops out if the single phase auxiliary winding voltage drops below 215<br />
volts. Its contacts switch <strong>of</strong>f relay Q44, thereby tripping DJ. Relay Q30 is switched on directly via<br />
the contacts <strong>of</strong> the relay Q45 and is fed via resistor RQ30 after the relay Q45 opens/ drops.<br />
5.2.9 ARNO STARTING RELAY (QCVAR)<br />
Relay QCVAR has been put across 'W' phase and neutral <strong>of</strong> Arno to ensure its starting.<br />
This cuts out Arno starting contactor Cl18. This is English Electric Relay. It picks up at 155-160<br />
volts AC.<br />
5.2.10 BATTERY CHARGER SIGNALING RELAY (QV-61)<br />
This relay which is provided across the battery charger CHBA, indicates the working <strong>of</strong><br />
the charger. This relay is English Electric make and operates at a voltage <strong>of</strong> 68-136 V. D.C.<br />
5.3 MEASURING INSTRUMENTS IN POWER CIRCUIT<br />
5.3.1 TRACTION MOTOR VOLTMETER (U 1-2)<br />
The meter indicates the voltage applied to traction motor armature during traction.<br />
During rheostatic braking also the generating voltage can be read through the meter. It is a moving<br />
iron type having range <strong>of</strong> 0-800 V.<br />
5.3.2 TRACTION MOTOR AMMETER (A 1/1, Al/2 & A 2/1, A2/2)<br />
These ammeters are provided to read the traction motor currents during service. These<br />
are moving coil type instruments having a range <strong>of</strong> 1000-0-1500 Amps. Braking currents can also<br />
be read on 0-1000 A range.<br />
5.4 AUXILIARY EQUIPMENTS (Ref. fig. 5.4.1)
5.4.1 Arno converter (CVAR)<br />
The single phase supply <strong>of</strong> 350 volts AC is fed direct to the 'U' and 'V’ phases <strong>of</strong> the<br />
Arno converter. Since the Arno converter is connected to single phase supply; no starting torque is<br />
developed.<br />
For starting the 'Arno' a split phase starting method is employed. The ‘W’ phase winding<br />
is connected to the supply ‘U’ phase through a starting resistor R118 and starting contactor C118<br />
for a short duration to start the Arno. Thus unbalanced three phase voltage is impressed to each<br />
phase winding <strong>of</strong> Arno converter and the starting torque is developed. The Arno convenor picks up<br />
speed within five seconds. After the Arno has gained sufficient speed, the ‘W’ phase is opened<br />
from the starting circuit by starting contactor Cl18. If the starting phase fails to open out within 5<br />
seconds after Arno has gained its rated speed there will be excessive vibration <strong>of</strong> the Arno and<br />
overheating <strong>of</strong> the Arno starting resistor. An interlock <strong>of</strong> Arno starting resistance cut out relay<br />
QCVAR opens Cl18 coil circuit, to protect against this.<br />
The neutral point 'O' <strong>of</strong> the Arno is connected to a earth fault relay QOA, which performs<br />
the same function as the relay QOP, in the power circuit. The relay QOA trips the circuit breaker<br />
DJ <strong>of</strong> the locomotive in the even <strong>of</strong> an earth fault in the auxiliary circuit. The switch HQOA and<br />
RQOA perform the same functions as the switch HQOP and resistor RQOP in the power circuit. In<br />
addition, the relay QOA is permanently shunted by a resistance RPQOA.<br />
The Arno converts the single phase input into three phase output as 380 V ± 22.5% The<br />
ratio <strong>of</strong> negative sequence voltage to positive sequence voltage is within 5%. The three phase<br />
output <strong>of</strong> the Arno converter is connected to the auxiliary motors.<br />
5.4.2 Silicon Rectifier Blower Motors (MVSI 1-2)<br />
Each rectifier cubicle is provided with one blower which is driven by the motors MVSI. The<br />
motors are rated for 380V ±22.5% 3 phase, 50 cycles. These motors <strong>of</strong> rectifier cubicle are<br />
switched on and <strong>of</strong>f by means <strong>of</strong> switch HVSI 1-2. Each motor is protected by a motor protection<br />
switch DMVSI. The cooling <strong>of</strong> the rectifiers is monitored by the air flow relay contact <strong>of</strong> QVSI 1-2<br />
and by the motor protection switch DMVSI. The contact <strong>of</strong> QVSI and the auxiliary contacts <strong>of</strong> the<br />
motor protection switch DMVSI are connected in series and lie in the energising circuit <strong>of</strong> the relay<br />
Q44.<br />
During normal operation these contactor are closed. On failure <strong>of</strong> a blower the appropriate<br />
air flow relay QVSI operates (contacts open). If the failure <strong>of</strong> the blower was caused by<br />
overloading <strong>of</strong> the motor, contacts open. In all cases the energising circuit <strong>of</strong> the relay Q44 is<br />
opened, thereby tripping the main circuit breaker DJ <strong>of</strong> the locomotive. The interlocks <strong>of</strong> QVSI in<br />
Q44 circuit can be by-passed by HVSI in case equipment QVSI becomes defective and the<br />
blowers are in good working condition.<br />
Following are positions <strong>of</strong> HVSI switch<br />
Position 0 - Functional relay QVSI, DMVSI & MVSI eliminated.<br />
Position I - QVSI, DMVSI and MVSI in service.<br />
Position II - QVSI, DMVSI in service MVSI eliminated.<br />
Position III - DMVSI and MVSI in service QVSI eliminated.<br />
5.4.3 Voltmeters (UA-1 and UA-2)
The voltmeter UA-1, UA-2 are fitted in the control desks and have double scale on which<br />
the auxiliary voltage and the catenary voltage can be read.<br />
5.4.4 Voltage stabilizer for headlight (RTPR)<br />
The circuit is protected by fuse CCRTPR. This is meant for maintaining constant voltage<br />
for the headlights <strong>of</strong> the locomotive to ensure that these provide a uniform level <strong>of</strong> illumination and<br />
also to protect the lamps from fusing. It also feeds 24 V supply to the measuring instruments<br />
through switch BL1LF and BL2LF. This is also provided with a 16 V tap for dimming the headlight.<br />
5.4.5 Selsyn Transformer (TFS)<br />
The transformer supplies 115 V AC supply to the system which transmit the position<br />
<strong>of</strong> the tap changer GR to the control desk for indication after stepping down 230 V AC<br />
supply.<br />
5.4.6 Static Battery Charger CHBA<br />
The static battery charger is fed from the supply <strong>of</strong> Arno converter. The unit comprises<br />
<strong>of</strong> a stepdown transformer, magnetic amplifier and rectification unit. The charger is able to give an<br />
output voltage <strong>of</strong> 110V DC and a load 20 Amps.<br />
5.5 TRACTION CONTROL CIRCUIT<br />
5.5.1 Compressed air for operation <strong>of</strong> pantographs and high voltage circuit breaker<br />
When the pressure in the auxiliary air reservoir and in the compressed air lines to the<br />
pantographs and the high voltage circuit breaker exceeds 5.5kg/cm² the pantographs may be<br />
raised and the high voltage circuit breaker can be closed.<br />
If the pressure lies below this value or drops while the pantographs are being raised it will<br />
be necessary to start up the auxiliary compressor set. This is done by closing the switch ZCPA.<br />
The pressure can be observed on the pressure gauge mounted above auxiliary<br />
reservoir for pantograph in AC1 cubicle in Cab1<br />
5.5.2 Operation <strong>of</strong> pantographs (Ref. fig. 5.5.2)<br />
The pantographs are operated by the pantograph selector switch ZPT1 or ZPT2 in the<br />
drivers desk. For this purpose the driver requires the operating key <strong>of</strong> the pantograph selector<br />
switch.<br />
The same operating key is required for unlocking the interlocking box BV and can be<br />
removed from this box only when the key for the high voltage compartment doors have been<br />
inserted and the ro<strong>of</strong> earthing switch HOM has been opened or brought to normal working<br />
position.<br />
Further, the operating key <strong>of</strong> the pantograph selector switch can be removed or fitted<br />
only in the zero position.<br />
The pantograph selector switches have the following positions.<br />
Position 0<br />
– The two solenoid valves VEPT1 & VEPT2 are switched <strong>of</strong>f the
pantographs 1 and 2 are lowered.<br />
Position 1 – The solenoid valve VEPT <strong>of</strong> the pantograph above the unoccupied<br />
cab is energised i.e. VEPT1 from cab2. The appropriate<br />
pantograph is raised.<br />
Position 1.2 – The two solenoid valves VEPT1 & VEPT2 are energised thereby<br />
raising both pantographs. This position is now isolated in the<br />
locos.<br />
Position 2 – The solenoid valve VEPT <strong>of</strong> the pantograph above the occupied<br />
cab is energised, i.e.VEPT2 from cab2. The appropriate<br />
pantograph is raised.<br />
5.5.3 Opening <strong>of</strong> high voltage circuit breaker (Ref. fig. 5.5.3)<br />
The high voltage circuit breaker DJ <strong>of</strong> the leading and trailing locomotives is tripped by<br />
opening the switch BL1DJ or BL2DJ.<br />
The high voltage circuit breaker DJ <strong>of</strong> the trailing locomotive can be tripped by opening<br />
the neutral section switch BL1SN or BL2SN in the leading locomotive remaining closed.<br />
Fuse CCPT protects the control circuit for pantograph and high voltage circuit breaker.<br />
With multiple unit operation the pantographs <strong>of</strong> the trailing locomotives are controlled via the<br />
neutral section switch BL1SN, BL2SN and the MU couplers. With multiple unit the pantographs<br />
selector switch ZPT on the trailing locomotives must be at position "O". The switch BLSN makes it<br />
possible to lower the pantographs <strong>of</strong> trailing locomotives when passing neutral section.<br />
5.5.3.1 Operation <strong>of</strong> high voltage circuit breaker<br />
The high voltage circuit breaker DJ is connected to compressed air supply which is<br />
controlled by the solenoid valve EFDJ. The breaker remains closed, as long as the holding<br />
solenoid valve MTDJ is energised. If the energising circuit <strong>of</strong> the holding solenoid valve MTDJ is<br />
interrupted, the main circuit breaker is tripped.<br />
5.5.3.2 Closing <strong>of</strong> high voltage circuit breaker<br />
Before the breaker can be closed the key <strong>of</strong> the BL switch box in cab1 or 2 must be<br />
inserted and turned to position 'ON'. This causes the auxiliary contacts BL1 or BL2 to be closed<br />
and unlocks the switch levers in the top row.<br />
DJ can be closed and opened in one <strong>of</strong> the following ways<br />
a) By use <strong>of</strong> switch BP2DJ located in TR panel. This switch is normally used only for<br />
trouble shooting. For closing with BP2DJ, BL1DJ or BL2DJ must be closed; ZPT<br />
should be closed; alternately BV interlock should be closed by putting HOM in<br />
earthed position.<br />
b) By use <strong>of</strong> switches BL1DJ and BL1RDJ located on the BL box. BL1DJ and ZPT<br />
should be closed and then BL1RDJ is pressed for closing DJ. BL1RDJ or BL2RDJ<br />
should be released as soon as green lamp LSCHBA extinguishes. Closing <strong>of</strong> DJ is<br />
signaled by extinction <strong>of</strong> red lamp LSDJ. The following switching operations then<br />
take place:
The relay Q45 closes provided that the auxiliary contact <strong>of</strong> the pantograph selector<br />
switch ZPT (pantograph raised) and the tap changer GR (contacts 43-44),in zero position are<br />
closed.<br />
The relay Q44 is switched on by contacts <strong>of</strong> the relay Q45, provided that the relay Q118<br />
has picked up (contacts closed) and the auxiliary contacts <strong>of</strong> the air motor for the tap changer<br />
ASMGR are closed (tap changer has not stopped between two notches). On closing or relay Q45<br />
and Q44, contactor coil Cl18 gets energised closing the Arno starting contactor and introducing the<br />
arno starting resistance Rl18. After these operations only EFDJ and MTDJ coils <strong>of</strong> the DJ will<br />
energise and close the DJ. If the pantographs <strong>of</strong> the leading locomotive are lowered thorough<br />
ZPT, the circuit breaker DJ <strong>of</strong> all locomotives coupled in multiple unit operation are tripped.<br />
5.5.4 ENFORCED OPENING OF DJ BY FAULTS<br />
Certain faults are followed by enforced tripping <strong>of</strong> the circuit breaker DJ on the<br />
locomotive on which the fault occurs. They are divided into three groups given below<br />
5.5.4.1 Instantaneous tripping follows in the event <strong>of</strong> any <strong>of</strong> the following faults<br />
• Upon overload on the high voltage side through tripping <strong>of</strong> overload relay QLM<br />
(contacts opened)<br />
• Upon overload <strong>of</strong> the traction circuits through overload relay QRSI1 or QRSI2<br />
(contacts opened)<br />
• Upon earth faults in traction circuits through earthing relay QOP1 or QOP2<br />
(contacts opened)<br />
• Upon earth faults in the auxiliary circuits through earthing relay QOA<br />
(contacts opened)<br />
• Upon pressure dropping in compressed air lines or in circuit breaker via pressure<br />
switched QPDJ (contacts opened)<br />
5.5.4.2 Tripping <strong>of</strong> DJ delayed by 0.6 seconds by relay Q44 follows in case <strong>of</strong> the<br />
following faults<br />
• Upon loss <strong>of</strong> 380 V auxiliary voltage through no-voltage relay Q30 (contacts<br />
opened)<br />
• Upon failure <strong>of</strong> one rectifier blower through contacts <strong>of</strong> relay QVSI1 or 2 or<br />
motor protection switched DMVSI 1-2 (contacts opened)<br />
breaker.<br />
Failures <strong>of</strong> any one blower <strong>of</strong> the two rectifier cubicles is sufficient to trip the main circuit<br />
To permit emergency operation <strong>of</strong> the locomotive with only one rectifier, the switch<br />
HVSI1 or HVSI2 is brought to position "O" to switch <strong>of</strong>f faulty rectifier and to bridge over the blower<br />
monitoring contacts QVSI and DMVSI <strong>of</strong> the faulty rectifier. The main circuit breaker can be<br />
reclosed now.<br />
• Upon opening <strong>of</strong> auxiliary contacts <strong>of</strong> air motor <strong>of</strong> the tap changer ASMGR if
the tap changer comes to a standstill between two notches.<br />
5.5.4.3 Tripping delayed by 5.6 seconds by relay Q-118.<br />
Relay Q118 drops out after delay <strong>of</strong> 5 seconds and opens engergised circuit breaker<br />
after a further delay <strong>of</strong> 0.6 seconds following any <strong>of</strong> the following faults:<br />
a) Upon failure <strong>of</strong> cooling system <strong>of</strong> traction motors or transformer oil coolers or<br />
smoothing reactor through protective relay QVMT1, QVMT2, QVRH and QVSL 1-<br />
2 as well as upon failure <strong>of</strong> the oil pump via protective relay QPH and Arno<br />
through relay QCVAR.<br />
The contacts <strong>of</strong> the protective relays are connected in series and are closed during<br />
normal operation.<br />
For closing the main circuit breaker DJ the relay Q-l18 must be energised. For this<br />
purpose the contacts <strong>of</strong> the protective relays are bridged over by the auxiliary contacts <strong>of</strong> the<br />
auxiliary contactors C105, C106, C107, GR's interlock and by a set <strong>of</strong> NC contacts <strong>of</strong> the relay<br />
Q44.<br />
The motors, particularly the large size, require several seconds for running up to full<br />
speed. However, since the relay Q118 drops out only after 5 seconds time delay, it remains pulled<br />
in until finally the contacts <strong>of</strong> the protective relays QVMT1, QVMT2, QVRH, QVSL 1-2, QPH<br />
and QCVAR reclose the circuit. During normal service the contacts <strong>of</strong> the protective relays are<br />
closed and the auxiliary contacts <strong>of</strong> the operating contactors and the contacts the relay Q44 are<br />
opened. Upon failure <strong>of</strong> a blower, the contacts <strong>of</strong> the associated protective relay open. This<br />
causes the relay Q118 to drop out after 5 seconds.<br />
By means <strong>of</strong> the associated switches HVMT1, HVMT2, HVRH, HVSL 1-2, HPH and<br />
HQCVAR, it is possible for the open contacts <strong>of</strong> the protective relay to be bridged over at switch<br />
position III or 0 <strong>of</strong> the programme switches, thereby permitting the main circuit breaker to be<br />
closed.<br />
The cooling <strong>of</strong> the traction motors and transformer oil cooler is monitored additionally by<br />
contacts <strong>of</strong> the traction motor blower motor contractors C105 and C106 and transformer oil cooler<br />
blower contactor C107. If operating contacts <strong>of</strong> C105, C106, and<br />
C107 are not closed the relay Q118 is switched <strong>of</strong>f by auxiliary contacts (73-74) <strong>of</strong> the tap changer<br />
GR as soon as the tap changer reaches 6th notch. The traction motors can be run without cooling<br />
till 5th notch <strong>of</strong> the tap changer GR.<br />
If the tap changer comes to a standstill at any particular notch while notching down with<br />
the master controller on "O" positions, relay Q46 is energised (contacts opened) thereby switching<br />
<strong>of</strong>f the relay Q118.<br />
position.<br />
The relay Q46 is constantly switched on and <strong>of</strong>f until the tap changer has reached zero<br />
5.5.4.4 Function test <strong>of</strong> high voltage circuit breaker with pantographs lowered (Ref.<br />
fig. 5.5.3)<br />
With the pantographs lowered the auxiliary contacts <strong>of</strong> the pantograph selector switch<br />
ZPT, which lie in the energising circuit <strong>of</strong> the relay Q45, are opened.<br />
The operating key <strong>of</strong> the pantograph selector switch should be inserted in the earthing
ox and turned by 90° to earthed position. This action closes the auxiliary contacts BV so as to<br />
bridge over the auxiliary contacts <strong>of</strong> the pantograph selector switch ZPT and the contacts <strong>of</strong> the<br />
relay Q44 in the operation circuit <strong>of</strong> the solenoid valves MTDJ <strong>of</strong> the HV circuit breaker.<br />
The circuit breaker DJ is closed as described under 5.5.3.2.<br />
5.6 CONTROL CIRCUIT OF TRACTION MOTOR DOUBLE REVERSERS AND<br />
TRACTION AND TRACTION/BRAKING SWITCHES (Ref. fig. 5.6.1)<br />
5.6.1 The order for operating the solenoid valves on the traction motor reversers J and<br />
<strong>Traction</strong>/Braking switches CTF is given via the reversing drum MPJ, the running braking drum MP<br />
<strong>of</strong> the master controller and the BL key Box.<br />
In the particular cab to be used for operation, BL key is inserted in the BL key switch<br />
box. Operation <strong>of</strong> this key supplies power to the running/braking drum MP via the associated set <strong>of</strong><br />
contacts BL.<br />
The reversing drum MPJ is operated only when the running/braking drum MP is in<br />
position "0" (mechanically interlocked). Both the traction motor double reverser J and the traction<br />
braking contactor CTF are changed over only at the zero position <strong>of</strong> the tap changer GR.<br />
Supervision takes place via the auxiliary contacts <strong>of</strong> GR 47-48, 49-50, 53-54 and 55-56.<br />
In the case <strong>of</strong> multiple unit operation all commands from leading locomotive are<br />
transmitted to the trailing locomotives via the MU couplers.<br />
The control circuit is protected by the fuse <strong>of</strong> CCPT.<br />
5.6.2 CONTROL CIRCUIT OF RELAY Q50 AND OF BRAKING EXCITATION CONTACTOR<br />
C145<br />
5.6.2.1 Operation in running position<br />
For energising the relay Q50 and for moving the tap changer in the up direction, the<br />
following conditions must be satisfied:<br />
a) The selected position (running) on the master controller MP must coincide with the<br />
corresponding operating position <strong>of</strong> the <strong>Traction</strong>/Braking switched CTF 1-2.<br />
Supervision takes place via the auxiliary contacts <strong>of</strong> reversers J1 & J2. Similarly<br />
supervision <strong>of</strong> reversers Jl & J2 is done through auxiliary contacts <strong>of</strong> CTF-1 and 2.<br />
b) Main circuit breaker DJ must be closed.<br />
c) Tap changer GR must be at position "0".<br />
5.6.2.2 Operation in braking position<br />
When changing over from running to braking operation the MP drum must be paused on<br />
position 'P' for a few seconds till the signal lamp LSR goes OFF.<br />
For energising the relay Q-50 the following conditions must be satisfied<br />
a) Condition as under 5,6.2,1<br />
b) The braking excitation contactor C145 must be closed<br />
c) The main circuit breaker DJ must be closed
d) The tap changer GR must be at position "zero". As soon as the position "zero" has<br />
been reached by GR all previously initiated switching operations are carried out.<br />
When the running braking drum MP is brought to braking position "+", the<br />
energizing <strong>of</strong> the "up" valve <strong>of</strong> the tap changer (SMGR-VE1) takes place and<br />
rheostatic braking is initiated.<br />
An immediate switching <strong>of</strong>f <strong>of</strong> the brake excitation contactor and the associated<br />
termination <strong>of</strong> the braking process results in the event <strong>of</strong> operation <strong>of</strong> the braking overload relay<br />
QF 1-2, or the braking excitation overload relay QE, or development <strong>of</strong> pressure in SWC.<br />
For multiple unit operation all control impulses for the operation <strong>of</strong> the electric brake as<br />
well as for the switching on and holding on <strong>of</strong> the relay Q-50 are transmitted to all locomotives<br />
concerned from leading loco.<br />
5.6.3 WEIGHT TRANSFER RELAY (QWC) (Ref. fig. 5.6.3)<br />
PC-8 type relay QWC is provided for electrical weight transfer compensation. By<br />
pressing switch ZQWC relay QWC can be energized. It is cut <strong>of</strong>f automatically after notch 15th.<br />
Economy resistance RQWC is introduced in circuit, after relay QWC is energized, switch should<br />
be returned to <strong>of</strong>f position when it is not required.<br />
5.7 CONTROL CIRCUIT OF LINE CONTACTORS (L-l TO L-6)<br />
5.7.1 Sequence <strong>of</strong> operation (Ref. fig. 5.7.1)<br />
For closing line contactors the following conditions must be satisfied<br />
a) The running braking drum <strong>of</strong> the master controller is at any <strong>of</strong> the running position<br />
except "0"<br />
b) The relay Q50 must be closed<br />
c) The tap changer GR must be on notch 1 or above<br />
When the programme switch HVSI1, HVMT1 are in position I or III, then Ll, L2, L3 can<br />
be closed at the following positions <strong>of</strong> HMCS1<br />
a) HMCS1 on 0 - Ll, L2, L3 closes.<br />
b) HMCS1 on 1 - Ll, opens, L2, L3 remain close.<br />
c) HMCS1 on 2 - L2, opens, -l, L3 close<br />
d) HMCS1 on 3 - L3, opens Ll, L2 close.<br />
5.7.2 CONTROL VIA MASTER CONTROLLER (Ref. fig 5.7.2)<br />
5.7.2.1 Function <strong>of</strong> tap changer moved in down direction<br />
The 'down' valve (SMGR-VE2) <strong>of</strong> air motor is energized at the master controller position<br />
'0' both for running and braking position.<br />
The following conditions must be satisfied:<br />
a) ZSMS must be at position 1
) Notch to notch relay Q52 must not be energized<br />
c) The valve ZSMGR must be at normal position.<br />
5.7.2.2 In case <strong>of</strong> auto regression <strong>of</strong> the tap changer GR the relay Q50 is de-energized. The<br />
'down' valve SMGR-VE2 is energized directly by passing BL and MP interlocks.<br />
5.7.2.3 Auto regression also takes place in the event <strong>of</strong> wheel slipping, the action takes place<br />
via line 700 and the closed contact <strong>of</strong> relay Q48. Relay Q48, is energized in the event <strong>of</strong> wheel<br />
slipping through relay QD. In such case slip protection relay Q51 is energized temporarily and<br />
gives supply to down valve SMGR-VE2 till the relay Q48 drops through relay QD after the arrest <strong>of</strong><br />
wheel slip.<br />
5.7.2.4 A down movement <strong>of</strong> the tap changer is interrupted automatically on reaching position<br />
“0” by interruption <strong>of</strong> the feed supply.<br />
5.7.2.5 The relay Q46 supervises the continued running <strong>of</strong> the air motor during regression with<br />
MP on position “0” and thus the return <strong>of</strong> the tap changer to zero.<br />
The following conditions must be satisfied for proper functioning <strong>of</strong> the relays<br />
a) The running braking drum MP must be at position "0"<br />
b) The tap changer must be on position other than zero<br />
c) The handle <strong>of</strong> the valve ZSMGR on the pneumatic control panel must be at the<br />
normal operating position.<br />
Should an air motor stop running with the tap changer away from the zero position and<br />
MP on position “0”, the relay Q46 remains energized and causes the relay Ql18 drop out and open<br />
DJ after 5 seconds,<br />
Any down or up movement <strong>of</strong> the tap changer can be stopped at any time by returning<br />
the master controller to position "N". The tap changer then remains at whatever position has been<br />
reached.<br />
5.7.3 CONTROL BY MASTER CONTROLLER – IMPULSE (+) OR (-)<br />
(Ref. fig. 5.7.2)<br />
The switch positions (+) or (-) are intended for notch by notch up or down movement <strong>of</strong><br />
the tap changer both for running and for braking operation.<br />
The switching sequences and inter relationship correspond to those described under<br />
5.7.2. In addition, the notch to notch relay Q52 goes into action, the feed lines 079 is energized at<br />
position (+) or (-).<br />
At all positions for up or down movement either the up or the down valve is energized.<br />
This energizing will be interrupted by contacts <strong>of</strong> the relay Q52 as soon as the air motor starts<br />
running. The relay Q52, is energized between notches via the contacts 7-8 ASMGR, this state<br />
being maintained via the self holding contacts in the line 079-087. The self holding circuit <strong>of</strong> Q52 is<br />
not cancelled until the master controller handle has been returned to position "N". This<br />
arrangement ensures that the tap changer always moves by only one notch at a time. The<br />
completion <strong>of</strong> the notch to notch movement is assured by the pneumatic control system.
5.7.3.1 Control <strong>of</strong> transformer tap changer air motor - Multiple Unit Operation.<br />
Synchronizing <strong>of</strong> air motor operation, as well as control impulses for running and braking<br />
a) Synchronizing relay Q49 on each <strong>of</strong> the locomotives must be in position when<br />
operating in multiple.<br />
b) The switch HBA on all the locomotives must be closed.<br />
c) The switch BL on the leading locomotive must be closed.<br />
d) The handle <strong>of</strong> the valve ZSMGR must be in the normal operating position in all<br />
locomotives.<br />
The circuit provides synchronization beyond notch 0 <strong>of</strong> the GR for notch by notch<br />
operation both in progression and regression.<br />
5.7.3.2 OPERATION AT POSITION (+) WITH RUNNING OR BRAKING OPERATION<br />
Provided the air motors <strong>of</strong> all coupled locomotives are in operation, the switching<br />
sequence <strong>of</strong> the supervision <strong>of</strong> synchronous up movement <strong>of</strong> the tap changer takes place as<br />
follows<br />
Energizing <strong>of</strong> synchronizing relay Q49 via control line 079 upon tap changer leaving a<br />
notch. Feeding <strong>of</strong> notch to notch relay Q52, via contacts <strong>of</strong> relay Q49 in the run <strong>of</strong> lines 211-079,<br />
as well as <strong>of</strong> auxiliary contacts 7-8 ASMGR which are closed between notches.<br />
Self holding contacts <strong>of</strong> notch to notch relay Q52 via its auxiliary contacts in the run <strong>of</strong><br />
lines 079-87, since relay Q46 is not energized. Tripping <strong>of</strong> relay Q49 owing to opening <strong>of</strong> contacts<br />
<strong>of</strong> notch to notch relay Q52.<br />
Tripping <strong>of</strong> relay Q52 upon tripping <strong>of</strong> relay Q49 by the opening <strong>of</strong> the Q49 contact in the<br />
run <strong>of</strong> line 211-079.<br />
The contacts 7-8 <strong>of</strong> the ASMGR which are closed between the notches are connected in<br />
parallel with the contact 211-079 <strong>of</strong> the relay Q49 in the energizing circuit <strong>of</strong> the notch to notch<br />
relay Q52.<br />
Should one or more air motors fail to operate or fail to follow the orders given by the<br />
position <strong>of</strong> the master controller MP, the air motors are locked.<br />
On the faulty machine or machines the relay Q49 remains energized. On all<br />
locomotives, however, on which the air motor could continue to run, the relay Q52 is held in via the<br />
control circuit couplers P and thus further upward notching operations cannot take place.<br />
The supervisory circuit for synchronous running does not function if one <strong>of</strong> the tap<br />
changers does not leave the zero position. In such a case the relay QV62 on the faulty locomotive<br />
remains energized.<br />
The feed circuit for the relay Q49 is thus opened. In such a case the lamp LSGR on the<br />
driver's control desk is not extinguished.<br />
follows:<br />
Further operation with faulty locomotives in multiple unit operation is then possible as<br />
The faulty locomotives must be switched <strong>of</strong>f on the battery side by opening the battery<br />
isolating switch HBA. The locomotive then runs like a trailer coach, merely passing on the control<br />
impulses.
The opening <strong>of</strong> the HBA switched causes the relay QV-62 to drop out. The lamp LSGR is<br />
extinguished.<br />
5.7.3.3 OPERATION AT POSITION (+) OR (-) WITH RUNNING OR BRAKING IN MULTIPLE -<br />
UNIT OPERATION<br />
When (+) or (-) command is given with the master controller MP the notch to notch relay<br />
Q52 is energized in all locomotives. The auxiliary contacts <strong>of</strong> this relay in the run <strong>of</strong> the line 080-<br />
081 prevent the synchronous running supervisory relay Q49 from being energized.<br />
If one <strong>of</strong> the air motors, does not follow the order, the relay Q49 on this faulty locomotive<br />
remains energized. The relay Q52 is held on the healthy locomotives too via the control coupler<br />
via the line run 211-085, thereby preventing further movement <strong>of</strong> the tap changer air motors.<br />
5.7.4.4 EMERGENCY STOP (ZERO POSITION OF MASTER CONTROLLER) WITH<br />
MULTIPLE UNIT OPERATION<br />
In this case the synchronous running supervisory control is cut out <strong>of</strong> action, since the<br />
zero position should be reached without interruption. The holding circuit - 87 for Q52 is interrupted<br />
by auxiliary contacts <strong>of</strong> Q46.<br />
Nevertheless, the relays Q49 and Q52 operate during the transition from notch to notch,<br />
since the energized relay Q46 itself switches on Q52 which, in turn, again switches <strong>of</strong>f Q49.<br />
However, the result <strong>of</strong> closing the Q46 auxiliary contact in the line run 087 (holding<br />
circuit) <strong>of</strong> the relay Q52 will be that, should an air motor stop before reaching the zero position,<br />
the main circuit breaker DJ will be tripped after approx.5.5sec. via Q46/Q118. The tripping<br />
<strong>of</strong> main circuit breakers on healthy locomotives will, however, be avoided.<br />
Since the return to zero during regression is not synchronized, it is necessary to avoid<br />
that the relay Q49 holds the remaining air motors via the multiple unit control lines as soon as the<br />
first tap changer <strong>of</strong> the coupled locomotives reached the zero position.<br />
For this purpose the contact <strong>of</strong> the auxiliary relay QV62 is inserted in the feed line <strong>of</strong><br />
Q49. When the particular tap changer reaches zero the relay QV62 picks up and interrupts the<br />
energizing circuit <strong>of</strong> Q49.<br />
5.7.5.5 ELECTRICAL AUXILIARY CONTROL OF TAP CHANGER<br />
In the case <strong>of</strong> faults affecting the issue <strong>of</strong> orders by the master controller, emergency<br />
electrical control (EEC) may be maintained with the aid <strong>of</strong> push buttons for notching up BPP and<br />
for notching down BPR.<br />
The following conditions must be satisfied for such operation:<br />
a) Switching on <strong>of</strong> lever in switch box (BL) provided in drivers cab.<br />
b) The master controller hand wheel must be at position "0" or "N".<br />
c) The programme switch ZSMS on the pneumatic control panel is changed over to<br />
position "0". A possible infeed via the master controller contacts is thus prevented<br />
while the lines 065 and 066 are energized.<br />
The push buttons BPP or BPR then act directly on the solenoid valves SMGR-VE1 and
VE2. The limit contacts <strong>of</strong> 61-62 for notching up, as well as 83-84 for notching down <strong>of</strong> tap<br />
changer continue to be effective in the feed circuits. This prevents the tap changer from running<br />
beyond the mechanical stops, even under auxiliary control.<br />
For multiple unit operation the switch ZSMS must be set to position "0" in all<br />
locomotives.<br />
5.7.4.6 MANUAL OPERATION OF TAP CHANGER<br />
In the case <strong>of</strong> faults in the electrical control circuits both in the master controller and in<br />
the emergency electrical controls there still remains the possibility <strong>of</strong> moving the tap changer by<br />
means <strong>of</strong> a hand crank. A hand crank is mounted above the gear case. This crank must then be<br />
fitted on the free end <strong>of</strong> shaft in the RH corridor. Removal <strong>of</strong> the cranking handle automatically<br />
cuts <strong>of</strong>f air supply to air servo-motor SMGR. This facility, however, can not be used for multiple<br />
operation <strong>of</strong> locos.<br />
5.7.4.7 NOTCHING TAP CHANGER FOR TEST PURPOSES (WITHOUT POWER TO<br />
TRACTION MOTOR)<br />
When performing tests under the catenary the HVSI on the RSI panels may be set at<br />
"0". The coils <strong>of</strong> the solenoid valves <strong>of</strong> the motor contractors L1-L6 are not energized.<br />
IMPORTANT<br />
Notching up <strong>of</strong> the tap changer should be done in the above case only at the position<br />
"Running" <strong>of</strong> the running breaking drum MP <strong>of</strong> the master controller.<br />
5.7.4.8 MECHANICAL INTERLOCKING OF MASTER CONTROLLER<br />
a) When the reversing drum MPJ is at "0"<br />
• The running/braking drum (MP) is locked at "0"<br />
• The operating key <strong>of</strong> the reversing drum MPJ can be withdrawn<br />
• The reversing drum (MPJ) can be moved from "0" to "F" or "R" by fitting<br />
the operating key and pressing it downwards for moving to F or R<br />
b) When the reversing drum MPJ is at position "F" or "R"<br />
• The running/braking drum MP may be moved to any desired position.<br />
• If the running/braking drum MP is not at zero, the reversing drum MPJ is<br />
locked. The operating lever <strong>of</strong> the reversing drum cannot be withdrawn.<br />
c) When the running/braking drum is held on position (+) or (-) (running or braking)<br />
on release it will return by spring force to the associated "N" position.<br />
d) When running/braking drum is moved from "N" and (+) on the running side, the<br />
shunting drum MPS is then released for operation.<br />
e) The running/braking drum is moved from "N" position on the "Running" side,<br />
the shunting drum MPS returns automatically to "0". The shunting drum MPS is<br />
locked on position "0" on all positions <strong>of</strong> braking and "0" <strong>of</strong> the running/braking
drum MP.<br />
5.8 AUXILIARY CONTROL CIRCUIT (Ref.fig. 5.5.2 & fig. 5.8.1)<br />
5.8.1 GENERAL<br />
The control circuits <strong>of</strong> the auxiliary motors are connected to 110 V dc supply from the<br />
battery circuit and are protected by fuse CCA. The auxiliary motors can be started only if the main<br />
circuit breaker DJ is closed. As soon as the auxiliary contacts <strong>of</strong> the main circuit breaker DJ and<br />
relay QCVAR have picked up, Cl18 contactor is de-energized and auxiliary interlock <strong>of</strong> C118<br />
closes after delay <strong>of</strong> 5 secs, and Q100 relay gets energized. Auxiliary interlock <strong>of</strong> Cl18 contactor is<br />
having adjustable mechanical time delay arrangement which closes with a delay <strong>of</strong> 5 secs, after<br />
opening <strong>of</strong> contactor Cl18.<br />
With the help <strong>of</strong> switches HCP, HVRH, HVMT1 and HVMT the contactors <strong>of</strong> the<br />
individual motor can be closed and opened.<br />
The opening positions <strong>of</strong> the switches are as follows:<br />
Position 0 – Auxiliary motors and functional relay disconnected.<br />
Position 1 – Auxiliary motor & functional relay in service.<br />
Position 2 – Auxiliary motor disconnected, functional relay in service.<br />
Position 3 – Auxiliary motor in service, functional relay disconnected.<br />
The contactors <strong>of</strong> the auxiliary motors are operated by the switches on BL key boxes in<br />
cab1&2. With multiple unit operation the auxiliary motors <strong>of</strong> the trailing locomotive are controlled<br />
from the leading locomotive. The contactor <strong>of</strong> the auxiliary motors in the trailing locomotive are<br />
switched on only if the respective main circuit breakers (DJ) are closed and Arno <strong>of</strong> that<br />
locomotive has started up. On the trailing locomotives the switched BLCP, BLCPD, BLVMT and<br />
BLPV are kept open. The battery switch HBA must be closed and all fuses inserted at their proper<br />
places.<br />
5.8.1 STRUCTURE OF MAIN COMPRESSOR<br />
After closing the switch BL1CP or BL2CP, the coils <strong>of</strong> contactor<br />
C101,C102, C103 energize, provided the relay Q100 has picked up and HCP is on<br />
''position 123".<br />
On closing <strong>of</strong> the contactor, the motors MCP 1-3 get the 3-phase 380 V ± 22.5% supply<br />
from the Arno. As soon as the pressure in the main compressed air line rises to 10 kg/cm²<br />
the pressure switch contact RGCP closes, disconnecting compressor contactor and connecting<br />
the compressor to through the unloader valve. The compressor is reconnected to supply when the<br />
pressure has dropped to below 8.5 kg/cm².
With multiple unit operation the main air lines <strong>of</strong> the individual locomotives are<br />
connected by MU coupler for air so that the pressure is the same in all locomotives. The starting<br />
and stopping <strong>of</strong> the compressors on the individual locomotives is controlled exclusively by the<br />
BLCP or BLCPD <strong>of</strong> the leading locomotive but the programme <strong>of</strong> selection <strong>of</strong> the various MCP is<br />
done by the HCP <strong>of</strong> each locomotive. On the trailing locomotives the switches BLCP are kept open<br />
as BL key is not inserted.<br />
If the compressor <strong>of</strong> one locomotive fails during multiple unit operation, it can be<br />
switched <strong>of</strong>f by the switch HCP, while the other compressors will continue to run.<br />
5.8.2 BLOWERS FOR TRANSFORMER OIL COOLER & TRACTION MOTORS<br />
5.8.2.1 Manual Starting<br />
The starting <strong>of</strong> the motors for the traction motor blower and the transformer oil cooler<br />
blower are made by closing the switch BL1VMT or BL2VMT at the driver's desk, provided in the<br />
relay Q100 has energized and N/O, interlock <strong>of</strong> Q100 in the circuit has closed. The coil <strong>of</strong><br />
contactor C107 gets energized immediately on pressing <strong>of</strong> BL1VMT or BL2VMT, thus closing the<br />
contactor C107, feeding transformer oil cooler blower motor (MVRH) the 3 phase, AC 380V ±<br />
22.5% supply from Arno converter. When the contactor CI07 closes, the relay QTD105 gets<br />
energized and its time delay contact closes after a time lag <strong>of</strong> 5 secs, thus energizing the coil <strong>of</strong><br />
C105 and relay QTD106. After a time delay <strong>of</strong> 5 secs, contactor C106 closes. Once the coils <strong>of</strong><br />
C105 and C106 energize, the two traction motor blower MVMT1 and MVMT2 get feed <strong>of</strong> 380V ±<br />
22.5% 3 phase ac from Arno. With multiple unit operation <strong>of</strong> the blower motor <strong>of</strong> the trailing<br />
locomotives, the switches BL1VMT and BL2VMT <strong>of</strong> the trailing locomotives is kept open.<br />
The contactors <strong>of</strong> the individual traction motor blowers can be switched <strong>of</strong>f directly by the<br />
switches HVMT1 and HVMT2. To do this the particular switch is brought to position "0". This action<br />
switches <strong>of</strong>f the particular blower motor, as well as bridges over the contacts <strong>of</strong> the associate^<br />
protective relay, thus permitting the main circuit breaker DJ to be reclosed through Q118.
5.8.2.2. Automatic starting<br />
If the switches BL1 VMT and BL2 VMT are left open, the contactors <strong>of</strong> the blower<br />
motors close automatically when the reverser drum MPJ is brought to position F or R and tap<br />
changer GR moves to notch 1 and above.<br />
The contactors <strong>of</strong> the blower motors are held closed by auxiliary contacts <strong>of</strong> the<br />
contactors C107, even after the tap changer has returned to zero and continue to be held in closed<br />
position until the reverser drum MPJ is brought back to zero position.<br />
5.8.2.3 AUTOMATIC STARTING OF AUXILIARY MOTORS AFTER<br />
PASSING A NEUTRAL SECTION<br />
Automatic starting <strong>of</strong> all auxiliary machines will take place under the following conditions<br />
• Automatic compressor switch BLCP or BLCPD closed.<br />
• <strong>Traction</strong> motor blower switches BLVMT opened.<br />
• Reverser drum MPJ at position "0"<br />
• Exhauster switches BLPV closed if working with a vacuum brake train.<br />
SEQUENCE<br />
After closing the main circuit breaker DJ, Arno starts and the following switching<br />
operations take place:<br />
• MVSI1-2, MVSL and MPH start.<br />
• Relay Q100 is energized after 5 secs, <strong>of</strong> Arno starting.<br />
• Main compressor starts as soon as Q-100 is energized. This is accomplished by<br />
closing <strong>of</strong> contactors C101/ C102/C103.<br />
• Exhausters start through contactors Cl11/C112.<br />
• As soon as BLVMT is closed, contactor C-107 pulls in as interlock <strong>of</strong> Q100 is<br />
already closed, MVRH, starts.<br />
• Relay QTD105 is energized by closing <strong>of</strong> C107 and after about 5 secs. C105<br />
closed thereby starting T.M. blower No.l (MVMT1)<br />
• Closing <strong>of</strong> C105 is energizes QTD105 and C106 is closed after 5 secs, <strong>of</strong><br />
energisation <strong>of</strong> QTD106 and T.M blower No.2 (MVMT2) starts.<br />
5.8.3 SANDING CIRCUIT (Ref. fig. 5.8.3)<br />
The sanding circuit is protected by fuse CCLS.<br />
Sanding takes place via the solenoid valves VESA1 for axle numbers 1, 2 & 4 and<br />
VESA2 for axle numbers 3, 5 & 6 Solenoid valve are energized by operating the pedals PSA1 or<br />
PSA2 in the cabs. The solenoid valves VESA are also energized automatically by the wheel slip
elay Q48. If the wheels on one bogie start slipping, the current on the motor concerned drops,<br />
This is detected by the relay QD1 or QD2 which, on operation energize the relay Q48 via its<br />
normally open contacts. (Ref.fig. 5.7.1).<br />
The relay Q48 can be energized only if the traction braking switched CTF1-2 are at<br />
position "Running".<br />
The auxiliary contacts <strong>of</strong> the relay Q48 are provided with a drop out delay <strong>of</strong> 5<br />
secs., which will begin as soon as the relay has been de-energized. This means that sanding will<br />
continues for 5 secs, after wheel slip has ceased (relay QD has dropped out).<br />
Operation <strong>of</strong> relay Q48 as a result <strong>of</strong> wheel slip and operation <strong>of</strong> relay QD1 or QD2, also<br />
results in automatic regression <strong>of</strong> the tap changer (GR) till the relay QD1 or QD2 drops out due to<br />
arrest <strong>of</strong> the wheel slip.<br />
With multiple unit operation the solenoid valves VESA <strong>of</strong> the trailing locomotives are<br />
controlled from the leading locomotives.<br />
By operation <strong>of</strong> the pedal PSA on the leading locomotives the appropriate solenoid valve<br />
VESA on all trailing locomotives is energized.<br />
Upon operation <strong>of</strong> the differential relay QD, the relay Q48, <strong>of</strong> any locomotive is<br />
energized and not only the solenoid valve VESA <strong>of</strong> the locomotive concerned, but the<br />
corresponding solenoid valves VESA <strong>of</strong> all locomotives are energized thereby sanding occurs<br />
ahead <strong>of</strong> all driven axles.<br />
5.9 LIGHTS, FANS & SIGNALING CIRCUIT<br />
5.9.1 GENERAL (Ref. fig. 5.9.1)<br />
Signaling and lighting circuits are connected to the 110 V dc supply.<br />
The auxiliary contacts <strong>of</strong> the BL switch box should be closed by inserting the key in the<br />
switch box <strong>of</strong> any one cab for energizing the signaling circuits. Lighting circuits are energized<br />
independent <strong>of</strong> BL switch.<br />
With multiple unit operation the signaling circuits in the trailing locomotives are supplied<br />
with power through the MU couplers from the leading locomotive.<br />
5.9.1.1 SIGNALING CIRCUITS<br />
The signaling circuits are protected by fuse CCLS.<br />
With the high voltage circuit breaker DJ open and the tap changer GR at position '0', all<br />
signaling lamps, except the lamp LSOL, LSP, LSBCR and LSRSI must light up when the battery<br />
switch HBA closed. This acts as a check whether any lamp is defective. For checking the signal<br />
lamps LSP and LSRSI push button switch BPT is used. As soon as the high voltage circuit breaker<br />
DJ is closed all signaling lamps, except the lamp LSGR, must go out. The lamp LSGR goes out<br />
when the tap changer GR has left position ‘0'.
5.9.1.2 Lamp LSDJ (Red) Position indication <strong>of</strong> main circuit breaker DJ<br />
The lamp LSDJ indicates the position <strong>of</strong> the main circuit breaker DJ When the main<br />
circuit breaker is open, its auxiliary contacts energizes the relay QV60 which in turn switches on<br />
the lamp LSDJ.<br />
Lamp LSDJ<br />
ON<br />
OFF<br />
Main Circuit Breaker DJ<br />
OPEN<br />
CLOSED<br />
5.9.1.3 Lamp LSCHBA (Green) Position indicator <strong>of</strong> static battery charger<br />
Lamp LSCHBA is meant to indicate to the driver the working <strong>of</strong> the State<br />
Battery Charger. When the driver closes HBA and BL switch, lamp LSCHBA glows. On<br />
closing DJ, lamp LSCHBA extinguishes after picking up <strong>of</strong> the relays QV61 and QCVAR<br />
on completion <strong>of</strong> starting <strong>of</strong> the starting <strong>of</strong> the Arno.
5.9.1.4 Lamp LSGR (Green) Tap changer GR zero position indication<br />
The lamp LSGR indicates whether the tap changer GR is at position '0' or away from<br />
that position. The auxiliary contacts 89-90 <strong>of</strong> the tap changer GR energizes the relay QV62 only at<br />
position '0' <strong>of</strong> the tap changer, the lamp LSGR being switched on by way <strong>of</strong> the contacts <strong>of</strong> the<br />
relay QV62.<br />
Lamp LSGR<br />
ON<br />
OFF<br />
Tap Changer GR<br />
At position '0'<br />
Not position '0'<br />
5.9.1.5 Lamp LSR (Yellow) Monitoring <strong>of</strong> Readiness <strong>of</strong> J & CTF for running/braking<br />
operation as ordered by Master controller.<br />
The lamp LSR is switched on by the relay QV64 which in turn is energized by the<br />
contacts <strong>of</strong> the relay Q50 in de-energized position.<br />
Lighting up <strong>of</strong> signal lamp LSR (Yellow) indicates that the locomotive power circuit is not<br />
ready for moving tap changer for traction or braking. For the lamp LSR to go <strong>of</strong>f the following<br />
equipment must be set in their proper position corresponding to the position <strong>of</strong> MP and MPJ on the<br />
master controller.<br />
Jl-2, CTF1-2, C145 with DJ in closed position.<br />
5.9.1.6 Lamp LSRSI (Yellow) for rectifier monitoring<br />
The lamp LSRSI lights us when signaling fuse operates in the main rectifier due to<br />
blowing <strong>of</strong> any <strong>of</strong> the bridge fuse as a result <strong>of</strong> failure <strong>of</strong> any <strong>of</strong> the main diodes.<br />
5.9.1.7 Lamp LSOL (Orange) & Lamp LS-Group (Red)<br />
The signal lamps are useful only during multiple unit operation <strong>of</strong> locomotives for<br />
detecting defective loco in the event <strong>of</strong> fault occurring in any <strong>of</strong> the locos.<br />
The relays QV60, QV61, QV63 and QV64 energizing the signal lamps LSDJ, LSCHBA,<br />
LSR and LSRSI respectively also energize signal lamp LS-Group and the relay QVLSOL.<br />
Defective locomotive is detected as follows:<br />
Faults on Leading Locomotive<br />
Lamp LSOL Lamp LS group.<br />
Indication on -<br />
• Leading Locomotive OFF ON<br />
• Trailing Locomotive (s) ON OFF
Fault on Leading Locomotive<br />
Indication on -<br />
• Leading Locomotive and Sound Trailing Loco ON OFF<br />
• Faulty Trailing Locomotive OFF ON<br />
5.9.1.8 Buzzer SON 1-2<br />
The buzzer sounds when relay Q20 operates due to TM voltage going above 865 V DC.<br />
5.10 LIGHTING CIRCUITS<br />
5.10.1 Head Lights (Ref.fig.5.10.1)<br />
The Headlights PR1 and 2 are equipped with 32 V, 250 W lamps which are supplied<br />
from a headlight voltage stabilizer RTPR connected to 380 V single phase ac source from the Arno<br />
converter. Switch ZRT is provided for switching on RTPR. Fuse CCRTPR protects the RTPR. The<br />
headlights are switched on by means <strong>of</strong> head light switch BLPRF(front light) or BLPRR(rear light)<br />
only one headlight at a time can be switched on.<br />
The headlights can be dimmed by the switch BLPRD ON the BL box. This operation<br />
changes over supply to headlights from a 32 V ac to 16 V ac tapping on the RTPR.<br />
5.10.2 Marker & Instrument Lamps (Ref.fig.5.10.2)<br />
The following lamps are switched ON by the switch BL1LF or BL2LF (Marker Lights) in<br />
the respective cabs:<br />
• Lamps for the BL switch box, LBL1-1, LBL1-2.<br />
• Lamps for the pneumatic instruments and notch indicator LP1, LP3, LP5 (LP 2,<br />
LP4, LP6 in Cab2) and for the marker lights while LF1G, LF1D (LF2G and LF2D<br />
in Cab2).<br />
By operating switch BL1ZLF (BL2ZLF) to ON position marker lights white LF1G, LF1D<br />
(LF2G, LF2D) change over to Red provided switch BL1LF (BL2LF) in ON.<br />
All the above lights in Cab1 and Cab2 are protected by fuse CCLF1, CCLF2<br />
respectively.<br />
The following lamps are also switched ON by the switch BL1LF (BL2LF) in Cab1 & Cab2<br />
from the stabilized voltage <strong>of</strong> 24 Volts ac from the voltage stabilizer RTPR.<br />
Dual illumination lamps for measuring instruments LU1, LUA1, LA1-1, LA1-2 (LU-2,<br />
LUA2, LA2-1, LA2-2) and for the speedometers.<br />
5.10.3 Engine Room Lamps, Ceiling Lamps & Sockets<br />
The lamps LCl-1 and LCl-2 or LC2-1 and LC2-2 for the ceiling lamps (Spotlights) in the
cabs are controlled by means <strong>of</strong> the switches ZLC1 or ZLC2 provided on the driving desks.<br />
The lamps LM1 to LM9 in the corridor and H.T. Compartment are controlled by the<br />
switches BL1LM, BL2LM. In Cab-1 the lamps can be switched on with the switch BL2LM and vice<br />
versa.<br />
CCLC.<br />
These circuits, as well as those for the wall sockets PCLX1-3 are protected by the fuse<br />
5.10.4 Entrance & Cab Lamp.<br />
Lamps LE1 to LE4 are switched on by switches ZLE1, ZLE2 and ZLE3, LE1 and LE2<br />
are the lamps provided near the entrance door <strong>of</strong> the cabs near the driver's seat. LE3 and LE4 are<br />
the lamp provided in the AC2 panel (in Cab2 for general illumination <strong>of</strong> TK panel).
––––––<br />
–
6. AIR COMPRESSOR<br />
6.0 INTRODUCTION<br />
The Elgi air compressor model TRC 1000 M/WK is a three cylinder, two stage,<br />
reciprocating, air cooled and splash lubricated compressor driven by an electric motor through a<br />
bibby coupling. It consists <strong>of</strong> three cylinders arranged in a 'W' form on a crank case. Oil bath air<br />
filers are fitted to the suction side <strong>of</strong> the LP cylinder heads. The discharge ports <strong>of</strong> the LP cylinder<br />
heads are connected to the radiator called inter cooler for effective cooling. Inter cooler is<br />
connected to the suction port <strong>of</strong> the HP cylinder head. The discharge port <strong>of</strong> the HP cylinder head<br />
is fitted with a box type after cooler. The compressed air flows from delivery <strong>of</strong> LP cylinder through<br />
inter cooler to HP cylinder and delivered after cooling in after cooler. The compressor is coupled<br />
with a 12.5 HP NGEF motor and mounted on a rigid, compact base. The air filter and other pipe<br />
fittings are all clamped properly to arrest vibration. A fan with a fan guard is provided to direct cool<br />
air on to the compressor unit. The fan draws the air over the motor there-by cooling the motor also.<br />
An eye bolt used to lift motor is provided at the terminal belt side <strong>of</strong> the motor. (Fix the eye bolt on<br />
the top <strong>of</strong> the motor and lift the motor)<br />
6.1 PARTS OF COMPRESSOR<br />
6.1.1 Connecting rod and crank shaft assembly<br />
The connecting rod and crankshaft assembly is precision machined and dynamically<br />
balanced. The crank shaft is provided with a single row heavy duty ball bearing at both ends. The<br />
main connecting rod big end is provided with a triple row roller bearing and small end consists <strong>of</strong><br />
phosphor bronze bearing.<br />
6.1.2 Piston and piston rings<br />
The pistons are <strong>of</strong> automotive type and are <strong>of</strong> low expansion silicon aluminum alloy.<br />
They are provided with plain compression rings, stepped rings and slotted oil control rings.<br />
6.1.3 Disc Valves<br />
A special type <strong>of</strong> concentric disc valves have been used for the low pressure and high -<br />
pressure cylinders.<br />
6.1.4 Inter cooler, safety valve & after cooler<br />
The inter cooler is a radiator, consists <strong>of</strong> a series <strong>of</strong> copper tubes, on which fins are wound for<br />
effective cooling. It is mounted above the motor. It connects the discharge <strong>of</strong> the LP cylinders to<br />
the suction <strong>of</strong> the HP cylinder. It is provided with a safety valve set to lift at 6 kg/cm² and a drain<br />
valve. The after cooler is also, four copper tubes with fins wound on them, arranged together for<br />
better cooling. A drain valve is provided with the after cooler. The inter cooler and after coolers are<br />
positioned properly for efficient cooling.<br />
6.2 BIBBY COUPLING
The flexible coupling, connecting the motor and the compressor consists <strong>of</strong> 2 hubs. Each hub is<br />
provided with a number <strong>of</strong> grooves to hold a spring which transmits the rotation from the motor to<br />
compressor. Care is necessary in the assembly <strong>of</strong> couplings, particularly in checking for both<br />
parallel and angular alignment and in setting the correct gap (0.8 mm). The coupling grooves must<br />
be completely packed with grease before the spring is inserted and a further liberal application <strong>of</strong><br />
grease after its insertion is essential. After the assembly <strong>of</strong> the outer shell the maximum possible<br />
quantity <strong>of</strong> grease must be forced in through the greasing nipple. This type <strong>of</strong> coupling does not<br />
require any attention during running except for the periodical replenishing <strong>of</strong> grease.<br />
Replacement item<br />
i) If any ring <strong>of</strong> gold spring is broken in the middle, the grid spring should be replaced.<br />
ii)<br />
If a tooth or a number <strong>of</strong> teeth <strong>of</strong> coupling hubs are broken it should be replaced.<br />
6.2.1 Bibby coupling assembly procedure (Ref. fig.6.2.1)<br />
1) Check parallelism by using straight edge over the tops <strong>of</strong> the hubs at each quarter<br />
points at 90° apart. Make final check after foundation bolts are tightened down.<br />
2) Check the gap between hub faces to ensure that it is within 0.8 mm to 1 mm.<br />
Check angular alignment using feelers in the gap at each quarter points at<br />
93° apart.<br />
3) After thoroughly packing the grooves with grease press the spring into its position.<br />
Then apply grease liberally on it. Draw the covers into position and tighten the<br />
bolts. Inject maximum amount <strong>of</strong> grease through grease nipple.
6.3 COMPRESSOR DETAILS<br />
Model : TRC 1000 M/WK<br />
Working pressure : 10.5 kg/cm²<br />
Free air delivery : 1000 liters/min.
Number <strong>of</strong> stages : 2<br />
Compressor speed : 980 rpm<br />
Type <strong>of</strong> cooling : Air cooled provided with a fan<br />
Direction <strong>of</strong> rotation : Anticlockwise as viewed from<br />
non-driving end<br />
Type <strong>of</strong> drive : Directly coupled with motor by a<br />
bibby coupling<br />
LP piston dia. : 100 mm<br />
HP piston dia. : 60 mm<br />
Stroke : 85 mm<br />
Displacement : 1275 ltrs/min at 1000 rpm<br />
LP Piston top to disc. valve clearance : 0.2 to 0.3 mm<br />
HP piston top to cylinder top clearance : 1.1 to 1.2 mm<br />
Recommended lubricants crank case lub. oil : Bharat Hydrol 150 (BPC)<br />
Enklo<br />
150 (HPC)<br />
Servo press<br />
150 (IOC)<br />
Bibby coupling grease : Bharat Univex 'A' (BPC)<br />
Wheel bearing grease (HPC)<br />
Servo grease<br />
MP(OC)<br />
6.4 VACUUM EXHAUSTER<br />
6.4.1 Description<br />
Two nos. <strong>of</strong> vacuum exhauster installed in the locomotive are <strong>of</strong> rotary air cooled type.<br />
They are designed for two speeds for operation with a normal running speed <strong>of</strong> 965 rpm and a<br />
capacity <strong>of</strong> 4500 liters per minute each. At this speed, a 54 cm (21" Hg) vacuum would be<br />
maintained against a leak <strong>of</strong> 7.95 mm diameter, for brake release purpose, the exhauster is run at<br />
1460 rpm when the capacity is 7000 liters per minute and 54 cm (21" Hg) vacuum will be held<br />
against a 12.6 mm diameter leak. The exhauster is capable <strong>of</strong> giving satisfactory continuous<br />
operation at high speed as well as at low speed and able to sustain the effects <strong>of</strong> repeated<br />
changeovers from rest to high speed direct and from low speed to high speed.<br />
The driving motor <strong>of</strong> the exhauster is a three phase inductor motor with squirrel cage<br />
rotor and star connected stator with two speed winding. The squirrel cage is <strong>of</strong> electrolytic copper<br />
silver brazed to copper end rings. The frame <strong>of</strong> the motor conforms to IEC standards and is<br />
provided with screen ed type enclosure. The motor is designed to operate on supply with 50 c/s,<br />
415V (290-500V).<br />
6.4.2. Technical Data<br />
A) Exhauster:
1) Type & Make : 1) Northey Type 250 RE<br />
M/s Bharat Brakes & Valves Ltd. make<br />
2) VL-30 Type<br />
M/s. SLM-MANEKLAL make<br />
2) Free air delivery at rated speed <strong>of</strong> driving motor 4500 LPM<br />
3) Swept volume at rated speed 166cfm (4700LPM)<br />
4) Design Data<br />
a) Barrel diameter … 9" dia (228.6mm)<br />
b) Rotor diameter … 9" dia (228.6mm)<br />
c) Clearances<br />
i) Between rotor face … (0.002" to 0.004")<br />
and gear case face<br />
(0.05 to 0.10mm)<br />
ii) Between rotor case … Inlet 0.012" (0.28mm)<br />
and end cover Exhaust 0.016" (0.41mm)<br />
0.10mm)<br />
0.15mm)<br />
iii) Between rotor tip … Inlet 0.003" to 0.004"<br />
and rotor case<br />
(0.08 to<br />
… Exhaust 0.005" to 0.006"<br />
(0.13 to<br />
iv) Between Rotor Bodies… 0.005" (0.13mm) maximum<br />
v) Between rotor tip … (0.15" to 0.040")<br />
and rotor inside contour<br />
5) Recommended working vaccum … 54 cms.<br />
6) Maximum vacuum allowed … 58 cm for 1 hour<br />
7) Sump capacity:<br />
Gear case oil capacity<br />
Maximum<br />
… 6.7 liters<br />
… Dip stick level<br />
Gear case oil capacity<br />
Maximum<br />
… 4.87 liters<br />
… Dip stick level<br />
B) Motor<br />
8) Maximum Backlash between gears … 0.004" (p. 10 mm)<br />
1) Type<br />
(1) Squirrel cage induction motor<br />
Bharaj Bijlee make type 56D20-6
(2) Squirrel cage induction motor<br />
ABB make type - TQU200M6bi<br />
2) No. <strong>of</strong> phase/connection … 3 phase, star connected<br />
3) Voltage … 415 V (290-500V)<br />
4) Frequency … 50 ± 3% c/s.<br />
(C)<br />
Coupling<br />
(i)<br />
Pin type cylvae flexible coupling (VL-30)<br />
Types : Permissible misalignments<br />
(a) Angular … 0.2 mm max.<br />
(b) Axial … 0.I5 mm max.<br />
(ii)<br />
Tyre type coupling<br />
(a) Angular … 0.2 mm max.<br />
(b) Axial … 0.15 mm max.<br />
(D)<br />
Weight <strong>of</strong> exhauster: 552 kg. complete with bed plate.<br />
6.4.3. Location<br />
In the locomotive exhauster 1 & 2 mounted in auxiliary compartments No. 1 & 2<br />
respectively.<br />
6.4.4 Construction<br />
The Northey vacuum brake exhauster consists essentially <strong>of</strong> two rotors mounted on<br />
parallel shafts rotating in a casing.<br />
The rotor casing is dowelled and bolted to a rigidly constructed casing forming the<br />
combined main support and gear case <strong>of</strong> the exhauster and in which both rotor shafts are located<br />
and supported by 2 single row taper roller bearings, additional support for the driving shaft being<br />
provided by a journal roller bearing carried in the fan housing helical gears transmit the drive from
one shaft to the other, and maintain the rotors in the correct relationship with each other.<br />
Oil contained in the gear case is distributed by splash to provide lubrication for bearings,<br />
seals and gears.<br />
To the opposite side <strong>of</strong> the rotor casing is dowelled and bolted on end cover, in which<br />
the rotor shafts are supported by additional journal roller bearings, lubrication for which is provided<br />
from an oil tank attached to the side <strong>of</strong> the exhauster from which oil is drawn through metering<br />
units, any excess oil passing into the rotor casing and finally being discharged with the exhaust air.<br />
Although timing <strong>of</strong> the exhaust ports is done by the rotor, the inlet port is arranged to<br />
feed directly into the rotor casing through an opening suitable for adequate size to meet the<br />
requirements <strong>of</strong> 3" train pipes. An integral filter is directly mounted to the inlet port.<br />
6.4.5 Operating Instructions<br />
Make certain that the exhauster is running in the correct direction <strong>of</strong> rotation which is<br />
clearly marked by an arrow on the fan housing.<br />
The automatic lubrication system has no means <strong>of</strong> adjustment and since the oil flow is<br />
vacuum controlled there is no flow at 0"Hg. vacuum, rising to a flow <strong>of</strong> approximately one to two<br />
drops per minute as the operating vacuum <strong>of</strong> the exhauster.<br />
The relief valve which is fitted in the system in order to limit the vacuum to that shown on<br />
the name-plate <strong>of</strong> the exhauster, should be adjusted if necessary to obtain a vacuum <strong>of</strong> 56/ 57 cm<br />
at 7.9mm diameter leak hole.<br />
Any attempt to operate the exhauster at a higher vacuum will cause overloading <strong>of</strong> the<br />
motor and the exhauster.<br />
6.4.6 Maintenance Instruction<br />
6.4.6.1 Gear case Lubrication<br />
Oil contained in the gear case provides lubrication for the gears, roller bearings and<br />
seals, and although normally no oil loss should take place, unless there is a leakage from slack<br />
drain plugs, a regular inspection <strong>of</strong> the oil level should be made when the exhauster is not running<br />
to safeguard against serious troubles arising should the oil level fall for any reason.<br />
It is recommended that after the first 200/250 running hours the gear case be drained by<br />
the removal <strong>of</strong> one or other <strong>of</strong> the two drain plugs, and refilled with clean recommended oil to the<br />
correct level.<br />
6.4.6.2 End cover bearing lubrication<br />
This is provided by oil contained in a tank fitted to one side <strong>of</strong> the exhauster and has<br />
sufficient capacity for approximately 800 hours running. Metering units which are present and<br />
cannot be adjusted any way, supply oil to the bearings and to the working chamber <strong>of</strong> exhauster,<br />
using the vacuum existing in the latter to provide the necessary pressure difference to cause the
oil flow.<br />
Since the oil flow is vacuum controlled there is not flow at 0 Hg vacuum, rising to<br />
approximately one to two drops per minute at the operating vacuum <strong>of</strong> the exhauster. There is<br />
always a small quantity <strong>of</strong> oil retained in the bearing housing to maintain lubrication when starting.<br />
There will be a slight increase in the rate <strong>of</strong> flow with the rise in temperature <strong>of</strong> the oil.<br />
No other maintenance is required on the system, but for its satisfactory operation it is<br />
essential that all connection in the circuit are vacuum tight.<br />
6.4.6.3 Air Filter<br />
The exhauster is supplied with an air filter, integral with the machine. This unit should be<br />
detached only during overhaul. On no account should the machine be run without the filter<br />
element.<br />
The element will require periodical cleaning according to service conditions. The<br />
element should be cleaned by washing in paraffin or similar solvent bath, followed by immersion in<br />
clean oil, which should be allowed to drain <strong>of</strong>f for a few hours, to give the necessary viscous<br />
coating. While the element is being cleaned, replace the filter cover, to prevent dust from entering<br />
the machine.<br />
All gaskets fitted between filter element and body should be replaced if necessary.<br />
6.4.7 Lubrication<br />
Recommended lubricant<br />
Replenishment period :<br />
Gear Case<br />
Tank<br />
: Servo super Oil 40 (IOC)<br />
: Every 200/250 running hours (fill up to maximum ref. mark)<br />
: Every 800 running hours (Fill up to maximum mark on dipstick)
7. BRAKE SYSTEM OF ELECTRIC<br />
LOCOMOTIVE & EMU<br />
7.1 VACUUM BRAKE SYSTEM<br />
7.1.1 The brake equipment is designed for:<br />
a) Independent brake application on loco while running light<br />
b) Braking <strong>of</strong> vacuum braked stock and at the same time a proportional air brake<br />
application on the locomotive by automatic brake valve<br />
c) Graduated vacuum brake application ("EQ" system)<br />
d) Multiple unit operation<br />
e) Dynamic brake application with interlocks.<br />
7.1.1 Compressed air system (Ref. fig. 7.1)<br />
Compressed air delivered by compressor, controlled to operate by an<br />
electropneumatic<br />
governor (RGCP) to cut in and cut out at 7 ± 0.1 kg/cm² and<br />
8±0.1 kg/cm²<br />
pressures respectively, is stored in two main reservoirs via non-return valve to supply air to<br />
pneumatic / electrical control equipment and two auxiliary reservoirs through non-return valve for<br />
feeding pressure to loco brake air supply pipe. The safety valves (type El & T2) set to blow <strong>of</strong>f at<br />
8.5 ± 0.1 kg/cm² pressure respectively do not allow the pressure to exceed this value in main and<br />
auxiliary/pantograph circuits.<br />
7.1.2 Independent brakes (Ref Fig 7.1)<br />
During independent brake valve (DAB) handle movement towards application position,<br />
air passes from locomotive brake supply pipe to brake application pipe through independent air<br />
brake valve (SA-1 type) to actuate B2 relay valve which in turn connects loco brake air supply pipe<br />
and loco independent brake cylinder pipe to brake cylinders via double check valve A7 to apply the<br />
brakes. The provision <strong>of</strong> relay valve eliminates the need for air from main reservoir to pass through<br />
DAB each time before reaching brake cylinders.<br />
During multiple operations this relay valve is essential for supplying air to trailing<br />
locomotive's brake cylinders from its own reservoirs.<br />
In release position <strong>of</strong> DAB valve, control air between DAB and relay valve exhausts<br />
through DAB to operate B2 relay valve to connect brake cylinders to exhaust and release the<br />
brakes. The independent brake valve is <strong>of</strong> self lapping type. Application & release operation <strong>of</strong><br />
brakes is quite automatic and the degree <strong>of</strong> brake application depends upon DAB handle
movement from release to application and vice versa.<br />
7.1.3 Automatic brakes (Ref. fig 7.1)<br />
When the loco is hauling vacuum braked trailing stock, air admission to loco brake<br />
cylinder in proportion to degree <strong>of</strong> vacuum brakes applied on trailing stock with the operation <strong>of</strong><br />
Driver's brake valve (having release running, graduated brake application zone and emergency<br />
positions) is achieved with the following equipment:<br />
a) Air/vacuum proportional valve, A 24<br />
b) Vacuum chamber , B14<br />
d) Auto isolating valve, A25 and<br />
e) Electro-pneumatic valve for brake release, A26.<br />
The difference <strong>of</strong> vacuum level between vacuum chamber (B14) and the lower portion <strong>of</strong><br />
the diaphragm actuates proportional valve. A23 to admit auxiliary reservoir air through automatic<br />
valve A14 to brake cylinders.<br />
The automatic isolating valve operated by an electrically energised magnet valve A15 cuts <strong>of</strong>f air<br />
supply when.<br />
(i)<br />
(ii)<br />
Driver feels that it is not considered necessary to brake the locomotive, this is<br />
achieved by pressing brake release pedal switch.<br />
Dynamic brake is being applied in addition to the train brakes. Proportionate<br />
brake on locomotive is cut <strong>of</strong>f automatically.<br />
In both case an electrical contact energises the coil <strong>of</strong> isolating relay magnet<br />
valve (A26). This establishes connection between aux. receiver and automatic isolating<br />
valve (A25). The availability <strong>of</strong> air pressure at the top point <strong>of</strong> (A25) cuts <strong>of</strong>f air supply <strong>of</strong><br />
BC from that <strong>of</strong> vacuum-air proportionate valve A24 also BC are connected to atmosphere<br />
through A25 thereby releasing the brakes.<br />
A pressure switch A20 is also provided to cut <strong>of</strong>f dynamic brakes when independent brake<br />
cylinder pressure exceeds 1.0 kg/cm² The vacuum release valve (B12) on vacuum<br />
chamber(B14) when operated allows reduction <strong>of</strong> vacuum on the top side <strong>of</strong> diaphragm <strong>of</strong><br />
air/vacuum proportional valve to release brakes when proportional valve gets jammed/defective in<br />
the unbalanced position.<br />
7.1.4 Graduated vacuum brake application (Ref. fig.7.1.4)<br />
"E.Q." system incorporates the following main components.<br />
a) Driver’s vacuum brake valve (DVB) with number <strong>of</strong> electrical switches for<br />
exhauster cut out valves and for locomotive in regression.<br />
b) Equalising reservoir (B20), connects the exhauster manifold and is controlled
y the driver’s vacuum brake valve.<br />
c) Air admission valve (B8), attached to the train pipe and<br />
d) Timing chamber (B22) to control sensitivity <strong>of</strong> air admission valve, controlled<br />
by the driver’s vacuum brake valve.<br />
e) Timing chamber to control sensitivity <strong>of</strong> air admission valve controlled by<br />
conditions in the equalising reservoir (B20).<br />
The exhausters (B1) with standard auxiliaries such as filter/strainer, non-return valve,<br />
vacuum relief valve, etc. are directly connected to the train pipe through 2 inch exhauster cut out<br />
valves, solenoid operated for vacuum creation and destruction. These cut out valves are energised<br />
to isolate the exhausters when the handle on the Driver’s vacuum brake valve is moved towards<br />
'brake on' but one exhauster always remains in communication with train pipe through a small bypass<br />
in exhauster cut out valve (VA-1 release valve) B6 and with the small equalising reservoir.<br />
With the further movement <strong>of</strong> DVB <strong>of</strong> graduated application zone, i.e. towards 'brake on' the<br />
atmospheric air is admitted to E.Q. reservoir at a faster rate with more port opening in DVB, but<br />
the size <strong>of</strong> the connection <strong>of</strong> E Q. reservoir to exhauster remains unaltered. With result a balance<br />
is set up between air admitted and air extracted for each position <strong>of</strong> DVB. The progressive<br />
reduction <strong>of</strong> vacuum in E.Q. reservoir to the required value operates the air admission valve<br />
diaphragm to admit atmospheric air directly into the train pipe. This action is quite automatic and<br />
over braking due to leakages in vacuum system/train pipe is compensated by continuous<br />
extraction <strong>of</strong> air from train pipe through by-pass hole in VA-1 release valve. A small timing<br />
chamber regulates the rate <strong>of</strong> fall <strong>of</strong> train pipe vacuum independent <strong>of</strong> rate <strong>of</strong> DVB handle<br />
movement.<br />
a) During emergency application <strong>of</strong> DVB, atmospheric air is also supplied by<br />
DVB directly through 2" diameter pipe in addition to the air admission valve to<br />
destroy vacuum at the quickest possible rate.<br />
b) For a partial release DVB handle is returned to full release position until the<br />
desired restoration <strong>of</strong> vacuum has taken place in T.P. and then it is only<br />
necessary to keep DVB in suitable notch to maintain desired vacuum level.<br />
c) The operation <strong>of</strong> emergency (flap type) valve directly connects the train pipe to<br />
atmosphere through 2" diameter opening thereby applying brakes on loco and<br />
trailing stock at the quickest possible rate and shuts <strong>of</strong>f exhausters in addition to<br />
regression.<br />
d) The main reservoir also supplies compressed air to control equipment such as<br />
horns, wipers, pantograph, auxiliary circuit but at the time <strong>of</strong> initial energisation<br />
when there is insufficient pressure in control /emergency reservoir to raise the<br />
pantograph, the auxiliary compressor (battery operated) is started to raise the<br />
pressure in auxiliary circuit to energise the locomotive,<br />
7.1.5 Setting <strong>of</strong> different valves <strong>of</strong> Vacuum brake system<br />
Driver's independent self-lapping : 3.5 ± 0.1 kg/cm²
straight air brake valve(DAB)<br />
Vacuum-air proportional valve : 21 ' /3.5 kg/cm²<br />
1/2" limiting valve (with bracket) : 3.5 ± 0.1 kg/cm²<br />
1/4" safety valve (type El) : 8.5 ±0.1 kg/cm²<br />
1/2" safety valve (type T2) : 8.5 ±0.1 kg/cm²<br />
Closing pressure for El & T2 : 7.5 to 7.8 kg/cm²<br />
safety valves.<br />
Vacuum relief valves : 54 ± 0.5 cm Hg.<br />
Duplex check valve : 1.9 ± 0.1 kg/cm²<br />
Compressor governor (RGCP)<br />
(with a total pressure differential <strong>of</strong> 1 kg/cm²)<br />
Pressure cut in : 7 ± 0.1 kg/cm²<br />
Pressure cut out : 8 ± 0.1 kg/cm²
7.2 DUAL BRAKE SYSTEM ON ELECTRIC LOCOMOTIVES<br />
WAG/5 and WAP/1 & 3 locomotives manufactured at CLW are fitted with twin pipe dual<br />
brake system. Railway have also converted some WAM/4, WCG/2, locomotive to twin pipe dual<br />
brake system. Dual brake system is designed for hauling stock equipped with either graduated<br />
release type single pipe or twin pipe air brakes or vacuum brakes.<br />
Simple schematic diagram explaining the principle <strong>of</strong> operation working <strong>of</strong> dual brake<br />
system, vacuum brake system and charging <strong>of</strong> main reservoir is attached as<br />
Fig.<br />
7.2.1,7.2.3,7.2.4,7.2.5.<br />
7.2.1 Description <strong>of</strong> the brake system<br />
The main features <strong>of</strong> the system as fitted on these locos are-<br />
a) Self lapping type independent brakes on the locomotive, i.e. the brakes on locos<br />
can be applied and released in steps with pressure maintaining feature in all<br />
positions.<br />
b) Braking <strong>of</strong> air braked passenger/freight trailing stock and at the same time<br />
proportional brake application on locomotive through distributor valve.<br />
c) Braking <strong>of</strong> air brake passenger/freight trailing stock fitted with graduated<br />
release type <strong>of</strong> brake equipment and at the same time proportional brake<br />
application on locomotive through distributor valve.<br />
d) Dynamic brake interlock to prevent simultaneous application <strong>of</strong> automatic air<br />
brakes and dynamic brakes on loco. Automatic application <strong>of</strong> emergency<br />
brakes on loco and trailing stock in case <strong>of</strong> failure <strong>of</strong> dynamic brakes.<br />
e) Multiple unit operations with locos fitted with similar type <strong>of</strong> brake system.<br />
f) In an emergency, brake pipe and vacuum train pipe can be directly vented<br />
simultaneously by the emergency brake valve provided in front <strong>of</strong> assistant<br />
driver's seat.<br />
g) Loco brakes can be released independent <strong>of</strong> the train brakes.<br />
h) Provision for freight/passenger changeover cocks to regulate locomotive air<br />
brake application timings depending upon the type <strong>of</strong> stock to be operated by<br />
locomotive.<br />
i) Provision for the driver to apply independent brakes on leading loco in MU<br />
operation in case <strong>of</strong> parting between locomotives.<br />
j) In case <strong>of</strong> very heavy leakage in the feed pipe or failure <strong>of</strong> feed pipe inter<br />
coupling equipment, twin pipe brake system on trailing stock can be worked as<br />
single pipe system by simply isolating the feed pipe <strong>of</strong> trailing stock from<br />
locomotives.<br />
k) Power cut <strong>of</strong>f during emergency brake application.<br />
l) Visual indication on driver's cab through air flow indicator device during train<br />
parting, alarm chain pulling or Guard's emergency brake valve operation or<br />
loco parting while hauling air braked stock.
m) Audio/visual indication in driver's cab to indicate the failure <strong>of</strong> D24B feed<br />
valve which feeds air pressure for electrical controls.<br />
7.2.2 Compressed air system (Ref. fig. 7.2.1)<br />
Compressed air delivered by the motor driven compressors is stored in the main<br />
reservoirs after being cooled by after coolers. Three safety valves set at 11.5 kg/cm² are provided<br />
to safeguard the compressors against build up <strong>of</strong> air pressure to a very high value, in case <strong>of</strong><br />
failure <strong>of</strong> check valves. The compressors are controlled by electro-pneumatic governor to cut in at<br />
3.5 ± 0.1 kg/cm² and cut out at 10 ± 0.1 kg/cm² pressure. One more safety valve set to blow <strong>of</strong>f at<br />
10.5 ± 0.1 kg/cm² is fitted between the second and the third main reservoir in case the pressure<br />
governor fails to operate.<br />
Compressed air at reduced pressure <strong>of</strong> 8 kg/cm² is stored in the control reservoir. This<br />
air is supplied for all electrical contactors. A pressure switch provided after the feed valve gives an<br />
audio visual indication through a buzzer and an indication lamp in each cab, in case pressure in<br />
the control reservoir falls below 6.0 ± 0.1 kg/cm² and cuts <strong>of</strong>f the audio visual indication when the<br />
pressure rises to 6.0 ± 0.1 kg/cm².<br />
In the release position <strong>of</strong> the A9 automatic brake valve, main reservoir air flows to the<br />
regulating portion <strong>of</strong> auto brake valve, where it is reduced to a predetermined pressure. The<br />
regulated air pressure flows through the auto brake valve to the addl. C2 relay valve to charge the<br />
air brake pipe. The air brake pipe pressure can be adjusted by adjusting the regulator <strong>of</strong> automatic<br />
brake valve.<br />
7.2.3 Independent brakes (Ref. fig. 7.2.3)<br />
Self-lapping SA9 type independent air brake valve (A12) is provided in each cab for<br />
application <strong>of</strong> air brakes on locomotives. Independent brake valve handle movement towards<br />
application position feeds pre-regulated pressure from the main reservoir. The pressure is<br />
regulated in the regulating portion <strong>of</strong> the independent brake valve and should be adjusted to 4 ±<br />
0.1 kg/cm². The brake can be applied and released in steps and maintained to any desired<br />
pressure depending upon the handle position. The air from the application pipe passes through<br />
MU-2B valve and double check valve A33 to actuate C2 relay valve (A29) which in turn connects<br />
the main reservoir air supply to brake cylinder to apply brakes. The brake cylinder pressure is<br />
indicated on duplex pressure gauge (A16) provided in the cab. The leakage in the brake cylinder<br />
is automatically compensated by the relay valve (A29).<br />
When the handle <strong>of</strong> the independent brake valve (A13) is brought back towards 'release'<br />
position, the air pressure is reduced in the application pipe through the exhaust port <strong>of</strong><br />
independent brake valve. This actuates C2 relay valve to exhaust the air from the brake cylinders,<br />
for releasing brakes. In the extreme release position the brakes are fully released.<br />
Isolating cocks (A15) are provided in the air supply and delivery pipes <strong>of</strong> the<br />
independent brake valve, to isolate the defective or unused brake valve in inoperative cab(s).<br />
7.2.4. Vacuum system (Ref. fig. 7.2.4)<br />
Two exhausters, are provided to create vacuum in the vacuum system <strong>of</strong> the loco and<br />
the vacuum trains pipe (VTP) for operating vacuum braked trailing stock. Normally one exhauster
is run to maintain vacuum in the system. Two exhausters can also be operated, if necessary.<br />
Exhausters (Bl) create vacuum in the VTP through VA-lB control valve (BG). When A9<br />
drivers automatic brake valve (A12) is placed in "release" position, the vacuum in the exhauster is<br />
limited by two vacuum relief valves (B5) set at 60 cms max. with hose pipe on dummy with 8 mm<br />
leak hole. Exhausters are protected against ingress <strong>of</strong> dirt and dust by GD80H (B3) type oil bath<br />
filters. Leakage <strong>of</strong> atmospheric air through the idle exhauster is avoided by non-return valve (B4).<br />
Vacuum relief valves in the exhauster line protect the exhausters against high vacuum when the<br />
VA-1B control valve is the disconnected from train pipe during brake application. The desired<br />
vacuum in the VTP during release position is controlled by the HS4 control air valve (B7). In<br />
release position <strong>of</strong> the automatic brake valve A9 (A13), VA-1B control valve (B6) is actuated by the<br />
air brake pipe pressure and the control valve piston is moved down to connect the exhauster to the<br />
VTP.<br />
7.2.5. Operation <strong>of</strong> brakes on trailing stock equipped with air brake equipment.<br />
(Ref. fig.7.2.5)<br />
In release position <strong>of</strong> A9 automatic brake valve (A13), main reservoir air flows to the<br />
regulating portion <strong>of</strong> automatic brake valve at a pre-determined pressure, normally 5 kg/cm2. The<br />
regulated air pressure flows through MU-2B valve (A54) to the control port2 <strong>of</strong> addl. C2 relay valve<br />
(A29). This control pressure actuates C2 relay valve (A29) which in turn connects main reservoir to<br />
brake pipe and charges the brake pipe and the connected system to the same pressure level<br />
throughout the train. Any leakage in the train system is automatically compensated by the add. C2<br />
relay valve.<br />
When the automatic brake valve handle A9 is moved to minimum reduction position,<br />
reduction <strong>of</strong> pressure in brake pipe by 0.2 to 0.5 kg/cm² is achieved and proportional application <strong>of</strong><br />
brakes on loco and trains take place. In full service position <strong>of</strong> the automatic brake valve handle,<br />
the BP pressure is reduced to 3.5 kg/cm².<br />
When the A9 automatic brake valve handle is placed in emergency position, the<br />
emergency cam dog <strong>of</strong> A9 is actuated to vent brake pipe pressure at a very fast rate to<br />
atmosphere to initiate an emergency brake application. Regression <strong>of</strong> power also takes place due<br />
to the actuation <strong>of</strong> H-5 relay air valve (fig 7.2.4). Reduction in pressure in the brake pipe actuates<br />
the distributor valve on the loco and trailing stock to apply brakes.<br />
The C3W distributor valve provided in the brake circuit, is connected to the brake pipe<br />
and responds to the variations <strong>of</strong> pressure in the brake pipe. It applies proportionate brake<br />
application on locomotive when train brakes are applied either through automatic or emergency<br />
brake valve. The C3W distributor has a in built Goods/Passenger changeover cock to regulate<br />
brake cylinder pressure depending on whether it is hauling passenger or freight train.<br />
32 mm feed pipe through-out the train in charged from the first two main reservoirs,<br />
through check valve and feed valve at 6.0 ± 0.1 kg/cm² and is used for filling auxiliary reservoirs <strong>of</strong><br />
the trailing stock initially as well as after the air from these reservoirs had been consumed during<br />
braking. The main advantage <strong>of</strong> this additional pipe is to reduce the release and recharging time <strong>of</strong><br />
the train after brake application.<br />
7.2.6 Operation <strong>of</strong> brakes on trailing stock equipped with vacuum brake equipment.<br />
(Ref. fig. 7.2.4)<br />
In release position <strong>of</strong> the automatic brake valve (A9) handle, the brake pipe is charged<br />
to 5.0 kg/cm² and vacuum in vacuum train pipe (VTP) is created through VA-1B control valve.
When the brake valve handle is moved from release position towards application position, the<br />
brake pipe pressure and vacuum in VTP is reduced and maintained to a value depending on the<br />
handle movement.<br />
The reduction in brake pipe pressure operates the VA-1B control valve to admit<br />
atmospheric air into the vacuum train pipe, to apply brakes on the vacuum braked trailing stock.<br />
During application, the exhauster connection with the vacuum train pipe is cut <strong>of</strong>f by the VA-1B<br />
control valve. After the desired degree <strong>of</strong> brake application has taken place, depending upon the<br />
extent <strong>of</strong> brake pipe pressure desired, the valve laps and maintains automatically the vacuum level<br />
against normal vacuum train pipe leakage.<br />
When the driver feels that it is not necessary to apply brake on a loco, the brake release<br />
pedal switch is pressed to release the loco brakes. The D-l air pilot is energised to cut <strong>of</strong>f<br />
automatic air brakes on the loco while train brakes remain applied on the trailing stock.<br />
During train parting while hauling vacuum braked stock, the vacuum in the train pipe<br />
falls suddenly, with a drop <strong>of</strong> vacuum by about 10 to 15 cm an unbalance in the VA-1B control<br />
valve is created allowing controlled air pressure to actuate HB-5 relay air valve to operate pressure<br />
switch through double check valve for regression <strong>of</strong> power.<br />
7.2.7 Operation <strong>of</strong> emergency brake (Ref. fig. 7.2.4)<br />
D-l air pilot provided in each cab, near the assistant driver's seat directly connects the<br />
vacuum train pipe and air brake pipe to atmosphere thereby applying brakes on loco and trailing<br />
stock at the quickest possible rate. The circuit for auto regression <strong>of</strong> the loco power due to the<br />
actuation <strong>of</strong> H-5 relay air valve is also automatically made. This relay valve also regresses power if<br />
the BP pressure drops due to any reason.<br />
7.2.8 Dynamic brakes<br />
D-l pilot air valve cuts <strong>of</strong>f loco brakes.<br />
While controlling the train with dynamic brakes, if the dynamic brake fails, brakes on the<br />
loco and train will be applied automatically.<br />
7.2.9 Air flow indicator<br />
Air flow indicator, a relay valve, one pressure switch and two flow indicator gauges (one<br />
in each cab) have been provided to give an indication <strong>of</strong> the air flow rate in the brake pipe <strong>of</strong> the<br />
train. Any abnormal increase in air flow in the brake pipe because <strong>of</strong> train parting, loco parting,<br />
alarm chain pulling, heavy leakage in brake in brake pipe, guard valve application or bursting <strong>of</strong> air<br />
brake pipe hose will give visual indication to the driver by air flow gauge needle and by glowing <strong>of</strong><br />
a bulb in the cab. On getting the indication driver shall apply brakes through A-9 automatic brake<br />
valve/D-l air/vacuum emergency valve depending upon the condition <strong>of</strong> the train and the<br />
emergency.<br />
7.2.10 Operation <strong>of</strong> brakes during multiple unit operation <strong>of</strong> locos (Ref. fig.7.2.8)<br />
When the locos are connected for multiple unit operation following pipes should be<br />
connected to each other and the angle cocks <strong>of</strong> these pipes to remain open at the coupled end<br />
closed on the free end.
1. MR equalising pipe<br />
2. BC equalising pipe<br />
3. BP angle cock<br />
4. Feed pipe angle cock<br />
Exhausters and compressors <strong>of</strong> trailing loco shall be in working condition and<br />
both the handles <strong>of</strong> independent brake valve and automatic brake valve shall be in released<br />
position in trailing loco.<br />
7.2.10.1 Application <strong>of</strong> independent brakes in trailing loco<br />
The MU-2B valve is kept in lead position in the leading loco and in trail position in the<br />
trailing loco. This sets Fl selector valve in lead and trail position respectively. When Fl-selector<br />
valve is in lead position following are the inputs to different ports <strong>of</strong> this valve:<br />
PORT NO F-1 selector valve port positions<br />
No<br />
53 Input from MU2B<br />
04 Output from C3W<br />
16 Input to port 2 to C2 relay<br />
30 Output from port 3 to C2 relay<br />
14 To BC equalising pipe<br />
In the lead position <strong>of</strong> the above valve port 4 and 16 and port 30 and 14 are connected<br />
to each other.<br />
In the trail position <strong>of</strong> Fl selector valve following are the inputs to different ports. No. 14<br />
input from BC equalising pipe.<br />
No. 16 output to port 2 <strong>of</strong> C2 relay valve.<br />
In trail position port 14 and 16 are connected to each other.<br />
When SA 9 is put to application position, control air pressure comes to port 2 <strong>of</strong> C2<br />
relay valve (A31) which allows proportionate MR pressure to pass to brake cylinder for application<br />
<strong>of</strong> brake in leading loco. This output signal <strong>of</strong> C2 relay valve goes to Port 30 <strong>of</strong> Fl selector valve <strong>of</strong><br />
the leading loco and through port 14 and BC equalising pipe goes to port 14 <strong>of</strong> trailing loco. In<br />
trailing loco port 14 and 16 are connected. The same brake cylinder pressure as <strong>of</strong> leading loco<br />
passes to port 2 <strong>of</strong> C2 relay valve <strong>of</strong> trailing loco which allows output pressure equal to the control<br />
air pressure to brake cylinder <strong>of</strong> the trailing loco.<br />
7.2.10.2 Parting <strong>of</strong> air brake stock (Ref. fig.7.2.4)<br />
Parting <strong>of</strong> air brake stock vents the brake pipe to atmosphere. This causes reduction in<br />
BP pressure in C3W distributor valve for both loco and trailing stock. Reduction in BP actuates
C3W distributor valve causes output air pressure to be sent to control port 2 <strong>of</strong> C2 relay valve<br />
through F-l selector valve in loco and in the trailing stock. This causes C2 relay valve <strong>of</strong> loco<br />
and C3W distributor valve <strong>of</strong> trailing stock to allow compressed air at same pressure to brake<br />
cylinder and proportionate application <strong>of</strong> brakes in both loco and trailing stock takes place.<br />
Simultaneously port 10 H5 relay air valve senses the reduction in BP pressure. This<br />
valve actuates, closes exhaust port 13 and connects port 9 to port 11. Main reservoir pressure<br />
from port 9 through port 11 and double check valve (A33) operates the pressure switch (RGEB,<br />
B15) to cause auto regression in the control circuit <strong>of</strong> the locomotives.<br />
7.2.10.3 Train parting with vacuum brake stock (Ref. fig. 7.2.4)<br />
When train equipped with vacuum brake gets parted the proportionate application <strong>of</strong> air<br />
brake in the loco and vacuum brake in the stock shall take place. During train parting as the<br />
vacuum in the train pipe falls by 10 to 15 cms it is sensed by VA-1B valve whose port 2 and 6 is<br />
having vacuum train pipe as its signal. The VA-1B valve get actuated and the exhauster is<br />
disconnected from vacuum train pipe also ports 1 and 11 <strong>of</strong> this valve gets connected. Main<br />
reservoir pressure passes to port 1 after getting reduced to 1.4 to 1.7 kg/cm² by control air valve<br />
HS4. This reduced pressure passes to port 10 <strong>of</strong> HB5 pipe relay valve. On receipt <strong>of</strong> this control<br />
pressure, HB5 gets actuated and port 9 (exhaust port) gets closed and port 12 and 11 gets<br />
connected. MR pressure through port 12 passes to double check valve (A33) through port 11 <strong>of</strong><br />
HB5 relay valve to pressure actuated switch (RGEB, B15) to start the auto regression control<br />
circuit in the loco.
7.2.11 Gauges<br />
There are five gauges in each driving cab. These gauges indicate BC, MR, FP, VTP air
flow measuring gauge, also BP pressure to the driver. Apart from these single pressure gauges<br />
are provided. One single pressure gauge is fitted near the panto reservoir. The second gauge is<br />
provided in the brake pipe line to show the brake pipe pressure. One single pressure gauge is<br />
provided to indicate the pressure in the control side <strong>of</strong> the VA-lB control valve, which is regulated<br />
by HS-4 control valve.<br />
7.2.12 Other Features<br />
It should be noted that whenever the vacuum setting is done through the vacuum relief<br />
valve (BS), it should be done by seeing the single vacuum gauge fitted in driver's cab.<br />
The first two main reservoirs are provided with auto drain valve and the condensate is<br />
automatically drained <strong>of</strong>f during the "cut out" and "cut-in" cycle <strong>of</strong> the compressor governor. All the<br />
other three main reservoirs are provided with manual drain cocks to drain <strong>of</strong>f periodically the<br />
condensate collected in the reservoirs.<br />
The main reservoir also supplies compressed air to auxiliaries such as wipers, horns and<br />
sanders. The MR equalising pipe is charged from the main reservoirs through a duplex check<br />
valve set at 5.0 ± 0.1kg/cm².<br />
The main reservoir also supplies compressed air to electrical auxiliaries such as<br />
pantographs, tap changers etc. At the time <strong>of</strong> initial energisation <strong>of</strong> loco or when there is<br />
insufficient pressure in pantograph reservoir to raise the pantograph, battery driven auxiliary<br />
compressor is operated to build up pressure in the pantograph reservoir and auxiliary circuit to<br />
energise the loco. The pantograph reservoir is operated against pressure leakage by a diaphragm<br />
operated cock. One safety valve to cut out at 8.5 ± 0.1kg/cm² has been provided to safeguard the<br />
baby compressor from excessive pressure.<br />
7.3 ELECTRO-PNEUMATIC BRAKES<br />
7.3.1 Introduction<br />
All BG EMU stock have been provided with self-lapping electro-pneumatic combined<br />
with automatic compressed air brakes. Two makes <strong>of</strong> equipment are in use viz. Westinghouse and<br />
Knorr-Bremese (Escort Knor). Though the details <strong>of</strong> equipment differ appreciably, both systems<br />
are quite similar in principle. The description given below pertains mainly to the Westinghouse<br />
equipment provided in ICF-built EMUs.<br />
7.3.2 Features <strong>of</strong> Electro-pneumatic brakes<br />
Electro-pneumatic braking is normally employed for service stops. The automatic brakes<br />
are used under the following circumstances:<br />
a) For automatic application <strong>of</strong> brakes on both halves <strong>of</strong> a train in the event <strong>of</strong> a<br />
parting.<br />
b) For application by the Guard in an emergency.<br />
c) For automatic application due to operation <strong>of</strong> the dead-man's device.<br />
d) For service stops by the Driver in the event <strong>of</strong> failure <strong>of</strong> control supply for EP
akes.<br />
e) When Driver makes an emergency application both EP and Auto brakes apply.<br />
7.3.3 Main components<br />
The main components <strong>of</strong> the equipment are as under -<br />
7.3.3.1 A main reservoir system consisting <strong>of</strong> a compressor in each motor coach feeding into main<br />
reservoirs on motor coaches and supplementary reservoirs on trailer coaches inter-connected<br />
from end to end <strong>of</strong> the train by a main reservoir pipe with flexible couplings at ends <strong>of</strong> coaches.<br />
The main reservoir is maintained at a pressure <strong>of</strong><br />
5.8 to 7.0 kg/cm² by means <strong>of</strong><br />
pressure governors controlling each compressor. All the compressors in train are synchronized to<br />
start and stop together.<br />
7.3.3.2 A brake pipe from end to end <strong>of</strong> the train with flexible inter-connections between coaches.<br />
The pressure in this pipe is maintained at 4.57 kg/cm ² to keep the automatic brakes released.<br />
7.3.3.3 A brake unit in each coach consisting <strong>of</strong> the control valves for control <strong>of</strong> EP and auto<br />
brakes.<br />
7.3.3.4 The brake cylinders on each bogie with automatic slack-adjusters and associated brake<br />
rigging. Usually the number <strong>of</strong> brake cylinders is four per bogie on motor coaches and two per<br />
bogie on trailer coaches.<br />
7.3.3.5 A brake controller in each driving cab. The controller in the driving cab in use is made<br />
operative by means <strong>of</strong> an isolating valve switch operated by Driver's key.<br />
7.3.3.6 A brake application relay in each driving cab, the one in the operative cab responding to<br />
the operation <strong>of</strong> the brake controller to control the supply to the brake control train wires carried<br />
along with the other control wires in the inter-vehicular couplers.<br />
7.3.3.7 Five train wires, viz EP supply wire, brake application holding train wire, brake indication<br />
wire and EP return wire.<br />
7.3.3.8 A warning system to indicate to the Driver if EP brakes have applied and to warn him if a<br />
failure takes place.<br />
7.3.3.9 A pilot valve and emergency valve to operate the brakes if the dead-man's device is<br />
released.<br />
7.3.3.10 Isolating cocks, pressure gauges and control switches.<br />
7.3.3.11 Release valves for manual release <strong>of</strong> brakes in individual bogies.<br />
7.3.4 Brake equipment in coaches<br />
Each coach has an EP brake unit which houses the control valves for both EP and autobrakes.<br />
The 'pipe-bracket' arrangement is used where by the valves are bolted on to a casting
which has the requisite inter connection between valves by means <strong>of</strong> cored passages in the<br />
casting itself, the only external pipe connections being from the main reservoir and brake pipes<br />
and atmosphere.<br />
7.3.5 Brake Controller<br />
The brake controller handle has five positions as under ;-<br />
(a) I ...... Release and Running<br />
(b) II ...... Full service EP<br />
(c) III ...... Lap (for auto application)<br />
(d) IV ...... Service automatic<br />
(e) V ...... Emergency<br />
The positions <strong>of</strong> brake controller is shown in fig. 7.3.5.<br />
Lower brake cylinder pressures with self-lapping feature as explained later are<br />
obtainable for intermediate positions <strong>of</strong> the handle between positions I and II, the actual brake<br />
cylinder pressure being dependent upon the degree <strong>of</strong> handle movement away from position I.<br />
7.3.6 E.P. brake system<br />
Fig 7.3.6 is a block diagram explaining the functioning <strong>of</strong> the EP brakes. When an EP<br />
application is to be made, the controller handle is moved from position I towards position II. (Fig<br />
7.3.5). First the holding train wire is energized which energizes the holding magnet valves<br />
throughout the train, thus closing the exhaust from the brake cylinders. The application valves are<br />
then energized via the application train wire. This causes compressed air to flow the brake<br />
cylinders from the main reservoir pipe, the rate <strong>of</strong> flow being controlled by a choke (not shown in<br />
the figure). If the application valve remains energized, the pressure in the brake cylinder builds up<br />
to 3.5 kg/cm², any rise <strong>of</strong> pressure beyond this value being prevented by the 'limiting valve'.<br />
Between positions I and II the self-lapping mechanism controls the brake cylinder<br />
pressure. Fig.7.3.5 shows the self-lapping mechanism schematically. Movement <strong>of</strong> the controller<br />
handle towards II compresses a spring in a small control cylinder, the amount <strong>of</strong> compression<br />
depending upon the degree <strong>of</strong> handle movement. This spring acts on piston at the back <strong>of</strong> which<br />
air pressure from the brake cylinders <strong>of</strong> the leading bogie is applied. When the brake cylinder<br />
pressure exceeds the value corresponding to the controller handle position, the mechanism deenergises<br />
the application train wire, thus limiting the brake cylinder pressure to value<br />
corresponding to the handle position. If the brake cylinder pressure drops on account <strong>of</strong> leakage<br />
etc. The application wire is re-energized. If the handle is moved backwards, the holding wire is deenergized<br />
till the brake cylinder pressure drops to the required value. The self-lapping mechanism<br />
thus automatically controls the brake cylinder pressure at definite value corresponding to the<br />
handle position and enables graduated application and release. In position II & V the application<br />
and holding circuits are energized by 'positive acting' contacts bypassing the self-lapping<br />
mechanism, the pressure then being limited by the limiting valve as explained earlier.<br />
Two indication lamps are provided on the Driver's desk a green lamp to indicate that EP<br />
brake control supply is available and an orange lamp which lights up when brake application is<br />
made if pressure has built up in all the bogies, which is detected by a pressure switch, the<br />
pressure switches in all the coaches being connected in series. The extinguishing <strong>of</strong> the green<br />
lamp indicates total failures <strong>of</strong> EP brakes necessitating use <strong>of</strong> the automatic brakes to control the
train. Failure <strong>of</strong> the orange lamps to light up when brakes are applied indicates partial failure <strong>of</strong> the<br />
EP brakes. The Driver has to be very vigilant and should be prepared to control the train, if<br />
required, by using auto brakes.<br />
7.3.7 Automatic brakes<br />
Fig. 7.3.7 is a block diagram explaining the function <strong>of</strong> the automatic brakes. When the<br />
brake controller in the driving cab is in position I and the controller is put into operation by putting<br />
on the ‘isolating valve switch' compressed air is fed to the brake pipe from the MR pipe via a<br />
reducing valve in the brake controller which ensures that the pressure in the brake pipe is built up<br />
and remains steady at 4.57 kg/cm².<br />
The vital component in the automatic brake system is the triple valve which<br />
forms a part <strong>of</strong> the EP brake unit in each coach, its functions are -<br />
7.3.7.1 When pressure in the brake pipe is 4.57 kg/cm², it opens the brake cylinder to atmosphere<br />
thus releasing the brakes and at the same time connects the brake pipe to an auxiliary reservoir in<br />
each coach storing compressed air at a pressure <strong>of</strong> 4.57 kg/cm² in the auxiliary reservoir.<br />
7.3.7.2 When pressure in the brake pipe is reduced either voluntarily by the Driver or the Guard or<br />
due to parting <strong>of</strong> train or operation <strong>of</strong> the dead-man's device etc., it closes the exhaust from the<br />
brake cylinder and connects the auxiliary reservoir to the brake cylinders, allowing the stored air in<br />
the reservoir to flow into the brake cylinders. The volume <strong>of</strong> the auxiliary reservoir is so chosen<br />
that the maximum pressure in the brake cylinders is limited to 3.5 kg/cm². The triple valve also has<br />
a lap position whereby it is possible to control the brake cylinder pressure to values below 3.5<br />
kg/cm² by holding the brake pipe pressure at intermediate values making use <strong>of</strong> position III on the<br />
brake controller.<br />
7.3.7.3 When the brake pipe is recharged by moving the controller to position I, the triple valve<br />
returns to the position indicated in (a) thus releasing the brakes and storing air in the auxiliary<br />
reservoir in readiness for the next application.<br />
A triple valve stabilizing valve is provided in the circuit which ensures that the triple valve does not<br />
react to small pressure pulsation.<br />
7.3.8 Emergency brakes<br />
In position V (i.e. emergency) <strong>of</strong> the brake controller, both EP and auto brakes apply together.<br />
Rapid application <strong>of</strong> the automatic brakes is obtained by quick venting <strong>of</strong> the brake pipe to<br />
atmosphere. A safety valve in the brake unit on each coach prevents excessive pressure in the<br />
brake cylinders. This valve is normally set at 3.9 kg/cm².<br />
Release <strong>of</strong> the dead-man's device by the Driver result in quick venting <strong>of</strong> the brake pipe<br />
to atmosphere via an emergency valve resulting in full auto application.<br />
7.3.9 Description <strong>of</strong> other equipments<br />
A valve is provided in each driving cab to enable the Guard to vent the brake pipe to<br />
atmosphere and thus cause brake application. A gauge is provided close to this valve to indicate<br />
the brake pipe pressure to the Guard.<br />
A pressure switch usually called the control governor connected to the brake pipe<br />
prevents application <strong>of</strong> power to the traction motors till the brakes are kept ready. This control<br />
governor opens and cuts <strong>of</strong>f traction control supply if the brake pipe pressure is reduced.
A duplex pressure gauge is provided in the driving cab to indicate to the Driver the<br />
pressure in the main reservoir and brake pipes. Another duplex gauge indicate to him the pressure<br />
in the cylinders <strong>of</strong> the two leading bogies.<br />
Isolating cocks are provided to isolate a defective brake unit from the MR and brake<br />
pipes and also to isolate brake cylinders in the individual bogies.<br />
The brake cylinders are equipped with automatic slack adjusters to take up the slack in<br />
the brake rigging with wear <strong>of</strong> brake blocks, thus ensuring fairly constant piston stroke and<br />
obviating the need for manual adjustment <strong>of</strong> the brake rigging between visits <strong>of</strong> the units to the<br />
shed. This is an essential feature <strong>of</strong> brake equipment for suburban services, when brake block<br />
wear is quite high on account <strong>of</strong> frequent application <strong>of</strong> brakes.<br />
The know system is quite similar to the system described above. In this system,<br />
however, the automatic brakes become operative automatically on failure <strong>of</strong> the EP brakes. With<br />
this arrangement the brake controller has only three positions viz. release, full service<br />
application and emergency.
8. MAINTENANCE, AND OVERHAUL<br />
SCHEDULES OF LOCOMOTIVES<br />
8.1 MAINTENANCE SCHEDULES<br />
<strong>Indian</strong> <strong>Railways</strong> have gained considerable experience with the maintenance <strong>of</strong> electric<br />
locomotives since 1960. Based upon the safety requirements, various checks have been<br />
evaluated and already standardized. Also, based upon the investigations into failures, special<br />
maintenance instruction (SMIs) have been issued by RDSO from time to time. Even for new type<br />
<strong>of</strong> locomotives, standard equipment like pantographs, circuit breakers etc. continue to be used and<br />
established maintenance practices for such equipments will, therefore, be applicable.<br />
The scope <strong>of</strong> maintenance work to be followed in each maintenance schedule can be<br />
arrived at, based upon the following -<br />
8.1.1 Maintenance instructions as furnished by manufacturer for a new type <strong>of</strong> rolling stock.<br />
Copies <strong>of</strong> these manuals will be readily made available for reference whenever required by<br />
maintenance staff, for each type <strong>of</strong> equipment in use.<br />
8.1.2 Maintenance instruction already developed by a zonal railway for standard equipments.<br />
8.1.3 Specific instructions already laid down regarding safety requirements/fire prevention<br />
requirements etc. <strong>of</strong> the rolling stock.<br />
8.1.4 Rich experiences <strong>of</strong> the system taking into account adverse environmental conditions in<br />
which electric locomotives are expected to perform satisfactorily like high temperature, high<br />
humidity, extremely dusty conditions etc.<br />
On the above line, maintenance schedules for electric locomotives <strong>of</strong> different classes<br />
and types already in service have more <strong>of</strong> less reached to an optimum level. Thus there may be<br />
little necessity for changes. There can be, <strong>of</strong> course, marginal changes as dictated by further<br />
service experience.<br />
As far as new types <strong>of</strong> electric locomotives/their sub-assemblies that may be introduced<br />
from time to time, principles enumerated above are to be followed for arriving at optimum scope <strong>of</strong><br />
work consistent with periodicity <strong>of</strong> prescribed schedules.<br />
8.2 ALTERATIONS IN MAINTENANCE SCHEDULES<br />
Presently individual railways might have made minor alterations in the schedules based<br />
upon their own experience. Considering the wide variations in operating and duty cycles and<br />
environments as experienced in different systems, this would be considered logical. However, the<br />
recent trend is to enlarge the field <strong>of</strong> operation <strong>of</strong> electric locomotives. Thus, today electric<br />
locomotives <strong>of</strong> one system are running in other systems. Thus alterations in schedules based<br />
upon local experience will have to give way to standardisation <strong>of</strong> schedules so that locomotives <strong>of</strong><br />
one system will perform satisfactorily when called upon to operate in other systems.<br />
In the light <strong>of</strong> experience and improvements based upon trials <strong>of</strong> modifications, it may
ecome advantageous either to reduce the scope <strong>of</strong> maintenance work or the periodicity already<br />
prescribed and standardised. The following procedure should be adopted for effecting such<br />
changes -<br />
8.2.1 Those which are connected with safety requirements, a comprehensive proposal<br />
indicating the actual experience <strong>of</strong> the railways, benefits that are likely to accrue due to proposed<br />
changes and the particular reasons for suggesting the change should be sent to RDSO with the<br />
approval <strong>of</strong> the Chief <strong>Electrical</strong> Engineer. Such modifications to the maintenance requirements<br />
should only be implemented after RDSO have studied the proposal <strong>of</strong> the railway and approved<br />
the same.<br />
8.2.2 Proposals other than item 8.2.1. A similar procedure must be adopted excepting that<br />
the Chief <strong>Electrical</strong> Engineer may authorize provisionally the introduction <strong>of</strong> the change subject to<br />
post facto approval from RDSO, in case RDSO convey an opinion to the contrary, the original<br />
schedule should be brought back. The railways can, however, continue to pursue the matter with<br />
RDSO and if the later agree finally, adopt the change to the extent agreed upon.<br />
8.3 INSPECTION SCHEDULES<br />
under -<br />
The maintenance and overhaul schedules to be followed for AC electric locos are as<br />
Nature <strong>of</strong> inspection/overhaul<br />
Place to be carried out<br />
1. Trip inspection, TI Passenger loco Outstation shed <strong>of</strong> homing<br />
every 3000 km.<br />
every loco shed as convenient<br />
Freight loco-<br />
i) TAO Motor-15 days after last attention.<br />
ii) HITACHI Motor-22 days after last attention<br />
2. Monthly inspection (IA) Homing or nominated<br />
40 days electric loco shed.<br />
3. Two monthly inspection (IB) Homing electric loco shed<br />
40 days<br />
4. Four monthly inspection (IC) Homing electric loco shed<br />
40 days<br />
5. Annual overhaul (AOH) Homing electric loco shed<br />
AOH + 15 days<br />
6 Intermediate overhaul (IOH) Homing electric loco shed<br />
300,000 km after POH or first or nominated workshop.<br />
Commissioning or 3 years whichever<br />
is earlier + 1 month<br />
*7 Periodical overhaul (POH) Workshop nominated for<br />
60,000 km after commissioning the purpose<br />
or last POH or 6 years whichever<br />
is earlier + 3 month.<br />
* The periodicity <strong>of</strong> IOH and POH shall be determined by each railway and for<br />
each type <strong>of</strong> locomotives. With the improved technical inputs the efforts should
e made to increase the interval between overhauls. There cannot be any hard<br />
and fast rules. Some <strong>of</strong> the older locos on which there are large-scale<br />
probabilities <strong>of</strong> failures may need frequent overhauls.<br />
Detailed instructions for TI, IA, IB, IC, AOH and IOH will be issued by CEE for each type<br />
and each series <strong>of</strong> locomotives. The scope <strong>of</strong> work is broadly covered in para 30350 to 30313 <strong>of</strong><br />
ACTM.<br />
It may be mentioned that inspections as detailed above may need revision as we gain<br />
experience with new types <strong>of</strong> locomotives.<br />
For example WAG/6A locos, schedules are monthly inspections, 6 monthly inspections,<br />
annual inspections and 3 yearly schedules, and<br />
WAG/7 loco schedule–POH after 9years, IA-45days, IB-90days,<br />
IC- 135 days.<br />
8.4 TECHNICAL INSTRUCTIONS<br />
A set <strong>of</strong> the technical instructions relevant to the work <strong>of</strong> each section should be made<br />
available so that they may carry out their work correctly. These can be classified under the<br />
following heads.<br />
a) Inspection books.<br />
b) Inspection charts.<br />
c) Trouble shooting charts.<br />
d) Technical charts.<br />
8.4.1 Inspection books: These give the scope <strong>of</strong> work at various scheduled inspection viz.<br />
TI, IA, IB, IC, etc. itemizing the works and the order in which they are to be carried out, arranged<br />
section-wise. The responsibility <strong>of</strong> each section supervisor is defined.<br />
8.4.2 Inspection charts: These charts are prepared for each component individually. These<br />
cover a comprehensive list <strong>of</strong> all points to be checked, the observations to be made, clearances to<br />
be ensured, specifying conditions under which such verification should be made and the<br />
measuring equipment to be used for the purpose.<br />
8.4.3 Trouble shooting charts: Clear instructions should be issued in the form <strong>of</strong> trouble<br />
shooting charts for each type <strong>of</strong> defect, detail in which the checks to be made and the order in<br />
which they are to be made. Before the locomotive is given back to service, a competent supervisor<br />
should satisfy himself regarding the correctness <strong>of</strong> the investigations and the rectifications made.<br />
In trouble shooting, the investigating team quite <strong>of</strong>ten discovers a pattern <strong>of</strong> failure on the basis <strong>of</strong><br />
which modifications and improvements to designs may have to be initiated.<br />
8.4.4 Technical charts: These cover full details <strong>of</strong> all repairs, major adjustments and refitting<br />
<strong>of</strong> equipment, which are to be carried out. Where such repairs are not possible, the item will have<br />
to be replaced by new component. In the technical charts the detailed description <strong>of</strong> the material,<br />
the tools to be used and the procedure to be followed and the defects to be checked after
completion <strong>of</strong> work are detailed.<br />
The CEE’s <strong>of</strong>fice will be responsible for ensuring that (a) the instructions received from<br />
RDSO are forwarded to the loco sheds and (b) the superseded instructions are cancelled,<br />
withdrawn and destroyed, preserving one copy only for future reference. Instructions received from<br />
RDSO require constant review and a system <strong>of</strong> generating feed back information on the<br />
implementation <strong>of</strong> these instructions will be followed. Any modifications required in RDSO's<br />
instructions should be carried out only after approval from RDSO is received.<br />
These technical instructions require constant review in the light <strong>of</strong> experience. If any<br />
modifications become necessary, Sr.DEE (RS) may introduce changes provisionally with the<br />
approval <strong>of</strong> CEE. Such changes should, however, be advised to RDSO for scrutiny and final<br />
incorporation in the documents.<br />
8.5 ITEMS OF INSPECTION<br />
8.5.1 Trip inspection: The trip inspection is mainly required for topping <strong>of</strong> oils, distilled water<br />
in batteries and attention to various minor defects which have been recorded in the log book. In<br />
addition certain checks are necessary mainly due to serve environmental conditions (hot, humid<br />
and dusty) existing in the country.<br />
During trip inspection the engine examiner should -<br />
a) Carry out detailed checks in regard to any unusual occurrence reported by the<br />
Drivers in the loco log-book.<br />
b) Visually inspect the auxiliaries for satisfactory starting and operation.<br />
c) Feel by hand the temperature <strong>of</strong> axle roller bearings.<br />
d) Visually inspect mechanical components like springs, dampers etc. and the brake<br />
rigging to detect any abnormality.<br />
8.5.2 Specific items to be attended in TI are:-<br />
8.5.2.1 General ro<strong>of</strong> inspection: Check the ro<strong>of</strong> generally for any foreign materials such as<br />
wire pieces, clean the insulators and check visually for cracks or chips, check abnormalities such<br />
as flashovers.<br />
8.5.2.2 Pantographs: Check for copper deposition, grooving <strong>of</strong> strips and proper lubrication;<br />
visually check springs and articulation and also test raising and lowering.<br />
8.5.2.3 Air blast circuit breakers/Vacuum circuit breaker: Check for satisfactory operation.<br />
8.5.2.4 Return current shunt: Check the shunt connections between the body, bogie<br />
frame/axle boxes, and traction motor/axle are intact, tighten if necessary.<br />
8.5.2.5 Bogies: Remove foreign material and dirt picked up on run visually inspect for loose,<br />
defective or missing parts.
8.5.2.6 Battery: Check and record battery voltage, top up cells as required.<br />
8.5.2.7 Auxiliaries: Check and top up oil in suspension bearing, exhausters, compressors,<br />
auxiliary compressors and gear cases and record in the log-book.<br />
8.5.2.8 Air reservoirs: Drain all accumulated water from all reservoirs.<br />
8.5.2.9 Cab and floor: Clean the cab and dust the flooring and remove oily deposits.<br />
8.5.2.10 Controls and indications: Visually check and test for proper operation <strong>of</strong> the master<br />
controller, the tap changer, all EP contractors, wipers, whistles, brakes, auxiliary equipment and<br />
indication and alarm circuits.<br />
8.5.2.11 Transformer oil level: Check oil level, ascertain the cause if it is low/high.<br />
8.5.2.12 Clean look out glasses.<br />
8.5.2.13 Check the following safety items:<br />
• Speed recorder/speed indicator for any abnormality<br />
• Flasher lights, head lights, marker lights etc. for working<br />
• Wipers<br />
• Sanding gear for any abnormality. Fill sand boxes with sand <strong>of</strong> specified quality<br />
• Wheel and axle for visual defects such as shelling cracks, flat spots etc.<br />
• Brake gear for (i) loose fasteners (ii) brake shoe wear (iii) brake shoe release (iv)<br />
operation <strong>of</strong> all the brake cylinder pistons and (v) leakage in the bogie hose pipe.<br />
• CBC & draft gear<br />
• Safety sling <strong>of</strong> brake shoe holder.<br />
• Brake pull rod safety brackets.<br />
• Safety brackets.<br />
• Cattle guard.<br />
• Rail guard.<br />
• Gear case for any missing parts and loose fasteners.<br />
• Hand brakes.<br />
• VEF.<br />
• QOP position.<br />
• Isolation <strong>of</strong> any component.<br />
• Vacuum <strong>of</strong> dummy and leakage.
8.5.2.14 Wherever time and facilities are available the passenger locomotives should<br />
immediately be washed.<br />
8.6 MONTHLY INSPECTION (IA)<br />
8.6.1 Tests<br />
The supervisor <strong>of</strong> E2 section should carry out tests listed below before and after the<br />
inspection .<br />
8.6.1.1 Preliminary tests with 25 kV supply ON –<br />
a) Measure and record battery (BA) voltage.<br />
b) Measure and record battery charger voltage.<br />
kg/ cm².<br />
c) Check time taken to build up compressed air pressure from 1 kg/cm² to 8-9<br />
d) Check blowing out <strong>of</strong> safety valve.<br />
e) Check vacuum obtained with driver brake control valve MPF or A9.<br />
f) After building up vacuum, check for vacuum leakage for 5 mins.<br />
g) Check vacuum drop required for brakes to apply.<br />
h) Note pressure gauge reading when brakes are applied.<br />
i) Check working <strong>of</strong> braking electro-valve VEF.<br />
j) Check working <strong>of</strong> blowers under 'direct' and 'automatic' starting conditions.<br />
k) Note and record air leakages for one minute in main reservoirs and brake<br />
cylinders.<br />
l) Test headlights.<br />
m) Test working <strong>of</strong> cab heaters and fans.<br />
8.6.1.2 Preliminary tests with 25 kV supply OFF -<br />
a) Measure and record time required for raising and lowering both the pantographs.<br />
b) Measure and record time taken for various time delay relays.<br />
c) Test functioning <strong>of</strong> auxiliary circuit earth fault relay (QOA) by creating an earth<br />
fault.<br />
d) Test functioning <strong>of</strong> power circuit earth fault (QOP) by creating an earth fault,<br />
e) Check functioning <strong>of</strong> all lights.<br />
8.6.1.3 Tests under high tension before and after inspection successively from cab 2 and
cab 1<br />
a) Raising <strong>of</strong> pantograph.<br />
b) Working <strong>of</strong> auxiliary compressor motor (MCPA) and Arno (EG), particularly<br />
observing behavior during starting and for abnormal noise.<br />
c) Working <strong>of</strong> main compressor.<br />
d) Working <strong>of</strong> both exhausters for various positions <strong>of</strong> exhausters isolating switch.<br />
e) Cutting IN and cutting OUT <strong>of</strong> compressor governor (RGCP).<br />
f) Blowing <strong>of</strong> safety valves.<br />
g) Working <strong>of</strong> blowers particularly watching for abnormal noise.<br />
h) Observation <strong>of</strong> contractors for abnormal sound and sparking.<br />
i) Observe deviation <strong>of</strong> main ammeters taking two traction notches in forward and<br />
reverse directions.<br />
j) Test wheel slip relay (QD), progression and regression relays (Q51 and Q 52).<br />
k) Test electro-valve VEF.<br />
8.6.1.4 Low tension tests before and after inspection<br />
a) Testing <strong>of</strong> master controller for notch-by-notch progression and regression and<br />
total time for regression.<br />
b) Test working <strong>of</strong> sanders<br />
c) Test working <strong>of</strong> exhauster isolating switch (ZPV).<br />
8.6.2 Details <strong>of</strong> inspections to be carried out by various sections.<br />
Section M1<br />
a) Inspect the various components <strong>of</strong> transmission, for breakage deformation or<br />
cracks, check silent block for slackness and the general condition <strong>of</strong> various<br />
washers.<br />
b) Check the general condition <strong>of</strong> body and bogie frame, links, pins, springs for<br />
cracks possibly by dye penetrant or magnetic particle method.<br />
c) Check centre pivot side housing for cracks and side bearer cover for proper<br />
seating. Check the oil level and replenish.<br />
d) Check the snubber assembly for broken springs and replace any broken spring.<br />
e) Check sanders for satisfactory operation and correct height and ensure that they<br />
are filled.
f) Inspect and if required refill the fire extinguishers.<br />
g) Lubricate gear cases, buffing and draw gear & screw couplings.<br />
h) Check general condition <strong>of</strong> brake rigging, renew worn-out brake blocks and adjust<br />
brake rigging as required. Clean and check hand brake for proper operation.<br />
Clean and lubricate slack adjuster.<br />
i) Check traction motor axle suspension bearing, remove complete wick assembly,<br />
clean the wicks by soaking them in lubricant, remove foreign material from<br />
lubricating surface.<br />
j) Axle boxes, examine and top up oil if required.<br />
Section M3<br />
a) Visually inspect and clean all ro<strong>of</strong> insulators.<br />
b) Check condition <strong>of</strong> contact surface <strong>of</strong> the pantographs, remove sharp edges <strong>of</strong><br />
current collecting strips, check strips for thickness, lubricate pans with graphite<br />
grease, check shunts and spring for damage or wear, examine the steps, check<br />
raising and lowering operations, adjust throttle valve if necessary.<br />
Section M5<br />
a) Check foundation bolts, fan and its blade clean exhauster, compressor tray, check<br />
oil level and oil leakage in compressors and exhausters and clean the oil trays<br />
under the exhausters and compressors.<br />
b) Check couplings and lubricate compressor and exhauster.<br />
c) Check drain pipes <strong>of</strong> trays and suction pipe.<br />
d) Check HS4, HB5, F1, VA-1B, MU-2B, C3W distributor valves for correct<br />
functioning. Overhaul the valves.<br />
Section El<br />
a) Blow out the loco before inspection.<br />
b) Clean loco ro<strong>of</strong> and body.<br />
c) Troubleshooting defects.<br />
Section E2<br />
a) Check electrolyte level and top up battery cells, if necessary.<br />
b) Clean all insulators.<br />
c) Check specific gravity and voltage <strong>of</strong> pilot cells & record.
d) Check containers <strong>of</strong> batteries for cracks.<br />
e) Tighten the terminals and apply Vaseline to terminal studs and nuts.<br />
f) Check the arc chutes <strong>of</strong> CGR for proper fixing and any signs <strong>of</strong> damage.<br />
g) Measure contact gap, check wear limit, if necessary replace contacts.<br />
h) Check transformer bushings for cracks.<br />
i) Check capacitors and resistors, clean condenser tube, surge absorber with dry<br />
cloth, check connections.<br />
j) Check reverser J and CTF (<strong>Traction</strong> braking contactor) for free movement, air<br />
leakage.<br />
k) Measure the clearance <strong>of</strong> ro<strong>of</strong> spark gaps.<br />
Section E3<br />
ET 1 - 210 mm (range 200 - 250mm)<br />
ET 2 - 70 mm (range 70 - 125mm)<br />
a) Carry out a visual check <strong>of</strong> the traction motors for condition <strong>of</strong> the commutators,<br />
signs <strong>of</strong> any abnormality like flash over etc.<br />
b) Check brush holders and brushes.<br />
c) Check connections for tightness.<br />
d) Clean and blow out with compressed air,<br />
e) Check commutator and brushes <strong>of</strong> auxiliary compressor.<br />
f) Check other auxiliary machines including Arno converter for tightness <strong>of</strong><br />
connections and foundation bolts.<br />
Section E4<br />
a) Check speedometer calibration renew charts.<br />
b) Visually check contact pressure and clean contacts <strong>of</strong> relays.<br />
c) Check time setting and operation <strong>of</strong> time delay relay.<br />
d) Check and clean insulators and inspect secondary contacts <strong>of</strong> air-blast circuit<br />
breaker.<br />
e) Drain the air reservoir <strong>of</strong> circuit breaker.<br />
v) Lubricate the isolating contacts by graphite grease and test the air-blast circuit<br />
breaker for proper operation.<br />
8.7 TWO MONTHLY INSPECTION (IB)<br />
The items listed below are in addition to those covered under IA. Tests before and after<br />
inspection will are as listed under IA:
Section M1<br />
a) Gauge and examine wheels/tyres for wear and record. The wheels should be<br />
repr<strong>of</strong>iled, should the “condemning gauge” so indicate.<br />
Section M3<br />
No additional items.<br />
Section M5<br />
Carry out the following:<br />
a) Clean and check setting <strong>of</strong> non-return valves.<br />
b) Check VER valve.<br />
c) Check operation <strong>of</strong> multiple units (MU) cut out cocks and couplers.<br />
d) Check exhauster for exhaust pipe leakage.<br />
e) Change swan neck gasket.<br />
Section El<br />
No additional items.<br />
Section E2<br />
Carry out the following:<br />
a) Examine the contacts <strong>of</strong> all electro-magnetic contactors removing the arc chutes,<br />
check bedding <strong>of</strong> contacts and tightness <strong>of</strong> connections, clean auxiliary contacts,<br />
clean and refit arc chutes.<br />
b) Measure contact gap <strong>of</strong> Tap Changer contractor (CGR), check the wear and<br />
change the contacts if necessary.<br />
c) Check and clean arcing horns.<br />
d) On battery (BA) panel check connections and blow <strong>of</strong>f dust.<br />
e) Check the condition <strong>of</strong> connections and switches on switchboard.<br />
f) Remove, clean and refit body-side filters.<br />
Section E3<br />
Carry out the following:<br />
a) In the traction motors check clearance between commutators and brush boxes.<br />
b) Check traction motor blower blades.
Section E4<br />
Carry out following:<br />
a) Check foundation bolts <strong>of</strong> DJ.<br />
b) Check carbon brushes and commutator <strong>of</strong> speedometer and transmitter.<br />
c) Check time lag, operation and contacts <strong>of</strong> circuit breaker tripping relay, circuit<br />
breaker resetting relay, slipping devices, time delay relay and signaling relays.<br />
d) Check in detail Q50, Q45 and QCVAR.<br />
e) Clean and lubricate earthing switch (HOM)<br />
f) Check functioning <strong>of</strong> airflow relays.<br />
g) Check surge arrestors ET1 and ET2 for flash marks,, clean arcing Horns.<br />
8.8 FOUR MONTHLY INSPECTION (IC)<br />
These items are in addition to those covered under IA and IB.<br />
Section M1<br />
Carry out the following:<br />
a) Replace axle box liners when the clearance between axle box and bogie pedestal<br />
exceed the limits prescribed. Record clearances.<br />
b) Check that the equalizer pin is 'free' and condition <strong>of</strong> wear liners.<br />
c) <strong>Traction</strong> motor axle suspension bearing; Check axle cap bolts for tightness.<br />
Examine sample <strong>of</strong> the oil drawn from the bottom <strong>of</strong> the sump for presence <strong>of</strong><br />
water, dirt or other contaminants by blotter spot test.<br />
Section M3<br />
Carry out the following:<br />
a) Check level <strong>of</strong> pantograph pan with spirit level and adjust if necessary; check the<br />
pantograph pressure, overhaul servo motor and check spring pressure.<br />
b) Check the ro<strong>of</strong> bus bars.<br />
Section M5<br />
Carry out the following:<br />
a) Overhaul Independent air brake valve and automatic air brake valves SA9, DAB,<br />
A9, DVB, MPF. Check for correct setting and operation.<br />
b) Clean the filters, check gaskets and replace if necessary.
c) Overhaul reducing valves.<br />
d) Check isolating cocks for free movement.<br />
e) Check the condition <strong>of</strong> rubber gasket <strong>of</strong> non-return and snifter valves.<br />
f) Examine, lubricate non-return valve <strong>of</strong> main compressor.<br />
g) Check condition and lubrication <strong>of</strong> MU couplers.<br />
h) Change diaphragm <strong>of</strong> horns.<br />
i) Clean and inspect the valve assemblies <strong>of</strong> main and auxiliary compressors and<br />
exhausters.<br />
j) Thoroughly clean filters <strong>of</strong> compressors and exhausters.<br />
k) Thoroughly clean and check and condition <strong>of</strong> gasket <strong>of</strong> suction filters, screening<br />
filters and snifter valve filter, blow <strong>of</strong>f pipe lines with compressed air.<br />
l) Overhaul safety valves.<br />
m) Check condition <strong>of</strong> gasket <strong>of</strong> hose pipes.<br />
n) Check reservoir piping.<br />
Section El<br />
Carry out the following:<br />
a) Check the tightness <strong>of</strong> silicon rectifier cells with torque wrench, remove dust with<br />
vacuum cleaner and clean the rectifier assembly, check clearance <strong>of</strong> live parts to<br />
earth.<br />
b) Visually check and test the functioning <strong>of</strong> cell check devices.<br />
Section E2<br />
Carry out the following:<br />
a) Check the condition <strong>of</strong> the battery and adjust charger voltage, if necessary, check<br />
the plates and containers for buckling, corrosion, swelling, cracking etc.<br />
b) Carry out capacity test for batteries by giving it a cycle <strong>of</strong> charge and discharge.<br />
For this purpose battery may be replaced with a battery on which capacity test has<br />
already been carried out.<br />
c) Check and clean Pantograph selecting switch (ZPT), check for proper contact and<br />
finger pressure.<br />
d) On the switch desk replace worn out contacts and clean other contacts, lubricate<br />
rollers and actuating bars.<br />
e) Check headlight stabilizer.
f) Inspect all resistance, including R 118 and braking resistances.<br />
g) Check all terminal boards.<br />
h) Test the manual control <strong>of</strong> tap changer servo-motor (SMGR), lubricate the level<br />
bars.<br />
i) Check the insulation values <strong>of</strong> transformer windings to earth.<br />
j) Check the springs <strong>of</strong> reverser and CTF and replace if necessary, verify the<br />
pressure on main contacts, clean the servo motor, check the operation <strong>of</strong> main<br />
and auxiliary contacts, check the rubber buckets.<br />
k) Lubricate contacts and the articulation points <strong>of</strong> Ll, L2, C 145 and shunting<br />
contactors and check rubber buckets.<br />
l) Inspect SJ and SL for any abnormality and clean.<br />
m) Inspect braking electro valves, Pantograph electro valves and sanding electro<br />
valves VEF, VEPT, VESA and VER.<br />
Section E3<br />
In addition to items under IA and IB<br />
a) Measure and record the insulation resistance <strong>of</strong> traction motor winding.<br />
b) Check visually for top circulating ring <strong>of</strong> rotor and its top position <strong>of</strong> rotor bar<br />
cracks in Arno and lubricate bearings.<br />
c) Check and clean the commutator and brush box auxiliary compressor motor.<br />
Section E4<br />
Carry out the following :<br />
a) Remove main contacts check wear <strong>of</strong> fixed and moving contacts. Replace if<br />
necessary.<br />
b) Check and adjust the gaps <strong>of</strong> lighting arresters.<br />
c) Check and clean the contacts <strong>of</strong> high tension overload relay (QLM), Smoothing<br />
rectifier circuit overload relay (QRSI), electric braking relay (QF), braking exciter<br />
overload relay (QE), auxiliary circuit earth fault relay (QOA), no voltage relay<br />
(Q30). Check proper alignment and bedding <strong>of</strong> contacts.<br />
d) Check collector comb, dropping resistance and multi-core cable. Replace carbon<br />
brush if necessary,<br />
e) Clean and check operation <strong>of</strong> tap changer servo-motor (SMGR) relays and<br />
slipping device differential relay (QD), traction motor over voltage relay (Q20).<br />
8.9. ANNUAL OVERHAUL (AOH)<br />
These are in addition to the items listed under IA, IB and IC.
Section Ml<br />
a) Ultrasonic test <strong>of</strong> the axles.<br />
b) Check the condition <strong>of</strong> liners <strong>of</strong> axle boxes. Grease suspension roller bearings.<br />
c) Overhaul brake cylinder.<br />
d) Check gear case for damage to felt seal.<br />
Section M2<br />
Carry out the following:<br />
a) Overhaul all valves and replace gaskets, match seating.<br />
b) Overhaul and calibrate gauges.<br />
c) Overhaul servo motors <strong>of</strong> wipers.<br />
d) Dismantle and completely overhaul main compressors, auxiliary compressor and<br />
exhauster. Replace worn out components and gaskets.<br />
e) Replace all cotton filters.<br />
Section M3<br />
a) Check ro<strong>of</strong> bar connection <strong>of</strong> pantograph.<br />
b) Overhaul throttle valves VEPT, VESA, VEF.<br />
Section El<br />
a) Check fixation <strong>of</strong> door hinges, shutters.<br />
b) Condition <strong>of</strong> look out glasses, sun visors.<br />
c) Check tightness <strong>of</strong> all bolts on the ro<strong>of</strong>.<br />
d) Check string fuses <strong>of</strong> silicon rectifier.<br />
e) Check RC network (with instruments).<br />
Section E2<br />
Carry out the following:<br />
a) Overhaul <strong>of</strong> master controller, dusting and cleaning, lubricates pins <strong>of</strong> articulation<br />
<strong>of</strong> interlocking mechanism and grease interlocking cams.
) Check capacitor <strong>of</strong> headlight stabilizer,<br />
c) Check transformer and tap changer oil for di-electric strength and acidity.<br />
Recondition/ replace, if necessary.<br />
d) Check the switch angle <strong>of</strong> SMGR.<br />
e) Overhaul SMGR.<br />
f) Lubricate all electro-pneumatic contactors.<br />
g) Check Q factor <strong>of</strong> electro-pneumatic contactors.<br />
h) Inspect dynamic braking resistor for damage. Overhaul and record resistance.<br />
Section E3<br />
Carry out the following:<br />
a) Lubricate Arno bearings, measure and record insulation resistance values.<br />
b) Overhaul brush holder insulators.<br />
c) Overhaul auxiliary machines.<br />
Section E4<br />
a) Overhaul and calibrate main power circuit overload relay (QLM), silicon rectifier<br />
overload relay (QRSI), electric braking overload relay (QF), braking excitation<br />
overload relay (QE), power circuit earth fault relay (QOP), auxiliary circuit earth<br />
fault relay (QOA) and No-volt relay (Q30).<br />
b) Overhaul and test Q118, Q44, QTD and Q 48.<br />
c) Overhaul and test SMGR relays (Q51, Q52), QD and Q20.<br />
d) Overhaul speedometer.<br />
8.10 INTERMEDIATE OVERHAUL (IOH)<br />
8.10.1. IOH <strong>of</strong> locos may be done at the homing shed itself or at a workshop nominated for the<br />
purpose.<br />
8.10.2. During IOH, in addition to a thorough inspection <strong>of</strong> all mechanical and electrical items as<br />
detailed under IA, IB, IC and AOH, squaring <strong>of</strong> bogies should be done and traction motors,<br />
rectifiers, auxiliary machines, blowers, tap changer, pantograph etc. should be taken <strong>of</strong>f the loco<br />
and overhauled. Transformer oil should be filtered and replaced if acidity is beyond the permissible<br />
limits. All wheels should be re-pr<strong>of</strong>iled. Insulation resistance <strong>of</strong> all HT and LT circuits should, be<br />
measured and recorded. Approved modifications, which can be executed in the shed, should be<br />
carried out.
8.11 PERIODICAL OVERHAUL (POH)<br />
8.11.1 The nominated POH workshop should issue a programme for POH <strong>of</strong> locos at least six<br />
months in advance giving the individual numbers <strong>of</strong> locos to be called in, month wise. The homing<br />
shed will then send to the workshop a list <strong>of</strong> important points to be specially attended to during<br />
POH and the list <strong>of</strong> modification to be carried out. This will enable the workshop to plan POH work<br />
and arrange for procurement/shop manufacture <strong>of</strong> components required.<br />
8.11.2 The loco should be sent to its own power from the homing shed to the workshop under<br />
escort and alongwith its History Book. A complete list <strong>of</strong> all deficiencies in the loco should be<br />
handed over to the workshop representative who should jointly check the loco along with the shed<br />
representative.<br />
8.11.3 All approved modifications should invariably be carried out during POH. Deferment <strong>of</strong><br />
any item may be done only with the personal approval <strong>of</strong> CEE controlling the POH shops in<br />
concurrence with the CEE controlling the homing shed and under advice to the homing shed. In<br />
addition to all the items indicated against IOH, renewal <strong>of</strong> liners, bushes etc. should be done so as<br />
to ensure clearance and tolerances with adequate margin for wear in service is available till the<br />
next POH.<br />
8.11.4 In addition to complete LT and HT testing <strong>of</strong> the locos on completion <strong>of</strong> POH, individual<br />
items should also be subjected to detailed tests after overhaul and repair. Detailed test schedules<br />
should be laid down for each time for mechanical as well as electrical tests and standard pr<strong>of</strong>orma<br />
should be available for recording the test results for each equipment. A typical list <strong>of</strong> tests to be<br />
carried out on equipment is given below.<br />
8.11.4.1 Rotating machines- Insulation resistance by megger, no load tests, full load tests<br />
(except for traction motor) drop test <strong>of</strong> armatures, resistance measurement <strong>of</strong> field coils,<br />
temperature rise measurement.<br />
8.11.4.2 Transformers- For small transformers in control circuits, ratio test and insulation<br />
resistance measurement.<br />
8.11.4.3 Relays- Measurement <strong>of</strong> resistance and insulation values for operating coils, pickup and<br />
drop <strong>of</strong>f values <strong>of</strong> voltage/current, time delay where applicable, opening and closing <strong>of</strong> contacts.<br />
8.11.4.4 Contactors- Measurement <strong>of</strong> pick up and drop-<strong>of</strong>f values for operating coils, check for<br />
simultaneous closing <strong>of</strong> all phases where applicable. Leakages from valves and cylinder in the<br />
case <strong>of</strong> electro-pneumatic contactors.<br />
8.11.4.5 Cables- Insulation and continuity tests, high voltage tests for rewired panels.<br />
8.11.4.6 Resistors, Condensers and Reactors: Measurement <strong>of</strong> insulation resistance and<br />
ohmic values <strong>of</strong> resistance/reactance.<br />
8.11.4.7 Air blast circuit breaker- Insulation resistance <strong>of</strong> coil windings and live, parts, minimum<br />
pick up voltage for operating coils, opening and closing time for primary and secondary contacts,<br />
minimum pressure for locking in, sequence <strong>of</strong> opening and closing <strong>of</strong> auxiliary contacts.<br />
8.11.4.8 Miniature Circuit Breakers (MCBs)- Tests for tripping at rated instantaneous trip value.<br />
8.11.4.9 Tap changer- Insulation resistance, BDV and acidity testing <strong>of</strong> oil, correct functioning with<br />
minimum air pressure relay , correct progression and regression sequence.<br />
8.11.4.10 Silicon Rectifiers- Forward voltage drop, inverse resistance, HV test for complete<br />
assembly, voltage sharing between diodes, testing <strong>of</strong> cell-check device.<br />
8.11.4.11 Compressors and exhausters- Volumetric efficiency and leakage tests.
8.11.4.12 Speedometers- Calibration by comparison with a standard meter.<br />
8.11.4.13 Meters and Gauges- Calibration with standard instruments.<br />
8.11.5 On completion <strong>of</strong> POH, the loco should be taken over by a representative, <strong>of</strong> the homing<br />
shed after a joint inspection at the workshop. Details <strong>of</strong> work done and modifications carried out<br />
should be entered in the History Book which should be returned along with the loco.<br />
8.11.6 Loco will be returned working on its own power and if possible working a train after POH<br />
to the owning Railway.<br />
8.12 REBUILDING AND RECABLING OF LOCOMOTIVES<br />
8.12.1 During every alternate POH, locomotives will need recabling and repiping <strong>of</strong> vacuum<br />
and pneumatic pipes. POH shops should, therefore, plan these works.<br />
8.12.2 During every 4th POH, mechanical components and traction gear may need rebuilding.<br />
Some <strong>of</strong> the major components will also need replacement. POH shops should plan for such<br />
works. Opportunity should be taken to upgrade the parts and use the state <strong>of</strong> art equipment during<br />
such extensive repairs.<br />
8.13 MECHANICAL SCHEDULES OF LOCO<br />
8.13.1 Loco wheel set: Record diameter and pr<strong>of</strong>ile <strong>of</strong> individual wheel. Wheel turning is<br />
required when the values are away from permissible limits given in Chapter 4 and below.<br />
Sr. Items to be Periodicity Permissible<br />
No. Inspected clearance tolerance<br />
01. Tyre pr<strong>of</strong>ile IA, IB, IC<br />
Root wear Y<br />
Flange wear X<br />
6 mm.<br />
3 mm.<br />
kmph.<br />
kmph.<br />
02. Flats on the running All 60 mm for speed < 100<br />
surfaces schedules 40 mm for speed > 100<br />
03. Proud metal at the edge - do - less than 6mm.<br />
8.13.2 Other mechanical items<br />
An important part <strong>of</strong> the maintenance <strong>of</strong> the locos is the checking at prescribed intervals<br />
<strong>of</strong> important mechanical clearance and dimensions which have a bearing on safe and efficient<br />
operation to ensure that they are within prescribed limits. Such measurements should be recorded<br />
suitably either in registers or on printed cards and preserved so as to be readily available for<br />
reference in the PPO at all times. The items to be checked at the interval at which these to be<br />
checked are indicated. Limits will be specified for each type <strong>of</strong> locomotives by the CEE based on<br />
the manufacturer’s/RDSO's recommendations.<br />
Sr. Items to be Periodicity <strong>of</strong>
No. inspected inspection<br />
01. Clearance <strong>of</strong> spring plank from rail level IC, AOH, IOH, POH<br />
02. Buffer Height IA, IB, IC, AOH,<br />
03. Coupler height 1105 mm(max) - 1030 mm(min) - do -<br />
POH<br />
04. Clearance between bogie frame and axle IB, IC, AOH, IOH,<br />
05. Clearance between top <strong>of</strong> axle box and bogie frame - do -<br />
06. Clearance between bottom <strong>of</strong> axle box and horn stay. - do -<br />
07. Clearance between bolster and bogie frame - do -<br />
POH<br />
08. Clearance between bogie and stops and under frame IB, IC, AOH, IOH,<br />
09. Clearance between bogie horn cheek and<br />
axle box horn face.<br />
-do-<br />
10. Clearance between traction pads on bolster -doand<br />
bogie frame.<br />
11. Clearance between axle collar and bearing -dobrass<br />
(end float)<br />
12. Clearance between axle box flange and horn leg. -do-<br />
13. Clearance between side stops. -do-<br />
14. Clearance between stops on bogie and under frame -do-<br />
8.14 SQUARING OF BOGIES<br />
Due to heavy mechanical stresses and impacts suffered by bogies in service, some <strong>of</strong><br />
them get out <strong>of</strong> shape and distorted. During IOH and POH it is essential to restore bogies to their<br />
correct shape and alignment. To check this, at every major shed and POH shop, a test rig with a<br />
substantial foundation is provided over which the bogie can be placed and the amount <strong>of</strong><br />
distortion, which has taken place, can be measured. By application <strong>of</strong> adequate pressure at<br />
appropriate points either hydraulically or by other means, frame distortions are corrected as<br />
required, so as to ensure proper mechanical alignment <strong>of</strong> all parts assembled over the bogie.<br />
8.15 ENGINE FITNESS CERTIFICATE<br />
8.15.1 Whenever a loco for passenger service is released from a loco shed or outstation depot<br />
after scheduled inspection or unscheduled repairs an Engine Fitness Certificate should be<br />
issued.<br />
8.15.2 The certificate will be in two parts:-<br />
Part A :<br />
Part B :<br />
Items to be checked by maintenance staff only.<br />
Items to be checked by maintenance staff and driver jointly.
8.15.3 One copy <strong>of</strong> the certificate will be kept by the issuing shed/depot. One copy will be<br />
attached to the loco logbook.<br />
8.15.4 The inspection<br />
for issue <strong>of</strong> the certificate will be conducted by a supervisor from the maintenance side and<br />
Shunter or Driver from the running side.<br />
8.15.5 After the joint inspection, the details <strong>of</strong> the observations will be recorded in the certificate<br />
and jointly signed by the supervisor and Driver/Shunter.<br />
8.15.6 After the joint inspection, if any dispute arises between the running and maintenance<br />
staff over the fitness <strong>of</strong> the engine, the matter will be referred to the TLC, whose instructions will<br />
be binding on the Driver and maintenance staff.<br />
8.15.7 Once a shed/outstation depot issues a certificate, the previous one will be automatically<br />
cancelled. The cancelled certificate should be removed from the logbook and sent to the homing<br />
shed for record.
9. SAFETY & FIRE PREVENTION<br />
PRECAUTIONS<br />
9.1 FIREFIGIITING APPLIANCES FOR ELECTRIC ROLLING STOCK<br />
Every electric locomotive should be provided either with 2 number <strong>of</strong> 4 kg capacity or 4<br />
numbers <strong>of</strong> 1.25 kg capacity Halon type fire extinguishers to IS 11108, one in each cab and<br />
remaining in each corridor. The fire extinguishers shall be fixed on brackets at approved points in<br />
the cabs and corridors. The ATFR on duty will be responsible for ensuring that the locos leave with<br />
the full complement <strong>of</strong> fire extinguishers. Sufficient number <strong>of</strong> spare fire extinguishers should be<br />
available with the ATFR to replace defective and damaged fire extinguishers.<br />
In exceptional circumstances CEE may authorize change in complement and / or type <strong>of</strong><br />
the fire extinguishers.<br />
On EMU, 2 number <strong>of</strong> 2.5 capacity Halon type fire extinguisher should be provided in<br />
each <strong>of</strong> the cabins occupied by motorman and guard and also 1 number <strong>of</strong> Halon type<br />
extinguisher <strong>of</strong> the same capacity should be provided in each motor-coach <strong>of</strong> EMU. As in the case<br />
<strong>of</strong> other passenger trains, the Operating Department will be responsible for custody <strong>of</strong> the fire<br />
extinguisher and their issue to the guard at the originating station <strong>of</strong> each EMU rake.<br />
All the staff <strong>of</strong> electrical department connected with the running and operation <strong>of</strong> trains<br />
should be duly trained for fire fighting and use <strong>of</strong> fire extinguishers within the locos and EMUs.<br />
9.2 FIRE PREVENTION IN ELECTRIC LOCO<br />
RDSO has issued detailed guidelines for prevention <strong>of</strong> fire on electric locomotives vide<br />
document No.E-21/08/93 issued in June 1993.Important maintenance practices to be followed are<br />
given below:<br />
9.2.1 The presence <strong>of</strong> a large quantity <strong>of</strong> oil in the transformers and tap changers <strong>of</strong> electric<br />
locos and EMUs makes it possible for even minor fires to spread and assume serious proportion.<br />
Spillage <strong>of</strong> oil from exhausters and compressors results in accumulation <strong>of</strong> oil on the loco flooring<br />
causing spread <strong>of</strong> fires. An essential step in prevention <strong>of</strong> fires in locos in therefore, to control the<br />
leakage <strong>of</strong> oil from exhausters, compressors and pipeline and to arrange periodic cleaning <strong>of</strong> the<br />
locos to remove accumulated oil. Always use funnel <strong>of</strong> proper shape for topping <strong>of</strong> oil to prevent<br />
spillage.<br />
9.2.2 The arcing horns <strong>of</strong> contactors should be properly attended to during inspection. The<br />
arc-chute should be properly secured and the securing arrangement periodically checked. The<br />
arc-chute should also be cleaned during inspections.<br />
9.2.3 In addition to periodic cleaning <strong>of</strong> the bogies and under frame to remove oily dust, it is<br />
also important that rheostic and regenerative braking, where provided, is kept in working order and<br />
drivers trained to make use <strong>of</strong> these on graded sections, obviating the need for heavy mechanical<br />
braking as far as possible thus preventing spark from brake blocks.<br />
9.2.4 Rating <strong>of</strong> the fuses particularly <strong>of</strong> low voltage dc circuits are to be checked periodically
to eliminate the possibility <strong>of</strong> fires due to short circuits/overloads etc. Always ensure that the<br />
proper sizes and types fuses are used for replacement. Check calibration <strong>of</strong> MCBs and fuses <strong>of</strong><br />
only approved suppliers as laid down by RDSO.<br />
9.2.5 Ensure that all the protective relays are in good working order and are properly<br />
calibrated.<br />
9.2.6 A loose connection is a potential source <strong>of</strong> fire. Proper tightness <strong>of</strong> all the connections<br />
is, therefore, to be ensured and this point is to be given particular attention during inspections.<br />
Locos commissioned after POH or new locos after commissioning should be thoroughly checked<br />
up for loose connection, as during the first few days, loose connections will show up. Ensure that<br />
the connections secured with a nut and bolts are provided with a set <strong>of</strong> plain and spring washers.<br />
9.2.7 Insulation failures can result from surface flash over due to presence <strong>of</strong> dirt and dust. It<br />
is, therefore, essential that proper cleaning <strong>of</strong> terminal connections, bus bars, insulations and<br />
equipment is done during schedules as laid down to remove oil and dust.<br />
9.2.8 Fires in control equipment cubicles are a problem and usually lead to considerable<br />
damage. Segregation <strong>of</strong> phases in TK panel, provision <strong>of</strong> insulating separators between the<br />
phases, use <strong>of</strong> Epoxy or Nylon cleats should be done.<br />
9.2.9 Batteries constitute some fire or explosion risk when they are being given a heavy<br />
charge. Heavy charging can be higher due to malfunction <strong>of</strong> the charging equipment or<br />
carelessness when charging from the shop floor rectifier. It is therefore important to check that the<br />
ventilation provided in the battery box is not choked.<br />
9.2.10 Use only elastomeric cable as per RDSO specification No.E-14/01 Part I and II<br />
revision1<strong>of</strong> 1992 should be used. Cleats used should not have sharp corners. Power, auxiliary and<br />
control cables should be separately laid down to prevent the chances <strong>of</strong> short circuit <strong>of</strong> cables <strong>of</strong><br />
different voltage grade.<br />
9.2.11 In order to monitor healthy condition <strong>of</strong> insulation <strong>of</strong> wiring and equipment, insulation<br />
resistance should be measured periodically in sheds and during POH in shops, and records kept.<br />
9.2.12 In the event <strong>of</strong> fire it is essential that the main circuit breaker is tripped and the battery<br />
fuses <strong>of</strong> locomotives and EMUs are immediately removed to eliminate the continued feeding <strong>of</strong> the<br />
fault by the battery.<br />
9.3 TECHNICAL INVESTIGATION INTO FIRES<br />
Every case <strong>of</strong> fire minor or major, irrespective <strong>of</strong> the location, whether in power, auxiliary<br />
or control circuits, should be investigated very carefully, every though an inquiry in accordance<br />
with the Accident Rules may not be called for. The cause as established by the investigation<br />
should be analyzed by the Sr.DEE/DEE personally to identify areas requiring further investigation<br />
and to tighten up preventive measures. A report on each case <strong>of</strong> fire should also be furnished to<br />
CEE. The general guidelines to check up the items in locomotive in the event <strong>of</strong> fire, is given<br />
below:<br />
9.3.1 Items to be cheeked up after the fire in a Locomotive:<br />
Position <strong>of</strong> master controller SMGR drum and tap position <strong>of</strong> tap changer.<br />
Condition <strong>of</strong> DJ, whether locked or open<br />
Whether relays particularly QLM, QRSI, QOP, QOA are in tripped condition or normal.
Condition <strong>of</strong> HOBA, HQOP and HQOA switches.<br />
Condition <strong>of</strong> fuses.<br />
Condition <strong>of</strong> CGR1, CGR2, CGR3 and RGR.<br />
Arc-chute <strong>of</strong> CGRs, line and shunting contactors, auxiliary circuit contactors.<br />
Condition <strong>of</strong> contactors-whether found in wedged or welded.<br />
Signs <strong>of</strong> overheating and loose connections at the terminal points.<br />
Identify the location <strong>of</strong> the cable where globules are found formed.<br />
Identify the area/zone where the damage to the locomotive is extensive due to fire.<br />
Condition <strong>of</strong> 25kV bushings <strong>of</strong> the transformer-whether burnt after bursting or simply<br />
burnt or not damaged.<br />
Possibility <strong>of</strong> transformer oil splashing with special attention to any sign <strong>of</strong> oil in<br />
conservator.<br />
taps.<br />
Condition <strong>of</strong> tap changer with particular attention to splashing <strong>of</strong> oil and flash-over <strong>of</strong> the<br />
Condition <strong>of</strong> other electrical equipment like rectifier block, inductive shunt, auxiliary<br />
machines and traction motors for any abnormality.<br />
Polarity <strong>of</strong> smoothing reactor, if not damaged fully.<br />
Condition <strong>of</strong> brake blocks, wheel disc for over-heating and melting <strong>of</strong> brake blocks.<br />
Search out molten pieces <strong>of</strong> brake blocks, if any on SL.<br />
Whether the fire took place when dynamic brake was in applied condition. If so, whether<br />
thermal relay <strong>of</strong> DBR was in working order. Examine the condition <strong>of</strong> DBR resistances.<br />
Presence <strong>of</strong> any inflammable material like jute, rubber etc.<br />
Abnormality, if any already indicated in the log book by the driver which can lead to fire.<br />
Take this statement <strong>of</strong> crew and other personnel traveling on the locomotive about how<br />
the fire originated.<br />
Whether specified fire extinguishers were available in the locomotive and used by the<br />
driver and how many <strong>of</strong> them were found effective.<br />
9.4 FIRE ACCIDENTS<br />
Fires in trains, whether carrying passengers or not, resulting in loss <strong>of</strong> human life or<br />
injury to any person or loss <strong>of</strong> or damage to railway property to the extent <strong>of</strong> or more than the<br />
value prescribed are required to be treated as accidents and have to be inquired into in<br />
accordance with the Rules for reporting and inquiring into accidents Fires in other railway<br />
premises resulting in damage to railway property to the extent <strong>of</strong> or more than the value prescribed<br />
are required to be treated as accidents. Fire accidents involving loss <strong>of</strong> human life or injury to<br />
persons or damage to railway property estimated to cost equal to or over a prescribed value have<br />
also to be reported as soon as possible on telephone to the Railway board by the General<br />
Manager through operating (safety ) Branch.<br />
When electrical installations or electric rolling stock are involved or when there<br />
is possibility that the fire was caused by electrical short circuit or due to defect or<br />
malfunctioning <strong>of</strong> electrical equipment, a reprehensive <strong>of</strong> the <strong>Electrical</strong> department should
invariably be a member <strong>of</strong> the inquiry committee. Rules also require that a representative<br />
<strong>of</strong> the Security department should be associated with all inquiries into fire accidents. On<br />
arrival at the site <strong>of</strong> fire they will collect necessary evidence and make out a joint report in<br />
consolation with the representative <strong>of</strong> the security department.<br />
The composition <strong>of</strong> the inquiry committee and the method <strong>of</strong> disposal <strong>of</strong> the report <strong>of</strong> the<br />
inquiry committee will be as laid down in the Rules for reporting and inquiring into accidents<br />
issued by the Zonal <strong>Railways</strong>.<br />
9.5 ELECTRICAL SAFETY<br />
Following guidelines are specifically meant for <strong>Electrical</strong> rolling <strong>Stock</strong>. These are to be observed<br />
and in no way nullify or counter any <strong>of</strong> the instruction laid down elsewhere by the CEE in his<br />
capacity as <strong>Electrical</strong> Inspector to the Government <strong>of</strong> India.<br />
9.5.1 All Loco/EMUs sheds should ensure that the various interlocks provided on the 'high<br />
tension compartments are effective and it is not possible to open HT compartment until the<br />
pantograph is in lowered position and is fully earthed.<br />
9.5.2 Drivers/Motormen should not enter the HT compartment unless the pantograph has<br />
been lowered and fully earthed.<br />
9.5.3 Drivers/Motormen should be fully trained in operations necessary to ensure electrical<br />
safety.
10. AC EMU DESCRIPTION OF<br />
ELECTRICAL CIRCUITS<br />
10.1 POWER CIRCUIT<br />
10.1.1 Ro<strong>of</strong> equipments (Ref. Fig.10.1.1)<br />
The pantograph is connected to the ro<strong>of</strong> bushing <strong>of</strong> the 25 kV cable via the air-blast<br />
circuit breaker, the live side <strong>of</strong> which has a surge diverter connected between it and earth, At ro<strong>of</strong>mounted<br />
earthing -switch is provided, having two eathing blades in the closed position, these<br />
blades contact both sides <strong>of</strong> the air-blast circuit breaker isolator arm, thereby earthing both the<br />
pantograph and the primary winding <strong>of</strong> the transformer.<br />
10.1.2 Transformer<br />
The 25 kV cable from the ro<strong>of</strong> bushing passes through. The emergency driving cab and<br />
enters the transformer through another bushing where a connection is made to the primary<br />
winding is brought out by an insulated cable which is connected to the traction motor earth<br />
brushes coming on the four axles. The earth brushes are insulated from the motor frames. The<br />
transformer return is therefore kept independent <strong>of</strong> the earthing <strong>of</strong> the equipment cases and under<br />
frame.<br />
Primary overload protection is provided by a relay operated through a current<br />
transformer. The primary overload relay (OLP) is combined with the earth fault relay (EFR) (Ref.<br />
fig 10.4), to form a double-element relay having a common set <strong>of</strong> interlocks and reset coil. Tripping<br />
<strong>of</strong> either OLP or EFR causes the air-blast circuit breaker (ABB) to open. The two trip elements are<br />
provided with flags to indicate which relay has caused the trip. The flag indication remains after the<br />
relay has been reset electrically, the flag must be reset manually. The transformer secondary<br />
consists <strong>of</strong> two separate windings each <strong>of</strong> 350V. One half has four taps dividing it into five sections<br />
each 70V.<br />
In the first half <strong>of</strong> the notching sequence, only the tapped portion <strong>of</strong> the winding is used,<br />
while for the remaining notches the two sections are connected in series. The changeover is<br />
effected by means <strong>of</strong> contacts W1 and W2 on the winding- grouping switch and are only operated<br />
<strong>of</strong>f load.<br />
The tap changer contactors T1 to T9 carry out the switching <strong>of</strong> the transformer sections.<br />
Contactors T1 to T6 are connected to the transformer tapings and select the required voltage. Tap<br />
changing is carried out by means <strong>of</strong> reactor TL, in conjunction with the two contactors T7 and T8<br />
to give alternate notches with and without the reactor in circuit. A resistor is also provided in series<br />
with the reactor. But this is in circuit only during the actual tap changing operation, being<br />
immediately cut out <strong>of</strong> circuit when contactor T9 closes. The purpose <strong>of</strong> this reactor is to ease the<br />
duty on the opening contactor by reducing the circulating current.<br />
The selected output voltage is fed through the overload relay trip coils OL5 and OL6 to<br />
the main rectifier unit. The function <strong>of</strong> this relay is described more fully under the heading<br />
TRANSFORMER OVERLOAD PROTECTION.
Two capacitors <strong>of</strong> 0.05 micr<strong>of</strong>arads are connected between the two secondary windings<br />
and earth to prevent the build up <strong>of</strong> high voltages to earth on the windings when they are not<br />
connected to the traction circuit earth.<br />
10.1.3 Dropping reactor DL<br />
The reactor DL is connected in such a position in the circuit that for all notches when only the<br />
tapped half <strong>of</strong> the secondary winding is in circuit, it is in series with the output. The purpose <strong>of</strong> this<br />
reactor is firstly to steepen the notching curves on low taps and thus reduce the notching current<br />
swing. Secondly to increase the short-circuit reactance <strong>of</strong> the transformer in the low taps, and<br />
thirdly to provide two extra notches 11 and 12. (Ref. fig 10.2.1)<br />
10.1.4 Transformer auxiliary windings<br />
Two tertiary windings are provided on the main transformer to supply the AC auxiliary machines<br />
and the DC low-tension circuits respectively. These are described more fully under AUXILIARY<br />
CIRCUITS.<br />
10.2 Tap changer contactor sequence (Ref. fig 10.2.1 and 10.2.2)<br />
Operation <strong>of</strong> the tap changer contactors is in accordance with the sequence chart and<br />
the circuitry is as shown in fig. 10.2.1.<br />
1<br />
Initially winding grouping switch contact W1 is closed and reactor DL is in circuit. Notch<br />
T1, T7 and T9 closed, connecting one 70V transformer section M3-M4 in circuit with the<br />
tap change reactor TL in series.<br />
Notch 2<br />
T1 and T8 closed, connecting section M3-M4 direct. This is the SHUNT notch and<br />
movement <strong>of</strong> the master controller handle to position I will allow the equipment to proceed<br />
automatically to this notch.<br />
Notch 3<br />
series.<br />
T2, T8 and T9 closed, connecting two transformer sections M3-M5 in circuit with TL in<br />
Notch 4<br />
T2 and T7 closed, connecting sections M3-M5 direct.<br />
Notch 5<br />
series.<br />
T3, T7 and T9 closed, connecting three transformer sections M3-M6 in circuit with TL in<br />
Notch 6<br />
T3 and T8 closed, connecting sections M3-M6 direct.
Notch 7<br />
T4, T8 and T9 closed, connecting transformer section M3-M7 in circuit with TL in series.<br />
Notch 8<br />
T4 and T7 closed, connecting section M3-M7.<br />
Notch 9<br />
T5, T7 and T9 closed, connecting transformer section M3-M8 in circuit with TL in series.<br />
Notch 10<br />
T5 and T8 closed. This connection applies the full voltage <strong>of</strong> the tapped half <strong>of</strong> the<br />
secondary winding M3-M8 to the rectifiers with DL still in series.<br />
Notch 11<br />
T6, T8 and T9 closed, connecting the section untapped half <strong>of</strong> the winding M1-M2 in<br />
circuit with TL in series but DL no longer in circuit.<br />
Notch 12<br />
T6 and T7 closed, connecting the untapped section <strong>of</strong> the winding M1-M2 the rectifier<br />
direct. This is the HALF POWER connection, and movement <strong>of</strong> the master controller handle to<br />
position 2 (half power) will allow notching to proceed automatically upto this notch.<br />
Notch 13<br />
Before proceeding to notch 13, movement <strong>of</strong> the master controller handle beyond<br />
position 2 causes the winding grouping switch to throw from LV to the HV position. This causes<br />
contacts W1 to open and W2 to close. Transition to notch 13 is completed when T1 closes and T6<br />
opens after which T9 closes connecting the untapped winding plus one section <strong>of</strong> the tapped<br />
winding M1-M4 in circuit.<br />
Notch 14<br />
T1 and T8 closed, connecting sections M1-M4 direct.<br />
Notch 15<br />
T2, T8, and T9 closed, connecting the untapped winding plus two sections <strong>of</strong> the tapped<br />
winding M1-M5 in circuit with TL in series.<br />
Notch 16<br />
T2 and T7 closed, connecting sections M1-M5 direct.<br />
Notch 17<br />
T3 T7 and T9 closed, connecting the untapped winding plus three sections <strong>of</strong> the tapped<br />
winding M1-M6 in circuit with TL in series.
Notch 18<br />
T3 and T8 closed, connecting sections M1-M6 direct.<br />
Notch 19<br />
T4,T8 and T9 closed, connecting the untapped winding plus four sections <strong>of</strong> the tapped<br />
winding M1-M7 in circuit with TL in series.<br />
Notch 20<br />
T4 and T8 closed, connecting sections M1-M7 direct.<br />
Notch 21<br />
series.<br />
T5, T7 and T9 closed, connecting the full secondary winding M1-M8 in circuit with TL in<br />
Notch 22<br />
T5 and T8 closed, connecting the full secondary winding direct. This is the PUT,I,<br />
POWER connection, selected by moving the master controller handle to position 3(full power).<br />
Notch 23<br />
Movement <strong>of</strong> the master controller handle to position 4(weak field) causes the four field<br />
weakening contactors Fl to F4 to close, giving the highest running speed.<br />
To summerise, the sequence <strong>of</strong> operation during tap changingis as below.<br />
Transition from odd to even numbered notch<br />
Consider notch 1 where T1 T7 and T9 are closed. Transition is initiated when T8 closes;<br />
this short circuits the tapchange reactor TL. T7 and T9 then open <strong>of</strong>f load in preparation for the<br />
next transition, and the circuit <strong>of</strong> notch 2 is set up i.e. Tl and T8 closed.<br />
Transition from even to odd numbered notch<br />
From notch 2, transition to notch 3 is initiated when T2 closes. This sets up ,in addition<br />
to the load current flowing through T1 and T8, a circulating current flowing through T2, reactor TL,<br />
transition resistor(M39 Mil and T1. T1 then opens and the transition is completed when T9 closes;<br />
this short circuits the transition resistor and gives the notch 3 circuit with T2 T8 and J9 closed.<br />
10.2.1 Transformer overload protection<br />
Two overload relay coils OL5 and OL6 form a double-element overload-relay OL5 protects against<br />
a direct overload due to a fault in the rectifier or motor circuits, and OL6 protects against four
tapchange contactors being closed together, for example, T1,T2,T7 and TS. The electrical<br />
interlocking is such that this condition is impossible electrically and could only occur due to<br />
mechanical failure <strong>of</strong> a contactor. Tripping <strong>of</strong> either OL5 or OL6 causes the air blast circuit breaker<br />
to open.<br />
10.3 RECTIFIER CIRCUITS<br />
The silicon-rectifier assembly consists <strong>of</strong> six bridge circuits in parallel, as shown in Fig.<br />
10.3, each bridge being protected on its a.c. side by fuses. A surge-absorbing capacitor and series<br />
resistor are connected across the a.c. input to the rectifier bridges.<br />
10.4 TRACTION MOTOR CIRCUIT<br />
The output from the rectifier assembly is taken through a smoothing reactor to the motor<br />
circuits. The four motors are arranged in parallel, and are connected in circuit as required by the<br />
four motor contactors Ml to M4 as shown in figure 10.4. Each motor is protected by an overload<br />
relay which trips the motor contactor in case <strong>of</strong> overload. The direction <strong>of</strong> rotation <strong>of</strong> the traction<br />
motor is reversed by reversing the connections to the motor field windings.<br />
Motors 1 and 3 have current limit relays connected in their circuits to control the<br />
automatic acceleration <strong>of</strong> the train. The normal setting <strong>of</strong> the relay is 625 amp., which is reduced to<br />
550 amps immediately before the transition from notch 10 to notch 11 and again before the weak<br />
field.<br />
Operation <strong>of</strong> the motor cut-out switches (MCOS) allows the unit to operate with any one<br />
motor cut -out, or with a bogie pair <strong>of</strong> motors cut-out. In any motor cut-out condition the currentlimit<br />
relay setting is reduced to 450 amp.<br />
An earth fault relay(EFR) trips the air-blast circuit-breaker in the event <strong>of</strong> an earth fault<br />
occurring in any part <strong>of</strong> the motor circuit. The relay has a flag which leaves an indication that a trip<br />
has occurred.<br />
Protection against interruptions <strong>of</strong> line voltage is given by a no-volt relay(NVR Ref fig<br />
10.5.1)which opens the contactors in the traction circuit in the event <strong>of</strong> failure <strong>of</strong> line voltage.<br />
10..5 AUXILIARY CIRCUITS<br />
There are two separate auxiliary circuits, normally 266V a.c. and 110V d.c. (141V a.c.)<br />
10.5.1 266V a.c. circuit (Ref. fig. 10.5.1)<br />
This circuit is fed from tertiary winding on the main transformer aux.2,giving a nominal<br />
266V ac output and is used to feed the static battery charger and the induction motor driven<br />
auxiliary machines. These comprise the following-<br />
Oil pump<br />
Radiator fans(two)<br />
Main rectifier fan<br />
(OP)<br />
(KFl,KF2)<br />
(RF)
These machines are capacitor start and run single phase induction motors and are<br />
protected by individual fuses MCB on the live side <strong>of</strong> each machine. Also connected directly<br />
across the 266V supply is a no-volt relay NVR. This is a d.c. relay fed by a bridge connected<br />
rectifier, and is used to detect when the transformer is 'ive. On failure <strong>of</strong> line voltage, NVR drops<br />
out and disconnects the traction circuit by means <strong>of</strong> its contacts NVR1 and NVR2 in the control<br />
circuits. The NVR circuit is protected by a miniature circuit breaker.<br />
The aux.2 winding is protected against a fault in the wiring <strong>of</strong> the 266V a.c. circuit by two<br />
main fuses API and AF2,situtated within the transformer connection chamber.<br />
10.5.2 141V a.c. circuit (Ref. fig. 10.5.2)<br />
This circuit is fed from a second tertiary winding aux. 1 (141V ac) and is protected by<br />
two fuses AF3 and AF4,located inside the transformer connection chamber.<br />
A rectifier-fed relay LTR is provided to prove that fuses AF3 and AF4 are intact and that<br />
the voltage <strong>of</strong> aux. 1 winding is applied to the auxiliary supply rectifier (ASR). The circuit <strong>of</strong> LTR is<br />
protected by a miniature circuit breaker.<br />
A surge suppression capacitor with a series resistor is provided across the input to ASR.<br />
10.5.3 Main-compressor motor (Ref fig 10.5.2)<br />
The main compressor motor is protected by fuse AF10 and a permanent series resistor,<br />
and its contactor CC1 which is in turn controlled by a trip and set relay CR, through the<br />
compressor governor.<br />
Compressor synchronising is achieved through train line wire 13.<br />
When the COMPRESSOR SET button in any driving cab is pressed, train line 12 is<br />
energised, setting all the compressor relays in the train and the contact CR/1 completes the<br />
respective compressor contactor coil (CCl) circuit. This closes the compressor contactor.<br />
To switch <strong>of</strong>f the compressor motors the COMPRESSOR TRIP button in the cab is<br />
pressed this energises train line 42, tripping the compressor relays and the compressor<br />
contactors.<br />
A sealed switch GS3 is provided to short circuit the main-compressor governor if it sticks<br />
in the open position. Two miniature circuit breakers protect the circuit in such a way that faults in<br />
various parts <strong>of</strong> the circuit do not disable the train. The blocking rectifier between wire 1445 and<br />
1446 is provided to prevent the batteries in two units operating in multiple from being connected in<br />
parallel.<br />
10.5.3 Smoothing reactor<br />
This is provided to smoothen the ripple on the output <strong>of</strong> the auxiliary-supply rectifier.<br />
This voltage is then fed to the fans.<br />
10.5.4 Ventilating fans
The ventilating fans for the whole unit are fed from two unit lines 29 and 30,energised<br />
from a double-pole fan contactor which is under the control <strong>of</strong> the guard. The contactor is <strong>of</strong> the<br />
latched type, and only momentary pulse from the FANS ON and FANS OFF buttons in the driving<br />
trailer cab are required to operate it. The two fan circuits are protected by fuses VF1 and VF2 or<br />
MCB.<br />
10.5.5 Battery circuits (Ref. fig.10.5.5)<br />
The battery positive and negative connections are taken through battery fuses BF1 and<br />
BF2, to the battery-isolating switch. This is a 200A1double-pole rotary switch having four positions<br />
OFF, NORMAL, OFF and CHARGE. In either <strong>of</strong> OFF positions the battery is completely isolated.<br />
In the CHARGE position the battery is connected to the charging socket in the emergency cab,<br />
thus allowing it to be charged from an external supply.<br />
In NORMAL position the battery is connected to wires DIG and GD, supplying the<br />
auxiliary compresssor, the emergency lights and the control circuits. The static battery charger<br />
feeds the battery on energisation <strong>of</strong> 266V ac auxiliary circuit.<br />
10.6 AUXILIARY COMPRESSOR MOTOR<br />
This is protected by fuse MCB and is controlled by auxiliary compressor contactor CC2.<br />
Contactor CC2 is fed from the control positive via a miniature circuit breaker. The auxiliarycompressor<br />
governor is provided with a sealed switch GS4 which can be closed in the event <strong>of</strong><br />
failure <strong>of</strong> governor. The function <strong>of</strong> the interlock ABR/1 is to isolate the auxiliary compressor circuit<br />
whenever the air-blast circuit-breaker is open.<br />
10.7 EMERGENCY LIGHT<br />
The two emergency lighting circuits are fed direct from the battery.<br />
10.7.1 The emergency head and tail lights are supplied through the emergency head and tail<br />
lights fuse EHTF, and a contact on the emergency head and tail lights relay. If the supply to the<br />
normal head and tail lights fail the relay opens and lights the emergency head and tail lamps.<br />
10.7.2 The emergency coach lights are fed through the emergency lights fuse ELF, and one<br />
pole <strong>of</strong> the double-pole lighting contactor which is under the control <strong>of</strong> the guard . The feed is also<br />
taken through contacts <strong>of</strong> the emergency lighting relay so that if the supplies to the main lighting<br />
circuits fail, the relay will open and the emergency lights will be lit.<br />
The emergency coach lighting circuits are the same on all coaches in the unit, each coach having<br />
its own relays controlling its own emergency lighting.<br />
10.8 CONTROL CIRCUIT SUPPLY<br />
The supply to all control circuits on the unit is fed through the control fuse CF to unit wire<br />
14. The auxiliary compressor-governor circuit and the LT voltmeter are also fed through this fuse.<br />
10.9 MAIN LIGHTS
The main lighting circuits are fed from the regulated 110V supply across wires D8 and '<br />
GD. They are protected by the main lights supply fuse MLSF and are controlled by the second<br />
pole <strong>of</strong> the double -pole lighting contactor (see under Emergency Lights). This is latched contactor,<br />
under the control <strong>of</strong> the guard. Only momentary pulses from the LIGHTS ON and LIGHTS OFF<br />
buttons in the driving trailer cab are required to operate it. The circuit divides into two halves each<br />
branch supplying the half the lights throughout the train, and each being protected by fuse, MLF1<br />
& MLF2.