Conversion Hub Unit SK RB/RLB to Hub Unit SK ... - Jupojos technika
Conversion Hub Unit SK RB/RLB to Hub Unit SK ... - Jupojos technika
Conversion Hub Unit SK RB/RLB to Hub Unit SK ... - Jupojos technika

Create successful ePaper yourself
Turn your PDF publications into a flip-book with our unique Google optimized e-Paper software.
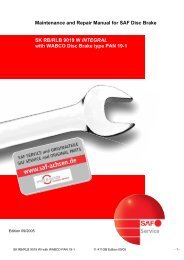
Service Instructions<br />
These instructions summarise using the following illustrations the steps and working sequences the steps<br />
necessary for replacing the <strong>Hub</strong> <strong>Unit</strong> with the INTEGRAL wheel <strong>Hub</strong> <strong>Unit</strong> on axle types <strong>SK</strong> <strong>RB</strong> / <strong>RLB</strong> 9019 /<br />
9022 with disc brake. The tightening <strong>to</strong>rques for the various items in the working steps can be found in<br />
Table 1.<br />
Safety instructions for repair work<br />
The perfect technical condition of the brake disc is of crucial importance for good driving and safe braking<br />
properties.<br />
Observe the wear limits of the brake pads and brake disc! Worn brake pads and/or brake discs can lead <strong>to</strong> a<br />
deterioration in the braking efficiency or even a complete brake failure! Danger of accidents! Burnt, glazed<br />
or oily brake pads must be replaced immediately!<br />
Brake pad replacement must always be performed for all the wheels on an axle!<br />
During repair work on the brake system, the trailer must be standing on level ground and secured <strong>to</strong> prevent<br />
it from rolling away. Use only approved equipment for supporting and securing the trailer. During the repair<br />
work on the brake system, measures must be taken <strong>to</strong> ensure that the brakes are not actuated accidentally.<br />
The brakes must not be actuated as long as the brake pads are removed. Danger of injury!<br />
During repair work on the brake system, do not clean soiled areas with compressed air or other high-pressure<br />
cleaners. Danger of injury!<br />
During work on the brake system or when moving the brake calliper, hold the parts only at the outer edges<br />
<strong>to</strong> prevent fingers being trapped between brake calliper and brake bracket!<br />
During removal and installation of the brakes on the trailer, obtain assistance from a second fitter.<br />
Heavy load! Danger of injury!<br />
During repair work on the brakes away from the trailer, the brake must be gripped firmly in a suitable<br />
device, e.g. vice. High loosening and tightening <strong>to</strong>rques of the bolts. Danger of injury!<br />
The brake calliper with clamping unit must not be opened.<br />
For this reason, the retaining bolts of the cover on the brake calliper must not be loosened.<br />
Carry out repair work only with recommended <strong>to</strong>ols.<br />
Do not use power wrenches or other power <strong>to</strong>ols!<br />
Tighten nuts and bolts only <strong>to</strong> the recommended tightening <strong>to</strong>rques.<br />
When new brake pads are installed, sharp braking should be avoided for the first 50 kilometres.<br />
Long braking distances and sudden braking should also be avoided.<br />
In the event of severe damage or wear of the castings (e.g. cracks), the complete brake must be replaced.<br />
On completing repair work, a final test should be carried out on a roller dynamometer.<br />
Notes!<br />
These working instructions relate only <strong>to</strong> the conversion of <strong>Hub</strong> <strong>Unit</strong> <strong>SK</strong> <strong>RB</strong> / <strong>RLB</strong> <strong>to</strong> <strong>Hub</strong> <strong>Unit</strong><br />
<strong>SK</strong> <strong>RB</strong> / <strong>RLB</strong> INTEGRAL.<br />
Illustrations in these working instructions show the conversion of <strong>Hub</strong> <strong>Unit</strong> <strong>SK</strong> <strong>RB</strong> / <strong>RLB</strong> with WABCO disc<br />
brake and apply analogously also for brake discs from other manufacturers.<br />
11396GB Edition 0606<br />
For all working steps relating <strong>to</strong> the disc brake, please refer <strong>to</strong> the latest edition of the installation and<br />
maintenance instructions for the respective disc brake.<br />
6