digital video camera gr-dvx707 gr-dvx507 gr-dvx407 gr-dvx400 - JVC
digital video camera gr-dvx707 gr-dvx507 gr-dvx407 gr-dvx400 - JVC
digital video camera gr-dvx707 gr-dvx507 gr-dvx407 gr-dvx400 - JVC

You also want an ePaper? Increase the reach of your titles
YUMPU automatically turns print PDFs into web optimized ePapers that Google loves.
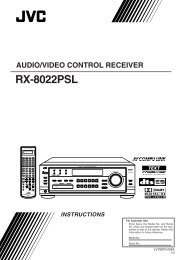
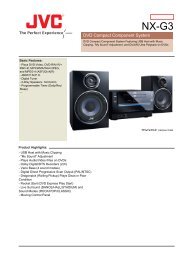
ENGLISH<br />
Automatic Demonstration 8<br />
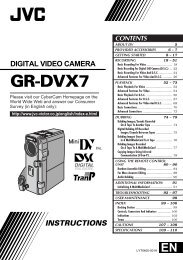
DIGITAL VIDEO CAMERA<br />
GR-DVX707<br />
GR-DVX507<br />
GR-DVX407<br />
GR-DVX400<br />
Please visit our Homepage on the World Wide<br />
Web and answer our Consumer Survey (in<br />
English only):<br />
http://www.jvc-victor.co.jp/english/index-e.html<br />
For Accessories:<br />
http://www.jvc-victor.co.jp/english/accessory<br />
GETTING STARTED 9<br />
VIDEO RECORDING &<br />
PLAYBACK<br />
DIGITAL STILL CAMERA<br />
(D.S.C.) RECORDING &<br />
PLAYBACK<br />
18<br />
26<br />
ADVANCED FEATURES 37<br />
The camcorder<br />
illustrations appearing in<br />
this instruction manual are<br />
of the GR-DVX707.<br />
REFERENCES 80<br />
INSTRUCTIONS<br />
TERMS 102<br />
The D.S.C. (Digital Still Camera) features are available on<br />
GR-DVX707 and GR-DVX507.<br />
LYT0957-001A<br />
EN
2 EN<br />
Dear Customer,<br />
Thank you for purchasing this <strong>digital</strong> <strong>video</strong> <strong>camera</strong>. Before use, please read the safety information and<br />
precautions contained in the following pages to ensure safe use of this product.<br />
Using This Instruction Manual<br />
● All major sections are listed in the Table Of Contents on the cover page.<br />
● Notes appear after most subsections. Be sure to read these as well.<br />
● Basic and advanced features/operation are separated for easier reference.<br />
It is recommended that you…<br />
…refer to the Index ( pg. 94 – 101) and familiarise yourself with button locations, etc. before use.<br />
…read thoroughly the Safety Precautions and Safety Instructions that follow. They contain extremely<br />
important information regarding the safe use of this product.<br />
You are recommended to carefully read the cautions on pages 88 through 90 before use.<br />
SAFETY PRECAUTIONS<br />
IMPORTANT (for owners in the U.K.)<br />
Connection to the mains supply in the United<br />
Kingdom.<br />
DO NOT cut off the mains plug from this<br />
equipment.<br />
If the plug fitted is not suitable for the power<br />
points in your home or the cable is too short to<br />
reach a power point, then obtain an appropriate<br />
safty approved extension lead or consult your<br />
dealer.<br />
BE SURE to replace the fuse only with an<br />
identical approved type, as originally fitted, and<br />
to replace the fuse cover.<br />
If nonetheless the mains plug is cut off be sure to<br />
remove the fuse and dispose of the plug<br />
immediately, to avoid possible shock hazard by<br />
inadvertent connection to the mains supply.<br />
If this product is not supplied fitted with a mains<br />
plug then follow the instructions given below:<br />
DO NOT make any connection to the Larger<br />
Terminal coded E or Green.<br />
The wires in the mains lead are coloured in<br />
accordance with the following code:<br />
Blue to N (Neutral) or<br />
Black<br />
Brown to L (Live) or Red<br />
If these colours do not correspond with the<br />
terminal identifications of your plug, connect as<br />
follows:<br />
Blue wire to terminal coded N (Neutral) or<br />
coloured black.<br />
Brown wire to terminal coded L (Live) or coloured<br />
Red.<br />
If in doubt — consult a competent electrician.<br />
WARNING:<br />
TO PREVENT FIRE OR SHOCK<br />
HAZARD, DO NOT EXPOSE THIS<br />
UNIT TO RAIN OR MOISTURE.<br />
CAUTIONS:<br />
● To prevent shock, do not open the cabinet. No<br />
user serviceable parts inside. Refer servicing to<br />
qualified personnel.<br />
● When you are not using the AC Adapter for a<br />
long period of time, it is recommended that you<br />
disconnect the power cord from AC outlet.<br />
NOTES:<br />
● The rating plate (serial number plate) and safety<br />
caution are on the bottom and/or the back of<br />
the main unit.<br />
● The rating information and safety caution of the<br />
AC Adapter are on its upper and lower sides.<br />
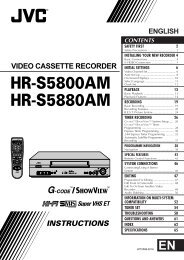
CAUTION:<br />
To avoid electric<br />
shock or damage to<br />
the unit, first firmly<br />
insert the small end<br />
of the power cord<br />
into the AC Adapter<br />
until it is no longer<br />
wobbly, and then plug the larger end of the power<br />
cord into an AC outlet.
EN 3<br />
CAUTIONS:<br />
● This camcorder is designed to be used with PAL-type colour television signals. It cannot be used for<br />
playback with a television of a different standard. However, live recording and LCD monitor/viewfinder<br />
playback are possible anywhere.<br />
● Use the <strong>JVC</strong> BN-V306U/V312U battery packs and, to recharge them or to supply power to the camcorder<br />
from an AC outlet, use the provided multi-voltage AC Adapter and Power Cord. (An appropriate<br />
conversion adapter may be necessary to accommodate different designs of AC outlets in different<br />
countries.)<br />
When the equipment is installed in a cabinet or on a shelf, make sure that it has sufficient space on all sides<br />
to allow for ventilation (10 cm or more on both sides, on top and at the rear).<br />
Do not block the ventilation holes.<br />
(If the ventilation holes are blocked by a newspaper, or cloth etc. the heat may not be able to get out.)<br />
No naked flame sources, such as lighted candles, should be placed on the apparatus.<br />
When discarding batteries, environmental problems must be considered and the local rules or laws<br />
governing the disposal of these batteries must be followed strictly.<br />
The apparatus shall not be exposed to dripping or splashing.<br />
Do not use this equipment in a bathroom or places with water.<br />
Also do not place any containers filled with water or liquids (such as cosmetics or medicines, flower vases,<br />
potted plants, cups etc.) on top of this unit.<br />
(If water or liquid is allowed to enter this equipment, fire or electric shock may be caused.)<br />
SOME DO’S AND DON’TS ON THE SAFE USE OF EQUIPMENT<br />
This equipment has been designed and manufactured to meet international safety standards but, like any<br />
electrical equipment, care must be taken if you are to obtain the best results and safety is to be assured.<br />
DO read the operating instructions before you attempt to use the equipment.<br />
DO ensure that all electrical connections (including the mains plug, extension leads and interconnections<br />
between pieces of equipment) are properly made and in accordance with the manufacturer’s<br />
instructions. Switch off and withdraw the mains plug when making or changing connections.<br />
DO consult your dealer if you are ever in doubt about the installation, operation or safety of your equipment.<br />
DO be careful with glass panels or doors on equipment.<br />
DON’T continue to operate the equipment if you are in any doubt about it working normally, or if it is<br />
damaged in any way — switch off, withdraw the mains plug and consult your dealer.<br />
DON’T remove any fixed cover as this may expose dangerous voltages.<br />
DON’T leave equipment switched on when it is unattended unless it is specifically stated that it is designed<br />
for unattended operation or has a standby mode. Switch off using the switch on the equipment and<br />
make sure that your family knows how to do this. Special arrangements may need to be made for<br />
infirm or handicapped people.<br />
DON’T use equipment such as personal stereos or radios so that you are distracted from the requirements of<br />
road safety. It is illegal to watch television whilst driving.<br />
DON’T listen to headphones at high volume, as such use can permanently damage your hearing.<br />
DON’T obstruct the ventilation of the equipment, for example with curtains or soft furnishings. Overheating<br />
will cause damage and shorten the life of the equipment.<br />
DON’T use makeshift stands and NEVER fix legs with wood screws — to ensure complete safety always fit<br />
the manufacturer’s approved stand or legs with the fixings provided according to the instructions.<br />
DON’T allow electrical equipment to be exposed to rain or moisture.<br />
ABOVE ALL<br />
— NEVER let anyone especially children push anything into holes, slots or any other opening in the case —<br />
this could result in a fatal electrical shock;<br />
— NEVER guess or take chances with electrical equipment of any kind — it is better to be safe than sorry!
4 EN<br />
SAFETY PRECAUTIONS<br />
Do not point the lens or the viewfinder directly into the sun. This can cause eye injuries, as well as lead to the<br />
malfunctioning of internal circuitry. There is also a risk of fire or electric shock.<br />
CAUTION!<br />
The following notes concern possible physical damage to the camcorder and to the user.<br />
When carrying, be sure to hold the camcorder firmly in your hand, with the <strong>gr</strong>ip strap securely around your<br />
wrist. Carrying or holding the camcorder by the viewfinder and/or the LCD monitor can result in dropping the<br />
unit, or in a malfunction.<br />
Take care not to get your finger caught in the cassette holder cover. Do not let children operate the<br />
camcorder, as they are particularly susceptible to this type of injury.<br />
Do not use a tripod on unsteady or unlevel surfaces. It could tip over, causing serious damage to the<br />
camcorder.<br />
CAUTION!<br />
Connecting cables (Audio/Video, S-Video, etc.) to the camcorder and leaving it on top of the TV is not<br />
recommended, as tripping on the cables will cause the camcorder to fall, resulting in damage.<br />
This camcorder is designed exclusively for the <strong>digital</strong> <strong>video</strong> cassette, SD Memory Card and<br />
MultiMediaCard. Only cassettes marked “ ” and memory cards* marked “ ” or<br />
“ ” can be used with this unit.<br />
Before recording an important scene…<br />
… make sure you only use cassettes with the Mini DV mark .<br />
… make sure you only use memory cards* with the mark or .<br />
… remember that this camcorder is not compatible with other <strong>digital</strong> <strong>video</strong> formats.<br />
… remember that this camcorder is intended for private consumer use only. Any commercial use without<br />
proper permission is prohibited. (Even if you record an event such as a show, performance or exhibition for<br />
personal enjoyment, it is strongly recommended that you obtain permission beforehand.)<br />
* Memory cards can be used with GR-DVX707/507 only.
EN 5<br />
Provided Accessories<br />
● AC Adapter<br />
AP-V10EG or AP-V12EG<br />
● Power Cord<br />
● Battery Pack<br />
BN-V306U<br />
● Battery Mount<br />
Cover*<br />
(Already attached on<br />
the camcorder)<br />
● Remote Control<br />
Unit<br />
RM-V717U<br />
● Cable Adapter ● CD-ROM ● AAA (R03) Battery<br />
x 2 (for remote<br />
control unit)<br />
● USB Cable<br />
(GR-DVX707/507<br />
only)<br />
● PC Connection<br />
Cable<br />
(GR-DVX407/400<br />
only)<br />
● Memory Card 8 MB<br />
(GR-DVX707/507 only)<br />
(Already inserted in the<br />
camcorder)<br />
● Lens Cap<br />
( pg. 7 for<br />
attachment)<br />
● Audio/Video Cable<br />
(ø3.5 mini-plug to<br />
RCA plug)<br />
● Editing Cable<br />
GR-DVX707/507:<br />
Both plugs have 1 ring<br />
around the pin.<br />
GR-DVX407/400:<br />
One plug has 3 rings<br />
around the pin and<br />
the other has 1 ring<br />
around the pin.<br />
● Grip Belt<br />
( pg. 6 for<br />
attachment)<br />
● Finger Support<br />
( pg. 6 for<br />
attachment)<br />
* Attach the battery mount cover to protect the battery connector when the battery pack is removed. For the<br />
attachment/detachment, refer to “Charging The Battery Pack” ( pg. 10).<br />
NOTE:<br />
In order to maintain optimum performance of the camcorder, provided cables may be equipped with one or<br />
more core filter. If a cable has only one core filter, the end that is closest to the filter should be connected to<br />
the camcorder.
6 EN<br />
How To Attach The Grip Belt<br />
NOTES:<br />
● It is recommended to use the finger support so that<br />
the tally lamp or the flash (GR-DVX707/507 only)<br />
is unobstructed with your fingers.<br />
● The <strong>gr</strong>ip belt can be attached to the camcorder<br />
even if the finger support is not used. Be careful<br />
not to cover the tally lamp or the flash<br />
(GR-DVX707/507 only) when holding camcorder<br />
without finger support.<br />
1) Thread the finger support with the end of the strap<br />
g.<br />
4) Thread the end of the strap through the buckle c.<br />
Open the pad and fold the end of the strap h in<br />
the pad. Then fold the pad.<br />
c<br />
g<br />
5) Adjust the <strong>gr</strong>ip. ( pg. 12)<br />
2) Thread the loop end g through the eyelet a, then<br />
pass the other end of the strap h and the pad<br />
through the loop end h.<br />
a<br />
h<br />
g<br />
3) Thread the end of the strap h through the eyelet<br />
b.<br />
b<br />
h
EN 7<br />
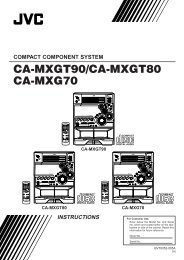
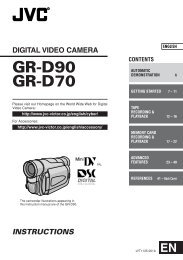
How To Attach The Lens Cap<br />
To protect the lens, attach the provided lens cap to<br />
the camcorder as shown in the illustration.<br />
NOTE:<br />
To confirm the lens cap is on correctly make sure the<br />
cap is flush to the camcorder.<br />
1)<br />
2)<br />
3) Attach the lens cap with the cut downward.<br />
● During shooting
8 EN<br />
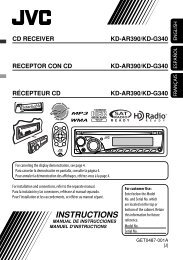
Automatic Demonstration<br />
Automatic Demonstration takes place when “DEMO<br />
MODE” is set to “ON” (factory-preset).<br />
Automatic Demonstration starts when there is no<br />
operation for about 3 minutes after the Power Switch is<br />
set to “A” or “M” and no cassette is in the camcorder.<br />
Performing any operation during the demonstration<br />
stops the demonstration temporarily. If no operation is<br />
performed for more than 3 minute after that, the<br />
demonstration will resume.<br />
“DEMO MODE” remains “ON” even if the camcorder<br />
power is turned off.<br />
To cancel Automatic Demonstration:<br />
1) Set the Power Switch to “M” while pressing down the<br />
Lock Button located on the switch.<br />
2) Open the LCD monitor fully, or pull out the viewfinder<br />
fully.<br />
3) Press the MENU Wheel in. The Menu Screen appears.<br />
4) Rotate the MENU Wheel to select “s SYSTEM”, and<br />
press it. The SYSTEM Menu appears.<br />
5) Rotate the MENU Wheel to select “DEMO MODE”,<br />
and press it. The Sub Menu appears.<br />
6) Rotate the MENU Wheel to select “OFF”, and press it.<br />
7) Rotate the MENU Wheel to select “BRETURN”, and<br />
press it twice. The normal screen appears.<br />
NOTE:<br />
Detach the lens cap to see the actual changes of the<br />
Automatic Demonstration activated on the LCD monitor<br />
or viewfinder.<br />
MENU Wheel<br />
GR-DVX707/<br />
507 only<br />
DEMO MODE<br />
Power Switch<br />
PLAY<br />
OFF<br />
Lock Button<br />
A<br />
M<br />
Sub Menu<br />
OFF<br />
ON
EN 9<br />
GETTING STARTED<br />
CONTENTS<br />
Power ..................................................................................................10<br />
Grip Adjustment .....................................................................................12<br />
Viewfinder Adjustment ...........................................................................12<br />
Tripod Mounting .....................................................................................13<br />
LCD Monitor And Viewfinder ...................................................................13<br />
Brightness Adjustment Of The Display ......................................................13<br />
Operation Mode .....................................................................................14<br />
Date/Time Settings ................................................................................15<br />
Loading A Cassette/Unloading A Cassette .................................................16<br />
Loading A Memory Card/Unloading A Memory Card<br />
(GR-DVX707/507 only) .........................................................................17
10 EN<br />
Power<br />
This camcorder’s 2-way power supply system lets<br />
you choose the most appropriate source of power.<br />
Do not use provided power supply units with other<br />
equipment.<br />
Charging The Battery Pack<br />
CHARGE Lamp<br />
To DC connector<br />
c<br />
AC Adapter<br />
d<br />
To AC outlet<br />
e<br />
Power Cord<br />
Lock Button<br />
BATT.RELEASE<br />
Tab<br />
Power Switch<br />
Open the cover.<br />
1 With the arrow on the battery pack pointing to<br />
the lens side, push the battery pack slightly<br />
against the battery pack mount a, then slide the<br />
battery pack until it locks in place b.<br />
2 Set the Power Switch to “OFF” while pressing<br />
down the Lock Button located on the switch.<br />
3 Connect the AC Adapter to the camcorder c,<br />
then connect the Power Cord to the AC Adapter<br />
d.<br />
4 Plug the Power Cord into an AC outlet e.<br />
5 The CHARGE Lamp on the camcorder blinks to<br />
indicate charging has started.<br />
6 When the CHARGE Lamp stops blinking but<br />
stays lit, charging is finished.<br />
7 Unplug the Power Cord from the AC outlet.<br />
8 Disconnect the AC Adapter from the camcorder.<br />
To detach the battery pack...<br />
While sliding and holding the BATT.RELEASE tab to<br />
the right, remove it.<br />
Battery pack<br />
BN-V306U<br />
BN-V312U<br />
(optional)<br />
NOTES:<br />
● During charging, the camcorder cannot be operated.<br />
● If the protective cap is attached to the battery pack,<br />
remove it first.<br />
● When charging the battery pack for the first time or<br />
after a long storage period, the CHARGE Lamp may<br />
not light. In this case, remove the battery pack from<br />
the camcorder, then try charging again.<br />
● If the battery operation time remains extremely short<br />
even after having been fully charged, the battery is<br />
worn out and needs to be replaced. Please purchase<br />
a new one.<br />
● For other notes, pg. 81.<br />
Using The Battery Pack<br />
Perform step 1 of “Charging The Battery Pack” in the<br />
left column.<br />
Approximate recording time<br />
For GR-DVX707:<br />
Battery pack LCD monitor on Viewfinder on<br />
BN-V306U* 45 min. 55 min.<br />
BN-V312U 1 hr. 40 min. 2 hr.<br />
BN-V840U 4 hr. 50 min. 5 hr. 40 min.<br />
BN-V856U 7 hr. 20 min. 8 hr. 35 min.<br />
For GR-DVX507/407/400:<br />
GETTING STARTED<br />
Charging time<br />
Approx. 1 hr. 30 min.<br />
Approx. 2 hr. 40 min.<br />
Battery pack LCD monitor on Viewfinder on<br />
BN-V306U* 50 min. 1 hr. 05 min.<br />
BN-V312U 1 hr. 50 min. 2 hr. 15 min.<br />
BN-V840U 5 hr. 20 min. 6 hr. 40 min.<br />
BN-V856U 8 hr. 10 min. 10 hr. 10 min.<br />
*Provided<br />
NOTES:<br />
● Recording time is reduced significantly under the<br />
following conditions:<br />
• Zoom or Record-Standby mode is engaged<br />
repeatedly.<br />
• The LCD monitor is used repeatedly.<br />
• The playback mode is engaged repeatedly.<br />
● Before extended use, it is recommended that you<br />
prepare enough battery packs to cover 3 times the<br />
planned shooting time.
EN 11<br />
INFORMATION:<br />
The optional extended-use battery pack kit is a set<br />
composed of a battery pack and AC Power Adapter/<br />
Charger:<br />
VU-V840 KIT: BN-V840U battery pack & AA-<br />
V15EG or AA-V15EK AC Power<br />
Adapter/Charger<br />
VU-V856 KIT: BN-V856U battery pack & AA-<br />
V80EG or AA-V80EK AC Power<br />
Adapter/Charger<br />
Read the kit’s instruction manual before using.<br />
Also, by using the optional <strong>JVC</strong> VC-VBN856U DC<br />
Cord, it will be possible to connect BN-V840U or<br />
BN-V856U battery packs to the camcorder and<br />
supply power directly to the camcorder.<br />
ATTENTION:<br />
Before detaching the power source, make sure<br />
that the camcorder’s power is turned off. Failure to<br />
do so can result in a camcorder malfunction.<br />
Using AC Power<br />
AC Adapter<br />
b<br />
To DC<br />
connector<br />
a<br />
Power Cord<br />
Open the cover.<br />
About Batteries<br />
Lithium-ion is vulnerable in colder temperatures.<br />
DANGER! Do not attempt to take the batteries apart,<br />
or expose them to flame or excessive heat, as it may<br />
cause a fire or explosion.<br />
WARNING! Do not allow the battery or its terminals<br />
to come in contact with metals, as this can result in<br />
a short circuit and possibly start a fire.<br />
The Benefits Of Lithium-Ion Batteries<br />
Lithium-ion battery packs are small but have a large<br />
power capacity. However, when one is exposed to<br />
cold temperatures (below 10°C), its usage time<br />
becomes shorter and it may cease to function. If this<br />
happens, place the battery pack in your pocket or<br />
other warm, protected place for a short time, then<br />
re-attach it to the camcorder. As long as the battery<br />
pack itself is not cold, it should not affect<br />
performance.<br />
(If you’re using a heating pad, make sure the battery<br />
pack does not come in direct contact with it.)<br />
For other notes, pg. 81.<br />
To AC outlet<br />
c<br />
1 Connect the AC Adapter to the camcorder a,<br />
then connect the Power Cord to the AC Adapter<br />
b.<br />
2 Plug the Power Cord into an AC outlet c.<br />
NOTES:<br />
● The provided AC Adapter features automatic<br />
voltage selection in the AC range from 110 V to<br />
240 V.<br />
● For other notes, pg. 81.
12 EN<br />
Grip Adjustment<br />
1 Loosen the belt.<br />
2 Pass your right hand through the loop and <strong>gr</strong>asp<br />
the <strong>gr</strong>ip.<br />
3 Hung your third and little fingers on the finger<br />
support so that the tally lamp or the flash<br />
(GR-DVX707/507 only) is unobstructed with<br />
your fingers.<br />
GETTING STARTED (cont.)<br />
Viewfinder Adjustment<br />
1 Set the Power Switch to “A” or “M” while<br />
pressing down the Lock Button located on the<br />
switch.<br />
2 Pull out the viewfinder fully.<br />
3 Turn the Dioptre Adjustment Control until the<br />
indications in the viewfinder are clearly focused.<br />
Power Switch<br />
PLAY<br />
OFF<br />
A<br />
M<br />
Lock Button<br />
4 Adjust your thumb and fingers through the <strong>gr</strong>ip to<br />
easily operate the Recording Start/Stop Button,<br />
Power Switch and Power Zoom Ring. Be sure to<br />
tighten the belt to your preference.<br />
PAUSE<br />
Dioptre Adjustment<br />
Control
EN 13<br />
Tripod Mounting<br />
Align the screw on the tripod with the camcorder’s<br />
mounting socket. Then tighten the screw.<br />
● Some tripods are not equipped with studs.<br />
LCD Monitor And Viewfinder<br />
While using the LCD monitor:<br />
Make sure the viewfinder is pushed back in. Open<br />
the LCD monitor fully. It can rotate 270º (90º<br />
downward, 180º upward).<br />
While using the viewfinder:<br />
Make sure the LCD monitor is closed and locked.<br />
Pull out the viewfinder fully.<br />
● Be sure to pull out the viewfinder until you hear a<br />
click, otherwise it may be pushed back in during<br />
use.<br />
180˚<br />
90˚<br />
CAUTION:<br />
When attaching the camcorder to a tripod, extend<br />
its legs to stabilise the camcorder. It is not advised<br />
to use small sized tripods. This may cause damage<br />
to the unit by falling over.<br />
Brightness Adjustment Of The<br />
Display<br />
Rotate the MENU (MENU/BRIGHT) Wheel until the<br />
bright level indicator on the display moves and the<br />
appropriate brightness is reached.<br />
BR I GHT<br />
MENU/<br />
BRIGHT Wheel
14 EN<br />
Operation Mode<br />
To turn on the camcorder, set the Power Switch to<br />
any operation mode except “OFF” while pressing<br />
down the Lock Button located on the switch.<br />
POWER<br />
Lamp<br />
VIDEO/MEMORY Switch<br />
(GR-DVX707/507 only)<br />
Power Switch<br />
GETTING STARTED (cont.)<br />
VIDEO/MEMORY Switch Position<br />
(GR-DVX707/507 only)<br />
VIDEO:<br />
Allows you to record on a tape or play back a<br />
tape. If “REC SELECT” is set to “ / ”<br />
( pg. 50), still images are recorded both on the<br />
tape and the memory card.<br />
MEMORY:<br />
● Allows you to record on a memory card or<br />
access data stored on a memory card.<br />
● When the Power Switch is set to “A” or “M”, the<br />
currently selected image size appears.<br />
PLAY<br />
OFF<br />
A<br />
M<br />
1024<br />
Lock Button<br />
Choose the appropriate operation mode according<br />
to your preference using the Power Switch and<br />
VIDEO/MEMORY Switch (GR-DVX707/507 only).<br />
Power Switch Position<br />
A (Full Auto Recording):<br />
Allows you to record using NO special effects or<br />
manual adjustments. Suitable for standard<br />
recording.<br />
“A” appears on the display.<br />
M (Manual Recording):<br />
Allows you to set various recording functions<br />
using the Menus. ( pg. 38)<br />
If you want more creative capabilities than Full<br />
Auto Recording, try this mode.<br />
There is no indication on the display.<br />
OFF:<br />
Allows you to switch off the camcorder.<br />
P:<br />
● Allows you to play back a recording on the tape.<br />
● Allows you to display a still image stored in the<br />
memory card or to transfer a still image stored in<br />
the memory card to a PC. (GR-DVX707/507<br />
only)<br />
● Allows you to transfer a still image recorded on<br />
the tape to a PC. (GR-DVX407/400 only)<br />
● Allows you to set various playback functions<br />
using the Menus. ( pg. 38)
EN 15<br />
Date/Time Settings<br />
The date/time is recorded onto the tape at all times,<br />
but its display can be turned on or off during<br />
playback. ( pg. 38, 49)<br />
POWER Lamp<br />
Power Switch<br />
5 Rotate the MENU Wheel to select “CLOCK<br />
ADJ.”, and press it. The parameter for “Day” is<br />
highlighted.<br />
6 Rotate the MENU Wheel to input the day, and<br />
press it. Repeat to input the month, year, hour<br />
and minute.<br />
GR-DVX707/507 only<br />
CLOCK<br />
ADJ .<br />
2 5 . 12 . 02<br />
17 : 30<br />
PLAY<br />
OFF<br />
A<br />
M<br />
7 Rotate the MENU Wheel to select “BRETURN”,<br />
and press it twice. The Menu Screen closes.<br />
MENU Wheel<br />
1 Set the Power Switch to “M” while pressing down<br />
the Lock Button located on the switch.<br />
2 Open the LCD monitor fully, or pull out the<br />
viewfinder fully.<br />
3 Press the MENU Wheel in. The Menu Screen<br />
appears.<br />
GR-DVX707/507 only<br />
Lock Button<br />
W I P E / FADER<br />
PROGRAM AE<br />
EXPOSURE<br />
W. BALANCE<br />
CAMERA<br />
MANUAL<br />
SYSTEM<br />
DISPLAY<br />
DSC<br />
END<br />
OFF<br />
4 Rotate the MENU Wheel to select<br />
“n DISPLAY”, and press it. The DISPLAY Menu<br />
appears.<br />
GR-DVX707/507 only<br />
ON SCREEN<br />
– LCD / TV<br />
DATE / T IME – AUTO<br />
TIME CODE<br />
CLOCK<br />
ADJ .<br />
– OFF<br />
2 5 . 12 . 02<br />
17 : 30<br />
Built-in Clock’s Rechargeable Lithium Battery<br />
To store the date/time in memory, the clock’s<br />
rechargeable lithium battery is inte<strong>gr</strong>ated in the<br />
camcorder. While the camcorder is connected to an<br />
AC outlet using the AC Adapter, or while the battery<br />
pack attached to the camcorder continues to supply<br />
power, the clock’s rechargeable lithium battery is<br />
always charged. However, if the camcorder is not<br />
used for approx. 3 months, the clock’s lithium<br />
battery will become discharged and the date/time<br />
stored in memory will be lost. When this occurs, first<br />
connect the camcorder to an AC outlet using the AC<br />
Adapter for over 24 hours to charge the clock’s<br />
rechargeable lithium battery. Then perform the date/<br />
time setting before using the camcorder.<br />
Note that the camcorder can be used without setting<br />
the date/time.<br />
NOTE:<br />
Even if you select “CLOCK ADJ.”, if the parameter is<br />
not highlighted, the camcorder’s internal clock<br />
continues to operate. Once you move the highlight<br />
bar to the first date/time parameter (day), the clock<br />
stops. When you finish setting the minute and press<br />
the MENU Wheel in, the date and time begin<br />
operation from the date and time you have just set.<br />
RETURN
16 EN<br />
Loading A Cassette<br />
/Unloading A Cassette<br />
The camcorder needs to be powered up to load or<br />
eject a cassette.<br />
1 Slide down and hold OPEN/EJECT in the<br />
direction of the arrow, then pull the cassette<br />
holder cover open until it locks. The cassette<br />
holder opens automatically.<br />
● Do not touch internal components.<br />
2 Insert or remove a tape and press “PUSH HERE”<br />
to close the cassette holder.<br />
● Be sure to press only the section labelled<br />
“PUSH HERE” to close the cassette holder;<br />
touching other parts may cause your finger to<br />
get caught in the cassette holder, resulting in<br />
injury or product damage.<br />
● Once the cassette holder is closed, it recedes<br />
automatically. Wait until it recedes completely<br />
before closing the cassette holder cover.<br />
● When the battery pack’s charge is low, you<br />
may not be able to close the cassette holder<br />
cover. Do not apply force. Replace the battery<br />
pack with a fully charged one or use AC power<br />
before continuing.<br />
3 Close the cassette holder cover firmly until it<br />
locks into place.<br />
Make sure the<br />
window side is<br />
facing out.<br />
Cassette holder<br />
Cassette holder cover<br />
GETTING STARTED (cont.)<br />
To protect valuable recordings…<br />
Slide the erase protection tab on the back of the tape<br />
in the direction of “SAVE”. This prevents the tape<br />
from being recorded over. To record on this tape,<br />
slide the tab back to “REC” before loading it.<br />
Approximate recording time<br />
Recording mode<br />
Tape<br />
SP<br />
LP<br />
30 min. 30 min. 45 min.<br />
60 min. 60 min. 90 min.<br />
80 min. 80 min. 120 min.<br />
To switch the recording mode, refer to page 38 and<br />
44.<br />
NOTES:<br />
● It takes a few seconds for the cassette holder to<br />
open. Do not apply force.<br />
● If you wait a few seconds and the cassette holder<br />
does not open, close the cassette holder cover and<br />
try again. If the cassette holder still does not open,<br />
turn the camcorder off then on again.<br />
● If the tape does not load properly, open the<br />
cassette holder cover fully and remove the<br />
cassette. A few minutes later, insert it again.<br />
● When the camcorder is suddenly moved from a<br />
cold place to a warm environment, wait a short<br />
time before opening the cassette holder cover.<br />
● Closing the cassette holder cover before the<br />
cassette holder recedes may cause damage to the<br />
camcorder.<br />
● Even when the camcorder is switched off, a<br />
cassette can be loaded or unloaded. After the<br />
cassette holder is closed with the camcorder<br />
switched off, however, it may not recede. It is<br />
recommended to turn the power on before<br />
loading or unloading.<br />
● When resuming recording, once you open the<br />
cassette holder cover a blank portion will be<br />
recorded on the tape or a previously recorded<br />
scene will be erased (recorded over) regardless of<br />
whether the cassette holder came out or not. See<br />
“Recording From The Middle Of A Tape”<br />
( pg. 21).<br />
PUSH HERE<br />
OPEN/EJECT Switch<br />
Erase protection tab
EN 17<br />
Loading A Memory Card<br />
/Unloading A Memory Card<br />
(GR-DVX707/507 only)<br />
The provided memory card is already inserted in the<br />
camcorder at the time of purchase.<br />
Card Cover<br />
To protect valuable files (available only for SD<br />
Memory Card)…<br />
Write/erase protection<br />
tab<br />
Slide the write/erase protection tab on the side of the<br />
memory card in the direction of “LOCK”. This<br />
prevents the memory card from being recorded over.<br />
To record on this memory card, slide the tab back to<br />
the position opposite to “LOCK” before loading it.<br />
NOTES:<br />
● Be sure to use only SD Memory Cards marked<br />
“ ” or MultiMediaCards marked<br />
“ ”.<br />
● Some brands of memory cards are not compatible<br />
with this camcorder. Before purchasing a memory<br />
card, consult its manufacturer or dealer.<br />
● Before using a new memory card, it is necessary to<br />
FORMAT the card. ( pg. 36)<br />
ATTENTION:<br />
Do not insert or remove the memory card while the<br />
camcorder is turned on, as this may cause the<br />
memory card to be corrupted or cause the<br />
camcorder to become unable to recognise whether<br />
or not the card is installed.<br />
Clipped edge<br />
Memory card<br />
Label<br />
1 Make sure the camcorder’s power is off.<br />
2 Open the card cover.<br />
3 To load a memory card, firmly insert it with its<br />
clipped edge first.<br />
To unload a memory card, push it once. After the<br />
memory card comes out of the camcorder, pull it<br />
out.<br />
● Do not touch the terminal on the reverse side<br />
of the label.<br />
4 Close the card cover.
18 EN<br />
VIDEO RECORDING & PLAYBACK<br />
CONTENTS<br />
VIDEO RECORDING ..................................................................................... 19<br />
Basic Recording ....................................................................................... 19<br />
Tape Remaining Time ............................................................................... 19<br />
Zooming ................................................................................................ 20<br />
Journalistic Shooting ................................................................................ 20<br />
Self-Recording ........................................................................................ 20<br />
Time Code .............................................................................................. 21<br />
Recording From The Middle Of A Tape ....................................................... 21<br />
VIDEO PLAYBACK ....................................................................................... 22<br />
Normal Playback ..................................................................................... 22<br />
Still Playback .......................................................................................... 22<br />
Shuttle Search ......................................................................................... 22<br />
Frame-By-Frame Playback ........................................................................ 22<br />
Blank Search ........................................................................................... 23<br />
Connections To A TV Or VCR .................................................................... 24
VIDEO RECORDING<br />
Basic Recording<br />
NOTE:<br />
Before continuing, perform the procedures listed<br />
below:<br />
● Power ( pg. 10)<br />
● Loading A Cassette ( pg. 16)<br />
● Remove the lens cap ( pg. 7)<br />
POWER Lamp<br />
VIDEO/MEMORY Switch<br />
(GR-DVX707/507 only)<br />
EN 19<br />
5 To stop recording, press the Recording Start/Stop<br />
Button again. The camcorder re-enters the<br />
Record-Standby mode.<br />
Tape Remaining Time<br />
Approximate tape remaining time appears on the<br />
display. “– – min” means the camcorder is<br />
calculating the remaining time. When the remaining<br />
time reaches 2 minutes, the indication starts<br />
blinking.<br />
25 min<br />
Recording Start/<br />
Stop Button<br />
Power Switch<br />
PLAY<br />
OFF<br />
A<br />
M<br />
min 90 min 89 min 3 min<br />
(Now calculating)<br />
0 min 1 min 2 min<br />
(Blinking) (Blinking) (Blinking)<br />
MENU Wheel<br />
Tally Lamp<br />
Lock Button<br />
1 Set the VIDEO/MEMORY Switch to “VIDEO”.<br />
(GR-DVX707/507 only)<br />
2 Set the Power Switch to “A” or “M” while<br />
pressing down the Lock Button located on the<br />
switch.<br />
3 Open the LCD monitor fully, or pull out the<br />
viewfinder fully.<br />
● The POWER Lamp lights and the camcorder<br />
enters the Record-Standby mode. “PAUSE” is<br />
displayed.<br />
4 To start recording, press the Recording Start/Stop<br />
Button. The Tally Lamp lights and “T REC”<br />
appears on the display while recording is in<br />
pro<strong>gr</strong>ess.<br />
NOTES:<br />
● The image will not appear simultaneously on the<br />
LCD monitor and the viewfinder.<br />
● If the Record-Standby mode continues for<br />
5 minutes, the camcorder’s power shuts off<br />
automatically. To turn the camcorder on again,<br />
push back and pull out the viewfinder again or<br />
close and re-open the LCD monitor.<br />
● LCD monitor/viewfinder indications:<br />
• When power is supplied from a battery: the<br />
“ ” battery indicator is displayed.<br />
( pg. 100)<br />
• When power is supplied from an AC outlet: the<br />
“ ” battery indicator does not appear.<br />
● When a blank portion is left between recorded<br />
scenes on the tape, the time code is interrupted<br />
and errors may occur when editing the tape. To<br />
avoid this, refer to “Recording From The Middle<br />
Of A Tape” ( pg. 21).<br />
● To turn the Tally Lamp or beep sounds off,<br />
pg. 38, 48.<br />
● To record in LP (Long Play) mode, pg. 38, 44.<br />
● For other notes, pg. 81.
20 EN<br />
Zooming<br />
Produces the zoom in/out effect, or an instantaneous<br />
change in image magnification.<br />
Zoom In<br />
Turn the Power Zoom Ring towards “T”.<br />
Zoom Out<br />
Turn the Power Zoom Ring towards “W”.<br />
● The further you turn the Power Zoom Ring, the<br />
quicker the zoom action.<br />
Zoom in (T: Telephoto)<br />
1 xW T<br />
10xW<br />
10x W T<br />
Approximate zoom ratio<br />
T<br />
20xW<br />
T<br />
40xW<br />
Zoom out (W: Wide angle)<br />
Digital zoom<br />
zone<br />
10X (optical)<br />
zoom zone<br />
Power Zoom<br />
Ring<br />
PLAY<br />
OFF<br />
A<br />
M<br />
T<br />
NOTES:<br />
● Focusing may become unstable during Zooming.<br />
In this case, set the zoom while in Record-<br />
Standby, lock the focus by using the manual focus<br />
( pg. 55), then zoom in or out in Record mode.<br />
● Zooming is possible to a maximum of 200X, or it<br />
can be switched to 10X magnification using the<br />
optical zoom. ( pg. 44)<br />
● Zoom magnification of over 10X is done through<br />
Digital image processing, and is therefore called<br />
Digital Zoom.<br />
● During Digital zoom, the quality of image may<br />
suffer.<br />
● Digital zoom cannot be used when the VIDEO/<br />
MEMORY Switch is set to “MEMORY”.<br />
● Macro shooting (as close as approx. 5 cm to the<br />
subject) is possible when the Power Zoom Ring is<br />
set all the way to “W”. Also see “TELE MACRO” in<br />
MANUAL Menu on page 46.<br />
● For other notes, pg. 81.<br />
Journalistic Shooting<br />
In some<br />
situations,<br />
different shooting<br />
angles may<br />
provide more<br />
dramatic results.<br />
Hold the<br />
camcorder in the<br />
desired position<br />
and tilt the LCD<br />
monitor in the<br />
most convenient<br />
direction. It can<br />
rotate 270º (90º<br />
downward, 180º<br />
upward).<br />
Self-Recording<br />
VIDEO RECORDING (cont.)<br />
You can shoot yourself while viewing<br />
your own image in the LCD monitor.<br />
Open the LCD monitor and tilt it<br />
upward 180º so that it faces forward,<br />
then point the lens toward yourself and<br />
start recording.
Time Code<br />
EN 21<br />
During recording, a time code is recorded on the tape. This code is to confirm the location of the recorded<br />
scene on the tape during playback.<br />
If recording starts from a blank portion, the time code begins counting from “00:00:00”<br />
(minute:second:frame). If recording starts from the end of a previously recorded scene, the time code<br />
continues from the last time code number.<br />
To perform Random Assemble Editing ( pg. 73 – 77), time code is necessary. If during recording a blank<br />
portion is left partway through the tape, the time code is interrupted. When recording is resumed, the time<br />
code starts counting up again from “00:00:00”. This means the camcorder may record the same time codes as<br />
those existing in a previously recorded scene. To prevent this, perform “Recording From The Middle Of A<br />
Tape” below in the following cases;<br />
● When shooting again after playing back a<br />
recorded tape.<br />
● When power shuts off during shooting.<br />
● When a tape is removed and re-inserted during<br />
shooting.<br />
● When shooting using a partially recorded tape.<br />
● When shooting on a blank portion located<br />
partway through the tape.<br />
● When shooting again after shooting a scene then<br />
opening/closing the cassette holder cover.<br />
Recording From The Middle Of A Tape<br />
1) Play back a tape or use Blank Search ( pg. 23) to find the spot at which you want to start recording, then<br />
engage the Still Playback mode. ( pg. 22)<br />
2) Set the Power Switch to “A” or “M” while pressing down the Lock Button located on the switch, then start<br />
recording.<br />
NOTES:<br />
● The time code cannot be reset.<br />
● During fast-forwarding and rewinding, the time code indication does not move smoothly.<br />
● The time code is displayed only when “TIME CODE” is set to “ON”. ( pg. 49)<br />
When a blank portion is recorded on a tape<br />
12:34:24<br />
Display<br />
Frames are not<br />
displayed during<br />
recording.<br />
Minutes<br />
Seconds<br />
Frames<br />
(25 frames = 1 second)<br />
Time code<br />
00:00:00<br />
Time code<br />
05:43:21<br />
Time code<br />
00:00:00<br />
Tape Already recorded scene Blank Newly recorded scene<br />
Shooting start point Shooting stop point Shooting start point<br />
Proper recording<br />
Time code<br />
00:00:00<br />
Time code<br />
05:43:21<br />
Time code<br />
05:44:00<br />
Tape Already recorded scene New scene Latest scene<br />
Shooting start point Shooting start point Shooting start point
22 EN VIDEO PLAYBACK<br />
Normal Playback<br />
To control the speaker volume…<br />
Turn the Power Zoom Ring toward “T” to turn up the<br />
volume, or toward “W” to turn down the volume.<br />
Stop Button<br />
(8)<br />
Rewind Button (3)<br />
Play/Pause Button (4/9)<br />
Fast-Forward Button<br />
(5)<br />
VIDEO/MEMORY<br />
Switch<br />
(GR-DVX707/507 only)<br />
Power Switch<br />
PLAY<br />
OFF<br />
A<br />
M<br />
Still Playback<br />
Pauses during <strong>video</strong> playback.<br />
1) Press 4/9 during playback.<br />
2) To resume normal playback, press 4/9 again.<br />
● If still playback continues for more than about<br />
3 minutes, the camcorder’s Stop mode is<br />
automatically engaged.<br />
● When 4/9 is pressed, the image may not<br />
pause immediately while the camcorder<br />
stabilises the still image.<br />
Shuttle Search<br />
Speaker<br />
Power Zoom Ring<br />
(Speaker Volume<br />
Control)<br />
Lock Button<br />
1 Load a cassette. ( pg. 16)<br />
2 Set the VIDEO/MEMORY Switch to “VIDEO”.<br />
(GR-DVX707/507 only)<br />
3 Set the Power Switch to “P” while pressing<br />
down the Lock Button located on the switch.<br />
4 To start playback, press 4/9.<br />
5 To stop playback, press 8.<br />
● During Stop mode, press 3 to rewind, or<br />
5 to fast-forward the tape.<br />
NOTES:<br />
● If Stop mode continues for 5 minutes when power<br />
is supplied from a battery, the camcorder shuts off<br />
automatically. To turn on again, set the Power<br />
Switch to “OFF”, then to “P”.<br />
● The playback picture can be viewed in the LCD<br />
monitor, viewfinder or on a connected TV.<br />
( pg. 24)<br />
● You can also view the playback picture on the<br />
LCD monitor with it flipped over and pushed<br />
against the camcorder body.<br />
● LCD monitor/viewfinder indications:<br />
• When power is supplied from a battery: the<br />
“ ” battery indicator is displayed.<br />
( pg. 100)<br />
• When power is supplied from an AC outlet: the<br />
“ ” battery indicator does not appear.<br />
• During Stop mode, none of the indications are<br />
displayed.<br />
● When a cable is connected to the AV connector,<br />
the sound is not heard from the speaker.<br />
Allows high-speed search in either direction during<br />
<strong>video</strong> playback.<br />
1) During playback, press 5 for forward search,<br />
or 3 for reverse search.<br />
2) To resume normal playback, press 4/9.<br />
● During playback, press and hold 5 or 3.<br />
The search continues as long as you hold the<br />
button. Once you release the button, normal<br />
playback resumes.<br />
● A slight mosaic effect appears on the display<br />
during Shuttle Search. This is not a malfunction.<br />
ATTENTION:<br />
During Shuttle Search, parts of<br />
the picture may not be clearly<br />
visible, particularly on the left<br />
side of the screen.<br />
Frame-By-Frame Playback<br />
Allows frame-by-frame search.<br />
1) Engage Still Playback.<br />
2) During Still Playback, rotate the MENU Wheel<br />
toward “+” for forward Frame-By-Frame<br />
Playback, or towards “–” for reverse Frame-By-<br />
Frame Playback.<br />
3) To resume normal playback, press 4/9.<br />
● You can also use the provided remote control<br />
for Frame-By-Frame Playback. ( pg. 68)
Blank Search<br />
Helps you find where you should start recording in<br />
the middle of a tape to avoid time code interruption.<br />
( pg. 21)<br />
6 Rotate the MENU<br />
Wheel to select<br />
“BLANK SRCH”, and<br />
press it. The Sub<br />
Menu appears.<br />
BLANK SRCH<br />
BLANK SRCH<br />
EN 23<br />
– CANCEL<br />
EXECUTE<br />
Stop Button (8)<br />
MENU Wheel<br />
1 Load a cassette. ( pg. 16)<br />
2 Set the VIDEO/MEMORY Switch to “VIDEO”.<br />
(GR-DVX707/507 only)<br />
3 Set the Power Switch to “P” while pressing<br />
down the Lock Button located on the switch.<br />
4 Press the MENU<br />
Wheel in. The Menu<br />
Screen appears.<br />
5 Rotate the MENU<br />
Wheel to select<br />
“t VIDEO”, and<br />
press it. The VIDEO<br />
Menu appears.<br />
VIDEO/MEMORY Switch<br />
(GR-DVX707/507 only)<br />
Power Switch<br />
PLAY<br />
OFF<br />
Lock Button<br />
VIDEO<br />
SYSTEM<br />
DISPLAY<br />
END<br />
A<br />
M<br />
SOUND MODE<br />
12BIT MODE<br />
SYNCHRO<br />
REC MODE<br />
BLANK<br />
SRCH<br />
COPY<br />
7 Rotate the MENU<br />
5<br />
Wheel to select<br />
“EXECUTE”, and<br />
press it.<br />
BLANK SEARCH<br />
● The “BLANK<br />
SEARCH”<br />
indication appears<br />
blinking and the<br />
camcorder automatically starts reverse or<br />
forward search, then stops at the spot which is<br />
about 3 seconds of tape before the beginning<br />
of the detected blank portion.<br />
● To cancel Blank Search midway, press 8.<br />
NOTES:<br />
● In step 7, if the current position is at a blank<br />
portion, the camcorder searches in the reverse<br />
direction. If the current position is at a recorded<br />
portion, the camcorder searches in the forward<br />
direction.<br />
● Blank Search does not work if “HEAD CLEANING<br />
REQUIRED. USE CLEANING CASSETTE” has<br />
appeared with the tape.<br />
● If the beginning or end of the tape is reached<br />
during Blank Search, the camcorder stops<br />
automatically.<br />
● A blank portion which is shorter than 5 seconds of<br />
tape may not be detected.<br />
● The detected blank portion may be located<br />
between recorded scenes. Before you start<br />
recording, make sure there is no recorded scene<br />
after the blank portion.<br />
Slow-Motion Playback<br />
Playback Zoom<br />
Playback Special Effects<br />
Available only with the remote control (provided).<br />
( pg. 68, 69)
24 EN<br />
VIDEO PLAYBACK (cont.)<br />
Connections To A TV Or VCR<br />
A. Use the provided Audio/Video cable and optional S-Video cable.<br />
To TV or VCR<br />
To S-VIDEO<br />
S-Video cable<br />
(optional)<br />
Audio/Video cable [miniplug<br />
to RCA plug]<br />
(provided)<br />
To S-VIDEO IN<br />
White to AUDIO L IN*<br />
Red to AUDIO R IN*<br />
TV<br />
Connector<br />
Covers***<br />
To AV<br />
Yellow to VIDEO<br />
IN**<br />
VCR<br />
* The Audio cable is not required for watching still images only.<br />
** Connect when an S-Video cable is not used.<br />
*** When connecting the cables, open these covers.<br />
B. If your TV/VCR has a 21-pin connector<br />
Use the provided Cable Adapter.<br />
To AV<br />
Audio/Video cable [miniplug<br />
to RCA plug]<br />
(provided)<br />
Yellow**<br />
White to AUDIO L IN*<br />
Red to AUDIO R IN*<br />
Cable<br />
Adapter<br />
To TV or VCR<br />
TV<br />
To S-VIDEO<br />
Connector Covers***<br />
S-Video cable<br />
(optional)<br />
To S-IN<br />
“Y/C”/“CVBS”<br />
Video Out<br />
Select Switch<br />
VCR<br />
* The Audio cable is not required for watching still images only.<br />
** Connect when an S-Video cable is not used.<br />
*** When connecting the cables, open these covers.<br />
NOTE:<br />
Set the <strong>video</strong> out select switch of the cable adapter as required:<br />
Y/C: When connecting to a TV or VCR which accepts Y/C signals and uses an S-Video cable.<br />
CVBS: When connecting to a TV or VCR which does not accept Y/C signals and uses an audio/<strong>video</strong> cable.
EN 25<br />
1 Make sure all units are turned off.<br />
2 Connect the camcorder to a TV or VCR as shown<br />
in the illustration. ( pg. 24)<br />
If using a VCR, go to step 3.<br />
If not, go to step 4.<br />
3 Connect the VCR output to the TV input,<br />
referring to your VCR’s instruction manual.<br />
4 Turn on the camcorder, the VCR and the TV.<br />
5 Set the VCR to its AUX input mode, and set the<br />
TV to its VIDEO mode.<br />
To choose whether or not the following displays<br />
appear on the connected TV…<br />
● Date/Time<br />
Set “DATE/TIME” to “AUTO”, “ON” or “OFF”.<br />
( pg. 49)<br />
Or, press DISPLAY on the remote control to turn<br />
on/off the date indication.<br />
● Time Code<br />
Set “TIME CODE” to “ON” or “OFF”. ( pg. 49)<br />
● Playback sound mode, tape speed and tape<br />
running displays for <strong>video</strong> playback<br />
Set “ON SCREEN” to “LCD” or “LCD/TV”.<br />
( pg. 49)<br />
NOTES:<br />
● It is recommended to use the AC Adapter as the<br />
power supply instead of the battery pack.<br />
( pg. 11)<br />
● To monitor the picture and sound from the<br />
camcorder without inserting a tape or memory<br />
card, set the camcorder’s Power Switch to “A” or<br />
“M”, then set your TV to the appropriate input<br />
mode.<br />
● Make sure you adjust the TV sound volume to its<br />
minimum level to avoid a sudden burst of sound<br />
when the camcorder is turned on.<br />
● If you have a TV or speakers that are not specially<br />
shielded, do not place the speakers adjacent to the<br />
TV as interference will occur in the camcorder<br />
playback picture.<br />
● While the Audio/Video cable is connected to the<br />
AV connector, sound cannot be heard from the<br />
speaker.<br />
NOTE:<br />
How to open the LCD monitor when using the<br />
connectors beneath the cover...<br />
1) Open the connector cover.<br />
2) Pull out the connector cover fully.<br />
3) Rotate the connector cover 90° to the left.<br />
4) Open the LCD Monitor.
26 EN<br />
DIGITAL STILL CAMERA (D.S.C.)<br />
RECORDING & PLAYBACK<br />
The D.S.C. (Digital Still Camera) features are available on<br />
GR-DVX707 and GR-DVX507.<br />
CONTENTS<br />
D.S.C. RECORDING ...................................................................................... 27<br />
Basic Shooting (D.S.C. Snapshot) ............................................................... 27<br />
D.S.C. PLAYBACK ........................................................................................ 28<br />
Normal Playback Of Images ..................................................................... 28<br />
Auto Playback Of Images ......................................................................... 28<br />
Playback Of Video Clips (GR-DVX707 only) ............................................... 29<br />
Playback Of Digital Sound Effects (GR-DVX707 only) .................................. 29<br />
Index Playback Of Files ........................................................................... 30<br />
Viewing File Information .......................................................................... 30<br />
Removing On-Screen Display .................................................................... 31<br />
Protecting Files ....................................................................................... 31<br />
Deleting Files .......................................................................................... 33<br />
Making A New Folder .............................................................................. 34<br />
Setting Print Information (DPOF Setting) ................................................... 34<br />
Initialising A Memory Card ....................................................................... 36
D.S.C. RECORDING<br />
Basic Shooting (D.S.C. Snapshot)<br />
You can use your camcorder as a Digital Still<br />
Camera for taking snapshots. Still images are stored<br />
in the memory card.<br />
NOTE:<br />
Before continuing, perform the procedures listed<br />
below:<br />
● Power ( pg. 10)<br />
● Loading A Memory Card ( pg. 17)<br />
● Remove the lens cap ( pg. 7)<br />
SNAPSHOT Button<br />
VIDEO/MEMORY Switch<br />
Power Switch<br />
1 Set the VIDEO/MEMORY Switch to “MEMORY”.<br />
2 Set the Power Switch to “A” or “M” while<br />
pressing down the Lock Button located on the<br />
switch.<br />
3 Open the LCD monitor fully, or pull out the<br />
viewfinder fully.<br />
4 Press SNAPSHOT. The “O” indication<br />
appears while the snapshot is being taken.<br />
● Still images are recorded in the snapshot mode<br />
with no frame.<br />
● To delete unwanted still images, refer to<br />
“Deleting Files” ( pg. 33).<br />
● When you do not want to hear the shutter<br />
sound, set “BEEP” to “OFF”. ( pg. 48)<br />
● To change the Image Size and/or Picture<br />
Quality, pg. 50.<br />
PLAY<br />
OFF<br />
Lock Button<br />
A<br />
M<br />
Snapshot mode with<br />
no frame<br />
1024<br />
B<br />
A<br />
C<br />
EN 27<br />
A Image Size ( pg. 50, 97)<br />
B Shooting Icon ( pg. 97)<br />
C Card Icon ( pg. 97)<br />
D Picture Quality ( pg. 50, 97)<br />
E Remaining Number Of Shots ( pg. 97)<br />
NOTES:<br />
● Even if “DIS” is set to “ON” ( pg. 46), the<br />
Stabiliser will be disabled.<br />
● If Snapshot recording is not possible, “O”<br />
blinks when SNAPSHOT is pressed.<br />
● If Pro<strong>gr</strong>am AE with special effects ( pg. 42) is<br />
engaged, certain modes of Pro<strong>gr</strong>am AE with<br />
special effects are disabled during Snapshot<br />
recording. In such a case, the icon blinks.<br />
● If shooting is not performed for approx. 5 minutes<br />
when the Power Switch is set to “A” or “M” and<br />
power is supplied from the battery pack, the<br />
camcorder shuts off automatically to save power.<br />
To perform shooting again, push back and pull out<br />
the viewfinder again or close and re-open the LCD<br />
monitor.<br />
● The Motor Drive mode ( pg. 53) is disabled<br />
when the VIDEO/MEMORY Switch is set to<br />
“MEMORY”.<br />
● When a cable is connected to the AV connector,<br />
the shutter sound is not heard from the speaker,<br />
however it is recorded onto the tape.<br />
● Still images taken are compliant to DCF (Design<br />
rule for Camera File system). They do not have any<br />
compatibility with devices which are not<br />
compliant to DCF.<br />
15<br />
D E<br />
There is the sound of<br />
a shutter closing.
28 EN D.S.C. PLAYBACK<br />
Normal Playback Of Images<br />
Images shot with the camcorder are automatically<br />
numbered, then stored in numerical order in the<br />
memory card. You can view the stored images, one<br />
at a time, much like flipping through a photo album.<br />
Stop Button (8)/<br />
Rewind Button (3)<br />
SELECT Button<br />
(GR-DVX707 only)<br />
Play/Pause Button (4/9)<br />
Fast-Forward Button<br />
(5)<br />
MENU Wheel<br />
VIDEO/MEMORY<br />
Switch<br />
Power Switch<br />
1 Load a memory card. ( pg. 17)<br />
2 Set the VIDEO/MEMORY Switch to “MEMORY”.<br />
3 Set the Power Switch to “P” while pressing<br />
down the Lock Button located on the switch.<br />
4 Open the LCD monitor fully, or pull out the<br />
viewfinder fully.<br />
● The type of file (IMAGE, E-MAIL CLIP or<br />
SOUND) which has been played back at the<br />
last time is displayed.<br />
5 If the <strong>video</strong> clip playback (E-MAIL CLIP,<br />
( pg. 29)) or the <strong>digital</strong> sound playback<br />
(SOUND, ( pg. 29)) screen appears, press<br />
SELECT. The MEMORY SELECT screen appears.<br />
6 Rotate the MENU Wheel to select “IMAGE”, and<br />
press it. The image playback screen (IMAGE)<br />
appears.<br />
7 Press 3 to display the previous file. Press 5<br />
to display the next file.<br />
● Pressing INFO gives you details on the<br />
displayed file. ( pg. 30)<br />
● You can also look for the desired file using<br />
Index Screen. ( pg. 30)<br />
● You can turn off the on-screen playback<br />
display. ( pg. 31)<br />
NOTES:<br />
● Even if you shoot a new image after playing back a<br />
low-numbered one, this will not overwrite an<br />
existing image, because new images are<br />
automatically stored after the last-recorded one.<br />
PLAY<br />
OFF<br />
Lock Button<br />
A<br />
M<br />
● Images shot in a file size other than “640 x 480”,<br />
“1024 x 768” and “1280 x 960” (GR-DVX707<br />
only) with another devices will be displayed<br />
thumbnail images. These thumbnail images<br />
cannot be transferred to a PC.<br />
● Images shot with devices (such as <strong>JVC</strong> GR-DVX7)<br />
that are not compatible with DCF cannot be<br />
viewed with this camcorder; “UNSUPPORTED<br />
FILES” will be displayed.<br />
Auto Playback Of Images<br />
You can run through all the images stored in<br />
memory card automatically.<br />
1 Perform steps 1 – 6 in “Normal Playback Of<br />
Images”.<br />
2 Press 4/9 to start Auto Playback.<br />
● If you press 3 during Auto Playback, files<br />
are displayed in descending order.<br />
● If you press 5 during Auto Playback, files<br />
are displayed in ascending order.<br />
3 To end Auto Playback, press 8.<br />
[For Normal Playback]<br />
To display the next image [For Auto Playback]<br />
Image playback screen<br />
(IMAGE)<br />
To display the previous<br />
image
EN 29<br />
Playback Of Video Clips<br />
(GR-DVX707 only)<br />
You can view <strong>video</strong> clips ( pg. 60) stored in the<br />
memory card.<br />
1 Load a memory card. ( pg. 17)<br />
2 Set the VIDEO/MEMORY Switch to “MEMORY”.<br />
3 Set the Power Switch to “P” while pressing<br />
down the Lock Button located on the switch.<br />
4 Open the LCD monitor fully, or pull out the<br />
viewfinder fully.<br />
● The type of file (IMAGE, E-MAIL CLIP or<br />
SOUND) which has been played back at the<br />
last time is displayed.<br />
5 If the image playback (IMAGE) or the <strong>digital</strong><br />
sound playback (SOUND) screen appears, press<br />
SELECT. The MEMORY SELECT screen appears.<br />
6 Rotate the MENU<br />
Wheel to select<br />
“E-MAIL CLIP”, and<br />
press it. The <strong>video</strong> clip<br />
playback screen<br />
(E-MAIL CLIP)<br />
appears.<br />
7 Press 3 to select the<br />
E-MAIL CLIP<br />
previous file. Press 5 to select the next file.<br />
● Pressing INFO gives you details on the<br />
displayed file. ( pg. 30)<br />
● You can also look for the desired file using<br />
Index Screen. ( pg. 30)<br />
8 To start playback, press 4/9.<br />
9 To stop playback, press 8.<br />
Playback Of Digital Sound Effects<br />
(GR-DVX707 only)<br />
12 sound effects are pre-stored in the provided<br />
memory card. You can listen to the sound effects<br />
stored in the memory card. The sound effects can be<br />
also dubbed onto a tape. ( pg. 59)<br />
EXPLOSION Explosion<br />
SIREN<br />
Siren<br />
LAUGHTER Laughter<br />
RACE CAR Racing car<br />
DOOR BELL Door bell<br />
BUZZER Buzzer<br />
FANFARE Fanfare<br />
APPLAUSE Applause<br />
CHEERS Cheers<br />
BOING Boing<br />
SCREAM Scream<br />
JEERS<br />
Jeers<br />
1 Load the provided memory card. ( pg. 17)<br />
2 Set the VIDEO/MEMORY Switch to “MEMORY”.<br />
3 Set the Power Switch to “P” while pressing<br />
down the Lock Button located on the switch.<br />
4 Open the LCD monitor fully, or pull out the<br />
viewfinder fully.<br />
● The type of file (IMAGE, E-MAIL CLIP or<br />
SOUND) which has been played back at the<br />
last time is displayed.<br />
5 If the image playback (IMAGE) or the <strong>video</strong> clip<br />
playback (E-MAIL CLIP) screen appears, press<br />
SELECT. The MEMORY SELECT screen appears.<br />
6 Rotate the MENU<br />
Wheel to select<br />
“SOUND”, and press<br />
it. The <strong>digital</strong> sound<br />
playback screen<br />
(SOUND) appears.<br />
7 To play back to the<br />
sound effect, press<br />
4/9.<br />
SOUND<br />
● All the sounds are played back in ascending<br />
order.<br />
NOTES:<br />
● In the <strong>digital</strong> sound playback screen,<br />
• Press 3 to select the previous file. Press 5<br />
to select the next file.<br />
• Pressing INFO gives you details on the displayed<br />
file. ( pg. 30)<br />
● You can also look for the desired file using Index<br />
Screen. ( pg. 30)
30 EN<br />
Index Playback Of Files<br />
You can view several different files stored in the<br />
memory card at a time. This browsing capability<br />
makes it easy to locate a particular file you want.<br />
1 For Index Playback of image files, perform 1 – 6<br />
in “Normal Playback Of Images” ( pg. 28).<br />
For Index Playback of <strong>video</strong> clip files, perform<br />
1 – 6 in “Playback Of Video Clips (GR-DVX707<br />
only)” ( pg. 29).<br />
For Index Playback of sound files, perform 1 – 6<br />
in “Playback Of Digital Sound Effects<br />
(GR-DVX707 only)” ( pg. 29).<br />
2 Press INDEX. The Index Screen of the selected<br />
type of file appears.<br />
Selected file<br />
Index number<br />
D.S.C. PLAYBACK (cont.)<br />
Viewing File Information<br />
You can get the relevant file information by pressing<br />
the INFO Button during normal playback or Index<br />
Playback.<br />
DCF : Folder and file number (IMAGE only)<br />
FOLDER : Folder name ( pg. 34)<br />
FILE : File name ( pg. 34)<br />
DATE : Date the file was made<br />
SIZE : Image size (IMAGE/E-MAIL CLIP<br />
only)<br />
QUALITY : Picture quality (IMAGE only)<br />
TIME : Playback time (E-MAIL CLIP/SOUND<br />
only)<br />
PROTECT : When set to “ON”, the file is<br />
protected from accidental erasure.<br />
( pg. 31)<br />
1 2 3<br />
4 5 6<br />
7 8 9<br />
Index Screen<br />
DCF :100-0010<br />
FOLDER<br />
: 1 0 0 J VCGR<br />
F I LE<br />
: DVC0<br />
0 0 1 0<br />
DATE<br />
: 2 7. 1 0 . 0 2<br />
S I ZE<br />
: 1 0 2 4 X 7 6 8<br />
QUAL<br />
I TY<br />
: F I NE<br />
PROTECT<br />
: OF<br />
F<br />
Information Screen<br />
3 Rotate the MENU Wheel to move the frame to<br />
the desired file.<br />
● Pressing 5 displays the next page and 3<br />
displays the previous page.<br />
4 Press the MENU Wheel in. The selected file is<br />
displayed.<br />
● Pressing INFO gives you details on the<br />
displayed file. ( right column)<br />
● Press the INFO Button again to close the<br />
Information Screen.<br />
NOTE:<br />
With images shot with other devices or processed on<br />
a PC, “QUALITY: – – –” will be displayed.
EN 31<br />
Removing On-Screen Display<br />
1 Perform steps 1 – 6 of “Normal Playback Of<br />
Images” ( pg. 28).<br />
2 Press the MENU Wheel in. The Menu Screen<br />
appears.<br />
3 Rotate the MENU Wheel to select<br />
“n DISPLAY”, and press it. The Sub Menu<br />
appears.<br />
4 Rotate the MENU Wheel to select “OFF”, and<br />
press it. The operation mode indicator and<br />
battery indicator ( ) disappear.<br />
● To display the indicators again, select “ON”.<br />
Operation mode indicator<br />
Battery indicator<br />
Protecting Files<br />
The Protect mode helps prevent the accidental<br />
erasure of files.<br />
SELECT Button<br />
(GR-DVX707 only)<br />
Rewind Button (3)<br />
Fast-Forward Button (5)<br />
VIDEO/MEMORY Switch<br />
Power Switch<br />
PLAY<br />
OFF<br />
A<br />
M<br />
MENU Wheel<br />
Lock Button<br />
MENU<br />
DISPLAY OFF<br />
ON<br />
RETURN<br />
1 Load a memory card. ( pg. 17)<br />
2 Set the VIDEO/MEMORY Switch to “MEMORY”.<br />
3 Set the Power Switch to “P” while pressing<br />
down the Lock Button located on the switch.<br />
4 Open the LCD monitor fully, or pull out the<br />
viewfinder fully.<br />
● The type of file (IMAGE, E-MAIL CLIP or<br />
SOUND) which has been played back at the<br />
last time is displayed.<br />
If you want to select another type of file, go to<br />
step 5.<br />
If not, go to step 7.<br />
5 Press SELECT. The MEMORY SELECT screen<br />
appears.<br />
6 Rotate the MENU Wheel to select the desired<br />
type of file, and press it.<br />
7 Press the MENU Wheel in. The Menu Screen<br />
appears.<br />
CONTINUED ON NEXT PAGE
32 EN<br />
8 Rotate the MENU<br />
Wheel to select<br />
“PROTECT”, and press<br />
it. The Sub Menu<br />
appears.<br />
To protect the currently displayed file<br />
9 Rotate the MENU<br />
Wheel to select<br />
“CURRENT”, and<br />
press it. The PROTECT<br />
screen appears.<br />
10 Press 3 or 5<br />
to select the desired<br />
file.<br />
11 Rotate the MENU<br />
Wheel to select<br />
“EXECUTE”, and press<br />
it.<br />
● To cancel<br />
protection, select<br />
“RETURN”.<br />
● Repeat steps 10 and<br />
MENU<br />
PROTECT<br />
DELETE<br />
DPOF<br />
NO . RESET<br />
FORMAT<br />
DISPLAY<br />
END<br />
MENU<br />
PROTECT CURRENT<br />
PROT . ALL<br />
CANC . ALL<br />
RETURN<br />
PROTECT<br />
PROTECTED<br />
RETURN<br />
11 for all files you want to protect.<br />
To protect all files stored in the memory<br />
card<br />
9 Rotate the MENU Wheel to select “PROT.ALL”,<br />
and press it. The PROTECT screen appears.<br />
10 Rotate the MENU Wheel to select “EXECUTE”,<br />
and press it.<br />
● To cancel protection, select “RETURN”.<br />
NOTES:<br />
● If the “ ” mark appears, the currently displayed<br />
file is protected.<br />
● When the memory card is initialised or corrupted,<br />
even protected files are deleted. If you do not want<br />
to lose important files, transfer them to a PC and<br />
save them.<br />
To Remove Protection<br />
D.S.C. PLAYBACK (cont.)<br />
Before doing the following, perform steps 1 – 8 in<br />
“Protecting Files” ( pg. 31).<br />
To remove protection from the currently<br />
displayed file<br />
9 Rotate the MENU Wheel to select “CURRENT”,<br />
and press it. The PROTECT screen appears.<br />
10 Press 3 or 5 to select the desired file.<br />
11 Rotate the MENU Wheel to select “EXECUTE”,<br />
and press it.<br />
● To cancel selection, select “RETURN”.<br />
● Repeat steps 10 and 11 for all files you want to<br />
remove protection.<br />
To remove protection from all files stored<br />
in the memory card<br />
9 Rotate the MENU Wheel to select “CANC.ALL”,<br />
and press it. The PROTECT screen appears.<br />
10 Rotate the MENU Wheel to select “EXECUTE”,<br />
and press it.<br />
● To cancel selection, select “RETURN”.
EN 33<br />
Deleting Files<br />
Previously stored files can be deleted either one at a<br />
time or all at once.<br />
SELECT Button<br />
(GR-DVX707 only)<br />
Rewind Button (3)<br />
Fast-Forward Button (5)<br />
MENU Wheel<br />
VIDEO/MEMORY<br />
Switch<br />
Power Switch<br />
1 Load a memory card. ( pg. 17)<br />
2 Set the VIDEO/MEMORY Switch to “MEMORY”.<br />
3 Set the Power Switch to “P” while pressing<br />
down the Lock Button located on the switch.<br />
4 Open the LCD monitor fully, or pull out the<br />
viewfinder fully.<br />
● The type of file (IMAGE, E-MAIL CLIP or<br />
SOUND) which has been played back at the<br />
last time is displayed.<br />
If you want to select another type of file, go to<br />
step 5.<br />
If not, go to step 7.<br />
5 Press SELECT. The MEMORY SELECT screen<br />
appears.<br />
6 Rotate the MENU Wheel to select the desired<br />
type of file, and press it.<br />
7 Press the MENU Wheel in. The Menu Screen<br />
appears.<br />
8 Rotate the MENU Wheel to select “DELETE”, and<br />
press it. The Sub Menu appears.<br />
PLAY<br />
OFF<br />
Lock Button<br />
A<br />
M<br />
To delete the currently displayed file<br />
9 Rotate the MENU<br />
Wheel to select<br />
“CURRENT”, and<br />
press it. The DELETE<br />
screen appears.<br />
10 Press 3 or 5<br />
to select the desired<br />
file.<br />
11 Rotate the MENU<br />
DELETE<br />
MENU<br />
CURRENT<br />
ALL<br />
Wheel to select<br />
DELETE<br />
“EXECUTE”, and press<br />
it.<br />
● To cancel deletion,<br />
select “RETURN”.<br />
● Repeat steps 10 and<br />
DELETE?<br />
EXECUTE<br />
RETURN<br />
11 for all files you<br />
want to delete.<br />
NOTE:<br />
If the “<br />
RETURN<br />
” mark appears, the selected file is<br />
protected and cannot be deleted.<br />
To delete all files stored in the memory<br />
card<br />
9 Rotate the MENU Wheel to select “ALL”, and<br />
press it. The DELETE screen appears.<br />
10 Rotate the MENU Wheel to select “EXECUTE”,<br />
and press it.<br />
● To cancel deletion, select “RETURN”.<br />
NOTES:<br />
● Protected files ( pg. 31) cannot be deleted with<br />
the above operation. To delete them, remove<br />
protection first.<br />
● Once files are deleted, they cannot be restored.<br />
Check files before deleting.<br />
CAUTION:<br />
Do not remove the memory card or perform any<br />
other operation (such as turning off the<br />
camcorder) during deletion. Also, be sure to use<br />
the provided AC Adapter, as the memory card may<br />
be corrupted if the battery becomes exhausted<br />
during deletion. If the memory card becomes<br />
corrupted, initialise it. ( pg. 36)
34 EN<br />
Making A New Folder<br />
New still pictures you are going to take can be<br />
separated from previously shot pictures by resetting<br />
the file name to DVC00001; these new pictures will<br />
be stored in a new folder.<br />
1 Load a memory card. ( pg. 17)<br />
2 Set the VIDEO/MEMORY Switch to “MEMORY”.<br />
3 Set the Power Switch to “P” while pressing<br />
down the Lock Button located on the switch.<br />
4 Open the LCD monitor fully, or pull out the<br />
viewfinder fully.<br />
● The type of file (IMAGE, E-MAIL CLIP or<br />
SOUND) which has been played back at the<br />
last time is displayed.<br />
5 If the <strong>video</strong> clip playback (E-MAIL CLIP,<br />
( pg. 29)) or the <strong>digital</strong> sound playback<br />
(SOUND, ( pg. 29)) screen appears, press<br />
SELECT. The MEMORY SELECT screen appears.<br />
6 Rotate the MENU Wheel to select “IMAGE”, and<br />
press it. The image playback screen (IMAGE)<br />
appears.<br />
7 Press the MENU Wheel in. The Menu Screen<br />
appears.<br />
8 Rotate the MENU Wheel to select “NO. RESET”,<br />
and press it. The NO. RESET screen appears.<br />
9 Rotate the MENU Wheel to select “EXECUTE”,<br />
and press it. The new folder (such as<br />
“101<strong>JVC</strong>GR”) will be made and the file made of<br />
the next shot starts from DVC00001.<br />
Folder and File names<br />
Each time shooting takes place, a file name is made<br />
using a number which is larger by one than the<br />
largest number of the file names which are in use.<br />
Even if you delete an image file with a number in the<br />
middle of range, the number will not be used for a<br />
new shot; a gap will remain in the numerical<br />
sequence. If the file name reaches DVC09999, a<br />
new folder (such as “101<strong>JVC</strong>GR”) will be made and<br />
the file name will start again from DVC00001.<br />
Setting Print Information (DPOF<br />
Setting)<br />
This camcorder is compatible with the DPOF<br />
(Digital Print Order Format) standard in order to<br />
support future systems such as automatic printing.<br />
You can select one of the 2 print information settings<br />
for images stored in the memory card: “To Print All<br />
Still Images (One Print For Each)” or “To Print By<br />
Selecting Still Images And Number Of Prints”.<br />
NOTES:<br />
● If you load a memory card already set as shown<br />
below in a printer compatible with DPOF, it will<br />
make prints of the selected still images<br />
automatically.<br />
● To print images recorded on a tape, first dub them<br />
to a memory card. ( pg. 65)<br />
To Print All Still Images (One Print For Each)<br />
1 Load a memory card. ( pg. 17)<br />
2 Set the VIDEO/MEMORY Switch to “MEMORY”.<br />
3 Set the Power Switch to “P” while pressing<br />
down the Lock Button located on the switch.<br />
4 Open the LCD monitor fully, or pull out the<br />
viewfinder fully.<br />
● The type of file (IMAGE, E-MAIL CLIP or<br />
SOUND) which has been played back at the<br />
last time is displayed.<br />
5 If the <strong>video</strong> clip playback (E-MAIL CLIP,<br />
( pg. 29)) or the <strong>digital</strong> sound playback<br />
(SOUND, ( pg. 29)) screen appears, press<br />
SELECT. The MEMORY SELECT screen appears.<br />
6 Rotate the MENU Wheel to select “IMAGE”, and<br />
press it. The image playback screen (IMAGE)<br />
appears.<br />
7 Press the MENU Wheel in. The Menu Screen<br />
appears.<br />
8 Rotate the MENU<br />
Wheel to select<br />
“DPOF”, and press it.<br />
The Sub Menu<br />
appears.<br />
9 Rotate the MENU<br />
Wheel to select<br />
“ALL 1”, and press it.<br />
The DPOF screen appears.<br />
D.S.C. PLAYBACK (cont.)<br />
DPOF<br />
MENU<br />
CURRENT<br />
ALL 1<br />
RESET<br />
RETURN
EN 35<br />
10 Rotate the MENU<br />
Wheel to select<br />
DPOF<br />
“EXECUTE”, and press<br />
it. The normal<br />
playback screen<br />
ALL1?<br />
appears.<br />
EXECUTE<br />
● To cancel selection,<br />
RETURN<br />
rotate the MENU<br />
Wheel to select “RETURN”, and press it.<br />
To Print By Selecting Still Images And Number<br />
Of Prints<br />
1 Perform steps 1 – 8 in “To Print All Still Images<br />
(One Print For Each)” ( pg. 34).<br />
2 Rotate the MENU<br />
Wheel to select<br />
“CURRENT”, and<br />
press it. The DPOF<br />
screen appears.<br />
3 Press 3 or 5 to<br />
select the desired file.<br />
4 Rotate the MENU Wheel to select the number<br />
indication (00), and press it.<br />
5 Select the number of<br />
prints by rotating the<br />
MENU Wheel and<br />
press it.<br />
● Repeat steps 3<br />
through 5 for the<br />
desired number of<br />
prints.<br />
● The number of prints can be set up to 15.<br />
● To correct the number of prints, select the<br />
image again and change the number.<br />
6 Rotate the MENU<br />
Wheel to select<br />
“RETURN”, and press<br />
it. The “SAVE?”<br />
appears.<br />
● If you did not<br />
change any settings<br />
in step 3 through 5,<br />
the Menu Screen reappears.<br />
DPOF<br />
SHEETS<br />
00<br />
RETURN<br />
DPOF<br />
SHEETS<br />
7 Rotate the MENU Wheel to select “EXECUTE” to<br />
save the setting you have just made, and press it.<br />
● To cancel selection, rotate the MENU Wheel to<br />
select “CANCEL”, and press it.<br />
05<br />
DPOF<br />
SAVE?<br />
EXECUTE<br />
CANCEL<br />
To Reset The Number Of Prints<br />
1 Perform steps 1 – 8 in “To Print All Still Images<br />
(One Print For Each)” ( pg. 34).<br />
2 Rotate the MENU Wheel to select “RESET”, and<br />
press it. The DPOF screen appears.<br />
3 Rotate the MENU Wheel to select “EXECUTE”,<br />
and press it. The normal playback screen<br />
appears.<br />
● To cancel selection, rotate the MENU Wheel to<br />
select “RETURN”, and press it.<br />
● The number of prints is reset to 0 for all still<br />
images.<br />
CAUTION:<br />
While performing the above, never disconnect<br />
power, as this may cause the memory card to be<br />
corrupted.
36 EN<br />
Initialising A Memory Card<br />
You can initialise a memory card anytime.<br />
After initialising, all files and data stored in the<br />
memory card, including those which have been<br />
protected, are cleared.<br />
VIDEO/MEMORY Switch<br />
Power Switch<br />
D.S.C. PLAYBACK (cont.)<br />
6 Rotate the MENU Wheel to select “EXECUTE”,<br />
and press it. The memory card is initialised.<br />
● When initialisation is finished, “NO IMAGES<br />
STORED”, “NO E-MAIL CLIP STORED” or<br />
“NO SOUND FILES” appears.<br />
● To cancel initialisation, rotate the MENU<br />
Wheel to select “RETURN” and press it.<br />
CAUTION:<br />
Do not perform any other operation (such as<br />
turning off the camcorder) during initialisation.<br />
Also, be sure to use the provided AC Adapter, as<br />
the memory card may be corrupted if the battery<br />
becomes exhausted during initialisation. If the<br />
memory card becomes corrupted initialise it.<br />
PLAY<br />
OFF<br />
A<br />
M<br />
Lock Button<br />
MENU Wheel<br />
1 Set the VIDEO/MEMORY Switch to “MEMORY”.<br />
2 Set the Power Switch to “P” while pressing<br />
down the Lock Button located on the switch.<br />
3 Open the LCD monitor fully, or pull out the<br />
viewfinder fully.<br />
4 Press the MENU<br />
Wheel in. The Menu<br />
Screen appears.<br />
MENU<br />
PROTECT<br />
DELETE<br />
DPOF<br />
NO . RESET<br />
FORMAT<br />
DISPLAY<br />
END<br />
5 Rotate the MENU<br />
Wheel to select<br />
“FORMAT”, and press<br />
it. The FORMAT<br />
screen appears.<br />
FORMAT<br />
ERASE ALL<br />
EX I ST I NG DATA?<br />
EXECUTE<br />
RETURN
EN 37<br />
ADVANCED FEATURES<br />
CONTENTS<br />
MENUS FOR DETAILED ADJUSTMENT ............................................................ 38<br />
Changing The Menu Settings ........................................................................ 38<br />
RECORDING MENUS .................................................................................... 40<br />
Wipe Or Fader Effects ................................................................................ 40<br />
Pro<strong>gr</strong>am AE With Special Effects ................................................................... 42<br />
Exposure Control (GR-DVX707/507 only) ...................................................... 43<br />
White Balance Adjustment ........................................................................... 43<br />
PLAYBACK MENUS ...................................................................................... 51<br />
FEATURES FOR RECORDING ......................................................................... 53<br />
Night-Scope ............................................................................................. 53<br />
Snapshot (For Video Recording) .................................................................... 53<br />
Snapshot Flash (GR-DVX707/507 only) ......................................................... 54<br />
Flash Brightness Adjustment (GR-DVX707/507 only) ....................................... 54<br />
Auto Focus ............................................................................................... 55<br />
Manual Focus ........................................................................................... 55<br />
Exposure Control ....................................................................................... 56<br />
Iris Lock .................................................................................................. 57<br />
Backlight Compensation .............................................................................. 57<br />
White Balance Adjustment ........................................................................... 58<br />
Manual White Balance Adjustment ................................................................ 58<br />
Recording Digital Sound Effects (GR-DVX707 only) ........................................... 59<br />
E-Mail Clip Recording (GR-DVX707 only) ........................................................ 60<br />
DUBBING ................................................................................................... 62<br />
Dubbing To A VCR ..................................................................................... 62<br />
Dubbing To A Video Unit Equipped With A DV IN Connector (Digital Dubbing) .......... 63<br />
Dubbing From A Video Unit Equipped With A DV OUT Connector (Digital Dubbing)<br />
(GR-DVX707/507/407 only) ..................................................................... 64<br />
Dubbing Still Images Recorded On A Tape To A Memory Card<br />
(GR-DVX707/507 only) ............................................................................. 65<br />
USING THE REMOTE CONTROL UNIT ............................................................. 66<br />
Audio Dubbing .......................................................................................... 70<br />
Audio Dubbing Using Digital Sound Effects (GR-DVX707 only) ............................. 71<br />
Insert Editing ............................................................................................ 72<br />
Random Assemble Editing [R.A.Edit] .............................................................. 73<br />
SYSTEM CONNECTIONS ............................................................................... 78<br />
Connection To A Personal Computer ............................................................... 78<br />
Using The Camcorder As A WebCam (GR-DVX707 only) ..................................... 79
38 EN MENUS FOR DETAILED ADJUSTMENT<br />
Changing The Menu Settings<br />
This camcorder is equipped with an easy-to-use, onscreen<br />
menu system that simplifies many of the<br />
more detailed camcorder settings. ( pg. 40 – 52)<br />
MENU Wheel<br />
VIDEO/MEMORY Switch<br />
Power Switch<br />
1 For Video and D.S.C. (GR-DVX707/507 only)<br />
Recording Menus:<br />
● Set the VIDEO/MEMORY Switch to “VIDEO”<br />
or “MEMORY”. (GR-DVX707/507 only)<br />
● Set the Power Switch to “M” while pressing<br />
down the Lock Button located on the switch.<br />
For Video Playback Menus:<br />
● Set the VIDEO/MEMORY Switch to “VIDEO”.<br />
(GR-DVX707/507 only)<br />
● Set the Power Switch to “P” while pressing<br />
down the Lock Button located on the switch.<br />
● For D.S.C. Playback Menus (GR-DVX707/507<br />
only), refer to “D.S.C. PLAYBACK” ( pg. 28).<br />
2 Open the LCD monitor fully, or pull out the<br />
viewfinder fully.<br />
3 Press the MENU Wheel in. The Menu Screen<br />
appears.<br />
W I P E / FADER<br />
PROGRAM AE<br />
EXPOSURE<br />
W. BALANCE<br />
CAMERA<br />
MANUAL<br />
SYSTEM<br />
DISPLAY<br />
DSC<br />
END<br />
OFF<br />
PLAY<br />
OFF<br />
Lock Button<br />
A<br />
Menu Screen for<br />
Video and D.S.C.<br />
Recording Menu<br />
GR-DVX707/507<br />
only<br />
M<br />
4 Rotate the MENU Wheel to select the desired<br />
function, and press it. The selected function<br />
menu appears.<br />
5 Setting procedure hereafter depends on the<br />
selected function.<br />
Menus without Sub Menus<br />
— v WIPE/FADER, r PROGRAM AE,<br />
p EXPOSURE (GR-DVX707/507 only),<br />
u W. BALANCE<br />
1) Rotate the MENU Wheel to select the desired<br />
parameter.<br />
Example: r PROGRAM AE Menu<br />
Selected function icon is<br />
displayed in reverse.<br />
GR-DVX707/507<br />
only<br />
<br />
SNOW<br />
SPOTL IGHT<br />
TW ILIGHT<br />
SEP I A<br />
MONOTONE<br />
CLASS IC FILM<br />
STROBE<br />
SLOW<br />
4X<br />
SLOW<br />
10X<br />
<br />
Selected parameter<br />
2) Press the MENU Wheel in. Selection is complete.<br />
The Menu Screen returns.<br />
● Repeat the procedure if you wish to set other<br />
function menus.<br />
GR-DVX707/507 only<br />
W I P E / FADER<br />
PROGRAM AE<br />
EXPOSURE<br />
W. BALANCE<br />
CAMERA<br />
MANUAL<br />
SYSTEM<br />
DISPLAY<br />
DSC<br />
END<br />
OFF<br />
3) Press the MENU Wheel in again. The Menu<br />
Screen closes.<br />
VIDEO<br />
SYSTEM<br />
DISPLAY<br />
SOUND MODE<br />
12BIT MODE<br />
SYNCHRO<br />
REC MODE<br />
BLANK<br />
SRCH<br />
COPY<br />
Menu Screen for<br />
Video Playback Menu<br />
END<br />
GR-DVX707/507<br />
only
EN 39<br />
Menus with Sub Menus<br />
— m CAMERA, q MANUAL, s SYSTEM,<br />
n DISPLAY, o DSC (GR-DVX707/507 only),<br />
t VIDEO<br />
1) Rotate the MENU Wheel to select the desired<br />
function and press it. The Sub Menu appears.<br />
Example: m CAMERA Menu<br />
Selected function icon is<br />
displayed in reverse.<br />
GR-DVX707/507 only<br />
REC MODE<br />
SOUND MODE<br />
ZOOM<br />
SNAP MODE<br />
GA I N UP<br />
RETURN<br />
Selected function<br />
2) Rotate the MENU Wheel to select the desired<br />
parameter.<br />
Sub Menu<br />
–<br />
–<br />
–<br />
–<br />
–<br />
SP<br />
12BI<br />
T<br />
40X<br />
FULL<br />
AGC<br />
NOTES:<br />
● The “m CAMERA” settings are effective when the<br />
Power Switch is set to both “A” and “M”.<br />
However, the menu settings can be changed only<br />
when the Power Switch is set to “M”.<br />
● The “q MANUAL” settings are effective only<br />
when the Power Switch is set to “M”.<br />
● The “s SYSTEM” and “n DISPLAY” functions<br />
which are set when the Power Switch is set to “M”<br />
are also applied when the Power Switch is set to<br />
“P”. The “CLOCK ADJ.” menu only appears<br />
when the Power Switch is set to “M”.<br />
● The “n DISPLAY” settings are effective even<br />
when the Power Switch is set to “A”. However,<br />
the menu settings can be changed only when the<br />
Power Switch is set to “M”.<br />
● The date indication can also be turned on/off by<br />
pressing the DISPLAY Button on the remote<br />
control (provided). ( pg. 25, 62, 74)<br />
REC MODE<br />
– SP<br />
LP<br />
GR-DVX707/507 only<br />
3) Press the MENU Wheel in. Selection is complete.<br />
● Repeat the procedure if you wish to set other<br />
function menus.<br />
REC MODE<br />
SOUND MODE<br />
ZOOM<br />
SNAP MODE<br />
GAIN UP<br />
–<br />
–<br />
–<br />
–<br />
–<br />
SP<br />
12BI<br />
T<br />
40X<br />
FULL<br />
AGC<br />
GR-DVX707/507 only<br />
RETURN<br />
4) Press the MENU Wheel in. The Menu Screen<br />
returns.<br />
● Repeat the procedure if you wish to set other<br />
function menus.<br />
GR-DVX707/507 only<br />
W I P E / FADER<br />
PROGRAM AE<br />
EXPOSURE<br />
W. BALANCE<br />
CAMERA<br />
MANUAL<br />
SYSTEM<br />
DISPLAY<br />
DSC<br />
END<br />
OFF<br />
5) Press the MENU Wheel in again. The Menu<br />
Screen closes.
40 EN RECORDING MENUS<br />
Wipe Or Fader Effects<br />
These effects let you make pro-style scene<br />
transitions. Use them to spice up the transition from<br />
one scene to the next.<br />
IMPORTANT:<br />
Some Wipe/Fader Effects cannot be used with<br />
certain modes of Pro<strong>gr</strong>am AE with special effects.<br />
( pg. 42) If an unusable Wipe/Fader Effect is<br />
selected, its indicator blinks in blue or goes out.<br />
VIDEO/MEMORY Switch<br />
(GR-DVX707/507 only)<br />
Recording Start/<br />
Stop Button<br />
Power Switch<br />
PLAY<br />
OFF<br />
A<br />
M<br />
Wipe or Fader works when <strong>video</strong> recording is started<br />
or stopped.<br />
1 Set the VIDEO/MEMORY Switch to “VIDEO”.<br />
(GR-DVX707/507 only)<br />
2 Set the Power Switch to “M” while pressing down<br />
the Lock Button located on the switch.<br />
3 Open the LCD monitor fully, or pull out the<br />
viewfinder fully.<br />
4 Set “v WIPE/FADER” to the desired mode.<br />
( pg. 38)<br />
● The selected effect indicator appears.<br />
5 Press the Recording Start/Stop Button to start or<br />
stop recording. The selected Fade-in/out or<br />
Wipe-in/out effect works.<br />
To deactivate the selected effect…<br />
Select “OFF” in step 4.<br />
NOTES:<br />
● You can select other effects for “v WIPE/FADER”<br />
during recording.<br />
● You can extend the length of a Wipe or Fader by<br />
pressing and holding the Recording Start/Stop<br />
Button.<br />
MENU Wheel<br />
Lock Button
EN 41<br />
WIPE/FADER ( : Factory-preset)<br />
Indicator Parameter Description<br />
— OFF Disables effects.<br />
FADER–WHITE Fade in or out with a white screen.<br />
FADER–BLACK Fade in or out with a black screen.<br />
FADER–B.W<br />
WIPE–CORNER<br />
WIPE–WINDOW<br />
WIPE–SLIDE<br />
WIPE–DOOR<br />
WIPE–SCROLL<br />
WIPE–SHUTTER<br />
Fade in to a colour screen from a black and white screen, or fade<br />
out from colour to black and white.<br />
Wipe in on a black screen from the upper right to the lower left<br />
corner, or wipe out from lower left to upper right, leaving a black<br />
screen.<br />
The scene starts in the centre of a black screen and wipes in<br />
toward the corners, or comes in from the corners, <strong>gr</strong>adually wiping<br />
out to the centre.<br />
Wipe in from right to left, or wipe out from left to right.<br />
Wipe in as the two halves of a black screen open to the left and<br />
right, revealing the scene, or wipe out and the black screen<br />
reappears from left and right to cover the scene.<br />
The scene wipes in from the bottom to the top of a black screen, or<br />
wipes out from top to bottom, leaving a black screen.<br />
Wipe in from the centre of a black screen toward the top and<br />
bottom, or wipe out from the top and bottom toward the centre<br />
leaving a black screen.
42 EN<br />
Pro<strong>gr</strong>am AE With Special Effects<br />
IMPORTANT:<br />
Some modes of Pro<strong>gr</strong>am AE with special effects<br />
cannot be used with certain Wipe/Fader effects.<br />
( pg. 40) If an unusable mode is selected, the<br />
indicator of Wipe/Fader effects blinks or goes out.<br />
1 Set the Power Switch to “M” while pressing down<br />
the Lock Button located on the switch.<br />
2 Open the LCD monitor fully, or pull out the<br />
viewfinder fully.<br />
RECORDING MENUS (cont.)<br />
3 Set “r PROGRAM AE” to the desired mode.<br />
( pg. 38)<br />
● The selected mode indicator appears.<br />
To deactivate the selected mode…<br />
Select “OFF” in step 3.<br />
NOTES:<br />
● Pro<strong>gr</strong>am AE with special effects can be changed<br />
during recording or during Record-Standby.<br />
● Some modes of Pro<strong>gr</strong>am AE with special effects<br />
cannot be used during Night-Scope.<br />
PROGRAM AE ( : Factory-preset)<br />
Indicator Parameter Description<br />
— OFF Deactivates Pro<strong>gr</strong>am AE with special effects.<br />
SHUTTER 1/50<br />
SHUTTER 1/120<br />
SPORTS<br />
SNOW<br />
SPOTLIGHT<br />
TWILIGHT<br />
SEPIA<br />
MONOTONE<br />
CLASSIC FILM*<br />
STROBE*<br />
(Variable Shutter Speed)<br />
The shutter speed is fixed at 1/50th of a second. Black bands that<br />
usually appear when shooting a TV screen become narrower.<br />
The shutter speed is fixed at 1/120th of a second. The flickering that<br />
occurs when shooting under a fluorescent light or mercury-vapour<br />
lamp is reduced.<br />
(Variable Shutter Speed: 1/250 – 1/4000)<br />
This setting allows fast-moving images to be captured one frame at a<br />
time, for vivid, stable slow-motion playback. The faster the shutter<br />
speed, the darker the picture becomes. Use the shutter function<br />
under good lighting conditions.<br />
Compensates for subjects that may otherwise appear too dark when<br />
shooting in extremely bright surroundings such as in the snow.<br />
Compensates for subjects that may otherwise appear too bright when<br />
shooting under extremely strong direct lighting such as spotlights.<br />
NOTE:<br />
“SPOTLIGHT” has the same effect as –3 with the exposure control.<br />
( pg. 56)<br />
Makes evening scenes look more natural. White Balance<br />
( pg. 43, 58) is automatically set to “ ”, but can be changed to<br />
your desired setting. When Twilight is chosen, the camcorder<br />
automatically adjusts the focus from approx. 10 m to infinity. From<br />
less than 10 m, adjust the focus manually. The flash does not fire in<br />
this mode.<br />
Recorded scenes have a brownish tint like old photos. Combine this<br />
with the Cinema mode for a classic look.<br />
Like classic black and white films, your footage is shot in B/W. Used<br />
together with the Cinema mode, it enhances the “classic film” effect.<br />
Gives recorded scenes a strobe effect.<br />
Your recording looks like a series of consecutive snapshots.
EN 43<br />
SLOW 4X<br />
SLOW 10X<br />
Slow Shutter (GR-DVX507/407/400 only)<br />
Lights dark subjects or areas even brighter than they would be under<br />
good natural lighting. Use “SLOW 10X” or “SLOW 4X” only in dark<br />
areas.<br />
NOTES:<br />
● When using “SLOW 10X” or “SLOW 4X”, the image takes on a<br />
strobe-like effect.<br />
● When using “SLOW 10X” or “SLOW 4X”, it may be difficult to<br />
bring the camcorder into focus. To prevent this, use of manual<br />
focus and/or a tripod is recommended.<br />
Slow Shutter raises light sensitivity to allow shooting in dark<br />
environments.<br />
Slow Shutter raises light sensitivity further to allow shooting in even<br />
darker environments.<br />
* For GR-DVX707: Available only when the VIDEO/MEMORY Switch is set to “VIDEO”.<br />
Exposure Control (GR-DVX707/507 only)<br />
EXPOSURE ( : Factory-preset)<br />
For details, refer to “Exposure Control” ( pg. 56).<br />
Indicator Parameter Description<br />
— AUTO Returns to automatic exposure control.<br />
— MANUAL Makes the exposure control indicator appear.<br />
White Balance Adjustment<br />
W. BALANCE ( : Factory-preset)<br />
For details, refer to “White Balance Adjustment” ( pg. 58).<br />
— AUTO White balance is adjusted automatically.<br />
MWB<br />
FINE<br />
CLOUD<br />
HALOGEN<br />
Adjust the white balance manually when shooting under various types of lighting.<br />
Outdoors on a sunny day.<br />
Outdoors on a cloudy day.<br />
A <strong>video</strong> light or similar type of lighting is used.
44 EN<br />
RECORDING MENUS (cont.)<br />
Camera Menu<br />
CAMERA ( : Factory-preset)<br />
Recording mode<br />
Allows you to set the recording mode (SP or LP) depending on your preference.<br />
NOTES:<br />
● Audio Dubbing ( pg. 70) and Insert Editing ( pg. 72) are possible on tapes recorded in the SP mode.<br />
● If the recording mode is switched during recording, the playback picture will be blurred at the switching<br />
point.<br />
● It is recommended that tapes recorded in the LP mode on this camcorder be played back on this camcorder.<br />
● During playback of a tape recorded on another camcorder, blocks of noise may appear or there may be<br />
momentary pauses in the sound.<br />
REC MODE SP Standard Play<br />
LP<br />
Long Play—more economical, providing 1.5 times the recording time.<br />
Sound mode<br />
SOUND<br />
MODE<br />
12 BIT Enables <strong>video</strong> recording of stereo sound on four separate channels, and is<br />
recommended for use when performing Audio Dubbing. (Equivalent to<br />
the 32 kHz mode of previous models)<br />
16 BIT Enables <strong>video</strong> recording of stereo sound on two separate channels.<br />
(Equivalent to the 48 kHz mode of previous models)<br />
Zooming<br />
ZOOM 10X When set to “10X” while using <strong>digital</strong> zoom, the zoom magnification will<br />
reset to 10X since <strong>digital</strong> zoom will be disengaged.<br />
40X* Allows you to use the Digital Zoom. By <strong>digital</strong>ly processing and<br />
magnifying images, zooming is possible from 10X (the optical zoom<br />
limit), to a maximum of 40X <strong>digital</strong> magnification.<br />
200X* Allows you to use the Digital Zoom. By <strong>digital</strong>ly processing and<br />
magnifying images, zooming is possible from 10X (the optical zoom<br />
limit), to a maximum of 200X <strong>digital</strong> magnification.<br />
* For GR-DVX707/507: Available only when the VIDEO/MEMORY Switch is set to “VIDEO”.
EN 45<br />
Snapshot mode for <strong>video</strong> recording<br />
For details on the procedure, refer to “Snapshot (For Video Recording)” ( pg. 53).<br />
SNAP MODE FULL Snapshot mode with no frame<br />
PIN-UP<br />
Pin-Up mode<br />
FRAME<br />
Snapshot mode with frame<br />
There is the sound effect of a shutter closing.<br />
Gain up<br />
GAIN UP OFF Allows you to shoot dark scenes with no picture brightness adjustment.<br />
AGC<br />
AUTO<br />
The overall appearance may be <strong>gr</strong>ainy, but the image is bright.<br />
The shutter speed is automatically adjusted (1/25 – 1/200 sec.). Shooting<br />
a subject in low or poor lighting at 1/25 sec. shutter speed provides a<br />
brighter image than in the AGC mode, but the subject’s movements are<br />
not smooth or natural. The overall appearance may be <strong>gr</strong>ainy. While the<br />
shutter speed is being automatically adjusted, “ ” is displayed.
46 EN<br />
RECORDING MENUS (cont.)<br />
Manual Menu<br />
MANUAL ( : Factory-preset)<br />
Digital Image Stabilisation<br />
DIS OFF<br />
ON<br />
To compensate for unstable images caused by <strong>camera</strong>-shake, particularly<br />
at high magnification.<br />
NOTES:<br />
● Accurate stabilisation may not be possible if hand shake is excessive, or<br />
under the following conditions:<br />
• When shooting subjects with vertical or horizontal stripes.<br />
• When shooting dark or dim subjects.<br />
• When shooting subjects with excessive backlighting.<br />
• When shooting scenes with movement in various directions.<br />
• When shooting scenes with low-contrast back<strong>gr</strong>ounds.<br />
● Switch off this mode when recording with the camcorder on a tripod.<br />
● The “ ” indicator blinks or goes out if the Stabiliser cannot be used.<br />
Maximum telephoto setting<br />
Usually the distance to a subject where the lens is in focus depends on the zoom magnification. Unless there<br />
is a distance more than 1 m to the subject, the lens is out of focus at the maximum telephoto setting.<br />
TELE<br />
MACRO<br />
Wide mode<br />
OFF<br />
ON<br />
Disables the function.<br />
When set to “ON”, you can shoot a subject as large as possible at a<br />
distance of approx. 60 cm.<br />
● Depending on the zoom position, the lens may go out of focus.<br />
WIDE MODE OFF Records with no change in the screen ratio. For playback on a TV with a<br />
normal screen ratio.<br />
CINEMA* Inserts black bands at the top and bottom of the screen. The indicator<br />
appears. During playback on wide-screen TVs, the black bands at the top<br />
and bottom of the screen are cut and the screen ratio becomes 16:9.<br />
When using this mode, refer to your wide-screen TV’s instruction manual.<br />
During playback/recording on 4:3 TVs/LCD monitor/viewfinder, black<br />
bands are inserted at the top and bottom of the screen and the image<br />
appears like a letter boxed 16:9 movie.<br />
SQUEEZE* For playback on TVs with an aspect ratio of 16:9. Naturally expands the<br />
image to fit the screen without distortion. The indicator appears.<br />
When using this mode, refer to your wide-screen TV’s instruction manual.<br />
During playback/recording on 4:3 TVs/LCD monitor/viewfinder, the<br />
image is elongated vertically.<br />
S.WIDE*<br />
(GR-DVX707<br />
only)<br />
The indicator appears. The zoom range is extended beyond the<br />
maximum optical zoom wide angle range. This mode’s wide angle setting<br />
is equivalent to using a 0.9X wide conversion lens. Zooming is possible<br />
from 0.9X to 10X. This mode is suitable for shooting in a small room.<br />
* For GR-DVX707/507: Available only when the VIDEO/MEMORY Switch is set to “VIDEO”.
EN 47<br />
Wind cut<br />
WIND CUT OFF Disengages the function.<br />
ON Helps cut down on noise created by wind. The “ ” indicator appears.<br />
The quality of the sound will change. This is normal.<br />
Snapshot flash mode (GR-DVX707/507 only)<br />
FLASH AUTO Refer to “Snapshot Flash (GR-DVX707/507 only)” ( pg. 54).<br />
AUTO C<br />
ON<br />
OFF<br />
Flash brightness adjustment (GR-DVX707/507 only)<br />
FLASH ADJ. ±3 Refer to “Flash Brightness Adjustment (GR-DVX707/507 only)”<br />
( pg. 54).
48 EN<br />
RECORDING MENUS (cont.)<br />
System Menu<br />
SYSTEM ( : Factory-preset)<br />
Beep, melody and shutter sound<br />
BEEP OFF Even though not heard while shooting, shutter sound is recorded on the<br />
tape.<br />
Tally lamp setting<br />
BEEP<br />
MELODY<br />
ID number setting (GR-DVX407/400 only)<br />
The beep sounds when the power is turned on or off, and at the<br />
beginning and end of recording. It also activates the shutter sound effect.<br />
( pg. 27, 53)<br />
Instead of a beep, a melody sounds when any operation is performed. It<br />
also activates the shutter sound effect. ( pg. 27, 53)<br />
TALLY OFF The tally lamp remains off at all times.<br />
ON<br />
The tally lamp comes on to signal the start of recording.<br />
ID NUMBER<br />
This number is necessary when connecting the camcorder to a device such as a computer<br />
using the J terminal (JLIP) or PC connector. The number range from 01 to 99. Factory<br />
setting is 06.<br />
Automatic demonstration mode<br />
Demonstrates certain functions such as Pro<strong>gr</strong>am AE with special effects, etc., and can be used to confirm how<br />
these functions operate. ( pg. 8)<br />
DEMO MODE OFF Automatic demonstration will not take place.<br />
ON<br />
Demonstrates certain functions such as Pro<strong>gr</strong>am AE with special effects,<br />
etc., and can be used to confirm how these functions operate.<br />
Demonstration starts in the following cases:<br />
•When the Menu Screen is closed after “DEMO MODE” is turned “ON”.<br />
•With “DEMO MODE” set to “ON”, if there is no operation for about<br />
3 minutes after the Power Switch is set to “A” or “M”.<br />
Performing any operation during the demonstration stops the<br />
demonstration temporarily. If no operation is performed for more than 3<br />
minutes after that, the demonstration will resume.<br />
NOTES:<br />
● If a cassette is in the camcorder, the demonstration cannot be turned on.<br />
● “DEMO MODE” remains “ON” even if the camcorder power is turned off.<br />
● If “DEMO MODE” remains “ON”, some functions will not be available.<br />
After viewing demo, set to “OFF”.
EN 49<br />
Resetting menu settings<br />
CAM RESET CANCEL Does not reset the settings to the factory-preset.<br />
EXECUTE Resets all settings to the factory-preset.<br />
Sound input (GR-DVX707 only)<br />
SOUND IN MIC Enables sound input from camcorder’s stereo microphone, when Audio<br />
Dubbing ( pg. 70) is executed. “MIC” appears on the Audio Dubbing<br />
screen.<br />
D.SOUND<br />
Enables sound effect input recorded on the provided memory card, when<br />
Audio Dubbing ( pg. 71) is executed. “D.SOUND” appears on the<br />
Audio Dubbing screen.<br />
Display Menu<br />
DISPLAY ( : Factory-preset)<br />
Display setting<br />
ON SCREEN LCD Keeps the camcorder’s display (except the date, time and time code) from<br />
appearing on the connected TV screen.<br />
Date and time display setting<br />
Time code setting<br />
Clock adjustment<br />
LCD/TV<br />
DATE/TIME OFF The date/time does not appear.<br />
AUTO<br />
ON<br />
Makes the camcorder’s display appear on screen when the camcorder is<br />
connected to a TV.<br />
Displays the date/time for approx. 5 seconds in the following cases:<br />
● When the Power Switch is set from “OFF” to “A” or “M”.<br />
● When playback starts. The camcorder displays the date/time when<br />
scenes are recorded.<br />
● When the date is changed during playback.<br />
The date/time is always displayed.<br />
TIME CODE OFF Time code is not displayed.<br />
ON<br />
Time code is displayed on the camcorder and on the connected TV.<br />
Frame numbers are not displayed during recording.<br />
CLOCK ADJ. Allows you to set the current date and time. ( pg. 15)
50 EN<br />
RECORDING MENUS (cont.)<br />
DSC Menu (GR-DVX707/507 only)<br />
DSC ( : Factory-preset)<br />
Picture quality<br />
QUALITY FINE<br />
STANDARD<br />
The Picture Quality mode can be selected to best match your needs. Two<br />
Picture Quality modes are available: FINE and STANDARD (in order of<br />
quality).<br />
NOTE:<br />
The number of storable images depends on the selected picture quality as<br />
well as the composition of the subjects in the images and the type of<br />
memory card being used.<br />
Image size<br />
IMAGE SIZE 640 x 480* The Image Size mode can be selected to best match your needs.<br />
1024 x 768**<br />
* GR-DVX507: Factory preset is 640 x 480.<br />
** GR-DVX707: Factory preset is 1024 x 768.<br />
1280 x 960 NOTE:<br />
(GR-DVX707 The settings can be changed only when the VIDEO/MEMORY Switch is<br />
only) set to “MEMORY”.<br />
Approximate Number of Storable Images<br />
The numbers in parentheses are for GR-DVX507.<br />
Image Size/Picture<br />
SD Memory Card<br />
MultiMediaCard<br />
Quality<br />
8 MB** 8 MB 16 MB 32 MB 64 MB 8 MB* 16 MB 32 MB<br />
640 x 480/FINE 39 46 (45) 98 (95) 205 (205) 405 (405) 50 (55) 105 (105) 210 (215)<br />
640 x 480/STANDARD 134 150 (160) 295 (295) 625 (625) 1215 (1215) 160 (190) 320 (320) 640 (645)<br />
1024 x 768/FINE 17 20 (20) 46 (45) 98 (95) 190 (190) 25 (24) 50 (48) 100 (100)<br />
1024 x 768/STANDARD 55 66 (65) 145 (145) 310 (310) 605 (605) 80 (75) 160 (160) 320 (320)<br />
1280 x 960/FINE*** 11 12 28 62 120 16 32 64<br />
1280 x 960/STANDARD*** 37 44 98 205 405 50 100 200<br />
* Provided with GR-DVX507 only<br />
** Provided with GR-DVX707 only (12 sound effects pre-stored)<br />
*** GR-DVX707 only<br />
Recording media selection<br />
REC SELECT<br />
When Snapshot recording is performed with the VIDEO/MEMORY<br />
Switch set to “VIDEO”, still images are recorded only onto the tape.<br />
/ When Snapshot recording is performed with the VIDEO/MEMORY<br />
Switch set to “VIDEO”, still images are recorded not only onto the tape<br />
but also in the memory card (640 x 480 pixels). In this mode, the “SNAP<br />
MODE” selection in CAMERA Menu is also applicable to memory card<br />
recording.
PLAYBACK MENUS<br />
EN 51<br />
Video Menu<br />
VIDEO ( : Factory-preset)<br />
Playback sound<br />
During tape playback, the camcorder detects the sound mode in which the recording was made, and plays<br />
the sound back. Select the type of sound to accompany your playback picture. According to the menu access<br />
explanation on page 38, select “SOUND MODE” or “12BIT MODE” from the Menu Screen and set it to the<br />
desired parameter.<br />
NOTES:<br />
● The “SOUND MODE” setting is available for both 12-bit and 16-bit sound. (In previous models’ functions,<br />
“12-bit” is called “32 kHz” and “16-bit” is called “48 kHz”.)<br />
● The camcorder cannot detect the sound mode in which the recording was made during fast-forward or<br />
rewind. During playback the sound mode is displayed in the upper left corner.<br />
SOUND<br />
MODE<br />
Synchro adjustment<br />
Recording mode<br />
Blank search<br />
STEREO<br />
SOUND L<br />
SOUND R<br />
Dubbing from tape to memory card<br />
Sound is output on both “L” and “R” channels in stereo.<br />
Sound from the “L” channel is output in stereo.<br />
Sound from the “R” channel is output in stereo.<br />
12BIT MODE MIX Original and dubbed sounds are combined and output in stereo on<br />
both “L” and “R” channels in stereo.<br />
SOUND 1<br />
SOUND 2<br />
Original sound is output on both “L” and “R” channels in stereo.<br />
Dubbed sound is output on both “L” and “R” channels in stereo.<br />
SYNCHRO ±0.0 Refer to “For More Accurate Editing” ( pg. 77).<br />
REC MODE SP<br />
LP<br />
Allows you to set the <strong>video</strong> recording mode (SP or LP) depending on<br />
your preference. It is recommended you use “REC MODE” in VIDEO<br />
Menu when using this camcorder as a recorder during <strong>digital</strong> dubbing<br />
(GR-DVX707/507/407 only). ( pg. 64)<br />
NOTE:<br />
“REC MODE” can be set when the Power Switch is set to “P” or<br />
“M”.<br />
BLANK SRCH CANCEL Helps find a blank portion of tape when you want to record from the<br />
EXECUTE<br />
middle of a tape. ( pg. 23)<br />
COPY<br />
OFF<br />
ON<br />
Enables snapshots to be taken during <strong>video</strong> playback.<br />
Enables dubbing of images recorded on a tape to a memory card.<br />
( pg. 65)
52 EN PLAYBACK MENUS (cont.)<br />
System Menu<br />
SYSTEM ( : Factory-preset)<br />
BEEP OFF pg. 48 Each setting is linked with “s SYSTEM”, which appears<br />
BEEP<br />
MELODY<br />
when the Power Switch is set to “M”. ( pg. 38)<br />
The parameters are the same as in the description on<br />
page 48.<br />
TALLY OFF pg. 48<br />
ON<br />
ID NUMBER (GR-DVX407/ pg. 48<br />
400 only)<br />
DEMO MODE OFF pg. 48<br />
ON<br />
Display Menu<br />
DISPLAY ( : Factory-preset)<br />
ON SCREEN LCD pg. 49 Each setting is linked with “n DISPLAY”, which appears<br />
LCD/TV<br />
when the Power Switch is set to “M”. ( pg. 38)<br />
The parameters are the same as in the description on<br />
DATE/TIME OFF pg. 49 page 49.<br />
AUTO<br />
ON<br />
NOTE:<br />
The date indication can also be turned on/off by pressing<br />
the DISPLAY Button on the remote control (provided).<br />
TIME CODE OFF pg. 49 ( pg. 25, 62, 74)<br />
ON<br />
Display<br />
ON SCREEN Setting:<br />
For playback sound, tape<br />
speed and tape running<br />
during <strong>video</strong> playback.<br />
12BIT/SOUND1<br />
L<br />
SP<br />
4<br />
DATE/TIME Setting:<br />
For date/time.<br />
2 5 . 12<br />
. 02<br />
17<br />
: 3 0<br />
TIME CODE Setting:<br />
For time code.<br />
12:34:24<br />
* 25 frames = 1 second<br />
Minutes<br />
Seconds<br />
Frames*
FEATURES FOR RECORDING<br />
Night-Scope<br />
SNAPSHOT Button<br />
MENU Wheel<br />
NIGHT Button<br />
VIDEO/MEMORY<br />
Switch<br />
(GR-DVX707/507<br />
only)<br />
Power Switch<br />
Makes dark subjects or areas even brighter than they<br />
would be under good natural lighting. Although the<br />
recorded image is not <strong>gr</strong>ainy, it may look as if it is<br />
strobing due to the slow shutter speed.<br />
1 Set the Power Switch to “M” while pressing down<br />
the Lock Button located on the switch.<br />
2 Open the LCD monitor fully or pull out the<br />
viewfinder fully.<br />
3 Press NIGHT so that the Night-Scope indicator<br />
“ ” appears.<br />
● The shutter speed is automatically adjusted to<br />
provide up to 30 times sensitivity.<br />
● “ ” appears beside “ ” while the shutter<br />
speed is being automatically adjusted.<br />
To deactivate Night-Scope…<br />
Press NIGHT again so that the Night-Scope<br />
indicator disappears.<br />
NOTES:<br />
● During Night-Scope, the following functions or<br />
settings cannot be activated and its indicator<br />
blinks or goes out:<br />
• Some modes of “Pro<strong>gr</strong>am AE With Special<br />
Effects” ( pg. 42).<br />
• “Snapshot Flash (GR-DVX707/507 only)”<br />
( pg. 54).<br />
• “GAIN UP” in CAMERA Menu. ( pg. 45)<br />
• “DIS” in MANUAL Menu. ( pg. 46)<br />
● During Night-Scope, it may be difficult to bring<br />
the camcorder into focus. To prevent this, use of a<br />
tripod is recommended.<br />
PLAY<br />
OFF<br />
Lock Button<br />
A<br />
M<br />
EN 53<br />
Snapshot (For Video Recording)<br />
This feature lets you record still images that look like<br />
photo<strong>gr</strong>aphs onto a tape.<br />
1 Set the VIDEO/MEMORY Switch to “VIDEO”.<br />
(GR-DVX707/507 only)<br />
2 Set the Power Switch to “M” while pressing down<br />
the Lock Button located on the switch.<br />
3 Open the LCD monitor fully, or pull out the<br />
viewfinder fully.<br />
4 Set “SNAP MODE” to the desired mode.<br />
( pg. 38, 45)<br />
5 Press SNAPSHOT.<br />
● The “O” indication appears and a still<br />
image will be recorded for approx. 6 seconds,<br />
then the camcorder re-enters the Record-<br />
Standby mode.<br />
● You can perform Snapshot also during<br />
recording. A still image will be recorded for<br />
approx. 6 seconds, then the normal recording<br />
resumes.<br />
● Regardless of the Power Switch position (“A”<br />
or “M”), Snapshot recording takes place using<br />
the selected Snapshot mode.<br />
NOTES:<br />
● To remove the shutter sound, refer to “BEEP” on<br />
page 48.<br />
● If Snapshot recording is not possible, the “O”<br />
indication blinks when SNAPSHOT is pressed.<br />
● If Pro<strong>gr</strong>am AE with special effects ( pg. 42) is<br />
engaged, certain modes of Pro<strong>gr</strong>am AE with<br />
special effects are disabled during Snapshot<br />
recording. In such a case, the icon blinks.<br />
● If SNAPSHOT is pressed when “DIS” is set to<br />
“ON” ( pg. 46), the Stabiliser will be disabled.<br />
● During playback as well, all snapshot modes are<br />
available when “ COPY” is set to “OFF”<br />
in VIDEO Menu. ( pg. 51) However, the shutter<br />
sound is not heard.<br />
● During Snapshot recording, the image displayed<br />
in the viewfinder may be partially missing.<br />
However, there is no effect in the recorded image.<br />
● When a cable is connected to the AV connector,<br />
the shutter sound is not heard from the speaker,<br />
however it is recorded onto the tape.<br />
Motor Drive Mode<br />
Keeping SNAPSHOT pressed in step 5 provides an<br />
effect similar to serial photo<strong>gr</strong>aphy. (Interval<br />
between still images: approx. 1 second)<br />
● The Motor Drive mode is disabled when “REC<br />
SELECT” is set to “ / ”. ( pg. 38, 50)
54 EN<br />
Snapshot Flash (GR-DVX707/<br />
507 only)<br />
SNAPSHOT Button<br />
MENU Wheel<br />
The flash can be used when a snapshot is taken in<br />
Record-Standby mode. ( pg. 27, 53)<br />
● When the Power Switch is set to “A”, the flash<br />
automatically fires if it is dark ( appears).<br />
● When the Power Switch is set to “M”, you can<br />
select the flash setting as follows:<br />
AUTO : Fires automatically if it is dark (<br />
AUTO<br />
C<br />
ON<br />
OFF<br />
appears).<br />
: Fires automatically if it is dark (<br />
appears) and reduces the Red-Eye effect<br />
in the subject’s eyes.<br />
: Always fires.<br />
: Will not fire.<br />
VIDEO/MEMORY<br />
Switch<br />
Power Switch<br />
● For the setting, refer to “Changing The Menu<br />
Settings” ( pg. 38).<br />
If “AUTO C” is selected...<br />
The C Red-Eye reduction indicator lights. Press<br />
SNAPSHOT. The flash fires twice. The first flash is<br />
for reduction of the human eye’s red reflection and<br />
the second flash is for the actual recording.<br />
NOTES:<br />
● Do not fire the flash at a person at short range.<br />
● The flash does not fire when the flash is set to<br />
“OFF” or when Night-Scope mode ( pg. 53) is<br />
engaged, and also when the battery remaining<br />
power is low. Moreover, the flash does not fire<br />
when it is set to “AUTO” with GAIN UP set to<br />
“OFF” ( pg. 45) and with Pro<strong>gr</strong>am AE with<br />
special effects set to “TWILIGHT”. ( pg. 42)<br />
● Although images shot with a flash tend to look<br />
whiter than they actually are, to compensate for<br />
this the camcorder automatically darkens the<br />
picture when using the flash. When shooting a<br />
PLAY<br />
OFF<br />
Lock Button<br />
A<br />
M<br />
FEATURES FOR RECORDING (cont.)<br />
subject at a distance where the flash light cannot<br />
reach (over approx. 2 m), set the flash to “OFF” to<br />
prevent the picture from becoming too dark or<br />
becoming too tinted.<br />
● The colour tone changes depending on the<br />
back<strong>gr</strong>ound lighting conditions, such as under<br />
fluorescent or halogen lamps.<br />
● While charging the flash, blinks and the flash<br />
will not fire. Although noise may appear, this is<br />
not a malfunction and is not recorded. It can take<br />
up to 10 seconds to charge the flash.<br />
Flash Brightness Adjustment<br />
(GR-DVX707/507 only)<br />
When a snapshot ( pg. 27, 53) is taken in the dark<br />
the camcorder fires the flash and adjusts the<br />
brightness automatically. You can also adjust the<br />
flash brightness manually. When you find that the<br />
snapshots you took look too bright or too dark,<br />
adjust it manually.<br />
1 Select “FLASH ADJ.” in MANUAL Menu, and<br />
press the MENU Wheel in.<br />
● The parameter appears.<br />
2 To intensify the flash, rotate the MENU Wheel<br />
towards “+”. To weaken the flash, rotate the<br />
MENU Wheel towards “–”.<br />
● Adjustment range: –3 to +3.<br />
3 Press the MENU Wheel in. Rotate the MENU<br />
Wheel to select “BRETURN”, and press it twice<br />
to close the Menu Screen.<br />
NOTE:<br />
When you change the subject you are shooting or<br />
the shooting location, set it back to ±0 as described<br />
in step 2 and take a snapshot to check the flash<br />
brightness. After doing this adjust to your desired<br />
brightness.
EN 55<br />
Auto Focus<br />
The camcorder’s Full Range AF system offers<br />
continuous shooting ability from close-up (as close<br />
as approx. 5 cm to the subject) to infinity.<br />
Focus detection zone<br />
However, correct focus may not be obtainable in the<br />
situations listed below (in these cases perform<br />
“Manual Focus”):<br />
● When two subjects overlap in the same scene.<br />
● When illumination is low.*<br />
● When the subject has no contrast (difference in<br />
brightness and darkness), such as a flat, onecolour<br />
wall, or a clear, blue sky.*<br />
● When a dark object is barely visible in the<br />
viewfinder.*<br />
● When the scene contains minute patterns or<br />
identical patterns that are regularly repeated.<br />
● When the scene is affected by sunbeams or light<br />
reflecting off the surface of a body of water.<br />
● When shooting a scene with a high-contrast<br />
back<strong>gr</strong>ound.<br />
* The following low-contrast warnings appear<br />
blinking: , , and<br />
NOTES:<br />
● If the lens is smeared or blurred, accurate focusing<br />
is not possible. Keep the lens clean. ( pg. 91)<br />
When condensation occurs, wipe with a soft cloth<br />
or wait for it to dry naturally.<br />
● When shooting a subject close to the lens, zoom<br />
out first. ( pg. 20) If zoomed-in in the auto focus<br />
mode, the camcorder may automatically zoom<br />
out depending on the distance between the<br />
camcorder and the subject. This will not occur<br />
when “TELE MACRO” is set to “ON”.<br />
( pg. 38, 46)<br />
Manual Focus<br />
NOTE:<br />
If you are using the viewfinder, you should already<br />
have performed “Viewfinder Adjustment”<br />
( pg. 12).<br />
1 Set the Power Switch to “M” while pressing down<br />
the Lock Button located on the switch.<br />
2 Press FOCUS. The manual focus indicator<br />
appears.<br />
3 To focus on a further subject, rotate the MENU<br />
Wheel towards “+”. The “ ” indicator appears<br />
and blinks.<br />
While focusing on a<br />
further subject<br />
Manual focus<br />
indicator<br />
To focus on a nearer subject, rotate the MENU<br />
Wheel towards “–”. The “ ” indicator appears<br />
and blinks.<br />
While focusing on a<br />
nearer subject<br />
Manual focus<br />
indicator<br />
4 Press the MENU Wheel in. Focus adjustment is<br />
complete.<br />
● To reset to Auto Focus, press FOCUS twice or<br />
set the Power Switch to “A”.<br />
● If FOCUS is pressed once, the camcorder will<br />
enter the focus adjustment mode again.<br />
NOTES:<br />
● Be sure to focus the lens in the maximum<br />
telephoto position when you use the Manual<br />
Focus mode. If you focus in on a subject in the<br />
wide-angle position, sharply focused images<br />
cannot be obtained when zoomed up because the<br />
depth-of-field is reduced at longer focal lengths.<br />
● When the focus level cannot be adjusted any<br />
further or closer, “ ” or “ ” will blink.
56 EN<br />
MENU Wheel<br />
VIDEO/MEMORY<br />
Switch<br />
(GR-DVX707/507<br />
only)<br />
Power Switch<br />
PLAY<br />
OFF<br />
A<br />
M<br />
FEATURES FOR RECORDING (cont.)<br />
To return to automatic exposure control...<br />
For GR-DVX707/507:<br />
Set “p EXPOSURE” to “AUTO”. ( pg. 43) Or, set<br />
the Power Switch to “A”.<br />
For GR-DVX407/400:<br />
Press EXPOSURE twice. Or, set the Power Switch to<br />
“A”.<br />
● If EXPOSURE is pressed once, the camcorder will<br />
enter the exposure control mode again.<br />
NOTE:<br />
You cannot use the manual exposure control at the<br />
same time when “r PROGRAM AE” is set to<br />
“SPOTLIGHT” or “SNOW” ( pg. 38, 42), or with<br />
the backlight compensation. ( pg. 57)<br />
EXPOSURE Button<br />
(GR-DVX407/400 only)<br />
Lock Button<br />
Exposure Control<br />
Manual exposure control is recommended in the<br />
following situations:<br />
● When shooting using reverse lighting or when the<br />
back<strong>gr</strong>ound is too bright.<br />
● When shooting on a reflective natural back<strong>gr</strong>ound<br />
such as at the beach or when skiing.<br />
● When the back<strong>gr</strong>ound is overly dark or the subject<br />
is bright.<br />
Before starting, perform the procedures listed<br />
below:<br />
● Set the Power Switch to “M” while pressing down<br />
the Lock Button located on the switch.<br />
● Open the LCD monitor fully, or pull out the<br />
viewfinder fully.<br />
1 For GR-DVX707/507:<br />
Set “p EXPOSURE” to “MANUAL”. ( pg. 43)<br />
For GR-DVX407/400:<br />
Press EXPOSURE.<br />
● The exposure control indicator appears.<br />
2 To brighten the image, rotate the MENU Wheel<br />
towards “+”. To darken the image, rotate the<br />
MENU Wheel towards “–”. (maximum ±6)<br />
● +3 exposure has the same effect as the<br />
backlight compensation. ( pg. 57)<br />
● –3 exposure has the same effect as when<br />
“r PROGRAM AE” is set to “SPOTLIGHT”.<br />
( pg. 42)<br />
3 Press the MENU Wheel in. Exposure adjustment<br />
is complete.
Iris Lock<br />
MENU Wheel<br />
BACKLIGHT Button<br />
VIDEO/MEMORY<br />
Switch (GR-DVX707/<br />
507 only)<br />
EN 57<br />
2 Adjust zoom so that the subject fills the LCD<br />
monitor or the viewfinder, then press and hold<br />
the MENU Wheel for over 2 seconds. The<br />
exposure control indicator and the “ ”<br />
indication appear.<br />
Press the MENU Wheel in. The “ ” indication<br />
changes to “ ” and the iris is locked.<br />
3<br />
Power Switch<br />
PLAY<br />
OFF<br />
A<br />
M<br />
Iris Lock Indicator<br />
EXPOSURE Button<br />
(GR-DVX407/400 only)<br />
Lock Button<br />
Like the pupil of the human eye, the iris contracts in<br />
well-lit environments to keep too much light from<br />
entering, and dilates in dim environments to allow<br />
in more light.<br />
Use this function in the following situations:<br />
● When shooting a moving subject.<br />
● When the distance to the subject changes (so its<br />
size in the LCD monitor or the viewfinder<br />
changes), such as when the subject is backing<br />
away.<br />
● When shooting on a reflective natural back<strong>gr</strong>ound<br />
such as at the beach or when skiing.<br />
● When shooting objects under a spotlight.<br />
● When zooming.<br />
When the subject is close, keep the iris locked. Even<br />
when the subject moves away from you, the image<br />
will not darken or brighten.<br />
Before starting, perform the procedures listed<br />
below:<br />
● Set the Power Switch to “M” while pressing down<br />
the Lock Button located on the switch.<br />
● Open the LCD monitor fully, or pull out the<br />
viewfinder fully.<br />
1 For GR-DVX707/507:<br />
Set “p EXPOSURE” to “MANUAL”. ( pg. 43)<br />
For GR-DVX407/400:<br />
Press EXPOSURE.<br />
● The exposure control indicator appears.<br />
To return to automatic iris control...<br />
For GR-DVX707/507:<br />
Set “p EXPOSURE” to “AUTO”. ( pg. 43) Or, set<br />
the Power Switch to “A”.<br />
For GR-DVX407/400:<br />
Press EXPOSURE twice. Or, set the Power Switch to<br />
“A”.<br />
● The exposure control indicator and “ ”<br />
disappear.<br />
To lock the exposure control and the iris…<br />
After step 1 of “Exposure Control”, adjust the<br />
exposure by rotating the MENU Wheel. Then lock<br />
the iris in step 2 of “Iris Lock”. For automatic<br />
locking, select “AUTO” or press EXPOSURE twice in<br />
step 1. The iris becomes automatic after about<br />
2 seconds.<br />
Backlight Compensation<br />
Backlight compensation brightens the subject<br />
quickly.<br />
Press BACKLIGHT. The indicator is displayed<br />
and the subject is brightened. If pressed again,<br />
disappears and the brightness returns to the previous<br />
level.<br />
● Using BACKLIGHT Button may cause the light<br />
around the subject to become too bright and the<br />
subject to become white.<br />
● Backlight compensations is also available when<br />
the Power Switch is set to “A”.
58 EN<br />
White Balance Adjustment<br />
The white balance that refers to the correctness of<br />
colour reproduction under various lighting. If the<br />
white balance is correct, all other colours will be<br />
accurately reproduced.<br />
The white balance is usually adjusted automatically.<br />
However, more advanced camcorder operators<br />
control this function manually to achieve a more<br />
professional colour/tint reproduction.<br />
— AUTO White balance is adjusted<br />
automatically.<br />
MWB<br />
FINE<br />
CLOUD<br />
HALOGEN<br />
Adjust the white balance<br />
manually when shooting<br />
under various types of<br />
lighting. ( “Manual White<br />
Balance Adjustment”)<br />
Outdoors on a sunny day.<br />
Outdoors on a cloudy day.<br />
A <strong>video</strong> light or similar type<br />
of lighting is used.<br />
( : Factory-preset)<br />
● For the setting, refer to “Changing The Menu<br />
Settings” ( pg. 38).<br />
● The selected mode indicator except “AUTO”<br />
appears.<br />
To return to automatic white balance…<br />
Set “u W.BALANCE” to “AUTO”. ( pg. 38) Or,<br />
set the Power Switch to “A”.<br />
NOTE:<br />
White balance cannot be used when<br />
“r PROGRAM AE” is set to “SEPIA” or<br />
“MONOTONE”. ( pg. 42)<br />
FEATURES FOR RECORDING (cont.)<br />
Manual White Balance Adjustment<br />
Adjust the white balance manually when shooting<br />
under various types of lighting.<br />
MENU Wheel<br />
White paper<br />
Before starting, perform the procedures listed<br />
below:<br />
● Set the Power Switch to “M” while pressing down<br />
the Lock Button located on the switch.<br />
● Open the LCD monitor fully, or pull out the<br />
viewfinder fully.<br />
1 Set “u W.BALANCE” to “MWB”. ( pg. 38, 43)<br />
● The indication blinks slowly.<br />
2 Hold a sheet of plain white paper in front of the<br />
subject. Adjust zoom or position yourself so that<br />
the white paper fills the screen.<br />
3 Press the MENU Wheel in until begins<br />
blinking rapidly.<br />
When the setting is completed, resumes<br />
normal blinking.<br />
4 Press the MENU Wheel in twice. The Menu<br />
Screen closes and the Manual White Balance<br />
indicator is displayed.<br />
NOTES:<br />
● In step 2, it may be difficult to focus on the white<br />
paper. In such a case, adjust focus manually.<br />
( pg. 55)<br />
● A subject can be shot under various types of<br />
lighting conditions indoors (natural, fluorescent,<br />
candlelight, etc.). Because the colour temperature<br />
is different depending on the light source, the<br />
subject tint will differ depending on the white<br />
balance settings. Use this function for a more<br />
natural result.<br />
● Once you adjust white balance manually, the<br />
setting is retained even if the power is turned off or<br />
the battery removed.
EN 59<br />
Recording Digital Sound Effects<br />
(GR-DVX707 only)<br />
MENU Wheel<br />
D.SOUND Button<br />
INDEX Button<br />
VIDEO/MEMORY<br />
Switch<br />
Power Switch<br />
The sound effects pre-stored in the provided<br />
memory card can be dubbed onto a tape.<br />
1 Load a cassette. ( pg. 16)<br />
2 Load the provided memory card. ( pg. 17)<br />
3 Set the VIDEO/MEMORY Switch to “VIDEO”.<br />
4 Set the Power Switch to “A” or “M” while<br />
pressing down the Lock Button located on the<br />
switch.<br />
5 Open the LCD monitor fully, or pull out the<br />
viewfinder fully.<br />
6 Press INDEX. The Index Screen for sound effects<br />
( pg. 30) appears.<br />
INDEX<br />
EXPLOS<br />
I ON<br />
S I REN<br />
LAUGHTER<br />
RACE<br />
CAR<br />
DOOR<br />
BELL<br />
BUZ<br />
ZER<br />
FANFARE<br />
7 Rotate the MENU Wheel to select the desired<br />
sound effect.<br />
PLAY<br />
OFF<br />
Lock Button<br />
Selected Sound<br />
A<br />
M<br />
8 Press the MENU Wheel in. Selection is complete.<br />
● Pressing D.SOUND<br />
SP10 min<br />
starts playback of the<br />
REC<br />
currently selected<br />
sound effect. You can<br />
check it without<br />
recording it onto the<br />
EXPLOS ION<br />
tape. Press D.SOUND<br />
again to stop the<br />
sound effect playback midway.<br />
9 Press D.SOUND during recording. The selected<br />
sound effect indication with a “ ” mark appears<br />
moving and the sound effect is recorded onto the<br />
tape.<br />
● The sound effect cannot be heard from the<br />
speaker during recording. Connect a<br />
headphone to the headphone connector to<br />
hear the sound effect.<br />
To cancel recording the sound effect midway...<br />
Press D.SOUND again. The camcorder stops<br />
recording the sound effect and the sound effect<br />
indication disappears.<br />
Downloading sound data from Web Site<br />
You can download sound data available at our Web<br />
Site (see below for URL) and transfer them from your<br />
PC to the memory card using a USB cable to create<br />
more sound effects.<br />
http://www.jvc-victor.co.jp/english/download/<br />
d-sound/index.html<br />
● You can also use the PC card adapter<br />
CU-VPSD60, floppy adapter CU-VFSD50 or USB<br />
reader/writer CU-VUSD70 to transfer sound data<br />
from a PC to the memory card.<br />
● Sound data should be copied into the memory<br />
card’s DCSD\100<strong>JVC</strong>GR folder.<br />
● The file names should be in numerical sequence<br />
starting from DVC00001.mp3. If you are using the<br />
provided memory card, file names should be from<br />
DVC00013.mp3 since 12 sound effects are prestored<br />
as DVC00001.mp3 through<br />
DVC00012.mp3.<br />
NOTES:<br />
● Sound effects can also be used for Audio Dubbing.<br />
( pg. 71)<br />
● Sound effects can also be selected during D.S.C.<br />
playback mode. ( pg. 29, 30)<br />
● Sound effects created on a PC can be transferred<br />
to a memory card by copying them into the<br />
memory card’s sound folder with the specified file<br />
name. For details, refer to the instruction manual<br />
of the provided software. However, some sound<br />
(effects) created on a PC cannot be played back<br />
with this camcorder.
60 EN<br />
E-Mail Clip Recording<br />
(GR-DVX707 only)<br />
You can make <strong>video</strong> clips in 160 x 120 pixels from<br />
real-time <strong>camera</strong> image or recorded <strong>video</strong> footage<br />
and store them in a memory card as files which can<br />
be conveniently sent via E-Mail.<br />
MENU Wheel<br />
E-MAIL Button<br />
VIDEO/MEMORY Switch<br />
Recording Start/<br />
Stop Button<br />
Power Switch<br />
PLAY<br />
OFF<br />
Lock Button<br />
A<br />
M<br />
FEATURES FOR RECORDING (cont.)<br />
To make <strong>video</strong> clips from real-time <strong>camera</strong><br />
image<br />
1 Load a memory card. ( pg. 17)<br />
2 Set the VIDEO/MEMORY Switch to “MEMORY”.<br />
3 Set the Power Switch to “A” or “M” while<br />
pressing down the Lock Button located on the<br />
switch.<br />
4 Press E-MAIL to engage the E-Mail Clip Record-<br />
Standby mode.<br />
● “E-MAIL CLIP” appears.<br />
5 Press the Recording Start/Stop Button to start<br />
recording.<br />
6 Press the Recording Start/Stop Button to stop<br />
recording.<br />
● “COMPLETED” is displayed, then the<br />
camcorder re-enters the E-Mail Clip Record-<br />
Standby mode.<br />
7 Press E-MAIL to end E-Mail Clip Recording. The<br />
normal screen reappears.<br />
To view <strong>video</strong> clips stored in a memory card…<br />
Refer to “Playback Of Video Clips (GR-DVX707<br />
only)” ( pg. 29).<br />
To delete unwanted <strong>video</strong> clips stored in a memory<br />
card…<br />
Refer to “Deleting Files” ( pg. 33).<br />
160 E<br />
-MAIL CL I<br />
P<br />
35<br />
mi n<br />
00:00<br />
STANDBY<br />
Remaining time<br />
160 E<br />
-MAIL CL<br />
I<br />
P<br />
35m mi n<br />
e 00:15<br />
REC<br />
Shooting starts when the<br />
Recording Start/Stop<br />
Button is pressed.<br />
C<br />
OM PLET<br />
E<br />
D<br />
Shooting stops when the<br />
Recording Start/Stop<br />
Button is pressed again.<br />
Recording is complete.
EN 61<br />
To make <strong>video</strong> clips from recorded <strong>video</strong><br />
footage<br />
MENU Wheel Play/Pause Button (4/9)<br />
E-MAIL Button<br />
VIDEO/MEMORY<br />
Switch<br />
Recording Start/<br />
Stop Button<br />
Power Switch<br />
PLAY<br />
OFF<br />
Lock Button<br />
A<br />
M<br />
NOTES:<br />
● Approximate maximum recording time per <strong>video</strong><br />
clip is 3 minutes.<br />
● Playback operation cannot be performed during<br />
E-Mail Clip Recording.<br />
● If the end of the tape is reached during E-Mail Clip<br />
Recording, that portion will be automatically<br />
stored in the memory card.<br />
● If the end of the tape is reached in step 6, the<br />
E-Mail Clip Record-Standby mode will be<br />
automatically cancelled.<br />
● The <strong>video</strong> clip files stored with this camcorder are<br />
compatible with MPEG4. Some MPEG4 files<br />
stored with other devices cannot be played back<br />
with this camcorder.<br />
● Video noise may appear while viewing <strong>video</strong> clips<br />
in the LCD monitor or viewfinder, however, this<br />
noise is not present in the actual <strong>video</strong> clips stored<br />
in the memory card.<br />
● You can also view <strong>video</strong> clips on your PC by using<br />
Windows ® Media Player version 6.4 or later. Refer<br />
to the instructions of PC and software.<br />
1 Load a cassette. ( pg. 16)<br />
2 Load a memory card. ( pg. 17)<br />
3 Set the VIDEO/MEMORY Switch to “VIDEO”.<br />
4 Set the Power Switch to “P” while pressing<br />
down the Lock Button located on the switch.<br />
5 Press 4/9 to start <strong>video</strong> playback.<br />
6 Press E-MAIL to engage the E-Mail Clip Record-<br />
Standby mode.<br />
● “E-MAIL CLIP” appears.<br />
● To cancel E-Mail Clip Recording, press E-MAIL<br />
again or press 8 to stop <strong>video</strong> playback.<br />
7 At the point you want to start dubbing, press the<br />
Recording Start/Stop Button to start E-Mail Clip<br />
Recording.<br />
8 Press the Recording Start/Stop Button to stop<br />
E-Mail Clip Recording.<br />
● “COMPLETED” is displayed, then the<br />
camcorder re-enters the E-Mail Clip Record-<br />
Standby mode.<br />
9 Press E-MAIL to end E-Mail Clip Recording. The<br />
normal screen reappears.<br />
To view <strong>video</strong> clips stored in a memory card…<br />
Refer to “Playback Of Video Clips (GR-DVX707<br />
only)” ( pg. 29).<br />
To delete unwanted <strong>video</strong> clips stored in a memory<br />
card…<br />
Refer to “Deleting Files” ( pg. 33).
62 EN DUBBING<br />
.<br />
Dubbing To A VCR<br />
To S-VIDEO<br />
S-Video cable<br />
(optional)<br />
“Y/C”/“CVBS”<br />
Video Out Select<br />
Switch<br />
Connector<br />
Covers**<br />
VCR<br />
TV<br />
To AV<br />
Audio/Video cable [miniplug<br />
to RCA plug]<br />
(provided)<br />
To AUDIO, VIDEO* and<br />
S-IN connectors<br />
Cable Adapter<br />
(provided)<br />
If your VCR has a<br />
SCART connector,<br />
use the provided<br />
cable adapter.<br />
* Connect when an S-Video cable is not used.<br />
** When connecting the cables, open these covers.<br />
1 Following the illustrations, connect the<br />
camcorder and the VCR. Also refer to pages 24<br />
and 25.<br />
2 Set the camcorder’s VIDEO/MEMORY Switch to<br />
“VIDEO”. (GR-DVX707/507 only)<br />
3 Set the camcorder’s Power Switch to “P”<br />
while pressing down the Lock Button located on<br />
the switch.<br />
4 Turn on the VCR’s power.<br />
5 Insert the source cassette in the camcorder.<br />
6 Insert the recording cassette in the VCR.<br />
7 Engage the VCR’s AUX and Record-Pause modes.<br />
● Refer to the instruction manual for the VCR.<br />
8 Press 4/9 on the camcorder to start playback of<br />
the source tape.<br />
9 At the point you want to start dubbing, engage<br />
the VCR’s Record mode.<br />
10 To pause dubbing, engage the VCR’s Record-<br />
Pause mode and press 4/9 on the camcorder.<br />
11 Repeat steps 8 – 10 for additional editing. Stop<br />
the VCR and camcorder.<br />
NOTES:<br />
● It is recommended to use the AC Adapter as the<br />
power supply instead of the battery pack.<br />
( pg. 11)<br />
● As the camcorder starts to play your footage it will<br />
appear on your TV. This will confirm the<br />
connections and the AUX channel for dubbing<br />
purposes.<br />
● Before you start dubbing, make sure that the<br />
indications do not appear on the connected TV. If<br />
they do, they are being recorded onto the new<br />
tape.<br />
To choose whether or not the following displays<br />
appear on the connected TV...<br />
• Date/time<br />
Set “DATE/TIME” to “AUTO”, “ON” or “OFF”.<br />
( pg. 38, 49) Or, press DISPLAY on the remote<br />
control to turn on/off the date indication.<br />
• Time code<br />
Set “TIME CODE” to “OFF” or “ON”.<br />
( pg. 38, 49)<br />
• Playback sound mode, tape speed and tape<br />
running displays<br />
Set “ON SCREEN” to “LCD” or “LCD/TV”.<br />
( pg. 38, 49)
EN 63<br />
Dubbing To A Video Unit Equipped<br />
With A DV IN Connector (Digital<br />
Dubbing)<br />
It is also possible to copy recorded scenes from the<br />
camcorder onto another <strong>video</strong> unit equipped with a<br />
DV connector. Since a <strong>digital</strong> signal is sent, there is<br />
little if any image or sound deterioration.<br />
Open the<br />
connector cover.<br />
Core filter<br />
To DV IN<br />
To DV<br />
DV cable<br />
(optional)<br />
Video unit equipped with<br />
DV connector<br />
1 Make sure all units are turned off.<br />
2 Connect this camcorder to a <strong>video</strong> unit equipped<br />
with a DV input connector using a DV cable as<br />
shown in the illustration.<br />
3 Set this camcorder’s VIDEO/MEMORY Switch to<br />
“VIDEO”. (GR-DVX707/507 only)<br />
4 Set this camcorder’s Power Switch to “P”<br />
while pressing down the Lock Button located on<br />
the switch.<br />
5 Turn on the <strong>video</strong> unit’s power.<br />
6 Insert the source cassette in this camcorder.<br />
7 Insert the recording cassette in the <strong>video</strong> unit.<br />
8 Press 4/9 on this camcorder to start playback of<br />
the source cassette.<br />
9 At the point you want to start dubbing, engage<br />
the <strong>video</strong> unit’s Record mode.<br />
10 To pause dubbing, engage the <strong>video</strong> unit’s<br />
Record-Pause mode and press 4/9 on this<br />
camcorder.<br />
11 Repeat steps 8 – 10 for additional editing. Stop<br />
the <strong>video</strong> unit and camcorder.<br />
NOTES:<br />
● It is recommended to use the AC Adapter as the<br />
power supply instead of the battery pack.<br />
( pg. 11)<br />
● If the remote control is used when both the player<br />
and recorder are <strong>JVC</strong> <strong>video</strong> units, both units will<br />
perform the same operation. To prevent this from<br />
happening, press the buttons on both units.<br />
● If a blank portion or disturbed image is played<br />
back on the player during dubbing, the dubbing<br />
may stop so that an unusual image is not dubbed.<br />
● Even though the DV cable is connected correctly,<br />
sometimes the image may not appear in step 9. If<br />
this occurs, turn off the power and make<br />
connections again.<br />
● If “Playback Zoom” ( pg. 68) or “Playback<br />
Special Effects” ( pg. 69) is attempted or<br />
SNAPSHOT is pressed during playback, only the<br />
original playback image recorded on the tape is<br />
output from the DV connector.<br />
● When using a DV cable, be sure to use the<br />
optional <strong>JVC</strong> VC-VDV204U DV cable.
64 EN<br />
Dubbing From A Video Unit<br />
Equipped With A DV OUT<br />
Connector (Digital Dubbing)<br />
(GR-DVX707/507/407 only)<br />
It is also possible to copy recorded scenes from<br />
another <strong>video</strong> unit equipped with a DV connector<br />
onto the camcorder. Since a <strong>digital</strong> signal is sent,<br />
there is little if any image or sound deterioration.<br />
Open the connector<br />
cover.<br />
Core filter<br />
To DV OUT<br />
To DV<br />
DV cable (optional)<br />
Video unit equipped with DV<br />
connector<br />
DUBBING (cont.)<br />
1 Make sure all units are turned off.<br />
2 Connect this camcorder to a <strong>video</strong> unit equipped<br />
with a DV output connector using a DV cable as<br />
shown in the illustration.<br />
3 Set this camcorder’s VIDEO/MEMORY Switch to<br />
“VIDEO”. (GR-DVX707/507 only)<br />
4 Set this camcorder’s Power Switch to “P”<br />
while pressing down the Lock Button located on<br />
the switch.<br />
5 Set “REC MODE” to “SP” or “LP”. ( pg. 38, 51)<br />
6 Turn on the <strong>video</strong> unit’s power.<br />
7 Insert the source cassette in the <strong>video</strong> unit.<br />
8 Insert the recording cassette in this camcorder.<br />
9 Press this camcorder’s Recording Start/Stop<br />
Button to engage the Record-Pause mode.<br />
● The “ DV. IN ” indication appears on the screen.<br />
10 Press this camcorder’s Recording Start/Stop<br />
Button to start recording.<br />
● The indication rotates.<br />
11 Press this camcorder’s Recording Start/Stop<br />
Button again to engage the Record-Pause mode.<br />
● The indication stops rotating.<br />
12 Repeat steps 10 – 11 for additional editing.<br />
Stop the <strong>video</strong> unit and camcorder.<br />
NOTES:<br />
● It is recommended to use the AC Adapter as the<br />
power supply instead of the battery pack.<br />
( pg. 11)<br />
● If the remote control is used when both the player<br />
and recorder are <strong>JVC</strong> <strong>video</strong> units, both units will<br />
perform the same operation. To prevent this from<br />
happening, press the buttons on both units.<br />
● If a blank portion or disturbed image is played<br />
back on the player during dubbing, the dubbing<br />
may stop so that an unusual image is not dubbed.<br />
● Even though the DV cable is connected correctly,<br />
sometimes the image may not appear in step 9. If<br />
this occurs, turn off the power and make<br />
connections again.<br />
● Digital Dubbing is performed in the sound mode<br />
recorded on the original tape, regardless of the<br />
current “SOUND MODE” setting. ( pg. 44)<br />
● During Digital Dubbing, no signals are output<br />
from the AV or S-Video output connector.<br />
● When using a DV cable, be sure to use the<br />
optional <strong>JVC</strong> VC-VDV204U DV cable.
EN 65<br />
Dubbing Still Images Recorded On<br />
A Tape To A Memory Card<br />
(GR-DVX707/507 only)<br />
Still images can be dubbed from a tape to a memory<br />
card.<br />
Play/Pause Button (4/9)<br />
NOTES:<br />
● If SNAPSHOT is pressed in step 8 when a memory<br />
card is not loaded, the message “COPYING<br />
FAILED” is displayed.<br />
● If an image recorded on the tape using “WIDE<br />
MODE” ( pg. 46) is dubbed to a memory card,<br />
the WIDE mode identifying signal is not dubbed<br />
with it.<br />
● To use Playback Special effects with a <strong>video</strong> image<br />
you wish to dub, perform up to step 8 using the<br />
remote control (provided). ( pg. 69)<br />
● Images are dubbed in 640 x 480 pixels.<br />
VIDEO/MEMORY<br />
Switch<br />
Power Switch<br />
PLAY<br />
OFF<br />
A<br />
M<br />
SNAPSHOT Button<br />
MENU Wheel<br />
Lock Button<br />
1 Load a cassette. ( pg. 16)<br />
2 Load a memory card. ( pg. 17)<br />
3 Set the VIDEO/MEMORY Switch to “VIDEO”.<br />
4 Set the Power Switch to “P” while pressing<br />
down the Lock Button located on the switch.<br />
5 Set “ COPY”<br />
to “ON”.<br />
( pg. 38, 51)<br />
6 Press 4/9 to start<br />
playback.<br />
7 At the point you want<br />
to dub, press 4/9<br />
again to engage Still<br />
Playback.<br />
8 To dub the image,<br />
press SNAPSHOT.<br />
● The ” ” indication<br />
blinks during<br />
dubbing.<br />
● The selected image<br />
is stored in the<br />
memory card.<br />
COPY<br />
– OFF<br />
ON<br />
SP
66 EN USING THE REMOTE CONTROL UNIT<br />
The Full-Function Remote Control Unit can operate this camcorder from a distance as well as the basic<br />
operations (Playback, Stop, Pause, Fast-Forward and Rewind) of your VCR. It also makes additional playback<br />
functions possible. ( pg. 68)<br />
Installing The Batteries<br />
The remote control uses two “AAA (R03)” size<br />
batteries. Refer to “General Battery Precautions”<br />
( pg. 88).<br />
1 Remove the battery compartment cover while<br />
pushing up the tab as illustrated.<br />
2 Insert two “AAA (R03)” size batteries in the<br />
correct direction.<br />
3 Re-attach the battery compartment cover.<br />
Beam Effective Area (indoor use)<br />
When using the remote control, be sure to point it at<br />
the remote sensor. The transmitted beam’s<br />
approximate effective distance for indoor use is 5 m.<br />
NOTE:<br />
The transmitted beam may not be effective or may<br />
cause incorrect operation when the remote sensor is<br />
directly exposed to sunlight or powerful lighting.<br />
Remote sensor<br />
1<br />
3<br />
Tab<br />
2 +<br />
– +<br />
–<br />
Buttons And Functions<br />
B<br />
D<br />
F<br />
H<br />
A<br />
C<br />
E<br />
G<br />
I<br />
J<br />
L<br />
N<br />
P<br />
R<br />
T<br />
K<br />
M<br />
O<br />
Q<br />
S
EN 67<br />
Buttons<br />
A Infrared beam transmitting window<br />
With the camcorder’s Power<br />
Switch set to “A” or “M”.<br />
Transmits the beam signal.<br />
Functions<br />
With the camcorder’s Power<br />
Switch set to “P”.<br />
B Zoom (T/W) Buttons Zoom in/out ( pg. 20) Zoom in/out ( pg. 68)<br />
C DISPLAY Button pg. 25, 62, 74<br />
D SHIFT Button pg. 68, 73<br />
E SLOW Rewind/Forward Buttons<br />
Left/Right Buttons<br />
F REW Button<br />
pg. 68<br />
pg. 68<br />
G FADE/WIPE Button pg. 75<br />
H EFFECT ON/OFF Button pg. 69<br />
I EFFECT Button pg. 69<br />
J PAUSE IN Connector pg. 74<br />
K START/STOP Button<br />
● Rewind/Reverse Shuttle Search<br />
on a tape ( pg. 22)<br />
● Displays previous file in a<br />
memory card (GR-DVX707/<br />
507 only) ( pg. 28)<br />
Functions the same as the Recording Start/Stop Button on the<br />
camcorder.<br />
L MBR SET Button pg. 73<br />
M SNAPSHOT Button<br />
N Up Button<br />
INSERT Button<br />
O Down Button<br />
A. DUB Button<br />
P PLAY Button<br />
Q FF Button<br />
Functions the same as SNAPSHOT on the camcorder.<br />
pg. 68<br />
pg. 72<br />
pg. 68<br />
pg. 70<br />
● Starts Playback of a tape<br />
( pg. 22)<br />
● Starts Auto Playback of images<br />
in a memory card<br />
(GR-DVX707/507 only)<br />
( pg. 28)<br />
● Forward/Forward Shuttle<br />
Search on a tape ( pg. 22)<br />
● Displays next file in a memory<br />
card (GR-DVX707/507 only)<br />
( pg. 28)<br />
R STOP Button ● Stops the tape ( pg. 22)<br />
● Stops Auto Playback<br />
(GR-DVX707/507 only)<br />
( pg. 28)<br />
S PAUSE Button Pauses the tape ( pg. 68)<br />
T R.A.EDIT Buttons pg. 73 – 77
68 EN<br />
.<br />
Remote sensor<br />
USING THE REMOTE CONTROL UNIT (cont.)<br />
Frame-By-Frame Playback<br />
Allows frame-by-frame search during <strong>video</strong><br />
playback.<br />
During normal or still playback, press SLOW (IU)<br />
repeatedly for forward or SLOW (YI) repeatedly for<br />
reverse. Each time SLOW (YI or IU) is pressed, the<br />
frame is played back.<br />
Playback Zoom<br />
Magnifies the recorded image up to 20X at any time<br />
during <strong>video</strong> playback.<br />
1) Press PLAY (U) to start playback.<br />
Zoom Buttons<br />
SHIFT<br />
Left or SLOW<br />
Rewind Button<br />
Right or SLOW<br />
Forward<br />
Button<br />
Slow-Motion Playback<br />
Up Button<br />
Down Button<br />
PLAY<br />
PAUSE<br />
STOP<br />
Allows slow-speed search in either direction during<br />
<strong>video</strong> playback.<br />
During normal <strong>video</strong> playback, press SLOW (YI or<br />
IU) more than approx. 2 seconds.<br />
● After approx. 1 minute in Slow Rewind or<br />
approx. 2 minutes in Slow Forward, normal<br />
playback resumes.<br />
● To pause Slow-Motion playback, press PAUSE (9).<br />
● To stop Slow-Motion playback, press PLAY (U).<br />
NOTES:<br />
● You can also engage Slow-Motion Playback from<br />
Still Playback by pressing SLOW (YI or IU) more<br />
than approx. 2 seconds.<br />
● During Slow-Motion Playback, due to <strong>digital</strong><br />
image processing, the picture may take on a<br />
mosaic effect.<br />
● After SLOW (YI or IU) is pressed and held, the still<br />
image may be displayed for a few seconds,<br />
followed by a blue screen for a few seconds. This<br />
is not a malfunction.<br />
● There may be a small margin between the slowmotion<br />
playback start point you chose and the<br />
actual start point for Slow-Motion Playback.<br />
● During Slow-Motion Playback, there will be<br />
disturbances in <strong>video</strong> and the picture may seem<br />
unstable, especially with steady images. This is not<br />
a malfunction.<br />
2) At the point you want to zoom<br />
in, press the Zoom Button (T).<br />
● To zoom out, press the Zoom<br />
Button (W).<br />
3) You can move the image on the<br />
screen around to find a particular<br />
portion of the picture. While<br />
holding down SHIFT, press L<br />
(Left), F (Right), U (Up) and E<br />
(Down).<br />
● To end zoom, press and hold W until<br />
magnification returns to normal. Or, press<br />
STOP (8) and then press PLAY (U).<br />
NOTES:<br />
● Zoom can also be used during slow-motion and<br />
still playback.<br />
● Due to <strong>digital</strong> image processing, the quality of the<br />
image may suffer.
EN 69<br />
Playback Special Effects<br />
Remote sensor<br />
1) To start playback, press PLAY (U).<br />
2) Press EFFECT. The<br />
PLAYBACK<br />
EFFECT<br />
PLAYBACK EFFECT<br />
Select Menu appears. OFF<br />
1 CLASS<br />
I C FILM<br />
3) Press EFFECT repeatedly 2 MONOTON<br />
E<br />
3 SEP<br />
I A<br />
to move the highlight 4 STROBE<br />
bar to the desired effect.<br />
● The selected function<br />
is activated and after<br />
2 seconds the menu disappears.<br />
● To deactivate the selected effect, press EFFECT<br />
ON/OFF. To reactivate the selected effect press<br />
EFFECT ON/OFF again.<br />
● To change the selected effect, repeat from<br />
step 2 above.<br />
PLAY<br />
EFFECT<br />
EFFECT ON/OFF<br />
Allows you to add creative effects to the <strong>video</strong><br />
playback image.<br />
The effects that can be used during playback are<br />
CLASSIC FILM, MONOTONE, SEPIA and STROBE.<br />
The effects work the same in playback as they did in<br />
recording. ( pg. 42)<br />
CLASSIC FILM<br />
MONOTONE<br />
SEPIA<br />
STROBE<br />
Gives recorded scenes<br />
a strobe effect.<br />
Like classic black and<br />
white films, your<br />
footage is shot in B/W.<br />
Used together with the<br />
Cinema mode, it<br />
enhances the “classic<br />
film” effect.<br />
Recorded scenes have<br />
a brownish tint like<br />
old photos. Combine<br />
this with the Cinema<br />
mode for a classic<br />
look.<br />
Your recording looks<br />
like a series of<br />
consecutive<br />
snapshots.
70 EN<br />
USING THE REMOTE CONTROL UNIT (cont.)<br />
Audio Dubbing<br />
The audio track can be customised only when<br />
recorded in the 12-bit and SP modes. ( pg. 44)<br />
Speaker<br />
Remote sensor<br />
Stereo microphone<br />
Headphone connector<br />
(GR-DVX707 only)<br />
Open the<br />
connector cover.<br />
1 Play back the tape to locate the point where<br />
editing will start, then press PAUSE (9).<br />
2 While holding A.<br />
DUB (D) on the<br />
remote control, press<br />
PAUSE (9). The<br />
“9D” indicator<br />
appears.<br />
3 Press PLAY (U), then<br />
begin “narrating”.<br />
Speak into the<br />
microphone.<br />
● To pause dubbing, press PAUSE (9).<br />
9D<br />
MIC<br />
GR-DVX707 only<br />
4 To end Audio Dubbing, press PAUSE (9), then<br />
STOP (8).<br />
To hear the dubbed sound during playback…<br />
Set “12BIT MODE” to “SOUND 2” or “MIX”.<br />
( pg. 38, 51)<br />
NOTES:<br />
● Sound is not heard from the speaker during Audio<br />
Dubbing. To hear sound, connect optional<br />
headphones to the headphone connector.<br />
(GR-DVX707 only)<br />
● When editing onto a tape that was recorded at<br />
12-bit, the old and new soundtracks are recorded<br />
separately.<br />
● If you dub onto a blank space on the tape, the<br />
sound may be disrupted. Make sure you only edit<br />
recorded areas.<br />
● If feedback or howling occurs during TV playback,<br />
move the camcorder’s microphone away from the<br />
TV, or turn down the TV’s volume.<br />
● If you change from 12-bit to 16-bit in midrecording<br />
and then use the tape for Audio<br />
Dubbing, it is not effective from the point where<br />
16-bit recording began.<br />
● During Audio Dubbing, when the tape moves to<br />
scenes recorded in the LP mode, scenes recorded<br />
in 16-bit audio or a blank portion, Audio Dubbing<br />
stops.<br />
● To perform Audio Dubbing while watching on the<br />
television, make connections. ( pg. 24, 25)<br />
A.DUB<br />
PLAY<br />
PAUSE<br />
STOP
EN 71<br />
Audio Dubbing Using Digital<br />
Sound Effects (GR-DVX707 only)<br />
MENU Wheel<br />
Remote sensor<br />
D.SOUND Button<br />
5 Rotate the MENU<br />
Wheel to select<br />
“D.SOUND”, and<br />
press it.<br />
6 Rotate the MENU<br />
APPLAUSE<br />
Wheel to select<br />
“BRETURN”, and<br />
press it twice. The<br />
Menu Screen closes and the sound effect<br />
indication appears.<br />
7 Press INDEX to access the sound effects Index<br />
Screen.<br />
8 Rotate the MENU Wheel to select the desired<br />
sound effect and press it.<br />
9 Press PLAY (U) to begin Audio Dubbing. The<br />
9D<br />
D.SOUND<br />
selected sound effect is dubbed onto the tape.<br />
● The “ ” moves while it is being dubbed.<br />
● To stop dubbing the sound effect midway, press<br />
D.SOUND.<br />
10 Press STOP (8) to end Audio Dubbing.<br />
NOTES:<br />
● After dubbing, set “SOUND IN” back to “MIC”.<br />
● The dubbed sound effect is recorded on<br />
SOUND 2. ( pg. 51)<br />
● If you press PAUSE (9) to pause dubbing in step 9<br />
the selected sound effect indication remains<br />
displayed. To resume dubbing, press PLAY (U).<br />
A.DUB<br />
PLAY<br />
PAUSE<br />
STOP<br />
1 Load the provided memory card. ( pg. 17)<br />
Then, perform step 1 and 2 on page 70.<br />
2 Press the MENU Wheel in. The Menu Screen<br />
appears.<br />
3 Rotate the MENU Wheel to select “s SYSTEM”,<br />
and press it. The SYSTEM Menu appears.<br />
4 Rotate the MENU Wheel to select “SOUND IN”,<br />
and press it. The Sub Menu appears.
72 EN<br />
USING THE REMOTE CONTROL UNIT (cont.)<br />
Insert Editing<br />
You can record a new scene into a previously<br />
recorded tape, replacing a section of the original<br />
recording with minimal picture distortion at the in<br />
and outpoints. The original audio remains<br />
unchanged.<br />
Remote sensor<br />
4 Press START/STOP to begin editing.<br />
● Confirm the insert at the time code you<br />
checked in step 1.<br />
● To pause editing, press START/STOP. Press it<br />
again to resume editing.<br />
5 To end Insert Editing, press START/STOP, then<br />
STOP (8).<br />
NOTES:<br />
● Pro<strong>gr</strong>am AE with special effects ( pg. 38, 42)<br />
can be used to spice up the scenes being edited<br />
during Insert Editing.<br />
● During Insert Editing, the date and time<br />
information changes.<br />
● If you perform Insert Editing onto a blank space on<br />
the tape, the audio and <strong>video</strong> may be disrupted.<br />
Make sure you only edit recorded areas.<br />
● During Insert Editing, when the tape moves to<br />
scenes recorded in the LP mode or a blank<br />
portion, Insert Edting stops. ( pg. 100, 101)<br />
START/STOP<br />
REW<br />
STOP<br />
INSERT<br />
PLAY<br />
PAUSE<br />
NOTES:<br />
● Before performing the following steps, make sure<br />
that “TIME CODE” is set to “ON”. ( pg. 38, 49)<br />
● Insert Editing is not possible on a tape recorded in<br />
the LP mode or on a blank portion of a tape.<br />
● To perform Insert Editing while watching in the<br />
television, make connections. ( pg. 24, 25)<br />
1 Play back the tape, locate the Edit-Out point and<br />
press PAUSE (9). Confirm the time code at this<br />
point. ( pg. 38, 49)<br />
2 Press REW (3) until the Edit-In point is located,<br />
then press PAUSE (9).<br />
3 Press and hold INSERT<br />
(I) on the remote<br />
control, then press<br />
PAUSE (9). The “9I”<br />
indicator and the Time<br />
Code (min.:sec.)<br />
appear and the<br />
camcorder enters<br />
Insert-Pause mode.<br />
12:34<br />
9I
EN 73<br />
Random Assemble Editing<br />
[R.A.Edit]<br />
Create edited <strong>video</strong>s easily using your camcorder as<br />
the source player. You can select up to 8 “cuts” for<br />
automatic editing, in any order you like. R.A.Edit is<br />
more easily performed when the MBR (Multi-Brand<br />
Remote) is set to operate with your brand of VCR<br />
(see “VCR CODE LIST”), but can also be performed<br />
by operating the VCR manually.<br />
Before operation, make sure the batteries are<br />
installed in the remote control. ( pg. 66)<br />
SHIFT<br />
VCR<br />
MBR SET<br />
Set Remote/VCR Code<br />
1 Turn off the power to the VCR and point the<br />
remote towards the VCR’s infrared sensor. Then,<br />
referring to the VCR CODE LIST, press and hold<br />
MBR SET, and enter the brand code.<br />
The code is automatically set once you release<br />
MBR SET, and the VCR’s power comes on.<br />
2 Make sure the VCR’s power is on. Then, while<br />
holding SHIFT, press the button on the remote<br />
for the desired function. The functions the remote<br />
can control are PLAY, STOP, PAUSE, FF, REW<br />
and VCR REC STBY (you do not need to press<br />
SHIFT for this one).<br />
You are now ready to try Random Assemble<br />
Editing.<br />
IMPORTANT<br />
Although the MBR is compatible with <strong>JVC</strong> VCRs<br />
and those of many other makers, it may not work<br />
with yours or may offer limited functions.<br />
NOTES:<br />
● If the VCR’s power does not come on in step 1, try<br />
another code from the VCR CODE LIST.<br />
● Some brands of VCR do not come on<br />
automatically. In this case, turn the power on<br />
manually and try step 2.<br />
● If the remote control is not able to control the<br />
VCR, use the controls on the VCR.<br />
● When the remote control’s batteries run out, the<br />
VCR brand you have set will be erased. In that<br />
case, replace the old battery with a new one to<br />
reset the VCR brand.<br />
VCR CODE LIST<br />
VCR BRAND<br />
NAME<br />
AKAI<br />
CODE<br />
F<br />
F<br />
G<br />
B<br />
D<br />
G<br />
BLAUPUNKT A C<br />
DAEWOO A H<br />
FERGUSON<br />
GRUNDIG<br />
HITACHI<br />
<strong>JVC</strong><br />
A<br />
B<br />
C<br />
I<br />
I<br />
C<br />
A<br />
C<br />
F<br />
F<br />
I<br />
I<br />
I<br />
LG/GOLDSTAR A<br />
MITSUBISHI<br />
NEC<br />
PANASONIC<br />
F<br />
F<br />
C<br />
C<br />
A<br />
A<br />
A<br />
I<br />
A<br />
G<br />
H<br />
B<br />
D<br />
D<br />
F<br />
C<br />
A<br />
F<br />
C<br />
A<br />
G<br />
H<br />
G<br />
H<br />
C<br />
G<br />
A<br />
D<br />
H<br />
VCR BRAND<br />
NAME<br />
PHILIPS<br />
CODE<br />
A<br />
I<br />
A<br />
I<br />
I<br />
I<br />
A<br />
C<br />
G<br />
I<br />
E<br />
A<br />
D<br />
A<br />
F<br />
B<br />
C<br />
B<br />
SAMSUNG I D<br />
SANYO<br />
SELECO, REX<br />
SHARP<br />
SONY<br />
THOMSON,<br />
TELEFUNKEN,<br />
SABA,<br />
NORDMENDE<br />
TOSHIBA<br />
C<br />
C<br />
I<br />
I<br />
A<br />
A<br />
F<br />
F<br />
C<br />
C<br />
I<br />
I<br />
I<br />
C<br />
F<br />
F<br />
F<br />
E<br />
A<br />
F<br />
E<br />
E<br />
I<br />
A<br />
A<br />
F<br />
G<br />
B<br />
I<br />
A<br />
CONTINUED ON NEXT PAGE
74 EN<br />
Make Connections<br />
Also refer to page 24 and 25.<br />
To EDIT**<br />
or JLIP**<br />
To S-VIDEO<br />
Editing cable<br />
(provided)<br />
ABTo Remote<br />
PAUSE or<br />
R.A.EDIT<br />
CTo PAUSE<br />
IN<br />
Open these<br />
connector<br />
covers.<br />
S-Video<br />
cable<br />
(optional)<br />
“Y/C”/“CVBS”<br />
Video Out<br />
Select Switch<br />
DISPLAY<br />
VCR<br />
To AV<br />
Audio/Video<br />
cable<br />
(provided)<br />
To AUDIO,<br />
VIDEO* and<br />
S-IN<br />
connectors<br />
Cable<br />
Adapter***<br />
TV<br />
USING THE REMOTE CONTROL UNIT (cont.)<br />
1 A A <strong>JVC</strong> VCR equipped with a Remote PAUSE<br />
connector…<br />
…Connect the editing cable to the Remote<br />
PAUSE connector.<br />
B A <strong>JVC</strong> VCR not equipped with a Remote<br />
PAUSE connector but equipped with an<br />
R.A.EDIT connector…<br />
…Connect the editing cable to the R.A.EDIT<br />
connector.<br />
C A VCR other than above…<br />
…Connect the editing cable to the remote<br />
control’s PAUSE IN connector.<br />
2 Insert a recorded tape into the camcorder.<br />
3 Set the VIDEO/MEMORY Switch to “VIDEO”.<br />
(GR-DVX707/507 only)<br />
4 Set the Power Switch to “P” while pressing<br />
down the Lock Button located on the switch.<br />
5 Turn the VCR power on, insert a recordable tape<br />
and engage the AUX mode.<br />
● Refer to the VCR’s instructions.<br />
NOTES:<br />
● Before Random Assemble Editing, make sure the<br />
indications do not appear on the TV monitor. If<br />
they do, they will be recorded onto the new tape.<br />
To choose whether or not the following displays<br />
appear on the connected TV…<br />
•Date/Time<br />
Set “DISPLAY” to “AUTO”, “ON” or “OFF”.<br />
( pg. 38, 49) Or, press DISPLAY on the remote<br />
control to turn on/off the date indication.<br />
• Time Code<br />
Set “TIME CODE” to “ON” or “OFF”.<br />
( pg. 38, 49)<br />
• Playback Sound Mode, Tape Speed And Tape<br />
Running Displays<br />
Set “ON SCREEN” to “LCD” or “LCD/TV”.<br />
( pg. 38, 49)<br />
● Set the <strong>video</strong> out select switch of the cable adapter<br />
as required:<br />
Y/C:<br />
When connecting to a TV or VCR which<br />
accepts Y/C signals and uses an S-Video<br />
cable.<br />
CVBS: When connecting to a TV or VCR which<br />
does not accept Y/C signals and uses an<br />
audio/<strong>video</strong> cable.<br />
● When editing on a VCR equipped with a DV input<br />
connector, an optional DV cable can be<br />
connected instead of an S-Video cable and audio/<br />
<strong>video</strong> cable.<br />
* Connect when an S-Video cable is not used.<br />
** EDIT: GR-DVX707/507<br />
JLIP: GR-DVX407/400<br />
*** If your VCR has a SCART connector, use the<br />
provided cable adapter.
EN 75<br />
Select Scenes<br />
Remote sensor<br />
FADE/WIPE<br />
EFFECT<br />
EDIT IN/OUT<br />
CANCEL<br />
PLAY<br />
R.A.EDIT<br />
ON/OFF<br />
6 Point the remote control at the camcorder’s<br />
remote sensor. Press PLAY (U) and then press<br />
R.A.EDIT ON/OFF on the remote control.<br />
The Random Assemble Editing Menu appears.<br />
Selected parameter<br />
I N OUT MODE<br />
1 ––<br />
2<br />
3<br />
4<br />
5<br />
6<br />
7<br />
8<br />
––:–– ~<br />
~<br />
~<br />
~<br />
~<br />
~<br />
~<br />
~<br />
TIME<br />
– – : ––<br />
TOTAL CODE<br />
00 : 00<br />
Random Assemble<br />
Editing Menu<br />
7 If using a Wipe/Fader at the beginning of the<br />
scene, press FADE/WIPE on the remote control.<br />
● Cycle through the effects by pressing<br />
repeatedly, and stop when the one you want is<br />
displayed.<br />
8 At the beginning of the scene, press EDIT IN/<br />
OUT on the remote control. The Edit-In position<br />
appears in the Random Assemble Editing Menu.<br />
9 At the end of the scene, press EDIT IN/OUT. The<br />
Edit-Out position appears in the Random<br />
Assemble Editing Menu.<br />
10 If using a Wipe/Fader at the end of the scene,<br />
press FADE/WIPE.<br />
● Cycle through the effects by pressing<br />
repeatedly, and stop when the one you want is<br />
displayed.<br />
● If you select a Wipe/Fader effect for an Edit-Out<br />
point, the effect is automatically applied to the<br />
following Edit-In point.<br />
● When you use Wipe/Fader effects, that time is<br />
included in the total time.<br />
11 If using Playback Special Effects, press EFFECT.<br />
( pg. 69)<br />
12 Repeat steps 8 through 11 to register<br />
additional scenes.<br />
● To change previously registered points, press<br />
CANCEL on the remote control. The registered<br />
points disappear, one at a time, from the most<br />
recently registered point.<br />
● If you are not using Wipe/Fader or Pro<strong>gr</strong>am AE<br />
with special effects, repeat steps 8 and 9 only.<br />
NOTES:<br />
● When choosing a scene, set Edit-In and Edit-Out<br />
points so that there is a relatively large difference<br />
between them.<br />
● If the search time for an in-point exceeds<br />
5 minutes, the recording deck’s Record-Standby<br />
mode will be cancelled and editing will not take<br />
place.<br />
● If there are blank portions before or after the Edit-<br />
In and Edit-Out points, a blue screen may be<br />
included in the edited version.<br />
● Since time codes register time only as accurately<br />
as seconds, the time code total time may not<br />
match the total pro<strong>gr</strong>am time exactly.<br />
● Turning off the camcorder’s power erases all<br />
registered Edit-In and Edit-Out points.<br />
● If you select Sepia or Monotone mode from<br />
Pro<strong>gr</strong>am AE with special effects, you cannot use<br />
the Black & White Fader. In this case the Black &<br />
White indicator begins blinking. Once the next<br />
Edit-In point is registered, the effect is turned off.<br />
To combine these effects, use Sepia or Monotone<br />
during recording, then use the Black & White<br />
Fader during Random Assemble Editing.<br />
● It is not possible to use Wipe/Fader effects and<br />
Pro<strong>gr</strong>am AE with special effects during Random<br />
Assemble Editing using a DV cable.<br />
CONTINUED ON NEXT PAGE
76 EN<br />
Automatic Editing To VCR<br />
Remote sensor<br />
Recording Start/<br />
Stop Button<br />
PLAY<br />
OFF<br />
A<br />
M<br />
START/STOP<br />
PAUSE<br />
R.A.EDIT<br />
ON/OFF<br />
VCR REC<br />
STBY<br />
USING THE REMOTE CONTROL UNIT (cont.)<br />
13 Rewind the tape in the camcorder to the<br />
beginning of the scene you want to edit and press<br />
PAUSE (9).<br />
14 Point the remote control towards the VCR’s<br />
remote sensor and press VCR REC STBY (79), or<br />
manually engage the VCR’s Record-Pause mode.<br />
15 Press the Recording<br />
Start/Stop Button on<br />
the camcorder. Editing<br />
proceeds as<br />
pro<strong>gr</strong>ammed, right<br />
through to the end of<br />
the last registered<br />
scene.<br />
I N OUT MODE<br />
1 00:25 ~ 02:05 –– ––<br />
2––<br />
07:18 ~ 08:31 –– ––<br />
3 ––<br />
4<br />
03 : 33 ~ 05:53<br />
09:30 ~ 13:15<br />
5 15: 55 ~ 16:29 –– ––<br />
6 –– ––:<br />
–– ~<br />
7<br />
8<br />
~<br />
~<br />
TIME<br />
1 6 : 30<br />
TOTAL CODE<br />
9 : 39<br />
● When dubbing is complete, the camcorder<br />
enters the Pause mode, and the VCR enters its<br />
Record-Pause mode.<br />
● If you do not register an Edit-Out point, the<br />
tape will be dubbed all the way to the end<br />
automatically.<br />
● If you operate the camcorder during automatic<br />
editing, the VCR will enter its Record-Pause<br />
mode and automatic editing will stop.<br />
16 Engage the Stop modes for the camcorder and<br />
the VCR.<br />
To make the R.A.Edit counter display disappear,<br />
press R.A.EDIT ON/OFF on the remote control.<br />
NOTES:<br />
● Pressing R.A.EDIT ON/OFF on the remote control<br />
clears all settings registered during Random<br />
Assemble Editing.<br />
● When the editing cable is connected to the remote<br />
control’s PAUSE IN connector during dubbing,<br />
make sure the remote control is pointed at the<br />
VCR’s sensor, and the path between the two is<br />
unobstructed.<br />
● Random Assemble Editing may not function<br />
properly when using a tape including several<br />
duplicated time codes. ( pg. 21)
EN 77<br />
For More Accurate Editing<br />
Some VCRs make the transition from Record-Pause<br />
to Record mode faster than others. Even if you begin<br />
editing for the camcorder and the VCR at exactly the<br />
same time, you may lose scenes you wanted, or find<br />
that you have recorded scenes you did not want. For<br />
a cleanly edited tape, confirm and adjust the timing<br />
of the camcorder against your VCR.<br />
Remote sensor<br />
R.A.EDIT<br />
ON/OFF<br />
Diagnosing VCR/Camcorder Timing<br />
1 Play back the tape in the camcorder, then point<br />
the remote control at the camcorder’s remote<br />
sensor and press R.A.EDIT ON/OFF.<br />
Random Assemble Editing Menu appears.<br />
Pro<strong>gr</strong>am 1<br />
I N OUT MODE<br />
1 ––<br />
2<br />
3<br />
4<br />
5<br />
6<br />
7<br />
8<br />
––:–– ~<br />
~<br />
~<br />
~<br />
~<br />
~<br />
~<br />
~<br />
TIME<br />
– – : ––<br />
TOTAL CODE<br />
00 : 00<br />
Random Assemble<br />
Editing Menu<br />
2 Perform Random Assemble Editing on Pro<strong>gr</strong>am 1<br />
only. In order to check VCR and camcorder<br />
timing, select the beginning of a scene transition<br />
as your Edit-In point.<br />
3 Play back the dubbed scene.<br />
● If any images from the scene prior to the<br />
transition you chose for your Edit-In point were<br />
recorded, that means your VCR moves too<br />
quickly from Record-Pause to Record mode.<br />
● If the scene you tried to dub starts in pro<strong>gr</strong>ess,<br />
the VCR is slow to start recording.<br />
Adjustment Of VCR/Camcorder Timing<br />
4 Point the remote control at the camcorder’s<br />
remote sensor and press R.A.EDIT ON/OFF to<br />
make the Random Assemble Editing menu<br />
disappear, then press the MENU Wheel in. The<br />
Menu Screen appears.<br />
5 Rotate the MENU<br />
Wheel to select<br />
“t VIDEO”, and<br />
press it. The VIDEO<br />
Menu appears. Then,<br />
rotate the MENU<br />
Wheel to select<br />
“SYNCHRO” and<br />
SYNCHRO<br />
– O.1<br />
press it. The value for “SYNCHRO” is<br />
highlighted.<br />
6 Based on the diagnostics performed, you can<br />
now advance the VCR’s record timing by rotating<br />
the MENU Wheel towards “+”. You can also<br />
delay the VCR’s record timing by rotating the<br />
MENU Wheel towards “–”.<br />
The adjustment range is from –1.3 to +1.3<br />
seconds, in 0.1-second increments.<br />
Press the MENU Wheel in to finish the setting.<br />
7 Rotate the MENU Wheel to select “BRETURN”,<br />
and press it twice.<br />
Now perform Random Assemble Editing<br />
beginning with step 6 on page 75.<br />
NOTES:<br />
● Before performing actual Random Assemble<br />
Editing, do a few Random Assemble Editing trial<br />
runs to check whether the value you have input is<br />
appropriate or not, and make adjustments<br />
accordingly.<br />
● Depending on the recorder, there may be<br />
situations where the timing difference cannot be<br />
fully corrected.
78 EN SYSTEM CONNECTIONS<br />
Connection To A Personal Computer<br />
[A] Using USB or PC connection cable<br />
GR-DVX407/400 only<br />
To PC<br />
To RS-232C<br />
PC connection cable (provided)<br />
USB cable (provided)<br />
Open the<br />
connector<br />
cover.<br />
[B] Using DV cable<br />
To USB<br />
GR-DVX707/507 only<br />
OR<br />
To USB connector<br />
PC<br />
To DV<br />
DV cable<br />
(optional)<br />
To DV<br />
connector<br />
Open the<br />
connector<br />
cover.<br />
Core filter<br />
Core filter<br />
PC with DV<br />
connector<br />
[A] Using USB or PC connection cable<br />
This camcorder can transfer still images to a PC by<br />
using the provided software.<br />
[B] Using DV cable<br />
It is also possible to transfer still images to a PC with<br />
a DV connector by using software equipped with the<br />
PC or commercially available software.<br />
1 Connect the camcorder to your PC using the<br />
appropriate cable as shown in the illustration.<br />
2 If you are using the USB connection, set the<br />
VIDEO/MEMORY switch to “MEMORY”.<br />
(GR-DVX707/507 only)<br />
3 Turn the camcorder’s Power Switch to “P”<br />
while pressing down the Lock Button located on<br />
the switch and turn on the PC.<br />
● Refer to the instruction manual of the software<br />
on how to transfer a still image to the PC.<br />
NOTES:<br />
● Refer to “SOFTWARE INSTALLATION AND USB<br />
OR PC CONNECTION GUIDE” for the installation<br />
of the bundled software and drivers.<br />
● It is recommended to use the AC Adapter as the<br />
power supply instead of the battery pack. ( pg. 11)<br />
● Never connect the USB or PC connection cable<br />
and the DV cable simultaneously to the<br />
camcorder. Connect only the cable you wish to<br />
use to the camcorder.<br />
● When using a DV cable, be sure to use the<br />
optional <strong>JVC</strong> VC-VDV206U or VC-VDV204U DV<br />
cable depending on the type of DV connector (4<br />
or 6 pins) on the PC, or use the DV cable<br />
provided with the capture board.<br />
● If the PC connected to the camcorder via the USB<br />
cable is not powered, the camcorder does not<br />
enter the USB mode.<br />
● The date/time information cannot be captured into<br />
the PC.<br />
● Refer to the instruction manuals of the PC and<br />
Software.<br />
● The still images can also be transferred to a PC<br />
with a DV connector-equipped capture board.<br />
● The system may not work properly depending on<br />
the PC or capture board you are using.<br />
For GR-DVX707/507 owners:<br />
“USB MODE” and/or “ACCESSING FILES”<br />
appears on the LCD monitor while the PC is<br />
accessing data in the camcorder or the camcorder<br />
is transferring a file to the PC.<br />
NEVER disconnect the USB cable while<br />
“ACCESSING FILES” is displayed on the LCD<br />
monitor since this can result in product damage.
EN 79<br />
Using The Camcorder As A<br />
WebCam (GR-DVX707 only)<br />
This camcorder can be used as a WebCam via USB<br />
connection.<br />
Open the<br />
connector cover.<br />
VIDEO/MEMORY<br />
Switch<br />
To USB<br />
1 Make sure all necessary software (provided) are<br />
installed in your PC and all units are turned off.<br />
2 Connect the camcorder to your PC using the USB<br />
cable.<br />
3 Set the VIDEO/MEMORY Switch to “MEMORY”.<br />
4 Set the Power Switch to “A” or “M” while<br />
pressing down the Lock Button located on the<br />
switch.<br />
5 Turn on the PC.<br />
● “Web CAMERA” appears on the screen.<br />
● If the PC is not<br />
powered on, the<br />
camcorder does not<br />
enter the Web<br />
Camera mode.<br />
6 When finished, turn<br />
off the PC first, then<br />
the camcorder.<br />
We<br />
b<br />
CAMERA<br />
Disconnect the USB cable from the camcorder<br />
and PC.<br />
NOTES:<br />
● It is recommended to use the AC Adapter as the<br />
power supply instead of the battery pack.<br />
( pg. 11)<br />
● Use the provided software PIXELA ImageMixer to<br />
capture <strong>video</strong> in real time.<br />
● You can also use the camcorder for web<br />
conference by using Microsoft Windows ®<br />
NetMeeting ® and signing up for MSN Hotmail.<br />
● In the Web Camera mode, the following buttons<br />
cannot be operated: E-MAIL, SNAPSHOT, the<br />
Recording Start/Stop Button.<br />
Refer to the instruction manuals of the PC and<br />
provided Software.<br />
P C<br />
USB cable<br />
(provided)<br />
To USB connector<br />
USB-equipped PC
80 EN<br />
REFERENCES<br />
CONTENTS<br />
DETAILS ..................................................................................................... 81<br />
TROUBLESHOOTING .................................................................................... 82<br />
CAUTIONS ................................................................................................. 88<br />
USER MAINTENANCE ................................................................................... 91<br />
SPECIFICATIONS ......................................................................................... 92<br />
INDEX ........................................................................................................ 94<br />
Controls ................................................................................................. 94<br />
Connectors ............................................................................................. 94<br />
Indicators ............................................................................................... 94<br />
Other Parts ............................................................................................ 94<br />
Indications .............................................................................................. 96<br />
TERMS .................................................................................................... 102
DETAILS<br />
ITEMS<br />
V Power ( pg. 10)<br />
V VIDEO<br />
RECORDING<br />
( pg. 19, 20)<br />
NOTES<br />
EN 81<br />
● Perform charging where the temperature is between 10°C and 35°C. 20°C to<br />
25°C is the ideal temperature range for charging. If the environment is too cold,<br />
charging may be incomplete.<br />
● Charging times noted above are for a fully discharged battery pack.<br />
● Charging time varies according to the ambient temperature and the status of the<br />
battery pack.<br />
● To avoid interference with reception, do not use the AC Adapter near a radio.<br />
● Since the AC Adapter processes electricity internally, it becomes warm during<br />
use. Be sure to use it only in well-ventilated areas.<br />
● The following operation stops charging:<br />
•Set the Power Switch to “P”, “A” or “M”.<br />
•Disconnect the AC Adapter from the camcorder.<br />
•Unplug the AC Adapter from the AC outlet.<br />
•Detach the battery from the camcorder.<br />
● When you use the LCD monitor outdoors in direct sunlight, the LCD monitor<br />
may be difficult to see. If this happens, use the viewfinder instead.<br />
● The cassette holder cannot be opened unless a power supply is attached.<br />
● There may be a delay after you open the cassette holder cover until the cassette<br />
holder opens. Do not use force.<br />
● Once the cassette holder is closed, it recedes automatically. Wait until it recedes<br />
completely before closing the cassette holder cover.<br />
● When the Recording Start/Stop button is pressed, it may take a few seconds<br />
before actual recording starts. The “T” indicator starts rotating when the<br />
camcorder actually starts recording.<br />
● The time required to calculate and display the remaining tape length, and the<br />
accuracy of the calculation, may vary according to the type of tape used.<br />
● “TAPE END” appears when the tape reaches its end, and the power goes off<br />
automatically if left in this condition for 5 minutes. “TAPE END” also appears<br />
when a cassette at its end is loaded.<br />
● During recording, sound is not heard from the speaker. To hear the sound,<br />
connect optional headphones to the headphone connector. (GR-DVX707 only)<br />
The sound volume is at the level it was adjusted to during playback. ( pg. 22)
82 EN TROUBLESHOOTING<br />
If, after following the steps in the chart below, the problem still exists, please consult your nearest <strong>JVC</strong> dealer.<br />
The camcorder is a microcomputer-controlled device. External noise and interference (from a TV, a radio,<br />
etc.) might prevent it from functioning properly. In such cases, first disconnect its power supply unit (battery<br />
pack, AC Adapter, etc.) and wait a few minutes; and then re-connect it and proceed as usual from the<br />
beginning.<br />
Power<br />
SYMPTOM POSSIBLE CAUSES CORRECTIVE ACTION<br />
1. No power is supplied. 1. •The power is not connected<br />
properly.<br />
•The battery is dead.<br />
•The LCD monitor is not open<br />
fully or the viewfinder is not<br />
pulled out when recording.<br />
Video and D.S.C. (GR-DVX707/507 only) Recording<br />
1. •Connect the AC Adapter<br />
securely. ( pg. 11)<br />
•Replace the dead battery<br />
with a fully charged one.<br />
( pg. 10, 11)<br />
•Open the LCD monitor fully<br />
or pull out the viewfinder.<br />
SYMPTOM POSSIBLE CAUSES CORRECTIVE ACTION<br />
2. Recording cannot be<br />
performed.<br />
3. When shooting a subject<br />
illuminated by bright light,<br />
vertical lines appear.<br />
4. When the screen is under<br />
direct sunlight during shooting,<br />
the screen becomes red or<br />
black for an instant.<br />
5. During recording, the date/<br />
time does not appear.<br />
2. •The Power Switch is set to<br />
“P” or “OFF”.<br />
— For Video Recording —<br />
•The tape’s erase protection<br />
tab is set to “SAVE”.<br />
•The VIDEO/MEMORY<br />
Switch is set to “MEMORY”.<br />
•“TAPE END” appears.<br />
•The cassette holder cover is<br />
open.<br />
— For D.S.C. Recording —<br />
•The VIDEO/MEMORY<br />
Switch is set to “VIDEO”.<br />
3. •This is a result of exceedingly<br />
high contrast, and is not a<br />
malfunction.<br />
2. •Set the Power Switch to “A”<br />
or “M”. ( pg. 14)<br />
— For Video Recording —<br />
•Set the tape’s erase<br />
protection tab to “REC”.<br />
( pg. 16)<br />
•Set the VIDEO/MEMORY<br />
Switch to “VIDEO”.<br />
•Replace with new cassette.<br />
( pg. 16)<br />
•Close the cassette holder<br />
cover.<br />
— For D.S.C. Recording —<br />
•Set the VIDEO/MEMORY<br />
Switch to “MEMORY”.<br />
3.<br />
4. •This is not a malfunction. 4.<br />
5. •“DATE/TIME” is set to “OFF”. 5. •Set “DATE/TIME” to “ON”.<br />
( pg. 38, 49)<br />
—<br />
—
6. During recording, sound<br />
cannot be heard.<br />
7. The LCD monitor or<br />
viewfinder indications blink.<br />
6. •The optional headphones are<br />
not connected to the<br />
headphones connector.<br />
(GR-DVX707 only)<br />
•The sound volume of the<br />
headphones connector<br />
(GR-DVX707 only) was not<br />
adjusted appropriately. The<br />
sound volume at this point is<br />
the same as the level it was<br />
adjusted to during playback.<br />
7. •Certain Wipe/Fader effects,<br />
certain modes of Pro<strong>gr</strong>am AE<br />
with special effects, “DIS”<br />
and other functions that<br />
cannot be used together are<br />
selected at the same time.<br />
8. Digital Zoom does not work. 8. •10X optical zoom is selected.<br />
•The VIDEO/MEMORY<br />
Switch is set to “MEMORY”.<br />
Video and D.S.C. (GR-DVX707/507 only) Playback<br />
EN 83<br />
6. •Connect the optional<br />
headphones to the<br />
headphone connector<br />
(GR-DVX707 only).<br />
( pg. 95)<br />
•Adjust the sound volume<br />
during playback. ( pg. 22)<br />
7. •Re-read the sections covering<br />
Wipe/Fader effects, Pro<strong>gr</strong>am<br />
AE with special effects and<br />
“DIS”. ( pg. 38, 40 –<br />
43, 46)<br />
8. •Set “ZOOM” to “40X” or<br />
“200X”. ( pg. 44)<br />
•Set the VIDEO/MEMORY<br />
Switch to “VIDEO”.<br />
SYMPTOM POSSIBLE CAUSES CORRECTIVE ACTION<br />
9. Play, Rewind and Fast-Forward<br />
functions do not work.<br />
10. The LCD monitor image is<br />
distorted.<br />
11. The tape is moving, but there is<br />
no picture.<br />
12. Blocks of noise appear during<br />
playback, or there is no<br />
playback picture and the<br />
screen becomes blue.<br />
13. A memory card cannot be<br />
played back.<br />
9. •The Power Switch is set to<br />
“A” or “M”.<br />
•VIDEO/MEMORY Switch is<br />
set to “MEMORY”.<br />
10. •During playback of the<br />
unrecorded portion, Highspeed<br />
Search and still<br />
playback, LCD monitor<br />
indications appear distorted.<br />
This is not a defect.<br />
11. •Your TV has AV input<br />
terminals, but is not set to its<br />
VIDEO mode.<br />
•The cassette holder cover is<br />
open.<br />
12.<br />
—<br />
13. •The Power Switch is set to<br />
“A” or “M”.<br />
•The VIDEO/MEMORY<br />
Switch is set to “VIDEO”.<br />
9. •Set the Power Switch to<br />
“P”. ( pg. 22)<br />
•Set the VIDEO/MEMORY<br />
Switch to “VIDEO”.<br />
10.<br />
—<br />
11. •Set the TV to the mode or<br />
channel appropriate for<br />
<strong>video</strong> playback.<br />
( pg. 24, 25)<br />
•Close the cassette holder<br />
cover. ( pg. 16)<br />
12. •Clean the <strong>video</strong> heads with<br />
an optional cleaning<br />
cassette. ( pg. 91)<br />
13. •Set the Power Switch to<br />
“P”. ( pg. 28)<br />
•Set the VIDEO/MEMORY<br />
Switch to “MEMORY”.<br />
CONTINUED ON NEXT PAGE
84 EN<br />
Advanced features<br />
TROUBLESHOOTING (cont.)<br />
SYMPTOM POSSIBLE CAUSES CORRECTIVE ACTION<br />
14. The focus does not adjust<br />
automatically.<br />
15. Snapshot mode cannot be<br />
used.<br />
16. The colour of Snapshot looks<br />
strange.<br />
17. The image taken using<br />
Snapshot is too dark.<br />
18. The image taken using<br />
Snapshot is too bright.<br />
19. White Balance cannot be<br />
activated.<br />
20. Wipe/Fader effects do not<br />
work.<br />
21. The Black & White Fader does<br />
not work.<br />
22. Pro<strong>gr</strong>am AE with special<br />
effects does not work.<br />
23. Even when Slow Shutter is not<br />
selected, the image looks like<br />
it is activated.<br />
14. •Focus is set to the Manual<br />
mode.<br />
•The recording was done in a<br />
dark place, or the contrast<br />
was low.<br />
•The lens is dirty or covered<br />
with condensation.<br />
15. •The Squeeze mode<br />
(SQUEEZE) is selected.<br />
16. •The light source or the<br />
subject does not include<br />
white. Or there are various<br />
different light sources behind<br />
the subject.<br />
•The Sepia (SEPIA) or<br />
Monotone (MONOTONE)<br />
mode is activated.<br />
17. •Shooting was performed<br />
under backlit conditions.<br />
14. •Set Focus to the Auto mode.<br />
( pg. 55)<br />
•Clean the lens and check the<br />
focus again. ( pg. 91)<br />
15. •Disengage the Squeeze<br />
(SQUEEZE) mode.<br />
( pg. 46)<br />
16. •Find a white subject and<br />
compose your shot so that it<br />
also appears in the frame.<br />
( pg. 27, 53)<br />
•Disengage the Sepia (SEPIA)<br />
and Monotone<br />
(MONOTONE). ( pg. 42)<br />
17. •Press BACKLIGHT.<br />
( pg. 57)<br />
18. •The subject is too bright. 18. •Set “r PROGRAM AE” to<br />
“SPOTLIGHT”. ( pg. 42)<br />
19. •The Sepia (SEPIA) or<br />
Monotone (MONOTONE)<br />
mode is activated.<br />
20. •The Power Switch is set to<br />
“A”.<br />
21. •The Sepia (SEPIA) or<br />
Monotone (MONOTONE)<br />
mode is activated.<br />
22. •The Power Switch is set to<br />
“A”.<br />
23. •When shooting in the dark,<br />
the unit becomes highly<br />
sensitive to light and the<br />
image takes on an effect<br />
similar to Slow Shutter.<br />
19. •Disengage the Sepia (SEPIA)<br />
or Monotone (MONOTONE)<br />
mode before setting White<br />
Balance. ( pg. 42, 43)<br />
20. •Set the Power Switch to “M”.<br />
( pg. 14)<br />
21. •Disengage the Sepia (SEPIA)<br />
and Monotone<br />
(MONOTONE). ( pg. 42)<br />
22. •Set the Power Switch to “M”.<br />
( pg. 14)<br />
23. •If you want the lighting to<br />
look more natural, set “GAIN<br />
UP” to “ACG” or “OFF”.<br />
( pg. 38, 45)
EN 85<br />
24. Although Snapshot is<br />
attempted, flash does not take<br />
place.<br />
25. Although a Snapshot is taken<br />
with the flash, Red-Eye<br />
Reduction does not take place.<br />
24. •The subject is too bright with<br />
the flash set to “AUTO” or<br />
“AUTO C”.<br />
•If blinks, the flash is being<br />
charged.<br />
•The camcorder is in the<br />
Record mode.<br />
•In the Menu Screen, “GAIN<br />
UP” is set to “OFF” or<br />
“r PROGRAM AE” is set to<br />
“TWILIGHT”.<br />
25. •The subject does not look<br />
straight toward the flash.<br />
•The subject does not look at<br />
the first flash, which is an<br />
important part of Red-Eye<br />
Reduction.<br />
•The camcorder is too far<br />
from the subject.<br />
•“FLASH” is not set to<br />
“AUTO C” in MANUAL<br />
Menu.<br />
24. •Set “FLASH” to “ON” in<br />
MANUAL Menu.<br />
( pg. 38, 47)<br />
•It can take up to 10 seconds<br />
to charge the flash.<br />
•Set the camcorder in the<br />
Record-Standby mode.<br />
( pg. 53, 54)<br />
•Set “GAIN UP” to<br />
“AUTO ” or “ACG”<br />
( pg. 38, 45) or disengage<br />
the “TWILIGHT” mode.<br />
( pg. 38, 42)<br />
25. •The subject should look<br />
straight toward the flash,<br />
especially the first flash. If<br />
the subject does not see the<br />
first flash, it will be difficult<br />
for Red-Eye Reduction to<br />
take place. ( pg. 54)<br />
•The flash is effective for<br />
subjects at a distance of<br />
approx. 0.7 m to 2 m from<br />
the camcorder. ( pg. 54)<br />
•Set “FLASH” to “AUTO C”<br />
to display the Red-Eye<br />
Reduction indicator.<br />
( pg. 38, 54)<br />
Other problems<br />
SYMPTOM POSSIBLE CAUSES CORRECTIVE ACTION<br />
26. The CHARGE indicator on the<br />
camcorder does not light.<br />
26. •The temperature of the<br />
battery is extremely high/low.<br />
•Charging is difficult in places<br />
subject to extremely high/<br />
low temperatures.<br />
27. “SET DATE/TIME!” appears. 27. •The built-in clock’s<br />
rechargeable lithium battery<br />
is discharged.<br />
•The previously set date/time<br />
is erased.<br />
28. There is no picture. 28. •The camcorder is not getting<br />
power, or some other<br />
malfunction exists.<br />
29. Some functions are not<br />
available using the MENU<br />
Wheel.<br />
30. Files stored in the memory<br />
card cannot be deleted.<br />
29. •The Power Switch is set to<br />
“A”.<br />
30. •Files stored in the memory<br />
card are protected.<br />
26. •To protect the battery, it is<br />
recommended to charge it in<br />
places with a temperature of<br />
10°C to 35°C. ( pg. 88)<br />
27. •Connect the camcorder to an<br />
AC outlet using the AC<br />
Adapter for over 24 hours to<br />
charge the clock’s lithium<br />
battery. ( pg. 15)<br />
28. •Turn the camcorder’s power<br />
off and on again. ( pg. 14)<br />
29. •Set the Power Switch to “M”.<br />
( pg. 14)<br />
30. •Remove protection from the<br />
files stored in the memory<br />
card and delete them.<br />
( pg. 31 – 33)<br />
CONTINUED ON NEXT PAGE
86 EN<br />
TROUBLESHOOTING (cont.)<br />
31. When the image is printed<br />
from the printer, a black bar<br />
appears at the bottom of the<br />
screen.<br />
32. When the camcorder is<br />
connected via the DV<br />
connector, the camcorder does<br />
not operate.<br />
33. The rear of the LCD monitor is<br />
hot.<br />
34. Images on the LCD monitor<br />
appear dark or whitish.<br />
35. Coloured bright spots appear<br />
all over the LCD monitor or the<br />
viewfinder.<br />
36. The indicators and the image<br />
colour on the LCD monitor are<br />
not clear.<br />
37. The cassette will not load<br />
properly.<br />
38. The memory card will not load<br />
properly.<br />
39. The memory card cannot be<br />
removed from the camcorder.<br />
31. •This is not a malfunction. 31. •By recording with “DIS”<br />
activated ( pg. 46) this can<br />
be avoided.<br />
32. •The DV cable was plugged/<br />
unplugged with power<br />
turned on.<br />
33. •The light used to illuminate<br />
the LCD monitor causes it to<br />
become hot.<br />
34. •In places subject to low<br />
temperature, images become<br />
dark due to the<br />
characteristics of the LCD<br />
monitor. When this happens,<br />
the displayed colours differ<br />
from those that are actually<br />
recorded. This is not a defect<br />
of the camcorder.<br />
•When the LCD monitor’s<br />
fluorescent light reaches the<br />
end of its service life, images<br />
on the LCD monitor become<br />
dark. Consult your nearest<br />
<strong>JVC</strong> dealer.<br />
35. •The LCD monitor and the<br />
viewfinder are made with<br />
high-precision technology.<br />
However, black spots or<br />
bright spots of light (red,<br />
<strong>gr</strong>een or blue) may appear<br />
constantly on the LCD<br />
monitor or the viewfinder.<br />
These spots are not recorded<br />
on the tape. This is not due to<br />
any defect of the unit.<br />
(Effective dots: more than<br />
99.99 %)<br />
36. •This may occur when the<br />
surface or the edge of the<br />
LCD monitor is pressed.<br />
37. •The cassette is in the wrong<br />
position.<br />
•The battery’s charge is low.<br />
38. •The memory card is in the<br />
wrong position.<br />
39.<br />
—<br />
32. •Turn the camcorder’s power<br />
off and on again, then<br />
operate it.<br />
33. •Close the LCD monitor to<br />
turn it off or set the Power<br />
Switch to “OFF”, and let the<br />
unit cool down.<br />
34. •Adjust the brightness and<br />
angle of the LCD monitor.<br />
( pg. 13)<br />
35.<br />
36.<br />
—<br />
—<br />
37. •Set it in the right position.<br />
( pg. 16)<br />
•Install a fully charged battery.<br />
( pg. 10, 11)<br />
38. •Set it in the right position.<br />
( pg. 17)<br />
39. •Push in the memory card a<br />
few more times. ( pg. 17)
40. Picture does not appear on the<br />
LCD monitor.<br />
41. Images on the LCD monitor<br />
are jittery.<br />
42. The LCD monitor, the<br />
viewfinder and the lens have<br />
become dirty (ex. fingerprints).<br />
40. •The viewfinder is pulled out.<br />
•The LCD monitor’s brightness<br />
setting is too dark.<br />
41. •The speaker volume is too<br />
<strong>gr</strong>eat.<br />
43. Time code does not appear. 43. •“TIME CODE” is set to<br />
“OFF”.<br />
44. An unusual mark appears. 44.<br />
—<br />
45. An error indication (E01, E02<br />
or E06) appears.<br />
46. An error indication (E03 or<br />
E04) appears.<br />
42.<br />
—<br />
45. •A malfunction of some kind<br />
has occurred. In this case the<br />
camcorder’s functions<br />
become unusable.<br />
46. •A malfunction of some kind<br />
has occurred. In this case the<br />
camcorder’s functions<br />
become unusable.<br />
EN 87<br />
40. •Push the viewfinder back in.<br />
•Adjust the brightness of the<br />
LCD monitor. ( pg. 13)<br />
•If the monitor is tilted<br />
upward 180 de<strong>gr</strong>ees, open<br />
the monitor fully. ( pg. 13)<br />
41. •Turn the speaker volume<br />
down. ( pg. 22)<br />
42. •Wipe them gently with soft<br />
cloth. Wiping strongly can<br />
cause damage. ( pg. 91)<br />
43. •Set “TIME CODE” to “ON”.<br />
( pg. 38, 49, 52)<br />
44. •Check the section of the<br />
manual that explains LCD<br />
monitor/viewfinder<br />
indications. ( pg. 96 – 99)<br />
45. •Remove the power supply<br />
(battery pack, etc.) and wait a<br />
few minutes for the<br />
indication to clear. When it<br />
does, you can resume using<br />
the camcorder.<br />
If the indication remains<br />
even though you repeat the<br />
above two or three times,<br />
please consult your nearest<br />
<strong>JVC</strong> dealer. Do not eject the<br />
cassette. This will cause<br />
damage to the tape.<br />
46. •Eject the cassette once and<br />
re-insert it, then check if the<br />
indication clears. When it<br />
does, you can resume using<br />
the camcorder.<br />
If the indication remains<br />
even though you repeat the<br />
above two or three times,<br />
please consult your nearest<br />
<strong>JVC</strong> dealer.
88 EN CAUTIONS<br />
General Battery Precautions<br />
If the remote control is not functioning even if it is<br />
being operated correctly, the batteries are<br />
exhausted. Replace them with fresh ones.<br />
Use only the following batteries: AAA (R03) size x 2<br />
Please make note of the following rules for battery<br />
use. When misused, the batteries can leak or<br />
explode.<br />
1. When replacing batteries, refer to page 66.<br />
2. Do not use any different size of batteries from<br />
those specified.<br />
3. Be sure to install batteries in the correct<br />
direction.<br />
4. Do not use rechargeable batteries.<br />
5. Do not expose the batteries to excessive heat as<br />
they can leak or explode.<br />
6. Do not dispose of the batteries in a fire.<br />
7. Remove the batteries from the unit if it is to be<br />
stored for an extended period to avoid battery<br />
leakage which can cause malfunctions.<br />
8. Do not recharge the provided batteries.<br />
Battery Packs<br />
The supplied battery pack<br />
is a lithium-ion battery.<br />
Before using the supplied<br />
battery pack or an<br />
optional battery pack, be<br />
sure to read the following Terminals<br />
cautions:<br />
1. To avoid hazards…<br />
...do not burn.<br />
...do not short-circuit the terminals. When<br />
transporting, make sure the provided battery<br />
cap is attached to the battery. If the battery cap<br />
is misplaced, carry the battery in a plastic bag.<br />
...do not modify or disassemble.<br />
...do not expose the battery to temperatures<br />
exceeding 60°C, as this may cause the battery<br />
to overheat, explode or catch fire.<br />
...use only specified chargers.<br />
2. To prevent damage and prolong service life…<br />
...do not subject to unnecessary shock.<br />
...charge in an environment where temperatures<br />
are within the tolerances shown in the chart<br />
below. This is a chemical reaction type<br />
battery — cooler temperatures impede<br />
chemical reaction, while warmer temperatures<br />
can prevent complete charging.<br />
...store in a cool, dry place. Extended exposure<br />
to high temperatures will increase natural<br />
discharge and shorten service life.<br />
...fully charge and then fully discharge the<br />
battery every 6 months when storing the<br />
battery pack over a long period time.<br />
... remove from charger or powered unit when<br />
not in use, as some machines use current even<br />
when switched off.<br />
NOTES:<br />
● It is normal for the battery pack to be warm after<br />
charging, or after use.<br />
Temperature Range Specifications<br />
Charging........10°C to 35°C<br />
Operation ......0°C to 40°C<br />
Storage ..........–10°C to 30°C<br />
● Recharging time is based on room temperature of<br />
20°C.<br />
● The lower the temperature, the longer recharging<br />
takes.<br />
Cassettes<br />
To properly use and store your cassettes, be sure to<br />
read the following cautions:<br />
1. During use…<br />
... make sure the cassette bears the Mini DV<br />
mark.<br />
... be aware that recording onto prerecorded<br />
tapes automatically erases the previously<br />
recorded <strong>video</strong> and audio signals.<br />
... make sure the cassette is positioned properly<br />
when inserting.<br />
... do not load and unload the cassette repeatedly<br />
without allowing the tape to run at all. This<br />
slackens the tape and can result in damage.<br />
... do not open the front tape cover. This exposes<br />
the tape to fingerprints and dust.<br />
2. Store cassettes…<br />
... away from heaters or other heat sources.<br />
... out of direct sunlight.<br />
... where they won’t be subject to unnecessary<br />
shock or vibration.<br />
... where they won’t be exposed to strong<br />
magnetic fields (such as those generated by<br />
motors, transformers or magnets).<br />
... vertically, in their original cases.
EN 89<br />
Memory Cards<br />
To properly use and store your memory cards, be<br />
sure to read the following cautions:<br />
1. During use…<br />
...make sure the memory card bears the SD or<br />
MultiMediaCard mark.<br />
...make sure the memory card is positioned<br />
properly when inserting.<br />
2. While the memory card is being accessed<br />
(during recording, playback, deletion,<br />
initialisation, etc.)…<br />
...never unload the memory card and never turn<br />
off the camcorder.<br />
3. Store memory cards…<br />
...away from heaters or other heat sources.<br />
...out of direct sunlight.<br />
...where they won’t be subject to unnecessary<br />
shock or vibration.<br />
...where they won’t be exposed to strong<br />
magnetic fields (such as those generated by<br />
motors, transformers or magnets).<br />
LCD Monitor<br />
1. To prevent damage to the LCD monitor,<br />
DO NOT…<br />
...push it strongly or apply any shocks.<br />
...place the camcorder with the LCD monitor on<br />
the bottom.<br />
2. To prolong service life . . .<br />
...avoid rubbing it with coarse cloth.<br />
3. Be aware of the following phenomena for LCD<br />
monitor use.<br />
These are not malfunctions:<br />
•While using the camcorder, the surface around<br />
the LCD monitor and/or the back of the LCD<br />
monitor may heat up.<br />
•If you leave power on for a long time, the<br />
surface around the LCD monitor becomes hot.<br />
Main Unit<br />
1. For safety, DO NOT…<br />
...open the camcorder’s chassis.<br />
...disassemble or modify the unit.<br />
...short-circuit the terminals of the battery pack.<br />
Keep it away from metallic objects when not in<br />
use.<br />
...allow inflammables, water or metallic objects<br />
to enter the unit.<br />
...remove the battery pack or disconnect the<br />
power supply while the power is on.<br />
...leave the battery pack attached when the<br />
camcorder is not in use.<br />
2. Avoid using the unit…<br />
...in places subject to excessive humidity or dust.<br />
...in places subject to soot or steam such as near<br />
a cooking stove.<br />
... in places subject to excessive shock or<br />
vibration.<br />
... near a television set.<br />
... near appliances generating strong magnetic or<br />
electric fields (speakers, broadcasting<br />
antennas, etc.).<br />
... in places subject to extremely high (over 40°C)<br />
or extremely low (under 0°C) temperatures.<br />
3. DO NOT leave the unit…<br />
... in places of over 50°C.<br />
... in places where humidity is extremely low<br />
(below 35%) or extremely high (above 80%).<br />
... in direct sunlight.<br />
... in a closed car in summer.<br />
... near a heater.<br />
4. To protect the unit, DO NOT…<br />
... allow it to become wet.<br />
... drop the unit or strike it against hard objects.<br />
... subject it to shock or excessive vibration<br />
during transportation.<br />
... keep the lens directed at extremely bright<br />
objects for long periods.<br />
... expose the lens to direct sunlight.<br />
... carry it by holding the LCD monitor or the<br />
viewfinder.<br />
... swing it excessively when using the hand strap<br />
or the <strong>gr</strong>ip.<br />
... swing the soft <strong>camera</strong> case excessively when<br />
the camcorder is inside it.<br />
5. Dirty heads can cause the following problems:<br />
•No picture during playback.<br />
•Blocks of noise appear during playback.<br />
•During recording or playback, the Head Clog<br />
Warning indicator “ ” appears.<br />
•Recording cannot be performed properly.<br />
In such cases, use an optional cleaning cassette.<br />
Insert it and play back. If the cassette is used more<br />
than once consecutively, damage to the <strong>video</strong> heads<br />
may result. After the camcorder plays back for about<br />
20 seconds, it stops automatically. Also refer to the<br />
cleaning cassette’s instructions.<br />
If, after using the cleaning cassette, the problems still<br />
exist, consult your nearest <strong>JVC</strong> dealer.<br />
Mechanical moving parts used to move the <strong>video</strong><br />
heads and <strong>video</strong> tape tend to become dirty and<br />
worn out over time. In order to maintain a clear<br />
picture at all times, periodic check-ups are<br />
recommended after using the unit for about 1,000<br />
hours. For periodic check-ups please consult your<br />
nearest <strong>JVC</strong> dealer.
90 EN<br />
How To Handle A CD-ROM<br />
•Take care not to soil or scratch the mirror surface<br />
(opposite to the printed surface). Do not write<br />
anything or put a sticker on either the front or back<br />
surface. If the CD-ROM gets dirty, gently wipe it<br />
with a soft cloth outward from the centre hole<br />
using a circular motion.<br />
•Do not use conventional disc cleaners or cleaning<br />
spray.<br />
•Do not bend the CD-ROM or touch its mirror<br />
surface.<br />
•Do not store your CD-ROM in a dusty, hot or<br />
humid environment. Keep it away from direct<br />
sunlight.<br />
CAUTIONS (cont.)<br />
About moisture condensation...<br />
● You have observed that pouring a cold liquid<br />
into a glass will cause drops of water to form on<br />
the glass’ outer surface. This same phenomenon<br />
occurs on the head drum of a camcorder when<br />
it is moved from a cool place to a warm place,<br />
after heating a cold room, under extremely<br />
humid conditions or in a place directly<br />
subjected to the cool air from an air conditioner.<br />
● Moisture on the head drum can cause severe<br />
damage to the <strong>video</strong> tape, and can lead to<br />
internal damage to the camcorder itself.<br />
Serious malfunctioning<br />
If malfunctioning occurs, stop using the unit<br />
immediately and consult your local <strong>JVC</strong> dealer.<br />
The camcorder is a microcomputer-controlled<br />
device. External noise and interference (from a TV,<br />
a radio, etc.) might prevent it from functioning<br />
properly. In such cases, first disconnect its power<br />
supply unit (battery pack, AC Adapter, etc.) and<br />
wait a few minutes and then re-connect it and<br />
proceed as usual from the beginning.
USER MAINTENANCE<br />
EN 91<br />
1 Turn off the camcorder.<br />
2 Slide down and hold OPEN/EJECT in the<br />
direction of the arrow, then pull the cassette<br />
holder cover open until it locks. The cassette<br />
holder opens automatically. Remove the cassette.<br />
3 Press “PUSH HERE” to close the cassette holder.<br />
● Once the cassette holder is closed, it recedes<br />
automatically. Wait until it recedes completely<br />
before closing the cassette holder cover.<br />
4 Slide and hold the BATT.RELEASE tab to the right<br />
1 and remove the battery pack 2.<br />
.<br />
After Use<br />
Cassette holder<br />
Remove.<br />
Cassette holder cover<br />
Cleaning The Camcorder<br />
1 To clean the exterior, wipe gently with a soft<br />
cloth.<br />
Put the cloth in diluted mild soap and wring it<br />
well to wipe off heavy dirt. Then wipe again with<br />
a dry cloth.<br />
2 Open the LCD monitor. Wipe gently with a soft<br />
cloth. Be careful not to damage the monitor.<br />
Close the LCD monitor.<br />
3 To clean the lens, blow it with a blower brush,<br />
then wipe gently with lens cleaning paper.<br />
4 Pull out the viewfinder fully.<br />
5 Open the viewfinder cleaning hatch in the<br />
direction of the arrow A.<br />
Insert a lens blower or soft cloth into the gap at<br />
the side of the viewfinder and clean the interior<br />
of the viewfinder with it B.<br />
6 Close the hatch until it locks in place and push<br />
the viewfinder back in.<br />
NOTES:<br />
● Avoid using strong cleaning agents such as<br />
benzine or alcohol.<br />
● Cleaning should be done only after the battery<br />
pack has been removed or other power units have<br />
been disconnected.<br />
● Mould may form if the lens is left dirty.<br />
● When using a cleaner or chemically treated cloth<br />
refer to the cautions of each product.<br />
PUSH HERE<br />
OPEN/EJECT<br />
Switch<br />
Hatch<br />
Lens blower<br />
BATT.RELEASE Tab
92 EN SPECIFICATIONS<br />
* GR-DVX707 only<br />
Camcorder<br />
For General<br />
Power supply : DC 11.0 V (Using AC Adapter)<br />
DC 7.2 V (Using battery pack)<br />
Power consumption<br />
LCD monitor off, viewfinder on : Approx. 4.5 W (GR-DVX707)/Approx. 3.8 W (GR-DVX507/407/400)<br />
LCD monitor on, viewfinder off : Approx. 5.4 W (GR-DVX707)/Approx. 4.7 W (GR-DVX507/407/400)<br />
Dimensions (W x H x D) : 54 mm x 113.5 mm x 96 mm<br />
(with the LCD monitor closed and the viewfinder pushed back in)<br />
Weight : Approx. 490 g (GR-DVX707/507)<br />
(incl. <strong>gr</strong>ip belt)<br />
Approx. 480 g (GR-DVX407/400)<br />
(incl. <strong>gr</strong>ip belt)<br />
Operating temperature : 0°C to 40°C<br />
Operating humidity : 35% to 80%<br />
Storage temperature : –20°C to 50°C<br />
Pickup : 1/3.8” CCD (GR-DVX707)<br />
1/4” CCD (GR-DVX507/407/400)<br />
Lens : F 1.8, f = 3.8 mm to 38 mm, 10:1 power zoom lens (GR-DVX707)<br />
F 1.8, f = 3.6 mm to 36 mm, 10:1 power zoom lens (GR-DVX507/<br />
407/400)<br />
Filter diameter : ø27 mm<br />
LCD monitor : 2.5” diagonally measured, LCD panel/TFT active matrix system<br />
Viewfinder : Electronic viewfinder with 0.44” black/white LCD<br />
Speaker : Monaural<br />
For Digital Video Camera<br />
Format : DV format (SD mode)<br />
Signal format : PAL standard<br />
Recording/Playback format : Video : Digital component recording<br />
Audio : PCM <strong>digital</strong> recording, 32 kHz 4-channel (12-bit), 48 kHz<br />
2-channel (16-bit)<br />
Cassette : Mini DV cassette<br />
Tape speed : SP: 18.8 mm/s<br />
LP: 12.5 mm/s<br />
Maximum recording time<br />
(using 80 min. cassette)<br />
: SP: 80 min.<br />
LP: 120 min.<br />
For Digital Still Camera (GR-DVX707/507 only)<br />
Storage media : SD Memory Card/MultiMediaCard<br />
Compression system : Still image : JPEG (compatible)<br />
Moving image*: MPEG4 (compatible)<br />
File size<br />
Still Image : 3 modes (1280 x 960 pixels*/1024 x 768 pixels/640 x 480 pixels)<br />
Moving Image* : 1 mode (160 x 120 pixels)<br />
Picture quality : 2 modes (FINE/STANDARD)<br />
Approximate number of storable images<br />
: pg. 50
EN 93<br />
For Connectors<br />
AV<br />
Video output : 1 V (p-p), 75 Ω, analogue<br />
Audio output : 300 mV (rms), 1 kΩ, analogue, stereo<br />
Headphone output<br />
: Stereo<br />
(GR-DVX707 only)<br />
S-VIDEO : Y: 1 V (p-p), 75 Ω, analogue output<br />
C: 0.29 V (p-p), 75 Ω, analogue output<br />
DV<br />
Input/output<br />
: 4-pin, IEEE 1394 compliant<br />
(GR-DVX707/507/407 only)<br />
Output<br />
: 4-pin, IEEE 1394 compliant<br />
(GR-DVX400 only)<br />
USB (GR-DVX707/507 only) : 5-pin<br />
EDIT (GR-DVX707/507 only) : ø3.5 mm, 2-pole<br />
JLIP (GR-DVX407/400 only) : ø3.5 mm, 4-pole<br />
PC (GR-DVX407/400 only) : ø2.5 mm, 3-pole<br />
AC Adapter<br />
For General<br />
Power requirement : AC 110 V to 240 Vd, 50 Hz/60 Hz<br />
Output : DC 11.0 V G, 1.0 A<br />
Specifications shown are for SP mode unless otherwise indicated. E & O.E. Design and specifications subject<br />
to change without notice.
94 EN INDEX Controls, Connectors And Indicators<br />
1<br />
PLAY<br />
OFF<br />
A<br />
M<br />
2<br />
3<br />
4<br />
5<br />
6<br />
7 8<br />
9<br />
0<br />
q<br />
w<br />
e<br />
r<br />
t
EN 95<br />
Controls<br />
a •Power Zoom Ring [T/W].................... pg. 20<br />
•Speaker Volume Control.................... pg. 22<br />
b Recording Start/Stop Button................ pg. 19<br />
c Power Switch [A, M, P, OFF].......... pg. 14<br />
d Lock Button ......................................... pg. 14<br />
e •Snapshot Button [SNAPSHOT] .... pg. 27, 53<br />
•Information Button [INFO] (GR-DVX707/507<br />
only) .................................................. pg. 30<br />
f •E-Mail Clip Recording Button [E-MAIL]<br />
(GR-DVX707 only)....................... pg. 60, 61<br />
•Index Button [INDEX]<br />
(GR-DVX707/507 only) ......... pg. 30, 59, 71<br />
•Exposure Button [EXPOSURE]<br />
(GR-DVX407/400 only) ..................... pg. 56<br />
g •Menu Wheel [MENU, +,–]................. pg. 38<br />
•LCD Monitor Brightness Control<br />
[BRIGHT, +,–].................................... pg. 13<br />
h Battery Release Tab [BATT.RELEASE].... pg. 10<br />
i Cassette Open/Eject Switch<br />
[OPEN/EJECT]...................................... pg. 16<br />
j •Play/Pause Button [4/9] .................. pg. 22<br />
•Backlight Compensation Button<br />
[BACKLIGHT] .................................... pg. 57<br />
k •Fast-Forward Button [5]................ pg. 22<br />
•Night-Scope Button [NIGHT] ............ pg. 53<br />
l VIDEO/MEMORY Switch [VIDEO/MEMORY]<br />
(GR-DVX707/507 only) ....................... pg. 14<br />
m •Rewind Button [3] ........................ pg. 22<br />
•Focus Adjustment Button<br />
[FOCUS] ............................................ pg. 55<br />
n •Stop Button [8] ................................. pg. 22<br />
•Digital Sound Button [D.SOUND]<br />
(GR-DVX707 only)............................. pg. 59<br />
•D.S.C. Playback Select Button [SELECT]<br />
(GR-DVX707 only)..................... pg. 28 – 34<br />
o Dioptre Adjustment Control ................ pg. 12<br />
Connectors<br />
The connectors are located beneath the covers.<br />
P S-Video Output Connector<br />
[S-VIDEO]................................ pg. 24, 62, 74<br />
Q •Edit Connector [EDIT]<br />
(GR-DVX707/507 only) ..................... pg. 74<br />
•J Terminal [JLIP (Joint Level Interface<br />
Protocol)] (GR-DVX407/400 only)..... pg. 74<br />
You can also connect to a JLIP-compatible<br />
camcorder or VCR to control it from the<br />
computer using the optional Software HS-<br />
V16KITE.<br />
R Headphone Connector [ ]<br />
(GR-DVX707 only)............................... pg. 70<br />
No sound is output from the speaker when<br />
headphones are connected to this connector.<br />
S Audio/Video Output Connector<br />
[AV] ......................................... pg. 24, 62, 74<br />
T DC Input Connector [DC] ............. pg. 10, 11<br />
U •USB (Universal Serial Bus) Connector<br />
(GR-DVX707/507 only) ...................... pg. 78<br />
•PC Connector<br />
(GR-DVX407/400 only) ..................... pg. 78<br />
V Digital Video Connector [DV IN/OUT<br />
(GR-DVX707/507/407) or DV OUT<br />
(GR-DVX400)] (i.Link*) ............ pg. 63, 64, 78<br />
* i.Link refers to the IEEE1394-1995 industry<br />
specification and extensions thereof. The logo<br />
is used for products compliant with the i.Link<br />
standard.<br />
Indicators<br />
A Power Lamp [POWER].................... pg. 14, 19<br />
B Charge Lamp [CHARGE] ...................... pg. 10<br />
C Tally Lamp ...................................... pg. 19, 48<br />
Other Parts<br />
a LCD Monitor .................................. pg. 13, 20<br />
b Viewfinder............................................ pg. 12<br />
c Viewfinder Cleaning Hatch .................. pg. 91<br />
d Speaker ................................................ pg. 22<br />
e Cassette Holder Cover.......................... pg. 16<br />
f Grip Belt Eyelet ...................................... pg. 6<br />
g Camera Sensor<br />
Be careful not to cover this area, a sensor<br />
necessary for shooting is built-in here.<br />
h Stereo Microphone............................... pg. 70<br />
i Lens<br />
j Flash Sensor (GR-DVX707/507 only)<br />
Be careful not to cover this area, as it contains a<br />
sensor required by the flash.<br />
k Flash (GR-DVX707/507 only)............... pg. 54<br />
l Remote Sensor ..................................... pg. 66<br />
m Card Cover [MEMORY CARD]<br />
(GR-DVX707/507 only)........................ pg. 17<br />
n Battery Pack Mount.............................. pg. 10<br />
o Stud Hole<br />
p Tripod Mounting Socket ....................... pg. 13
96 EN INDEX Indications<br />
Indications<br />
LCD Monitor/Viewfinder Indications During Video Recording Only<br />
1 2 3 4 5<br />
LP1 00 min<br />
REC<br />
6<br />
7<br />
SOUND<br />
12BIT<br />
8<br />
15:55<br />
0<br />
9<br />
a Selected Wipe/Fader Effect Indicator<br />
( pg. 40, 41)<br />
b Selected Wide Mode Indicator ( pg. 46)<br />
c Tape Running Indicator ( pg. 19)<br />
(Rotates while tape is running.)<br />
d Recording Speed Mode (SP/LP) ( pg. 44)<br />
e Tape Remaining Time ( pg. 19)<br />
f •REC: (Appears during recording) ( pg. 19)<br />
•PAUSE: (Appears during Record-Standby mode)<br />
( pg. 19)<br />
g Insert Editing/Insert Editing Pause Mode<br />
( pg. 72)<br />
h Wind Cut Indicator ( pg. 47)<br />
i Sound Mode Indicator ( pg. 44)<br />
(Appears for approx. 5 seconds after turning on<br />
the camcorder)<br />
j Time Code ( pg. 49, 52)
EN 97<br />
LCD Monitor/Viewfinder Indications During D.S.C. Recording Only (GR-DVX707/507 only)<br />
1 2 3 4 5<br />
1024<br />
15<br />
00:<br />
15<br />
6<br />
a Image Size: 1280 (1280 x 960) (GR-DVX707<br />
only), 1024 (1024 x 768) or 640 (640 x 480)<br />
( pg. 50)<br />
b Shooting Icon ( pg. 27)<br />
(Appears and blinks during shooting.)<br />
c Card Icon ( pg. 27)<br />
(Appears during shooting and blinks when a<br />
memory card is not loaded: (SD Memory<br />
Card) or (MultiMediaCard).)<br />
d Picture Quality: F (FINE) and S (STANDARD) (in<br />
order of quality) ( pg. 50)<br />
e •Remaining Number Of Shot ( pg. 27)<br />
(Displays the approximate remaining number of<br />
shots that can be stored. The number increases<br />
or decreases depending on the Picture Quality/<br />
Image Size, etc.)<br />
•Memory Card Remaining Time For E-Mail Clip<br />
Recording (GR-DVX707 only) ( pg. 60)<br />
f E-Mail Clip Recording Time (GR-DVX707 only)<br />
( pg. 60)
98 EN<br />
INDEX Indications (cont.)<br />
LCD Monitor/Viewfinder Indications During Both Video And D.S.C. Recording<br />
9 0g<br />
1<br />
2 3<br />
4<br />
5<br />
6<br />
7<br />
8<br />
3<br />
40x<br />
3<br />
W T<br />
EXPLOSION<br />
O<br />
10 . 11<br />
.<br />
10<br />
: 0 2<br />
00<br />
q<br />
w<br />
e<br />
r<br />
y<br />
t<br />
a Operation Mode ( pg. 14)<br />
b • : Night-Scope Indicator ( pg. 53)<br />
(Appears when Night-Scope is engaged.)<br />
• : Gain Up Mode ( pg. 45)<br />
(Appears when “GAIN UP” is set to “AUTO”<br />
and the shutter speed is automatically adjusted.)<br />
c Red Eye Reduction Indicator (GR-DVX707/507<br />
only) ( pg. 54)<br />
(Appears when the “FLASH” is set to<br />
“AUTO C”.)<br />
d White Balance Indicator ( pg. 58)<br />
e • : Backlight Compensation Indicator<br />
( pg. 57)<br />
•±: Exposure Adjustment Indicator ( pg. 56)<br />
f Selected Pro<strong>gr</strong>am AE With Special Effects<br />
Indicator ( pg. 42, 43)<br />
g Iris Lock Indicator ( pg. 57)<br />
h Digital Image Stabiliser (“DIS”) ( pg. 46)<br />
i Approximate Zoom Ratio ( pg. 20)<br />
(Appears during zooming.)<br />
j Zoom Indicator ( pg. 20)<br />
(Appears during zooming.)<br />
(The level indicator g moves.)<br />
k O: (Appears when taking Snapshot)<br />
( pg. 53)<br />
l Flash Indicator (GR-DVX707/507 only)<br />
( pg. 54)<br />
(Appears when the flash is ready. A number<br />
appears next to the indication after adjusting the<br />
brightness of the flash.)<br />
m • EXPLOSION: Selected Digital Sound Effect<br />
(GR-DVX707 only) ( pg. 59)<br />
•BRIGHT: Brightness Control Indicator (LCD<br />
monitor) ( pg. 13)<br />
(The level indicator g moves.)<br />
n Battery Indicator ( pg. 100)<br />
o Date/Time ( pg. 15)<br />
p Manual Focus Adjustment Indicator ( pg. 55)
EN 99<br />
LCD Monitor/Viewfinder Indications During Video Playback<br />
a Sound Mode Indicator ( pg. 51)<br />
b Blank Search Indicator ( pg. 23)<br />
c Tape Speed ( pg. 44)<br />
12B<br />
I T / SOUND1<br />
L<br />
BLANK<br />
SEARCH<br />
VOLUME<br />
20<br />
: 21<br />
: 25<br />
8<br />
1 2 3 4 5<br />
g<br />
7<br />
SP<br />
MIC<br />
10 . 01<br />
. 02<br />
10<br />
: 0 0<br />
6<br />
d •U : Playback<br />
•5 : Fast-Forward/Shuttle Search<br />
•3 : Rewind/Shuttle Search<br />
•9 : Pause<br />
•9 U : Forward Slow-Motion<br />
•Y 9 : Reverse Slow-Motion<br />
•D : Audio Dubbing<br />
•9D : Audio Dubbing Pause<br />
(Appear while a tape is running.)<br />
e Sound Input For Audio Dubbing ( pg. 70, 71)<br />
f Date/Time ( pg. 49, 52)<br />
g •VOLUME : Volume Level Indicator (Speaker or<br />
headphone (GR-DVX707 only)) ( pg. 22)<br />
(The level indicator g moves.)<br />
•BRIGHT : Brightness Control Indicator (LCD<br />
monitor) ( pg. 13)<br />
(The level indicator g moves.)<br />
h Time Code ( pg. 49, 52)<br />
LCD Monitor/Viewfinder Indications During D.S.C. Playback (GR-DVX707/507 only)<br />
a Operation Mode Indicator ( pg. 31)<br />
b Brightness Control Indicator (LCD monitor)<br />
( pg. 13)<br />
(The level indicator g moves.)<br />
1<br />
BR I GHT<br />
2 g
100 EN INDEX Indications (cont.)<br />
Warning Indications<br />
Indications<br />
CHECK TAPE’S ERASE<br />
PROTECTION TAB<br />
HEAD CLEANING<br />
REQUIRED USE<br />
CLEANING CASSETTE<br />
CONDENSATION<br />
OPERATION PAUSED<br />
PLEASE WAIT<br />
TAPE!<br />
Function<br />
Displays the battery remaining power.<br />
Remaining power level: high<br />
Remaining power level: exhausted<br />
As the battery power comes close to nil, the battery indicator blinks.<br />
When the battery power is exhausted, power turns off automatically.<br />
Appears when no tape is loaded. ( pg. 16)<br />
Appears when the erase protection tab is set to “SAVE” while the Power Switch is<br />
set to “A” or “M” and the VIDEO/MEMORY Switch is set to “VIDEO”.<br />
( pg. 14)<br />
Appears if dirt is detected on the heads during recording. Use an optional<br />
cleaning cassette. ( pg. 91)<br />
Appears if condensation occurs. When this indication is displayed, wait more<br />
than 1 hour until condensation disappears.<br />
Appears if a tape is not loaded when the Recording Start/Stop Button or<br />
SNAPSHOT Button is pressed while the Power Switch is set to “A” or “M” and<br />
the VIDEO/MEMORY Switch is set to “VIDEO”.<br />
TAPE END Appears when the tape ends during recording or playback. ( pg. 81)<br />
DIFFERENT<br />
FORMATTED TAPE<br />
SET DATE/TIME!<br />
LENS CAP<br />
Appears if a tape in another format is loaded.<br />
● Appears when the date/time is not set. ( pg. 15)<br />
● Appears when the built-in clock (lithium) battery is discharged and the<br />
previously set date/time is erased. ( pg. 15)<br />
Appears for 5 seconds after power is turned on if the lens cap is attached.<br />
A. DUB ERROR! Appears if Audio Dubbing is attempted on a blank portion of a tape. ( pg. 70)<br />
A. DUB ERROR!<br />
<br />
<br />
<br />
<br />
● Appears if Audio Dubbing is attempted on a tape recorded in the LP mode.<br />
( pg. 70)<br />
● Appears if Audio Dubbing is attempted on a tape recorded in 16-bit audio.<br />
( pg. 70)<br />
● Appears if A. DUB (D) on the remote control is pressed when the erase<br />
protection tab is set to “SAVE”. ( pg. 70)<br />
● Appears if Audio Dubbing using Digital Sound Effects is attempted when a<br />
memory card is not loaded. ( pg. 71)<br />
INSERT ERROR! Appears if Insert Editing is attempted on a blank portion of a tape. ( pg. 72)
Indications<br />
INSERT ERROR!<br />
<br />
<br />
MEMORY IS FULL<br />
COPYING FAILED<br />
MEMORY CARD!<br />
or PLEASE INSERT<br />
CARD<br />
PLEASE FORMAT<br />
NO SOUND FILES<br />
NO IMAGE STORED<br />
NO E-MAIL CLIP<br />
STORED<br />
CARD ERROR!<br />
UNSUPPORTED<br />
FILES<br />
CHECK CARD’S<br />
WRITE PROTECTION<br />
SWITCH<br />
E01, E02 or E06<br />
UNIT IN SAFEGUARD<br />
MODE REMOVE AND<br />
REATTACH BATTERY<br />
E03 or E04<br />
UNIT IN SAFEGUARD<br />
MODE EJECT AND<br />
REINSERT TAPE<br />
Function<br />
EN 101<br />
● Appears if Insert Editing is attempted on a tape recorded in the LP mode.<br />
( pg. 72)<br />
● Appears if INSERT (I) on the remote control is pressed when the erase<br />
protection tab is set to “SAVE”. ( pg. 72)<br />
Appears when the memory card’s memory is full and shooting is not possible.<br />
● Appears if dubbing of copyguarded signals is attempted while this camcorder<br />
is being used as a recorder.<br />
● Appears in the following cases when dubbing from a tape to a memory card<br />
(as <strong>digital</strong> stills or <strong>video</strong> clips):<br />
– when no memory card is loaded.<br />
– when the memory card’s memory is full.<br />
– when the memory card is not formatted.<br />
– when a write-protected SD Memory Card is loaded. ( pg. 61, 65)<br />
Appears if there are no sound files stored on the memory card loaded when you<br />
attempt to record on a memory card or access data on a memory card.<br />
Appears when there is a problem with a memory card and its memory is<br />
corrupt, or it has not been initialised. Initialise the memory card. ( pg. 36)<br />
Appears if there are no sound files stored in the memory card when you attempt<br />
to use <strong>digital</strong> sound effects.<br />
Appears if there are no image files stored in the memory card when you attempt<br />
memory card playback.<br />
Appears if there are no <strong>video</strong> clip files stored in the memory card when you<br />
attempt memory card playback.<br />
Appears when the camcorder does not recognise the loaded memory card.<br />
Remove the memory card once and insert it again. Repeat these procedures<br />
until no indication appears. If the indication still appears, the memory card is<br />
corrupted.<br />
● Appears when a file in a format other than MP3 is selected.<br />
● Appears when playing back a file that is not compatible with DCF or a file<br />
with a size that is not compatible with this camcorder.<br />
● Appears when you attempt to shoot <strong>digital</strong> still images when the write<br />
protection tab on the SD Memory Card is set to the “LOCK” position.<br />
● Appears when you attempt MEMORY SELECT menu operation with a writeprotected<br />
SD Memory Card loaded.<br />
The error indications (E01, E02 or E06) show what type of malfunction has<br />
occurred. When an error indication appears, the camcorder turns off<br />
automatically. Remove the power supply (battery, etc.) and wait a few minutes<br />
for the indication to clear. When it does, you can resume using the camcorder. If<br />
the indication remains, consult your nearest <strong>JVC</strong> dealer.<br />
The error indications (E03 or E04) show what type of malfunction has occurred.<br />
When an error indication appears, the camcorder turns off automatically. Eject<br />
the cassette once and re-insert it, then check if the indication clears. When it<br />
does, you can resume using the camcorder. If the indication remains, consult<br />
your nearest <strong>JVC</strong> dealer.
102 EN TERMS<br />
A<br />
AC Adapter ...................................................10, 11<br />
Audio Dubbing ...................................................70<br />
Auto Focus ..........................................................55<br />
Auto Playback Of Images ....................................28<br />
Auto Shut Off ................................................19, 27<br />
B<br />
Backlight Compensation ......................................57<br />
Battery Pack ............................................10, 11, 88<br />
Beep (BEEP) .........................................................48<br />
Blank search (BLANK SRCH) .........................23, 51<br />
Brightness Adjustment Of The Display ................13<br />
Built-in Clock’s Rechargeable Lithium Battery .....15<br />
C<br />
Changing The Menu Settings ...............................38<br />
Channels (Left/Right) ...........................................51<br />
Charging The Battery Pack ..................................10<br />
Cleaning The Camcorder .....................................91<br />
Clock adjustment (CLOCK ADJ.) .........................15<br />
Connections<br />
Charging .......................................................10<br />
Dubbing ...............................................62 – 65<br />
Random Assemble Editing .....................73 – 77<br />
To A Personal Computer ...............................78<br />
To A TV Or VCR ...........................................24<br />
WebCam ......................................................79<br />
D<br />
Date/Time<br />
Display ...................................................49, 52<br />
Settings .........................................................15<br />
DCF (Design rule for Camera File system) ......27, 28<br />
Deleting Files ......................................................33<br />
Demonstration Mode (DEMO MODE) .............8, 48<br />
Digital Image Stabilisation (DIS) ..........................46<br />
Digital Sound Effects ...............................29, 59, 71<br />
Display setting (ON SCREEN) ..............................49<br />
DPOF Setting (Digital Print Order Format) .....34, 35<br />
Dubbing ......................................................62 – 65<br />
Dubbing from tape to memory card<br />
( COPY) .........................................51, 65<br />
E<br />
E-Mail Clip Recording ................................... 60, 61<br />
Erase Protection ............................................ 16, 17<br />
Exposure Control ................................................ 56<br />
F<br />
Fade-In/Out .................................................. 40, 41<br />
Fast-Forward The Tape ........................................ 22<br />
Flash (FLASH) ..................................................... 54<br />
Flash Brightness Adjustment (FLASH ADJ.) .......... 54<br />
Frame-By-Frame Playback ............................ 22, 68<br />
G<br />
Gain Up (GAIN UP) ............................................ 45<br />
Grip Adjustment ................................................. 12<br />
I<br />
ID number setting (ID NUMBER) ........................ 48<br />
Image Size (IMAGE SIZE) .................................... 50<br />
Index Playback Of Files ...................................... 30<br />
Indications on the LCD Monitor/<br />
Viewfinder .................................................. 96 – 99<br />
Indicators .................................................... 41 – 52<br />
Initialising A Memory Card ................................. 36<br />
Insert Editing ....................................................... 72<br />
Iris ...................................................................... 57<br />
Iris Lock .............................................................. 57<br />
J<br />
Journalistic Shooting ........................................... 20<br />
L<br />
Loading A Cassette .............................................. 16<br />
Loading A Memory Card ..................................... 17<br />
M<br />
Manual Focus ..................................................... 55<br />
Memory Card ................................................ 17, 89<br />
Menu Screen<br />
CAMERA ................................................ 44, 45<br />
D.S.C. Playback .................................... 31 – 36<br />
DISPLAY ................................................. 49, 52<br />
DSC .............................................................. 50<br />
MANUAL ............................................... 46, 47<br />
SYSTEM ............................................ 48, 49, 52<br />
VIDEO .......................................................... 51<br />
Motor Drive Mode .............................................. 53<br />
MultiMediaCard ............................................ 17, 89
EN 103<br />
N<br />
Night-Scope ........................................................53<br />
P<br />
Picture Quality (QUALITY) ..................................50<br />
Playback sound (SOUND MODE,<br />
12BIT MODE) .....................................................51<br />
Playback Special Effects ......................................69<br />
Playback Zoom ...................................................68<br />
Power Switch Position .........................................14<br />
Pro<strong>gr</strong>am AE With Special Effects (PROGRAM AE)<br />
Classic Film (CLASSIC FILM) .........................42<br />
Monotone (MONOTONE) ............................42<br />
Sepia (SEPIA) .................................................42<br />
Shutter Speed (SHUTTER) .............................42<br />
Slow Shutter (SLOW) ....................................43<br />
Snow (SNOW) ..............................................42<br />
Sports (SPORTS) ............................................42<br />
Spotlight (SPOTLIGHT) .................................42<br />
Strobe (STROBE) ...........................................42<br />
Twilight (TWILIGHT) ....................................42<br />
Protecting Files ..............................................31, 32<br />
Provided Accessories .............................................5<br />
R<br />
Random Assemble Editing ...........................73 – 77<br />
Recording media selection (REC SELECT) ............50<br />
Recording Mode (REC MODE) ......................44, 51<br />
Recording Time<br />
Battery Pack ..................................................10<br />
Tape .............................................................16<br />
Record-Standby ...................................................19<br />
Remaining Power Level .....................................100<br />
Remote Control ...................................................66<br />
Resetting Menu Settings (CAM RESET) .................49<br />
Rewind The Tape ................................................22<br />
S<br />
SD Memory Card ..........................................17, 89<br />
Self-Recording .....................................................20<br />
Set Remote/VCR Code .........................................73<br />
Shuttle Search .....................................................22<br />
Slow-Motion Playback ........................................68<br />
Snapshot .......................................................27, 53<br />
Snapshot Mode (SNAP MODE) ............................45<br />
Sound input (SOUND IN) ........................49, 70, 71<br />
Sound Mode (SOUND MODE) ......................44, 51<br />
Speaker Volume ..................................................22<br />
Specifications ................................................92, 93<br />
Still Playback .......................................................22<br />
Synchro adjustment (SYNCHRO) .........................77<br />
T<br />
Tally Lamp (TALLY) ....................................... 19, 48<br />
Telephoto Setting (TELE MACRO) ....................... 46<br />
Time Code (TIME CODE) ........................ 21, 49, 52<br />
Tripod Mounting ................................................. 13<br />
U<br />
Unloading A Cassette .......................................... 16<br />
Unloading A Memory Card ................................. 17<br />
V<br />
VIDEO/MEMORY Switch Position ....................... 14<br />
Viewfinder Adjustment ....................................... 12<br />
W<br />
WebCam ............................................................ 79<br />
White Balance (W.BALANCE) ....................... 43, 58<br />
Wide Mode (WIDE MODE)<br />
Cinema (CINEMA) ........................................ 46<br />
Squeeze (SQUEEZE) ..................................... 46<br />
Wide (S.WIDE) ............................................. 46<br />
Wind Cut (WIND CUT) ....................................... 47<br />
Wipe In/Out .................................................. 40, 41<br />
Z<br />
Zooming (ZOOM) ......................................... 20, 44
EN<br />
GR-DVX707<br />
GR-DVX507<br />
GR-DVX407<br />
GR-DVX400<br />
COPYRIGHT© 2002 VICTOR COMPANY OF JAPAN, LTD.<br />
EG/EK<br />
Printed in Japan<br />
0202HOV<br />
* ID * VP