lt-42fzd7 lt-46fzd7 lt-32fxd7 wide lcd panel tv - JVC
lt-42fzd7 lt-46fzd7 lt-32fxd7 wide lcd panel tv - JVC
lt-42fzd7 lt-46fzd7 lt-32fxd7 wide lcd panel tv - JVC

Create successful ePaper yourself
Turn your PDF publications into a flip-book with our unique Google optimized e-Paper software.
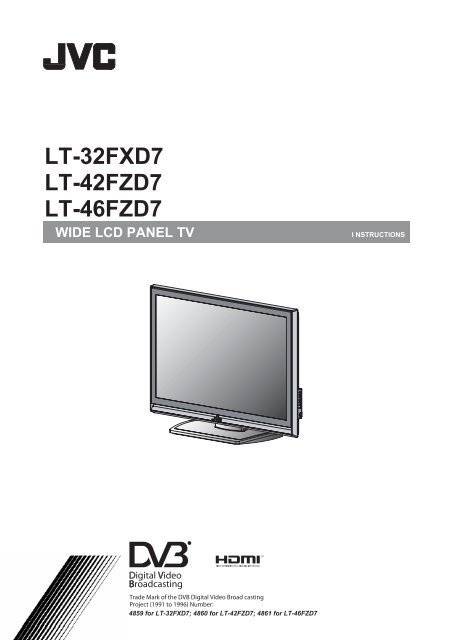
LT-32FXD7<br />
LT-42FZD7<br />
LT-46FZD7<br />
WIDE LCD PANEL TV<br />
I NSTRUCTIONS<br />
Digital Video<br />
Broadcasting<br />
Trade Mark of the DVB Digital Video Broad casting<br />
Project (1991 to 1996) Number:<br />
4859 for LT-32FXD7; 4860 for LT-42FZD7; 4861 for LT-46FZD7
Thank you for buying this <strong>JVC</strong> WIDE LCD PANEL TV<br />
To make sure you understand how to use your new TV, please read this manual thoroughly before you begin.<br />
(“LCD” stands for Liquid Crystal Display.)<br />
READ THESE INSTRUCTIONS.<br />
KEEP THESE INSTRUCTIONS.<br />
WARNING: TO PREVENT FIRE OR ELECTRIC SHOCK HAZARD,<br />
DO NOT EXPOSE THIS APPLIANCE TO RAIN OR MOISTURE.<br />
WARNING<br />
• Do not allow children to hang from the TV, place their elbows on the TV or lean<br />
against the TV. Doing so may cause the TV to fall over and lead to inquires.<br />
• The MAIN plug is used as the disconnect device, the disconnect device shall remain<br />
readily operable.<br />
• Do not defeat the safety purpose of the polarized or grounding-type plug. The<br />
protective earthling terminal shall be permanently connected to earth.<br />
CAUTION:<br />
• Operate only from the power source specified (AC 240V,<br />
50 Hz).<br />
• Avoid damaging the AC plug, and power cord. (Protect the<br />
power cord from being walked on or pinched particularly at<br />
plugs, convenience receptacles, and the point where they exit<br />
from the apparatus.)<br />
• When you are not using this unit for a long period of time, it is<br />
recommended that you disconnect the power cord from the<br />
main outlet.<br />
• Make enough room for inserting and removing the power plug.<br />
Place the TV as close to the outlet as possible. The main power<br />
supply for this TV is controlled by inserting or removing the<br />
power plug.<br />
NOTES:<br />
• The rating plate (serial number plate) and safety caution are<br />
on the back of the main unit.<br />
1
Point defects<br />
LCDs use collections of fine pixels to display images. While there is no problem with more than 99.99% of these pixels, please<br />
understand that a very small number of pixels may not light or may light all the time.<br />
Distance recommendations<br />
Avoid improper installation and never position the unit where good<br />
ventilation is impossible.<br />
When installing this TV, distance recommendations must be<br />
maintained between the set and the wall, as well as inside a tightly<br />
enclosed area or piece of furniture.<br />
Keep to the minimum distance guidelines shown for safe operation.<br />
150mm<br />
200mm<br />
150mm<br />
200mm<br />
50mm<br />
50mm<br />
Failure to take the following precautions may cause damage to the television or remote control.<br />
DO NOT block the TV’s ventilation openings or holes.<br />
(If the ventilation openings or holes are blocked by a newspaper or cloth, etc., the heat may not be able to get out.)<br />
DO NOT place anything on top of the TV.<br />
(Such as cosmetics or medicines, flower vases, potted plants, cups, etc.)<br />
DO NOT allow objects or liquid into the cabinet openings.<br />
(If water or liquid is allowed to enter this equipment, fire or electric shock may be caused.)<br />
DO NOT place any naked flame sources, such as lighted candles, on the TV.<br />
DO NOT install near any heat sources such as radiators, heat resisters, stoves, sunlight, or other apparatus (including amplifiers) that<br />
produce heat.<br />
The surface of the TV screen is easily damaged. Be very careful with it when handling the TV.<br />
Should the TV screen become soiled, wipe it with a soft dry cloth. Never rub it forcefully.<br />
Never use any cleaner or detergent on it.<br />
If there is a fau<strong>lt</strong>, unplug the unit and call a service technician. Do not attempt to repair it yourself or remove the rear cover.<br />
Note:<br />
Due to static electricity, the TV may be covered with dust.<br />
If this happens, wisp the TV with a soft cloth being careful not scratch the TV.<br />
Digital terrestrial broadcasting(DVB-T)service area<br />
A<strong>lt</strong>hough this TV can receive both Digital terrestrial broadcasting (DVB-T) and Analogue terrestrial broadcasting, depending on<br />
the area in which you live, you may not be able to receive Digital broadcasting (DVB-T).<br />
Cleaning the screen<br />
The screen is coated with a special thin film to reduce reflection. If this film is damaged, uneven colors, discoloration, scratches,<br />
and other problems that can not be repaired may occur. Pay attention to the following when handling the screen.<br />
• Do not use glue or adhesive tape on the screen.<br />
• Do not write on the screen.<br />
• Do not allow the screen to come in contact with any hard objects.<br />
• Do not allow condensation to form on the screen.<br />
• Do not use alcohol, thinner, benzene or other solvents on the screen.<br />
• Do not rub the screen hard.<br />
2
CONTENTS<br />
Setting up your TV.................................... 4<br />
Installation............................................................. 4<br />
Using the stand..................................................... 4<br />
Putting the batteries into the Remote control....... 5<br />
Remove the terminal cover................................... 5<br />
Connecting the aerial and video cassette<br />
recorder (VCR)..................................................... 6<br />
Initial settings............................................ 7<br />
TV buttons and functions......................... 8<br />
Turn the TV on from standby mode...................... 8<br />
Choose a TV channel........................................... 8<br />
Watch images from external devices................... 8<br />
Adjust the volume................................................. 8<br />
Using the Menu.................................................... 8<br />
Remote control buttons and<br />
functions.................................................... 9<br />
Turn the TV on or off from standby mode................. 9<br />
Choose a TV channel................................................ 9<br />
Adjust the volume.................................................... 10<br />
Watch images from external equipment.................. 10<br />
Hyper Surround....................................................... 10<br />
Displaying the source information........................... 10<br />
ZOOM function........................................................ 11<br />
Using the PCPIP function........................................ 12<br />
Operating a <strong>JVC</strong> brand VCR or DVD player........... 12<br />
Teletext function..................................... 13<br />
Basic operation................................................... 13<br />
Hold.................................................................... 13<br />
Sub-page............................................................ 14<br />
Reveal................................................................. 14<br />
Size..................................................................... 14<br />
Index................................................................... 14<br />
Cancel................................................................. 14<br />
INSTALL................................................... 19<br />
AUTO PROGRAM...............................................19<br />
MANUAL..............................................................19<br />
To edit the PR LIST menu...................................20<br />
Operation with the DTV menu................ 23<br />
Displaying the DTV menu....................................23<br />
INSTALLATION...................................................23<br />
EDIT PR LIST......................................................25<br />
SETTING FAVOURITE CHANNELS...................26<br />
CONFIGURATION ..............................................27<br />
Operation while watching DTV menu.....30<br />
Information Function............................................30<br />
Using the Electronic Program Guide(EPG).........30<br />
Displaying the subtitles........................................30<br />
PC MENU ................................................. 31<br />
PC PICTURE POSITION ....................................31<br />
PICTURE.............................................................31<br />
SOUND................................................................32<br />
PC support mode list ...........................................33<br />
Additional preparation............................ 34<br />
Connecting external equipment...........................34<br />
Troubleshooting...................................... 35<br />
Specifications.......................................... 37<br />
Using the TV’s menu.............................. 15<br />
Basic operation................................................... 15<br />
PICTURE SETTING................................. 16<br />
PICTURE MODE BRIGHT................................. 16<br />
Picture Adjustment............................................. 16<br />
WHITE BALANCE.............................................. 16<br />
SOUND..................................................... 17<br />
STEREO/I. II....................................................... 17<br />
Sound Adjustment.............................................. 17<br />
HDMI IN.............................................................. 17<br />
FEATURES.............................................. 18<br />
SLEEP TIMER.................................................... 18<br />
BLUE BACK........................................................ 18<br />
CHILD LOCK...................................................... 18<br />
3
Setting up your TV<br />
Installation<br />
Cautions for installation<br />
• Install the TV in a corner on a wall or on the floor so as to keep cords out of the way.<br />
• The TV will generate a slight amount of heat during operation. Ensure that sufficient space is available around the TV to<br />
allow satisfactory cooling. See “Distance recommendations” on page 2.<br />
Using the stand<br />
This TV comes with a Table Top Stand already<br />
attached.<br />
Tidy the cables:<br />
A cable holder which is used to keep the connection cables<br />
tidy is attached to the back of the stand.<br />
• The following illustration is LT-46FZD7.<br />
1<br />
2<br />
3<br />
4<br />
4
Setting up your TV<br />
Putting the batteries into the Remote control<br />
Use two AA/R6 dry cell batteries.<br />
Insert the batteries from the - end, making sure the + and - polarities are correct.<br />
• Follow the warnings printed on the batteries.<br />
• Battery life is about six months to one year, depending on your frequency of use.<br />
• The batteries we supply are only for setting up and testing your TV, please replace them as soon as you need to.<br />
• If the remote control does not work properly, replace the batteries.<br />
Remove the terminal cover<br />
There are connection terminals behind the cover of the rear of the TV. Remove the cover before connecting a DVD or VCR.<br />
The cover can be removed by removing the hooks in the left side of TV. To replace the cover, first connect the hook at the<br />
side of the cover to the TV and then insert the hooks.<br />
• Leave the cover off if they do not fit properly. Do not force to replace the covers. Doing so may cause damages of the<br />
connection cables and the cover.<br />
• The following illustration is LT-46FZD7.<br />
Press to<br />
remove.<br />
Cable cover<br />
5
Setting up your TV<br />
Connecting the aerial and VCR<br />
• The connecting cables are not provided. Use a good quality of 75-ohm coaxial cable to connect.<br />
• Use a fiber connector D to connect to digital sound equipment (DTV only)<br />
Caution<br />
• Turn off all the equipment including the TV before connecting anything.<br />
If you connect via a device with an antenna terminal such as a VCR, follow A <br />
B in the diagram.<br />
If connecting a VCR:<br />
1 Connect the aerial cable to the aerial input<br />
socket on the VCR, and connect the VCR and<br />
TV with another aerial cable<br />
2 Connect the VCR’s VIDEO OUT (video output)<br />
terminal and the TV’s VIDEO terminal with a<br />
video cable C<br />
To connect a VCR to the TV with an S-Video cable: Connect<br />
the VCR’s S-VIDEO OUT (S-VIDEO output) terminal and<br />
TV’s S-VIDEO terminal with an S-VIDEO cable, instead of<br />
connecting with a video cable. Note that the connections with<br />
a video cable will be ignored in case you connect a VCR to<br />
the TV with both video cable and S-VIDEO cable.<br />
3 Connect the VCR’s VIDEO OUT (audio L/R<br />
output) terminals and the TV’s AUDIO input<br />
terminals with an audio cable.<br />
• To connect more equipments, please see “Connecting<br />
external equipment” on page 34.<br />
• When receiving Digital terrestrial broadcasting (DVB-T),<br />
reception can suddenly be lost if the signal becomes<br />
weak. Use a correct instilled high performance antenna.<br />
• When connecting via a device with an antenna terminal<br />
such as a VCR, depending on the connection method,<br />
the signal may be weakened. If this happens, use a<br />
booster to increase the signal strength.<br />
• In areas with a lot of radio communication such as near<br />
ports or airports, noise may be introduced into the<br />
picture or sound. In such cases, reception may be<br />
improved by using a high-performance antenna.<br />
• Read the instruction manual of the devices which you<br />
connect to the TV.<br />
C<br />
L<br />
R<br />
D<br />
B<br />
A<br />
6
Initial settings<br />
When the TV is first turned on, it enters the initial setting<br />
mode. Follow the instructions on the on-screen display to<br />
make the initial settings.<br />
3 AUTO PROGRAM menu appears<br />
INSTALL<br />
/I button<br />
VCR/TV/<br />
DVD Switch<br />
AUTO PROGRAM<br />
:SELECT<br />
OK:MOVE<br />
4 Press the OK button to enter the<br />
AUTO PROGRAM.<br />
TV/DTV<br />
MENU<br />
AUTO PROGRAM<br />
START<br />
OK: START<br />
5 Press the OK button to start AUTO PROGRAM.<br />
AUTO PROGRAM<br />
NOW PROGRAMMING<br />
MENU:EXIT<br />
The AUTO PROGRAM menu appears and received TV<br />
channels are automatically stored.<br />
• To cancel the AUTO PROGRAM function:<br />
Press the MENU button.<br />
1 Make sure to set the VCR/TV/DVD switch to the<br />
TV position.<br />
• You cannot turn the TV on when the VCR/TV/DVD<br />
switch is set to the VCR or DVD position.<br />
2 Press the button on the remote control<br />
After a short interval the power lamp changes from red to<br />
green.<br />
After the TV channels have been registered in the<br />
program numbers, the PR LIST menu appears<br />
PR LIST<br />
01 -----<br />
02 -----<br />
03 -----<br />
04 -----<br />
05 -----<br />
06 -----<br />
07 -----<br />
08 -----<br />
09 -----<br />
10 -----<br />
11 -----<br />
12 -----<br />
13 -----<br />
14 -----<br />
15 -----<br />
16 -----<br />
17 -----<br />
18 -----<br />
19 -----<br />
20 -----<br />
21 -----<br />
22 -----<br />
23 -----<br />
24 -----<br />
25 -----<br />
26 -----<br />
27 -----<br />
28 -----<br />
29 -----<br />
30 -----<br />
NAME<br />
INSERT<br />
DELETE<br />
<br />
• If you want, you can now edit the program numbers<br />
using the AUTO PROGRAM function.<br />
For details, see “To edit the PR LIST menu” on page 20.<br />
7
TV buttons and functions<br />
Turn the TV on from standby mode<br />
Press the button or buttons to turn the<br />
TV on from standby mode<br />
Choose a TV channel<br />
Press the<br />
number<br />
buttons to choose a program<br />
Watch images from external devices<br />
Press the TV/AV button to choose a TV/AV<br />
Terminal<br />
TV mode<br />
EXT mode<br />
Last<br />
program<br />
number<br />
DTV<br />
VIDEO-1<br />
VIDEO-2<br />
1<br />
2<br />
PC<br />
VIDEO-3<br />
VIDEO-4<br />
3<br />
4<br />
Adjust the volume<br />
5<br />
6<br />
Press the -/+ buttons<br />
The volume level indicator appears.<br />
Using the Menu<br />
Use the MENU button.<br />
Refer to "Using the TV's menu"(see page 15) for details of<br />
using the menu.<br />
1 MENU switch<br />
2 TV/AV/OK button<br />
3 (Volume) -/+ buttons<br />
4 buttons<br />
5 (Standby) button<br />
6 Headphone jack (mini jack)<br />
8
Remote control buttons and functions<br />
1 Muting button<br />
2 Number buttons<br />
3 Information button<br />
4 Colour buttons<br />
5 TV/DTV button<br />
6<br />
7<br />
⊳/// buttons<br />
(Text)button<br />
8 button<br />
9 VCR/DVD/Teletext buttons<br />
10 (Favourite) button<br />
11 buttons<br />
12 ZOOM button<br />
13 (Hyper Surround) button<br />
14 (Standby) button<br />
15 VCR/TV/DVD switch<br />
16 AV button<br />
17 MENU button<br />
18 OK button<br />
19 BACK button<br />
20 Volume buttons<br />
21 GUIDE button<br />
22 SUBTITLE button<br />
23 button<br />
24 button<br />
Choose a TV channel<br />
Use the number buttons:<br />
Enter the program number of the channel<br />
using the number buttons.<br />
Turn the TV on or off from standby<br />
mode<br />
1 Make sure to set the VCR/TV/DVD switch to the<br />
TV position.<br />
• You cannot turn the TV on or off when the<br />
VCR/TV/ DVD switch is set to the VCR or DVD<br />
position.<br />
Example:<br />
• PR 6 press 6<br />
• PR 12 press1 and 2<br />
Use the buttons:<br />
Press the buttons to choose the<br />
program number you want.<br />
2 Press the (standby) button to turn the TV<br />
on or off.<br />
When the TV is turned on, the power lamp changes<br />
from red to green.<br />
• The power can be turned on by pressing<br />
buttons or Number buttons.<br />
• Check that the AC plug on the power cord from the<br />
TV is connected to AC outlet.<br />
9
Remote control buttons and functions<br />
Adjust the volume<br />
Press the buttons to adjust the volume.<br />
The volume indicator appears and the volume changes as<br />
you press the buttons.<br />
Muting the sound<br />
Press the (muting) button to turn off the<br />
sound.<br />
Pressing the (muting) button again returns the<br />
previous volume level.<br />
Watch images from external equipment<br />
Use the AV button:<br />
Press the AV button to choose an EXT<br />
terminal.<br />
TV mode<br />
Last<br />
program<br />
number<br />
DTV<br />
EXT mode<br />
VIDEO-1<br />
VIDEO-2<br />
Displaying the source information<br />
You can display the source information and current time on the<br />
screen.<br />
Press the (information) button to display the<br />
source information<br />
Pressing the (information) button changes the display as<br />
follows:<br />
01<br />
VIDEO-1<br />
TV<br />
VIDEO-1<br />
Signal source<br />
VIDEO-3<br />
PC<br />
VIDEO-4<br />
In the PC mode:<br />
If following message appears, the power lamp lights in amber<br />
and the TV goes in to reduced power mode.<br />
• The source information and current time switched by<br />
(information) button.<br />
• The source type<br />
TV/DTV/VIDEO-1/VIDEO-2/VIDEO-3/VIDEO-4/PC<br />
• If the program being watched does not have Teletext<br />
transmission, only a box will be displayed at the same<br />
location.<br />
• When watching videos, an incorrect current time is<br />
sometime displayed.<br />
• In PC mode, the current time will not be displayed.<br />
• In DTV mode, only information plate will be displayed.<br />
"NO SIGNAL"<br />
" OUT OF RANGE"<br />
See "Troubleshooting" on page 36 for details of this message.<br />
Hyper Surround<br />
You can enjoy Surround with a "live" effect by using the<br />
Hyper Surround function.<br />
ON:<br />
Hyper Surround function is turned on.<br />
OFF:<br />
Hyper Surround function is turned off.<br />
10
Remote control buttons and functions<br />
ZOOM function<br />
You can change the screen size according to the picture<br />
aspect ratio. Choose the optimum one from the following<br />
ZOOM modes.<br />
REGULAR:<br />
Use to view a normal picture (4:3 aspect ratio) as this is its<br />
original shape.<br />
PANORAMIC:<br />
This stretches the left and right sides of a normal picture<br />
(4:3 aspect ratios) to fill the screen, without making the<br />
picture appear unnatural.<br />
•The top and bottom of the picture are slightly cut off.<br />
16:9 ZOOM:<br />
This zooms up the <strong>wide</strong> picture (16:9 aspect ratios) to the<br />
full screen.<br />
Choose the ZOOM mode<br />
1 Press the ZOOM button to choose the ZOOM<br />
menu<br />
Adjusting the visible area of the picture<br />
If subtitles or the top (or bottom) of the picture are cut off,<br />
you can adjust the visible area of the picture manually.<br />
1 Press the ZOOM button<br />
The indicator appears.<br />
2 While it is displayed, press the / buttons to<br />
change the position of the picture<br />
• You cannot adjust the visible area in REGULAR or<br />
FULL mode.<br />
16:9 ZOOM SUBTITLE:<br />
This zooms up the <strong>wide</strong> picture (16:9 aspect ratios) with<br />
subtitles to the full screen.<br />
FULL:<br />
This uniformly stretches the left and right sides of a normal<br />
picture (4:3 aspect ratios) to fill the <strong>wide</strong> TV screen.<br />
• For 16:9 aspect ratio pictures that have been squeezed<br />
into a normal picture (4:3 aspect ratio), use the FULL<br />
mode to restore the picture to its original shape.<br />
In DTV mode, not available for 1080i (1125i) / 720p (750p)<br />
signals.<br />
In PC mode, "REGULAR" and "FULL" can be selected.<br />
11
Remote control buttons and functions<br />
Using the PCPIP function<br />
A PC picture and TV or a video program from an external<br />
device can be watched at the same time.<br />
1 Press the button.<br />
Operating a <strong>JVC</strong> brand VCR or DVD<br />
player<br />
These buttons will operate a <strong>JVC</strong> brand VCR or DVD<br />
player. Pressing a button that looks the same as the device’s<br />
original remote control button has the same effect as the<br />
original remote control.<br />
1 Set the VCR/TV/DVD switch to the VCR or<br />
DVD position<br />
VCR:<br />
When you are using a VCR, set the switch to the VCR<br />
position. You can turn the VCR on or off with the<br />
(Standby) button.<br />
DVD:<br />
When you are using a DVD player, set the switch to the<br />
DVD position. You can turn the DVD player on or off<br />
with the (Standby) button.<br />
Press the<br />
button to choose the sound.<br />
MAIN: Main picture<br />
SUB: Sub picture<br />
• If you press the menu button when the PIP<br />
functions is on, PC menu will appear. To display<br />
the TV menu, change the mode to the TV mode.<br />
NOTE:<br />
LT-32FXD7 does not support PIP Funtion.<br />
PIP sub picture only support analog TV and AV<br />
(Video2).<br />
2 Press the VCR/DVD Control Buttons to control<br />
your VCR or DVD player<br />
• If your device is not made by <strong>JVC</strong>, these buttons<br />
will not work.<br />
• Even if your device is made by <strong>JVC</strong>, some of these<br />
buttons may not work, depending on the device you<br />
are using.<br />
• You can use the buttons to choose a TV<br />
channel the VCR will receive, or choose the chapter<br />
the DVD player plays back.<br />
• Some models of DVD player use the<br />
buttons for both operating the fast<br />
forward/backward functions and for choosing the<br />
chapter.<br />
• Set the VCR/TV/DVD switch to the TV position<br />
when you turn the TV on or off.<br />
12
Teletext function<br />
Basic operation<br />
1 Choose a TV channel with a teletext broadcast<br />
Hold<br />
You can hold a teletext page on the screen for as long as<br />
you want, even while several other teletext pages are being<br />
received.<br />
2 Make sure to set the VCR/TV/DVD switch to the<br />
TV position.<br />
Press the<br />
(Hold) button Hold indication<br />
Hold indication<br />
100 101 102 103<br />
3 Press (Text) button to display the teletext<br />
Pressing (Text) button changes the mode as<br />
follows:<br />
To cancel the Hold function:<br />
Press (Hold) button again.<br />
TV mode<br />
Text mode<br />
4 Choose a teletext page by pressing<br />
the buttons, number buttons or colors<br />
buttons<br />
To return to the TV mode:<br />
Press the (Text) button.<br />
• If you have trouble receiving teletext broadcasts,<br />
consu<strong>lt</strong> your local dealer or the teletext station.<br />
• The ZOOM function will not work in the Text<br />
mode.<br />
• You cannot operate menus when viewing a teletext<br />
program.<br />
13
Teletext function<br />
Sub-page<br />
Some teletext pages include sub-pages that are automatically<br />
displayed.<br />
1 Choose a teletext page that includes<br />
sub-pages<br />
Press the button, Sub-page numbers can be<br />
viewed and displayed at the screen.<br />
2 Press the number buttons to choose a<br />
sub-page number<br />
Sxxxx : xxxx is the number 0 ~ 9 that you entered.<br />
Reveal<br />
For example, sub-page 1 is S0001, you must enter 0,0,<br />
0 and 1 serially to view sub-page S0001.<br />
Some teletext pages include hidden text (such as the answers<br />
to a quiz)<br />
You can display the hidden text.<br />
Cancel<br />
You can search for a teletext page while watching TV.<br />
1 Press the number button to enter a page<br />
number, or press a colour button<br />
The TV searches for a teletext page.<br />
2 Press the (Cancel) button<br />
The TV program appears. When the TV finds the<br />
teletext page, its page number appears in the upper left<br />
of the screen.<br />
3. Press the (Cancel) button to return to a<br />
teletext page when the page number is on the<br />
screen<br />
• The TV mode cannot be resumed by pressing the<br />
(Cancel) button. To return to the TV mode press<br />
button.<br />
Each time you press the (Reveal) button, text is<br />
hidden or revealed<br />
Size<br />
You can double the height of the teletext display.<br />
Press the<br />
(Size) button.<br />
Index<br />
You can return to the index page instantly.<br />
Press the (Index) button<br />
14
Using the TV’s menu<br />
This TV has a number of functions you can operate using<br />
menus. To use all your TV’s functions, you need to understand<br />
the basic menu operating techniques fully.<br />
3 Press the / buttons to choose a function<br />
• For details of the functions in the menus, see the<br />
following pages.<br />
4 Press the ⊳/ buttons to choose the setting<br />
of that function<br />
• If you want to operate a function which appears<br />
only with its name, follow the descriptions of that<br />
function on the following pages.<br />
• The display appearing at the bottom of a menu<br />
shows you a button on the remote control that you<br />
can use when you operate a chosen function.<br />
Colour button<br />
MENU button<br />
buttons<br />
5 Press the OK button to complete the setting<br />
The menu disappears.<br />
• When watching the television with the PAL system,<br />
the menus are displayed at about half of their<br />
normal vertical size.<br />
• The menu will be disappear if you press<br />
the buttons, the AV button or the<br />
number buttons while the menu is displayed.<br />
Operation with the buttons on the TV<br />
You can also operate the menus using the buttons on the side<br />
<strong>panel</strong> of the TV.<br />
Basic operation<br />
1 Press the MENU button to display the MENU<br />
(main menu)<br />
MENU<br />
PICTURE<br />
SOUND<br />
FEATURES<br />
INSTALL<br />
:SELECT<br />
OK:MOVE<br />
MENU<br />
TV/AV/OK<br />
2 Press the ⊳/ and / buttons to choose a<br />
menu title, and press the OK button.<br />
The menu appears.<br />
To return to the previous menu:<br />
Press the BACK button on the remote control or the<br />
MENU button on the TV.<br />
To exit a menu instantly:<br />
Press the MENU button on the remote control or press<br />
the MENU button on the TV several times.<br />
+ VOLUME-<br />
P V/<br />
STANDBY<br />
HEADPHONE<br />
The menu will disappear after about one minute if no operation<br />
is performed.<br />
15
PICTURE SETTING<br />
Refer to “Using the TV’s menu” (see page 15) for details of<br />
displaying the menu.<br />
PICTURE<br />
PICTURE MODE<br />
CONTRAST<br />
BRIGHT-1<br />
SHARP<br />
COLOUR<br />
BRIGHT-2<br />
WHITE BALANCE<br />
RESET<br />
:SELECT<br />
BRIGHT<br />
HIGH<br />
PICTURE MODE BRIGHT<br />
:MOVE<br />
WHITE BALANCE<br />
You can select one of two WHITE BALANCE modes<br />
(two tones of white) to adjust the white balance of the<br />
picture. Since white is the colour which is used as a<br />
reference for all the other colours, changing the WHITE<br />
BALANCE mode affects the appearance of all the other<br />
colours on the screen.<br />
HIGH:<br />
A bluish white. Using this mode when watching bright<br />
pictures allows you to enjoy a more vivid and bright<br />
picture.<br />
LOW:<br />
A reddish white. Using this mode when watching films<br />
allows you to enjoy colors that are characteristic of films.<br />
You can choose one of three PICTURE MODEs to adjust<br />
the picture settings automatically.<br />
BRIGHT:<br />
Heightens contrast and sharpness.<br />
STANDARD:<br />
Standardizes picture adjustment.<br />
SOFT:<br />
Softens contrast and sharpness.<br />
Picture Adjustment<br />
You can change the picture settings of each PICTURE<br />
MODE as you like.<br />
CONTRAST:<br />
You can adjust the picture contrast.<br />
Lower<br />
Higher<br />
BRIGHT-1:<br />
You can adjust the picture brightness.<br />
Darker<br />
Brighter<br />
SHARP:<br />
You can adjust the picture sharpness.<br />
Softer<br />
Sharper<br />
COLOUR:<br />
You can adjust the picture colour.<br />
Lighter<br />
Deeper<br />
BRIGHT-2:<br />
You can adjust the back light.<br />
Darker<br />
Lighter<br />
16
SOUND<br />
Refer to “Using the TV’s menu” (see page 15) for details<br />
of displaying the menu.<br />
SOUND<br />
STEREO/I . II<br />
BASS<br />
TREBLE<br />
BALANCE<br />
HDMI IN<br />
:SELECT<br />
O<br />
Analog<br />
:MOVE<br />
HDMI IN<br />
You can set the kind of the device connected with the<br />
HDMI terminal.<br />
HDMI: If the HDMI device is connected, select HDMI.<br />
Analog: If the DVI device is connected, select Analog.<br />
• For Video3 only.<br />
STEREO/ I . II<br />
Press to set sound mode, there are Stereo, SAP, and Mono.<br />
(TV mode only)<br />
Sound Adjustment<br />
You can adjust the sound to your favourite.<br />
BASS:<br />
You can adjust the low tone of the sound.<br />
: Weaker<br />
: Strong<br />
TREBLE:<br />
You can adjust the high tone of the sound.<br />
: Weaker<br />
: Strong<br />
BALANCE:<br />
You can adjust the volume balance between the left and<br />
right speaker.<br />
: Turn the left speaker’s volume level up.<br />
: Turn the right speaker’s volume level up.<br />
17
FEATURES<br />
Refer to “Using the TV’s menu” (see page 15) for details of<br />
displaying the menu.<br />
FEATURES<br />
SLEEP TIMER<br />
BLUE BACK<br />
CHILD LOCK<br />
:SELECT<br />
OFF<br />
OFF<br />
OFF<br />
:MOVE<br />
SLEEP TIMER<br />
You can set the TV to automatically turn off after a set<br />
period of timer; press the button to set the period of time<br />
from 30, 60, 90, 120, to OFF.<br />
BLUE BACK<br />
You can set the TV to automatically change to a blue<br />
screen and mute the sound if the signal is weak or absent,<br />
or when there is no input from an external device.<br />
ON<br />
This function is turned on.<br />
OFF<br />
This function is turned off.<br />
CHILD LOCK<br />
When the CHILD LOCK mode is on, the TV buttons will<br />
be locked except “POWER” button. TV only can be<br />
controlled by remote controller.<br />
ON<br />
This function is turned on<br />
OFF<br />
This function is turned off.<br />
18
INSTALL<br />
Refer to “Using the TV’s menu” (see page 15) for details of<br />
displaying the menu.<br />
INSTALL<br />
AUTO PROGRAM<br />
MANUAL<br />
PR LIST<br />
:SELECT<br />
AUTO PROGRAM<br />
AUTO PROGRAM<br />
OK:MOVE<br />
You can automatically store the TV channels for which you<br />
have the best reception. Store them in the TV’s program<br />
numbers list by doing the following.<br />
1 Choose AUTO PROGRAM. Then press the OK<br />
button.<br />
AUTO PROGRAM<br />
START<br />
OK:START<br />
2 Press the OK button to start the AUTO<br />
PROGRAM<br />
AUTO PROGRAM<br />
NOW PROGRAMMING<br />
MENU:EXIT<br />
The AUTO PROGRAM menu appears and received TV<br />
channels are automatically stored in the program numbers.<br />
• To cancel the AUTO PROGRAM function:<br />
Press the MENU button.<br />
After the TV channels have been registered in the<br />
program numbers, the PR LIST menu appears.<br />
• If you want, you can now edit the program numbers<br />
using the AUTO PROGRAM function. For details, see<br />
“To edit the PR LIST menu” on page 20.<br />
MANUAL<br />
You can store the TV channel for which you needed.<br />
Store them in the TV’s program numbers list by setting the<br />
following.<br />
MANUAL<br />
PROGRAM<br />
BAND<br />
CHANNEL<br />
SEARCH<br />
FINE TUNING<br />
STORE<br />
:SELECT<br />
00<br />
CH<br />
02<br />
:MOVE<br />
1 Select PROGRAM and press the / buttons to<br />
choose the program number from 00 to 99.<br />
2 Select BAND and press the / buttons to<br />
choose the band type.<br />
CH(AIR) / CC(CATV)<br />
3 Select CHANNEL and press the / buttons to<br />
choose the channel number. (CH:02-69,CC:01-99)<br />
4 Select SEARCH and press the / buttons to<br />
choose the serviceable TV channel.<br />
5 If the channel reception is poor, select FINE<br />
TUNING and press the<br />
the program.<br />
/ buttons to fine tune<br />
PR LIST<br />
01 -----<br />
02 -----<br />
03 -----<br />
04 -----<br />
05 -----<br />
06 -----<br />
07 -----<br />
08 -----<br />
09 -----<br />
10 -----<br />
NAME<br />
INSERT<br />
11 -----<br />
12 -----<br />
13 -----<br />
14 -----<br />
15 -----<br />
16 -----<br />
17 -----<br />
18 -----<br />
19 -----<br />
20 -----<br />
DELETE<br />
<br />
21 -----<br />
22 -----<br />
23 -----<br />
24 -----<br />
25 -----<br />
26 -----<br />
27 -----<br />
28 -----<br />
29 -----<br />
30 -----<br />
6 Select Store and press the<br />
the manual setting.<br />
/ buttons to store<br />
When stored, OK will be displayed for short<br />
seconds.<br />
19
INSTALL<br />
To edit the PR LIST menu<br />
You can edit the program numbers.<br />
Caution<br />
Using the NAME, DELETE or INSERT functions rewrites<br />
the current program numbers list.<br />
Therefore, the program number of some of the TV<br />
channels will change.<br />
1 Choose PR LIST, then press the OK button<br />
PR LIST<br />
01 -----<br />
02 -----<br />
03 -----<br />
04 -----<br />
05 -----<br />
06 -----<br />
07 -----<br />
08 -----<br />
09 -----<br />
10 -----<br />
▓ NAME<br />
▓ INSERT<br />
11 -----<br />
12 -----<br />
13 -----<br />
14 -----<br />
15 -----<br />
16 -----<br />
17 -----<br />
18 -----<br />
19 -----<br />
20 -----<br />
▓ DELETE<br />
▓<br />
21 -----<br />
22 -----<br />
23 -----<br />
24 -----<br />
25 -----<br />
26 -----<br />
27 -----<br />
28 -----<br />
29 -----<br />
30 -----<br />
2 Follow the operation description of a function<br />
you want to use and operate the function<br />
NAME:<br />
This function registers a channel name (ID) to a TV<br />
channel.<br />
INSERT:<br />
This function changes a program number of TV<br />
channel.<br />
DELETE:<br />
This function deletes a TV channel you do not want to<br />
list.<br />
NAME<br />
1 Press the◄/► and ▼/▲buttons to choose a TV<br />
channel<br />
Every time you press the ◄/► and ▼/▲ buttons, the<br />
program number changes and the picture of the TV<br />
channel stored in the program number appears on the<br />
screen.<br />
2 Press the red button to start the NAME function<br />
PR LIST<br />
01 -----<br />
02 -----<br />
03 -----<br />
04 -----<br />
05 -----<br />
06 -----<br />
07 -----<br />
08 -----<br />
09 -----<br />
10 -----<br />
▓ STORE<br />
▓<br />
11 -----<br />
12 -----<br />
13 -----<br />
14 -----<br />
15 -----<br />
16 -----<br />
17 -----<br />
18 -----<br />
19 -----<br />
20 -----<br />
▓<br />
▓ CANCEL<br />
21 -----<br />
22 -----<br />
23 -----<br />
24 -----<br />
25 -----<br />
26 -----<br />
27 -----<br />
28 -----<br />
29 -----<br />
30 -----<br />
3 Press the ◄/►and ▼/▲ buttons to edit the<br />
channel name you want to give the TV channel<br />
PR LIST<br />
01 -----<br />
02 <strong>JVC</strong><br />
03 -----<br />
04 -----<br />
05 -----<br />
06 -----<br />
07 -----<br />
08 -----<br />
09 -----<br />
10 -----<br />
▓ STORE<br />
▓<br />
11 -----<br />
12 -----<br />
13 -----<br />
14 -----<br />
15 -----<br />
16 -----<br />
17 -----<br />
18 -----<br />
19 -----<br />
20 -----<br />
▓<br />
▓ CANCEL<br />
21 -----<br />
22 -----<br />
23 -----<br />
24 -----<br />
25 -----<br />
26 -----<br />
27 -----<br />
28 -----<br />
29 -----<br />
30 -----<br />
4 Press the red button to store the setting<br />
PR LIST<br />
01 -----<br />
02 <strong>JVC</strong><br />
03 -----<br />
04 -----<br />
05 -----<br />
06 -----<br />
07 -----<br />
08 -----<br />
09 -----<br />
10 -----<br />
▓ NAME<br />
▓ INSERT<br />
11 -----<br />
12 -----<br />
13 -----<br />
14 -----<br />
15 -----<br />
16 -----<br />
17 -----<br />
18 -----<br />
19 -----<br />
20 -----<br />
▓ DELETE<br />
▓<br />
21 -----<br />
22 -----<br />
23 -----<br />
24 -----<br />
25 -----<br />
26 -----<br />
27 -----<br />
28 -----<br />
29 -----<br />
30 -----<br />
20<br />
To return-to the INSTALL menu:<br />
Press the BACK button.<br />
To exit a menu instantly:<br />
Press the MENU button.
INSTALL<br />
INSERT<br />
1 Press the / and / buttons to choose a<br />
program number for which you want<br />
Every time you press the / and / buttons, the<br />
program number changes and the picture of the TV channel<br />
stored in the program number appears on the screen.<br />
PR LIST<br />
01 -----<br />
02 <strong>JVC</strong><br />
03 -----<br />
04 -----<br />
05 -----<br />
06 -----<br />
07 -----<br />
08 -----<br />
09 -----<br />
10 -----<br />
NAME<br />
INSERT<br />
11 -----<br />
12 -----<br />
13 -----<br />
14 -----<br />
15 -----<br />
16 -----<br />
17 -----<br />
18 -----<br />
19 -----<br />
20 -----<br />
<br />
<br />
21 -----<br />
22 -----<br />
23 -----<br />
24 -----<br />
25 -----<br />
26 -----<br />
27 -----<br />
28 -----<br />
29 -----<br />
30 -----<br />
2 Press the green button to start the INSERT<br />
function<br />
4 Press the green button to insert the channel into<br />
the new program number<br />
PR LIST<br />
01 -----<br />
02 -----<br />
03 -----<br />
04 <strong>JVC</strong><br />
05 -----<br />
06 -----<br />
07 -----<br />
08 -----<br />
09 -----<br />
10 -----<br />
NAME<br />
INSERT<br />
11 -----<br />
12 -----<br />
13 -----<br />
14 -----<br />
15 -----<br />
16 -----<br />
17 -----<br />
18 -----<br />
19 -----<br />
20 -----<br />
DELETE<br />
To return to the INSTALL menu:<br />
Press the BACK button.<br />
To exit a menu instantly:<br />
Press the MENU button.<br />
21 -----<br />
22 -----<br />
23 -----<br />
24 -----<br />
25 -----<br />
26 -----<br />
27 -----<br />
28 -----<br />
29 -----<br />
30 -----<br />
PR LIST<br />
01 -----<br />
02 <strong>JVC</strong><br />
03 -----<br />
04 -----<br />
05 -----<br />
06 -----<br />
07 -----<br />
08 -----<br />
09 -----<br />
10 -----<br />
<br />
INSERT<br />
11 -----<br />
12 -----<br />
13 -----<br />
14 -----<br />
15 -----<br />
16 -----<br />
17 -----<br />
18 -----<br />
19 -----<br />
20 -----<br />
<br />
CANCEL<br />
21 -----<br />
22 -----<br />
23 -----<br />
24 -----<br />
25 -----<br />
26 -----<br />
27 -----<br />
28 -----<br />
29 -----<br />
30 -----<br />
3 Press the/ and / buttons to choose a new<br />
program number<br />
PR LIST<br />
01 -----<br />
02 <strong>JVC</strong><br />
03 -----<br />
04 -----<br />
05 -----<br />
06 -----<br />
07 -----<br />
08 -----<br />
09 -----<br />
10 -----<br />
<br />
INSERT<br />
11 -----<br />
12 -----<br />
13 -----<br />
14 -----<br />
15 -----<br />
16 -----<br />
17 -----<br />
18 -----<br />
19 -----<br />
20 -----<br />
<br />
CANCEL<br />
21 -----<br />
22 -----<br />
23 -----<br />
24 -----<br />
25 -----<br />
26 -----<br />
27 -----<br />
28 -----<br />
29 -----<br />
30 -----<br />
21
INSTALL<br />
DELETE<br />
1 Press the ◄/► and ▼/▲ buttons to choose a<br />
program number for which you want<br />
Every time you press the ◄/►and▼/▲ buttons, the<br />
program number changes and the picture of the TV channel<br />
stored in the program number appears on the screen.<br />
To exit a menu instantly:<br />
Press the MENU button.<br />
PR LIST<br />
01 -----<br />
02 <strong>JVC</strong><br />
03 -----<br />
04 -----<br />
05 -----<br />
06 -----<br />
07 -----<br />
08 -----<br />
09 -----<br />
10 -----<br />
▓ NAME<br />
▓ INSERT<br />
11 -----<br />
12 -----<br />
13 -----<br />
14 -----<br />
15 -----<br />
16 -----<br />
17 -----<br />
18 -----<br />
19 -----<br />
20 -----<br />
▓ DELETE<br />
▓<br />
21 -----<br />
22 -----<br />
23 -----<br />
24 -----<br />
25 -----<br />
26 -----<br />
27 -----<br />
28 -----<br />
29 -----<br />
30 -----<br />
2 Press the yellow button to start the DELETE<br />
function<br />
The TV channel is deleted from the program numbers list<br />
PR LIST<br />
▓<br />
▓<br />
01 -----<br />
02 <strong>JVC</strong><br />
03 -----<br />
04 -----<br />
05 -----<br />
06 -----<br />
07 -----<br />
08 -----<br />
09 -----<br />
10 -----<br />
11 -----<br />
12 -----<br />
13 -----<br />
14 -----<br />
15 -----<br />
16 -----<br />
17 -----<br />
18 -----<br />
19 -----<br />
20 -----<br />
▓ DELETE<br />
▓ CANCEL<br />
21 -----<br />
22 -----<br />
23 -----<br />
24 -----<br />
25 -----<br />
26 -----<br />
27 -----<br />
28 -----<br />
29 -----<br />
30 -----<br />
3 Press the yellow buttons to deleted the selected<br />
TV channel<br />
The TV channel is deleted from the program numbers list<br />
PR LIST<br />
01 -----<br />
02 -----<br />
03 -----<br />
04 -----<br />
05 -----<br />
06 -----<br />
07 -----<br />
08 -----<br />
09 -----<br />
10 -----<br />
▓ NAME<br />
▓ INSERT<br />
11 -----<br />
12 -----<br />
13 -----<br />
14 -----<br />
15 -----<br />
16 -----<br />
17 -----<br />
18 -----<br />
19 -----<br />
20 -----<br />
▓ DELETE<br />
▓<br />
21 -----<br />
22 -----<br />
23 -----<br />
24 -----<br />
25 -----<br />
26 -----<br />
27 -----<br />
28 -----<br />
29 -----<br />
30 -----<br />
To return to the INSTALL menu:<br />
Press the BACK button.<br />
22
Operation with the DTV menu<br />
This DTV has a number of functions you can operate by<br />
entering menus. To use all functions, you need to understand<br />
the basic menu operating techniques fully.<br />
5 Press the OK button to complete the setting<br />
The menu disappears.<br />
• The menu will be disappear if you press<br />
the buttons, the AV button or the<br />
number buttons while the menu is displayed.<br />
6 For DTV menu, press the / buttons<br />
INSTALL and then OK to display the DTV menu<br />
as a sub-menu.<br />
⊳/// buttons<br />
Displaying the DTV menu<br />
1 Press the MENU button to display the MENU<br />
(main menu)<br />
INSTALLATION<br />
MENU<br />
PICTURE<br />
SOUND<br />
FEATURES<br />
INSTALL<br />
:SELECT<br />
OK:MOVE<br />
This is mainly for program searching and factory resetting.<br />
There are 4 items under INSTALLATION.<br />
1 Press the / buttons to choose INSTALLATION<br />
and press the OK button.<br />
2 Press the / buttons to choose a menu title,<br />
and press the OK button.<br />
The menu appears.<br />
To return to the previous menu:<br />
Press the BACK button on the remote control or the<br />
MENU button on the TV.<br />
To exit a menu instantly:<br />
Press the MENU button on the remote control or press<br />
the MENU button on the TV several times.<br />
3 Press the / buttons to choose a function<br />
• For details of the functions in the menus, see the<br />
following pages.<br />
QUICK SEARCH<br />
It can automatically store the DTV channels based on the<br />
reception of the city you live in. Store them in the TV’s<br />
program numbers list by following below.<br />
1 Press the / buttons to choose QUICK<br />
SEARCH. Then press the OK button.<br />
4<br />
Press the / buttons to choose the setting<br />
of that function<br />
• If you want to operate a function which appears<br />
only with its name, follow the descriptions of that<br />
function on the following pages.<br />
• The display appearing at the bottom of a menu<br />
shows you a button on the remote control that you<br />
can use when you operate a chosen function.<br />
3 Press the / buttons to choose a function<br />
23
Operation with the DTV Menu<br />
2 The defau<strong>lt</strong> city will be displayed. Press the<br />
/ buttons to choose the city you live in,<br />
then press OK button.<br />
AUTOMATIC SEARCH<br />
It automatically stores the all DTV channels for which<br />
generally you have the best reception. This is automatic<br />
generate the full band scan based on 7 MHz bandwidth.<br />
The setting process is as the same as QUICK SEARCH.<br />
Current listed cities are for the country of Australia only.<br />
1 Press the / buttons to choose AUTOMATIC<br />
SEARCH. Then press the OK button.<br />
The Digital terrestrial broadcasting (DVB-T) Automatic Search<br />
starts and channels which can be received are automatically<br />
registered.<br />
3 If you want to abort this searching, you can<br />
press BACK button and use / buttons to<br />
choose “OK” or “EXIT” searching, then press<br />
OK button .<br />
After the DTV channels have been registered in the<br />
Program List, the PR LIST menu appears and<br />
contains all the available channels.<br />
• You can now edit the program setting in the PR LIST<br />
function. For details, see “EDIT PR LIST” on page<br />
25.<br />
MANUAL SEARCH<br />
You can store the DTV channels for which you need.<br />
This search function only scans one channel at each time.<br />
1 Press the / buttons to choose MANUAL<br />
SEARCH. Then press the OK button.<br />
24<br />
After the DTV channels have been registered in the<br />
Program List, the PR LIST menu appears and contains all<br />
the available channels.<br />
• ou can now edit the program setting in the PR LIST<br />
function. For details, see “EDIT PR LIST” on page<br />
25.<br />
2 Press the / buttons to choose on an item,<br />
press OK buttons to show off options, and OK<br />
button to choose number.
Operation with the DTV menu<br />
3 Press the ▼/▲ buttons to highlight Start Scan,<br />
and then press OK button to implement<br />
scanning the channel.<br />
EDIT PR LIST<br />
This feature allows you to edit channel settings that requires<br />
a password.<br />
1 Press the ▼/▲ buttons to choose EDIT PR<br />
LIST and press the OK button.<br />
After the DTV channels have been registered in<br />
the Program List, the PR LIST menu appears and<br />
contains all the available channels.<br />
2 When you select EDIT PR LIST, it requires the<br />
password. The factory defau<strong>lt</strong> password is<br />
“0000”.<br />
• You can now edit the program setting in the PR LIST<br />
function. For details, see “EDIT PR LIST” on page<br />
25.<br />
FACTORY SETTING<br />
This setting allows you to return to the original setting.<br />
1 Press the▼/▲ buttons to choose FACTORY<br />
SETTING. Then press the OK button to enter.<br />
Choosing a channel<br />
1 Press the ▼/▲ buttons to turn on features and<br />
delete channels.<br />
2 Press OK to confirm your setting.<br />
2 If you want to restore to defau<strong>lt</strong>, press ◄/►<br />
buttons to select “YES” with the resu<strong>lt</strong> of<br />
losing current settings. If not, please select<br />
“NO”. Press OK to confirm.<br />
LOCK:<br />
This function locks channels so that they cannot be<br />
watched by children.<br />
FAVOURITE:<br />
This function sets your favourite channels to easily<br />
choose from only the channels you often watch.<br />
•Press favourite button on remote control to turn on<br />
Program List while watching DTV, and then press the<br />
▼/▲ buttons to choose a program and then OK to<br />
enter the program.<br />
DELETE:<br />
This function deletes the DTV channel you do not want<br />
to list.<br />
25
Operation with the DTV menu<br />
SETTING FAVOURITE CHANNELS<br />
After initial Channel Installation<br />
To set favourites<br />
1 Press MENU.<br />
5 Under book mark row press “OK” once to select<br />
and “OK” a second time to remove.<br />
2 Select INSTALL.<br />
MENU<br />
PICTURE<br />
SOUND<br />
FEATURES<br />
►INSTALL<br />
▼▲:SELECT<br />
3 Select EDIT PR LIST.<br />
►<br />
►<br />
►<br />
►<br />
OK:MOVE<br />
Note: Channels marked in"EDIT PR LIST" are shown on<br />
"FAVOURITE LIST".<br />
WATCH FAVOURITE CHANNELS<br />
1 Press the (favourite) button on the remote<br />
control.<br />
1<br />
* Press once to display Program List.<br />
*<br />
4 Enter PIN number ( defau<strong>lt</strong> : 0000)<br />
1<br />
*<br />
*.<br />
* Press second time to display Favourite List.<br />
2 *.<br />
l<br />
2<br />
2 Choose the channel you want to view from the<br />
list you made here.<br />
* To return to the previous menu:<br />
Press the BACK button on the remote control.<br />
26
Operation with the DTV menu<br />
CONFIGURATION<br />
Set the basic setting for watching Digital terrestrial<br />
broadcasting (DVB-T). You can setup the audio output,<br />
local Time, a new pin code and I-Plate.<br />
1 Press the ▼/▲ buttons to choose<br />
CONFIGURATION and press the OK button.<br />
PCM (Pulse code modulation):<br />
A technique used to transform an incoming analog<br />
signal into a noise-free, digital equivalent.<br />
Dolby Digital:<br />
A technique used to perform digital sound effect with<br />
high definition programming.<br />
“Dolby”, and the double-D symbol are trademarks of<br />
Dolby Laboratories.<br />
3 Press the ◄/► buttons to choose save or not,<br />
then press the OK button.<br />
AUDIO SETUP<br />
This adjusts audio performance and language format.<br />
1 Press the ▼/▲ buttons to choose AUDIO<br />
SETUP, and then press the OK button.<br />
MULTILINGUAL<br />
With Digital terrestrial broadcasting (DVB-T), a number of<br />
languages can be broadcasting at the same time. Choose the<br />
language you want to listen to when watching these<br />
broadcasts.<br />
1 Press the ▼/▲ buttons to choose<br />
MULTILINGUAL and press the OK button.<br />
2 Press the ▼/▲ buttons to choose the<br />
language.<br />
DIGITAL OUTPUT<br />
You can set the digital audio output format.<br />
1 Press the ▼/▲ buttons to choose DIGITAL<br />
OUTPUT and press the OK button.<br />
The language changes every time the button is pressed. If<br />
the selected language is not a broadcast, the defau<strong>lt</strong><br />
language will be played.<br />
2 Press the ▼/▲ buttons to choose PCM or<br />
DOLBY DIGITAL, then press the OK button.<br />
-ENGLISH(M) : PCM<br />
-ENGLISH(D) : Dolby Digital<br />
-UND : Undefined<br />
27
Operation with the DTV menu<br />
TIME ZONE<br />
You may set your local time depending on area.<br />
1 Press the ▼/▲ buttons to choose TIME ZONE,<br />
and then press the OK button.<br />
RECEIVER UPGRADE<br />
Set the method to upgrade the Digital terrestrial broadcasting<br />
(DVB-T) receiver software. This function is only available to<br />
be upgraded by your distributor.<br />
1 Press the ▼/▲ buttons to choose RECEIVER<br />
UPGRADE, and then press the OK button.<br />
2 Press OK button to select the time zone.<br />
3 Press the ▼/▲ buttons to choose your local<br />
time, then press the OK button.<br />
28
Operation with the DTV menu<br />
ENTER PIN CODE<br />
You can change the pin code, and its purpose is allowing to<br />
enter the system of locking certain channels in EDIT PR LIST<br />
menu.<br />
1 Press the ▼/▲ buttons to choose ENTER PIN<br />
CODE, and then press the OK button.<br />
I-PLATE SETUP<br />
The programer information setting can be adjusted.<br />
1 Press the ▼/▲ buttons to choose I-PLATE, and<br />
then press the OK button.<br />
2 Press the ▼/▲ buttons to choose an item and<br />
then press the buttons to choose your<br />
settings.<br />
2 Press the number buttons to enter current pin<br />
code.<br />
The defau<strong>lt</strong> factory pin code is “0000”.<br />
I plate Display:<br />
This function is to turn on and off displaying I-PLATE<br />
when changing channels.<br />
Display Time:<br />
This function is to display in time for I-PLATE from 1<br />
second to 20 seconds.<br />
3 Enter a new PIN CODE in both of change pin<br />
code and confirm pin code.<br />
Your newly chosen PIN CODE is now set. You will<br />
now need to use the new PIN CODE to lock or unlock<br />
certain channels through EDIT PR LIST.<br />
Time Format<br />
This function is to choose “24H” or “AM/PM” time<br />
format.<br />
3 After the settings are done, press OK button.<br />
Then, press the buttons to choose save<br />
or not, then press the OK button.<br />
29
Operation while watching DTV Menu<br />
Information function<br />
When the (Information) button is pressed while the<br />
information would be displayed.<br />
Using the Electronic Program Guide<br />
(EPG)<br />
EPG screen appears when the GUIDE button is pressed under<br />
Digital terrestrial broadcasting (DVB-T).<br />
1 Channel Number<br />
2 Date<br />
3 Time<br />
4 TELETEXT/Subtitle<br />
5 Parental Guidance<br />
6 Optical output (DolbyD=Dolby Digital)<br />
7 Signal format (SD:576i, HD:576p/1080i/720p)<br />
8 Network name<br />
9 Current displaying program<br />
10 Next displaying program<br />
11 Channel signal level rate<br />
12 Channel signal quality rate<br />
The program information shows all relevant information and<br />
appears only for approximately 1 minute.<br />
The time display in the program information uses the time<br />
information which is included in the Digital terrestrial<br />
broadcasting (DVB-T). Depending on the channel, the time<br />
information may not be correct.<br />
• You can edit the Information format setting. For details, see<br />
“I-PLATE SETUP” on page 29.<br />
EPG provides you the current and next program information<br />
and the program duration.<br />
Press the / buttons to highlight/choose a channel, and then<br />
OK to enter the program.<br />
Choosing a channel<br />
1 Press the / buttons and choose a channel<br />
The program name, broadcast time and a brief<br />
description of the program are displayed.<br />
2 Press the OK button<br />
The chosen program appears on the<br />
quarter-screen.<br />
• When the GUIDE, BACK button is pressed to<br />
disappear the EPG screen and return to the normal<br />
screen.<br />
Displaying the subtitles<br />
With Digital terrestrial broadcasting (DVB-T), some programs<br />
are broadcast with subtitles/close captions. Subtitles can be<br />
displayed when watching these programs.<br />
Press the SUBTITLE button to turn on and off when<br />
watching Digital terrestrial broadcasting (DVB-T)<br />
“CC ON” appears at the top-right of the screen and,<br />
when the program has subtitles, the subtitles are<br />
displayed.<br />
When the SUBTITLE button is pressed again, “CC<br />
OFF” appears and the subtitles disappear.<br />
30
PC MENU (In PC mode only)<br />
This TV also has a number of functions on PC mode; you<br />
can operate using pc menus.<br />
PC MENU<br />
PC PICTURE POSTITION<br />
PICTURE<br />
SOUND<br />
:SELECT<br />
OK:MOVE<br />
1024 X 768<br />
H:48 kHz V:60 Hz<br />
PC PICTURE POSITION<br />
You can adjust the picture settings as following functions.<br />
PICTURE<br />
You can change the picture settings of each PICTURE mode as<br />
you like.<br />
PC PICTURE<br />
CONTRAST<br />
BRIGHT-1<br />
WHITE BALANCE<br />
R<br />
G<br />
B<br />
RESET<br />
:SELECT<br />
HIGH<br />
:MOVE<br />
PC PICTURE POSITION<br />
AUTO SETUP<br />
H POSITION<br />
V POSITION<br />
CLOCK<br />
PHASE<br />
RESET<br />
:SELECT<br />
:MOVE<br />
CONTRAST:<br />
You can adjust the picture contrast.<br />
low<br />
high<br />
BRIGHT-1:<br />
You can adjust the picture brightness.<br />
darker<br />
lighter<br />
AUTO SETUP:<br />
You can adjust picture settings automatically for optimized<br />
picture position, clock and phase.<br />
H POSITION:<br />
You can adjust picture horizontal position.<br />
left<br />
right<br />
V POSITION:<br />
You can adjust picture vertical position.<br />
down<br />
up<br />
CLOCK:<br />
You can adjust CLOCK to fine tune picture.<br />
PHASE:<br />
You can adjust PHASE to fine tune picture.<br />
RESET:<br />
You can select RESET mode for defau<strong>lt</strong> setting.<br />
Connecting the PC<br />
Connect the PC with the D-SUB cable to the D-SUB in at<br />
the TV, and connect the sound device of PC with a stereo<br />
mini-jack to PC AUDIO IN.<br />
You can adjust the picture by AUTO SETUP function when<br />
the PC signal is output correctly, the AUTO SETUP<br />
function can optimize the picture position, clock and phase.<br />
You can have a fine vision after AUTO SETUP function<br />
executed.<br />
31
PC MENU (In PC mode only)<br />
WHITE BALANCE:<br />
You can adjust the picture colour mode.<br />
HIGH:<br />
A bluish white. Using this mode when watching bright<br />
pictures allows you to enjoy a more vivid and bright<br />
picture.<br />
LOW:<br />
A reddish white. Using this mode when watching films<br />
allows you to enjoy colors that are characteristic of films.<br />
R<br />
You can adjust the Red colour component.<br />
reddish<br />
redder<br />
G<br />
You can adjust the Green colour component.<br />
greenish<br />
greener<br />
B<br />
You can adjust the Blue colour component.<br />
bluish<br />
bluer<br />
RESET<br />
You can select RESET mode for defau<strong>lt</strong> setting.<br />
SOUND<br />
You can adjust the sound to your liking.<br />
SOUND<br />
BASS<br />
TREBLE<br />
BALANCE<br />
:SELECT<br />
BASS:<br />
You can adjust the low tone of the sound.<br />
weaker<br />
strong<br />
:MOVE<br />
TREBLE:<br />
You can adjust the high tone of the sound.<br />
weaker<br />
strong<br />
BALANCE:<br />
You can adjust the volume balance between the left and<br />
right speaker.<br />
turn the left speaker’s volume level up.<br />
turn the right speaker’s volume level up.<br />
32
PC MENU (In PC mode only)<br />
PC Support mode list<br />
Please use AUTO Setup to automatically configure your<br />
display to the best setting.<br />
Mode No.<br />
1.<br />
2.<br />
Mode Name<br />
Resolution<br />
VGA 60HZ<br />
640*480<br />
MAC VGA<br />
640*480<br />
H.Freq.(KHZ)<br />
V.Freq.(HZ)<br />
31.469<br />
59.941<br />
35<br />
66.667<br />
Notice when using LCD-TV under PC mode:<br />
1. Whenever your LCD-TV is connected to the PC, or<br />
you have changed the PC display mode. Please use<br />
AUTO Setup to automatically configure your display<br />
to the best setting.<br />
2. You must perform auto setup before making any<br />
adjustment.<br />
3.<br />
US TEXT<br />
720*400<br />
31.469<br />
70.087<br />
4.<br />
SVGA 60HZ<br />
800*600<br />
37.879<br />
60.317<br />
5.<br />
XGA 60HZ<br />
1024*768<br />
48.363<br />
60.004<br />
6.<br />
WXGA<br />
1280*768<br />
47.73<br />
60<br />
7.<br />
VGA 75HZ<br />
640*480<br />
37.5<br />
75<br />
8.<br />
SVGA 75HZ<br />
800*600<br />
46.875<br />
75<br />
9.<br />
XGA 75HZ<br />
1024*768<br />
60.023<br />
75.029<br />
33
Additional preparation<br />
Connecting external equipment<br />
Connect the equipment to the TV, making the correct rear<br />
<strong>panel</strong> and front <strong>panel</strong> connections.<br />
Before connecting anything:<br />
• Read the manuals that came with the equipment.<br />
Depending on the equipment, the connection method<br />
may be different from the diagram. Also, the<br />
equipment settings may need to change depending on<br />
the connection method.<br />
• Turn off all the equipment including the TV.<br />
• The “Specifications” on page 37 give the details of<br />
the EXT terminals. If you are connecting equipment<br />
not listed in the following connection diagram, see<br />
the table to choose the best EXT terminal.<br />
• Connecting cables are not supplied.<br />
• If the VCR's audio output is in mono, connect the<br />
VCR's AUDIO OUT (audio output) terminal and<br />
TV's Audio L/MONO input terminal with an audio<br />
cable.<br />
1 VCR (composite signal)<br />
2 VCR (composite signal/S-VIDEO signal)<br />
3 DVD player (composite signal/S-VIDEO signal)<br />
4 DVD player (component signal)<br />
5 VCR or DVD recorder (digital signal)<br />
6 Video cable (digital)<br />
7 Audio cable (digital)<br />
8 S-Video Cable<br />
9 Video cable<br />
10 Audio cable<br />
11 Component cable<br />
12 Audio cable<br />
13 HDMI Cable<br />
14 Audio Cable<br />
15 Digital Audio Fiber Cable<br />
16 Headphones<br />
16<br />
HDMI<br />
6<br />
7<br />
5<br />
15<br />
8<br />
9<br />
10<br />
11<br />
1 2 3 4<br />
L<br />
R<br />
12<br />
13<br />
34<br />
14
Troubleshooting<br />
If a problem arises while you are using the TV, please read this troubleshooting guide carefully before you ask to have the TV<br />
repaired. You may be able to fix it easily by yourself. For example, if the mains plug is disconnected from the mains outlet, or the<br />
TV aerial has problems, you may think there is a problem with the TV itself.<br />
Important:<br />
• This troubleshooting guide only covers problems whose causes are not easy to decide. If you have a question when you are<br />
operating a function, read the page(s) for that function carefully, not this troubleshooting guide.<br />
• If you follow the advice in this troubleshooting guide without any success, unplug the mains plug and ask for your TV to be<br />
repaired. Do not attempt to repair the TV by yourself or to remove the rear cover of the TV.<br />
If you cannot turn on the TV<br />
• Are the AC plug on the power cord from the TV is<br />
connected to AC outlet?<br />
• Make sure to set the VCR/TV/DVD switch to the TV<br />
position. You cannot turn the TV on when the<br />
VCR/TV/DVD switch is set to the VCR or DVD<br />
position.<br />
If you cannot turn off the TV<br />
• Make sure to set the VCR/TV/DVD switch to the TV<br />
position. You cannot turn the TV off when the<br />
VCR/TV/DVD switch is set to the VCR or DVD<br />
position.<br />
No picture or no sound<br />
• Have you chosen a TV channel with very poor reception?<br />
If so, the BLUE BACK function will be activated: the<br />
entire screen becomes blue, and the sound is muted. If<br />
you still want to view the TV channel, follow the<br />
description “FEATURES” on page 18 in analogue TV to<br />
change the BLUE BACK function setting to OFF.<br />
Poor picture<br />
• If noise (snow) totally blocks out the picture, there<br />
may be a problem with the aerial or aerial cable. Check<br />
the following to try to solve the problem:<br />
Have the TV and aerial been connected properly?<br />
Has the aerial cable been damaged?<br />
Is the aerial pointing in the right direction?<br />
Is the aerial itself fau<strong>lt</strong>y?<br />
• If the TV or aerial suffers interference from other<br />
equipment, stripes or noise may appear in the picture.<br />
Move any equipment such as an amplifier, personal<br />
computer, or a hair drier, that can cause interference<br />
away from your TV. Or try moving the TV. If the aerial<br />
suffers interference from a radio tower or high-vo<strong>lt</strong>age<br />
wire, please contact your local dealer.<br />
• If the TV suffers interference from signals reflecting<br />
from mountains or buildings, double-pictures (ghosting)<br />
will occur. Try to change the aerial’s direction or<br />
replace it with one with better directionality.<br />
• Have the COLOUR and BRIGHT-1 settings been<br />
adjusted properly? Follow the description “Picture Setting”<br />
on page 16 to try to adjust them properly for Analogue TV.<br />
• Videotaping teletext is not recommended because it may<br />
not record correctly.<br />
• When viewing images from commercially available<br />
video software products, or videos from videotapes<br />
which have been recorded improperly, the top of the<br />
image may be distorted. This is due to the condition of<br />
the video signal. There is nothing wrong with the TV.<br />
Poor sound<br />
• Have you adjusted BASS or TREBLE properly? If not,<br />
follow the description of “Sound” on page 17 in<br />
Analogue TV.<br />
If the remote control does not respond to the<br />
TV<br />
• Have the batteries of the remote control worn out?<br />
Follow the description “Putting the batteries into the<br />
Remote control” on page 5 and replace them with new<br />
batteries.<br />
• Have you attempted to use the remote control from the<br />
sides, rear of the TV, or from more than seven meters<br />
away from the TV? Use the remote control in the front<br />
of your TV and from less than seven meters away.<br />
• If the TV suddenly stops responding, disconnect the<br />
power cord of the TV from the AC outlet and then<br />
connect them to the AC outlet again to turn on the TV.<br />
If the TV returns to a normal state, it is not a failure.<br />
35
Troubleshooting<br />
rouesoong<br />
Other concerns<br />
• When the SLEEP TIMER function operates, the TV is<br />
automatically turned off. If the TV suddenly turns off, try to<br />
press the (standby) button to turn on the TV once again. If<br />
the TV goes back to normal, there is no problem.<br />
• It takes a short period of time from the time an operation<br />
such as changing channels is performed until an image is<br />
displayed. This is not a malfunction. This is the time<br />
required for the image to stabilize before it can be<br />
displayed.<br />
• The TV may make a crackling sound due to a sudden change<br />
in temperature. The picture or sound may be normal. If you<br />
hear crackling sounds frequently while you are viewing the<br />
TV, there may be other causes. As a precaution, ask your<br />
service technician to inspect it.<br />
• In the twin pictures mode the sub-picture may disappear<br />
when the external device is operated. If this happens, press<br />
the button and display the sub-picture again.<br />
• The top of the TV and the screen may become hot during<br />
use but this has no affect on the performance of the TV.<br />
Ensure that the ventilation holes are not blocked.<br />
• When the picture is unstable, the screen may become white<br />
for a moment. This occurs when the signal which drives the<br />
liquid crystal is missing. This is not a malfunction.<br />
• When a still image has been displayed for a long period, a<br />
faint residual image may remain on the screen for a short<br />
time after the power has been turned off or when another<br />
image is displayed. This is not a malfunction and the image<br />
will eventually disappear.<br />
• When the correct picture has not been displayed on screen,<br />
the following error messages will display on screen.<br />
NO SIGNAL - TV received no signal from PC, you may<br />
check your PC is working correctly or not.<br />
OUT OF RANGE - The picture resolution is out of limit.<br />
Ensure that the PC picture resolution is set correctly.<br />
36
Specifications<br />
Model<br />
COUNTRY setting<br />
Broadcasting system<br />
Colour system<br />
Channels and frequencies<br />
Sound-mu<strong>lt</strong>iplex systems<br />
Teletext<br />
Power requirements<br />
Power consumption<br />
Screen size(Viewable area)<br />
Audio output<br />
Speaker<br />
VIDEO-1 terminal<br />
VIDEO-2 terminal<br />
VIDEO-3 terminal<br />
(HDMI)<br />
VIDEO-4 terminal<br />
(HDMI)<br />
Digital Audio Output terminal<br />
PC INPUT terminal<br />
LT-32FXD7 LT-42FZD7 LT-46FZD7<br />
AUSTRALIAN<br />
CCIR B/G<br />
PAL<br />
Analogue 48.25~863.25MHz<br />
Digital 174MHz~858MHz<br />
A2/NICAM system,Digital(MPEG2)<br />
FLOF(Fastext) ,WST(World Standard System)<br />
240V AC, 50Hz<br />
164W (Standby < 1W) 287W (Standby < 1W) 328W (Standby < 1W)<br />
80.0cm (31.5 inch) 106.73cm (42.02 inch) 116.84cm (46.0 inch)<br />
Rated Power output: 10W + 10W<br />
11.5×5 cm ×2 16×4 cm ×2 16×4 cm ×2<br />
RCA connector × 3<br />
Component video(YPbPr)input and Audio L/R inputs are available.<br />
576i/p , 480i/p , 720p, 1080i, 50/60HZ signals are available.<br />
RCA connector × 1, S-Video connector × 1<br />
Video input, S-Video(Y/C) input and Audio L/R inputs are available.<br />
576i signals are available.<br />
Support HDCP.<br />
Audio L/R for analog Sound Input.<br />
576i/p, 480i/p, 720p, 1080i, 1080p, 50/60HZ signals are available.<br />
Support HDCP.<br />
576i/p, 480i/p, 720p, 1080i, 1080p, 50/60HZ signals are available.<br />
Optical Connector × 1<br />
Dolby audio out is available<br />
Analogue RGB:D-SUB (15pin x1)<br />
PC signal is available.<br />
Stereo mini-jack(3.5 mm in diameter)<br />
Headphone jack<br />
Stereo mini-jack (3.5mm in diameter)<br />
800×545×131mm 1030×672×123mm 1126×721×120mm<br />
Dimension(W×H×D)<br />
800×592×245mm(with stand) 1030×720×312mm(with stand) 1126×775×340mm(with stand)<br />
Weight(NET) 16.0 kg 29.2 kg 35.0 kg<br />
Accessories<br />
Remote control unit × 1(RM-C1896)<br />
AA/R6 dry cell battery × 2<br />
We may change the design and specification without notice.<br />
Pictures displayed on the screen using this TV’s ZOOM functions should not be shown for any commercial or demonstration purpose<br />
in public places. (cafes, hotels, etc.) without the consent of the owners of copyright of the original picture sources, as this would be an<br />
infringement of copyright.<br />
37
©2007 Victor Company of Japan, Limited E030057335