colour television contents av-24wt2ek av-28wt2ek - JVC
colour television contents av-24wt2ek av-28wt2ek - JVC
colour television contents av-24wt2ek av-28wt2ek - JVC

Create successful ePaper yourself
Turn your PDF publications into a flip-book with our unique Google optimized e-Paper software.
COLOUR TELEVISION<br />
AV-24WT2EK<br />
AV-28WT2EK<br />
CONTENTS<br />
SAFETY PRECAUTIONS ......... 2<br />
Locations of remote control<br />
buttons ............................... 4<br />
Locations of TV buttons and<br />
parts ................................... 5<br />
PREPARATION AND BASIC<br />
OPERATION ....................... 6<br />
SOUND AND PICTURE .......... 12<br />
OTHER FEATURES ............... 14<br />
TELETEXT ............................. 17<br />
OTHER PREPARATION ......... 19<br />
TROUBLESHOOTING ........... 24<br />
SPECIFICATIONS .................. 26<br />
INSTRUCTIONS
Thank you for purchasing this <strong>JVC</strong> <strong>colour</strong> <strong>television</strong>.<br />
To ensure your complete understanding, please read this manual<br />
thoroughly before operation.<br />
SAFETY PRECAUTIONS<br />
2<br />
WARNING:<br />
CAUTION:<br />
WARNING:<br />
TO PREVENT FIRE OR SHOCK HAZARD, DO NOT EXPOSE THIS<br />
APPLIANCE TO RAIN OR MOISTURE.<br />
TO ENSURE PERSONAL SAFETY, OBSERVE THE FOLLOWING RULES<br />
REGARDING THE USE OF THIS UNIT.<br />
• Operate only from the power source specified (AC 220 – 240V, 50 Hz) on the unit.<br />
• Avoid damaging the AC plug and power cord.<br />
• Avoid improper installation and never position the unit where good ventilation is<br />
unattainable.<br />
When installing this <strong>television</strong>, distance<br />
recommendations must be maintained<br />
15 cm<br />
between the floor and wall, as well as<br />
installment in a tightly enclosed area or<br />
piece of furniture. Please adhere to the<br />
minimum distance guidelines show for<br />
10 cm 10 cm 15 cm<br />
safe operation.<br />
• Do not allow objects or liquid into the cabinet openings.<br />
• In the event of a fault, unplug the unit and call a service technician. Do not<br />
attempt to repair it yourself or remove the rear cover.<br />
* When you do not use this TV set for a long period of time, be sure to disconnect<br />
the power plug from the AC outlet.<br />
DO NOT cut off the mains plug from this equipment. If the plug fitted is not<br />
suitable for the power points in your home or the cable is too short to reach a power<br />
point, then obtain an appropriate safety approved extension lead or adaptor or<br />
consult your dealer.<br />
If nonetheless the mains plug is cut off, remove the fuse and dispose of the plug<br />
immediately, to <strong>av</strong>oid a possible shock hazard by inadvertent connection to the<br />
mains supply.<br />
If a new mains plug has to be fitted, then follow the instruction given below:<br />
IMPORTANT.<br />
DO NOT make any connection to the larger terminal which is marked with the letter<br />
E or by the safety earth symbol or <strong>colour</strong>ed green or green-and-yellow.<br />
The wires in the mains lead on this product are <strong>colour</strong>ed in accordance with the<br />
following code:<br />
Blue: Neutral<br />
Brown: Live<br />
As these <strong>colour</strong>s may not correspond with the <strong>colour</strong>ed marking identifying the<br />
terminals in your plug proceed as follows:<br />
The wire which is <strong>colour</strong>ed blue must be connected to the terminal which is marked<br />
with the letter N or <strong>colour</strong>ed black.<br />
The wire which is <strong>colour</strong>ed brown must be connected to the terminal which is<br />
marked with the letter L or <strong>colour</strong>ed red.<br />
When replacing the fuse only a correctly rated approved type should be used and be<br />
sure to re-fit the fuse cover.<br />
IF IN DOUBT — CONSULT A COMPETENT<br />
ELECTRICIAN.<br />
How To Replace The Fuse<br />
Open the fuse compartment with the blade screwdriver,<br />
and replace the fuse.<br />
Fuse
Some Do’s And Don’ts On The Safe Use Of Equipment<br />
This equipment has been designed and manufactured to meet international safety<br />
standards but, like any electrical apparatus, care must be taken if you are to obtain<br />
the best results and safety is to be assured.<br />
○ ○ ○ ○ ○ ○ ○ ○ ○ ○ ○ ○ ○ ○ ○ ○ ○ ○ ○ ○ ○ ○ ○ ○ ○ ○ ○ ○ ○ ○ ○ ○ ○ ○ ○ ○ ○ ○ ○ ○ ○ ○ ○ ○ ○ ○ ○<br />
DO<br />
DO<br />
DO<br />
DO<br />
read the operating instructions before you attempt to use the equipment.<br />
ensure that all electrical connections (including the mains plug, extension<br />
leads and interconnections between pieces of equipment) are properly<br />
made and in accordance with the manufacturer’s instructions.<br />
consult your dealer if you are ever in doubt about the installation or<br />
operation or safety of your equipment.<br />
be careful with glass panels or doors on equipment.<br />
○ ○ ○ ○ ○ ○ ○ ○ ○ ○ ○ ○ ○ ○ ○ ○ ○ ○ ○ ○ ○ ○ ○ ○ ○ ○ ○ ○ ○ ○ ○ ○ ○ ○ ○ ○ ○ ○ ○ ○ ○ ○ ○ ○ ○ ○ ○<br />
DON’T continue to operate the equipment if you are in any doubt about it working<br />
normally, or if it is damaged in any way — switch off — withdraw the mains<br />
plug and consult your dealer.<br />
DON’T remove any fixed cover as this may expose dangerous voltages.<br />
DON’T le<strong>av</strong>e equipment switched on when it is unattended unless it is specifically<br />
stated that it is designed for unattended operation or has a standby mode.<br />
Switch off using the switch on the equipment and make sure that your family<br />
know how to do this. Special arrangements may need to be made for infirm<br />
or handicapped people.<br />
DON’T use equipment such as personal stereos or radios that may distract you<br />
when driving. It is illegal to watch <strong>television</strong> while driving.<br />
DON’T listen to headphones at high volume, as such use can permanently damage<br />
your hearing.<br />
DON’T obstruct the ventilation of the equipment, for example with curtains or soft<br />
furnishings. Overheating will cause damage and shorten the life of the<br />
equipment.<br />
DON’T use makeshift stands and NEVER fix legs with wood screws — to ensure<br />
complete safety always fit the manufacturer’s approved stand or legs with<br />
the fixings provided according to the instructions.<br />
DON’T allow electrical equipment to be exposed to rain or moisture.<br />
○ ○ ○ ○ ○ ○ ○ ○ ○ ○ ○ ○ ○ ○ ○ ○ ○ ○ ○ ○ ○ ○ ○ ○ ○ ○ ○ ○ ○ ○ ○ ○ ○ ○ ○ ○ ○ ○ ○ ○ ○ ○ ○ ○ ○ ○ ○<br />
ABOVE ALL<br />
— NEVER let anyone especially children push anything into holes, slots or any<br />
other opening in the case — this could result in a fatal electrical shock.<br />
— NEVER guess or take chances with electrical equipment of any kind. It is<br />
better to be safe than sorry.<br />
○ ○ ○ ○ ○ ○ ○ ○ ○ ○ ○ ○ ○ ○ ○ ○ ○ ○ ○ ○ ○ ○ ○ ○ ○ ○ ○ ○ ○ ○ ○ ○ ○ ○ ○ ○ ○ ○ ○ ○ ○ ○ ○ ○ ○ ○ ○<br />
3
Locations of remote control buttons<br />
OUTSIDE BUTTONS<br />
INSIDE BUTTONS<br />
How to open the cover.<br />
1<br />
8<br />
2<br />
1 2 3<br />
4 5 6<br />
7 8 9<br />
3<br />
4<br />
5<br />
6<br />
7<br />
ZOOM<br />
TV<br />
P<br />
P<br />
0<br />
AV<br />
MENU<br />
OK<br />
9<br />
0<br />
-<br />
=<br />
~<br />
MENU<br />
P<br />
TV<br />
OK<br />
P<br />
HOLD<br />
SUBPAGE<br />
MODE<br />
STORE<br />
REVEAL<br />
CANCEL<br />
VCR TEXT<br />
SIZE<br />
INDEX<br />
!<br />
@<br />
1 Mute button p.12<br />
2 Number buttons p.9<br />
3 ZOOM button p.16<br />
4 Hyper Sound button p.12<br />
5 Information button p.9, 14<br />
6 TV button<br />
7 Volume –/+ buttons p.10<br />
8 Standby button p.8, 10<br />
9 Colour buttons<br />
0 TV/text button p.17<br />
- OK button<br />
= PR channel / buttons p.9<br />
~ / / / buttons<br />
! Teletext/VCR control buttons p.17<br />
@ VCR/TEXT selector switch<br />
• When switched to the VCR side, the ! buttons function as<br />
the <strong>JVC</strong> VCR control buttons.<br />
Notes:<br />
• For details on button functions, see the <strong>JVC</strong> VCR<br />
manual.<br />
• Depending on your VCR, the remote control may not<br />
operate perfectly, and may not even control the VCR at<br />
all.<br />
• When switched to the TEXT side, the ! buttons function<br />
as teletext control buttons.<br />
Inserting batteries into your remote<br />
control<br />
Use two AAA/R03 dry cell batteries.<br />
Insert two batteries, observing the<br />
polarities, inserting the end first.<br />
CAUTION:<br />
• Follow the cautions printed on the batteries.<br />
and<br />
Notes:<br />
• Battery life is approx. six months to one year, depending on<br />
frequency of use.<br />
• If the remote control operates erratically, replace the batteries.<br />
• We recommend that you use the supplied batteries<br />
temporarily and replace them as soon as operation becomes<br />
erratic. The supplied batteries are for operational testing of the<br />
remote control, not for regular use.<br />
4
Locations of TV buttons and parts<br />
FRONT PANEL<br />
Push to open<br />
(behind the door)<br />
L<br />
EXT-3<br />
R<br />
P<br />
ECO<br />
1 2 3 4 5 6 7 8 9 0 -<br />
REAR PANEL<br />
1 Remote control sensor<br />
2 ECO sensor<br />
3 Headphone jack (mini jack) p.7<br />
4 EXT-3 terminals p.6, 19<br />
5 Volume button p.10<br />
(Press this button to display the volume<br />
level indicator. Press the 6 Up/down<br />
buttons to change volume while the<br />
volume level indicator is displayed.)<br />
6 Up/down buttons p.10<br />
(You can use this button as the /<br />
buttons of the PR channel. Pressing the<br />
5 Volume button makes this button<br />
function as the Volume –/+ buttons.)<br />
7 Hyper Sound lamp p.12<br />
=<br />
8 ECO lamp p.13<br />
9 Sleep timer lamp p.14<br />
0 Power lamp p.8, 10<br />
~<br />
!<br />
EXT-1<br />
S<br />
EXT-2<br />
S<br />
- Main power button p.8, 10<br />
= EXT-2 terminal p.6, 19<br />
~ EXT-1 terminal p.6, 19<br />
! Aerial socket p.6<br />
5
PREPARATION AND BASIC OPERATION<br />
1. Connecting the aerial and VCR<br />
If not connecting a VCR, do 1 only.<br />
If connecting a VCR, proceed 1 → 2 → 3.<br />
VHF/UHF outdoor aerial<br />
Notes:<br />
• For further details, refer to manuals<br />
provided with the devices you are<br />
connecting.<br />
• Connecting cables are not supplied.<br />
• You can view video from a VCR<br />
without doing 3. For details, refer to<br />
the manual provided with your VCR.<br />
1<br />
2<br />
EXT-1<br />
S<br />
EXT-2<br />
S<br />
3<br />
To RF <br />
output<br />
To AV IN / OUT <br />
terminal<br />
1 To aerial input<br />
VCR / S-VHS VCR<br />
2. Connecting other external devices<br />
Conditions:<br />
• This TV set has external device connectors, EXT-1 to EXT-3 to which<br />
you can connect a VCR. However, there are some differences in<br />
functions among them. Consult the following table before making<br />
connections.<br />
EXT-1 EXT-2 EXT-3 (front)<br />
VIDEO IN √ *1 √ *1 √<br />
VIDEO OUT √ *2 √ *3 –<br />
S-VIDEO IN √ *1 √ *1 –<br />
S-VIDEO OUT – – –<br />
RGB IN √ – –<br />
AUDIO-L IN √ √ √<br />
AUDIO-R IN √ √ √<br />
AUDIO-L OUT √ *2 √ *3 –<br />
AUDIO-R OUT √ *2 √ *3 –<br />
Others<br />
• Automatic detection and<br />
switching of input mode.<br />
• Automatic detection and<br />
switching of ZOOM mode.<br />
*1 Select VIDEO or S-VIDEO<br />
mode from the EXT SETTING<br />
menu. For details, see page 19<br />
“EXT SETTING.”<br />
*2 Only the TV broadcast is<br />
output.<br />
*3 TV broadcasts or inputs from<br />
EXT-1 or 3 can be output. For<br />
details, see page 19<br />
“DUBBING.”<br />
• Use headphones with a stereo mini jack (dia. 3.5 mm).<br />
When using headphones, the speakers will not output sound.<br />
• For further details, refer to manuals provided with the devices you are<br />
connecting.<br />
• Connecting cables are not supplied.<br />
6
Devices which can be connected to the terminals on the rear panel<br />
1 VCR<br />
2 S-VHS VCR<br />
1 2 3<br />
3 Decoder<br />
4 TV game<br />
or<br />
4<br />
1 2<br />
EXT-1<br />
S<br />
EXT-2<br />
S<br />
Devices which can be connected to the terminals on the front panel<br />
(behind the door)<br />
Camcorder<br />
L<br />
EXT-3<br />
R<br />
Push to open<br />
To audio <br />
output<br />
or<br />
TV game<br />
Headphones<br />
To video output<br />
3. Connecting the power cord<br />
Insert the power plug into an AC outlet (AC 220 – 240 V,<br />
50 Hz).<br />
Power cord<br />
AC outlet<br />
7
4. Turning the power and TV on<br />
1. Press the Main power button on the TV to turn<br />
the power on.<br />
The Power lamp lights red (power on), then green (TV<br />
on).<br />
If the power lamp stays red and does not change to green:<br />
Your TV is in the standby mode. Press the Standby button on the<br />
remote control to turn your TV on.<br />
Note:<br />
• You can also press the PR channel<br />
/ button, a number button or the<br />
up/down button on the front panel to<br />
turn the TV on.<br />
5. Initial Settings<br />
• When the TV is first turned ON, it enters into the initial setting mode, and<br />
the <strong>JVC</strong> logo is displayed.<br />
1. Press any button on the remote control.<br />
LANGUAGE menu appears.<br />
Selecting the on-screen language<br />
You can select your language from ten languages listed on the LANGUAGE<br />
menu. The displayed menus on the screen are described in the selected<br />
language.<br />
2. Press / button to select<br />
ENGLISH.<br />
LANGUAGE<br />
ENGLISH<br />
FRANÇAIS<br />
DEUTSCH<br />
ITALIANO<br />
CASTELLANO<br />
NEDERLANDS<br />
DANSK<br />
NORSK<br />
SVENSKA<br />
SUOMI<br />
TV:EXIT<br />
OK:OK<br />
Note:<br />
• The TV enters into the initial setting<br />
mode only once when the TV is first<br />
turned ON. If you turn the TV off or exit<br />
from the setting menu while performing<br />
the initial settings by mistake, you must<br />
redo the initial settings, “LANGUAGE”<br />
and “AUTO PROGRAM”, following the<br />
procedures described in page 20.<br />
3. Press OK button.<br />
English is set for the on-screen display<br />
description, and the AUTO PROGRAM menu<br />
appears.<br />
AUTO PROGRAM<br />
START<br />
CANCEL<br />
TV:EXIT<br />
OK:OK<br />
Automatically allocating stations to PR channels<br />
To view a TV programme, you must first allocate broadcast stations to PR<br />
channels. You can automatically allocate up to 99 stations to PR channels<br />
PR1 to PR 99 on this TV. Broadcast stations that can be received are<br />
automatically determined and set to PR channels.<br />
8
4. Press OK button.<br />
Broadcast stations are automatically allocated<br />
to the PR channels.<br />
AUTO PROGRAM<br />
CH 60<br />
81%<br />
TV:EXIT<br />
OK:OK<br />
Note:<br />
• If you want to quit automatic allocation<br />
in the middle, press the TV button.<br />
The EDIT menu is displayed after the<br />
allocation is completed.<br />
• If you want to edit PR channels or allocate a<br />
station to PR0 (AV) channel, see page 21<br />
“EDIT/MANUAL” for procedural description.<br />
• When carrying out automatic programming,<br />
the following broadcast channels and Station<br />
IDs are automatically set to PR channels<br />
PR1 to 6 by the AUTO PROGRAM function.<br />
EDIT<br />
PR ID CH/CC<br />
AV -----<br />
1 BBC1 CH 21<br />
2 BBC2 CH 22<br />
3 ITV CH 23<br />
4 CH4 CH 24<br />
5 CH5 CH 25<br />
6 CH 26<br />
7 CH 27<br />
8 CH 28<br />
9 CH 29<br />
TV OK :MOVE<br />
:ID<br />
:INSERT<br />
:DELETE<br />
:MANUAL<br />
Notes:<br />
• When the previous tables broadcast<br />
channels cannot be received, nothing<br />
is set to that particular PR channels.<br />
• To store different broadcast channels<br />
to PR 1 to 6, see "EDIT/MANUAL" on<br />
page 21.<br />
PR channel Broadcast channel Station ID<br />
PR 1 BBC1 BBC1<br />
PR 2 BBC2 BBC2<br />
PR 3 ITV ITV<br />
PR 4 CHANNEL4 CH4<br />
PR 5 CHANNEL5 CH5<br />
PR 6 SKY1* No indication<br />
* To receive SKY1, a satellite broadcast<br />
reception tuner is required. Before<br />
carrying out automatic setting, receive<br />
SKY1 on the satellite broadcast<br />
reception tuner.<br />
● The procedure is complete.<br />
Press the TV button to exit the menu.<br />
6. Viewing a <strong>television</strong> programme<br />
1. Select a PR channel.<br />
Selection<br />
P<br />
• Press the PR channel / button.<br />
P<br />
Direct channel selection<br />
1<br />
4<br />
2<br />
5<br />
3<br />
6<br />
• Press the corresponding number buttons.<br />
Example: To select channel 6, press “6”.<br />
To select channel 12, press “1” and “2”.<br />
Notes:<br />
• If the picture is not clear or no <strong>colour</strong><br />
appears, change the <strong>colour</strong> system<br />
manually (see page 13 for details).<br />
• Enter “0” when selecting an AV<br />
channel (PR 0 channel).<br />
7 8 9<br />
0<br />
AV<br />
PR LIST<br />
To use the PR LIST to select a PR channel<br />
1. Press Information button.<br />
The PR LIST appears.<br />
• To exit the PR LIST, press TV<br />
button.<br />
PR ID<br />
AV -----<br />
1 BBC1<br />
2 BBC2<br />
3 ITV<br />
4 CH4<br />
5 CH5<br />
6<br />
7<br />
8<br />
9<br />
TV:EXIT<br />
OK:OK<br />
9
P<br />
P<br />
MENU<br />
OK<br />
2. Press / button to select a PR<br />
channel.<br />
• Press button to view the next<br />
page of the PR LIST.<br />
• Press button to view the<br />
previous page of the PR LIST.<br />
3. Press OK button.<br />
PR LIST<br />
PR ID<br />
AV -----<br />
1 BBC1<br />
2 BBC2<br />
3 ITV<br />
4 CH4<br />
5 CH5<br />
6<br />
7<br />
8<br />
9<br />
TV:EXIT<br />
OK:OK<br />
Note:<br />
• The mark will appear on the PR<br />
channel when the CHILD LOCK setting<br />
is on (see page 15).<br />
2. Press the Volume -/+ button.<br />
The Volume level indicator appears and the<br />
volume changes as you press the Volume -/+<br />
buttons.<br />
20<br />
Turning the TV and power off<br />
1. Press the Standby button to turn the TV off.<br />
The Power lamp changes from green to red.<br />
The TV enters standby mode.<br />
2. Press the Main power button on the TV to turn<br />
the main power off.<br />
The Power lamp goes off.<br />
Note:<br />
• To s<strong>av</strong>e energy, we recommend that<br />
you turn the main power off if you do<br />
not plan to use your TV for a long time.<br />
To select a channel without using the remote<br />
control<br />
You can also use the buttons on the front panel of the TV.<br />
1. Press the Up/down button to turn your TV on.<br />
P<br />
The Power lamp changes from red to green.<br />
Note:<br />
• If your TV does not turn on, press the<br />
Main power button, and then press the<br />
Up/down button again.<br />
2. Press the Up/down button to select the PR<br />
channel.<br />
3. Adjust the volume.<br />
1. Press the Volume button.<br />
The volume level indicator appears.<br />
P<br />
2. Press the Up/down button while the volume level<br />
indicator is displayed.<br />
Note:<br />
• PR channel selection is not <strong>av</strong>ailable<br />
while the volume level indicator is<br />
displayed.<br />
● To turn off your TV, press the Main power button.<br />
The Power lamp goes off.<br />
10
Viewing images from external devices<br />
1. Repeatedly press the 0 button to select the EXT<br />
terminal.<br />
0<br />
AV<br />
The current selection appears, and disappears after several<br />
seconds.<br />
When a station is not registered to the PR 0 (AV) channel, pressing<br />
the 0 button changes the selection as follows:<br />
TV mode<br />
EXT modes<br />
Notes:<br />
• If the picture is not clear or no <strong>colour</strong><br />
appears, change the <strong>colour</strong> system<br />
manually (see page 13).<br />
• When selecting an EXT terminal with<br />
no input signal, the EXT number and<br />
ID become fixed on screen.<br />
PR channel<br />
number<br />
EXT-1<br />
EXT-2<br />
E1 or S1 E2 or S2<br />
EXT-3<br />
E3<br />
When a station is registered to the PR 0 (AV) channel, pressing the<br />
0 button changes the selection as follows:<br />
PR channel<br />
number<br />
TV modes<br />
PR 0 channel<br />
AV<br />
EXT modes<br />
EXT-1<br />
EXT-2<br />
E1 or S1 E2 or S2<br />
EXT-3<br />
E3<br />
TV mode:<br />
Shows images input from an external device (such as a VCR) or TV<br />
aerial connected to the aerial socket of your TV.<br />
EXT modes:<br />
Shows images input from an external device (such as a VCR)<br />
connected to the selected EXT terminal.<br />
• To use S-Video mode to view input from an S-VHS VCR, see “To<br />
select S-VIDEO input for a terminal” on page 19. When selecting<br />
EXT-1 or EXT-2 input terminals as S-VIDEO input, E1 or E2 changes<br />
to S1 or S2 in the display.<br />
11
SOUND AND PICTURE<br />
MUTE<br />
MULTI SOUND<br />
TINT<br />
You can mute the volume to 0<br />
instantly. This is convenient when<br />
answering the phone or when<br />
receiving visitors.<br />
1. Press (Mute).<br />
The sound is muted.<br />
To restore the sound:<br />
Press the Mute button again.<br />
HYPER SOUND<br />
You can enjoy sounds with a wider<br />
ambiance by Hyper sound.<br />
1. Press (Hyper Sound).<br />
The HYPER SOUND ON appears.<br />
• The Hyper Sound lamp lights.<br />
HYPER SOUND ON<br />
To return to normal sound:<br />
Press the Hyper Sound button again.<br />
• HYPER SOUND can be also set to<br />
ON by operating MENU.<br />
1. Press the OK button.<br />
The MENU appears.<br />
2. Press / button to select<br />
SOUND SETTING, and press OK<br />
button.<br />
The SOUND SETTING menu<br />
appears.<br />
3. Press / button to select<br />
HYPER SOUND.<br />
SOUND SETTING<br />
STEREO/I•II I II<br />
BASS<br />
TREBLE<br />
BALANCE<br />
HYPER SOUND<br />
OFF<br />
TV:EXIT<br />
OK:OK<br />
4. Press / button to select ON,<br />
OFF.<br />
5. Press the OK button.<br />
This completes the setting.<br />
• If you turned on HYPER<br />
SOUND, the Hyper Sound<br />
lamp lights.<br />
You can select the multi sound mode<br />
for stereo broadcast programmes<br />
and bilingual programmes.<br />
Note:<br />
• The MULTI SOUND function has no<br />
effect on programmes other than A2 or<br />
NICAM broadcast programmes.<br />
1. Press OK.<br />
The MENU appears.<br />
MENU<br />
PICTURE SETTING<br />
SOUND SETTING<br />
EXT SOURCE<br />
FEATURES<br />
INSTALL<br />
DEMO<br />
TV:EXIT<br />
OK:OK<br />
2. Press / to select<br />
SOUND SETTING, then<br />
press OK.<br />
The SOUND SETTING menu<br />
appears.<br />
SOUND SETTING<br />
STEREO/I•II I II<br />
BASS<br />
TREBLE<br />
BALANCE<br />
HYPER SOUND<br />
OFF<br />
TV:EXIT<br />
OK:OK<br />
3. Press / to select<br />
STEREO/I•II.<br />
Notes:<br />
• The multi sound mode display is<br />
different from the broadcast<br />
programme.<br />
• The multi sound function does not<br />
work in EXT modes.<br />
The STEREO/I•II does not appear<br />
in SOUND SETTING menu.<br />
4. Press / to select a<br />
multi sound mode.<br />
: Stereo sound<br />
: Bilingual I (Sub I)<br />
: Bilingual II (Sub II)<br />
: Normal sound<br />
5. Press OK.<br />
This completes the setting.<br />
Note:<br />
• When you display the current PR<br />
channel number, the current multi sound<br />
mode appears for approximately 3<br />
seconds.<br />
You can choose from among three<br />
TINT modes.<br />
1. Press OK.<br />
The MENU appears.<br />
2. Press / to select<br />
PICTURE SETTING, then<br />
press OK.<br />
The PICTURE SETTING menu<br />
appears.<br />
3. Press / to select TINT.<br />
PICTURE SETTING<br />
TINT<br />
NORMAL<br />
CONTRAST<br />
BRIGHT<br />
SHARP<br />
COLOUR<br />
HUE<br />
ECO MODE<br />
OFF<br />
COLOUR SYSTEM<br />
PAL<br />
4:3 AUTO ASPECT REGULAR<br />
TV:EXIT<br />
OK:OK<br />
:RESET<br />
4. Press / to select a tint<br />
mode.<br />
COOL:<br />
A cool white <strong>colour</strong> base with a<br />
boost in the <strong>colour</strong> and contrast<br />
levels. Creating a more vivid<br />
picture.<br />
WARM:<br />
Use this mode when viewing film<br />
programmes.<br />
NORMAL:<br />
A normal white <strong>colour</strong> base with no<br />
boost in the <strong>colour</strong> or contrast<br />
levels.<br />
5. Press OK.<br />
This completes the setting.<br />
12
COLOUR SYSTEM<br />
The <strong>colour</strong> system is automatically<br />
selected, but if the picture is not<br />
clear or no <strong>colour</strong> appears, select<br />
the <strong>colour</strong> system manually.<br />
1. Press OK.<br />
The MENU appears.<br />
2. Press / to select<br />
PICTURE SETTING, then<br />
press OK.<br />
The PICTURE SETTING menu<br />
appears.<br />
3. Press / to select<br />
COLOUR SYSTEM.<br />
4. Press / to select the<br />
appropriate <strong>colour</strong> system.<br />
PAL:<br />
PAL system.<br />
PICTURE SETTING<br />
TINT<br />
NORMAL<br />
CONTRAST<br />
BRIGHT<br />
SHARP<br />
COLOUR<br />
HUE<br />
ECO MODE<br />
OFF<br />
COLOUR SYSTEM NTSC3.58<br />
4:3 AUTO ASPECT REGULAR<br />
TV:EXIT<br />
OK:OK<br />
:RESET<br />
NTSC3.58:<br />
NTSC 3.58 MHz system.<br />
NTSC4.43:<br />
NTSC 4.43 MHz system.<br />
AUTO:<br />
Automatic <strong>colour</strong> system selection.<br />
Notes:<br />
• Auto may not function properly<br />
depending on signal quality. If the<br />
picture is abnormal in AUTO mode,<br />
select another <strong>colour</strong> system<br />
manually.<br />
• When in TV mode (PR 1 to PR 99),<br />
you cannot select AUTO, NTSC<br />
3.58 or NTSC 4.43.<br />
• When in TV mode (PR 0), you<br />
cannot select NTSC 3.58 or NTSC<br />
4.43.<br />
5. Press OK.<br />
This completes the setting.<br />
PICTURE/SOUND<br />
ADJUSTMENT<br />
You can adjust the picture and<br />
sound as you like.<br />
To adjust the picture<br />
1. Press OK.<br />
The MENU appears.<br />
2. Press / to select<br />
PICTURE SETTING, then<br />
press OK.<br />
The PICTURE SETTING menu<br />
appears.<br />
PICTURE SETTING<br />
TINT<br />
NORMAL<br />
CONTRAST<br />
BRIGHT<br />
SHARP<br />
COLOUR<br />
HUE<br />
ECO MODE<br />
OFF<br />
COLOUR SYSTEM<br />
PAL<br />
4:3 AUTO ASPECT REGULAR<br />
TV:EXIT<br />
OK:OK<br />
3. Press / to select an<br />
item, and press / to<br />
adjust it.<br />
CONTRAST<br />
• To return to the default settings,<br />
press blue button.<br />
Item<br />
Lower CONTRAST Higher<br />
(picture contrast)<br />
Darker BRIGHT Brighter<br />
(picture brightness)<br />
Softer SHARP Sharper<br />
(picture sharpness)<br />
Lighter COLOUR Deeper<br />
(picture <strong>colour</strong>)<br />
Reddish HUE Greenish<br />
(picture hue)<br />
Note:<br />
• You can adjust the HUE (picture<br />
hue) only when the <strong>colour</strong> system<br />
is NTSC 3.58 or NTSC 4.43.<br />
4. Press OK.<br />
This completes the setting.<br />
To adjust the sound<br />
1. Press OK.<br />
The MENU appears.<br />
:RESET<br />
2. Press / to select<br />
SOUND SETTING, then<br />
press OK.<br />
The SOUND SETTING menu<br />
appears.<br />
3. Press / to select an<br />
item, and press / to<br />
adjust it.<br />
Item<br />
Weaker BASS Stronger<br />
(low frequency sound)<br />
Weaker TREBLE Stronger<br />
(high frequency sound)<br />
Left BALANCE Right<br />
(audio balance)<br />
4. Press OK.<br />
This completes the setting.<br />
ECO MODE<br />
SOUND SETTING<br />
STEREO/I•II I II<br />
BASS<br />
TREBLE<br />
BALANCE<br />
HYPER SOUND<br />
OFF<br />
TV:EXIT<br />
OK:OK<br />
When you set ECO MODE to ON,<br />
the screen contrast is automatically<br />
adjusted to a setting suitable for the<br />
brightness of your room.<br />
This reduces eye strain and the<br />
power consumption of the TV.<br />
1. Press OK.<br />
The MENU appears.<br />
2. Press / to select<br />
PICTURE SETTING, then<br />
press OK.<br />
The PICTURE SETTING menu<br />
appears.<br />
3. Press / to select ECO<br />
MODE.<br />
PICTURE SETTING<br />
TINT<br />
NORMAL<br />
CONTRAST<br />
BRIGHT<br />
SHARP<br />
COLOUR<br />
HUE<br />
ECO MODE<br />
OFF<br />
COLOUR SYSTEM<br />
PAL<br />
4:3 AUTO ASPECT REGULAR<br />
TV:EXIT<br />
OK:OK<br />
:RESET<br />
4. Press / to select ON,<br />
OFF.<br />
5. Press OK.<br />
This completes the setting.<br />
• If you turned on ECO MODE, the<br />
ECO lamp lights.<br />
13
OTHER FEATURES<br />
INFORMATION<br />
SLEEP TIMER<br />
BLUE BACK<br />
You can display the PR LIST or the<br />
current time.<br />
1. Press (Information)<br />
repeatedly.<br />
The display changes cyclically in<br />
the following order.<br />
PR LIST<br />
PR ID<br />
AV -----<br />
1 BBC1<br />
2 BBC2<br />
3 ITV<br />
4 CH4<br />
5 CH5<br />
6<br />
7<br />
8<br />
9<br />
TV:EXIT<br />
OK:OK<br />
21:30<br />
Current time<br />
You can set the TV to automatically<br />
turn off after a specified period of<br />
time.<br />
Note:<br />
• The SLEEP TIMER does not turn off the<br />
Main power.<br />
1. Press OK.<br />
The MENU appears.<br />
2. Press / to select<br />
FEATURES, then press OK.<br />
The FEATURES menu appears.<br />
FEATURES<br />
SLEEP TIMER<br />
BLUE BACK<br />
CHILD LOCK<br />
TV:EXIT<br />
OK:OK<br />
3. Press / to select SLEEP<br />
TIMER, then press OK.<br />
The SLEEP TIMER menu appears.<br />
SLEEP TIMER<br />
60<br />
OFF 120<br />
TV:EXIT<br />
OK:OK<br />
When viewing a PR channel with no<br />
or poor reception, or if there is no<br />
input from an external device, you<br />
can mute the sound and change the<br />
picture into a blue picture.<br />
1. Press OK.<br />
The MENU appears.<br />
2. Press / to select<br />
FEATURES, then press OK.<br />
The FEATURES menu appears.<br />
FEATURES<br />
SLEEP TIMER<br />
BLUE BACK<br />
CHILD LOCK<br />
TV:EXIT<br />
OK:OK<br />
3. Press / to select BLUE<br />
BACK, then press OK.<br />
The BLUE BACK menu appears.<br />
BLUE BACK<br />
ON<br />
OFF<br />
TV:EXIT<br />
OK:OK<br />
No indication<br />
About PR LIST:<br />
• Ten positions including the currently<br />
selected PR channel will be displayed<br />
as a list.<br />
Press / / / to select the<br />
desired PR channel. For details see<br />
page 9.<br />
About the current time display:<br />
This TV uses teletext data to determine<br />
the current time.<br />
• If the TV has not received a station<br />
that has teletext data since it was<br />
turned on, the time display is blank.<br />
To view the current time, select a<br />
station that is broadcasting teletext<br />
data. As long as you do not turn off<br />
the TV, then even if you select other<br />
stations, the time will still be<br />
displayed.<br />
4. Press / to select a<br />
period of time.<br />
You can set the period of time a<br />
maximum of 120 minutes in 10<br />
minute increments.<br />
OFF:<br />
Turns off the SLEEP TIMER.<br />
5. Press OK.<br />
The selected period of time is<br />
displayed for approx. 3 seconds.<br />
SLEEP TIMER 60<br />
• The Sleep timer lamp lights if you<br />
set the SLEEP TIMER.<br />
To display the remaining Sleep timer<br />
time:<br />
Perform steps 1 to 3 to display the<br />
SLEEP TIMER menu, and press OK<br />
button when you finish checking the<br />
time.<br />
To turn off the Sleep timer:<br />
Perform steps 1 to 3 to display the<br />
SLEEP TIMER menu, press button to<br />
select “OFF”, and then press OK button.<br />
• The Sleep timer lamp goes out.<br />
Note:<br />
• One minute before the SLEEP TIMER<br />
turns off the TV, “GOOD NIGHT!”<br />
appears. Three seconds before the<br />
SLEEP TIMER turns off the TV, “<strong>JVC</strong>” is<br />
displayed on the screen.<br />
4. Press / to select ON or<br />
OFF.<br />
5. Press OK.<br />
This completes the setting.<br />
14
CHILD LOCK<br />
You can lock some PR channels to<br />
prevent your children from watching<br />
them.<br />
To set the CHILD LOCK<br />
1. Press OK.<br />
The MENU appears.<br />
2. Press / to select<br />
FEATURES, then press OK.<br />
The FEATURES menu appears.<br />
FEATURES<br />
SLEEP TIMER<br />
BLUE BACK<br />
CHILD LOCK<br />
TV:EXIT<br />
OK:OK<br />
3. Press / to select CHILD<br />
LOCK, then press 0 button.<br />
The SET ID NO menu appears.<br />
SET ID NO<br />
0000<br />
TV:EXIT<br />
OK:OK<br />
4. Enter the ID number.<br />
1. Press / to select a number.<br />
2. Press / to move the cursor.<br />
5. Press OK.<br />
The CHILD LOCK menu appears.<br />
CHILD LOCK<br />
PR ID CH/CC<br />
AV -----<br />
1 BBC1 CH 21<br />
2 BBC2 CH 22<br />
3 ITV CH 23<br />
4 CH4 CH 24<br />
5 CH5 CH 25<br />
6 CH 26<br />
7 CH 27<br />
8 CH 28<br />
9 CH 29<br />
TV:EXIT<br />
OK:OK<br />
6. Press / to select a PR<br />
channel, then press blue<br />
button.<br />
The selected PR channel is locked.<br />
TV:EXIT<br />
:LOCK<br />
CHILD LOCK<br />
PR ID CH/CC<br />
AV -----<br />
1 BBC1 CH 21<br />
2 BBC2 CH 22<br />
3 ITV CH 23<br />
4 CH4 CH 24<br />
5 CH5 CH 25<br />
6 CH 26<br />
7 CH 27<br />
8 CH 28<br />
9 CH 29<br />
OK:OK<br />
:CANCEL<br />
• To cancel the CHILD LOCK:<br />
Press blue button again.<br />
• Repeat step 6 to lock all PR<br />
channels which you want to lock.<br />
7. Press OK.<br />
This completes the setting.<br />
Notes:<br />
• You cannot select a locked PR channel<br />
using the PR channel / buttons.<br />
• Even if you can select a locked channel<br />
and display it, you can not view the<br />
programme of the locked channel.<br />
To view a locked PR<br />
channel<br />
1. Select a locked PR channel.<br />
• Use the number buttons to select<br />
the PR channel.<br />
The locked channel is displayed.<br />
2. Press (Information).<br />
The ID NO. input menu appears.<br />
3. Press the number buttons<br />
to enter the ID number.<br />
You are now viewing the locked PR<br />
channel.<br />
If you forget the ID number:<br />
Perform steps 1 to 3 of “To set the<br />
CHILD LOCK”. After you confirm the ID<br />
number, press the TV button to exit the<br />
menu.<br />
7<br />
7<br />
ID NO. :<br />
DEMONSTRATION<br />
The demonstration runs<br />
automatically and introduces the<br />
menus of this TV’s main features.<br />
1. Press OK.<br />
The MENU appears.<br />
2. Press / to select DEMO,<br />
then press OK.<br />
The demonstration begins.<br />
• To stop the demonstration, press<br />
any button on the remote control.<br />
15
16<br />
OTHER FEATURES<br />
ZOOM<br />
Select a ZOOM mode to change the<br />
picture format. You can enlarge the<br />
picture to fill the wide TV screen<br />
(16:9 aspect ratio). In addition, you<br />
can stretch a normal picture (4:3<br />
aspect ratio) to fill the wide TV<br />
screen.<br />
Notes:<br />
• The picture format information of the<br />
present broadcasting programme may<br />
be received as WSS (Wide Screen<br />
Signalling). When AUTO mode is<br />
selected for ZOOM mode and the WSS<br />
signal is received, this TV automatically<br />
selects the optimum ZOOM mode<br />
corresponding to the WSS signal.<br />
However, in the case of weak WSS<br />
signal reception, this function may not<br />
work correctly. In this case, select the<br />
optimum ZOOM mode manually.<br />
• If the EXT-1 terminal’s input is from a<br />
picture signal with a 16:9 aspect ratio<br />
picture format, the ZOOM mode may<br />
automatically changes to FULL mode.<br />
This is because the TV detects an<br />
identification signal which is not an WSS<br />
signal.<br />
Manual ZOOM selection<br />
You can select a ZOOM mode<br />
manually.<br />
1. Press ZOOM repeatedly to<br />
select a ZOOM mode.<br />
The picture expands.<br />
REGULAR mode:<br />
Use to view a normal picture (4:3<br />
aspect ratio) unchanged.<br />
PANORAMIC mode:<br />
Stretches the left and right sides of<br />
a normal picture to fill the screen, in<br />
a way that does not appear<br />
unnatural.<br />
(PANORAMIC)<br />
Note:<br />
• In PANORAMIC mode, the top,<br />
bottom, left and right of the picture<br />
are slightly cut off.<br />
16:9 ZOOM mode:<br />
Use to expand a wide picture (16:9<br />
aspect ratio).<br />
(16:9 ZOOM)<br />
14:9 ZOOM mode:<br />
Use to expand a picture with a 14:9<br />
aspect ratio.<br />
(14:9 ZOOM)<br />
16:9 ZOOM SUBTITLE mode:<br />
Use to expand a picture with a 16:9<br />
aspect ratio h<strong>av</strong>ing subtitles at the<br />
bottom of the screen.<br />
SUBTITLE SUBTITLE<br />
SUBTITLE SUBTITLE<br />
(16:9 ZOOM SUBTITLE)<br />
Note:<br />
• In 16:9 ZOOM SUBTITLE mode,<br />
the top of the picture are slightly<br />
cut off.<br />
FULL mode:<br />
Uniformly stretches the left and right<br />
sides of a normal picture (4:3 aspect<br />
ratio) to fill the wide TV screen.<br />
(FULL)<br />
Note:<br />
• For pictures with a 16:9 aspect<br />
ratio that h<strong>av</strong>e been squeezed into<br />
a normal picture (4:3 aspect ratio),<br />
select FULL mode to restore their<br />
original dimensions.<br />
To move the picture vertically:<br />
If you cannot see subtitles at the<br />
bottom of the screen, or if the top or<br />
bottom is cut off, move the picture<br />
vertically.<br />
Note:<br />
• You cannot move the picture vertically in<br />
AUTO, REGULAR and FULL mode.<br />
1. Press ZOOM.<br />
The current ZOOM mode is<br />
displayed.<br />
16:9 ZOOM<br />
2. Before the display<br />
disappears, press / to<br />
move the picture up or<br />
down.<br />
, :Default position<br />
, :The picture is moved from<br />
default position.<br />
Note:<br />
• If you change the ZOOM mode, the<br />
picture returns to its default<br />
position.<br />
Automatic ZOOM<br />
selection (AUTO mode)<br />
You can set your TV to automatically<br />
select the optimum ZOOM mode to<br />
suit the picture format.<br />
1. Press ZOOM repeatedly to<br />
select AUTO.<br />
Your TV automatically selects the<br />
optimum ZOOM mode to suit the current<br />
programme’s picture format.<br />
Note:<br />
• This function may not work<br />
correctly depending on the<br />
programme. In this case, select the<br />
optimum ZOOM mode manually.<br />
To preset a ZOOM mode for the<br />
normal picture:<br />
You can preset one of the three<br />
ZOOM modes, REGULAR,<br />
PANORAMIC or 14:9 ZOOM, as the<br />
ZOOM mode for the normal picture<br />
(4:3 aspect ratio).<br />
1. Press OK<br />
The MENU appears.<br />
2. Press / to select<br />
PICTURE SETTING, then<br />
press OK.<br />
The PICTURE SETTING menu<br />
appears.<br />
3. Press / to select<br />
4:3 AUTO ASPECT.<br />
PICTURE SETTING<br />
TINT<br />
NORMAL<br />
CONTRAST<br />
BRIGHT<br />
SHARP<br />
COLOUR<br />
HUE<br />
ECO MODE<br />
OFF<br />
COLOUR SYSTEM<br />
PAL<br />
4:3 AUTO ASPECT REGULAR<br />
TV:EXIT<br />
OK:OK<br />
:RESET<br />
4. Press to select ZOOM<br />
mode.<br />
5. Press OK.<br />
This completes the setting.
TELETEXT<br />
Note:<br />
• If you h<strong>av</strong>e trouble receiving teletext<br />
broadcasts, consult your local dealer or<br />
the teletext station.<br />
4<br />
5<br />
6<br />
7<br />
3<br />
(Outside buttons)<br />
0<br />
ZOOM<br />
TV<br />
HOLD<br />
SUBPAGE<br />
BASIC TELETEXT<br />
OPERATION<br />
P<br />
P<br />
(Inside buttons)<br />
P<br />
MODE<br />
STORE<br />
REVEAL<br />
CANCEL<br />
VCR TEXT<br />
You can view two types of teletext<br />
broadcasts on the TV: Fastext and<br />
WST. The TV automatically<br />
recognizes the type of teletext<br />
broadcast.<br />
Condition:<br />
• The VCR/TEXT selector switch must<br />
already be set to the TEXT side.<br />
1. Select a channel with a<br />
teletext broadcast.<br />
AV<br />
MENU<br />
OK<br />
SIZE<br />
INDEX<br />
1<br />
2<br />
8<br />
9<br />
0<br />
-<br />
1 Colour buttons<br />
2 TV/text button<br />
3 VCR/TEXT selector switch<br />
• When this switch is set to the<br />
TEXT side, the following buttons<br />
function as the teletext control<br />
button.<br />
4 MODE button<br />
5 HOLD button<br />
6 SUB PAGE button<br />
7 STORE button<br />
8 REVEAL button<br />
9 SIZE button<br />
0 INDEX button<br />
- DISPLAY CANCEL button<br />
2. Press (TV/text).<br />
TV mode<br />
TEXT TEXT TEXT<br />
TEXT TEXT TEXT<br />
TEXT TEXT TEXT<br />
P100 P101 P102 P103<br />
Text mode<br />
3. Select a page number.<br />
Browse:<br />
Press the PR channel / button on<br />
the remote control.<br />
Direct selection:<br />
Press the number buttons to enter a<br />
three-digit page number.<br />
Colour button selection:<br />
Press a <strong>colour</strong> button to select the<br />
corresponding page number on the<br />
bottom line of the screen.<br />
Notes:<br />
• Category names of teletext pages<br />
may appear instead of page<br />
numbers.<br />
• In principle, ZOOM mode is fixed to<br />
FULL mode when you view Teletext<br />
programmes.<br />
• Some Teletext programmes display<br />
a mixture of regular TV<br />
programmes and Text information.<br />
When viewing these Teletext<br />
programmes, pay attention to the<br />
following points.<br />
– Teletext pages cannot be<br />
selected with the Colour buttons.<br />
To change to other Teletext<br />
pages, select the Teletext page<br />
that you want to view with the<br />
Channel / buttons or number<br />
buttons.<br />
– ZOOM mode returns to the mode<br />
you selected before you started<br />
viewing Teletext programmes. If<br />
part of the Teletext information is<br />
missing at the top or bottom of<br />
the screen, press the ZOOM<br />
button to switch ZOOM mode to<br />
FULL mode or REGULAR mode.<br />
● To return to TV mode, press the<br />
TV/text again.<br />
Note:<br />
• You can also return to TV mode by<br />
pressing the TV button.<br />
DISPLAY CANCEL<br />
You can search for a teletext page<br />
while watching TV.<br />
1. Select a teletext page.<br />
The TV searches for a teletext<br />
page.<br />
2. Press DISPLAY CANCEL.<br />
The TV programme appears.<br />
When the TV finds the teletext page,<br />
its page number appears in the<br />
upper left of the screen.<br />
Note:<br />
• If selecting something other than<br />
REGULAR or FULL mode for<br />
ZOOM mode, the page number<br />
does not appear on the screen.<br />
3. Press (TV/text) when<br />
the page number is on the<br />
screen.<br />
SIZE<br />
You can double the height of the<br />
teletext display.<br />
1. Press SIZE repeatedly.<br />
TEXT<br />
SIZE<br />
TEXT<br />
TEXT SIZE<br />
SIZE<br />
17
TELETEXT<br />
HOLD<br />
LIST MODE<br />
SUB PAGE<br />
You can hold a teletext page on the<br />
screen for a desired length of time,<br />
even while several other teletext<br />
pages are being received.<br />
1. Press HOLD.<br />
is displayed in the upper left of<br />
the screen, and the teletext page is<br />
held on the screen.<br />
To release hold mode:<br />
Press HOLD button again.<br />
INDEX<br />
Just press INDEX button to return to<br />
the index page.<br />
1. Press INDEX.<br />
Fastext/WST:<br />
Returns to page 100 or a previously<br />
specified page.<br />
LIST mode:<br />
Returns to the page number displayed in<br />
the lower left area of the screen.<br />
REVEAL<br />
P100 P101 P102 P103<br />
Some teletext pages include hidden<br />
text (such as answers to a quiz).<br />
1. Press REVEAL.<br />
Each time you press REVEAL<br />
button, text is hidden or revealed.<br />
1 + 2 =<br />
2 x 3 =<br />
If you store the numbers of teletext<br />
pages you view often, you can<br />
quickly call up a desired teletext<br />
page whenever you like.<br />
Note:<br />
• You can store up to 64 pages in<br />
memory. You can store four pages in<br />
each channel from 1 to 15 (60 pages),<br />
and four pages that are the same for all<br />
channels above channel 15 (4 pages).<br />
To store the page<br />
numbers<br />
1. Press MODE to engage<br />
LIST mode.<br />
Stored page numbers are displayed<br />
at the bottom of the screen.<br />
2. Press a <strong>colour</strong> button, then<br />
enter the number of the<br />
teletext page.<br />
To assign other pages to remaining<br />
<strong>colour</strong> buttons, repeat this<br />
operation.<br />
3. Press and hold STORE.<br />
The four page numbers blink white<br />
to indicate that they are stored in<br />
memory.<br />
To call up a stored page<br />
1. Press MODE to engage<br />
LIST mode.<br />
Stored page numbers are displayed<br />
at the bottom of the screen.<br />
To release LIST mode:<br />
Press MODE button again.<br />
2. Press a <strong>colour</strong> button to<br />
which a page has been<br />
assigned.<br />
Some teletext pages include subpages<br />
that are automatically<br />
displayed. You can hold any subpage,<br />
or view it at any time.<br />
1. Call up a teletext page with<br />
sub-pages.<br />
2. Press SUB PAGE.<br />
3. Enter the number of the<br />
sub-page.<br />
Example:<br />
To select the 3rd sub-page, press<br />
number buttons “0”, “0”, “0”, and “3”.<br />
Note:<br />
• You can also select a sub page by<br />
pressing the red or green <strong>colour</strong> button.<br />
P100 P101 P102 P103<br />
1 + 2 = 3<br />
2 x 3 = 6<br />
P100 P101 P102 P103<br />
18
OTHER PREPARATION<br />
EXT SETTING<br />
You can select S-VIDEO or normal<br />
input for the EXT-1 and EXT-2<br />
terminals, and you can give an EXT<br />
ID to each EXT input terminal.<br />
To select S-VIDEO input<br />
for a terminal<br />
1. Press OK.<br />
The MENU appears.<br />
2. Press / to select EXT<br />
SOURCE, then press OK.<br />
The EXT SOURCE menu appears.<br />
EXT SOURCE<br />
EXT SETTING<br />
DUBBING<br />
TV:EXIT<br />
OK:OK<br />
3. Press / to select EXT<br />
SETTING, then press OK.<br />
The EXT SETTING menu appears.<br />
EXT SETTING<br />
EXT S-IN ID<br />
EXT-1<br />
EXT-2<br />
EXT-3<br />
TV:EXIT<br />
OK:OK<br />
:S<br />
:ID<br />
4. Press / to select an<br />
EXT input terminal.<br />
5. Press yellow button.<br />
The S-VIDEO input indication<br />
appears.<br />
• To select normal input, press<br />
yellow button again.<br />
EXT SETTING<br />
EXT S-IN ID<br />
EXT-1 S<br />
EXT-2<br />
EXT-3<br />
TV:EXIT<br />
OK:OK<br />
:S<br />
:ID<br />
• If you want to set an EXT ID here,<br />
perform the operation procedures<br />
from the step 4 in the next<br />
column.<br />
6. Press OK.<br />
The menu disappears.<br />
To give an EXT ID to an<br />
EXT input terminal<br />
1. Press OK.<br />
The MENU appears.<br />
2. Press / to select EXT<br />
SOURCE, then press OK.<br />
The EXT SOURCE menu appears.<br />
3. Press / to select EXT<br />
SETTING, then press OK.<br />
The EXT SETTING menu appears.<br />
4. Press / to select an<br />
EXT input terminal.<br />
5. Press blue button.<br />
6. Repeatedly press / to<br />
select a character.<br />
7. Press to move the<br />
cursor forward.<br />
• Pressing button moves the<br />
cursor backward.<br />
• To cancel the operation, press the<br />
(Information) button.<br />
8. Press OK.<br />
EXT SETTING<br />
EXT S-IN ID<br />
EXT-1<br />
EXT-2<br />
EXT-3<br />
TV:EXIT<br />
OK:OK<br />
:S<br />
EXT SETTING<br />
EXT S-IN ID<br />
EXT-1 V<br />
EXT-2<br />
EXT-3<br />
TV:EXIT<br />
OK:OK<br />
:S<br />
EXT SETTING<br />
EXT S-IN ID<br />
EXT-1 VCR-1<br />
EXT-2<br />
EXT-3<br />
TV:EXIT<br />
OK:OK<br />
:S<br />
Note:<br />
• To erase EXT ID, reset the EXT ID to a<br />
blank space.<br />
● This completes the procedure.<br />
Press the TV button to exit the<br />
menu.<br />
DUBBING<br />
Select output to a VCR or other<br />
device connected to the EXT-2<br />
terminal. Note that you cannot<br />
output from the EXT-2 terminal when<br />
the TV is turned off.<br />
Note:<br />
• RGB signals from TV games and<br />
TELETEXT screens cannot be output<br />
from EXT-2 terminal.<br />
1. Press OK.<br />
The MENU appears.<br />
2. Press / to select EXT<br />
SOURCE, then press OK.<br />
The EXT SOURCE menu appears.<br />
3. Press / to select<br />
DUBBING, then press OK.<br />
The DUBBING menu appears.<br />
DUBBING<br />
EXT-1<br />
EXT-3<br />
TV<br />
TV:EXIT<br />
OK:OK<br />
EXT-2<br />
4. Press / to select the<br />
input which you want to<br />
output from EXT-2.<br />
TV:<br />
The sound and picture of the<br />
currently selected PR channel is<br />
output from EXT-2, so you can<br />
record the output on a VCR<br />
connected to the EXT-2 terminal<br />
while watching a video input from<br />
the EXT-1 or EXT-3 terminal.<br />
DUBBING<br />
EXT-1<br />
EXT-3<br />
TV<br />
TV:EXIT<br />
DUBBING<br />
EXT-1<br />
EXT-3<br />
OK:OK<br />
EXT-2<br />
EXT-2<br />
TV<br />
TV:EXIT<br />
OK:OK<br />
5. Press OK.<br />
The menu disappears.<br />
19
OTHER PREPARATION<br />
LANGUAGE<br />
You can select one of ten languages<br />
for the on-screen display.<br />
1. Press OK.<br />
The MENU appears.<br />
2. Press / to select<br />
INSTALL, then press OK.<br />
The INSTALL menu appears.<br />
INSTALL<br />
LANGUAGE<br />
AUTO PROGRAM<br />
EDIT/MANUAL<br />
TV:EXIT<br />
OK:OK<br />
3. Press / to select<br />
LANGUAGE, then press<br />
OK.<br />
The LANGUAGE menu appears.<br />
LANGUAGE<br />
ENGLISH<br />
FRANÇAIS<br />
DEUTSCH<br />
ITALIANO<br />
CASTELLANO<br />
NEDERLANDS<br />
DANSK<br />
NORSK<br />
SVENSKA<br />
SUOMI<br />
TV:EXIT<br />
OK:OK<br />
4. Press / to select a<br />
language.<br />
5. Press OK.<br />
This completes the setting.<br />
AUTO PROGRAM<br />
You can automatically allocate up to<br />
99 stations to PR channels PR 1 to<br />
PR99 on this TV.<br />
When the TV receives a signal<br />
describing the station’s name, it<br />
allocates those stations, station IDs,<br />
and registers then as they were<br />
preset at the <strong>JVC</strong> factory.<br />
1. Press OK.<br />
The MENU appears.<br />
2. Press / to select<br />
INSTALL, then press OK.<br />
The INSTALL menu appears.<br />
3. Press / to select AUTO<br />
PROGRAM, then press OK.<br />
The AUTO PROGRAM menu<br />
appears.<br />
AUTO PROGRAM<br />
START<br />
CANCEL<br />
TV:EXIT<br />
OK:OK<br />
Note:<br />
• If you make a mistake when<br />
selecting your country, or do not<br />
want to use the Automatic<br />
allocation function, select<br />
CANCEL, and then press OK<br />
button to return to the INSTALL<br />
menu.<br />
4. Press OK.<br />
The PR channel is automatically set<br />
and the EDIT menu is displayed.<br />
• If you want to edit PR channels or<br />
allocate a station to PR0 (AV)<br />
channel, see page 21 “EDIT/<br />
MANUAL” for procedural<br />
description.<br />
AUTO PROGRAM<br />
CH 60<br />
81%<br />
TV:EXIT<br />
OK:OK<br />
EDIT<br />
PR ID CH/CC<br />
AV -----<br />
1 BBC1 CH 21<br />
2 BBC2 CH 22<br />
3 ITV CH 23<br />
4 CH4 CH 24<br />
5 CH5 CH 25<br />
6 CH 26<br />
7 CH 27<br />
8 CH 28<br />
9 CH 29<br />
TV OK :MOVE<br />
:ID :DELETE<br />
:INSERT :MANUAL<br />
Note:<br />
• If a station you want to view is not<br />
allocated to a PR channel, perform<br />
Manual allocation (see page 23).<br />
● The procedure is complete.<br />
Press the TV button to exit the<br />
menu.<br />
20
EDIT/MANUAL<br />
You can change PR channel settings<br />
by doing any of the following:<br />
• You can delete an unwanted<br />
station from a PR channel,<br />
• You can change the PR channel<br />
number of a station,<br />
• You can add station IDs to PR<br />
channels,<br />
• You can add a new station to a PR<br />
channel, or<br />
• You can manually allocate the<br />
desired station to a PR channel.<br />
To edit PR channels<br />
1. Press OK.<br />
The MENU appears.<br />
2. Press / to select<br />
INSTALL, then press OK.<br />
The INSTALL menu appears.<br />
3. Press / to select EDIT/<br />
MANUAL, then press OK.<br />
The EDIT menu appears.<br />
EDIT<br />
PR ID CH/CC<br />
AV -----<br />
1 BBC1 CH 21<br />
2 BBC2 CH 22<br />
3 ITV CH 23<br />
4 CH4 CH 24<br />
5 CH5 CH 25<br />
6 CH 26<br />
7 CH 27<br />
8 CH 28<br />
9 CH 29<br />
TV OK :MOVE<br />
:ID<br />
:INSERT<br />
:DELETE<br />
:MANUAL<br />
4. Use any of the procedures<br />
described in the following<br />
pages to change the PR<br />
channel settings.<br />
● This completes the procedure.<br />
Press the TV button to exit the<br />
menu.<br />
To delete a station from a<br />
PR channel<br />
1. Press / to select the<br />
station you want to delete.<br />
EDIT<br />
PR ID CH/CC<br />
AV -----<br />
1 BBC1 CH 21<br />
2 BBC2 CH 22<br />
3 ITV CH 23<br />
4 CH4 CH 24<br />
5 CH5 CH 25<br />
6 CH 26<br />
7 CH 27<br />
8 CH 28<br />
9 CH 29<br />
TV OK :MOVE<br />
:ID<br />
:INSERT<br />
:DELETE<br />
:MANUAL<br />
2. Press yellow button.<br />
EDIT<br />
PR ID CH/CC<br />
AV -----<br />
1 BBC1 CH 21<br />
2 BBC2 CH 22<br />
3 ITV CH 23<br />
4 CH4 CH 24<br />
5 CH5 CH 25<br />
6 CH 26<br />
7 CH 28<br />
8 CH 29<br />
9 CH 30<br />
TV OK :MOVE<br />
:ID<br />
:INSERT<br />
:DELETE<br />
:MANUAL<br />
Note:<br />
• Stations allocated to PR channels<br />
following the deleted PR channel<br />
number are shifted back by one to<br />
the preceding PR channel number.<br />
To change the PR channel<br />
number of a station<br />
1. Press / to select the<br />
station.<br />
2. Press .<br />
3. Press / to move the<br />
selected station to the<br />
desired PR channel<br />
number.<br />
• To cancel the operation, press the<br />
(Information) button<br />
4. Press .<br />
EDIT<br />
PR ID CH/CC<br />
AV -----<br />
1 BBC1 CH 21<br />
2 BBC2 CH 22<br />
3 ITV CH 23<br />
4 CH4 CH 24<br />
5 CH5 CH 25<br />
6 CH 26<br />
7 CH 27<br />
8 CH 28<br />
9 CH 29<br />
TV OK :MOVE<br />
:ID<br />
:INSERT<br />
:DELETE<br />
:MANUAL<br />
EDIT<br />
PR ID CH/CC<br />
AV -----<br />
1 BBC1 CH 21<br />
2 BBC2 CH 22<br />
3 ITV CH 23<br />
4 CH4 CH 24<br />
5 CH5 CH 25<br />
6 CH 26<br />
7 CH 27<br />
8 CH 28<br />
9 CH 29<br />
TV<br />
OK<br />
STORE:<br />
EDIT<br />
PR ID CH/CC<br />
AV -----<br />
1 BBC1 CH 21<br />
2 BBC2 CH 22<br />
3 CH 27<br />
4 ITV CH 23<br />
5 CH4 CH 24<br />
6 CH5 CH 25<br />
7 CH 26<br />
8 CH 28<br />
9 CH 29<br />
TV<br />
OK<br />
STORE:<br />
EDIT<br />
PR ID CH/CC<br />
AV -----<br />
1 BBC1 CH 21<br />
2 BBC2 CH 22<br />
3 CH 27<br />
4 ITV CH 23<br />
5 CH4 CH 24<br />
6 CH5 CH 25<br />
7 CH 26<br />
8 CH 28<br />
9 CH 29<br />
TV OK :MOVE<br />
:ID<br />
:INSERT<br />
:DELETE<br />
:MANUAL<br />
21
OTHER PREPARATION<br />
To add a station ID to a<br />
station<br />
1. Press / to select the<br />
station.<br />
2. Press red button.<br />
3. Press / to select the<br />
first letter of the desired<br />
station’s ID.<br />
4. Press OK.<br />
The ID LIST appears.<br />
EDIT<br />
PR ID CH/CC<br />
AV -----<br />
1 BBC1 CH 21<br />
2 BBC2 CH 22<br />
3 ITV CH 23<br />
4 CH4 CH 24<br />
5 CH5 CH 25<br />
6 CH 26<br />
7 CH 27<br />
8 CH 28<br />
9 CH 29<br />
TV OK :MOVE<br />
:ID<br />
:INSERT<br />
:DELETE<br />
:MANUAL<br />
EDIT<br />
PR ID CH/CC<br />
AV -----<br />
1 BBC1 CH 21<br />
2 BBC2 CH 22<br />
3 ITV CH 23<br />
4 CH4 CH 24<br />
5 CH5 CH 25<br />
6 CH 26<br />
7 CH 27<br />
8 CH 28<br />
9 CH 29<br />
TV OK:LIST<br />
EDIT<br />
PR ID CH/CC<br />
AV -----<br />
1 BBC1 CH 21<br />
2 BBC2 CH 22<br />
3 ITV CH 23<br />
4 CH4 CH 24<br />
5 CH5 CH 25<br />
6 CH 26<br />
7 M CH 27<br />
8 CH 28<br />
9 CH 29<br />
TV OK:LIST<br />
EDIT<br />
PR ID CH/CC<br />
AV -----<br />
1 BBC1 CH 21<br />
2 BBC2 CH 22<br />
3 ITV CH 23<br />
4 CH4 CH 24<br />
5 CH5 CH 25<br />
6 CH 26<br />
7 M6 CH 27<br />
8 CH 28<br />
9 CH 29<br />
TV OK:STORE<br />
ID LIST<br />
M6<br />
MBC<br />
MCM<br />
MDR<br />
MOVIE<br />
MTV<br />
MTV3<br />
5. Press / to select the<br />
station ID.<br />
• To cancel the operation, press the<br />
(Information) button.<br />
6. Press OK.<br />
Returns to the EDIT menu.<br />
EDIT<br />
PR ID CH/CC<br />
AV -----<br />
1 BBC1 CH 21<br />
2 BBC2 CH 22<br />
3 ITV CH 23<br />
4 CH4 CH 24<br />
5 CH5 CH 25<br />
6 CH 26<br />
7 MOVIE CH 27<br />
8 CH 28<br />
9 CH 29<br />
TV OK :MOVE<br />
:ID :DELETE<br />
:INSERT :MANUAL<br />
Programming a station’s ID<br />
manually:<br />
Follow the operations below in place of<br />
steps 3 thru 5.<br />
(1) Press the / button repeatedly to<br />
select a character.<br />
(2) Press the button to move cursor<br />
to input position.<br />
• Pressing the button moves the<br />
cursor backward.<br />
(3) To complete station ID, follow steps<br />
(1) and (2) repeatedly.<br />
• A station ID can h<strong>av</strong>e up to 5<br />
characters.<br />
To add a new station to a<br />
PR channel<br />
1. Press / to select the<br />
row containing the PR<br />
channel number to which<br />
you want to add a station.<br />
EDIT<br />
PR ID CH/CC<br />
AV -----<br />
1 BBC1 CH 21<br />
2 BBC2 CH 22<br />
3 ITV CH 23<br />
4 CH4 CH 24<br />
5 CH5 CH 25<br />
6 CH 26<br />
7 CH 27<br />
8 CH 28<br />
9 CH 29<br />
TV OK :MOVE<br />
:ID<br />
:INSERT<br />
:DELETE<br />
:MANUAL<br />
2. Press green button.<br />
• To cancel the operation, press the<br />
(Information) button.<br />
EDIT<br />
PR ID CH/CC<br />
AV -----<br />
1 BBC1 CH 21<br />
2 BBC2 CH 22<br />
3 ITV CH 23<br />
4 CH4 CH 24<br />
5 CH5 CH 25<br />
6 CH 26<br />
7 CH --<br />
8 CH 27<br />
9 CH 28<br />
TV OK 0 9<br />
Note:<br />
• For details on the relationship<br />
between the displayed CH number<br />
and the actual channel number,<br />
see the Channel table on page 25.<br />
3. Press the number buttons<br />
to enter the channel<br />
number.<br />
• To enter a one-digit channel<br />
number, enter the corresponding<br />
number and press OK button.<br />
EDIT<br />
PR ID CH/CC<br />
AV -----<br />
1 BBC1 CH 21<br />
2 BBC2 CH 22<br />
3 ITV CH 23<br />
4 CH4 CH 24<br />
5 CH5 CH 25<br />
6 CH 26<br />
7 CH 50<br />
8 CH 27<br />
9 CH 28<br />
TV OK :MOVE<br />
:ID<br />
:INSERT<br />
:DELETE<br />
:MANUAL<br />
Note:<br />
• When you add a station, the station<br />
preset to PR99 is deleted.<br />
22
To manually allocate a<br />
station to PR channel<br />
(Manual allocation)<br />
1. Press blue button.<br />
Your TV enters the Manual<br />
allocation mode.<br />
EDIT<br />
PR ID CH/CC<br />
AV -----<br />
1 BBC1 CH 21<br />
2 BBC2 CH 22<br />
3 ITV CH 23<br />
4 CH4 CH 24<br />
5 CH5 CH 25<br />
6 CH 26<br />
7 CH 27<br />
8 CH 28<br />
9 CH 29<br />
TV OK:STORE<br />
:SEARCH+<br />
:SEARCH-<br />
:FINE+<br />
:FINE-<br />
2. Press / to select a PR<br />
channel number.<br />
Note:<br />
• PR channel number “AV” appears<br />
on the screen as PR 0 channel.<br />
We recommend that you allocate<br />
this PR channel to a VCR<br />
connected to the aerial socket.<br />
3. Press green or red button<br />
to search for a station.<br />
Scanning stops when the TV<br />
receives a broadcast.<br />
Press green or red button to search<br />
for another station, and keep<br />
searching until you see the station<br />
you want.<br />
If reception is poor:<br />
Press the blue or yellow button to<br />
fine-tune the station.<br />
Note:<br />
• For details on the relationship<br />
between the displayed CH number<br />
and the actual channel number,<br />
see the Channel table on page 25.<br />
4. Press OK.<br />
The station is allocated to a PR<br />
channel.<br />
23
TROUBLESHOOTING<br />
• If the plug is disconnected from the AC socket, or the TV aerial has problems, you may think there is a problem<br />
with the TV itself. Be sure to check the following before calling for service.<br />
IMPORTANT<br />
• Review all instructions in this manual.<br />
■ GENERAL<br />
■ PICTURE<br />
■ SOUND<br />
■ TELETEXT<br />
Problem<br />
No power supply.<br />
No picture or sound.<br />
The power shuts off<br />
automatically.<br />
Inoperable remote control.<br />
Poor <strong>colour</strong>.<br />
The screen mode suddenly<br />
changed.<br />
Lines or streaks in picture<br />
(interference).<br />
Spots (crosstalk).<br />
Double pictures (ghosts).<br />
Snowy pictures (noise).<br />
The screen turns blue.<br />
No sound from the TV’s<br />
speakers.<br />
No stereo sound.<br />
No “SUB-I” or “SUB-II” sound in<br />
a multisound broadcast.<br />
No teletext reception.<br />
The current time is not<br />
displayed.<br />
Action<br />
Insert the plug in an AC socket.<br />
Press the Main power button (see page 8).<br />
Check aerial connections (see page 6).<br />
Press the number 0 button to select the correct mode (see page 11).<br />
Select the correct <strong>colour</strong> system manually (see page 13).<br />
Press the Standby button to turn the power on again (see page 8).<br />
Replace the batteries (see page 4).<br />
Insert the batteries correctly (see page 4).<br />
Use the remote control within about 7 metres of the TV.<br />
Adjust COLOUR and BRIGHT (see page 13).<br />
Select the correct <strong>colour</strong> system manually (see page 13).<br />
The ZOOM mode’s automatic selective function is working<br />
(see page 16).<br />
Move the components apart until the interference is eliminated.<br />
Reposition the aerial.<br />
Reposition the aerial.<br />
Replace with an aerial with better directionality.<br />
Reposition the aerial.<br />
Replace with an aerial with better directionality.<br />
Check aerial connections.<br />
Redirect the aerial.<br />
Replace or repair the aerial.<br />
The BLUE BACK function is on (see page 14).<br />
Disconnect the headphones.<br />
Change STEREO/I•II to (stereo sound) mode (see page 12).<br />
Change STEREO/I•II to the correct mode (see page 12).<br />
Tune to a teletext broadcast channel (see page 17).<br />
We recommend that you not videotape teletext, as it may not be<br />
recorded correctly.<br />
Tune to a teletext broadcast channel (see page 14).<br />
The following are normal and are NOT malfunctions:<br />
• When you touch the CRT surface, you might feel a slight charge of static electricity. This is because the CRT contains static<br />
electricity; it does not affect the human body.<br />
• The TV may emit a crackling sound due to a sudden change in temperature. There is no problem unless the picture or<br />
sound is abnormal.<br />
• When a bright a still image (of a white dress, for example) appears on the screen, the image may be <strong>colour</strong>ed. This problem<br />
occurs in all CRTs, and as the bright image disappears, such <strong>colour</strong>ation also disappears.<br />
• This TV is equipped with a microcomputer that may operate abnormally due to interference from external components. If<br />
this happens, turn off the main power and disconnect the power cord from the AC socket. Then reconnect the power cord to<br />
AC socket and turn on the main power again.<br />
24
Channel table<br />
• The following table shows the relationship between the displayed CH channel number and the actual channel<br />
number.<br />
CH --<br />
Channel<br />
CH --<br />
Channel<br />
CH --<br />
Channel<br />
CH --<br />
Channel<br />
CH 21<br />
CH 22<br />
CH 23<br />
E21<br />
E22<br />
E23<br />
CH 34<br />
CH 35<br />
CH 36<br />
E34<br />
E35<br />
E36<br />
CH 47<br />
CH 48<br />
CH 49<br />
E47<br />
E48<br />
E49<br />
CH 60<br />
CH 61<br />
CH 62<br />
E60<br />
E61<br />
E62<br />
CH 24<br />
CH 25<br />
CH 26<br />
CH 27<br />
E24<br />
E25<br />
E26<br />
E27<br />
CH 37<br />
CH 38<br />
CH 39<br />
CH 40<br />
E37<br />
E38<br />
E39<br />
E40<br />
CH 50<br />
CH 51<br />
CH 52<br />
CH 53<br />
E50<br />
E51<br />
E52<br />
E53<br />
CH 63<br />
CH 64<br />
CH 65<br />
CH 66<br />
E63<br />
E64<br />
E65<br />
E66<br />
CH 28<br />
CH 29<br />
CH 30<br />
E28<br />
E29<br />
E30<br />
CH 41<br />
CH 42<br />
CH 43<br />
E41<br />
E42<br />
E43<br />
CH 54<br />
CH 55<br />
CH 56<br />
E54<br />
E55<br />
E56<br />
CH 67<br />
CH 68<br />
CH 69<br />
E67<br />
E68<br />
E69<br />
CH 31<br />
CH 32<br />
CH 33<br />
E31<br />
E32<br />
E33<br />
CH 44<br />
CH 45<br />
CH 46<br />
E44<br />
E45<br />
E46<br />
CH 57<br />
CH 58<br />
CH 59<br />
E57<br />
E58<br />
E59<br />
25
SPECIFICATIONS<br />
Model<br />
Item AV-24WT2EK AV-28WT2EK<br />
TV RF systems<br />
Colour systems<br />
Channels and frequencies<br />
Sound-multiplex systems<br />
Teletext systems<br />
CCIR I<br />
PAL (NTSC 3.58 / 4.43 MHz only in EXT modes)<br />
E21-E69<br />
NICAM system<br />
Fastext (United Kingdom system) / WST (standard system)<br />
Power requirements<br />
AC 220 – 240 V, 50 Hz<br />
Power consumption Maximum 136 W, Maximum 140 W,<br />
Average 111 W, Standby 1.5 W<br />
Average 121 W, Standby 1.5 W<br />
Picture tube size Visible area 56 cm Visible area 66 cm<br />
(measured diagonally)<br />
(measured diagonally)<br />
Audio output<br />
Rated Power output 5 W + 5 W<br />
Speakers 3 × 10 cm oval × 2 10 cm round × 2<br />
External input / output EXT-1, EXT-2 21-pin Euroconnector (SCART)<br />
EXT-3<br />
VIDEO IN (RCA)<br />
AUDIO L / R IN (RCA)<br />
Headphone jack (stereo mini jack, dia. 3.5 mm)<br />
Dimensions (W × H × D) 645 mm × 427 mm × 443 mm 716 mm × 489 mm × 496 mm<br />
Weight 23.0 kg 32.9 kg<br />
Accessories Remote control unit RM-C794 × 1<br />
AAA (R03) dry cell battery × 2<br />
Design and specifications subject to change without notice.<br />
Pictures displayed on the screen using this TV’s image-processing functions should not be shown for any<br />
commercial or demonstration purpose in public places (tearooms and halls in hotels, etc.) without the consent of<br />
the owners of copyright of the original picture sources, as this constitutes an infringement of copyright.<br />
26
AV-24WT2EK/AV-28WT2EK<br />
VICTOR COMPANY OF JAPAN, LIMITED<br />
© 1997 VICTOR COMPANY OF JAPAN, LIMITED<br />
CQ40350-001-E<br />
0497-Ki-AB-JMUK


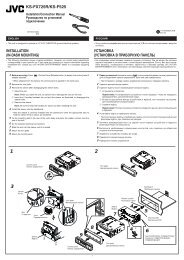

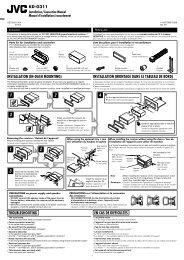

![TH-V70R[B] revision - JVC](https://img.yumpu.com/23738839/1/184x260/th-v70rb-revision-jvc.jpg?quality=85)