720W Long Run Portable Generator - ALDI UK: Warranty Search
720W Long Run Portable Generator - ALDI UK: Warranty Search
720W Long Run Portable Generator - ALDI UK: Warranty Search

You also want an ePaper? Increase the reach of your titles
YUMPU automatically turns print PDFs into web optimized ePapers that Google loves.
<strong>UK</strong>. Subject to change.<br />
Document Ref: <strong>720W</strong> <strong>Long</strong> <strong>Run</strong> <strong>Portable</strong> <strong>Generator</strong><br />
Ver 061204<br />
Copyright These instructions are the sole property of Aldi <strong>UK</strong> Ltd and may not be reproduced.<br />
Due to continuous product improvement we reserve the right to change the product specification without prior notice.<br />
WARRANTY<br />
Power Craft air tools have been manufactured to a high standard and carefully inspected and tested before<br />
shipment and are guaranteed to be free from defective materials and workmanship for a period of 36 months<br />
from the original date of purchase.<br />
Should the tool develop a fault, please return the complete tool to your nearest authorised Power Craft<br />
warranty repair agent. If, upon inspection it is found that the fault has occurred due to defective materials<br />
or workmanship, repairs will be carried out free of charge. This guarantee does not apply to normal wear<br />
and tear, nor does it cover any damage caused by misuse, careless or unsafe handling, alterations, accident,<br />
or repairs attempted or made by any persons other than the authorised Power Craft warranty repair agent.<br />
Your Power Craft guarantee is not effective unless you can produce, upon request, a dated receipt or invoice<br />
to verify your proof of purchase within the guarantee period. This guarantee is an additional benefit and<br />
does not affect your statutory rights.<br />
Declaration of conformity<br />
We declare under our sole responsibility that this product is in conformity with the<br />
following standards and documents<br />
M.D Irwin<br />
Omega Wolf Ltd<br />
Kirkby In Ashfield<br />
NG17 7LF<br />
Helpline: <strong>UK</strong> 08707 323023<br />
ROI 1800 481 005<br />
03/07 36<br />
EN12601:2001<br />
ISO8528-8:1995<br />
In accordance with the regulations<br />
98/37EEC<br />
73/23EEC<br />
89/336EEC<br />
2000/14/EC<br />
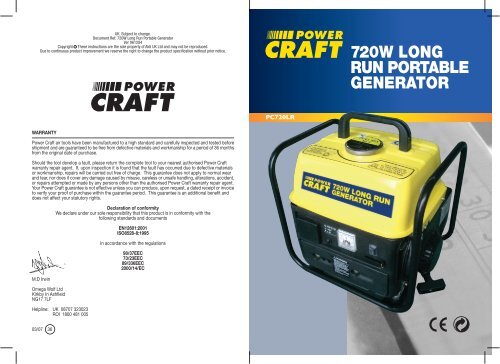
PC720LR<br />
<strong>720W</strong> LONG<br />
RUN PORTABLE<br />
GENERATOR
<strong>720W</strong> LONG RUN<br />
PORTABLE<br />
GENERATOR<br />
2 Stroke Petrol Power <strong>Generator</strong><br />
Congratulations on purchasing this Power Craft product.<br />
Power Craft products have been constructed to high<br />
quality standards and they are safe and fit for purpose<br />
at the time of sale. Before operating the generator<br />
ensure that you have read all the safety and operational<br />
instructions and do not carry out the operation until<br />
you are sure you can do so in safety. Always follow<br />
these instructions. Remember to consider the work<br />
environment for safe operation as well as safety for<br />
generator use.<br />
TECHNICAL SPECIFICATION<br />
Type 2 stroke, force air<br />
cooled, petrol engine.<br />
Cylinder Arrangement Inclined, 1 cylinder<br />
Displacement 63cm 3<br />
Continuous Output 650W<br />
(0.65KVA at cos =1)<br />
Max Output <strong>720W</strong><br />
Rated Current (constant) 2.8A (3.2A Max)<br />
Rated Voltage 230V, 12V DC<br />
Rated Frequency 50Hz<br />
Fuel Mixed petrol (unleaded)<br />
(50:1) 2 stroke mixture<br />
Fuel Tank Capacity (Litres) 7.5 (Max)<br />
(Max fill<br />
recommended 6.5 Ltrs)<br />
Spark Plug: Type BPR5ES(NGK)<br />
Gap 0.7 - 0.8mm<br />
Sound Pressure Level LwA 85 (LwA 92 Max)<br />
Sound Power Level<br />
(Outdoor Noise @ 7m ) 62dB(A)<br />
Dimensions (L/W/H) (mm) 375 x 315 x 370<br />
(Excluding carry<br />
handle)<br />
Weight kg 21.7<br />
Helpline: <strong>UK</strong> 08707 323023<br />
ROI 1800 481 005<br />
2<br />
IMPORTANT NOTICE<br />
Please note that this generator is fitted with a 2<br />
stroke petrol engine and must only be operated<br />
with mixed unleaded petrol/ 2 stroke oil in the ratio<br />
50:1. Please refer to pg 5.<br />
ACCESSORIES<br />
1 x Instruction manual.<br />
1 x Box spanner (for spark plug removal).<br />
1 x 12V lead with crocodile clips.<br />
Check the generator, loose parts and accessories for<br />
transport damage.<br />
GENERATOR SCHEMATIC<br />
Fig M.<br />
1<br />
8<br />
12<br />
15<br />
1 Fuel Tank<br />
2 Fuel Tank Cap<br />
3 Fuel Cock<br />
4 Air Filter Cover<br />
5 Spark Plug<br />
6 Muffler / Silencer<br />
7 Choke Lever<br />
8 AC Socket<br />
9 Engine Switch<br />
10 Earth/Ground Terminal<br />
11 Recoil Starter<br />
12 AC Circuit Breaker<br />
13 Carrying Handle<br />
14 12V DC Outlet for Battery Charging<br />
15 Voltmeter<br />
Helpline: <strong>UK</strong> 08707 323023<br />
ROI 1800 481 005<br />
2<br />
4<br />
9<br />
7<br />
11<br />
13<br />
14<br />
11<br />
3<br />
5 6<br />
10
PERIODIC MAINTENANCE<br />
Item Remarks<br />
Spark Plug Check condition. Adjust gap and clean. Replace if necessary.<br />
Air Filter Clean, replace if necessary<br />
Fuel Filter Clean fuel cock and fuel tank filter. Replace if necessary.<br />
Fuel Line Check fuel hose for cracks or other damage. Replace if necessary.<br />
Exhaust System<br />
Check for leakage. Retighten or replace gasket if necessary.<br />
Check exhaust screen. Clean/replace if necessary.<br />
Carburettor Check choke operation<br />
Starting System Check recoil starter operation<br />
Fittings/Fasteners Check. Replace if necessary<br />
Fig L.<br />
Helpline: <strong>UK</strong> 08707 323023<br />
ROI 1800 481 005<br />
DAILY<br />
(Preoperation<br />
check)<br />
1st<br />
MONTH<br />
or 20 Hrs<br />
3<br />
MONTHS<br />
or 50 Hrs<br />
6<br />
MONTHS<br />
or<br />
100 Hrs<br />
SAFETY INSTRUCTIONS<br />
The following symbols are used throughout this manual<br />
and on the generator:<br />
Denotes risk of personal injury, loss of life or<br />
damage to the generator in case of nonobservance<br />
of the instructions in this manual.<br />
Denotes risk of electric shock.<br />
Denotes the surface is hot to touch – take<br />
care not to touch the engine case and the<br />
exhaust.<br />
Denotes emission of toxic exhaust gases.<br />
Do not use in a poorly ventilated space.<br />
Keep this manual with your generator at all times.<br />
Make sure all users read it.<br />
GENERAL SAFETY INSTRUCTIONS<br />
Dress properly.<br />
Do not wear loose clothing or jewellery. It can get<br />
caught in moving parts. Non-skid footwear is<br />
recommended. Wear protective hair covering to contain<br />
long hair.<br />
Stay alert.<br />
Watch what you are doing. Use common sense. Do<br />
not operate the generator when tired or after taking<br />
alcohol or prescription/ non-prescription drugs.<br />
Concentrate.<br />
Do not allow routine, which occurs when using the<br />
generator frequently, to lead to mistakes. Avoid splashes<br />
and spillages.<br />
Before use understand all the controls.<br />
Ensure that you understand all the controls and how<br />
to bring the generator to an immediate stop.<br />
Keep work area clean.<br />
Cluttered areas invite injuries. Clean up any spillages<br />
immediately.<br />
Helpline: <strong>UK</strong> 08707 323023<br />
10 ROI 1800 481 005<br />
3<br />
Consider the work environment.<br />
Keep work area well lit.<br />
Keep children and pets away.<br />
Do not let children or pets come into contact with the<br />
generator, cables or work area.<br />
Ensure appliances are switched off.<br />
Before plugging an appliance into the generator, ensure<br />
that the appliance switch is in the off position to avoid<br />
unintentional starting.<br />
Do not modify the generator.<br />
Never attempt to modify this generator to perform in<br />
any manner not intended by the manufacturer.<br />
Ensure the generator has no missing<br />
or damaged parts before use.<br />
Never operate the generator with damaged, broken or<br />
missing parts, or with any guards or covers removed.<br />
Exhaust fumes can kill.<br />
Exhaust fumes are highly poisonous Always operate<br />
the generator outdoors with good ventilation.<br />
Provide good ventilation for the generator.<br />
Do not cover the generator with a cloth or plastic sheet<br />
and it should be at least 3 feet (1m) away from buildings.<br />
The generator requires a free air flow around the unit<br />
for ventilation and air supply.<br />
Lift the generator by the handle.<br />
Keep the handle dry, clean and free of fuel and/or oil.<br />
Store the generator away from<br />
possible sources of ignition.<br />
Such as gas-powered water heaters, clothes<br />
dryers, or oil-fired furnaces, portable heaters, etc.<br />
Avoid flammable materials and gases.<br />
Do not operate where flammable materials are present<br />
or around flammable liquids or gases. An explosion<br />
and/or fire may result.<br />
Keep the generator clean.<br />
Always keep the engine free of debris build-up.<br />
Do not touch hot surfaces.<br />
DO NOT TOUCH or let your hands or body<br />
come in contact with the hot exhaust, spark<br />
plug wire or engine case.<br />
Place the generator on level ground.<br />
Always place your generator in a safe place on solid<br />
level ground.<br />
Maintain the generator.<br />
The generator should be maintained in accordance<br />
with the maintenance schedule. Never carry out repairs<br />
or maintenance if you do not have the required level<br />
of experience to perform the procedures competently.
REFUELLING SAFETY – PETROL IS HIGHLY<br />
FLAMMABLE!!<br />
• Always stop the engine and let it cool before<br />
refuelling or servicing.<br />
• Never overfill or tilt your generator as petrol may<br />
spill.<br />
• Do not smoke during refuelling.<br />
WARNING! Working with petrol is dangerous;<br />
fumes may linger for some distance.<br />
NO SMOKING! NO NAKED FLAMES!<br />
• Clean up any spilled fuel immediately.<br />
• Wash off any fuel which splashes on your skin<br />
immediately.<br />
• Store fuel safely in an approved container and<br />
away from sources of heat and ignition. Ensure<br />
that the container is clean and contains no water<br />
or rust.<br />
• Do not inhale fumes from petrol.<br />
• REFUEL IN A SAFE PLACE. Open fuel cap slowly<br />
to release any pressure which may have formed<br />
in fuel tank. Always wipe unit of fuel or oil spills<br />
before starting.<br />
• To prevent a fire hazard, move at least 12 feet (4<br />
metres) from fuelling area before starting and<br />
ensure the fuel cap is secure.<br />
• DO NOT USE ANY OTHER FUEL than that<br />
recommended in your manual. Always follow<br />
instructions in the Fuelling section of this manual<br />
on pg 5.<br />
• Do not store fuel in the tank for prolonged<br />
periods. – refer to section on ‘storage’ on pg 8.<br />
Helpline: <strong>UK</strong> 08707 323023<br />
ROI 1800 481 005<br />
ELECTRICAL SAFETY<br />
Always check the voltage on the rating plate<br />
of the appliance to be used corresponds to<br />
that of the generator and that the load power<br />
(Watts) required is not in excess of that,<br />
which can be delivered by the generator.<br />
ELECTRICITY CAN KILL<br />
• Do not touch your generator if you have wet hands.<br />
• Do not operate your generator in wet conditions.<br />
• Do not operate your generator near water.<br />
• Always earth your generator. Refer to the section<br />
‘Grounding you generator’ on pg 5.<br />
• Never connect two generators together.<br />
• Never connect your generator to any mains<br />
electricity power outlet. This can cause electrical<br />
current to ‘back feed’ into the local network. For<br />
a fixed installation always consult a suitably<br />
qualified electrician.<br />
• Make sure any extension cords used are in safe<br />
condition and of sufficient capacity for the task.<br />
CAUTION:<br />
Operating voltages and frequency requirements of all<br />
electronic equipment should be checked prior to<br />
plugging them into this generator. Damage may result<br />
if the equipment is not designed to operate within a<br />
+/- 10% voltage variation and +/- 3% frequency<br />
variation from the generator rating.<br />
A power line conditioner may be necessary in some<br />
applications i.e. with computers. For further details<br />
contact your appliance manufacturer.<br />
ENVIRONMENTAL PROTECTION<br />
Periodically inspect the exhaust to ensure that it has<br />
not corroded. (Ensure the generator is switched off and<br />
cold first.) A leaking exhaust muffler will cause an<br />
increase in noise levels.<br />
Do not dispose of fuel/oil into the sewer system. Take<br />
to your local community facilities for oil disposal.<br />
TROUBLESHOOTING GUIDE<br />
Symptom Possible cause Corrective action<br />
Zero power output 1. Engine speed is too slow. 1. Contact Power Craft dealer and<br />
2. Problems in the wiring circuit. have engine speed adjusted.<br />
3. AC Circuit breaker has tripped 2. Contact Power Craft dealer.<br />
due too high a load. 3. Reduce the load and reset the<br />
breaker.<br />
Low/ High voltage 1. Engine speed is too slow/ fast. 1. Contact Power Craft dealer and have<br />
output with no load 2. Problems in the wiring circuit. engine speed adjusted.<br />
2. Contact Power Craft dealer.<br />
Low/ High voltage 1. Engine speed is 1. Contact Power Craft dealer and have<br />
output under load too low at full load. engine speed adjusted.<br />
2. Excessive load applied. 2. Reduce the applied load.<br />
3. Open rectifier. 3. Contact Power Craft dealer.<br />
Erratic output voltage 1. Dirty or loose wiring. 1. Contact Power Craft dealer.<br />
2. Unbalanced load applied. 2. Remove all loads and apply each<br />
one individually to determine,<br />
which one is causing erratic function.<br />
Noisy operation 1. Loose generator or engine bolt. 1. Tighten all mountings.<br />
2. Faulty bearing. 2. Contact Power Craft dealer.<br />
3. Short circuit in generator field or load. 3. Contact Power Craft dealer.<br />
Engine won’t start 1. No fuel. 1. Check fuel.<br />
2. Fuel cock (tap) is closed. 2. Turn cock (tap) to on position.<br />
3. Fuel cock filter is clogged. 3. Clean fuel cock filter.<br />
4. Main Engine switch is in 4. Press engine switch to on.<br />
closed position.<br />
5. Spark plug cap is not secure or 5. Check spark plug cap and lead.<br />
spark plug lead is damaged. Replace if necessary.<br />
6. Spark plug dirty or wrong gap. 6. Clean spark plug, adjust gap.<br />
7. Wrong fuel mixture. Replace if necessary.<br />
8. Not enough compression in 7. Replace with correctly mixed fuel.<br />
the cylinder. 8. Check cylinder head bolts and tighten.<br />
Contact Power Craft dealer.<br />
Helpline: <strong>UK</strong> 08707 323023<br />
4 ROI 1800 481 005<br />
9<br />
Fig K.<br />
ENVIRONMENT<br />
In order to prevent the machine from damage during<br />
transport, it is delivered in a sturdy packaging. Most of<br />
the packaging materials can be recycled. Take these<br />
materials to the appropriate recycling locations.<br />
Take your unwanted machines to your local Power Craft<br />
dealer. Here they will be disposed of in an<br />
environmentally safe way.
Fuel cock.<br />
• To remove the fuel cock filter, simply undo the cup<br />
at the bottom of the fuel cock using a small spanner.<br />
Ensure the cock is in the off position first.<br />
• Clean and wash out the filter and cup, with solvent<br />
and replace.<br />
Fuel tank filter.<br />
• A plastic filter is fitted below the fuel filler cap.<br />
• Remove filter with your fingers and wash it in<br />
solvent.<br />
• Replace when completely clean.<br />
Cleaning.<br />
Regularly clean the generator, preferably after each<br />
use. Maintain the body of the tank by wiping off oil<br />
and fuel etc.<br />
Have your tool repaired by an expert.<br />
This appliance is manufactured in accordance with<br />
relevant safety standards. Only experts must carry out<br />
repairing of electrical appliances, otherwise considerable<br />
danger for the user may result.<br />
Storing the generator.<br />
When not in use the generator should be stored in a<br />
dry place, out of reach of children.<br />
Before long term storage:<br />
• Drain fuel tank, fuel cock, carburettor bowl and<br />
carburettor.<br />
• Pour 1 cup of 2 stroke engine oil into the fuel tank<br />
and shake the generator to spread the oil around<br />
the tank. Drain excess oil.<br />
• Remove spark plug and pour in 1 spoonful of 2<br />
stroke oil and loosely replace the spark plug. Pull<br />
the starter cord several times with the starter<br />
switch OFF. This will prevent the cylinder and<br />
valves from rusting.<br />
• Pull on the starter cord until you feel compression<br />
and stop.<br />
• Clean the generator’s exterior and coat with rust<br />
inhibitor.<br />
• Place the generator on flat ground and cover with<br />
a clean dry cloth.<br />
Faults.<br />
Should a fault occur, e.g. worn out part, please contact<br />
your local Power Craft dealer.<br />
Helpline: <strong>UK</strong> 08707 323023<br />
ROI 1800 481 005<br />
USING THE GENERATOR<br />
BEFORE OPERATING THE GENERATOR<br />
Ensure that the carry handle is fixed to the top of the<br />
generator. Refer to Fig A below.<br />
Helpline: <strong>UK</strong> 08707 323023<br />
8 ROI 1800 481 005<br />
5<br />
Fig A.<br />
Before each use perform the additional checks<br />
as stated in the ‘periodic maintenance table’<br />
Fig L on pg 10.<br />
Check the condition of the electrical outlet<br />
sockets on the generator and the condition of<br />
the plug, cable and switch of your appliance<br />
before use. Do not use if any damage is<br />
present.<br />
Grounding the generator to Earth.<br />
The generating set must be earthed to reduce the risk<br />
of electric shock. To do this, use a 12mm 2 copper wire<br />
(not supplied) and bolt it to the generator chassis (see<br />
<strong>Generator</strong> schematic for earthing point on pg 11.) and<br />
at the other end, bolt it to an earthing rod of copper or<br />
brass (not supplied with the generating set) driven into<br />
the ground. The earth connection also dissipates static<br />
electricity generated by the electrical equipment.<br />
Fig B.<br />
Fuelling<br />
DANGER: Never connect the generator earth<br />
to pipes. If the pipes carry inflammable<br />
substances such as gas, there is a risk of<br />
explosion in the event of a short circuit.<br />
Refer to the full section ‘Refuelling Safety –<br />
Petrol is highly flammable’ on pg 4. Never<br />
refuel a generator whilst it is running!<br />
ONLY USE UNLEADED PETROL MIXED WITH<br />
2 STROKE OIL ONLY. (RATIO 50:1)<br />
Use the following guidelines:<br />
1 Litre of petrol + 20ml 2 stroke oil.<br />
2 Litres of petrol + 40ml 2 stroke oil.<br />
3 Litres of petrol + 60ml 2 stroke oil.<br />
4 Litres of petrol + 80ml 2 stroke oil (Full Cap).<br />
Use the petrol cap as a measure. Fill the cap with oil.<br />
Fig C<br />
Each level marker = 20ml<br />
Fig C.<br />
0.08L (80ml)<br />
0.06L (60ml)<br />
0.04L (40ml)<br />
0.02L (20ml)<br />
• Ensure that the generator is on a level surface.<br />
• Remove the petrol cap.<br />
• Ensure the fuel filter is in place – Do not pour fuel<br />
into the tank without the fuel filter in place.<br />
• DO NOT OVERFILL- the fuel tank capacity of this<br />
product is 7.5 litres and once full will provide up<br />
to 10 hours of operation. The prevent overfilling<br />
we recommend that the fuel tank only be filled with<br />
6.5 litres of fuel.<br />
• Add correct quantity of 2 stroke oil. Always add<br />
oil to petrol, never petrol to oil.<br />
• Always screw down fuel cap.<br />
• Once the petrol and oil are in the fuel tank, shake<br />
well to mix.<br />
• Clean up any spilled fuel immediately.<br />
• Move generator at least 12 feet (4m) away from<br />
the fuelling area before starting.
WHEN OPERATING THE GENERATOR<br />
Never start the generator with any load<br />
connected.<br />
Please note: The first 25 hours of operation is considered<br />
the running-in period for the engine. During this<br />
time operate at less than 75% of the load limit.<br />
Starting the generator:<br />
Step 1: Disconnect any loads.<br />
Fig D.<br />
Step 2: Turn on the fuel cock (tap) clockwise.<br />
Fig E.<br />
Step 3: Turn on the engine switch.<br />
Fig F.<br />
Step 4: Move choke lever to the start (closed ) position.<br />
The choke may not be needed if the engine<br />
is warm.<br />
Fig G.<br />
Helpline: <strong>UK</strong> 08707 323023<br />
ROI 1800 481 005<br />
Step 5: Pull slowly on the starter cord until it engages.<br />
Then pull sharply to start the engine.<br />
Fig H.<br />
Step 6: If starting from cold allow the engine to run<br />
with no load for a few minutes to allow the<br />
engine to warm up.<br />
Step 7: Move the choke lever to the open position.<br />
Fig I.<br />
Step 8: Plug in the appliance power cord<br />
Stopping the generator:<br />
Step 1: Unplug all appliance power cords.<br />
Step 2: Turn the engine switch to off.<br />
Step 3: Turn the fuel cock (tap) to the off position.<br />
IMMEDIATELY SWITCH OFF THE GENERATOR<br />
IN CASE OF:<br />
• Excessive engine noise – knocking or rattling.<br />
• Broken switches.<br />
• Smoke or smell caused by scorched insulation<br />
other than that through the exhaust.<br />
Operation load and ratings:<br />
Please ensure that the load on the generator falls within<br />
its capacity as specified in the table before plugging<br />
in any power cords.<br />
Ensure also that the cord and plug capacity is sufficient<br />
for the duty.<br />
50Hz<br />
220V/230V<br />
AC<br />
Power<br />
factor<br />
Maximum<br />
loading of<br />
connected<br />
appliances<br />
Power Craft 720<br />
Fig J.<br />
Lighting<br />
Power<br />
Tools<br />
1 0.8-0.95 0.4-0.75<br />
(@85%eff)<br />
Up to 650W Up to<br />
520W<br />
Induction<br />
Motors<br />
Less than<br />
220W<br />
12V Battery Charging Facility<br />
The 12V output is designed to charge standard lead<br />
acid batteries (up to 40ah), the overload will cut the<br />
power if a battery that is too big is attempted to be<br />
charged. Only use the lead provided.<br />
Note: The DC output will not cut out once the battery<br />
is charged and so should not be left unattended for<br />
extended periods.<br />
MAINTENANCE, CARE AND REPAIR<br />
Make sure that the generator is not running when<br />
carrying out maintenance work.<br />
The Power Craft machines have been designed to<br />
operate over a long period of time. Continuous<br />
satisfactory operation depends upon proper machine<br />
care, regular cleaning and by following the periodic<br />
maintenance schedule. Refer to Fig L on pg 10. If the<br />
generator is operating in unusually dust or hot conditions<br />
the time between servicing the generator must be<br />
decreased.<br />
Inspect the generator and extension cables periodically<br />
and if damaged, have them repaired by a qualified<br />
person or authorised service body. Do not use the<br />
generator with damaged parts.<br />
Refer to the generator schematic diagrams on pg 11<br />
for details of component locations.<br />
Oil replacement.<br />
• Warm up engine on level ground.<br />
• Remove filler cap.<br />
• Open drain plug and let oil drain completely into<br />
a pan placed under the engine.<br />
• Check gaskets, replace if required. Refit drain plug<br />
and refill engine with clean oil.<br />
• Replace filler cap.<br />
Spark plug inspection.<br />
• Remove spark plug with the plug spanner supplied.<br />
• Inspect the spark plug. It should be a tan colour.<br />
• Adjust the gap: 0.7 – 0.8mm (0.028 – 0.031in).<br />
• Replace the spark plug with correct torque: 28Nm<br />
(2.8m.kg; 20ft lb).<br />
• Replace spark plug if required. (NGK) BR5ES<br />
Exhaust Screen inspection.<br />
• Wait for exhaust to cool.<br />
• Exhaust screen may be blocked with carbon<br />
deposits.<br />
• Remove the screen by unscrewing the two 10mm<br />
bolts at exhaust inlet and one 10mm bolt on<br />
alternator. Remove exhaust muffler.<br />
• Clean the screen with a wire brush and refit.<br />
Replace exhaust screen if damaged.<br />
Helpline: <strong>UK</strong> 08707 323023<br />
6 ROI 1800 481 005<br />
7<br />
Air filter cleaning<br />
Caution! Do not run the engine without the<br />
air filter element in place.<br />
• Unscrew the air filter cover.<br />
• Remove filter element and wash well in solvent.<br />
• Pour a small amount of oil (SAE 20) onto the filter<br />
element and gently squeeze out any excess oil.<br />
• Replace the filter element and air filter cover.<br />
• Be sure the filter cover seals properly all around.