MANUAL VERIFONE VX680 ERIFONE VX680 - Konttorilaite
MANUAL VERIFONE VX680 ERIFONE VX680 - Konttorilaite
MANUAL VERIFONE VX680 ERIFONE VX680 - Konttorilaite

You also want an ePaper? Increase the reach of your titles
YUMPU automatically turns print PDFs into web optimized ePapers that Google loves.
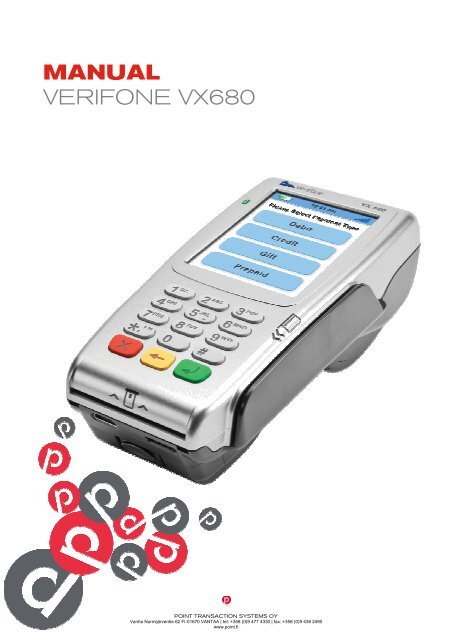
<strong>MANUAL</strong><br />
<strong>V<strong>ERIFONE</strong></strong> <strong>VX680</strong><br />
POINT TRANSACTION SYSTEMS OY<br />
Vanha Nurmijärventie 62 FI-01670 VANTAA | tel: +358 (0)9 477 4330 | fax: +358 (0)9 436 2490<br />
www.point.fi
Page<br />
2 (29)<br />
Date<br />
25.10.2011<br />
INDEX:<br />
1. BEFORE USE ........................................................................................................................ 4<br />
1.1 Important .............................................................................................................................. 4<br />
1.2 Terminal structure ............................................................................................................. 5<br />
1.3 Technical data .................................................................................................................... 6<br />
1.4 Connecting the cables ..................................................................................................... 6<br />
1.5 Battery ................................................................................................................................... 7<br />
1.6 SIM-card ................................................................................................................................ 8<br />
1.7 Touchscreen ....................................................................................................................... 8<br />
1.8 Stylus ..................................................................................................................................... 8<br />
1.9 Using the menus ............................................................................................................... 9<br />
1.10 Letters and special characters ................................................................................... 9<br />
1.11 Terminal start-up and shutdown ................................................................................ 9<br />
1.12 Switching the paper......................................................................................................10<br />
1.13 Testing the connection ...............................................................................................10<br />
2. SETTINGS ............................................................................................................................. 11<br />
2.1 Terminal settings ..............................................................................................................11<br />
2.2 Parameter printing ..........................................................................................................11<br />
2.3 Batch time .........................................................................................................................11<br />
2.4 Cashier number ...............................................................................................................11<br />
2.5 Time and date settings ..................................................................................................12<br />
2.6 Fixed IP-address ..............................................................................................................12<br />
2.7 Power options ...................................................................................................................12<br />
2.8 Contrast ..............................................................................................................................12<br />
2.9 Sounds ...............................................................................................................................12<br />
3. DOWNLOADS ..................................................................................................................... 13<br />
3.1 Downloading applications .............................................................................................13<br />
3.2 Parameter downloading ................................................................................................13<br />
3.3 Certificate downloading .................................................................................................13<br />
4. DAILY USE ........................................................................................................................... 14<br />
4.1 Transactions ......................................................................................................................14<br />
4.1.1 Chip card transactions ...............................................................................................14<br />
4.1.2 Swipe card transactions ............................................................................................14<br />
POINT TRANSACTION SYSTEMS OY<br />
Vanha Nurmijärventie 62 FI-01670 VANTAA | tel: +358 (0)9 477 4330 | fax: +358 (0)9 436 2490<br />
www.point.fi
Page<br />
3 (29)<br />
Date<br />
25.10.2011<br />
4.1.3 Void ...................................................................................................................................15<br />
4.1.4 External void ..................................................................................................................15<br />
4.1.5 Manual entry ..................................................................................................................15<br />
4.1.6 Receipt copy ..................................................................................................................16<br />
4.1.7 Return ..............................................................................................................................16<br />
4.2 Online batch ......................................................................................................................17<br />
4.2.1 TCS ...................................................................................................................................17<br />
4.3 TCS queue limits ..............................................................................................................18<br />
4.4 Reports and bank connection ....................................................................................18<br />
4.4.1 Print batch ......................................................................................................................18<br />
4.4.2 Monthly report ...............................................................................................................18<br />
4.4.3 Send Batch ....................................................................................................................19<br />
4.4.4 Blacklist ...........................................................................................................................19<br />
4.4.5 Report explanations ....................................................................................................20<br />
4.5 Authorization notifications .............................................................................................21<br />
5. SPECIAL FUNCTIONS .................................................................................................. 23<br />
5.1 Cash receipt ......................................................................................................................23<br />
5.2 Cash withdraw ..................................................................................................................23<br />
5.3 Extra amount ....................................................................................................................24<br />
5.4 VAT .......................................................................................................................................24<br />
5.5 Mandatory authorization ................................................................................................24<br />
5.6 Preauthorization ...............................................................................................................25<br />
5.7 Invoice .................................................................................................................................25<br />
5.8 Multi cashier version........................................................................................................25<br />
6. TROUBLE SHOOTING .................................................................................................. 26<br />
6.1 Notifications on the screen ..........................................................................................26<br />
6.2 Notifications on the receipt ...........................................................................................27<br />
6.3 Other exceptions ..............................................................................................................27<br />
6.4 Service .................................................................................................................................28<br />
7. USEFUL CONTACT INFORMATION ..................................................................... 29<br />
POINT TRANSACTION SYSTEMS OY<br />
Vanha Nurmijärventie 62 FI-01670 VANTAA | tel: +358 (0)9 477 4330 | fax: +358 (0)9 436 2490<br />
www.point.fi
Page<br />
4 (29)<br />
Date<br />
25.10.2011<br />
1. BEFORE USE<br />
1.1 Important<br />
NOTE! If these instructions are not followed and the terminal is damaged it will void the<br />
warranty!<br />
• Protect the power cord and modem. If they are damaged they are not to be used anymore.<br />
• The terminal is not waterproof or dustproof, and is intended for indoor use only.<br />
• The warranty of the terminal will void if it is exposed to water or dust.<br />
• Do not use the terminal next to water or moist areas.<br />
• Do not use below 0°C degrees.<br />
• Never place anything inside the chip slot or connection ports that are not meant there. This<br />
might seriously damage the terminal.<br />
• If the terminal is damaged contact Point’s maintenance service. Never try to fix the terminal<br />
by yourself.<br />
• Use only appropriate paper with the terminal’s printer. Poor quality paper can jam the<br />
printer and create excessive paper dust.<br />
• Never use thinner, trichloroethylene, or ketone-based solvents- they may cause<br />
deterioration of plastic or rubber parts. Do not spray cleaners or other solutions directly onto<br />
the keypad.<br />
• Always shut down the terminal before removing the battery.<br />
• Disconnecting the power during a transaction may cause transaction data files not yet<br />
stored in terminal memory to be lost.<br />
• The terminals Li-ion –battery is not hazardous waste. Do not dispose the battery with<br />
combustible wastes. The battery should be recycled with other hazardous wastes or<br />
delivered to the terminal supplier for disposal.<br />
POINT TRANSACTION SYSTEMS OY<br />
Vanha Nurmijärventie 62 FI-01670 VANTAA | tel: +358 (0)9 477 4330 | fax: +358 (0)9 436 2490<br />
www.point.fi
Page<br />
5 (29)<br />
Date<br />
25.10.2011<br />
1.2 Terminal structure<br />
STYLUS<br />
INTERNAL THERMAL<br />
PRINTER (AT THE BACK)<br />
INDICATOR LED<br />
TERMINAL DISPLAY /<br />
TOUCHSCREEN<br />
SWIPE READER<br />
TELEPHONE-STYLE<br />
KEYPAD<br />
ENTER KEY<br />
CANCEL KEY<br />
CLEAR KEY<br />
CHIP CARD READER<br />
POINT TRANSACTION SYSTEMS OY<br />
Vanha Nurmijärventie 62 FI-01670 VANTAA | tel: +358 (0)9 477 4330 | fax: +358 (0)9 436 2490<br />
www.point.fi
Page<br />
6 (29)<br />
Date<br />
25.10.2011<br />
1.3 Technical data<br />
Processor: 400 MHz ARM11, 32-bit RISC processor<br />
Memory:<br />
192 MB (128 MB Flash, 64 MB SDRAM) standard, can exceed up<br />
to 500 MB. Optional micro SD Flash memory card<br />
Display:<br />
240 x 320 pixel color TFT (QVGA)<br />
supports up to 26 lines x 26 characters<br />
8 soft-function keys and 4 screen-addressable<br />
keys via resistive touch screen<br />
Swipe card reader:<br />
Triple track (tracks 1, 2, 3), high coercivity, bi-directional<br />
Chip card reader:<br />
ISO 7816, 1.8V, 3V, 5V; synchronous and asynchronous cards<br />
EMV Approved<br />
SAM-card readers:<br />
3 Security Access Modules (SAMs)<br />
Keypad:<br />
3 x 4 numeric keypad, plus screen addressable keys can be simulated<br />
on resistive touch screen<br />
Peripheral Ports:<br />
Single multi-port connector, which supports RS-232, USB Host, USB<br />
Slave, and Integrated Charging<br />
Connection:<br />
GPRS or WLAN<br />
Printer:<br />
Integrated thermal with graphics capabilities,<br />
18 lines per second, 22, 32, or 42 columns.<br />
Paper roll width 40mm, diameter 40 mm.<br />
Security:<br />
3DES, Master/session and DUKPT key management; PED approved,<br />
SSL, WPA<br />
Battery:<br />
1800 mA lithium-Ion Smart<br />
Physical:<br />
Length 17.2 cm, max width 8.2 cm, height 6.2 cm, weight 477 g<br />
1.4 Connecting the cables<br />
Connect the adapter to the main power cord, the power cord to the power supply and the plug to<br />
the electrical outlet. The adapter is connected at the bottom of the terminal into the left port.<br />
POINT TRANSACTION SYSTEMS OY<br />
Vanha Nurmijärventie 62 FI-01670 VANTAA | tel: +358 (0)9 477 4330 | fax: +358 (0)9 436 2490<br />
www.point.fi
Page<br />
7 (29)<br />
Date<br />
25.10.2011<br />
1.5 Battery<br />
The battery is attached by placing it on its slot and pressing it downwards.<br />
To remove the battery, press the locking tab and pull the battery from its slot.<br />
When the power cord is not connected to the terminal, it shows the state of the battery on the top<br />
right corner of the screen. The text BAT and the bars on top of it indicate how much is left of the<br />
battery. During normal use, the battery should be loaded when its indicator shows 1 bar or less.<br />
The terminal starts charging the battery when it is connected to the power cord. When the battery<br />
is charging, the LED-indicator blinks as an orange light. When the battery is fully charged the LEDlight<br />
turns green. When the battery is almost empty the light turns red. The terminal can be<br />
connected to the power cord at all times; this does not affect the battery. It is recommended to<br />
keep the terminal connected to the power cord during night time. This will charge the battery so<br />
that it is fully charged at the start of the next work day, and also ensure the success of possible<br />
automatic batch sendings during the night.<br />
POINT TRANSACTION SYSTEMS OY<br />
Vanha Nurmijärventie 62 FI-01670 VANTAA | tel: +358 (0)9 477 4330 | fax: +358 (0)9 436 2490<br />
www.point.fi
Page<br />
8 (29)<br />
Date<br />
25.10.2011<br />
1.6 SIM-card<br />
Terminals which use GPRS-connection have a SIM-card. Before inserting the SIM-card inside the<br />
terminal, disable the PIN-code query.<br />
The SIM-card operator’s APN information is inserted to the GPRS APN menu in the terminal. The<br />
APN information is set to INTERNET by default, change this if needed.<br />
The SIM-card is placed beneath the battery so that the chip is facing down and the folded corner<br />
points downwards.<br />
1.7 Touchscreen<br />
The terminal has a touchscreen, which allows selecting menus directly from the screen. Enter- and<br />
cancel-functions can be selected directly from the screen or by pressing the particular key.<br />
1.8 Stylus<br />
The terminal comes with a stylus, which eases the selection of on screen menus. The stylus is<br />
located inside the left top corner of the terminal.<br />
POINT TRANSACTION SYSTEMS OY<br />
Vanha Nurmijärventie 62 FI-01670 VANTAA | tel: +358 (0)9 477 4330 | fax: +358 (0)9 436 2490<br />
www.point.fi
Page<br />
9 (29)<br />
Date<br />
25.10.2011<br />
1.9 Using the menus<br />
To see the terminal’s various settings and functions, press the desired menu icon from the screen.<br />
To scroll inside the menu’s press the arrow keys from the screen, or numbers 1 and 3 from the<br />
keypad. To select a particular function or setting, press its text field from the screen. A function is<br />
selected by pressing the enter key from the screen or from the keypad. To view the previous<br />
display, press the cancel key from the screen or from the keypad. To get to the main screen, press<br />
the cancel key several times. When selecting Reports or Settings the terminal asks to press enter.<br />
1.10 Letters and special characters<br />
To insert letters and special characters press the number with the desired character until the<br />
appropriate character appears. To switch capital letters into lower case letters, press the ”A->a”<br />
icon from the screen.<br />
1= Q Z .<br />
2= A B C<br />
3= D E F<br />
4= G H I<br />
5= J K L<br />
6= M N O<br />
7= P R S<br />
8= T U V<br />
9= W X Y<br />
0= - space +<br />
*= , ‘ “<br />
#= ! : ; @ = & / \ % $ _<br />
1.11 Terminal start-up and shutdown<br />
The terminal is switched on by pressing the Enter key for a while or by connecting it to the power<br />
cord. To shutdown the terminal press the Cancel key until the terminal shuts down.<br />
NOTE! The terminal will not shutdown if the power cord is connected.<br />
POINT TRANSACTION SYSTEMS OY<br />
Vanha Nurmijärventie 62 FI-01670 VANTAA | tel: +358 (0)9 477 4330 | fax: +358 (0)9 436 2490<br />
www.point.fi
Page<br />
10 (29)<br />
Date<br />
25.10.2011<br />
1.12 Switching the paper<br />
• Pull the printer covers eject button upwards, so that it opens.<br />
• Remove the previous paper roll from the printer tray.<br />
• Place the new paper roll so that the paper moves from the bottom of the roll towards the<br />
front edge.<br />
• Leave a small amount of paper to extend outside the printer door.<br />
• Close the printer cover.<br />
• The terminal informs ”PAPER INSERTED PRESS ANY KEY”. Press any key to continue.<br />
1 2<br />
3<br />
1.13 Testing the connection<br />
From the main display, select the Reports menu by pressing its icon. After this, press enter and<br />
select SEND BATCH. The screen informs DIALING. If the terminal successfully connects, the text<br />
CONNECTED appears on screen. A white bar and the text RECEIVING are displayed on screen.<br />
The bar turns gradually black as the batch sending progresses. The terminal downloads the<br />
blacklist and other required card information files from the bank.<br />
After this, the terminal is ready for use.<br />
If the blacklist is not downloaded to the terminals memory, you can test the connection by<br />
switching on the terminal.<br />
The screen informs BLACKLIST MISSING UPDATE THE BLACKLIST? Press Enter, and the<br />
terminal connects to the bank and downloads the blacklist and other required card information files.<br />
If the connection is not working, see section 7 TROUBLESHOOTING for further information.<br />
POINT TRANSACTION SYSTEMS OY<br />
Vanha Nurmijärventie 62 FI-01670 VANTAA | tel: +358 (0)9 477 4330 | fax: +358 (0)9 436 2490<br />
www.point.fi
Page<br />
11 (29)<br />
Date<br />
25.10.2011<br />
2. SETTINGS<br />
2.1 Terminal settings<br />
To get to the terminals setting menu, select the Settings icon from the screen and press Enter.<br />
Some of the listed settings are explained in later sections. The sections are marked in brackets.<br />
From the Settings menu choose EDIT.<br />
BATCH TIME (2.3)<br />
CASHIER NUMBER (2.4)<br />
TCP/IP PARAMETERS (2.6)<br />
LANGUAGE<br />
EXTRA AMOUNT (6.3)<br />
CASH RECEIPT (6.1)<br />
POWER OPTIONS (2.7)<br />
AUTH. MANDATORY (6.5)<br />
TIME SETTINGS (2.5)<br />
VAT (6.4)<br />
PREAUTHORIZATION (5.6)<br />
MULTICASHIER VER (5.8)<br />
SOUND (2.9)<br />
ONLINE BATCH (5.2)<br />
TCS QUEUE LIMITS (5.3)<br />
CONTRAST (2.8)<br />
Batch sending time<br />
Terminal’s cashier number<br />
DHCP / FIXED IP<br />
Terminal’s language (FIN/SWE/ENG)<br />
Extra amount settings<br />
YES / NO<br />
Terminal’s power settings<br />
YES/ NO<br />
Time and date settings<br />
YES / NO<br />
YES / NO<br />
YES / NO<br />
ON / OFF<br />
ON / OFF/ CONDITIONAL<br />
TCS QUEUE AMOUNT/TCS QUEUE COUNT<br />
Settings for the screen’s brightness<br />
2.2 Parameter printing<br />
Select the Settings menu and press Enter.<br />
Choose PRINT and PAREMETERS.<br />
The terminal prints out the parameters list, which shows the technical settings of the terminal. This<br />
list is good to save.<br />
2.3 Batch time<br />
The terminal will send the batch automatically if you have set a sending time to the<br />
setting. Sending time can be at any time. We recommend that the time is after the<br />
closing time. Even hours are not recommended (e.g. 2100).<br />
If you do not want to use the automatic sending time, set it to be at 9999. The<br />
batch must then be sent manually.<br />
To set the sending time, choose BATCH TIME from the EDIT menu. Type on the screen the<br />
sending time that you want with four digits (e.g. 0315).<br />
2.4 Cashier number<br />
If you have in use more than one terminal, it is important to specify each terminal by their cashier<br />
number. The cashier number is printed on every receipt so that it is easy to discover which<br />
transaction has been done with which terminal in any problem cases. From the EDIT menu,<br />
choose CASHIER NUMBER. Type on the screen the cashier number that you want for the terminal<br />
with three digits (e.g. 001).<br />
POINT TRANSACTION SYSTEMS OY<br />
Vanha Nurmijärventie 62 FI-01670 VANTAA | tel: +358 (0)9 477 4330 | fax: +358 (0)9 436 2490<br />
www.point.fi
Page<br />
12 (29)<br />
Date<br />
25.10.2011<br />
2.5 Time and date settings<br />
Select TIME SETTINGS from the EDIT menu.<br />
Choose ADJUST CLOCK.<br />
Select the information you want to change, type in the new value and press Enter.<br />
2.6 Fixed IP-address<br />
If the terminal uses WLAN-connection, fixed IP-addresses must be defined to the terminal.<br />
Select TCP/IP PARAMETERS from the EDIT menu and choose FIXED IP.<br />
Activate IP address = the IP-address for the terminal<br />
Default gateway = Default gateway<br />
SUBNET MASK = Subnet mask<br />
DNS 1 / DNS 2 = Terminal does not use DNS addresses<br />
2.7 Power options<br />
Select POWER OPTIONS from the EDIT menu.<br />
Shut down timer = Time it takes that the terminal automatically shuts down. The time is indicated in<br />
seconds (e.g. 180 = 3 min.) The terminal does not shutdown if it is connected to the power cord. If<br />
the sleep timer is enabled the terminal also will not shut down. If you want to disable the shut down<br />
timer, type 0 as the value.<br />
Online bat percent = minimum battery reserve that the terminal requires to work. This is indicated<br />
in percentage (e.g. 20).<br />
Sleep timer = Time it takes that the terminal’s screen saver appears. This is indicated in seconds<br />
(e.g. 90 = 1.5 min). The screen saver will not appear, if the terminal is connected to the power<br />
cord. If you want to disable the screen saver, type 0 as the value.<br />
2.8 Contrast<br />
You can adjust the screen’s contrast from the CONTRAST-settings with the minus and plus icons.<br />
Select the Menu icon from the screen and choose CONTRAST.<br />
2.9 Sounds<br />
To disable the terminal’s button sounds, select SOUND from the EDIT menu and choose OFF.<br />
POINT TRANSACTION SYSTEMS OY<br />
Vanha Nurmijärventie 62 FI-01670 VANTAA | tel: +358 (0)9 477 4330 | fax: +358 (0)9 436 2490<br />
www.point.fi
Page<br />
13 (29)<br />
Date<br />
25.10.2011<br />
3. DOWNLOADS<br />
3.1 Downloading applications<br />
NOTE! The terminal should be kept still and connected to the power cord during the entire<br />
download. It is not adviced to download the terminal e.g. in a moving vehicle. This might<br />
disrupt the download.<br />
Send the batch from the terminal before downloading.<br />
To send the batch, select the Reports icon from the screen, press Enter and choose SEND<br />
BATCH.<br />
Select the Settings icon from the screen and press Enter.<br />
Choose APP. DOWNLOAD<br />
Select APP + PARAMS or ONLY APPLICATION<br />
The terminal downloads the application. A white bar appears on the screen, which gradually turns<br />
black as the download progresses.<br />
NOTE! Parameters must be downloaded to the terminal after the application download has<br />
ended. Guides for parameter downloading are listed below.<br />
3.2 Parameter downloading<br />
Select the Settings icon from the screen and press Enter.<br />
Choose DOWNLOAD<br />
Choose FROM LOADPOINT<br />
Choose PHONE<br />
The terminal downloads the parameters. A white bar appears on the screen, which gradually turns<br />
black as the download progresses. The terminal prints on the paper “SUCCESSFUL<br />
PARAMETERS DOWNLOAD”.<br />
NOTE! After downloading the parameters, the terminal must connect to the bank. Select<br />
Reports from the screen, press Enter and choose SEND BATCH.<br />
3.3 Certificate downloading<br />
The certificate is always already loaded to the terminal by Point.<br />
Select the Settings icon from the screen and press Enter.<br />
Choose DOWNLOAD<br />
Choose DOWNLOAD CERTIFICATE<br />
The terminal downloads the certificate and prints on the paper”SUCCESSFUL CERTIFICATE<br />
DOWNLOAD”.<br />
POINT TRANSACTION SYSTEMS OY<br />
Vanha Nurmijärventie 62 FI-01670 VANTAA | tel: +358 (0)9 477 4330 | fax: +358 (0)9 436 2490<br />
www.point.fi
Page<br />
14 (29)<br />
Date<br />
25.10.2011<br />
4. DAILY USE<br />
4.1 Transactions<br />
4.1.1 Chip card transactions<br />
ENTER AMOUNT: Type the precise amount, including the cents, and press Enter.<br />
PLEASE INSERT OR SWIPE CARD: Insert the card into the chip reader, located at the front of the<br />
terminal, with the chip side facing up.<br />
CREDIT / DEBIT: Customer selects the payment method.<br />
ENTER PIN: Customer types the PIN-code and presses Enter.<br />
NOTE! You can pass the PIN-code by pressing Enter. In this case the responsibility of the<br />
transaction is yours.<br />
The terminal prints out the merchant’s receipt and asks to print the customer’s receipt. Press Enter<br />
if you wish to print out the customer’s receipt. Otherwise, press Cancel.<br />
If the PIN-code was entered, the customer does not need to sign the receipt. The terminal will<br />
remind you to check the customer’s ID, if the transaction exceeds 50,00€ (depending on the card<br />
used). Press Enter, check the ID and write the last 4 digits of the social security number and which<br />
ID was checked to the receipt.<br />
REMOVE CARD: Take the card from the chip card reader.<br />
NOTE! The card must be in the reader during the entire transaction. Otherwise the<br />
transaction is cancelled.<br />
4.1.2 Swipe card transactions<br />
ENTER AMOUNT: Type the precise amount, including the cents, and press Enter.<br />
PLEASE INSERT OR SWIPE CARD: Swipe the card from the magnetic reader.<br />
CREDIT / DEBIT: Choose the payment method<br />
The terminal prints out the merchant’s receipt and asks to print the customer’s receipt. Press Enter<br />
if you wish to print out the customer’s receipt. Otherwise, press Cancel.<br />
The terminal will remind you to check the customer’s ID, if the transaction exceeds 50,00€<br />
(depending on the card used). Press Enter, check the ID and write the last 4 digits of the social<br />
security number and which ID was checked to the receipt.<br />
POINT TRANSACTION SYSTEMS OY<br />
Vanha Nurmijärventie 62 FI-01670 VANTAA | tel: +358 (0)9 477 4330 | fax: +358 (0)9 436 2490<br />
www.point.fi
Page<br />
15 (29)<br />
Date<br />
25.10.2011<br />
4.1.3 Void<br />
NOTE! A void can only be done to a transaction that is still in the terminals memory.<br />
Press the Menu icon from the screen and choose VOID.<br />
ENTER RECEIPT NUMBER: The terminal suggests the number of the last transaction. Accept by<br />
pressing Enter. Otherwise, type the wanted receipt number and press Enter.<br />
PLEASE INSERT OR SWIPE CARD: Insert the card into the chip reader or swipe the card<br />
The terminal informs CANCELLATION APPROVED, prints out the merchant’s receipt and asks to<br />
print out the customer’s receipt. Press Enter if you wish to print out the customer’s receipt.<br />
Otherwise, press Cancel.<br />
TRANSACTION DOESN’T EXIST: The receipt number is incorrectly typed or the transaction has<br />
been sent forward from the terminal.<br />
4.1.4 External void<br />
With the external void you can void a transaction that has been made with another terminal. This<br />
requires that the terminals are linked to the TCS-service.<br />
Select the Menu icon from the screen and choose EXTERNAL VOID<br />
ENTER RECEIPT NUMBER: Type the transaction’s receipt number. This is found on the receipt.<br />
INPUT SN: Enter the serial number of the terminal, in which the transaction has been made. The<br />
serial number is located at the back side of the terminal, next to the bar code after initials S/N.<br />
TRANSACTION TIME HHMM?: Type the time of the transaction (hours:minutes). This is found on<br />
the receipt.<br />
PLEASE INSERT CARD: Insert the card that the transaction has been made with into the chip<br />
reader. The terminal connects and voids the transaction. The terminal informs CANCELLATION<br />
APPROVED.<br />
NOTE! External voids cannot be performed without the card that the transaction has been<br />
made with.<br />
The terminal prints out the merchant’s receipt and asks to print the customer’s receipt. Press Enter<br />
if you wish to print out the customer’s receipt. Otherwise, press Cancel.<br />
4.1.5 Manual entry<br />
Select the Menu icon from the screen and choose <strong>MANUAL</strong> ENTRY<br />
CARD NUMBER: Type the card number and press Enter<br />
EXPIRY DATE: Type the card’s expiry date and press Enter<br />
CREDIT / DEBIT: Choose the payment method.<br />
ENTER AMOUNT: Type the complete amount and press Enter .<br />
DIAL YES / NO: If you want the terminal to make an automatic authentication for the transaction<br />
choose YES<br />
POINT TRANSACTION SYSTEMS OY<br />
Vanha Nurmijärventie 62 FI-01670 VANTAA | tel: +358 (0)9 477 4330 | fax: +358 (0)9 436 2490<br />
www.point.fi
Page<br />
16 (29)<br />
Date<br />
25.10.2011<br />
NOTE! Manually entered transactions must be authenticated<br />
If you pass the authentication by choosing NO the terminal will ask for authentication code. Call to<br />
the authorization centre and ask for an authentication code. Type in the code given to you and<br />
press Enter. You can pass this by typing 9999. In this case the responsibility of the transaction is<br />
on the company.<br />
The terminal prints out the merchant’s receipt and asks to print the customer’s receipt. Press Enter<br />
if you wish to print out the customer’s receipt. Otherwise, press Cancel.<br />
The terminal will remind you to check the customer’s ID, if the transaction exceeds 50,00€<br />
(depending on the card used). Press Enter, check the ID and write the last 4 digits of the social<br />
security number and which ID was checked to the receipt.<br />
NOT ALLOWED: The transaction is not allowed with the card type<br />
4.1.6 Receipt copy<br />
Select the Menu icon and choose PRINT COPY.<br />
RECEIPT NUMBER: The terminal suggests the number of the last transaction. Accept by pressing<br />
Enter. Otherwise, type the wanted receipt number and press Enter.<br />
The terminal prints out a copy.<br />
4.1.7 Return<br />
You can make a return at any time. If you need to undo a transaction at the same day use the<br />
VOID instead<br />
NOTE! It is not allowed to make a return for a bank card.<br />
Select the Menu icon and choose RETURN<br />
ENTER AMOUNT: Type the complete amount and press Enter<br />
PLEASE INSERT OR SWIPE CARD: Insert the card into the chip reader or swipe the card<br />
CREDIT / DEBIT: Choose the payment method.<br />
The terminal prints out the merchant’s receipt and asks to print the customer’s receipt. Press Enter<br />
if you wish to print out the customer’s receipt. Otherwise, press Cancel.<br />
If the PIN-code was entered, the customer does not need to sign the receipt. The terminal will<br />
remind you to check the customer’s ID, if the transaction exceeds 50,00€ (depending on the card<br />
used). Press Enter, check the ID and write the last 4 digits of the social security number and which<br />
ID was checked to the receipt.<br />
Return without the card: Press the * key when the terminal asks to insert the card. The terminal<br />
asks for the card number and expiry date. The terminal will inform NOT ALLOWED if the card does<br />
not allow manual entry.<br />
POINT TRANSACTION SYSTEMS OY<br />
Vanha Nurmijärventie 62 FI-01670 VANTAA | tel: +358 (0)9 477 4330 | fax: +358 (0)9 436 2490<br />
www.point.fi
Page<br />
17 (29)<br />
Date<br />
25.10.2011<br />
4.2 Online batch<br />
Select ONLINE BATCH from the EDIT menu.<br />
Choose ON.<br />
Online batch is a function that sends details of the transaction to the TCS-service’s real time<br />
database automatically after each transaction. This prevents any possible cases of transactions<br />
being destroyed / lost from the terminal. The next time the batch is being manually or automatically<br />
sent from the terminal, the saved information will move onward from the real time database to a<br />
section which sends the transactions to the bank.<br />
If you select OFF, the online batch is disabled. This means that the transactions will not move<br />
forward from the terminal until the batch is sent manually or automatically.<br />
NOTE! In this case the responsibility is yours.<br />
The CONDITIONAL-option in the Online batch menu is meant for terminals, that use GPRSconnection.<br />
When making an offline transaction (card is not authenticated), the terminal will not<br />
send the transaction as an online batch. The next time an online transaction is made, the terminal<br />
will send all the transactions that are in the terminal’s memory.<br />
4.2.1 TCS<br />
TCS (Transaction Collecting System) is a service by Point, which enables companies to monitor<br />
their centralized money flow. The service offers a customer-specific website that makes the<br />
centralized management possible for companies. The TCS-service gathers transactions from<br />
terminals into different groups determined by the customer. The transactions are sent from TCS to<br />
the customer’s bank every day. The banks payments appear in the company’s account with the<br />
TCS group names. A group-specific reference can be determined for the bank payments. This<br />
makes it easier for financial management programs to target specific payments.<br />
A customer needs only one contract to enable all their terminals to be linked to TCS. Terminals<br />
linked to the TCS-service do not require installment of PATU-keys from the bank. The customerspecific<br />
websites for the system are encrypted with the same method as online bank services. The<br />
connection between a client’s web browser and the TCS service is encrypted (https). Users log in<br />
to TCS with three different identification information’s: username, fixed password and a variable<br />
password from a password list.<br />
For further information about the TCS-service, contact Point’s sales department:<br />
Tel: +358 (0)9 477 43340<br />
E-mail: myynti@point.fi<br />
POINT TRANSACTION SYSTEMS OY<br />
Vanha Nurmijärventie 62 FI-01670 VANTAA | tel: +358 (0)9 477 4330 | fax: +358 (0)9 436 2490<br />
www.point.fi
Page<br />
18 (29)<br />
Date<br />
25.10.2011<br />
4.3 TCS queue limits<br />
From the settings found in the TCS queue limits menu, you can determine when the terminal sends<br />
transactions that are in queue from its memory as an online batch. To get to the menu, choose<br />
TCS QUEUE SETTINGS from the EDIT menu.<br />
NOTE! The menu is not displayed if the online batch-function is disabled.<br />
TCS QUEUE AMOUNT = the maximum sum of the transactions in queue. After this amount is<br />
reached, the terminal will send all of the transactions in queue (e.g. 2000 €).<br />
The largest possible sum for this setting is 999999,99 €.<br />
TCS QUEUE COUNT = the maximum number of transactions in queue. After this number is<br />
reached, the terminal will send all of the transactions in queue (e.g. 20).<br />
The largest possible number for this is 40.<br />
4.4 Reports and bank connection<br />
4.4.1 Print batch<br />
Select the Reports icon from the screen and press Enter.<br />
Choose PRINT BATCH.<br />
The terminal prints out a report of the current days transactions. Different card types are grouped<br />
separately on the receipt. The terminal resets the report after sending the batch from the terminal.<br />
4.4.2 Monthly report<br />
The monthly report can also be used as a shift report. The report gathers information of the<br />
transactions until the monthly report is reset.<br />
NOTE! The report must always be printed before being reset.<br />
Printing the monthly report:<br />
Select the Reports icon and press Enter.<br />
Select MONTHLY REPORT.<br />
Select again MONTHLY REPORT.<br />
The terminal prints out the report.<br />
Resetting the monthly report:<br />
Select the Reports icon and press Enter.<br />
Select MONTHLY REPORT.<br />
Select RESET REPORT<br />
The terminal resets the report.<br />
POINT TRANSACTION SYSTEMS OY<br />
Vanha Nurmijärventie 62 FI-01670 VANTAA | tel: +358 (0)9 477 4330 | fax: +358 (0)9 436 2490<br />
www.point.fi
Page<br />
19 (29)<br />
Date<br />
25.10.2011<br />
4.4.3 Send Batch<br />
The terminal automatically sends the batch, if you have installed a sending time to the settings.<br />
You can also send the batch manually, for example if the automatic batch sending has not<br />
succeeded.<br />
NOTE! The automatic batch sending does not work, if the terminal is turned off.<br />
Select the Reports menu from the screen and press Enter.<br />
Choose SEND BATCH.<br />
The terminal prints out the report and connects to TCS. The terminal sends the transactions,<br />
retrieves the necessary files: return report, EMV keys, AID and BIN tables, and the blacklist.<br />
If the batch sending is ok, the terminal prints out”BATCH SENDING OK”. This text does not appear<br />
if there are no transactions on the report.<br />
NOTE! The merchant has the duty to check that the accounting is correct with the<br />
report”LÄHETYSERÄRAPORTTI” and the return report”MAKSUPÄÄTEPALAUTE”.<br />
4.4.4 Blacklist<br />
The terminal updates the blacklist automatically during the batch sending. You can also download<br />
the blacklist manually if it is missing from the terminal.<br />
Select the Settings menu from the screen and press Enter.<br />
Choose DOWNLOAD.<br />
Choose BLACKLIST and select FULL or UPDATE.<br />
FULL = Terminal downloads the full blacklist<br />
UPDATE = Terminal updates the blacklist<br />
The terminal connects to TCS and downloads the blacklist from the bank. The terminal prints out to<br />
the receipt the amount of cards on the blacklist.<br />
POINT TRANSACTION SYSTEMS OY<br />
Vanha Nurmijärventie 62 FI-01670 VANTAA | tel: +358 (0)9 477 4330 | fax: +358 (0)9 436 2490<br />
www.point.fi
Page<br />
20 (29)<br />
Date<br />
25.10.2011<br />
4.4.5 Report explanations<br />
This is an example of the report and the information in it.<br />
SENT TO TCS: The total<br />
sum and amount of<br />
transactions that are sent<br />
to TCS as online<br />
transactions<br />
NOT SENT TO TCS: The<br />
total sum and amount of<br />
transactions that have not<br />
been sent to TCS as<br />
online transactions.<br />
YHTEENSÄ: The total<br />
sum and amount of all the<br />
transactions in the<br />
terminal’s memory.<br />
BATCH SENDING OK: the<br />
batch sending is ok.<br />
MAKSUPAATEPALAUTE:<br />
information of the previous<br />
batch sending. This only<br />
comes if it has been<br />
formed at the bank. It<br />
never comes on weekends<br />
and bank holidays or if the<br />
terminal has not been in<br />
use.<br />
AID TABLE, BIN TABLE<br />
and KEYS: These are<br />
updated if the bank has<br />
updated them.<br />
KIELTOLUETTELO: this<br />
shows the amount of<br />
cards on the blacklist.<br />
POINT TRANSACTION SYSTEMS OY<br />
Vanha Nurmijärventie 62 FI-01670 VANTAA | tel: +358 (0)9 477 4330 | fax: +358 (0)9 436 2490<br />
www.point.fi
Page<br />
21 (29)<br />
Date<br />
25.10.2011<br />
4.5 Authorization notifications<br />
When a transaction is declined at the authorization centre a declining code is printed on the<br />
receipt. This code tells you the reason why it has been declined. The transaction is declined by a<br />
notification given by the bank or the credit card company.<br />
000-099 Accepted<br />
000 Accepted<br />
001 Check ID<br />
002 Accepted for partial amount<br />
003 Accepted (VIP)<br />
005 Accepted, account type defined by the card donor<br />
006 Accepted for partial amount, account type defined by the<br />
card donor<br />
007 Accepted, chip update<br />
100-199 Declined, card removal not needed<br />
100 Declined<br />
101 Card is no longer valid<br />
102 Suspected card counterfeit<br />
103 Cashier, call recipient<br />
104 Limited card<br />
105 Cashier, call recipients’ security department<br />
106 Exceeds PIN-code attempts<br />
107 Cashier, call the card donor<br />
108 Cashier, check the card donors’ special terms, make a<br />
manual authorization<br />
109 False payment recipients’ identifier<br />
110 False amount<br />
111 False card number<br />
112 PIN-code required<br />
113 Commission not accepted<br />
114 False account type<br />
115 Required action not supported<br />
116 Not enough allowance<br />
117 False PIN<br />
118 Unknown card<br />
119 Transaction is not allowed for card holder<br />
120 Transaction is not allowed for payment terminal<br />
121 Exceeds withdrawals floor limit<br />
122 Security violation<br />
123 Exceeds withdrawals time limit (too often)<br />
124 Crown violation<br />
125 Card is not valid yet<br />
126 False PIN block<br />
127 False PIN length<br />
128 False PIN key synchronization<br />
129 Suspected abuse<br />
200-299 Declined, card removal needed<br />
200 Declined<br />
201 Card expired<br />
202 Suspected card counterfeit<br />
POINT TRANSACTION SYSTEMS OY<br />
Vanha Nurmijärventie 62 FI-01670 VANTAA | tel: +358 (0)9 477 4330 | fax: +358 (0)9 436 2490<br />
www.point.fi
Page<br />
22 (29)<br />
Date<br />
25.10.2011<br />
203 Cashier, contact the recipient<br />
204 Limited card<br />
205 Cashier, contact recipients’ security department<br />
206 Exceeds PIN-code attempts<br />
207 Special situation<br />
208 Extinct card<br />
209 Stolen card<br />
210 Suspected abuse<br />
300 Successful<br />
306 Unsuccessful<br />
307 unsuccessful, form fault<br />
400 Declined. Accepted revocation of authorization, try again<br />
900-999 System error, authorization not successful<br />
902 False transaction<br />
903 Do the transaction again<br />
904 Form fault, try again<br />
905 Unable to route the transaction to recipient<br />
906 Temporary usage brake in the card donors system<br />
907 No connection to the card donor<br />
908 Unable to route the message<br />
909 System error<br />
910 Unable to connect to the card donor<br />
911 Unable to connect to the card donor<br />
912 Card donor not available<br />
913 Dual transaction sending<br />
914 The original transaction cannot be traced<br />
915 Control error, card donors’ system temporarily unavailable<br />
916 MAC-error<br />
917 MAC-synchronization error<br />
918 Data transfer keys not available<br />
919 Encryption keys’ synchronization error<br />
920 Security program error, try again<br />
921 Security program error, no transaction<br />
922 Unknown message number<br />
923 Transaction is being processed<br />
930 Payment terminal error, date error<br />
1Z3<br />
0Y1<br />
0Y3<br />
1Z1<br />
Unable to connect to authorization centre, try again<br />
Offline accepted, no authorization<br />
Offline accepted, unsuccessful authorization<br />
Offline declined<br />
POINT TRANSACTION SYSTEMS OY<br />
Vanha Nurmijärventie 62 FI-01670 VANTAA | tel: +358 (0)9 477 4330 | fax: +358 (0)9 436 2490<br />
www.point.fi
Page<br />
23 (29)<br />
Date<br />
25.10.2011<br />
5. SPECIAL FUNCTIONS<br />
5.1 Cash receipt<br />
Cash receipt is used when a customer pays with cash and a receipt is wanted from the terminal.<br />
Cash receipts are also seen on batch reports.<br />
Cash receipt is activated from the Settings menu (2.1).<br />
Making a cash receipt sale:<br />
Select the Menu icon from the screen<br />
Choose CASH RECEIPT<br />
Select CASH RECEIPT SALE<br />
ENTER AMOUNT: Enter the complete amount and press Enter.<br />
VAT RATE %: Select the VAT percent.<br />
The terminal prints out the merchant’s receipt and asks to print the customer’s receipt. Press Enter<br />
if you wish to print out the customer’s receipt. Otherwise, press Cancel.<br />
Voiding a cash receipt sale:<br />
Select the Menu icon from the screen<br />
Choose CASH RECEIPT<br />
Choose CASH RECEIPT VOID<br />
ENTER AMOUNT: Enter the complete amount and press Enter.<br />
The terminal prints out the merchant’s receipt and asks to print the customer’s receipt. Press Enter<br />
if you wish to print out the customer’s receipt. Otherwise, press Cancel.<br />
5.2 Cash withdraw<br />
Cash withdraw is used when a customer wants to withdraw cash from the cash register. A<br />
transaction is made, and the customer receives cash from the register. The merchant receives<br />
0,50 € from every cash withdraw transaction. For example, if a customer wants to withdraw 10,00€<br />
the merchant makes a transaction of 10,50€. The customer receives 10,00€ from the cash register.<br />
NOTE! It is only permitted to make a cash withdraw with a bank card. You must make a<br />
contract with your bank in order to make cash withdraws.<br />
Press the Menu icon from the screen<br />
Choose CASH WITHDRAW<br />
ENTER AMOUNT: Enter the complete number and press Enter.<br />
PLEASE INSERT OR SWIPE CARD: Insert the chip card to the reader or swipe the card<br />
CREDIT / DEBIT: Choose the payment method<br />
ENTER PIN: Customer types the PIN-code and presses Enter, if the card is a chip card.<br />
The terminal prints out the merchant’s receipt and asks to print the customer’s receipt. Press Enter<br />
if you wish to print out the customer’s receipt. Otherwise, press Cancel.<br />
POINT TRANSACTION SYSTEMS OY<br />
Vanha Nurmijärventie 62 FI-01670 VANTAA | tel: +358 (0)9 477 4330 | fax: +358 (0)9 436 2490<br />
www.point.fi
Page<br />
24 (29)<br />
Date<br />
25.10.2011<br />
The terminal will remind you to check the customer’s ID, if the transaction exceeds 50,00€<br />
(depending on the card used). Press Enter, check the ID and write the last 4 digits of the social<br />
security number and which ID was checked to the receipt.<br />
5.3 Extra amount<br />
Extra amount is used for example in restaurants when a customer wishes to leave tip for the<br />
waiter.<br />
The Extra amount-function is activated from the Settings menu (2.1).<br />
Extra amount options:<br />
No = Extra is not in use<br />
Only before = Extra amount is given during the transaction<br />
Only after = Extra amount is printed on the receipt and it is entered afterwards to the terminal<br />
Unrestricted = The terminal asks for extra during the transaction and also prints an extra line to the<br />
receipt<br />
NOTE! If the card in use is a chip card you can only give the extra amount during the<br />
transaction.<br />
Entering the extra amount afterwards:<br />
The receipt has an amount marked on the EXTRA part. This amount should be typed manually to<br />
the terminal during the same day of the transaction.<br />
Press the Menu icon from the screen<br />
Select EXTRA AMOUNT<br />
RECEIPT NUMBER: The terminal suggests the number of the last transaction. Accept by pressing<br />
Enter. Otherwise, type the wanted receipt number and press Enter.<br />
EXTRA: Enter the amount and press Enter.<br />
The terminal prints out the merchant’s receipt and asks to print the customer’s receipt. Press Enter<br />
if you wish to print out the customer’s receipt. Otherwise, press Cancel.<br />
5.4 VAT<br />
VAT is activated from the Settings menu (2.1).<br />
When making a transaction, the terminal asks to choose a VAT-rate for the transaction. Select the<br />
rate from the icons on the screen. The terminal prints out the VAT rate on the receipt.<br />
5.5 Mandatory authorization<br />
Mandatory authorization is activated from the Settings menu (2.1). When the mandatory<br />
authorization is activated, the terminal automatically authenticates all transactions regardless of the<br />
amount or the card type.<br />
POINT TRANSACTION SYSTEMS OY<br />
Vanha Nurmijärventie 62 FI-01670 VANTAA | tel: +358 (0)9 477 4330 | fax: +358 (0)9 436 2490<br />
www.point.fi
Page<br />
25 (29)<br />
Date<br />
25.10.2011<br />
5.6 Preauthorization<br />
Preauthorization is activated from the Settings menu (2.1).<br />
With the preauthorization function, the merchant can check the card’s functionality. This is useful<br />
for example in car rentals or hotels.<br />
Press the Menu button from the screen.<br />
Choose PREAUTHORIZATION.<br />
PLEASE INSERT OR SWIPE CARD: Insert the card into the chip reader or swipe the card.<br />
CREDIT / DEBIT: Choose the payment method.<br />
ENTER AMOUNT: The terminal suggests 1 EUR. Press Enter.<br />
ENTER PIN: If the card is a chip card, customer enters the PIN-code and presses Enter<br />
The terminal connects to the authorization center, makes a provision and revokes it.<br />
The terminal prints out the merchant’s receipt and asks to print the customer’s receipt. Press Enter<br />
if you wish to print out the customer’s receipt. Otherwise, press Cancel.<br />
5.7 Invoice<br />
The invoice works in the same way as a cash receipt, except that the text INVOICE is printed on<br />
the receipt instead of CASH RECEIPT.<br />
Making an invoice:<br />
Press the Menu button from the screen.<br />
Choose INVOICE.<br />
Choose INVOICE again.<br />
ENTER AMOUNT: Enter the complete amount and press Enter.<br />
The terminal prints out the merchant’s receipt and asks to print the customer’s receipt. Press Enter<br />
if you wish to print out the customer’s receipt. Otherwise, press Cancel.<br />
Voiding an invoice:<br />
Press the Menu button from the screen.<br />
Choose INVOICE.<br />
Choose VOID INVOICE<br />
ENTER AMOUNT: Enter the complete amount and press Enter.<br />
The terminal prints out the merchant’s receipt and asks to print the customer’s receipt. Press Enter<br />
if you wish to print out the customer’s receipt. Otherwise, press Cancel.<br />
5.8 Multi cashier version<br />
The multi cashier version is activated from the Settings menu (2.1).<br />
When this version is in use, the terminal asks for a cashier number before transactions. The<br />
cashier number can be anything from between 1 - 99. The cashier number is printed on the receipt.<br />
This function is useful for example in restaurants, when the waiters’ transactions need to be<br />
separated.<br />
POINT TRANSACTION SYSTEMS OY<br />
Vanha Nurmijärventie 62 FI-01670 VANTAA | tel: +358 (0)9 477 4330 | fax: +358 (0)9 436 2490<br />
www.point.fi
Page<br />
26 (29)<br />
Date<br />
25.10.2011<br />
6. TROUBLE SHOOTING<br />
6.1 Notifications on the screen<br />
NO SIM CARD = The terminal does not have a SIM-card inside, or the SIM-card is not properly<br />
placed. See instructions (1.6)<br />
NO BATTERY = Check that the battery is firmly locked at its place. The terminal cannot connect or<br />
print receipts without the battery.<br />
BLACKLIST MISSING = The blacklist is missing from the terminal. See instructions for<br />
downloading the blacklist (4.4.4).<br />
USE MAG CARD = The terminal cannot read the card’s chip. Use the magnetic strip reader.<br />
USE CHIP = The card has an EMV-chip. Use the chip reader.<br />
PIN LOCKED = The pin code of the card in use has been locked. It can be unlocked<br />
by contacting the card donor or by using the card on an atm.<br />
APPLICATION LOCKED = The application on the card is locked. The card holder has<br />
to contact the card donor.<br />
JÄSENLIIKENUMERO PUUTTUU = The card is not included in the terminals card<br />
selection. It cannot be used. The terminal also might not have the AID and BIN-tables. Send the<br />
batch from the terminal (instructions 4.4.3).<br />
SERVICE NOT ALLOWED FOR THIS CARD PRODUCT = The card in use is not included<br />
in the terminals card selection. It cannot be used.<br />
NOT ALLOWED = The card in use does not permit to make the wanted transaction. For example<br />
manual entry with a Visa Electron is not allowed.<br />
WRONG CARD = Check that the card in use is the correct card for the required transaction.<br />
TRANS NOT FOUND = The transaction is not in the terminals memory, check the receipt number.<br />
MAX LIMIT EXCEEDED = The amount of the transaction exceeds the maximum limit of the card in<br />
use.<br />
WRONG PIN = Customer has typed the wrong PIN-code for the card.<br />
DOWNLOAD NEEDED = The program needs to be downloaded to the terminal. Contact Point’s<br />
customer service.<br />
TAMPERING DETECTED = The terminal has suffered a knock or a power surge, which has<br />
caused it to go into a security lock mode. The terminal must be delivered to Point’s maintenance<br />
service, where the security lock can be opened. See instructions, part 6.4.<br />
POINT TRANSACTION SYSTEMS OY<br />
Vanha Nurmijärventie 62 FI-01670 VANTAA | tel: +358 (0)9 477 4330 | fax: +358 (0)9 436 2490<br />
www.point.fi
Page<br />
27 (29)<br />
Date<br />
25.10.2011<br />
6.2 Notifications on the receipt<br />
CONNECTION ERROR = There is a problem with the connection. See part 6.3.<br />
BATCH SENDING ERROR = There is a problem with the connection. See part 6.3.<br />
”PYYTÄMÄÄNNE AINEISTOA EI OLE” = The bank does not have information of the previous<br />
batch sending ready.<br />
”TAPAHTUMATIEDOSTO PUUTTUU” = The bank does not have information ready of the previous<br />
batch sending.<br />
ERROR FILE NOT EXISTENT = The bank does not have information ready of the previous batch<br />
sending.<br />
OTA YHTEYS NEUVONTAAN = Contact the bank.<br />
6.3 Other exceptions<br />
CONNECTION PROBLEM = Switch the terminal off and on and try to connect again. Check that<br />
the SIM-card is properly placed in its slot.<br />
TERMINAL DOES NOT READ CARDS =Switch the terminal off and on and try again. The chip<br />
card reader might also be unclean. Clean the reader with a cleaning card and try again.<br />
POWER IS OFF = Switch on the terminal by pressing the Enter-button for a while. The battery<br />
might also be empty and require charging.<br />
POINT TRANSACTION SYSTEMS OY<br />
Vanha Nurmijärventie 62 FI-01670 VANTAA | tel: +358 (0)9 477 4330 | fax: +358 (0)9 436 2490<br />
www.point.fi
Page<br />
28 (29)<br />
Date<br />
25.10.2011<br />
6.4 Service<br />
NOTE! Do not, under any circumstances, try to fix the terminal by yourself. The terminal<br />
should be always delivered to the maintenance service.<br />
If you suspect that the terminal is damaged or broken, do the following:<br />
• Pack the terminal firmly, so that it will not be damaged during the delivery.<br />
• Attach a description of the problem and your contact information with the terminal. Attach<br />
also a notification if there are transactions in the terminal.<br />
• You do not have to send the cables with the terminal unless you want them tested too.<br />
• Send the terminal by post. The postage is always paid by the sender.<br />
• Service address is:<br />
Point Transaction Systems Oy/<br />
Service<br />
Vanha Nurmijärventie 62D<br />
01670 Vantaa<br />
POINT TRANSACTION SYSTEMS OY<br />
Vanha Nurmijärventie 62 FI-01670 VANTAA | tel: +358 (0)9 477 4330 | fax: +358 (0)9 436 2490<br />
www.point.fi
Page<br />
29 (29)<br />
Date<br />
25.10.2011<br />
7. USEFUL CONTACT INFORMATION<br />
Authorization centers:<br />
American Express 0800 114 646<br />
Diners Club 0800 955 55<br />
Luottokunta 09 696 4646<br />
Bank cards 0100 3100<br />
Banks:<br />
Nordea: 0200 672 10<br />
Osuuspankki: 0100 051 51<br />
Sampo: 0600 125 25<br />
Säästöpankit/Aktia/Local Osuuspankki: 0100 4050<br />
Handelsbanken: 010 444 2545<br />
Ålandsbanken: 020 429 2910<br />
Operators:<br />
Elisa: 010 808 088<br />
Sonera: 0200 188 18<br />
POINT TRANSACTION SYSTEMS OY<br />
Vanha Nurmijärventie 62 FI-01670 VANTAA | tel: +358 (0)9 477 4330 | fax: +358 (0)9 436 2490<br />
www.point.fi