E-mail: info@fgimaging.com Website: www ... - engineersgroup
E-mail: info@fgimaging.com Website: www ... - engineersgroup
E-mail: info@fgimaging.com Website: www ... - engineersgroup

You also want an ePaper? Increase the reach of your titles
YUMPU automatically turns print PDFs into web optimized ePapers that Google loves.
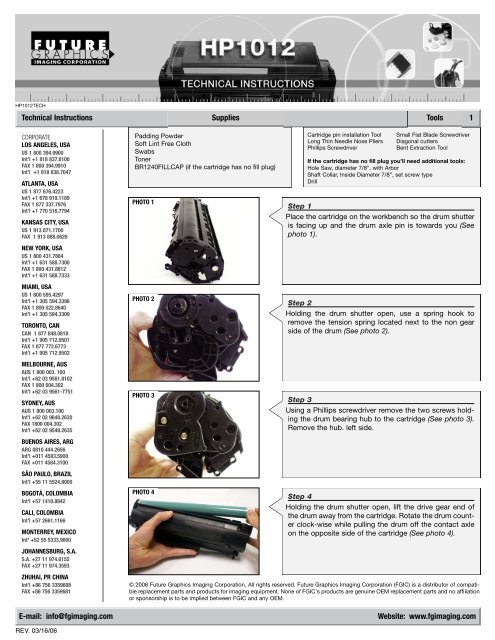
HP1012TECH<br />
Technical Instructions Supplies Tools 1<br />
CORPORATE<br />
LOS ANGELES, USA<br />
US 1 800 394.9900<br />
Int’l +1 818 837.8100<br />
FAX 1 800 394.9910<br />
Int’l +1 818 838.7047<br />
ATLANTA, USA<br />
US 1 877 676.4223<br />
Int’l +1 678 919.1189<br />
FAX 1 877 337.7976<br />
Int’l +1 770 516.7794<br />
KANSAS CITY, USA<br />
US 1 913 871.1700<br />
FAX 1 913 888.0626<br />
NEW YORK, USA<br />
US 1 800 431.7884<br />
Int’l +1 631 588.7300<br />
FAX 1 800 431.8812<br />
Int’l +1 631 588.7333<br />
MIAMI, USA<br />
US 1 800 595.4297<br />
Int’l +1 305 594.3396<br />
FAX 1 800 522.8640<br />
Int’l +1 305 594.3309<br />
TORONTO, CAN<br />
CAN 1 877 848.0818<br />
Int’l +1 905 712.9501<br />
FAX 1 877 772.6773<br />
Int’l +1 905 712.9502<br />
MELBOURNE, AUS<br />
AUS 1 800 003. 100<br />
Int’l +62 03 9561.8102<br />
FAX 1 800 004.302<br />
Int’l +62 03 9561-7751<br />
SYDNEY, AUS<br />
AUS 1 800 003.100<br />
Int’l +62 02 9648.2630<br />
FAX 1800 004.302<br />
Int’l +62 02 9548.2635<br />
BUENOS AIRES, ARG<br />
ARG 0810 444.2656<br />
Int’l +011 4583.5900<br />
FAX +011 4584.3100<br />
SÃO PAULO, BRAZIL<br />
Int’l +55 11 5524.8000<br />
BOGOTÁ, COLOMBIA<br />
Int'l +57 1410.8842<br />
CALI, COLOMBIA<br />
Int'l +57 2661.1166<br />
MONTERREY, MEXICO<br />
Int' +52 55 5333.9800<br />
JOHANNESBURG, S.A.<br />
S.A. +27 11 974.6155<br />
FAX +27 11 974.3593<br />
ZHUHAI, PR CHINA<br />
Int’l +86 756 3359608<br />
FAX +86 756 3359681<br />
E-<strong>mail</strong>: <strong>info@fgimaging</strong>.<strong>com</strong><br />
Padding Powder<br />
Soft Lint Free Cloth<br />
Swabs<br />
Toner<br />
BR1240FILLCAP (if the cartridge has no fill plug)<br />
PHOTO 1<br />
PHOTO 2<br />
PHOTO 3<br />
PHOTO 4<br />
Cartridge pin installation Tool<br />
Long Thin Needle Nose Pliers<br />
Phillips Screwdriver<br />
Small Flat Blade Screwdriver<br />
Diagonal cutters<br />
Bent Extraction Tool<br />
If the cartridge has no fill plug you’ll need additional tools:<br />
Hole Saw, diameter 7/8”, with Arbor<br />
Shaft Collar, Inside Diameter 7/8”, set screw type<br />
Drill<br />
Step 1<br />
Place the cartridge on the workbench so the drum shutter<br />
is facing up and the drum axle pin is towards you (See<br />
photo 1).<br />
Step 2<br />
Holding the drum shutter open, use a spring hook to<br />
remove the tension spring located next to the non gear<br />
side of the drum (See photo 2).<br />
Step 3<br />
Using a Phillips screwdriver remove the two screws holding<br />
the drum bearing hub to the cartridge (See photo 3).<br />
Remove the hub. left side.<br />
Step 4<br />
Holding the drum shutter open, lift the drive gear end of<br />
the drum away from the cartridge. Rotate the drum counter<br />
clock-wise while pulling the drum off the contact axle<br />
on the opposite side of the cartridge (See photo 4).<br />
© 2008 Future Graphics Imaging Corporation. All rights reserved. Future Graphics Imaging Corporation (FGIC) is a distributor of <strong>com</strong>patible<br />
replacement parts and products for imaging equipment. None of FGIC's products are genuine OEM replacement parts and no affiliation<br />
or sponsorship is to be implied between FGIC and any OEM.<br />
<strong>Website</strong>: <strong>www</strong>.fgimaging.<strong>com</strong><br />
REV. 03/16/06
2 HP1012 Technical Instructions<br />
Step 5<br />
Using needle nose pliers remove the<br />
PCR from the cartridge (See photo<br />
5). Clean the PCR using a mild soap<br />
and water.<br />
PHOTO 6<br />
Step 6<br />
With a bent extraction tool push the cartridge<br />
pin out from the inside of the cartridge<br />
(See photo 6).<br />
PHOTO 5<br />
PHOTO 7<br />
Step 7<br />
Using diagonal cutters pull the cartridge<br />
pins out from the both sides of the cartridge<br />
(See photos 7 & 8).<br />
Notes<br />
PHOTO 8<br />
PHOTO 9<br />
Step 8<br />
Separate the two sections of the cartridge<br />
(See photo 9). Set the toner hopper aside.<br />
PHOTO 10<br />
Step 9<br />
Remove the drum shutter tension spring<br />
(See photo 10).<br />
© 2008 Future Graphics Imaging Corporation. All<br />
rights reserved. Future Graphics Imaging<br />
Corporation (FGIC) is a distributor of <strong>com</strong>patible<br />
replacement parts and products for imaging equipment.<br />
None of FGIC's products are genuine OEM<br />
replacement parts and no affiliation or sponsorship<br />
is to be implied between FGIC and any OEM.
HP1012 Technical Instructions 3<br />
PHOTO 11<br />
Step 10<br />
Slide the drum shutter open and lift the<br />
shutter from its cradles (See photo 11).<br />
Step 16<br />
Install the drum bearing hub onto the<br />
side of the cartridge. Install the two<br />
screws that hold the hub in place<br />
(See photo 16).<br />
PHOTO 12<br />
Step 11<br />
Using a Philips screwdriver remove the two<br />
screws holding the wiper blade (See photo<br />
12). Remove the wiper blade.<br />
Step 12<br />
Clean the waste hopper using dry <strong>com</strong>pressed<br />
air or a vacuum. Clean the PCR<br />
saddle contact with alcohol and a swab.<br />
PHOTO 16<br />
PHOTO 13<br />
Step 13<br />
Apply padding powder to the used or new<br />
wiper blade. Install the blade onto the waste<br />
hopper and install the two screws that hold<br />
the blade in place (See photo 13).<br />
Step 17<br />
Slide the drum shutter over the<br />
waste hopper and place the shutter<br />
into its cradles (See photo 17).<br />
PHOTO 17<br />
PHOTO 14<br />
Step 14<br />
Apply conductive grease to the PCR contact<br />
(black) saddle. Install the cleaned PCR<br />
into the saddles (See photo 14).<br />
PHOTO 15<br />
Step 15<br />
Apply padding powder to the drum. While<br />
rotating the drum counter clock-wise, slide<br />
the drum onto the contact axle (See photo<br />
15).<br />
© 2008 Future Graphics Imaging Corporation. All<br />
rights reserved. Future Graphics Imaging<br />
Corporation (FGIC) is a distributor of <strong>com</strong>patible<br />
replacement parts and products for imaging equipment.<br />
None of FGIC's products are genuine OEM<br />
replacement parts and no affiliation or sponsorship<br />
is to be implied between FGIC and any OEM.
4 HP1012 Technical Instructions<br />
Step 18<br />
Reinstall the tension spring onto the<br />
drum shutter (See photo 18).<br />
PHOTO 20<br />
Step 21<br />
Remove the three gears from the side of<br />
the toner hopper, leaving the toner hopper<br />
agitator gear (See photo 20).<br />
PHOTO 18<br />
PHOTO 21<br />
Step 22<br />
Rotate the cartridge 180°. Remove the<br />
screw holding the contact end cap to the<br />
toner hopper (See photo 21). Remove the<br />
end cap.<br />
Step 19<br />
Set the waste hopper aside in a protected<br />
area<br />
Step 20<br />
Remove the screw holding the gear<br />
end cap to the toner hopper (See<br />
photo 19). Remove the end cap.<br />
PHOTO 19<br />
PHOTO 22<br />
Step 23<br />
Lift out the mag roller. Remove the mag<br />
roller bushings from the ends of the roller<br />
(See photo 22).<br />
Step 24<br />
Clean the mag roller first using dry <strong>com</strong>pressed<br />
air or a vacuum. Then clean the<br />
roller using a lint free cloth and a mag roller<br />
cleaner.<br />
PHOTO 23<br />
Step 25<br />
Remove the two screws holding the doctor<br />
blade to the toner hopper (See photo 23).<br />
Remove the white scraper from the end of<br />
the blade, and remove the doctor blade.<br />
Clean the doctor blade using a lint free cloth<br />
and DI water.<br />
PHOTO 24<br />
Step 26<br />
Remove the doctor blade sealing end foams<br />
from both sides of the toner hopper (See<br />
photo 24).<br />
© 2008 Future Graphics Imaging Corporation. All<br />
rights reserved. Future Graphics Imaging<br />
Corporation (FGIC) is a distributor of <strong>com</strong>patible<br />
replacement parts and products for imaging equipment.<br />
None of FGIC's products are genuine OEM<br />
replacement parts and no affiliation or sponsorship<br />
is to be implied between FGIC and any OEM.
HP1012 Technical Instructions 5<br />
PHOTO 25<br />
Step 27<br />
Using a small flat blade screwdriver push<br />
the seal exit port plug out from the hopper<br />
(See photo 25).<br />
Step 33<br />
Install a new or a clean used doctor<br />
blade onto the hopper. Install the<br />
two white scrapers on the end of the<br />
doctor blade and install the two<br />
screws that hold the blade in place<br />
(See photo 30).<br />
PHOTO 26<br />
Step 28<br />
Clean the seal area using a swab and alcohol.<br />
Step 29<br />
Remove the backing of the seal and install<br />
the seal onto the toner hopper (See photo<br />
26).<br />
PHOTO 30<br />
PHOTO 27<br />
Step 30<br />
Slide the tail of the seal through the seal<br />
exit port and install the plug in the end of the<br />
hopper (See photo 27).<br />
Step 34<br />
Place the mag roller bushing on the<br />
ends of the mag roller, the white<br />
bearing goes on the gear side and<br />
the black bearing goes on the contact<br />
side of the mag roller (See photo<br />
31).<br />
PHOTO 31<br />
PHOTO 28<br />
Step 31<br />
Remove the fill plug. Fill the toner hopper<br />
with toner (See photo 28). Reinstall the fill<br />
plug.<br />
NOTE: If the cartridge has no fill plug,<br />
please see Appendix A.<br />
PHOTO 29<br />
Step 32<br />
Install new doctor blade sealing end foams<br />
on both ends of the hopper (See photo 29).<br />
© 2008 Future Graphics Imaging Corporation. All<br />
rights reserved. Future Graphics Imaging<br />
Corporation (FGIC) is a distributor of <strong>com</strong>patible<br />
replacement parts and products for imaging equipment.<br />
None of FGIC's products are genuine OEM<br />
replacement parts and no affiliation or sponsorship<br />
is to be implied between FGIC and any OEM.
6 HP1012 Technical Instructions<br />
Step 35<br />
Install the mag roller onto the toner<br />
hopper. Place the contact end cap<br />
onto the side of the cartridge and<br />
install the screw that holds the end<br />
cap in place.<br />
NOTE: Make sure the magnet sits<br />
correctly inside the contact end<br />
cap (See photo 32).<br />
PHOTO 32<br />
PHOTO 34<br />
PHOTO 35<br />
Step 37<br />
Place the toner hopper gear end cap on to<br />
the toner hopper install the screw that holds<br />
the end cap in place.<br />
NOTE: The mag roller drive gear must sit<br />
correctly inside the end cap (See photo<br />
34).<br />
Step 38<br />
Apply a small bead of toner to the mag<br />
roller. Rotate the mag roller 4-5 revolutions.<br />
Step 39<br />
Join the toner hopper and waste hopper<br />
together. Carefully slide the drum shutter<br />
open, install the cartridge pin on the contact<br />
side of the cartridge (See photo 35).<br />
Step 36<br />
Install the three gears on the end of<br />
the toner hopper (See photo 33).<br />
PHOTO 36<br />
Step 40<br />
Using long thin needle nose pliers or a cartridge<br />
pin installation tool, install the cartridge<br />
pin through the drum axle hub on the<br />
gear side of the cartridge (See photo 36).<br />
PHOTO 33<br />
PHOTO 37<br />
Step 41<br />
Install the cartridge tension spring next to<br />
the drum contact hub (See photo 37).<br />
Step 42<br />
Test cartridge.<br />
© 2008 Future Graphics Imaging Corporation. All rights reserved. Future Graphics Imaging Corporation (FGIC) is a distributor of <strong>com</strong>patible replacement parts and products for imaging<br />
equipment. None of FGIC's products are genuine OEM replacement parts and no affiliation or sponsorship is to be implied between FGIC and any OEM.
In September 2003, HP released a new entry level<br />
laser printer, the HP1012. Based on a new Canon<br />
engine the HP1012 provides a few improvements over<br />
the discontinued HP1000. The biggest improvement<br />
being that the HP1012 can print at 15 pages per<br />
minute, an increase of 5 pages per minute <strong>com</strong>pared<br />
to the HP1000. Like the HP1000, the HP1012 prints at<br />
a resolution of 600x600 dpi but also can support 1200<br />
dpi using the HP FastRes 1200 technology. Targeted<br />
at small business users and home offices, the HP1012<br />
has a starting price of just under $200.<br />
The machine uses a new all in one toner cartridge<br />
(Q2612A) that holds 110 grams of toner and yields<br />
2,000 pages at 5% coverage. At a price of $69 the<br />
HP1012 cartridge holds less toner, prints less pages,<br />
and costs more than the HP1000 cartridge.<br />
Q2612A<br />
HP1012<br />
Appendix A:<br />
New style HP1012 cartridges do not have a toner entry port or a fill<br />
plug. Use a 7/8” Hole Saw to make a hole on the left (contact) side of<br />
the toner hopper, where the toner entry port has been located on the<br />
old style cartridges.<br />
Install set screw type Shaft Collar on the Hole Saw (Photo A). The<br />
distance between the working edge of the saw and the low edge of the<br />
collar should be 13 mm, to limit the drilling depth and prevent agitator<br />
damage.<br />
Drill a hole through the molded plastic funnel, where the toner entry<br />
port has been located on the old style cartridges (Photo B).<br />
Clean the toner hopper with vacuum or <strong>com</strong>pressed air.<br />
Fill the toner hopper with toner. Install BR1240FILLCAP (Photo C).<br />
Go to the Step 32 of the Technical Instructions.<br />
© 2008 Future Graphics Imaging Corporation. All rights reserved. Future Graphics Imaging Corporation (FGIC) is a distributor of <strong>com</strong>patible replacement parts and products for imaging<br />
equipment. None of FGIC's products are genuine OEM replacement parts and no affiliation or sponsorship is to be implied between FGIC and any OEM.<br />
E-<strong>mail</strong>: <strong>info@fgimaging</strong>.<strong>com</strong><br />
<strong>Website</strong>: <strong>www</strong>.fgimaging.<strong>com</strong>