INSTALLATION GUIDE Novitherm heat reflector ... - Matrix Energy
INSTALLATION GUIDE Novitherm heat reflector ... - Matrix Energy
INSTALLATION GUIDE Novitherm heat reflector ... - Matrix Energy

Create successful ePaper yourself
Turn your PDF publications into a flip-book with our unique Google optimized e-Paper software.
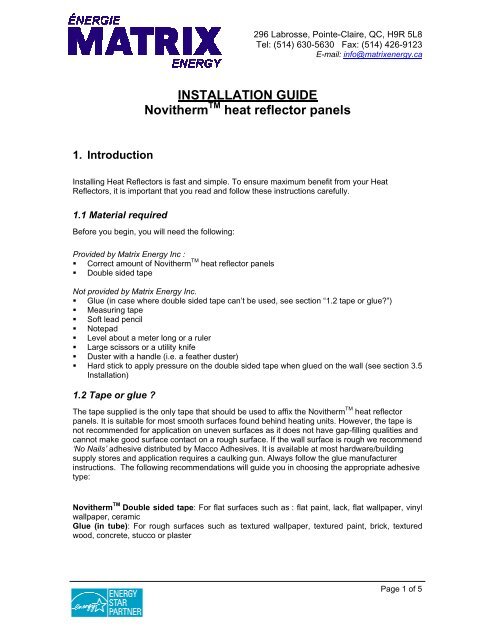
296 Labrosse, Pointe-Claire, QC, H9R 5L8<br />
Tel: (514) 630-5630 Fax: (514) 426-9123<br />
E-mail: info@matrixenergy.ca<br />
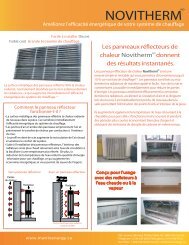
<strong>INSTALLATION</strong> <strong>GUIDE</strong><br />
<strong>Novitherm</strong> TM <strong>heat</strong> <strong>reflector</strong> panels<br />
1. Introduction<br />
Installing Heat Reflectors is fast and simple. To ensure maximum benefit from your Heat<br />
Reflectors, it is important that you read and follow these instructions carefully.<br />
1.1 Material required<br />
Before you begin, you will need the following:<br />
Provided by <strong>Matrix</strong> <strong>Energy</strong> Inc :<br />
• Correct amount of <strong>Novitherm</strong> TM <strong>heat</strong> <strong>reflector</strong> panels<br />
• Double sided tape<br />
Not provided by <strong>Matrix</strong> <strong>Energy</strong> Inc.<br />
• Glue (in case where double sided tape can’t be used, see section “1.2 tape or glue?”)<br />
• Measuring tape<br />
• Soft lead pencil<br />
• Notepad<br />
• Level about a meter long or a ruler<br />
• Large scissors or a utility knife<br />
• Duster with a handle (i.e. a feather duster)<br />
• Hard stick to apply pressure on the double sided tape when glued on the wall (see section 3.5<br />
Installation)<br />
1.2 Tape or glue ?<br />
The tape supplied is the only tape that should be used to affix the <strong>Novitherm</strong> TM <strong>heat</strong> <strong>reflector</strong><br />
panels. It is suitable for most smooth surfaces found behind <strong>heat</strong>ing units. However, the tape is<br />
not recommended for application on uneven surfaces as it does not have gap-filling qualities and<br />
cannot make good surface contact on a rough surface. If the wall surface is rough we recommend<br />
‘No Nails’ adhesive distributed by Macco Adhesives. It is available at most hardware/building<br />
supply stores and application requires a caulking gun. Always follow the glue manufacturer<br />
instructions. The following recommendations will guide you in choosing the appropriate adhesive<br />
type:<br />
<strong>Novitherm</strong> TM Double sided tape: For flat surfaces such as : flat paint, lack, flat wallpaper, vinyl<br />
wallpaper, ceramic<br />
Glue (in tube): For rough surfaces such as textured wallpaper, textured paint, brick, textured<br />
wood, concrete, stucco or plaster<br />
Page 1 of 5
296 Labrosse, Pointe-Claire, QC, H9R 5L8<br />
Tel: (514) 630-5630 Fax: (514) 426-9123<br />
E-mail: info@matrixenergy.ca<br />
2. Cleaning the surfaces<br />
For the Heat Reflector to be installed properly, it MUST have good adhesion to the wall.<br />
Therefore, the surface behind the <strong>heat</strong>ing unit needs to be clean and dust free. Although it is<br />
difficult to remove all traces of surface dirt and dust, it is important to remove as much as<br />
possible. Wiping a household duster between the wall and the <strong>heat</strong>ing unit will provide enough<br />
pressure to remove most dirt and dust.<br />
When the <strong>Novitherm</strong> TM <strong>heat</strong> <strong>reflector</strong> panels are installed in enclosed radiators, after removing the<br />
cover it is important to do the cleaning on the surface where the <strong>reflector</strong> panel will be installed. It<br />
is also highly important to clean the fins to remove the accumulated dust or particles.<br />
3. Installation <strong>Novitherm</strong> TM <strong>heat</strong> <strong>reflector</strong> panels<br />
Using your notepad, pencil, and tape measure, follows this procedure:<br />
Width of <strong>heat</strong>ing unit<br />
• From the top of the <strong>heat</strong>ing unit, measure the<br />
distance from the last ridge on the left to the<br />
last ridge on the right<br />
• If your radiator has a cover with <strong>heat</strong>ing fins<br />
inside, measure the full width of the cover.<br />
Height of <strong>heat</strong>ing unit<br />
• Measure from the top of the base board to the<br />
top of the <strong>heat</strong>ing unit. (Many people prefer to<br />
install the Heat Reflector about 1 inch below<br />
the top of the <strong>heat</strong>ing unit. (It depends on how<br />
much of the Heat Reflector you want visible).<br />
On your notepad, identify the <strong>heat</strong>ing unit and<br />
write these measurements down.<br />
• If your radiator has a cover with <strong>heat</strong>ing fins<br />
inside, measure the height starting the bottom<br />
of the fins up to the top of the cover.<br />
Repeat these measurement procedures for each<br />
<strong>heat</strong>ing unit. Now you are ready to size your Heat<br />
Reflectors.<br />
Example of radiator with cover<br />
Page 2 of 5
296 Labrosse, Pointe-Claire, QC, H9R 5L8<br />
Tel: (514) 630-5630 Fax: (514) 426-9123<br />
E-mail: info@matrixenergy.ca<br />
3.2 Sizing the <strong>reflector</strong> panels<br />
The Heat Reflectors are 8, 12 or 20 inches high by<br />
34 inches wide. Heat Reflectors can be easily<br />
reduced or enlarged to fit any size <strong>heat</strong>ing unit. It is<br />
important to note that the correct way to install Heat<br />
Reflectors is with the flat top of the ridged profile<br />
up.<br />
Heat Reflectors are divided across its width into<br />
four sections: A-11" / B-6" / B-6" / A-11". This<br />
design will allow you to size the Heat Reflectors to<br />
fit any size <strong>heat</strong>ing unit with little waste.<br />
3.3 Cutting the <strong>reflector</strong> panels<br />
Vertical Height - depending upon the <strong>heat</strong>ing unit dimensions, you may need a combination of<br />
Heat Reflectors. In most cases, you will want to make the sized Heat Reflector smaller than the<br />
<strong>heat</strong>ing unit; about _ - 1" in from each edge. If you have <strong>heat</strong>ing unit covers, this may not be an<br />
issue.<br />
To combine two Heat Reflectors, you will simply adhere the Heat Reflectors together. If you need<br />
partial sizes (i.e. to get 26", use a 20" and part of an 8"), cut as follows:<br />
Lay the 8" Heat Reflector with its lower ridges lying over the top of the 20" Heat Reflector.<br />
Measure the height you need. Next, measure down an additional two ridges and cut horizontally<br />
along the bottom of the second additional ridge. Save the pieces that you have cut off.<br />
Overlap the top part of the 8" Heat Reflector over the 20" Heat Reflector to give you the<br />
measured height. Always put the top Heat Reflector over the bottom one. Overlap and adhere the<br />
Heat Reflectors together. When overlapping 2 Heat Reflectors, have the uppermost Heat<br />
Reflector overlap the lower one.<br />
Horizontal Width/Length – use the vertical flat lines to cut the appropriate width. Cut up the<br />
middle of the flat area leaving some flat edge on both Heat Reflector pieces for tape. You may<br />
need to add Heat Reflectors together or place side by side. To add width, proceed as follows:<br />
Measure the width you need. Add an additional two inches and cut vertically through a section of<br />
the ridge.<br />
Once cut, overlap to give you the measured width.<br />
Save the section you have cut off for use with<br />
another <strong>heat</strong>ing unit. Overlap and adhere the Heat<br />
Reflectors together.<br />
IMPORTANT <strong>INSTALLATION</strong> NOTE: there must<br />
be a flat surface all around the outer edge of the<br />
sized Heat Reflectors. This traps the air behind the<br />
Heat Reflector to give you a thermal barrier<br />
between the <strong>heat</strong>ing unit and the exterior wall.<br />
Page 3 of 5
296 Labrosse, Pointe-Claire, QC, H9R 5L8<br />
Tel: (514) 630-5630 Fax: (514) 426-9123<br />
E-mail: info@matrixenergy.ca<br />
3.4 Applying the tape<br />
The back of the Heat Reflector has vertical and horizontal flat surfaces designed for adhesive.<br />
These are the surfaces that affix to the wall.<br />
Now that you have determined the size of the Heat Reflector, you need to decide whether to use<br />
tape (on a smooth wall surface) and/or adhesive (on a rough wall surface).<br />
For a smooth wall surface – Double Sided Tape<br />
Apply the tape onto the flat surfaces (back, top, sides and bottom as well as on the vertical and<br />
middle flat tracks). Note: DO NOT PEEL THE PAPER BACKING OFF OF TAPE YET.<br />
For a rough wall surface – ‘No Nails’ Adhesive<br />
First, place 2" pieces of the double sided tape in strategic points to help hold the Heat Reflector in<br />
place while the adhesive sets. Using a caulking gun, follow the manufacturer’s instructions and<br />
apply a thin bead of the adhesive to the flat surfaces (back, top, sides and bottom as well as on<br />
the vertical and middle flat tracks).<br />
Page 4 of 5
296 Labrosse, Pointe-Claire, QC, H9R 5L8<br />
Tel: (514) 630-5630 Fax: (514) 426-9123<br />
E-mail: info@matrixenergy.ca<br />
3.5 Installing the <strong>reflector</strong> panels<br />
Peel the cover from the tape. Take one Heat<br />
Reflector and gently slide it behind the <strong>heat</strong>ing unit,<br />
being careful not to touch the wall. Once you have<br />
the Heat Reflector lined up and level, take the<br />
installation cane and gently press down on the<br />
vertical tracks (starting at the top) until the Heat<br />
Reflector is firmly fixed to the wall. It is best to work<br />
from the middle outward. Do not press too hard or<br />
you may puncture or flatten the ridges.<br />
It is necessary to provide pressure on the tape (10<br />
to 20 pounds per linear inch recommended) to<br />
allow to adhesive the come into direct contact with<br />
the substrate. Using a hard edged, plastic or<br />
wooden tool, which is the full width of the laminated<br />
part, helps provide the necessary pressure at the<br />
point of lamination.<br />
Using the same procedure, take the next sized section and fit it to the wall making sure that the<br />
edges line up to the <strong>Novitherm</strong> TM <strong>heat</strong> <strong>reflector</strong> panels already installed.<br />
4. Adjusting the boiler temperature<br />
To get the maximum energy savings out of your <strong>Novitherm</strong> TM <strong>heat</strong> <strong>reflector</strong> panels you will need<br />
to turn down your boiler/furnace thermostat (not your room thermostat) by about 5°C after<br />
installing the <strong>reflector</strong> panels. Contact your technician if you need help in this operation.<br />
Your <strong>Novitherm</strong> TM <strong>heat</strong> <strong>reflector</strong> panels are now installed. Enjoy your energy savings!<br />
<strong>Matrix</strong> <strong>Energy</strong> Inc.<br />
296 Labrosse, Pointe Claire, QC, Canada, H9R 5L8<br />
Tel: (514) 630-5630 - Fax: (514) 426-9123<br />
Website: www.matrixenergy.ca<br />
Page 5 of 5