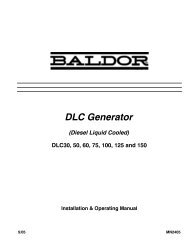
Installation & Operation Manual: Portable Premier Series
Installation & Operation Manual: Portable Premier Series
Installation & Operation Manual: Portable Premier Series

You also want an ePaper? Increase the reach of your titles
YUMPU automatically turns print PDFs into web optimized ePapers that Google loves.
Section 5<br />
Troubleshooting and Maintenance<br />
Maintenance<br />
This manual contains only very minimal engine maintenance instructions. Refer to the engine<br />
manufacturer’s owner’s manual for specific engine maintenance instructions for your generator<br />
set. Any maintenance instructions or recommendations in the engine owner’s manual take<br />
precedence over any of the following general recommendations.<br />
General:<br />
1. Inspect the fuel system for leaks. Replace all defective components immediately.<br />
2. Inspect and replace any fuel line that shows signs of deterioration.<br />
3. Inspect all fuel clamps to ensure they are tight.<br />
4. Make sure the fuel cap fits snugly on the fuel tank and that the fuel tank does not leak.<br />
5. Inspect and clean the battery posts and the associated battery cable terminals.<br />
6. Inspect the external wire cables and connectors used with the generator set for cuts,<br />
frayed insulation, or loose connections. Repair or replace damaged parts before use.<br />
7. The engine should be checked for proper speed setting(s).<br />
Prior to adjusting the engine speed, turn the auto idler switch to “OFF” (if present).<br />
Make sure that the auto idler magnet does not touch the throttle lever of the engine<br />
when running.<br />
a. Disconnect all electrical loads and start the engine.<br />
b. Adjust the engine speed to 3720 RPM (62 Hz) with no load speed.<br />
c. Adjust the auto idler speed after you have accomplished the above adjustment.<br />
d. Adjust the auto idler speed by moving the electro−magnet back and forth in the<br />
magnet bracket to achieve an engine RPM of 2500−2900 with the auto idler switch<br />
“ON”.<br />
8. Test all GFCI receptacles monthly by pressing the test button on the receptacle and<br />
making sure that the GFCI trips and and no voltage is present at the receptacle.<br />
Replace any GFCI receptacle that fails the test.<br />
Engine:<br />
1. Clean and/or replace any fuel, oil, and/or air filters per the engine manufacturers’<br />
guidelines.<br />
2. Check oil level regularly; at least every 5 to 8 operating hours. Maintain the proper oil<br />
level.<br />
3. Change the oil as is recommended in the engine manufacturer’s owner’s manual.<br />
4. Replace the spark plug(s) as is recommended by the engine manufacturer.<br />
5. Clean the cooling fins on the engine to keep the engine’s heat dissipation potential at<br />
it’s maximum.<br />
6. Inspect and clean all governor and carburetor linkages so they operate properly.<br />
7. Inspect the recoil starting rope for any damage and replace it if necessary (if<br />
applicable).<br />
8. Clean the trash screen around the recoil starter or other cooling air intake.<br />
Alternator: ( also called Generator End)<br />
This generator set must be run at its proper speed to obtain the correct electrical power at its<br />
output. All engines have a tendency to slow down when a load is applied to it. The engine<br />
governor is designed to hold the operating speed as nearly constant as possible. When the<br />
electrical load is increased, the engine is more heavily loaded and engine speed drops slightly.<br />
This slight decrease in engine speed results in a slight decrease in generator voltage and<br />
frequency output. This voltage and frequency variation has no appreciable effect in the operation<br />
of motors, lights, and most appliances and tools. However, timing devices and clocks will not<br />
keep perfect time when used on this generator.<br />
1. Clean the generator set and remove any and all dust, dirt, or other foreign material.<br />
2. Inspect and clean the cooling air intake and exhaust louvers of the generator end.<br />
Make sure they are clean. Remove dirt or any buildup that may restrict the cooling air<br />
flow.<br />
3. Clean the generator set and its components with a damp cloth or sponge.<br />
Never use a water hose or pressure washer as this may damage electrical<br />
components.<br />
4. Inspect and replace any control panel components that are broken or not working<br />
properly (receptacles, circuit breakers, switches, etc.)<br />
MN2410<br />
Troubleshooting and Maintenance 5-1