to download the PDF - Ovation Tribute
to download the PDF - Ovation Tribute
to download the PDF - Ovation Tribute

You also want an ePaper? Increase the reach of your titles
YUMPU automatically turns print PDFs into web optimized ePapers that Google loves.
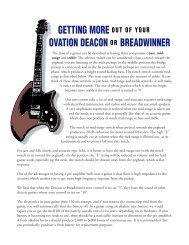
Introduction<br />
Congratulations and thank you for selecting an <strong>Ovation</strong> Acoustic/Electric<br />
guitar equipped with <strong>the</strong> Optima ® preamp. Please<br />
read this brief manual thoroughly <strong>to</strong> insure you get “Optima-l”<br />
performance from your new <strong>Ovation</strong>.<br />
The <strong>Ovation</strong> Optima preamp represents <strong>the</strong> cutting edge of<br />
acoustic/electric guitar circuitry. This preamp offers <strong>the</strong> player<br />
tremendous control and sonic flexibility while maintaining<br />
acoustic “transparency.” In addition, this new preamp includes<br />
a built-in digital tuner - an <strong>Ovation</strong> first! In o<strong>the</strong>r<br />
words, whe<strong>the</strong>r in <strong>the</strong> recording studio or on stage, your<br />
<strong>Ovation</strong> will sound more “acoustic” and in-tune than ever.<br />
Referring <strong>to</strong> fig. 1, you’ll see <strong>the</strong> layout and nomenclature<br />
associated with <strong>the</strong> control features of <strong>the</strong> unit. To simplify<br />
<strong>the</strong> explanation of <strong>the</strong> functions and features, it’s convenient<br />
<strong>to</strong> discuss <strong>the</strong> preamp and tuner functions separately.<br />
Preamp Features & Functions<br />
The Optima’s audio circuitry is studio-quiet with super low<br />
dis<strong>to</strong>rtion (see specifications table). Tone control is greatly<br />
enhanced with a precise four-band graphic equalizer. Moreover,<br />
you can connect your guitar <strong>to</strong> a wide range of audio<br />
amplification and recording equipment. Since <strong>the</strong> Optima<br />
features both a low impedance balanced XLR connec<strong>to</strong>r as<br />
well as a standard ¼” Hi-Z, unbalanced phone jack, you<br />
can even use your mixer’s phan<strong>to</strong>m power capability <strong>to</strong> eliminate<br />
<strong>the</strong> preamp’s drain on <strong>the</strong> battery!<br />
Connections<br />
On <strong>the</strong> rear of <strong>the</strong> guitar, near <strong>the</strong> endpin, you’ll notice two<br />
audio connec<strong>to</strong>rs. One is a three pin XLR (mic) type, balanced<br />
output, while <strong>the</strong> o<strong>the</strong>r is a conventional, ¼” phone jack.<br />
Hi-Z Connection<br />
If you wish <strong>to</strong> connect your guitar <strong>to</strong> a high impedance (Hi-<br />
Z) acoustic guitar amp or mixer, use a standard, shielded,<br />
¼” guitar cable inserted in<strong>to</strong> <strong>the</strong> ¼” jack on <strong>the</strong> guitar. If<br />
you have a battery installed in <strong>the</strong> guitar, you’re ready <strong>to</strong><br />
play (of course you’ll read <strong>the</strong> rest of this manual first)!<br />
Lo-Z Connection<br />
If you have chosen <strong>to</strong> connect <strong>the</strong> guitar <strong>to</strong> a low impedance<br />
mixer or amp, <strong>the</strong>re are a couple of options. If you have a<br />
conventional, Lo-Z balanced line XLR (or mic) cable, connect<br />
<strong>the</strong> guitar <strong>to</strong> <strong>the</strong> amp/mixer and insert a ¼” “activation<br />
plug 1 ” in<strong>to</strong> <strong>the</strong> phone jack on <strong>the</strong> guitar. This plug connects<br />
<strong>the</strong> battery’s current <strong>to</strong> <strong>the</strong> preamp circuitry. If you have<br />
purchased an <strong>Ovation</strong> Lo-Z XLR Activation Cable 2 , simply<br />
connect your guitar <strong>to</strong> your amp or mixer and play!<br />
Phan<strong>to</strong>m Power<br />
Here’s ano<strong>the</strong>r unique <strong>Ovation</strong> feature: If your mixer or acoustic<br />
guitar amp has phan<strong>to</strong>m power available (a voltage source<br />
that is superimposed inaudibly on <strong>the</strong> same wires as <strong>the</strong> signal),<br />
using <strong>the</strong> XLR connec<strong>to</strong>r on <strong>the</strong> guitar (with any balanced<br />
XLR cable) will direct this voltage <strong>to</strong> your preamp.<br />
This will dramatically extend battery life, as only <strong>the</strong> tuner<br />
will require battery current. Even without a battery, using<br />
<strong>the</strong> phan<strong>to</strong>m powering option will ensure that you’re getting<br />
<strong>the</strong> ultimate response and output from your preamp. Please<br />
note however, that <strong>the</strong> tuner will not function without a serviceable<br />
battery installed in <strong>the</strong> guitar.<br />
Controls<br />
Please refer again <strong>to</strong> fig. 1 <strong>to</strong> note control names and functions.<br />
Gain<br />
This “retractable” control allows you <strong>to</strong> set <strong>the</strong> output level<br />
of <strong>the</strong> preamp. If you depress and release this knob, it will<br />
“pop” out and allow easy access for adjustment. Clockwise<br />
rotation increases <strong>the</strong> output level. Depress and release <strong>the</strong><br />
knob again and it will return <strong>to</strong> its original, recessed posifigure<br />
1.<br />
tion. This low-profile position helps avoid unintentional contact...<br />
your level setting “stays put.”<br />
Battery Low<br />
This indica<strong>to</strong>r will illuminate if <strong>the</strong> voltage of <strong>the</strong> battery<br />
installed in <strong>the</strong> guitar dips below 7.7V. This means you should<br />
replace <strong>the</strong> battery as soon as possible <strong>to</strong> avoid degraded<br />
performance. If this indica<strong>to</strong>r is not lit and your guitar has<br />
no output, it likely means that <strong>the</strong> battery is completely dead.<br />
Ei<strong>the</strong>r replace <strong>the</strong> battery or use phan<strong>to</strong>m power (see above).<br />
With average tuner use, expect 100-150 hours of use per battery.<br />
EQ Controls<br />
The EQ section allows you <strong>to</strong> accent or attenuate certain<br />
frequency bands within <strong>the</strong> guitar’s audio spectrum. When<br />
all of <strong>the</strong> controls are in <strong>the</strong> center (detent) position, signals<br />
pass through <strong>the</strong> circuit unaltered. Raising an EQ knob above<br />
<strong>the</strong> center position increases <strong>the</strong> energy contained within that<br />
spectrum. Likewise, moving <strong>the</strong> control below <strong>the</strong> center position<br />
decreases <strong>the</strong> signals within that band.<br />
The Optima preamp offers ±12dB control over four discrete<br />
ranges of <strong>the</strong> guitar’s sonic spectrum.<br />
The Low EQ control allows you <strong>to</strong> increase or reduce <strong>the</strong><br />
sound in <strong>the</strong> bass region. Raise this control above <strong>the</strong> center<br />
position <strong>to</strong> add fullness or bot<strong>to</strong>m <strong>to</strong> your sound. De-emphasizing<br />
this band results in a lighter, less ponderous sound<br />
quality.<br />
The High EQ control performs similarly <strong>to</strong> <strong>the</strong> “Low” control<br />
except that its effect shapes <strong>the</strong> high frequency, or treble<br />
band. Increase this control for bright or airy sounds, or decrease<br />
for darker or round <strong>to</strong>nalities.<br />
Much like <strong>the</strong> High and Low controls, <strong>the</strong> two mid-band<br />
controls add coloration <strong>to</strong> <strong>the</strong> lower and upper midrange<br />
frequencies. The 600Hz EQ is effective controlling “nasal”<br />
<strong>to</strong>ne qualities while <strong>the</strong> 6K control can add edge or help<br />
your sound "cut” without loss of musicality.<br />
EQ In/Out<br />
This push-but<strong>to</strong>n enables you <strong>to</strong> engage or defeat <strong>the</strong> EQ<br />
section. When <strong>the</strong> switch is in <strong>the</strong> depressed position, <strong>the</strong><br />
EQ is active. Return <strong>the</strong> switch <strong>to</strong> <strong>the</strong> “up” position and <strong>the</strong><br />
EQ circuit is bypassed. The bypass of <strong>the</strong> EQ circuit is desirable<br />
in some studio environments where external EQ is<br />
preferable. You can also use this defeat switch <strong>to</strong> quickly<br />
check <strong>the</strong> results of your EQ adjustments relative <strong>to</strong> <strong>the</strong> original<br />
sound or even as instant access <strong>to</strong> a discrete second EQ<br />
“channel.”<br />
Notch In/Out<br />
This switch enables <strong>the</strong> notch circuitry in <strong>the</strong> down position<br />
and disables it in <strong>the</strong> up position.<br />
Notch<br />
A Notch filter is a very special type of EQ. Essentially, it is<br />
an extremely narrow and deep cut of an audio frequency<br />
band. The Optima has a “tunable” notch filter which empowers<br />
you <strong>to</strong> select <strong>the</strong> specific frequency band that will<br />
be affected by <strong>the</strong> notch. With <strong>the</strong> Optima’s tunable notch<br />
filter you can “surgically” remove troublesome feedback frequencies<br />
which occur due <strong>to</strong> <strong>the</strong> guitar’s natural resonances.<br />
The Notch control provides control of <strong>the</strong> center frequency<br />
of <strong>the</strong> notch effect. Like <strong>the</strong> Gain Control it is “retractable.”
When your moni<strong>to</strong>r or stage levels are <strong>to</strong>o high, and you<br />
hear <strong>the</strong> guitar starting <strong>to</strong> feed back, engage <strong>the</strong> notch circuitry<br />
and simply tune <strong>the</strong> filter (you’re actually changing<br />
<strong>the</strong> center frequency of <strong>the</strong> notch) by slowly rotating <strong>the</strong> Notch<br />
control until <strong>the</strong> feedback is eliminated. Full counterclockwise,<br />
<strong>the</strong> Notch frequency is roughly 70Hz, while full clockwise<br />
it is about 700Hz.<br />
Tuner Features and Functions<br />
The tuner built in <strong>to</strong> your Optima preamp is easy <strong>to</strong> use,<br />
flexible, and extremely accurate. It is an “au<strong>to</strong>matic chromatic”<br />
model which, when activated, will display <strong>the</strong> name<br />
of <strong>the</strong> note you are playing as well as its tuning status (sharp<br />
or flat). There is an additional function which allows “offset”<br />
tuning - a quick way <strong>to</strong> <strong>to</strong>uch up a guitar's tuning. Finally,<br />
<strong>to</strong> extend battery life, <strong>the</strong> tuner is controlled by a au<strong>to</strong>matically<br />
timed turn-off circuit. The tuner function is accessible<br />
regardless of whe<strong>the</strong>r or not you are “plugged in.”<br />
This means that even when you are playing acoustically,<br />
you’ll be able <strong>to</strong> tune your instrument precisely.<br />
Tune/Cal<br />
To activate <strong>the</strong> tuner, simply depress <strong>the</strong> Tune/Cal push-but<strong>to</strong>n<br />
one time. The tuner “OK” LED will flash periodically,<br />
indicating that it is now in <strong>the</strong> “standby” mode - awaiting a<br />
note <strong>to</strong> measure. It will remain active for over one minute<br />
(usually enough time <strong>to</strong> completely tune your instrument).<br />
After this period, <strong>the</strong> timer circuit will return <strong>the</strong> tuner <strong>to</strong> its<br />
“off” state <strong>to</strong> ensure that your battery will not be unnecessarily<br />
depleted. You can activate <strong>the</strong> tune mode in this way as<br />
often as you need <strong>to</strong> complete tuning.<br />
Once you’ve enabled <strong>the</strong> tuner, simply play a note on <strong>the</strong><br />
guitar and <strong>the</strong> tuner LEDs will indicate <strong>the</strong> note name and<br />
<strong>the</strong> tuning status. If <strong>the</strong> note is <strong>to</strong>o sharp, <strong>the</strong> “Sharp” indica<strong>to</strong>r<br />
will illuminate. Similarly, <strong>the</strong> “Flat” and <strong>the</strong> “OK”<br />
LEDs will respond <strong>to</strong> note you play. In addition, if <strong>the</strong> note<br />
you play is sharp or flat, <strong>the</strong> LED will flash at varying rates<br />
depending upon <strong>the</strong> amount sharp or flat. As you move closer<br />
<strong>to</strong> <strong>the</strong> correct pitch, <strong>the</strong> flash rate will decrease until you<br />
have reached <strong>the</strong> correct pitch, at which time <strong>the</strong> “OK” LED<br />
will illuminate. After tuning each string this way, check<br />
each string a second time. Some strings may require “re<strong>to</strong>uching,”<br />
especially if your guitar was significantly out of<br />
tune <strong>to</strong> begin with.<br />
There is ano<strong>the</strong>r convenient function built in <strong>to</strong> this tuner.<br />
Occasionally, you might find yourself in a situation where<br />
you must play with o<strong>the</strong>r instruments (like an old piano) which<br />
may be slightly out of tune. Simply tune one string of your<br />
guitar <strong>to</strong> this instrument, <strong>the</strong>n activate <strong>the</strong> tuner (see above)<br />
and play that string. Wait for <strong>the</strong> tuner <strong>to</strong> “lock” on <strong>the</strong><br />
pitch (it may indicate sharp or flat). While “locked,” depress<br />
<strong>the</strong> Tune/Cal but<strong>to</strong>n again. The tuner will now be calibrated<br />
<strong>to</strong> “relative” pitch. This approach may also be used<br />
when performing “live” and <strong>the</strong>re isn’t enough time <strong>to</strong> completely<br />
retune your guitar... You started your first set in tune,<br />
but <strong>the</strong> whole guitar has gone a little flat... one string a little<br />
more than <strong>the</strong> o<strong>the</strong>rs. You can “<strong>to</strong>uch up” that offending string<br />
quickly and accurately. Activate <strong>the</strong> tuner and play a string<br />
that’s “relatively” in tune. By locking <strong>the</strong> tuner calibration <strong>to</strong><br />
this pitch <strong>the</strong> offending string can now be accurately tuned relative<br />
<strong>to</strong> <strong>the</strong> o<strong>the</strong>r strings! This “offset” tuning function is indicated<br />
by a double flash of <strong>the</strong> “OK” LED in <strong>the</strong> standby mode.<br />
1<br />
Activation Plug (¼”)<br />
(Part Number 9659-0)<br />
2<br />
<strong>Ovation</strong> Lo-Z Balanced XLR Activation Cable<br />
(Part Number 9658-0)<br />
Retail: $3.99<br />
Retail: $19.95<br />
Above accessories are available from <strong>the</strong> <strong>Ovation</strong> Service<br />
Department (800-552-4681).<br />
Specifications<br />
Current Draw:<br />
Flat Ref. Level:<br />
Freq. Response:<br />
Signal <strong>to</strong> Noise:<br />
EQ Response:<br />
4.7mA @ 9VDC<br />
-6.1dB<br />
20Hz-20KHz (±0.5dB)<br />
Bypass EQ/Notch w/max Gain: -104.3dB<br />
EQ in w/flat setting:<br />
- 99.8dB<br />
EQ in w/max High:<br />
- 94.9dB<br />
Low:<br />
LMid:<br />
HMid:<br />
High<br />
Notch Response:<br />
±14dB @ 80Hz<br />
±14dB @ 600Hz<br />
±13dB @ 6.6KHz<br />
±12dB @ 10KHz<br />
Range: 56Hz 105Hz 668Hz<br />
Depth: -31dB -32dB -28dB<br />
Q: 3.3 2.9 2.5<br />
Output: Max. Level @ 5K Ohm: 2V<br />
Max. Level @ 600 Ohm: 1.4V<br />
THD:<br />
Tune "ON" Timer:<br />