Eberspacher Hydronic 30 Workshop Manual
The full workshop manual for the Eberspacher Hydronic 30 heater, intended to support to support trained staff to eliminate faults and preform repairs.
The full workshop manual for the Eberspacher Hydronic 30 heater, intended to support to support trained staff to eliminate faults and preform repairs.

Create successful ePaper yourself
Turn your PDF publications into a flip-book with our unique Google optimized e-Paper software.
*<br />
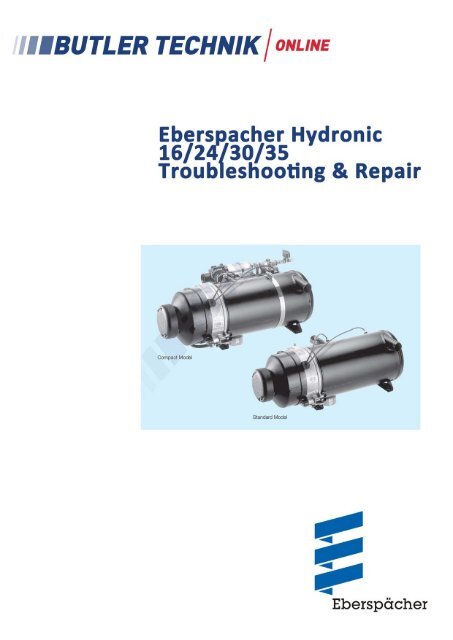
HYDRONIC 16/24/<strong>30</strong>/35<br />
Technical Description<br />
Troubleshooting and Repair <strong>Manual</strong><br />
Eberspächer ®<br />
J. Eberspächer<br />
GmbH & Co.<br />
Eberspächerstr. 24<br />
D - 737<strong>30</strong> Esslingen<br />
Telephone (switchboard)<br />
+49 (0)711 939 - 00<br />
Fax<br />
+49 (0)711 939 - 0500<br />
www.eberspaecher.com<br />
This Troubleshooting and Repair <strong>Manual</strong> is valid for the following heater models:<br />
Standard Model Cat. No. Basic Heater No.<br />
HYDRONIC 16 - 24 V 25 2165 02 00 00 25 2165 01 00 00<br />
HYDRONIC 24 - 24 V 25 1817 02 00 00 25 1817 01 00 00<br />
HYDRONIC <strong>30</strong> - 24 V 25 1818 02 00 00 25 1818 01 00 00<br />
HYDRONIC 35 - 24 V 25 1819 02 00 00 25 1819 01 00 00<br />
Compact Model Cat. No. Basic Heater No.<br />
HYDRONIC 24 - 24 V 25 1817 05 00 00 25 1817 01 00 00<br />
HYDRONIC <strong>30</strong> - 24 V 25 1818 05 00 00 25 1818 01 00 00<br />
HYDRONIC 35 - 24 V 25 2041 05 00 00 25 1819 01 00 00<br />
Compact Model<br />
Standard Model<br />
25 1818 95 14 86 04.2001 The information contained in this document is subject to change without notice. (s.e.e.o.) Printed in Germany © J. Eberspächer
1 / Introduction<br />
Table of Contents<br />
This table of contents provides detailed information on the<br />
contents of this Technical Description, Troubleshooting and<br />
Repair <strong>Manual</strong>.<br />
To find a term, use the index at the end of this document.<br />
Technical Description<br />
Chapter Title Content Page<br />
No.<br />
1 Introduction • Table of contents -------------------------------------------------------------------- 2<br />
• Special notation, pictures and pictograms ---------------------------------------- 4<br />
• Liability claims / warranty ----------------------------------------------------------- 7<br />
• Accident prevention ----------------------------------------------------------------- 7<br />
• Important information prior to commencing work -------------------------------- 5<br />
- Applications in which the HYDRONIC may be used<br />
- Intended use of the HYDRONIC<br />
- Initial operation of the HYDRONIC and functional testing following a repair<br />
- Content and purpose of this documentation<br />
- Additional documentation on the HYDRONIC<br />
• Statutory requirements-------------------------------------------------------------- 6<br />
- Directions regarding installation and repair<br />
- Directions for operation<br />
• Safety instructions for installation and repair<br />
of the HYDRONIC ------------------------------------------------------------------- 7<br />
• Safety instructions for operation --------------------------------------------------- 7<br />
2 Product information • HYDRONIC Cat. No. and additional parts-------------------------------------- 8, 9<br />
• Catalogue numbers, control elements------------------------------------------ 8, 9<br />
• Construction of the HYDRONIC-------------------------------------------------- 10<br />
• Special features of the HYDRONIC ---------------------------------------------- 10<br />
• Function description--------------------------------------------------------------- 10<br />
• Sectional view---------------------------------------------------------------------- 11<br />
• Control diagram-------------------------------------------------------------------- 12<br />
• Functional diagram ---------------------------------------------------------------- 12<br />
• Technical data---------------------------------------------------------------------- 13<br />
• Principal dimensions -------------------------------------------------------------- 14<br />
3 Installation • Installation position ------------------------------------------------------------ 15, 16<br />
- Selection of installation position<br />
- Installation of the HYDRONIC in a case<br />
• Rating plate ------------------------------------------------------------------------ 16<br />
• Permissible installation positions and fastening<br />
of the HYDRONIC ----------------------------------------------------------------- 17<br />
• Installation of the water pump ---------------------------------------------------- 18<br />
• Exhaust gas piping ---------------------------------------------------------------- 19<br />
• Combustion air piping------------------------------------------------------------- 20<br />
• Coolant circuit---------------------------------------------------------------------- 21<br />
• Fuel supply --------------------------------------------------------------------- 22, 23<br />
- Connection of intake and return pipes to the heater<br />
- Permissible fuel line dimensions<br />
- Fuel quality<br />
• Electrical system------------------------------------------------------------------- 23<br />
- Electrical connection of the HYDRONIC<br />
2
1 / Introduction<br />
Troubleshooting and repair instructions<br />
Chapter Title Content Page<br />
No.<br />
4 Troubleshooting • In the event of faults, start by checking ----------------------------------------- 24<br />
• Control unit locking ---------------------------------------------------------------- 24<br />
• Release of control unit when locked --------------------------------------------- 24<br />
• Diagnosis --------------------------------------------------------------------------- 25<br />
• Fault diagnosis - flashing code --------------------------------------------------- 26<br />
• Fault diagnosis with the diagnostic unit ----------------------------------------- 27<br />
• Fault diagnosis with the ISO adapter and the KD 2000 software ------------- 28<br />
• Fault diagnosis with the modular timer ------------------------------------------ 29<br />
• Troubleshooting-------------------------------------------------------------- <strong>30</strong> - 33<br />
5 Repair instructions • Assembly drawing ------------------------------------------------------------ 34, 35<br />
• Repair instructions<br />
- Prior to working on the HYDRONIC,<br />
the following safety instructions should be noted----------------------------- 36<br />
- Removing the hood-------------------------------------------------------------- 37<br />
- Removing the burner ------------------------------------------------------------ 37<br />
- Removing the burner motor ---------------------------------------------------- 38<br />
- Checking burner motor with the test unit for burner head ------------------- 38<br />
- Removing the ignition electrodes----------------------------------------------- 39<br />
- Removing the fuel atomizer nozzle--------------------------------------------- 39<br />
- Removing the ignition spark generator ---------------------------------------- 40<br />
- Checking the ignition spark generator with the test unit for burner head -- 40<br />
- Removing the solenoid valve --------------------------------------------------- 41<br />
- Checking the solenoid valve with the test unit for burner head ------------- 41<br />
- Removing the heating cartridge for the nozzle holder heater---------------- 42<br />
- Removing the flame pipe-------------------------------------------------------- 43<br />
- Removing the temperature sensor and safety thermal cutout sensor ------ 44<br />
- Impedances for temperature sensor<br />
and safety thermal cutout sensor ----------------------------------------- 44, 45<br />
- Fuel supply ----------------------------------------------------------------------- 45<br />
- Removing the fuel strainer ------------------------------------------------------ 45<br />
- Note regarding fuel quantity ---------------------------------------------------- 45<br />
- Measuring the CO 2<br />
content in the exhaust gas ------------------------------- 46<br />
- Adjusting the combustion air --------------------------------------------------- 46<br />
- Taking the water pump apart (standard model) ------------------------------- 47<br />
- “Bus 2000” water pump -------------------------------------------------------- 47<br />
6 Wiring diagram • Wiring diagram for the basic heater models ------------------------------- 48, 49<br />
- HYDRONIC 16 - 24 V - 25 2165 01 00 00<br />
- HYDRONIC 24 - 24 V - 25 1817 01 00 00<br />
- HYDRONIC <strong>30</strong> - 24 V - 25 1818 01 00 00<br />
- HYDRONIC 35 - 24 V - 25 1819 01 00 00<br />
• Wiring diagram, control elements ------------------------------------------------ 50<br />
7 Environment • Certification------------------------------------------------------------------------- 51<br />
• Test symbol ------------------------------------------------------------------------ 51<br />
• EU declaration of conformity ----------------------------------------------------- 51<br />
• Disposal ---------------------------------------------------------------------------- 51<br />
8 Service / Index • Regional offices in Germany ------------------------------------------------------ 52<br />
• Representative offices abroad----------------------------------------------- 52, 53<br />
• List of Abbreviations--------------------------------------------------------------- 53<br />
• Index A-Z ---------------------------------------------------------------------- 54, 55<br />
3
1 / Introduction<br />
Special notation, pictures and pictograms<br />
This document uses special notation and pictograms to give<br />
emphasis to different types of information.<br />
Their meaning and how you should respond to them are<br />
explained in the examples below.<br />
Liability claims / warranty<br />
Adherence to the official regulations and the safety instructions<br />
is essential if any liability claims are to be accepted.<br />
Failure to observe the official regulations and the safety<br />
instructions will result in exemption of the heater manufacturer<br />
from liability.<br />
Special notation and pictures<br />
A bullet symbol (•) is used to indicate a list which is introduced<br />
by a heading.<br />
If an indented dash (-) occurs after a bullet point, then this list<br />
is subordinate to the main bullet list.<br />
Accident prevention<br />
The general Accident Prevention Regulations and the<br />
corresponding plant and operational protective instructions<br />
must be observed.<br />
Pictograms<br />
Regulation<br />
This pictogram, accompanied by the caption “Regulation”,<br />
indicates a statutory requirement.<br />
Failure to comply with this regulation will cause the<br />
General Type Approval for the HYDRONIC to lapse and<br />
invalidate the warranty and any liability on the part of<br />
J. Eberspächer GmbH & Co.<br />
Danger!<br />
This pictogram, accompanied by the caption ”Danger”, draws<br />
your attention to an imminent danger to life and limb. Failure to<br />
observe this instruction could result in serious injury.<br />
Important!<br />
This pictogram, accompanied by the caption “Important!”,<br />
draws your attention to a situation which is potentially<br />
dangerous to a person and / or the product.<br />
Failure to observe this instruction could result in physical injury<br />
and / or damage to the equipment.<br />
Please note!<br />
This instruction provides recommendations for use and helpful<br />
tips regarding the installation and / or repair of the HYDRONIC.<br />
4
1 / Introduction<br />
Important information prior to commencing<br />
work<br />
Applications in which the HYDRONIC may be used<br />
The engine-independent “HYDRONIC 16 / 24 / <strong>30</strong> / 35” water<br />
heaters are intended for installation in the following vehicles<br />
(in each case, the heater output should be appropriate to the<br />
application):<br />
• motor vehicles, especially buses<br />
• building machinery<br />
• trailers<br />
• ships and yachts<br />
Important!<br />
• The heater may only be used and operated for the<br />
applications specified by the manufacturer and in<br />
compliance with the enclosed “Operating Instructions”<br />
for the heater concerned.<br />
• Installation of the HYDRONIC in vehicles that are used to<br />
transport dangerous goods within the provisions of GGVS /<br />
TRS 003, ADR / ADR99 is not permitted.<br />
Intended use of the HYDRONIC<br />
• preheating, de-icing of windows<br />
• heating and maintaining the heated temperature of:<br />
- drivers‘ cabs and work cubicles<br />
- cargo areas<br />
- ships‘ cabins<br />
- travel compartments for passengers and crew<br />
- vehicle engines and assemblies<br />
Content and purpose of this documentation<br />
The Technical Description, Troubleshooting and Repair <strong>Manual</strong><br />
is valid for the heaters listed on the front page and contains all<br />
the necessary technical information.<br />
• The Technical Description is contained on pages 4 to 23.<br />
The Technical Description describes the correct installation<br />
of the HYDRONIC in compliance with the relevant<br />
regulations.<br />
• The Troubleshooting and Repair <strong>Manual</strong> is contained on<br />
pages 24 to 47.<br />
The Troubleshooting and Repair <strong>Manual</strong> describes the<br />
troubleshooting procedures and the repair work that is<br />
permitted on the HYDRONIC.<br />
Additional documentation on the HYDRONIC<br />
Operating Instructions<br />
The Operating Instructions provide customers with the<br />
information that is necessary for safe handling and use of the<br />
HYDRONIC.<br />
Spare Parts List<br />
The Spare Parts List provides Eberspächer service partners<br />
with the information they need to order spare parts for repair<br />
purposes.<br />
On the basis of its functional specifications, the HYDRONIC is<br />
not approved for use in the following applications:<br />
• long-term sustained operations, e.g. to pre-heat and heat<br />
- living rooms<br />
- garages<br />
- work enclosures, weekend homes and hunting lodges<br />
- houseboats and similar.<br />
Initial operation of the HYDRONIC and functional testing<br />
following a repair<br />
• Following installation or repair of the HYDRONIC, it is<br />
necessary to carefully bleed the coolant circuit and the entire<br />
fuel supply system. When doing so, the instructions issued<br />
by the vehicle manufacturer must be observed.<br />
• Prior to test running, open all heating circuits (set the<br />
temperature controller to “HOT”).<br />
• During test running of the HYDRONIC, check all water<br />
and fuel connections to ensure that they are leakproof and<br />
securely in position.<br />
• If during operation the HYDRONIC should develop a fault,<br />
then identify the cause of the fault using a diagnostic facility<br />
and rectify.<br />
5
1 / Introduction<br />
Statutory requirements<br />
To install the heater in a vehicle subject to the German<br />
regulations governing the registration of motor vehicles<br />
(StVZO), a “General Type Approval” has to be issued by the<br />
Federal Motor Vehicle Office (Kraftfahrtbundesamt) and the<br />
appropriate official test symbol must be indicated on the<br />
heater rating plate.<br />
HYDRONIC 16 S 329<br />
HYDRONIC 24 S 297<br />
HYDRONIC <strong>30</strong> S 295<br />
HYDRONIC 35 S 296<br />
The statutory requirements are binding for applications which<br />
fall within the scope of the StVZO (regulations governing the<br />
registration of motor vehicles) and should also be adhered to<br />
in countries in which there are no specific regulations.<br />
Where heaters are installed in vehicles that are not subject<br />
to the StVZO (e.g. ships) the directions and installation<br />
instructions which apply specifically to those cases must be<br />
observed.<br />
Directions for operation<br />
• The heater must be switched off during refuelling.<br />
• Operation of the heater in an enclosed space is<br />
not permitted, e.g.<br />
- garages<br />
- underground car parks<br />
- multi-storey car parks<br />
Please note!<br />
• All other installation requirements related to the General<br />
Type Approval are printed in the relevant sections of these<br />
Installation Instructions.<br />
• The Final Approval Certificate is contained in the Operating<br />
Instructions.<br />
Directions regarding installation and repair<br />
• Installation of heaters must comply with the Installation<br />
Instructions. In the following cases,<br />
a) vehicle type test under §20 StVZO<br />
b) individual test under §21 StVZO or<br />
c) examination under §19 StVZO,<br />
the heater must be checked by an officially certified<br />
expert or tester of motor vehicles, a motor vehicle<br />
expert or employee in accordance with Section 7.4 a of<br />
the Annex to the StVZO,<br />
and in case c) this must be certified with details of the<br />
vehicle manufacturer, vehicle type and vehicle identification<br />
number on the Final Approval Certificate contained in the<br />
copy of the General Type Approval.<br />
The validity of the Type Approval depends on this.<br />
The Final Approval Certificate must be kept in the vehicle.<br />
• Where the heater is installed in a special-purpose vehicle<br />
(e.g. a vehicle for transporting hazardous goods), the<br />
installation must comply with the regulations<br />
applicable to such vehicles.<br />
• Installation in the driver‘s cab or passenger compartment<br />
of buses containing more than eight seats in addition to the<br />
driver‘s seat is not permitted.<br />
• The instruction sticker, “Switch off heater before filling up”<br />
contained in the Scope of Supply for the heater, must be<br />
displayed in a prominent position in the vehicle (near to the<br />
fuel filler connection).<br />
6
1 / Introduction<br />
Safety instructions for installation and<br />
repair of the HYDRONIC<br />
Danger of injury, fire and poisoning!<br />
• Disconnect the vehicle battery prior to starting work.<br />
• Prior to starting any repair work, switch off the HYDRONIC<br />
and allow all hot components to cool down.<br />
Important!<br />
• The heater may only be installed or, in the case of repair<br />
or work under guarantee, repaired by an Eberspächer<br />
service partner authorised by the manufacturer and<br />
in accordance with the directions contained in this<br />
documentation or any special installation suggestions.<br />
• Repairs by non-authorised third parties and / or<br />
using non-genuine spare parts are dangerous and are<br />
therefore not permitted. They will result, moreover, in lapse<br />
of the General Type Approval of the heater and, in the case<br />
of motor vehicles, possibly of the General Operating Permit<br />
for the vehicle as well.<br />
• The following measures are not permitted:<br />
- modification of heater-relevant components,<br />
- use of non-original parts which have not been approved<br />
by the Eberspächer company,<br />
- departures from legal, safety and / or function-relevant<br />
directions contained in the Installation Instructions and<br />
the Operating Instructions, either in the installation or<br />
operation of the heater.<br />
This applies in particular to the electrical wiring (wiring<br />
diagrams), the fuel supply, the combustion air and<br />
exhaust gas piping.<br />
Safety instructions for operation<br />
Important!<br />
• Operation of the heater is not permitted where flammable<br />
vapours or dust could build up, for example in the vicinity of<br />
- fuel depots<br />
- coal stores<br />
- timber stores<br />
- stores of grain and similar.<br />
• The delayed shutoff of the HYDRONIC must not be<br />
terminated prematurely, e.g. through activation of the<br />
battery isolating switch, except in case of emergency<br />
cutout.<br />
Emergency cutout -<br />
emergency circuit breaker<br />
If an emergency cutout - emergency circuit breaker -<br />
should be necessary during operation, the following<br />
procedure should be followed:<br />
• switch off HYDRONIC on the control element<br />
or<br />
• take out the fuse<br />
or<br />
• open the battery isolating switch<br />
or<br />
• disconnect the HYDRONIC from the battery<br />
• Only original accessories and spare parts may be used<br />
during installation or repair.<br />
• The HYDRONIC may only be operated using control<br />
elements approved by the Eberspächer company.<br />
Use of other control elements can lead to malfunctioning of<br />
the heater / heating operation.<br />
• Prior to reinstalling a heater in a different vehicle, the<br />
water-carrying parts of the heater must be rinsed with<br />
clear water.<br />
7
2 / Product Information<br />
Cat. No. HYDRONIC and additional<br />
equipment<br />
Fig. No. / Designation<br />
Cat. No.<br />
1 HYDRONIC 16 - 24 V 25 2165 02 00 00<br />
1 HYDRONIC 24 - 24 V 25 1817 02 00 00<br />
2 HYDRONIC 24 - 24 V 25 1817 05 00 00<br />
Compact model<br />
1 HYDRONIC <strong>30</strong> - 24 V 25 1818 02 00 00<br />
2 HYDRONIC <strong>30</strong> - 24 V 25 1818 05 00 00<br />
Compact model<br />
1 HYDRONIC 35 - 24 V 25 1819 02 00 00<br />
2 HYDRONIC 35 - 24 V 25 2041 05 00 00<br />
Compact model<br />
Additional equipment which has to be ordered separately<br />
3 “Bus 2000” water pump 25 1818 25 00 00<br />
4 Water pump, 5000 I/h 25 1578 25 00 00<br />
5 Hose clip, dia. 40 mm - 47 mm 152 00 158<br />
6 Hose bend 38 mm dia. 360 00 <strong>30</strong>0<br />
7 Connecting pipe 38 mm dia. 25 1214 89 00 21<br />
8 T-piece 38-38-38 mm dia. 25 1371 89 04 00<br />
9 Reducing piece, 38/28 mm dia. 25 1214 89 00 19<br />
10 Hose clip, dia. 32mm - 39 mm 152 61 097<br />
11 Pipe bend, 38 mm dia. 25 1214 89 00 03<br />
12 Water hose 38 mm dia. 360 75 096<br />
13 Exhaust pipe connection<br />
70 mm dia. 25 2025 89 01 00<br />
14 Exhaust pipe connection<br />
70 mm dia. 22 1000 40 04 00<br />
15 Exhaust pipe bend 70 mm dia. 22 1000 40 03 00<br />
16 Fuel filter 3<strong>30</strong> 00 052<br />
17 Hollow screw, M 14 x 15 104 10 040<br />
18 Seal ring, A 14 x 18 323 16 006<br />
19 Fuel intake pipe 25 1698 05 03 00<br />
20 Screw coupling, M14 x 1,5 266 42 004<br />
21 Spherical bush 263 35 080<br />
22 Cap nut, M 14 x 15 116 10 040<br />
23 Fuel pipe dia. 6 x 1 mm (copper),<br />
per metre 080 16 003<br />
24 Fuel hose dia. 5 x 3 mm 360 75 350<br />
25 Hose clip 11 mm dia. 10 2063 01 10 98<br />
26 Screw coupling, M 14 x 1.5 25 1706 05 01 00<br />
27 Ball valve, M 14 x 1.5 3<strong>30</strong> 00 019<br />
28 Fuel return line 25 1698 05 04 00<br />
29 Valve 3<strong>30</strong> 00 210<br />
<strong>30</strong> Reducing joint 8/6 mm 266 00 026<br />
31 Hood with hose connection 22 1000 40 06 00<br />
32 1 m flexible hose, 60 mm dia. 10 2114 31 00 00<br />
33 Hose clip 10 2064 05 00 70<br />
34 Air hose fastening set 22 1000 50 02 00<br />
35 Grille plastic 25 1688 80 06 00<br />
Cat. No. Control element, optional<br />
Quantity / Designation<br />
Cat. No.<br />
1 Universal switch 25 1380 89 04 00<br />
ON / OFF switch<br />
Additionally required:<br />
1 electric bulb 207 00 006<br />
1 Mini-timer 12 / 24 V 22 1000 31 31 00<br />
The mini-timer can be combined<br />
with the TP 41i radio remote control.<br />
1 Modular timer -12 / 24 V 22 1000 <strong>30</strong> 34 00<br />
The modular timer can be combined<br />
with the TP 41i radio remote control.<br />
1 „Modular timer“ fasteners 25 1482 70 01 00<br />
Only required where heater<br />
is installed with trim panel<br />
1 Radio remote control TP 4i 22 1000 <strong>30</strong> 99 00<br />
12 / 24 V<br />
The TP 4i radio remote control can only be used<br />
in combination with the modular timer.<br />
1 Radio remote control TP 41i 22 1000 31 39 00<br />
12 / 24 V<br />
Please note!<br />
The TP 41i radio remote control can be used<br />
both independently and also in combination<br />
with the mini-timer.<br />
(Cat. No. of the mini-timer - 22 1000 31 31 00)<br />
Choice of control elements must be appropriate to<br />
the purpose for which the HYDRONIC is to be used.<br />
Selection criteria:<br />
• switching on / off<br />
• program preselection and / or remote control<br />
Operating Instructions are enclosed with the control<br />
elements. These are intended for the customer along<br />
with the Operating Instructions for the HYDRONIC.<br />
For other additional equipment, see Additional Equipment<br />
Catalogue.<br />
8
2 / Product Information<br />
5<br />
Control elements<br />
10<br />
9<br />
12<br />
8<br />
5<br />
5<br />
7<br />
11<br />
4<br />
6<br />
5<br />
1<br />
18<br />
3<br />
28<br />
18<br />
26<br />
18<br />
21<br />
20<br />
18<br />
27<br />
22<br />
23<br />
25<br />
29<br />
24<br />
<strong>30</strong><br />
25<br />
17<br />
19<br />
16<br />
13<br />
14<br />
15<br />
2<br />
31<br />
35<br />
Drawing 1<br />
33<br />
32<br />
34<br />
9
2 / Product Information<br />
Construction of the HYDRONIC<br />
The HYDRONIC consists of a heat exchanger and a<br />
removable burner.<br />
The heat exchanger is a combustion chamber, consisting of a<br />
flame pipe with integrated mixer.<br />
If required, the flame pipe can be removed from the heat<br />
exchanger.<br />
The control unit and electric motor are attached under the<br />
burner hood on the burner flange.<br />
The fuel pump forms an integral part of the burner casing.<br />
To operate the HYDRONIC, the following additional equipment<br />
is required:<br />
• water pump<br />
• parts for connecting to the water circulation system<br />
• additional equipment for the fuel supply<br />
• additional equipment for the exhaust gas piping<br />
• control element<br />
Special features of the HYDRONIC<br />
• If the water flow rate is insufficient, the water outlet<br />
temperature is limited by early correction.<br />
• The temperature rise of the heating medium is monitored<br />
by time.<br />
If the temperature rises too quickly (because the water flow<br />
rate is insufficient), the heater will automatically switch itself<br />
off and the delayed shutoff will commence, following which<br />
the cycle starts up again.<br />
• The values of the temperature sensor and the safety<br />
thermal cutout sensor are continuously compared, resulting<br />
in improved safety since, if the difference in the values is<br />
too great (because the water flow rate is insufficient), a fault<br />
shutdown will occur.<br />
For catalogue numbers of the additional equipment, see<br />
pages 8 and 9.<br />
For other additional equipment, see Additional Equipment<br />
Catalogue.<br />
Function description<br />
Switching on the HYDRONIC<br />
When the HYDRONIC is switched on, a component test<br />
lasting 3 seconds is carried out, following which the water<br />
pump is started up.<br />
Note:<br />
If the water temperature is 55°C --> vehicle blower “ON”<br />
- Water temperature vehicle blower “OFF”<br />
For further information on control of the vehicle blower, see<br />
wiring diagrams on pages 48 to 50.<br />
Switching off the HYDRONIC<br />
Once the HYDRONIC has been switched off, the fuel solenoid<br />
valve closes and at the same moment the 3-minute delayed<br />
shutoff commences.<br />
Following termination of the delayed shutoff, the HYDRONIC is<br />
automatically switched off.<br />
Please note!<br />
• The fuel continues to circulate until the heater is switched<br />
off, including during the delayed shutoff period.<br />
10
2 / Product Information<br />
Sectional view<br />
Drawing 2<br />
1 Hood (CO 2<br />
setting)<br />
12 Fuses<br />
A<br />
Exhaust gases<br />
2 Coupling<br />
3 Control unit<br />
13 Modular timer<br />
14 Fan wheel<br />
B<br />
Fuel<br />
4 Ignition spark generator<br />
15 Electric motor<br />
V<br />
Combustion air<br />
5 Flame monitor<br />
6 Solenoid valve<br />
16 Fuel connection<br />
17 Nozzle holder heater<br />
WA<br />
Water outlet<br />
7 Temperature sensor<br />
8 Ignition electrodes<br />
18 Fuel atomizer nozzle<br />
19 Flame pipe<br />
WE<br />
Water inlet<br />
9 Combustion chamber<br />
20 Heat exchanger<br />
10 Safety thermal cutout sensor<br />
21 “Bus 2000” water pump<br />
11 Relay (vehicle blower control)<br />
22 Exhaust pipe connection<br />
11
2 / Product Information<br />
Functional diagram<br />
Nozzle holder heater<br />
(On at temp. < 5 °C)<br />
Water pump<br />
HYDRONIC<br />
ON<br />
Component test<br />
Operation<br />
HYDRONIC<br />
OFF<br />
Delayed shutoff<br />
From control unit 25 1818 53 00 00,<br />
switching on and off the nozzle holder<br />
heater is temperature-controlled<br />
Solenoid valve<br />
Ignition spark<br />
generator<br />
From control unit 25 1818 53 00 00<br />
Electric Motor<br />
Drawing 3<br />
3 60 10<br />
180<br />
10<br />
Sec.<br />
Control diagram<br />
t °C<br />
78<br />
73<br />
70<br />
65<br />
HYDRONIC<br />
Normal operation<br />
ON OFF ON OFF ON<br />
<strong>Hydronic</strong><br />
OFF<br />
delayed shutdown<br />
3 min.<br />
Vehicle blower<br />
ON<br />
Vehicle blower<br />
OFF<br />
55<br />
50<br />
5<br />
0<br />
Regulation - normal<br />
Drawing 4<br />
Regulation when "Lower Temperature" selected<br />
12
2 / Product-Information<br />
Technical Data HYDRONIC 16 HYDRONIC 24 HYDRONIC <strong>30</strong> HYDRONIC 35<br />
Test symbol S 329 S 297 S 295 S 296<br />
Heating medium<br />
Mixture of water and refrigerant<br />
(Max 50% proportion of refrigerant<br />
Heating capacity (at ambient temperature of 20ºC) 16,000 W 24,000 W <strong>30</strong>,000 W 35,000 W<br />
Temperature control values - at water inlet ON 73 °C / OFF 78 °C<br />
Temperature control values - at water outlet ON 85 °C / OFF 118 °C<br />
Fuel<br />
Commercial grade diesel - DIN 51601 or<br />
fuel oil EL - DIN 51603<br />
Fuel consumption (at ambient temperature of -10ºC) 2.0 l/h 2.9 l/h 3,65 l/h 4,2 l/h<br />
Rated voltage<br />
Lower voltage limit<br />
The control unit is protected against undervoltage so that when the<br />
voltage drops to the predefined limit, the HYDRONIC is switched off.<br />
Upper voltage limit<br />
The control unit is protected against overvoltage so that when<br />
the voltage limit is exceeded, the HYDRONIC is switched off .<br />
24 V<br />
19 V<br />
<strong>30</strong> V<br />
Electric power consumption 60 W 80 W 105 W 120 W<br />
(during combustion / without circulating pump)<br />
Water content of heat exchanger<br />
Water content of water circulation system<br />
Approx. 2 l<br />
Min. 10 l<br />
Minimum throughput of heating medium (± 200 l/h) 1,400 l/h 2,000 l/h 2,600 l/h 3,000 l/h<br />
Permissible ambient temperature<br />
Operating pressure (water circulation system)<br />
In operation: -40°C to +85°C<br />
During transportation / in storage: -40ºC to + 100ºC<br />
For combustion air:
2 / Product Information<br />
Principal dimensions<br />
HYDRONIC - standard model<br />
Please note!<br />
• If there is enough space, the burner can be<br />
swung out for routine checks - see drawing.<br />
• The principal dimensions are the same when a<br />
hood with hose connection is mounted. 29<br />
ca. 335<br />
320<br />
82<br />
Drawing 5<br />
HYDRONIC - compact model<br />
224 115<br />
233<br />
ø 38<br />
2<br />
(+) (-)<br />
190<br />
24<br />
<strong>30</strong>2<br />
320<br />
ø70<br />
50<br />
600<br />
1<strong>30</strong> min.<br />
ø 38<br />
153<br />
180<br />
150<br />
70<br />
M8<br />
1<strong>30</strong> min.<br />
110<br />
222<br />
190<br />
ø 220<br />
ca. 140<br />
2<strong>30</strong><br />
ø 38<br />
50<br />
244<br />
2<br />
M10 x1<br />
220<br />
<strong>30</strong>2<br />
600<br />
Min. 375 mm for dismantling<br />
Flame pipe<br />
Please note!<br />
• The principal dimensions are the same when a<br />
hood with hose connection is mounted.<br />
Drawing 6<br />
14
3 / Installation<br />
Installation position<br />
The heater should be installed as low down as possible in<br />
the vehicle, e.g. in the engine compartment or in a stowage<br />
area.<br />
This will ensure that the heater and water pump are<br />
automatically ventilated.<br />
Other installation positions are also permitted as long as<br />
they comply with the installation requirements stated in these<br />
Installation Instructions.<br />
When choosing where to install the heater, care must be taken<br />
to ensure that there is sufficient space to disassemble the<br />
hood (1<strong>30</strong> mm) and the flame pipe (375 mm).<br />
All openings towards the outside must be splash-proof.<br />
Regulation!<br />
• Installation in the driver‘s cab or passenger compartment<br />
of buses containing more than eight seats in addition to the<br />
driver‘s seat is not permitted.<br />
Please note!<br />
• Mount the HYDRONIC below the minimum cooling water<br />
level (expansion tank, radiator, vehicle heat exchanger).<br />
• Further information on installation (e.g. for boats and ships)<br />
is available from the manufacturer on request.<br />
• For installation of the HYDRONIC in a case, see page 16.<br />
Example of a HYDRONIC installation in a bus<br />
1 HYDRONIC<br />
2 Water pump<br />
3 Tank connection<br />
4 Vehicle engine<br />
5 Front heater<br />
6 Roof air ducts<br />
7 Roof heater<br />
8 Floor heater<br />
Drawing 7<br />
15
3 / Installation<br />
Installation of the HYDRONIC in a case<br />
If installation in the engine compartment or stowage<br />
compartment of the vehicle is not possible, than the<br />
HYDRONIC can also be installed in a case.<br />
The case containing the installed HYDRONIC is then affixed<br />
to the vehicle at a suitable location, e.g. to the longitudinal<br />
chassis frame.<br />
It is recommended that a hood with a hose connection is<br />
mounted for the combustion air intake. The combustion air is<br />
then drawn in outside of the case via a flexible hose.<br />
In this way it is possible for the combustion air to be drawn<br />
from an area where the temperature is within the permitted<br />
range and protection is provided against dirt accumulation.<br />
Place a protective grille on the flexible hose.<br />
Please note!<br />
• The case must be sufficiently ventilated from outside that<br />
the permitted ambient temperature is not exceeded.<br />
• Air vents must be arranged on the case in such a way that<br />
they cannot become clogged up with dirt or snow.<br />
• Any water which penetrates the case must be able to flow<br />
out.<br />
Example of a HYDRONIC installation in a case<br />
Water outlet<br />
Drawing 8<br />
Water inlet<br />
Fuel<br />
1 Case<br />
2 HYDRONIC<br />
3 Hood with hose connection<br />
4 Flexible hose with<br />
protective grille<br />
5 Water pump<br />
6 Fuel lines<br />
7 Water hose<br />
Rating plate<br />
Regulation!<br />
• The year in which the heater was first commissioned must<br />
be shown permanently on the rating plate. For this purpose<br />
3 year numbers are printed on the appropriate area of<br />
the rating plate. The applicable year must be indicated by<br />
removing the years which are not applicable.<br />
• The HYDRONIC rating plate is attached to the burner and<br />
must also be in easy view in the installed condition.<br />
If this is not the case, a duplicate containing the same<br />
information as the original rating plate can be attached.<br />
The duplicate must be attached in a prominent position on<br />
the HYDRONIC or on a cover in front of the HYDRONIC.<br />
The duplicate is affixed to the hood in a manner which enables<br />
it to be taken off.<br />
Heater type<br />
Model<br />
Model no.<br />
Factory no.<br />
Test symbol<br />
Fuel<br />
Electrical rating<br />
Heating capacity<br />
Operating gauge pressure<br />
Not to be installed in<br />
driver‘s cab or<br />
passenger compartment<br />
Data first used<br />
Drawing 9<br />
16
3 / Installation<br />
Permissible installation positions and<br />
attachment of the HYDRONC<br />
The HYDRONIC should if possible be installed in the normal<br />
position.<br />
To do this, transfer the 4 fastening holes and the through-hole<br />
for the exhaust outlet - as shown in the diagram - to the<br />
mounting surface and drill.<br />
Fasten the HYDRONIC to the vehicle with the two mounting<br />
supports.<br />
Please note!<br />
• The support surface for the two mounting supports of the<br />
HYDRONIC must be flat.<br />
• Depending on the installation conditions, the HYDRONIC<br />
can be inclined, as shown in the diagrams.<br />
During operation of the heater a deviation from the normal<br />
position - caused by the incline of the vehicle - of up to +15º<br />
in all directions is possible.<br />
Permissible installation positions and template for holes for the<br />
HYDRONIC - standard model and compact model<br />
Compact model - must be installed in level position with the<br />
deviations shown in the diagram.<br />
15°<br />
15°<br />
5°<br />
5°<br />
15°<br />
15°<br />
5°<br />
5°<br />
Standard model<br />
• Must be installed in level position with the deviations<br />
shown in the diagram<br />
• Can also be installed in vertical installation position<br />
without any deviations.<br />
Hole template for the HYDRONIC - standard model<br />
and compact model<br />
320<br />
82<br />
Ø 9 (4x)<br />
Ø4,5 at M4<br />
Ø2,9 at B3,9<br />
75<br />
150<br />
Drawing 10<br />
82<br />
17
3 / Installation<br />
Installation of the water pump<br />
The water pump must be installed at the lowest point in the<br />
water circulation system, taking into account the installation<br />
position - see diagrams.<br />
Transfer the four fastening holes for the water pump holder to<br />
the mounting surface - as shown in the diagram - and drill.<br />
Attach the water pump to the vehicle with the holder.<br />
Please note!<br />
• No shutoff valves may be inserted in the water hose for the<br />
water pump (intake side).<br />
• The surface in contact with the water pump holder must<br />
be flat.<br />
Water pump - standard model<br />
Principal measurements and permissible installation positions<br />
Template<br />
for holes<br />
55<br />
ø 9 (4x)<br />
219<br />
100<br />
90<br />
112<br />
Delivery curve<br />
P<br />
[bar]<br />
0,7<br />
0,6<br />
55 85<br />
0,5<br />
0,4<br />
0,3<br />
0,2<br />
Drawing 11<br />
0,1<br />
24V<br />
1 2 3 4 5 6 7 8 9<br />
V<br />
[10 3 l/h]<br />
Bus 2000 water pump<br />
Principal measurements and permissible installation positions<br />
Template<br />
for<br />
holes<br />
98<br />
ø 9 (4x)<br />
85<br />
85<br />
113<br />
85<br />
240<br />
153<br />
10<br />
85<br />
98<br />
Delivery curve<br />
P<br />
[bar]<br />
1,0<br />
0,9<br />
0,8<br />
0,7<br />
90<br />
0,6<br />
120<br />
120<br />
0,5<br />
Drawing 12<br />
120<br />
Pump components can be<br />
rotated by 3 x 120° to the motor part.<br />
0,4<br />
0,3<br />
0,2<br />
0,1<br />
24V<br />
1 2 3 4 5 6 7 8 9<br />
V<br />
[10 3 l/h]<br />
18
3 / Installation<br />
Exhaust gas piping<br />
Regulation!<br />
• The outlet must be implemented in such a way that insertion<br />
of a 16 mm dia. ball is not possible.<br />
• Exhaust pipes must be laid in such a way that there is no<br />
likelihood of any exhaust gases entering the vehicle interior.<br />
• The functioning of parts of the vehicle which are important<br />
for its operation must not be impaired.<br />
• It must not be possible for condensate or water to collect<br />
in the exhaust gas line.<br />
Drain holes are permitted. These must convey the fluid<br />
through the interior in sealed pipes to the outside.<br />
• The exhaust pipe opening should face upwards or to the<br />
side or, if the exhaust piping is laid below the floorpan of<br />
the vehicle, it should extend to near the side or rear of the<br />
driver‘s cab or vehicle.<br />
Danger of combustion and poisoning!<br />
• Whenever combustion occurs high temperatures and<br />
exhaust gases with toxic elements are generated.<br />
- Do not perform any work on the exhaust gas piping while<br />
the heater is on.<br />
- If any work needs to be done to the exhaust gas piping,<br />
switch off the HYDRONIC, wait until all components have<br />
completely cooled and, if necessary, wear protective<br />
gloves.<br />
- Do not breathe in any exhaust gases.<br />
Important!<br />
• The entire exhaust gas piping is very hot both during and<br />
immediately after operation of the heater.<br />
- Mount exhaust pipe with sufficient separation away from<br />
parts which are sensitive to the heat.<br />
- In particular, look out for fuel lines (plastic or metal),<br />
electric lines and brake hoses.<br />
- Exhaust pipes must be securely fastened (with a<br />
recommended standard distance 50 cm) in order to avoid<br />
damage through vibration.<br />
- Lay the exhaust gas piping so that the exhaust gases are<br />
not drawn in directly as combustion air.<br />
- When installing the HYDRONIC in a case and with a short<br />
exhaust pipe, the exhaust gas piping must run to the<br />
outside through the bottom of the case.<br />
- The functioning of parts of the vehicle which are important<br />
for its operation must not be impaired (take care to allow<br />
sufficient separation).<br />
- The opening of the exhaust gas pipe must not be allowed<br />
to become clogged up with dirt or snow.<br />
- The opening of the exhaust gas pipe must not be pointing<br />
in the direction of travel.<br />
Fitting exhaust gas piping<br />
The exhaust gas piping can be laid out as shown below. See<br />
also page 20, Diagram 14:<br />
• Exhaust pipe connection, bent by 60º, dia. = 70 mm<br />
• Exhaust pipe connection, dia. = 70 mm<br />
• Exhaust pipe bend, dia. = 70 mm<br />
• Rigid exhaust pipe from unalloyed or alloyed steel,<br />
dia. = 70 mm, length max. 4 m, wall thickness min. 1 mm<br />
Also required:<br />
1 exhaust pipe bend, dia. = 70 mm<br />
1 end sleeve<br />
• Flexible exhaust pipe out of alloyed steel<br />
dia. = 70 mm, length max. 4 m<br />
Also required:<br />
1 end sleeve<br />
Attach the exhaust pipe with pipe clips to the floorpan of the<br />
vehicle in suitable places.<br />
Mount an end sleeve with crossbars on the exhaust pipe.<br />
The exhaust gas piping can be bent a max. 3 x 90°, in which<br />
case the overall length is reduced by 0.5 m for each 90°<br />
bend.<br />
To enable the condensate to flow out, drill a hole 5 mm dia. at<br />
the lowest point on the exhaust gas piping.<br />
Please note!<br />
• The rigid exhaust pipe and the flexible exhaust pipe are<br />
currently not included in the Eberspächer scope of supply.<br />
If required, these exhaust pipes must be obtained from a<br />
specialist shop.<br />
• If necessary, you can make the end sleeve with crossbars<br />
(out of metal) for the exhaust pipe yourself (see diagram).<br />
End sleeve with crossbars<br />
Drawing 13<br />
70<br />
7,5<br />
35 <strong>30</strong><br />
19
3 / Installation<br />
Examples of exhaust gas piping<br />
1 HYDRONIC<br />
2 Exhaust pipe connection<br />
3 Exhaust pipe connection,<br />
60°<br />
4 Exhaust pipe bend<br />
5 Exhaust pipe<br />
6 End sleeve<br />
7 Flex. exhaust pipe<br />
Please note!<br />
Drawing 14<br />
Items 5-8 are not included<br />
in the Eberspächer scope<br />
of supply.<br />
Combustion air piping<br />
Regulation!<br />
• The necessary combustion air must be drawn from the<br />
outside.<br />
• The combustion air inlet must be implemented in such a<br />
way that insertion of a 16 mm dia. ball is not possible.<br />
Please note!<br />
• When laying the combustion air piping the following should<br />
be noted:<br />
- The combustion air inlet must always be uncovered.<br />
- Lay the combustion air inlet so that exhaust gases are not<br />
drawn in directly as combustion air.<br />
- Do not position the combustion air inlet so that it faces the<br />
vehicle‘s air stream.<br />
- Combustion air inlet must not be allowed to become<br />
clogged up with dirt or snow.<br />
- Any water that has penetrated must be able to drain off.<br />
Combustion air intake when the HYDRONIC is installed<br />
in a case<br />
When installing the HYDRONIC in a case, it is recommended<br />
that a hood with hose connection is mounted to draw in the<br />
combustion air.<br />
The combustion air is then drawn in outside of the case via<br />
a flexible hose.<br />
In this way it is possible for the combustion air to be drawn<br />
from an area where the temperature is within the permitted<br />
range and protection is provided against dirt accumulation.<br />
Place a protective grille on the flexible hose. If the hood with<br />
hose connection is not used, the combustion air must be<br />
drawn in through an air vent with an effective minimum crosssection<br />
corresponding to a pipe of 60 mm dia.<br />
Please note!<br />
• The air vent for the combustion air must be positioned on<br />
the case in such a way that<br />
- it cannot become clogged up with dirt or snow<br />
- exhaust gases cannot be drawn in.<br />
Examples of combustion air piping<br />
Combustion air intake through a<br />
louvred plate<br />
Drawing 15<br />
Combustion air intake with a<br />
flexible hose, 60 mm dia., max.<br />
1 m long.<br />
20
3 / Installation<br />
Coolant circuit<br />
Warning: contact with hot parts could cause burning.<br />
• The coolant and the coolant circuit components can get<br />
very hot.<br />
- Lay and attach water-carrying parts in such a way that<br />
there is no danger of burning to humans, animals or any<br />
temperature-sensitive material from either heat radiation<br />
or direct contact.<br />
- Prior to working on the coolant circuit, switch off the<br />
HYDRONIC and wait until all components have cooled<br />
down completely, if necessary wearing gloves.<br />
Please note!<br />
• When installing the HYDRONIC, note carefully the direction<br />
of flow of the coolant circuit.<br />
• The water hoses must be laid in such a way that they are<br />
buckle-free and if possible are sloping upwards.<br />
• When laying the water hoses, make sure you leave a<br />
sufficient gap between hoses and any hot parts of the<br />
vehicle.<br />
• All water pipes must be protected against chafing and<br />
excessively high temperatures.<br />
Water circulation system<br />
• Secure all hose connections with hose clips (fastening<br />
torque 1.5 Nm).<br />
• Re-tighten the hose clips after the vehicle has been in<br />
operation for 2 hours or 100 km have been driven.<br />
• The minimum water through-flow is only guaranteed if the<br />
difference in temperature between the heating medium inlet<br />
and outlet does not exceed 10°C during combustion.<br />
• There must be at least 10 litres of coolant in the coolant<br />
circuit.<br />
• Only relief pressure valves with an opening pressure of<br />
min. 0.4 - max. 2 bar may be used in the coolant circuit.<br />
• Before using the heater for the first time or after changing<br />
the coolant, the entire coolant circuit must be bled so<br />
that it is bubble-free in accordance with the manufacturer‘s<br />
specification and, if necessary, it must then be topped up<br />
with coolant approved by the vehicle manufacturer.<br />
Installation example<br />
The HYDRONIC is installed into the coolant circuit of the<br />
vehicle.<br />
Another installation variant is to install a separate coolant<br />
circuit for the HYDRONIC with an expansion tank.<br />
The diagram shows the HYDRONIC integrated into the coolant<br />
circuit of a bus.<br />
Convector heater Convector heater Convector heater<br />
Space heater Space heater Space heater<br />
To veh. engine or<br />
expansion tank<br />
From veh. engine or<br />
expansion tank<br />
Drawing 16<br />
Front heater HYDRONIC Water pump<br />
21
3 / Installation<br />
Fuel supply<br />
Regulation!<br />
• When laying fuel lines and installing an additional fuel tank,<br />
§§45 and 46 StVZO (regulations governing the registration<br />
of motor vehicles) must be adhered to.<br />
Excerpt from §§45 and 46 StVZO:<br />
- Fuel tanks may not be contained in passenger<br />
compartments or driver‘s cabs of buses.<br />
They must be positioned in such a way that in the event of<br />
a fire the exits are not directly endangered.<br />
- Fuel lines may not be contained in compartments or<br />
driver‘s cabs of buses.<br />
Danger of fire, explosions and poisoning!<br />
• When working on the fuel supply, shut down the vehicle<br />
engine and the HYDRONIC.<br />
• Avoid naked flames while handling fuel.<br />
• Do not smoke. This applies also where fuel can be detected<br />
only by its characteristic smell.<br />
• Do not breathe in fuel vapour.<br />
Important!<br />
• Secure all connections on fuel hoses with clips.<br />
• Use connecting hoses (approx. 50 mm long) when<br />
connecting up fuel pipes and secure with clips.<br />
• Cut fuel hoses and pipes to length only using a sharp knife.<br />
Cuts must not be pressed in or have any burr.<br />
• Exhaust pipes must be securely held in position (with a<br />
recommended standard distance 50 cm) in order to avoid<br />
damage and / or noise during vibration.<br />
• Lay the fuel lines in such a way that twisting movements of<br />
the vehicle and movements of the engine and similar cannot<br />
have any adverse effect on durability.<br />
• Fuel lines must be protected against mechanical damage.<br />
• Fuel carrying parts must be protected against heat arising<br />
due to malfunctions.<br />
• Fuel lines must never be laid or fastened directly next to<br />
exhaust piping for the HYDRONIC or the vehicle engine.<br />
Where lines cross, make sure there is always sufficient<br />
space separating the hot parts, and if necessary apply heat<br />
protection sheets.<br />
• Dripping or vaporizing fuel must not be allowed to collect or<br />
ignite on hot parts or on electric fixtures.<br />
Connection of intake and return pipes to the heater<br />
The fuel is taken from the vehicle fuel tank or from a separate<br />
fuel reservoir.<br />
Any of the normal fuel hoses or pipes used in vehicle<br />
manufacturing, e.g. steel, copper or plastic pipes, can be<br />
used as fuel lines.<br />
Fuel hoses and fuel pipes are available as additional<br />
equipment - see pages 8 and 9 or the Additional Equipment<br />
Catalogue.<br />
Please note!<br />
Fuel<br />
• When operating with one-line systems ---><br />
please consult the manufacturer.<br />
Drawing 17<br />
22
3 / Installation<br />
Permissible fuel line dimensions<br />
Inner diameter of the intake pipe = 6 mm dia. to 8 mm dia.<br />
Inner diameter of the return pipe = 6 mm dia. to 8 mm dia.<br />
Permitted intake head and length of intake pipe:<br />
• Where intake head is up to 1.5 m ---> max. length = 25 m.<br />
• Where intake head is 1.5 m to 4.0 m ---><br />
max. length = 15 m.<br />
Permitted line lengths of the return pipe<br />
• Max. length = 18 m<br />
Fuel quality<br />
All commercial grade diesel which complies with DIN 51 601<br />
may be used as fuel. Any heating oils which comply with class<br />
EL, DIN 51 603 can also be used.<br />
At temperatures below 0°C diesel must be used as specified<br />
in the table below.<br />
Please note!<br />
• Admixing waste oil is prohibited.<br />
• It must be possible to filter the fuel under all conditions of<br />
use (as specified in DIN EN 116).<br />
• The HYDRONIC is not approved for use with PME (biodiesel<br />
according to DIN V 51606).<br />
Temperature Winter diesel Summer diesel or EL Additive<br />
fuel oil Petroleum Regular-grade<br />
petrol<br />
0 °C to -10 °C 100% or 70% + <strong>30</strong>% or <strong>30</strong>%<br />
-10 °C to -15 °C 100% or 50% + 50% ----<br />
-15 °C to -20 °C 70% ---- ---- + <strong>30</strong>% or <strong>30</strong>%<br />
-20 °C to -25 °C 50% ---- ---- + 50% ----<br />
Electrical system<br />
Regulation!<br />
• Electrical leads, switches and control units for heaters must<br />
be arranged in the vehicle so that their operation under<br />
normal operating conditions is not impaired in any way.<br />
All lines leading from heaters to the outside must be laid so<br />
that they are splash-proof at the opening.<br />
• It must be easy for the user to determine the operating state<br />
(as a minimum, whether switched on or off).<br />
Electrical connection of the HYDRONIC<br />
The detailed electrical connection of the HYDRONIC and the<br />
control element is shown in the wiring diagrams on pages 48<br />
to 50.<br />
Please note!<br />
• The wire sizes specified in the wiring diagram must be noted<br />
and adhered to.<br />
• Run “positive-negative” cable section from the HYDRONIC<br />
directly to the battery and connect up.<br />
• When laying the electrical lines care must be taken to ensure<br />
that their insulation cannot be damaged as a result of wear,<br />
bending, becoming caught or the effects of heat.<br />
23
4 / Troubleshooting<br />
In the event of faults, start by checking…<br />
• Defective wiring (short-circuits, open circuit).<br />
• Visual inspection for<br />
- corroded contacts<br />
- defective fuses<br />
- damaged electric lines, joints and connections<br />
- damaged exhaust gas and combustion air piping<br />
• Battery voltage on starting up the heater nozzle holder heater switched on for<br />
60 seconds.<br />
• The Bus 2000 water pump and the HYDRONIC are<br />
automatically switched off shortly after start-up if there is<br />
insufficient coolant or the pump impeller is blocked.<br />
Control unit locking<br />
The control unit is locked if any of the following malfunctions<br />
occurs:<br />
• Overheating<br />
If the HYDRONIC overheats 3x in succession - fault code<br />
012, displayed as AF 015 ---> the control unit is locked.<br />
• Flame during delayed shutoff<br />
If the fault “Flame during delayed shutoff” is reported 3x<br />
in succession - fault code 058, displayed as AF 016<br />
---> the control unit is locked.<br />
• Too many start attempts<br />
After a sequence of ten unsuccessful attempts at starting<br />
up the HYDRONIC - fault code 052, displayed as AF 050<br />
---> the control unit is locked.<br />
Release of control unit when locked<br />
Release of the control unit following locking is described on<br />
pages 26 to 29.<br />
24
4 / Troubleshooting<br />
Diagnosis<br />
The HYDRONIC electronic control unit can store up to five<br />
faults.<br />
The faults can be read from the control unit and displayed by<br />
one of the following means:<br />
• Flashing code<br />
After connection of an LED and a series resistor (approx.<br />
1 kΩ / 11 W) the function / fault is displayed as a flashing<br />
code.<br />
For details of the flashing code signals and the<br />
corresponding faults, see table on page 26.<br />
LED and series resistor<br />
Connector B2<br />
Connector B1<br />
Compartment 5<br />
Resistor<br />
Compartment 2<br />
Diode<br />
1 3 5 7<br />
2 4 6 8<br />
B2<br />
3 2 1<br />
6 5 4<br />
B1<br />
Drawing 18<br />
• Diagnostic unit<br />
After connection of the diagnostic unit, the function / fault is<br />
shown on the display as a number.<br />
For information regarding the connection and operation of<br />
the diagnostic unit, see page 27.<br />
To connect the diagnostic unit, an adapter cable is<br />
required.<br />
For fault code table, see pages <strong>30</strong> to 33.<br />
Cat. No.<br />
diagnostic unit<br />
22 1512 89 00 00<br />
Cat. No.<br />
adapter cable<br />
22 1000 31 66 00<br />
• ISO adapter with KD 2000 software<br />
Following installation of the KD 2000 software and<br />
connection of the ISO adapter, the function / fault is shown<br />
as a number on the display.<br />
For information regarding the connection and operation of<br />
the ISO adapter, see page 28.<br />
To connect the ISO adapter, an adapter cable is required.<br />
For fault code table, see pages <strong>30</strong> to 33.<br />
Cat. No.<br />
ISO adapter<br />
22 1524 89 00 00<br />
Cat. No.<br />
adapter cable<br />
22 1000 31 66 00<br />
Drawing 19<br />
• Modular timer installed in the vehicle<br />
When a modular timer is installed, the function / faults can<br />
be shown as a number on the display.<br />
For information regarding operation of the modular timer,<br />
see page 29.<br />
For fault code table, see pages <strong>30</strong> to 33.<br />
Cat. No.<br />
modular timer<br />
22 1000 <strong>30</strong> 34 00<br />
• External diagnostic system<br />
With an external, vehicle-specific diagnostic system<br />
---> consult the vehicle manufacturer.<br />
25
4 / Troubleshooting<br />
Fault diagnosis - flashing code<br />
(LED with series resistor)<br />
The electronic control unit can store up to five faults.<br />
The function or type of fault is output by the control unit as a<br />
flashing code and displayed by an LED (with series resistor).<br />
The LED with series resistor is connected to the cable harness<br />
of the HYDRONIC, using the 8-pin connector, pin 12, blue /<br />
white cable 1 mm² (see wiring diagram page 25).<br />
The remedial measures are described in the fault code tables<br />
on pages <strong>30</strong> to 33 under the appropriate fault code.<br />
Flashing code<br />
Release of control unit when locked<br />
With the HYDRONIC switched on, apply positive for approx. 3<br />
seconds to the 8-pin cable harness connector, pin 13, yellow<br />
/ red 1 mm² cable (external excitation of the water pump)<br />
--> the control unit is unlocked.<br />
Additional variant from control unit 25 1818 53 00 00<br />
Apply positive for approx. 3 seconds to the 8-pin cable harness<br />
connector, pin 9, blue / black 1 mm² cable (fault in Bus<br />
2000 water pump) --> the control unit is unlocked.<br />
400 ms interval at<br />
start of flashing code 8 sec. 16 sec.<br />
Operation without fault<br />
Flame monitor<br />
Fault code 16, 51, 58<br />
Safety time overshoot<br />
Fault code 50 , 52<br />
Flame loss<br />
Fault code 54<br />
Overheating<br />
Fault code 12, 15<br />
Burner motor<br />
Fault code 32, 33<br />
Undervoltage cutout<br />
Fault code 11<br />
Overvoltage cutout<br />
Fault code 10<br />
Temperature sensor<br />
Fault code 14, 60 ,61, 71, 72<br />
Connection fault<br />
Fault code 20, 21, 25, 37 - 39<br />
44 - 49, 80 - 83<br />
Control unit<br />
Fault code 90 - 97<br />
Drawing 20<br />
Light duration - short pulse:<br />
Light duration - long pulse:<br />
0,4 sec.<br />
2,0 sec.<br />
Interval between the pulses: 0.4 sec.<br />
Period of a flashing sequence: 8.0 sec.<br />
26
4 / Troubleshooting<br />
Fault diagnosis with the diagnostic unit<br />
Diagnostic unit<br />
Cat. No. 22 1512 89 00 00<br />
To connect the diagnostic unit,<br />
an adapter cable is required.<br />
Adapter cable<br />
Cat. No. 22 1000 31 66 00<br />
~ Call diagnostic fault code<br />
Ä Clear the stored faults<br />
Å Clear the stored faults<br />
Ç Back, faults F5 - F1<br />
É Forwards, faults F1 - F5<br />
Ñ= Display with error message<br />
The electronic control unit can store up to 5 faults, which can<br />
be read out and displayed with the timer.<br />
The current error is shown as “AF” and is always written to<br />
memory location F1. Previous faults are transferred to memory<br />
locations F2 - F5; if necessary, the content of memory location<br />
F5 is overwritten.<br />
Connect diagnostic unit<br />
Detach the HYDRONIC cable harness.<br />
Connect the diagnostic unit to the adapter cable at the cable<br />
harness, as shown in the diagram.<br />
Retrieve fault memories F1 to F5<br />
• Switch on the HYDRONIC at the control element.<br />
• Press D key on the diagnostic unit.<br />
Display readout:<br />
AF<br />
= current fault<br />
3-digit number = fault code<br />
• Press the f key once to display F1, twice for F2 etc.<br />
The fault code, description of the fault and comments / remedial<br />
measures are described on pages <strong>30</strong> to page 33.<br />
Cancel control unit locking and simultaneously clear fault<br />
memory<br />
• Press the two l keys a minimum of 2 seconds<br />
simultaneously ---> the control unit is unlocked and the<br />
stored faults F1 to F5 are cleared.<br />
Drawing 21<br />
~<br />
~ Diagnostic unit with<br />
connecting cable<br />
Ä Adapter cable<br />
27
4 / Troubleshooting<br />
Fault diagnosis with the ISO adapter<br />
and the KD 2000 software<br />
ISO adapter and KD-2000 software<br />
Cat. No. 22 1524 89 00 00<br />
To connect the ISO adapter, an adapter cable is<br />
required.<br />
Adapter cable<br />
Cat. No. 22 1000 31 66 00<br />
The electronic control unit can store up to 5 faults.<br />
The faults can be read out and displayed with the ISO adapter<br />
and the KD 2000 software.<br />
In heaters up to factory no. 12000, faults 1-5 are displayed.<br />
With heaters from factory no. 12001, measured data is shown<br />
in addition to faults 1-5.<br />
Connect ISO adapter<br />
• Detach the HYDRONIC cable harness.<br />
• Connect the adapter cable to the cable harness, as shown<br />
in the diagram<br />
• Connect the adapter cable to the ISO adapter.<br />
• Connect the SUB-D connecting cable with the PC and the<br />
ISO adapter.<br />
Please note!<br />
Installing KD 2000 software on the PC<br />
• Place CD-ROM in the CD drive.<br />
• Double click on the file "setup.exe" and follow the<br />
instructions of the SETUP program.<br />
Query / clear fault memories F1-F5 and / or cancel control<br />
unit locking<br />
• On the PC, start the KD 2000 software<br />
- On the desktop, double-click on the "KD 2000" icon<br />
- Select heater type<br />
- Press "GO" button<br />
• Clear fault memories and / or cancel control unit locking<br />
- Click on “Clear fault memory” button<br />
---> the stored faults F1-F5 are cleared and the control<br />
unit is unlocked.<br />
Diagnosis complete<br />
• Press "STOP" button --> interrogation of fault memory is<br />
terminated.<br />
It is essential that the correct installation sequence is followed.<br />
~=ISO adapter<br />
Ä Adapter cable<br />
Å SUB-D connection cable<br />
Å<br />
Drawing 22<br />
28
4 / Troubleshooting<br />
Fault diagnosis with the modular timer<br />
Modular timer<br />
Cat. No. 22 1000 <strong>30</strong> 34 00<br />
~ Clock time<br />
Ä Area code<br />
Å Heat<br />
Ç Back<br />
É Forwards<br />
Ñ == Display with error message<br />
The electronic control unit can store up to 5 faults, which can<br />
be read out and displayed with the timer.<br />
The current error is shown as “AF” and is always written to<br />
memory location F1.<br />
Previous faults are transferred to memory locations F2 - F5; if<br />
necessary, the content of memory location F5 is overwritten.<br />
Retrieve fault memories F1 to F5<br />
• Press key c ---> HYDRONIC is switched on.<br />
• Press key a and keep held down, then within 2 sec. press<br />
key p.<br />
Display readout:<br />
AF<br />
= current fault<br />
3-digit number = fault code<br />
• Press the f > key once to display F1, twice for F2 etc.<br />
The fault code, description of the fault and comments / remedial<br />
measures are described on pages <strong>30</strong> to page 33.<br />
Cancel control unit locking and simultaneously clear fault<br />
memory<br />
Condition:<br />
An electrical connection exists between Terminal 15 (ignition)<br />
and the timer, 12-pin connector, compartment 10.<br />
• Press key c<br />
Display readout:<br />
The current fault F15, F16 or F50<br />
• Press key a and keep held down, then within 2 sec. press<br />
key p.<br />
The modular timer has now entered the “Interrogate fault<br />
memory” routine.<br />
• Switch ignition off (terminal 15).<br />
• Press key a and key p simultaneously; in addition, switch<br />
the ignition on (terminal 15) and wait until the following<br />
appears in the display:<br />
Display readout following ignition “ON”:<br />
Display flashes,<br />
Heater symbol does not flash<br />
• Switch HYDRONIC off and on --> the control unit is<br />
unlocked, the HYDRONIC starts up again.<br />
Information shown after switching off and on, and new<br />
interrogation of fault memory:<br />
Display flashes<br />
Heater symbol does not flash<br />
29
4 / Troubleshooting<br />
Fault code<br />
Fault Description<br />
Cause<br />
• Remedial measures<br />
000 No fault -----------------<br />
010 Overvoltage --> disconnection Overvoltage (><strong>30</strong> V) exists for a minimum of 20 seconds without interruption<br />
at the control unit - HYDRONIC not working.<br />
• Unplug 18-pin connector on the control unit and start up vehicle engine.<br />
Measure the voltage between PIN 15 (red 2.5 mm² cable) and PIN 16<br />
(brown 2.5 mm² cable) if the voltage ><strong>30</strong> V --> check alternator controller.<br />
011 Undervoltage --> disconnection Undervoltage (1<strong>30</strong>ºC<br />
• Check water circulation system:<br />
- Check all hose connections for leaks<br />
- Bleed water circulation system<br />
- Check valves in water circulation system and, if necessary, replace<br />
- Temperature difference between water inlet and water outlet must<br />
check minimum throughput of the heating medium,<br />
see values in the Technical Data.<br />
• Check water pump and if necessary replace<br />
• Check safety thermal cutout sensor and if necessary replace (see diagram<br />
on page 45)<br />
014 Temperature difference between Difference between measured values of temperature sensor and<br />
temperature sensor and safety<br />
safety thermal cut-out sensor above permitted limits for an extended period.<br />
thermal cutout sensor too big<br />
• Check mounting of both sensors, if necessary, tighten up sensors,<br />
tightening torque on both sensors 2.5 +0.5 Nm.<br />
• Check temperature sensors and safety thermal cutout sensor (see<br />
diagrams, pages 44 and 45).<br />
• Check minimum throughput of the heating medium. See values in the<br />
Technical Data.<br />
015 Operation disable - control unit is locked Fault code 012 “Overheating” has been displayed three times in succession<br />
--> fault code 015 displayed.<br />
Control unit unlocked by clearing the fault memory (see pages 26 to 29).<br />
• For remedial measures, see fault code 012.<br />
016 Operation disable - control unit is locked Fault code 058 “Flame during delayed shutoff” has been displayed three<br />
times in succession --> fault code 016 displayed.<br />
Control unit unlocked by clearing the fault memory (see pages 26 to 29).<br />
• For remedial measures, see fault code 058.<br />
<strong>30</strong>
4 / Troubleshooting<br />
Fault code<br />
Fault Description<br />
Cause<br />
• Remedial measures<br />
020 Ignition spark generator - open circuit Control line from ignition spark generator to the control unit has open circuit<br />
or short circuit.<br />
• Check cable section from the ignition spark generator to the control unit<br />
and, if necessary, eliminate open circuit or short circuit.<br />
• Check functioning of the ignition spark generator only with the test unit for<br />
burner head; if necessary ,replace the ignition spark generator.<br />
• If the fault could not be eliminated by taking the remedial measures listed<br />
High voltage<br />
above, --> replace control unit.<br />
021 Ignition spark generator - ground leakage Control line from the ignition spark generator to the control unit has ground<br />
leakage.<br />
• Check cable section from the ignition spark generator to the control unit<br />
and, if necessary, eliminate ground leakage.<br />
• Check functioning of the ignition spark generator only with the test unit for<br />
burner head; if necessary, replace the ignition spark generator.<br />
• If the fault could not be resolved by taking the remedial measures listed<br />
High voltage<br />
above, --> replace control unit.<br />
025 Diagnostic output - short circuit Blue / white 1 mm² cable from the 18-pin control unit connector,<br />
compartment 12 to the 8-pin cable harness connector, compartment 2 has<br />
short-circuit against +U B<br />
• Check lead and connections and, if necessary, eliminate short circuit.<br />
032 Burner motor does not turn - on start-up Fan wheel is chafing or is blocked.<br />
033 Burner motor does not turn - during operation Burner motor faulty.<br />
Generator voltage too low.<br />
• Check that fan wheel is running freely.<br />
• Check lines and connections to the burner motor.<br />
• Check functioning of the installed burner motor only with the test unit for<br />
burner head; if necessary, replace the burner motor.<br />
Apply max. 12 V at burner<br />
motor<br />
• If the fault could not be eliminated by taking the remedial measures listed<br />
above, --> replace control unit.<br />
Fuel pump is blocked.<br />
• Check that fuel pump is running freely. If necessary, replace the burner.<br />
037 Water pump - fault Check in advance:<br />
• Is Bus 2000 water pump installed?<br />
• Is Bus 2000 water pump cable section “Diagnosis” connected?<br />
• Does the Bus 2000 water pump have any power?<br />
If yes - detach plug connection from the “Diagnosis” cable section.<br />
Start HYDRONIC - if fault code 037 is no longer displayed,<br />
then check the Bus 2000 water pump for dry running<br />
and / or for blockages.<br />
- If fault code 037 continues to be displayed, then apply the<br />
remedial measures described for the water pump (standard<br />
model).<br />
• Water pump (normal model) is installed?<br />
If yes - detach plug connection from the “Water pump” cable section,<br />
apply power to the 2-pin connector on the “Water pump”<br />
cable section and check for correct functioning.<br />
If the water pump is functioning OK, then check fuse (15A),<br />
cable section and water pump connections --> if fault code<br />
037 continues to be displayed, then replace the control unit.<br />
31
4 / Troubleshooting<br />
Fault code<br />
Fault Description<br />
Cause<br />
• Remedial measures<br />
039 Vehicle blower control - short circuit Black 1 mm² cable from the 18-pin control unit connector, compartment<br />
6 to the 8-pin cable harness connector, compartment 7, and from there to<br />
the blower relay has short-circuit.<br />
• Check lead and connections and, if necessary, eliminate short circuit.<br />
• Check mounting of the relay.<br />
• Replace relay.<br />
• If the fault could not be eliminated by taking the remedial measures listed<br />
above, then replace control unit.<br />
044 Water pump - relay coil open circuit • Check mounting of the relay on the control unit.<br />
045 Water pump - relay coil short circuit • Replace relay.<br />
• If the fault could not be eliminated by taking the remedial measures listed<br />
above, then replace control unit.<br />
046 Solenoid valve - open circuit "Solenoid valve" cable section from the control unit (connector position “D”)<br />
to the solenoid valve has open circuit or ground leakage.<br />
• Check leads and connections to solenoid valve, if necessary eliminate<br />
ground leakage.<br />
• Replace solenoid valve coil.<br />
• If the fault could not be eliminated by taking the remedial measures listed<br />
above, then replace control unit.<br />
047 Solenoid valve - short circuit “Solenoid valve” cable section from the control unit (connector position “D”)<br />
to the solenoid valve has short-circuit.<br />
• Check leads and connections to solenoid valve, if necessary eliminate<br />
short circuit.<br />
• Replace solenoid valve coil.<br />
• If the fault could not be eliminated by taking the remedial measures listed<br />
above, then replace control unit.<br />
048 Nozzle holder heater - • Check mounting of the relay on the control unit.<br />
relay coil open circuit<br />
• Replace relay.<br />
049 Nozzle holder heater -<br />
relay coil short circuit<br />
050 Operation disable - control unit is locked The control unit remains locked through 10 attempts at start-up without<br />
flame detection.<br />
Control unit unlocked by clearing the fault memory with modular timer,<br />
diagnostic unit or KD 2000 (see pages 26 to 29).<br />
• For remedial measures, see fault code 052.<br />
051 Flame monitor reports • Replace burner.<br />
"Flamme vor Brennstoff" [Flame without fuel]<br />
052 No start or safety time overshoot No flame was detected within the ignition phase.<br />
• Check combustion air inlet and exhaust gas piping.<br />
• Check fuel supply (supply and return).<br />
• Check flame pipe to make sure it is correctly mounted in the heat<br />
exchanger.<br />
• Check functioning of the ignition spark generator only with the test unit for<br />
burner head; if necessary, replace the ignition spark generator.<br />
• Check ignition electrode, adjust and, if necessary, replace.<br />
High voltage<br />
Take care when checking the<br />
ignition spark generator!<br />
• Check electric leads and connections.<br />
• Check flame monitor for dirt accumulation and, if necessary, clean.<br />
• Replace fuel atomizer nozzle.<br />
• If the fault could not be eliminated by taking the remedial measures listed<br />
above, then replace control unit.<br />
32
4 / Troubleshooting<br />
Fault code<br />
Fault Description<br />
Cause<br />
• Remedial measures<br />
054 Flame loss during operation HYDRONIC has ignited, detected the flame and reports flame loss twice<br />
within an operating period of 60 minutes.<br />
• Check fuel supply (supply and return).<br />
• Measure the amount of CO 2<br />
.<br />
• Replace fuel atomizer nozzle.<br />
• If the fault could not be eliminated by taking the remedial measures listed<br />
above, then replace control unit.<br />
058 Flame not extinguished during delayed shutoff Flame monitor reports <strong>30</strong> seconds after delayed shutoff “ON” that the flame<br />
has not gone out.<br />
• Check heat exchanger and clean as necessary, then measure the amount<br />
of CO 2<br />
.<br />
• Check solenoid valve with the test unit for burner head and, if necessary,<br />
replace.<br />
• If fuel continues to be delivered during the delayed shutoff --> replace<br />
fuel pump.<br />
• If the fault could not be eliminated by taking the remedial measures listed<br />
above, then replace control unit.<br />
060 Temperature sensor - open circuit Temperature outside operating range.<br />
061 Temperature sensor - short circuit • Check plug connection for temperature sensor and line to the control unit.<br />
• Check temperature sensor (see diagram on page 44).<br />
• If the fault could not be eliminated by taking the remedial measures listed<br />
above, then replace control unit.<br />
071 Safety thermal cutout sensor - open circuit Temperature outside operating range.<br />
• Check plug connection for safety thermal cutout sensor and line to the<br />
072 Safety thermal cutout sensor - short circuit control unit.<br />
• Check safety thermal cutout sensor (see diagram on page 45).<br />
• If the fault could not be eliminated by taking the remedial measures listed<br />
above, then replace control unit.<br />
081 Combustion indicator light - short circuit Yellow/white 1 mm² cable from the 18-pin control unit connector,<br />
compartment 8 to the 8-pin cable harness connector, compartment 3, and<br />
from there to the combustion indicator light has short-circuit.<br />
• Check lead and connections and, if necessary, eliminate short circuit.<br />
• Check combustion indicator light and, if necessary, replace.<br />
083 Fault indicator light - short circuit Green 1 mm² cable from the 18-pin control unit connector, compartment 5<br />
to the 8-pin cable harness connector, compartment 6, and from there to<br />
the fault indicator light has short-circuit.<br />
• Check lead and connections and, if necessary, eliminate short circuit.<br />
• Check fault indicator light and, if necessary, replace.<br />
090, 092 Control unit faulty • Replace control unit.<br />
093, 094<br />
097<br />
091 External interference voltage Possible causes:<br />
• Incorrect setting of the ignition electrodes - adjust ignition electrodes.<br />
Remove battery charger or other source of interference voltage.<br />
• If the fault could not be eliminated by taking the remedial measures listed<br />
above, then replace control unit.<br />
33
5 / Repair Instructions<br />
Assembly drawing<br />
3<br />
8<br />
7<br />
2<br />
4<br />
1<br />
6<br />
5<br />
1 Hood with hose connection<br />
2 Flexible hose<br />
3 Protective grille<br />
4 Hose clip<br />
5 Hood<br />
6 Fan wheel<br />
7 Control unit<br />
8 Electric motor<br />
9 Cable section<br />
10* Baffle plate<br />
11 Burner casing with<br />
integrated fuel pump<br />
12 Ignition spark generator<br />
13 Cartridge heater<br />
14* Temperature switch<br />
15 Nozzle holder<br />
16 Baffle plate<br />
17 Fuel atomizer nozzle<br />
18 Ignition electrodes<br />
19 Solenoid valve<br />
20* Flame pipe<br />
21 Heat exchanger<br />
22 Temperature sensor<br />
23 Safety thermal cutout sensor<br />
9<br />
Drawing 23<br />
34
5 / Repair Instructions<br />
12<br />
14*<br />
13<br />
18 15 16<br />
17<br />
19<br />
11<br />
10*<br />
23<br />
22<br />
20*<br />
21<br />
20<br />
* Only with heater models<br />
HYDRONIC 16 - 25 2165 01 00 00<br />
HYDRONIC 24 - 25 1817 01 00 00<br />
35
5 / Repair Instructions<br />
Repair Instructions<br />
The “Repair Instructions” chapter describes the approved<br />
repair work for the HYDRONIC 16 / 24 / <strong>30</strong> / 35.<br />
Where extensive repair work is to be carried out, it is sensible<br />
to dismantle the HYDRONIC.<br />
Mounting of the HYDRONIC involves the reverse sequence of<br />
steps, but there may be some additional instructions which<br />
need to be heeded.<br />
Once all work on the HYDRONIC has been completed, a<br />
functional test should be performed (see page 5).<br />
Prior to working on the HYDRONIC, the following safety<br />
instructions should be noted:<br />
Danger of injury, burning and poisoning!<br />
• Always switch off the HYDRONIC and allow to cool before<br />
commencing work.<br />
• Disconnect battery.<br />
• Remove any excess pressure in the cooling system by<br />
opening the radiator cap.<br />
• Do not switch on HYDRONIC with the burner dismantled.<br />
• Prior to removing the ignition spark generator, detach the<br />
plug connections in the cable harness.<br />
• The HYDRONIC must not be operated in enclosed spaces<br />
such as garages or workshops.<br />
Exception:<br />
Where existing exhaust gas extraction is directly at the<br />
exhaust pipe entrance.<br />
Please note!<br />
• Gaskets on dismantled components must be replaced.<br />
• Where repair work is performed, examine all components<br />
for damage and, if necessary, replace.<br />
• Examine plug contacts, plug connections and lines for<br />
corrosion and damage and, if necessary, repair.<br />
• When a part needs to be replaced, only Eberspächer spare<br />
parts may be used.<br />
• After working on the coolant circuit, the status of the<br />
coolant must be checked, and if necessary the coolant<br />
must be topped up in accordance with the vehicle<br />
manufacturer‘s specification.<br />
The coolant circuit must then be bled.<br />
• Operation or delayed shutoff of the HYDRONIC may only<br />
be terminated in an emergency (see “Emergency cutout -<br />
emergency circuit breaker” page 7) through disconnection<br />
of the battery (danger of HYDRONIC overheating).<br />
36
5 / Repair Instructions<br />
Removing the hood (see Drawing 24)<br />
• Undo the two fixing screws on the hood.<br />
• Take off the hood.<br />
Beware danger of injury!<br />
• The fan wheel has sharp edges.<br />
- Avoid contact with the fan wheel and, if<br />
necessary, wear protective gloves.<br />
1<br />
~ Fixing screw<br />
1<br />
Drawing 24<br />
Removing the burner (see Figure 1).<br />
• Take off the hood.<br />
• Pull out “Temperature sensor” and “Safety thermal cutout<br />
sensor” cable sections on the control unit.<br />
• Take grommet out of burner casing.<br />
Please note!<br />
Ç<br />
Å<br />
The fuel lines should remain connected. If necessary, lengthen<br />
the fuel lines.<br />
Ä<br />
~ Burner<br />
Ä Heat exchanger<br />
Å Grommet<br />
Ç “Temperature sensor” and “Safety thermal cutout sensor”<br />
cable sections<br />
Figure 1<br />
~<br />
Remove control unit (see Figure 2)<br />
• Take off the hood.<br />
• Remove burner.<br />
• Unscrew the fan wheel in an anti-clockwise direction,<br />
counter-restraining the motor shaft with screwdriver.<br />
• Pull off connectors on the front and rear sides of the control<br />
unit.<br />
• Unlock and remove control unit with the 4 clamps.<br />
Ä<br />
~<br />
Ä<br />
Ä<br />
~ Control unit<br />
Ä Clamps<br />
Å Motor shaft (threaded)<br />
Ä<br />
Å<br />
Figure 2<br />
37
5 / Repair Instructions<br />
Removing the burner motor (see Figures 3 and 4)<br />
• Take off the hood.<br />
• Unscrew the fan wheel in an anti-clockwise direction,<br />
counter-restraining the motor shaft with screwdriver.<br />
• If necessary, check the burner motor with the test unit for<br />
burner head (see below).<br />
• Pull out “Burner motor” cable section at the control unit,<br />
slot “B”.<br />
• Undo 3 fastening screws from the burner motor.<br />
• Remove burner motor.<br />
Please note!<br />
When mounting the fan wheel, tighten with 1 Nm +0.5 Nm.<br />
Ä<br />
Ä<br />
Ä<br />
~<br />
~<br />
Ä<br />
Å<br />
Figure 3<br />
~ Electric motor<br />
Ä Fixing screws<br />
Å Motor shaft (threaded)<br />
Figure 4<br />
~ Figure 4<br />
Ä Coupling<br />
Checking functioning and rpm of the burner motor with<br />
the test unit for burner head (see Diagram 25)<br />
• Remove all connectors from the control unit.<br />
• Connect test unit for burner head.<br />
• Mark the fan wheel.<br />
• Hold down the “Heizung EIN” [“Heating ON”] switch for 4<br />
seconds ---> the HYDRONIC starts, the electric motor must<br />
run for 180 seconds (delayed shutoff) ---><br />
- If it does, measure the rpm with a contactless speed<br />
measuring unit.<br />
- If not, replace the electric motor.<br />
Electric motor rpm<br />
HYDRONIC 16<br />
HYDRONIC 24<br />
HYDRONIC <strong>30</strong><br />
HYDRONIC 35<br />
3800 ±350 rpm<br />
4200 ±350 rpm<br />
4800 ±350 rpm<br />
5200 ±350 rpm<br />
Drawing 25<br />
~ Fan wheel with marking<br />
~<br />
Beware danger of injury!<br />
• The fan wheel has sharp edges.<br />
- Avoid contact with the fan wheel and, if necessary, wear<br />
protective gloves.<br />
Please note!<br />
Please observe the operating instructions for the test unit<br />
for burner head. Wait for the electric motor to run for 180<br />
seconds.<br />
38
5 / Repair Instructions<br />
Removing the ignition electrodes<br />
(see Figure 5 and Drawing 26)<br />
• Take off the hood.<br />
• Remove burner.<br />
• Remove ignition electrodes from ignition spark generator.<br />
Following installation, check the position of the ignition<br />
electrodes and adjust as necessary.<br />
• Attach the reference gauge to the nozzle and push as far<br />
as the limit stop.<br />
• Check the electrode position. The points of the electrodes<br />
should be touching the square-shaped surfaces of the<br />
reference gauge. If necessary, carefully bend the electrode<br />
points until they are touching the square surfaces of the<br />
reference gauge.<br />
Please note!<br />
• The insulation of the ignition electrodes must not be<br />
damaged.<br />
• When measuring the distance between the electrodes<br />
do not touch the fuel atomizer nozzle opening.<br />
• The reference gauge is enclosed with the spare parts.<br />
~<br />
~<br />
Ä<br />
Figure 5<br />
~ Ignition electrodes<br />
Drawing 26<br />
~ Ignition electrodes<br />
Ä Reference gauge<br />
Removing the fuel atomizer nozzle (see Figure 6)<br />
• Take off the hood.<br />
• Remove burner.<br />
• Remove ignition electrodes.<br />
• Unscrew fuel atomizer nozzle from the nozzle holder.<br />
Ä<br />
Ç<br />
Please note!<br />
• When installing the fuel atomizer nozzle, do not touch the<br />
nozzle opening.<br />
• Following installation of the fuel atomizer nozzle, check the<br />
position of the ignition electrodes and adjust as necessary.<br />
• Tightening torque for fuel atomizer nozzle 16 +1 Nm.<br />
Å<br />
~<br />
Figure 6<br />
~ Fuel atomizer nozzle Å = Baffle plate<br />
Ä Ignition electrodes Ç Flame monitorr<br />
39
5 / Repair Instructions<br />
Removing the ignition spark generator (see Figures 7-9)<br />
• Take off the hood.<br />
• Remove burner.<br />
• Remove ignition electrodes.<br />
• Remove securing clip (retaining spring) from the nozzle<br />
holder and take off the baffle plate.<br />
• If necessary, check the ignition spark generator with the<br />
test unit for burner head (see below).<br />
• Pull out “ignition spark generator” cable section at the<br />
control unit, slot “E”.<br />
• Undo the two fastening screws from the ignition spark<br />
generator.<br />
• Remove ignition spark generator.<br />
Å<br />
~<br />
Ä<br />
Please note!<br />
Figure 7<br />
• When installing, insert the ignition spark generator into the<br />
burner casing fixtures.<br />
• Following installation, check the position of the ignition<br />
electrodes and adjust as necessary.<br />
• Run the cable sections as shown in Figs. 8 and 9.<br />
~ Ignition electrodes<br />
Ä Securing clip (retaining spring)<br />
Å Baffle plate<br />
~<br />
Ä<br />
Ä<br />
~<br />
Figure 8<br />
~ Ignition spark generator<br />
Ä =Connection of the “Ignition spark generator” cable section<br />
to the control unit, slot “E”<br />
Figure 9<br />
~ Ignition spark generator<br />
Ä Fixtures for the ignition spark generator<br />
Checking the ignition spark generator with the test unit<br />
for burner head<br />
Danger!<br />
• A spark gap with a voltage of approx. 20,000 V is formed<br />
between the electrodes.<br />
- Only check ignition spark generator with the test unit for<br />
burner head.<br />
- Do not check ignition spark generator without ignition<br />
electrodes.<br />
High voltage<br />
Functional test<br />
• Remove all connectors from the control unit.<br />
• Connect test unit for burner head.<br />
• Press “ZFG” switch / button ---> a spark gap should form<br />
between the electrodes<br />
- If not, replace the electric motor.<br />
It is imperative to exercise caution<br />
when checking the ignition spark<br />
generator!<br />
40
5 / Repair Instructions<br />
Removing the solenoid valve<br />
(see Figure 10 and Drawing 26)<br />
• Take off the hood.<br />
• Remove burner.<br />
• If necessary, check the solenoid valve with the test unit for<br />
burner head (see below).<br />
• Pull out “Solenoid valve” cable section at the control unit,<br />
slot “D”.<br />
• Loosen hexagonal nut from the solenoid valve.<br />
• Remove solenoid valve coil.<br />
• Unscrew magnet.<br />
~<br />
Ä<br />
Please note!<br />
During installation of the heater, lay the cable sections as<br />
shown in Figure 10.<br />
Figure 10<br />
~ Solenoid valve<br />
Ä =Connection of the “Solenoid valve” cable section to the<br />
control unit, slot “D”<br />
Checking the solenoid valve with the test unit for<br />
burner head<br />
• Remove all connectors from the control unit.<br />
• Connect test unit for burner head.<br />
• Press “MV” button ---> solenoid valve should click. If it<br />
does not, replace solenoid valve.<br />
Ä1<br />
~ 2<br />
3<br />
Drawing 26<br />
~ Magnet<br />
Ä Solenoid valve coil<br />
41
5 / Repair Instructions<br />
Removing the heating cartridge for the nozzle holder<br />
heater (see Figures 11 and 12)<br />
Heating cartridge without temperature switch<br />
• Take off the hood.<br />
• Remove burner.<br />
• Remove ignition electrodes from ignition spark generator.<br />
• Remove securing clip (retaining spring) from the nozzle<br />
holder.<br />
• Remove baffle plate.<br />
• Pull out “Heating cartridge” cable section at the control unit,<br />
slot “F”.<br />
• Remove securing pin from the nozzle holder (which holds<br />
the heating cartridge).<br />
• Pull out heating cartridge from the nozzle holder.<br />
• Unscrew temperature switch (if present) from the nozzle<br />
holder.<br />
• If appropriate, check the heating cartridge (see below).<br />
Figure 11<br />
~ Ä Å<br />
Please note!<br />
• When installing the heating cartridge, insert the securing pin<br />
into the nozzle holder again.<br />
• Tightening torque for temperature switch 2.8 +1 Nm.<br />
Functional testing of the heating cartridge<br />
~ Heating cartridge - installed in the nozzle holder<br />
Ä Securing pin for heating cartridge<br />
Å =Connection of the “Heating cartridge” cable section to<br />
the control unit, slot “F”<br />
Heating cartridge with temperature switch<br />
(only with HYDRONIC 24)<br />
• Connect ohmmeter to the 2-pin receptacle housing and<br />
behind the temperature switch (if present). If the measured<br />
value is 5-10 Ω, then the heating cartridge is OK, otherwise<br />
replace the heating cartridge.<br />
Ç<br />
~ Ä Å<br />
Figure 12<br />
~ Heating cartridge - installed in the nozzle holder<br />
Ä Securing pin for heating cartridge<br />
Å =Connection of the “Heating cartridge” cable section to the<br />
control unit, slot “F”<br />
Ç Temperature switch<br />
42
5 / Repair Instructions<br />
Removing the flame pipe (see Figure 13 and Drawing 27)<br />
• Take off the hood.<br />
• Remove burner.<br />
• Take flame pipe out of the heat exchanger.<br />
~ Ä<br />
Please note!<br />
During installation, insert the catch of the flame pipe into slot<br />
on the heat exchanger.<br />
Å<br />
Figure 13<br />
~ Flame pipe<br />
Ä Catch on the flame pipe<br />
Å Heat exchanger<br />
2 1 3<br />
~ Flame pipe<br />
Ä Catch on the flame pipe<br />
Å Heat exchanger<br />
Drawing 27<br />
43
5 / Repair Instructions<br />
Removing the temperature sensor and safety thermal<br />
cutout sensor (see Figure 14 and Drawing 28)<br />
• Take off the hood.<br />
• Unscrew the fan wheel in an anti-clockwise direction,<br />
counter-restraining the motor shaft with screwdriver.<br />
• Remove plug connector from the temperature sensor /<br />
safety thermal cutout sensor on the control unit.<br />
• Unscrew temperature sensor / safety thermal cutout sensor<br />
from the heat exchanger.<br />
2<br />
1<br />
~<br />
Ä<br />
Drawing 28<br />
~ Temperature sensor<br />
Ä Safety thermal cutout sensor<br />
Figure 14<br />
~ Control unit, slot “G” for temperature sensor<br />
Ä Control unit, slot “C” for safety thermal cutout sensor<br />
Impedances for temperature sensor and safety thermal<br />
cutout sensor (see Drawings 29 and <strong>30</strong>)<br />
Check the temperature sensor and the safety thermal cutout<br />
sensor using a digital multimeter and compare the values with<br />
the diagram and table of characteristic values.<br />
If the measured values do not agree with the diagram or table<br />
of characteristic values, then replace the temperature sensor<br />
or safety thermal cutout sensor.<br />
Test for ground leakage:<br />
There must be no electric connection between the sensor<br />
connections and the casing. Impedance must be ∞.<br />
Characteristic values - temperature sensor (PTC)<br />
Temp. [°C] Impedance [Ω] Permitted deviation [±Ω]<br />
- 40 567 18<br />
Diagram - temperature sensor (excerpt)<br />
Resistance [ohms]<br />
2000<br />
1800<br />
1600<br />
1400<br />
1200<br />
1000<br />
800<br />
600<br />
0 815 15<br />
25 1000 12<br />
40 1122 16<br />
60 1299 23<br />
80 1490 <strong>30</strong><br />
100 1696 44<br />
400<br />
200<br />
0<br />
-40 0 40 80 120<br />
Temperature [C°]<br />
120 1915 52<br />
Drawing 29<br />
1<strong>30</strong> 2023 62<br />
44
5 / Repair Instructions<br />
Characteristic value table - safety thermal cutout sensor<br />
(NTC)<br />
Temp. [°C] Impedance [Ω] Permitted deviation [±Ω]<br />
Diagram - safety thermal cutout sensor (excerpt)<br />
Resistance [kOhm]<br />
1000<br />
- 40 3 492 000 324 600<br />
0 337 933 21 560<br />
25 103 517 5 000<br />
40 55 143 3 1<strong>30</strong><br />
100<br />
60 25 950 1 727<br />
80 13 118 995<br />
100 7 099 597<br />
120 4 069 374<br />
10<br />
1<strong>30</strong> 3 135 <strong>30</strong>0<br />
150 1 917 199<br />
180 981 115<br />
200 668 85<br />
1<br />
-40 0 40 80 120<br />
Temperature [C°]<br />
Drawing <strong>30</strong><br />
Fuel supply<br />
Danger of fire, explosions and poisoning!<br />
• Exercise caution when handling fuel.<br />
• Avoid naked flames while handling fuel.<br />
• Do not smoke. This applies also where fuel can be<br />
detected only by its characteristic smell.<br />
• Do not breathe in fuel vapour.<br />
• When dismantling the fuel supply line, collect any fuel that<br />
comes out.<br />
Removing the fuel strainer (see Figure 15)<br />
• Take off the hood.<br />
• Remove burner.<br />
• Unscrew the hollow screw and the ring connection piece<br />
from the fuel supply line to the burner.<br />
• Unscrew the fuel strainer from the burner casing, clean and,<br />
if necessary, replace.<br />
Figure 15<br />
~ Hollow screw and ring connection piece from the fuel<br />
supply line<br />
Ä Fuel strainer<br />
Please note!<br />
Note regarding fuel quantity<br />
It is not possible to accurately check the fuel quantity and<br />
pump pressure.<br />
If necessary, the combustion can be checked by examining<br />
the CO 2<br />
content in the exhaust gas.<br />
If any change is necessary to the factory combustion air<br />
settings (CO 2<br />
content), this can be effected by twisting the<br />
adjustment cap (see page 46).<br />
45
5 / Repair Instructions<br />
Measuring the CO 2<br />
content in the exhaust gas<br />
Danger of injury, fire and poisoning!<br />
• The HYDRONIC must not be operated in enclosed spaces<br />
such as garages or workshops without exhaust-gas<br />
extraction.<br />
• Do not switch on HYDRONIC with the burner dismantled.<br />
Please note!<br />
• Measurement of the CO 2<br />
content and, if necessary,<br />
adjustment of the combustion air, is necessary:<br />
- after repairs to the HYDRONIC (functional test)<br />
- where combustion is not normal<br />
- after changing the fuel atomizer nozzle<br />
Measurement<br />
Figure 16<br />
~<br />
~ Adjustment cap<br />
Measurement of the CO 2<br />
content of the HYDRONIC is carried<br />
out when the vehicle is running.<br />
In order to be able to measure the CO 2<br />
content accurately, the<br />
HYDRONIC must have reached its operating temperature.<br />
Measure the CO 2<br />
content using a CO 2<br />
indicator, observing the<br />
manufacturer‘s data.<br />
Adjusting the combustion air (see Figure 16)<br />
• Unscrew the adjustment cap.<br />
- If the CO 2<br />
content is less than 9 vol %, then turn the<br />
adjustment cap towards the left (CO 2<br />
+).<br />
- If the CO 2<br />
content is greater than 11 vol %, then turn the<br />
adjustment cap towards the right (CO 2<br />
-).<br />
• Secure the adjustment cap again.<br />
• If it is not possible to adjust CO 2<br />
content properly,<br />
- check burner for damage<br />
- check electric motor rpm<br />
- replace fuel atomizer nozzle.<br />
46
5 / Repair Instructions<br />
Taking the water pump apart (standard model)<br />
(see Drawing 31)<br />
• Unscrew screws from the pump housing and take out the<br />
pump housing.<br />
• Unscrew locknut and take out the impeller wheel.<br />
• Remove axial face seal and ring from the motor shaft.<br />
• Unscrew screws from the pump flange and take out the<br />
pump flange.<br />
• Replace any faulty parts.<br />
Please note!<br />
• Clean axial face seal and ring with a dry cloth prior to<br />
installation.<br />
• Slide surfaces must be free of grease and dust.<br />
• Replace the O-ring.<br />
• For spare parts numbers, see Spare Parts List.<br />
Water pump - standard model<br />
1<br />
2<br />
3<br />
10<br />
8<br />
4<br />
5<br />
6 7 9<br />
~ Water pump<br />
Ä Fastening device<br />
Å Clamping clip<br />
Ç Pump housing<br />
É Impeller wheel<br />
Ñ= Disc<br />
Ö= Axial face seal<br />
Ü= O-ring<br />
á= Ring<br />
à= Pump flange<br />
Drawing 31<br />
Bus 2000 water pump (see Drawing 32)<br />
The Bus 2000 water pump is maintenance-free. In case of<br />
damage, the entire water pump must be replaced.<br />
Please note!<br />
For spare parts numbers of add-on components, see Spare<br />
Parts List.<br />
2<br />
Drawing 32<br />
5<br />
4<br />
6<br />
3<br />
1<br />
~ Bus 2000<br />
water pump<br />
Ä Cover, above<br />
Å Cover, rear<br />
Ç Fastening device<br />
É Clamping clip<br />
Ñ Metal-rubber pad<br />
47
6 / Wiring diagram<br />
Wiring diagram for the basic heater models<br />
HYDRONIC 16 - 24 V 25 2165 01 00 00<br />
HYDRONIC 24 - 24 V 25 1817 01 00 00<br />
HYDRONIC <strong>30</strong> - 24 V 25 1818 01 00 00<br />
HYDRONIC 35 - 24 V 25 1819 01 00 00<br />
Parts list<br />
1 HYDRONIC<br />
1.1 Burner motor<br />
1.2 Ignition electrode<br />
1.3 Ignition spark generator<br />
1.4.1 Temperature switch - only<br />
on HYDRONIC 16 / 24<br />
1.5 Safety thermal cutout<br />
sensor<br />
1.11 Fuel solenoid valve<br />
1.13 Temperature sensor<br />
1.14 Heating cartridge for<br />
nozzle holder heater<br />
2.1 Control unit<br />
2.5.1 Relay, heating<br />
cartridge<br />
2.5.6 Relay, water pump<br />
25 1818 00 96 01 C<br />
a) HYDRONIC connection<br />
X Diagrammatic representation of the control<br />
unit from the fan wheel side<br />
The plug connector and socket housings are<br />
shown as viewed from the cable entry side.<br />
For “Operation” wiring diagram, see page 50.<br />
48
6 / Wiring diagram<br />
Cablecolours<br />
sw<br />
ws<br />
rt<br />
ge<br />
gn<br />
vi<br />
br<br />
gr<br />
bl<br />
li<br />
black<br />
white<br />
red<br />
yellow<br />
green<br />
violet<br />
brown<br />
grey<br />
blue<br />
lilac<br />
25 1818 00 97 01 E<br />
Parts list<br />
2.5.7 Relay for control, e.g. of<br />
vehicle blower<br />
2.7 Main fuse 15 A<br />
2.7.1 5A fuse for control switch<br />
2.7.2 15A fuse for water pump<br />
2.12.1 Bus 2000 water pump<br />
2.12.2 Water pump<br />
3.1.4 Switch, temperature reduction<br />
3.1.5 Switch, water pump<br />
3.4.1 Pilot light / flame indicator<br />
3.4.3 Fault code indicator<br />
3.4.6 Combustion indicator light<br />
5.1 Battery<br />
5.2 Battery isolating switch<br />
a) HYDRONIC connection<br />
d) Either 2.12.1 or 2.12.2<br />
f) If 3.2.6 is used, optionally<br />
terminal 15 or terminal <strong>30</strong><br />
- otherwise switch-on positive<br />
(yellow 1 mm² line).<br />
49
6 / Wiring diagram<br />
Wiring diagram, control elements<br />
25 1818 00 97 01 E<br />
Parts list<br />
2.15.9 Sensor, external temperature<br />
3.1.1 Universal switch<br />
3.1.2 Switch, heat, continuous operation<br />
3.1.12 Fault code inquiry<br />
b) Connect to terminal +15<br />
c) Illumination, terminal 58<br />
e) External ON/OFF key (optional)<br />
i) Radio remote control connection<br />
3.2.6 Mini-timer<br />
3.2.9 Modular timer<br />
3.2.12 Mini-timer (new)<br />
50
7 / Environment<br />
Certification<br />
The Eberspächer company accepts the challenge and takes<br />
active steps to avoid and eliminate ecological problems.<br />
The HYDRONIC heater is designed for environmentally friendly<br />
operation.<br />
ISO 9000 / ISO 14001<br />
Our production process is certified to ISO 9000 (quality<br />
management) and ISO 14001 (environmental management).<br />
QS 9000<br />
In addition to ISO 9000, the Eberspächer company is certified<br />
to QS9000 (extended quality management for the American<br />
motor industry promoted by the manufacturers Ford, GM and<br />
Chrysler) and VDA 6.1 (extended quality management for the<br />
German motor industry).<br />
EU declaration of conformity<br />
It is hereby confirmed for the following products - heater, type<br />
HYDRONIC 16 / HYDRONIC 24<br />
HYDRONIC <strong>30</strong> / HYDRONIC 35<br />
that the heater complies with the essential protection<br />
requirements laid down in Council Directive 89/336/EEC on<br />
the approximation of the laws of the member states relating to<br />
electromagnetic compatibility.<br />
This declaration applies to all units which are manufactured<br />
in accordance with manufacturing drawings HYDRONIC 16 /<br />
HYDRONIC 24, HYDRONIC <strong>30</strong> / HYDRONIC 35 - which are<br />
part of this declaration.<br />
The following standards / directives have been used to assess<br />
the product with regard to its electromagnetic compatibility<br />
characteristics (EMC):<br />
EN50081-1 Emissions<br />
EN50082-1 Immunity<br />
72/245/EEC - as amended by 95/54/EC on the<br />
electromagnetic interference produced by<br />
spark ignition engines<br />
Disposal<br />
Disposal of materials<br />
Old heaters, faulty parts and packaging materials must be<br />
sorted by type so that, if required, all parts can be disposed of<br />
in an environmentally friendly fashion with recycling of<br />
materials where appropriate. In this connection, electric<br />
motors, control units and sensors (e.g. temperature sensors)<br />
count as “electrical scrap”.<br />
Heaters should be taken apart in accordance with the<br />
provisions of this manual relating to repairs.<br />
Packaging<br />
The heater packaging can be retained in case it needs to be<br />
sent back.<br />
51
8 / Service / Index<br />
Regional offices - Germany<br />
Postcode Town Company Road Telephone<br />
17358 Torgelow Eberspächer Heizgeräte GmbH Wilhelmstraße 47 Tel. +49 (0)3976 23 50 - 0<br />
20539 Hamburg J. A. Schlüter Söhne Ausschläger Billdeich 62–64 Tel. +49 (0)40 7 88 16 86<br />
Industrie-Vertriebs-GmbH<br />
44139 Dortmund Eugen Boss GmbH & Co. KG Rosemeyerstr. 14 Tel. +49 (0)231 91 14 - 236<br />
65936 Frankfurt Dipl. Ing. B. Schmitt GmbH Westerbachstr. 124 Tel. +49 (0)69 3 40 51 - 0<br />
Technikhaus<br />
70327 Stuttgart Fritz Trost GmbH & Co. Kesselstr. 23 Tel. +49 (0)711 40 13 - 0<br />
80807 Munich MEINBURK Meineke GmbH Ingolstädter Str. 43 Tel. +49 (0)89 3 50 33 - 0<br />
Representative offices abroad<br />
Country Company Town Telephone<br />
Argentina Champion S.A. AR - 1603 Buenos Aires Tel. 01 - 709-02 24<br />
Chile AGCO Argentina S.A AR - 1603 Haedo Tel. 01 - 483 32 01<br />
Uruguay<br />
Belgium Eberca b.v.b.a B - 19<strong>30</strong> Zaventem Tel. 02 - 720 97 35 / 36<br />
Luxemburg<br />
Denmark Robert Bosch A / S DK - 2750 Ballerup Tel. 44 - 89 89 89<br />
Estonia Hesyco Group EE - 72752 Järvamaa Tel. 2 38 - 4 88 90<br />
Finland Wihuri Oy Autola SF - 01510 Vanta Tel. 89 - 82 58 51<br />
France Eberspächer S. A. S. F - 93213 La Plaine St. Denis Tel. 01 - 49 17 52 00<br />
Greece Systems S. A. GR - 18346 Moschato Tel. 1 - 48 13 280<br />
United Kingdom Eberspächer UK Ltd. GB - Hampshire BH 243 PB Tel. 01425 - 48 01 51<br />
Iceland I. Erlingsson EHF 104 Reykjavik Tel. 5 - 5 88 06 98<br />
Italy Ofi ra Italiana SPA. I - 25 126 Brescia Tel. 0<strong>30</strong> - 37 93 - 1<br />
Canada Espar Products Inc. CDN - Mississauga Tel. 905 - 670 09 60<br />
Ontario L5T / 1Z8<br />
Latvia Trans - Baltic Trading Corp. LV - 1063 Riga Tel. 2 - 26 63 23<br />
Lithuania Tradcon Ltd. LIT - 2055 Vilnius Tel. 2 - 63 44 <strong>30</strong><br />
Netherlands Eberca b.v. NL - 3261 LW Oud-Beijerland Tel. 01 86 - 62 19 55<br />
Norway Robert Bosch Norge A / S N - 1411 Kolbotn Tel. 66 - 81 70 00<br />
Austria Eberspächer Ges.m.b.H. A - 1232 Vienna Tel. 01 - 6 16 16 46 - 0<br />
also<br />
Bulgaria, Croatia<br />
Republic of Yugoslavia,<br />
Romania, Slovakia,<br />
Slovenia, Hungary<br />
52
8 / Service / Index<br />
Representative offices abroad<br />
Country Company Town Telephone<br />
Poland Eberspächer Sp.zo. PL- 62081 Przezmierowo Tel. 061 - 81 6 18 50<br />
Russia Company OKMA RUS - 105023 Moscow Tel. 095 - 111 90 95<br />
Sweden Svenska Eberspächer AB S - 128<strong>30</strong> Skarpnäck Tel. 0 8 - 683 11 00<br />
Switzerland Technomag AG Ch - 4127 Birsfelden Tel. 061 - 378 9152<br />
Spain Pedro Sanz Clima S. L E - 28022 Madrid Tel. 91 - 748 07 85<br />
Portugal<br />
Czech Republic Eberspächer spol. sr. o. CZ - 15543 Prague 5 Tel. 02 - 652 05 48/49/50<br />
Turkey Konvekta Klima ve Sogutma TR - 34860 Hadimköy - Tel. 0 21 26 23 20 80 - 85<br />
Hosdere Mevkii<br />
Istanbul<br />
Ukraine Geruk 000 UA - 257008 Tscherkassy Tel. 0472 - 63 87 47<br />
USA Espar Tech Center Romulus, Michigan 48 174 Tel. 734 - 947 - 3900<br />
Belarus ZAO Belvneshinvest BY. 220 113 Minsk Tel. 172 - 317 294<br />
List of Abbreviations<br />
ABG<br />
General Type Approval<br />
PME<br />
Biodiesel that complies with DIN V 51606<br />
ADR<br />
European Agreement concerning the International Carriage<br />
of Dangerous Goods by Road (ADR)<br />
StVZO<br />
German regulations governing the registration of motor<br />
vehicles<br />
ADR99<br />
Dangerous goods regulations in France<br />
TRS 003<br />
Technical regulations relating to the transport of dangerous<br />
goods by road in conjunction with Annex B of the ADR<br />
EMV<br />
Electromagnetic compatibility<br />
GGVS<br />
Directive on the transport of dangerous goods by road<br />
(transport of dangerous goods by road, GGVS)<br />
Please note!<br />
• Installation of the HYDRONIC in vehicles that are used to<br />
transport dangerous goods within the provisions of GGVS /<br />
TRS 003, ADR / ADR99 is not permitted.<br />
JE service partners<br />
J. Eberspächer service partners<br />
53
8 / Service / Index<br />
Index A-M<br />
Keyword<br />
Page<br />
Keyword<br />
Page<br />
A<br />
Accident prevention --------------------------------------- 2, 4<br />
Additional equipment ----------------------------- 2, 8, 10, 22<br />
ADR --------------------------------------------------------5, 54<br />
ADR99 -----------------------------------------------------5, 54<br />
Ambient temperature ----------------------------------- 13, 16<br />
Applications --------------------------------------------- 2, 5, 6<br />
Assembly drawing ----------------------------------------3, 34<br />
B<br />
Burner--------------------------2, 10, 15, 16, 32, 36, 37 - 46<br />
Burner motor -------------------------------------2, 31, 38, 48<br />
Burner start-up-----------------------------------------------10<br />
Bus 2000 water pump --------------------- 2, 18, 24, 47, 49<br />
C<br />
Capacity ------------------------------------------------------13<br />
Cartridge heater----------------------------------3, 34, 42, 48<br />
Case ----------------------------------------------2, 15, 16, 20<br />
Catalogue numbers-------- front cover, 2, 8, 10, 25, 27, 28<br />
Certification---------------------------------------------------51<br />
Characteristic value table ------------------------------ 44, 45<br />
CO in exhaust gas -------------------------------------------13<br />
CO 2<br />
-value-----------------------------------------3, 13, 45, 46<br />
Combustion air piping ------------------------------- 2, 20, 24<br />
Compact model------------------------ front cover, 8, 14, 17<br />
Construction-----------------------------------------------2, 10<br />
Control diagram-------------------------------------------2, 12<br />
Control elements------------------------------2, 3, 7, 8, 9, 50<br />
Control unit -----------------------10, 11, 13, 25 - 34, 37, 38<br />
-------------------------------------------------- 40 - 42, 44, 48<br />
Coolant circuit------------------------------------- 2, 5, 21, 36<br />
D<br />
Declaration of conformity------------------------------------51<br />
Diagnosis -----------------------------------------3, 25, 27, 28<br />
Diagnostic unit ------------------------------ 3, 24, 25, 27, 32<br />
Disposal----------------------------------------------------3, 51<br />
Duplicate------------------------------------------------------16<br />
E<br />
Electric power consumption --------------------------------13<br />
Electromagnetic compatibility-------------------------------51<br />
EMC------------------------------------------------------ 51, 54<br />
Emergency cutout -------------------------------------------- 7<br />
End sleeve ----------------------------------------------- 19, 20<br />
Environmental protection------------------------------------51<br />
Exhaust gas piping ---------------------------2, 7 ,10, 19, 32<br />
F<br />
Fastening --------------------------------------------------2, 17<br />
Fault --------------------------------------5, 24, 25, 26, <strong>30</strong>, 31<br />
Fault code ---------------------------- 24, 26, 27, 29, <strong>30</strong> - 33<br />
Fault description ------------------------------ 27, 29, <strong>30</strong> - 33<br />
Flame pipe-------------------------------3, 10, 11, 32, 34, 43<br />
Flashing code ---------------------------------------- 3, 25, 26<br />
Fuel---------------------------- 10, 11, 13, 22, 23, 28, 33, 45<br />
Fuel atomizer nozzle --------------- 3, 11, 32, 33, 34, 39, 46<br />
Fuel consumption--------------------------------------------13<br />
Fuel lines------------------------------------- 2, 16, 19, 22, 23<br />
Fuel quantity-----------------------------------------------3, 45<br />
Fuel strainer -----------------------------------------------3, 45<br />
Fuel supply ------------------------------2, 10, 22, 24, 32, 33<br />
Functional diagram ------------------------------------------12<br />
Functional test------------------------------------------2, 5, 36<br />
Fuses----------------------------------------------------- 24, <strong>30</strong><br />
G<br />
GGVS ------------------------------------------------------5, 54<br />
H<br />
Heating capacity ---------------------------------------------13<br />
Heating medium ---------------------------------------- 10, 13<br />
Heating operation--------------------------------------- 17, 19<br />
Hood --------------------3, 8, 10, 11,15, 16, 20, 34, 37 - 45<br />
I<br />
Ignition electrodes ------------------- 11, 32 - 34, 39, 40, 42<br />
Ignition spark generator ----- 10, 11, 31, 34, 39, 40, 42, 48<br />
Index ----------------------------------------------3, 52, 53, 54<br />
Inital operation------------------------------------------2, 5, 21<br />
Installation -------------------------- 2, 4 - 8, 15 - 22, 39 - 43<br />
Installation ----------------------------------16, 20, <strong>30</strong>, 32, 47<br />
Installation example---------------------------------15, 16, 21<br />
Installation position ---------------------------------------2, 15<br />
Installation positions --------------------------------------2, 17<br />
Intake head ---------------------------------------------------23<br />
Intake pipe-------------------------------------------------8, 23<br />
Intended use ----------------------------------------------- 2, 5<br />
Introduction------------------------------------------------ 2 - 7<br />
ISO adapter --------------------------------------3, 24, 25, 28<br />
K<br />
KD 2000 software ----------------------------------- 3, 25, 28<br />
L<br />
Liability claims ---------------------------------------------- 2, 4<br />
List of abbreviations -----------------------------------------53<br />
Locking ------------------------------------- 2, 24, 26 - 29, 32<br />
54
8 / Service / Index<br />
Index N-Z<br />
Keyword<br />
Page<br />
Keyword<br />
Page<br />
M<br />
Minimum throughput ----------------------------------- 13, <strong>30</strong><br />
Mini-timer --------------------------------------------------8, 50<br />
Modular timer ------------------------3, 8, 11, 25, 29, 32, 50<br />
Mounting surface --------------------------------------- 17, 18<br />
N<br />
Notes----------------------------------------------------------36<br />
Nozzle holder heater--------------------3, 11, 24, 32, 42, 48<br />
O<br />
Operating Instructions ---------------------------------------- 8<br />
Operating pressure ------------------------------------------13<br />
Operating temperature --------------------------------------46<br />
Operation --------------------- 2, 6, 7, 10, 13, 23, 31, 33, 36<br />
P<br />
Packaging ----------------------------------------------------51<br />
Permissible ambient temperature --------------------------13<br />
Permissible installation positions ------------------------2, 17<br />
Pictograms ------------------------------------------------- 2, 4<br />
PME ------------------------------------------------------ 23, 54<br />
Power consumption -----------------------------------------13<br />
Power-on ------------------------------------------------ 10, 29<br />
Principal dimensions--------------------------------------2, 14<br />
Product information-----------------------------------2, 8 - 14<br />
R<br />
Radio interference suppression level-----------------------13<br />
Radio remote control -------------------------------------8, 50<br />
Rated voltage ------------------------------------------------13<br />
Rating plate---------------------------------------------2, 6, 16<br />
Regional offices ----------------------------------------------52<br />
Regulations ------------------------------------------- 2, 5, 6, 7<br />
Remedial measures--------------------------------26, <strong>30</strong> - 33<br />
Repair instructions -------------- front cover, 2, 3, 5, 34 - 47<br />
Representative offices abroad ------------------------- 52, 53<br />
Resistance values-----------------------------------------3, 44<br />
Return pipe ---------------------------------------- 2, 8, 22, 23<br />
T<br />
Table of contents---------------------------------------------- 2<br />
Technical data ---------------------------------------------2, 13<br />
Technical description ------------------------ front cover, 2, 5<br />
Temperature control values ---------------------------------13<br />
Temperature controller---------------------------------------- 5<br />
Temperature sensor --------------- 3, 11, <strong>30</strong>, 33, 34, 44, 48<br />
Temperature switch------------------------------------- 34, 42<br />
Template for holes -------------------------------------- 17, 18<br />
Test equipment-----------------------------------------------24<br />
Test symbol---------------------------------------------3, 6, 13<br />
Test unit for burner head ------ 3, 24, 31, 32, 33, 38, 40,41<br />
Transport------------------------------------------------------13<br />
Troubleshooting ----------------- front cover, 2, 3, 5, 24 - 33<br />
TRS 003 ---------------------------------------------------5, 52<br />
Type of protection--------------------------------------------13<br />
U<br />
Universal switch-------------------------------------------8, 50<br />
V<br />
Voltage ------------------------------------------ 13, <strong>30</strong>, 31, 40<br />
Voltage limit---------------------------------------------------13<br />
W<br />
Warranty ---------------------------------------------------- 2, 4<br />
Water content ------------------------------------------------13<br />
Water pump -----------------2, 8, 10, 12, 13, 15, 16, 18, 21<br />
----------------------------------------- 24, 26, <strong>30</strong> - 32, 47, 48<br />
Weight --------------------------------------------------------13<br />
Winter diesel--------------------------------------------------23<br />
Wiring diagram ---------------------3, 10, 23, 25, 26, 48 -50<br />
S<br />
Safety instructions ----------------------------------2, 3, 7, 36<br />
Scope of supply-------------------------------------------6, 19<br />
Sectional view ---------------------------------------------2, 11<br />
Solenoid valve------------------------------ 3, 11, 32 - 34, 41<br />
Spare parts list --------------------------------------------5, 47<br />
Standard model -------------------- front cover, 3, 14, 17, 47<br />
Statutory requirements ------------------------------------ 2, 6<br />
Storage -------------------------------------------------------13<br />
Summer diesel -----------------------------------------------23<br />
Support surface----------------------------------------- 17, 18<br />
Switch-off------------------------------------------ 7, 8, 10, 29<br />
Safety thermal cutout sensor -------------- 2, 10 ,11, <strong>30</strong>, 33<br />
--------------------------------------------------- 34, 44, 45, 48<br />
55