Repairs and Maintenance
Repairs and Maintenance
Repairs and Maintenance

You also want an ePaper? Increase the reach of your titles
YUMPU automatically turns print PDFs into web optimized ePapers that Google loves.
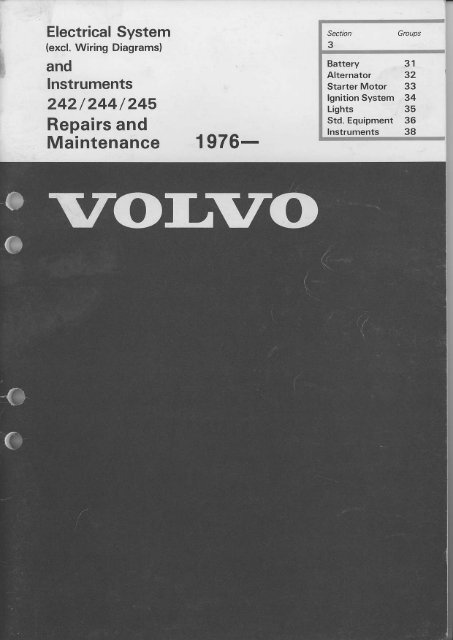
Electrical System<br />
(excl. Wiring Diagrams)<br />
<strong>and</strong><br />
lnstruments<br />
242/244/245<br />
<strong>Repairs</strong> <strong>and</strong><br />
<strong>Maintenance</strong> 1976-<br />
Section<br />
Grcups<br />
Battery 31<br />
Alternator 32<br />
Starter Motor 33<br />
lgnition System 34<br />
Lights 35<br />
Std. Equipment 36<br />
Instruments 38
Content of Manual<br />
Group 31: Battery<br />
General infomation<br />
GrouD 32: Alt€rnator<br />
Specifications 3<br />
New Fealures.......,,,,<br />
Description .............<br />
Service Diagnosis<br />
5<br />
6<br />
Check of charg'ng system ........... .....<br />
A 1-A12 7<br />
Service Procedures<br />
Special instructions for work on alternator<br />
equipment.........<br />
12<br />
Group 33: Starter Motor<br />
General Infomation<br />
Spare Parts lllustration<br />
Special Tools<br />
22<br />
23<br />
24<br />
Group 34: lgnition System<br />
Specificarrons<br />
Lubracation ............<br />
lllusration<br />
Bre8kerl€ss Electronic lgnition Sysrem<br />
General<br />
Service Procedures:<br />
Replacing distriburor<br />
Replacing impulse sender<br />
Group 35: Lights<br />
Specifications<br />
Headlamps<br />
Front lights<br />
Lights, 242 <strong>and</strong> 244, DL <strong>and</strong> GT<br />
Lights, 245<br />
Group 36: St<strong>and</strong>ard Electrical Equipment<br />
Switches<br />
Bulb Failure Warning Light<br />
Tailgate Window Wiper <strong>and</strong> Washer. 245<br />
Windshield Wiper Assembly<br />
81 816<br />
32<br />
32<br />
33<br />
39<br />
43<br />
44<br />
?t5<br />
46<br />
47<br />
,$<br />
49<br />
50<br />
52<br />
GrouD 38: Instruments<br />
Instrument Cluster<br />
Warning Lights<br />
Replacing instrument<br />
Testing fuel gauges <strong>and</strong> tank level senderc<br />
Addilional Inlomalion<br />
A1 A8<br />
NOTE: All references to model 240 in this manual also apply to DL, GL <strong>and</strong> GT.<br />
53<br />
53<br />
54<br />
55<br />
56<br />
58<br />
61<br />
TP 11402t2<br />
3000.03.80<br />
Printed in lJ.S.A.
Battery<br />
Group 31<br />
General Informalion<br />
o<br />
O<br />
The Battery<br />
<strong>and</strong> major engine<br />
electrical compon€nts<br />
General<br />
Lack ot eleclrolyle causes prcmature lailure of batteries<br />
tasier lhan anything else, Plales exposed lo ai<br />
delefiorale rapidly. Check electrolyls level fiequenlly,<br />
especially in hot weather when evaporalion as more<br />
likely.<br />
Fill deslilled water only to the battery, never acid. Howsvsr,<br />
any watsr is batter than no waler. Batlery life is<br />
ext€nd€d by using the puresl waler available.<br />
Checking Banery<br />
The most common way to check battery charge is wilh a<br />
hydrometer. lt measurespecific gravity which is a direct<br />
measure of percenlage sulphuric acid in the electro'<br />
lyl6. As batlery drops lrom chae€d to discharged condition,<br />
acid leaves lhe solulion <strong>and</strong> enters lhe plates. This<br />
causes a decrease in specilic gravity.<br />
Prolonging battery lile is tusl a matler ol oeveloping<br />
good habils ol lesling <strong>and</strong> mainienance. Adirty battery<br />
discharges ilsel{:acid corrosion <strong>and</strong> dirt acl as conductors.<br />
Corrosion around batlery posts eats away copper<br />
cable terminals.<br />
A darty batleryshould b€ €movsd <strong>and</strong> scrubbed with a<br />
solution oJ baking soda <strong>and</strong> water or ammonia <strong>and</strong><br />
spEcrFrc GRAVTTY (@20'Cr AND CHARGE<br />
Specillc Gravlty Readlng<br />
(use lhe mlnlmum flgure tor lestlng)<br />
Minimum<br />
Batleru Charoe<br />
1.260..................100% Charged<br />
1.230.................. 75./. Charged<br />
1.200 .... .... .... .. .... 50% Charged<br />
1.170 .... ... ..... ... ... 25 Chaged<br />
1.140.. -...-...........Very<br />
Litlle Power Letl<br />
1.10... -..-...-.......Completely<br />
Discharged<br />
'(80"F)<br />
water, Then flush wilh clean water. Be sure vent caps<br />
are tight so no solution gels into cells to neulralize<br />
the acid.<br />
Also wash batlery carrier <strong>and</strong> holddowns.<br />
Do nol ovenighten holddorvn bolts. Tighl boltswillstrain<br />
the battery. Check banery case for cracks.<br />
when charged, a battery giv€s off hydrogen <strong>and</strong> oxygen,<br />
a mbdure which is highly explosive. Keep open<br />
llames away Aom batlery <strong>and</strong> never disconnect a<br />
charger by removing the connection al the battery post.<br />
Guad againsl sparks by disconnecling tho ground<br />
cable lirst <strong>and</strong> connecting it lest. Be caretul nol lo lel<br />
tools or other meial objecls fall across lhe battery<br />
terminals.<br />
Neve. take rcadings right atter adding water. Water<br />
must lilst be mixed wilh eleclrolyle. This is done by<br />
charging the batt€ry or running it on lhe car for a couple<br />
Take e lecvollte from each cell <strong>and</strong> compare readings, lt<br />
one cellis 0,030ormore lowerthan olhercslls its plates<br />
are not holding charge <strong>and</strong> il might bs n€cessary lo<br />
replace the batlery. (0.0501or dry charged)<br />
ll batlery ch€cks good by the specilic gravily test, il<br />
might still b6 necessary lo make a high rale discharge<br />
lest, duplicaling lhe staner motordem<strong>and</strong>s. See Group<br />
33, Slarter Molor <strong>and</strong> Eleclrical test specilicaiions.<br />
Do not maantain load on bailery longerthan€cessary,<br />
Group 31<br />
Battery 1
Banery<br />
WARNING!<br />
Caution<br />
We would like to strcss the importance ot not havjng<br />
open llames or spa*s in the vicinity of the battery b€cause<br />
ol the explosive gas which lonns in the battery.<br />
There is thus a danger of sparks from shoding at lhe<br />
batlery posls whrch can cause the gas to ignde.<br />
Prccedures<br />
-Both batteries (sender <strong>and</strong> receiving) must have the<br />
same voltage.<br />
-TheAmperageolthe senderbattery mustnotbevery<br />
much greater lhan lhat for the receiver battery.<br />
-The battery cellcaps mustbe in position (thisreduces<br />
risk ol gas igniting).<br />
-lf lhe receiving batlery is frozen, il must be attowed lo<br />
thawoul betore connecling up the jumber cabtes. (A<br />
flal battery lrcezes al -10"C.(15"F.))<br />
RECEIViNG CAR<br />
SENO ING CAL<br />
os itive<br />
Negat i ve<br />
Terminal<br />
Use of Jumper Cables<br />
-The sender baltery engine musl be switched off. The<br />
receiver battery main swilch must b€ off. The bodies<br />
of both lhe cars musl not be in coniacl with €ach other<br />
(risk oJ sparks foming when the cables are connected<br />
up.)<br />
1 . Connect the red cable from sender battery plus terminalo<br />
receiving battery plus post.<br />
2. Connectonend oflhe blackcabte to aground point<br />
some distance lrom lhe receiving batlery. Suitabty<br />
lhe receiving banery's ground connection should<br />
also be on the body or on the engine.<br />
-Slart the carof lhe sender battery <strong>and</strong> idte it at about<br />
1500 rpm for several minules.<br />
-Starl the car of the receiver battery.<br />
F ITT ING CAELES<br />
NOTE! Do not alter the position of the cabte<br />
clamps du ng lhe starting attempt otheMise<br />
lhere is risk of spa*s forming.<br />
Do nol bend over the batteryl<br />
-Remove the cables in precisely the reverse order to<br />
fltting them.<br />
R E]'1OV<br />
CABLES<br />
2<br />
Gtoup 31<br />
Battery
Specifications<br />
Group 32<br />
Alternator<br />
Alternator<br />
Tlpe<br />
Output<br />
\,4., sppFd ..<br />
Specifications<br />
13.0-15.0V<br />
55 Amps<br />
225 t/s<br />
= 13500 rpnr<br />
I<br />
Drection of rotdt on ..<br />
qoro. e_g e alrpr'3ro_ .. .... ....<br />
SID 'rngs. r ni-Jm didmele.<br />
ra: o-r oI o-no<br />
Stdtor Loil res stdnce<br />
Foror corl resrstance<br />
O-rpu esl<br />
Clockwise<br />
1:2<br />
31.5 mm<br />
0.O3 mm = O.OO12<br />
O.14 ohm + 10%<br />
4.O ohms + 10%<br />
48 Amps at 3000 rpm, 13.2 Vohs <strong>and</strong><br />
24oC ambientemperature<br />
Voltage Regulator<br />
Tlp. .. ...<br />
Colt'o. vordge ol 40OO pr<br />
Load ru r.rr owo 'wo co.racrs<br />
Control range, belween upper <strong>and</strong> lower contact sets .... .... ...<br />
Description<br />
13.9-14.8 Volts<br />
4511 Amp<br />
O O.4 Vohs<br />
3-8 Amps<br />
I<br />
o<br />
1. &ush holdor<br />
2. M6gn6iizing Diodes<br />
3. Slip ng 6nd shield<br />
4 B€crmd (slrien diodas)<br />
T1. allernaror rs a th'e" pl'ase sld. Lonnpcl.d a -.<br />
nar n9 un r. lhe Fcl 'ie' rs burl rnro _l_e s o r' q "nd<br />
shield <strong>and</strong> consisls of six silicon diodes. Aso ho{rsed<br />
n rhe slip rng end shield are three so called mag<br />
ne /rng dodFs. wl_cl repd rhP rred via ll"e vor;9.<br />
An a rF ' ator has a rota!.S ,re d .orl(ro_orl ard . sld.<br />
tionary main coil(stator). The rotor is a 12 pole clawpole<br />
rype w,rh rl"e l,ed Lo' 'ed ac oss lwo slip rings.<br />
Since the ahernator outpul s self-limited (max. 55<br />
amps), a simple regu atoris used. t conlrols the vo tage<br />
Gtoup 32<br />
Ntomator<br />
Specitications 3
Design<br />
New Features<br />
A new type SEV altemator (SEV P/N 71655302) is now<br />
being slocked under Volvo P/N 5462893€. The new<br />
allemalor can be identilied by a black plastic daode<br />
guard <strong>and</strong> a mold€d wiring hamess assembly. (See<br />
Piclure Below). When replacing the older style SEV<br />
allernalor with the new version,lwo minor changes lo<br />
lheoldwiring hamess are rcquired. Reter to lhe instructions<br />
below.<br />
After old style allemalor is removed <strong>and</strong> in-car hamess<br />
js disconnected, proceed with the operationshown<br />
during inslallation oJ lhe new allernator.<br />
1 . Connecl in-car harness leads to terminals at back oi<br />
new alternator as followsi<br />
a. Heavy gauge, rcd twin<br />
lead 10 B+ teminal.<br />
b. Single red lead to D+/61 teminal.<br />
c. Black lead to D- teminal.<br />
.)<br />
d. Use elecvical lape to securely fasten green DF lead<br />
Nole: Make sure ihe lead is well insulated <strong>and</strong><br />
I<br />
I<br />
2, Carelully tape the old in-carwiing harnessconnector<br />
piug as shown.<br />
The connectorplug irom lhe new molded alternalor<br />
harnesshould be plugged inlo the regulalor.<br />
Nole: Do not under any circumslances cut any oJ<br />
the old leads since they may be needed for<br />
Juture altemalor installations.<br />
4<br />
Gtoup 32<br />
Altemator
Design<br />
Altomator<br />
When $e ignition is switched on, current nows<br />
through the charging warning lamp ro terminal D+<br />
on the voltage regulator. Via the regulaior, rhe current<br />
rs conducred rhrough the roror corl ro ground.<br />
02s-0,40mm<br />
Voltaga regularor<br />
Regubtor contact for 3. Spring rensioner<br />
ower conro! range 4. Spring upper seciion:<br />
2. Regulalor contacl tor<br />
upper contol range<br />
lf the vohage ises in spite of thig rhe armature on<br />
the voltage coil is pulled furtherdown so that rhe upper<br />
contol range contacts close, Thus ihe rotor coil is<br />
grounded at both ends which causes the voltage ro<br />
d.op rapidly. The cycle is repeated continuously so<br />
that the voltage is maintained constant.<br />
5Wr<br />
t_-!<br />
When the roior starts rotating, ahemating current is<br />
formed in the stator. Most of the current is recrified<br />
by the positive <strong>and</strong> negative diodes <strong>and</strong> is conducted<br />
via B+ on the alternator ro the battery. A small part<br />
of the currenr is rectified by the exciter diodes <strong>and</strong><br />
is led via 61/D+ to the voltage regulator <strong>and</strong> rhen<br />
to the rotor coil. This cycle is repeated until the regulating<br />
voltage has been reached, at which point the<br />
lower controlrange coniacts on the voltage regulator<br />
open <strong>and</strong> field current must oass a control resistance.<br />
lo0o500060007ooo<br />
AIIEBNAIOR BPM<br />
Arr€matoroutputcurue f:j9<br />
A = amps<br />
RM = ahernator speed/mi.ute<br />
The alternator maximum outpui is 55 amps. Top speed<br />
is 13500 rpm.<br />
Group 32<br />
5
Diagnosis<br />
Service Diagnosis<br />
Condition:<br />
Warning lamp does not light with engine off.<br />
Action<br />
Test lamp (12 volts 2 wattst between B+ <strong>and</strong> 61/D+<br />
on alternator lights.<br />
Test lamp between B+ <strong>and</strong> 61/D+ does not light.<br />
Test lamp between 61/D+ <strong>and</strong> ground lights.<br />
Test lamp between 61/D+ <strong>and</strong> ground gives a weak<br />
light. Remove the plug at the regulator <strong>and</strong> connect<br />
an ammeter between B+ <strong>and</strong> DF on the alternator.<br />
O amp<br />
2-2-5 amps<br />
Possible cause<br />
Warning lamp burned out or open circuit to D+ on<br />
regulator.<br />
Positive diode shorted.<br />
Worn brushes, oxidized slip ings on breakage in rotor<br />
Open ckcuit in regulator or in lead DF from regulator<br />
to DF on alternator,<br />
oi'<br />
o<br />
Condition:<br />
Warning lamp lights with engine oftor running.<br />
Action<br />
Disconnect the plug at the regulator<br />
Control lamp still lights.<br />
Warning lamp goes out- Re installthe plug i. the rcgulator<br />
<strong>and</strong> connect an ammeter between B+ <strong>and</strong> D+<br />
Possible cause<br />
Circuit shorted between D+ on the regulator<strong>and</strong> 61/D<br />
Less than 2.0 2.5 Ampsl<br />
More than 2.0-2.5 Amps:<br />
Condition:<br />
Defective regularor (brcakage).<br />
Circuil shorted between DF on regulator <strong>and</strong> DF on<br />
Coil shoned.<br />
Warning lamp lights with 6ngin6 off bu1 starts to give a weak light<br />
when€ngine is running.<br />
I<br />
0.<br />
Actionr<br />
Test lamp beiween B+ <strong>and</strong> 61/D+ on the alternator<br />
wirh the engine runningl<br />
Does not light,<br />
Gives a weak light.<br />
Install new regulator.<br />
Test lamp between B+<br />
<strong>and</strong> 61/D+:<br />
Does not light.<br />
Gives a weak light.<br />
Possible cause<br />
Transition resistance in the charging circuit or in the<br />
lead to the waming lamp.<br />
Defective regulator (overcharging of the battery)or de<br />
fective ahernaior (insufficient charging oflhe battery).<br />
Removed regulator defective.<br />
Defective alternator.<br />
6<br />
Group 32
Diagnosis<br />
Check ol charging system<br />
General orientation<br />
Connections at altemator<br />
FED wlFE. TO CHAFGTNG CONTROLIGTIT<br />
ir<br />
iiJ"<br />
ro<br />
D<br />
o<br />
'1.,,<br />
o<br />
t FED or aRowri<br />
PLUG AT ALTERNATOR WITH WIFE<br />
LOOM TO VOLTAGE FEGUIATOF<br />
_.._.i...t_<br />
Connections al voltage regulaior<br />
idenlifcalion of wtres n plug<br />
RED o. BFOWN<br />
D+<br />
DF<br />
GREEN or WHITE<br />
Procedures<br />
Check drive bell tehsion<br />
Defledon at mdpont sholJd be approx. 5/16'(8<br />
Gtoup 32
Check batlery condition<br />
A2<br />
A battery in good condition should be used fo' rhe<br />
I<br />
Check that batterY terminals are clean <strong>and</strong> tighl<br />
Reler 1o Group 31 for checking battery. The battery<br />
should be in fully charged <strong>and</strong> good condilion lor the<br />
tollowing lesls.<br />
A3<br />
Switch on ignition<br />
Charging light on instr!ment panel should illuminaie<br />
a. Light illuminates. go to A4.<br />
b. Light does not illuminate: discon.ect plug al vol<br />
rage regulalor <strong>and</strong> ground red wire D+.<br />
- Light illuminates: go to 44<br />
Light does not illuminater check wires, control<br />
light bulb etc.<br />
A4<br />
Connect a voltmeter to alternator B+ <strong>and</strong><br />
grouno<br />
I<br />
I<br />
I<br />
I<br />
I<br />
I<br />
//<br />
I<br />
I<br />
I<br />
\<br />
VOLT-I']ETEF<br />
All lighls <strong>and</strong> accessodes switched off. Run engine al<br />
approx. 2000 rpm for one minute, then read voltage.<br />
a. Voltage reading coflecl go to ,q5,<br />
b. Reading higher than 14.4 volts: go to 410-<br />
c. Reading lovver than 13.0 volts: go to A10.<br />
(Refer to s€ction Tesling the Voltage Regulatol for<br />
charging rats).<br />
A5<br />
0)<br />
,<br />
Voltmeter stillto alternator B+ <strong>and</strong> ground<br />
Switch on blower, rear window heater <strong>and</strong> headlighl<br />
BED or BBOWN<br />
\\s<br />
Run engine at 2OO rpm for one minute<br />
Vollage reading should be less than O.7 volt lower<br />
GREEN of WtllTE<br />
a. Less than 0.7 volt: go to A6.<br />
b. More than O.7 volt: go to A1O.<br />
I<br />
Group 32
T<br />
Diagnosb<br />
A6<br />
Connect voltmeter to alternator Bi <strong>and</strong> battery<br />
plus<br />
Switch on headlighr uppe. beams. Run engine ar approx.<br />
1500 rpm. Voltmeter reading sho! d be O.O-O.3<br />
N<br />
a. Less than 0.3 vok: go ro A7.<br />
b. IMore than 0.3 vot:<br />
ch€ck wire from a lernator 8+ io starter motor<br />
to batiery pl(]s for loose or corroded connecton.<br />
FED or BFOW{<br />
-xF<br />
Connect voltmeter to battery minus <strong>and</strong> engineground<br />
Swnch on headlight upper beams. Run eng neat 15O0<br />
Voltage reading should be 0.0-0.2 voll.<br />
a. Less rhan O.2 vok, go to A8.<br />
b. Mo'e ll_d.0.2 volr. chFck wre l.om ba ery mr-us<br />
to eng ne ground to alternator ground for<br />
or corroded connectons.<br />
GFEEN orWHm<br />
A8<br />
Charging system should be correct if all previous<br />
tests have proven satistactory.<br />
Gtoup 32
With incorrect system test readings<br />
A9<br />
Re{erence to A4<br />
{Voltage reading higher than 14.4 volts)<br />
I<br />
/l<br />
'/.-_'<br />
I<br />
Connect voltmeter to D+ <strong>and</strong> B+ on alternator.<br />
Run engine at l5OO rpm.<br />
a. Vollage reading exceeds 0.5 volt ahernator must<br />
be defective <strong>and</strong> should be replaced or repaired.<br />
b. Voltage reading lower than 0.5 volt voltage regulator<br />
should be replaced. Recheck.<br />
At0<br />
Reference to 44<br />
(voltage reading below 13.0 volrs)<br />
of referenoo to a5<br />
(voltage drop more than O.7 voh)<br />
Connect voltmeter to O+ <strong>and</strong> B+ on alterna-<br />
Bun engine at 1500 rpm.<br />
a. Voltage reading exceedsO.5 volt:alternaror must<br />
be defective <strong>and</strong> should be replaced or repaired.<br />
b. Voltage readins below O.5 voh: so ro A11.<br />
Prior ro this test, carefully check that wires from atternator<br />
to voltage regulator are in corect order. No<br />
shons, no grounds, no loose connections.<br />
Atl<br />
Check rotor circuit resistance<br />
I<br />
I<br />
I<br />
I<br />
I I<br />
OlIU.UETEB<br />
Disconnect wire DF (plud at vohage regulator. Use<br />
ohmmetertocheck rotor resistanc€. Correct resistance<br />
is approx.4 ohms. Howevet depending on brush conditlon,<br />
resistances of 4-10 ohms might be considered<br />
Run engine at 1500 rpm.<br />
b.<br />
qoror ressrance checks our coiiect: go to 41r.<br />
Botof resistance checks out lower than approx<br />
i<br />
BLACK WIRE<br />
rolor is orobably defectrve. When reDaiflng. checl<br />
rotor resislance direcrlyon sliprings lo venfytautt.<br />
Rotor r esr$ ance consrderably hrgher than app'ox.<br />
4 ohTs clea' ahernaror brushes <strong>and</strong> shp rings.<br />
10<br />
Gtoup 32
Diagnosis<br />
(<br />
I<br />
\<br />
JUMPEA W|FE<br />
,.-_-\<br />
\--<br />
DF<br />
GREEN o. WHIIE<br />
D+<br />
RED WIBE<br />
At 2<br />
Full Fielding Test<br />
This is alullcharge test ol alternator, airnsd atdefinitety<br />
separating allernalor problems from voltage regutator<br />
a. Remove the plug at the vollage regulalor <strong>and</strong> connecl<br />
a jumperwirc between D+ <strong>and</strong> DF as shown.<br />
/a<br />
Connect voltmeter toalternator B+ <strong>and</strong> ground<br />
bower, rear wrndow heater. head ighr upper<br />
Run eng ne at 2OOO fpm.<br />
(<br />
VOLT-METEF<br />
d.<br />
Pe"d, 9" I gr er rhcn 4.O rol,s rndrudre aller<br />
a,d oa\eoJert\ volragF rPgulator<br />
sho!ld be replaced.<br />
Beadings below 14 volts, usually considerably<br />
lose:indicare rl-e dlrqnj o' ,no-lo b. epa, -o<br />
or'eodnedr'. r1e. drode>o F ros ilplyar,arlr.<br />
o<br />
\\s<br />
CAUTION: Do notrun engine higherthan 2000 RPN4 or<br />
lor lengthly pedod-it could damage the<br />
battery <strong>and</strong> other electrica circuits due lo<br />
High Voltage.<br />
GREEN or WHIIE<br />
Group 32<br />
Altematot<br />
11
Removing altenator<br />
S€rvice Procedures<br />
Special instructions lor work on alternator equipment<br />
1. When replacing or installing banery. make surc lhal<br />
proper polarity is observed, A misconnected baltery<br />
will immediately ruin the r-ectifers.<br />
Neverrun lhe allemalorwith lhe main ckcuit broken<br />
The battery <strong>and</strong>/or altemator <strong>and</strong> regulalor leads<br />
must never b€ disconnecled whrF lhe engne is<br />
running.<br />
3. No attempt should be made to polafize the al-<br />
When fastcharging battery in vehicle disconn€ct lhe<br />
battery ground cable.<br />
5. When using an extra battory as a starling aid, connect<br />
it in parallel.<br />
When arc welding on the vehicle, disconneci the<br />
battery gound cable as well as lhe B+ lead on the<br />
alternator <strong>and</strong> lhe plug al lhe voltage regulalot. The<br />
welding unitshould always beconnectedcloseto the<br />
0l<br />
Removing alternator<br />
0(<br />
BI<br />
Remove alternator<br />
a. Disconnect wires at alternator.<br />
b. Remove bolt for tensioner bar, hex 13 mm<br />
c. Lift off drive belts <strong>and</strong> lower alternaior.<br />
0),<br />
Remove alternator <strong>and</strong> bracket<br />
ALso remove the tensioner bar.<br />
B2<br />
c<br />
r<br />
Hex 13 mm<br />
12<br />
Group 32
Diassem b li ng d I tematol<br />
Disassembling alternator<br />
Remove nut<strong>and</strong> washerfrom pulley. Pulloff pulley <strong>and</strong><br />
cl<br />
o<br />
Bemove brush holder retaining screws.<br />
Remove blush holder.<br />
C3<br />
Remove nuts <strong>and</strong> bolts connecting akernator end<br />
Remove front end shield from stator <strong>and</strong> rear end<br />
Press out rotor lrcm lronl end shield.<br />
Note: old type shown.<br />
Gtoup 32
Testing<br />
Remove the screws retainingthe fronl ball bea.ing.<br />
Press out ihe bearing.<br />
tu,*<br />
C6<br />
Femove nuts for p us diode plate. Lift up <strong>and</strong> bend<br />
0<br />
c7<br />
Solder loose the staror connections frorn the terminal<br />
0<br />
NOTE: Aways use a heat sink when soldering <strong>and</strong><br />
soldering around diodes to prevent damage to<br />
Test of disassembled alternator<br />
C8<br />
Stator<br />
Test stalor insulation.<br />
Connect a 40 Voll alternating cuffeni across ground<br />
<strong>and</strong> phase termrnal.<br />
Correct resistance: indeiinite.<br />
c9<br />
Test stator coil resistance.<br />
Connect the iest instiurnent across the phase termi<br />
0<br />
O<br />
Conect resistance: O.14 ohm + 1O%.<br />
-.<br />
14<br />
Group 32
Testing<br />
Rotor<br />
c70<br />
Test rotor insulaton.<br />
Conned a 40 Volt alternaring cunent across roror<br />
grolnd <strong>and</strong> a slrp ring.<br />
Corred resistance: indef nite.<br />
o<br />
o<br />
cl l<br />
Test rotor coil resistance.<br />
Connect the test instrument across rhe slip rings.<br />
Corect resstance 4.O ohms + 10%.<br />
Sllp rngs which are burned or damaged should be<br />
turned in a athe. use tail stock.<br />
Slip rng minimlm diameier s 31.5 mm = 1.3'.<br />
Use a dia indicator to check out-of-round. max mum<br />
0.03 mnr = 0.OO12".<br />
Brush holder<br />
ct 2<br />
Use 40 Voh altemating cuiienr.<br />
Correct r€ad ng: indeiinite<br />
Check that minimlm brush ength is 14 mm = O.55'.<br />
Group 32<br />
15
Replacing defective rectifier diodes<br />
Diodes<br />
Test rhe diodes with<br />
ct3<br />
NOTE: Although Bosch testing equipment is shown,<br />
similar equipmenl is availabb from domeslic<br />
manulaqurers.<br />
Assembling alternator<br />
cl4<br />
lnstall the stator in the slip ring end shield. Solder the<br />
stator wires to the terminals.<br />
Install the plus diode plate assembly.<br />
c15<br />
Grease the drive end ball bearins with srease Bosch<br />
Ft 1V4 {orequivale.t).<br />
Insta I bear ng assembly in the drive end bearlng shield.<br />
O<br />
O<br />
16<br />
Gtoup 32
,<br />
Assembling altemator<br />
Press drive end bearingshied onto the rotof.<br />
lnstal rhe spacer nng.<br />
c16<br />
cl7<br />
Grease the slip rlng €nd shield bearing wth grease<br />
Bos.r' Fr 1 V 35 o' Loiiespondrng. Coal the sLip rinq<br />
end shield bearing seal with N/lolykote. Assemble the<br />
Do o forg.r ro as a.l rl-e sonnq o rl--.[p aq e_d<br />
Assemble alternaror compolelt\. -oro-e rcrarrlg<br />
screws to 3.6 4.3 lb.ft. = 5.G-6.9 Nm <strong>and</strong> nuts to<br />
3.3 4.3 Lb.ft. =.4.5-6.0 Nm.<br />
InsraLl rhe brush holder.<br />
ct8<br />
cl9<br />
Installkey, fan, spacer <strong>and</strong> pulley. Position the washer<br />
<strong>and</strong> lorque the nut to 29 lb. tt. = 40 Nm.<br />
Test on a lest bench before installalion.<br />
c20<br />
Gtoup 32<br />
17
lnstalling ahenatot<br />
Alternator terminals<br />
L DF To field winding<br />
2. 61/D+ From magnerizing<br />
3. B+ To batrery<br />
c21<br />
Installing alternator<br />
DI<br />
Install altemator with bracket <strong>and</strong> tensioner<br />
DAr<br />
Hex 13 mm<br />
0<br />
Installdrive belts<br />
Install bolt for tensione. bar. Adjust<br />
D2<br />
Cl<br />
f(<br />
Old allernalor shown,<br />
18<br />
Group 32
Tesnng voltage rcgulator<br />
Testing voltage regulator<br />
-{:-._:<br />
llilN<br />
Charging Regulator<br />
Electronicharuing regulalors have now been Introduced<br />
as spare parts lor cars which do nol have lhe<br />
thr€e-teminal clnnection contact on the regulalor.<br />
These nsw regulato|s can be easily identilied by lhek<br />
grey cover, The old type regulators have black covers.<br />
ldentitying the regulEtor<br />
with<br />
Sev P/N 72610102<br />
diode (ed<br />
plate)<br />
Magnetizing<br />
diode<br />
Sev P/N 726-10002<br />
Marking<br />
Spot<br />
Blue or<br />
Black<br />
Spol<br />
1259303-4<br />
12593026<br />
ldentitying the alternator<br />
Allemators walh protectivg diodes have a red plate on<br />
Those allernalors which do not have a red plate on the<br />
rear end are fitled with magnelizing diodes.<br />
r||gnetlzlng Olodo3<br />
Group 32<br />
Altematot
Test ing vohage rcg u la tol<br />
Testing voltage regulator<br />
(On test bench or in vehicle)<br />
EI<br />
Connect the regubror to an alternator n good condition.<br />
c.<br />
D.<br />
E -'l<br />
L-<br />
L JI!<br />
H 'l<br />
t-<br />
'<br />
D<br />
li.ii!<br />
0<br />
Wiring diagramfortssting voltag€ regulator<br />
0,25-A,1O.r'm<br />
E. Ammeter 0 50 amps.<br />
Voh€se lamp 12 vohs F. Fesuaror resistance<br />
Conlrol lamp 12 vo rs, G. Batery 60 amparehours<br />
Voltage regulator -<br />
L<br />
2.<br />
Fesularor contacr for 3. Sprins rensoner V<br />
rower conrrorange 4. spring upper secrion<br />
Fegulalor contacl Jor Sreet spring<br />
upper conlrol Enge Lower seclioni<br />
Br meta spfng<br />
(<br />
-24 .2o .4O<br />
r80<br />
Run the alternatorat 5000 rpm (alt. speed) or2500 rpm<br />
(enginespeed) for 15 seconds. Read the voltage on the<br />
voltmeler. Wilh no load on lhe allernatof, the vollmeler<br />
should read 13.1-14.4 volts wilh the regulator ambient<br />
lemperalure at 25rc (77"F).<br />
Load lhe altematorwilh 10-15 amps, such as switching<br />
on headlights 10 ripper beam, <strong>and</strong> read thevollage. The<br />
voltage should still read betwe€n 13.1'14.4 volts, bul<br />
must notdrop more than ,4 volts less than the unloaded<br />
specification.<br />
For exact voltage at ambient lemperaturesee diagrams<br />
opposite.<br />
0<br />
0<br />
20<br />
Group 32
Testing voltage reg u latol<br />
Testing voltage regulator<br />
lon test bench or in vehicle)<br />
El€ctronlc F€gulalol!<br />
llvollage isoulsidespecificationlhe regulalorshould be<br />
replaced. lf ihe voltage regulator is to be tssled morc<br />
accuhtely, installit in thevehicle which should lhen b€<br />
d v€n for approx, 45 minules at speed above 30 mph.<br />
The €ason lorlhe diving is to letlhe regulator obtain<br />
cofiecl wo*ing temperature.<br />
NOTE: The vehicle must be driven. lt is not sufficient iusl<br />
to have the engine idling.<br />
lmmediately after, or prelerably during driving, measure<br />
the vollag€ between B+ <strong>and</strong> D on the altemator. The<br />
engine should bs tuming over al i50O rpm, which is<br />
approximately tfie same as 3000 lpm allernator speed<br />
whenmeasu ng. With regulator<br />
ambient temperature<br />
ol approximalely 25'C (7rD the voltage should be<br />
according to diagrams. Please note vollage variations<br />
according lo ambient lemperalures.<br />
-20-10<br />
0 +to +20 +30 +{o +50 +60 oc<br />
0 +lri +32 +tO +68 +85 +lo4 fl22 +140 oF<br />
Gtoup 32
Group 33<br />
Starter Motor<br />
General Information<br />
Specifications<br />
The starter motor is rnounted on the fiywheel housing<br />
on lhe left side of the erg ne. I is a a pol€ ser€s<br />
wound motor. The pinion on the starter motor armature<br />
shaft moves axally to engage the f ywheel r ng<br />
gear. The pinion is controlled by a solenoid.<br />
TJr_ing the rgn rion ley ro sraflrrg posrron cLls rr<br />
the soenoid, causing the armature ln the soenoid to<br />
be drawn I ;nd lhe slarre. pin on ro e_gdge rhe .i.9<br />
gear on the engine flywheel/drive plate. When the<br />
armatLrre has moved a ce.tain distance, the contacts<br />
for ihe main curfent close <strong>and</strong> the starter rnotor starts<br />
running.<br />
0<br />
0<br />
f'(<br />
(<br />
(<br />
Designation ..-......... ................. Bosch<br />
Direction of rotation<br />
O!iput 810 W ( 1.1<br />
I<br />
12V<br />
I<br />
22<br />
Group 33<br />
Staftet Motol
Mechanical test specif icat;ons<br />
Armarure end I'oal .. ..<br />
Brush sping tension.<br />
DEranc" hor p,nron end ro ,ing gear race<br />
F iclondl rorque oI 'olor brak-<br />
Pin o idling Io que . ..<br />
Backlash<br />
Cornmuralor m. drd-ere' . ...<br />
Brush min. length<br />
Etecrrical test specif ications<br />
1-.5 Volrs ard 30 50 Amps<br />
90 Volts a d I85 220 A-ps<br />
7 Vohq a_d 400 490 Aaps ...<br />
C-r ir rokage<br />
Be'easevollage.......<br />
0.01 O.03 mm<br />
t4 t6 N<br />
1.2-4.4 mn<br />
25 40 Ncm<br />
IrL l8 Ncm<br />
0.3-0.5 mm<br />
2.12<br />
33.5 mm<br />
13 mm<br />
97 130 ./s<br />
11.522.5<br />
t/s<br />
0 r/s<br />
M n I Volts<br />
Less than 1 v.<br />
0.002 0.012-<br />
3.1 3.5 tbs<br />
o.o47,0.173<br />
2.17 3.81 b. n<br />
1.20 1.56 b. n<br />
0.006-o.oo<br />
r 318"<br />
o.52'<br />
s80O 7800 rpm<br />
1050 1350 rpm<br />
O rpm<br />
o<br />
ie<br />
nt,<br />
t:<br />
13<br />
14<br />
\15<br />
\o<br />
7 26<br />
\<br />
e 18 17<br />
15. Connuroror.nd riome<br />
3 T.minorlor bd!.ry reod<br />
9. Coniedion l.dd ro rield<br />
Group 33<br />
Staftet Matol<br />
23
-T<br />
Special tools<br />
Renoval, disassembly<br />
Special Tools<br />
EF 2122 Sleeve 6nd drifl for inst.lins cnclip<br />
EFAL 3 Smoothing drift<br />
FG 2649/ 1 Sr.oothing drift<br />
EF 2649 Drift for installing bushing<br />
ili<br />
Service Procedures<br />
Removal<br />
0<br />
0 (<br />
Disconnect the battery ground cable.<br />
Disconnect the leads from the staner motor.<br />
A3<br />
Remove the bolts which hold the starter motor to the<br />
timlng gea. housing.<br />
tl<br />
Disassembly<br />
I (<br />
Rernove the two screws retaining the cover-<br />
8l<br />
Gtoup 33<br />
24 starter Motor
Disassembly<br />
B2<br />
Bemove lock ring <strong>and</strong> spacerings.<br />
Remove the two screws retaining the corn mutator end<br />
o<br />
B3<br />
Lift up the brushes.<br />
Remove rhe brush holder bridge lrom the armature<br />
shaft.<br />
The minus brushes are retained togeiher with the<br />
brush holder bridge.<br />
The plus brushes stay with the field coils.<br />
B4<br />
Remove the nLrt connecling the field coil to the so_<br />
Remove rhe screws rer arni"g the so eroid to the prn o'<br />
Remove the solenoid.<br />
B5<br />
Remove ihe stator assembly from ihe pinion end<br />
Group 33<br />
Stafter Motor<br />
25
Examination<br />
B6<br />
Remove rubb€r stop <strong>and</strong> steel washer<br />
Remove the pivot pin for the pinion levsr. Lift out armature<br />
assembly from the pinion drive shield.<br />
B7<br />
Use 6 fitting sleeve to remove the end stop.<br />
Remove lock ring, stop <strong>and</strong> pinion. (<br />
(<br />
Examination<br />
B8<br />
Check the armature for damagss <strong>and</strong> wear. Replace<br />
the armarLrre if the shaft is worn or warped.<br />
Turn the commutator in a lathe if it is scorsd, pitted<br />
Minimum diameter is 33 mm = 1.3OO .<br />
Max. permitted out-of-round is 0.08 mm = O.0OO32<br />
'.<br />
B9<br />
Usea Mica undsrcutter to undercut 0.4 mm = 0.008".<br />
lf no machine is available, us€ a properly ground lrack-<br />
0 (<br />
26<br />
Group 33<br />
Starter Motor
Examination<br />
Bto<br />
c<br />
Bll<br />
Use a "Growler" to check the armature for shorts.<br />
Switch on <strong>and</strong> hold a hacksaw blade close to the ac<br />
mature. lf the blade vibrates in any position, one of<br />
the following faults can exist:<br />
- commutator shorted<br />
Replace ihe rotor if faulty.<br />
812<br />
lJse 40 Volts AC cufi entoravailable equipmentlo check<br />
the stalor coil insulation.<br />
(0<br />
Bt3<br />
Check end shields <strong>and</strong> brush holdsr.<br />
Replacs worn or damaged parts<br />
No more than 0.005 (O12 mm) bushing play is per-<br />
Check other pans <strong>and</strong> replace if worn or damaged.<br />
The lock ring should always b3 r€placed as it might<br />
have been damaged or lost its tension when removed,<br />
Group 33<br />
Staftet Motor
Installing bushings<br />
T m-<br />
Before installation,<br />
Bt4<br />
new bushings should be immersed<br />
in oil, Bosch 01 1 V 13 or similar, for at least 1/2<br />
hour. Otherwisetheir seNice time willbe considerably<br />
The bushings are made to correct dimensions <strong>and</strong><br />
must not be machined. Any machining will block the<br />
pore holes which in turn obstructs the lubricating abil<br />
Use Bosch special tool EF 2649 to press out the old<br />
bushing.<br />
Clean the hole <strong>and</strong> remove any burrs.<br />
Use same aosch tool to press in the new bushing.<br />
Replacing field coil<br />
Bt5<br />
lvlark poles <strong>and</strong> housing. The poles should be reinstalled<br />
in exact positions.<br />
Place the siator in a clamping device, Bosch EFAW9<br />
or similar, <strong>and</strong> slacken the pole screws.<br />
Remove the stator from the clamping device.<br />
Remove poles <strong>and</strong> field coils.<br />
(<br />
(<br />
816<br />
Position the newfield coils<strong>and</strong> the poles in the stator.<br />
Heat the f ield coils slightly bef ore installation. Orientate<br />
the poles according to markings.<br />
a<br />
,<br />
(<br />
1<br />
..JI-J<br />
28<br />
Group 33<br />
Stafte, Motor
Replacing brushes<br />
-)-: ",,<br />
-"''<br />
Bt 7<br />
Brushes siroder than 9/ 16 = 14 mm should be re<br />
1. Solder loose the brushes from their attachments.<br />
2. Solder on the new brlshes. llse a sufficienty hot<br />
:.- 7.,-11<br />
u; :i,,;<br />
Do not allow any soder to Rrn down in the brush<br />
leads. This would stiffen the leads <strong>and</strong> prohibir<br />
iree movements.<br />
Assembling starter motor +<br />
$E<br />
F@&,<br />
Bt8<br />
Lubricate as shown- Use Bosch lubricanrs or similar:<br />
I FI 2 V3 Applyathin layerofgreaseon insulatLon<br />
washerc, shaft bearing sudaces, spacer<br />
washers <strong>and</strong> lock r ng.<br />
2. 01 M3 lmmersethe bushins n oil 1/2 hour be<br />
fore lnsta lation.<br />
3. Ft 2 V3 Apply generously of grease in the ar<br />
maluregeargu des<strong>and</strong> i thep nion lev<br />
er groove.<br />
4. Ft 2 V3 Apply a thin layer of grease on the shatt<br />
bearing sLrrfaces.<br />
5. 01 1 V13 lmmerse the bushlngs ln oil 1/2 hour<br />
before installalion.<br />
6. Fl 2 V3 Lubricate shifi lever joints <strong>and</strong> solenoid<br />
i.on core with a thin ayer of grease.<br />
lnstall prnion, stop ring <strong>and</strong> lock ring. Tighten the stop<br />
rng into pace with a fitling puLler.<br />
il<br />
llnrr.LnJl<br />
Attach the shift lever to the pinion,<br />
lnstall the armature n the drive end shied.<br />
Install the shift lever pivot stud.<br />
Bt9<br />
Group 33<br />
Starter Motor 29
AssmW<br />
820<br />
lnstall steel washer <strong>and</strong> rubber stoo.<br />
Install solenoid.<br />
821<br />
@<br />
(<br />
o<br />
(<br />
822<br />
{(<br />
{(<br />
823<br />
Install brush holder bridge <strong>and</strong> brushes.<br />
Gtoup 33<br />
Starter Motor
Install commuralor end shield.<br />
Installthetwo long screws that hold rhe staner motor<br />
o<br />
825<br />
Installspacer washers <strong>and</strong> lock ring. Thearmature end<br />
play should be 0.002-0.006- = O.05-O.3 mn<br />
Install sufficient amount of washers to keep the end<br />
play within these limits.<br />
Attach the smallcover over lhe shaft end.<br />
Installing starter motor<br />
Connect the starter motor leads.<br />
Feconnect the battery ground cable.<br />
Stan the engine to check the starter motor function.<br />
Fi!. L0. Sb'l r hor.r t.roii.ll<br />
L Fr.n 6ct..r<br />
3. To fi.ld windiig<br />
2. Fron isnition *irct' 1. To ilnnion .oil<br />
Gtoup 33<br />
Staftet Motol
_...-!<br />
Specifications<br />
Group 34<br />
lgnition System<br />
Specifications<br />
Tvpe .. .....<br />
Firins order ............<br />
lgnation timing, vacuum unit disoonnoct€d (check engine specificalions) .<br />
Spark plugs (Check 6ngin€ sp€cifications)<br />
cap ... ...<br />
Tighrening rorque<br />
Distributor<br />
Bosch (Check engine spscificalions) ... .... ...<br />
lsnitioncoil<br />
Eosch No,<br />
Bosch No.<br />
Metric<br />
US specs<br />
Ereakerless electronic ignition<br />
13-4-2<br />
0.7-08 mm<br />
20-30 Nm<br />
0221 122 006<br />
0227 100 005<br />
0.028-0.0032"<br />
15-22 tb.fr<br />
I<br />
@(<br />
@l<br />
Centrifugal governor<br />
Toral advance. distibutor degrees<br />
Advance begins at, distibutor<br />
Distributor rpm at 50 advance<br />
9' advance ........ ....<br />
f'rll advance ...........<br />
7.2-1O | / s<br />
15.2-14.3 t/s<br />
23.3-34.5 r/s<br />
40 t/s<br />
430-600 rpm<br />
910- 1100 lpm<br />
14OU2O7O rym<br />
24OO tpm<br />
Retard, dislributor degrees (double for crankshaft degreed . . .. . . .<br />
Retard begins at ....... .... .... .... .<br />
20 rerard al ,<br />
Retard ends al<br />
Consull correct specifcations for Model yoar,<br />
Lubricating distributor<br />
5.Oo t 10<br />
6l-l07 mmFrg<br />
79-129 mm Flg<br />
l5O mm Hg<br />
2.44.3 in Hs<br />
3.1-5.1 in Hg<br />
5.9 in Hg<br />
The only lubrication permitted is applying a couple of<br />
drops of oil on the felt wick in the center of the rotor<br />
shaft.<br />
fll<br />
(<br />
Remove distributor cap <strong>and</strong> rotor.<br />
Lubricate felt wick underoror with a couple of drops<br />
of light oil.<br />
B€careful, do not splash anyoilon the impulss sen-<br />
32<br />
Gtoup 34<br />
lgnition System
D<br />
0<br />
0<br />
\<br />
lr<br />
Group 34<br />
lgnition System 33
Breakerless Electronic lgnition System<br />
General<br />
Two main changes frcm the conventional ignition<br />
1. The breaker poinis are replaced by an induction<br />
type impulse sender.<br />
2. An electronic module has been added. lt is wired<br />
betlveen distributor <strong>and</strong> ignition coil. lt amplifies<br />
the impulses before sending them on to the ig-<br />
Otherlvise the design <strong>and</strong> function is the same as the<br />
conventonar system.<br />
{<br />
(<br />
Specific Functionlnformation<br />
0l<br />
1. lmpulse sender<br />
It is located in the distributor where the breaker points<br />
Insread of closing ard opening an eLecrricircuit. rhe<br />
mpulse sende'opens <strong>and</strong>.loses a magneri circurr.<br />
This induces impulses in a coil (or magnetic pick-up).<br />
The impulse s€ndsr consists of:<br />
Note 1:<br />
When using a distriburor lester, also the electronic<br />
module must be connecled in order to get a distributor<br />
2. coil (magnetic pick-up)<br />
3. armature kotor)<br />
4. permanent magnet<br />
Stator. coil 6nd pemanent magnet are connected to<br />
the distributor housing while the armature is connected<br />
to the disr butor shaft.<br />
Stator <strong>and</strong> armature have as many pole teeth as the<br />
ensin€ has cylinders.<br />
n(<br />
(<br />
Note 2:<br />
When making Cylinder Balancs testing, most instru<br />
ments require that a special adapter be used (or the<br />
engine will die).<br />
34<br />
Gtoup 34<br />
lgnition System
Futiction<br />
The permanent magnet creates a magnelc field which<br />
goes through the stator. The rnagnetic cirorh is clos€d<br />
lvhen ths pole testh are opposita each othe.. The magnetic<br />
circuit is open when lhe pole teeth are separated.<br />
This m€ans that the armature clos€s <strong>and</strong> opens the<br />
magnetic field while it is rot8ring This generates cllr<br />
rent pulses in the diskibutor coil {magnetic pick-up).<br />
Vacuum <strong>and</strong> centdfugal control of lhe dming is per<br />
formed similar to the conventional distributor.<br />
o<br />
2. Electronic module<br />
The electronic module is a solid state design with<br />
transistors. h amplifies the impulses from the impulse<br />
sender. lt also controls the 'dwell angle".<br />
ro<br />
For 240 S6d6, a 1,o g r6istor is l@t6d on thoiirewart<br />
The impulse received from the coil (magnetic pick-up)<br />
in the distributor is converted <strong>and</strong> reinforced in the<br />
electronic module <strong>and</strong> governs the output transistor<br />
which in turn governs the ignition coil primary circuit.<br />
When the pole teeth are in front of each other, the<br />
module output transistor breaks the primary circuil<br />
inducing secondary voltage in the coilto firsthespark<br />
plugs.<br />
The pole teeth have a function similar to that of the<br />
cam bb€s in a conveniional distributor.<br />
NOTE: Ths ignition coilisdesigned specifically for the<br />
breake ess solid state ignition sysrem. lt is identified<br />
by specifications <strong>and</strong> number only <strong>and</strong> cannot be replaced<br />
by other lype coils.<br />
Group 34<br />
lgnition System 35
Diagnosis<br />
ffiH<br />
E<br />
o<br />
o<br />
o<br />
o<br />
r! ^<br />
!;;: :<br />
i:;E: i<br />
ii iii !<br />
..:!5! n<br />
='E:::;<br />
:!:iii<br />
o(<br />
€(<br />
E)<br />
o<br />
-9 Lo<br />
(E<br />
o<br />
-r ri<br />
I t;; :l<br />
. f,-lii=,<br />
: | | giit I<br />
il rd<br />
tia ! :<br />
;:; .: ;<br />
ili t s :<br />
iEE i 1<br />
i':! i ! !<br />
ES:: i :<br />
!!::: a<br />
o<br />
o<br />
IE<br />
o<br />
tt<br />
o<br />
o<br />
-c<br />
o<br />
l,l El<br />
iil rlil<br />
l" llFI<br />
ttll<br />
|l r-l<br />
l,f,-l;; t<br />
lillii;;l<br />
til Eqil<br />
,.(<br />
r-<br />
|<br />
Gtoup 34<br />
36 lsnition Sysbm
Replacing distribut$<br />
Service Procedures<br />
Replacing distributor<br />
AI<br />
Disconnect high tension leads (or capl primsry wire<br />
<strong>and</strong> vacuum hose at the distributor.<br />
Remove attaching bott <strong>and</strong> tift oft distributor.<br />
A3<br />
Rotate crankshaft until No. 1 pisron is at top oeso<br />
cent€r {TDC}.<br />
- The cams willthen pointobliquetyup<strong>and</strong> pulley mark<br />
will b€ at Oo.<br />
Line up rotor<br />
Turn rotor so mark is approx. 600 frcm mark on o|stributor<br />
housing.<br />
Install distributor<br />
Push distributor into position in engine block. Check<br />
that rnark on rotor <strong>and</strong> mark on distributor housino<br />
line up. Install dislnbutoretsining boft, hex 13 mlrl-.<br />
Group 34<br />
lgnhion System
c)-<br />
A6<br />
Install dust cover<br />
Remove rotor, fit dust cover, <strong>and</strong> r€-inst6ll rotor.<br />
Install distributor cap<br />
A7<br />
e(<br />
@l<br />
Reconnect<br />
P mary wire, vacuum Iine stc.<br />
A8<br />
(<br />
/./.'<br />
Set timing<br />
Refer to v€hicle specificatrons.<br />
A9<br />
38<br />
Group 34<br />
lgnition SYstem
Beplacing impulse sEnder<br />
Replacing impulse sender<br />
Ramoval<br />
Unclasp the lock clasps.<br />
Bemove cap. rotor <strong>and</strong> dust cover,<br />
io<br />
Remove vacuum unit ancl clasps.<br />
Caution:<br />
The retaining screws have ditterent lengths <strong>and</strong> if im,<br />
pnoperly placed can project <strong>and</strong> damags moving parts.<br />
Theretore, always place the screws logelher with the<br />
componenl to which they belong.<br />
B3<br />
Rsmove the screws securing the contact.<br />
Removethe contact by pulling it carefully straight out.<br />
o<br />
io<br />
84<br />
Remov€ ths screws retaining ths impulse sender plat6.<br />
I<br />
Group 34<br />
lgnition System
Replacng impulse 'endel<br />
Remove snap ring <strong>and</strong> shims<br />
Lift off the armature <strong>and</strong> the small lock Din.<br />
B6<br />
Use sn6p ring pliers to remove the snap ring.<br />
Lift up the impulse sender <strong>and</strong> plate.<br />
87<br />
88<br />
Remove thr€e screws <strong>and</strong> replace impulse sendet.<br />
40<br />
Gtuup 34<br />
lgnition System
Replacing impulse setd]aii<br />
B9<br />
lnstallation<br />
Attach the impuls€ sender to the ptate.<br />
The connector pins should be ptaced opposite abovs<br />
the attachment sar lor ths impulse s€nder plate.<br />
Install impulse s€nder.<br />
S€cure it with ths two screws.<br />
hstall sn6p ring.<br />
Bto<br />
Btl<br />
Install the armature.<br />
Th€ slot should be opposit€ the dge on the distributor<br />
shaft.<br />
Fit the lock.pin so that the lift faces the dg€ on the<br />
distributor shafL<br />
OtheMiss tha lock pin may be shear€d off.<br />
hstalt shims <strong>and</strong> snap ng.<br />
Bt2<br />
Gtoup 34<br />
lgnkion System 41
Replacing impulse sendel<br />
813<br />
R€connect the wir6 conn€ctor <strong>and</strong> tighten the screw.<br />
Install clasps <strong>and</strong> vacuum uniL<br />
Bt4<br />
Install dust cover, rotor <strong>and</strong> cap,<br />
R15<br />
i/r<br />
t\<br />
Check distlibutol<br />
Bt6<br />
Rotats thg distributor shaft s6v6ral tums in both directions<br />
It should rotate freely <strong>and</strong> without any nois€ or s€izure.<br />
The only resistanc€ which may occur is the littl6<br />
stiffnss caused by the magnet in the impulso send€r<br />
wh€n the teeth pass each oth€r.<br />
42<br />
Gtoup 34<br />
lgnition System
'v<br />
Llghts, 12 V<br />
Headlights<br />
244-245<br />
DL 4D Wagon'<br />
US bulb No.<br />
5Ya" Typ€ 1<br />
5%" fype 2<br />
S€aied Beam<br />
Headlighls<br />
242, GI<br />
7" rype 2<br />
Fosition Lights, tiont 67<br />
Tum Signals, front 1073<br />
Tum Signals, rear 1073<br />
Tailljghb<br />
67<br />
Stop Lighls<br />
1073<br />
Back-up Lighls 1073<br />
Group 35<br />
Lights<br />
Specifications<br />
Powor Sockel No. ot bulbs<br />
5w4cp Balss<br />
21wl32cp Bal5s<br />
21wl32cp 8a156<br />
5w4cp 8a15s<br />
21wl32cp Ba15s<br />
21wl32cp Balss<br />
Side lvlarksr Lights 57<br />
3wlzcp<br />
The following bulbs may be obtained from a Volvo dealefi<br />
S 8.5<br />
Socket<br />
1,2 W w 't.8 d<br />
Re3r Ash Tray Light<br />
License Plate Light<br />
lntsrior Light<br />
Glovs Locker Light<br />
Instrument Pansl Light<br />
Control Panel Light<br />
Shift Positiong Autom.<br />
Engine Compartment Light<br />
Control Lamps<br />
Charging<br />
Turn Signals<br />
Brake Failure<br />
Parking Brake<br />
Headlights<br />
Oil Pre:sure<br />
Overdrive<br />
Warning Flashers<br />
El. Heated Window<br />
Seat Belts<br />
Bulb Failur€<br />
1.2 W<br />
1.2 W<br />
15w<br />
1.2 W<br />
't.2 w<br />
1.2 W<br />
1.2 W<br />
1.2 W<br />
1.2 W<br />
1.2 W<br />
2W<br />
1.2 W<br />
s 8.5<br />
Bags<br />
BaTs<br />
w 1.8 d<br />
wt.8d<br />
w 1.4 d<br />
w1.8d<br />
w1.8d<br />
wl.8d<br />
w 1.8 d<br />
w 1.8 d<br />
w 1.8 d<br />
wr,8d<br />
w1,8d<br />
Bags<br />
w 1.8 d<br />
2<br />
2<br />
2<br />
2<br />
2<br />
2<br />
2<br />
2<br />
No of bulbs<br />
,I<br />
2<br />
1 \245:21<br />
I<br />
3<br />
3<br />
l<br />
2<br />
1<br />
1<br />
1<br />
1<br />
I<br />
I<br />
1<br />
,I<br />
1<br />
1<br />
Specifications<br />
Gtoup 35<br />
Lights 43
Service Procedures<br />
Replacing Sealed Beam headlamPs<br />
Turn 1/2 turn to rcmove the plastic screws.<br />
Remov€ the he.dlight rim.<br />
Turn the chromed ring slightly counter clockwise.<br />
Remove the chromed ring <strong>and</strong> lift out the headlamp<br />
unit.<br />
Disconnect the socket contact.<br />
q,:1,>.<br />
Feconnect socket contact,<br />
chromed ing <strong>and</strong> rim.<br />
install headlamp unit,<br />
Headlight alignment<br />
lJss the wo Bcrsws to adjud ths hsadlight alignm€nt.<br />
44<br />
Gtoup 35<br />
Lights<br />
Models 240, DL 2d, <strong>and</strong> GT
flril<br />
ii:,- :.;<br />
iit;:::,4)<br />
@,<br />
D<br />
I<br />
llttt<br />
,ilJlll<br />
i NNER BIA{,<br />
sEAtE -BqAM Tvpe 1<br />
OUTER BEAIq, 5 3/4"<br />
SEALED BEAfi TYPE 2<br />
Models 240, DL 4d <strong>and</strong> DL 5d<br />
l1\\\i<br />
K<br />
Group 35<br />
45
U9hE, 242, 244, DL & GT<br />
2<br />
q3><br />
@L<br />
tr<br />
@(<br />
Irj? *s*.1-.. .<br />
@(<br />
30<br />
a<br />
fr<br />
J,l<br />
t4<br />
I<br />
/.rfl<br />
cr<br />
c4<br />
\OLVO PARTS<br />
1 030230r8<br />
(1036)
Lights 245<br />
15 l/<br />
@-<br />
rNTERroRLrcHrs<br />
6;> IC t/<br />
c<br />
€
Group 36<br />
St<strong>and</strong>ard Electrical Equipment<br />
Replacing ignition switch<br />
Remove nose insulation pane <strong>and</strong> cefter side panel.<br />
Disconnect-the terminal block for the ignition swrch.<br />
Use a stubby screwdriver to remove the ignition<br />
Atlach the new ignition swLtch,<br />
Connect the terminat btock.<br />
Re-instal panels.<br />
A2<br />
@l<br />
I<br />
Replacing turn signalswitch (headlight dimmer switch)<br />
Rernove the two casings round rhe sreering cotumn.<br />
Remove the lwo retaining screws.<br />
-rd_>fp,<br />
rhe wres to rhe r.w swtcn. Resror..<br />
,<br />
Replacing horn<br />
CI<br />
l_l<br />
Disconnecthe battery ground cable. Turn <strong>and</strong> lift off<br />
the lock pins. Remove the grille.<br />
Disconnect the wires at the horns.<br />
C2<br />
Attach the wires as shown.<br />
lnstallthe gr lle <strong>and</strong> reconnecthe battery gro!nd ca,<br />
48<br />
Group 36<br />
S ta ndad E lectrica I E q u ipmen t
Bulb Fatlurc Warntng System<br />
Replacing light switch<br />
DI<br />
Disconnecthe defrosrer hose from the defroster out-<br />
Remove the screws retainlng the defroster outlet.<br />
Pull out the switch knob.<br />
Lift out the defroster outlet.<br />
Remove ihe nut <strong>and</strong> lift out the switch.<br />
D2<br />
D3<br />
Disconnect the switch from the terminal<br />
block.<br />
Connecthe new switch.<br />
lnstall switch, defroster outet, switch h<strong>and</strong>le <strong>and</strong> de-<br />
Checking Bulb Failure warning light operation<br />
NOTEi BuLb Faiure Warning light may come on if con<br />
nected bulbs current draw ls disiorted. A short ndi<br />
cation may sometimes occur, when headlights are<br />
switched on, depending on vaiation in "starting" time<br />
E2<br />
Switch on €ninon.<br />
The warning lighi should come on.<br />
lf the warning light does noi come on, it is de<br />
Start engrne,<br />
The warning light should go oLrt.<br />
The Bulb Failure Warning light <strong>and</strong>the chargrng<br />
control light simultaneously = alternator does<br />
The Bulb Failure Warning light is on after ihe<br />
charging control light has gone out = Sensor<br />
NOTE: llghr switch shouLd be pLrshed in <strong>and</strong><br />
brake pedal not actuated durrng test.<br />
E3<br />
E4<br />
E5<br />
E6<br />
E7<br />
EB<br />
Switch on headlight lower beam.<br />
The Waming light should be out.<br />
The Bulb FailureWarning lighl ison, butallbulbs<br />
lor lower beam, parking lighl, laillighl, efc., are<br />
functioning = Sensor is defeclive.<br />
Switch off headlighl lower beam.<br />
Bemove fuse No. 1l or 12.<br />
The waming lighl shou d come on. f not = Sen<br />
sor is defective.<br />
Re-connect fuse.<br />
Switch off ight.<br />
Depress brake pedal.<br />
The warning light should be out. lf it comes on<br />
<strong>and</strong> both brake lights function, it is defective.<br />
Switch off igniton.<br />
Grou? 36<br />
St<strong>and</strong>a rd E lectrical Eq u iqme nt<br />
49
Bulb Failurc TailgaE<br />
Replacing Bulb Failure Warning Light sensor<br />
F] Disconnect the connector ar the Sensor Unit.<br />
F2 Remove the Sensor Unit.<br />
F3 Install the replacemenr Sensor unir.<br />
F4 Re-connect the connector to the Sensor Unit.<br />
F5 Check the function of the replacement unit.<br />
Tail gate window wiper <strong>and</strong> washer, 245<br />
Spare Parts lllustration<br />
Qr<br />
cl<br />
(<br />
(<br />
50<br />
Group 36<br />
Sta ndad Electical Equ ipment
Tailgate window Wiperlwasher<br />
Tail gate window wiper, 245<br />
G7<br />
Removing<br />
Disconnectlhe battery ground cable. Removelhe panel<br />
on the inside of the tailgale.<br />
Remove the retaining sc.ews for lhe wrper motor pro-<br />
Disconnect the link arm ai the wiper molor. Fold the<br />
prctection plate aside <strong>and</strong> lift oul the wrper motor'<br />
Markthewires, <strong>and</strong> disconnectthem at lhe wLper mo-<br />
lnstalling<br />
G2<br />
Reconnect the wres to the molor'<br />
Attach motor <strong>and</strong> protection plate<br />
Reconne the link arm to the wiper moior' Install the<br />
protecnon plate relarnrn9 screws<br />
Insiall the panelon the inside ol lhe tailgale<br />
Reconnect lhe battery ground cable,<br />
Replacing brushes<br />
Fold rhe retaining bracket asde.<br />
Unhook the brush springs.<br />
Bemove the brushes from ihe brush holders. Observe<br />
care not to damage the brush holders.<br />
lnstal the new brushes.<br />
Hook on the brush spring.<br />
Gtuup 36<br />
St<strong>and</strong>a rd Electrical Eq u ipment 51
Windshield Wiper<br />
Windshield wiper assembly<br />
CoNNEcroR AssEMBLY<br />
Includ* $itch for p8rt pGition <strong>and</strong><br />
@nn€ctoE for wirlng h.r6.<br />
l. ca€e th€ p€rk $itch is defsctiv€, only<br />
lhk @nn6ctor e3s€Fbly should b.<br />
r€plac€d, not the 6mi€ sip€r trDtor.<br />
AVAILABLE As SPARE PARTS<br />
Replacing wiper unit<br />
Removal<br />
Jl Disconnest battery ground c€ble<br />
Remove side panel,<br />
Remove panel under dashboard.<br />
J2 Remove defroster hoses<br />
Remove glove box,<br />
J3 Bemove wiper arms.<br />
/ Disconnect wip€r assembly <strong>and</strong> lift it out<br />
through glove box opening.<br />
lnstallation<br />
K1<br />
K2<br />
K3<br />
Install wiper ass€mbly.<br />
Remove device secudng wiper ass€mbly at<br />
transport <strong>and</strong> h<strong>and</strong>ling.<br />
Install glove box<br />
dsfrostsr hosss<br />
side panels<br />
panel uncler dashboard<br />
Install wiper arms.<br />
Reconnect battery ground cable, I<br />
Check function.<br />
52<br />
Group 36<br />
S ta nda rd E I ecuica I E q u ipm e nt
l-<br />
Group 38<br />
Instruments<br />
Instrument cluster<br />
B<br />
Odometer D Parkins brake reminder light(red)<br />
Mile reading E High beam indicator (blue)<br />
Speedometer F Brake {aiture warning light(red)<br />
Left turn signal indica'tor light{green)<br />
A<br />
B<br />
c<br />
D<br />
E<br />
F<br />
G<br />
H<br />
I<br />
Righturn signal indicator (green)<br />
Oil pressure wa rnins lisht(red)<br />
Alternator warning light ked)<br />
c<br />
J<br />
K<br />
(last figures represents 1/ 10 mile)<br />
Trip odometer resst knob<br />
Push in to reset<br />
P<br />
Remlnder light, EGR Service (except Lambda-Sond)<br />
Tachometer(certain models)<br />
O<br />
Reads thous<strong>and</strong>s of engine rpm.<br />
O angp rdnge lor momentdrv Jse. during d' cel-<br />
L<br />
N<br />
o<br />
P<br />
lf the pointer enters the .ed range repeatedly,<br />
check coolant level <strong>and</strong> fan bek tension, see page<br />
49.<br />
Overdrive indicator (green)<br />
Lights when overdrive is engaged.<br />
Fuelgauge<br />
The fueltank capacity is approx 60 lhers = 15.8<br />
US sals.l13.2 lmp. sals.<br />
o<br />
Red prohibited range.<br />
Bulblailure warning light (yellow,<br />
Temperature gauge<br />
The gauge pointer should normally remain in_<br />
side the green range.<br />
1/2<br />
Warning lights<br />
The red range from R to O represents approx.<br />
I itels = 2.5 US gals./2 lmp. gals.<br />
These lights will light up when the ignitlon is turned<br />
on. before the €ngine is started. This is also to prove<br />
rhar rhe lightr f-nLrioi. The light should go our d'ter<br />
the engine has started. (However, the parking brake<br />
rem nder light will not go out until the parking brake<br />
Oil pressure<br />
warning light lredl<br />
lf the lishl comes on during drivlng, the oil pressure<br />
is too low Stop the engine immediaiely <strong>and</strong> check<br />
the engine oil evel, see page 46. After hard driving,<br />
rhe lignt will come on occdsrondlly wle_ rhe "ngrr.<br />
is idling. This is normal, provided it soes oul when<br />
the engin€ speed is increased.<br />
The warning light for the oil pressure receivescur.ent<br />
via the ignition switch. lt is grounded through a pressura<br />
sanstrve valve on rle FnSrne. Wrrh lhp enginF<br />
running <strong>and</strong> at normal pressufe, the circuit lhrolgh<br />
this light tsnd grolnd is open. When the oi pressure<br />
drops below a pre-determinated value, the pressure<br />
sensitive valve closes the circuh <strong>and</strong> the warn ng light<br />
is illuminated.<br />
Brakefailure<br />
warnins lishtked)<br />
lfthe lighr comes on whiledriving <strong>and</strong> the brake peda<br />
ca_ bedep essed f-fthe'tha- rcrmdl il isdn i di,dlior<br />
that one of the br.ke cncuits is oul of fLrnctior.<br />
Sho-ld a 'auk a.ise in any oi rhe lwo c'c-iis ol rl e<br />
hydraulic brake system, so that $ere is a pressure<br />
difference between the circuits of more than 8 10<br />
kp/cmz 1114-142 psil when the brakes are applied,<br />
this actuates the valve <strong>and</strong> ihe warning light goes on.<br />
The warning lamp remains lighted r.rntil the fallt n<br />
the brake systern has been conected <strong>and</strong> the warn ng<br />
vdlve re ser. 9e .e 'elthg rhe wa'n 19 vdve. s"e SeL<br />
tion 5, Brake, Grolp 52.<br />
Gtoup 38<br />
53
lnstrument Cluster<br />
Altemator<br />
warning light(red)<br />
lf the light comes on when engine is running, check<br />
the ahernator drive belt tension as soon as possrble.<br />
The alternator waming light lights up when lhe alternator<br />
voltage is ower than the battery voLtage. As<br />
the alternator vohage rises <strong>and</strong> commences to charge<br />
ihe battery, the warning light goes out, indicating that<br />
the alternator is charging.<br />
Parking brake<br />
reminder light<br />
This light wiL be on when the parking br6ke (h<strong>and</strong><br />
br.ke) is set. The parking brake lever is situated between<br />
ihe lront seats.<br />
The parking blake reminder light receives curent vla<br />
the ign tion swich. When the parking br6ke is app ied,<br />
thewarning light is grounded bylheswitch.The warn<br />
ing lamp femains lighted as long as ihe parking brake<br />
Reminder light,<br />
EGR service (except Lambda-Sond)<br />
lf the vehlcle is equ pped with an EGR (Exhaust Gas<br />
Be&culation) 15OO0 mile service remindef light, as<br />
required bytheU.S. E nvionmental Protection Agency.<br />
the lighi wil come on ar 15000 mile interuals. This<br />
ls a reminder to gei the EGR valve servlced. The light<br />
wil stay on until .eset by rhe dealer.<br />
NOTE: Warning lights, generally, are lights which il<br />
uminateto indicateth.t a device is noi operatrng pro-<br />
Bulb failure<br />
warning light<br />
The ligh, coaes on if .1y oi rhe 'ollowrnq .glr1" i)<br />
one of the lower beams<br />
One of the taillights<br />
one of the license plate lights<br />
one of the take lights {when the brake peda is de<br />
Indicator lights. 9q "ra l. a e lgl'rs wh.h ' urrndro<br />
to indicate that a device is operating.<br />
(<br />
Testing speedometer <strong>and</strong> odometer assembly<br />
lf speedometer or odometer s not functioning, ihe<br />
reason may be a fault in Lnslrument or speedometer<br />
cable or the worm gear in the transmission, or ln the<br />
50O rpm<br />
lOO0 rpm<br />
1750 rpm<br />
Speedometer readins<br />
31.5 I 2.5 mph<br />
f the sp€edometer funct ons while the odometer does<br />
not, or vice'versa, the instrument is deiective <strong>and</strong><br />
should be replaced. No attempt should be made to<br />
repa r rne Insvumenr.<br />
Whe_ borh speeoonere'<strong>and</strong> ooon e,e'{op f-nc on<br />
ing, the fault ls probably in speedometer cable or gear.<br />
Disconnect speedomeier cable f.om instrumeni <strong>and</strong><br />
see if it can be roiated,<br />
ChecL rhe cable <strong>and</strong> the drive dt the trdnsmission<br />
Checl rhe dnve Lo-p ngs'olale eas.l' f rr .a-s hF<br />
instument should also be repaced.<br />
The speedometer can be checked by rufning it at dffer€nl<br />
speecls. Thefollowing valuesshould then applyl<br />
t<br />
,_(<br />
SDeedometer drive cable<br />
It is rnost important ihat the speedometer cabe s<br />
correctly iitted if the speedomeler is to functon wthout<br />
trouble. t is vitaly imporiant thar the cable is nol<br />
benl too sharply. At no point must the radius of a<br />
bend be less than 100 mm (4"). lf it s ess than this,<br />
vibration <strong>and</strong> noise can occur in the inslrument. The<br />
drive couplings must run trle in the outer casing of<br />
the cable. This is checked with<br />
54<br />
Group 38
Replacing instrument cluster<br />
I<br />
2.<br />
Remove the cove6 round the steering coturnn.<br />
Bemove the bracket retaining screws.<br />
Allow the bracketo slip down on the sreerinq<br />
Removs the retaining screws trom the instrum€nt<br />
3.<br />
5.<br />
Disconnect speedometer cable,<br />
Grip the reve.se side of the speedometer <strong>and</strong><br />
press the Instrument up,oul until the snap lock<br />
at the instruments upper edge releases.<br />
Lift out the instrument <strong>and</strong> disconnect the rer<br />
m;nal block on the reverce side.<br />
Replacing tachometer<br />
1.<br />
2.<br />
3.<br />
4.<br />
(Remove instrument cluster, see above).<br />
Remove three retaining screws,<br />
Carefully remove the instrument. The terminats<br />
can easily be damaged.<br />
Install tachometer (or cove, as shown.<br />
Replacing speedometer assembly<br />
t.<br />
2.<br />
3.<br />
Remove instrument cluster, see above,<br />
Remove tachom€ler (or blind cover,)<br />
Remove three speedometer retaining screws.<br />
Carefully rcmove the instrumem.<br />
Replacing instrumentplate("printed circuit")<br />
t.<br />
2.<br />
3.<br />
4.<br />
5.<br />
{Remove instrument cluster, see above).<br />
Remove tachometer (or bl;nd coved.<br />
Remove speedometer.<br />
Remove three plate retaining screws.<br />
Carefully remove the plate. not damagrng remperature<br />
of fuel gauge.<br />
Group 38
Gauges<br />
Replacing clock<br />
1. Disconnect the battery ground cable.<br />
2. Disconnect the control panel <strong>and</strong> pull it out.<br />
3. Bemove the impact guard bY pushing it down.<br />
4. Remove two screws.<br />
5. Lift out defroster outlet <strong>and</strong> clock.lMark the wites<br />
before disconnectang.<br />
6. Bemove two retaining screws. Beplace clock<br />
7. Installation is opposite oder.<br />
Replacing temperature gauge/fuel gauge<br />
1.<br />
2.<br />
3.<br />
4.<br />
5.<br />
6.<br />
7.<br />
Remove inslrument clusler.<br />
Remove tachometer (or blind cover).<br />
Remove speedometer.<br />
Remove instrument.<br />
Remove two retaining nuts on the instrument<br />
Remove the gauge.<br />
Replacing 'uelgauge sending unit (tank unit)<br />
o<br />
,5016<br />
t-<br />
1. Disconnect the battery ground cable.<br />
2. Unfold the mat in the luggage compartment.<br />
3. Remove cover <strong>and</strong> disconnect ground wne.<br />
4. Disconnecthe wire at the sending unit terminal.<br />
5. Disconned the return hose at the sendrng unrl.<br />
6. Disconnect <strong>and</strong> move aside the breather hose.<br />
7. Use tool 9995016 to remove rhe sending unat.<br />
8. Install the new sending unit with a new gasket.<br />
9, Installation is opposite order.<br />
56<br />
Grcup 38
Gauges<br />
Testing temperature gauge or fuel gauge<br />
w,@-19A/2AO,N<br />
lf a lemperalure orluelgauge is not wo*ing properly,<br />
the gauge system can be tesled as lollows:<br />
METHOD<br />
A. T€sling the voltage siabilizer.<br />
1 - Connect the test resistor (pan no. 9995158-4)<br />
to the<br />
inslrument which is functioning pfopedy. In other<br />
words, il lhe,uelgaugs is nol functioning prope y,<br />
disconnect the lemperature gauge cable from the<br />
sensor <strong>and</strong> connecthe test resistor belween the<br />
sender cable <strong>and</strong> vehicle ground.<br />
2. 140, 160-1974 240, 260<br />
The pointer should now be horizontal<br />
(tolerance + pointer widlh).<br />
lf the inslrumenl polnter points outside the toleF<br />
ence range, then the voltage stabilizer is faulty. It<br />
lhe instrument poinfer is within the tolennce<br />
range! continue wilh Slep B.<br />
B. Testing the gauge <strong>and</strong> sender.<br />
1 , Disconnect lhe cable !o the faulty inslrumenl sender<br />
<strong>and</strong> conneci the lest €sistance between ihe sender<br />
cable <strong>and</strong> vehicle ground.<br />
2. ll the instrumenl pointer is horlzontal or inside the<br />
ma*, then the sender is laulty (tolerance + poanter<br />
width). Check the luel gauge sender according to<br />
Servace lvanual, S€c- 3 240 or 260 se es, Elec.<br />
System & Instrumenls (TP ii402 or 11413). lfthe<br />
pointer is oulside the lolerance range, then lhe instrument<br />
is faulty.<br />
Test resistol<br />
P/N:<br />
9995158-4 (blue cable) Volvo 140, 160-1976,<br />
240,260<br />
Spare Parts<br />
P/N Resislor<br />
9999145-7 100 1W5% 140, 160-1974<br />
240,260<br />
Replacing the resistor<br />
Disconnect the cables <strong>and</strong> open the holder. Place<br />
lhe new resislor in the holder <strong>and</strong> allow the rcsistor<br />
conneclions to project lrom lhe holder. Insed the<br />
conneclion cables <strong>and</strong>lighten up. Cuttho part of the<br />
resislor cable which projecls.<br />
Group 38<br />
Instruments 57
Testing fuelgauges <strong>and</strong> tank levelsenders<br />
To avoid unnecessary r€placemsntg following procedures<br />
should be used when checking complainrs on<br />
th€ fu€l gaug€ indications.<br />
To check a master gauge is needed. This is a gauge<br />
which has corect resistance.<br />
19?6 Model Shorvn<br />
Masteagauge<br />
Obtain a fu€l gauge tank sender from Parts Department<br />
ancl check it with an accurate ohm-meter<br />
An extra accurate master gauge should stay within<br />
th€ following limhs:<br />
Upper end position {Full tank}<br />
40ohmst2ohms<br />
Boftom end position {emptyl<br />
282 ohms a 14 ohms<br />
It might be a good idea to bsnd ths movement limiter<br />
to obtain correct readings.<br />
Position<br />
Omm<br />
15 mm<br />
84 mm<br />
191 mm<br />
282 t 48 ohms<br />
223 A 26.5 ohms<br />
98 a 14 ohms<br />
40 t 5 ohms<br />
NOTE: Check vehicle specilicalions.<br />
A2<br />
Disconnect the blue (brown) wire at the fu€l gauge<br />
tank sender in the trunk Instead, connect the master<br />
gauge <strong>and</strong> ground it.<br />
1,7mm<br />
A2<br />
Swhch ontheignition.<br />
Compare fuelgaugo rsading with picture at leftr showing<br />
deviation permitted at €nd of st.okes.<br />
Correct reading: proca€d to A3.<br />
Incorrsct reading: proceed to A4.<br />
n<br />
58<br />
Gtoup 38<br />
lnstruments
Testing fuel gauge<br />
Check connections<br />
A3<br />
Check that the terminal prns (1) have corect conracr<br />
<strong>and</strong> thal the nuts (2) are tighrened.<br />
Also check temperEture gauge nurs.<br />
0<br />
Test operation of voltage stabilizer<br />
44<br />
To do this, use a new voltage slabiizer to test gauge<br />
To replace voltage stabilizer, puli straight out so the<br />
three pins come loose from the retainers-<br />
A5<br />
lf mis-reading percists in spite of operations according<br />
ro 1 <strong>and</strong> 2 above. re install the ordinary voltage stabilizer<br />
<strong>and</strong> replace the fuel gauge-<br />
The luel gauge tank sender rcmains as possible<br />
Bemove the tank sender.<br />
A6<br />
,72!2<br />
Check thai the tank sender<br />
bind ns.<br />
lever operates without<br />
Use an ohrn meter to check resisrance,<br />
urements as shown in il[]srration at left.<br />
ll might be convenient to make a fixilre<br />
c itates a quick sefting.<br />
A8<br />
0mm<br />
15 mm<br />
84 mm<br />
282 I 48 ohms<br />
223 t 26.5 ohms<br />
98 :t 14 ohms<br />
40 :l 5 ohms<br />
Group 38<br />
59
Testing fuel gauge<br />
VOLVO<br />
112 BB2<br />
li a cusromer stil complains in spite all specificalions<br />
are wlh n limits, t musl be expained to h m that the<br />
expanson tank inside ihe fueltank causes the reading<br />
to drop fasler al full tank.<br />
The expansion tank capacity is approx. 6 liters (qts).<br />
t is slowy fiied with fuel.<br />
When filling f!el. the expanson tank is srill almost<br />
empry when rhe tuel tank has been filled.<br />
It lakes approx. 30 minLrtes to fill ihe expansion tank.<br />
This will cause the leve in lhe fuel tank io drop <strong>and</strong>,<br />
in addition to the fuel used, this mght qive the m<br />
pression lhe gauge reading is lower than normal <strong>and</strong><br />
the gauge incorect.<br />
The p!rcose of the expansion tank is to prevent the<br />
flel tank from releasing fuel in cases when lhe tank<br />
has been filled whh cod fuel whrch then heats up<br />
olr<br />
I<br />
NOTE: Eady type illustraled-consult olher publicaiions<br />
for new design fuel lank specificalions.<br />
Testing temperature sensor<br />
The sensor is checked by heating h in water <strong>and</strong> reading<br />
resistance <strong>and</strong> temper.ture.<br />
Besistance may deviate :t 10%.<br />
50oc = 122oF<br />
loooc = 212oF<br />
12OoC = 24AoF<br />
282 ohms<br />
60 ohms<br />
40 ohms<br />
.l<br />
t<br />
107 366<br />
60<br />
Group 38
Specifrcations<br />
Additional Information<br />
Main <strong>and</strong> Pump Relay Application<br />
1974/1975 lrodelg<br />
Eoth pump <strong>and</strong> main relay are the sarhe.<br />
They are located in the engine companment,<br />
They are inlerchangeable.<br />
.1975/192<br />
Models<br />
Eo5cn t0332 ?Ol lO2<br />
I<br />
v<br />
Both the main <strong>and</strong> pump rslays are located under the<br />
dash near lhe hood relsase cable,<br />
The pump rslay is easiv dislinguished lrom lhe main<br />
relay by a heavy gauge yellow wire in its mulliplug<br />
(#87), which goes lo luel pump.<br />
In most cases, lhe pump relay ls fitted with a whils<br />
plastic plug.<br />
PJr!!-Er&v<br />
lblF<br />
tlz3t75l<br />
||lvo 'l2t50D!<br />
torP oa lla<br />
!!F.!..d..<br />
Ey<br />
r><br />
,03t2 015 0t<br />
CAUTION: These lwo<br />
changed.<br />
relays must never be inter-<br />
Group 36<br />
Ralays<br />
61
SpecrTlcadors<br />
Maln & Pump Relays<br />
1978/1979 lrodels<br />
!2r5337-l<br />
This relay is locatedunder the dash n€ar the hood<br />
release cable.<br />
192/1979 Models<br />
gs!g:99!4-e,g<br />
a2<br />
This r6lay is localed under the hood near the batlery,<br />
Volvo #1235013-8.<br />
Both rolays us€ th€ same Volvo number.<br />
The mounting bracket is the only ditference bslween the<br />
ea.ly <strong>and</strong> late version.<br />
62<br />
Group 36<br />
Relays
llatioml<br />
Instihrte tot<br />
AUIO ONYT<br />
sElvtGt<br />
EXCEU.EilCE<br />
VOI-VO SUPPOBTS VOLUIITARY<br />
rrrEcMt{tc cEn FtcAfl 0rl<br />
8Y THE lt.t.t.S.t.<br />
(U.s.A. only)