Olympus PMT-35TA and PMT-35RA Photomacrographic System ...
Olympus PMT-35TA and PMT-35RA Photomacrographic System ...
Olympus PMT-35TA and PMT-35RA Photomacrographic System ...

Create successful ePaper yourself
Turn your PDF publications into a flip-book with our unique Google optimized e-Paper software.
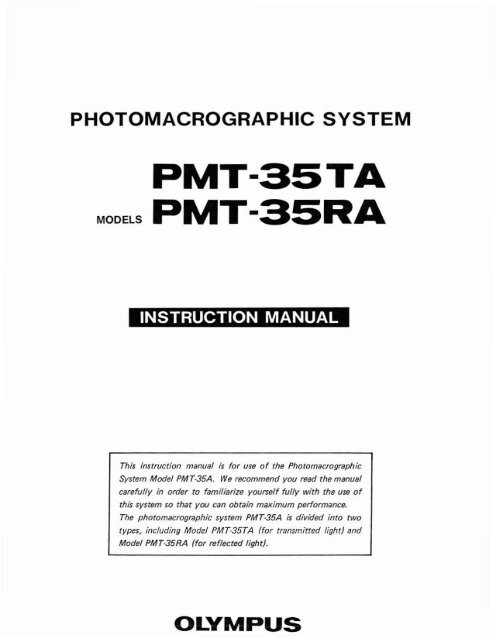
PHOTOMACROGRAPHIC SYSTEM<br />
<strong>PMT</strong>-<strong>35TA</strong><br />
MODELS<br />
<strong>PMT</strong>-<strong>35RA</strong><br />
This instruction manual is for use of the <strong>Photomacrographic</strong><br />
<strong>System</strong> Model <strong>PMT</strong>-35A. We recommend you read the manual<br />
carefully in order to familiarize yourself fully with the use of<br />
this system so that you can obtain maximum performance.<br />
The photomacrographic system PM T-35A is divided into two<br />
types, including Model <strong>PMT</strong>-<strong>35TA</strong> (for transmitted light) <strong>and</strong><br />
Model PM T·<strong>35RA</strong> (for reflected light).<br />
OLYMPUS
BEFORE USE<br />
Observe the foll owi ng procedures:<br />
D Operat1o<br />
1. T he photomacrographic system <strong>PMT</strong>-35A is a precision instrument. A lways h<strong>and</strong> le the <strong>PMT</strong>-35A<br />
with the care it deserves, <strong>and</strong> avoid abrupt motions <strong>and</strong> shock.<br />
2. Avoid exposure to direct sunlight, high temperature <strong>and</strong> hum idity . dust <strong>and</strong> vibrat ion.<br />
3. Use the macro lenses as designated by <strong>Olympus</strong> (see the speci f ica tio ns on page 4); Use of macro<br />
lenses other than designa ted will resu lt in unsatisfactory performance o f the system.<br />
4. Use an OM system camera back in conjunction with this photomacrographic system. Especiall y<br />
t he OM system "automatic" exposure camera backs, compa t ible w ith t he OM system interchangeable<br />
toucsing screens" are recommended .<br />
· OM system interchangeable focusing screens most suitable for macro lenses are as foll ows:<br />
Macro lenses<br />
Focusing screen Nos.<br />
Zuiko Macro BOmm F4 MBOMC.2U 1·4, 1·10, 1-11<br />
Zuiko Macro 38mm F2.8 M38MC·2 1·4, 1·10, 1-11, 1-12<br />
Zu iko Macro 20 mm F2 M20MC·2 1-11, 1-12<br />
fJ Maintenance<br />
1. Lenses must always be kept clean. If they are smudged w ith oil, f ingerprints, etc.. carefully<br />
w ipe them off the lens su rfaces w ith gauze moistened with a small amount of alcohol -ether<br />
mixture (3 : 7) or xy lene.<br />
2. Do no t use organ ic solutions to w ipe the surfaces o f various components. Plast ic parts , especiall<br />
y , shou ld be cleaned w ith neutra l det ergent.<br />
3. When not in use, the <strong>PMT</strong>-35A should be covered w ith t he viny l dust cover provided.
CONTENTS<br />
. ~ . . ,/'<br />
. '". "-<br />
1. STAND ARD EOUIPMENT 1 1<br />
2. SPECiFiCATIONS :.~. .:.:.:. =4~-- - 2 .<br />
3. NOMENC LATURE . .... . . . . ... .. . ... . . . . . . . . . . . . . .. . . . . . . . . . . 5 3<br />
4. ASSEMBLY :..: .:.:. .:.=]9~---ll!:<br />
5. SUMMARY OF PUTTING THE <strong>PMT</strong>·35A IN OPERATION 5<br />
6<br />
6- 1<br />
6-2<br />
6- 3<br />
Photomacrography with Transm itted Light<br />
Photomicrography .<br />
Photomacrography with Reflected Ligh t<br />
13<br />
16<br />
18<br />
7. CONDITIONS FOR TAKING GOOO PICTURES 20 7<br />
7- 1<br />
7- 2<br />
Envi ronmen tal Factors<br />
Specimens<br />
... , . . . . . . . . . . . . . . . . . . . . . . . . . . . . .<br />
. . . . . . . . . . . . .. , . .... . .. ..... . . . . . . . . . . . . . . .<br />
20<br />
20<br />
7- 3<br />
Selection of Films <strong>and</strong> Filters 20<br />
8. TROUBLE SHOOTING · 2:2i1--- 8
I<br />
STANDARD EQUIPMENT ~ .;< _. • .-,- .<br />
-. ~ .<br />
. ... ,,~<br />
-~.<br />
, "<br />
Component<br />
<strong>35TA</strong><br />
<strong>PMT</strong>-<br />
35R A<br />
Pho tomacrographic outfits, consisting of: PM T-<strong>35TA</strong>-F 1 0<br />
Base <strong>and</strong> pillar PM-PS35<br />
A uto bellows PM-BD35A<br />
Mechanical shutter PM-MS35<br />
Light excluding collar PM-SDM-2<br />
Double cable release<br />
Transmitted light illuminator PM-D L95, consisting of lamp<br />
housi ng, mirror housing with condenser lens, stage, pillar <strong>and</strong><br />
Slage focusing mechanism <strong>and</strong> metallic Slage insert plates<br />
(AA6585 <strong>and</strong> AA6587)<br />
Auxiliary condenser PM·MC38<br />
Bulb socket LLS-B<br />
Stage clips. paired<br />
Tungsten bul b 6V5ATP-l (3 pcs .]<br />
Accessory container <strong>PMT</strong>-<strong>35TA</strong>Wa<br />
Dust cover A 031<br />
~<br />
" o ,.<br />
'"o<br />
m o<br />
C<br />
-e<br />
'" m " -l<br />
<strong>Photomacrographic</strong> outfits, co nsisting of : <strong>PMT</strong>-<strong>35RA</strong>- F 0 1<br />
Base <strong>and</strong> pillar PM-PS35<br />
Auto bellows PM-BD3 5A<br />
Mechanical shutter PM·MS35<br />
Light excluding collar PM ·SDM·2<br />
Do uble cable release<br />
Acce ssory contai ner <strong>PMT</strong>-<strong>35TA</strong> -WB<br />
Dust cover A03 1<br />
Universal illuminator. consist ing pair ed light sources PM·lSO-W 0 1<br />
Stage plate (clear) SP·C 1 0<br />
Filter set for color fi lm (consisting of 45lBD2N, 45LBTN. 43N D6- PM·F l l ·C 1 1<br />
W45 <strong>and</strong> 43ND25W45. one each)<br />
Filter set for black & white f ilm {consisting of 45G-533, 450·560 PM·F 1L4 1 1<br />
<strong>and</strong> 43N D25-W4 5, one each)<br />
OM camera mou nt PM ·CAMS 1 1<br />
Transfor mer TGHM 1 2<br />
Power cord uvcr 1 2<br />
Optional Accessories<br />
Zuiko macro lens 20 mm F2<br />
Zuikc macro lens 38 mm F2.8<br />
Zuiko macro lens 80 mm F4<br />
Photomicrographic exposure meters<br />
Adapter for EMM·7<br />
Coaxial illuminator mirror housings<br />
M20MC-2<br />
M38MC·2<br />
M80MC·2U<br />
EMM-6. EMM-7<br />
PM·EA<br />
PM·El20/·E l 38/ ·EL80<br />
- - - - --- - - - - - - - - - --- - - - - - 0
~ ~ -<br />
u ,<br />
. .. ...<br />
><br />
z<br />
w<br />
"e,<br />
::> awac:<br />
'"o<br />
z<br />
'" t;;<br />
I A. Setup of Photo macrographic Outfits <strong>PMT</strong>·<strong>35TA</strong>· F (For transmitted light illumination)<br />
A uto bellows PM ·BD35A<br />
ILight excl uding collar PM·SDM·2 I<br />
•<br />
Tra nsm itted light illuminator<br />
PM·Dl95<br />
Bu lb socket LlS·B<br />
I Awc iliary condenser PM-MC3B I<br />
Base <strong>and</strong> pillar PM·PS35<br />
I Double cable release I<br />
•<br />
- 1--=<br />
I B. <strong>PMT</strong>-<strong>35RA</strong>·F (For reflected light ill uminat ion)<br />
Auto bellows PM·BD35A<br />
I Light excluding collar PM.SDM-2 1<br />
Mechanical shu tter PM-MS35<br />
Base <strong>and</strong> pillar PM-PS35<br />
IDouble ca ble release I<br />
•<br />
~ l'==---_<br />
I C. Stage Plate SP-C<br />
L:::---"'=--'--"=-=--=---<br />
I I D. Filter Sets<br />
I PM-FI L -C<br />
I PM-FI L"<br />
I<br />
I<br />
43ND6W45 43ND25W45<br />
o<br />
•<br />
45G·533<br />
450-560<br />
45LBTN<br />
43ND25·W45<br />
1lI- - - - - - - - - - - - - - - - - - - - - -
I E. OM Camera Mount PM -CAMS I F. Transformer TGHM<br />
•<br />
III<br />
,.<br />
,.<br />
z<br />
o<br />
-~-<br />
G ~...<br />
••<br />
- ẓ<br />
..<br />
- -•<br />
• m<br />
'"o<br />
m0<br />
C<br />
-c<br />
"<br />
I G. Incident Light Illuminator PM·LSD·W I I H. Power Cord UYCP<br />
•<br />
I . Macro Lenses<br />
(Optionally available)<br />
Zuiko Macro lens 80 mm F4 MBOMC·2UI<br />
I Zuiko Macro lens 38 mm F2.B M38MC.21<br />
IZuiko Macro lens 20 mm F2 M20MC·2 I<br />
-------- - - - - - --- - - - - - - 0
11- - - - - - - - - - - - - - - - - - - - - - - -<br />
SPECIFICATIONS _ _ .<br />
Item<br />
Description<br />
35 mm camera back, compatible OM system camera bodies<br />
Auto bellows<br />
PM-BD35A<br />
Projection length (dis- 328.5 mm maximum.<br />
lance between flange o f 94 mm nummum (with mechanical shutter detached).<br />
photo lens <strong>and</strong> f ilm plane)<br />
Magnification indication<br />
Provided w ith graduat ions for magnification <strong>and</strong> bellows<br />
length on shdewav.<br />
Lens mount <strong>Olympus</strong> OM mount; bayonet mounting by turn ing 70 0<br />
D iaphragm control<br />
Mechanical shutter PM·MS35<br />
Base <strong>and</strong> pillar PM·PS35<br />
Photo lenses, com patible<br />
Lens <strong>and</strong> shutter d iaphragms can be li nked by the double<br />
cable release.<br />
FO' checking t he depth o f f ield by slopping down dla-<br />
Prese t lever phragm aperture to the lens w or k ing aperture without<br />
shutter release.<br />
Focu s ad justment By lens movement on rack <strong>and</strong> p inion.<br />
Effect ively illuminated 95mm dia.<br />
area maxrmurn<br />
#0 shu tter {effective diameter<br />
-<br />
: 24 mmJ.<br />
Sh utter speeds 1 sec. 11500 sec. plus T <strong>and</strong> B. M·X<br />
synchronization. Preview lever for opening/closing the<br />
shutter at any t ime. Vibration preventive mount.<br />
Base surface : 320 mrr. x 39 5 mm; provided w ith pillar<br />
inser tion sleeve, pre -centered pin for po sit ioning the transmined<br />
ligh t illuminator <strong>and</strong> auto-bellows mounting dovetail.<br />
Pillar height: 580mm<br />
Zuiko macro lens 80mm F4 , bayonet mount (M80MC·2U)<br />
Zuiko macro lens 38 m m F2.8, bayonet mount (M38MC·2)<br />
z utko macro lens 20 mm F2, bayonet mount (M20MC·2 )<br />
Iris diaphragm 10 mm - 95 mm dia.<br />
Vertical movement of To tal range: 170 mm<br />
(Including 100 mm on rack <strong>and</strong> pinion <strong>and</strong> 70 mm by<br />
manual dovetail movement)<br />
"""<br />
160 mm x 175 mm<br />
Stage<br />
Tra nsm itted Opening for stage insertion plate: l 00 m m d ia.<br />
light Glass plate (clear) SP·c<br />
illum inator<br />
Stage plates<br />
Metal plate w ith 45 mm-dia. cper unq.<br />
PM·DL95 Metal plate with 28 rnm-d!a. openi ng, compatible with<br />
the mechanical stage on it.<br />
Built-in condenser for 80 m m macro lens; pl us built-en<br />
Condensers auxiliary condenser (PM-MC38) fo' 38mm <strong>and</strong> 20mm<br />
macro lenses.<br />
Filter mount<br />
Accepts 45 mm-dia. filters up to 4 in au.<br />
Light source Pre-centered 6V3f.JN tungsten bu lb. (6V5ATP- 1)<br />
Transformer For 6V3(JoN; vol tage variable. ITGHM I<br />
Fo' con necting tne auto<br />
Light excluding collar PM-SDM-2 a rmcroscooe: OM mount bayonet mounting; m conjunction<br />
w ith PM·AD F photo eyepiece adapter.<br />
St<strong>and</strong><br />
WImp housing<br />
bellows to the photo tube of<br />
Heigh t 460 mm maximum, provided with universal joint.<br />
Coaxial centering knob provid ed.<br />
Incident light Light source 6V3(}N tungsten bulb TB·l<br />
illuminator Collector lens Focusing knob pro vid ed .<br />
PM-LSD W<br />
Fi lter mount<br />
Accepts 45 rnm-dia. filters up to 2; provided with screw<br />
mount to- camera filters {49 mm dia., pitch 0 .75 mmJ<br />
Transformer 6V30W; voltage variable.
3 NOMENCLATURE .<br />
A. Base <strong>and</strong> Pillar PM·PS35<br />
Cap<br />
Arm clamping knob<br />
Keyway lock<br />
- -<br />
A' m<br />
~/<br />
•..<br />
• •<br />
Bellows mounting do vetail<br />
I!!I<br />
z<br />
• •<br />
- . - ~ •<br />
o<br />
"<br />
m<br />
Zo<br />
r-<br />
~<br />
Collar clamping k l')Qb<br />
I<br />
Lower limit knob of the bell ows<br />
"m<br />
Pillar<br />
Pre-centered p in<br />
Pillar clamping knob<br />
For POSitioning the tran$lTlin ed<br />
light illuminator.<br />
Rubber mat<br />
B""<br />
- - - - - - - --- ------- - - - - --- 0
11---- - - - - - --- - - - - - - -<br />
~ .<br />
•• • - 0- _~ _ . __ • , ,.... -.......- ... _ ~ _<br />
I B.<br />
Auto Bellows PM -BD35A<br />
Upper limit screw<br />
ur<br />
::> '"<br />
3 ozw<br />
" o z<br />
Camera mount holder<br />
Doveta il slidewav<br />
Magnif icat ion scale<br />
Posit ioning dots<br />
Bellows upper end<br />
Dovetail<br />
Fits into the bellow s<br />
do~eta il mount.<br />
Clamping knob<br />
Bellows<br />
Bellows lower end<br />
Joint block<br />
Clamping knob<br />
Tigh ten the dovetail<br />
suoewav.<br />
Preset lever<br />
Focusing knob<br />
Moves lens holder vertica lly. Lens holder<br />
should be set at the lowest position for<br />
transmitted light.<br />
Camera mount cla mping knob<br />
Clamping kno bs<br />
Bellows clamping knob<br />
Cable release socket<br />
Position ing dot<br />
A ligns with t he red d o t on<br />
pho to lens bar rel.<br />
l ens mount<br />
Accepts photo lens.
• •<br />
.' .-' ~<br />
., "' . "",," • L<br />
. , . . . . .<br />
I C•<br />
Photo Lenses<br />
Zuiko macro lens 80 mm F4 Zuiko macro lens 38 mm F2.8 Zuiko macro lens 20 rum F2<br />
(M80MC-2U) (M38MC·2( (M20MC·2)<br />
Lens release button<br />
Diaphragm ring<br />
Diaphragm ring<br />
Diaphragm ring<br />
Lens mount<br />
Red dot<br />
Aligns wi th the p osi tio n ing<br />
dot on the lens holder<br />
Focus ring<br />
Usually used a t<br />
retracted posit ion.<br />
Lens mounts<br />
z<br />
o<br />
"<br />
m<br />
Z<br />
o<br />
r-<br />
" .... c:<br />
'"m<br />
I D. Transmitted Light Illuminato r PM -DL9S<br />
Iris diaphragm lever<br />
Stage plate clamping knob<br />
Stage Stage plate Bulb socket clamping knob<br />
Stage clips<br />
Focus knob<br />
Bulb socket<br />
1Au xiliary condenser (pM· MC38) I<br />
for 20 mm <strong>and</strong> 38 mm macro lenses<br />
Base<br />
Filter mOUn!<br />
Stop pin<br />
Stage dovetail<br />
Stage insert p lat e<br />
w it h 45 01 01<br />
diameter openin<br />
Stage insert plate<br />
with 28 01 01<br />
diameter oneninn<br />
(accept ing<br />
a mechan ica l stage)<br />
Stage dovetail clamping k nob<br />
--------- ---------- 0
I E.<br />
Mech anical Shutter PM -MS35<br />
Bellows mounting r ing<br />
Cab le release attachment<br />
Synch contact<br />
w<br />
or<br />
i'<br />
'"~<br />
u zw<br />
" o z<br />
Clamping knob<br />
Shutter cocking lever<br />
Shutter speed scale<br />
Shutter pre .... iew le....er<br />
M·X synch selector lever<br />
I F. OM Camera Mount PM-CAMS I G. Ught Exclud ing Collar PM·SOM·2<br />
Adapter<br />
A ccepts 35 mm<br />
camera beck .<br />
Bayonet mount<br />
Flange<br />
Fi ts in the bellows.<br />
Camera release button<br />
I H. Double Cable Release<br />
Time screw<br />
Cable release plunger<br />
.•"..,,",.= -e,"'-<br />
' ..-:?:<br />
,-? .»<br />
Loc k. nut<br />
Needle adjustment sleeve<br />
1iI- - - - - - - - - - - - - - - - - - -
4<br />
• •<br />
,ASSEMBLY. . ;:;'. -: -:',- ..:;,: ' . '<br />
D Set u p the pillar..<br />
Insert the pillar @<br />
into the pillar sl eeve Q) on t he base, aligni ng the<br />
notch @ at t he lower end of the pillar to the guide pin at the bot <br />
tom of the sleeve so that the keyway comes to t he operator 's left<br />
h<strong>and</strong> side. Tighten t he pillar clamp ing k nob ® . (F ig. 1)<br />
Fig 1<br />
-I<br />
I<br />
® •<br />
L<br />
Fig . 2<br />
II Attach the collar to· t h e, . p~i~II~'~'.":::':· ;:·:·~::::::::::i<br />
Unscrew the cap Q) from t he top of the p illar <strong>and</strong> slide t he collar
II ~ Iace tl'ie t ransmitteCl ig t 11 umlnator on li1) ~'~~"~'~.:::::::::1<br />
Loosen t he pre-centered p in CD on t he base w ith a co in unt il it stops<br />
Insert the pin head into the positioning hole ® at the bottom o f the<br />
illuminator base. This will align the cen ter of t he lig ht path between<br />
the illum inator <strong>and</strong> photographic equ ipment. (Fig.61<br />
--- .. _.<br />
-<br />
:I:<br />
Fig. 6<br />
11 \
. ~'<br />
..~ .<br />
.. . .<br />
. ,<br />
",.. ,~,....,.~.,."<br />
.. .<br />
!<br />
Fig, 10<br />
Fig, 11<br />
A . Synchronization of the auto iris diaphragm <strong>and</strong> camera shutter<br />
The auto iris diaphragm built in each macro lens can be automatically<br />
synchronized with t he camera shutter by means o f t he doubl e cable<br />
release. The two needles at the double cable release must be adj usted<br />
before loading the film so that the longer needle CD . marked red, that<br />
screws into the soc ket on the bellows comes earlier than the o ther<br />
needle <br />
l:l<br />
m<br />
"~<br />
r<br />
-<<br />
B. Synchronizat ion of the mechanical shutter <strong>and</strong> camera shutter<br />
Fig. 12<br />
GJ<br />
Th e double cabl e release must be adjusted so that the mechanical<br />
shutter will be open alter the camera shutter op ened :<br />
1) Make this adjustment before film loading.<br />
2} Screw the shorter cable need le into the mechanical shu tter CD, <strong>and</strong><br />
the longer cable needle
SUMMARY OF PUlTINGJHE PMl·35A IN..OPERATION<br />
. - . . -.. . - . ,- ~ .. '- _. .<br />
Photography at low magnification<br />
Photography at high magnification<br />
(5X <strong>and</strong> lower) (5X <strong>and</strong> higher )<br />
EI<br />
I A ttach the mechanical shutter. I<br />
~<br />
I A djust the double cable release. I I Adjust the double cable release. I<br />
!<br />
I Open the mechanical shutter. I<br />
~<br />
Set the preset lever of the auto bellows<br />
to manual Slop-down position.<br />
~<br />
I Load f ilm . Set the film speed. I<br />
! ~<br />
I Determine the magnif ication. Choose a photo lens. I<br />
!<br />
Place the auxiliary condenser on the f ixed<br />
condenser inside the illuminator.<br />
~<br />
I Switch on the illuminator; adj ust bulb vo ltage; <strong>and</strong> mount the filters. I<br />
I Open the lens at full aperture. I<br />
!<br />
I Framing, trimming, <strong>and</strong> slopp ing down the iris d iaphragm until it circumsc ribes t he field of view.I<br />
I Fine focu s. I<br />
* Do not mo ve the photo lens ,n case of<br />
t ransmitted li ght illumination.<br />
I Stop down the lens aperture to check t he depth of focus, <strong>and</strong> determine the aper ture. I<br />
~<br />
Chock the exposure.<br />
(A uto exposure) (Manual exposure)<br />
Exposure co mpensation by " 1" or " 1-113" stops over for<br />
low contrast specimen.<br />
Set the mode selector lever o f Read the exposure meter of the OM<br />
tne OM camera to positio n camera <strong>and</strong> set tne shutter speed on<br />
" MA NUA L". the mechanical shutter.<br />
! !<br />
I Set the shutter speed . I Clo se the mechanical shutter <strong>and</strong> charge<br />
the shutter.<br />
~<br />
I Set the OM camera shutter at position B.I<br />
!<br />
I<br />
Charge the OM camera shutter; press the double cable release plunger; <strong>and</strong> expose.<br />
~<br />
I Open the mechanical shutter. I<br />
~<br />
I Advance 'ho f ilm . I<br />
1IiI- - - - - - - - - - - - - - - - - - - - - -
6<br />
PHOTOGRAPHIC PROCEDURES ., - '.' . " . . .<br />
J. . .; , .~~_ '_.J~" ".' _ "',<br />
6-1 Photomacrography with Transmitted Light<br />
The <strong>PMT</strong>.J5TA employs a tentem-tvoe illumination system for its li ght source, which enables t he light beam<br />
emitted from the tungsten bulb to pass through t he collec tor lens so as to dispersedly illum inate the wide<br />
area on the specimen by means of a condense r lens; t hen the !igh l collects at the objective pup il (or at the<br />
d iaphragm position). By matching the condenser lens w ith the pho to lens, even ill um ination can be obtained<br />
throughout the entire range of magnifications.<br />
Since the photo lens must be posit ioned at t he collecting poi nt of the light beam after passing t hrough the<br />
condenser, the stage is designed to move vertically unti l co rrect focus is ob tained.<br />
The essential point of this illuminator, t herefore, is to converge t he illuminating light at the photo lens by<br />
vert ical movements of the stage. This opt ical system needs no center ing adjust ment since t he illuminato r<br />
<strong>and</strong> auto bellows are correct ly aligned by filt ing the illuminator onto the pre-cente red p in on t he base, <strong>and</strong> In<br />
addition, du e to the pre-centered bu lb, t he <strong>PMT</strong> -3 5T A does not require any fu rther centering adjustment.<br />
D pOfifjo ning of die p.:tiO!O lens<br />
Securely clamp t he photo lens holder CD to the lower end of the<br />
dovetail slideway (2) by means of the clamp ing knob. (Fig. 14)<br />
The posit ion of the bellows jo int b lock (j) on the slideway varies<br />
accord ing to th e macro lens in use, Prop er position is indicated by<br />
different co lor dots on the sl ideway to converge the light bea m at t he<br />
pupil o f the respective macro lenses:<br />
Color o f dots on slideway<br />
Macro lens<br />
-c<br />
'" ":)<br />
o<br />
" '"<br />
" -c<br />
F ig. 14<br />
Yellow<br />
Green<br />
Light blue<br />
Zuiko Macro 80 mm<br />
Zu iko Macro 38 m m<br />
Zu iko Macro 20 m m<br />
'"o<br />
-c<br />
.n o<br />
" m o C'"<br />
m<br />
-<br />
... ....~<br />
Fig, 15<br />
(j)<br />
,<br />
*Adjustment of the lens posit ion IS not necessa ry for ref lected light<br />
illumination.<br />
* Use the focus ring (4) o f each macro lens at most retracted posit ion.<br />
fJ Use of t he iris dlap'hragm ring<br />
Each macro lens, op tionally available, prov ides fu ll y automatic<br />
diaphragm control , which allows the operat or to focus <strong>and</strong> compose<br />
a pictu re with t he lens full y opened . This diaphragm w ill autornatically<br />
clo se to th e preselected aperture at the moment of exposure. To<br />
check the depth of focus before shutter release, press the p review<br />
lever CD <strong>and</strong> look through the viewfinder of the camera. (Fig. 15)<br />
If a specimen has a flat surface (e ,g . stained specimen), t he stoppeddown<br />
aperture by about 1/2 ...... 1 stop is preferable to the fully-opened<br />
aperture.<br />
II MounttQ9 the ~ux i liary c~on~lla~e!!!n~s~!or::===~=:::=:::<br />
(For use o f t he 20 mm <strong>and</strong> 38 mm macro lenses)<br />
,<br />
~<br />
z<br />
e<br />
m<br />
i!<br />
r-<br />
Place the auxil iary condenser CV on the f ixed condenser bu ilt in the<br />
transmitted light il luminator. (Fig. 15)<br />
- - ----------------- ----- 11]
o Use of the sta~ p'lates<br />
--<br />
Three stage plates are ava il able, including on e glass p late (clear) <strong>and</strong><br />
two metal plat es (one w ith a 45 mrn-dia . opening <strong>and</strong> the other w ith<br />
a 28 mm-dia. opening). Use of t hem depends on the size of the<br />
specimen, purpose o f photography. etc. (The 28 mrn-d ia. opening<br />
p late CD permits use o f the mechan ical stage FM·3 . opt ionally available<br />
. at the tapped hole (j).1 (Fig . 16)<br />
* When the glass plate is used, wipe it clean; otherwise. smudges on<br />
the surfaces will be photographed. The plate can be fixed to the<br />
stage by the stage plate cla m ping knob {j' .<br />
II Magnification <strong>and</strong> focusing ad j u~st [i]m~e~n~t~s":==:"_'::'.:J<br />
These adjustments can be made by vertical movements of the stage<br />
<strong>and</strong> camera back w ithout mov ing the photo lens. If t he photo lens is<br />
moved after these adjust ments ar e compl ete. It may cause uneven<br />
illumination. The magn if ication scale on the slideway is ident ified by<br />
colors according to the macro lens in use:<br />
~<br />
jO<br />
w<br />
c<br />
z<br />
V><br />
w<br />
'" OJ<br />
c w<br />
s<br />
'"<br />
e,<br />
u<br />
:r e,<br />
"o:<br />
o<br />
g o<br />
:r c,<br />
Fig, 17<br />
Scale color<br />
Yellow<br />
Green<br />
Blue<br />
Wh it e<br />
Macro lens<br />
Zu iko Macro 80 mm<br />
Zu iko Macro 38 mm<br />
Zu tko Macro 20 mm<br />
Project ion length (between the f lange o f<br />
photo lens <strong>and</strong> the film plate in mm)<br />
Looking through the camera viewfinder, bring the specimen into focus.<br />
If the Varimagni Finder, optionally availab le. is used , more accurate<br />
focusing can be easily obtained.<br />
1) Coarse focus adjustment by the vertical movements of the stage<br />
<strong>and</strong> the arm (j) upon which the camera back is mounted. (F ig. 17)<br />
* When t he arm is vertically moved, be certai n to clamp t he drop<br />
prevention collar CV at th e lowest possib le position of t he arm.<br />
2) Clamp the arm <strong>and</strong> collar f inally <strong>and</strong> touch up the stage only for fine<br />
focus adjustments, then clamp the stage , to o.<br />
* Tension adjustment of the focus knobs of the stage<br />
To adjust the t ension, grasp the left-h<strong>and</strong> focus kn ob in one h<strong>and</strong>,<br />
<strong>and</strong> rotate the right -h<strong>and</strong> focus kn ob clockwise by the other<br />
h<strong>and</strong>, to t ighten t he focus k nobs, or counterclockwise to loo sen<br />
the knobs. Do not loosen the knobs too much; otherwise the<br />
k nobs will slip. (Fig. 18 )<br />
* A s t he 80 mm macro lens has a longer wo rking distance, it is<br />
necessary to raise the stage dovetail CD to a h igher position as<br />
shown in F ig. 18 for magnifications over O.9X·. (Fig. 18 )<br />
Fig, 18<br />
III- - - - - - - - - - - - - - - - - - - - - - - -
~ • • ft •<br />
. ,<br />
~ . , ....<br />
-'-: '<br />
CD<br />
'.,.~<br />
• •<br />
The substage ir is diaphragm is used as a fie ld d iaphragm which shou ld<br />
be properly stopped down by the lever CD to cut off extraneous light<br />
entering from outside the f ield of view. (Fig. 19)<br />
The visual f ield when looked th rough the viewfinder is generally<br />
small er t han the actual area in t he pictu re. Therefore, it is preferable<br />
to enlarge the opening of the iris d iaphragm by about 20% - 30"10<br />
larger t han the diagonal of the visual f ield .<br />
Fig. 19<br />
Q t"Q:hec<br />
the exposure,<br />
To make good ph otogra phy of a low contrast specimen w it h transmitted<br />
light, we r ecommend you to set t he expo su re compensation dial<br />
on the OM camera back to "1 " ...... " 1·1 / 3" stop over. An accurate exposure<br />
w ith crispl y defined image can be obtained.<br />
If t he exposure met er indicates a faster shutter speed over 1/1000<br />
sec.. add an N O filter.<br />
-e<br />
:l:<br />
S o""<br />
" -e<br />
:l:<br />
o<br />
-c<br />
"o<br />
o<br />
m<br />
oC<br />
"m on<br />
z<br />
o<br />
m<br />
i!<br />
r-<br />
- - - - - - - - - --- - - - -------11:'1
The auto bell ows can be used for photomicrography in conjunction w ith a microscope <strong>and</strong> vert ica l photo<br />
tube. This photographic method enables continuous change of magnifications, f ree of shutter vibration,<br />
since the auto bellows can hold the camera back detached away from the microscope.<br />
J<br />
A. Setup of the <strong>PMT</strong>-35A <strong>and</strong> microscope<br />
Camera back<br />
Camera adapter holder<br />
Auto bellows<br />
~<br />
;':<br />
w<br />
a<br />
Z<br />
Microscope<br />
(Model BH2)<br />
I B. Assembly<br />
1. Place a microscope on the base.<br />
Since the pre-centered pin is not needed In this use, screw the pin into the base with a coin <strong>and</strong> place the<br />
microscope in the center of the base, so that the optical axis of the photo tube is approximately aligned<br />
with the center of the auto bellows; then put the eyepiece adapter PM·ADF (optionally available) on<br />
the photo tube, <strong>and</strong> insert the photo eyepiece F K into t he adapter.<br />
* In the case of a BH2 microscope. insert the pho to eyep iece directly into the photo tu be.<br />
2. Attach the light excluding collar to the bellows.<br />
Connect the light excluding collar to the bellows' bayonet, lower the dovetail slideway until the light<br />
excluding collar covers the photo tube. leaving about 1 mm cl earance between the light excluding collar<br />
<strong>and</strong> photo tube for prevention of the shutter Vibration from transm itting to the camera back; then tighten<br />
the slideway,<br />
3. Center t he microscope accurately .<br />
Looking at the specimen through the microscope eyepieces <strong>and</strong> the camera's viewfinder alternately. adjust<br />
the microscope position until t he optical axis through the photo tube <strong>and</strong> auto bellows is correctly aligned.<br />
1Iil- - - - - - - - - - - - - - - - ----- - - -
C. Procedure<br />
The procedure for phtomicrography is the sa me as indicated in the " Summary of Put t ing t he <strong>PMT</strong>-35A in<br />
Operat io n" in page 12.<br />
The lett-side scale engraved on the dovetail slideway o f the auto bellows in dicates t he proj ection length,<br />
from which you can obtain the magnification on the f ilm p lane by app ly ing the formula below:<br />
M= mob x moc x<br />
L<br />
250<br />
M,<br />
mob:<br />
moc:<br />
L'<br />
Magnification on the f ilm plane<br />
Mag nif ication o f the objecti ve<br />
Mag nif icat ion of the photo eyepiece<br />
Project ion length in mm.<br />
For use o f Ol y mpus NFK photo eyepieces, t he formula w ill be mod ified as follows since the image distance<br />
is 125 m m:<br />
M = mob x moc x<br />
L<br />
125<br />
* In case of NF K ph oto eyepieces, it is recommended to extend t he project io n length longer than 125 mm.<br />
* When objectives are changed at the longer projection lengths, however, check the focus, since parfocalitv<br />
may somet imes not be maintained; <strong>and</strong> when you rotate the nosepiece, be careful not to hit the objective<br />
f ron t lens against the specimen.<br />
-e<br />
'"o -<<br />
o o<br />
~,.<br />
-c<br />
'"o<br />
-c<br />
zn<br />
o o<br />
m<br />
oc;<br />
'"m<br />
'" Zom:;!<br />
r-<br />
- - ----- ---------------Iil
6-3 Photomacrography with Reflected Ught<br />
Ref lected light can be employed in a w ide range of photomacrographi c appl ications. depending upon the<br />
various forms <strong>and</strong> conditions of specimens or photographi c pur poses. Some of the typical applicat ions of<br />
this photomacrograph ic equipment (pMT·35 AAl. including sta ndard or optional com ponents, will be explained<br />
as follows:<br />
D<br />
e "llummation<br />
The universal illuminator PM- LSD-W . composed of paired ligh t sources <strong>and</strong> transformers, can be used for<br />
oblique illumination. Each set, consisting of a tall pillar <strong>and</strong> long arm, can hold the light source to illuminate<br />
a specimen at various position s <strong>and</strong> angles. The built-in condenser lens travels by the focusing knob CD for<br />
con vergence or d ivergence, as well as parallel, adjustments of t he light beam, which makes it convenient to use<br />
them as a main illuminator <strong>and</strong> sub-illuminat or. The latter can attenuate the shadow caused by t he former,<br />
To reduce highl ight reflect ed from the specimen surface , cotar.<br />
izing f ilters (M 49 mm, pitch 0 .75 mml, available at the market ,<br />
can be mounted in the front holders o f. the light sources <strong>and</strong><br />
photo lens respect ively .<br />
•<br />
....<br />
-;;<br />
w<br />
c<br />
z<br />
'"w owo<br />
o
D Sflaoowless iIIum mation<br />
The Lleberkubn reflect ors PM-LM38 <strong>and</strong> PM -LM20.both op tionally eveuebte.are used for photomacrography<br />
o f a specimen within a diameter of 25 mm. T he PM·LM38 Q) mounted on the macro lens 38 rrvn.cr the PM·<br />
LM 20 mounted on the macro lens 20. receives paralle l light from a substagoa mirror <strong>and</strong> directs to the sceclmen.<br />
The shadcwless light reflected by the Lieberkuhn is soft with very little glare. IFig. 21)<br />
II Electronic f1a Sti<br />
lignting<br />
Fig.21<br />
The OTF {ott-tne -fltm) light measuring syst em adopted in the OM camera back s (automatic exposure version ;<br />
e.q. OM ·2. OM-2N. OM2-SIP. OM-4, etc.} faci htates ph otomacrography with electronic flash lighting. This<br />
lighting system permits simple. accurate automatic exp osure w it hou t t ime·taking problems of calculating t he<br />
exposure setting of a flash unit in use.<br />
* The macro lenses 20 mm <strong>and</strong> 38 mm are sometimes unable to automat ically photomacrograph with ef·<br />
fectlve flash li ght ing. because of their connect ing restr ict ions.<br />
-c<br />
:z:<br />
8<br />
o<br />
7 CONDITIONS FOR TAKING GOOD PICTURES<br />
• •• • •<br />
Taking a good phc tc macroqraph depends on var ious factors . including f ilms, f ilters, developing process,<br />
printing, etc. in addit ion to the pho tographic equipment. staining, <strong>and</strong> instrumen tal techniques. The fo llowing<br />
explana tion w ill serve as a brief guide to prepare for taking good pho tomacrog raphs :<br />
In co mparison w ith photomicrography. pho tomacrography is dominated by the lower magnifications <strong>and</strong><br />
larger wor k ing d istances o f macro lenses, <strong>and</strong> therefore, may be more easily affected by lighting conditions.<br />
Do not all ow th ese factors to affect the quality of your cnotomecrccraobs as much as possible. The <strong>PMT</strong><br />
35A is recommended to use in a dimly-lit r oom . fr ee fr om moisture <strong>and</strong> vibration .<br />
I7-2 Specimens<br />
. "<br />
•<br />
Generall y low magn ificat ion photography is not suited for detailed examination , <strong>and</strong> it gives an impression<br />
o f fla tne ss. We recom mend to section a specimen extremely thin <strong>and</strong> stain it denser than normal. From<br />
densely stained specimens, conrrastv pictures can be obtained.<br />
7-3 Selection of Films <strong>and</strong> Filters<br />
l' =<br />
I<br />
-<br />
"' w<br />
::> '"<br />
r<br />
o<br />
e,<br />
c<br />
o<br />
C><br />
C><br />
Z<br />
'"<br />
" a: o u,<br />
"' z<br />
o<br />
r<br />
cz<br />
o H igh contrast <strong>and</strong> w ide latitude f ilm is required for pho tomacrography as in case of photomicr ography .<br />
Example: for specimens of low contrast Kodak Panato rmc X, 32 A SA!ISO<br />
for general use<br />
D Monochromatic f ilters<br />
o Green filter 4 5G·533:<br />
o Orange filter 450·560:<br />
o No f ilter:<br />
II Color film<br />
Makes pictures o f maximum resolu tion <strong>and</strong> good con trast. Most recommendable<br />
for general use.<br />
Emphasizes "blue" o f stained specimens. A contrast f ilter.<br />
Results in p ictures of Slightly less<br />
green filter.<br />
Kodak Hiqhccmrast co py,<br />
64 ASA/ISO, preferable to Kodak Plus X,<br />
125 ASA/ ISO<br />
contrast compared with photographs with<br />
The <strong>PMT</strong>-35A uses a tungsten bulb as the light source, <strong>and</strong> its color te mperature is low <strong>and</strong> u nsuitable for<br />
daylight film. In order to obtain proper color rendition for daylight film , an l BO·2N fiher is provided to<br />
co nvert the co lor temperatu re o f the tungsten bulb into the daylight co lor temperature. And use the tuoqsten<br />
bulb at 9V.<br />
D [L i9fE!~~==========::J<br />
The above tnter-vcnece combinat ion is given as a guideline. <strong>and</strong> sometimes may not be enough to obtain<br />
a satisfactory resu lt in all cases. due to the d ifferences between the types of film or in co lor reproduction<br />
processes. etc. To avoid these d ifferences as much as possible. a color compensa ting f ilter can be used. A s<br />
the balance between red <strong>and</strong> blue t ints can be adjusted by means of voltage change. it is convenient to prepare<br />
green filters CC 5G <strong>and</strong> 10 G as basic color compensating f ilters.<br />
Bil- - - - - - - - - - - - - - --- - - - - -
II Neutra aenslty. fi ters<br />
It is necessary to reduce light intensity when illuminat ion is too bright, especially when the transmitted<br />
light illuminator is used in low magnification. To avoi d voltage change which affects color rendition, NO<br />
filters are preferable .<br />
u<br />
: = " ' ,<br />
, _.<br />
Color reversal film is suited to obtain color slides or transparencies; while color negative is used for duplicate<br />
color prints. When printing color dupli cates f rom negative f ilm the pro cessing laboratory has wider latitude<br />
in reproducing color tones t han w ith reversal fi lm. The laboratory automatically adjusts color reproduction<br />
when pr inting famil iar objects as l<strong>and</strong>scapes, portraits, etc.<br />
When processing ohotomrcro or photomacrographic prints, however, the labor atory has no experience to<br />
guide them; <strong>and</strong> we therefore suggest a photomacrographer to si multaneously photograph the specimen on<br />
a col or reversa l exposed under identical condi t ions (including ident ica l or suitably adjusted color temperature).<br />
<strong>and</strong> supply the labo ra tory with a transparency to guide them in t he selection of the correct colo r<br />
hues of the print. Or it is also advisable to directly print from the reversal.<br />
8 zo'"<br />
o z<br />
~<br />
-n<br />
o<br />
"<br />
>!<br />
"z<br />
"<br />
"o oo<br />
-c<br />
~<br />
"m<br />
~<br />
- - ---------------- --- --f.D
8<br />
TROUBLE SHOOTING . ... .. ..<br />
If you are unable to obtain a perfect performance from t he <strong>PMT</strong>·35A because o f unfamiliarity with the instrument<br />
. please use t he table below as rem ind er of checking t he instrument :<br />
1. Operat ion<br />
T~·~ u b l e<br />
,<br />
..<br />
C.' .. .., ... . .. ..<br />
Cause R . m 'dY"' '' '~ '' ' .<br />
a) Field of view is still dim Mechanical shutter is clo sed . Open shutter b y lever.<br />
even after switching on il -<br />
luminator.<br />
b] Field of view is cut off at Transmitted light illuminator rs not Raise pre-centered pin <strong>and</strong> place ilpe<br />
riphery. 0' not evenly co rrectly a ligned w it h p re-centered lum inato r on it.<br />
illuminated.<br />
pm.<br />
When sett ing up pillar <strong>and</strong> arm, guide Correct ly mount pilla r <strong>and</strong> aIm in<br />
pins a nd notches ate not correct ly place.<br />
a ligned a nd deviated from center.<br />
Auxiliary condenser is not correctly Use 3UJdliary condenser with macro<br />
" sed, lenses 38mm <strong>and</strong> 20mm Inot recessarv<br />
for macro lens BOmml.<br />
Bulb socket rs not inserted into iI· Push socket in completely.<br />
lum inator complet ely .<br />
Field iris d iaphragm is stopped down Open diaphragm more w idely than<br />
too much. frame retide (by about 20-30%).<br />
Photo lens rs not locat ed In correct Locate photo lens in correct position<br />
position. (refer to "positioning o f t he photo<br />
lens" at peqe 13).<br />
c) Dust or d irt partid es ate Dust on condenser top lens.<br />
visible in field o f view.<br />
D irty specimen .<br />
Clean.<br />
Oust on viewfinder.<br />
d) Specimen is hard to b ring Focal depth of photo lens is too deep. T I Y a Varimagni Finder, optionall y<br />
into sharp focus. available at the camera market, to<br />
facilitate focusing.<br />
o<br />
Z<br />
I<br />
o<br />
;:;<br />
w<br />
~<br />
'" ::><br />
o<br />
I- '"<br />
By moving stage up <strong>and</strong> down alternatelv,<br />
memorize two positions where<br />
image blurs equally; then bring st age<br />
to rnld -po sltion between them tor<br />
optimum focu s.<br />
OM svstem foc using screen rs not U,. focusing screen matched with<br />
matched w ith macro lens. macro Ierts as follows : Focusing<br />
screen Nos. 1-4, 1-1 0, 1-1 1 for macro<br />
8Omm; 14, 1-1 0, 1-11, 1-12 for macro<br />
38mm; <strong>and</strong> 1-11 , 1-12 tor macro<br />
20mm.
"<br />
Trouble •<br />
2, Photography<br />
,<br />
- . ; " < - cause<br />
, . L~ -<br />
I"''''fi'' , . " Remedy'<br />
, ,<br />
,} Poor color r end it ion. Color temperature of light source is Use LBD-2N filter for daylight type<br />
too low (or high) for co lo r f il m in use. f ilm or LBT f il ter for tungsten type<br />
f ilm.<br />
Bu lb voltage rs too low (0' high); Raise (0' lower) voltage. (St<strong>and</strong>ard<br />
t inted red (or blue) too much .<br />
voltage: abou t 9V.l It is recommended<br />
to test at this st<strong>and</strong>ard voltage (±1 V)<br />
to obtain a guideline at initia l stage of<br />
your photographing opera tion.<br />
,<br />
Bulb has aged after long use,<br />
Replace defect ive bu lb.<br />
Spectra l emission (or co lor balance) of<br />
Use color co mpensating filt er properly:<br />
light source is not pro perly cc rnpen- CCM (magenta) for tinted green; 0'<br />
sated fo r fi lm in use (e.g . t inted green CCG (gre en) f or t inted magenta).<br />
or magenta} .<br />
Ava ilab le per iod of film has been ex-<br />
pired.<br />
Use fi lm w ithin available period.<br />
b ) Incorrect expo sure. Exposu re rs not co rrectly comoen. Basically, compensate exposure t ime<br />
sated for low contrast specimen. up to 1 to 1·1/3 stops over for low<br />
contrast. (Prior to this compensat ion,<br />
reduce fi lm speed ISO 100 to ISO 40-<br />
50, for instance.)<br />
Obj ects ar e scattered in field o f view.<br />
Light intensity is too high t hat shutter<br />
speed exceeds 1/1000 sec.<br />
Adjust exp osure:<br />
in bright f ield . . over exposure {+} or<br />
in dark field . . . under exposrue (-J.<br />
or manual exposure.<br />
Use ND filt er.<br />
cl B lurred i rn a ~ e . Eyep iece diopter w", em correctly A djust eyepiece d iopter so tha t tocusadjust<br />
ed for o perator's eye acuity _ ing reticle (o r doub le cross lines] can<br />
be sharply seen.<br />
Image blurs by camera's shutter vib ra-<br />
t fo n.<br />
Incorrect focus<br />
Use mechanical shutter.<br />
Refer to 1. d).<br />
d) Pi ctu re image is not sharp. Lens aperture rs stopped down (0 ' Maxim ize lens aperture for plain speclopened)<br />
too much. moe (e.g. slide specimen); 0' stop<br />
down aperture for uneven object (be<br />
certain to check depth of focus by<br />
means of stop down lever).<br />
Specimen is stained too weak; lack of • Change stain color.<br />
con trast . • Use contrast filter to tak e monochromatic<br />
p icture or use high contra<br />
st film.<br />
--i<br />
'"o<br />
C<br />
OLYMPUS OPTICALCO. LTO. OLYMPLTS<br />
. S OKYO""':...<br />
SAN.E1 BUILD ING, 22_2. N ISHISHINJ UKU<br />
1.CHOME. SHIN JUKU.KU. TO KYO, JAPAN<br />
Printed in J8Pl1n 8~08 M 03