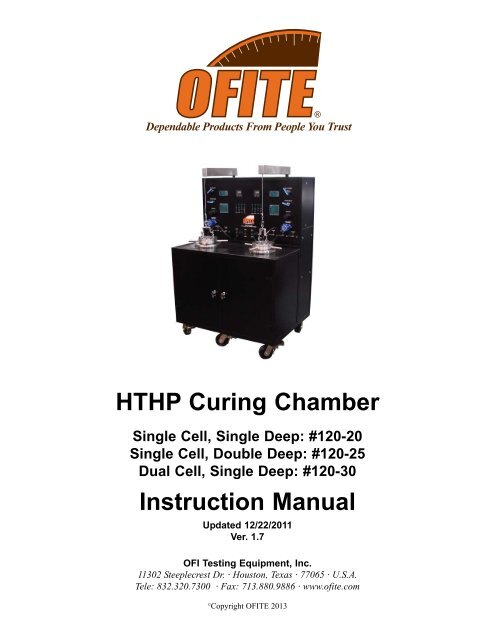
HTHP Curing Chamber Instruction Manual - OFI Testing Equipment ...
HTHP Curing Chamber Instruction Manual - OFI Testing Equipment ...
HTHP Curing Chamber Instruction Manual - OFI Testing Equipment ...

Create successful ePaper yourself
Turn your PDF publications into a flip-book with our unique Google optimized e-Paper software.
<strong>HTHP</strong> <strong>Curing</strong> <strong>Chamber</strong><br />
Single Cell, Single Deep: #120-20<br />
Single Cell, Double Deep: #120-25<br />
Dual Cell, Single Deep: #120-30<br />
<strong>Instruction</strong> <strong>Manual</strong><br />
Updated 12/22/2011<br />
Ver. 1.7<br />
<strong>OFI</strong> <strong>Testing</strong> <strong>Equipment</strong>, Inc.<br />
11302 Steeplecrest Dr. · Houston, Texas · 77065 · U.S.A.<br />
Tele: 832.320.7300 · Fax: 713.880.9886 · www.ofite.com<br />
©<br />
Copyright <strong>OFI</strong>TE 2013
Table of<br />
Contents<br />
Intro....................................................................................................2<br />
Description........................................................................................2<br />
Components......................................................................................2<br />
Specifications ...................................................................................3<br />
Setup..................................................................................................4<br />
Prepare Molds...................................................................................5<br />
Prepare Slurry...................................................................................5<br />
Fill Molds...........................................................................................5<br />
Operation ..........................................................................................6<br />
Termination .......................................................................................8<br />
Maintenance......................................................................................9<br />
Troubleshoot.....................................................................................9<br />
Appendix .........................................................................................10<br />
Pressure Indicator.......................................................................10<br />
Set Temperature .........................................................................11<br />
Set Timer ....................................................................................13<br />
<strong>OFI</strong>TE, 11302 Steeplecrest Dr., Houston, TX 77065 USA / Tel: 832-320-7300 / Fax: 713-880-9886 / www.ofite.com 1
Intro<br />
Description<br />
Components<br />
The Model 200 <strong>HTHP</strong> <strong>Curing</strong> <strong>Chamber</strong> is utilized to prepare well cement<br />
specimens for compressive strength tests. It is necessary to determine the<br />
amount of time required for a cement to develop compressive strength so<br />
that drilling/production operations can be resumed as quickly as possible.<br />
The goal is to design a slurry that can quickly develop compressive strength<br />
so that the “waiting on cement” time may be minimized. The <strong>OFI</strong>TE <strong>HTHP</strong><br />
<strong>Curing</strong> <strong>Chamber</strong>s provide a means of curing cement specimens under typical<br />
downhole temperatures and pressures.<br />
Cement is poured into a special mold that produces specimens measuring 2"<br />
× 2" × 2". The mold is placed into the test cell and the pressure is increased<br />
via an air-driven hydraulic pump. Test temperature is governed by a PID temperature<br />
controller, which actuates the heater. After a predetermined amount<br />
of time, the temperature of the test cell is reduced by the cooling system.<br />
Specimens are removed and the compressive strength is determined as outlined<br />
in API Specification 10.<br />
Components:<br />
#122-001 Thermocouple Assembly<br />
#122-008 Heater Assembly<br />
#122-052 Rupture Disk, 5,500 PSI (38 MPa)<br />
#122-073 2-Amp Fuse, 5 mm × 20 mm<br />
#122-077 10-Amp Fuse, 5 mm × 20 mm<br />
#122-079 Circuit Breaker<br />
#122-083 Mold Assembly, 8 Specimen<br />
Optional:<br />
#120-21 Spare Parts for One Year’s Operation 120-20:<br />
#122-001 Thermocouple Assembly<br />
#122-008 Heater, Qty: 2<br />
#122-052 Rupture Disk, 5500 PSI (38 MPa), Qty: 2<br />
#122-073 Fuse, 2 Amp, 5 mm × 20 mm, Qty: 4<br />
#122-074-1 Fuse, 5 Amp, 5 mm × 20 mm, Qty: 4<br />
#122-077 Fuse, 10 Amp, 5 mm × 20 mm, Qty: 4<br />
#122-079 Circuit Breaker with Neutral Breaker, 25 Amp<br />
#120-31 Spare Parts for One Year’s Operation 120-30:<br />
#122-001 Thermocouple Assembly, Qty: 4<br />
#122-008 Heater, Qty: 4<br />
#122-034 Valve, Qty: 4<br />
#122-052 Rupture Disk, 5,500 PSI (38 MPa), Qty: 4<br />
#122-072 1-Amp Fuse, 5 mm × 20 mm, Qty: 8<br />
#122-074-1 5-Amp Fuse, 5 mm × 20 mm, Qty: 4<br />
#122-079 25-Amp Circuit Breaker with Neutral Breaker, Qty: 2<br />
#122-083 Mold Assembly, 8 Specimen, Qty: 2<br />
<strong>OFI</strong>TE, 11302 Steeplecrest Dr., Houston, TX 77065 USA / Tel: 832-320-7300 / Fax: 713-880-9886 / www.ofite.com 2
Specifications<br />
Air Supply<br />
Cooling Water Supply<br />
Readout<br />
Safety Features<br />
Power Requirements<br />
Weight<br />
Dimensions<br />
Shipping Weight<br />
Shipping Dimensions<br />
Industry Standards<br />
Not more than 150 PSI (1035 kPa)<br />
40 PSI (276 kPa)<br />
Digital<br />
Pressure Relief Valve<br />
Safety Head with Rupture Disk<br />
220 Volts, 50 / 60 Hz, 40 Amp Electrical Power<br />
Supply<br />
499 kg<br />
84 × 76 × 152 cm<br />
590 kg<br />
99 × 91 × 168 cm<br />
SPI Specification 10<br />
ASTM Standard C-109<br />
Maximum Temperature / Pressure Combinations<br />
Safety Factor: 2.0<br />
Temperature °F (°C)<br />
Pressure PSI (kPa)<br />
72 (22) 5,750 (39,675)<br />
85 (29) 5,600 (38,640)<br />
125 (52) 5,250 (36,225)<br />
190 (88) 4,800 (33,120)<br />
260 (127) 4,400 (30,360)<br />
375 (191) 4,000 (27,600)<br />
550 (288) 3,600 (24,840)<br />
650 (343) 3,400 (23,460)<br />
746 (397) 3,275 (22,598)<br />
Maximum Temperature / Pressure Combinations<br />
Safety Factor: 1.5<br />
Temperature °F (°C)<br />
Pressure PSI (kPa)<br />
75 (24) 8,875 (61,193)<br />
80 (27) 8,800 (60,676)<br />
105 (41) 8,400 (57,918)<br />
135 (57) 8,000 (55,160)<br />
175 (79) 7,600 (52,402)<br />
220 (104) 7,200 (49,644)<br />
275 (135) 6,800 (46,886)<br />
340 (171) 6,400 (44,128)<br />
430 (221) 6,000 (41,370)<br />
535 (279) 5,600 (38,612)<br />
700 (371) 5,200 (35,854)<br />
750 (399) 5,100 (35,164)<br />
<strong>OFI</strong>TE, 11302 Steeplecrest Dr., Houston, TX 77065 USA / Tel: 832-320-7300 / Fax: 713-880-9886 / www.ofite.com 3
Setup<br />
1. Carefully remove the instrument from the wooden crate.<br />
2. Ensure all five valves on the front of the instrument are closed. These<br />
valves are labeled “FILL CELL”, “AIR SUPPLY”, “WATER SUPPLY”,<br />
“AIR TO CYLINDER”, and “PRESSURE RELEASE”.<br />
3. An air/nitrogen (690 - 1,035 kPa or 100 - 150 PSI) supply line should<br />
be connected to the “AIR SUPPLY” on the back of the instrument. The<br />
<strong>Curing</strong> <strong>Chamber</strong> is equipped with a ¼" (6.35mm) NPT fitting for connecting<br />
the air supply. The fitting is located on the back of the <strong>Curing</strong><br />
<strong>Chamber</strong> at the very bottom.<br />
4. The “DRAIN” and “WATER SUPPLY” lines should be connected in a<br />
similar manner. These ¼" hose connections are located right next to<br />
the air supply connection on the back of the unit.<br />
5. Ensure that all electrical switches are in the off (down) position and<br />
make the necessary electrical connections in accordance to local<br />
codes. Ensure that the unit is grounded.<br />
6. Turn the “MAIN” switch to the on position.<br />
7. Prepare the cement molds as outlined on the next page. Note that<br />
these procedures are stated within API Specification 10.<br />
<strong>Curing</strong> <strong>Chamber</strong> Control Panel<br />
AIR TO CYLINDER<br />
Pressure Indicator/Alarm<br />
Timer<br />
PRESSURE RELEASE<br />
PRESSURE<br />
REGULATOR<br />
MAIN PUMP HEAT TIMER<br />
AUTO COOL<br />
SONALERT<br />
COOL<br />
ALARM<br />
Temperature Controller<br />
BACK PRESSURE<br />
REGULATOR<br />
AIR SUPPLY<br />
WATER SUPPLY<br />
FILL CELL<br />
ON<br />
ON<br />
ON<br />
SLURRY<br />
RAISE<br />
OFF<br />
OFF<br />
OFF<br />
CELL<br />
LOWER<br />
<strong>OFI</strong>TE, 11302 Steeplecrest Dr., Houston, TX 77065 USA / Tel: 832-320-7300 / Fax: 713-880-9886 / www.ofite.com 4
Prepare Molds<br />
Prepare Slurry<br />
Fill Molds<br />
Thinly coat the interior faces of the molds and the contact surfaces of the<br />
plates with grease to facilitate the removal of the cement specimens once<br />
they have cured.<br />
Prepare the cement slurry in accordance with Sect. 5 of API Specification<br />
10.<br />
Place the slurry in the prepared molds in a layer equal to one-half of the<br />
mold depth. After all the specimen compartments are filled half full with<br />
slurry, puddle each specimen 25 times with a puddling rod. After puddling<br />
the first layer, stir the remaining slurry by hand using a puddling rod or<br />
spatula to eliminate segregation. Then fill each specimen to overflowing<br />
and puddle as the first layer. After puddling, strike off the excess slurry<br />
even with the top of the mold, using a straight-edge. Discard specimens in<br />
molds which show evidence of leaking. Place a greased cover plate on top<br />
of the mold. For one test determination, not less than three specimens<br />
should be used.<br />
Cement Molds<br />
<strong>OFI</strong>TE, 11302 Steeplecrest Dr., Houston, TX 77065 USA / Tel: 832-320-7300 / Fax: 713-880-9886 / www.ofite.com 5
1. Loosen all twelve set screws on the cell cap with a torque wrench.<br />
Operation<br />
2. Unscrew the cell cap by turning it counter-clockwise.<br />
3. Once the cell cap is completely unscrewed, flip the winch switch to<br />
“RAISE.” The winch switch is located to the left of the cell on the<br />
<strong>Curing</strong> <strong>Chamber</strong> cabinet. The winch will automatically lift the cell cap<br />
off of the test cell.<br />
4. Carefully lower the cement molds into the test cell, ensuring that the<br />
thermocouple port is centered correctly.<br />
5. Remove the handle from the mold.<br />
6. The sealing ring and threads on the cell cap should be lubricated periodically<br />
with a high temperature grease.<br />
7. Flip the winch switch to “LOWER,” helping align the cell cap as it is lowered<br />
to the test cell.<br />
8. The test cell cap should be tightly screwed all the way into the test cell<br />
by hand, being careful not to damage the seal rings and the cap itself.<br />
9. Tighten all the set screws on the cell cap by hand, using a circular<br />
sequence.<br />
10. Adjust a torque wrench to 90 inch-pounds and tighten the set screws in<br />
a rotational sequence. In other words, tighten a set screw, skip four set<br />
screws, tighten the fifth set screw, skip four set screws, etc. until all of<br />
the set screws have been tightened. The torque wrench will click when<br />
the specific torque has been achieved.<br />
!<br />
Important<br />
11. Now adjust the torque wrench to 180 inch-pounds and tighten the set<br />
screws in the same rotational sequence as described above. In other<br />
words, tighten a set screw, skip four set screws, tighten the fifth set<br />
screw, skip four set screws, etc. until all of the set screws have been<br />
tightened. Again, be sure and listen for the click that signals the specific<br />
torque has been achieved.<br />
It is imperative that the cap be tightened in a consistent and uniform<br />
manner to obtain a good seal.<br />
12. Insert the thermocouple through the top of the test cell, tighten the<br />
threaded gland finger tight and then loosen 1/8 turn. Verify that the<br />
other thermocouple plug is connected to the side of the curing chamber<br />
cabinet.<br />
13. Verify that the “AIR TO CYLINDER” and “PRESSURE RELEASE”<br />
valves are closed.<br />
<strong>OFI</strong>TE, 11302 Steeplecrest Dr., Houston, TX 77065 USA / Tel: 832-320-7300 / Fax: 713-880-9886 / www.ofite.com 6
14. Turn the “WATER SUPPLY” valve on.<br />
15. Turn the “AIR SUPPLY” valve on.<br />
16. Turn the “FILL CELL” valve on. Water will flow into the test cell and air<br />
will be expelled from the loosened thermocouple connection.<br />
17. With a 5/8" wrench handy, watch the top of the cell. When water<br />
begins to flow from the thermocouple connection, tighten the thermocouple<br />
fitting with the wrench.<br />
18. Apply pressure to the test cylinder by turning the “PUMP” switch on.<br />
The pressure may then be increased by turning the “REGULATOR”<br />
clockwise until the desired pressure is obtained. This pressure is<br />
shown on the “PRESSURE INDICATOR.” The system will automatically<br />
make adjustments to keep the pressure consistent. The pressure<br />
threshhold may be reduced by slightly opening the “BACK PRESSURE<br />
REGULATOR.” See the Appendix for how to set up the alerts on the<br />
“PRESSURE INDICATOR.”<br />
19. For temperature, you have a choice of manual control or running up a<br />
custom program. If you are controlling the temperature manually, use<br />
the up/down arrows on the “TEMPERATURE CONTROLLER” to set<br />
your temperature. If you are using a pre-set program, push and hold<br />
the “Run/Hold” button until the light for Run turns on. See the Appendix<br />
for how to custom program your “TEMPERATURE CONTROLLER.”<br />
20. Turn on the “HEATER” switch.<br />
21. Turn on the “SONALERT” so that you will be notified with beeping noises<br />
should the unit experience any alarms.<br />
22. The timer on the <strong>OFI</strong>TE <strong>Curing</strong> <strong>Chamber</strong> incorporates a relay which<br />
can be used to automatically control the water cooling solenoid. The<br />
timer may be activated by turning the “TIMER” switch and pressing the<br />
“R” button on the “TIMER”. If you are using the “AUTO COOL” feature,<br />
flip that switch on as well. See the Appendix for how to custom program<br />
your “TIMER.”<br />
<strong>OFI</strong>TE, 11302 Steeplecrest Dr., Houston, TX 77065 USA / Tel: 832-320-7300 / Fax: 713-880-9886 / www.ofite.com 7
Termination<br />
1. After the cement has cured for the required amount of time, the test will<br />
need to be terminated. If you are running a custom program on the<br />
“TEMPERATURE CONTROLLER,” push and hold the “Run/Hold” button<br />
until the light for Run and Hold both turn off. If you are manually<br />
handling the temperature, use the down arrow key to reduce the temperature.<br />
In either case, the “HEAT” switch should be turned off.<br />
2. If you are not using the “AUTO COOL” feature in conjunction with the<br />
“TIMER,” turn the “COOL” switch on.<br />
!<br />
Important<br />
3. After cooling to less than 80°C (180°F), release the pressure by switching<br />
the “PUMP” switch to the off position. Slowly open the “PRES-<br />
SURE RELEASE” valve. The pressure gauge should be close to zero.<br />
DO NOT RELEASE THE TEST PRESSURE UNTIL THE TEMPERA-<br />
TURE HAS BEEN REDUCED TO A MINIMUM OF 200°F.<br />
4. With the “PRESSURE RELEASE” valve open, water can now be<br />
removed from the test cell. Slowly open the "AIR TO CYLINDER"<br />
valve. Air pressure will force water from the test cell. When air is<br />
escaping out of the vent, the "AIR TO CYLINDER" valve should be<br />
closed.<br />
5. Slowly loosen the fitting on the thermocouple and remove it from the<br />
test cell.<br />
6. The cap screws should be loosened and the test cell cap should be<br />
unscrewed. Use the winch switch to raise the cell cap. Remove the<br />
cement specimens and cool as stated within API Specification 10.<br />
7. Return the test cell cap to the test cell to prevent dust and other matter<br />
from entering the test cell. Close all valves and return all switches to<br />
the off position.<br />
<strong>OFI</strong>TE, 11302 Steeplecrest Dr., Houston, TX 77065 USA / Tel: 832-320-7300 / Fax: 713-880-9886 / www.ofite.com 8
Maintenance<br />
1. One of the most important elements of trouble free operation is keeping<br />
the interior of the test cell as clean as possible. Never insert a cement<br />
covered cement mold into the test cell and periodically examine the test<br />
cell to ensure that it is clean. High pressure valves wear quickly when<br />
exposed to fluids containing cement and other particulate matter. Also<br />
make sure the air used for the air supply is clear.<br />
2. <strong>OFI</strong>TE uses a high pressure filter to protect valve stems. We recommend<br />
that filtered water be used in the curing chamber to prevent particulate<br />
matter from entering the pump and possibly causing damage.<br />
Clean or replace these filters when fluid flow is reduced from that of a<br />
clean system. Remember: Filters are inexpensive when compared to<br />
the costs of replacing the components they were designed to protect.<br />
3. The test cell cap threads have been lubricated prior to shipment and<br />
periodically should be re-lubricated.<br />
Troubleshoot<br />
The <strong>OFI</strong>TE <strong>Curing</strong> <strong>Chamber</strong> utilizes several fuses that are integral to the<br />
unit’s proper functioning. Located on the left side of the <strong>Curing</strong> <strong>Chamber</strong><br />
cabinet, these should be checked periodically and whenever you are experiencing<br />
problems with the <strong>Curing</strong> <strong>Chamber</strong>.<br />
1. Main Circuit Breaker - Check if you are having problems with power<br />
to the unit.<br />
2. Heater Circuit Breaker - Check if the unit’s heaters are not functioning.<br />
3. F4, F5, F6, F7 Fuses - A light indicates when they need to be<br />
replaced.<br />
The <strong>OFI</strong>TE <strong>Curing</strong> <strong>Chamber</strong> also contains a built in test you can perform to<br />
make sure the “PRESSURE INDICATOR/ALARM” is functioning properly.<br />
To perform this test, press in the white plastic key located on the far right.<br />
The unit should beep and the entire “PRESSURE INDICATOR/ALARM”<br />
panel should light up in a circular motion.<br />
F4-F7 Fuses<br />
Pressure Indicator/Alarm Key<br />
Main Circuit Breaker<br />
Heater Circuit Breaker<br />
<strong>OFI</strong>TE, 11302 Steeplecrest Dr., Houston, TX 77065 USA / Tel: 832-320-7300 / Fax: 713-880-9886 / www.ofite.com 9
Appendix<br />
Pressure Indicator<br />
The pressure indicator not only shows you the current pressure, but it also<br />
alerts you when the pressure rises above the value you set.<br />
The display shows the current pressure in KPSI. This means a reading of<br />
12.501 indicates a pressure of 12,501 PSI.<br />
To set the high-pressure alarm:<br />
1. Press the “Page” button until the display reads “AL”.<br />
2. Press the “Enter” button until the display reads “1FSH”.<br />
3. Press the up and down arrows to set the high-pressure setpoint.<br />
Enter Key<br />
Page Key<br />
Pressure Indicator<br />
<strong>OFI</strong>TE, 11302 Steeplecrest Dr., Houston, TX 77065 USA / Tel: 832-320-7300 / Fax: 713-880-9886 / www.ofite.com 10
Appendix<br />
Set Temperature<br />
!<br />
Important<br />
The Eurotherm Model 2404 Temperature Controller is the most important<br />
component of the temperature control system and it is strongly recommended<br />
that operators carefully study the Model 2404 instruction manual<br />
included with the <strong>Curing</strong> <strong>Chamber</strong>.<br />
If a test requires a custom program, it is important to build and save the<br />
program prior to creating the slurry and loading the molds.<br />
Below is an example that illustrates how to program the controller. In this<br />
example, the target temperature is 150°C, which is obtained at a rate of 2.5<br />
degrees per minute. The target temperature of 150°C is maintained for the<br />
duration of 180 minutes (3 hours), after which you want to stop the heat.<br />
Press the “Page” button three times, and you will see “ProG List.” Use the<br />
scroll button to decide which setting to change. Use the arrow buttons to<br />
change the values for that setting.<br />
Output 1<br />
(If Output 1 is<br />
lit, you have<br />
output, ie. the<br />
heat is on.)<br />
OP 1<br />
200.0<br />
200.0<br />
Actual<br />
Temperature<br />
Setpoint<br />
AUTO<br />
MAN<br />
RUN<br />
HOLD<br />
PAGE<br />
SCROLL<br />
><br />
><br />
Temperature Controller<br />
Front Panel Layout<br />
<strong>OFI</strong>TE, 11302 Steeplecrest Dr., Houston, TX 77065 USA / Tel: 832-320-7300 / Fax: 713-880-9886 / www.ofite.com 11
For the test described on the previous page, you will want the following settings:<br />
ProG List Setting Explanation<br />
Prg 1 1<br />
Hb OFF Settings may be hidden.<br />
Hb.u 0.0 Do not change the first<br />
Rmp.u min six settings.<br />
Dwl.u<br />
min<br />
Cyc.n 1<br />
Seg 1<br />
Type rmp.r (ramp rate - other choices include<br />
ramp time, dwell)<br />
Tgt 150 (final temperature)<br />
Rate 2.5 (rate per minute)<br />
Segn 2<br />
Type dwell (holds the temperature for the amount<br />
of time chosen for Dur below)<br />
Dur 180 (duration time)<br />
Segn 3<br />
Type<br />
end<br />
End.t<br />
sop<br />
To run the test, push and hold the “Run/Hold” button until the light for Run<br />
turns on. To stop the test, Push and hold the “Run/Hold” button until the<br />
light for Run and Hold both turn off. Be sure and turn the “HEATER” switch<br />
off as well.<br />
The temperature controller utilizes a high alarm setpoint which will bring the<br />
unit to an alarm condition if the temperature ever exceeds the set value.<br />
This value is defaulted to 200°C or 400°F, but can be programmed to different<br />
values.<br />
An alarm condition will also occur if the slurry thermocouple is unplugged.<br />
When a alarm condition occurs, the <strong>Curing</strong> <strong>Chamber</strong> will start to beep if the<br />
“SONALERT” switch is turned on, the “ALARM” switch will light up red, and<br />
the “TEMPERATURE CONTROLLER” will display “IFSH”. The heat and<br />
pump will be turned off. After the alarm condition is over, everything will be<br />
turned back on.<br />
<strong>OFI</strong>TE, 11302 Steeplecrest Dr., Houston, TX 77065 USA / Tel: 832-320-7300 / Fax: 713-880-9886 / www.ofite.com 12
Appendix<br />
Set Timer<br />
The <strong>OFI</strong>TE <strong>Curing</strong> <strong>Chamber</strong> incorporates a timer for auto-cooling. The<br />
timer may be activated by turning the “TIMER” switch to the on position. It<br />
must be reset to zero at the beginning of a test by depressing the “R” button<br />
on the timer’s face. The timer has been set in units of hours and minutes<br />
but may be programmed to operate in a variety of units.<br />
As an example, suppose you wish to ramp the temperature up to 350°F in<br />
one hour and maintain it for four hours. After the test, you want it to cool<br />
for two hours.<br />
1. Press “1” to set up setpoint 1. Use the “1” key to set the first digit to<br />
0. Press the “2” key to set the hours to 5 and use the two blank<br />
keys to set the hours and minutes to 0.<br />
2. Press “E” to save these settings.<br />
3. Press “2” to set up setpoint 2. Use the “1” key to set the first digit to<br />
0. Press the “2” again to set up the hours to 7 and use the two<br />
blank keys to set the hours and minutes to 0.<br />
4. Press “E” to save these settings.<br />
The program is started when “R” is pressed and the “AUTO COOL” switch<br />
placed in the “ON” position. After 5 hours the water solenoid would energize<br />
and begin cooling the unit. The unit would cool for 2 hours and then<br />
the solenoid would de-activate.<br />
Timer Front Panel Layout<br />
<strong>OFI</strong>TE, 11302 Steeplecrest Dr., Houston, TX 77065 USA / Tel: 832-320-7300 / Fax: 713-880-9886 / www.ofite.com 13