Download - Omega Engineering
Download - Omega Engineering
Download - Omega Engineering

You also want an ePaper? Increase the reach of your titles
YUMPU automatically turns print PDFs into web optimized ePapers that Google loves.
®<br />
User’s Guide<br />
Shop online at<br />
omega.com ®<br />
e-mail: info@omega.com<br />
For latest product manuals:<br />
omegamanual.info<br />
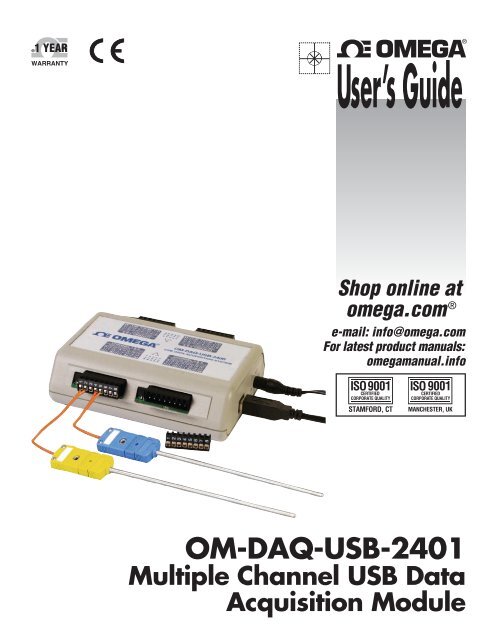
OM-DAQ-USB-2401<br />
Multiple Channel USB Data<br />
Acquisition Module
®<br />
OMEGAnet ® Online Service<br />
omega.com<br />
Internet e-mail<br />
info@omega.com<br />
Servicing North America:<br />
U.S.A.: <strong>Omega</strong> <strong>Engineering</strong>, Inc., One <strong>Omega</strong> Drive, P.O. Box 4047<br />
ISO 9001 Certified Stamford, CT 06907-0047 USA<br />
Toll Free: 1-800-826-6342 TEL: (203) 359-1660<br />
FAX: (203) 359-7700<br />
e-mail: info@omega.com<br />
Canada:<br />
976 Bergar<br />
Laval (Quebec), H7L 5A1 Canada<br />
Toll-Free: 1-800-826-6342 TEL: (514) 856-6928<br />
FAX: (514) 856-6886<br />
e-mail: info@omega.ca<br />
For immediate technical or application assistance:<br />
U.S.A. and Canada: Sales Service: 1-800-826-6342/1-800-TC-OMEGA ®<br />
Customer Service: 1-800-622-2378/1-800-622-BEST ®<br />
<strong>Engineering</strong> Service: 1-800-872-9436/1-800-USA-WHEN ®<br />
Mexico/ En Español: 001 (203) 359-7803 FAX: 001 (203) 359-7807<br />
Latin America: info@omega.com.mx e-mail: espanol@omega.com<br />
Benelux:<br />
Servicing Europe:<br />
Managed by the United Kingdom Office<br />
Toll-Free: 0800 099 3344 TEL: +31 20 347 21 21<br />
FAX: +31 20 643 46 43<br />
e-mail: sales@omegaeng.nl<br />
Czech Republic: Frystatska 184<br />
733 01 Karviná, Czech Republic<br />
Toll-Free: 0800-1-66342 TEL: +420-59-6311899<br />
FAX: +420-59-6311114<br />
e-mail: info@omegashop.cz<br />
France:<br />
Managed by the United Kingdom Office<br />
Toll-Free: 0800 466 342 TEL: +33 (0) 161 37 29 00<br />
FAX: +33 (0) 130 57 54 27<br />
e-mail: sales@omega.fr<br />
Germany/Austria: Daimlerstrasse 26<br />
D-75392 Deckenpfronn, Germany<br />
Toll-Free: 0800 6397678 TEL: +49 (0) 7056 9398-0<br />
FAX: +49 (0) 7056 9398-29<br />
e-mail: info@omega.de<br />
United Kingdom:<br />
ISO 9001 Certified<br />
OMEGA <strong>Engineering</strong> Ltd.<br />
One <strong>Omega</strong> Drive, River Bend Technology Centre, Northbank<br />
Irlam, Manchester M44 5BD United Kingdom<br />
Toll-Free: 0800-488-488 TEL: +44 (0) 161 777-6611<br />
FAX: +44 (0) 161 777-6622<br />
e-mail: sales@omega.co.uk<br />
It is the policy of OMEGA <strong>Engineering</strong>, Inc. to comply with all worldwide safety and EMC/EMI<br />
regulations that apply. OMEGA is constantly pursuing certification of its products to the European New<br />
Approach Directives. OMEGA will add the CE mark to every appropriate device upon certification.<br />
The information contained in this document is believed to be correct, but OMEGA accepts no liability for any<br />
errors it contains, and reserves the right to alter specifications without notice.<br />
WARNING: These products are not designed for use in, and should not be used for, human applications.
OM-DAQ-USB-2400<br />
Multiple Channel USB Data Acquisition Module<br />
TABLE OF<br />
CONTENTS<br />
Page<br />
Section 1 - Introduction ....................................................................... 1-1<br />
1.1 Precautions ................................................................................................ 1-1<br />
1.2 Safety Warnings and IEC Symbols ......................................................... 1-2<br />
1.3 Statement on CE Marking ........................................................................ 1-2<br />
1.4 General Description and System Components .................................... 1-2<br />
Section 2 - Hardware .......................................................................... 2-1<br />
2.1 Package Inspection ................................................................................... 2-1<br />
2.2 Included Items .......................................................................................... 2-1<br />
Section 3 - Hardware Setup ................................................................. 3-1<br />
3.1 OM-DAQ-USB-2400 Components ......................................................... 3-1<br />
3.2 USB Hubs and Power Adaptors ............................................................. 3-1<br />
3.2.1 USB-powered Hubs .................................................................... 3-2<br />
3.2.2 Self-powered Hubs ..................................................................... 3-2<br />
3.2.3 Power Adaptors .......................................................................... 3-2<br />
3.3 Connecting Your OM-DAQ-USB-2401 Acquistition Systems To PC ... 3-3<br />
3.4 Connecting Various Hardware Setups .................................................. 3-4<br />
3.4.1 Direct Connection To Computer USB Port(s) ......................... 3-4<br />
3.4.2 Connection To USB-powered Hub ........................................... 3-5<br />
3.4.3 Connections To Self-powered and USB-powered Hubs ........ 3-5<br />
3.5 OM-DAQ-USB-2401 Mounting .............................................................. 3-6<br />
3.5.1 OM-DAQ-USB-2401 Wall Mounting ........................................ 3-7<br />
3.5.2 OM-DAQ-USB-2401 DIN Rail Mounting ................................ 3-8<br />
Section 4 - Software ............................................................................ 4-1<br />
4.1 Getting Started .......................................................................................... 4-1<br />
4.2 Software Installation ................................................................................ 4-1<br />
4.2.1 System Requirements ................................................................. 4-1<br />
4.2.2 Software Setup ............................................................................. 4-2<br />
4.3 DAQ Central Software Operation .......................................................... 4-4<br />
4.3.1 Main Control Window Pull-Down Operations ...................... 4-6<br />
4.3.2 Device Configuration ................................................................. 4-8<br />
4.4 Power Line Rejection .............................................................................. 4-14<br />
4.5 Optical Isolation ....................................................................................... 4-14<br />
4.6 A/D Conversion ..................................................................................... 4-14<br />
4.7 Input Ranges .................................................................................................... 4-15<br />
4.8 Analog Input Configuration .................................................................. 4-15<br />
4.9 Measurement Duration, Scan Time, and Resolution ......................... 4-16<br />
4.10 Automatic Calibration ...........................................................................4-17<br />
4.11 Thermocouple Measurements ............................................................ 4-18<br />
Section 5 - Signal Management ............................................................ 5-1<br />
5.1 Channel Control and Expansion ............................................................ 5-1<br />
5.2 Scan Time and Resolution ....................................................................... 5-1<br />
5.2.1 Scan Time ..................................................................................... 5-1<br />
5.2.2 Resolution [Effective Number of Bits (ENOB, RMS)] .............5-1<br />
5.3 Under Sampling and Aliasing ................................................................ 5-2<br />
i
TABLE OF<br />
CONTENTS<br />
OM-DAQ-USB-2400<br />
Multiple Channel USB Data Acquisition Module<br />
Page<br />
5.4 Triggering ................................................................................................... 5-4<br />
5.5 Signal Modes ............................................................................................. 5-4<br />
5.6 System Noise ............................................................................................. 5-6<br />
5.7 Averaging ................................................................................................... 5-6<br />
5.8 Analog Filtering ........................................................................................ 5-6<br />
5.9 Input and Source Impedance .................................................................. 5-7<br />
5.10 Crosstalk .................................................................................................. 5-7<br />
8.1 Service and Calibration ............................................................................ 7-1<br />
Section 6 - CE Conformity ..................................................................... 6-1<br />
6.1 OM-DAQ-USB-2401 Design for CE Conformity .................................. 6-1<br />
Section 7 - Troubleshooting .................................................................. 7-1<br />
7.1 Basic Checklist ........................................................................................... 7-1<br />
7.2 Symptoms and Solutions ......................................................................... 7-1<br />
Section 8 - Service and Calibration ....................................................... 8-1<br />
8.1 Service and Calibration ............................................................................ 8-1<br />
Section 9 - Specifications ..................................................................... 9-1<br />
Section 10 - Approvals and Regulatory Compliance ........................... 10-1<br />
10.1 International Usage and CE Marking ................................................ 10-1<br />
ii
OM-DAQ-USB-2400<br />
Multiple Channel USB Data Acquisition Module<br />
LIST OF<br />
FIGURES<br />
List of Figures<br />
Section Figure Description .............................................................. Page<br />
Section 1 1-1 IEC Symbols ............................................................... 1-2<br />
1-2 System Components ................................................. 1-3<br />
Section 3 3-1 OM-DAQ-USB-2401 Hardware and Dimensions ... 3-1<br />
3-2 Connection of an OM-DAQ-USB-2401 System<br />
to a Computer USB Port ........................................... 3-3<br />
3-3 Direct Connection to Computer USB Port ............. 3-4<br />
3-4 Connection to USB-powered Hub .......................... 3-5<br />
3-5 Connection to Self-powered Hub<br />
and to USB-powered Hub ........................................ 3-6<br />
3-6 OM-DAQ-USB-2401 Wall Mounting ...................... 3-7<br />
3-7 OM-DAQ-USB-2401 Wall Mounting<br />
Dimensions ................................................................ 3-7<br />
3-8 OM-DAQ-USB-2401 Rail Mounting ....................... 3-8<br />
Section 4 4-1 Welcome Screen ......................................................... 4-2<br />
4-2 Select Install Screen ................................................... 4-2<br />
4-3 Confirm Installation Screen ..................................... 4-3<br />
4-4 Main Control Window ............................................. 4-4<br />
Table 4-1 Toolbar Buttons ......................................................... 4-5<br />
4-5 File Menu .................................................................... 4-6<br />
4-6 Device Menu .............................................................. 4-6<br />
4-7 Tools Menu ................................................................. 4-7<br />
4-8 Help Menu ................................................................. 4-7<br />
4-9 Configuration Mode Channels Tab Screen ............ 4-8<br />
4-10 Scan Options .............................................................. 4-9<br />
4-11 Unit Options .............................................................. 4-9<br />
4-12 Automatic Calibration .............................................. 4-9<br />
4-13 Trigger Options ....................................................... 4-10<br />
4-14 "Start Trigger" Options ............................................ 4-10<br />
4-15 "Stop Trigger" Options ........................................... 4-10<br />
4-16 Data Tab .................................................................... 4-11<br />
4-17 Data "Save Behavior" Option ................................. 4-11<br />
4-18 Main Window Screen ............................................. 4-12<br />
4-19 Gauges Screen .......................................................... 4-12<br />
4-20 Bars Screen ............................................................... 4-12<br />
4-21 Digital Screen ........................................................... 4-12<br />
4-22 Table Screen .............................................................. 4-12<br />
4-23 Waveform Screen .................................................... 4-13<br />
4-24 Sample Options Screen ........................................... 4-13<br />
iii
LIST OF<br />
FIGURES<br />
OM-DAQ-USB-2400<br />
Multiple Channel USB Data Acquisition Module<br />
List of Figures<br />
Section Figure Description ............................................................. Page<br />
4-25 OM-DAQ-USB-2400 Block Diagram .................... 4-14<br />
4-26 OM-DAQ-USB-2401 Single-ended and Differential<br />
Conections to Analog Input Channels Diagram ... 4-16<br />
4-27 Calibration/Scan Arrangement ............................ 4-17<br />
4-28 Thermocouple Wiring ............................................ 4-18<br />
Section 5 Table 5-1 Scan Rate vs Resolution (ENOB, RMS) .................. 5-2<br />
5-1 Examples of Under Sampling ................................. 5-3<br />
5-2 Trigger Source Diagram ........................................... 5-4<br />
5-3 Noise Reduction in Differential Mode ................... 5-5<br />
5-4 Example of Floating Differential Circuit .................5-5<br />
5-5 Analog to Digital Converter .................................... 5-7<br />
Section 6 6-1 OM-DAQ-USB-2401 With Ferrite Cores Installed .. 6-1<br />
6-2 Ferrite Core ................................................................ 6-2<br />
Section 9 Table 9-1<br />
Thermocouple Accuracy (C) for<br />
OM-DAQ-USB-2400 .................................................. 9-1<br />
iv
Introduction 1<br />
Section 1 - Introduction<br />
Please read this manual completely before installing and operating your <strong>Omega</strong><br />
data acquisition system. It’s important to read and follow all notes, cautions,<br />
warnings and safety precautions before operating this device. “Device” refers to<br />
your data acquisition unit.<br />
1.1 Precautions<br />
• This device is not designed for use in any medical or nuclear applications.<br />
• Do not operate this device in flammable or explosive environments.<br />
• Never operate with a power source other than the one recommended in this<br />
manual or listed on product labels.<br />
• This device has been designed for dry, moisture free indoor applications only.<br />
• Do not operate this device outside of the recommended use outlined in this<br />
manual.<br />
• Never use your data acquisition unit as a portable device. Your unit has been<br />
designed to be operated in a permanent installation only.<br />
NOTE:<br />
There are no user serviceable parts inside your device.<br />
Attempting to repair or service your unit may void your<br />
warranty.<br />
NOTE:<br />
The discharge of static electricity can damage some electronic<br />
components. Semiconductor devices are especially susceptible<br />
to ESD damage. You should always handle components<br />
carefully, and you should never touch connector pins or<br />
circuit components unless you are following ESD guidelines in<br />
an appropriate ESD controlled area. Such guidelines include<br />
the use of properly grounded mats and wrist straps, ESD<br />
bags and cartons, and related procedures.<br />
NOTE:<br />
Never remove a USB cable from an active OM-DAQ-USB-<br />
2401 unit while an acquisition is in progress. An active unit is<br />
any unit that is currently open and has channels configured<br />
for scanned input. Such disconnection may require you to exit<br />
and then re-launch <strong>Omega</strong> DAQ Central, after the USB cable<br />
has been connected.<br />
1-1
1<br />
Introduction<br />
NOTE:<br />
When using OM-DAQ-USB-2401 unit to acquire data,<br />
computer energy save modes can cause false data readings.<br />
Prior to using the unit, ensure your computer’s energy save<br />
mode is disabled. If needed, consult your PC user’s manual to<br />
disable energy save (power suspension) modes.<br />
1.2 Safety Warnings and IEC Symbols<br />
This device is marked with international safety and hazard symbols in<br />
accordance with IEC standards. It is important to read and follow all precautions<br />
and instructions in this manual before operating or commissioning this device as<br />
it contains important information relating to safety and EMC. Failure to follow<br />
all safety precautions may result in injury and or damage to your device. Use of<br />
this device in a manner not specified will void your warranty.<br />
IEC symbols<br />
Description<br />
Caution, refer to accompanying documentation<br />
EU’s Waste Electrical and Electronic Equipment<br />
Compliance<br />
Figure 1-1. IEC Symbols<br />
1.3 Statement on CE Marking<br />
It is the policy of OMEGA ® to comply with all worldwide safety and EMI/EMC<br />
regulations that apply. OMEGA is constantly pursuing certification of its<br />
products to the European New Approach Directives. OMEGA will add the CE<br />
mark to every appropriate device upon certification. For additional information<br />
see Section 10 - Approvals & Regulatory Compliance.<br />
1.4 General Description & System Components<br />
The OM-DAQ-USB-2401 is a USB 2.0 full speed thermocouple/voltage input<br />
data acquisition module (fully compatible with both USB 1.1 and USB 2.0 ports).<br />
This stand-alone module draws power from the USB port to operate. An external<br />
(optional) power supply can be used. All configurable options (including<br />
individual channel input type and range) are software programmable.<br />
The OM-DAQ-USB-2401 has user programmable voltage inputs that range from<br />
±30 mV to ±10V, full scale. The compact, modular packaging ensures ease of use<br />
in a variety of applications. Units can be DIN rail or wall mounted with the<br />
included hardware or easily operated on a bench. All analog input channels can<br />
be measured sequentially at about 1 ms per channel. A total of 1000 samples per<br />
second can be taken, divided across all active channels.*<br />
1-2
Introduction 1<br />
NOTE:<br />
*At highest scan rate, 1000 samples/sec +/- 1% with one<br />
channel on, +/- 5% with all channels on.<br />
The main items you will be using in your data acquisition system are the<br />
OM-DAQ-USB-2401 unit, its USB cable, and power adaptor.<br />
POWER<br />
ADAPTER<br />
(OPTIONAL)<br />
OM-DAQ-USB-2401<br />
MODULE<br />
USB<br />
PC WITH USB CONNECTION (NOT INCLUDED)<br />
Figure 1-2. System Components<br />
1-3
2<br />
Hardware<br />
Section 2 - Hardware<br />
It is important that you read this manual completely and follow all safety<br />
precautions before operating this instrument.<br />
2.1 Package Inspection<br />
Remove the packing list and verify that you have received all your equipment. If<br />
you have any questions about the shipment, please call our Customer Service<br />
Department at 1-800-622-2378 or 203-359-1660. We can also be reached on the<br />
Internet at omega.com, e-mail: cservice@omega.com. When you receive the<br />
shipment, inspect the container and equipment for any signs of damage. Note<br />
any evidence of rough handling in transit. Immediately report any damage to<br />
the shipping agent.<br />
NOTE:<br />
The carrier will not honor any damage claims unless all<br />
shipping material is saved for inspection. After examining<br />
and removing contents, save packing material and carton in<br />
the event reshipment is necessary.<br />
2.2 Included Items<br />
The following items are supplied in the box:<br />
• 1 <strong>Omega</strong> OM-DAQ-USB-2401 data acquisition module<br />
• 1 <strong>Omega</strong> DAQ Central software CD<br />
• 1 USB Cable<br />
• 1 9Vdc Power Adaptor<br />
• 1 Mounting Kit (8 screws, 2 mounting brackets, 2 DIN rail adaptors)<br />
• 1 <strong>Omega</strong> screwdriver<br />
• 1 OM-DAQ-USB-2400 Series User Manual (this one, M-5025)<br />
• 1 OM-DAQ-USB-2400 Series Quickstart Manual (MQS-5025)<br />
• 2 Type K Thermocouples with Stripped Leads<br />
2-1
Hardware Setup 3<br />
Section 3 - Hardware Setup<br />
3.1 OM-DAQ-USB-2401 System Components<br />
127 (5.00)<br />
CHANNEL 7 & 8<br />
ANALOG INPUT 12 V OUT<br />
A C A<br />
7 O 8<br />
L M H<br />
C<br />
O<br />
M<br />
E<br />
X<br />
C<br />
C<br />
O<br />
M<br />
A<br />
8<br />
L<br />
A<br />
7<br />
H<br />
!<br />
CHANNEL 5 & 6<br />
ANALOG INPUT 12 V OUT<br />
A C A<br />
5 O 6<br />
L M H<br />
OM-DAQ-USB-2400 SERIES<br />
USB DATA ACQUISITION SYSTEM<br />
C<br />
O<br />
M<br />
E<br />
X<br />
C<br />
C<br />
O<br />
M<br />
A<br />
6<br />
L<br />
A<br />
5<br />
H<br />
97<br />
(3.80)<br />
107<br />
(4.20)<br />
CHANNEL 1 & 2<br />
ANALOG INPUT 12 V OUT<br />
A A C A A C E C<br />
1 1 O 2 2 O X O<br />
H L M H L M C M<br />
!<br />
CHANNEL 3 & 4<br />
ANALOG INPUT 12 V OUT<br />
A A C A A C E C<br />
3 3 O 4 4 O X O<br />
H L M H L M C M<br />
38<br />
(1.5)<br />
USB<br />
STATUS<br />
- +<br />
PWR 9V<br />
IND 1.0 A<br />
EXT<br />
PWR<br />
DIMENSIONS mm (in)<br />
POWER SUPPLY<br />
POWER LED<br />
STATUS LED<br />
USB PORT<br />
Figure 3-1. OM-DAQ-USB-2401 Hardware and Dimensions<br />
NOTE:<br />
The external power port is used in applications which have<br />
USB hubs that are not self-powered. See the next section for<br />
more information.<br />
NOTE:<br />
The 'STATUS LED' blinking at Scan Rate means an acquisition<br />
is in progress. At a fast scan rate, the 'STATUS LED' appears<br />
solid. The 'POWER LED' in solid means the unit has power<br />
3.2 USB Hubs and Power Adaptors<br />
With the use of USB hubs you can connect up to 10 DAQ units to one PC. USB<br />
hubs can be of the self-powered type, or of the USB-powered type. Both types of<br />
hubs are available from a variety of vendors.<br />
3-1
3<br />
Hardware Setup<br />
3.2.1 USB-powered Hubs<br />
These hubs draw all power from the host USB connector’s power pins. The<br />
power is used for hub internal functions and for the hub’s ports. Each port of a<br />
USB-powered hub must be capable of supplying at least 100 mA.<br />
3.2.2 Self-powered Hubs<br />
These hubs draw power from a source other than the host USB connector, with<br />
exception that they may draw up to 100 mA from their upstream connection for<br />
hub internal functions. The external power is used for hub internal functions and<br />
for the hub’s ports. Each port of a self-powered hub must be capable of<br />
supplying 500 mA.<br />
3.2.3 Power Adaptors<br />
Power adaptors, also referred to as auxiliary power packs, are required for some<br />
self-powered hubs, and for DAQ modules that are powered from USB-powered<br />
hubs. In addition, DAQ units will require the use of a power adaptor when used<br />
with certain laptops.<br />
NOTE:<br />
When using a power adaptor with your DAQ system, be sure<br />
to supply power (from the adaptor to the DAQ unit) before<br />
connecting the USB cable. This allows the DAQ to inform the<br />
host computer (upon connection of the USB cable) that the<br />
unit requires minimal power from the computer.<br />
Power adaptors for use with the DAQ have a current limit of 500 mA (min.) and<br />
a voltage range of +7.5 to +12 Volts DC. These specifications are provided on the<br />
end-face of the DAQ unit.<br />
If the computer does not recognize the DAQ unit, make sure the computer’s USB<br />
port is properly enabled and is in good working order. If the computer still fails<br />
to recognize the DAQ unit, the use of an external 9v DC power adaptor may be<br />
required.<br />
NOTE:<br />
The use of certain notebook computers may require the use<br />
of a power adaptor with your DAQ unit.<br />
3-2
Hardware Setup 3<br />
3.3 Connecting Your OM-DAQ-USB-2401 Acquisition System to PC<br />
NOTE:<br />
When using a power adaptor with your DAQ system, be sure<br />
to supply power (from the adaptor to the DAQ) before<br />
connecting the USB cable. This allows your DAQ to inform<br />
the host computer (upon connection of the USB cable) that the<br />
unit requires minimal power from the computer.<br />
Use an approved high-speed USB cable to connect the DAQ system to one of the<br />
host computer’s USB ports. There is no need for an additional power source in<br />
this setup since the power pins (of the PC’s USB connection) supply 500 mA at 4<br />
to 5.25 V. Additional setup examples are described in this chapter, some of which<br />
involve USB hubs and/or power adaptors.<br />
POWER<br />
ADAPTER<br />
(OPTIONAL)<br />
USB<br />
Figure 3-2. Connection of an OM-DAQ-USB-2401 System to a Computer USB Port<br />
NOTE:<br />
Certain notebook computers require the use of a power<br />
adaptor with your DAQ unit.<br />
3-3
3<br />
Hardware Setup<br />
3.4 Connecting Various Hardware Setups<br />
ON-DAQ-USB-2401 data acquisition systems range from simple to complex. One<br />
example of a simple system is that of one OM-DAQ-USB-2401 connected to a<br />
PC’s USB connector. A much more complex system is one that contains 10 OM-<br />
DAQ-USB-2401 units and a combination of USB-powered and self-powered<br />
hubs. Despite the wide range of possibilities in between, use of the following<br />
examples should enable you to properly connect your system.<br />
NOTE:<br />
In the examples that follow, the USB hubs have four external<br />
ports (downstream ports). The USB hubs used in your system<br />
may have more. Connections can be adjusted accordingly.<br />
3.4.1 Direct Connection to Computer USB Port(s)<br />
In this example, one DAQ unit is connected by cable to one of the computer’s<br />
USB ports. The number of USB connectors may vary from PC to PC. When you<br />
connect DAQ units directly to a USB connector in this manner, no additional<br />
power source is required since the computer’s USB connector power pins supply<br />
the DAQ with adequate power (500 mA at 4.75 to 5.25 V).<br />
POWER<br />
ADAPTER<br />
(OPTIONAL)<br />
USB<br />
Figure 3-3. Direct Connection to a Computer USB Port(s)<br />
3-4
Hardware Setup 3<br />
3.4.2 Connection to USB-powered Hub<br />
In this example, two OM-DAQ-USB-2401s are connected by cable to individual<br />
ports of a single USB-powered hub. Since the hub receives all its power from the<br />
computer’s USB, the hub cannot supply adequate power to the DAQ units.<br />
Because of this aspect of insufficient power, each unit is connected to its own<br />
power adaptor.<br />
POWER<br />
ADAPTER<br />
POWER<br />
ADAPTER<br />
USB<br />
HUB<br />
USB<br />
Figure 3-4. Connection to USB-Powered Hub<br />
NOTE:<br />
The power adaptors used must be capable of supplying at<br />
least 500 mA and have a voltage rating of +7.5 to +12 Vdc.<br />
3.4.3 Connections to Self-Powered and USB-powered Hubs<br />
This example illustrates a system that makes use of four DAQ units and two<br />
different style USB hubs. Two DAQs are connected by cable to individual ports<br />
of a self-powered USB hub. In addition, the self-powered hub is connected to a<br />
downstream USB-powered hub, which is also connected to two DAQ units.<br />
Notice that the DAQ units connected to the self-powered hub have no adaptors<br />
connected to them. This is because the hub receives external power (in addition<br />
to the PC supplied USB power), which is capable of supporting the downstream<br />
devices connected directly to it. In comparison, the three OM-DAQ-USB-2401s<br />
connected to the USB-powered hub each require their own power adaptor. As in<br />
example 3.4.2, the power adaptors used must be capable of supplying at least<br />
500 mA and have a voltage rating of +7.5 to +12 Vdc.<br />
3-5
3<br />
Hardware Setup<br />
POWER<br />
ADAPTER<br />
POWER<br />
ADAPTER<br />
USB<br />
HUB<br />
POWER<br />
ADAPTER<br />
USB<br />
USB<br />
HUB<br />
Figure 3-5. Connections to Self-Powered Hub and to USB-Powered Hub<br />
NOTE:<br />
USB port locations vary from PC to PC.<br />
3.5 OM-DAQ-USB-2401 Mounting<br />
The OM-DAQ-USB-2401 mounting kit contains the following accessories:<br />
• 2 mounting brackets (to be used for either wall or DIN rail)<br />
• 4 long screws (to be used for either wall or DIN rail)<br />
• 4 short screws (to be used for the DIN rail)<br />
• 2 DIN rail plastic adaptors<br />
3-6
Hardware Setup 3<br />
3.5.1 OM-DAQ-USB-2401 Wall Mounting<br />
In order to mount the OM-DAQ-USB-2401 to the wall, you will need to:<br />
1. Remove the rear screws from the OM-DAQ-USB-2401.<br />
2. Align the mounting brackets with the rear holes on the DAQ unit (make sure<br />
that the ears are facing outwards, like in the figure below).<br />
3. Use the longer screws to reconnect the mounting brackets to the body of the<br />
enclosure, in the same direction as the screws that were removed from the<br />
DAQ unit.<br />
4. Drill 2 holes for #4 screws, 5.50" apart. Tip: Hold the DAQ unit with mounting<br />
brackets attached, up against the wall; use the holes as a guide to mark where<br />
you will drill holes in the wall.<br />
5. Install the two screws into the wall.<br />
6. Mount the DAQ unit on the wall by passing the screw head through the larger<br />
mounting bracket holes and then sliding it down.<br />
Figure 3-6. OM-DAQ-USB-2401 Wall Mounting<br />
146 (6.00)<br />
133 (5.50)<br />
MOUNTING HOLE DISTANCE<br />
Ø3<br />
2 PLACES<br />
(0.125)<br />
Ø6<br />
2 PLACES<br />
(0.25)<br />
CHANNEL 7 & 8<br />
ANALOG INPUT 12 V OUT<br />
A C A A<br />
7 O 8H 8<br />
L M L<br />
C<br />
O<br />
M<br />
E<br />
X<br />
C<br />
C<br />
O<br />
M<br />
A<br />
7<br />
H<br />
CHANNEL 1 & 2<br />
ANALOG INPUT 12 V OUT<br />
A A C A A C E C<br />
1 1 O 2 2 O X O<br />
H L M H L M C M<br />
!<br />
CHANNEL 5 & 6<br />
ANALOG INPUT 12 V OUT<br />
A C A A<br />
5 O 6H 6<br />
L M L<br />
OM-DAQ-USB-2400 SERIES<br />
USB DATA ACQUISITION SYSTEM<br />
!<br />
C<br />
O<br />
M<br />
E<br />
X<br />
C<br />
C<br />
O<br />
M<br />
A<br />
5<br />
H<br />
CHANNEL 3 & 4<br />
ANALOG INPUT 12 V OUT<br />
A A C A A C E C<br />
3 3 O 4 4 O X O<br />
H L M H L M C M<br />
107<br />
(4.20)<br />
Figure 3-7. OM-DAQ-USB-2401 Wall Mounting Dimensions<br />
3-7
3<br />
Hardware Setup<br />
3.5.2 OM-DAQ-USB-2401 DIN Rail Mounting<br />
In order to mount the OM-DAQ-USB-2401 to a DIN-Rail, you will need to:<br />
1. Attach the DIN-rail plastic adaptors to the mounting brackets, using the four<br />
shorter screws.<br />
2. Remove the rear screws from the OM-DAQ-USB-2401.<br />
3. Align the mounting brackets with the rear holes on the DAQ unit (make sure<br />
that the ears are facing inwards, like in the figure below).<br />
4. Use the longer screws to reconnect the mounting brackets to the body of the<br />
enclosure, in the same direction as the screws that were removed from the<br />
DAQ unit.<br />
5. Attach the DAQ unit to the DIN rail, using the plastic adaptors attached to the<br />
mounting brackets.<br />
Figure 3-7. OM-DAQ-USB-2401 Rail Mounting<br />
3-8
Software 4<br />
Section 4 - Software<br />
4.1 Getting Started<br />
The following program files are included on the <strong>Omega</strong> DAQ Central User<br />
Software CD supplied with your data acquisition unit. These files can also be<br />
downloaded from the omega.com website should you misplace your CD.<br />
• DAQ Central data logging software installer<br />
• <strong>Omega</strong>.DAQ .NET API<br />
NOTE:<br />
When using <strong>Omega</strong> DAQ modules to acquire data, computer<br />
energy save modes can cause false data readings. Prior to<br />
using <strong>Omega</strong> DAQ modules, ensure your computer’s energy<br />
save mode is disabled. If needed, consult your PC user’s<br />
manual to disable energy save (power suspension) modes.<br />
4.2 Software Installation<br />
4.2.1 System Requirements<br />
Minimum Requirements:<br />
• Processor: 800 MHz<br />
• Hard Drive Space: 300 megabytes<br />
• Ram: 512 megabytes or higher<br />
• 1 Available USB Port<br />
• CD-ROM Drive or Internet connection<br />
• Windows XP Service Pack 3 (32-bit), Windows Vista (32-bit), Windows 7 (32-<br />
bit), or Windows 7 (64-bit)<br />
Recommended Requirements:<br />
• Processor: 1.5 GHz<br />
• Hard Drive Space: 300 megabytes<br />
• Ram: 1.5 gigabytes<br />
• 1 Available USB Port<br />
• CD-ROM Drive or Internet connection<br />
• Windows XP Service Pack 3 (32-bit), Windows Vista (32-bit), Windows 7 (32-<br />
bit), or Windows 7 (64-bit)<br />
4-1
4<br />
Software<br />
4.2.2 Software Setup<br />
Insert the DAQ Central Software CD that was included with your DAQ unit into<br />
the CD-ROM drive on your PC. Your system should begin the installation<br />
process automatically. If the software installation does not start automatically:<br />
open: "My Computer", double-click your CD-ROM drive, and run "setup.exe".<br />
Figure 4-1. Welcome Screen<br />
This welcome screen should be visible on your computer screen. To continue<br />
with installing the program click the “Next >” button.<br />
From this screen you select the folder were you want the program files installed<br />
on your PC. The default setting will install the software under your “Program”<br />
folders in a new folder named “<strong>Omega</strong>” To continue with installing the program<br />
click the “Next >” button.<br />
Figure 4-2. Select Install Screen<br />
4-2
Software 4<br />
Figure 4-3. Confirm Installation Screen<br />
The setup wizard now has all the information to complete the installation of the<br />
software on your PC. To continue with installing the program click the “Next >”<br />
button.<br />
During the install process, a Windows Command Prompt may pop up. No<br />
interaction is required in this window; it is automatically installing or updating<br />
the device’s USB drivers. Please let this process complete before closing the<br />
software installation wizard.<br />
Congratulations! You have just successfully installed the DAQ Central Program<br />
on your PC. To end installing the program and close the setup wizard click the<br />
“Close” Button.<br />
4-3
4<br />
Software<br />
4.3 DAQ Central Software Operation<br />
Below is the basic flow of operation when using the software:<br />
1. Highlight desired device.<br />
2. Open Device Configuration window.<br />
3. Set channels, sample rate, triggering, and data output file.<br />
4. Click “OK” to confirm Device Configuration.<br />
5. Open any desired Data Displays.<br />
6. Click the Start button.<br />
Details on the various windows and options can be found in the rest of this<br />
chapter.<br />
Figure 4-4. Main Control Window<br />
4-4
Software 4<br />
TOOLBAR BUTTONS<br />
Start Button<br />
Stop Button<br />
Device<br />
Configuration<br />
Icon<br />
Gauges Display<br />
Button<br />
Bars Display<br />
Button<br />
Digital Display<br />
Button<br />
Table Display<br />
Button<br />
Waveforms<br />
Display Button<br />
Device Display<br />
List<br />
Initiates data acquisition for the<br />
highlighted device. Even if a Start<br />
Trigger is set, this must be pressed<br />
to Arm the device.<br />
Stops data acquisition for the<br />
highlighted device. If a Stop<br />
Trigger is set, this will cancel the<br />
trigger.<br />
Accesses the Device Configuration<br />
window for the selected device.<br />
The Device Configuration window<br />
is used to set up all device options,<br />
including channels, sample rate,<br />
triggers, and data output file.<br />
Opens a Gauges window.<br />
Displays measurements in analog<br />
meter format.<br />
Opens a Bars window. Displays<br />
measurements in a bar graph<br />
format.<br />
Opens a Digital meter window.<br />
Displays measurements in a digital<br />
meter format.<br />
Opens a Table window. Displays<br />
measurements in a table format.<br />
Opens a Waveform window.<br />
Displays the measurements in a<br />
scrolling chart.<br />
Displays:<br />
- The available connected DAQ<br />
devices - DAQ2401DEMO –<br />
Demo/simulation device for testing<br />
software features without<br />
hardware.- LEDs – Will flash green<br />
during the data acquisition.<br />
Table 4-1. Toolbar Buttons<br />
4-5
4<br />
Software<br />
4.3.1 Main Control Window Pull-Down Operations<br />
Below are the operations that are available in the Pull-Down Menus of the DAQ<br />
Central Main Control Window.<br />
Figure 4-5. File Menu<br />
Open Configuration<br />
Opens Device Configuration settings from a saved file<br />
Save Configuration As Saves current Device Configuration settings to a new file name<br />
These settings files contain all of the data that is found in the Device<br />
Configuration window.<br />
Figure 4-6. Device Menu<br />
Detect Devices<br />
Detects available OM-DAQ-USB-2401 devices which are currently<br />
connected to the computer through the USB.<br />
Configuration Same function as Configuration button . Accesses the device<br />
Configuration window to configure ‘Channels’ settings, ‘Triggers’<br />
settings, and ‘Data’ settings.<br />
Start Acquisition Same function as Start button .. Initiates data acquisition for<br />
the highlighted device. Even if a Start Trigger is set, this must be<br />
selected to Arm the device.<br />
4-6<br />
Stop Acquisition Same function as Stop button . Stops data acquisition for the<br />
highlighted device. If a Stop Trigger is set, this will cancel the trigger.
Software 4<br />
Figure 4-7. Tools Menu<br />
Export Data File – To convert data file from binary file to .csv file<br />
Fgure 4-8. Help Menu<br />
Check for Updates<br />
About<br />
To check for the latest <strong>Omega</strong> DAQ Central software update<br />
information through the Internet connection.<br />
To view software version.<br />
4-7
4<br />
Software<br />
Section 4.3.2 Device Configuration<br />
The Device Configuration window contains the Channel, Triggers, and Data<br />
tabs. Details for these tabs are below. When finished making changes, press<br />
“OK” to confirm the changes or “Cancel” to abandon the changes.<br />
Figure 4-9. Configuration Mode - Channels Tab Screen<br />
Channels Tab<br />
The Channels tab contains a spreadsheet designed for setting up channels for<br />
data acquisition. Depending on the column, you can make changes to the<br />
information contained in a cell by placing the mouse cursor in the cell.<br />
All columns except “Channel” are editable. Those with drop-down arrows are<br />
limited to the choices in the drop-down list.<br />
You can use your PC’s keypad arrow and tab keys to select new “active cells” in<br />
the spreadsheet.<br />
4-8
Software 4<br />
Configuration Parameter Settings<br />
Channel<br />
Nickname<br />
Units<br />
On/Off<br />
Single/Diff<br />
Range<br />
Scale and<br />
Offset<br />
The input channel’s name (not editable)<br />
AN1D = analog channel 1, differential input<br />
AN1H = analog channel 1, single-ended high input<br />
AN1L = analog channel 1, single-ended low input<br />
Etc.<br />
You can specify the Nickname (e.g., Oven 1, Monitor<br />
Room)<br />
You can specify the <strong>Engineering</strong> Unit. When switching<br />
between voltage and thermocouple ranges, this will<br />
automatically switch to the default units for that range.<br />
However, any units label may be typed in here.<br />
To turn on or turn off the selected input channel<br />
You can select input channel as Single-ended or<br />
Differential input.<br />
You can select the voltage input range or thermocouple<br />
type for each input channel. Thermocouples must<br />
always be used with Differential input.<br />
You can rescale the input signal. This scaled/offset<br />
value will appear in all data displays, and in any saved<br />
data files.<br />
Sampling can be set in terms of “Scan Rate” or “Scan Time”.<br />
Scan Rate = 1/(Scan Time).<br />
For example, if you are acquiring 4 voltage inputs at 250 Hz, you will receive 250<br />
complete scans per second. Meaning each channel will send 250 pieces of data<br />
every second, for a total of (4 x 250) = 1000 pieces of data.<br />
The maximum scan rate is affected by the number of channels turned on.<br />
Selecting thermocouple input also lowers the maximum scan rate.<br />
Figure 4-10. Scan Options<br />
Figure 4-11. Units Options<br />
Figure 4-12. Automatic Calibration<br />
4-9
4<br />
Software<br />
Figure 4-13. Trigger Options<br />
The Triggers tab is used to set up triggers for starting and stopping data<br />
acquisition. The Start Trigger and the Stop Trigger each have a different set of<br />
available trigger types:<br />
Figure 4-14. "Start Trigger" Options<br />
Figure 4-15. "Stop Trigger" Options<br />
Trigger Types<br />
Manual<br />
Level<br />
Date/Time<br />
Time Span<br />
Acquisition is manually started/stopped.<br />
Set trigger to stop/start acquistition when the input level is either above or below a certain threshold.<br />
Set trigger to stop/start acquistition at a certain date and time, as per the PC’s clock.<br />
Set trigger to stop acquistition after a certain elapsed time.<br />
Scan Count Set trigger to stop acquistition after a certain number of scans have been acquired.<br />
4-10
Software 4<br />
NOTE:<br />
For all Start Trigger types, the device must be armed by pushing the Start Button on the main window.<br />
Data storage and display will not begin until the device triggers.<br />
Data Tab<br />
Figure 4-16. Data Tab<br />
To save data to a file on the PC, select the Data tab and choose a filename. This data<br />
can be saved in Binary or Delimited (.csv) format.<br />
• Binary format is faster, and is recommended for slower PCs. Binary format also<br />
creates files that are about 50% smaller than Delimited files. Binary files can be<br />
converted to “.csv” format later by selecting Tools --> Export Data File.<br />
• Delimited format can use either commas or tabs as the delimiter, and the time can<br />
be saved as Elapsed Time or as a Date/Time stamp.<br />
There are three “Save Behavior” options:<br />
FIG 4-17. Data ‘Save Behavior’ Options<br />
Auto-overwrite<br />
Prompt for<br />
overwrite<br />
Add creation<br />
time to<br />
filename<br />
If a file with the same name already exists, it will be automatically overwritten when<br />
the Start Acquisition button is pressed.<br />
If a file with the same name already exists, a prompt<br />
will appear when the Start Acquisition button is pressed.<br />
A timestamp is added to the filename, in the format<br />
YYYY-MM-DD-hhmm-ss. For example, MyFile.bin<br />
becomes MyFile-2011-1031-1121-03.bin. The timestamp will be automatically added<br />
every time the Start Acquisition button is pressed, so multiple acquisitions can be easily<br />
stored to the same folder without revisiting the Device Configuration window.<br />
Data Displays<br />
From the Main Window, you can choose to view live data from any combination of Gauges, Bars,<br />
Digital Displays, Tables, and Waveforms. These displays can be opened by clicking the appropriate<br />
button in the Main Window.<br />
4-11
4<br />
Software<br />
Figure 4-18. Main Window Screen<br />
Figure 4-19. Gauges Screen<br />
Figure 4-20. Bars Screen<br />
Figure 4-21. Digital Screen<br />
Figure 4-22. Table Screen<br />
4-12
Software 4<br />
Figure 4-23. Waveform Screen<br />
Each Data Display can be customized by clicking the Options Icon .<br />
Each Data Display's Options screen lets you choose which device channels to<br />
display in that window. Channels can be added or removed with the Add<br />
Display and Delete Display buttons. Confirm changes by clicking the<br />
OK button. Start Acquistion by clicking the Play button on the Main Window.<br />
Acquistion can be stopped with the Stop button.<br />
Figure 4-24. Sample Options Screen<br />
4-13
4<br />
Software<br />
4.4 Power Line Rejection<br />
The OM-DAQ-USB-2401 Series can take readings while making use of 50/60Hz<br />
line cycle rejection. While in the line cycle rejection mode, the maximum sample<br />
rate is as follows:<br />
• 50 Hz rejection: Scan Rate (SR) Range: 0.153Hz < SR
Software 4<br />
The converter is comprised of a 4th-order, delta-sigma (Δ∑) analog-to-digital<br />
(A/D) converter modulator followed by a programmable digital filter. A flexible<br />
input multiplexer handles differential or single-ended signals; the programmable<br />
filter allows the user to optimize between a resolution of up to 23 bits noise-free.<br />
Examples of scan sequences, with various channel resolutions and calibration<br />
arrangements, appear in Table 5-1 on page 5-2.<br />
4.7 Input Ranges<br />
You can individually select the input range for each channel. For example, one<br />
channel could be used for volts and another for temperature. <strong>Omega</strong>’s OM-<br />
DAQ-USB-2401 automatically assigns the appropriate units depending on two<br />
factors:<br />
• The selected range and<br />
• Measurement unit preferences<br />
Measurement unit preferences can be modified from the <strong>Omega</strong> DAQ Central<br />
‘Channels’ tag of the ‘Configuration’ window. Chapter 4 provides more detailed<br />
information.<br />
NOTE:<br />
The maximum voltage input range (full scale) is –10 to +10<br />
Vdc. The lowest programmable voltage input range is -30mV<br />
to +30 mV. A complete list of the OM-DAQ-USB-2401’s<br />
programmable ranges appears on page 8-1.<br />
Each analog input channel has the following user-specified measurement<br />
parameters:<br />
• Signal type: volts, or thermocouple type J, K, T, E, R, S, B, or N<br />
• Full scale voltage: from -10 to + 10 Vdc; with programmable ranges as<br />
indicated on page 8-1.<br />
• Resolution/sample period: from 22.5 bit RMS at 0.153 samples/sec, to 17 bit<br />
RMS at 50 samples/sec or greater<br />
NOTE:<br />
These rates were obtained with a 16-channel scan.<br />
4.8 Analog Input Configuration<br />
The OM-DAQ-USB-2401 includes 16 analog signal inputs which may be used as<br />
16 single-ended inputs, 8 differential inputs, or as a combination of single-ended<br />
and differential inputs with up to 16 connections.<br />
Single-ended inputs are used with signals that share the same common low<br />
(COM), such as multiple batteries which have their negative sides connected in<br />
common. Differential inputs are required when signals do not share the same<br />
common low, such as in the typical use of thermocouples.<br />
4-15
4<br />
Software<br />
NOTE:<br />
In DAQ applications, thermocouples should not be connected<br />
single-ended. Doing so can result in noise and false readings.<br />
This is especially true when acquiring other high-amplitude<br />
signals in conjunction with thermocouple signals that are<br />
connected single-ended.<br />
The DAQ units include built-in cold-junction compensation (CJC), which is<br />
automatically invoked when you select TC measurements. The OM-DAQ-USB-<br />
2401 automatically converts acquired voltage readings into compensatedlinearized<br />
temperature readings. This DAQ system can make thermocouple and<br />
volts measurements concurrently.<br />
OM-DAQ-USB-2401<br />
TERMINAL BLOCK<br />
(PARTIAL)<br />
A<br />
1<br />
H<br />
A<br />
1<br />
L<br />
C<br />
O<br />
M<br />
A<br />
2<br />
H<br />
A<br />
2<br />
L<br />
V 1<br />
V 2<br />
COM<br />
V 3<br />
V 3+<br />
V 3-<br />
Figure 4-26. OM-DAQ-USB-2401 Single-Ended and Differential Connections to<br />
Analog Input Channels Diagram<br />
Figure Notes: *V1 and V2 are single-ended inputs.<br />
*V3 is a thermocouple and is a differential input.<br />
4.9 Measurement Duration, Scan Time, and Resolution<br />
In relation to sampling analog input, the terms measurement duration, sample<br />
rate, and resolution have the following meanings:<br />
Measurement duration (per channel) – the amount of time used for sampling a<br />
channel’s input signal. The measurement durations for the OM-DAQ-USB-2401's<br />
analog channels range from very slow (400 milliseconds for one measurement<br />
duration) to very fast (1 millisecond for one measurement duration).<br />
Scan Time (per scan) - The amount of time used for scanning (sampling) all<br />
selected channels’ input signal. For the OM-DAQ-USB-2401, the scan rates range<br />
from very slow (1 hour per scan) to very fast (1 milliseconds per scan).<br />
4-16
Software 4<br />
Resolution (Effective Number of Bits - ENOB, RMS) – The number of reliable<br />
data bits that exist for a signal’s measurement. The greater the resolution, the<br />
more detailed the reading. For example, with an increased resolution, a reading<br />
of 5.12 V could become 5.11896 V. The DAQ actually provides for 24 bits of data<br />
information; however, the accuracy of the least significant bits decreases as the<br />
measurement duration speeds up.<br />
NOTE:<br />
When measuring variable input signals (as opposed to<br />
relatively steady input signals), the variable signals will<br />
require more samples/sec to obtain a realistic signal<br />
representation.<br />
At a scan time greater than 6.5 seconds, the last 1.5 bits are considered unreliable,<br />
resulting in a resolution of 22.5 bits. At a very fast scan time (1 millisecond), the<br />
seven least significant bits are unreliable, resulting in 17 bit accuracy. When you<br />
select the Scan Time you also determine the scan (sample) rate and resolution for<br />
the applicable channel. For the DAQ’s analog input applications, scan (sample)<br />
rates range from 0.0002778 samples/sec (1 hr/scan) up to 1000 samples/sec<br />
(m/scan), and corresponding resolution ranges from 22.5 to 17 bits.<br />
4.10 Automatic Calibration<br />
The DAQ unit contains a built-in source for performing automatic selfcalibrations.<br />
These calibrations can be performed between scans periodically<br />
throughout the measurement process, as indicated in the following figure. Such<br />
calibration ensures accurate measurements, even in environments that<br />
experience significant temperature fluctuations. The figure below shows an<br />
initial calibration followed by the scan/calibrate, scan/calibrate pattern.<br />
NOTE:<br />
The continuous calibration feature is built into the DAQ<br />
system. With Auto-Calibration enabled, you may experience<br />
slower sample rates especially with multiple chanels turned on.<br />
INITIAL CALIBRATION<br />
SCAN<br />
CALIBRATION<br />
SCAN<br />
CALIBRATION<br />
SCAN<br />
CALIBRATION<br />
0<br />
SCAN PERIOD<br />
TIME<br />
Figure 4-27. Calibration/Scan Arrangement<br />
4-17
4<br />
Software<br />
4.11 Thermocouple Measurements<br />
The OM-DAQ-USB-2401 provides effortless thermocouple (TC) measurements.<br />
The unit includes built-in cold-junction compensation (CJC), which is<br />
automatically invoked when you select TC measurements. The DAQ unit<br />
automatically converts acquired voltage readings into compensated-linearized<br />
temperature readings. A DAQ system can make thermocouple and volts<br />
measurements concurrently.<br />
TIP: If you experience noise from thermocouple wires, you can connect a 100K<br />
resistor from AxL to the COM to elimate some noise. Please reference the<br />
following diagram:<br />
CONNECT A 100K RESISTER<br />
TO ELIMATE SOME<br />
THERMOCOUPLE INPUT NOISE<br />
A<br />
1<br />
H<br />
A<br />
1<br />
L<br />
C<br />
O<br />
M<br />
A<br />
2<br />
H<br />
A<br />
2<br />
L<br />
V 3<br />
V 3+<br />
100K<br />
V 3-<br />
Figure 4-28. Thermocouple Wiring<br />
4-18
Signal Management 5<br />
Section 5 – Signal Management<br />
5.1 Channel Control and Expansion<br />
In the OM-DAQ-USB-2401 system, the quantities and types of DAQ units used<br />
determine the system’s channel capacity. Up to 10 OM-DAQ-USB-2401s can be<br />
used with one host PC. See the Specifications for more detailed channel<br />
information.<br />
5.2 Scan Time and Resolution<br />
5.2.1 Scan Time<br />
Scan Time (per scan) - The amount of time used for scanning (sampling) all<br />
selected channels’ input signal. For the OM-DAQ-USB-2401, the scan rates range<br />
from very slow (1 hour per scan) to very fast (1 milliseconds per scan).<br />
5.2.2 Resolution (Effective Number of Bits – ENOB, RMS)<br />
Resolution (Effective Number of Bits - ENOB, RMS) – The number of reliable<br />
data bits that exist for a signal’s measurement. The greater the resolution, the<br />
more detailed the reading, for example, with increased resolution a reading of<br />
5.12 V could become 5.11896 V. The DAQ actually provides for 24 bits of data<br />
information; however, the accuracy of the least significant bits becomes less as<br />
the measurement duration speeds up.<br />
At a scan time greater than 6.5 seconds, the last 1.5 bits are considered unreliable,<br />
resulting in a resolution of 22.5 bits. At a very fast scan time ( 1 milliseconds), the<br />
seven most least significant bits are unreliable, resulting in 17 bit accuracy.<br />
When you select the Scan Time you also determine the scan(sample) rate and<br />
resolution for the applicable channel. For the DAQ’s analog input applications,<br />
scan(sample) rates range from 0.0002778 samples/sec up to 1000 samples/sec<br />
and corresponding resolution ranges from 22.5 to 17 bits.<br />
5-1
5<br />
Signal Management<br />
Scan Rate vs. Resolution 2<br />
Resolution<br />
Scan Rate 3,4 (Scans (ENOB 5<br />
Speed Designation Scan Time 1 (s) per Second - SPS) RMS)<br />
Very Slow, 50 / 60 Hz rejection 3600s>=ST >= 6.5s 0.0002778=< SR ST >= 1s 0.153 < SR ST >=0.6s 1 < SR ST >=0.3s 1.67 < SR ST >=0.2s 3.33 < SR ST >=0.05s 5 < SR ST >=0.02s 20 < SR ST >=0.001s 50< SR
Signal Management 5<br />
The following table provides general advice regarding the selection of Scan<br />
Time. The concepts are further illustrated by the figure, Examples of Under<br />
Sampling.<br />
Scan Time<br />
(Measurement Scan Rate<br />
Analog Input Signal Duration) (Sample Rate) Resolution<br />
Steady, or gradual<br />
change Long Low High<br />
Highly variable<br />
(unsteady) Short High Low<br />
Figure 5-1. Examples of Under Sampling<br />
The above figure depicts three signals from the same temperature fluctuations.<br />
Under Sampling (aliasing) is evident in two of the signals. Elaboration follows:<br />
Signal 1:<br />
This signal, based on 1 sample(scan) per division, is represented by a heavy solid<br />
line and sample-points designated by polygon symbols. The signal represented<br />
is a fairly accurate portrayal of the actual temperature fluctuations.<br />
Signal 2:<br />
This signal, based on 1 sample(scan) every 3 divisions, is represented by a heavy<br />
dotted line and sample-points designated by squares. Under sampling has<br />
resulted in a distortion, in effect, a lower amplitude than that exhibited by the<br />
first signal, even though each measured point is accurate.<br />
Signal 3:<br />
This signal, based on 1 sample(scan) every 4 divisions, is represented by a<br />
dotted/dashed line and sample-points designated by plus signs (+). Fewer<br />
samples (a greater degree of under sampling) has resulted in a further distortion<br />
and lowering of signal amplitude.<br />
From these examples it should be realized that more samples(scans) will result in<br />
a more accurate representation of the actual signal, and that under sampling will<br />
tend to lower the amplitude of the signal, exhibiting a trend toward a “flat line”<br />
state.<br />
As stated earlier, the more variability a signal has, the more samples that are<br />
needed to accurately portray it.<br />
5-3
5<br />
Signal Management<br />
5.4 Triggering<br />
Triggering controls an acquisition cycle. Once the system is armed, a trigger is<br />
required to collect the data.<br />
The user must determine the triggering requirement based on the nature of the<br />
measurement and the amount of data needed to satisfy the system’s purpose.<br />
The trigger source can be a software command or an analog input channel on<br />
reaching a specified voltage level can be used to trigger the system.<br />
TYPE OF<br />
TRIGGER SOURCE<br />
IMMEDIATE<br />
START TIME<br />
CHANNEL VALUE - RISING<br />
- FALLING<br />
TRIGGER EVENT<br />
SCAN GROUP<br />
POST-TRIGGER SCAN COUNT<br />
TIME<br />
SCAN PERIOD<br />
5.5 Signal Modes<br />
Figure 5-2. Trigger Source Diagram<br />
OM-DAQ-USB-2401 units operate in one of two modes, (1) single-ended mode,<br />
or (2) differential mode. These terms (single-ended mode and differential mode)<br />
apply to their use in this manual. In other sources these terms may be used in a<br />
different manner.<br />
Choosing between differential and single-ended inputs is made by software<br />
command. The following text briefly describes the two signal modes.<br />
Single-ended mode refers to a mode, or circuit set-up, in which a voltage is<br />
measured between one signal line and common ground voltage (Vcm). The<br />
measured voltage may be shared with other channels. The advantage of a singleended<br />
non-differential mode [over differential mode] is that it provides for a<br />
higher channel count, for example: 16 channels instead of 8.<br />
NOTE:<br />
In DAQ applications, thermocouples should not be connected<br />
single-ended. Doing so can result in noise and false readings.<br />
This is especially true when acquiring other high-amplitude<br />
signals in conjunction with thermocouple signals that are<br />
connected single-ended.<br />
5-4
Signal Management 5<br />
Differential mode refers to a mode, or circuit set-up, in which a voltage is<br />
measured between two signal lines. The measured differential voltage is used for<br />
a single channel. An advantage of using differential inputs is that they reduce<br />
signal errors and the induction of noise resulting from ground current. The<br />
following illustration is an example of how noise is reduced, or canceled-out,<br />
when using the differential<br />
Figure 5-3. Noise Reduction in Differential Mode<br />
In the schematic, voltage signal S2 is subtracted from signal S1, resulting in the<br />
output signal shown. The noise spikes (having the same polarity, phase, and<br />
magnitude in each input signal) cancel each other out. This results in a clean<br />
differential signal (S1 - S2).<br />
Floating-differential measurements are made when low-level signals must be<br />
measured in the presence of high levels of common-mode noise (e.g., a nongrounded<br />
thermocouple). When the signal source has no direct connection to the<br />
system analog common, one must be provided. In <strong>Omega</strong> Daq the connection to<br />
analog common is provided in the circuitry with both the channel high and<br />
channel low connected to analog common. Both of these connections to common<br />
are made through 1 MΩ resistors. No additional connections of channel high and<br />
low to common should be made.<br />
Figure 5-4. Example of Floating Differential Circuit<br />
NOTE:<br />
Differential signal hookups do not provide isolation or any<br />
kind of circuit protection.<br />
5-5
5<br />
Signal Management<br />
Resolution: An analog-to-digital converter (ADC) converts an analog voltage to<br />
a digital number. The digital number represents the input voltage in discrete<br />
steps with finite resolution. ADC resolution is determined by the number of bits<br />
that represent the digital number. An n-bit ADC has a resolution of 1 part in 2n.<br />
Thus, 12 and 16 bit resolutions are as follows:<br />
• 12-bit resolution: 1 part in 4096 (212), corresponding to 2.44 mV in a 10 V<br />
range.<br />
• 16-bit resolution: 1 part in 65,536 (216), corresponding to 0.153 mV in a 10 V<br />
range.<br />
5.6 System Noise<br />
Laboratory and industrial environments often have multiple sources of electrical<br />
noise. An AC power line is a source of 50/60 Hz noise. Heavy equipment (air<br />
conditioners, elevators, pumps, etc.) can be a source of noise, particularly when<br />
turned on and off. Local radio stations are a source of high-frequency noise, and<br />
computers and other electronic equipment can create noise in a multitude of<br />
frequency ranges. Thus, an absolute noise-free environment for data acquisition<br />
is not realistic. Fortunately, noise-reduction techniques such as averaging,<br />
filtering, differential voltage measurement, and shielding are available to reduce<br />
noise to an acceptable level.<br />
5.7 Averaging<br />
Certain acquisition programs apply averaging after several samples have been<br />
collected. Depending on the nature of the noise, averaging can reduce noise by<br />
the square root of the number of averaged samples. Although averaging can be<br />
effective, it suffers from several drawbacks. Noise in measurements only<br />
decreases as the square root of the number of measurements—reducing RMS<br />
noise significantly may require many samples. Thus, averaging is suited to lowspeed<br />
applications that can provide many samples.<br />
NOTE:<br />
Only random noise is reduced or eliminated by averaging.<br />
Averaging does not reduce or eliminate periodic signals.<br />
5.8 Analog Filtering<br />
A filter is an analog circuit element that attenuates an incoming signal according<br />
to its frequency. A lowpass filter attenuates frequencies above the cutoff<br />
frequency. Conversely, a high-pass filter attenuates frequencies below the cutoff.<br />
As frequency increases beyond the cutoff point, the attenuation of a singlepole,<br />
low-pass filter increases slowly. Multi-pole filters provide greater attenuation<br />
beyond the cutoff frequency but may introduce phase (time delay) problems that<br />
could affect some applications.<br />
5-6
Signal Management 5<br />
5.9 Input and Source Impedance<br />
As illustrated below, the input impedance (Ri) of an analog-to-digital converter<br />
combines with the transducer’s source impedance (Rs) forming a voltage<br />
divider. This divider distorts the voltage being read at the analog-to-digital<br />
converter. The actual voltage read is represented by the equation:<br />
VADC = VT x Ri / (Rs + Ri)<br />
The input impedance (Ri) of most ADCs is at least 1 MΩ; low source impedance<br />
(Rs) usually presents no problem. Some transducers, such as piezoelectric types,<br />
have high source impedance, and should therefore be used with a chargesensitive<br />
amplifier of low output impedance. As described in the following<br />
paragraphs, multiplexing can greatly reduce the effective input impedance of an<br />
analog-to-digital converter.<br />
Figure 5-5. Analog to Digital Converter<br />
5.10 Crosstalk<br />
Crosstalk is a type of noise related to source impedance and capacitance, in<br />
which signals from one channel leak into an adjacent channel, resulting in<br />
interference or signal distortion. The impact of source impedance and stray<br />
capacitance can be estimated by using the following equation.<br />
T = RC<br />
Where T is the time constant, R is the source impedance, and C is the stray<br />
capacitance.<br />
High source (transducer) impedance can be a problem in multiplexed A/D<br />
systems. When using more than 1 channel, the channel input signals are<br />
multiplexed into the A/D. The multiplexer samples each signal and then<br />
switches to the next input signal. A high-impedance input interacts with the<br />
multiplexer’s stray capacitance and causes crosstalk and inaccuracies in the A/D<br />
sample.<br />
A solution to high source impedance in relation to multiplexers involves the use<br />
of buffers. The term buffer has several meanings; but in this case, buffer refers to<br />
an operational amplifier having high input impedance but very low output<br />
impedance. Placing such a buffer on each channel (between the transducer and<br />
the multiplexer) prevents the multiplexer’s stray capacitance from combining<br />
with the high input impedance. This use of a buffer also stops transient signals<br />
from propagating backwards from the multiplexer to the transducer.<br />
5-7
6<br />
CE Conformity<br />
Section 6 - CE Conformity<br />
6.1 OM-DAQ-USB-2401 Design for CE Conformity<br />
The OM-DAQ-USB-2401 has been designed to meet requirements as outlined in<br />
European Community EMC Directive EN61326. Three ferrite cores are included<br />
in the OM-DAQ-USB-2401 package. When powering the unit using the adapter,<br />
the ferrite cores must be attached to both the USB cable and the power adapter to<br />
meet EFT (Electrical Fast Transient) specifications. Refer to Figure 6-1.<br />
POWER<br />
ADAPTER<br />
USB<br />
(MIDPOINT OF CABLES)<br />
Figure 6-1. OM-DAQ-USB-2401 with Ferrite Cores Installed<br />
To maintain CE certification and install the ferrite cores, perform the following:<br />
1. Using a small screw driver or other suitable instrument, unsnap the ferrite<br />
core to open it (as shown in Figure 6-2).<br />
2. Install one ferrite core on each far end of the USB cable, and one ferrite core in<br />
the middle of the cable (as shown in Figure 6-1).<br />
3. Install one ferrite core on each far end of the power adapter, and one ferrite<br />
core in the middle of the cable (as shown in Figure 6-1).<br />
6-1
CE Conformity 6<br />
UNSNAP<br />
FERRITE<br />
CORES<br />
HERE<br />
Figure 6-2 Ferrite Core<br />
The ferrite cores may be removed from the DAQ unit; however, in order to<br />
conform to CE standards, all of the ferrite cores must be attached to the USB<br />
cable and power adapter.<br />
NOTE:<br />
If the user is not using the power adapter but relying on<br />
power from the host USB connection, no ferrites are required.<br />
6-2
7<br />
Troubleshooting<br />
Section 7 – Troubleshooting<br />
7.1 Basic Checklist<br />
Power – Check USB cable connection. The green “PWR IND” LED should be lit<br />
on the DAQ device. If using a powered USB hub, make sure its power cable is<br />
plugged in.<br />
Signal – Check signal lines and connections. Connectors must be free of<br />
corrosion. Signal lines should be undamaged and free of sharp bends and twists.<br />
Signal paths should avoid potential sources of noise (high voltage and<br />
electromagnetic interference).<br />
Device Selection – Make sure the serial number selected in the software matches<br />
the serial number of your device. Each data display will show the serial number<br />
(or Nickname, if assigned) of the device it is currently displaying.<br />
“DAQ2401DEMO” is a software demo device which outputs a sine wave.<br />
Software Updates – A software update may be available. In DAQ Central,<br />
choose “Check For Updates” from the Help Menu on an Internet-connected PC.<br />
7-1<br />
7.2 Symptoms and Solutions<br />
USB drivers are not found or hardware installation fails. This can happen if the<br />
device is plugged into the computer’s USB port before software installation is<br />
complete. The program “C:\Program Files\<strong>Omega</strong>\DAQ Central\USB<br />
Drivers\CDM20814_Setup.exe” can be run to reinstall the USB drivers. All noncritical<br />
USB devices should be unplugged while this program runs, including all<br />
DAQ devices.<br />
The “20814” portion of this filename may be different, and the “DAQ<br />
Central\USB Drivers” directory may be in a different location if an alternate<br />
directory was chosen during installation.<br />
Data does not appear or data does not make sense. See “Device Selection”<br />
under Basic Checklist.<br />
Stop the acquisition and check the Triggers tab of the Device Configuration<br />
window. A trigger may be set to start acquisition at a future date. Try setting<br />
both Start and Stop triggers to manual and restarting acquisition.<br />
The Device Configuration screen is grayed out. A data acquisition may be<br />
running. A device’s configuration can not be edited during acquisition.<br />
The waveform scale is too small/large The vertical scale can be adjusted by<br />
clicking the max and min values on the y-axis. The horizontal scale can be adjusted<br />
from the Waveform Options screen, which is accessed by clicking the Options button<br />
at the top of the Waveform window. The “Scans to graph” setting determines how<br />
many data points (scans) will appear along the x-axis. A higher number shows a<br />
greater span of time, but uses more of the PC’s RAM and may slow it down.<br />
The main DAQ Central window does not respond. A configuration window<br />
may be open. Configuration windows must be closed before continuing to<br />
interact with the software. Check your desktop and Windows taskbar for a<br />
Device Configuration window or an Options window.<br />
The device does not appear in the device list. Select “Detect Devices” from the<br />
Device menu to re-scan for connected devices. See also “Power” under “Basic<br />
Checklist” and “USB drivers…” in this section.<br />
Thermocouple inputs are noisy. If you experience noise from thermocouple<br />
wires, you can connect a 100K resistor from AxL to COM to eliminate some noise.
Service and Calibration 8<br />
Section 8 – Service & Calibration<br />
Your <strong>Omega</strong> DAQ components have been built and factory calibrated to meet or<br />
exceed the specifications listed here in this manual. The following section<br />
provides information on how to have your device serviced.<br />
8.1 Service & Calibration<br />
If any of your DAQ system components require service or calibration, please call<br />
our Customer Service Department at 1-800-622-2378 or 203-359-1660. They will<br />
assist you in arranging the return and service of your device. We can also be<br />
reached on the Internet at www.omega.com, e-mail: cservice@omega.com<br />
8-1
9<br />
Specifications<br />
Section 9 – Specifications<br />
General Isolation:<br />
External Excitation Output Voltage:<br />
Power Requirements:<br />
Thermocouple Types:<br />
Cold-Junction Compensation<br />
Accuracy:<br />
Isolation:<br />
Channel Capacities:<br />
Environmental:<br />
Operating Temperature:<br />
Analog Input Accuracy<br />
Differential Input:<br />
Single-end Input:<br />
Storage Temperature:<br />
Weight:<br />
500V from PC<br />
+12v DC Regulated,<br />
Maximum total current output 67mA<br />
Powered from USB port max 500 mA,<br />
or from external 7.5 to 12 Vdc,<br />
(1.0 A recommended)<br />
J, K, T, E, R, S, B, N<br />
±1.0°C<br />
500 Vdc from PC common<br />
Volts Inputs: 8 DE, or 16 SE<br />
Thermocouple Inputs: 8 DE<br />
* DE = Differential Mode,<br />
SE = Single ended mode<br />
0 to 50°C (0 to 122°F)<br />
95% RH (non-condensing)<br />
0 to 50°C (32 to 122°F),<br />
0 to 95% RH non –condensing<br />
(exclusive of noise)<br />
0.015% of reading + .004% of range<br />
(In very slow mode)+ 10uV<br />
(exclusive of noise)<br />
0.05% of reading + 0.01% of range<br />
(In very slow mode) + 50uV<br />
(exclusive of noise)<br />
-40 to 85°C (-40 to 185°F)<br />
0.5 lbs (0.23 kg)<br />
Dimensions: 107 W x 128 L x 39mm H (4.2 x 5.1 x 1.5")<br />
Input Voltage Range:<br />
Differential/Single-ended:<br />
Software-programmable On A Perchannel<br />
Basis<br />
-10 to 10V<br />
-5 to 5V<br />
-2.5 to 2.5V<br />
-2 to 2V<br />
-1 to V -500 to 500 mV<br />
-250 to 250 mV<br />
-125 to 125 mV<br />
-75 to 75 mV<br />
-30 to 30 mV<br />
9-1
Specifications 9<br />
Thermocouple Input Range:<br />
Cold Junction<br />
Compensation Accuracy:<br />
Input Voltage Range Relative<br />
To Analog Common (COM):<br />
Input Resistance:<br />
Absolute Maximum Input Voltage:<br />
Warm-up:<br />
USB Device Type:<br />
Type J: -18 to 1200°C (0 to 2192°F)<br />
Type K: -129 to 1372°C (-200 to 2502°F)<br />
Type T: -101 to 400°C (-150 to 752°F)<br />
Type E: -184 to 1000°C (-300 to 1832°F)<br />
Type R: 204 to 1768°C (400 to 3214°F)<br />
Type S: 204 to 1768°C (400 to 3214°F)<br />
Type B: 538 to 1820°C (1000 to 3308°F)<br />
Type N: -129 to 1300°C (-200 to 2372°F)<br />
±1.0°C<br />
-10 to +10 Vdc<br />
1MΩ (single ended);<br />
2MΩ (differential); ±5%<br />
±20 V maximum,<br />
relative to analog common<br />
1 hour to rated specifications<br />
USB 2.0 (full-speed)<br />
Device Compatibility: USB 1.1, USB 2.0<br />
Power Supply:<br />
External Power Source:<br />
DIN Rail Mounted For<br />
Rack Application:<br />
Open Thermocouple Detect:<br />
Limitations of the Total Recording<br />
Memory Size:<br />
MCU:<br />
From USB(Port) or 9 Vdc adaptor<br />
Required when used with a bus-powered<br />
hub;<br />
Optional<br />
Automatically enable when a channel is<br />
configured for a thermocouple sensor.<br />
1 G or 500M (in PC)<br />
32 bit<br />
NOTE:<br />
All temperature specifications assume unit is held in relatively<br />
still air environment.<br />
NOTE:<br />
UNIV-AC-100/240, the external power supply is a Universal<br />
Power Adaptor. It is a 100-240 VAC to+9 Vdc output<br />
adaptor<br />
9-2
9<br />
Specifications<br />
Table 9-1. Thermocouple Accuracy (ºC) for OM-DAQ-USB-2401<br />
TC Type Temp. Typical Fast<br />
(°C)<br />
Slow<br />
-18 1.3 3.8<br />
J 0 1.1 3<br />
1200 0.9 2.5<br />
-129 1.8 5<br />
K 0 1.4 3.9<br />
1372 1.3 3.7<br />
-101 1.6 4.5<br />
T 0 1.4 4<br />
400 1 2.9<br />
-184 1.2 3.4<br />
E 0 0.9 2.6<br />
1000 0.7 1.9<br />
204 5.2 14.8<br />
R 700 4.6 13.1<br />
1768 3.9 11<br />
204 5.6 16<br />
S 700 5.2 14.7<br />
1768 4.6 12.8<br />
B 538 7.9 13.7<br />
1820 4.8 13.7<br />
-129 2.6 7.3<br />
N 0 2 5.9<br />
1300 1.4 4<br />
NOTE:<br />
Thermocouple accuracy excludes cold junction compensation<br />
error.<br />
9-3
Approvals and Regulatory Compliance 10<br />
10.1 International Usage & CE Marking<br />
The OM-DAQ-USB-2401 multiple channel USB data acquisition module is CE<br />
marked and certified for use in several European countries. Please contact<br />
OMEGA for information on International Regulatory Compliance for each<br />
country.<br />
It is your (the user’s) responsibility to insure that these products are operated<br />
within the guidelines here in this manual and in conformance with all local or<br />
national regulations and laws.<br />
10-1
NOTES:<br />
10-2
NOTES:<br />
10-3
NOTES:<br />
10-4
WARRANTY/DISCLAIMER<br />
OMEGA ENGINEERING, INC. warrants this unit to be free of defects in materials and workmanship for a<br />
period of 13 months from date of purchase. OMEGA’s WARRANTY adds an additional one (1) month<br />
grace period to the normal one (1) year product warranty to cover handling and shipping time. This<br />
ensures that OMEGA’s customers receive maximum coverage on each product.<br />
If the unit malfunctions, it must be returned to the factory for evaluation. OMEGA’s Customer Service<br />
Department will issue an Authorized Return (AR) number immediately upon phone or written request.<br />
Upon examination by OMEGA, if the unit is found to be defective, it will be repaired or replaced at no<br />
charge. OMEGA’s WARRANTY does not apply to defects resulting from any action of the purchaser,<br />
including but not limited to mishandling, improper interfacing, operation outside of design limits,<br />
improper repair, or unauthorized modification. This WARRANTY is VOID if the unit shows evidence of<br />
having been tampered with or shows evidence of having been damaged as a result of excessive corrosion;<br />
or current, heat, moisture or vibration; improper specification; misapplication; misuse or other operating<br />
conditions outside of OMEGA’s control. Components in which wear is not warranted, include but are not<br />
limited to contact points, fuses, and triacs.<br />
OMEGA is pleased to offer suggestions on the use of its various products. However,<br />
OMEGA neither assumes responsibility for any omissions or errors nor assumes liability for any<br />
damages that result from the use of its products in accordance with information provided by<br />
OMEGA, either verbal or written. OMEGA warrants only that the parts manufactured by the<br />
company will be as specified and free of defects. OMEGA MAKES NO OTHER WARRANTIES OR<br />
REPRESENTATIONS OF ANY KIND WHATSOEVER, EXPRESSED OR IMPLIED, EXCEPT THAT OF<br />
TITLE, AND ALL IMPLIED WARRANTIES INCLUDING ANY WARRANTY OF MERCHANTABILITY<br />
AND FITNESS FOR A PARTICULAR PURPOSE ARE HEREBY DISCLAIMED. LIMITATION OF<br />
LIABILITY: The remedies of purchaser set forth herein are exclusive, and the total liability of<br />
OMEGA with respect to this order, whether based on contract, warranty, negligence,<br />
indemnification, strict liability or otherwise, shall not exceed the purchase price of the<br />
component upon which liability is based. In no event shall OMEGA be liable for<br />
consequential, incidental or special damages.<br />
CONDITIONS: Equipment sold by OMEGA is not intended to be used, nor shall it be used: (1) as a “Basic<br />
Component” under 10 CFR 21 (NRC), used in or with any nuclear installation or activity; or (2) in medical<br />
applications or used on humans. Should any Product(s) be used in or with any nuclear installation or<br />
activity, medical application, used on humans, or misused in any way, OMEGA assumes no responsibility<br />
as set forth in our basic WARRANTY/DISCLAIMER language, and, additionally, purchaser will indemnify<br />
OMEGA and hold OMEGA harmless from any liability or damage whatsoever arising out of the use of the<br />
Product(s) in such a manner.<br />
RETURN REQUESTS/INQUIRIES<br />
Direct all warranty and repair requests/inquiries to the OMEGA Customer Service Department. BEFORE<br />
RETURNING ANY PRODUCT(S) TO OMEGA, PURCHASER MUST OBTAIN AN AUTHORIZED RETURN<br />
(AR) NUMBER FROM OMEGA’S CUSTOMER SERVICE DEPARTMENT (IN ORDER TO AVOID<br />
PROCESSING DELAYS). The assigned AR number should then be marked on the outside of the return<br />
package and on any correspondence.<br />
The purchaser is responsible for shipping charges, freight, insurance and proper packaging to prevent<br />
breakage in transit.<br />
FOR WARRANTY RETURNS, please have the<br />
following information available BEFORE<br />
contacting OMEGA:<br />
1. Purchase Order number under which the product<br />
was PURCHASED,<br />
2. Model and serial number of the product under<br />
warranty, and<br />
3. Repair instructions and/or specific problems<br />
relative to the product.<br />
FOR NON-WARRANTY REPAIRS, consult OMEGA<br />
for current repair charges. Have the following<br />
information available BEFORE contacting OMEGA:<br />
1. Purchase Order number to cover the COST<br />
of the repair,<br />
2. Model and serial number of the product, and<br />
3. Repair instructions and/or specific problems<br />
relative to the product.<br />
OMEGA’s policy is to make running changes, not model changes, whenever an improvement is possible. This affords<br />
our customers the latest in technology and engineering.<br />
OMEGA is a registered trademark of OMEGA ENGINEERING, INC.<br />
© Copyright 2012 OMEGA ENGINEERING, INC. All rights reserved. This document may not be copied, photocopied,<br />
reproduced, translated, or reduced to any electronic medium or machine-readable form, in whole or in part, without the<br />
prior written consent of OMEGA ENGINEERING, INC.
Where Do I Find Everything I Need for<br />
Process Measurement and Control?<br />
OMEGA…Of Course!<br />
Shop online at omega.com SM<br />
TEMPERATURE<br />
Thermocouple, RTD & Thermistor Probes, Connectors, Panels & Assemblies<br />
Wire: Thermocouple, RTD & Thermistor<br />
Calibrators & Ice Point References<br />
Recorders, Controllers & Process Monitors<br />
Infrared Pyrometers<br />
PRESSURE, STRAIN AND FORCE<br />
Transducers & Strain Gages<br />
Load Cells & Pressure Gages<br />
Displacement Transducers<br />
Instrumentation & Accessories<br />
FLOW/LEVEL<br />
Rotameters, Gas Mass Flowmeters & Flow Computers<br />
Air Velocity Indicators<br />
Turbine/Paddlewheel Systems<br />
Totalizers & Batch Controllers<br />
pH/CONDUCTIVITY<br />
pH Electrodes, Testers & Accessories<br />
Benchtop/Laboratory Meters<br />
Controllers, Calibrators, Simulators & Pumps<br />
Industrial pH & Conductivity Equipment<br />
DATA ACQUISITION<br />
Data Acquisition & <strong>Engineering</strong> Software<br />
Communications-Based Acquisition Systems<br />
Plug-in Cards for Apple, IBM & Compatibles<br />
Data Logging Systems<br />
Recorders, Printers & Plotters<br />
HEATERS<br />
Heating Cable<br />
Cartridge & Strip Heaters<br />
Immersion & Band Heaters<br />
Flexible Heaters<br />
Laboratory Heaters<br />
ENVIRONMENTAL<br />
MONITORING AND CONTROL<br />
Metering & Control Instrumentation<br />
Refractometers<br />
Pumps & Tubing<br />
Air, Soil & Water Monitors<br />
Industrial Water & Wastewater Treatment<br />
pH, Conductivity & Dissolved Oxygen Instruments<br />
M5025/0112